-
Contents
-
Table of Contents
-
Bookmarks
Quick Links
EN
EN
ASM 310
Portable leak detector
Operating instructions
Operating instructions
Related Manuals for Adixen ASM 310
Summary of Contents for Adixen ASM 310
-
Page 1
ASM 310 Portable leak detector Operating instructions Operating instructions… -
Page 3
The applications of helium leak testing are extremely diversified ranging from high-tech installation maintenance to high-speed testing of industrial products. Each product of the adixen detector range is designed to meet the specific needs of each application: • portability, •… -
Page 4
These Directives are amended by Directive 93/68/E.E.C (E.C. Marking). Copyright/Intellectual property: The use of adixen products are subject to copyright and intellectual property rights in force in any jurisdiction. All rights reserved, including copying this document in whole or any part without prior written authorization from adixen Vacuum Products. -
Page 5
Chapter D MAINTeNANCe — TROUBLeShOOTINg D 100 — Indicator lights and default display D 200 — General troubleshooting guide D 200/D 300 — General troubleshooting guide/Symptoms description D 300 — Symptoms description adixen Vacuum Products — ASM 310 Operating instructions… -
Page 6
G 200 — Wiring diagram G 400 — Long distance sniffer probe user manual G 500 — Helium spray gun user manual G 600 — Service G 700 — Units G 800 — Tools adixen Vacuum Products — ASM 310 Operating instructions… -
Page 7
— Analyzer cell operating principle — About helium and hydrogen A 400 Accessories — Accessories Common to all leak detectors — Specific accessories to one or several leak detectors A 500 Technical characteristics A 600 Dimensions adixen Vacuum Products — ASM 310 Operating instructions… -
Page 8
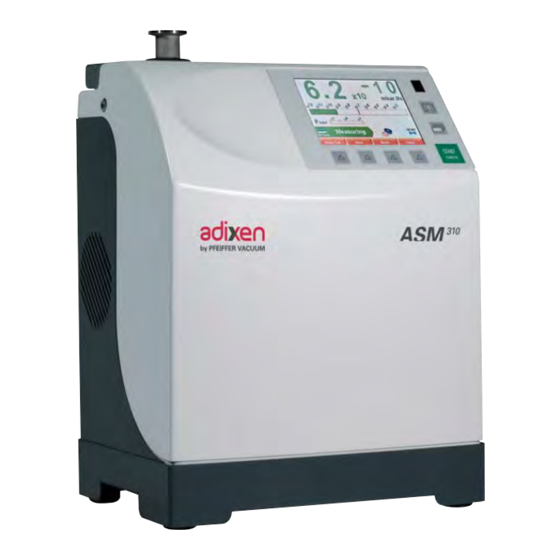
Introduction Congratulations, you have just acquired a unique dry helium leak detector truly portable: the ASM 310. The ASM 310 is the lightest unit of its category (less than 48 lbs) that offers the following features: 1 cfm (1.7 m /h) dry and clean roughing capacity, … -
Page 9
(M2), helium isotope (M3) and helium (M4). For more information on the operating principle, please go to the end of this chapter. The ASM 310 helium leak detector has a wide measuring range capability. It can detect a leak as large as 10 mbar l/s down to a leak as small as 3×10 mbar l/s. -
Page 10
The high vacuum is then connected to the inlet of the leak detector taking care of the gas load. The analyzer cell will measure any helium present. The value of the leak will be measured and displayed on the control panel. 2/11 adixen Vacuum Products — ASM 310 Operating instructions… -
Page 11
Global test without possible location of the leak. Hard Vacuum test Hard Vacuum test Sniffing test C 402 3/11 adixen Vacuum Products — ASM 310 Operating instructions… -
Page 12
T = V/S (T in second, V in litre, S in l/s) T is the time required for the signal to reach 63 % of the final value. 4/11 adixen Vacuum Products — ASM 310 Operating instructions… -
Page 13
The sniffer probe only samples the concentration of helium. part of the helium escaping from the part. The sample depends on the distance separating the leak from the tip of the probe. 5/11 adixen Vacuum Products — ASM 310 Operating instructions… -
Page 14
Several parts play an important part such as: the pressurization time, the helium bombing pressure, the internal volume, the aeration time, the size of the leak. Please consult us for details about this method. 6/11 adixen Vacuum Products — ASM 310 Operating instructions… -
Page 15
The molecules of the gas being analyzed pass into an ionization chamber 4 where they are bombarded by an electron beam generated by a heated iridium filament 5. A large number of the molecules are transformed into ions. 7/11 adixen Vacuum Products — ASM 310 Operating instructions… -
Page 16
It is essential that the total pressure in the analyzer cell is less than mbar, so that the trajectories of the electrons and the ions are not disturbed by residual molecules. There is a spare iridium filament 6 in the analyzer cell. 8/11 adixen Vacuum Products — ASM 310 Operating instructions… -
Page 17
— Power supply board: delivers power to all the components — Measure board: Treat and convert the signal into a digital signal (semi-log form). — Preamp board: preamplification and mechanical interface. 9/11 adixen Vacuum Products — ASM 310 Operating instructions… -
Page 18
It’s the most difficult gas to liquefy. It’s used as an inert shield gas to protect things from oxidation – and of course as leak detection tracer gas. 10/11 adixen Vacuum Products — ASM 310 Operating instructions… -
Page 19
This mixture is however classified according to ISO 10156 as Flammable Gas and should only be used after due safety considerations and approvals. 11/11 adixen Vacuum Products — ASM 310 Operating instructions… -
Page 20
Power supply cords • Measurement gauge (*) also available in option You can find via our Web Site free softwares designed to help you in your applications. Refer to G 800. 1/16 adixen Vacuum Products — ASM 310 Operating instructions… -
Page 21
1000 cc stainless steel mbar l/s between 5 and 8 · 10 mbar l/s 1000 cc stainless steel mbar l/s between 1 and 3 · 10 mbar l/s 1000 cc stainless steel 2/16 adixen Vacuum Products — ASM 310 Operating instructions… -
Page 22
«requested value = 1.8 mbar l/s». · C2 Calibration accessory Used to connect the calibrated leak and in sniffing the sniffer probe for a calibration. Model Part No DN 16 110715 DN 25 110716 3/16 adixen Vacuum Products — ASM 310 Operating instructions… -
Page 23
802767 Cable of 35 m/114.8 feet/1378 inches 802768 Cable only Cable of 40 m/131.2 feet/1575 inches 802769 Cable of 45 m/147.6 feet/1772 inches 802770 Cable of 50 m/164 feet/1968 inches 802771 4/16 adixen Vacuum Products — ASM 310 Operating instructions… -
Page 24
15 cm 45 cm Sniffer probe part number SNC1E1T1 SNC1E2T1 SNC1E3T1 SNC1E4T1 SNC2E1T1 SNC2E2T1 SNC2E3T1 SNC2E4T1 * Sniffer probes with flexible nozzle cannot be used with the ASM 310. Sniffer probe with short rigid nozzle (9 cm/3.5”): Tube Model Part No Tube length 20 m/69.6 feet/787 inches… -
Page 25
Able to measure helium concentration inside water or liquids. Model Flange Part No Sniffer probe with membrane DN 25 103592 Sniffer probe with membrane and smooth Ø 14 mm 067678 tube connection 6/16 adixen Vacuum Products — ASM 310 Operating instructions… -
Page 26
Standard leak mode: for quick and rough leak tests. „ Fine leak mode. „ The Helium spray gun is provided with 2 standard needles wich allow the adjustment of the Helium flow at the outlet of the nozzle. 7/16 adixen Vacuum Products — ASM 310 Operating instructions… -
Page 27
105841 20 μm inlet filter 40/40 105842 20 μm inlet filter 40/25 105843 5 μm inlet filter 25/25 105844 5 μm inlet filter 40/40 105845 5 μm inlet filter 40/25 105846 8/16 adixen Vacuum Products — ASM 310 Operating instructions… -
Page 28
70 μm 067636 20 μm inlet filter Ø 114 mm 105847 5 μm inlet filter Ø 114 mm 105848 O’ring, dia. 5 mm Ø 114 mm 082152 9/16 adixen Vacuum Products — ASM 310 Operating instructions… -
Page 29
A 400 Accessories S1 Transport case Part number: 119594 S2 Transport cart Part number: 114820 Cart Maxi authorized weight on the transport cart: 26 kg/57 lb Compulsory fixing to the leak detector. 10/16 adixen Vacuum Products — ASM 310 Operating instructions… -
Page 30
Bottle holder fixed on Bottle holder equipped the leak detector with helium bottle B 240. Installation: Refer to S4 Bluetooth Part number: P0482E1 A 300. Description Installation and use: refer to B 308. 11/16 adixen Vacuum Products — ASM 310 Operating instructions… -
Page 31
A 300. Description B 306. Installation and use: refer to Check compatibility between « 37 pin input/output board with Ethernet » accessory and the other interfaces in option/accessory: refer to B 300. 12/16 adixen Vacuum Products — ASM 310 Operating instructions… -
Page 32
The option use requires a primary pumping associated to the leak detector: at the customer’s charge. Sniffing probe required in sniffing mode is not delivered in the kit: at the customer’s charge. 13/16 adixen Vacuum Products — ASM 310 Operating instructions… -
Page 33
L = 100/115 V — 50/60 Hz H = 200/240 V — 50/60 Hz Motor M = Single phase with on/off switch S = Single phase without switch T = Three-phase 14/16 adixen Vacuum Products — ASM 310 Operating instructions… -
Page 34
Cable, main power; 2 m — without plug 104559 Cable, main power; 2 m — Italy 104758 Cable, main power; 2 m — Switzerland 103718 Cable, main power; 2.5 m — United Kingdom 104411 15/16 adixen Vacuum Products — ASM 310 Operating instructions… -
Page 35
ASI 30 electronic module is set to be used with TPR 280 gauge. Measurement range: 5 · 10 to 1000 mbar Flange: DN 16 ISO-KF TPR 280 gauges with other flanges: refer to Pfeiffer Vacuum book. 16/16 adixen Vacuum Products — ASM 310 Operating instructions… -
Page 36
180° magnetic deviation mass spectrometer Analyzer cell filaments 2 Iridium filaments Emission current range 0.2 to 2 mA Display: Inlet port pressure display range to 10 mbar / 10 to 10 adixen Vacuum Products — ASM 310 Operating instructions… -
Page 37
Maxi couple to apply on the inlet part (any direction) 5 n.m Humidity max. (at 40 °C) 95 % Weight < 48 lbs Maximum weight of the tested part 5 kg / 11 lb adixen Vacuum Products — ASM 310 Operating instructions… -
Page 38
A 600 Dimensions (mm/feet) 3.18 2.44 10.00 13.77 3.93 3.18 3.93 Keep 100 Inch. free for the detector ventilation. Keep 10 cm free for the detector ventilation. adixen Vacuum Products — ASM 310 Operating instructions… -
Page 39
Neutral gas purge and inlet vent connection — Purpose — Connection to the leak detector — Gas characteristics B 300 Controlling the detector — Proposed interfaces B 301 RS 232 — Purpose — Connection — Use adixen Vacuum Products — ASM 310 Operating instructions… -
Page 40
Detailed contents B 302 15 pin Interface — Purpose — Connection — Use — Analog Output B 400 Start-up — Connecting the detector to the installation — Starting up — Switching off recommanded adixen Vacuum Products — ASM 310 Operating instructions… -
Page 41
In all cases, we recommend keeping the packaging (reusable materials) for further transport of the equipment or for prolonged storage. adixen Vacuum Products — ASM 310 Operating instructions… -
Page 42
— do not push it sideways or press on its side faces, — do not leave objects leaning on the side of it. The detector is not designed to carry people or loads and is not for use as a seat or step. adixen Vacuum Products — ASM 310 Operating instructions… -
Page 43
Lock out (LO/TO) of nitrogen purging circuit. The user will need to provide a dedicated Nitrogen circuit, fitted with a manual valve, that can be locked out within a radius of 3 m (10 ft) of the equipment. adixen Vacuum Products — ASM 310 Operating instructions… -
Page 44
After connecting the appliance to the pumping line, check for leaks along the whole of the line to ensure proper connections have been made (pump, pipes, valves, etc.). adixen Vacuum Products — ASM 310 Operating instructions… -
Page 45
All other cleaning operations must be done by our service centers. Whenever you return the product to an adixen repair service center, you must comply with the requirements of the «Procedure for returning adixen products» and fill in the safety questionnaire available in appendix chapter of the operating manual. -
Page 46
Vacuum Products original spare parts, delivered by adixen Vacuum Products, containing i.e. all its components and sub-assemblies. This obligation will not cover the shipping cost to an adixen take back facility. Before returning the product, fill in the safety form available in appendix of the operating manual. -
Page 47
1 SD card (inside the control panel) 1 maintenance kit. „ 1 plug Sub D 15 pts not wired for I/O. „ „ Power supply cord France and US (other power supply cords : A 400 ). adixen Vacuum Products — ASM 310 Operating instructions… -
Page 48
We advise to use the transport case specially designed for the ASM 310. Range the accessories in the foam (optional). Place the ASM 310 Remove the foam of to stop. the case. Put back the foam. adixen Vacuum Products — ASM 310 Operating instructions… -
Page 49
Shock indicator: indicates if the box has been shook. „ Tilt indicator: indicates that the box has been tipped. „ Safety label: guarantees that nobody has opened the packaging „ since the manufacturing departure. adixen Vacuum Products — ASM 310 Operating instructions… -
Page 50
Located on the frame, this label indicates if “Bluetooth”, “Input/ „ output board with Ethernet” or “Input/output board with Wi-Fi” options are placed in the detector. If yes, their Mac addresses, required for their configuration, are indicated. adixen Vacuum Products — ASM 310 Operating instructions… -
Page 51
Located on the frame, under the cover, this label indicates „ parameters values only necessary to Service Centers for the leak detector maintenance. Leak detector quality control comply at factory leaving. „ Leak detector conformed with the R.O.H.S. directives. „ adixen Vacuum Products — ASM 310 Operating instructions… -
Page 52
Product drained before leaving factory: fill the primary pump „ with oil before running. ATTENTION NOTICE PUMP IS SHIPPED WITHOUT POMPE LIVREE SANS HUILE OIL INSTALLED A L’INTERIEUR consulter le manuel d’utilisation consult maintenance manual ATTENTION CAUTION adixen Vacuum Products — ASM 310 Operating instructions… -
Page 53
This label recommends disconnecting electrically the leak detector before removing the cover. DISCONNECT POWER CABLE BEFORE REMOVING COVER adixen Vacuum Products — ASM 310 Operating instructions… -
Page 54
The user must keep all body parts away from moving parts. WARNING MOVING PARTS PRESENT Moving parts can crush and cut. Keep hands or feet aways from moving parts. adixen Vacuum Products — ASM 310 Operating instructions… -
Page 55
The inlet vent status (open or closed) depends on the parameters set by the operator ( C 500). If no inlet vent system is connected, the inlet vent is connected to the ambient air. adixen Vacuum Products — ASM 310 Operating instructions… -
Page 56
1.5 to 4.5 psig), Use pressure ≈ 1.1 to 1.3 bar absolute ( 16 to 20 psia) If the purge gas pressure is too high, the inlet valve could always be stay closed. adixen Vacuum Products — ASM 310 Operating instructions… -
Page 57
B 300 Controlling the detector Proposed interfaces Standard interface RS 232 ( B 301) „ 15 pins interface ( B 302). „ NETWORK SERIAL INPUTS/OUTPUTS adixen Vacuum Products — ASM 310 Operating instructions… -
Page 58
It is necessary to allocate RS 232 to serial link 1 in the control panel advanced menu ( C 406) to activate it. „ Refer to the RS 232 specific operating manual supplied with the leak detector operating manual. adixen Vacuum Products — ASM 310 Operating instructions… -
Page 59
: this command deactivates the loudspeaker. To deactivate audio/headphones output, it is necessary to send «=HPE» RS 232 command to the leak detector : this command activates again the loudspeaker. adixen Vacuum Products — ASM 310 Operating instructions… -
Page 60
Inlet pressure 2,5 V/8,5 V (10 to 10 mbar) He compound 0/10 V (compound exponent, mantissa) (*) Graphs and formulas in appendix: G 300 After modification, we advise to save all inputs/outputs set. adixen Vacuum Products — ASM 310 Operating instructions… -
Page 61
Do not seal Controlling the detector with a PC through the RS 232 interface Main power cable (PC not included, payable by the customer) Main power switch Power fuse + exchange fuse adixen Vacuum Products — ASM 310 Operating instructions… -
Page 62
The leak detector could be use in a horizontal position: turn the control panel for a better reading. Position the leak detector so that there is no risk of fall or shock. adixen Vacuum Products — ASM 310 Operating instructions… -
Page 63
It also makes the SD card access inaccessible. The control panel could also be fix on all other supports thanks to 2 nuts embed in the plastic hull. adixen Vacuum Products — ASM 310 Operating instructions… -
Page 64
But we advise to read chapters B and C. If you have already used this type of product, do not hesitate to discover the menus by yourself. Read the chapter C. adixen Vacuum Products — ASM 310 Operating instructions… -
Page 65
Wait before moving the detector so as to make sure of the „ complete turbomolecular pump stop. The leak detector is so under vacuum avoiding an important degassing time in a future use. adixen Vacuum Products — ASM 310 Operating instructions… -
Page 66
— Legend — Value adjustment from the control panel C 401 Set points Menu — Purpose — Audio alarm and digital voice set points — He max. — Set points — Probe clogged adixen Vacuum Products — ASM 310 Operating instructions… -
Page 67
— Leak detection: Calibration — Leak detection: Analyzer cell — Leak detection: Internal Pirani gauge calibration — Input/Output menu — Input/Output: COM serial port — SD card menu — Load/Save Detec. Param. adixen Vacuum Products — ASM 310 Operating instructions… -
Page 68
— Parameters configuration C 600 «Setting» menus arborescence C 700 Remote control (accessory) — Interface — Connecting — Choice — Use and display C 900 Long distance sniffer probe and Helium spray gun (accessories) adixen Vacuum Products — ASM 310 Operating instructions… -
Page 69
3 function keys levels proposed. At each level, press on each function key (on the control panel or with the key opposite) to discover its action. adixen Vacuum Products — ASM 310 Operating instructions… -
Page 70
( Notes In stand-by mode, the leak value displayed is the helium background value. If the automatic cycle function is activated, the test end is different ( C 304). adixen Vacuum Products — ASM 310 Operating instructions… -
Page 71
Any press on the screen will reactivate the display. If the touch-sensitive screen is defective, the functions remain accessible by keys: use the RS 232 to pilot/set the detector or the SD card (setting only). adixen Vacuum Products — ASM 310 Operating instructions… -
Page 72
The operator can mask, add, switch some windows in the C 403. loop The operator can have only a single application window displayed. adixen Vacuum Products — ASM 310 Operating instructions… -
Page 73
8 Measure unit of the leak flow 9 Signal correction function activated indicator 10 Zero function activated indicator Detector inlet pressure display (coherent unit with the leak flow unit) 12 Tracer gas (if He or Hy) adixen Vacuum Products — ASM 310 Operating instructions… -
Page 74
Measured The vacuum circuit varies according to the detector state: signal digital green: valve opened display red: valve closed. It is not possible to control valves. adixen Vacuum Products — ASM 310 Operating instructions… -
Page 75
It is necessary to read the operating manual. C 406 *advanced setting required a good leak detection knowledge: cell setting, pressure gauge, etc. • «Setting» menu is also accessible from any window by pressing simultaneously the keys adixen Vacuum Products — ASM 310 Operating instructions… -
Page 76
5 Signal correction function activated indicator The operator could move the «measure» window on the touch- sensitive screen: press on the measure window with the finger and move this one on the screen. adixen Vacuum Products — ASM 310 Operating instructions… -
Page 77
3 standard configurations are proposed meeting the majority of the C 405 ). user’s need ( Line 3 Line 2 Line 1 If necessary, the operator can customize the function keys. C 405. adixen Vacuum Products — ASM 310 Operating instructions… -
Page 78
Scales (3), (4), (5), are adjustable by pressing on the graph. „ „ The operator could move the «measure» window on the touch- sensitive screen: press on the measure window with the finger and move this one on the screen. adixen Vacuum Products — ASM 310 Operating instructions… -
Page 79
2 decades scale from 5 · 10 to 5 · 10 mbar l/s automatic scale 4 decades scale from 5 · 10 to 5 · 10 mbar l/s adixen Vacuum Products — ASM 310 Operating instructions… -
Page 80
C 300 Graphic display Recording Recording total time according to the sample time Sample time Sample time Maximum capacity File size 0.2 s 6 hours 33 minutes 7 Mo 30 s 983 hours adixen Vacuum Products — ASM 310 Operating instructions… -
Page 81
„ If the memory is not delete between 2 recordings, ( all the successive recordings are consecutive on the recorded graph. A cursor indicates the end of each recording. record record record adixen Vacuum Products — ASM 310 Operating instructions… -
Page 82
Visualisation of a plotting realized. Deletion of the plottings recordings. Plotting total time „ If any plotting has been done, the message below appears: Nothing recording adixen Vacuum Products — ASM 310 Operating instructions… -
Page 83
(except in a same basic graph come back. range). • Adjust if necessary the zone to enlarge by pulling the corners or sides of the zone with your finger. adixen Vacuum Products — ASM 310 Operating instructions… -
Page 84
4 Tracer gas signal value (in red) or inlet pressure (in blue) display 5 Navigation between next/previous recorded points • To have the exact values of all the recoverable measures under any spreadsheets, save the recorded plotting in .txt file. adixen Vacuum Products — ASM 310 Operating instructions… -
Page 85
.txt files. .bmp files can be displayed on the control panel screen in the .txt „ files. „ .txt files can be opened only from a PC. SD card C 406 adixen Vacuum Products — ASM 310 Operating instructions… -
Page 86
It is necessary to read the user’s mannual. C 406 *advanced setting required a good leak detection knowledge: cell setting, pressure gauge, etc. • «Setting» menu is also accesible from any window by pressing simultaneously the leys adixen Vacuum Products — ASM 310 Operating instructions… -
Page 87
C 200). Function key: access to function A by tactile press or press on the opposite Value adjustment from the control panel Exponent adjustment Unit adjustment Tenth adjustment adixen Vacuum Products — ASM 310 Operating instructions… -
Page 88
The level varies from 0 to 8 (0 to 90 dB). • Quick access to setting from the control panel: • Stop simultaneously the audio alarm and the digital voice with the adixen Vacuum Products — ASM 310 Operating instructions… -
Page 89
Define the acceptance threshold of the good/bad parts: leak value measured ≤ reject set point => part accepted leak value measured > reject set point => part rejected. • Fast access to setting from the control panel: adixen Vacuum Products — ASM 310 Operating instructions… -
Page 90
If not, the probe may be clogged. • Do not block the end a long time: if the measured signal decreases too much, there is risk of taking out of the sniffing test. adixen Vacuum Products — ASM 310 Operating instructions… -
Page 91
Set the correction factor to apply. Digital and bargraph Only the digital display is corrected by the correction factor. display The correction factor does not apply to the bargraph display. adixen Vacuum Products — ASM 310 Operating instructions… -
Page 92
Normal mode High Sensitivity mode • By default, the leak detector is configurated to work in vacuum test, in the most sensitive test mode: this configuration meet the majority of the operators needs. adixen Vacuum Products — ASM 310 Operating instructions… -
Page 93
(x < 0 s, otherwise part bad). T = x + 0 sec..: Test stop, stand-by mode, inlet vent if automatic • Function to use to automate small production or realize repetitive operations with different detectors. adixen Vacuum Products — ASM 310 Operating instructions… -
Page 94
If «Operator» is selected, it is necessary to press the dedicated function key to put back the inlet detector to atmosphere. Intet vent manual activation: From thumb (if parameted) or From standard window Inlet Vent adixen Vacuum Products — ASM 310 Operating instructions… -
Page 95
The automatic closing after a defined time allows to limit the dry air or nitrogen consummation if this one is connected. • Always allocate a function key to the inlet vent function to active it manually. adixen Vacuum Products — ASM 310 Operating instructions… -
Page 96
It is the global performance indicator of the analyzer cell sensitivity. Factory departure : Fil. Margin = 100 % Normal wear on some cell components will reduce this value in the time, without deteriorate the detector measurement accuracy. adixen Vacuum Products — ASM 310 Operating instructions… -
Page 97
„ When a parameters saving is realized ( C 406), all data of all calibrated leaks set (1 internal and 3 external) are saved. More informations about the calibrated leaks E 412. adixen Vacuum Products — ASM 310 Operating instructions… -
Page 98
• Do not forget to do a counter reset after having done the mainte- nance operation. • According to your need, you can set another value and so better adapt the maintenance to your application. adixen Vacuum Products — ASM 310 Operating instructions… -
Page 99
Timer balance • Do not forget to do a timer reset after having done the mainte- nance operation. • With the secondary pump #1 timer, you can follow, for example, the ball bearings maintenance. adixen Vacuum Products — ASM 310 Operating instructions… -
Page 100
Filament change (manually or automatically with firmware) I320 Calib. Pirani int Automatic internal Pirani gauge calibration I321 Storage delay Storage delay : it is activated if the leak detector doesn’t start since 15 days (minimum). adixen Vacuum Products — ASM 310 Operating instructions… -
Page 101
Reject set point of the test mode in progress Activated functions list in automatic Secondary or primary pump maintenance ( C 404) Calibration information Detector softwares information • Quick access to informations from control panel: adixen Vacuum Products — ASM 310 Operating instructions… -
Page 102
The function keys allow to activate/stop a function or to set set points from the different applicative windows. 3 configurations are predefined. The operator can also define its own function keys configuration. adixen Vacuum Products — ASM 310 Operating instructions… -
Page 103
Thanks to the function keys, it is possible to give to the operator a limited functions access and to protect by password the other notauthorized functions of the «Setting» menu. adixen Vacuum Products — ASM 310 Operating instructions… -
Page 104
Select the «Mute» function with the arrows Select the function key successive presses (key selected if white bottom). Valid the configuration the function key is now allocated to the «Mute» function. adixen Vacuum Products — ASM 310 Operating instructions… -
Page 105
When a window is no more selected ) or if its order has been changed, the order is automatically up dated. When a window is again selected, it takes place automatically at the last position. adixen Vacuum Products — ASM 310 Operating instructions… -
Page 106
A single press on the touch-sensitive screen reactivates the display. By default, the automatic panel off is not activated. Access password 3 user levels allow restricting display and access to settings and User levels functions. adixen Vacuum Products — ASM 310 Operating instructions… -
Page 107
„ password: setting possible „ 2 function keys available: « Info » and « Basic param. » Cell pressure hidden „ Function keys hidden „ adixen Vacuum Products — ASM 310 Operating instructions… -
Page 108
START key valid „ STAND-BY Measured leak value and „ reject set point displayed only in test. Access to “Setting” menu by „ pressing on for a long time. „ Any restiction adixen Vacuum Products — ASM 310 Operating instructions… -
Page 109
Lock a menu by tactile press „ on the opened padlock. „ To unlock a menu, tactile „ press on its closed padlock. Example : Locking of Set Points, Spectro and Advanced menus. „ adixen Vacuum Products — ASM 310 Operating instructions… -
Page 110
In the «Setting» window, the locked menus are indicated with a closed padlock. Change password Enter the password (5555 by „ default) and validate. Select «Change password»: „ enter the new password and validate. adixen Vacuum Products — ASM 310 Operating instructions… -
Page 111
Start-up time delay detector use during a defined time after its switching on. It forbids a measure while the leak detector is neither thermically stabilized, nor degased. Leak detector locking time 1/15 adixen Vacuum Products — ASM 310 Operating instructions… -
Page 112
Activated function if «automatic» Function triggering mode If «auto, to set Function triggering set point „ Manual activation of the Zero function: • It is advised to use this function when the He background is high and stable. • This function allows to measure a leak flow 2 ranges below the detector background in progress, as soon as this one is no more in roughing. 2/15 adixen Vacuum Products — ASM 310 Operating instructions… -
Page 113
If calibration is not realized in the next 20 mn after the leak detector switch on, a reminder message displays. Calibration start calibration „Calibration = starting Calibration is automatically start at the leak detector switch on. 3/15 adixen Vacuum Products — ASM 310 Operating instructions… -
Page 114
If the value is out of limits, there is a message which request to „ start acomplete leak detector calibration. Function activation. Set points launching the calibration checking. The first reached will launch the checking. • At any time, the operator can launch a leak detector calibration checking: detector in stand-by mode, press twice on the function key in less than 5 secondes 4/15 adixen Vacuum Products — ASM 310 Operating instructions… -
Page 115
The filament can be switched off by the operator (OFF): it is not necessary to switch it off in stand-by mode to save it. • Do not switch off the filament except to do a manual calibration. • Attention : the manual calibration is kept to leak detection experts. • The leak detector swings automatically from a filament to the other one if the selected filament in progress of use becomes defective. • At the leak detector switching on, the detector will start again with the selected filament at the last switching off. 5/15 adixen Vacuum Products — ASM 310 Operating instructions… -
Page 116
Make sure that the detector is at atmospheric pressure. The value «Pressure» increases: wait the stabilisation of this value (around 5 minutes) and press on the Input/Output menu Setting of the RS 232 serial connection parameters. 6/15 adixen Vacuum Products — ASM 310 Operating instructions… -
Page 117
RS 485 V- Not used Not used + 5 V ; 500 mA Communication mode The tickets of communication are printed. description Connection to the printer Leak detector Printer serial port 7/15 adixen Vacuum Products — ASM 310 Operating instructions… -
Page 118
PEAK ADJUSTMENT : dac_ref.=1162 vacc_ref.=141.8 dac_peak.=1179 vacc_peak.=141.8 SIGNAL RECORDS (no calibrated): global: 3.5E-07 background: 1.1E-10 CALIBRATION INFORMATIONS: total time(sec): result: COMPLETED CURRENT ASM310 CALIBRATION: DATE:Jan/08/2007 TIME:01:34:41 Fil:1 Ie=0.6 Vac=140.6 Coef_cal:00.54 8/15 adixen Vacuum Products — ASM 310 Operating instructions… -
Page 119
——- 01:02:33 5.9E-02 ——- Leak value 01:02:36 01:02:36 01:02:36 stop stop stop 9.9E-05 9.9E-05 9.9E-05 1.3E-05 1.3E-05 1.3E-05 FAIL FAIL FAIL Test result if Memo function activated Memo function C 406 9/15 adixen Vacuum Products — ASM 310 Operating instructions… -
Page 120
Value extern HV cal. (?AEH) 150-09 [=AEH150-09] Value extern SN cal. (?AES) 500-08 [=AES500-08] Analog output1 (?AO1) [=AO11] ?AP (?AP) 300-06E [=AP300-06E] Autozero status (?AZ) [=AZD] Auto cycle param. (?CA) DE00100010 [=CADE00100010] 10/15 adixen Vacuum Products — ASM 310 Operating instructions… -
Page 121
[=P1150-01] Norm. pr. threshold (?P2) 500-03 [=P2500-03] HS press. threshold (?P3) 400-04 [=P3400-04] Inlet pressure (?PE) 760+00 Cell pressure (?PS) 100-06 Password (?PW) 5555D [=PW5555D] ?RD0 (?RD0) 02030 ?RD2 (?RD2) [=RD2005] 11/15 adixen Vacuum Products — ASM 310 Operating instructions… -
Page 122
Temperature (?TE) [=TE28S] Current hour (?TI) 133646 Latest shut down time (?TIA) 090247 Latest autocal time (?TIC) 091844 Latest start-up time (?TIM) 091549 HLD status (?TR) 219-1423874760-02 Measure unit used (?UN) [=UN2] 12/15 adixen Vacuum Products — ASM 310 Operating instructions… -
Page 123
[=OP4000] (?IPG) AT2573308500584029781 [=IPG0584029781] EEProm write cycles (?EEP) 000053025121024 Test method used (?TST) [=TST0] Inlet Vent Param. (?IVP) A1E0009 [=IVPA1E0009] Background suppr. (?ZB) O_0010500-09 [=ZBO_0010500-09] First detector run (?P3D) [=P3D0] (?CRX) 13/15 adixen Vacuum Products — ASM 310 Operating instructions… -
Page 124
High bargraph decade [>DBH-02] High pressure decade [>DPH003] Low pressure decade [>DPB-03] View reject point? [>REP000] Hardkeys#1 009000000 [>HK0009000000] Hardkeys#2 007000000 [>HK1007000000] Hardkeys#3 005000000 [>HK2005000000] Hardkeys#4 008000000 [>HK3008000000] Hardkeys#5 002000000 [>HK4002000000] 14/15 adixen Vacuum Products — ASM 310 Operating instructions… -
Page 125
012000000 [>HK9012000000] Hardkeys#11 012000000 [>H10012000000] Hardkeys#12 012000000 [>H11012000000] Luminosity setting [>LUM254] Ecran#0 [>EC0001] Ecran#1 [>EC1002] Ecran#2 [>EC2003] Ecran#3 [>EC3004] Panel contrast 00000 [>COP00000] Panel off after [>MVE000] First screen display [>APR001] 15/15 adixen Vacuum Products — ASM 310 Operating instructions… -
Page 126
Vacuum reject point .0E-07 Sniffing reject point .0E-04 Probe clogged reject point .E-06 C 401 Alarm 3 — On Digital voice 4 — On He Max. He Max. reject point .0E-05 adixen Vacuum Products — ASM 310 Operating instructions… -
Page 127
T° Coeff. (%/°C) : with the detector Ref. T° Primary pump maintenance counter 0000 initial value Secondary pump maintenance counter 5000 initial value C 404 Cycles maintenance counter initial 5.00E-05 value adixen Vacuum Products — ASM 310 Operating instructions… -
Page 128
Triode pressure Hide Stand-by He Screen luminosity high 50 % Screen contrast Panel off Set points menu access Test menu access Spectro menu access Maintenance menu access Config. menu access Advanced menu access adixen Vacuum Products — ASM 310 Operating instructions… -
Page 129
Timer (mm:ss) 00:0 C 406 Background suppression operator Trigger set point Value 5.0E-07 Timer (mm:ss) 00:0 Autocalibration manual Cal. check manual Every (cycles) 0050 Every (hours) 000 Filament used Mode advanced Period Handshake adixen Vacuum Products — ASM 310 Operating instructions… -
Page 130
C 600 «Setting» menus arborescence Nota: Values given as example Nota: Values given as example adixen Vacuum Products — ASM 310 Operating instructions… -
Page 131
C 600 «Setting» menus arborescence Nota: Values given as example adixen Vacuum Products — ASM 310 Operating instructions… -
Page 132
C 600 «Setting» menus arborescence Nota: Values given as example Nota: Values given as example adixen Vacuum Products — ASM 310 Operating instructions… -
Page 133
C 600 «Setting» menus arborescence Nota: Values given as example Nota: Values given as example adixen Vacuum Products — ASM 310 Operating instructions… -
Page 134
C 600 «Setting» menus arborescence Nota: Values given as example Nota: Values given as example adixen Vacuum Products — ASM 310 Operating instructions… -
Page 135
C 600 «Setting» menus arborescence Nota: Values given as examplel (*) Adjustable only if calibration = operator adixen Vacuum Products — ASM 310 Operating instructions… -
Page 136
C 600 «Setting» menus arborescence Nota: Values given as example Standard (15 pin interface) = without 37 pin I/O interface in option/accessory Standard 15 pin adixen Vacuum Products — ASM 310 Operating instructions… -
Page 137
C 600 «Setting» menus arborescence Nota: Values given as example With 37 pin I/O interface option/accessory 37 pin I/O interface (option/acc.) adixen Vacuum Products — ASM 310 Operating instructions… -
Page 138
Test ON indicator (ON when activated) 12 Inlet VENT ON indicator Test Start/Stand-by control Helium signal standard scale ON indicator Calibration in progress Helium signal Zero scale indicator ON indicator 15 Zero ON/OFF control key adixen Vacuum Products — ASM 310 Operating instructions… -
Page 139
The LED indicator is ON/OFF when the control key is activated/ deactivated: if the led is OFF, the leak detector is in stand-by. As soon as the detector is in test, the TEST indicator is ON. adixen Vacuum Products — ASM 310 Operating instructions… -
Page 140
The LED indicator is blinking when the external calibration is activated. At the end of the calibration procedure, the LED indicator is OFF and the correction factor COR is ON. External calibration E 410 adixen Vacuum Products — ASM 310 Operating instructions… -
Page 141
C 900 Long distance sniffer probe and Helium spray gun (accessories) Please refer to the specific sheets for the instruction: Long distance sniffer probe Helium spray gun G 500 G 400 adixen Vacuum Products — ASM 310 Operating instructions… -
Page 142
G 100 Declaration of conformity Alcatel Vacuum Technology France — ATH 200 User’s Manual adixen Vacuum Products — ASM 310 Operating instructions… -
Page 143
If you use specific parameters for your application, you have to devices set these again. Service orders All service orders are carried out exclusively according to our general terms and conditions for the repair and maintenance, available in our website. adixen Vacuum Products — ASM 310 Operating instructions… -
Page 144
Pfeiffer Vacuum stands for innovative and custom vacuum Pfeiffer Vacuum stands for innovative and custom vacuum Vacuum Solutions Vacuum Solutions from a single Source from a single Source solutions worldwide, technological perfection, competent advice solutions worldwide, technological perfection, competent advice and reliable service.
Specifications:1287/1287503-asm_310.pdf file (11 Apr 2023) |
Accompanying Data:
Adixen ASM 310 Security Sensors PDF Operating Instructions Manual (Updated: Tuesday 11th of April 2023 08:56:59 AM)
Rating: 4.9 (rated by 56 users)
Compatible devices: ASM 142 D, TC-6832, ASM 142, PMD85, PSP05-A, Digi-415DT, WNX-40HW, Verso.
Recommended Documentation:
Operating Instructions Manual (Text Version):
(Ocr-Read Summary of Contents of some pages of the Adixen ASM 310 Document (Main Content), UPD: 11 April 2023)
-
121, Adixen ASM 310 GB 04708 — Edition 03 — March 12 11/15 C 406 Advanced Menu Command (RS 232 code) Read value Parameters command Fil. sens. coeff. (?CF) 669-03100-02 [=CF669-031] [=CF100-022] Hours counters val. (?CH) 004860026400000 Communication param. (?CO) 38N2 ?CP (?CP) (*) 800- 02000+00655+02 [=CP800-02000+00655+02] Current D…
-
41, GB 04313 — Edition 03 — March 12 1/6 B 100 Safety instructions Before switching on the appliance, study the operating manual and make sure you follow the safety instructions it gives. You can recognise these by the ‘Caution’, ‘Warning’ and ‘Danger’ symbols. Good practice tips and manufac…
-
30, 11/16 A 400 Accessories GB 03329 — Edition 06 — February 12 S3 Bottle holder Part number: 118444 The bottle holder allows to fix a helium bottle of Ø 180 mm maximum on the leak detector (example: B5 or B11 type). The helium bottle is not supplied with bottle holder: it is at the customer’s charge. Install…
-
79, 2/8 C 300 Graphic display GB 03344 — Edition 04 — March 12 Setting Access to the graph setting menu by pressing on the graph. Display 1 Display/mask the measured signal 2 Display/mask the inlet pressure 3 Recording time parameters 4 Inlet pressure scale parameters 5 He signal scale parameters (if automatic scale deacti…
-
12, Adixen ASM 310 4/11 A 200 About leak detection GB 03302 — Edition 03 — July 12 He He START STAND-BY START STAND-BY Spray method Response time When spraying starts, the leak signal is not displayed instantaneously on the analyzer cell: there is a response time which depends on the volume V being tested and the helium pumping …
-
101, 4/4 C 404 Maintenance Menu GB 04270 — Edition 02 — March 12 Calibrations history Infos History export at .CSV format Calibrations history records the last 20 calibrations realized. Beyond 20, the oldest recorded calibration will be replaced by the last one realized and so on. •Quick access to informations fro…
-
Adixen ASM 310 User Manual
-
Adixen ASM 310 User Guide
-
Adixen ASM 310 PDF Manual
-
Adixen ASM 310 Owner’s Manuals
Recommended: G1163, WLW3600B, JMDM-IPBT-HDDR, PaceMaster, SmartCD.MP
Operating Impressions, Questions and Answers:
adixen Vacuum Products — ASM 310 Operating instructions
Dear customer,
You have just bought an adixen detector.
We would like to thank you and we are proud to count you among
our customers.
This product is a result of the experience acquired since many years
in vacuum and leak detection technology.
The applications of helium leak testing are extremely diversified
ranging from high-tech installation maintenance to high-speed testing
of industrial products.
Each product of the adixen detector range is designed to meet the
specific needs of each application:
•
portability,
•
high sensitivity,
•
pumping capacity,
•
pumping type.
1/2
Table of Contents for Adixen ASM 310:
-
GB 04543 — Edition 02 — March 12 1/2 B 302 15 pin Interface Purpose The 15 pin Input/Output interface allows to control the leak detector with a programmable logic controller or any other external control device. It also allows to get back a 0 — 10 V signal (1 V/decade) corresponding to the leak flow measurement. Connection Refer to B 400. The 15 pin male connector and its cover are supplied with the leak detector. It is recommended to use a shielded cable which is grounded on the connector cover. Use 9 15 1 8 14 Inputs Digital 14 Cycle start Analog 5 Not acti
-
4/4 C 500 Factory configuration of the leak detector parameters GB 03291 — Edition 02 — January 09 Parameters Configuration Factory Customer modification Memo function activated no Display timer activated no Timer (mm:ss) 00:10 Background suppression operator Trigger set point Value 5.0E-07 Timer (mm:ss) 00:10 Autocalibration manual Cal. check manual Every (c
-
6/6 B 100 Safety instructions GB 04313 — Edition 03 — March 12 Decontamination – product dismantling According to the regulations 2002/96/CE about Waste of electrical and electronical equipments, and 2002/95/CE about Restriction of Hazardous substances, the manufacturer provides a recycling paid service for the end of-life of waste electrical and electronic equipment. Any obligation of the manufacturer to take
-
16/16 A 400 Accessories GB 03329 — Edition 06 — February 12 S12 Measurement gauge Gauge part number: PT R26 950 Gauge cable part number: PT 448 250 -T ASI 30 electronic module is set to be used with TPR 280 gauge. Measurement range: 5 · 10 -4 to 1000 mbar Flange: DN 16 ISO-KF TPR 280 gauges with other flanges: refer to Pfeiffer Vacuum book. adixen Vacuum Products — ASM 310 Operating instructions
-
GB 04527 — Edition 02 — June 12 7/9 C 405 Configuration Menu Inlet pressure and cell pressure hidden START STAND-BY key valid Measured leak value and reject set point displayed only in test. Access to “Setting” menu by pressing on for a long time. Any restiction (ctd) adixen Vacuum Products — ASM 310 Operating instructions
-
GB 04708 — Edition 03 — March 12 1/15 C 406 Advanced Menu Advanced menu is kept to leak detection experts and/or to a particular product configuration. Parameters setting connected to: advanced functions, inputs/outputs, SD card (data saving). Purpose Setting of the next parameters: start-up time delay, Memo function, background suppression, Calibration. Setting of the next components: analyzer cell, internal gauge. Lea
-
GB 04313 — Edition 03 — March 12 3/6 B 100 Safety instructions In leak detectors fitted with atmospheric air purging, avoid performing detection operations in non ventilated rooms. The helium concentration may be too high. Installation (cont.) The leak detector must be installed on a horizontal flat surface and never laid on its side. Some models cater for other positions; these are described in the operating manual. The leak
-
GB 03298 — Edition 02 — July 2011 1/2 C 400 Settings 2 4 6 1 3 5 1 Set points setting: reject set point, audio level, digital voice, He max. C 401 2 Method and test mode selection. Inlet vent management. Correction value. C 402 3 Tracer gas selection Calibrated leak setting. C 403 4 Maintenance planning. C 404 5 Detector configuration for the user: language, unit, password, function keys, applicative windows. C 405 6
-
12/16 A 400 Accessories GB 03329 — Edition 06 — February 12 S5 Input/Output board 37 pin input/output board Description A 300. Installation and use: refer to B 308. Check compatibility between « 37 pin input/output board » accessory and the other interfaces in option/accessory: refer to B 300. 37 pin input/output board with Wi-Fi Description A 300. Installation and use: refer to B 305. Check compatibilit
-
2/6 B 112 Product labelling GB 04701 — Edition 01 — November 12 Detector Located on the frame, identity label indicates: General data allowing identifying the leak detector. Safety data allowing using the leak detector in good conditions. Product customized in factory, according to customer order. 1 Part number 2 Designation 3 Net weight 4 Use voltage 5 Use frequency 6 Maxi power consumption 7 Serial number 8 Index 9 Manufacturing date Located on the frame, this label indica
-
GB 03302 — Edition 03 — July 12 11/11 A 200 About leak detection Helium and leak detection: which purity? Helium is commercialized in many different purity levels, the highest level of purity is requested from some laboratories for fundamental researches or very accurate analyses. The use of the Helium as a tracer gas into a mass spectrometer doesn’t require such attention. A purity
Questions, Opinions and Exploitation Impressions:
You can ask a question, express your opinion or share our experience of Adixen ASM 310 device using right now.
Download Operating instructions manual of Adixen ASM 310 Security Sensors for Free or View it Online on All-Guides.com.

1

2

3

4

5

6

7

8

9

10

11

12

13

14

15

16

17

18

19

20

21

22

23

24

25

26

27

28

29

30

31

32

33

34

35

36

37

38

39

40

41

42

43

44

45

46

47

48

49

50

51

52

53

54

55

56

57

58

59

60

61

62

63

64

65

66

67

68

69

70

71

72

73

74

75

76

77

78

79

80

81

82

83

84

85

86

87

88

89

90

91

92

93

94

95

96

97

98

99

100

101

102

103

104

105

106

107

108

109

110

111

112

113

114

115

116

117

118

119

120

121

122

123

124

125

126

127

128

129

130

131

132

133

134

135

136

137

138

139

140

141

142

143

144

Operating instructions
Translated from original version
Translated from original version
Portable leak detector
EN
ASM 310