AKASO Brave 4 — 4K 20MP WiFi Action Camera Manual
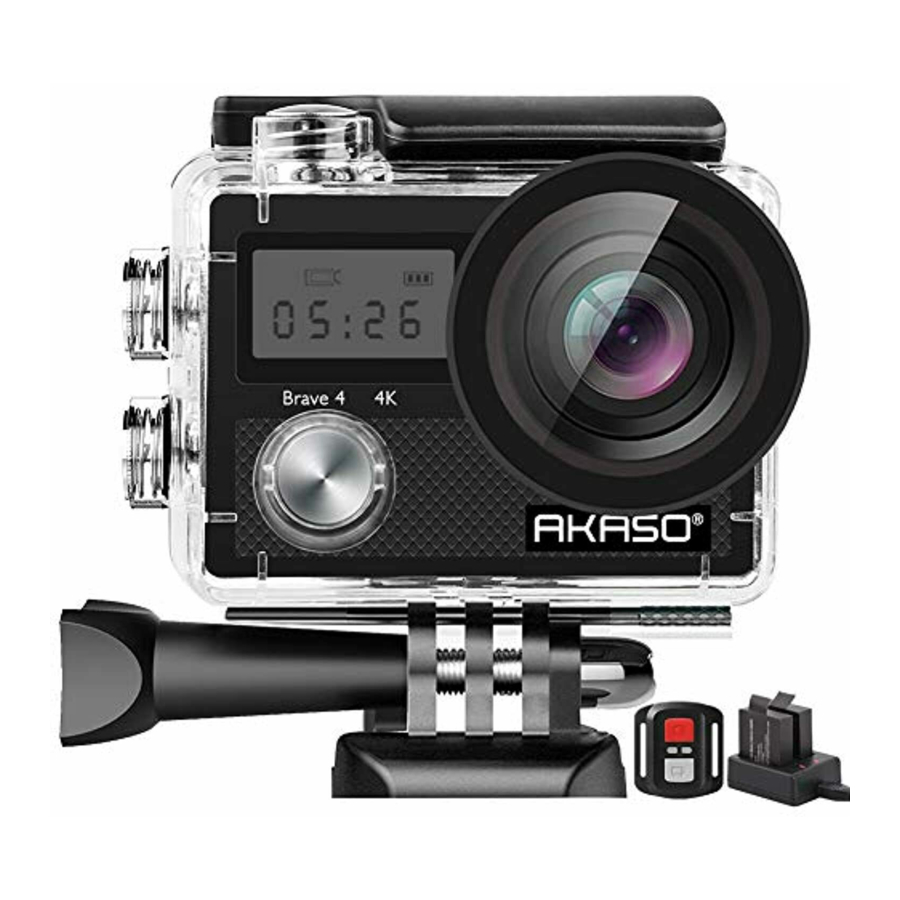
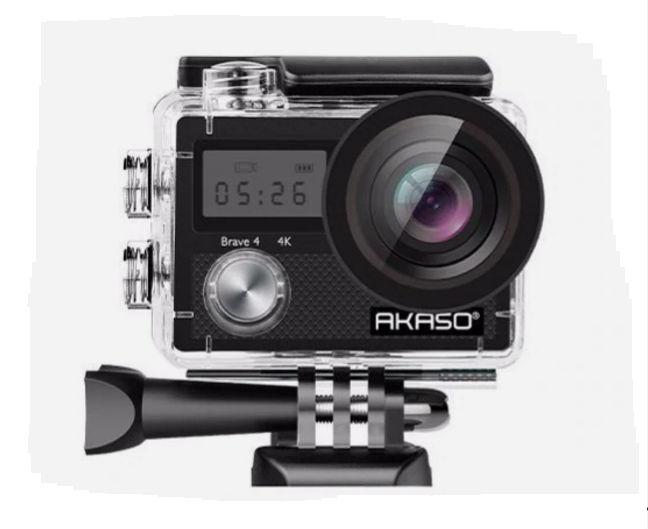
YOUR BRAVE 4


- Shutter / WiFi / Select Button
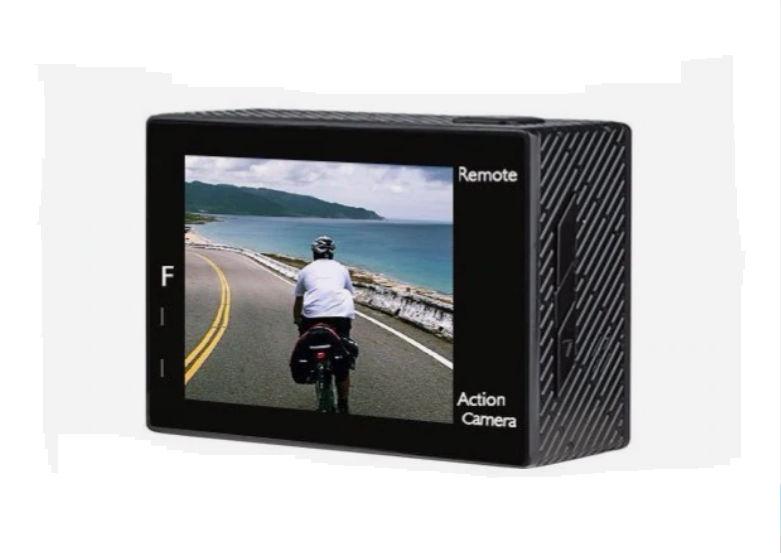
- Screen
- Power / Mode / Exit Button
- Micro USB Port
- MicroSD Slot
- Micro HDMI Port
- Lens
- Screen
- Up / WiFi Button
- Speaker
- Down
- Battery Door
Note: Camera does not record sound when it is in the waterproof case.
GETTING STARTED
MICRO SD CARDS
Use brand name memory cards that meet these requirements:
- micro SD, micro SDHC, or micro SDXC
- Class 10 or UHS-I rating
- Capacity up to 64GB (FAT32)
Note:
- Please format the micro SD card first in this camera before using. To keep your micro SD card in good condition, reformat it on a regular basis. Reformatting erases all of your content, so be sure to offload your photos and videos first.
- FAT32 format Micro SD card stops recording when the storage of each file is over 4 GB and starts to record again on a new file.
POWERING ON + OFF
To Power On:
Press and hold the Mode button for three seconds. The camera beeps while the camera status light is on. When information appears on the LCD display or the camera status screen, your camera is on.
To Power Off:
Press and hold the Mode button for three seconds. The camera beeps while the camera status light is off.
SWITCHING MODE
To Switch Mode:
Turn on camera, press Mode button to switch mode.
To Exit Mode:
Press the Mode button to exit mode.
TURNING ON / OFF Wi-Fi
To turn on Wi-Fi:
Turn on camera, press Up button to turn on Wi-Fi. You can also enter Camera Setting to turn on Wi-Fi.
To turn off Wi-Fi:
Press Up button to turn off Wi-Fi.
OVERVIEW OF MODES
There are 4 modes: There are 4 modes: Video, Photo, Playback and Camera Setting.
VIDEO MODE
Video Mode is the default mode when you turn on the camera.
In Video Mode, press Shutter button, the camera starts recording video. Press Shutter button to stop recording video. Press Mode Button to take a still photo when recording video. Press Up or Down button to adjust the zoom level.

PHOTO MODE
Press Mode button once to switch to Photo Mode after you turn on camera. In Photo Mode, press Shutter button, the camera takes a photo. Press Up or Down button to adjust the zoom level.

PLAYBACK MODE
Press Mode button several times to switch to Playback Mode. In Playback Mode, press the Up/ Down button to scroll through video or photo files.

CAMERA SETTING MODE
Press Mode button several times to switch to Camera Setting Mode. You can change camera settings in this mode.
Note: Camera does not record sound when it is in the waterproof case.
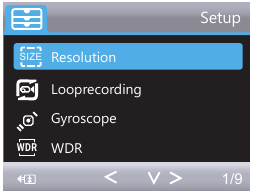
CUSTOMIZING YOUR BRAVE 4
1. Resolution: 4K / 24FPS, 2K / 30FPS, 1080P / 60FPS, 1080P / 30FPS, 720P / 120FPS, 720P / 60FPS, 720P / 30FPS
Default setting is 1080P 60FPS.
Note: When capturing video at high resolutions or high frame rates in warm ambient temperatures, the camera may become warm and use more power.
2. Loop recording: Off / 3 Minutes / 5 Minutes / 10 Minutes
Default setting is 3 minutes.
Using Loop Recording, you can continuously record video, but save only the moments that you want. For example, if you select a 5-minute interval, only the previous 5 minutes are saved when you press the Shutter button to stop recording. If you record for 5 minutes and do not press the Shutter button to stop recording and save, the camera records a new 5-minute interval by recording over your previous 5 minutes of footage. When the micro SD card is full, the new files will cover the old one if loop recording is on.
3. Gyroscope: Off / On
Default setting is off.
This setting adjusts the footage to offset for motion during capture. The result is smoother footage, especially in activities with relatively small but fast motion including cycling, motorcycling, and handheld uses.
4. WDR: Off / On
Default setting is on.
Wide Dynamic Range (WDR) retains a greater level of detail in the dark and bright areas of an image. The result is a photo that is properly exposed for both of these extremes. This setting is especially useful for scenes that are backlist or that have large bright regions and a dark foreground. WDR is available in Video mode only.
5. Time-lapse Record: Off / 100ms / 200ms / 500ms / 1 Sec / 5 Seconds
Default setting is off.
Time Lapse Video creates video from frames captured at specific intervals. This option lets you capture a time lapse event and immediately view or share it as a video. Time Lapse Video is captured without audio.
6. Motion Detection: Off / On
Default setting is off.
Motion detection is the process of detecting a change in the position of an object relative to its surroundings or a change in the surroundings relative to an object. Turn on Motion Detection and camera, the camera records video automatically when it detects a change in the position of an object relative to its surroundings.
7. Record Audio: Off / On
Default setting is on.
Turn off Record Audio, the camera does not record audio when you record video.
Note: Press Down button, the camera does not record sound when you record video.
8. Date Stamp: Off / On
Default setting is on.
Turn on Date Stamp, this camera adds date stamp to the videos and photos you take.
9. Angle: 170°, 140°, 110°, 70°
Default setting is 170°.
The angle refers to how much of the scene (measured in degrees) can be captured through the camera lens. 170° angle captures the largest amount of the scene, while 70°angle captures the least.
10. Diving mode: Off / On
Default setting is off.
Turn on Diving Mode, it can compensate for the lack of red light in underwater scenes. Diving Mode is designed to be used in tropical and blue water, optimized for use between 10 and 80 feet.
11. Special Effects: Off / Night Scene / Portrait / Lightpainting
Default setting is off.
12. Self Timer: Single / 2S Timer/ 5S Timer/ 10S Timer
Default setting is single.
A Self Timer gives a delay between pressing the shutter release and the shutter’s firing. It is most commonly used to let photographers to take a photo of themselves (often with family).
13. Image Size: 20M / 16M / 12M / 10M / 8M / 5M / 3M / VGA 640×480
Default setting is 20M.
14. Burst: Off / Burst3 / Burst5 / Burst10
Default setting is off.
Burst captures up to 10 photos in 1 second, so it is perfect for capturing fast-moving activities.
15. Quality: Fine / Normal / Economy
Default setting is Normal.
16. Sharpness: High / Normal / Medium
Default setting is Normal.
Sharpness controls the quality of details captured in your video footage or photos. When you change this setting, the touch display immediately shows you the effect on your image.
17. White Balance: Auto / Daylight / Cloudy / Tungsten / Fluorescent
Default setting is Auto.
White Balance lets you adjust the color temperature of videos and photos to optimize for cool or warm lighting conditions. When you change this setting, the LCD display immediately shows you the effect on your image.
18. Color: Natural / Black & White / Sepia
Default setting is natural.
19. ISO: Auto/ 100/ 200/ 400
Default setting is Auto.
ISO determines the camera’s sensitivity to light, and creates a trade-off between brightness and resulting image noise. Image noise refers to the degree of graininess in the image. In low light, higher ISO values result in brighter images, but with greater image noise. Lower values result in lower image noise, but darker images. When you change this setting, the LCD display immediately shows you the effect on your image.
20. Exposure Value: +2.0, +1.7, +1.3, +0.7, +0.3, 0, -0.3, -0.7, -1.0, -1.3, -1.7, -2.0
Default setting is 0.
By default, your camera uses the entire image to determine the appropriate exposure level. However, Exposure lets you select an area that you want the camera to prioritize when determining exposure. This setting is particularly useful in shots where an important region might otherwise be over- or underexposed.
When you change this setting, the LCD display immediately shows you the effect on your image. If you change modes, the camera returns to using the entire scene to determine the correct level of exposure.
21. Anti-Shaking: Off/On
Default setting is On.
This setting adjusts the footage to offset for motion during capture. The result is smoother footage, especially in activities with relatively small but fast motion including cycling, motorcycling, and handheld uses.
22. Protect: Lock Current, Unlock Current, Lock All, Unlock All
Default setting is Lock Current.
23. WiFi: Off / On
Default setting is Off.
Note: You can also press Up button to turn on Wi-Fi in Video mode.
24. Date / Time: YY / MM / DD
The date and time are automatically updated when you connect your camera to the AKASO DV app. However, you can manually change these settings, if needed.
Note: If the battery is removed from the camera for an extended period of time, the date and time will be reset automatically.
25. Auto Power Off: Off / 1Minute / 3Minutes / 5Minutes / 10Minutes
Default setting is 3 minutes.
Powers off your Brave 4 after a period of inactivity to save battery life.
26. Beep Sound: Off / On
Default setting is On.
Sets the volume of your Brave 4’s alerts.
27. Voice Prompt: Off / On
Default setting is on.
Turn on Voice Prompt, the camera will say ‘Video Start’ when you start recording video. The camera will say ‘Video Stop’ when you stop recording video. The camera will say ‘Photograph’ when you take photo.
28. OSD: Off/ On
Default setting is On.
OSD (On Screen Display) is a feature of action cameras that displays video or photo resolution, date, time and setting data on the camera screen.
29. Car ACC: Off / On
Default setting is Off.
If you turn on Car ACC ( Driving Mode ) and connect camera with car cigarette lighter, the camera will turn on automatically if you start your car and will turn off if you stop your car.
30. Language: English / Français / Deutsch / Español / Italiano/ Português / Pyckий / 日本語/ 简体中文/ 繁體中文/ Polski
31. Screen Save: Off / 30 Sec / 1 Minute / 3 Minutes
Default setting is 1 Minute.
Turns off the LCD display after a period of inactivity to save battery life. To turn on the LCD display again, press any button on the camera.
32. Frequency: 50 Hz / 60 Hz
Default setting is 50 Hz.
33. Format
To keep your micro SD card in good condition, reformat it on a regular basis. Reformatting erases all of your content, so be sure to offload your photos and videos first. To reformat your card, press the mode button to enter camera setting, then press Up button several times to enter Format > SD Card > All data will be deleted > Cancel / OK.
34. Default Setting: Return menu setting to defaults Cancel OK
This option resets all settings to their default values.
35. Version: Brave 4 Version: IPS7789-V3 20180702
You can check the model, version and updated time of your Brave 4.
CONNECTING TO THE AKASO DV APP
The AKASO DV app lets you control your camera remotely using a smartphone or tablet. Features include full camera control, live preview, playback, download, sharing of content and setting camera.
- Download AKASO DV app to your mobile device from the Apple App Store or Google Play.
- Turn on the camera, then enter Camera Setting to turn on Wi-Fi. You can also press Up button to turn on Wi-Fi when the camera is in Video Mode.
- Turn on Wi-Fi of your mobile device, connect to the Wi-Fi SSID ‘AKASO’.
- Enter the password: 1234567890.
- Open the AKASO DV app.
Note: You can also download Camking app if AKASO DV app does not work.
PLAYING BACK YOUR CONTENT
You can play back your content on the camera’s LCD display, your computer, TV, or smartphone / tablet.
You can also play back content by inserting the micro SD card directly into a device, such as a computer or compatible TV. With this method, playback resolution depends on the resolution of the device and its ability to play back that resolution.
VIEWING VIDEOS AND PHOTOS ON YOUR BRAVE 4
- Enter Playback mode. If your micro SD card contains a lot of content, it might take a minute for it to load.
- Press the Up / Down button to scroll through the video or photo files.
DELETING VIDEOS AND PHOTOS ON YOUR BRAVE 4
- Enter Playback mode. If your micro SD card contains a lot of content, it might take a minute for it to load.
- Press Up / Down button to scroll through the video or photo files.
- Press and hold Up or Down button for three seconds. The screen shows the
 icon.
icon. - Press OK button. The screen shows ‘Delete Current / Delete All’.
- Press OK button again. The selected file will be deleted.
- To exit Playback mode, press Mode button.
OFFLOADING YOUR CONTENT
OFFLOADING YOUR CONTENT TO A COMPUTER
To play back your video and photos on a computer, you must first transfer these files to a computer. Transferring also frees up space on your micro SD card for new content.
To offload files to a computer using a card reader (sold separately) and your computer’s file explorer, connect the card reader to the computer, then insert the micro SD card. You can then transfer files to your computer or delete selected files on your card. Note that you must use a card reader to offload photos or audio files.
OFFLOADING YOUR CONTENT TO SMARTPHONE OR TABLET
- Open the ‘AKASO DV’ app.
- Tap ‘Folders’ at the left corner of the bottom screen.
- Tap ‘Edit’ at the right corner of the top screen.
- Tap the files you want to save.
- Tap ‘Save’ at the right corner of the bottom screen. The screen shows ‘Confirm Download’.
- Tap ‘Confirm Download’.

MAINTENANCE YOUR CAMERA
Follow these guidelines to get the best performance from your camera:
- For best audio performance, shake the camera or blow on the mic to remove debris from the microphone holes.
- To clean the lens, wipe it with a soft, lint-free cloth. Do not insert foreign objects around the lens.
- Don’t touch the lens with fingers.
- Keep the camera away from drops and bumps, which may cause damage to the parts inside.
- Keep the camera away from high temperature and strong sunshine to avoid being damaged.
MAXIMIZING BATTERY LIFE
If the battery reaches 0% while recording, the camera saves the file and powers off.
To maximize battery life, follow these guidelines when possible:
- Turn off Wireless Connections
- Capture video at lower frame rates and resolutions
- Use Screen Saver setting.
ADJUSTING THE ZOOM LEVEL
The Zoom function lets you adjust how close or far away the subject appears in your photo. The default is no zoom. Zoom function is available in Video and Photo Mode.
Brave 4 can 5X zoom.
- Turn on Brave 4.
- Enter Video or Photo Mode.
- Press and hold Up or Down button to adjust the zoom level.
REFORMATTING YOUR MICRO SD CARD
To keep your micro SD card in good condition, reformat it on a regular basis. Reformatting erases all of your content, so be sure to offload your photos and videos first.
- Press and hold Mode button for 3 seconds to turn on Brave 4.
- Press Mode button three times to enter Camera Setting.
- Press UP / Down button to find the ‘Format’ option.
- Press Shutter button, the screen shows ‘SD Card.’
- Press Shutter button, the screen shows ‘All data will be deleted Cancel / OK’
- Press Down button then Shutter button. The screen shows ‘Please wait’. Then you format your micro SD card successfully.
ADJUSTING THE ZOOM LEVEL
The camera contains sensitive components, including the battery. Avoid exposing your camera to very cold or very hot temperatures. Low or high temperature conditions may temporarily shorten the battery life or cause the camera to temporarily stop working properly. Avoid dramatic changes in temperature or humidity when using the camera, as condensation may form on or within the camera.
- Do not dry the camera or battery with an external heat source such as a microwave oven or hair dryer. Damage to the camera or battery caused by contact with liquid inside the camera is not covered under the warranty.
- Do not store your battery with metal objects, such as coins, keys or necklaces. If the battery terminals come in contact with metal objects, this may cause a fire.
- Do not make any unauthorized alterations to the camera. Doing so may compromise safety, regulatory compliance, performance, and may void the warranty.
Do not drop, disassemble, open, crush, bend, deform, puncture, shred, microwave, incinerate or paint the camera or battery. Do not insert foreign objects into the battery opening on the camera. Do not use the camera or the battery if it has been damaged — for example, if cracked, punctured or harmed by water. Disassembling or puncturing the battery can cause an explosion or fire.
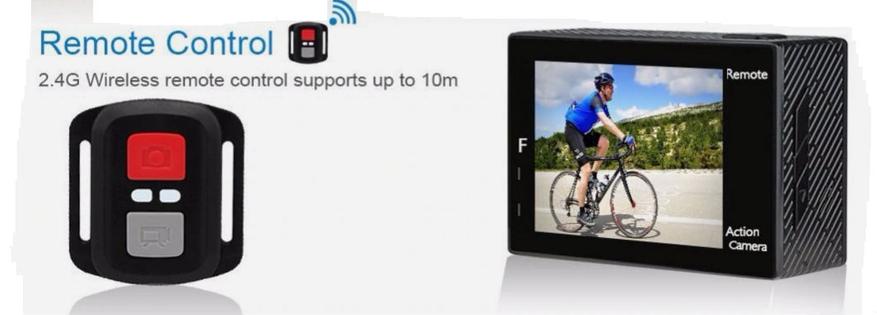
2.4G REMOTE

VIDEO
To record Video, verify the camera is in Video mode.
To start recording:
Press the Grey Video Button. The camera will emit one beep and the camera light will flash while recording.
To stop recording:
Press the Grey Video Button again. The camera will emit one beep and the camera light will stop flashing while recording.
PHOTO
To capture a photo, verify the camera is in Photo mode.
To take a photo:
Press the Red Photo Button. The camera will emit a camera shutter sound.
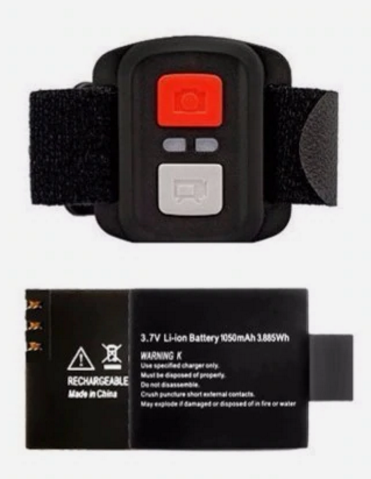
CR2032 BATTERY REPLACEMENT FOR BRAVE 4 REMOTE
- Use a 1.8mm Phillips tip screwdriver to remove the 4 screws on the back cover of the remote, allowing you to open it.

- Remove another 4 screws on PCB board.

- Lift the PCB board and slide out the battery, as shown in the picture.
Note: Do NOT rotate the PCB board to avoid reversing the camera and video button functions.
- Install the new battery, keeping the «+» pole facing up.
- Install all 4 screws back onto the PCB board.

- Install all 4 screws back into the cover.
MOUNTING YOUR CAMERA
Attach your camera to helmets, gear and equipment.


For any inquiries, issues or comments concerining our products, please send E-mail to the address below or call us. We will respond as soon as possible.
E-mail: cs@akasotech.com
US customer service line: (301)670-7335

Videos
AKASO Brave 4 — 4K Action Camera Review [Unboxing & Setup Guide Video]
Documents / Resources
Download manual
Here you can download full pdf version of manual, it may contain additional safety instructions, warranty information, FCC rules, etc.
Download AKASO Brave 4 — 4K 20MP WiFi Action Camera Manual
Для работы проектов iXBT.com нужны файлы cookie и сервисы аналитики.
Продолжая посещать сайты проектов вы соглашаетесь с нашей
Политикой в отношении файлов cookie
Камеру можно приобрести здесь: ALIEXPRESS
Экшн-камера AKASO Brave 4 имеет ultra HD 4 К 24 кадров в секунду и 2 К 30 кадров в секунду видеозапись, 20 Мп. Идеально подходит для занятий спортом на открытом воздухе и подводными видами спорта, такими как велоспорт, мотоспорт, катание на лыжах, дайвинг, серфинг, аттракцион и так далее.
Время записи
Каждый аккумулятор для 1080 P/около 90 минут, для 4 К и 2 К около 60 минут.
Совет: рекомендуется использовать карту micro sd max 64 ГБ класса 10. Перед использованием отформатируйте карту (не входит в комплект) в камере.
Buit-in — электронная стабилизация изображения, включите гироскоп при съемке видео, чтобы сделать видео гораздо более гладким. Включите антивибрацию при съемке, чтобы сделать фотографию более четкой.
Технические характеристики:
Регулируемый угол обзора/водонепроницаемый корпус/пульт дистанционного управления/Wi-Fi управление/Циклическая запись/промежуток времени/звук/Запись/WDR/Дайвинг/Обнаружение движения/анти-встряхивание/Автомобильный dvr режим/Micro USB порт/HDMI
Включите Wi-Fi и подключите камеру к мобильному телефону или планшету с помощью приложения Camking. Позволяет контролировать в режиме реального времени — просматривать видео/фотографии на мобильном телефоне и мгновенно делиться в социальных сетях. Устройство подключается к компьютеру с помощью usb-кабеля для передачи файлов или к телевизору через HDMI.
Снимайте с твердым водонепроницаемым корпусом, позволяющим снимать до 30 м под водой. Откройте режим дайвинга — для отфильтровки света. Больше никаких затрат на аккумуляторы и монтажные аксессуары.
Поставляется с 2 перезаряжаемыми 1050 мАч батареями. Каждая батарея может записывать до 90 минут, вместе с набором аксессуаров, которые также совместимы с большинством камер таких как Gopro.
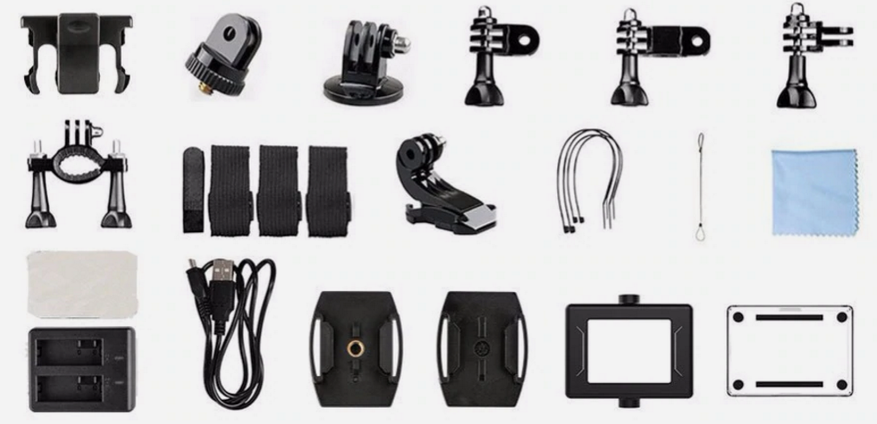
Что в коробке:
1х камера AKASO Brave 4
1x удаленный контроль
2×1050 мАч батарея
1x водонепроницаемый чехол
1x подставка для велосипеда
7x крепление
2x зажим
1x крепления на шлем
1x повязки
5x тросов
1x защитная backdo
1x умный гироскоп для защиты от тряски
ПОДРОБНАЯ ИНФОРМАЦИЯ
Сейчас на главной
Новости
Публикации
Не самые дешевые, но очень качественные и удобные планарномагнитные наушники от компании Sendy (дочка Sivga Audio). Обе конторы специализируются на производстве как среднебюджетных, так и…

При создании системы видеонаблюдения многие часто выбирают именно операционную систему Linux. Давайте разберемся почему: ⦁ Начнем с того, что данная ОС не требует лицензии (ключа), т. е….
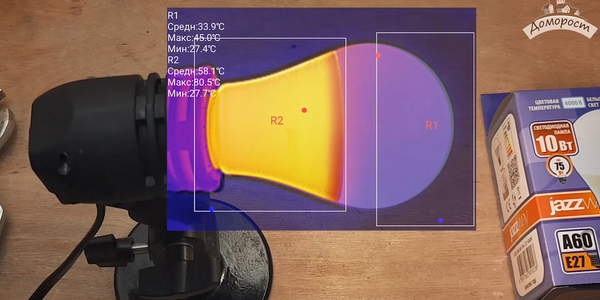
Лампа за 341
рубль — не частый гость моих разборов, скорее это уже какой-то премиальный сегмент. Покупая такую лампочку, мы, конечно, ожидаем довольно выского качества света и…

Сбор металлолома позволяет неплохо экономить в производстве металла для промышленности. Но любому понятно, поднимать его со дна моря экономически не эффективно. Это же не золото испанских…

Разрешение 256×192 пикселей, диапазон измерения температуры от -0℃ до 100℃, углы обзора 13.6° х 10.2°(оптический зум х2), частота 50Гц. Посмотрим в том числе и на применение по прямому назначению,…
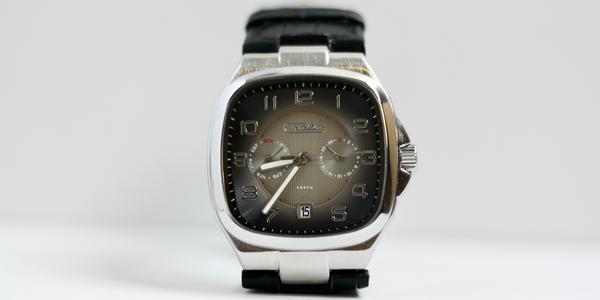
Новые версии часов в корпусах, типа «телевизор» сейчас выпускают многие. И действительно, пожалуй, право на это имеют. Лет 50 назад такой тип корпуса гремел, так что бренды, обращаясь к своему…
Посмотреть инструкция для Akaso Brave 4 бесплатно. Руководство относится к категории фотокамеры, 2 человек(а) дали ему среднюю оценку 8.9. Руководство доступно на следующих языках: английский. У вас есть вопрос о Akaso Brave 4 или вам нужна помощь? Задайте свой вопрос здесь
Не можете найти ответ на свой вопрос в руководстве? Вы можете найти ответ на свой вопрос ниже, в разделе часто задаваемых вопросов о Akaso Brave 4.
Какой вес Akaso Brave 4?
Akaso Brave 4 имеет вес 550 g.
Инструкция Akaso Brave 4 доступно в русский?
К сожалению, у нас нет руководства для Akaso Brave 4, доступного в русский. Это руководство доступно в английский.
Не нашли свой вопрос? Задайте свой вопрос здесь