Часто задаваемые вопросы
Тест-полоски
Глюкометры
Какой срок годности у глюкометра Акку-Чек Инстант с улучшенными характеристиками?
Срок годности набора с глюкометром Акку-Чек Инстант с улучшенными характеристиками составляет 21 месяц и устанавливает по наименьшему сроку годности компонентов системы — тест-полоскам, срок годности которых составляет 21 месяц и не зависит от даты вскрытия. При этом глюкометр можно использовать в течение всего срока службы — 5 лет.
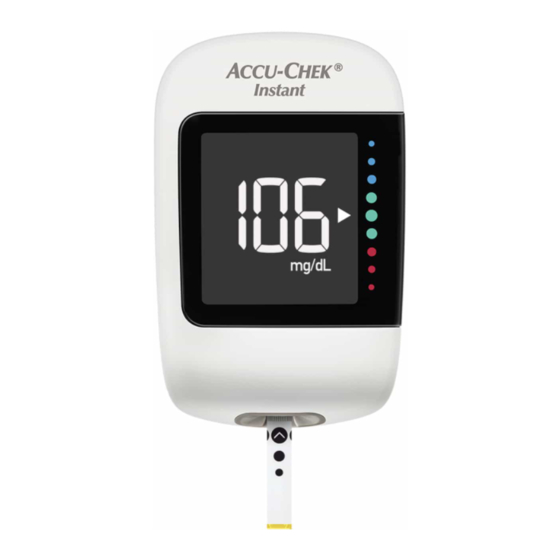
Куда можно наносить каплю крови на тест-полоске Акку-Чек Инстант?
Тест-полоска обладает капиллярным забором крови, то есть нужно поднести каплю крови к желтой зоне забора крови. Тест-полоска сама всасывает каплю. При этом желтая зона забора крови расположена по всей ширине тест-полоски, то есть подносить каплю крови можно со всех 3 сторон желтой зоны (главное не наносить каплю крови сверху, как для Акку-Чек Актив).
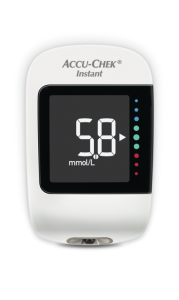
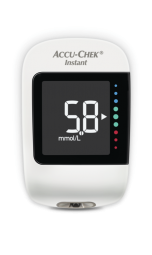
Что означают разноцветные кружочки, расположенные справа от экрана на глюкометре Акку-Чек Инстант?
Это цветовой помощник, а именно индикатор целевого диапазона. Зеленая зона означает, что полученное на экране измерение находится в целевом диапазоне, который установлен в пределах 3,9 — 10,0 ммол/л. Синяя зона означает, что полученные результат выше целевого диапазона – 10,1 — 33,3 ммол/л. Красная зона означает, что полученные результат ниже целевого диапазона – 0,6 — 3,8 ммол/л.
Как посмотреть средние значения в глюкометре Акку-Чек Инстант?
Глюкометр использует все результаты измерения уровня глюкозы в крови за последние 7, 14, 30 или 90 дней для расчета среднего значения.
Если глюкометр выключен, нажмите кнопку вниз, чтобы включить его. На дисплее появится последний результат измерения уровня глюкозы крови. Нажмите кнопку вверх для просмотра среднего значения за 7 дней. Продолжайте нажимать кнопку вверх, чтобы просмотреть средние значения за 7, 14, 30 и 90 дней.
Количество результатов измерений, включенных в среднее значение = n.
Как посмотреть результаты измерений в глюкометре Акку-Чек Инстант?
В памяти глюкометра автоматически сохраняются результаты не менее 720 измерений уровня глюкозы крови, включая дату и время их проведения.
- На выключенном глюкометре нажмите кнопку вниз для просмотра последнего результата измерения глюкозы крови с временем и датой, отображающимися в верхней части дисплея.
- Продолжайте нажимать кнопку вниз для просмотра предыдущих результатов измерения в порядке от самых новых до самых старых.
ПОЛНЫЙ СПИСОК ВОПРОСОВ
Воспользуйтесь поиском, если не удалось найти, что искали
Акку-Чек Инстант
ДИСПЛЕЙ
жидкокристаллический дисплей с подсветкой
ОБЪЕМ КАПЛИ КРОВИ
0,6 мкл
ВЕС
Прибл. 43 г (с батарейками)
ВРЕМЯ ИЗМЕРЕНИЯ
<4 секунд
РАЗМЕРЫ (ДШВ)
77,1 × 48,6 × 15,3 мм
Технические характеристики
Время измерения:
<4 секунд
Объем капли крови:
0,6 мкл
Объем памяти::
720 результатов измерений с указанием времени и даты
Средние значения:
за 7, 14, 30 и 90 дней
Батарейки:
Две плоские круглые литиевые батарейки (3 В, тип CR2032)
Автоматическое включение и выключение:
- Автоматическое включение при введении тест-полоски
- Прибор выключится через 90 секунд после измерения, 15 секунд после извлечения тест-полоски или 5 секунд после выведения результата измерения на экран
Диапазон измерения:
0,6–33,3 ммоль/л
Метод измерения:
электрохимический
Условия хранения глюкометра. Температура:
от –25 до +70 °C
-
Демо версия -
Руководство пользователя - Сервис
Акку-Чек Инстант
Новинка!
Просто использовать.
Легко понять.
Ключевые характеристики
— Широкая зона забора крови
— Легкий для чтения дисплей с подсветкой и крупными цифрами
— Цветовой помощник в виде индикатора целевого диапазона
- Manuals
- Brands
- Roche Manuals
- Blood Glucose Meter
- Accu-Chek Instant
- User manual
-
Contents
-
Table of Contents
-
Troubleshooting
-
Bookmarks
Quick Links
User’s Manual
Blood Glucose Meter
Related Manuals for Roche Accu-Chek Instant
Summary of Contents for Roche Accu-Chek Instant
-
Page 1
User’s Manual Blood Glucose Meter… -
Page 2
Contents Introduction ……………………2 Chapter 1: Your New System ………………4 Chapter 2: Blood Glucose Tests ………………9 Chapter 3: Control Tests ………………..15 Chapter 4: Review Your Data ………………18 Chapter 5: Wireless Communication and Meter Pairing ……….20 Chapter 6: Connecting to a PC ……………… -
Page 3
Introduction The Accu-Chek Instant System w WARNING The Accu‑Chek Instant test strips with the • Choking hazard. Small Accu‑Chek Instant meter are intended to parts. Keep away from quantitatively measure glucose in fresh children under the age capillary whole blood from the finger, of 3 years. -
Page 4
Introduction Why Regular Blood Glucose Testing Is Important Testing your blood glucose regularly can make a big difference in how you manage your diabetes every day. We have made it as simple as possible. Important Information About Your New Meter •… -
Page 5
Your New System The Accu-Chek Instant Meter Right Side View Front View Left Side View 4. Micro USB Port 1. Up Button and Down Button Transfers data from the meter to a Press to turn the meter on and off, computer (PC). -
Page 6
Your New System Back View Underside View 6. Battery Door 7. Test Strip Slot Open to replace batteries. Insert test strip here. 8. Test Strip Container* 11. Control Solution Bottle* (for example) 12. Batteries 9. Test Strip — Metallic End * Some items may not be included in the Insert this end into the meter. -
Page 7
Your New System Using the Meter Buttons When instructed to press a meter button, press it briefly and release it. When instructed to press and hold a meter button, press and hold it for 3 or more seconds. Button Functions Here are the functions of the Up button and Down button on the meter. -
Page 8
Your New System Symbols Symbol Description 7‑day average symbol. This indicates that you are viewing the 7‑day average of your blood glucose results. 14‑day average symbol. This indicates that you are viewing the 14‑day average of your blood glucose results. 30‑day average symbol. -
Page 9
Your New System Setting the Time and Date NOTE Press to turn the • The meter prompts you to set the meter on. time and date the first time you turn the meter on or if an error occurs. The flashing test strip symbol appears on the •… -
Page 10
• Refer to the test strip package insert for mmol/L or mg/dL is printed here test strip storage and system operating conditions. Using the Accu-Chek Instant System w WARNING • If you drop the meter or drop the meter with a test strip inserted, the… -
Page 11
Blood Glucose Tests Performing a Blood Glucose Test with Blood from Your Fingertip Check the use by date on the test strip w WARNING container. When performing a blood glucose test: Do not use test strips If the control bottle symbol and the past the use by date. -
Page 12
Blood Glucose Tests Touch the yellow edge of the test strip to the blood drop. Do not put blood on top of the test strip. Remove your finger from the test strip when the flashing hourglass symbol appears. Failure to move your finger away from the test strip could give inaccurate test results. -
Page 13
Blood Glucose Tests Performing a Blood Glucose Test with Blood from Your Palm, Forearm, or Upper Arm (Alternative Site Testing) w WARNING • Do not use alternative site testing to calibrate a continuous glucose monitoring system. • Do not use alternative site testing to make insulin dosing calculations. You have the option of obtaining a blood sample from other sites on your body besides the fingertip. -
Page 14
Blood Glucose Tests Unusual Blood Glucose Results If your blood glucose result does not match how you feel, check this list to help solve the problem. Troubleshooting Checks Action Did you wash your hands? Wash your hands with warm soapy water and dry thoroughly. -
Page 15
Blood Glucose Tests Symptoms of Low or High Blood Glucose w WARNING If you are experiencing any of these symptoms, or other unusual symptoms, test your blood glucose from the fingertip or palm. If your blood glucose result is displayed as LO or HI, contact your healthcare professional immediately. -
Page 16
Control Tests When to Perform a Control Test • The control solution can stain fabric. Remove stains by washing with soap Performing a control test lets you know and water. the meter and test strips are working properly. You should perform a control test Performing a Control Test when: •… -
Page 17
Control Tests The control result, the bottle symbol, and the flashing L1 or L2 appear on the display. Press and hold confirm the control Insert the metallic end of the test strip level you tested. into the meter. The meter turns on. Press to alternate between L1 A flashing drop symbol appears. -
Page 18
Control Tests Understanding Out-of-Range Control Results w WARNING The control ranges are printed on the test strip container label. If the control result is out of range, check this list to help solve the problem. Troubleshooting Checks Action Were the test strips or control Discard the test strips or control solution if solutions expired? either is past the use by date. -
Page 19
Review Your Data Overview NOTE • The meter automatically stores at least 720 blood glucose results in memory The meter has time and date auto‑sync with the time and date of the test. capability when paired with a mobile device that will update the meter time •… -
Page 20
Review Your Data Reviewing Your Test Result Averages NOTE The meter uses all of your blood glucose • Press to move back through results from the past 7, 14, 30, or 90 days averages to the most recent blood to calculate a single number. This number glucose result. -
Page 21
Wireless Communication and Meter Pairing Overview The process of creating a connection On Your Mobile Device between the meter and the mobile device Within the app, select your meter from is called pairing. You will need an the list of found meters. When application on your mobile device that can prompted, enter the 6‑digit PIN number accept the meter data. -
Page 22
Wireless Communication and Meter Pairing Turning Bluetooth Off Turning Bluetooth On Turn Bluetooth off to disable wireless If you have turned Bluetooth off, follow communication (flight mode). Turning these steps below to turn it back on. This Bluetooth off will not unpair your meter. will enable wireless communication with your mobile device. -
Page 23
Connecting to a PC Connecting the Meter to a PC NOTE Using a USB Cable The USB cable does not charge the Follow the steps below to access diabetes meter batteries. Remove the USB cable management software on a PC. You can after you have finished. -
Page 24
Meter Maintenance and Troubleshooting Meter Maintenance The meter automatically tests its own Remove the old systems every time you turn it on and lets batteries. Press and you know if something is wrong. See the hold for at least 2 Error Messages section of this chapter. -
Page 25
Meter Maintenance and Troubleshooting Checking the Meter Display With the meter off, press and hold until all display segments appear. Check the meter display for missing segments. All segments should look like the picture above. If any segments are missing from the display, contact the Accu‑Chek Customer Careline on 0800 701 000 (UK) or 1 800 709 600 (ROI), as there may be a problem with the meter. -
Page 26
Meter Maintenance and Troubleshooting NOTE Make sure the meter is turned off. The error code and Err will alternate on Gently wipe the meter surface with a the display for all coded error soft cloth slightly dampened (wring out messages (E‑1 through E 14). any excess liquid) with one of these solutions: To clean the meter… -
Page 27
Meter Maintenance and Troubleshooting (The error code and Err will alternate on the display.) The meter was unable to pair with a A meter or test strip error has mobile device. occurred. Retry the pairing. This error message could appear if the cap on the test strip container was not closed tightly. -
Page 28
Meter Maintenance and Troubleshooting (The error code and Err will (The error code and Err will alternate on the display.) alternate on the display.) Not enough blood or control solution The temperature is above or below the was drawn into the test strip for proper range for the system. -
Page 29
Meter Maintenance and Troubleshooting (The error code and Err will (The error code and Err will alternate on the display.) alternate on the display.) The time and date setting may be Your blood sample may contain a high incorrect. level of ascorbate. A flashing wireless symbol appears Contact your healthcare professional. -
Page 30
Meter Maintenance and Troubleshooting Blood glucose may be higher than the measuring range of the system. See the Unusual Blood Glucose Results section in the chapter Blood Glucose Tests. Blood glucose may be lower than the measuring range of the system. See the Unusual Blood Glucose Results section in the chapter Blood Glucose Tests. -
Page 31
Technical Information Product Limitations See the literature packaged with the test strips and control solutions for the latest information on product specifications and limitations. Specifications Blood volume Refer to the test strip package insert. Sample type Measuring time Measuring range Test strip storage conditions System operating conditions Meter storage conditions… -
Page 32
Used meters therefore Declaration of Conformity – Hereby, carry a risk of infection. Before Roche declares that the radio equipment discarding the meter, remove the type Accu‑Chek Instant blood glucose battery or batteries. Discard used meter is in compliance with Directive meters according to the regulations 2014/53/EU. -
Page 33
Technical Information Explanation of Symbols These symbols may appear on the packaging, on the type plate, and in the instructions for the Accu‑Chek Instant meter. Consult instructions for use Biological Risks – used meters carry a risk of infection. Caution, refer to safety‑related notes in the instructions for use accompanying this product. -
Page 34
Technical Information On the finger pricker itself and on the packaging of the Accu‑Chek FastClix finger pricker, you will encounter the following symbols, shown here with their meaning. Use only once Use by Batch code Sterilised using irradiation This product fulfils the requirements of the European Directive 93/42/EEC on medical devices. -
Page 35
Technical Information Our studies involving alternative site testing of adults with diabetes show that most persons will find their glucose level changes more quickly in blood from the fingertip or palm than in blood from the forearm or upper arm. This is especially important when blood glucose levels are falling or rising rapidly. -
Page 36
The Accu-Chek FastClix Finger Pricker Using the Accu-Chek FastClix Finger Pricker 1 2 3 4 Lever (for advancing to new lancet) Comfort Dial with Depth Selection Lancet Counter Depth Indicator Release Button • The black cap is for fingertip testing only. •… -
Page 37
The Accu‑Chek FastClix Finger Pricker Inserting a Lancet Drum w WARNING You must first load the lancet drum into You must not insert the lancet drum the finger pricker to get it ready for use. into the finger pricker and simultaneously press the release button or hold the finger pricker with Remove the cap. -
Page 38
The Accu‑Chek FastClix Finger Pricker Obtaining a Fingertip Blood Obtaining an Alternative Site Blood Sample Sample Wash and dry your Make sure you select hands. the AST converter cap. Make sure you select Dial the depth setting the correct cap. to 5½… -
Page 39
The Accu‑Chek FastClix Finger Pricker to the AST converter cap to get a sufficient blood drop. Return the AST • Once you perform a successful blood converter cap to the glucose test, you may want to find same position over the lowest depth setting that the puncture site. -
Page 40
The Accu‑Chek FastClix Finger Pricker NOTE Insert a new lancet • Clean the finger pricker and cap drum, white end first, before they are disinfected to remove until it clicks firmly blood and dirt. into place. • To clean and disinfect the finger Slide the cap back on pricker and cap you need lint‑free until it stops by aligning the notch on… -
Page 41
The Accu‑Chek FastClix Finger Pricker Any Questions? Review your test procedure and make sure that you are performing the steps We want to give you the help you need for correctly. If you still have questions, please long and reliable service of your meter and contact the Accu‑Chek Customer Careline finger pricker. -
Page 42
Guarantee Guarantee The statutory provisions on rights in consumer goods sales in the country of purchase shall apply. -
Page 43
Index alternative site testing 12, 33, 37 lancet drum, changing 38 averages 7, 19 lancet drum, inserting 36 low blood glucose 13 batteries, changing 23 battery type 23, 30 maintenance, meter 23 blood glucose results, unusual 13 meter, cleaning and disinfecting 24 blood glucose test, performing 9 meter memory 18 button, functions 4, 6… -
Page 44
Bluetooth SIG, ® Inc. and any use of such marks by Roche is under license. All other product names and trademarks are the property of their respective owners. © 2020 Roche Diabetes Care…