-
Contents
-
Table of Contents
-
Troubleshooting
-
Bookmarks
Quick Links
UA-66
Urine Analyzer
Operator’s Manual
Related Manuals for Mindray UA-66
Summary of Contents for Mindray UA-66
-
Page 1
UA-66 Urine Analyzer Operator’s Manual… -
Page 3
Contents of this manual are subject to change without prior notice. All information contained in this manual is believed to be correct. Mindray shall not be liable for errors contained herein or for incidental or consequential damages in connection with the furnishing, performance, or use of this manual. -
Page 4
Mindray or repairs by people other than Mindray authorized personnel. -
Page 5
UA-66 Urine Analyzer Operator’s Manual Labels Labels are used to indicate potential hazards in operating the system. The following table explains the labels used on the system. Serial number. Risk of electric shock Biohazard Warning: Risk of potentially biohazardous infection Date of manufacture. -
Page 6
UA-66 Urine Analyzer Operator’s Manual… -
Page 7: Table Of Contents
UA-66 Urine Analyzer Operator’s Manual Contents 1 Introduction………………….1 1.1 Specifications ……………………1 1.2 Displayed/Printed Results ………………..2 2 Installation ………………….5 2.1 General……………………..5 2.2 Environment Factors ………………….5 2.3 Unpacking……………………..5 2.4 Outline of the Instrument………………… 6 2.5 Connect to a Computer ………………….. 7 2.6 Power On……………………..
-
Page 9: Introduction
UA-66 Urine Analyzer Operator’s Manual 1 Introduction 1.1 Specifications Power Required AC 220V 50/60Hz (AC 110V 50/60Hz) Line Leakage Current ≤ 0.5 mA Dimensions Width: 360 mm (14.2 in.) Depth: 300 mm (11.8 in.) Height: 100 mm (3.94 in.) Weight 3.8 Kg…
-
Page 10: Displayed/Printed Results
UA-66 Urine Analyzer Operator’s Manual 1.2 Displayed/Printed Results Arbitrary Conversional neg. ± 15 Leu/µL 70 Leu /µL 125 Leu /µL 500 Leu /µL Neg. norm. Norm. 1 mg/dL 17 µmol/L 2 mg/dL 35 µmol/L 4 mg/dL 70 µmol/L 8 mg/dL 140 µmol/L…
-
Page 11
UA-66 Urine Analyzer Operator’s Manual Arbitrary Conversional Neg. Neg. 100 mg/dL 5 mmol/L 250 mg/dL 15 mmol/L 500 mg/dL 30 mmol/L 1000 mg/dL 60 mmol/L 2000 mg/dL 110 mmol/L 0 mmol/L 0.6 mmol/L 1.4 mmol/L 2.8 mmol/L 5.6 mmol/L Table 1.2… -
Page 12
UA-66 Urine Analyzer Operator’s Manual — 4 -… -
Page 13: Installation
Read this section carefully before attempting to operate the instrument. The UA-66 is a precision instrument and must be handled accordingly. Rough handling or dropping of the instrument will disturb internal calibrated optics and cause other damage. Always handle the instrument with care.
-
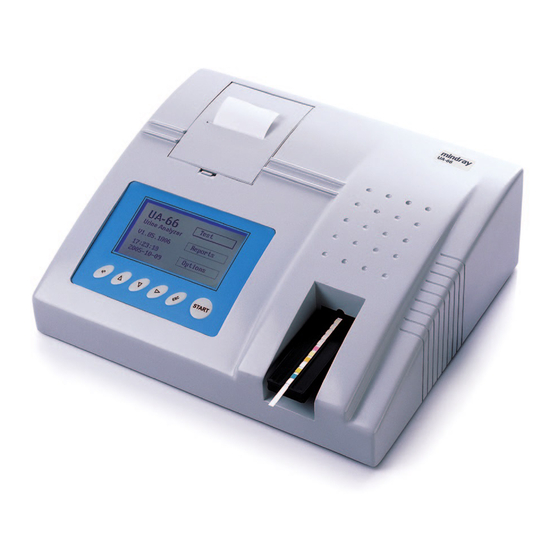
Page 14: Outline Of The Instrument
UA-66 Urine Analyzer Operator’s Manual NOTE: Retain the UA-66 shipping carton for future use. If the instrument ever needs to be shipped, the shipping carton will afford the best protection. 2.4 Outline of the Instrument Feed Table Insert Printer Cover…
-
Page 15: Connect To A Computer
(see 7. Maintenance). 2.5 Connect to a Computer The UA-66 can also be connected to a host computer via the RS-232C serial port. Plug one end of the RS-232C communication cable into the RS-232C port on the rear panel of the instrument;…
-
Page 16: Adjust The Display
UA-66 Urine Analyzer Operator’s Manual instrument. 1. Be sure that the instrument is in idle state, press until the display return to the main menu. 2. Lift the printer cover on the top of the instrument. 3. Remove the used paper roll core.
-
Page 17
UA-66 Urine Analyzer Operator’s Manual The content of the menu is the following: Single Mode Test Slow Batch Mode Fast Batch Mode Reports Strip Critical Value Grade Displayer Date Realtime Clock Time Option Options Printer Shade Diagnosis 9600 19200 Serial Port… -
Page 18: Turn The Instrument Off
UA-66 Urine Analyzer Operator’s Manual displayer to indicator the location of the current menu, for example: Options>Realtime Clock>Date 2002.06.03 2002.06.03 Figure 2.5 Sometimes pop-up menu is used to accept instructions from the operator. Press FUN to show a pop-up menu, for example:…
-
Page 19
UA-66 Urine Analyzer Operator’s Manual Move Out Move In Figure 2.10 3. Select “Move In” by , and press , the feed table begins to move in until the START ▲ ▼ storage position. 4. Place the power switch to the “0” position. -
Page 20: Setup
UA-66 Urine Analyzer Operator’s Manual 3 Setup At the main menu( See Figure 2.5 ), use as necessary to select “Options” , and ▲ ▼ press to enter “Options” menu: START Options Strip Printer Critical Value Serial Port Grade Serial No.
-
Page 21: Grade
UA-66 Urine Analyzer Operator’s Manual “Options>Critical Value” menu: Options>Critical Value neg. neg. norm. 1.015 neg. neg. Figure 3.3 to select a parameter to be modified, press to show a pop-up window: START ▲ ▼ 75 /uL Figure 3.4 to change the value, press…
-
Page 22: Printer
UA-66 Urine Analyzer Operator’s Manual Options>Realtime Clock 2002-06-03 12:03:45 Figure 3.6 to select the date, press to modify the date: START ▲ ▼ Options>Realtime Clock 2002-06-03 2002-06-03 Figure 3.7 Press to move highlighted block among the year, month and day fields. Press ►…
-
Page 23: Rs-232C
UA-66 Urine Analyzer Operator’s Manual “Options>Printer” menu: Options>Printer Option Shade Diagnosis Figure 3.9 to select “Auto Print”, press to modify the auto print option: START ▲ ▼ Options>Printer>Option Not Print Print Figure 3.10 Press to select “Yes” or “No”, press to validate the new option.
-
Page 24: Serial No
UA-66 Urine Analyzer Operator’s Manual Options>Serial Port 9600 19200 38400 57600 Figure 3.12 Press to select the designated baud rate, press to validate the new value. ▲ ▼ START 3.7 Serial No. At the “Options” menu( See Figure 3.1 ), use to select “Serial Port”, press…
-
Page 25
UA-66 Urine Analyzer Operator’s Manual -17-… -
Page 26: Testing
UA-66 Urine Analyzer Operator’s Manual 4 Testing The instrument supports 3 testing modes: single mode, slow batch mode and fast batch mode. Under the single mode, the operator is required to press every time to start a test and can START do 60 tests per hour.
-
Page 27: The Single Mode
UA-66 Urine Analyzer Operator’s Manual 5 samples are listed on the displayer and the sample No. next to the latest sample is automatically selected. Sample No. and the time when being tested are used to identify a sample. A prefixed “*” indicates that the sample has at least a result higher than the corresponding critical value, and a prefixed “…
-
Page 28: The Batch Modes
UA-66 Urine Analyzer Operator’s Manual 4.4 The Batch Modes If “Slow Batch Mode” was selected, the instrument will prompt operator to dip the reagent strip 60 seconds after the first strip test started. If “Fast Batch Mode” was selected, the instrument will prompt operator to dip the reagent strip 30 seconds after the first strip test started.
-
Page 29
UA-66 Urine Analyzer Operator’s Manual -21-… -
Page 30: Reports
UA-66 Urine Analyzer Operator’s Manual 5 Reports The instrument can store up to 1000 reports in its Flash ROM. A report is saved to the Flash ROM immediately after a test is done. When the storage overflows, the oldest 333 reports will be dropped.
-
Page 31
UA-66 Urine Analyzer Operator’s Manual nearest date. Select “Delete” item of the pop-up menu (See Figure 5.2) and press to delete reports START generated between 2 specified dates. First the instrument asks the operator to enter the start date. From 2002-05-23 Figure 5.4… -
Page 32: Report
UA-66 Urine Analyzer Operator’s Manual Transmitting… Figure 5.9 Press to stop the transmission. Select “Print” item of the pop-up menu (see Figure 5.2 ) and press to print reports of the START selected date. Just as the transmitting process described above, the instrument will ask the operator to enter the start No.
-
Page 33
UA-66 Urine Analyzer Operator’s Manual “Testing>Sample No” menu. If the report being currently displayed has already been marked, “Remove Mark” will be shown instead of “Mark”. Select “Select No.”, the instrument prompt the operator to enter a new sample No.. -
Page 34: Troubleshooting
UA-66 Urine Analyzer Operator’s Manual 6 Troubleshooting If the instrument is in an abnormal condition, or being operated incorrectly, an error will occur. Table 6.1 lists all the errors and corresponding solutions. Error ID Message Solution System Memory The system memory failed and the instrument can’t work.
-
Page 35
UA-66 Urine Analyzer Operator’s Manual -27-… -
Page 36: Maintenance
7.2 Daily Cleaning The feed table and feed table insert must be kept clean to obtain the best result with the UA-66 instrument / reagent strip system. At the end of each daily use, the instrument‘s white plastic calibration chip, located on the feed table insert, and the reagent strip holding channel should be cleaned.
-
Page 37: Disinfection
7.3 Disinfection The only part of the UA-66 instrument that comes into contact with the urine specimen is the feed table insert. To disinfection the insert, perform the followings: 1. Remove, clean and dry the feed table insert as instructed in 7.2.
-
Page 38: Periodic Cleaning
UA-66 Urine Analyzer Operator’s Manual 6. Remove the feed table insert and rinse thoroughly with distilled water to remove any residual solution. 7. Wipe the feed table insert in dry with an absorbent tissue. 8. Replace the feed table insert in the feed table, as instructed in 7.2 Daily Cleaning.
-
Page 39
UA-66 Urine Analyzer Operator’s Manual -31-… -
Page 40
P/N: 0103-20-61103 (4.0)
Предложите, как улучшить StudyLib
(Для жалоб на нарушения авторских прав, используйте
другую форму
)
Ваш е-мэйл
Заполните, если хотите получить ответ
Оцените наш проект
1
2
3
4
5
УСТАНОВКА
ПРИБОРА
1. Выберите каретку соответственно типу используемых
тест-полосок (LabStripU11Plus). Введите каретку так, чтобы её правый край соответствовал
правому краю прибора.
2. Подсоедините шнур сетевого адаптера к разъему
на задней панели DocUReader.
3. Вставьте адаптер в сетевую розетку. После этого
начинается короткая фаза включения, когда каретка тест-полосок начинает двигаться
для самопроверки, и прибор распечатывает результат на принтере.
ВСТАВКА НОВОЙ ИЛИ ЗАМЕНА БУМАГИ ПРИНТЕРА:
• откройте крышку принтера,
• нажмите кнопку FEED и удалите оставшуюся бумагу
(если необходимо). Нажмите кнопку FEED
снова для остановки продвижения бумаги,
• вставьте
обрезанный край нового рулона бумаги в прорезь. Обрежьте конец бумаги таким обра-
зом, чтобы он напоминал большую букву V. Немного развернув бумагу, вставляйте ее
в ролик принтера, пока обрезанный конец не появится с другой стороны ролика.
• подайте бумагу нажатием кнопки FEED,
• выведите бумагу в прорезь крышки и закройте крышку
принтера.
Примечание: Прибор не определяет, когда в
принтере заканчивается бумага. Однако, на последних десятках сантиметров появляется
пометка (красная или синяя линия). Замените рулон, когда уви- дите соответствующую
пометку.
ЭТАПЫ РАБОТЫ ПРИБОРА
1. Приготовьте
пробирки с пробами мочи и упаковку полосок, разместите рядом с прибором DocUReader.
Откройте флакон, выньте полоску, держа за свободный конец, и закройте крышку
флакона.
2. Нажмите кнопку START.
3. В то же время полностью погрузите полоску в первую
пробу мочи и затем выньте её. Подожди- те, пока большие капли мочи стекут обратно
в пробирку с мочой и удалите излишки мочи, про- мокнув край полоски о
фильтровальную бумагу.
4. Поместите полоску в каретку тестовыми зонами вверх.
Убедитесь, что тест-полоска помещена правильно, т.е. конец полоски упирается в левый
блок каретки. Тест-полоска должна быть по- мещена в каретку в течение 50 секунд
после погружения. Это время отображается на верхней панели анализатора индикаторами
зелёного цвета каждые 5 секунд и последние три – индикаторами красного цвета,
предупреждающими о том что время инкубации уже заканчивает- ся.
5. После этого процесс анализа полоски проводится
автоматически анализатором DocUReader
путём измерения каждого поля полоски последовательно
шаг за шагом.
6. Подождите, пока DocUReader выведет каретку с полоской
назад, и результаты будут распеча- таны на принтере. Индикаторные светодиоды загораются
соответственно результату: зе- лёный цвет означает норму, красный цвет означает
патологический результат. Каждый индикатор соответствует определённому параметру,
который обозначен тремя буквами на па- нели прибора. (В случае использования полосок
LabStripU11Plus, результат определения ас- корбиновой кислоты индикатором не обозначается).
Удалите использованную полоску из карет- ки и выбросите её.
7. При завершении обычной ежедневной работы всегда
очищайте каретку, промывая под проточ-
ной водой.
…
Перейти к описанию или заказу прибора Анализатор мочи DocUReader (11 параметров)…->