-
Contents
-
Table of Contents
-
Bookmarks
Quick Links
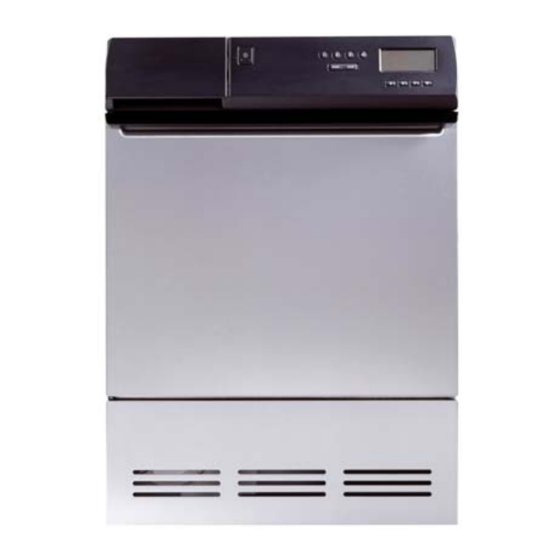
PROFESSIONAL TUMBLE DRYER
5kg
SERVICE MANUAL
8064375
Publication date: Sep 2002
Related Manuals for Asko TDC33
Summary of Contents for Asko TDC33
-
Page 1
PROFESSIONAL TUMBLE DRYER SERVICE MANUAL 8064375 Publication date: Sep 2002… -
Page 3
INTRODUCTION INTRODUCTION You have in your hand the ASKO Service Manual for the commercial machines of the new generation of tumble driers, that are friendly to the environment in both their manufacture and their use. This new generation of tumble driers has been designed for ease of servicing. By this we mean that it’s a simple job, for example, to replace a damaged side panel. -
Page 4: Table Of Contents
Installing the input terminal block Adjusting the feet Removing the radio interference filter Condensation water (TDC44) Installing the radio interference filter Air extraction (TDC33) Contactor Connection to the tumble drier Removing the contactor Connection to exhaust duct Installing the contactor…
-
Page 5
Changing the panel handle Cleaning the fan Changing the indication lamp/symbol Cleaning the condenser (TDC44) lens Changing the main power button Drying guide TDC33 Changing the push-button switches Drying guide TDC44 Changing the DCU panel board and the Circuit diagram push-buttons… -
Page 6
TABLE OF CONTENTS… -
Page 7: Safety Regulations
TDC33: TRANSPORT/WINTER STORAGE If the tumble drier is to be transported, or stored for the winter in unheated premises, ensure that the condensation water tank has no water in it.
-
Page 8: Specifications
SPECIFICATIONS SPECIFICATIONS PRINCIPAL DIMENSIONS Height: 850 mm Width: 595 mm Depth: 585 mm Weight: TDC33 39 kg TDC44 47 kg VOLUME/CAPACITY Drum volume: 111 litres Drying capacity : 5.0 kg Speed: 52 rpm ELECTRICAL CONNECTION ALTERNATIVES Power consumption: See type label…
-
Page 9: The Drying Process
THE DRYING PROCESS THE DRYING PROCESS TDC33 Air at room temperature is heated by the heating element and drawn into the drum, where it ex- tracts the dampness from the clothes. The ridges in the drum prevent the clothes from sticking to each other.
-
Page 10: Tdc44
THE DRYING PROCESS TDC44 The condensing tumble drier has two circulation systems: one for drying air and one for cooling air. The black arrows show the warm drying air, and the white arrows the cooling air at room tem- perature. The ridges in the drum prevent the clo- thes from sticking to each other.
-
Page 11: Installation
850 mm. The width of the opening must be at least 600 C. Washing tower The tumble drier can be placed on top of an ASKO washing machine. The tumble drier is fastened securely and prevented from moving by the to- wer fasteners that come with the machine: 2 off angle pieces.
-
Page 12
INSTALLATION Install the tower configuration like this: 1. Unscrew and remove the outermost screws from each side of the rear of the washing machine. 2. Screw the angle pieces to the rear of the wash- ing machine. 3. Secure the two plastic cups to the front edge of the top cover. -
Page 13: Adjusting The Feet
INSTALLATION ADJUSTING THE FEET Screw the feet in or out until the tumble drier is standing vertical and steady. Lock the feet by tight- ening their locking nuts. CONDENSATION WATER (TDC44) Alternative 1 (as delivered) Condensation water is pumped up into the con- densation water tank, which is pulled out and emptied manually.
-
Page 14: Air Extraction (Tdc33)
INSTALLATION AIR EXTRACTION (TDC33) The exhaust air from the tumble drier should be taken to an exhaust duct or a wall outlet with the aid of the accompanying air extraction hose. Connection to the tumble drier The tumble drier has three possible air extraction points: the rear, right or left side.
-
Page 15: Installation In Warm Climates
INSTALLATION Installation in warm climates When installing in temperatures above 25°C (77°F) with a high level of humidity, do not route the air exhaust hose upwards. The hose must always run downwards or stay level with the tumble dryer. Condensation problems If the hose is long and the room is cold, conden- sation will form inside the hose.
-
Page 16: Electrical Installation
Rewiring to single-phase stalling the tumble drier jointly with a single-phase The machine can be reconfigured The machine ASKO washing machine, the phases should be should be reconfigured as shown in the wiring connected like this: diagram underneath the top panel of the machi- Tumble drier: Terminal labelled L1 to phase 1.
-
Page 17: Doorhanging
DOORHANGING DOOR HANGING The tumble drier’s front door can be adjusted to hang on either the left or the right. Tumble driers are normally delivered with the door hanging on the left. Left hanging to right hanging 1. Keep the front door closed, it will be held in position by the door magnet.
-
Page 18
DOOR HANGING 13. Remove the screw that is securing the front panel at the bottom edge of the side where the hinge will be installed. 14. Keep the front door in place with the door magnet. 15. Install the hinge fixing in the order a,b,c,d. 16. -
Page 19: Right Hanging To Left Hanging
DOOR HANGING Right hanging to left hanging 1. Keep the front door closed, it will be held in position by the door magnet. 2. Remove the bottom cover. 3. TDC44: Open the condenser housing co- ver. 4. Remove the 3 screws that secure the hinge fixing and the lower screw that secures the front panel.
-
Page 20
DOOR HANGING 16. Install the hinge fixing in the order a,b,c. 17. TDC44: Close the condenser housing co- ver. 18. Refit the bottom cover. -
Page 21: Fault Tracing
FAULT TRACING FAULT TRACING ERROR MESSAGES GENERAL The display text field shows a message if a fault There is more information in chapter ”Test pro- occurs during the time the program is running. gram and fault indications” The error messages that may be shown are: THE MACHINE WILL NOT START Maximum program time: When the machine has been running for its maximum time (3 hours)
-
Page 22
FAULT TRACING PROBLEMS IF THE PROGRAM UNIT IS CHANGED bottom water container is full, because the pump or hoses are blocked or faulty. If the condensate If the program unit is changed, check if the jum- water is pumped straight out via the drain hose — per is cut correctly. -
Page 23: Problems
5. Drive belt running incorrectly on motor shaft se, 10 A) also prolongs the drying time. = too high drum speed > 56 rpm 6. TDC33: The length of and number of bends on the evacuation hose affects drying opera- The washing will not dry? tion.
-
Page 24: Components And Measurements
COMPONENTS AND MEASUREMENTS COMPONENTS AND MEASUREMENT VALUES INDICATION LAMP MOTOR Part no.: 80 070 73 50 Hz Current: 1.68 mA, 230 V, 50 Hz Part no.: 80 618 24 Resistance of winding The lamp indicates that the main power switch is 24,5 W Cabel marked white-blue: set to on.
-
Page 25
HUMIDITY SENSOR indications. Part no.: 80 618 55 Part no.: 80 638 75 (ASKO) Part no.: 80 637 29 (OEM) The humidity sensor is used to control the dry- ing process. During operation the sensor output signal is between 1 and 16 mVDC. Any other value causes the program to stop. -
Page 26
COMPONENTS AND MEASUREMENT VALUES HEATING ELEMENT TDC33 2620 W Part no.: 80 618 33 66.7/25.7 W Resistance: The element has a maximum power rating of 2620W but consists of two loops of 1900W and 720W, which permits rewiring from 2620W to 1900W. -
Page 27
COMPONENTS AND MEASUREMENT VALUES TDC44 2500 W Part no.: 80 638 08 79,7/25 W Resistance: The element has a maximum power rating of 2500W but consists of two loops of 1900W and 600W, which permits rewiring from 2500W to 1900W. Temperature ˚C (68) (67) -
Page 28: Test Program And Fault Indications
TEST PROGRAM AND FAULT INDICATIONS TEST PROGRAM AND FAULT INDICATIONS FAULT INDICATIONS TEST PROGRAM Overfill: Overfill condensation water holder. The machine must be in its starting state (obtai- Maximum running time: Maximum running ned by pressing the main power button). time achieved, 3 hours.
-
Page 29: Consumption Values
ASKO washing machine. Other garments (non-iron and acrylic) should, before tumble drying, be spun at 800 rpm (short spin drying) in an ASKO washing machine. The consumption values may differ between machines for differens markets. To get the values for the machine, see the user guide for the mach-…
-
Page 30: Tdc44
ASKO washing machine. Other garments (non-iron and acrylic) should, before tumble drying, be spun at 800 rpm (short spin drying) in an ASKO washing machine The consumption values may differ between machines for differens markets. To get the values for the machine, see the user guide for the mach-…
-
Page 31: Tools
TOOLS TOOLS LIST OF TOOLS «Torx» spanners: • T25 • T20 • T10 U-ring spanners: • 11/16” • 13 mm • 8 mm Socket screwdriver: • 10 mm Flathead screwdriver 6.5 — 7 mm Star socket head screwdriver Flat-nose pliers…
-
Page 32: Application Areas
TOOLS APPLICATION AREAS Humidity sensor: • torx T25 Top lid: • torx T20 • torx T25 • torx T10 • special tool (Part no. 88 011 54) Rear piece: • torx T25 Thermistor: • torx T20 • torx T25 • U-ring spanner 13 mm •…
-
Page 33
TOOLS Water tank housing: • torx T25 • torx T20 Side panels/Bottom: • torx T25 • torx T20 • torx T10 • 6.5-7 mm wide blade screwdriver Front panel: • torx T25 • torx T20 • 6.5-7 mm wide blade screwdriver… -
Page 34: Special Tools
SPECIAL TOOLS SPECIAL TOOLS INSTALLING THE DRUM TD20 Part no. 88 011 54 The tool hangs in one of the punched-out key- holes in the front rail, then the rear edge of the drum is rolled up on to the roller and the drum is held in place.
-
Page 35: Service
SERVICE SERVICE TOP COVER Removing the top cover 1. Remove the 3 screws at the rear of the top cover. 2. Tilt the cover and pull it backwards. Installing the top cover 1. Ensure that the sealing strip is positioned along the edge of the top cover.
-
Page 36: Removing The Rear Panel
SERVICE Removing the rear panel 1. Remove the 3 screws at the rear of the top cover and lift it off. 2. Unscrew the centring nut until the face of the nut is level with the end of the thread and knock out the bearing.
-
Page 37: Removing The Inner And Outer Rear Panels
SERVICE Removing the inner and outer rear panels 1. Remove the rear panel in accordance with the section «Rear panel — removing…». 2. Remove the screws that secure the inner rear panel to the outer, and the cable clamp. 3. Lift them apart. IMPORTANT The bearing is now free and can be removed.
-
Page 38: Changing The Foam Rubber Seal
SERVICE Changing the foam rubber seal 1. Remove the 3 screws at the rear of the top cover and lift it off. 2. Remove the screws that secure the rear panel sides and bottom. 3. Remove the screws that secure the inner and outer rear panels.
-
Page 39: Changing The Rear Felt Strip Seal
SERVICE Changing the rear felt strip seal 1. Remove the rear panel in accordance with the section «Rear panel — removing…». 2. Lift off the felt strip seal. 3. Thread the new felt strip into place. 4. Tighten the tensioning band around the felt strip, using the special tool.
-
Page 40: Changing The Overheating Protection Device
SERVICE Changing the overheating protection device 1. Remove the three screws at the rear edge and lift off the top cover. 2. Remove the screws that secure the rear panel to the sides and bottom. 3. Remove the screws that secure the inner and outer rear panels, along with the cable clamp.
-
Page 41: Input Terminal Block
SERVICE INPUT TERMINAL BLOCK Removing the input terminal block 1. Remove the three screws at the rear edge and lift off the top cover. 2. Remove the earth screw. 3. Remove all the wiring. 4. Press in the latches with a screwdriver and pull out the input terminal block.
-
Page 42: Removing The Radio Interference Filter
SERVICE RADIO INTERFERENCE FILTER Removing the radio interference filter 1. Remove the three screws at the rear edge and lift off the top cover. 2. Disconnect the wiring from the radio interfe- rence filter. 3. Unscrew the nut securing the filter. Installing the radio interference filter 4.
-
Page 43: Contactor
SERVICE CONTACTOR Removing the contactor 1. Remove the three screws at the rear edge and lift off the top cover. 2. Remove the wiring to the contactor. 3. Unscrew the 2 screws that secure the contac- tor. Installing the contactor 4.
-
Page 44: Fuse
SERVICE FUSE Changing the fuse 1. Remove the fuse holder insert with a screw- driver (1/4 turn). 2. Change the fuse. IMPORTANT The fuse must be of 250V and 6.3 Ampere type. 3. Fit the fuse holder insert with the fuse into the fuse holder.
-
Page 45: Drum
SERVICE DRUM Removing the drum 1. Remove the rear panel in accordance with the section «Rear panel — removing…». 2. TDC44: Remove the external fan housing in accordance with the section » External fan hou- sing — removing…» steps 2-4. 3.
-
Page 46: Changing The Drum Ridge
SERVICE Changing the drum ridge 1. Remove the three screws at the rear edge and lift off the top cover. 2. Unscrew the 5 screws that secure the drum rid- NOTE Rotate the drum until you can gain access to the screws.
-
Page 47: External Fan Housing (Tdc44)
SERVICE EXTERNAL FAN HOUSING (TDC44) Removing the external fan housing 1. Remove the rear panel in accordance with the section «Rear panel — removing…». 2. Unclip the external fan housing suction side. 3. Unscrew the external fan wheel and remove 4.
-
Page 48: Motor
SERVICE MOTOR Removing the motor 1. Remove the drum in accordance with the sec- tion «Drum — removing…». 2. Take off the bottom cover (snap fasteners). 3. Remove the fan housing cover (4 snap fasten- ers and 1 screw). 4. Unscrew the fan wheel. 5.
-
Page 49: Changing The Capacitor
SERVICE Changing the capacitor 1. Remove the rear panel in accordance with the section «Rear panel — removing…». 2. TDC44: Remove the external fan housing in accordance with the section «External fan hou- sing — removing…» steps 2-4. 3. Unscrew the capacitor. 4.
-
Page 50: Air Extraction System
SERVICE AIR EXTRACTION SYSTEM Removing the exhaust air duct hook 1. Remove the bottom cover. 2. Take hold of the duct hook and twist it free. Installing exhaust air duct hook 3. Push one end into the exhaust air duct T-pie- 4.
-
Page 51: Humidity Sensor
SERVICE HUMIDITY SENSOR Removing the humidity sensor 1. Remove the three screws at the rear edge and lift off the top cover. 2. Take off the bottom cover (snap fasteners). 3. Use a screwdriver to remove the plugs. 4. Remove the cover for the fan housing (4 snap fasteners and 1 screw).
-
Page 52: Thermistor
SERVICE THERMISTOR Removing the thermistor 1. Remove the three screws at the rear edge and lift off the top cover. 2. Take off the bottom cover (snap fasteners). 3. Remove the protection. 4. Take out the thermistor with the aid of flat- nose pliers.
-
Page 53: Front Frame
12. Install the fan housing cover (4 snap fasteners and 1 screw). 13. Put the cable bundle into the cable clamps. 14. TDC33: Install the exhaust duct hook by pres- sing it on to the front frame exhaust lip. 15. Install the motor in accordance with the sec- tion «Motor…
-
Page 54: Changing The Front Felt Seal
SERVICE Changing the front felt seal 1. Remove the drum in accordance with the sec- tion «Drum — removing…». 2. Remove the seal. 3. Install the new seal evenly distributed around the groove. IMPORTANT The strip seal must be pressed firmly all around the groove.
-
Page 55: Front Door
SERVICE FRONT DOOR Removing the front door NOTE The front door must remain closed during the entire removal procedure; the door magnet will hold it in place. 2. Unscrew and remove the 3 screws that secure the hinge fixture. 3. Lift down the front door. Installing the front door 4.
-
Page 56: Changing The Hinge Socket
SERVICE Changing the hinge socket 1. Remove the three screws that secure the lo- wer hinge and twisting it free, take off the front door. 2. Change the hinge socket. 3. Hang the front door back on with the aid of the door magnet and secure the hinge.
-
Page 57: Changing The Inner Door
SERVICE Changing the inner door 1. Remove the three screws that secure the lo- wer hinge and twist it free, lift off the front door. 2. Unscrew the handle. 3. Unscrew the 2 screws at the side of the front door and the 3 at the lower edge.
-
Page 58: Changing/Cleaning The Filter Holder
SERVICE Changing/cleaning the filter holder 1. Open the front door. 2. Pull out the filter holder and take out the double filter. 3. Squeeze the snap fasteners inwards while at the same time lifting the filter holder out of the inner door. IMPORTANT Take care when lifting the filter holder out not to damage it.
-
Page 59: Changing The Door Switch Pin
SERVICE Changing the door switch pin 1. Drill a 4 mm diameter hole where the old pin was. 2. Fit a door switch pin (part no.: 80 642 40) into the hole. IMPORTANT Fit the pin so that it projects by 11 mm.
-
Page 60: Front Panel
SERVICE FRONT PANEL Removing front panel 1. Remove the three screws at the rear edge and lift off the top cover. 2. Remove the three screws that secure the lo- wer hinge and twist it free, lift off the front door.
-
Page 61: Changing The Fixing Clip For The Bottom Cover (Female)
3. Install a new clip. 4. Install the bottom cover. Changing the fixing clip for the bottom cover (male) TDC33, Left TDC44: 1. Remove the bottom cover. 2. Squeeze the snap fasteners and pull or push out the clip. 3. Install a new clip.
-
Page 62: Panel
2. TDC44: Pull out the water tank. 3. TDC44: Unscrew the 2 screws that secure the panel to the front rail. 4. TDC33: Unscrew the 2 screws securing the front rail. 5. Remove the 4 snap fasteners at the bottom edge by bending the clips apart with a screw- driver with a 6.5 to 7 mm wide blade.
-
Page 63: Changing The Panel Handle
SERVICE Changing the panel handle 1. Remove the three screws at the rear edge and lift off the top cover. 2. TDC33: Unscrew the 2 screws securing the front rail. 3. Pull the handle off. 4. Fit the handle. 5. Fit the top cover.
-
Page 64: Changing The Main Power Button
SERVICE Changing the main power button 1. Remove the panel in accordance with the sec- tion «Panel — removing…». 2. Press in the latches with a screwdriver and pull out the button. 3. Install the new button. IMPORTANT Ensure that the spring is located in the button before installation.
-
Page 65: Changing The Push-Button Switches
SERVICE Changing the push-button switches 1. Remove the panel in accordance with the sec- tion «Panel — removing…». 2. Get hold of the switch inside the machine and pull on it, while at the same time bending the wings at the front of the switch inwards with a screwdriver.
-
Page 66: Electronic Control Unit
SERVICE ELECTRONIC CONTROL UNIT WARNING An earthed EMC wristband must be worn at all times when working with electronic components to prevent damage to them. Changing the electronic control unit 1. Remove the three screws at the rear edge and lift off the top cover.
-
Page 67: Installing Electronic Control Unit With Its Holder
SERVICE Removing the electronic control unit with its holder 1. Remove the three screws at the rear edge and lift off the top cover. 2. Remove the panel in accordance with the sec- tion «Panel — removing…». 3. Press in the 2 snap fasteners. 4.
-
Page 68: Condenser Housing (Tdc44)
SERVICE CONDENSER HOUSING (TDC44) Removing the condenser housing 1. Remove the drum in accordance with the sec- tion «Drum — removing…». 2. Remove the external fan housing in accordance with the section «External fan housing — remo- ving…». 3. Remove the snap fasteners with the aid of a screwdriver.
-
Page 69: Changing The Microswitch For The Condensed Water Pump
SERVICE Changing the microswitch for the condensed water pump 1. Remove the rear panel in accordance with the section «Rear panel — removing…». 2. Remove the wiring and the microswitch. 3. Fit the new microswitch. 4. Install the rear panel in accordance with the section «Rear panel — installation…».
-
Page 70: Changing The Float
SERVICE Changing the float 1. Remove the drum in accordance with the sec- tion «Drum — removing…». 2. Remove the external fan housing in accordance with the section «External fan housing — remo- ving…». 3. Remove the snap fasteners with the aid of a screwdriver and lift out the condenser assem- bly.
-
Page 71: Water Tank Housing (Tdc44)
SERVICE WATER TANK HOUSING (TDC44) Removing water tank housing 1. Pull out the water tank. 2. Remove the three screws at the rear edge and lift off the top cover. 3. Remove the hoses. 4. Unscrew the 2 screws in the panel and the screws in the rear panel.
-
Page 72: Side Panels
SERVICE SIDE PANELS Changing the side panels 1. Remove the front panel in accordance with the section «Front panel — removing…». 2. Remove the panel in accordance with the sec- tion «Panel — removing…». 3. Early models: the hole is marked out on the bottom.
-
Page 73: Bottom
SERVICE BOTTOM Changing the bottom 1. Remove the condenser housing in accordance with the section «Condenser housing — remo- ving…» 2. Early models: the hole is marked out on the bottom. 3. Cut off the rivets between the bottom and side panels.
-
Page 74: Program And Options
PROGRAM AND OPTIONS PROGRAMS AND OPTIONS Program selection LC-Display Main power Start Stop Program selection Start/Stop PROGRAMS Extra dry Extra dry, Dry, Normal dry and This program is for fabrics that are particularly Iron dry difficult to dry, such as jeans with very thick These programs correspond to program 1-4, but seams.
-
Page 75: Change Settings
CHANGE SETTINGS CHANGE SETTINGS CHILD LOCK ON BUTTON LANGUAGE To prevent accidental button pushes on the You can change the language of the displayed text. button you can activate the child lock function. The languages you can choose from are Dansk, button then must be held in for three Deutsch, English, Espanol, Français, Italiano, Nederlands, Norsk, Portugués, Suomi and Svens-…
-
Page 76
PROGRAM TYPE TEMP NORMAL/LOW DRYING PHASE COOLING Extra dry normal Like the drying phase on program P2 and another 10 min. approx. 20 min normal The length of the drying phase is calculated from measurements approx. 20 min during the heating phase. Normal dry normal Like the drying phase on program P2, but is interrupted erarlier. -
Page 77: Tumble Drying
TUMBLE DRYING TUMBLE DRYING 1. Sort the laundry. 2. Set the main power switch to on, 3. Check the fluff filter. 4. Put the laundry into the tumble drier. 5. Close the door. 6. Select program. 7. Press the button. Start 8.
-
Page 78: Cleaning And Maintenance
CLEANING AND MAINTENANCE CLEANING AND MAINTENANCE CLEANING the fluff filter The fluff filter should be cleaned after every tum- ble-drying session. If you have very hard water the fluff filter may collect a layer of scale. Check when you are clea- ning fluff out of the filter if scale is present, and if so, wash the scale off by hand.
-
Page 79: Cleaning The Outside Of The Machine
CLEANING AND MAINTENANCE CLEANING THE OUTSIDE OF THE MACHINE Clean the outside and the program panel with a mild detergent. NOTE Don’t use any king of solvent, this can damage the machine. Don’t drench the machine in water, either. IMPORTANT Don’t let dust collect around the machine.
-
Page 80: Cleaning The Condenser (Tdc44)
CLEANING AND MAINTENANCE CLEANING THE CONDENSER (TDC44) The condenser should be cleaned at least six ti- mes a year. NOTE If you have pets at home the condenser should be cleaned more often. 1. Set the main power switch to off. 2.
-
Page 81
INDEX djusting the feet andle Air extraction 12,48 Heating element Hinge pin Hinge socket earing Humidity sensor Bottom ndication lamp/symbol lens apacitor Inner door seal Child lock settings Inner door Condensed water pump Input terminal block Condensation water Condensed water tank anguage settings Condenser Condenser housing… -
Page 82: Drying Guide
WHAT THE DISPLAY SHOWS DRYING GUIDE TDC33 Program information When you press P1 to P8 this field shows which program is selected. While the program is running it shows how far the cycle has progressed. FABRICS ERROR MESSAGES Dry fabrics of the same type together to ensure uniform drying.
-
Page 83
WHAT THE DISPLAY SHOWS DRYING GUIDE TDC44 Program information When you press P1 to P8 this field shows which program is selected. While the program is running it shows how far the cycle has progressed. FABRICS ERROR MESSAGES Dry fabrics of the same type together to ensure uniform drying. If an error message appears on the display after completed or interrupted program, proceed as follows: FABRIC… -
Page 84: Circuit Diagram
Description(ENG) N N N N L2 L2 L2 L2 2 2 2 2 N(L1) 1) 1) 1) CIRCUIT DIAGRAM TD33/44, TDC33/44 REC L L L L F1 F1 F1 F1 N(L1) 1) 1) 1) F1 F1 F1 F1N N N N…
This manual is also suitable for:
Tdc44
- Techno Pride. Бытовая техника
-
Документация
- Сушильные машины
- Asko
Инструкции сушильных машин Asko
Asko
- Все бренды
- AEG
- Asko
- Bauknecht
- Beko
- Bosch
- Candy
- Electrolux
- Gorenje
- Jacky`s
- Korting
- Kuppersbusch
- Miele
- Schaub Lorenz
- Schulthess
- Siemens
- Smeg
- Vestfrost
- Zanussi
Сушильные машины
- Все категории
- Холодильники
- Стиральные машины
- Сушильные машины
- Посудомоечные машины
- Варочные панели
- Духовые шкафы
- Вытяжки
- Микроволновые печи
- Винные шкафы
- Кофемашины
- Вакуумные упаковщики
- Подогреватели
- Аксессуары
Инструкция для сушильной машины Asko DC7583S 2,00 мб.
Инструкция для сушильной машины Asko DC7583W 2,00 мб.
Инструкция для сушильной машины Asko DC7774V.W 3,38 мб.
Инструкция для сушильной машины Asko DC7784V.S 2,29 мб.
Инструкция для сушильной машины Asko DC7784V.W 3,38 мб.
Инструкция для сушильной машины Asko T 784C W 2,11 мб.
Инструкция для сушильной машины Asko T 884XL HP 3,40 мб.
Инструкция для сушильной машины Asko T208C.W 9,34 мб.
Инструкция для сушильной машины Asko T208C.W.P 9,33 мб.
Инструкция для сушильной машины Asko T208H.W 10,56 мб.
Инструкция для сушильной машины Asko T208H.W.P 9,05 мб.
Инструкция для сушильной машины Asko T210H.W.P 1,07 мб.
Инструкция для сушильной машины Asko T211H.W 10,56 мб.
Инструкция для сушильной машины Asko T211H.W 0,18 мб.
Инструкция для сушильной машины Asko T408CD.W.P 9,34 мб.
Инструкция для сушильной машины Asko T408HD.T.P 9,05 мб.
Инструкция для сушильной машины Asko T408HD.W 10,86 мб.
Инструкция для сушильной машины Asko T408HD.W.P 9,05 мб.
Инструкция для сушильной машины Asko T409HS.W 11,65 мб.
Инструкция для сушильной машины Asko T409HS.W.P 9,76 мб.
1
2
3
4
5
Бесплатная доставка
Большинство товаров доставляем бесплатно по России
Бесплатная установка
Отмеченные товары устанавливаем бесплатно на готовые коммуникации
Простой возврат или обмен
Защищаем интересы покупателей, соблюдаем законодательство РФ
Фирменная гарантия
Фирменная гарантия производителей. Официальный дилер большинства брендов
Акции и скидки
Участвуем во всех официальных акциях
Содержание
- Особенности сушильных машинок Asko
- На что обращать внимание при выборе
- 5 самых популярных и надежных моделей в 2023 году
- Asko T608HX.W
- Asko TDC1481HS.C
- Asko T208H.W.P
- Asko T408HD.T.P
- Asko T408CD.W.P
Сушильные машины Asko бесперебойны в работе, имеют множество опций и программ. Шведский бренд гарантирует полную безопасность и долговечность техники. Его ключевые аспекты — премиальное качество, опыт, инновации, эргономичность.
Особенности сушильных машинок Asko
Первая особенность — конструктивные отличия. Выпускаются сушильные машины с насосом и конденсационного типа. В обеих разновидностях предусмотрен щадящий режим сушки, когда обеспечивается сохранность вещей, исключается риск усадки тканей.
Важно!
У многих машинок Asko с насосом имеется встроенный парогенератор — он освежает, чистит и производит первичную глажку. Соответственно, наличие опции приводит к удорожанию в цене.
У техники Asko есть ряд других особенностей:
- Система Sensy Dry автоматически рассчитывает время цикла. Установлены датчики, которые контролируют уровень влаги. При достижении необходимого параметра техника отключается автоматически.
- Технология Butterfly Drying ускоряет сушку. Массивные лопасти бережно вращают одежду по траектории «восьмерки», при этом исключается скручивание и повреждение тканей.
- Модели Style и Logic оснащены светодиодной подсветкой.
- Kid Safe — функция, которая исключает травмы детей во время работы техники. В непредвиденных ситуациях сушка автоматически остановится.
- Опция «Отложенный старт» позволяет запустить машину в назначенное время (в течение суток).
- До 18 программ сушки. При выборе учитывается тип ткани, способ обработки.
Техника Asko надежна благодаря продуманной конструкции. В большинстве моделей имеется барабан Soft Drum, изготовленный из нержавеющей стали. Он обеспечивает равномерную, щадящую и быструю сушку при любой загрузке. На валу барабана, под ним и возле мотора установлено 5 подшипников. Бесщеточный двигатель работает бесшумно.
На что обращать внимание при выборе

Все зависит от индивидуальных предпочтений. Кому-то важно, чтобы было много программ. Другие пользователи обращают внимание на габариты техники. Но все же есть несколько универсальных советов, которые необходимо учесть при выборе сушильной машины:
- Систему сушки. В машинах конденсационного типа во время работы образуется конденсат, который выводится в канализацию. В моделях с тепловым насосом жидкость нагревается до необходимой температуры и используется повторно. Второй способ экономит электроэнергию.
- Размеры. Есть устройства, которые встраиваются в колонны. В частности, их можно располагать над стиральными машинами.
- Уровень шума — он незначительно отличается в пределах линейки.
- Количество программ. Желательно, чтобы их было как минимум 10, с разделением на типы тканей и способы обработки.
- Дополнительный функционал — антисминание, проветривание, блокировка от детей и подобные опции.
- Наличие русскоязычной инструкции по эксплуатации.
Важно!
Большинство моделей оснащено дверями, которые можно перенавешивать. Если предусмотрена установка в колонну, техника комплектуется кронштейном и ножками-присосками.
5 самых популярных и надежных моделей в 2023 году
Все устройства имеют высокий класс энергоэффективности и стильный дизайн. Техника рассчитана на срок службы не менее 20 лет. В обзоре представлены как новинки, так и разработки прежних лет.
Asko T608HX.W
Первое место в рейтинге занимает сушильная машина Asko серии Style. Подходит как для домашней, так и для профессиональной сушки. Помимо теплового насоса, машина оснащена встроенным парогенератором, что дает дополнительные возможности:
- избавление от неприятных запахов — можно просто освежить свитер, который долго лежал в шкафу;
- возвращение прежней формы пуховикам и другой верхней одежде;
- пропитка курток специальным водоотталкивающим составом.
Машинка оснащена индукционным двигателем — он мощнее инверторного. В памяти устройства 18 программ. Пользователь может настраивать большинство параметров, например — степень высушивания.
Преимущества:
- реверсивный барабан Soft Drum с мощными лопастями бережно и равномерно сушит одежду;
- 4-ступенчатая система фильтрации собирает ворс, шерсть, волосы;
- энергосберегающий класс А+++;
- простая и понятная инструкция;
- электронное управление.
Минусы сушильной машины не связаны с ее параметрами или технической стороной. Главным недостатком является высокая цена.
Asko TDC1481HS.C

Профессиональная модель, которая может использоваться и для домашнего пользования. Корпус машины выполнен в цвете «нержавеющая сталь». Индукционный мотор работает бесперебойно, сокращая время цикла сушки. За счет отсутствия щеток внутри механизма, его работа бесшумна. Можно запускать машину даже ночью, не опасаясь разбудить соседей.
Преимущества:
- загрузка белья — до 8 кг;
- мощный тепловой насос;
- удобство управления — имеется сенсорный TFT-дисплей и регулятор;
- имеется фильтр, который не дает мелким предметам (ворс, шерсть) попасть внутрь машины;
- 12 программ;
- технологии Sensy Dry и Butterfly Drying .
Недостаток: высокая цена. Также, в отличие от предыдущей модели, отсутствует обработка паром.
Asko T208H.W.P
Сушильная машина для белья относится к серии Classic. Барабан вмещает 8 кг белья, что позволяет сушить большое количество вещей за один цикл. Инверторный двигатель работает бесперебойно и тихо.
Преимущества:
- компактные размеры — машинку можно установить в ванной комнате с ограниченным пространством;
- 10 программ;
- технология Butterfly Drying уменьшает износ белья и ускоряет сушку;
- дополнительные опции — отсрочка старта, защита от детей.
Недостаток один, но существенный. В интернете встречаются отзывы, что устройство сильно греется во время работы.
Asko T408HD.T.P
Техника впишется даже в небольшое помещение. С помощью крепежного набора она может монтироваться сверху на стиралку. Дверцу можно перенавешивать.
Установлен двигатель инверторного типа. В модели используется тепловой насос — воздух непрерывно циркулирует между камерой и испарителем. После стирки вещи мягкие и воздушные, без заломов.
Преимущества:
- класс энергоэффективности А++;
- технология Butterfly Drying;
- 14 программ — можно сушить и деликатные ткани;
- звуковая индикация;
- электронное управление.
Недостатки: некоторые пользователи недовольны солидными габаритами машины (85*60*65). При этом масса устройства составляет 56 кг.
Asko T408CD.W.P
В машине предусмотрен конденсационный тип сушки, при котором влага удаляется в канализацию. Цельнометаллический корпус защищает машину от повреждений. Имеется 13 программ. Можно сушить не только белье, но и верхнюю одежду, подушки, махровую ткань.
Преимущества:
- одновременно можно сушить до 8 кг белья;
- перенавешиваемая дверца;
- подробная инструкция по применению;
- совершенная система фильтрации из 3 ступеней;
- удобный и интуитивно понятный интерфейс.
Недостаток связан с потреблением электричества. У этой сушильной машины энергоэффективность класса В.
Сушильная машина — не роскошь, а необходимость, особенно, если семья большая. Конкретную модель каждый пользователь выбирает для себя сам, исходя из функционала, количества программ и технологий. Однако независимо от понравившейся разновидности, вся техника Asko прослужит долго. На машины этого бренда действует гарантия 2 года.