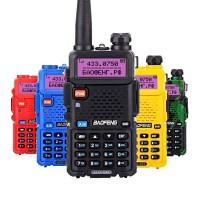
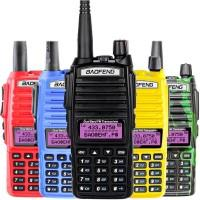
Baofeng UV 82 — это портативная радиостанция, с заявленной мощностью 8 ватт, которая понравится — сторожам, водителям, охранным организациям, строителям, охотникам, рыболовам и любителям активного вида спорта.
Функции рации:
- Наличие дисплея с полной информацией используемых функций
- FM — приемник
- Частотные и канальные режимы отображения на дисплее (CH001 или 443.075)
- Поддержка кодировок каналов, для уменьшения вероятности прослушивания радиопереговоров, к сожалению в одностороннем порядке
- Наличие функции сканирования каналов
- Великолепная функция VOX (передача без использования кнопки передачи, то есть как только говоришь радиостанция выходит на передачу.
- Кнопка тревоги передающая в эфир
- 128 каналов памяти
- Регулировка мощности передачи 5w или 1w
- Крутая вещь (для взрослых-детей) — переключение цвета подсветки в состоянии покоя, приема и передачи. В кажном положении свой цвет.
- Включение и отключение звука клавиатуры
- Функция одновременного приема с двух каналов «S»
- Изменение шага частоты 2,5/5/6,25/10/12,5/25/50 кГц
- Режим экономии аккумулятора
- Возможность ограничения времени передачи (для болтунов, учитесь говорить кратко и по существу, если не являетесь таковым, то не включайте этот режим).
- Наличие фонарика, встроенный
- Настройка шумодава от 0 до 9
- Тон окончания передачи
- Блок дисплея

-
Contents
-
Table of Contents
-
Troubleshooting
-
Bookmarks
Quick Links
DUAL BAND/DUAL DISPLAY RADIO
UV-82
O
M
PERATING
ANUAL
Related Manuals for Baofeng UV-82
Summary of Contents for Baofeng UV-82
-
Page 1
DUAL BAND/DUAL DISPLAY RADIO UV-82 PERATING ANUAL… -
Page 2
PREFACE Thank you for purchasing UV-82 Portable Radio, which is a dual band/dual display radio. This easy-to-use radio will deliver you secure, instant and reliable communications at peak efficiency. Please read this manual carefully before use. The information presented herein will help you to… -
Page 3
CONTENT 1.SAFETY INFORMATION 2.FEATURES AND FUNCTIONS 3.UNPACKING AND CHECKING EQUIPMENTS 4. OPTIONAL ACCESSORIES 5. INSTALLATION OF ACCESSORIES 5.1. INSTALLING THE ANTENNA 5.2. INSTALLING THE BELT CLIP 5.3. MICROHEADSET INSTALLATION OF EXTERNAL 5.4. – BATTERY INSTALLATION 6.BATTERY CHARGING 7.BATTERY INFORMATION 7.1.INITIAL USE 7.2.BATTERY TIPS 7.3.PROLONG BATTERY LIFE 7.4.BATTERY STORAGE 8.PARTS, CONTROLS AND KEYS 8.1.RADIO OVERVIEW 8.2. COMMAND/KEY DEFINITION 9.‘LCD’ DISPLAY 10. 1750 Hz TONE FOR ACCESS TO REPEATERS 11.1.RADIO ONOFF/VOLUME CONTROL 11.2. SELECTING A FREQUENCY OR CHANNEL 12ADVANCED OPERATION … -
Page 4
12.1.SET MENU DESCRIPTION 12.2.SHORTCUT MENU OPERATION 12.3. “SQL” (SQUELCH) 12.4.FUNCTION “VOX” (VOICE OPERATED TRANSMISSION) 12.5.‐ SELECT WIDEBAND OR NARROW BAND “W/N” 12.6.‐TDR (DUAL WATCH/DUAL RECEPTION) 12.7. TOT(TRANSMISSION TIMER) 12.8.CTCSS/DCS 12.9. ANI 12.10. DTMFST (DTMF TONE OF TRANSMITTING CODE ) 12.11. SCREV(SCAN RESUME METHOD) 12.12. PTTID(PTT OR RELEASE PTT TO TRANSMIT THE SIGNAL CODE) 12.13BCL(BUSY CHANNEL LOCKOUT) 12.14. SFTD(DIRECTION OF FREQUENCY SHIFT) 12.15. OFFSET(FREQUENCY SHIFT) 12.16.STE(STE TAIL TONE ELIMATION) 12.17.THE INSTRUCTIONS TO SAVE CHANNEL 12.18. CTCSS/DCS SCANNING 12.19. REPEATER TAIL TONE 13.CTCSS TABLE 14.DCS TABLE 15.TECHNICAL SPECIFICATION 15.1.GENERAL 15.2. – TRANSMITTER … -
Page 5: Troubleshooting
15.3. RECEIVER 16.TROUBLESHOOTING 17.WARRANTY …
-
Page 6: Safety Information
◇ This equipment shall be serviced by qualified technicians only. ◇ Do not modify the radio for any reason. ◇ Use only BAOFENG supplied or approved batteries and chargers. ◇ Do not use any portable radio that has a damaged antenna. If a damaged antenna comes into contact with your skin, a minor burn can result.
-
Page 7: Features And Functions
2.FEATURES AND FUNCTIONS: -Dual-band handheld transceiver with display function menu on the display «LCD». — Commercial FM radio receiver (65 MHz ~ 108 MHz). -Frequency Mode/Channel Mode — DTMF encoded. — Incorporates 105 codes «DCS» and 50 privacy codes «CTCSS» programmable. -CTCSS & DCS Scanning — CTCSS &…
-
Page 8: Unpacking And Checking Equipments
3.UNPACKING AND CHECKING EQUIPMENTS: Carefully unpack the transceiver. We recommend that you identify the items listed in the following before discarding the packing material. If any items are missing or have been damaged during shipment, please contact your dealers immediately. Battery Pack Antenna Adapter Drop-in Charging Tray…
-
Page 9: Installing The Belt Clip
5. INSTALLATION OF ACCESSORIES: 5.1. INSTALLING THE ANTENNA: Install the antenna as shown in the figure below and turn it clockwise until it stops. Note: ‐ When installing the antenna, don’t rotate it by its top, holding it by its base and turn. ‐ If you use an external antenna, make sure the ‘SWR’ is about 1.5:1 or less, to avoid damage to the transceiver’s final transistors. ‐ Do not hold the antenna with your hand or wrap the outside of it to avoid bad operation of the transceiver. ‐ Never transmit without an antenna. 5.2. INSTALLING THE BELT CLIP: If necessary, install the belt clip at the rear of the battery compartment cover as shown in the figure below.
-
Page 10: Battery Charging
body. -Align the battery with the guide rails on the aluminum chassis and slide it upwards until a ‘click’ is heard. -The battery latch at the bottom locks the battery. -Turn off the radio before removing the battery. -Slide the battery latch, at the bottom of the radio’s body, in the direction indicated by the arrow. -Slide down the battery for about 1 to 2 centimeters, and then remove the battery from the radio’s body.
-
Page 11: Battery Tips
3. Plug the DC connector of the adapter into the DC socket on the back of the charger. 4. Place the radio with the battery attached, or the battery alone, in the charger. 5. Make sure the battery is in good contact with the charging terminals. The charging process initiates when the red LED lights.
-
Page 12: Parts, Controls And Keys
over-discharge. 2. Recharge a battery after several months’ storage (Li-Ion batteries: 6 months), to avoid battery capacity reduction due to over-discharge. 3. Store your battery in a cool and dry place under room temperature, to reduce self-discharge. 8.PARTS, CONTROLS AND KEYS: 8.1.RADIO OVERVIEW: ①…
-
Page 13
-Press the 【F】button, to activate the FM Radio on; Press it again to deactivate the FM Radio. -Press and hold on the 【F】button, to activate the alarm function; Press and hold it again, to deactivate the alarm function. SKSIDE KEY2/【M】: -Press the 【M】 button, to turn on the flashlight; Press it again to turn off. Press and hold on the 【M】 button, to monitor the signal. -
Page 14: Basic Operation
Icon Description ‘CTCSS’ activated. ‘DCS’ activated. Frequency Shift + Frequency Shift — Frequency offset direction for accessing repeaters. Dual Watch/Dual Reception functions activated. Function ‘VOX’ enabled. Reverse function activated. Wide Band selected. Battery Level indicator Keypad lock function activated. Low transmit power. Operation frequency.
-
Page 15: Advanced Operation
12ADVANCED OPERATION: You can program your transceiver operating in the setup menu to suit your needs or preferences. 12.1.SET MENU DESCRIPTION: Menu Function/Description Available settings 0 SQL (Squelch level) 0‐9 1 STEP(Frequency step) 6.25/12.5/kHz 2 TXP(Transmit power) HIGH/LOW 3 SAVE( Battery save,1:1/1:2/1:3/1:4) OFF/1/2/3/4 4 VOX(Voice operated transmission) OFF/0‐10 5 W/N( Wideband/narrowband) WIDE/NARR 6 …
-
Page 16: Shortcut Menu Operation
38 PONMGS(Boot display) FULL/MGS 39 ROGER(tone end of transmission) ON/OFF 40 A/B‐BP(Tone end of reception) OFF/A/B 41 RESET (Restore to default setting) VFO/ALL 12.2.SHORTCUT MENU OPERATION: ▲ ▼ 1.‐Press the key MENU,then press the key or to select the desired menu. 2.‐Press the key MENU again, come to the parameter setting. 3.‐Press the key ▲ or ▼ to select the desired parameter. 4.‐Press the key MENU to confirm and save, press the key EXIT to cancel setting or clear the input. …
-
Page 17
12.6.‐ TDR (DUAL WATCH/DUAL RECEPTION): This feature allows you to operate between frequency A and frequency B. Periodically, the transceiver checks whether a signal is received on another frequency that we have scheduled. If you receive a signal, the unit will remain in the frequency until the received signal disappears. … -
Page 18
transmitted. ‐“DT‐ANI”—under transmitting mode, you can hear the DTMF tone, while you press the key to transmit the code or the code automatically transmitted. 12.11. SCREV(SCAN RESUME METHOD): This transceiver allows you to scan memory channels, all the bands or part of the bands. When the transceiver detects a communication, the scan will stop automatically. Notes: ‐ «TO» (Time Operation): Scanning will stop when it detects an active signal. The scanning will stop on each channel or active frequency for a predetermined time, after that time the scan will resume automatically. ‐ «CO» (Carrier Operation): The scanning will stop and remain in the frequency or channel, until the active signal disappears. ‐ «SE»(Search Operation): The scanning will stop and remain in the frequency or channel after it detects an active signal. 12.12. PTTID(PTT OR RELEASE PTT TO TRANSMIT THE SIGNAL CODE): ‐This feature allows you to know who call you. ‐“OFF”—Don’t transmit the code while push the PTT button. ‐“BOT”‐Transmit the code while push the PTT button.(the code only could be set by PC software.) ‐“EOT”‐Transmit the code while release the PTT button. ‐“BOTH”‐Transmit the code while push or release the PTT button. 12.13. BCL(BUSY CHANNEL LOCKOUT): The BCLO feature prevents the radio’s transmitter from being activated if a signal strong enough to break through the “noise” squelch is present. On a frequency where stations using different CTCSS or DCS codes may be active, BCLO prevents you from disrupting their communications accidentally (because your radio may be muted by its own tone decoder). 12.14. SFTD(DIRECTION OF FREQUENCY SHIFT): The «OFFSET» is the difference or offset between the reception frequency and the frequency of transmission for access to amateur radio repeaters. -
Page 19: Ctcss/Dcs Scanning
to [-], so the transceiver will always 145,600 MHz in frequency and when you press [PTT] to transmit transceiver, the frequency will automatically move to 145,000 MHz Note: Under VFO mode, you can do like this. If you need the TX and RX frequency different under Channel mode, you can directly store different RX and TX frequency into one channel through MENU 27.
-
Page 20: Ctcss Table
press the PTT of another radio, then you will see the CTCSS scanning automatically. When the scanning stops, that means you find the same CTCSS as that of another radio, now press 【MENU】to store the CTCSS. 12.19. REPEATER TAIL TONE We all know that repeaters receive on one frequency and simultaneously retransmit that same information on a different frequency.
-
Page 21: Technical Specification
D116N D244N D356N D516N D734N D122N D245N D364N D523N D743N D125N D246N D365N D526N D754N 15.TECHNICAL SPECIFICATION: 15.1.GENERAL: Frequency range: 65MHz‐108MHz(Only commercial FM radio reception). …
-
Page 22
16.TROUBLESHOOTING: Problem Possible cause / solution The radio does not start. The battery is low, replace the battery with a charged battery or proceed to the battery. The battery is not installed correctly, remove the battery and reattach it. The battery runs down quickly. The battery life has come to an end, replace the battery with a new one. The battery is fully charged, make sure the battery is made in full. The receiving indicator LED lights but do not hear Make sure the volume setting is too low. … -
Page 23: Warranty Certificate
17.WARRANTY: (Better buy the radios from local dealer). WARRANTY CERTIFICATE Brand: Model no.: Serial no.: Name of purchaser: Address: City: Zip code: Province/State: Tel no.: Seal and name of the dealer: Date of purchase: WARNING: Warranty is valid provided it is complete and properly filled in legibly and clearly present the seal and name of the dealer and have attached the bill proof of purchase of equipment. The device described in this Certificate is guaranteed for a period of TWO YEARS from the date of sale to the final user.This Warranty Certificate is unique and not transferable and may not be reissued for new or original or copy. Substitution of product failure or any part thereof shall not involve extension of the guarantee. The warranty covers the replacement and free replacement of all parts that are defective in materials and components used in manufacturing and / or assembly of the apparatus. The warranty does not cover any faults caused by accident, improper installation and use, electric shock (eg storms), connect a power other than that specified, reverse polarity in the diet, or claims due to deterioration in the external appearance of normal use, nor the amount or condition of the accessories. Checking the accessories is the responsibility of the purchaser at the time of purchasing the device. The warranty does not cover rechargeable batteries even if they are part of the equipment purchased as they are considered consumables, the impairment must be reported within a period of fifteen days from the date of purchase. The warranty is void on the following assumptions: 1. ‐ Devices that have been manipulated by another or by anyone other than authorized service provider. 2. ‐ Equipment and accessories in which the serial number has been altered, deleted or filed unreadable. 3. ‐ Use of the product than as intended. …
-
Page 24: Safety Training Information
SAFETY TRAINING INFORMATION Your BAOFENG radio generates RF electromagnetic en-ergy during transmit mode. This radio is designed for and classified as “Occupational Use Only”, meaning it must be used only during the course of employment by individuals aware of the hazards, Warning and the ways to minimize such hazards.
-
Page 25
RF exposure limits of this radio. Electromagnetic Interference/Compatibility During transmissions, your BAOFENG radio generates RF energy that can possibly cause interference with other devices or systems. To avoid such interference, turn off the radio in areas where signs are posted to do so. DO NOT operate the transmitter in areas that are sensitive to electromagnetic radiation such as hospitals, aircraft, and blasting sites.
Сопутствующие Товары

Цвет
Черный (Baofeng UV-5R)
Зеленый (Baofeng UV-5R)+200.00 р.
Красный (Baofeng UV-5R)+200.00 р.
Синий (Baofeng UV-5R)+200.00 р.
Желтый (Baofeng UV-5R)+200.00 р.
Дополнительно хочу:
Запрограммировать LPD/PMR каналы (бесплатно)
1699.00 р.

Цвет
Черный (Baofeng UV-82)
Зеленый (Baofeng UV-82)+200.00 р.
Синий (Baofeng UV-82)+200.00 р.
Дополнительно хочу:
Запрограммировать LPD/PMR каналы (бесплатно)
1799.00 р.

Цвет
Чёрный (Baofeng BF-888S)
Красный (Baofeng BF-888S)+100.00 р.
Желтый (Baofeng BF-888S)+100.00 р.
Синий (Baofeng BF-888S)+100.00 р.
Дополнительно хочу:
Запрограммировать LPD/PMR каналы (бесплатно)
850.00 р.

Дополнительно хочу:
Запрограммировать LPD/PMR каналы (бесплатно)
1990.00 р.
Похожие статьи

Программое обеспечение (софт) для раций
Программное обеспечение (софт) для настройки и программирования раций Baofeng, TYT, WLN, Quansheng, Baojie можно скачать по следующим ссылкам:Характеристики, отзывы, цены на рации Baofeng и рации друг..
117680
19.10.2018

Драйверы
Драйверы для программаторов и раций BaofengДрайверы и программы с диска, идущего в комплекте с программаторами BaofengДрайверы и программы с диска для универсального программатора 6 в 1Драйвер програм..
54561
19.10.2018
![]()
| Языки: |
Русский |
|---|---|
| Страницы: | 20 |
| Описание: | Радиостанция |
Стр.
из
результат(ов) по запросу ««
×
|
|
NoDevice
Loading…
-
« Назад
Ctrl + ←
-
Вперёд »
Ctrl + →
Мануал подходит для устройств
-
BAOFENG UV-82
