|
Код товара: 132
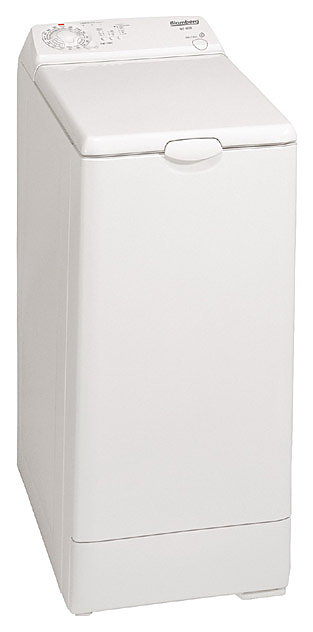
Описание Общие характеристики: Тип загрузки: вертикальный Максимальная загрузка (кг): 5 Скорость вращения центрифуги (об/мин): 800 Класс стирки: А Класс энергопотребления: А Класс отжима: С Материал бака: политенакс Программы: Деликатная стирка — шерсти, шёлка, атласа Ручная стирка Быстрая стирка (30 мин при 40°C). Лёгкая глажка (деликатный отжим, предотвращающий сминание) Предварительная стирка. Дополнительное полоскание Дополнительные функции: Таймер :Отсрочка старта на 3-6-9 час Термостат регулируемый: (max 90°C). Световые индикаторы на панели управления показывают: — стадию программы — количество оборотов при отжиме — дополнительно выбранные функции Автоматическая оптимизация расходов Расход воды (л): 42 Система безопасности: Aquastop Цвет: белый Дополнительная информация: Контроль дисбаланса. Контроль пенообразования. Система «Posistop» обеспечивает остановку барабана в положении открытия, независимо от количества белья. Дверцы барабана плавно открываются нажатием клавиши. Фильтр для улавливания мелких предметов. Подключение к холодной воде. Вес: — в упаковке: 62 кг — без упаковки: 65 кг. Внимание! Информация о товарах, размещенная на сайте, не является публичной офертой, определяемой положениями Части 2 Статьи 437 Гражданского кодекса Российской Федерации. Производители вправе вносить изменения в технические характеристики, внешний вид и комплектацию товаров без предварительного уведомления. Уточняйте характеристики у наших менеджеров перед оформлением заказа. |
Торговая марка Blomberg Blomberg – торговая марка, которая недаром пользуется доверием и уважением покупателей всего мира. Blomberg была основана в 1883 году, и за более чем 120 лет своей деятельности накопила достаточный опыт в производстве бытовых приборов.
Анастасия Отдел качества Распределение заказов, отправленных нами через ТК: Деловые линии — 58.3% Санкт-Петербург, Екатеринбург, Сочи, … ПЭК — 20.3% Санкт-Петербург, Сочи, Екатеринбург, … КИТ — 3.3% Астана, Атырау, Феодосия, … Желдорэкспедиция — 1.2% Якутск, Владивосток, Находка, … Байкал-Сервис — 1.2% Пятигорск, Санкт-Петербург, Анапа, … За прошедшие 5 дней отправлены заказы в города: Астрахань, Барнаул, Благовещенск, Выкса, Екатеринбург, Ижевск, Краснодар, Миасс, Мурманск, Нижний Тагил, Петрозаводск, Санкт-Петербург, Тверь, Хасавюрт, Челябинск, Якутск |


Не тратьте время на поиск нужной запчасти, оформите заявку на заказ товара и наш менеджер свяжется с вами и согласует заказ.
Модель
Просьба указывать серийный номер техники, для ускорения
обработки заказа.
Запчасть
Если у вас есть Артикул (P/N) необходимой запчасти — укажите её.
Email используется для отправки уведомлений о ценах и наличии
Наша компания продает запчасти к бытовой технике уже много лет. Мы реализуем запчасти для стиральных машин Blomberg в розницу и оптом в различные регионы России и Украины. С повсеместным распространением всемирной паутины все больше людей стали делать выбор в пользу интернет-магазинов, понимая, что торговля через интернет позволяет продавцу избежать затрат связанных с арендой помещения, содержания огромного штата продавцов и т.п. Поэтому, мы предлагаем покупателям запчасти для стиральных машин по более низким ценам, нежели в обычных магазинах. Мы постоянно расширяем ассортимент запчастей, заключая договора напрямую с заводами-изготовителями.
Воспользовавшись услугами наших менеджеров, можно оперативно уточнить характеристики деталей для стиральных машин Blomberg, получить консультацию по применению, взаимозаменяемости запчасти и другую дополнительную информацию.
Для оплаты заказа предусмотрены различные возможности, удобные как частным лицам, так и организациям. Доставка возможна несколькими способами: товар может доставить наш курьер, можно воспользоваться услугами транспортных компаний, либо осуществить пересылку почтой не только в такие крупные города как Москва, Санкт-Петербург, Нижний Новгород, Екатеринбург, Казань, Самара, Новосибирск, Киев, Днепропетровск, Донецк, Харьков, Запорожье, Одесса, Львов, а и в любой уголок России и Украины.
- Manuals
- Brands
- Blomberg Manuals
- Washer
ManualsLib has more than 194 Blomberg Washer manuals
Click on an alphabet below to see the full list of models starting with that letter:
1
7
L
W
Popular manuals
44 pages
WM 77110 NBL00 Owner’s Manual

40 pages
WM67120 Owner’s Manual & Installation Instructions

36 pages
WNF 6221 User Manual
41 pages
LWF174310W User Manual
44 pages
WM 87120 NBL00 Owner’s Manual
32 pages
WM72200W Owner’s Manual

64 pages
WMT 7310 User Manual
40 pages
WNF 5200 User Manual

76 pages
WM 98400 SX Owner’s Manual & Installation Instructions
2 pages
WAF 7200 Specifications
44 pages
LWF29441W User Manual
40 pages
WM 67121 NBL00 Owner’s Manual
40 pages
WNF 6280 User Manual
48 pages
WMF 8669 WZE50 User Manual

28 pages
WAF 1500 Operating Instructions Manual
28 pages
WAF 1300 Operating Instructions Manual
40 pages
WNF63211 User Manual
52 pages
WNF 7321 A User Manual

40 pages
WNF 9448 AE20 User Manual
48 pages
WMI 7462 W20 User Manual
Models
Document Type
1
1010

User Manual
7
7145845100
User Manual
7162845300
User Manual
7178484300
User Manual
L
LBF16230W
User Manual
LBF1623W
User Manual
LWF1114520W
User Manual
LWF174310W
User Manual
LWF184410W
User Manual
LWF184420
User Manual
LWF184420G
User Manual
LWF184610W
User Manual
LWF194410
User Manual
LWF194410W
User Manual
LWF194520Q
User Manual
LWF194520QW
User Manual
LWF27441
User Manual
LWF274411W
User Manual
LWF27441W
User Manual • User Manual
LWF28441
User Manual
LWF284411W
User Manual
LWF28441W
User Manual
LWF284421G
User Manual
LWF28442B
User Manual
LWF28442G
User Manual
LWF29441
User Manual
LWF294411W
User Manual
LWF29441W
User Manual • User Manual
LWF3114420
User Manual
LWF3114420W
User Manual
LWF4114421W
User Manual
LWF411452A
User Manual
LWF411452AW
User Manual
LWI28441
User Manual
LWI284410
User Manual
LWI842
User Manual
W
WAF 1200
Operating Instructions Manual
WAF 1200 A
Operating Instructions Manual
WAF 1220
Operating Instructions Manual
WAF 1220 A
Operating Instructions Manual
WAF 1300
Operating Instructions Manual
WAF 1300 A
Operating Instructions Manual
WAF 1320
Operating Instructions Manual
WAF 1320 A
Operating Instructions Manual
WAF 1321
Operating Instructions Manual
WAF 1340
Operating Instructions Manual
WAF 1340 A
Operating Instructions Manual
WAF 1341
Operating Instructions Manual
WAF 1500
Operating Instructions Manual
WAF 1500 A
Operating Instructions Manual
WAF 1520
Operating Instructions Manual
WAF 1520 A
Operating Instructions Manual
WAF 1540
Operating Instructions Manual
WAF 1540 A
Operating Instructions Manual
WAF 1560
Operating Instructions Manual
WAF 1560 A
Operating Instructions Manual
WAF 4080
User Manual
WAF 4080 A
User Manual
WAF 4100
User Manual
WAF 4100 A
User Manual
WAF 6080
User Manual
WAF 6080 A
User Manual
WAF 6100
User Manual
WAF 6100 A
User Manual
WAF 6120
User Manual
WAF 6120 A
User Manual
WAF 6140
User Manual
WAF 6140 A
User Manual
WAF 6150
User Manual
WAF 6150 A
User Manual
WAF 7200
Specifications
WAF 7200 A
Specifications
WAF 7208
Specifications
WAF 7208 A
Specifications
WAF 7210
Specifications
WAF 7210 A
Specifications
WAF 7220
Specifications
WAF 7220 A
Specifications
WAF 7300
Specifications
WAF 7300 A
Specifications
WAF 7320
Specifications
WAF 7320 A
Specifications
WAF 7340 S
Specifications
WAF 7520
Specifications
WAF 7520 A
Specifications
WAF 7540
Specifications
WAF 7540 S
Specifications
WAF 7560
Specifications
WAF 7560 S
Specifications
WAF 800
Operating Instructions Manual
WAF 800 A
Operating Instructions Manual
WAF 8422
User Manual
WDT 5431
Specifications
WE 20
User Manual
WM 26110 NBL00
Owner’s Manual
WM 67120 NBL00
Owner’s Manual & Installation Instructions
WM 67121 NBL00
Owner’s Manual
WM 77110 NBL00
Owner’s Manual
WM 77120 NBL01
Owner’s Manual
WM 87120 NBL00
Owner’s Manual • Owner’s Manual
WM 98200 SX
Owner’s Manual & Installation Instructions
WM 98400 SX
Owner’s Manual & Installation Instructions
WM67120
Owner’s Manual & Installation Instructions
WM72200W
Owner’s Manual
WM77110NBL01
Owner’s Manual And Installation Instructions
WMF 8629 WZE4
User Manual
WMF 8649 WZE50
User Manual
WMF 8669 WZE50
User Manual
WMF 9629 WZE30
User Manual
WMF 9629 WZE40
User Manual
WMF 9629 WZE50
User Manual
WMF 9649 WZE30
User Manual
WMF 9649 WZE40
User Manual
WMF 9649 WZE50
User Manual
WMI 7462 W20
User Manual
WMI 7462 WE20
User Manual
WMT 7310
User Manual
WMT 7310 S
User Manual
WMT 8320
User Manual
WNF 5200
User Manual
WNF 5300 WE
User Manual
WNF 5321 WE
User Manual
WNF 5341 WE
User Manual
WNF 5380 WE
User Manual
WNF 5421 AE
User Manual
WNF 5441 AE
User Manual
WNF 6100 WEN
User Manual
WNF 6180 WEN
User Manual
WNF 6200
User Manual
WNF 6200 WE 20
User Manual
WNF 6200N
User Manual
WNF 6221
User Manual • User Manual • User Manual
WNF 6221 WE 20
User Manual
WNF 6241 WE20
User Manual
WNF 6280
User Manual • User Manual
WNF 6280 WE 20
User Manual
WNF 6300
User Manual
WNF 6300 WE20
User Manual • User Manual
WNF 6321
User Manual
WNF 6321 WE20
User Manual
WNF 6341 A
User Manual
WNF 6341 AE20
User Manual
WNF 6380
User Manual
WNF 6380 WE20
User Manual
WNF 6421 WE20
User Manual
WNF 6421 WEN20
User Manual
WNF 7201 WE20
User Manual
WNF 7221 WE20
User Manual
WNF 7241 WE20
User Manual
WNF 7281 WE20
User Manual
WNF 7300 WE20
User Manual
WNF 7301
User Manual
WNF 7301 WE20
User Manual
WNF 7321 A
User Manual
WNF 7321 AE20
User Manual
WNF 7341 A
User Manual • User Manual
WNF 7341 AE20
User Manual
WNF 7361 A
User Manual
WNF 7361 AE20
User Manual
WNF 7361 SCE20
User Manual
WNF 7402 AE20
User Manual
WNF 7402 WE20
User Manual
WNF 7406
User Manual
WNF 7406 S
User Manual
WNF 7422 AE20
User Manual
WNF 7426 A
User Manual
WNF 7442 AE20
User Manual
WNF 7446 A
User Manual
WNF 7462 AE20
User Manual
WNF 7462 SE20
User Manual
WNF 7466 A
User Manual
WNF 7466 S
User Manual
WNF 8406 A
User Manual
WNF 8427 A30
User Manual
WNF 8427 AE30
User Manual
WNF 8428 A
User Manual
WNF 8441 AE20
User Manual
WNF 8447 AE30
User Manual
WNF 8447 S30
User Manual
WNF 8447 SE30
User Manual
WNF 8467 AE 40
User Manual
WNF 8524 AE20
User Manual
WNF 8543 ACE20
User Manual
WNF 8543 AE20
User Manual
WNF 8543 SE20
User Manual
WNF 9402 C20
User Manual
WNF 9422 ACE20
User Manual
WNF 9422 C20
User Manual
WNF 9422 SC20
User Manual
WNF 9448 AE20
User Manual
WNF63211
User Manual
WT 4180
Specifications
WT 4200
Specifications
WT 4220
Specifications
Manual for WT 4180
Manual for Blomberg | Washer | WT 4180 free download

brand:Blomberg
category:Washer
file name:WashingMachine.pdf
size:2.34 MB
pages:2
Manual for Blomberg | Washer | WT 4180 free download
brand:Blomberg
category:Washer
file name:1971_09_01.pdf
size:8.86 MB
pages:26
Manual for Blomberg | Washer | WT 4180 free download
brand:Blomberg
category:Washer
file name:1977_11_15.pdf
size:3.98 MB
pages:24
Manual for Blomberg | Washer | WT 4180 free download
brand:Blomberg
category:Washer
file name:1971_09_20.pdf
size:5.1 MB
pages:22
Manual for Blomberg | Washer | WT 4180 free download
brand:Blomberg
category:Washer
file name:Tai2_2007.pdf
size:395.02 KB
pages:9
 04:56
04:56
Blomberg Washing Machine Installation
 03:48
03:48
Blomberg Washing Machine Maintenence
 02:26
02:26
Blomberg WNF6221 Review — 6kg Washing Machine
 54:28
54:28
IDOC’s—Intermediate Document(SAP All Modules required concept)—ALE/EDI IDOS full overview
 36:11
36:11
ALE IDOC Part 2 Continued…..Day 23
 24:19
24:19
SAP IDOC SAP EDI,ALE/IDOC online Training Video
 08:49
08:49
How to search an Idoc with Segment Values in SAP WE09 — SAP EDI
 06:29
06:29
CREATE OUTBOUND PARTNER PROFILE AVI
Washing Machine VaskemaskineПральна машина Стиральная машина…
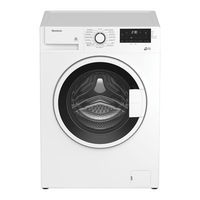
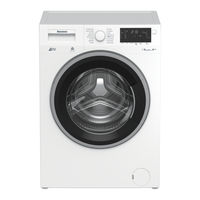
Стиральные машины Blomberg
- Изображение
- Текст
Washing Machine
Vaskemaskine
Пральна машина
Стиральная машина
User‘s Manual
Brugsanvisning
Посібник користувача
Инструкция по эксплуатации
WNF 6441 AE20
WNF 6461 AE20
WNF 6401 WE20

1 important safety instructions, 2 installation, General safety
Intended use, Children’s safety
- Изображение
- Текст
2
EN
1 Important safety instructions
This section contains safety instructions that will
help protect from risk of personal injury or property
damage. Failure to follow these instructions shall
void any warranty.
General safety
• This product should not be used by persons
with physical, sensory or mental disorders or
unlearned or inexperienced people (including
children) unless they are attended by a person
who will be responsible for their safety or who
will instruct them accordingly for use of the
product.
• Never place the product on a carpet-covered
floor; otherwise, lack of airflow beneath the
machine will cause electrical parts to overheat.
This will cause problems with your product.
• Do not operate the product if the power cable
/ plug is damaged. Call the Authorized Service
Agent.
• Have a qualified electrician connect a
16-Ampere fuse to the installation location of
the product.
• If the product has a failure, it should not be
operated unless it is repaired by the Authorized
Service Agent. There is the risk of electric
shock!
• This product is designed to resume operating
in the event of powering on after a power
interruption. If you wish to cancel the
programme, see «Cancelling the programme»
section.
• Connect the product to a grounded outlet
protected by a fuse complying with the values
in the «Technical specifications» table. Do not
neglect to have the grounding installation
made by a qualified electrician. Our company
shall not be liable for any damages that
will arise when the product is used without
grounding in accordance with the local
regulations.
• The water supply and draining hoses must be
securely fastened and remain undamaged.
Otherwise, there is the risk of water leakage.
• Never open the loading door or remove the
filter while there is still water in the drum.
Otherwise, risk of flooding and injury from hot
water will occur.
• Do not force open the locked loading door.
The loading door will be ready to open just a
few minutes after the washing cycle comes to
an end. In case of forcing the loading door to
open, the door and the lock mechanism may
get damaged.
• Unplug the product when not in use.
• Never wash the product by spreading or
pouring water onto it! There is the risk of
electric shock!
• Never touch the plug with wet hands! Never
unplug by pulling on the cable, always pull out
by grabbing the plug.
• Use detergents, softeners and supplements
suitable for automatic washing machines only.
• Follow the instructions on the textile tags and
on the detergent package.
• The product must be unplugged during
installation, maintenance, cleaning and
repairing procedures.
• Always have the installation and repairing
procedures carried out by the Authorized
Service Agent. Manufacturer shall not be
held liable for damages that may arise from
procedures carried out by unauthorized
persons.
Intended use
• This product has been designed for domestic
use. It is not suitable for commercial use and it
must not be used out of its intended use.
• The product must only be used for washing
and rinsing of laundry that are marked
accordingly.
• The manufacturer waives any responsibility
arisen from incorrect usage or transportation.
Children’s safety
• Electrical products are dangerous for the
children. Keep children away from the product
when it is in use. Do not let them to tamper
with the product. Use child lock to prevent
children from intervening with the product.
• Do not forget to close the loading door when
leaving the room where the product is located.
• Store all detergents and additives in a safe
place away from the reach of the children.
2 Installation
Refer to the nearest Authorised Service Agent for
installation of the product. To make the product
ready for use, review the information in the user
manual and make sure that the electricity, tap water
supply and water drainage systems are appropriate
before calling the Authorized Service Agent. If they
are not, call a qualified technician and plumber to
have any necessary arrangements carried out.
C
Preparation of the location and electrical, tap
water and waste water installations at the place
of installation is under customer’s responsibility.
B
Installation and electrical connections of the
product must be carried out by the Authorized
Service Agent. Manufacturer shall not be
held liable for damages that may arise from
procedures carried out by unauthorized
persons.
A
Prior to installation, visually check if the product
has any defects on it. If so, do not have it
installed. Damaged products cause risks for
your safety.
C
Make sure that the water inlet and discharge
hoses as well as the power cable are not
folded, pinched or crushed while pushing
the product into its place after installation or
cleaning procedures.

3
EN
Appropriate installation location
• Place the machine on a rigid floor. Do not
place it on a long pile rug or similar surfaces.
• Total weight of the washing machine and the
dryer -with full load- when they are placed
on top of each other reaches to approx. 180
kilograms. Place the product on a solid and flat
floor that has sufficient load carrying capacity!
• Do not place the product on the power cable.
• Do not install the product at places where
temperature may fall below 0ºC.
• Place the product at least 1 cm away from the
edges of other furniture.
Removing packaging reinforcement
Tilt the machine backwards to remove the
packaging reinforcement. Remove the packaging
reinforcement by pulling the ribbon.
Removing the transportation locks
A
Do not remove the transportation locks before
taking out the packaging reinforcement.
A
Remove the transportation safety bolts before
operating the washing machine, otherwise, the
product will be damaged.
1. Loosen all the bolts with a spanner until they
rotate freely (C).
2. Remove transportation safety bolts by turning
them gently.
3. Attach the plastic covers supplied in the User
Manual bag into the holes on the rear panel.
(P)
C
Keep the transportation safety bolts in a safe
place to reuse when the washing machine
needs to be moved again in the future.
C
Never move the product without the
transportation safety bolts properly fixed in
place!
Connecting water supply
C
The water supply pressure required to run
the product is between 1 to 10 bars (0.1 – 10
MPa). It is necessary to have 10 – 80 liters of
water flowing from the fully open tap in one
minute to have your machine run smoothly.
Attach a pressure reducing valve if water
pressure is higher.
C
If you are going to use the double water-inlet
product as a single (cold) water-inlet unit, you
must install the supplied stopper to the hot
water valve before operating the product.
(Applies for the products supplied with a blind
stopper group.)
C
If you want to use both water inlets of the
product, connect the hot water hose after
removing the stopper and gasket group from
the hot water valve. (Applies for the products
supplied with a blind stopper group.)
A
Models with a single water inlet should not be
connected to the hot water tap. In such a case
the laundry will get damaged or the product
will switch to protection mode and will not
operate.
A
Do not use old or used water inlet hoses on
the new product. It may cause stains on your
laundry.
1. Connect the special hoses supplied with the
product to the water inlets on the product. Red
hose (left) (max. 90 ºC) is for hot water inlet,
blue hose (right) (max. 25 ºC) is for cold water
inlet.
A
Ensure that the cold and hot water
connections are made correctly when installing
the product. Otherwise, your laundry will come
out hot at the end of the washing process and
wear out.
2. Tighten all hose nuts by hand. Never use a
wrench when tightening the nuts.
3. Open the taps completely after making the
hose connection to check for water leaks at
the connection points. If any leaks occur, turn
off the tap and remove the nut. Retighten the
nut carefully after checking the seal. To prevent
water leakages and damages caused by them,
keep the taps closed when the machine is not
in use.
Connecting to the drain
• The end of the drain hose must be directly
connected to the wastewater drain or to the
washbasin.
A
Your house will be flooded if the hose comes
out of its housing during water discharge.
Moreover, there is risk of scalding due to
high washing temperatures! To prevent such
situations and to ensure smooth water intake
and discharge of the machine, fix the end of
the discharge hose tightly so that it cannot
come out.
• The hose should be attached to a height of at
least 40 cm, and 100 cm at most.
• In case the hose is elevated after laying it on
the floor level or close to the ground (less than
40 cm above the ground), water discharge
becomes more difficult and the laundry may

EN come out excessively wet. Therefore, follow the heights…
Страница 4
- Изображение
- Текст
4
EN
come out excessively wet. Therefore, follow
the heights described in the figure.
• To prevent flowing of dirty water back into the
machine and to allow for easy discharge, do
not immerse the hose end into the dirty water
or drive it in the drain more than 15 cm. If it is
too long, cut it short.
• The end of the hose should not be bent, it
should not be stepped on and the hose must
not be pinched between the drain and the
machine.
• If the length of the hose is too short, use it
by adding an original extension hose. Length
of the hose may not be longer than 3.2 m.
To avoid water leak failures, the connection
between the extension hose and the drain
hose of the product must be fitted well with an
appropriate clamp as not to come off and leak.
Adjusting the feet
A
In order to ensure that the product operates
more silent and vibration-free, it must stand
level and balanced on its feet. Balance the
machine by adjusting the feet. Otherwise, the
product may move from its place and cause
crushing and vibration problems.
1. Loosen the lock nuts on the feet by hand.
2. Adjust the feet until the product stands level
and balanced.
3. Tighten all lock nuts again by hand.
A
Do not use any tools to loosen the lock nuts.
Otherwise, they will get damaged.
Electrical connection
Connect the product to a grounded outlet
protected by a fuse complying with the values in
the «Technical specifications» table. Our company
shall not be liable for any damages that will arise
when the product is used without grounding in
accordance with the local regulations.
• Connection must comply with national
regulations.
• Power cable plug must be within easy reach
after installation.
• The voltage and allowed fuse or breaker
protection are specified in the “Technical
specifications” section. If the current value of
the fuse or breaker in the house is less than 16
Amps, have a qualified electrician install a 16
Amp fuse.
• The specified voltage must be equal to your
mains voltage.
• Do not make connections via extension cables
or multi-plugs.
B
Damaged power cables must be replaced by
the Authorized Service Agents.
First use
Before starting to use the product, make sure
that all preparations are made in accordance
with the instructions in sections «Important safety
instructions» and «Installation».
To prepare the product for washing laundry, perform
first operation in Drum Cleaning programme. If
your machine is not featured with Drum Cleaning
programme, use Cottons-90 programme and
select Additional Water or Extra Rinse auxiliary
functions as well. Before starting the programme,
put max. 100 g of powder anti-limescale into the
main wash detergent compartment (compartment
nr. II). If the anti-limescale is in tablet form, put only
one tablet into compartment nr. II. Dry the inside
of the bellow with a clean piece of cloth after the
programme has come to an end.
C
Use an anti-limescale suitable for the washing
machines.
C
Some water might have remained in the
product due to the quality control processes

5
EN
in the production. It is not harmful for the
product.
Disposing of packaging material
Packaging materials are dangerous to children.
Keep packaging materials in a safe place away
from reach of the children.
Packaging materials of the product are
manufactured from recyclable materials. Dispose of
them properly and sort in accordance with recycled
waste instructions. Do not dispose of them with
normal domestic waste.
Transportation of the product
Unplug the product before transporting it. Remove
water drain and water supply connections. Drain
the remaining water in the product completely;
see, «Draining remaining water and cleaning the
pump filter». Install transportation safety bolts
in the reverse order of removal procedure; see,
«Removing the transportation locks».
C
Never move the product without the
transportation safety bolts properly fixed in
place!
Disposing of the old product
Dispose of the old product in an environmentally
friendly manner.
Refer to your local dealer or solid waste collection
centre in your area to learn how to dispose of your
product.
For children’s safety, cut the power cable and break
the locking mechanism of the loading door so
that it will be nonfunctional before disposing of the
product.
Preparing laundry for washing
• Laundry items with metal attachments such as,
underwired bras, belt buckles or metal buttons
will damage the machine. Remove the metal
pieces or wash the clothes by putting them in a
laundry bag or pillow case.
• Take out all substances in the pockets such as
coins, pens and paper clips, and turn pockets
inside out and brush. Such objects may
damage the product or cause noise problem.
• Put small size clothes such as infant’s socks
and nylon stockings in a laundry bag or pillow
case.
• Place curtains in without compressing them.
Remove curtain attachment items.
• Fasten zippers, sew loose buttons and mend
rips and tears.
• Wash “machine washable” or “hand washable”
labeled products only with an appropriate
programme.
• Do not wash colours and whites together. New,
dark coloured cottons release a lot of dye.
Wash them separately.
• Tough stains must be treated properly before
washing. If unsure, check with a dry cleaner.
• Use only dyes/colour changers and limescale
removers suitable for machine wash. Always
follow the instructions on the package.
• Wash trousers and delicate laundry turned
inside out.
• Keep laundry items made of Angora wool in
the freezer for a few hours before washing. This
will reduce pilling.
• Laundry that are subjected to materials such
as flour, lime dust, milk powder, etc. intensely
must be shaken off before placing into the
machine. Such dusts and powders on the
laundry may build up on the inner parts of the
machine in time and can cause damage.
Correct load capacity
The maximum load capacity depends on the type
of laundry, the degree of soiling and the washing
programme desired.
The machine automatically adjusts the amount of
water according to the weight of the loaded laundry.
A
Follow the information in the “Programme
and consumption table”. When overloaded,
machine’s washing performance will drop.
Moreover, noise and vibration problems may
occur.
Loading the laundry
• Open the loading door.
• Place laundry items loosely into the machine.
• Push the loading door to close until you hear a
locking sound. Ensure that no items are caught
in the door.
C
The loading door is locked while a programme
is running. The door can only be opened a
while after the programme comes to an end.
A
In case of misplacing the laundry, noise and
vibration problems may occur in the machine.
3 Preparation
Things to be done for energy saving
Following information will help you use the product
in an ecological and energy-efficient manner.
• Operate the product in the highest capacity
allowed by the programme you have selected,
but do not overload; see, «Programme and
consumption table».
• Always follow the instructions on the detergent
packaging.
• Wash slightly soiled laundry at low
temperatures.
• Use faster programmes for small quantities of
lightly soiled laundry.
• Do not use prewash and high temperatures for
laundry that is not heavily soiled or stained.
• If you plan to dry your laundry in a dryer, select
the highest spin speed recommended during
washing process.
• Do not use detergent in excess of the amount
recommended on the detergent package.
Sorting the laundry
• Sort laundry according to type of fabric, colour,
and degree of soiling and allowable water
temperature.
• Always obey the instructions given on the
garment tags.

6
EN
Using detergent and softener
Detergent Drawer
The detergent drawer is composed of three
compartments:
— (I) for prewash
— (II) for main wash
– (III) for softener
– (*) in addition, there is siphon piece in the softener
compartment.
1
2
3
1
2
3
C
The detergent dispenser may be in two
different types according to the model of your
machine as seen above.
Detergent, softener and other cleaning
agents
• Add detergent and softener before starting the
washing programme.
• Never open the detergent drawer while the
washing programme is running!
• When using a programme without prewash,
do not put any detergent into the prewash
compartment (compartment nr. I).
• In a programme with prewash, do not put
liquid detergent into the prewash compartment
(compartment nr. I).
• Do not select a programme with prewash if you
are using a detergent bag or dispensing ball.
Place the detergent bag or the dispensing ball
directly among the laundry in the machine.
• If you are using liquid detergent, do not forget
to place the liquid detergent cup into the main
wash compartment (compartment nr. II).
Choosing the detergent type
The type of detergent to be used depends on the
type and colour of the fabric.
• Use different detergents for coloured and white
laundry.
• Wash your delicate clothes only with special
detergents (liquid detergent, wool shampoo,
etc.) used solely for delicate clothes.
• When washing dark coloured clothes and
quilts, it is recommended to use liquid
detergent.
• Wash woolens with special detergent made
specifically for woolens.
A
Use only detergents manufactured specifically
for washing machines.
A
Do not use soap powder.
Adjusting detergent amount
The amount of washing detergent to be used
depends on the amount of laundry, the degree
of soiling and water hardness. Read the
manufacturer’s instructions on the detergent
package carefully and follow the dosage values.
• Do not use amounts exceeding the dosage
quantities recommended on the detergent
package to avoid problems of excessive
foam, poor rinsing, financial savings and finally,
environmental protection.
• Use lesser detergent for small amounts or
lightly soiled clothes.
• Use concentrated detergents in the
recommended dosage.
Using softeners
Pour the softener into the softener compartment of
the detergent drawer.
• Use the dosages recommended on the
package.
• Do not exceed the (>max<) level marking in the
softener compartment.
• If the softener has lost its fluidity, dilute it with
water before putting it in the detergent drawer.
Using liquid detergents
If the product contains a liquid detergent cup:
• Make sure that you have placed the liquid
detergent cup in compartment nr. «II».
• Use the detergent manufacturer’s measuring
cup and follow the instructions on the package.
• Use the dosages recommended on the
package.
• If the liquid detergent has lost its fluidity, dilute it
with water before putting in the detergent cup.
If the product does not contain a liquid
detergent cup:
• Do not use liquid detergent for the prewash in a
programme with prewash.
• Use the detergent manufacturer’s measuring
cup and follow the instructions on the package.
• Liquid detergent stains your clothes when used
with Delayed Start function. If you are going
to use the Delayed Start function, do not use
liquid detergent.
Using gel and tablet detergent
When using tablet, gel, etc. detergents, read
the manufacturer’s instructions on the detergent
package carefully and follow the dosage values. If
there is not any instruction on the package, apply
the following.
• If the gel detergent thickness is fluidal and
your machine does not contain a special liquid
detergent cup, put the gel detergent into the
main wash detergent compartment during first
water intake. If your machine contains a liquid
detergent cup, fill the detergent into this cup
before starting the programme.

If the gel detergent thickness is not fluidal or in the sh…
Страница 7
- Изображение
- Текст
7
EN
• If the gel detergent thickness is not fluidal or in
the shape of capsule liquid tablet, put it directly
into the drum before washing.
• Put tablet detergents into the main wash
compartment (compartment nr. II) or directly
into the drum before washing.
C
Tablet detergents may leave residues in the
detergent compartment. If you encounter such
a case, place the tablet detergent between the
laundry, close to the lower part of the drum in
future washings.
C
Use the tablet or gel detergent without
selecting the prewash function.
Using starch
• Add liquid starch, powder starch or the dyestuff
into the softener compartment as instructed on
the package.
• Do not use softener and starch together in a
washing cycle.
• Wipe the inside of the machine with a damp
and clean cloth after using starch.
Using bleaches
• Select a programme with prewash and add
the bleaching agent at the beginning of the
prewash. Do not put detergent in the prewash
compartment. As an alternative application,
select a programme with extra rinse and add
the bleaching agent while the machine is taking
water from the detergent compartment during
first rinsing step.
• Do not use bleaching agent and detergent by
mixing them.
• Use just a little amount (approx. 50 ml) of
bleaching agent and rinse the clothes very
well as it causes skin irritation. Do not pour the
bleaching agent onto the clothes and do not
use it for coloured clothes.
• When using oxygen based bleaches,
follow the instructions on the package and
select a programme that washes at a lower
temperature.
• Oxygen based bleaches can be used together
with detergents; however, if its thickness is
not the same with the detergent, put the
detergent first into the compartment nr. «II»
in the detergent drawer and wait until the
detergent flows while the machine is taking in
water. Add the bleaching agent from the same
compartment while the machine is still taking in
water.
Using limescale remover
• When required, use limescale removers
manufactured specifically for washing
machines only.
• Always follow instructions on the package.

8
EN
Tips for efficient washing
Clothes
Light colours and
whites
Colors
Dark colors
Delicates/
Woolens/Silks
(Recommended
temperature range
based on soiling level:
40-90C)
(Recommended
temperature range based
on soiling level: cold-40C)
(Recommended
temperature range
based on soiling
level: cold-40C)
(Recommended
temperature range
based on soiling
level: cold-30C)
S
oi
lin
g
Le
ve
l
Heavily Soiled
(difficult stains
such as grass,
coffee, fruits and
blood.)
It may be necessary
to pre-treat the
stains of perform
prewash. Powder
and liquid detergents
recommended
for whites can be
used at dosages
recommended for
heavily soiled clothes.
It is recommended to
use powder detergents
to clean clay and soil
stains and the stains
that are sensitive to
bleaches.
Powder and
liquid detergents
recommended for
colours can be used at
dosages recommended
for heavily soiled clothes.
It is recommended to use
powder detergents to
clean clay and soil stains
and the stains that are
sensitive to bleaches.
Use detergents without
bleach.
Liquid detergents
suitable for
colours and dark
colours can be
used at dosages
recommended
for heavily soiled
clothes.
Prefer liquid
detergents
produced for
delicate clothes.
Woollen and silk
clothes must
be washed with
special woollen
detergents.
Normally Soiled
(For example,
stains caused by
body on collars
and cuffs)
Powder and
liquid detergents
recommended for
whites can be used at
dosages recommended
for normally soiled
clothes.
Powder and
liquid detergents
recommended for
colours can be used at
dosages recommended
for normally soiled
clothes. Use detergents
without bleach.
Liquid detergents
suitable for
colours and dark
colours can be
used at dosages
recommended
for normally soiled
clothes.
Prefer liquid
detergents
produced for
delicate clothes.
Woollen and silk
clothes must
be washed with
special woollen
detergents.
Lightly Soiled
(No visible stains
exist.)
Powder and
liquid detergents
recommended for
whites can be used at
dosages recommended
for lightly soiled clothes.
Powder and
liquid detergents
recommended for
colours can be used at
dosages recommended
for lightly soiled clothes.
Use detergents without
bleach.
Liquid detergents
suitable for
colours and dark
colours can be
used at dosages
recommended
for lightly soiled
clothes.
Prefer liquid
detergents
produced for
delicate clothes.
Woollen and silk
clothes must
be washed with
special woollen
detergents.

4 operating the product, Control panel, Display symbols
Preparing the machine, Programme selection
- Изображение
- Текст
9
EN
4 Operating the product
Control panel
1 —
Spin Speed Adjustment button
2 —
Display
3 —
Temperature Adjustment button
4 —
Programme Selection knob
1
6
7
8
2
3
4
5
5 —
On / Off button
6 —
Delayed Start buttons (+ / -)
7 —
Auxiliary Function buttons
8 —
Start / Pause / Cancel button
Display symbols
F1
F2
F3
F4
a
— Spin Speed indicator
b
— Temperature indicator
c
— Spin symbol
d
— Temperature symbol
e
— Remaining Time and Delayed Start
indicator
f
— Programme Indicator symbols (Prewash /
Main Wash / Rinse / Softener / Spin)
g
— Economy symbol
h
— Delayed Start symbol
i
— Door Locked symbol
j
— Start symbol
k
— Pause symbol
l
— Auxiliary Function symbols
m —
No Water symbol
Preparing the machine
Make sure that the hoses are connected tightly.
Plug in your machine. Turn the tap on completely.
Place the laundry in the machine. Add detergent
and fabric softener.
Programme selection
1. Select the programme suitable for the type,
quantity and soiling degree of the laundry
in accordance with the «Programme and
consumption table» and the temperature table
below.
90˚C
Heavily soiled white cottons and linens.
(coffee table covers, tableclothes,
towels, bed sheets, etc.)
60˚C
Normally soiled, coloured, fade proof
cottons or synthetic clothes (shirt,
nightgown, pajamas, etc.) and lightly
soiled white linens (underwear, etc.)
40˚C-
30˚C-
Cold
Blended laundry including delicate
textile (veil curtains, etc.), synthetics and
woolens.
2. Select the desired programme with the
Programme Selection button.
C
Programmes are limited with the highest spin
speed appropriate for that particular type of
fabric.
C
When selecting a programme, always consider
the type of fabric, colour, degree of soiling and

EN permissible water temperature. C Always select the lowe…
Страница 10
- Изображение
- Текст
10
EN
permissible water temperature.
C
Always select the lowest required temperature.
Higher temperature means higher power
consumption.
C
For further programme details, see
«Programme and consumption table».
Main programmes
Depending on the type of fabric, use the following
main programmes.
• Cottons
Use this programme for your cotton laundry (such
as bed sheets, duvet and pillowcase sets, towels,
bathrobes, underwear, etc.). Your laundry will be
washed with vigorous washing action for a longer
washing cycle.
• Synthetics
Use this programme to wash your synthetic
clothes (shirts, blouses, synthetic/cotton blends,
etc.). It washes with a gentle action and has a
shorter washing cycle compared to the Cottons
programme.
For curtains and tulle, use the Synthetic 40˚C
programme with prewash and anti-creasing
functions selected. As their meshed texture causes
excessive foaming, wash the veils/tulle by putting
little amount of detergent into the main wash
compartment. Do not put detergent in the prewash
compartment.
• Woollens
Use this programme to wash your woolen clothes.
Select the appropriate temperature complying with
the tags of your clothes. Use appropriate detergents
for woolens.
Additional programmes
For special cases, additional programmes are
available in the machine.
C
Additional programmes may differ according to
the model of the machine.
• Cotton Economic
You may wash your normally soiled durable cotton
and linen laundry in this programme with the highest
energy and water saving compared to all other
wash programmes suitable for cottons. Actual
water temperature may differ from the declared
cycle temperature. Programme duration may
automatically be shortened during later stages of
the programme if you wash less amount (e.g. ½
capacity or less) of laundry. In this case energy and
water consumption will be further decreased giving
you the opportunity for a more economical wash.
This feature is available for certain models having
remaining time display.
• Hygiene
Use this programme to wash baby laundry, and the
laundry that belongs to allergic persons. Longer
heating time and an additional rinsing step provide a
higher level of hygiene.
• Hand wash
Use this programme to wash your woolen/delicate
clothes that bear “not machine- washable” tags and
for which hand wash is recommended. It washes
laundry with a very gentle washing action to not to
damage clothes.
• Mini
Use this programme to wash your lightly soiled
cotton clothes in a short time.
• Mini 14
Use this programme to wash your little amount of
lightly soiled cotton clothes in a short time.
• Darkcare
Use this programme to wash your dark coloured
laundry or the laundry that you do not want it get
faded. Washing is performed with little mechanic
action and at low temperatures. It is recommended
to use liquid detergent or woolen shampoo for dark
coloured laundry.
• Intensive
You can wash your durable and heavily soiled
clothes on this program. In this program, your
clothes will be washed for a longer time and
an extra rinse cycle will be made compared to
the “Cottons” program. You can use it for your
heavily soiled clothes that you wish to be rinsed
gently.
• Lingerie
Use this programme to wash delicates such as
underwears. If there is little amount of laundry, use a
laundry net.
C
Enclasp and button the clothes, and zip up.
Washing is made at low temperatures and with
less mechanical movements.
C
Better rinsing results are obtained thanks to the
additional rinsing.
• Freshen Up
Use this programme to remove the odour on the
laundry that are worn only for once and do not
contain any stains or dirt.
• Eco Clean
Use this programme, which is much more sensitive
to environment and natural resources, to wash your
lightly soiled and unstained cotton laundry (max. 3.5
kg) in a short time and economically.
C
It is recommended to use liquid detergent or
gel washing detergent.
• Self Clean
Use this programme regularly (once in every 1-2
months) to clean the drum and provide the required
hygiene. Run the programme without any laundry
in the machine. To obtain better results, put powder
limescale remover for washing machines into the
detergent compartment II. When the programme is
over, leave the loading door ajar so that the inside of
the machine gets dry.
C
This is not a washing programme. It is a
maintenance programme.
C
Do not run the programme when there is
something in the machine. If you try to do so,
the machine detects that there is a load inside
and aborts the programme.
Special programmes
For specific applications, select any of the following
programmes.
