Дополнительная информация
-
Руководство пользователя PDF
файл,
7.0 MB
15 апреля 2022 г. -
Руководство пользователя PDF
файл,
7.0 MB
15 апреля 2022 г. -
Руководство пользователя PDF
файл,
1.5 MB
16 апреля 2022 г. -
Руководство пользователя PDF
файл,
1.5 MB
16 апреля 2022 г. -
Руководство пользователя PDF
файл,
1.5 MB
16 апреля 2022 г. -
Руководство пользователя PDF
файл,
1.5 MB
16 апреля 2022 г. -
Руководство пользователя PDF
файл,
1.5 MB
16 апреля 2022 г. -
Руководство пользователя PDF
файл,
1.5 MB
16 апреля 2022 г. -
Руководство пользователя PDF
файл,
1.5 MB
16 апреля 2022 г. -
Руководство пользователя PDF
файл,
1.5 MB
16 апреля 2022 г. -
Руководство пользователя PDF
файл,
1.5 MB
16 апреля 2022 г. -
Руководство пользователя PDF
файл,
1.5 MB
16 апреля 2022 г. -
Руководство пользователя PDF
файл,
1.5 MB
16 апреля 2022 г. -
Руководство пользователя PDF
файл,
1.5 MB
16 апреля 2022 г. -
Руководство пользователя PDF
файл,
1.5 MB
16 апреля 2022 г. -
Руководство пользователя PDF
файл,
1.5 MB
16 апреля 2022 г. -
Руководство пользователя PDF
файл,
1.5 MB
16 апреля 2022 г. -
Руководство пользователя PDF
файл,
1.5 MB
16 апреля 2022 г. -
Руководство пользователя PDF
файл,
1.5 MB
16 апреля 2022 г. -
Руководство пользователя PDF
файл,
1.5 MB
16 апреля 2022 г. -
Руководство пользователя PDF
файл,
1.5 MB
16 апреля 2022 г. -
Руководство пользователя PDF
файл,
1.5 MB
16 апреля 2022 г. -
Руководство пользователя PDF
файл,
1.5 MB
16 апреля 2022 г. -
Руководство пользователя PDF
файл,
1.5 MB
16 апреля 2022 г. -
Руководство пользователя PDF
файл,
1.5 MB
16 апреля 2022 г. -
Руководство пользователя PDF
файл,
1.5 MB
16 апреля 2022 г. -
Руководство пользователя PDF
файл,
1.5 MB
16 апреля 2022 г. -
Руководство пользователя PDF
файл,
1.5 MB
16 апреля 2022 г. -
Руководство пользователя PDF
файл,
1.5 MB
16 апреля 2022 г. -
Руководство пользователя PDF
файл,
1.5 MB
16 апреля 2022 г. -
Руководство пользователя PDF
файл,
1.5 MB
16 апреля 2022 г. -
Руководство пользователя PDF
файл,
1.5 MB
16 апреля 2022 г. -
Руководство пользователя PDF
файл,
1.5 MB
16 апреля 2022 г. -
Руководство пользователя PDF
файл,
1.5 MB
16 апреля 2022 г. -
Руководство пользователя PDF
файл,
1.5 MB
16 апреля 2022 г. -
Руководство пользователя PDF
файл,
1.5 MB
16 апреля 2022 г. -
Руководство пользователя PDF
файл,
1.5 MB
16 апреля 2022 г. -
Руководство пользователя PDF
файл,
1.5 MB
16 апреля 2022 г. -
Руководство пользователя PDF
файл,
1.5 MB
16 апреля 2022 г. -
Руководство пользователя PDF
файл,
1.5 MB
16 апреля 2022 г. -
Руководство пользователя PDF
файл,
1.5 MB
16 апреля 2022 г. -
Руководство пользователя PDF
файл,
1.5 MB
16 апреля 2022 г. -
Руководство пользователя PDF
файл,
1.5 MB
16 апреля 2022 г. -
Руководство пользователя PDF
файл,
1.5 MB
16 апреля 2022 г. -
Руководство пользователя PDF
файл,
1.5 MB
16 апреля 2022 г. -
Руководство пользователя PDF
файл,
1.5 MB
16 апреля 2022 г. -
Руководство пользователя PDF
файл,
1.5 MB
16 апреля 2022 г. -
Руководство с важными сведениями PDF
файл,
195.0 kB
15 апреля 2022 г. -
Руководство с важными сведениями PDF
файл,
195.0 kB
15 апреля 2022 г. -
Руководство с важными сведениями PDF
файл,
195.0 kB
15 апреля 2022 г. -
UK Declaration of conformity ZIP
файл,
194.8 kB
11 августа 2023 г. -
Локализованная торговая брошюра PDF
файл,
733.0 kB
29 июля 2023 г.
Зарегистрируйте продукт и получите
- Электронную гарантию
- Информацию о скидках и акциях
- Простой доступ к поддержке продуктов
Обращение в компанию Philips
Мы всегда рады помочь вам
Предлагаемые продукты
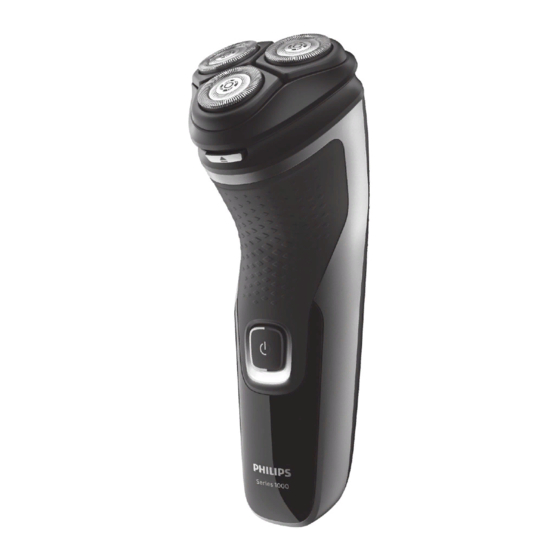
Посмотреть инструкция для Philips Shaver 1000 S1110 бесплатно. Руководство относится к категории бритвы, 7 человек(а) дали ему среднюю оценку 8.7. Руководство доступно на следующих языках: русский, английский. У вас есть вопрос о Philips Shaver 1000 S1110 или вам нужна помощь? Задайте свой вопрос здесь
Не можете найти ответ на свой вопрос в руководстве? Вы можете найти ответ на свой вопрос ниже, в разделе часто задаваемых вопросов о Philips Shaver 1000 S1110.
Инструкция Philips Shaver 1000 S1110 доступно в русский?
Да, руководствоPhilips Shaver 1000 S1110 доступно врусский .
Не нашли свой вопрос? Задайте свой вопрос здесь
- Manuals
- Brands
- Philips Manuals
- Electric Shaver
- S1000
- Manual
-
Contents
-
Table of Contents
-
Bookmarks
Quick Links
Related Manuals for Philips S1000
Summary of Contents for Philips S1000
-
Page 1
S1000… -
Page 4
empty page before TOC… -
Page 5
English 6 Français (Canada) 22… -
Page 6: Table Of Contents
Recycling__________________________________________________________ Removing the rechargeable shaver battery_____________________ Warranty and support____________________________________________ Introduction Congratulations on your purchase and welcome to Philips! To fully benefit from the support that Philips offers, register your product at www.philips.com/welcome. General description (Fig. 1) Protective cap 2 Shaving unit…
-
Page 7: Important Safety Information
English Important safety information Read this important information carefully before you use the appliance and save it for future reference. Danger — Keep the supply unit dry. Warning — To charge the battery, only use the detachable supply unit (HQ8505) provided with the appliance.
-
Page 8
— Do not use the supply unit in or near wall sockets that contain an electric air freshener to prevent irreparable damage to the supply unit. Electromagnetic fields (EMF) This Philips appliance complies with all applicable standards and regulations regarding exposure to electromagnetic fields. -
Page 9: Charging
English General — This shaver can be safely cleaned under the tap. — The supply unit is suitable for mains voltages ranging from 100 to 240 volts. — The supply unit transforms 100-240 volts to a safe low voltage of less than 24 volts. Charging Note: You can also use the shaver while it is plugged-in and charging.
-
Page 10: Charging Indications
English 3 After charging, remove the supply unit from the wall socket and pull the small plug out of the appliance. Charging indications Battery fully charged When the battery is fully charged, the charging light lights up white continuously. Note: After approx. 30 minutes, the charging light goes out to save energy.
-
Page 11: Using The Appliance
— Your skin may need 2 or 3 weeks to get accustomed to the Philips shaving system. Switching the appliance on and off 1 To switch on the appliance, press the on/off button once.
-
Page 12: Trimming
English 2 Move the shaving heads over your skin in circular movements to catch all hairs growing in different directions. 3 Stretch your skin with your free hand so the blades can lift and cut hair. Gently press the shaver onto you skin so the floating heads can follow the contours of your face.
-
Page 13: Cleaning And Maintenance
English 5 Close the pop-up trimmer (‘click’). Cleaning and maintenance Cleaning the shaver Clean the shaver after every shave for optimal shaving performance. Caution: While rinsing shaving heads, water may drip out of the base of shaver. This is a normal occurrence.
-
Page 14
English Never dry the shaving unit with a towel or tissue, as this may damage the shaving heads. 5 Carefully shake off excess water and let the shaver air dry. 6 Close the shaving unit. Cleaning the pop-up trimmer Clean the pop-up trimmer after each use. Never dry the trimmer teeth with a towel or tissue, as this may damage the trimmer teeth. -
Page 15
English 2 Press the release button to open the shaving unit. Pull the shaving unit off the appliance. 3 Turn the lock anticlockwise (1) and remove the retaining frame (2). 4 Remove and clean one shaving head at a time. Each shaving head consists of a cutter and a guard. -
Page 16: Replacement
Replace damaged shaving heads immediately. Always replace the shaving heads with original Philips shaving heads (see ‘Ordering accessories’). 1 Switch off the appliance and make sure it is disconnected from the wall socket.
-
Page 17
English 2 Press the shaving unit release button to open the shaving unit. Pull the shaving unit off the appliance. 3 Turn the lock anticlockwise (1) and remove the retaining frame (2). Place it aside in a safe place. 4 Remove the shaving heads from the shaving unit. -
Page 18: Storage
Note: Always let the shaver dry completely before storing. Ordering accessories To buy accessories or spare parts, visit www.philips.com/parts-and-accessories or go to your Philips dealer. You can also contact the Philips Consumer Care Center in your country (see the international warranty leaflet for contact details). Recycling…
-
Page 19: Removing The Rechargeable Shaver Battery
Please take your product to an official collection point or a Philips service center to have a professional remove the rechargeable battery. — Follow your country’s rules for the separate collection of electrical and electronic products and rechargeable batteries.
-
Page 20
English 2 Remove the screw in the back of the shaver. 3 Remove the back panel by using a flathead screwdriver. 2× 4 Remove two screws and then remove the hair chamber from the shaver. 5 Lift out the front panel. -
Page 21: Warranty And Support
2× 9 Remove the two rechargeable batteries. Warranty and support If you need information or support, please visit www.philips.com/support or read the international warranty leaflet. Warranty restrictions The shaving heads (cutters and guards) are not covered by the terms of the international warranty…
-
Page 22: Introduction
Pour retirer la pile rechargeable du rasoir_______________________ Garantie et support_______________________________________________ Introduction Félicitations pour votre achat et bienvenue dans l’univers Philips! Pour profiter pleinement des avantages de l’assistance Philips, enregistrez votre produit à l’adresse www.philips.com/welcome. Description générale (fig. 1) Couvercle de protection 2 Unité…
-
Page 23: Renseignements Importants Sur La Sécurité
Français (Canada) Renseignements importants sur la sécurité Lisez attentivement ces renseignements importants avant d’utiliser l’appareil et conservez- les pour un usage ultérieur. Danger — Gardez le bloc d’alimentation au sec. Avertissement — Pour charger la batterie, utilisez uniquement le bloc d’alimentation détachable (HQ8505) fourni avec l’appareil.
-
Page 24
électrique afin d’éviter des dommages irréparables au bloc d’alimentation. Champs électromagnétiques (CEM) Cet Philips appareil est conforme à toutes les normes et à tous les règlements applicables… -
Page 25: Charge En Cours
Français (Canada) relatifs à l’exposition aux champs électromagnétiques. Général — Ce rasoir peut être nettoyé à l’eau courante en tout sécurité. — L’appareil est conçu pour une tension secteur comprise entre 100 V et 240 V. — Le bloc d’alimentation transforme la tension de 100-240 volts en tension plus faible et plus sécuritaire de 24 volts.
-
Page 26: Indicateur De Charge
Français (Canada) Chargement à l’aide du bloc d’alimentation 1 Insérez la petite fiche dans l’appareil. 2 Branchez l’adaptateur sur une prise murale. — Le voyant de charge indique l’état de charge de l’appareil. 3 Une fois la charge terminée, débranchez le bloc d’alimentation de la prise murale, puis retirez la petite fiche de l’appareil.
-
Page 27: Utilisation De L’appareil
— Votre peau pourrait avoir besoin de 2 ou 3 semaines pour s’habituer au système de rasage Philips. Mise en marche et arrêt de l’appareil 1 Pour allumer l’appareil, appuyez sur le bouton marche/arrêt.
-
Page 28: Tonte
Français (Canada) 2 Faites glisser les têtes de rasage sur votre visage en effectuant des mouvements circulaires afin de couper les poils poussant dans différentes directions. 3 Tendez votre peau avec votre main libre afin que les lames puissent relever et couper les poils.
-
Page 29: Nettoyage Et Entretien
Français (Canada) 1 Ouvrez la tondeuse en poussant la glissière de libération vers le bas. 2 Allumez l’appareil. 3 Maintenez la tondeuse perpendiculairement à la peau et déplacez l’appareil vers le bas tout en exerçant une légère pression. 4 Éteignez et nettoyez la tondeuse après chaque utilisation.
-
Page 30
Français (Canada) 2 Appuyez sur le bouton de libération pour ouvrir l’unité de rasage. 3 Rincez l’unité de rasage et le compartiment à poils à l’eau tiède. 4 Rincez l’extérieur de l’unité de rasage à l’eau tiède. Ne séchez jamais l’unité de rasage à l’aide d’une serviette au risque d’endommager les têtes de rasage. -
Page 31
Français (Canada) 3 Allumez l’appareil et rincez la tondeuse rétractable à l’eau tiède. 4 Après le nettoyage, éteignez l’appareil. 5 Secouez doucement l’appareil pour éliminer l’eau restante et laissez la tondeuse rétractable sécher à l’air libre. 6 Fermez la tondeuse rétractable (vous entendrez un déclic). -
Page 32
Français (Canada) rasage, plusieurs semaines peuvent être nécessaires avant de retrouver un rasage optimal. 5. Retirez la lame du dresse-poils et nettoyez les deux pièces à l’eau courante. 6. Replacez la lame dans la grille. 7. Remettez les têtes de rasage dans l’unité de rasage. -
Page 33: Remplacement
Remplacez toujours les têtes de rasoir par des têtes (voir ‘Commande d’accessoires’) de marque Philips. 1 Éteignez l’appareil et assurez-vous qu’il est débranché de la prise murale. 2 Appuyez sur le bouton de libération pour ouvrir l’unité…
-
Page 34
Français (Canada) 4 Retirez les têtes de rasage de l’unité de rasage. Mettez immédiatement au rebut les têtes de rasage utilisées pour éviter de les mélanger avec les nouvelles têtes de rasage. 5 Insérez les nouvelles têtes de rasoir dans l’unité de rasage. -
Page 35: Rangement
Visitez le site www.philips.com/parts-and- accessories ou rendez-vous chez votre détaillant Philips pour acheter des accessoires ou pièces détachées. Vous pouvez également communiquer avec le service à la clientèle Philips de votre pays (consultez le dépliant de garantie internationale pour obtenir les coordonnées). Recyclage — Lorsqu’il ne fonctionnera plus, ne jetez pas le…
-
Page 36: Pour Retirer La Pile Rechargeable Du Rasoir
Français (Canada) Pour retirer la pile rechargeable du rasoir Ne retirez les piles rechargeables que lorsque vous mettez l’appareil au rebut. Avant de retirer les piles, vérifiez que l’appareil est débranché de la prise de courant et que les piles sont complètement déchargées.
-
Page 37
Français (Canada) 2× 4 Retirez deux vis, puis retirez le compartiment à poils. 5 Soulevez la plaque avant. 6 Pliez les huit fermoirs de côté à l’aide d’un tournevis à tête plate et retirez le couvercle du bloc d’alimentation. 8× 7 Soulevez le bloc d’alimentation. -
Page 38: Garantie Et Support
9 Retirez les deux piles rechargeables. Garantie et support Si vous avez besoin de plus d’information ou de support visitez www.philips.com/support ou liser la brochure de Garantie international. Restrictions de garantie Sujettes à l’usure, les têtes de rasoir (lames et grilles) ne sont pas couvertes par la garantie internationale.
-
Page 39
Empty page before back cover… -
Page 40
© 2019 Koninklijke Philips N.V. All rights reserved Tous droits réservés 3000.041.7423.1 (15/7/2019) >75 % recycled paper >75 % papier recyclé…
Требуется руководство для вашей Philips S1223 AquaTouch Электробритва? Ниже вы можете просмотреть и загрузить бесплатно руководство в формате PDF. Кроме того, приведены часто задаваемые вопросы, рейтинг изделия и отзывы пользователей, что позволит оптимально использовать ваше изделие. Если это не то руководство, которое вы искали, – свяжитесь с нами.
Ваше устройство неисправно, и в руководстве отсутствует решение? Перейдите в Repair Café для получения бесплатных ремонтных услуг.
Руководство

Рейтинг
Сообщите нам, что вы думаете о Philips S1223 AquaTouch Электробритва, оставив оценку продукта. Хотите поделиться вашими впечатлениями от данного изделия или задать вопрос? Вы можете оставить комментарий в нижней части страницы.
Довольны ли вы данным изделием Philips?
Да Нет
2 голоса
Часто задаваемые вопросы
Наша служба поддержки выполняет поиск полезной информации по изделиям и отвечает на часто задаваемые вопросы. Если вы заметили неточность в наших часто задаваемых вопросах, сообщите нам об этом с помощью нашей контактной формы.
Как часто следует чистить бритвенные головки бритвы Philips? Проверенный
Philips рекомендует делать это каждые два месяца. Регулярная чистка продлит срок службы устройства.
Это было полезно (238)
На сколько хватит бритвенной головки до ее замены? Проверенный
Срок службы бритвенной головки составляет от 6 месяцев до 2 лет, в зависимости от того, как часто она используется. Для достижения оптимального результата рекомендуется заменять бритвенную головку один раз в год.
Это было полезно (191)
В каком направлении мне бриться? Проверенный
В большинстве случаев рекомендуется бриться по направлению роста волос. Это снижает риск раздражения кожи и вросших волос.
Это было полезно (119)
В чем разница между вибрирующей и вращающейся головками бритвы? Проверенный
Выбор зависит прежде всего от личных потребностей и предпочтений каждого, однако в целом можно сказать, что лезвия вибрирующей головки двигаются быстрее, а значит, результат достигается быстрее. Бритвой с вращающейся головкой легче достать до некоторых частей лица.
Это было полезно (118)
Где я могу найти модель и / или серийный номер моей бритвы Philips? Проверенный
Номер модели можно найти на задней панели устройства. Иногда серийный номер также находится на задней панели устройства, в противном случае его можно найти под машинкой для стрижки или в камере для волос.
Это было полезно (117)
перейти к содержанию

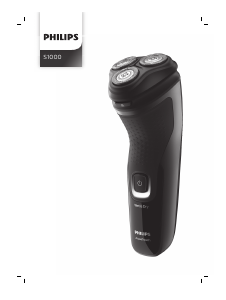
Главная » Philips » Руководство пользователя электробритвы PHILIPS ![]()

Электробритва
S1000
Руководство пользователя![]()

Поставляемые аксессуары могут отличаться для разных продуктов. На коробке показаны аксессуары, входящие в комплект поставки вашего прибора.

www.philips.com/support
www.philips.com/register![]()


© 2019 Koninklijke Philips NV
Все права защищены
3000.040.8714.1 (16) \

![]() > 75% переработанной бумаги
> 75% переработанной бумаги
> 75% переработанного папье
Документы / Ресурсы
Рекомендации
Похожие сообщения


