Инструкции и Руководства для CAB SQUIX.
Мы нашли 76
инструкции доступные для бесплатного скачивания:
Инструкция по эксплуатации, Руководство пользователя

CAB SQUIX 4 MT Инструкция по эксплуатации
Бренд:
CAB
Размер:
3 MB
Страниц:
36
Язык(и):
Русский
Оглавление
-
4
Указания
-
4
Использование по назначению
-
5
Указания по технике безопасности
-
5
Окружающая среда
-
6
Обзор устройства
-
8
Распаковка и установка прибора
-
8
Установка адаптера Wi-Fi
-
9
Подключение прибора
-
9
Подключение к электрической сети
-
9
Подключение к компьютеру или компьютерной сети
-
9
Включение прибора
-
10
Основной экран
-
12
Навигация в меню
-
13
Закладка рулонного материала
-
13
Разместите рулон материала на держателе
-
14
Закладка этикеток в печатающую головку
-
14
Настройка датчика этикеток
-
15
Намотка этикеток в режиме намотки
-
16
Извлечение намотанного рулона
-
17
Намотка материала подложки в режиме отклеивания
-
18
Загрузка этикеток Leporello
-
19
Настройка прижимного валика
-
20
Монтаж и демонтаж перегородки, датчика запроса или отрывной кромки
-
21
Закладка трансферной ленты
-
22
Настройка хода трансферной ленты
-
23
Синхронизация хода бумаги
-
23
Режим отрыва этикеток
-
23
Режим отклеивания
-
23
Внутренняя намотка
-
24
Запрет обратной подачи (только для SQUIX MT)
-
24
Предотвращение потерь материала (только для SQUIX MT)
-
25
Указания по очистке
-
25
Очистка печатного валика
-
25
Чистка головки
-
26
Очистка датчика этикеток
-
27
Индикация неисправностей
-
27
Сообщения о неисправностях/ошибках и их устранение
-
29
Устранение проблем
-
30
Размер этикеток / непрерывной бумаги
-
31
Размеры устройства
-
32
Размеры отражающих меток
-
33
Размеры отверстий перфорации
-
34
Указание к Декларации соответствия требованиям ЕС
Открыть в новой вкладке


CAB SQUIX 4 MT Инструкции за работа
Бренд:
CAB
Размер:
3 MB
Страниц:
36
Язык(и):
Болгарский
Оглавление
-
4
Указания
-
4
Използване по предназначение
-
5
Правила по техника на безопасност
-
5
Околна среда
-
6
Преглед на уреда
-
8
Разопаковане и сглобяване на уреда
-
8
Инсталиране на флаш паметта за Wi-Fi
-
9
Свързване на уреда
-
9
Свързване към електрическата мрежа
-
9
Свързване към компютър или компютърна мрежа
-
9
Включване на уреда
-
10
Начален екран
-
12
Навигация в менюто
-
13
Поставяне на ролковия материал
-
13
Поставяне на ролката с материала върху държача на ролката
-
14
Поставяне на етикетите в печатащата глава
-
14
Настройване на светлинната бариера за етикетите
-
15
Навиване на етикетите в режим на навиване
-
16
Сваляне на навитата ролка
-
17
Навиване на носещия материал в режим на подаване
-
18
Зареждане на етикети Leporello
-
19
Настройка на системата за бутони с натиск
-
21
Поставяне на трансферното фолио
-
22
Настройване на движението на трансферното фолио
-
23
Синхронизиране на движението на хартията
-
23
Режим на откъсване
-
23
Режим на подаване
-
23
Вътрешно навиване
-
24
Потискане на връщането (само SQUIX MT)
-
24
Предотвратяване загуби на материал (само SQUIX MT)
-
25
Указания за почистване
-
25
Почистване на печатащия валяк
-
25
Почистване на главата
-
26
Почистване на светлинната бариера за етикетите
-
27
Указание за неизправност
-
27
Съобщения за неизправности и отстраняване на неизправности
-
29
Отстраняване на неизправности
-
30
Размери етикети/Непрек. носител
-
31
Размери на уреда
-
32
Размери за рефлексните маркировки
-
33
Размери за щанцовки
-
34
Указание към ЕС декларацията за съответствие
Открыть в новой вкладке


CAB SQUIX 4 MT Betjeningsvejledning
Бренд:
CAB
Размер:
3 MB
Страниц:
36
Язык(и):
Датский
Оглавление
-
4
1 Indledning
-
4
1.1 Bemærkninger
-
4
Tilsigtet anvendelse
-
5
1.3 Sikkerhedsanvisninger
-
5
1.4 Miljø
-
6
2 Installation
-
6
Oversigt over enheden
-
8
Udpakning og opstilling af enheden
-
8
Installation af WLAN-stikket
-
9
Tilslutning af enheden
-
9
Tilslutning til strømforsyningsnettet
-
9
Tilslutning til en computer eller et computernetværk
-
9
Tænd enheden
-
10
3 Touchscreen-display
-
10
3.1 Startskærmbillede
-
12
Navigering i menuen
-
13
Ilægning af materialet
-
13
Ilægning af rullemateriale
-
13
Placering af materialerullen på rulleholderen
-
14
Ilægning af etiketter i printhovedet
-
14
Indstilling af etiketfotocelleanlægget
-
15
Opvikling af etiketterne i opviklingsmodus
-
16
Udtagning af en opviklet rulle
-
17
Opvikling af substratet i dispenseringsmodus
-
18
Indlæser Leporello-etiketter
-
19
Indstilling af hovedprintsystemet
-
20
Afmontering og montering af ledepladen dispenserings- eller afrivningskanten
-
21
Ilægning af farvebånd
-
22
Indstilling af farvebåndets bane
-
23
5 Printning
-
23
Synkronisering af papirbanen
-
23
5.2 Afrivningsfunktion
-
23
5.3 Dispenseringsmodus
-
23
Intern opvikling
-
24
Undertrykkelse af tilbagekørsel (kun SQUIX MT)
-
24
Hindring af materialetab (kun SQUIX MT)
-
25
6 Rengøring
-
25
6.1 Rengøringsanvisninger
-
25
Rengøring af trykvalsen
-
25
Rengør printhoved
-
26
Rengøring af etiketfotocelleanlægget
-
27
7 Fejlafhjælpning
-
27
7.1 Fejlvisning
-
27
Fejlmeldinger og fejlafhjælpning
-
29
7.3 Problemløsning
-
30
Etiketter / endeløs bane
-
30
Mål etiketter / endeløs bane
-
31
Enhedens mål
-
32
Mål for blackmarks
-
33
Mål for udstansninger
-
34
9 Godkendelser
-
34
Henvisning til EU-overensstemmelseserklæring
-
34
9.2 FCC
-
35
10 Stikordsregister
Открыть в новой вкладке

CAB SQUIX 4 MT Handleiding
Бренд:
CAB
Размер:
3 MB
Страниц:
36
Язык(и):
Голландский
Оглавление
-
4
1 Inleiding
-
4
1.1 Aanwijzingen
-
4
Correct gebruik
-
5
1.3 Veiligheidsaanwijzingen
-
5
1.4 Milieu
-
6
2 Installatie
-
6
Overzicht van het apparaat
-
8
Apparaat uitpakken en opstellen
-
9
Apparaat aansluiten
-
9
Op stroomnet aansluiten
-
9
Op computer of computernetwerk aansluiten
-
9
Apparaat inschakelen
-
10
3 Touchscreen-display
-
10
3.1 Startscherm
-
12
Navigeren in het menu
-
13
Materiaal invoeren
-
13
Rolmateriaal invoeren
-
13
Materiaalrol op rolhouder plaatsen
-
14
Etiketten in de printkop invoeren
-
14
Etiketfotocel instellen
-
15
Opwikkelen van de etiketten in de opwikkelmodus
-
16
Opgewikkelde rol eruit halen
-
17
Opwikkelen van het dragermateriaal in de peelermodus
-
18
Leporello-etiketten invoeren
-
19
Aandruksysteem van de kop instellen
-
20
Omleidingsplaat, peeler- of afscheurrand demonteren en monteren
-
21
Transferfolie invoeren
-
22
Transferfolieloop instellen
-
23
5 Afdrukbedrijf
-
23
Synchronisatie van het papiertraject
-
23
5.2 Afscheurmodus
-
23
5.3 Peelermodus
-
23
Intern opwikkelen
-
24
Onderdrukking van het terugtrekken (alleen SQUIX MT)
-
24
Vermijding van materiaalverliezen (alleen SQUIX MT)
-
25
6 Reiniging
-
25
6.1 Reinigingsinstructies
-
25
Drukwals reinigen
-
25
Printkop reinigen
-
26
Etiketfotocel reinigen
-
27
7 Foutoplossing
-
27
7.1 Foutaanduiding
-
27
Foutmeldingen en foutoplossing
-
29
7.3 Probleemoplossing
-
30
Etiketten/Doorlopende media
-
30
Afmetingen etiketten/doorlopende media
-
31
Afmetingen van het apparaat
-
33
Afmetingen voor perforaties
-
34
9 Toelatingen
-
34
Aanwijzing betreffende de verklaring van conformiteit
-
34
9.2 FCC
-
35
10 Trefwoordenregister
Открыть в новой вкладке

CAB SQUIX 4 MT Kasutusjuhend
Бренд:
CAB
Размер:
3 MB
Страниц:
36
Язык(и):
Эстонский
Оглавление
-
4
1 Sissejuhatus
-
4
1.1 Märkused
-
4
Sihipärane kasutamine
-
5
1.3 Ohutusjuhised
-
5
1.4 Keskkond
-
6
2 Paigaldamine
-
6
Seadme ülevaade
-
8
Pakkige seade lahti ja pange kokku
-
8
Wi-Fi-pulga installimine
-
9
Seadme ühendamine
-
9
Vooluvõrguga ühendamine
-
9
Arvuti või arvutivõrguga ühendamine
-
9
Seadme sisselülitamine
-
10
Puutetundlik ekraan
-
10
3.1 Avakuva
-
12
Menüüs navigeerimine
-
13
Materjali laadimine
-
13
Materjalirulli laadimine
-
13
Materjalirulli positsioneerimine rullihoidikule
-
14
Etikettide laadimine trükipeasse
-
14
Etikettide valgusbarjääri seadistamine
-
16
Keritud rulli eemaldamine
-
18
Voldiketikettide laadimine
-
19
Tõmberulliku pea seadistamine
-
20
Suunaja, väljastus- või rebimisserva eemaldamine ja paigaldamine
-
21
Siirdelindi laadimine
-
22
Siirdelindi sööte seadistamine
-
23
5 Printimine
-
23
Paberisööte sünkroniseerimine
-
23
Sisemine kerimine
-
24
Tagasisöödu tõkestamine (ainult SQUIX MT)
-
24
Materjalikaotuste vältimine (ainult SQUIX MT)
-
25
6 Puhastamine
-
25
6.1 Puhastusjuhised
-
25
Trükivaltside puhastamine
-
25
Trükipea puhastamine
-
26
Etikettide valgusbarjääri puhastamine
-
27
Vigade kõrvaldamine
-
27
7.1 Veanäidik
-
27
Veateated ja vea kõrvaldamine
-
29
Probleemi kõrvaldamine
-
30
Etiketid/ katkematu andmekandja
-
30
Etikettide/ katkematu andmekandja mõõtmed
-
31
Seadme mõõtmed
-
32
Peegeldusmärgiste mõõtmed
-
33
Pressilõigete mõõtmed
-
34
9 Heakskiidud
-
34
Viide ELi vastavusdeklaratsioonile
-
34
9.2 FCC
-
35
10 Märksõnaloend
Открыть в новой вкладке

CAB SQUIX 4 MT Kasutusjuhend
Бренд:
CAB
Размер:
3 MB
Страниц:
36
Язык(и):
Эстонский
Оглавление
-
4
1 Johdanto
-
4
1.1 Huomautukset
-
4
Tarkoituksenmukainen käyttö
-
5
1.3 Turvallisuusohjeet
-
5
1.4 Ympäristö
-
6
2 Asennus
-
6
Laitteen yleiskuva
-
8
Laitteen purkaminen pakkauksesta ja pystytys
-
8
WiFi-tikun asennus
-
9
Laitteen liittäminen
-
9
Liittäminen sähköverkkoon
-
9
Tietokoneeseen tai tietokoneverkkoon liittäminen
-
9
Laitteen kytkeminen päälle
-
10
3 Kosketusnäyttö
-
10
3.1 Aloitusnäyttö
-
12
Valikossa liikkuminen
-
13
Materiaalin asettaminen
-
13
Rullamateriaalin asettaminen
-
13
Materiaalirullan asettaminen rullan pidikkeeseen
-
14
Etikettien asettaminen kirjoitinpäähän
-
14
Tarravalopuomin säätö
-
15
Tarrojen kelaaminen kelaustilassa
-
16
Kelatun rullan irrottaminen
-
17
Alustamateriaalin kelaaminen annostelutilassa
-
18
Leporello-tarrojen asettaminen
-
19
Pääpuristusjärjestelmän säätö
-
20
Kääntölevyn, annostelu- tai repäisyreunan irrotus ja kiinnitys
-
21
Siirtokalvon asettaminen
-
22
Siirtokalvon kulun säätö
-
23
5 Tulostuskäyttö
-
23
Paperinkulun synkronointi
-
23
5.2 Repäisytila
-
23
5.3 Annostelutila
-
23
Sisäinen kelaus
-
24
Takaisinkelauksen estäminen (vain SQUIX MT)
-
24
Materiaalihävikin välttäminen (vain SQUIX MT)
-
25
6 Puhdistus
-
25
6.1 Puhdistusohjeet
-
25
Painotelan puhdistus
-
25
Kirjoitinpäätä puhdistetaan
-
26
Tarravalopuomin puhdistus
-
27
Virheiden korjaaminen
-
27
7.1 Virhenäyttö
-
27
Virheilmoitukset ja virheiden korjaus
-
29
Ongelmien korjaaminen
-
30
Tarrat / jatkuva materiaali
-
30
Mitat tarrat / jatkuva materiaali
-
31
Laitteen mitat
-
32
Tunnistusmerkkien mitat
-
33
Mitat stanssauksia varten
-
34
9 Hyväksynnät
-
34
EU-vaatimustenmukaisuusvakuutusta koskeva huomautus
-
34
9.2 FCC
-
35
10 Hakusanahakemisto
Открыть в новой вкладке

CAB SQUIX 4 MT Οδηγίες λειτουργίας
Бренд:
CAB
Размер:
3 MB
Страниц:
36
Язык(и):
Греческий
Оглавление
-
4
Υποδείξεις
-
4
Προβλεπόμενη χρήση
-
5
Υποδείξεις ασφαλείας
-
5
Περιβάλλον
-
6
Επισκόπηση συσκευής
-
8
Αποσυσκευασία και εγκατάσταση της συσκευής
-
8
Εγκατάσταση στικ WLAN
-
9
Σύνδεση συσκευής
-
9
Σύνδεση στο ηλεκτρικό δίκτυο
-
9
Σύνδεση στον ηλεκτρονικό υπολογιστή ή στο δίκτυο ηλεκτρονικών υπολογιστών
-
9
Ενεργοποίηση συσκευής
-
10
Αρχική οθόνη
-
12
Περιήγηση στο μενού
-
13
Τοποθέτηση ρολό υλικού
-
13
Τοποθετήστε το ρολό υλικού στο συγκρατητή ρολό
-
14
Τοποθέτηση των ετικετών στην κεφαλή εκτύπωσης
-
14
Ρύθμιση φωτοκύτταρου για ετικέτες
-
15
Τύλιγμα των ετικετών στη λειτουργία τυλίγματος
-
16
Αφαίρεση τυλιγμένου ρολό
-
17
Τύλιγμα υλικού φορέα στον τρόπο λειτουργίας διανομής
-
18
Τοποθέτηση ετικετών Leporello
-
19
Ρύθμιση του pincher roller της κεφαλής
-
20
Τοποθέτηση και αφαίρεση του ελάσματος εκτροπής, της ακμής διανομής ή αποκοπής
-
21
Τοποθέτηση της ταινίας μεταφοράς
-
22
Ρύθμιση της διαδρομής της ταινίας μεταφοράς
-
23
Συγχρονισμός της κίνησης του χαρτιού
-
23
Λειτουργία αποκοπής
-
23
Λειτουργία διανομής
-
23
Εσωτερικό τύλιγμα
-
24
Διακοπή της επανατροφοδότησης (μόνο με SQUIX MT)
-
24
Αποφυγή απώλειας υλικού (μόνο για SQUIX MT)
-
25
Υποδείξεις καθαρισμού
-
25
Καθαρισμός του κυλίνδρου εκτύπωσης
-
25
Καθαρισμός κεφαλής εκτύπωσης
-
26
Καθαρισμός φωτοκύτταρου ετικετών
-
27
Ένδειξη σφαλμάτων
-
27
Μηνύματα σφάλματος και αντιμετώπιση σφαλμάτων
-
29
Αντιμετώπιση προβλημάτων
-
30
Διαστάσεις ετικετών/ Θέση τού αισθητήρα χαρτιού σε συνεχόμενη ροή
-
31
Διαστάσεις συσκευής
-
32
Διαστάσεις για ανακλαστικές σημάνσεις
-
33
Διαστάσεις για διατρήσεις
-
34
Συμμόρφωση με δήλωση πιστότητας Ε.Ε
Открыть в новой вкладке


CAB SQUIX 4 MT ekspluatācijas instrukcija
Бренд:
CAB
Размер:
3 MB
Страниц:
36
Язык(и):
Латышский
Оглавление
-
4
Norādes
-
4
Lietošana atbilstoši paredzētajam mērķim
-
5
Drošības norādes
-
5
Apkārtējā vide
-
6
Ierīces pārskats
-
8
Ierīces izsaiņošana un uzstādīšana
-
8
Wi-Fi spraudņa instalēšana
-
9
Ierīces pieslēgšana
-
9
Pieslēgšana strāvas tīklam
-
9
Pieslēgšana datoram vai datortīklam
-
9
Ierīces ieslēgšana
-
10
Sākuma ekrāns
-
12
Navigācija izvēlnē
-
13
Ruļļa materiāla uzstādīšana
-
13
Materiāla ruļļa pozicionēšana uz ruļļa turētāja
-
14
Etiķešu uzstādīšana drukas galviņā
-
14
Etiķešu fotoelementa iestatīšana
-
15
Etiķešu uztīšana uztīšanas režīmā
-
16
Uztīta ruļļa izņemšana
-
17
Pamatnes materiāla uztīšana palaišanas režīmā
-
18
Leporello etiķešu uzstādīšana
-
19
Galviņas piespiešanas sistēmas iestatīšana
-
20
Pagriešanas plāksnes, palaišanas vai noplēšanas malas demontāža un uzstādīšana
-
21
Pārneses plēves lentes uzstādīšana
-
22
Pārneses plēves lentes gaitas iestatīšana
-
23
Papīra gaitas sinhronizācija
-
23
Noplēšanas režīms
-
23
Palaišanas režīms
-
23
Iekšēja uztīšana
-
24
Atpakaļpadeves bloķēšana (tikai SQUIX MT)
-
24
Materiāla zuduma novēršana (tikai SQUIX MT)
-
25
Tīrīšanas norādes
-
25
Iespiedveltnīša tīrīšana
-
25
Drukas galviņas tīrīšana
-
26
Etiķešu fotoelementa tīrīšana
-
27
Kļūdas rādījums
-
27
Kļūdu ziņojumi un kļūdu novēršana
-
29
Problēmu novēršana
-
30
Etiķešu / nepārtraukta medija izmēri
-
31
Ierīces izmēri
-
32
Refleksa atzīmju izmēri
-
33
Perforējumu izmēri
-
34
Norāde uz ES atbilstības deklarāciju
Открыть в новой вкладке

CAB SQUIX 4 MT Valdymo instrukcijos
Бренд:
CAB
Размер:
3 MB
Страниц:
36
Язык(и):
Литовский
Оглавление
-
4
Nuorodos
-
4
Naudojimas pagal paskirtį
-
5
Saugos nuorodos
-
5
Aplinka
-
6
Įtaiso apžvalga
-
8
Įtaiso išpakavimas ir pastatymas
-
8
„Wi-Fi“ atmintuko įdiegimas
-
9
Įtaiso prijungimas
-
9
Prijungimas prie elektros srovės tinklo
-
9
Prijungimas prie kompiuterio arba kompiuterio tinklo
-
9
Įtaiso įjungimas
-
10
Pradžios ekranas
-
12
Naršymas meniu
-
13
Ritininės medžiagos įdėjimas
-
13
Medžiagos ritinio uždėjimas ant ritinio laikiklio
-
14
Etikečių įdėjimas į spausdinimo galvutę
-
14
Etikečių šviesos užtvaros nustatymas
-
15
Etikečių vyniojimas vyniojimo režimu
-
16
Suvynioto ritinio išėmimas
-
17
Laikančiosios medžiagos vyniojimas dalijimo režimu
-
18
„Leporello“ etikečių įkėlimas
-
19
Galvutės prispaudimo veleno nustatymas
-
20
Kreipiamojo skydo, poreikio jutiklio arba nuplėšimo krašto montavimas ir išmontavimas
-
21
Pernešimo dažjuostės įdėjimas
-
22
Pernešimo dažjuostės eigos nustatymas
-
23
Popieriaus eigos sinchronizavimas
-
23
Nuplėšimo režimas
-
23
Dalijimo režimas
-
23
Vidinis vyniojimas
-
24
Įtraukimo slopinimas (tik SQUIX MT)
-
24
Medžiagos nuostolių vengimas (tik SQUIX MT)
-
25
Valymo nuorodos
-
25
Spausdinimo velenėlio valymas
-
25
Spausdinimo galvutės valymas
-
26
Etikečių šviesos užtvaros valymas
-
27
Klaidų indikatorius
-
27
Klaidų pranešimai ir klaidų šalinimas
-
29
Problemų šalinimas
-
30
Etikečių / ištisinės juostos matmenys
-
31
Įtaiso matmenys
-
32
Atspindžio žymų matmenys
-
33
Iškirtimų matmenys
-
34
Nuoroda dėl ES atitikties deklaracijos
Открыть в новой вкладке

CAB SQUIX 4 MT Betjeningsvejledning
Бренд:
CAB
Размер:
3 MB
Страниц:
36
Язык(и):
Датский
Оглавление
-
4
1 Innledning
-
4
1.1 Merknad
-
4
Tiltenkt bruk
-
5
1.3 Sikkerhetsinstruksjoner
-
5
1.4 Miljø
-
6
2 Installasjon
-
6
2.1 Enhetsoversikt
-
8
Pakk ut og sett opp enhet
-
8
Installere WLAN-pinne
-
9
Koble til enheten
-
9
Koble til strømnettet
-
9
Koble til datamaskin eller datanettverk
-
9
Slå på enhet
-
10
3 Touchscreen-display
-
10
3.1 Startskjerm
-
12
Navigere i meny
-
13
Legge inn materiale
-
13
Legg inn rullmateriale
-
13
Plasser materialrull på rullholder
-
14
Legg inn etiketter i skriverhodet
-
14
Still inn etikettfotocelle
-
15
Oppvikling av etikettene i oppviklingsmodus
-
16
Ta av oppviklet rull
-
17
Oppvikling av bærematerialet i avtrekkingsmodus
-
18
Legge inn Leporello-etiketter
-
19
Stille inn hodeklemrullen
-
20
Montere og demontere styreplate, avtrekkings- eller avrivingskant
-
21
Legg inn overføringsfolie
-
22
Stille inn overføringsfolieløp
-
23
5 Skriverdrift
-
23
Synkronisering av papirløpet
-
23
5.2 Avrivingsmodus
-
23
5.3 Avtrekkingsmodus
-
23
Intern oppvikling
-
24
Undertrykking av returtransport (kun SQUIX MT)
-
24
Unngå materialtap (kun SQUIX MT)
-
25
6 Rengjøring
-
25
6.1 Rengjøringsinstruksjoner
-
25
Rengjøre trykkvalse
-
25
Rens skrivehode
-
26
Rengjøre etikettfotocelle
-
27
7 Feilretting
-
27
7.1 Feilindikering
-
27
Feilmeldinger og feilretting
-
29
7.3 Problemløsning
-
30
Etiketter / endeløst materiale
-
30
Mål etiketter / endeløst materiale
-
32
Mål for refleksmerker
-
33
Mål for stansinger
-
34
9 Tillatelser
-
34
Henvisning til EU-samsvarserklæring
-
34
9.2 FCC
-
35
10 Stikkordfortegnelse
Открыть в новой вкладке

CAB SQUIX 4 MT Instrukcja obsługi
Бренд:
CAB
Размер:
3 MB
Страниц:
36
Язык(и):
Польский
Оглавление
-
4
1 Wprowadzenie
-
4
Informacje
-
4
Użytkowanie zgodnie z przeznaczeniem
-
5
Zasady bezpieczeństwa
-
5
Środowisko
-
6
Budowa urządzenia
-
8
Rozpakowywaniei ustawianie urządzenia
-
8
Wkładanie karty wtykowej Wi-Fi
-
9
Podłączanie urządzenia
-
9
Podłączanie do sieci elektrycznej
-
9
Podłączanie do komputera lub sieci komputerowej
-
9
Włączanie urządzenia
-
10
Ekran startowy
-
12
Poruszanie się po menu
-
13
Wkładanie rolki materiału
-
13
Ustawianie rolki materiału na uchwycie rolek
-
14
Wkładanie etykiet do głowicy drukującej
-
14
Ustawianie bariery świetlnej etykiet
-
15
Nawijanie etykiet w trybie nawijania
-
16
Zdejmowanie nawiniętej rolki
-
17
Nawijanie materiału podłoża w trybie odrywania
-
18
Wkładanie etykiet leporello
-
19
Ustawianie rolki dociskowej głowicy
-
20
Montaż i wymontowywanie kierownicy, dyspensera lub krawędzi oddzierającej
-
21
Wkładanie taśmy transferowej
-
22
Ustawianie przebiegu taśmy transferowej
-
23
Tryb drukowania
-
23
Synchronizacja przebiegu papieru
-
23
Tryb oddzierania
-
23
Tryb odrywania
-
23
Wewnętrzne nawijanie
-
24
Powstrzymywanie cofania (tylko SQUIX MT)
-
24
Zapobieganie stratom materiału (tylko SQUIX MT)
-
25
Zasady czyszczenia
-
25
Czyszczenie wałka drukarki
-
25
Czyszczenie głowicy drukującej
-
26
Czyszczenie bariery świetlnej etykiet
-
27
Komunikat o błędzie
-
27
Komunikaty o błędzie i środki zaradcze
-
29
Rozwiązywanie problemów
-
30
Wymiary etykiet / papieru ciągłego
-
31
Wymiary urządzenia
-
32
Wymiary znaczników odblaskowych
-
33
Wymiary wycięć
-
34
9 Atesty
-
34
Wskazówka dotycząca deklaracji zgodności WE
Открыть в новой вкладке


CAB SQUIX 4 MT Instrucțiuni de utilizare
Бренд:
CAB
Размер:
3 MB
Страниц:
36
Язык(и):
Румынский
Оглавление
-
4
1 Introducere
-
4
1.1 Note
-
4
Utilizarea conformă cu destinația
-
5
Indicații de securitate
-
5
1.4 Mediu
-
6
Vedere de ansamblu asupra dispozitivului
-
8
Despachetarea și plasarea dispozitivului
-
8
Instalarea stick-ului Wi-Fi
-
9
Racordarea dispozitivului
-
9
Racordarea la rețeaua electrică
-
9
Racordarea la computer sau la rețeaua de computere
-
9
Pornirea dispozitivului
-
10
Ecran de pornire
-
12
Navigarea în meniu
-
13
Încărcare material în role
-
13
Poziționarea rolei de material pe suportul pentru rolă
-
14
Încărcarea etichetelor în capul de tipărire
-
14
Reglarea barierei luminoase pentru etichete
-
15
Înfășurarea etichetelor în modul de înfășurare
-
16
Îndepărtarea rolei înfășurate
-
17
Înfășurarea materialului suport în modul de dezlipire
-
18
Încărcare etichete Leporello
-
19
Reglarea sistemului de apăsare a capului
-
20
Demontare și montare tablă de întoarcere, senzor de cerere sau muchie de rupere
-
21
Încărcarea benzii de transfer
-
22
Reglarea deplasării benzii de transfer
-
23
Sincronizarea deplasării hârtiei
-
23
Mod de rupere
-
23
Mod de dezlipire
-
23
Înfășurarea internă
-
24
Suprimarea retragerii etichetei (doar SQUIX MT)
-
24
Evitarea pierderilor de material (doar SQUIX MT)
-
25
Indicații de curățare
-
25
Curățarea cilindrului de tipărire
-
25
Curățare cap de tipărire
-
26
Curățarea barierei luminoase pentru etichete
-
27
Afișarea erorii
-
27
Mesaje de eroare și remedierea erorilor
-
29
Remedierea problemei
-
30
Dimensiuni Etichete / Media continuă
-
31
Dimensiuni dispozitiv
-
32
Dimensiune pentru marcaje de reflexie
-
33
Dimensiuni pentru ștanțări
-
34
Indicație cu privire la Declarația de Conformitate UE
-
35
10 Index
Открыть в новой вкладке


CAB SQUIX 4 MT Instrucciones de operación
Бренд:
CAB
Категория:
Label printers
Размер:
3 MB
Страниц:
36
Язык(и):
Испанский
Оглавление
-
4
1 Introducción
-
4
1.1 Indicaciones
-
4
Uso indicado
-
5
Indicaciones de seguridad
-
5
Medio ambiente
-
6
2 Instalación
-
6
Vista general del dispositivo
-
8
Desembalaje y emplazamiento del dispositivo
-
8
Instalación del dispositivo Wi-Fi
-
9
Conexión del dispositivo
-
9
Conexión a la red de corriente
-
9
Conexión a un ordenador o a una red de ordenadores
-
9
Activación del dispositivo
-
10
Pantalla táctil
-
10
Pantalla de inicio
-
12
Navegación dentro del menú
-
13
Colocación del material
-
13
Colocación del material en carrete
-
13
Posicionamiento del carrete de material sobre el soporte de carrete
-
14
Colocación de las etiquetas en el cabezal
-
14
Ajuste del sensor de etiquetas
-
15
Rebobinado de las etiquetas en el modo de rebobinado
-
16
Retirada del carrete rebobinado
-
17
Rebobinado del material de soporte en modo de dispensado
-
18
Carga de las etiquetas Leporello
-
19
Ajuste del sistema de presión de cabezal
-
20
de corte manual
-
21
Colocación del ribbon
-
22
Ajuste del paso del ribbon
-
23
Servicio de impresión
-
23
Sincronización del paso del papel
-
23
Modo de corte manual
-
23
Modo de dispensado
-
23
Rebobinado interno
-
24
Suspensión del retroceso (solo SQUIX MT)
-
24
Evitar pérdidas de material (solo SQUIX MT)
-
25
6 Limpieza
-
25
Instrucciones de limpieza
-
25
Limpieza del rodillo de presión
-
25
Limpieza del cabezal
-
26
Limpieza del sensor de etiquetas
-
27
Resolución de errores
-
27
Indicación de error
-
27
Mensajes de error y resolución de errores
-
29
Resolución de problema
-
30
Etiquetas / material continuo
-
30
Dimensiones de las etiquetas / material continuo
-
31
Dimensiones del dispositivo
-
33
Dimensiones para cortes
-
34
9 Autorizaciones
-
34
Nota sobre la declaración UE de conformidad
-
34
9.2 FCC
-
35
Índice alfabético
Открыть в новой вкладке

CAB SQUIX 4 MT Bruksanvisningar
Бренд:
CAB
Размер:
3 MB
Страниц:
36
Язык(и):
Шведский
Оглавление
-
4
1 Inledning
-
4
1.1 Anmärkningar
-
4
Avsedd användning
-
5
1.3 Säkerhetsanvisningar
-
5
1.4 Miljö
-
6
2 Installation
-
6
Översikt över maskinen
-
8
Packa upp och ställa upp enheten
-
8
Installera Wi-Fi-stickan
-
9
Ansluta apparaten
-
9
Ansluta till elnätet
-
9
Ansluta till datorn eller datornätverket
-
9
Sätta på apparaten
-
10
3 Pekskärm
-
10
3.1 Startskärm
-
12
Navigering i menyn
-
13
Lägga i material
-
13
Lägga i rullmaterial
-
13
Placera materialrullen på rullhållaren
-
14
Lägga i etiketter i skrivarhuvudet
-
14
Ställa in etikettsensor
-
15
Upplindning av etiketter i upplindningsläge
-
16
Ta ut upplindad rulle
-
17
Upplindning av bärarmaterial i dispenseringsläge
-
18
Lägga in Leporello-etiketter
-
19
Ställa in skrivarhuvudets tryckrulle
-
20
Montera och ta bort styrplåt, dispenserings- eller avrivningskant
-
21
Lägga i transferfolie
-
22
Ställa in transferfoliebana
-
23
5 Utskriftsförfarande
-
23
Synkronisering av pappersbanan
-
23
5.2 Avrivningsläge
-
23
5.3 Dispenseringsläge
-
23
Intern upplindning
-
24
Undertrycka returmatning (endast SQUIX MT)
-
24
Undvika materialspill (endast SQUIX MT)
-
25
6 Rengöring
-
25
6.1 Rengöringsinstruktioner
-
25
Rengör tryckvals
-
25
Rengör skrivarhuvud
-
26
Rengöra etikettsensor
-
27
Åtgärda fel
-
27
7.1 Felmeddelande
-
27
Felmeddelanden och korrigering av fel
-
29
7.3 Problemlösning
-
30
Etiketter/kontinuerlig media
-
30
Mått etiketter/kontinuerlig media
-
32
Mått för reflexmärken
-
33
Mått för stansning
-
34
9 Godkännanden
-
34
Information om EU-försäkran om överensstämmelse
-
34
9.2 FCC
-
35
10 Index
Открыть в новой вкладке


CAB EOS2/EOS5 Benutzerhandbuch
Бренд:
CAB
Размер:
2 MB
Страниц:
65
Язык(и):
Немецкий
Оглавление
-
7
Druckdienste Raw-IP und LPR/LPD unter MS Windows
-
7
Windows-Druckereinstellung anpassen
-
7
Etikettendrucker über Ethernet-Schnittstelle anschließen
-
8
WLAN-Verbindung einrichten
-
8
Drucker mit Netzwerk verbinden
-
9
Hotspot einrichten
-
10
Etikettendrucker über USB-Schnittstelle anschließen
-
10
Etikettendrucker über RS-232-Schnittstelle anschließen
-
10
Bluetooth-Verbindung einrichten
-
11
Struktur des Menüs
-
12
Navigieren im Menü
-
14
3.3 Serviceschlüssel
-
17
6.1.1 Drucken
-
18
6.1.2 Etiketten
-
20
6.1.3 Transferfolie
-
20
6.1.4 Abreißen
-
21
6.1.5 Schneiden
-
21
6.1.6 Spenden
-
22
6.1.7 Etikettieren
-
23
6.1.8 RFID
-
24
6.1.9 Schnittstellen
-
27
6.1.10 Fehler
-
27
6.1.11 Region
-
27
6.1.12 Zeit
-
28
6.1.13 Anzeige
-
29
6.1.14 Interpreter
-
29
6.1.15 ZPL
-
31
Register Status
-
32
Register Einstellungen
-
33
Register Sicherheit
-
34
Register Benachrichtigungen
-
35
Register Geräte
-
35
Register Schriften
-
36
Menü Hilfe
-
37
7.1 Übersicht
-
37
7.2 Statusausdruck
-
38
7.3 Schriftenliste
-
39
7.4 Geräteliste
-
40
7.5 Testgitter
-
41
WLAN Status
-
42
8.1 Druckkopf
-
43
8.2 Monitormodus
-
45
8.4 Ereignisliste
-
46
Datenstrom aufzeichnen
-
47
Druckbild speichern
-
48
System-Log speichern
-
49
Firmware aktualisieren
-
49
Einstellungen speichern
-
49
Einstellungen laden
-
50
Einstellungen zurücksetzen
-
50
Passwörter zurücksetzen
-
50
9.6 Reinigungsintervall
-
51
Rechtliche Hinweise
-
53
Servicezähler zurücksetzen
-
53
Druckkopf Nullposition X
-
53
Druckkopf Nullposition Y
-
54
11.4 Druckermodell
-
54
Kein Branding
-
55
12.1 FTP-Anmeldung
-
55
Drucken über FTP
-
55
FTP-Zugriff auf Speichermedien
-
56
12.4 FTP-Firmware-Update
-
57
Verwendbare Speichermedien
-
57
13.2 Installieren
-
57
13.3 Ordnerstruktur
-
58
13.4 Beschreiben
-
58
13.5 Speichermedienfunktionen
-
59
Etiketten drucken
-
59
Dateiliste drucken
-
59
Dateien kopieren
-
60
Speicher formatieren
-
60
13.5.5 Standardspeicher
-
62
Externe Tastatur anschließen
-
62
Hinweise zur Tastaturbelegung
-
63
Spezielle Tastenfunktionen
Открыть в новой вкладке

CAB SQUIX 4 MT Benutzerhandbuch
Бренд:
CAB
Размер:
1 MB
Страниц:
66
Язык(и):
Немецкий
Оглавление
-
6
Druckdienste Raw-IP und LPR/LPD unter MS Windows
-
6
Windows-Druckereinstellung anpassen
-
7
Etikettendrucker über Ethernet-Schnittstelle anschließen
-
7
WLAN-Verbindung einrichten
-
7
Etikettendrucker über USB-Schnittstelle anschließen
-
8
Etikettendrucker über RS-232-Schnittstelle anschließen
-
8
Bluetooth-Verbindung einrichten
-
9
Struktur des Menüs
-
10
Navigieren im Menü
-
11
3.3 Serviceschlüssel
-
14
6.1.1 Drucken
-
16
6.1.2 Etiketten
-
16
6.1.3 Folie
-
17
6.1.4 Abreißen
-
17
6.1.5 Schneiden
-
17
6.1.6 Spenden
-
18
6.1.7 Etikettieren
-
19
6.1.8 Schnittstellen
-
21
6.1.9 Fehler
-
22
6.1.10 Region
-
22
6.1.11 Zeit
-
23
6.1.12 Anzeige
-
23
6.1.13 Interpreter
-
23
6.1.14 ZPL
-
25
Register Status
-
26
Register Einstellungen
-
27
Register Sicherheit
-
28
Register Geräte
-
28
Register Schriften
-
29
Menü Hilfe
-
30
7.1 Übersicht
-
30
7.2 Statusausdruck
-
31
7.3 Schriftenliste
-
32
7.4 Geräteliste
-
33
7.5 Testgitter
-
34
WLAN Status
-
35
8.1 Druckkopf
-
36
8.2 Monitormodus
-
38
8.4 Ereignisliste
-
39
Datenstrom speichern
-
40
Druckbild speichern
-
41
System-Log speichern
-
42
Firmware aktualisieren
-
42
Einstellungen speichern
-
43
Einstellungen laden
-
43
Einstellungen zurücksetzen
-
43
Passwörter zurücksetzen
-
44
9.6 Reinigungsintervall
-
44
Rechtliche Hinweise
-
46
Servicezähler zurücksetzen
-
46
Sensor kalibrieren
-
47
Druckkopf Nullposition X
-
47
Druckkopf Nullposition Y
-
47
11.5 Druckermodell
-
48
12.1 Pinbelegung
-
49
Interne Beschaltung der Ein- und Ausgänge
-
50
Ausgewählte Lösungen
-
50
Spenden auf Anforderung mit Spendelichtschranke PS800 / PS900 / PS
-
51
Spenden auf Anforderung ohne Spendelichtschranke
-
54
Schneiden auf Anforderung mit Schneidemesser CU
-
55
Unterbrechen und Fortsetzen eines Druckauftrags
-
56
13.1 FTP-Anmeldung
-
56
Drucken über FTP
-
56
FTP-Zugriff auf Speichermedien
-
57
13.4 FTP-Firmware-Update
-
58
Verwendbare Speichermedien
-
58
14.2 Installieren
-
58
14.3 Ordnerstruktur
-
59
14.4 Beschreiben
-
59
14.5 Speichermedienfunktionen
-
59
Etiketten drucken
-
60
Dateiliste drucken
-
60
Dateien kopieren
-
60
Speicher formatieren
-
61
14.5.5 Standardspeicher
-
63
Externe Tastatur anschließen
-
63
Hinweise zur Tastaturbelegung
-
64
Spezielle Tastenfunktionen
Открыть в новой вкладке


CAB SQUIX 4 MT Bedienungsanleitung
Бренд:
CAB
Размер:
3 MB
Страниц:
36
Язык(и):
Немецкий
Оглавление
-
4
1 Einleitung
-
4
1.1 Hinweise
-
4
Bestimmungsgemäßer Gebrauch
-
5
1.3 Sicherheitshinweise
-
5
1.4 Umwelt
-
6
2 Installation
-
6
2.1 Geräteübersicht
-
8
Gerät auspacken und aufstellen
-
8
WLAN-Stick installieren
-
9
Gerät anschließen
-
9
An Stromnetz anschließen
-
9
An Computer oder Computernetzwerk anschließen
-
9
Gerät einschalten
-
10
3 Touchscreen-Display
-
10
3.1 Startbildschirm
-
12
Navigieren im Menü
-
13
Material einlegen
-
13
Rollenmaterial einlegen
-
13
Materialrolle auf Rollenhalter positionieren
-
14
Etiketten in Druckkopf einlegen
-
14
Etikettenlichtschranke einstellen
-
15
Aufwickeln der Etiketten im Aufwickelmodus
-
16
Aufgewickelte Rolle entnehmen
-
17
Aufwickeln des Trägermaterials im Spendemodus
-
18
Leporello-Etiketten einlegen
-
19
Kopfandrucksystem einstellen
-
20
Umlenkblech, Spende- oder Abreißkante ab- und anbauen
-
21
Transferfolie einlegen
-
22
Transferfolienlauf einstellen
-
23
5 Druckbetrieb
-
23
Synchronisation des Papierlaufs
-
23
5.2 Abreißmodus
-
23
5.3 Spendemodus
-
23
Internes Aufwickeln
-
24
Unterdrückung des Rücktransports (nur SQUIX MT)
-
24
Vermeidung von Materialverlusten (nur SQUIX MT)
-
25
6 Reinigung
-
25
6.1 Reinigungshinweise
-
25
Druckwalze reinigen
-
25
Druckkopf reinigen
-
26
Etikettenlichtschranke reinigen
-
27
7 Fehlerbehebung
-
27
7.1 Fehleranzeige
-
27
Fehlermeldungen und Fehlerbehebung
-
29
7.3 Problembehebung
-
30
Etiketten / Endlosmaterial
-
30
Maße Etiketten / Endlosmaterial
-
33
Maße für Stanzungen
-
34
9 Zulassungen
-
34
Hinweis zur EU-Konformitätserklärung
-
34
9.2 FCC
-
35
10 Stichwortverzeichnis
Открыть в новой вкладке

CAB SQUIX 4 MT Istruzioni per l’uso
Бренд:
CAB
Размер:
3 MB
Страниц:
36
Язык(и):
Итальянский
Оглавление
-
4
1 Introduzione
-
4
1.1 Avvertenze
-
4
Uso conforme
-
5
Avvertenze di sicurezza
-
5
1.4 Ambiente
-
6
2 Installazione
-
6
Panoramica del dispositivo
-
8
Estrazione dall’imballo e installazione del dispositivo
-
8
Installazione della chiavetta Wi-Fi
-
9
Collegamento del dispositivo
-
9
Collegamento alla rete elettrica
-
9
Collegamento al computer o a una rete di computer
-
9
Accensione del dispositivo
-
10
Display touch screen
-
10
Schermata iniziale
-
12
Navigazione nel menu
-
13
Inserimento del materiale
-
13
Inserimento del materiale in rotoli
-
13
Posizionare il rotolo di materiale sul portarotoli
-
14
Inserimento delle etichette nella testina di stampa
-
14
Impostazione della fotocellula per le etichette
-
15
Avvolgimento delle etichette in modalità avvolgimento
-
16
Prelievo del rotolo avvolto
-
17
Avvolgimento del supporto in modalità distribuzione
-
18
Caricamento delle etichette a modulo continuo
-
19
Regolazione del sistema di pressione testina
-
20
Montaggio e smontaggio della lamina di rinvio, della lama dispensatrice o del bordo di strappo
-
21
Inserimento del nastro
-
22
Regolazione dello scorrimento del nastro
-
23
Attività di stampa
-
23
Sincronizzazione dello scorrimento della carta
-
23
Modalità strappo
-
23
Modalità di distribuzione
-
23
Avvolgimento interno
-
24
Soppressione del ritorno (solo SQUIX MT)
-
24
Prevenzione delle perdite di materiale (solo SQUIX MT)
-
25
6 Pulizia
-
25
Avvertenze per la pulizia
-
25
Pulizia del controrullo
-
25
Pulizia della testina di stampa
-
26
Pulizia della fotocellula per etichette
-
27
Risoluzione dei problemi
-
27
Schermata degli errori
-
27
Messaggi d’errore e rimedi
-
29
Risoluzione dei problemi
-
30
Etichette / rotolo in continuo
-
30
Dimensioni etichette / rotolo in continuo
-
31
Dimensioni del dispositivo
-
33
Dimensioni per perforazioni
-
34
9 Omologazioni
-
34
Nota sulla dichiarazione di conformità UE
-
34
9.2 FCC
-
35
Indice delle parole chiave
Открыть в новой вкладке

CAB SQUIX 4 MT Mode d’emploi
Бренд:
CAB
Размер:
3 MB
Страниц:
36
Язык(и):
Французский
Оглавление
-
4
1 Introduction
-
4
1.1 Instructions
-
4
Usage prévu
-
5
Consignes de sécurité
-
5
1.4 Environnement
-
6
2 Installation
-
6
Description de l’imprimante
-
8
Déballer et installer l’imprimante
-
8
Installer la clé Wi-Fi
-
9
Connexion de l’imprimante
-
9
Raccordement au réseau électrique
-
9
Raccordement à un ordinateur ou à un réseau d’ordinateurs
-
9
Mise sous tension de l’imprimante
-
10
Écran d’accueil
-
12
Navigation dans le menu
-
13
Insertion des consommables
-
13
Insertion du rouleau d’étiquettes
-
13
Positionnement du rouleau d’étiquettes sur le support de rouleau
-
14
Insertion de la bande d’étiquettes sous la tête d’impression
-
14
Réglage de la cellule de détection d’étiquettes
-
15
Enroulement de la bande d’étiquettes en mode réenroulement
-
16
Retrait du rouleau enroulé
-
17
Enroulement du support d’étiquettes en mode pré-décollement
-
18
Insertion des étiquettes en paravent
-
19
Réglage du système de pression de tête
-
20
Montage et démontage de la tôle de rembobinage, de pré-décollement ou d’arrachage
-
21
Insertion du ruban transfert
-
23
Fonctionnement de l’impression
-
23
Mode arrachage
-
23
Mode pré-décollement
-
23
Enroulement interne
-
24
Neutralisation du recul de la matière (uniquement sur SQUIX MT)
-
24
Prévention de la perte de matière (uniquement sur SQUIX MT)
-
25
6 Entretien
-
25
Consignes de nettoyage
-
25
Nettoyage du rouleau d’impression
-
25
Nettoyage de la tête d’impression
-
26
Nettoyage de la cellule de détection d’étiquettes
-
27
7 Dépannage
-
27
Messages d’erreurs et solutions
-
29
7.3 Dépannage
-
30
Étiquettes / support continu
-
30
Dimensions étiquettes / support continu
-
32
Dimensions pour marquages au dos
-
33
Dimensions pour perforations
-
34
Remarque concernant la déclaration UE de conformité
-
34
9.2 FCC
-
35
10 Index
Открыть в новой вкладке


- Manuals
- Brands
- CAB Manuals
- Label Maker
- SQUIX Series
- Configuration manual
-
Contents
-
Table of Contents
-
Bookmarks
Quick Links
cab Label Printers
Configuration Manual
Related Manuals for CAB SQUIX Series
Summary of Contents for CAB SQUIX Series
-
Page 1
Label Printers Configuration Manual… -
Page 2
Edition: 05/2020 — Part No. 9009899 Copyright This documentation as well as translation hereof are property of cab Produkttechnik GmbH & Co. KG. The replication, conversion, duplication or divulgement of the whole manual or parts of it for other intentions than its original intended purpose demand the previous written authorization by cab. -
Page 3: Table Of Contents
Table of Contents Introduction ……………………….5 Connecting Label Printer to Computer ………………..6 Print Services Raw-IP and LPR/LPD in MS Windows …………….7 Adjusting Windows Printer Setting ………………….7 Connecting Label Printer via Ethernet Interface ………………7 Setting Up a Wi-Fi Connection ……………………. 8 2.4.1 Connecting Printer to Network………………….
-
Page 4
Table of Contents Extras …………………………48 Firmware Update ………………………. 48 Save Settings ……………………….48 Load Settings ……………………….48 Reset Settings ……………………….49 Reset Passwords ……………………… 49 Cleaning Interval ………………………. 49 Legal Notices ……………………….50 Help …………………………. 51 Service Menu ……………………….52 11.1 Reset Service Counter ……………………… -
Page 5: Introduction
Introduction Important information and instructions in this documentation are designated as follows: Danger! Draws attention to an exceptionally great, imminent danger to your health or life due to hazardous voltages. Danger! Draws attention to a danger with high risk which, if not avoided, may result in death or serious injury. Warning! Draws attention to a danger with medium risk which, if not avoided, may result in death or serious injury.
-
Page 6: Connecting Label Printer To Computer
Connecting Label Printer to Computer Choose from the following options for connecting a computer to the label printer: Direct connection to the Ethernet interface (6) «2.3» on page 7. • Connection via a computer network to the Ethernet interface (6) «2.3» on page 7. •…
-
Page 7: Print Services Raw-Ip And Lpr/Lpd In Ms Windows
Connecting Label Printer to Computer Print Services Raw-IP and LPR/LPD in MS Windows Install a standard TCP/IP port as additional port for printing. During installation of the new port choose between «Raw» and «LPR» Raw-IP: Enter the same port address in the printer which you have selected during installation. Notice! In the delivery status the print services RawIP (Port 9100) and LPD are activated on the printer …
-
Page 8: Setting Up A Wi-Fi Connection
Connecting Label Printer to Computer Setting Up a Wi-Fi Connection 2.4.1 Connecting Printer to Network Access only with service Wi-Fi stick installed. Note! That mode allows to use an existing wireless network for controlling and configuring the printer and for sending print jobs to the printer.
-
Page 9: Installing A Hotspot
Connecting Label Printer to Computer 2.4.2 Installing a Hotspot Access only with service Wi-Fi stick installed. Note! In that mode the Wi-Fi stick will be configured as a hotspot. That way a printer-own wireless network will be installed and the printer can be controlled and configured by a mobile device. …
-
Page 10: Connecting Label Printer Via Usb Interface
Connecting Label Printer to Computer Connecting Label Printer via USB Interface The full-speed USB interface allows the label printer to be operated via a USB interface of a computer running one of the 32bit or 64bit operating systems: • Windows Vista •…
-
Page 11: Menu
Menu Structure of the Menu The menu contains setting options on several levels for configuring the label printer. In addition, the menu features test and diagnostic functions for supporting the configuration or checking the function of the label printer. 1st Selection Level 2nd Selection Level 3rd Selection Level Info Storage Setup Printing Labels Ribbon Tearing-off Cutting Peeling-off Labelling Interfaces Ethernet Wi-Fi Network services RS-232 Errors Region Time Display Interpreter Test Security Diagnostics Extras Help Service…
-
Page 12: Navigating In The Menu
Menu Navigating in the Menu The orientation of the display contents is adapted to the orientation of the display in the typical operation position of the printer. Portrait Landscape Figure 3 Orientation of the display contents Note! At printers with divers possible operation positions the orientation of the display contents can be turned in steps of 90 degree …
-
Page 13
Menu Start a function. The printer will carry out the function possibly after a preparing dialogue. — or — Select a parameter to set. The setup possibilities are depending from the parameter type. Logical parameters Selection parameters Numerical parameters Date/time Figure 5 Samples for parameter setting… -
Page 14: Service Key
Menu Service Key A service key is required for accessing special service functions not accessible to the operator. This key switches the printer to service mode and enables: Access to additional configuration parameters • • Resetting of the service counter • Additional information in the status print and in the device list •…
-
Page 15: Info
IPv4 address of the printer when connected to a network via Wi-Fi IPv4 192.168.10.1 MAC address of the Wi-Fi adapter MAC e8:4e:06:3e:72:26 mDNS Zeroconf host name cab-05cbbf.local Hours/no. of labels Operative time and number of printed labels 150h/1208 Thermal/Transfer Previously printed paper lengths with thermal direct printing / thermal 29.04m/32.52m…
-
Page 16: Security
Security Security menu the access rights for several printer function can be set. In the Start menu. Select Security. Parameter Meaning Default PIN protection Activation of a four-digit PIN to protect certain parameters and functions accessible by the control panel. Setup: Protection of the submenu Setup Menu: Protection of the whole menu Password ftpprint…
-
Page 17: Configuration
Configuration Configuration via Control Panel A host of parameters for configuring the printer are found in the Setup menu. Configure the printer via the control panel during initial commissioning and when making major changes to the operational conditions. For changes required for processing different print jobs use software settings. Notice! The Setup menu can be protected from unauthorized access via a code number (PIN). 6.1.1 Printing …
-
Page 18: Labels
Configuration Parameter Meaning Default Print on demand Peel-off mode : Behavior after removing a label from the peel position On: The next label will be printed and peeled-off after touching Off: The next label will be printed and peeled-off immediately Cut mode : Behavior between the cuts On: After cutting the next label will be printed and cut after touching Off: All labels will be printed and cut nonstop…
-
Page 19
Configuration Parameter Meaning Default Warn level labels Only at HERMES Q! Threshold diameter (80–240 mm) of the label supply roll, if the value is undershot the «labels low» message will be activated. Pause on warning The print job will be interrupted when the «labels low» message appears Parameters of the Setup >… -
Page 20: Ribbon
Configuration 6.1.3 Ribbon Start menu. Select Setup > Ribbon. Parameter Meaning Default Transfer print On: Sensor for monitoring the transfer ribbon is activated. Off: Sensor for monitoring the transfer ribbon is not activated. The setting can be overwritten for each print job via software. The basic setting is not changed by this.
-
Page 21: Cutting
Configuration 6.1.5 Cutting Only with cutter installed! Not at HERMES Q and PX Q! Start menu. Select Setup > Cutting. Note! The content of the menu is depending on the cutter type and described in the manual of the cutter. 6.1.6 Peeling-off Not at EOS!
-
Page 22: Labelling
Configuration 6.1.7 Labelling Not at MACH 4S and EOS! If applicator is not installed, access only with service key inserted. Start menu. Select Setup > Labelling. Parameter Meaning Default Transfer mode Setting the operation mode Stamp on, Roll on, Blow on Stamp on Cycle sequence Setting the application mode Print-Apply / Apply-Print…
-
Page 23: Interfaces
Configuration Configuration 6.1.8 Interfaces Start menu. Select Setup > Interfaces. Ethernet Parameter Meaning Default Hostname generated of Unique identification of the printer in a network in a human readable OEM name format and the last six digits of the MAC address DHCP Method of issuing IP address On: Dynamic issuing of IP address by the DHCP server Off: Direct issuing of the IP address by the operator >…
-
Page 24
Configuration Wi-Fi Access only with Wi-Fi stick installed. Parameter Meaning Default Wi-Fi Activation of the Wi-Fi interface > Operation mode Connect to Selection of the operation mode network Connect to network: Connection of the printing to an existing wireless network Hotspot: Installation of an printer-own wireless network to connect mobile devices to the printer… -
Page 25
Configuration Network Services Parameter Meaning Default Activation of the File Transfer Protocol Activation of the network printing service LPD RawIP Activation of the network printing service RawIP and selection of the port address > RawIP Port 9100 Selection of the port address for RawIP >… -
Page 26: Errors
Configuration 6.1.9 Errors Start menu. Select Setup > Errors. Parameter Meaning Default Error-Reprint On: With a correctable error and corresponding troubleshooting, the label being printed when the error occurs is repeated. If an error occurs in the mode Backfeed=smart after the first label part has been printed, the label cannot be repeated.
-
Page 27: Display
Configuration Parameter Meaning Default Time Setting the system time in the HH:MM:SS format. When changing the time, ensure that the Timezone, Daylight saving and Date parameters are set correctly. The time can also be synchronized automatically via the internet using the Ethernet interface.
-
Page 28: Interpreter
Configuration 6.1.13 Interpreter Start menu. Select Setup > Interpreter. Parameter Meaning Default Character set UTF-8 Selection of the character set table for adaptation to the computer system used. Switching the character set via software is not possible. Characters not available in the selected character set can be accessed using the Unicode table.
-
Page 29: Configuration Via The Web Interface
Configuration Configuration via the Web Interface The parameters accessible via the control panel can also be set via the web interface contained in the firmware of the printer. The printer web interface can be accessed with a browser (e.g. Microsoft Internet Explorer, Mozilla Firefox) with JavaScript activated via the Ethernet interface or the optional Wi-Fi interface. Calling Up the Web Interface Attention! Whenever settings are changed via the web interface you are requested to enter the user name «admin»…
-
Page 30: Status Tab
Configuration 6.2.1 Status Tab Figure 8 «Status» tab on the printer web interface The following information is contained in the left top section of the «Status» tab: • Printer type • Firmware version • Serial number of the PCB CPU •…
-
Page 31: Setup Tab
Configuration 6.2.2 Setup Tab On the «Setup» tab all the configuration parameters can be set which are also accessible via the control panel in the Setup menu. Figure 9 «Setup» tab on the printer web interface To change a parameter: 1. Locate parameter in the tree structure. 2. Set the value of the parameter at the right end of the concerning line. A prompt to enter user name and password appears …
-
Page 32: Security Tab
Configuration 6.2.3 Security Tab On the «Security» tab the access rights for several printer function can be set. The tab contains the same parameters as the Security menu of the Setup page 16. Figure 10 «Security» tab on the printer web interface To change a parameter: 1.
-
Page 33: Notifications Tab
Configuration 6.2.4 Notifications Tab The «Notifications» tab allows to send status and error messages automatically to a SNMP manager or via e-mail to selected addresses via the Ethernet interface or WiFi. «Notifications» tab on the printer web interface Figure 11 To change settings: 1. If necessary expand the tree structure. 2. Locate and click the message in the tree structure. 3. Select management station or e-mail address. button next to the concerning title and define the SNMP 4.
-
Page 34: Devices Tab
Configuration 6.2.5 Devices Tab The «Devices» tab provides an overview of the most important hardware components installed in the printer and the optional devices connected. Figure 13 «Devices» tab on the printer web interface The contents of the display correspond with those of the Device list «Table 22» on page 38. 6.2.6 Fonts Tab The most important parameters of the fonts available in the printer are listed on the «Fonts»…
-
Page 35: Help Menu
6.2.7 Help Menu Independent from the chosen tab some help functions can be selected : Figure 15 «Help» menu on the printer web interface Check of the firmware version and offer for update. Visit the cab-Website. Information about the version and the latest alterations of the web interface.
-
Page 36: Test Functions
Select Test > Status print. The printout can be canceled with Status print Wi-Fi Interpreter Wed Aug 14 10:48:21 2019 Wi-Fi cab SQUIX 4/300MP Access Point cabgast Character set UTF-8 Firmware V5.27 (Jul 25, 2019) — #164162036456 DHCP JScript IP address 172.20.200.93…
-
Page 37: Font List
If the printout is to occur using thermal transfer printing, insert transfer ribbon with the maximum width. Start menu. Select Test > Font list. The printout can be canceled with Font list Wed Aug 14 10:44:21 2019 cab SQUIX 4/300MP Firmware V5.27 (Jul 25, 2019) — #164162036456 Name Type Description _DEF1…
-
Page 38: Device List
Start menu. Select Test > Device list. The printout can be canceled with Device list Wed Aug 14 10:41:19 2019 cab SQUIX 4/300MP USB [5] Microchip Technology Inc./AR1100 HID-DIGITIZER Firmware V5.27 (Jul 25, 2019) — #164162036456 Full Rev. 1.01 Mfr.
-
Page 39: Test Grid
Test Functions Test Grid The Test grid function prints out a geometric pattern on a background grid. This allows you to assess the evenness of the print quality. The printout occurs using the heat level and print speed specified in the Setup > Printing menu. Notice! The printout occurs without taking the label gaps into consideration. This is why endless media are most suitable for this purpose.
-
Page 40: Wi-Fi Status
If the printout is to occur using thermal transfer printing, insert transfer ribbon with the maximum width. Start menu. Select Test > Wi-Fi status. The printout can be canceled with Wi-Fi status Wed Aug 14 10:36:15 2019 cab SQUIX 4/300MP Firmware V5.27 (Jul 25, 2019) — #164162036456 Channel Name/BSS ID Signal level Security ●●●●●…
-
Page 41: Diagnostic Functions
Diagnostic Functions Diagnostics menu contains several functions for troubleshooting Printhead The function Printhead provides an overview of important status information concerning the printhead on the display of the printer. Start menu. Select Diagnostics > Printhead. Return with Close. The following parameters are displayed: Line Meaning…
-
Page 42: Monitor Mode
Select Example: Monitor Mode Wed Aug 14 10:28:12 2019 cab SQUIX 4/300MP Firmware V5.27 (Jul 25, 2019) — #164162036456 Example label printed normally (left) and in Monitor mode (right) Figure 21 The control characters (ASCII-Code 00…31) are presented in stylized design.
-
Page 43: Label Profile
Start the diagram printout with Continue. The printout can be canceled with Label profile Wed Aug 14 10:25:17 2019 cab SQUIX 4/300MP Firmware V5.27 (Jul 25, 2019) — #164162036456 Peripheral device : None 50 mm/s — Gap Sensor — brightness 5 % 71.09mm — σ²…
-
Page 44: Event Log
TPH (#59-0051) -> 300 dpi, 1248 dots 20.09.17 07:46 Firmware update -> V5.10 (0000) 04.10.17 07:38 Firmware update -> V5.11 (0000) 15.10.17 13:35 Printer model: cab SQUIX 4/300MP 19.12.17 14:01 Firmware update -> V5.13 (0000) 05.09.18 11:38 Clear service counters 05.09.18 11:38 Cleaning interval ->…
-
Page 45: Record Data Steam
Diagnostic Functions Record Data Steam Access only with external storage device! The function Record data stream allows to store data incoming via an interface as an .lbl file to an external storage device (SD card, USB memory module) installed on the printer. Insert SD card or USB memory module. Start menu. Select Diagnostics > Record data stream. …
-
Page 46: Save Print Image
Diagnostic Functions Save Print Image Access only with external storage device! The function Save print image allows to store the last print image as a .png file to an external storage device (SD card, USB memory module) installed on the printer. Insert SD card or USB memory module. Start menu. Select Diagnostics > Save print image. …
-
Page 47: Save System Log
Diagnostic Functions Save System Log Access only with external storage device! The function Save system log allows to store several system files packed to a .zip file to an external storage device (SD card, USB memory module) installed on the printer. Insert SD card or USB memory module. Start menu. Select Diagnostics > Save system log. …
-
Page 48: Extras
Extras Firmware Update Notice! The firmware file can be obtained from the internet. Access only with external storage device! Copy the firmware file to the «misc» directory of the storage device. This can be done on a computer or via FTP on the printer. Insert the prepared storage device into the printer. Start menu. Select Extras. If the menu is protected via a PIN a prompt appears in the display. Enter the code number and confirm it. …
-
Page 49: Reset Settings
Extras Reset Settings With the Default settings function all setup parameters excepting the passwords page 16 can be reset to the default values. Start menu. Select Extras. If the menu is protected via a PIN a prompt appears in the display. Enter the code number and confirm it. Select Reset settings. The display shows «Reset settings». …
-
Page 50: Legal Notices
Extras Legal Notices The Legal notices function shows the licenses and software libraries of third party solutions used in the printer firmware. Start menu. Select Extras. If the menu is protected via a PIN a prompt appears in the display. Enter the code number and confirm it. Select Legal notices. The notices will be shown on the display Select Close to leave the notices.
-
Page 51: Help
Help The Help menu contains links to video clips about important operations. Start menu. Select Help. A list of clips will be shown. Figure 27 Help Select a clip. The display shows a QR code which can be scanned by a mobile device. If the mobile device is connected to the internet a video clip with the selected content will start.
-
Page 52: Service Menu
Service Menu 11.1 Reset Service Counter Access only with service key inserted! The printer has total and service counters. • Total counter: The total counter contains the values for the entire service life of the printer up to now. The values of the total counter are displayed in the Info menu and in the Status print.
-
Page 53: Printer Model
11.5 No Branding Access only with service key inserted! With the activation of the No branding parameter the cab Logo in the display can be suppressed. «3.2» on page 12 Start menu. Select Service > No branding.
-
Page 54: Ftp Printer Management
After logging on the FTP server is accessible in a manner similar to a Windows folder. 12.2 FTP Printing Label files in cab JScript format ( Programming Manual) or in ZPL format can be printed directly via FTP connection: Establish a FTP connection with the user name ftpprint and the defined password (Default: print) An empty folder of the FTP server will be shown.
-
Page 55: Ftp Firmware Update
FTP Printer Management 12.4 FTP Firmware Update FTP allows to carry out a firmware update: Establish a FTP connection with the user name ftpadmin and the defined password (Default: admin). An empty folder of the FTP server will be shown. Copy a valid firmware file (e.g. 527_9725.cfw) to the folder. The status of the saving procedure is shown by a progress indicator in the display. The printer resets automati- cally after the update is carried out successfully.
-
Page 56: Storage Devices
Storage Devices Label descriptions, graphics, fonts, and database information can be saved for the long-term on memory media. Notice! Always create a backup copy of external devices in case of a malfunction. 13.1 Suitable Storage Devices External Devices USB flash drive at USB host interface. •…
-
Page 57: Writing
Storage Devices 13.4 Writing The storage devices can be written to in several ways. The most functionally secure way is writing to the storage device via a data interface. Attention! The device selected as Default storage is written to by default. To write to another device specify the path name of the device in the file name (…
-
Page 58: Print File List
Storage Devices 13.5.2 Print File List The Print file list function creates a list of the files stored on the default storage device. Insert printable medium (labels, endless paper) which extends across the entire printing width. If the printout is to occur using thermal transfer printing, insert transfer ribbon with the maximum width. …
-
Page 59: Default Storage
Storage Devices 13.5.5 Default Storage With the parameter Default storage Definition the storage device can be defined, which can be operated via interfaces and FTP printer management. At functions started from the printer display all storage devices are accessible, but the default storage will be offered first. Start menu. Select Storage > Default storage. The display shows the selection of storage devices.
-
Page 60: Remote Access Via Vnc
Remote Access via VNC Attention! For the remote access via VNC the firmware version 5.03 or later must be installed. VNC is a software that allows remote control of a printer’s operation control panel (server) via a computer (client) through input devices like keyboard and mouse. VNC ist not platform dependent and enables the use of a Windows computer as well as a mobile Android or iOS system as an external remote control.
-
Page 61: External Keyboard
External Keyboard An external keyboard or a compatible input device (e.g. barcode scanner) can be connected directly to the printer. Using an external keyboard facilitates the entry of variable data while processing print jobs and printing from storage devices. Input prompts and the data received from the keyboard are shown in the display. 15.1 Connecting External Keyboard Any HID compatible USB keyboard can be connected to the printer.
-
Page 62: Special Key Functions
External Keyboard 15.3 Special Key Functions General : Executes the Load label storage device function. [F1] [F2] Prints an additional label from the last print job. Corresponds to Repeats the last print job with renewed polling of the variable data and polling of the label [F3] quantity.
-
Page 63: Cabfirmwareupdater
The cabFirmwareUpdater, which can be downloaded free of charge from the cab Website, offers an easy way to transfer firmware files from the computer to the printer. Figure 28 cabFirmwareUpdater With the cabFirmwareUpdater it is possible to start a firmware update via USB, Ethernet or serial interface : 1. Start the cabFirmwareUpdater. 2. Select the printer model.
-
Page 64: Index
Index Apply/Print ……..22 IFFS ……….54, 56 Save print image…….46 Important information……5 Save settings ……..48 Interfaces ……….23 Security tab……..32 Backfeed………..17 Interpreter ………28 Service key ……..14 Backfeed position ……17 IP ……….23, 24 Setup tab ……….31 Baud rate ……….25 Single print mode……18 Blowing air ……..22 Stamp on ……….22 Blow on ……….22 JScript……….28…
28.08.2023
Предлагаем вам наши рекомендации по выбору маркеров и индикаторов…
подробнее
23.08.2023
Публикуем советы по выбору смываемый промышленных маркеров
подробнее
22.08.2023
Опубликовали рекомендации по подготовке и хранению маркеров с…
подробнее
| Загрузка этикеток | Очистка печатающей головки |
| Замена прижимного валика | Использование встроенного намотчика |
| Снятие рулона со встроенного намотчика | Заправка диспенсера этикеток |
| Загрузка стопированного носителя | Загрузка этикеток (SQUIX M) |
| Загрузка красящей ленты (SQUIX M) | Загрузка этикеток (SQUIX MT) |
| Загрузка красящей ленты (SQUIX MT) | Загрузка этикеток (SQUIX MT) |
| Загрузка красящей ленты | Установка USB WLAN — адаптора |
| Замена пластины диспенсера | |
- Manuals
- Brands
- CAB Manuals
- Label Maker
- SQUIX
- Operator’s manual
-
Contents
-
Table of Contents
-
Bookmarks
Quick Links
Operator’s Manual
SQUIX
Label Printer
Made in Germany
Related Manuals for CAB SQUIX
Summary of Contents for CAB SQUIX
-
Page 1
Operator’s Manual SQUIX Label Printer Made in Germany… -
Page 2
Trademark Windows is a registered trademark of the Microsoft Corporation. Editor Regarding questions or comments please contact cab Produk- ttechnik GmbH & Co. KG. Topicality Due to the constant further development of our products discrepancies between documentation and product can occur. -
Page 3: Table Of Contents
Tear-off Mode ……………………….23 Peel-off Mode ……………………….23 Internal Rewinding ……………………..23 Suppressing Backfeed (SQUIX 4MT only) ………………… 24 Avoiding Loss of Material (SQUIX 4MT only) ………………24 Cleaning …………………………25 Cleaning Information ……………………..25 Cleaning the Print Roller ……………………25 Cleaning the Printhead ………………………
-
Page 4: Introduction
Introduction Instructions Important information and instructions in this documentation are designated as follows: Danger! Draws attention to an exceptionally great, imminent danger to your health or life due to hazardous voltages. Danger! Draws attention to a danger with high risk which, if not avoided, may result in death or serious injury. Warning! Draws attention to a danger with medium risk which, if not avoided, may result in death or serious injury.
-
Page 5: Safety Instructions
Introduction Safety Instructions The device is configured for voltages of 100 to 240 V AC. It only has to be plugged into a grounded socket. • • Only connect the device to other devices which have a protective low voltage. • Switch off all affected devices (computer, printer, accessories) before connecting or disconnecting. •…
-
Page 6: Installation
5 Ribbon supply hub 6 Ribbon take-up hub 7 Internal rewinder (only «P» devices) 8 Print unit 9 Cover (not at SQUIX 4P/4.3P/4MT/4.3MT) 10 Touchscreen display 11 LED «Power on» Figure 1 Overview 12 Ribbon deflection 13 Printhead retainer with printhead…
-
Page 7
23 Antistatic brush 24 Pressing roller system 25 Detent pin 26 Pinch roller Figure 3 Separator on SQUIX 4MT 27 Power switch 28 Power connection jack 29 Slot for SD card 30 2 USB master ports for keyboard, scanner, USB memory stick, Bluetooth… -
Page 8: Unpacking And Setting-Up The Printer
Installation Unpacking and Setting-up the Printer Lift the label printer out of the box. Check label printer for damage which may have occurred during transport. Set up printer on a level surface. Remove foam transportation safeguards near the printhead. …
-
Page 9: Connecting The Device
Installation Connecting the Device The standard available interfaces and connectors are shown in Figure 4. 2.4.1 Connecting to the Power Supply The printer is equipped with a wide area power unit. The device can be operated with a supply voltage of 230 V~/50 Hz or 115 V~/60 Hz without adjustment.
-
Page 10: Touchscreen Display
Touchscreen Display The user can control the operation of the printer with the control panel, for example: • Issuing, interrupting, continuing and canceling print jobs, Setting printing parameters, e.g. heat level of the printhead, print speed, interface configuration, language and • time of day ( Configuration Manual), • Control stand-alone operation with a memory module ( Configuration Manual), Update the firmware ( Configuration Manual).
-
Page 11
Touchscreen Display With special software or hardware configurations additional symbols appear on the start screen: Printing on demand Printing on demand Direct cut without print job within print job with CU, PCU or ST cutter installed Figure 7 Optional symbols on the start screen Release printing of a single label within a Release a direct cut without media feed print job including peeling-off, cutting… -
Page 12: Navigation In The Menu
Touchscreen Display Navigation in the Menu Start level Selection level Parameter/function level Figure 9 Menu levels To open the menu select on the start screen. Select a theme in the selection level. Several themes have substructures again with selection levels. To return from the current level to the upper one select .
-
Page 13: Loading Material
4. Load label roll (3) on the roll retainer in such a way that the labels can be inserted into the printhead in the right position. The printing side of the labels must be visible from above. SQUIX 4/4P Re-mount the margin stop (1) onto the roll retainer (4). Push the margin stop (1) to the roll until the roll touches the chassis and the roll retainer and a clear resistance is encountered.
-
Page 14: Inserting The Media Strip Into The Printhead
6. SQUIX 4MT: Guide label strip further between pressing roller system (10) and pinch roller (8) of the separator, pull the detent pin, push the pressing roller system (10) downwards and lock it with the detent pin.
-
Page 15: Winding Up The Media Strip In Rewind Mode
Loading Material 4.1.4 Winding up the Media Strip in Rewind Mode Figure 13 Guiding the media strip in rewind mode In rewind mode, the labels are wound up internally after printing for later use. 1. Install rewind guide plate ( 4.4 on page 20). 2.
-
Page 16: Removing The Wound Roll
Loading Material 4.1.5 Removing the Wound Roll Figure 14 Removing the wound roll 1. Turn lever (1) counterclockwise to lift the printhead. 2. Cut label strip and wind it fully around the rewinder (3). 3. Hold rewinder (3) firmly and turn knob (2) clockwise. The rewinder spindle relaxes and the wound roll (4) is released. 4.
-
Page 17: Winding Up The Liner In Peel-Off Mode
Loading Material 4.1.6 Winding up the Liner in Peel-Off mode Figure 15 Guidance of the material in peel-off mode In Peel-Off mode, the labels are removed after printing, and only the liner is wound up internally. 1. Lift the pinch roller (4) off the rewind assist roller (3). 2.
-
Page 18: Loading Fanfold Media
1. Turn ring (2) counterclockwise, so that the arrow points to the symbol , and thus release the margin stop (1). 2. Move the margin stop(s) (1) in such a position that SQUIX 4/4P the media can pass between the margin stop and the chassis. SQUIX 4M/4MP/4MT the media can pass between the two margin stops.
-
Page 19: Setting The Head Locking System
• prevent premature wearing of the print roller and printhead. Figure 17 Setting the head locking system SQUIX 4/4P Loosen threaded pin (3) at outer plunger (1) with Allen key. Turn lever (2) clockwise to lock the printhead.
-
Page 20: Removing And Installing The Rewind Guide Plate, Dispense Plate Or Tear-Off Plate
Loading Material Removing and Installing the Rewind Guide Plate, Dispense Plate or Tear-off Plate To convert the printer for use in another operating mode, a rewind guide plate (2a), a dispense plate (2b) or a tear-off plate (2c) may need to be installed. Figure 19 Removing and installing the rewind guide plate, dispense plate or tear-off plate Removing a plate…
-
Page 21: Loading Transfer Ribbon
2. Turn lever (6) counterclockwise to lift the printhead. 3. Slide transfer ribbon roll (1) onto the ribbon supply hub (2) so that the color coating of the ribbon faces downward when being unwound. 4. SQUIX 4/4P Slide the roll (3) until it stops. SQUIX 4M/4MP/4MT Position the roll in such a way that both ends of the roll show identical scale values.
-
Page 22: Setting The Feed Path Of The Transfer Ribbon
Loading Material Setting the Feed Path of the Transfer Ribbon Transfer ribbon wrinkling can lead to print image errors. The transfer ribbon deflection (3) can be adjusted so as to prevent wrinkles. Notice! A maladjustment of the head locking system may also cause ribbon wrinkling ( 4.3 on page 19). Figure 22 Setting the feed path of the transfer ribbon Notice! The adjustment is best carried out during printing.
-
Page 23: Printing Operation
Printing Operation Attention! Printhead damage caused by improper handling! Do not touch the underside of the printhead with the fingers or sharp objects. Ensure that the labels are clean. Ensure that the label surfaces are smooth. Rough labels act like emery paper and reduce the service life of the printhead.
-
Page 24: Suppressing Backfeed (Squix 4Mt Only)
Attention! Loss of material! At SQUIX 4MT a media backfeed from the cutting edge to the printhead is not allowed due to the reliability of the media transport. Therefore every interruption of the continuos print process has the following consequences : •…
-
Page 25: Cleaning
Cleaning Cleaning Information Danger! Risk of death via electric shock! Disconnect the printer from the power supply before performing any maintenance work. The label printer requires very little maintenance. It is important to clean the thermal printhead regularly. This guarantees a consistently good printed image and plays a major part in preventing premature wear of the printhead.
-
Page 26: Cleaning The Label Sensor
Cleaning Cleaning the Label Sensor Attention! Label sensor can be damaged! Do not use sharp or hard objects or solvents to clean the label sensor. The label sensor can become dirtied with paper dust. This can adversely affect label detection. Figure 23 Cleaning the label sensor 1.
-
Page 27: Fault Correction
Fault Correction Error Display The appearance of an error will be shown on the display: Figure 24 Error display The error treatment is pending on the error type 7.2 on page 27. The display offers the following possibilities to continue after an error occurred: Repeat The print job will be continued after clearing the error cause.
-
Page 28
Swing the pinch roller against the rewind assist locked in peel-off mode roller. The pressing roller system on Lock the pressing roller system. SQUIX 4MT is not locked. Printhead open Printhead not locked Lock printhead. Printhead too hot Printhead is overheated After pausing the print job will be continued automatically. -
Page 29: Problem Solution
Fault Correction Problem Solution Problem Cause Remedy Transfer ribbon deflection not adjusted Adjust the transfer ribbon deflection. Transfer ribbon creases 4.6 on page 22 Head locking system not adjusted Adjust the head locking system. 4.3 on page 19 Transfer ribbon too wide Use a transfer ribbon slightly wider than the width of label.
-
Page 30: Media
Media Media Dimensions Labels Endless material / Shrink tubes Figure 25 Media dimensions Dim. Designation Dim. in mm 4/4P 4M/4MP/4MT 4.3/4.3P 4.3M/4.3MP/4.4MT Label width 20 — 116 4 -110 Label height 6 — 2000 4 — 2000 in peel-off mode 12 — 200 12 — 200 Tear-off length…
-
Page 31: Device Dimensions
Media Device Dimensions SQUIX 4/4P SQUIX 4M/4MP/4MT Gap sensor & Reflective sensor Printhead Peel-off edge Tear-off edge Cut edge Figure 27 Device dimensions Dim. Designation Dim. in mm 4.3M 4.3MT 4.3P 4.3MP Distance printhead — peel-off edge 13,5 Distance printhead — tear-off edge…
-
Page 32: Reflex Mark Dimensions
Media Reflex Mark Dimensions Labels with reflex marks Endless material with reflex marks SQUIX 4/4P virtual label front edge reflex mark SQUIX 4M/4MP/4MT virtual label front edge reflex mark Reflex mark dimensions Figure 28 Dim. Designation Dim. in mm Label distance > 2 Distance between print zones > 2 Width of reflex mark >…
-
Page 33: Cut-Out Mark Dimensions
Media Cut-out Mark Dimensions Labels with cut-out marks Endless material with cut-out marks SQUIX 4/4P SQUIX 4M/4MP/4MT for marginal cut-out marks minimum liner thickness 0,06 mm Figure 29 Cut-out mark dimensions Dim. Designation Dim. in mm Label distance > 2 Distance between print zones >…
-
Page 34: Licenses
Licenses Reference to the EU Declaration of Conformity The printers of the SQUIX series comply with the relevant fundamental regulations of the EU Rules for Safety and Health: • Directive 2014/35/EU relating to electrical equipment designed for use within certain voltage limits •…
-
Page 35: Index
Index Backfeed………..24 Safety instructions ……5 Service work ……..5 Setting-up ………..8 Cleaning Supply voltage ……..9 information ……..25 Switching on ……..9 printhead ……..25 Synchronization of the paper feed ..23 print roller ……..25 Cleaning information……25 Connecting ………9 Tear-off mode ……14, 23 Contents of delivery ……8 Tear-off plate ……..20 Cut mode ……….23 Unpacking………..8…
-
Page 36
This page was left blank intentionally.

Термотрансферный промышленный принтер cab SQUIX 4 для печати на самоклеющихся этикетках и бирках. Широкий выбор дополнительных принадлежностей. Возможна комплектация усиленными печатающими головками типа 4.3 для прямой термопечати и шероховатых материалов.
Для дизайна и печати предлагается программное обеспечение cablabel S3. Версию cablabel S3 Lite и драйверы принтера можно бесплатно скачать на сайте производителя.
К версии принтера с отклеиванием этикеток может подключаться аппликаторы для SQUIX для автоматического и полуавтоматического нанесения напечатанных этикеток.
Гарантия 2 года, при условии использования оригинальных расходных материалов.
Производство cab Produkttechnik GmbH (Германия).
-
Описание
-
Детали
Описание
ВерсииХарактеристикиАксессуарыВидеоИнструкцииАналогиЗапчастиЗаказ/запрос
Версии
 SQUIX
SQUIX
базовая, выравнивание по левому краю
 SQUIX M
базовая, с центральным выравниванием
 SQUIX M RFID
печать RFID-этикеток, с центральным выравниванием
 SQUIX MT
печать на текстильных лентах, с центральным выравниванием
Характеристики
| SQUIX 4.3 | SQUIX 4 | |||
|---|---|---|---|---|
| Тип печати | прямая термопечать | термотрансферная (термоперенос) | ||
| Тип печатающей головки | 4.3 | 4.3 | 4 | 4 |
| Разрешение печати, dpi | 203 | 300 | 300 | 600 |
| Макс. скорость печати, мм/сек | 250 | 250 | 300 | 150 |
| Макс. ширина печати, мм | 104 | 108,4 | 105,6 | 105,6 |
| Расстояние от левого края материала до зоны печати | 2,8 | 1,2 | 2,0 | 2,0 |
| Допустимая толщина материала для печати | Толщина материала с вырубными этикетками 0,03 до 0,6 мм Толщина непрерывного материала от 0,05 до 0,5 мм) Толщина подложки от 0,03 до 0,13 мм Плотность термокартона до 300 г/м2 |
|||
| Ширина этикеток, мм | 20-116 | |||
| Высота этикеток, мм | 6-2000 | |||
| Ширина подложки или непрерывного материала, мм | 24-120 | |||
| Максимальный диаметр риббона | 80 мм (примерно соответствует намотке 450 м чёрного риббона) | |||
| Макс. диаметр рулона материала | 205 мм на шпуле диаметром от 38 до 100 мм (с адаптерами) | |||
| Интерфейсы | RS232, USB 2.0, Ethernet 10/100, 3 разъёма USB длявнешней клавиатуры или сканера | |||
| Программное обеспечение | Cablabel S3 Lite для дизайна и печати этикеток, драйверы для Windows, Linux и Mac OS X |
Особенности
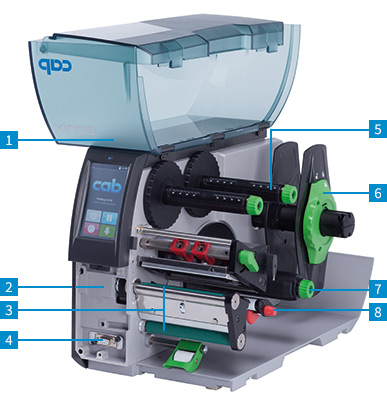
- Полупрозрачная крышка
Крышка состоит из двух частей и сделана из ударопрочного пластика. При открывании складывается, чтобы занимать меньше места. Большое окошко позволяет контролировать расход материала и отслеживать весь процесс печати. - Прочное металлическое шасси
Сделано из литого алюминия. Все компоненты монтируются на прочном шасси. - Функция отклеивания этикеток (опция)
Этикетка отделяется от подложки с помощью специальной пластины. Вспомогательные валики для смотки подложки обеспечивают точность печати и нанесения (при использовании аппликатора). - Интерфейс для подключения периферийных устройств
Удобное подключение дополнительных модулей. Все периферийные устройства стыкуются с принтером с помощью двух выступов и фиксируются одним винтом. - Держатели для риббона
Валы, состоящие из трёх расходящихся частей, обеспечивают быструю и удобную замену рулонов риббона. - Держатель для рулонов материала
Ограничитель рулона с пружинным механизмом удерживает рулон с материалом при размотке, что обеспечивает высокую точность печати. Для тяжёлых рулонов со шпулей диаметром от 76 до 100 мм рекомендуется использовать специальные адаптеры. - Внутренний намотчик (опция, только на моделях с отклеиванием этикеток)
На него можно смотать как пустую подложку после отклеивания этикеток, так и рулон готовых отпечатанных этикеток без шпули (нужна дополнительная пластина для смотки). Вал, состоящий из трёх расходящихся частей, обеспечивает удобное снятие рулона. - Качалка
Надёжный качающийся механизм с тефлоновыми роликами компенсирует натяжение при начале печати, что повышает точность печати.
Автономная работа
Дизайн этикеток создаётся с помощью специальной программы или напрямую с ПК. Форматы этикеток, шрифты и изображения, а также файлы с переменными данными и копируются на карту памяти типа SD, на флэш-накопитель USB или во встроенную память принтера (IFFS). Перед началом печати необходимые данные вводятся в принтер с клавиатуры, с помощью сканера штрих-кодов, или отсылаются с компьютера.
Аксессуары
Внешние размотчики рулонов и катушек
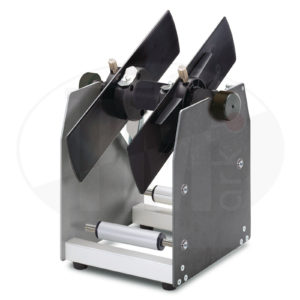 |
Внешний размотчик EUВнешний размотчик EU для больших рулонов и катушек гарантирует плавную подачу материала. Имеет встроенный тормоз и натяжитель. Подходит для принтеров cab серии SQUIX. Подходит для рулонов с намоткой как внутрь (IN), так и наружу (OUT). Подробнее |
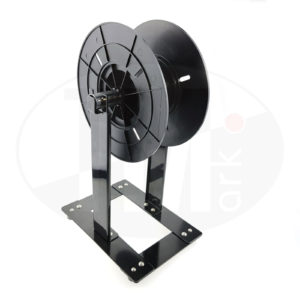 |
Внешний размотчик EUВнешний размотчик EU для больших рулонов и катушек гарантирует плавную подачу материала. Имеет встроенный тормоз и натяжитель. Подходит для принтеров cab серии SQUIX. Подходит для рулонов с намоткой как внутрь (IN), так и наружу (OUT). Подробнее |
Внешний размотчик вертикальныйУниверсальный внешний размотчик для катушек и рулонов. Подробнее |
Дополнительное оборудование и запчасти
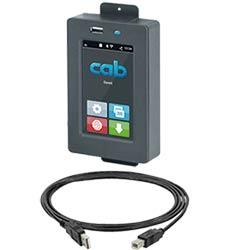 |
Внешняя панель управленияUSB кабель длиной 1,8 м |
 |
Внешняя панель управленияUSB кабель длиной 1,8 м |
Печатный валик DRS4Для материалов шириной до 120 мм, с силиконовым покрытием для максимального срока службы. |
 |
Антистатическая щёткаЩётка снимает статический заряд возникающий в процессе печати. |
 |
Антистатическая щёткаЩётка снимает статический заряд возникающий в процессе печати. |
Адаптер 100Для рулонов этикеток с диаметром сердечника 100 мм и внешним диаметром более 180 мм. |
 |
SD карта памяти8 Гб |
 |
SD карта памяти8 Гб |
USB флешка8 Гб |
 |
USB WLAN адаптер2.4 ГГц 802.11b/g/n |
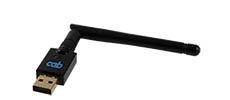 |
USB WLAN адаптер2.4 ГГц 802.11b/g/n |
USB WLAN адаптер с антенной2.4 GHz 802.11b/g/n + 5 GHz a/n/ac in infrastructure mode with rod antenna for extended reach |
 |
USB Bluetooth адаптер |
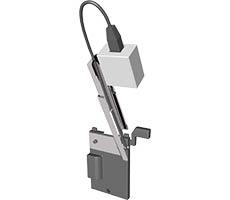 |
USB Bluetooth адаптер |
Тестер штрих-кода CC100 для линейного и 2D-кодаЧитаемость вертикально или горизонтально расположенного штрих-кода проверяется сразу же после печати. При обнаружении нечитаемого кода печать останавливается для удаления этикетки. Тестер может использоваться вместе с отделителем, отклеивателем и со внешним намотчиком. |
Соединительные провода
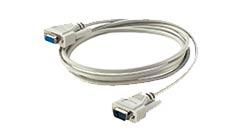 |
Соединительный кабель RS232 C9/9 pin, длина 3 метра |
Специальные крышки и защитные корпуса
 |
Соединительный кабель RS232 C9/9 pin, длина 3 метра |
Специальные крышки и защитные корпуса
|
Токопроводящие крышки для ESD зонДоступно для всех принтеров серии SQUIX. Для защиты от электростатического разряда, откидывающуюся крышку делают из токопроводящего пластика. Благодаря использованию углеволокна крышка очень крепкая, и удовлетворяет стандартам ESD. По запросу, весь корпус может быть изготовлен из электропроводящего материала. Соответствие ESD согласно DIN EN 61340-5-1:2016 Стойкость поверхности согласно DIN IEC 60093 ≤ 104 Ом; заряд сокращается с 1000 В до 100 В менее чем за 2 секунды. |
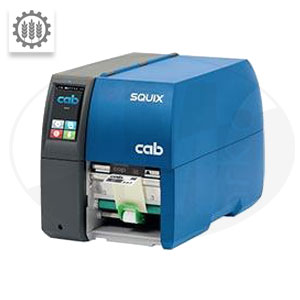 |
Крышки для пищевой промышленностиДоступно для всех принтеров серии SQUIX. Крышка содержит железную крошку. Таким образом осколки крышки могут быть обнаружены металл-детектором или системой рентгеновкого сканирования. Голубая поверхность крышки служит для лёгкого визуального обнаружения среди пищевых продуктов. По запросу, весь корпус может быть изготовлен из материала с железной крошкой. Материал удовлетворяет нормативных актам пищевой промышленности, таким как EU no. 10/2011 и FDA CFR 21 177.2600. |
|
Герметичный корпус из нержавеющей стали для пищевой промышленностиДоступно для принтеров SQUIX 4, для SQUIX 6 — по запросу. Чтобы достать готовую этикетку, требуется открыть переднюю крышку. Для замены расходных материалов и обслуживания принтера, открывается лицевая часть корпуса и платформа с принтером выдвигается на телескопических рельсах. При чистке корпуса парогенератором, крышка на лицевой части должна быть закрыта. Опционально, корпус может быть оборудован датчиками контроля температуры и влажности. Класс защиты IP69K, согласно EN 60529. |
 |
Пылезащитный корпус для пыльных помещенийДоступно для принтеров SQUIX 4, для SQUIX 6 — по запросу. Чтобы достать готовую этикетку, требуется открыть переднюю крышку. Внутри корпуса вентилятор оборудованный фильтром для создания избыточного давления — этим предотвращается попадание пыли внутрь шасси. Класс защиты IP52, согласно EN 60529. |
Отклеивание этикеток
Сенсор этикетки PS800Для моделей с выравниванием по левому краю Датчик определяет этикетку в режиме отклеивания. После удаления этикетки с подложки следующая отклеивается автоматически. Ширина этикетки от 16 мм |
 |
Сенсор этикетки PS900Для моделей с выравниванием по левому краю или по центру Датчик определяет этикетку в режиме отклеивания. После удаления этикетки с подложки следующая отклеивается автоматически. Ширина этикетки от 4 мм |
 |
Сенсор этикетки PS900Для моделей с выравниванием по левому краю или по центру Датчик определяет этикетку в режиме отклеивания. После удаления этикетки с подложки следующая отклеивается автоматически. Ширина этикетки от 4 мм |
Пластина-отделитель этикеток DP410Для этикеток с сильным адгезивом и этикеток с толстой подложкой. Сенсор этикеток не применим. |
 |
Световой датчик наличия этикеткиСветовой барьер для автоматического обнаружения продукта на конвейерной ленте. |
Интерфейсы, выключатели
 |
Световой датчик наличия этикеткиСветовой барьер для автоматического обнаружения продукта на конвейерной ленте. |
Интерфейсы, выключатели
I/O интерфейсЭтикеткирование начинается по сигналу PLC от сенсора или ручного выключателя. Одновременно может отправлять сообщение о статусе устройства или ошибке. Является стандартным для принтеров с отклеивателем, а для базовых принтеров это опция. |
 |
I/O коннектор интерфейса, SUB-D 25 pinпозволяет подключать контроллеры для подачи сигнала на I/O интерфейс. |
 |
I/O коннектор интерфейса, SUB-D 25 pinпозволяет подключать контроллеры для подачи сигнала на I/O интерфейс. |
Выбор этикетки — I/O boxUp to 16 different labels per box can be selected from the memory card by a master control, e.g. PLC. Two boxes can be connected. The I/O box allows simple PLC control processes with four inputs and outputs each via abc programming. |
 |
Ручной выключатель TR2для подключения к интерфейсу ввода-вывода (I/O interface) |
 |
Ручной выключатель TR2для подключения к интерфейсу ввода-вывода (I/O interface) |
Ножной выключательдля подключения к интерфейсу ввода-вывода (I/O interface) |
Отрезание, перфорация
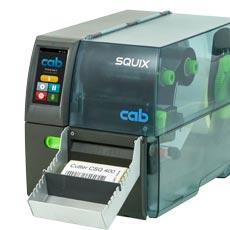 |
Гильотинные резаки CSQ 400Подходит для всех базовых моделей принтеров SQUIX 4. Устанавливается на принтер на заводе или поставляется отдельно для самостоятельной установки. Предназначен для отрезания бумажных этикеток, самоклеящихся этикеток, термокартона, пластиковых материалов и термоусадочных трубок. При откидывании резака, можно извлечь материал на котором осуществлялась печать. Высота отрезаемой этикетки может быть настроена на принимающем лотке. Износ резака контролируется, благодаря сохранению в памяти количеству отрезаний. При отрезании стандартных материалов, обеспечивается ресурс в миллион и более отрезаний.
|
Ротационный резак CUРезак CU служит для отрезание после печати: бумажных этикеток, самоклеящихся этикеток, картона, текстильных или пластиковых лент и термоусадочной трубки. Лоток под резаком для сбора отрезанных этикеток вместимостью ~50 этикеток
|
 |
Перфорационный резак PCU400Такие рулонные материалы как термоусадочная трубка и текстильная лента после печати перфорируется для ручного отделения позже. Также материалы могут отрезаться.
|
Сматывание этикеток в рулон
Сматывание этикеток в обычный рулон и на картонный сердечник.
 |
Перфорационный резак PCU400Такие рулонные материалы как термоусадочная трубка и текстильная лента после печати перфорируется для ручного отделения позже. Также материалы могут отрезаться.
|
Сматывание этикеток в рулон
Сматывание этикеток в обычный рулон и на картонный сердечник.
Направляющая пластина RG для внутреннего сматыванияВнутреннее сматывание подложки в рулон доступно для принтеров с отклеивателем этикеток. Для этого пластина отклеивателя заменяется направляющей пластиной RG.
|
 |
Внешние смотчики ER1, ER2 для прямого подключения к принтеруСмотчик механически соединяется с принтером этикеток. Доступна внутренняя или внешняя смотка рулона этикеток. Рычаг прижима обеспечивает плотную и аккуратную намотку.
|
 |
Внешние смотчики ER1, ER2 для прямого подключения к принтеруСмотчик механически соединяется с принтером этикеток. Доступна внутренняя или внешняя смотка рулона этикеток. Рычаг прижима обеспечивает плотную и аккуратную намотку.
|
Внешние смотчики ER4, ER6 со встроенным питаниемСмотчик может быть подключён к любому принтеру. Доступна внутренняя или внешняя смотка рулона этикеток. Рычаг прижима обеспечивает плотную и аккуратную намотку.
|
Аппликаторы и диспенсеры этикеток
 |
Аппликатор этикеток S1000Аппликатор cab S1000 в паре с принтером серии SQUIX является выгодным решением для полуавтоматического наклеивания этикеток, а также подходит для встраивания в производственную линию, с нанесением этикеток сверху вниз. После печати этикетка наносится на маркируемый продукт при помощи штампа.
Подробнее |
Аппликатор этикеток S3200Аппликатор cab S3200 установленный на принтер серии SQUIX, является выгодным решением для полуавтоматического наклеивания этикеток. Также подходит для вертикального встраивания в производственную линию. При помощи S3200, отпечатанные этикетки автоматически наносятся на маркируемый продукт. Наличие вращающейся оси цилиндра регулируемой в диапазоне от 45° до 90° в горизонтальной плоскости, позволяет варьировать угол наклеивания этикетки на поверхность. Остальные данные по обслуживанию, эксплуатации, отклеиванию, настройке давления воздуха, процессу работы аналогичны аппликатору cab S1000.
Штампы для наклеивания прижимом или сжатым воздухом изготавливаются в соответствии с размером этикетки.
Подробнее |
 |
Отделитель этикеток cab S5104Для этикетирования упаковки товара на конвейерной ленте. Датчик продукта определяет начало этикетирования. Отделение начинается в момент начала печати следующей этикетки. Скорость конвейерной ленты должна быть синхронизирована со скоростью печати этикеток. В качестве датчика продукта можно использовать световой барьер.
* для этикетки высотой 100 мм, скорость печати 100 мм/с Подробнее |
Видео
Промышленные принтеры cab серии SQUIX

Отделитель этикеток cab S5104
Для этикетирования упаковки товара на конвейерной ленте. Датчик продукта определяет начало этикетирования. Отделение начинается в момент начала печати следующей этикетки. Скорость конвейерной ленты должна быть синхронизирована со скоростью печати этикеток. В качестве датчика продукта можно использовать световой барьер.
| Модуль | S5104 | S5106 |
|---|---|---|
| Для использование с принтером | SQUIX 4.3, SQUIX 4 | SQUIX 6.3 |
| Выравнивание материала | левый край | |
| Ширина этикетки, мм | 25-116 | 50-176 |
| Высота этикетки, мм | 25-200 | |
| Расстояние от линии печати до кромки отделяющей пластины, мм | 336-518 | |
| Поверхность продукта | плоская | |
| Высота продукта | фиксированная | |
| Продукт во время маркировки | движущийся, скорость синхронизируется с принтером | |
| Время цикла, приблизительно* | 60 этикеток в минуту |
* для этикетки высотой 100 мм, скорость печати 100 мм/с
Подробнее
Видео
Промышленные принтеры cab серии SQUIX
Чистка печатного валика
Чистка печатного валика в принтере cab SQUIX
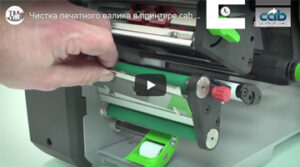
Чистка печатающей головки
Чистка печатающей головки в принтере cab SQUIX
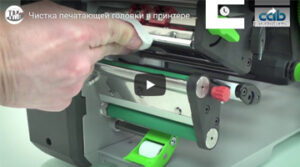
Установка рулона этикеток
Установка рулона этикеток в принтер cab SQUIX
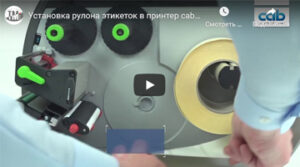
Установка рулона риббона
Установка рулона риббона в принтер cab SQUIX
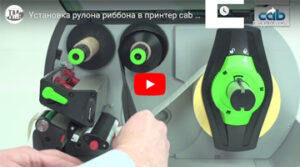
Замена печатного валика
Замена печатного валика в принтере cab SQUIX
Инструкции
Аналоги
• Weidmüller THM MultiMark Plus;
• Phoenix Contact Thermomark Rollmaster 300;
• HellermannTyton TT4030;
• Brady BradyPrinter i7100 300 dpi;
• Tyco T3212;
• Phoenix Contact Thermomark Rollmaster 600;
• Tyco T3224;
• Brady BradyPrinter i7100 600 dpi.
Запчасти
Популярные
Наиболее популярные запасные части для принтеров cab SQUIX 4
Все
Полный список запасных частей для принтеров cab SQUIX 4
| Артикул | Описание | В упаковке, шт. |
|---|---|---|
| 5977382.001 | Термоголовка / печатающая голова / Printhead 4.3/200 | 1 |
| 5977383.001 | Термоголовка / печатающая голова / Printhead 4.3/300 | 1 |
| 5977380.001 | Термоголовка / печатающая голова / Printhead 4/600 | 1 |
| 5987179.001 | Термоголовка / печатающая голова / Printhead 4/300 SQUIX RFID | 1 |
| 5987180.001 | Термоголовка / печатающая голова / Printhead 4/600 SQUIX RFID | 1 |
| 5987177.001 | Термоголовка / печатающая голова / Printhead 4.3/200 SQUIX RFID | 1 |
| 5987178.001 | Термоголовка / печатающая голова / Printhead 4.3/300 SQUIX RFID | 1 |
| 5954180.001 | Печатный валик / Drive Roller DR4 | 1 |
| 5954183.001 | Roller RR4 | 1 |
| 3300911.001 | Cable RFID | 1 |
| 3300949.001 | Cable RFID | 1 |
| 5540637.001 | Spring | 10 |
| 5541172.001 | Pivot Arm | 1 |
| 5550611.001 | Power Cable Type E+F | 1 |
| 5551162.001 | Power Supply | 1 |
| 5551312.001 | PCB I/O Interface | 1 |
| 5551353.001 | PCB CPU X4.2 | 1 |
| 5901060.001 | Plastic Bushing | 10 |
| 5901071.001 | Ball Bearing DIN625-F688-ZZ | 1 |
| 5901090.001 | Ball Bearing DIN625-F608-ZZ | 1 |
| 5901123.001 | Plastic Bushing | 10 |
| 5901575.001 | Cable Clamp | 10 |
| 5901655.001 | Cable USB | 1 |
| 5901781.001 | Cable Clamp | 10 |
| 5902007.001 | Screw DIN912-M3x6 | 10 |
| 5902010.001 | Screw DIN912-M3x10 | 10 |
| 5902011.001 | Screw DIN912-M3x20 | 10 |
| 5902241.001 | Screw DIN7984-M4x10 | 10 |
| 5902358.001 | Screw DIN7984-M4x6 | 10 |
| 5902457.001 | Screw DIN7985-M2x10 | 10 |
| 5902505.001 | Nut DIN934-M3 | 10 |
| 5902571.001 | Screw DIN7984-M4x6 | 10 |
| 5902592.001 | Screw DIN7984-M4x10 | 10 |
| 5902816.001 | Screw EJOT-PT-K40x10 | 10 |
| 5902817.001 | Screw sim. ISO7380-M4x6 | 10 |
| 5903004.001 | Washer DIN125-A3.2 | 10 |
| 5903020.001 | Washer DIN988-8x14x0.5 | 10 |
| 5903035.001 | Washer DIN988-8x14x1.0 | 10 |
| 5903038.001 | Washer DIN988-8x14x0.2 | 10 |
| 5903091.001 | Washer DIN988-5x8x0,5 | 10 |
| 5903103.001 | Washer DIN988-3x6x1.0 | 10 |
| 5903128.001 | Washer 35×8.4×1.25 | 10 |
| 5903137.001 | Washer DIN125-A4.3 | 10 |
| 5903501.001 | E-Ring DIN6799-7 | 10 |
| 5903516.001 | Snap Ring DIN471-8×0.8 | 10 |
| 5903521.001 | Snap Ring DIN471-A6 | 10 |
| 5904915.001 | Screw DIN7984-M4x8 | 10 |
| 5904916.001 | Screw DIN7984-M4x16 | 10 |
| 5905570.001 | O-Ring 5×1.5 | 10 |
| 5905827.001 | Belt 155MXL 037 | 1 |
| 5906133.001 | Spring | 10 |
| 5906136.001 | Spring | 5 |
| 5906209.001 | Ferrite | 1 |
| 5906254.001 | Belt 54MXL 037 | 1 |
| 5906262.001 | Spring | 1 |
| 5906322.001 | Belt 310MXL 037 | 1 |
| 5907261.001 | Belt 146MXL 037 | 1 |
| 5907267.001 | Belt 129MXL 037 | 1 |
| 5907723.001 | Adhesive Plate | 1 |
| 5943120.001 | Gear 28 | 1 |
| 5946113.001 | Allen Key | 1 |
| 5946238.001 | Gear 29 | 1 |
| 5952698.001 | Switch | 1 |
| 5954044.001 | Roller | 1 |
| 5954113.001 | Slipping Clutch | 1 |
| 5954114.001 | Brake | 1 |
| 5954115.001 | Gear 42 | 1 |
| 5954121.001 | Cone | 1 |
| 5954122.001 | Shell | 1 |
| 5954124.001 | Snap Ring | 10 |
| 5954131.001 | Spring | 5 |
| 5954141.001 | Shell | 3 |
| 5954143.001 | Cone | 1 |
| 5954146.001 | Slipping Clutch | 1 |
| 5954182.001 | Shaft | 1 |
| 5954184.001 | Shaft | 1 |
| 5956214.001 | Belt Tension Bracket | 1 |
| 5958595.001 | Shell | 1 |
| 5959588.001 | Margin Stop | 1 |
| 5970813.001 | Shaft | 1 |
| 5970820.001 | Roller | 1 |
| 5970821.001 | Axle | 1 |
| 5970822.001 | Retainer | 1 |
| 5970824.001 | Screw | 1 |
| 5970834.001 | Spring | 1 |
| 5970846.001 | Pinch Roller | 1 |
| 5970853.001 | Plate | 1 |
| 5970856.001 | Bracket | 1 |
| 5977312.001 | Cable Control Panel | 1 |
| 5977314.001 | Ribbon Sensor | 1 |
| 5977316.001 | Lever | 1 |
| 5977326.001 | Cable Power Supply | 1 |
| 5977327.001 | Cable Sensors | 1 |
| 5977328.001 | Cable Periphery | 1 |
| 5977330.001 | Cable I/O Interface | 1 |
| 5977331.001 | Switch | 1 |
| 5977332.001 | Hinged Cover | 1 |
| 5977336.001 | Spring | 1 |
| 5977345.001 | Control Panel | 1 |
| 5977345.003 | Control Panel | 1 |
| 5977346.001 | Cover | 1 |
| 5977346.003 | Cover | 1 |
| 5977348.001 | Profile | 1 |
| 5977350.001 | Stepper Motor | 1 |
| 5977366.001 | Profile | 1 |
| 5977373.001 | Eccentric | 1 |
| 5977375.001 | PCB UHF RFID Adapter | 1 |
| 5977399.001 | Cover | 1 |
| 5977399.004 | Cover | 1 |
| 5977405.001 | Cover Plate | 1 |
| 5977405.004 | Cover Plate | 1 |
| 5977414.001 | Dispense Plate DP400 | 1 |
| 5977415.001 | Tear-off Plate TP400 | 1 |
| 5977416.001 | Printhead Mounting Bracket | 1 |
| 5977420.001 | Roller Bearing | 1 |
| 5977422.001 | Axle | 1 |
| 5977423.001 | Pinch Roller | 1 |
| 5977432.001 | Profile | 1 |
| 5977435.001 | Side Plate | 1 |
| 5977436.001 | Side Plate | 1 |
| 5977441.001 | Spring | 1 |
| 5977443.001 | Profile | 1 |
| 5977444.001 | Printhead 4/300 | 1 |
| 5977459.001 | Lever | 1 |
| 5977461.001 | Wall Spacer | 1 |
| 5977462.001 | Wall Spacer | 1 |
| 5977466.001 | Foot | 1 |
| 5977470.001 | Roller | 1 |
| 5977472.001 | Gear | 1 |
| 5977475.001 | Rewinder Wall Plate | 1 |
| 5977476.001 | Wall Spacer | 1 |
| 5977480.001 | Cable Printhead | 1 |
| 5977481.001 | Pivot Arm | 1 |
| 5977482.001 | Side Plate | 1 |
| 5977483.001 | Side Plate | 1 |
| 5977484.001 | Side Plate | 1 |
| 5977491.001 | Control Panel | 1 |
| 5977511.001 | Profile | 1 |
| 5977514.001 | Printhead Locking System | 1 |
| 5977516.001 | Printhead Locking System | 1 |
| 5977531.001 | Label Sensor | 1 |
| 5977536.001 | Roller Ribbon | 1 |
| 5977554.001 | Locking | 1 |
| 5977561.001 | Printhead Mounting Bracket | 1 |
| 5977562.001 | Cap | 1 |
| 5977568.001 | Hinge | 1 |
| 5977569.001 | Hinge | 1 |
| 5977570.001 | Cover | 1 |
| 5977570.002 | Cover | 1 |
| 5977576.001 | Cover | 1 |
| 5977577.001 | Axle | 1 |
| 5977578.001 | Roller | 1 |
| 5977591.001 | Clamp | 1 |
| 5977596.001 | Distance Bolt | 1 |
| 5977738.001 | Cable I/O-RFID | 1 |
| 5977763.001 | Hinged Cover | 1 |
| 5977764.001 | Hinged Cover | 1 |
| 5977793.001 | Swing | 1 |
| 5977794.001 | Swing | 1 |
| 5977802.001 | Shaft | 1 |
| 5977803.001 | Shaft | 1 |
| 5977816.001 | Swing | 1 |
| 5977818.001 | Internal Rewinder | 1 |
| 5977819.001 | Ribbon Supply Hub | 1 |
| 5977820.001 | Ribbon Takeup Hub | 1 |
| 5977821.001 | Ribbon Takeup Hub | 1 |
| 5977823.001 | Ribbon Supply Hub | 1 |
| 5977846.001 | Baseplate | 1 |
| 5978912.001 | USB WiFi Stick | 1 |
| 5978914.001 | Media Hub | 1 |
| 5978958.001 | Strip | 1 |
| 5979795.001 | Cover | 1 |
| 5979798.001 | PCB Antenna RFID | 1 |
| 5984304.001 | Packaging | 1 |
| 5984438.001 | Knurled Knob | 1 |
| 5984439.001 | Wall Spacer | 1 |
| 5984440.001 | Side Plate | 1 |
| 5984782.001 | Antistatic Brush | 1 |
| 5984802.001 | PCB Antenna RFID | 1 |
Заказ/запрос