(скачивание инструкции бесплатно)
Формат файла: PDF
Доступность: Бесплатно как и все руководства на сайте. Без регистрации и SMS.
Дополнительно: Чтение инструкции онлайн

Страница:
(1 из 123)
навигация

1

2

3

4

5

6

7

8

9

10

11

12

13

14

15

16

17

18

19

20

21

22

23

24

25

26

27

28

29

30

31

32

33

34

35

36

37

38

39

40

41

42

43

44

45

46

47

48

49

50

51

52

53

54

55

56

57

58

59

60

61

62

63

64

65

66

67

68

69

70

71

72

73

74

75

76

77

78

79

80

81

82

83

84

85

86

87

88

89

90

91

92

93

94

95

96

97

98

99

100

101

102

103

104

105

106

107

108

109

110

111

112

113

114

115

116

117

118

119

120

121

122

123
Оглавление инструкции
- Страница 1 из 124
- Страница 2 из 124
Меры предосторожности Поздравляем вас с приобретением электронного музы кального инструмента CASIO! • Прежде чем приступать к использованию этого инструмента, внимательно прочитайте все содержа щиеся в этом руководстве инструкции. • Храните это руководство всегда под рукой, чтобы обращаться к нему - Страница 3 из 124
Меры предосторожности ПРЕДУПРЕЖДЕНИЕ ПРЕДУПРЕЖДЕНИЕ Адаптер переменного тока Вода и посторонние предметы Неправильное использование шнура адаптера перемен ного тока может повлечь за собой повреждение или поломку адаптера, что влечет за собой опасность возго рания и поражения электрическим током. - Страница 4 из 124
Меры предосторожности ОПАСНОСТЬ ПРЕДУПРЕЖДЕНИЕ Установка Батареи Не устанавливайте музыкальный инстру мент на неустойчивой подставке или его подставку на неровной или неустойчивой поверхности. Установка инструмента на неровной или неустойчивой поверхности может привести к его падению и травмам. - Страница 5 из 124
Меры предосторожности ОПАСНОСТЬ Громкость звука Не слушайте очень громкую музыку в течение длительного времени. Особую осторожность следует соблюдать при прослушивании музыки через наушники. Очень громкий звук может повредить слух. Тяжелые предметы Никогда не ставьте на музыкальный инстру мент - Страница 6 из 124
Введение Поздравляем вас с приобретением этого музыкального инструмента CASIO. Он предоставляет вам целый ряд возмож ностей и имеет следующие функции. 516 тембров, включая улучшенные тембры богатого звучания 300 улучшенных тембров запрограммированы с использованием цифрового процессора сигналов, - Страница 7 из 124
Введение Регистрационная память Настройки музыкального инструмента могут быть сохранены в памяти для последующего вызова и мгновенной уста новки всякий раз, когда они вам нужны. В регистрационной памяти можно сохранить до 32 настроек (4 настройки х 8 банков памяти). Загрузка данных с компьютера Вы - Страница 8 из 124
Содержание Меры предосторожности …….. 4 Введение ………………………. 5 Путеводитель по общему устройству инструмента …….. 9 Прикрепление подставки для партитуры …………………………….. 10 Проигрывание демонстрационной мелодии …………………………………….. - Страница 9 из 124
Содержание Регистрационная память …… 50 Характеристики регистрационной памяти ……………………………………….. 50 Использование SMF плеера ………………….. 76 Воспроизведение SMF файла ……… 78 Как сохранить комплект настроек в регистрационной памяти ………….. 51 - Страница 10 из 124
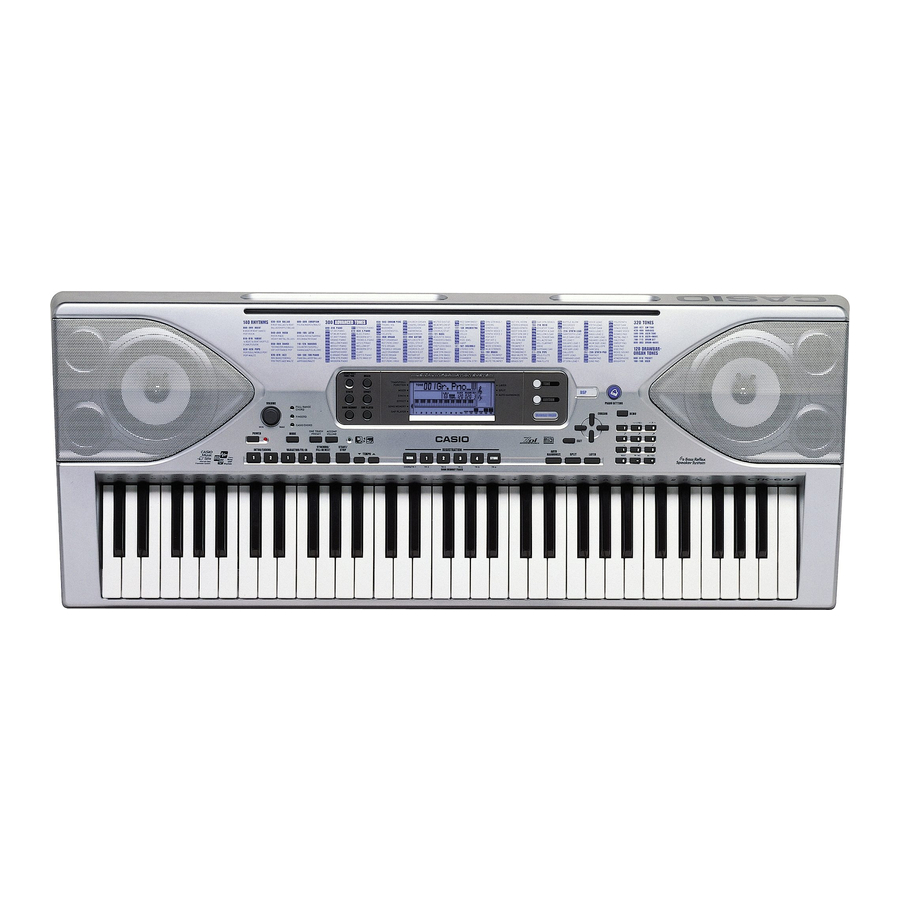
Общий путеводитель 9 - Страница 11 из 124
Общий путеводитель 1 Кнопка «POWER» [Электропитание] 22 Кнопка «LAYER» [Наложение тембров] 2 Индикатор питания 23 Кнопки перемещения курсора 3 Кнопка «SONG MEMORY» [Песенная память] 4 Кнопка «SYNTH» [Синтезатор] 24 Кнопка «DEMO» [Демонстрационная мелодия] 5 Кнопка «TRANSPOSE/FUNCTION» - Страница 12 из 124
Общий путеводитель *2 39 Кнопки с цифрами • 40 Для ввода числовых установок, отобра жаемых на экране дисплея. Кнопки [+]/[ ] («YES»/»NO» [Да/Нет]) • Отрицательные числа можно менять только при помощи кнопок [+] и [ ], позволяющих увеличивать и уменьшать вводимые значения. Задняя панель 41 Гнездо - Страница 13 из 124
Общий путеводитель Дисплей 1. Появляющиеся в этой области индикаторы показывают, какой режим используется в данный момент: режим «TRANSPOSE» [Транспонирование клавиатуры], режим настройки клавиатуры, режим «MIXER» [Микшер], режим «Synthesizer» [Синтезатор], режим «Effect» [Эффект], режим «SONG - Страница 14 из 124
Общий путеводитель 12. Вы можете включить метроном, чтобы прослушивать удары ритма во время игры на клавиатуре. 13. В этой области экрана отображаются ноты, исполняемые на клавиатуре; ноты, воспроизводи мые из песенной памяти, формы аккордов и принимаемые MIDI данные*. 14. Во время использования - Страница 15 из 124
Источники питания Питание этого музыкального инструмента может осуще ствляться электрическим током от батареек или от стандартной настенной розетки домашней электросети (через указанный адаптер переменного тока). Обяза тельно выключайте музыкальный инструмент всякий раз, когда вы им не пользуетесь. - Страница 16 из 124
Источники питания ОПАСНОСТЬ Неправильное обращение с батарейками может привести к протечке электролита, который может повредить окружающие предметы. Кроме того, батарейки могут разорваться, что влечет за собой опасность пожара или получения травмы. Обратите внимание на следующие предосторожности: • - Страница 17 из 124
Источники питания Автоматическое отключение электропитания При питании от батареек электропитание инструмента автоматически отключается, если инструмент не используется в течение 6 минут. В этом случае для повторного включения инструмента нажмите кнопку «POWER» [Электропитание]. ПРИМЕЧАНИЯ • - Страница 18 из 124
Электрические соединения Разъем «PHONES/OUTPUT» [Наушники/ Выходной сигнал] Перед подсоединением наушников или другой внешней аппаратуры установите на минимум уровень громкости на инструменте и подключаемом устройстве. После подключения можно установить требуемый уровень громкости. Задняя панель - Страница 19 из 124
Электрические соединения Приглушающая педаль Нажатие этой педали приглушает звучание нот, испол няемых в данный момент. Педаль запуска/остановки ритма В данном случае педаль выполняет те же самые функ ции, что и кнопка «START/STOP» [Запуск/Остановка]. Принадлежности и дополнительные устройства - Страница 20 из 124
Основные операции ቢ Кнопка « VOLUME» [Уровень громкости] ቦ Кнопка «PIANO SETTING» [Настройка пианино] ባ Кнопка «DSP» [Цифровая обработка звука] ቧ Кнопки [+]/[ ] ቤ Цифровые кнопки ቨ Кнопка «TONE» [Тембр] ብ Кнопка «POWER» [Электропитание] ቩ Кнопка «START/STOP» [Запуск/Остановка] В этом разделе - Страница 21 из 124
Основные операции Тембры акустического органа: 50 встроенных тембров + 100 тембров пользователя. Как выбрать тембр 1. 2. *1. См. раздел «Изменение установок тембров и выбор конфигурации цифровых эффектов (DSP)» на стр. 21. *2. Область памяти для созданных вами тембров. См. раздел «Режим - Страница 22 из 124
Основные операции Изменение установок тембров и выбор конфигурации цифровых эффектов (DSP) Этот инструмент имеет только один источник цифровой обработки звука (DSP эффектов). По этой причине выбор тембров, для которых подключена функция DSP эффектов, при использовании нескольких партий во время - Страница 23 из 124
Акустический орган ቢ «DRAWBAR ORGAN» [Акустический орган] ባ Кнопки перемещения курсора ቤ «EXIT» [Выход] ብ Кнопки с цифрами ቦ [+]/[ ] Этот музыкальный инструмент имеет встроенные «тембры акустического органа», которые можно менять при помощи девяти цифровых регуляторов, действие которых аналогично - Страница 24 из 124
Акустический орган • Всего имеется 13 параметров. Просмотр их осуществляется при помощи кнопок управ и . Более подроб ления курсором ные сведения см. в разделе «Параметры тембров» на стр. 24. • Во время отображения на дисплее экрана с запросом «More?» [Еще ?] вы можете перей ти к экрану синтезатора - Страница 25 из 124
Акустический орган Параметры тембров Ниже приведены подробные сведения о параметрах, установки которых вы можете задавать, используя экран редактирования тембров акустического органа. «Drawbar Position» [Позиция регулятора «Drawbar»] Этот параметр определяет позицию каждого регулятора «Drawbar» и - Страница 26 из 124
Акустический орган Как сохранить отредактированный тембр акустического органа 1. Завершив редактирование параметров, при помощи кнопок управления курсо и , выведите на дисплей ром экран с запросом «More ?». 2. Три раза нажмите кнопку , чтобы появился экран ввода названия тембра и присвоения номера - Страница 27 из 124
Применение эффектов к тембрам ቢ Кнопка «EFFECT» [Эффект] ባ Кнопки перемещения курсора §/§/§/§ ቤ Кнопка «EXIT» [Выход] ብ Кнопки с цифрами ቦ Кнопка «DSP» [Цифровой эффект] ቧ Кнопки [+]/[ ] Этот инструмент имеет большой выбор эффектов, которые вы можете применить к тембрам. Встроенные эффекты содержат - Страница 28 из 124
Применение эффектов к тембрам 2. Нажмите кнопку [§]. • Спустя пять секунд после нажатия этой кнопки автоматически появится экран задания типа DSP эффекта. 3. При помощи кнопок [+] и [ ] или кнопок с цифрами выберите нужный тип DSP эффекта. • Имеющиеся типы DSP эффектов приведены в разделе «Список - Страница 29 из 124
Применение эффектов к тембрам Сохранение установок параметров DSP эффектов В области памяти пользователя вы можете сохранить до 100 модифицированных DSP эффектов для их последу ющего вызова в случае необходимости. ПРИМЕЧАНИЯ • В пользовательской области памяти DSP эффектов (номера с 100 по 199) - Страница 30 из 124
Применение эффектов к тембрам 1. Выбрав нужный тип эффекта реверберации, при помощи кнопок перемещения курсора [ǡ] и [Ǡ] выведите на экран параметр, ус тановку которого вы хотите изменить. • Появится экран задания установки пара метра. Пример Как задать параметр «Reverb Time» [Время реверберации] - Страница 31 из 124
Применение эффектов к тембрам 2. Нажмите кнопку «EFFECT» [Эффект] или «EXIT» [Выход]. • При этом появится экран задания тембра или ритма. Параметры хорус эффектов «Chorus Level» [Уровень хорус эффекта] (диапазон: от 000 до 127) Задает силу эффекта реверберации. «Chorus Rate» [Интенсивность хорус - Страница 32 из 124
Автоаккомпанемент 1 Кнопка «MODE» [Режим] 2 Кнопка «RHYTHM» [Ритм] 3 Кнопки «VARIATION / FILL IN» [Вариация/Вставка] 1/2 4 Кнопка «TEMPO» [Регулирование темпа] 5 Кнопки [+]/[ ] 6 Кнопка «ONE TOUCH PRESET» [Программирование одним нажатием] 7 Кнопка «EXIT» [Выход] Этот музыкальный инструмент - Страница 33 из 124
Автоаккомпанемент Выбор ритма Музыкальный инструмент имеет 140 захватывающих встроенных ритмов, которые вы можете выбирать при помощи приведённой ниже процедуры. Вы можете также переслать данные аккомпанемента с вашего компьютера и сохранить до 16 наборов данных в памяти инструмента в качестве - Страница 34 из 124
Автоаккомпанемент Регистр аккомпанемента и регистр мелодии согласно методу «CASIO CHORD» Использование автоаккомпанемента Приведённая ниже процедура описывает, как пользо ваться функцией автоаккомпанемента данного музы кального инструмента. Прежде чем приступать к вы полнению этой процедуры, вам - Страница 35 из 124
Автоаккомпанемент Метод исполнения аккордов «FINGERED» [Аппликатурный] Метод «FINGERED» предоставляет в ваше распоряже ние 15 различных типов аккордов. Ниже демонстриру ются «регистр аккомпанемента» и «регистр мелодии» и рассказывается, как исполнять аккорды с основным тоном До по методу - Страница 36 из 124
Автоаккомпанемент Пример Как сыграть аккорд «C» [До мажор]. Любая из аппликатур, показанных на приведённой ниже иллюстрации, будет образовывать до мажорный аккорд. Использование модели вставки Модели вставки позволяют мгновенно изменить модель ритма, добавляя тем самым новые интересные вариа ции - Страница 37 из 124
Автоаккомпанемент Использование вариаций ритма Для достижения некоторого разнообразия вы, помимо использования стандартной модели ритма, можете переключаться на «вторичную» вариацию модели выбранного вами ритма. Как вставить модель вариации ритма 1. Для запуска исполнения ритма нажмите кнопку - Страница 38 из 124
Автоаккомпанемент Использование функции «One Touch Preset» [Программирование одним нажатием] Функция «One Touch Preset» [Программирование одним нажатием] автоматически задает установки перечис ленных ниже рабочих параметров в соответствии с той моделью ритма, которую вы используете. • Тембр - Страница 39 из 124
Автоаккомпанемент Типы автогармонизации Инструмент имеет 10 типов автогармонизации. Вы можете выбрать любой из них. Смена типа производит ся при помощи кнопки «TRANSPOSE/FUNCTION» [Транс понирование/Функция]. Более подробные сведения см. в разделе «Изменение других параметров» на стр. 71. - Страница 40 из 124
Функция микшера ቢ Кнопка «MIXER» [Микшер] ባ Кнопка «EXIT» [Выход] ቤ Кнопки [+]/[ ] ብ Кнопка «DRAWBAR ORGAN» [Органный тембр] Что можно делать при помощи микшера Этот клавишный музыкальный инструмент предостав ляет вам возможность в одно и то же время исполнять партии различных музыкальных - Страница 41 из 124
Функция микшера Подключение и отключение каналов При отключении канала перестает звучать инструмент , записанный на этом канале. Как подключать и отключать каналы 1. Нажмите кнопку «MIXER» [Микшер]. • При этом на дисплее рядом с индикатором «MIXER» появится указатель. 2. При помощи кнопок - Страница 42 из 124
Функция микшера 3. При помощи кнопок управления курсо ром и выберите параметр, установку которого вы хотите изменить. Пример. Выберите параметр «громкость», выведя на экран индикатор «Volume». • Нажимая кнопку управления курсором или , вы можете осуществлять циклический просмотр параметров. • В - Страница 43 из 124
Функция микшера • «Octave Shift» [Сдвиг октавы] (Диапазон: от 2 до 0 и до +2) Вы можете использовать этот параметр для сдвига диапазона тембра вверх или вниз. При использовании тембра пикколо могут возникнуть ситуации, когда окажется, что очень высокие ноты, которые вы попыта етесь исполнить, - Страница 44 из 124
Функция микшера • «DSP System Reverb Send» [Передача системного DSP эффекта реверберации] Этот параметр регулирует величину эффекта ревербе рации, применяемого ко всем партиям. • «DSP System Chorus Send» [Передача системного DSP хорус эффекта] Этот параметр регулирует величину хорус эффекта. - Страница 45 из 124
Режим «Synthesizer» [Синтезатор] ቢ Кнопка «SYNTH» [Синтезатор] ባ Кнопки с цифрами ቤ Кнопка «EXIT» [Выход] Режим «Synthesizer» [Синтезатор] данного музыкального инструмента предоставляет в ваше распоряжение все необходимые инструменты для создания ваших собствен ных оригинальных тембров. Для - Страница 46 из 124
Режим «Synthesizer» [Синтезатор] Форма волны характеристики тембра • • Установка тембра Резонанс улучшает гармонические компоненты побли зости от граничной частоты, что обеспечивает особое отчетливое звучание. Более высокая установка резо нанса улучшает качество звучания, как показано на рисунке. - Страница 47 из 124
Режим «Synthesizer» [Синтезатор] Сохранение тембров пользователя в памяти Группа номеров тембров с 600 го по 699 й (или, как их называют по другому, с «USER001» [Пользователь 001] по «USER100» [Пользователь 100]) носит название «области пользователя», поскольку эти номера зарезервированы для - Страница 48 из 124
Режим «Synthesizer» [Синтезатор] Создание тембра пользователя Используйте приведённую ниже процедуру для выбора встроенного тембра и изменения его параметров с целью создания тембра пользователя. 1. Прежде всего выберите тот встроенный тембр, который вы хотите использовать в качестве основы для - Страница 49 из 124
Режим «Synthesizer» [Синтезатор] • «Vibrato Delay» [Задержка вибрато] (Диапазон: от 64 до 00 и до +63) Задает время до начала действия вибрато. • (Диапазон: от 000 до 127) Этот параметр регулирует эффект реверберации. • «Vibrato Rate» [Скорость вибрато] (Диапазон: от 64 до 00 и до +63) Скорость - Страница 50 из 124
Режим «Synthesizer» [Синтезатор] Советы по созданию тембров пользователя Приведённые ниже советы помогут вам сделать процесс создания тембров пользователя чуть чуть более быст рым и простым. Используйте тот встроенный тембр, который подо бен тембру, который вы пытаетесь создать. Всякий раз, когда у - Страница 51 из 124
Регистрационная память ቢ Кнопка «MODE» [Режим] ባ Кнопка «BANK» [Банк] ቤ Кнопки «REGISTRATION» [Регистрация] Характеристики регистрационной памяти Регистрационная память позволяет сохранять до 32 настроек клавиатуры (4 выборки х 8 банков) для последующего мгновенного вызова из памяти всякий раз, - Страница 52 из 124
Регистрационная память Названия комплектов настроек Вы можете присвоить по одному комплекту настроек любой из 32 областей памяти. Выбрать нужную об ласть памяти можно при помощи кнопок «BANK» [Банк] (кнопки 1 4) и четырех кнопок «REGISTRATION» [Регис трация]. Таким образом, областям памяти - Страница 53 из 124
Регистрационная память Как вызвать комплект настроек из регистрационной памяти 1. Используйте кнопку «BANK» [Банк] или кнопки с цифрами для выбора нужного вам банка памяти. • Если вы не выполняете никакой кнопочной операции в течение примерно пяти секунд после нажатия кнопки «BANK» [Банк], то - Страница 54 из 124
Функция песенной памяти (1) Кнопка «MODE» [Режим] (2) Кнопка «SONG MEMORY» [Песенная память] (3) Кнопка «TONE» [Тембр] (4) Кнопка «DRAWBAR ORGAN» [Акустический орган] (5) Кнопки управления курсором [Ĭ]/[į]/[ǡ]/[Ǡ] (6) Кнопка «INTRO / ENDING» [Вступление / Концовка] 1/2 (7) Кнопка «VARIATION / FILL - Страница 55 из 124
Функция песенной памяти Выбор дорожки При помощи кнопок «SONG MEMORY TRACK» [Дорожка песенной памяти], обозначенных «CHORD/TR1 6» [Ак корд/Дорожка 1 6], выберите нужную вам дорожку. Кнопки «SONG MEMORY TRACK» [До рожка песенной памяти] Использование режима записи в реальном времени При записи в - Страница 56 из 124
Функция песенной памяти 5. Сыграйте что нибудь на клавиатуре инструмента. • Вы можете также записать аккорды автоак компанемента, выбрав соответствующий режим при помощи кнопки «MODE» [Режим]. • Если при записи вы пользуетесь педалью, то операции с педалью также записываются на дорожку. См. раздел - Страница 57 из 124
Функция песенной памяти Как начать исполнение автоаккомпане мента и модели вступления посред ством синхронного старта Вместо выполнения операции, описанной в пункте 4, нажмите кнопку «SYNCHRO / FILL IN NEXT» [Синхро низация/Следующая вставка], а затем «SYNCHRO/ ENDING 1» [Синхронизация / Концовка - Страница 58 из 124
Функция песенной памяти цифрами. Подробные сведения об этом содержатся в разделе «Задание длительности звучания ноты» на стр. 58. • Указанный аккорд и его длина хранятся в памяти, и инструмент ждет ввода следую щего аккорда. • Для ввода следующих аккордов повторите операции, описанные в пунктах 5 и - Страница 59 из 124
Функция песенной памяти Задание аккордов в режиме «NORMAL» [Обычное исполнение] Если во время записи переключатель «MODE» [Режим] установлен в положение «NORMAL» [Обычное исполне ние], вы можете задавать аккорды способом, отличным от тех способов, которые используются в режимах «FINGERED» и «CASIO - Страница 60 из 124
Функция песенной памяти Вариации пошаговой записи на дорожку 1 Ниже приведены различные вариации, которыми вы можете воспользоваться, выполняя пошаговую запись на дорожку 1. Все эти вариации основаны на процеду ре, описанной в разделе «Как выполнять пошаговую запись аккордов» на стр. 57. Как начать - Страница 61 из 124
Функция песенной памяти Содержимое дорожек после выполнения записи в реальном времени Помимо нот исполняемых на клавиатуре, в ходе записи , в реальном времени на выбранную дорожку записыва ются указанные ниже данные. Эти данные применяют ся при воспроизведении этой дорожки. • Номер тембра • - Страница 62 из 124
Функция песенной памяти Индикаторы уровня в режиме ожидания записи/редактирования Каналы с 11 го по 16 й соответствуют дорожкам с 1 й по 6 ю. Когда клавиатура работает в режиме ожидания записи или редактирования (см. стр. 62), индикаторы уровня показывают, на каких дорожках уже есть данные, а какие - Страница 63 из 124
Функция песенной памяти 3. Нажмите кнопку управления курсором . 4. Нажмите кнопку «YES» [Да]. • При этом будут удалены все данные, начиная с заданной позиции, и инструмент войдет в режим ожидания пошаговой записи. • При нажатии кнопки управления курсором или «NO» [Нет] операция удаления данных - Страница 64 из 124
Функция песенной памяти 5. Измените значение так, как вам нужно. • Фактические процедуры, которые вам понадобятся для изменения параметра, зависят от типа изменяемых данных. Подробные сведения см. в разделе «Методы редактирования и содержимое дисплея» на стр. 63. • Чтобы отредактировать другие - Страница 65 из 124
Функция песенной памяти Как изменить операцию контроллера ритмов * * 3. Операции с кнопкой «INTRO / ENDING 1» [Вступ ление / Концовка 1], «INTRO / ENDING 2» [Вступле ние / Концовка 2], «VARIATION / FILL IN 1» [Вариа ция/Вставка 1], «VARIATION / FILL IN 2» [Вариа ция/Вставка 2], «SYNCHRO / FILL IN - Страница 66 из 124
Функция песенной памяти Как переписать данные заголовка (запись на панель) Вы можете использовать процедуру, называемую «Запись на панель», чтобы изменить исходные установ ки микшера, темпа и т.п., хранящиеся в заголовке песни. 1. Один раз нажмите кнопку «SONG MEMORY» [Песенная память], чтобы войти - Страница 67 из 124
Установки клавиатуры (1) Кнопка «MODE» [Режим] (2) Кнопка «TRANSPOSE/FUNCTION» [Транспонирова ние/Функция] (3) Кнопка «TONE» [Тембр] (4) Кнопка «EXIT» [Выход] (5) Кнопка «DSP» [Цифровой эффект] (6) Кнопка «SPLIT» [Разделение клавиатуры] (7) Кнопка «LAYER» [Наложение тембров] (8) Кнопки управления - Страница 68 из 124
Установки клавиатуры 5. Для отмены наложения тембров и воз врата клавиатуры в нормальный режим нажмите кнопку «LAYER» [Наложение тембров] еще раз. Как выполнить разделение клавиатуры 1. Пример. Для выбора в качестве основного тембра «348 STRINGS 1» [Струнные инструменты 1] нажмите кнопку «TONE» - Страница 69 из 124
Установки клавиатуры 2. ПРИМЕЧАНИЯ • При включении функции разделения клавиатуры текущей выбранной партией становится партия 3, и на экран выводится дополнительный тембр. В это время вы можете использовать кнопки управления курсором [ǡ] и [Ǡ] для переключения между партиями. При отключении функции - Страница 70 из 124
Установки клавиатуры Транспонирование клавиатуры Транспонирование дает возможность повышать или понижать общую тональность клавиатуры шагами изменения в один полутон. Например, если необходимо аккомпанировать певцу, поющему в специфической тональности, отличной от данного музыкального инстру мента, - Страница 71 из 124
Установки клавиатуры Настройка клавиатуры Функция настройки клавиатуры даёт вам возможность выполнить тонкую настройку для соответствия настрой ке другого музыкального инструмента. Как настроить клавиатуру 1. Нажмите кнопку «TRANSPOSE/FUNCTION» [Транспонирование/Функция]. 2. При помощи кнопок - Страница 72 из 124
Установки клавиатуры Изменение других установок Типы установок В приведенной ниже таблице представлены параметры, установки которых вы можете менять. ПРИМЕЧАНИЯ • Все указанные установки сохраняются всякий раз, когда вы выключаете инструмент. Подробные сведения см. в разделе «Содержимое памяти» на - Страница 73 из 124
Установки клавиатуры Как использовать меню установок клавиатуры 1. 2. Нажмите кнопку «TRANSPOSE/FUNCTION» [Транспонирование / Функция]. При помощи кнопок управления курсором установки которых вы хотите изменить. и и кнопок и вызовите параметры, Экран выбора тембра Кнопка «TRANSPOSE/ FUNCTION» - Страница 74 из 124
Установки клавиатуры 3. Для изменения установок используйте кнопки [+] и [–]. • Заданные установки войдут в силу, даже если вы не нажали кнопку «EXIT» [Выход]. • Подробные сведения о каждой установке приведены в следующем разделе «Перечень установок параметров». • Завершив задание всех необходимых - Страница 75 из 124
Установки клавиатуры Перечень установок параметров меню Типы автогармонизации Вы можете выбрать любой их описанных ниже 10 типов автогармонизации. Другие установки 74 - Страница 76 из 124
Установки клавиатуры Установки MIDI Установки удаления / инициализации 75 - Страница 77 из 124
Использование SMF плеера ቢ «SMF PLAYER» [SMF плеер] ባ «MIXER» [Микшер] ቤ «EXIT» [Выход] ብ «ACCOMP VOLUME» [Громкость аккомпанемента] ቦ «START/STOP» [Запуск/Остановка] ቧ Кнопки управления курсором [§]/[§]/[§]/[§] ቨ Кнопки с цифрами ቩ Кнопки [+]/[ ] Аббревиатура «SMF» («Standard MIDI File» - Страница 78 из 124
Использование SMF плеера Последовательность выполнения операций в режиме SMF плеера Экран выбора тембра/ритма Кнопка «SMF PLAYER» [SMF плеер] Кнопка «SMF PLAYER» [SMF плеер] * Светится индикатор SMF плеера Выберите имя файла. Режим воспроизведения + имя файла Кнопка «START/STOP» [Запуск/Остановка] - Страница 79 из 124
Использование SMF плеера Воспроизведение SMF файла 2. Как воспроизвести SMF файл 1. 2. При помощи кнопок управления курсо и или кнопок [+] и [ ] выбе ром рите файл, который вы хотите воспроиз вести. • В области текста на дисплее появится имя выбранного в данный момент файла. В цифровой области - Страница 80 из 124
Использование SMF плеера 4. Нажмите кнопку , чтобы вывести на дисплей экран выбора режима выдачи выходного сигнала. • При помощи кнопок управления курсором и или кнопок [+] и [ ] выберите режим выдачи выходного сигнала. • Вы можете выбрать любой из следующих двух типов выходного сигнала: «int»: - Страница 81 из 124
MIDI Что такое «MIDI»? Каналы MIDI Буквы MIDI означают «Musical Instrument Digital Interface» [Цифровой Интерфейс Музыкальных Инструментов], представляющего собой название всемирного стандарта для цифровых сигналов и соединительных устройств, дающих возможность обмена музыкальными данными между - Страница 82 из 124
MIDI Передача и прием сообщений MIDI Данный клавишный музыкальный инструмент может передавать ноты, исполняемые на клавиатуре, а также модели автоаккомпанемента и воспроизведение произ ведений из песенной памяти в виде сообщений MIDI на другое устройство. Передача данных MIDI • Исполнение на - Страница 83 из 124
MIDI Использование службы пересылки данных Вы можете скачать с музыкального сайта CASIO (http:/ /music.casio.com) на ваш компьютер указанные ниже типы данных, а затем переслать их в ваш инструмент. • Тембры • Тембры с волнами • DSP эффекты • Ритмы • Песни • SMF данные • Как выполнить подключение к - Страница 84 из 124
Поиск и устранение неисправностей 83 - Страница 85 из 124
Поиск и устранение неисправностей 84 - Страница 86 из 124
Технические характеристики 85 - Страница 87 из 124
Технические характеристики * Та же область памяти используется для хранения данных о формах сигналов, данных аккомпанемента и SMF данных. 86 - Страница 88 из 124
Уход за музыкальным инструментом Избегайте нагрева, высокой влажности и прямого солнечного света. Оберегайте ваш музыкальный инструмент от прямого солнечного света, не размещайте его рядом с кондиционером или в таком месте, где очень высокая температура. Не устанавливайте музыкальный инструмент - Страница 89 из 124
Список алгоритмов DSP эффектов 00:Auto Pan (Автопанорамирование) 0: «Low Frequency» [Низкая частота] (Диапазон: 0 (200 Гц), 1 (400 Гц), 2 (800 Гц)) Регулирует граничную частоту нижнего диапазона частот эквалайзера. 1: «Low Gain» [Усиление нижнего диапазона частот] (Диапазон: 12, 11, 10 до 0 и до - Страница 90 из 124
Список алгоритмов DSP эффектов • Параметры 0: «Input Level» [Уровень входного сигнала] (Диапазон: от 0 до 127) Регулирует уровень входного сигнала. Входной сигнал может искажаться, когда уровень звукового сигнала на входе, число аккордов или значение резонанса слишком велико. Отрегулируйте - Страница 91 из 124
Список алгоритмов DSP эффектов [Быстрое] на установку «Slow» [Медленное]. • Параметры 0: «Resonance» [Резонанс] (Диапазон: от 0 до 127) Регулирует резонанс звука. 1: «Manual» [Вручную] (Диапазон: от 64 до 0 до +63) Регулирует громкость сдвига фазовращателя, которая используется в качестве - Страница 92 из 124
Список алгоритмов DSP эффектов • Функция Улучшает контуры нижнего и верхнего диапазонов входного сигнала. • Параметры 0: 1: «Low Frequency» [Низкая частота] (Диапазон: от 0 до 127) Регулирует частоту гармонического корректора нижнего диапазона. «Low Gain» [Усиление низких частот] (Диапазон: от 0 до - Страница 93 из 124
Список алгоритмов DSP эффектов Регулирует глубину сигналов НЧ генератора. 2: 3: «Wet Level» [Уровень смешанного сигнала](Диапазон: от 0 до 127) Регулирует уровень громкости звучания эффекта. 3: «Feedback» [Обратная связь] (Диапазон: от 64 до 0 до +63) Регулирует обратную связь звука. 18: 3 Phase - Страница 94 из 124
Список алгоритмов DSP эффектов 3: 4: 5: «High Damp» [Затухание в высоком диапазоне] (Диапазон: от 0 до 127) Регулирует затухание звука задержки высокого частотного диапазона. Чем меньше значение, тем больше затухание звука задержки высокого частотного диапазона. «Ratio L» [Коэффициент для левого - Страница 95 из 124
Список алгоритмов DSP эффектов 1: «HPF» [Фильтр верхних частот] (Диапазон: от 0 до 127) Регулирует граничную частоту фильтра верхних частот. Чем больше значение, тем более низкие частоты отрезаются. 2: «Feedback» [Обратная связь] (Диапазон: от 0 до 127) Регулирует повтор задержки. 3: «High Damp» - Страница 96 из 124
Список алгоритмов DSP эффектов 4: 5: «Ratio L» [Коэффициент для левого канала] (Диапазон: от 0 до 127) Регулирует время задержки левого канала. Пропорционально значению, заданному для параметра «Delay Time». «Ratio R» [Коэффициент для правого канала] (Диапазон: от 0 до 127) Регулирует время - Страница 97 из 124
Список алгоритмов DSP эффектов сигнала фазовращателя] 0: «Enhancer Low Frequency» [Низкая частота гармонического корректора] «Delay Wet Level» [Уровень смешанного сигнала задержки звука] 1: «Enhancer Low Gain» [Усиление низких частот гармонического корректора] «Delay Feedback» [Обратная связь - Страница 98 из 124
Список алгоритмов DSP эффектов НЧ генератора] тремоло] 5: «Tremolo Depth» [Г лубина сигналов тремоло] M10:Multi10 (Stereo Phaser Auto Pan) 6: «Delay Time» [Время задержки звука] 7: «Delay Wet Level» [Уровень смешанного сигнала задержки звука] • Функция Это мультиэффектор, относящийся к двум - Страница 99 из 124
Список алгоритмов DSP эффектов 7: частот гармонического корректора] «Lo Fi Resonance» [Резонанс Lo Fi] M16:Multi16 (Drive Rotary Reflection) 5: «Delay Time» [Время задержки звука] • Функция 6: Это мультиэффектор, относящийся к двум эффектам: Drive Rotary Reflection. • Параметры «Delay Wet Level» - Страница 100 из 124
Список алгоритмов DSP эффектов вручную] 2: «Wah Depth» [Г лубина «вау» эффекта] 3: «Chorus LFO Rate» [Интенсивность хорус эффекта НЧ генератора] 4: «Chorus LFO Depth» [Г лубина хорус эффекта НЧ генератора] Это мультиэффектор, относящийся к эффектам: Distortion 1 Phase Chorus 2 Tap Delay. • - Страница 101 из 124
Список алгоритмов DSP эффектов Tap Delay) фазовращателя] • Функция Это мультиэффектор, относящийся к эффектам: LFO Wah Distortion 2 Tap Delay. • Параметры 0: «Wah Manual» [Регулировка «вау» эффекта вручную] 1: «Wah LFO Rate» [Интенсивность «вау» эффекта НЧ генератора] 2: «Wah LFO Depth» [Г лубина - Страница 102 из 124
Приложение Перечень тембров № Группа тембров Название тембра “Bank Select «Program Максимальная MSB” [Самый Change» полифония [Программное старший разряд выбора банка] изменение] Тип диапазона Тип DSP эффекта «PIANO» [Фортепияно] «STEREO GRAND PIANO» [Стереофонический рояль] «PIANO» [Фортепияно] - Страница 103 из 124
Приложение № Группа тембров «ORGAN» [Орган] «ORGAN» [Орган] «ORGAN» [Орган] «ORGAN» [Орган] Название тембра «ROCK ORGAN» [Рок орган] «ROTARY ELEC. ORGAN» [Ротационный электри ческий орган] «ROTARY PERC. ORGAN 2» [Ротационный ударный орган 2] «ORGAN» [Орган] «CHURCH ORGAN 1» [Церковный орган 1] - Страница 104 из 124
Приложение № Группа тембров Название тембра «BASS» [Контрабас] «RESO.SAW BASS 1» [Контрабас в резонансом, с пилообразной волной сигнала 1] «DISTORTION SQR BASS» [Искаженный контрабас с квадратной волной сигнала] «RESO.SAW BASS 2» [Контрабас с резонансом, с пилообразной волной сигнала 2] «BASS» - Страница 105 из 124
Приложение № Группа тембров Название тембра «BRASS» [Духовые инструменты] «BRASS» [Духовые инструменты] «BRASS» [Духовые инструменты] «BRASS» [Духовые инструменты] «BRASS» [Духовые инструменты] «BRASS» [Духовые инструменты] «BRASS» [Духовые инструменты] «BRASS» [Духовые инструменты] «BRASS» - Страница 106 из 124
Приложение № Группа тембров «PIPE» [Труба] «PIPE» [Труба] «PIPE» [Труба] Название тембра “Bank Select «Program MSB” [Самый Change» Максимальная [Программное старший разряд полифония выбора банка] изменение] Тип диапазона Тип DSP эффекта «SYNTH PAN FLUTE» [Синтезированная пан флейта] «SYNTH - Страница 107 из 124
Приложение № Группа тембров «SYNTH PAD» [Доп. регистр синтезатора] «SYNTH PAD» [Доп. регистр синтезатора] «SYNTH PAD» [Доп. регистр синтезатора] «SYNTH PAD» [Доп. регистр синтезатора] «SYNTH PAD» [Доп. регистр синтезатора] «SYNTH PAD» [Доп. регистр синтезатора] «SYNTH PAD» [Доп. регистр - Страница 108 из 124
Приложение № Группа тембров «GM» [Стандарт General MIDI] «GM» [Стандарт General MIDI] «GM» [Стандарт General MIDI] «GM» [Стандарт General MIDI] «GM» [Стандарт General MIDI] «GM» [Стандарт General MIDI] «GM» [Стандарт General MIDI] «GM» [Стандарт General MIDI] «GM» [Стандарт General MIDI] «GM» - Страница 109 из 124
Приложение № Группа тембров «GM» [Стандарт General MIDI] «GM» [Стандарт General MIDI] «GM» [Стандарт General MIDI] «GM» [Стандарт General MIDI] «GM» [Стандарт General MIDI] «GM» [Стандарт General MIDI] «GM» [Стандарт General MIDI] «GM» [Стандарт General MIDI] «GM» [Стандарт General MIDI] «GM» - Страница 110 из 124
Приложение № Группа тембров Название тембра «VARIOUS» [Разное] «MARIMBA WIDE» [Широкая маримба] «VARIOUS» [Разное] «TREMOLO ORGAN GM» [Орган тремоло стандарта GM] «VARIOUS» [Разное] «DRAWBAR ORGAN 2 GM» [Орган 2 стандарта GM] «VARIOUS» [Разное] Тип DSP эффекта «VIBRAPHONE WIDE» [Широкий вибрафон] - Страница 111 из 124
Приложение № Группа тембров Название тембра «VARIOUS» [Разное] Тип диапазона Тип DSP эффекта «WOOD PAD» «VARIOUS» [Разное] Тип DSP эффекта «FAST SWEEP» «VARIOUS» [Разное] Тип диапазона «SOPRANO PAD» [Дополинтельный регистр сопрано] «VARIOUS» [Разное] «Program “Bank Select Change» MSB” [Самый - Страница 112 из 124
Приложение № Группа тембров «DRAWBAR» [Акустический орган] «DRAWBAR» [Акустический орган] «DRAWBAR» [Акустический орган] «DRAWBAR» [Акустический орган] «DRAWBAR» [Акустический орган] «DRAWBAR» [Акустический орган] «DRAWBAR» [Акустический орган] «DRAWBAR» [Акустический орган] «DRAWBAR» [Акустический - Страница 113 из 124
Приложение Таблица назначения клавишам клавиатуры тембров ударных инструментов «Program Change» [Программное изменение] № / Название набора ударных инструментов Клавиша / Номер ноты PC0: Набор ударных PC1: Набор ударных PC8: Набор ударных PC16: Набор ударных PC24: Набор ударныхPC25: Набор - Страница 114 из 124
Приложение «Program Change» [Программное изменение] № / Название набора ударных инструментов Клавиша / Номер ноты PC0: Набор ударных PC1: Набор ударных PC8: Набор ударных PC16: Набор ударныхPC24: Набор ударныхPC25: Набор ударных PC30: Набор ударных PC32: Набор ударных СТАНДАРТНЫЙ 1 СТАНДАРТНЫЙ 2 - Страница 115 из 124
Приложение Перечень ритмов 114 - Страница 116 из 124
Приложение 115 - Страница 117 из 124
Приложение Диаграмма аппликатуры аккордов В приведенной ниже таблице указаны аппликатуры наиболее часто используемых аккордов, включая инвертиро ванные аппликатуры. Тип аккорда Основ ной тон аккорда 116 - Страница 118 из 124
Приложение Тип аккорда Основ ной тон аккорда * Вы можете изменить диапазон клавиатуры аккордов dim7 для основных тонов A, B§ и B, а также увели ченных аккордов для основных тонов B§ и B путем изменения установки разделения клавиатуры (см. стр. 67). 117 - Страница 119 из 124
Приложение Перечень эффектов Перечень эффектов эквалайзера Перечень эффектов «REVERB» [Реверберация] Перечень DSP эффектов Перечень хорус эффектов Устанавливаемые параметры зависят от типа DSP эффекта. Кроме того, параметры для каждого типа DSP эффектов зависят от алгоритма, связанного с этим - Страница 120 из 124
Приложение № DSP Номер эффекта алгоритма Индикация на дисплее Название DSP эффекта «Chorus» [Хрпус эффект] № DSP Номер эффекта алгоритма Индикация на дисплее Название DSP эффекта «Rotary Fx» [Ротационный эффект Fx] «Flanger» [Фланг процессор] «Delay» [Задержка] «Wah» [Вау эффект Fx] - Страница 121 из 124
Технологическая карта MIDI Модель СЕЛ 691 Версия: 1.0 - Страница 122 из 124
Режим 1: OMNI ON, POLY [Общий режим для всех каналов включен], [Полифонический] Режим 2: OMNI ON, MONO [Общий режим для всех каналов включен], [Одноголосый] Режим 3: OMNI OFF, POLY [Общий режим для всех каналов выключен], [Полифонический] Режим 4: OMNI OFF, MONO [Общий режим для всех каналов - Страница 123 из 124
Символ вторичной переработки указывает на соответствие упаковки законодательству Герма нии по защите окружающей среды. - Страница 124 из 124

Меры предосторожности
■ /К
ОПАСНОСТЬ!
громкость звутса
Не слушайте очень гром кую »^эыку в те чение
длительного вр>емени. Особую осторожносгь
следует соблюдать при прос^пдиивании
муаьпси через наушники. Очень громкий звук
может повредить слух.
Тяжелые Ефедмсты
Никогда не ставьте на музыкальный инстру
мент тяжелые предадеты.
В противном случае инструмент может
перевернуться или этот предмет может
упасть с него, что соадаетугрозу травмы.
Правильная сбор
1
са подставки *
Неправильноустановленная подставка
может перевернуться, а инструмент упасть,
что повлечет за собой опасность получения
травмы.
Акь*уратно соберите подставку соблюдая
прилагаемую инструкцию. Убедатесь в том,
что музыкальный инструмент правильно
установлен на подставке.
О
Подставку можно приобрести дополнительно (в
комплект поставки музыкального инструмента
она не входит).
ВНИМАНИЕМ
при использовании батарей в случае обнаружения
любого из ниже перечисленных признаков обязатель“
но замените батареи или переключитесь на какой-
нибудь другой источник питания.
• Уменьшение яркости индикатора питания.
• Инструмент не включается,
• Изображение на дисплее стало тусклым или трудно
считывать данные сдисплея.
• Слишком низкий уровень громкости звука из
динамика или наушников.
• Искажение звука.
• Периодическое пропадание звука на большой
громкости,
• Внезапное прекращение электропитания на боль
шой громкости.
• Изображение на дисплее мигает или стало тусклым
на большой громкости.
• Продолжение звучания даже после отпускания
клавиши.
• Совершенно другойтембрзвучания.
• Нарушение воспроизведения ритмических схем и
демонстрв
14
ионных мелодий
• Прекращение питания, искажение звука или низкий
уровень громкости при воспроизведении от под
ключенного компьютера или инструмента MIDI.
Введение
Поздравляем вассприоб регтением этого музыка-чьного инструмента CASIO. Он предоставляет вам целый ряд возмож
ностей и ихк«т следующее функции.
516 тембров, включая улучшенные тембры богатого звучания
300у.>тучшенныхтембров запрограммированы С использованием цифрового процессора сигналов, обеспечивая их
богатхлвоимощь.Такиеулу’^шенныетембры. как *Stereo Piano» [Стереофоническое пианино] H«TVemolo Elec tríe Piano»
[Электрическое пианиносзффе
KTovt
тремоло] являютсяулучшенными версиями тембров «Plano» [Пианино] MtElectríc
Plano» (Электрическое пианино] и соэдаютабсолюпю повое звучание.
50 тембров акустического органа
Помимо 51 в стаидартшэтхтембров инструмент иктеетБО реалистичттьтхтембров акустического органа. Т>мбры акугти
ческогоорганазтраштяются при помопги девяти ьшфровых регуляторов. Вы можететакжевыбратьударный звук или
щелчок клавиши и даже отредактироватьпараметры предварительнозаданных тембров и сохранить в perисл’ре
памятитембровдо 100 оригинальных польэовательскихтсмбров.
Флэш-память
Встроенная ([злаш-память позво;шст расширит ь выбор тембров и ришов nyieM перекачки данныхе сайта CASIO
MUSIC SITE или из другого источника. Вы можете танисе сохранить до 200 музыкальных файлов формата SMF для
их последующего воспроизведения.
Кнопка «PIANO 5ETTÌNG» [Настройка пианино]
Нажатие этой кнопки позволяет оптимизировать настройку клавиатуры для игры с испальзованием тембра
пианино.
140 встроенных ритмов + 16 ритмов пользователя
Широкий выбор из 140 ритмов включает различные виды аккокгаанемекта практически для любого музыкалт^но
го стиля: от рок-музыки до поп-музьжи и джаза.
Вы можете также псреслате данные аккомхханемен’гас вашего компьютера и сохранить их в качестве ритов
пользователя (маьхимум 16 пользовате-тьских ритмов] в памяти клавиатуры.
Автоаккомпанемент
Просто задайте аккорд и инструмент будет автоматически исполнять нужный вам ритм, басыиаккорды. Функ
ция «One Tbuch Preset» [Программирование одним налкагием] мшовенно вызывает из памяти наиболее подходя
щие установк-и инструментального тембра и темпа в соотаетствии с используемым вами ритмом.
Большой информативный дисплей
На большом встроенном дисплее отображаются названия аккордов, установка темпа, музыкальная информация
клавиатуры, нотный стан с исполняемыми нотами и другая необходимая информация об исполняемой вами
музыке. Встроенная подсветка делать экран легкочитаемым и позволяет считывать показания дисплея даже в
полной темноте.
Песенная память
Вы можете записать в память до шести партий совместно с их установками тембров, громкости, панорамирова
ния и другими параметрами для их последующего воспроизведения. С помощью функции автчэаккомпанемента
аьз можете добиться реалистичного звл’чания целого ансамбля.
Режим синтезатора
Изменяет параметры любого из естроекшых звуков для создания вгштх собственных оригинальных творений. До
120 орш инальньк звуков может быть сохранено в памяти для последующего вызова из памяти и использования.
Taic же как вс’троснных тембров.
Совместимость с Общей Системой «МЮ1»
Набор тонов Общей Системы «MIDI» позволяетподключать этот инструмент к персональному компьютеру и наслаж
даться возможностями, предоставляемыми «настольным му’зыкалькым центром*. Этот музыкальный инструмент
может использоваться как настольное музыкальное входное устройство или как источник звука. С его помощью вы
можете прослушивать приобретенные в магазине записи, отвечающие требованиям Общей Системы «МШЬ.
Мощные эффекты
Кхх’шекция мощных эффе1стов, таких как цифровая обработка звука (DSP), реверберация, хорус-эффекти др. обеспе
чивает вам по.чный контрачь над необходи.мьш ва.м звучанием. Вы можече даже мз.менить парамегры лкХЗого
зффсьладля создания своего собственного, оригинального эффекта. Имеется также четырехполосный эквалайзер.
Микшер
Вы можете определять тембр, гро.мкость. позицию панорамирования и другие параметры д.чя каждой встроен150й
партии автоаккомпапемента. Кроме того, вы можете управлять теми ясе самььми параметрами во время ввода
-MIDI
-данных.
Как использовать наш сайт инструкций OnlineManuals.ru
Наша цель состоит в том, чтобы предоставить вам быстрый доступ к содержанию инструкции для синтезатора, цифрового пианино Casio CTK-691.
С помощью онлайн просмотра, Вы можете быстро просмотреть содержимое инструкции и найти решение проблемы с синтезатора, цифрового пианино Casio CTK-691.
Для Вашего удобства
Если листать руководство пользователя синтезатора, цифрового пианино Casio CTK-691 прямо на сайте, не очень удобно для Вас, есть два возможных решения:
• Просмотр в полноэкранном режиме — легко просмотреть руководство пользователя (без загрузки его на свой компьютер), Вы можете использовать режим полноэкранного просмотра.
Для просмотра инструкции пользователя синтезатора, цифрового пианино Casio CTK-691 на полном экране, используйте кнопку «Открыть в Pdf-viewer».
• Загрузка на компьютер — Вы можете также скачать Инструкция синтезатора, цифрового пианино Casio CTK-691 на свой компьютер и сохранить его в файлах.
Многие люди предпочитают читать документы не на экране, а в печатной версии.
Возможность печати руководства пользователя также была предусмотрена на нашем сайте,
и вы можете использовать ее, нажав на иконку «печать» в Pdf-viewer.
Нет необходимости печатать все руководство синтезатора, цифрового пианино Casio CTK-691, можно выбрать только нужные страницы инструкции.
-
Contents
-
Table of Contents
-
Troubleshooting
-
Bookmarks
Quick Links
CTK691ES01-01_cover1-4.fm 1 ページ 2003年9月29日 月曜日 午後4時56分
Related Manuals for Casio CTK-691
Summary of Contents for Casio CTK-691
-
Page 1
CTK691ES01-01_cover1-4.fm 1 ページ 2003年9月29日 月曜日 午後4時56分… -
Page 2
CTK691ES01-01_cover1-4.fm 2 ページ 2003年10月23日 木曜日 午後5時2分… -
Page 3
CTK691E01-01.book 1 ページ 2003年9月29日 月曜日 午後4時47分 Safety Precautions Safety Precautions Congratulations on your selection of the CASIO electronic musical instrument. Before using the instrument, be sure to carefully read through the instructions contained in this manual. Please keep all information for future reference. -
Page 4
Never twist or stretch the cord. Should the electric cord or plug become damaged, contact your original retailer or authorized CASIO Service Provider. AC Adaptor Never touch the AC adapter while your hands are wet. Doing so creates the risk of electric shock. -
Page 5: Safety Precautions
CTK691E01-01.book 3 ページ 2003年9月29日 月曜日 午後4時47分 Location Avoid locating the product on an unstable stand, on an uneven surface, or any other unstable location. An unstable location can cause the product to fall over, creating the risk of personal injury. AC Adaptor Misuse of the AC adaptor creates the risk of fire and electric shock.
-
Page 6
CTK691E01-01.book 4 ページ 2003年9月29日 月曜日 午後4時47分 Safety Precautions Sound Volume Do not listen to music at very loud volumes for long periods. Particular care concerning this precaution is required when using headphones. High volume settings can damage your hearing. Heavy Objects Never place heavy object on top of the product. Doing so can make the product top heavy, causing the product to tip over or the object to fall from it, creating the risk of personal injury. -
Page 7: Introduction
100 original tones in user tone memory. Flash Memory Built-in Flash memory lets you expand your selection of tones and rhythms by downloading data from the CASIO MUSIC SITE, or from other sources. You can also store up to 200 SMF format music files for playback.
-
Page 8
Keyboard setups can be stored in memory for later recall and instant set up whenever you need them. Up to 32 setups (4 setups x 8 banks) can be stored in registration memory. Data download from your computer You can use your computer to download data from the CASIO MUSIC SITE. 705A-E-008A… -
Page 9: Table Of Contents
CTK691E01-01.book 7 ページ 2003年9月29日 月曜日 午後4時47分 Contents Safety Precautions … E-1 Introduction … E-5 General Guide … E-9 Attaching the Score Stand …E-10 Playing a Demo Tune…E-11 About the display…E-12 Power Supply … E-14 Using batteries …E-14 Using the AC Adaptor …E-15 Auto Power Off…E-16 Turning Off the Keyboard …E-16 Memory Contents…E-16…
-
Page 10
CTK691E01-01.book 8 ページ 2003年9月29日 月曜日 午後4時47分 Contents Storing a User Tone In Memory …E-49 Registration Memory .. E-50 Registration Memory Features…E-50 To Save a Setup in Registration Memory …E-51 To Recall a Setup from Registration Memory …E-52 Song Memory Function … E-53 Tracks …E-53 Basic Song Memory operations …E-54 Using Real-time Recording …E-54… -
Page 11: General Guide
CTK691E01-01.book 9 ページ 2003年9月29日 月曜日 午後4時47分 General Guide General Guide 705A-E-011A…
-
Page 12: Attaching The Score Stand
CTK691E01-01.book 10 ページ 2003年9月29日 月曜日 午後4時47分 General Guide POWER button Power indicator SONG MEMORY button SYNTH button TRANSPOSE/FUNCTION button MIXER button EFFECT button SMF PLAYER button VOLUME knob MODE button ONE TOUCH PRESET button ACCOMP VOLUME button DATA ACCESS indicator RHYTHM button TONE button DRAWBAR ORGAN button DSP button…
-
Page 13: Playing A Demo Tune
CTK691E01-01.book 11 ページ 2003年9月29日 月曜日 午後4時47分 Rear Panel Playing a Demo Tune (*3) Pressing the DEMO button starts demo tune play. There are 3 demo tunes, which continuously play in sequence. To stop demo tune play, press either the DEMO button or the START/STOP button. Pressing the [ + ]/[–] buttons skips to the next demo tune.
-
Page 14: About The Display
CTK691E01-01.book 12 ページ 2003年9月29日 月曜日 午後4時47分 General Guide About the display Pointers appear here to show when Transpose, the Keyboard Setting Mode, the Mixer Mode, Synthesizer, Effect, Song Memory, or SMF player is being used. The TONE indicator appears when you are selecting or viewing the TONE setting, while RHYTHM appears for the RHYTHM setting.
-
Page 15
CTK691E01-01.book 13 ページ 2003年9月29日 月曜日 午後4時47分 You can turn on the metronome to provide a reference beat for your keyboard play. This display shows the note played on the keyboard, notes being played back from Song Memory, chord forms, and received MIDI data*. The name of the chord being played is shown on the display while Auto Accompaniment is being used. -
Page 16: Power Supply
CTK691E01-01.book 14 ページ 2003年9月29日 月曜日 午後4時47分 Power Supply Power Supply This keyboard can be powered by current from a standard household wall outlet (using the specified AC adaptor) or by batteries. Always make sure you turn the keyboard off whenever you are not using it. Using batteries Always make sure you turn off the keyboard before loading or replacing batteries.
-
Page 17: Using The Ac Adaptor
Never twist or stretch the cord. Should the electric cord or plug become damaged, contact your original retailer or authorized CASIO Service Provider. Never touch the AC adaptor while your hands are wet. Doing so creates the risk of electric shock.
-
Page 18: Auto Power Off
CTK691E01-01.book 16 ページ 2003年9月29日 月曜日 午後4時47分 Power Supply Auto Power Off When you are using battery power, keyboard power turns off automatically whenever you leave it on without performing any operation for about 6 minutes. When this happens, press the POWER button to turn power back on. Auto Power Off is disabled (it does not function) when you are using the AC adaptor to power the keyboard.
-
Page 19: Connections
When connected to a musical instrument amplifier, set the volume of the keyboard to a relatively low level and make output volume adjustments using the amplifier’s controls.
-
Page 20: Accessories And Options
CTK691E01-01.book 18 ページ 2003年9月29日 月曜日 午後4時47分 Connections Soft Pedal Depressing the pedal softens the sound of the notes being played. Rhythm Start/Stop Pedal In this case, the pedal performs the same functions as the START/STOP button. Accessories and Options Use only the accessories and options specified for this keyboard.
-
Page 21: Basic Operations
CTK691E01-01.book 19 ページ 2003年9月29日 月曜日 午後4時47分 Basic Operations Basic Operations VOLUME Number buttons This section provides information on performing basic keyboard operations. To play the keyboard Press the POWER button to turn the keyboard Use the VOLUME knob to set the volume to a relatively low level.
-
Page 22
CTK691E01-01.book 20 ページ 2003年9月29日 月曜日 午後4時47分 Basic Operations Drawbar Organ Tones: 50 Preset Tones + 100 User Tones Number of Number Tone Type Tones 000-049 Preset Tones 100-199 User Tones (*6) *1: See “Changing Tones and Configuring DSP Effect Settings” on page E-21. *2: Memory area for tones created by you. -
Page 23: Piano Setting Button
CTK691E01-01.book 21 ページ 2003年9月29日 月曜日 午後4時47分 Digital Sampling A number of the tones that are available with this keyboard have been recorded and processed using a technique called digital sampling. To ensure a high level of tonal quality, samples are taken in the low, mid, and high ranges and then combined to provide you with sounds that are amazingly close to the originals.
-
Page 24: Using The Drawbar Organ Mode
CTK691E01-01.book 22 ページ 2003年9月29日 月曜日 午後4時47分 Using the Drawbar Organ Mode Using the Drawbar Organ Mode DRAWBAR ORGAN Number buttons Your keyboard has built-in “drawbar organ tones” that can be altered using nine digital drawbars whose operations are similar to the controls on a drawbar organ. You can also select percussion or key click. There is room in memory for storage of up to 100 user- created drawbar tone variations.
-
Page 25: To Select A Drawbar Organ Tone
CTK691E01-01.book 23 ページ 2003年9月29日 月曜日 午後4時47分 To select a drawbar organ tone Find the drawbar organ tone you want to use in the tone list and note its tone number. Press the DRAWBAR ORGAN button. This causes the drawbar organ tone selection screen to appear.
-
Page 26: Parameter Details
CTK691E01-01.book 24 ページ 2003年9月29日 月曜日 午後4時47分 Using the Drawbar Organ Mode Parameter Details The following provides details about the parameters you can configure using the drawbar organ tone editing screen. Drawbar Position This parameter defines the position of each drawbar, and the volume of each overtone.
-
Page 27: To Save An Edited Drawbar Organ Tone
CTK691E01-01.book 25 ページ 2003年9月29日 月曜日 午後4時47分 To save an edited drawbar organ tone After editing parameters, use the [ CURSOR buttons to display “More?”. Press the [ ] CURSOR button three times to display the screen for inputting a tone name and assigning a tone number.
-
Page 28: Applying Effects To Tones
CTK691E01-01.book 26 ページ 2003年9月29日 月曜日 午後4時47分 Applying Effects to Tones Applying Effects to Tones EFFECT ] CURSOR This keyboard provides you with a selection of effects that you can apply to tones. The built-in effects include a wide variety of variations that give you access to a selection of general digital effects.
-
Page 29
CTK691E01-01.book 27 ページ 2003年9月29日 月曜日 午後4時47分 Press the [ ] CURSOR button. The DSP type setting screen will appear automatically about fives seconds after you press the button. Use the [+] and [–] buttons or the number buttons to select the type of DSP you want. See the “Effect List”… -
Page 30: Dsp Button
CTK691E01-01.book 28 ページ 2003年9月29日 月曜日 午後4時47分 Applying Effects to Tones Saving the Settings of DSP Parameters You can save up to 100 modified DSPs in the user area for later recall when you need them. User DSP areas 100 through 199 initially contain the same data as DSP types 000 through 099.
-
Page 31: Selecting Chorus
CTK691E01-01.book 29 ページ 2003年9月29日 月曜日 午後4時47分 After selecting the reverb type you want, use the [ ] and [ ] CURSOR buttons to display the parameter whose setting you want to change. This displays the parameter setting screen. Example: To set the Reverb Time parameter Use the [ + ] and [–] buttons or the number buttons to input the parameter setting you want.
-
Page 32: Using The Equalizer
CTK691E01-01.book 30 ページ 2003年9月29日 月曜日 午後4時47分 Applying Effects to Tones Press the EFFECT or EXIT button. This returns to the tone or rhythm selection screen. CHORUS Parameters Chorus Level (Range: 000 to 127) Specifies the size of the chorus sound. Chorus Rate (Range: 000 to 127) Specifies the undulation speed of the chorus sound.
-
Page 33: Auto Accompaniment
CTK691E01-01.book 31 ページ 2003年9月29日 月曜日 午後4時47分 Auto Accompaniment Auto Accompaniment MODE RHYTHM VARIATION/FILL-IN 1/2 TEMPO [ + ]/[–] This keyboard automatically plays bass and chord parts in accordance with the chords you finger. The bass and chord parts are played using sounds and tones that are automatically selected to select the rhythm you are using.
-
Page 34: Selecting A Rhythm
CTK691E01-01.book 32 ページ 2003年9月29日 月曜日 午後4時47分 Auto Accompaniment Selecting a Rhythm This keyboard provides you with 140 exciting rhythms that you can select using the following procedure. You can also transfer accompaniment data from your computer and store up to 16 of them as user rhythms in keyboard memory.
-
Page 35: Using Auto Accompaniment
The accompaniment keyboard can be used for playing chords only. No sound will be produced if you try playing single melody notes on the accompaniment keyboard. Chord Types CASIO CHORD accompaniment lets you play four types of chords with minimal fingering. Chord Types Example…
-
Page 36
CTK691E01-01.book 34 ページ 2003年9月29日 月曜日 午後4時47分 Auto Accompaniment FINGERED FINGERED provides you with a total of 15 different chord types. The following describes the FINGERED “accompaniment keyboard” and “melody keyboard”, and tells you how to play a C-root chord using FINGERED. FINGERED Accompaniment Keyboard and Melody Keyboard The accompaniment keyboard can be used for playing chords only. -
Page 37: Using An Intro Pattern
Before starting, you should first select the rhythm you want to use, set the tempo, and use the MODE button to select the chord play method you want to use (NORMAL, CASIO CHORD, FINGERED, FULL RANGE CHORD). To insert an intro Press INTRO/ENDING button 1 or 2.
-
Page 38: Using A Rhythm Variation
Before starting, you should first select the rhythm you want to use, set the tempo, and use the MODE button to select the chord play method you want to use (NORMAL, CASIO CHORD, FINGERED, FULL RANGE CHORD). To use synchro start Press the SYNCHRO/FILL-IN NEXT button to put the keyboard into synchro start standby.
-
Page 39: Using One-Touch Preset
Auto Harmonize turns off temporarily whenever you start demo tune play. It turns back on as soon as the operation or function that caused it to turn off is finished. Auto Harmonize is enabled only when the Auto Accompaniment mode is FINGERED or CASIO CHORD. E-37…
-
Page 40: Adjusting The Accompaniment Volume
CTK691E01-01.book 38 ページ 2003年9月29日 月曜日 午後4時47分 Auto Accompaniment Auto Harmonize Types Auto Harmonize lets you select from among the 10 Auto Harmonize types. Type changing is performed by the setting item using the TRANSPOSE/FUNCTION button. See “Changing Other Settings” on page E-71 for more information.
-
Page 41: Mixer Function
When this keyboard is being used as the sound source for an externally connected computer or other MIDI device, all 16 channels are assigned musical instrument parts. The notes played over the channel selected by steps 1 and 2 under “Turning Channels On and Off” on page E-40 are shown on the displayed keyboard and staff.
-
Page 42: Turning Channels On And Off
CTK691E01-01.book 40 ページ 2003年9月29日 月曜日 午後4時47分 Mixer Function Turning Channels On and Off Turning a channel off mutes any instrument recorded in the channel. To turn channels on and off Press the MIXER button. This causes a pointer to appear on the display next to MIXER.
-
Page 43: How Parameters Work
main10.fm 41 ページ 2003年10月29日 水曜日 午後2時12分 Use the [ ] and [ ] CURSOR buttons to select the parameter whose setting you want to change. Example: Select volume setting by displaying “Volume”. Each press of the [ ] or [ ] CURSOR buttons cycles through the parameters.
-
Page 44: Effect Parameters
CTK691E01-01.book 42 ページ 2003年9月29日 月曜日 午後4時47分 Mixer Function Octave Shift (Range: –2 to 0 to +2) You can use octave shift to shift the range of the tone up or down. When using the piccolo tone, there may be cases when very high notes you want to play are not included within the range of the keyboard.
-
Page 45
CTK691E01-01.book 43 ページ 2003年9月29日 月曜日 午後4時47分 DSP System Reverb Send (Range: 000 to 127) This parameter adjusts how much reverb is applied to all parts. DSP System Chorus Send (Range: 000 to 127) This parameter adjusts chorus. Changing the tone, volume, pan pot, coarse tune, fine tune, reverb send, or chorus send setting causes the corresponding MIDI message to be output from the MIDI terminal. -
Page 46: Synthesizer Mode
CTK691E01-01.book 44 ページ 2003年9月29日 月曜日 午後4時47分 Synthesizer Mode Synthesizer Mode SYNTH Number buttons The Synthesizer Mode of this keyboard provides the tools for creating your own original tones. Simply select one of the built-in tones and change its parameters to create your own original sound.
-
Page 47
CTK691E01-01.book 45 ページ 2003年9月29日 月曜日 午後4時47分 Tone Characteristic Waveform Tone Setting Specifies which of the preset tones should be used as the original tone. Volume Characteristic Parameters These parameters control how the tone changes over time, from when the keyboard key is pressed until the tone decays. You can specify changes in volume and sound characteristics. -
Page 48
CTK691E01-01.book 46 ページ 2003年9月29日 月曜日 午後4時47分 Synthesizer Mode Saving User Tones The group of tone numbers from 600 through 699 (User 001 through User 100) is called the “user area” because they are reserved for storage of user tones. After you recall a preset tone and change its parameters to create your own user tone, you can store it in the user area for later recall. -
Page 49: Creating A User Tone
CTK691E01-01.book 47 ページ 2003年9月29日 月曜日 午後4時47分 Creating a User Tone Use the following procedure to select a preset tone and change its parameters to create a user tone. First, select the preset tone you want to use as a basis for your user tone. Press the SYNTH button.
-
Page 50
CTK691E01-01.book 48 ページ 2003年9月29日 月曜日 午後4時47分 Synthesizer Mode Vibrato Delay (Range: –64 to 00 to +63) Specifies the amount of time before vibrato starts. Vibrato Rate (Range: –64 to 00 to +63) Rate (speed) of the vibrato effect Vibrato Depth (Range: –64 to 00 to +63) Depth of the vibrato effect Octave Shift (Range: –2 to 0 to +2) Up/down octave shift… -
Page 51: Storing A User Tone In Memory
CTK691E01-01.book 49 ページ 2003年9月29日 月曜日 午後4時47分 User Tone Creation Hints The following hints provide helpful advice on making user tone creation a bit quicker and easier. Use a preset tone that is similar to the one you are trying to create. Whenever you already have a rough idea of the tone you are trying to create, it is always a good idea to start with a preset tone that is similar.
-
Page 52: Registration Memory
CTK691E01-01.book 50 ページ 2003年9月29日 月曜日 午後4時47分 Registration Memory Registration Memory MODE STORE Registration Memory Features Registration memory lets you store up to 32 keyboard setups (4 sets x 8 banks) for instant recall whenever you need them. The following is a list of settings that are saved in registration memory.
-
Page 53: To Save A Setup In Registration Memory
CTK691E01-01.book 51 ページ 2003年9月29日 月曜日 午後4時47分 Setup Names You can assign setups into one of 32 areas, which you can select using BANK buttons 1 through 4 and the four REGISTRATION buttons. Area names range from 1-1 through 8-4 as shown below. Use the BANK button to select the bank.
-
Page 54: To Recall A Setup From Registration Memory
CTK691E01-01.book 52 ページ 2003年9月29日 月曜日 午後4時47分 Registration Memory To Recall a Setup from Registration Memory Use the BANK button or the number buttons to select the bank. If you do not perform any operation for about five seconds after pressing the BANK button, the keyboard automatically clears the registration memory recall screen.
-
Page 55: Song Memory Function
CTK691E01-01.book 53 ページ 2003年9月29日 月曜日 午後4時47分 Song Memory Function Song Memory Function MODE DRAWBAR ORGAN VARIATION/FILL-IN 1/2 TEMPO [ + ]/[–], YES/NO This keyboard lets you record up to five separate songs in song memory for later playback. There are two methods you can use to record a song: real-time recording where you record the notes as you play them on the keyboard, and step recording where you input chords and notes one-by-one.
-
Page 56: Basic Song Memory Operations
CTK691E01-01.book 54 ページ 2003年9月29日 月曜日 午後4時47分 Song Memory Function Selecting a Track Use the SONG MEMORY TRACK buttons marked CHORD/ TR1 through TR6 to select the track you want. SONG MEMORY TRACK Buttons Track 1 Track 2 Track 3 Track 4 Track 5 Track 6 Basic Song Memory operations The status of the Song Memory changes each time you press…
-
Page 57: Mixer Mode Settings
CTK691E01-01.book 55 ページ 2003年9月29日 月曜日 午後4時47分 Play something on the keyboard. You can also record Auto Accompaniment chords by selecting the applicable mode with the MODE button. Optional pedal operation is also recorded. See “Track 1 Contents After Real-time Recording”. Press the START/STOP button to end recording when you are finish playing.
-
Page 58: Playing Back From Song Memory
CTK691E01-01.book 56 ページ 2003年9月29日 月曜日 午後4時47分 Song Memory Function To synchro start Auto Accompaniment with an intro pattern In place of step 4, press the SYNCHRO/FILL-IN NEXT button and then INTRO/ENDING 1 or INTRO/ENDING 2 button. Auto-accompaniment will start with the intro pattern when you play a chord on the accompaniment keyboard.
-
Page 59
Press the SYNCHRO/FILL-IN NEXT button. Play a chord. Use the chord play method that is specified by the current MODE setting (FINGERED, CASIO CHORD, etc.). When the accompaniment mode is set to NORMAL, specify the chord using the root input keyboard and chord type input keyboard. -
Page 60
When the accompaniment mode is set to NORMAL during step recording, you can specify chords using a method that is different from CASIO CHORD and FINGERED fingerings. This chord specification method can be used to input 18 different chord types using only two keyboard keys, so chords can be specified even if you don’t know how to… -
Page 61: Recording Multiple Tracks
CTK691E01-01.book 59 ページ 2003年9月29日 月曜日 午後4時47分 Track 1 Step Recording Variations The following describes a number of different variations you can use when recording to Track 1 using step recording. All of these variations are based upon the procedure described under “To record chords with step recording” on page E-57. To start accompaniment with an intro pattern In step 4, press INTRO/ENDING 1 or INTRO/ENDING 2 button after the SYNCHRO/FILL-IN NEXT button.
-
Page 62: Track Contents After Real-Time Recording
CTK691E01-01.book 60 ページ 2003年9月29日 月曜日 午後4時47分 Song Memory Function Track Contents After Real-time Recording In addition to keyboard notes, the following data is also recorded to the selected track during real-time recording. This data is applied whenever the track is played back. Tone number Optional pedal operations The following data is recorded in the header whenever you…
-
Page 63: Correcting Mistakes While Step Recording
CTK691E01-01.book 61 ページ 2003年9月29日 月曜日 午後4時47分 Level Meter Contents During Record/Edit Standby Channels 11 through 16 correspond to Tracks 1 through 6. Whenever the keyboard is in record or edit (page E-62) standby, the level meter display shows which tracks already contain recorded data and which are still empty. Tracks with four lit segments already contained recorded data, while tracks with one lit segment are not yet recorded.
-
Page 64: Editing Memory Contents
CTK691E01-01.book 62 ページ 2003年9月29日 月曜日 午後4時47分 Song Memory Function Press the [ ] CURSOR button. Press the YES button. This deletes all data from the location you specified and enters step record standby. Pressing the [ ] CURSOR button or the NO button cancels deleting the data.
-
Page 65
To change a chord Use the chord fingering method selected by the MODE button (FINGERED, CASIO CHORD, etc.) to input a chord. To change a tone number Use the number buttons or [ + ] and [–] buttons to change a tone number. -
Page 66: Editing A Song
CTK691E01-01.book 64 ページ 2003年9月29日 月曜日 午後4時47分 Song Memory Function To change a rhythm controller operation * * INTRO/ENDING 1 button, INTRO/ENDING 2 button, VARIATION/FILL IN 1 button, VARIATION/FILL IN 2 button, SYNCHRO/FILL IN NEXT button operations Press the rhythm controller button you want to change to. Editing a Song You can perform the following operations in the song editing mode.
-
Page 67
CTK691E01-01.book 65 ページ 2003年9月29日 月曜日 午後4時47分 To rewrite song header data (Panel Record) You can use a procedure called “Panel Record” to change the initial Mixer, tempo and other settings stored in the song header. Press the SONG MEMORY button once to enter playback standby. -
Page 68: Keyboard Settings
CTK691E01-01.book 66 ページ 2003年9月29日 月曜日 午後4時47分 Keyboard Settings Keyboard Settings MODE EXIT LAYER [ + ]/[–], YES/NO Parts Up to four parts (numbered 1 through 4) can be used simultaneously during keyboard play. These parts can be used by the layer and split functions explained below. Part 1: Main tone part Part 2: Layered tone part Part 3: Split tone part…
-
Page 69: Using Split
CTK691E01-01.book 67 ページ 2003年9月29日 月曜日 午後4時47分 Press the LAYER button again to unlayer the tones and return the keyboard to normal. Turning on layering switches the currently selected part from Part 1 to Part 2, and displays the layered tone. At that time, you can use the [ ] and [ ] CURSOR buttons to…
-
Page 70: Using Layer And Split Together
Song Memory Mode, or while you are using the SMF Player Mode. When the accompaniment mode is set to CASIO CHORD or FINGERED, the accompaniment keyboard range is in accordance with the split point you specify with the above procedure.
-
Page 71: Transposing The Keyboard
CTK691E01-01.book 69 ページ 2003年9月29日 月曜日 午後4時47分 Transposing the Keyboard Transpose lets you raise and lower the overall key of the keyboard in semitone units. If you want to play an accompaniment for a vocalist who sings in a key that’s different from the keyboard, for example, simply use transpose to change the key of the keyboard.
-
Page 72: Tuning The Keyboard
CTK691E01-01.book 70 ページ 2003年9月29日 月曜日 午後4時47分 Keyboard Settings Tuning the Keyboard The tuning feature lets you fine tune the keyboard to match the tuning of another musical instrument. To tune the keyboard Press the TRANSPOSE/FUNCTION button. Use the [ ] and [ ] CURSOR buttons to display the tuning screen.
-
Page 73: Changing Other Settings
main14.fm 71 ページ 2003年10月29日 水曜日 午後2時36分 Changing Other Settings Setting Types The table below shows the parameters whose settings you can change. Setting menu Transpose Adjusts overall keyboard tuning by semitone units. (Trans.) Auto Harmonize Selects the Auto Harmonize Type. (AutoHarm) Touch Response Specifies how sound should change with keyboard pressure.
-
Page 74
CTK691E01-01.book 72 ページ 2003年9月29日 月曜日 午後4時47分 Keyboard Settings To use the keyboard settings menu Press the TRANSPOSE/FUNCTION button. This causes a pointer to appear on the display next to TRANSPOSE/FUNCTION. Use the [ ] and [ ] CURSOR buttons, and the [ settings you want to change. -
Page 75
CTK691E01-01.book 73 ページ 2003年9月29日 月曜日 午後4時47分 Use the [ + ] and [–] buttons or the number buttons to change the values. Settings you make are applied even if you do not press the EXIT button. See the following section titled “Setting Menu Items” for details on each setting. After making the settings you want, press the TRANSPOSE/FUNCTION button or EXIT button to return to the tone or rhythm selection screen. -
Page 76
CTK691E01-01.book 74 ページ 2003年9月29日 月曜日 午後4時47分 Keyboard Settings Setting Menu Items Auto Harmonize Types You can select from among the 10 different types of auto harmonize listed below. Type Duet1 Adds a 1-part harmony to keyboard play. Duet2 Adds a 1-part harmony to keyboard play. Duet2 harmony is more open than Duet1. Country Adds a country-flavor harmony to keyboard play. -
Page 77
CTK691E01-01.book 75 ページ 2003年9月29日 月曜日 午後4時47分 MIDI Settings Setting menu Range Keyboard Channel 01 to 16 (Keybd Ch) MIDI In Chord Judge on/oFF (Chord) Accomp/Song MIDI Out on/oFF (Ac/sg Out) Local Control Setting on/oFF (Local) Delete/Initialize Settings Setting menu Range SMF Delete —… -
Page 78: Using The Smf Player
The Flash Memory built into your keyboard lets you store SMF format music data for playback whenever you want. You can have up to 200 music files* in Flash Memory at one time. You can download SMF data from the CASIO MUSIC SITE and then transfer it from your computer to the keyboard’s flash memory.
-
Page 79
CTK691E01-01.book 77 ページ 2003年9月29日 月曜日 午後4時47分 Using the SMF Player SMF Player Mode Operational Flow E-77 705A-E-079A… -
Page 80: Playing Back An Smf
CTK691E01-01.book 78 ページ 2003年9月29日 月曜日 午後4時47分 Using the SMF Player Playing Back an SMF To play back an SMF Press the SMF PLAYER button to display the file selection screen. This causes the SMF player pointer to appear on the display. SMF are those whose file names end with the extension “MID”.
-
Page 81
CTK691E01-01.book 79 ページ 2003年9月29日 月曜日 午後4時47分 Press the [ ] CURSOR button to display the output mode selection screen. Use the [ ] and [ ] CURSOR buttons or the [ + ] and [–] buttons to select the output mode. You can select from among the following two output types. -
Page 82: Midi
CTK691E01-01.book 80 ページ 2003年9月29日 月曜日 午後4時47分 MIDI MIDI What is MIDI? The letters MIDI stand for Musical Instrument Digital Interface, which is the name of a worldwide standard for digital signals and connectors that make it possible to exchange musical data between musical instruments and computers (devices) produced by different manufacturers.
-
Page 83: Sending And Receiving Midi Messages
: Outputs auto accompaniment or Song Memory as MIDI messages through the keyboard’s MIDI OUT terminal. oFF : Does not output auto accompaniment or Song Memory. For details about MIDI specifications, visit the CASIO Website. http://world.casio.com E-81…
-
Page 84: Using The Data Download Service
CTK691E01-01.book 82 ページ 2003年9月29日 月曜日 午後4時47分 MIDI Using the Data Download Service You can download the following type of data from CASIO MUSIC SITE (http://music.casio.com) to your computer, and then transfer it to the keyboard. Tones Tones with waves Drum sets with waves…
-
Page 85: Troubleshooting
2. Power is not turned on. 3. Volume setting is too low. 4. Playing in the accompaniment keyboard area while the MODE button setting is CASIO CHORD or FINGERED. 5. Local Control is off. 6. Mixer channel 1 is turned off.
-
Page 86
CASIO Service Provider to request repair. Use the TRANSPOSE/FUNCTION button to perform the system reset operation. If this does not correct the problem, contact your nearest authorized CASIO Service Provider to request maintenance. Action See page E-67 E-69, 70… -
Page 87: Specifications
Equalizer (10 types, 4 bands) 156 (internal, 16 user areas*) Variable (226 steps, = 30 to 255) 3 fingering methods (CASIO CHORD, FINGERED, FULL RANGE CHORD) START/STOP, INTRO/ENDING 1 and 2, VARIATION/FILL-IN 1 and 2, SYNCHRO/ FILL-IN NEXT 0 to 127 (128 steps) Recalls settings for tone, tempo, layer on/off, and harmonize on/off in accordance with rhythm.
-
Page 88
main18.fm 86 ページ 2003年10月23日 木曜日 午後5時9分 Specifications Mixer Function Channels: Parameters: MIDI: Other Functions Transpose: Tuning: LCD: SMF Player Flash Memory Terminals MIDI Terminals: Sustain/Assignable Terminal: Headphone/Output Terminal: Power Supply Terminal: Power Supply: Batteries: Battery Life: AC Adaptor: Auto Power Off: Speaker Output: Power consumption: Dimensions: Weight:… -
Page 89: Care Of Your Instrument
CTK691E01-01.book 87 ページ 2003年9月29日 月曜日 午後4時47分 Care of your Instrument Avoid heat, humidity or direct sunlight. Care of your Instrument Do not overexpose the instrument to direct sunlight, or place it near an air conditioner, or in any extremely hot place. Do not use near a TV or radio. This instrument can cause video or audio interference with TV and radio reception.
-
Page 90: Dsp Algorithm List
CTK691E01-01.book 88 ページ 2003年9月29日 月曜日 午後4時47分 DSP Algorithm List DSP Algorithm List 00 :Auto Pan Function Continually performs left-right panning of the input signal in accordance with an LFO. Parameters Rate (Range: 0 to 127) Adjusts the panning rate. Depth (Range: 0 to 127) Adjusts the panning depth.
-
Page 91
CTK691E01-01.book 89 ページ 2003年9月29日 月曜日 午後4時47分 Parameters Input Level (Range: 0 to 127) Adjusts the input level. The input signal can become distorted when the level of the sound being input, the number of chords, or the Resonance value is large. Adjust this parameter to eliminate such distortion. -
Page 92
CTK691E01-01.book 90 ページ 2003年9月29日 月曜日 午後4時47分 DSP Algorithm List Parameters Resonance (Range: 0 to 127) Adjusts the resonance of the sound. Manual (Range: –64 to 0 to +63) Adjusts the phaser shift volume, which is used for reference. Rate (Range: 0 to 127) Adjusts the rate of the LFO. -
Page 93
CTK691E01-01.book 91 ページ 2003年9月29日 月曜日 午後4時47分 High Gain (Range: 0 to 127) Adjusts the high range enhancer gain. 14 :Ring Modulator Function This is a ring modulator (AM modulator) that makes it possible to modulate the frequency of internal oscillator (OSC) in accordance with an internal LFO. Parameters OSC Frequency (Range: 0 to 127) Sets the reference frequency of the internal… -
Page 94
CTK691E01-01.book 92 ページ 2003年9月29日 月曜日 午後4時47分 DSP Algorithm List Wet Level (Range: 0 to 127) Adjusts the level of the effect sound. 19 :Tri 2-Phase Chorus Function This is stereo chorus in accordance with triangular wave LFO. Parameters LFO Rate (Range: 0 to 127) Adjusts the rate of the LFO. -
Page 95
CTK691E01-01.book 93 ページ 2003年9月29日 月曜日 午後4時47分 Parameters LPF (Range: 0 to 127) Adjusts the cutoff frequency of the low-pass filter. A smaller value cuts the high range. HPF (Range: 0 to 127) Adjusts the cutoff frequency of the high-pass filter. A larger value cuts the low range. Feedback (Range: 0 to 127) Adjusts the repeat of the reverb. -
Page 96
CTK691E01-01.book 94 ページ 2003年9月29日 月曜日 午後4時47分 DSP Algorithm List ER Level (Range: 0 to 127) Adjusts the level of the initial reflection. Wet Level (Range: 0 to 127) Adjusts the level of the effect sound. 28 :2-Tap Delay Function This is left/right 2-tap delay. Parameters Delay Time (Range: 0 to 127) Adjusts the delay time. -
Page 97
CTK691E01-01.book 95 ページ 2003年9月29日 月曜日 午後4時47分 Delay Wet Level Delay Feedback Delay High Damp M04 : Multi04 (Stereo Phaser – Stereo Delay 1) Function This is a multi effector that is related to Stereo Phaser – Stereo Delay 1. Parameters Phaser Resonance Phaser Manual Phaser Rate Phaser Depth… -
Page 98
CTK691E01-01.book 96 ページ 2003年9月29日 月曜日 午後4時47分 DSP Algorithm List M09 :Multi09 (Sin 2-Phase Chorus – Tremolo) Function This is a multi effector that is related to Sin 2-Phase Chorus – Tremolo. Parameters Chorus LFO Rate Chorus LFO Depth Chorus Feedback Chorus Wet Level Tremolo Rate Tremolo Depth M10 : Multi10 (Stereo Phaser –… -
Page 99
CTK691E01-01.book 97 ページ 2003年9月29日 月曜日 午後4時47分 Reflection Wet Level Reflection Feedback Reflection Tone M15 : Multi15 (Distortion – Lo-Fi) Function This is a multi effector related to Distortion – Lo-Fi. Parameters Distortion Gain Distortion Low Distortion High Distortion Level Lo-Fi Noise1 Lo-Fi Noise2 Lo-Fi Tone Lo-Fi Resonance M16 : Multi16 (Drive Rotary –… -
Page 100
CTK691E01-01.book 98 ページ 2003年9月29日 月曜日 午後4時47分 DSP Algorithm List Parameters Phaser Resonance Phaser Manual Phaser Rate Phaser Depth Chorus LFO Rate Chorus LFO Depth Auto Pan Rate Auto Pan Depth M21 :Multi21 (Auto Wah – Tri 2-Phase Chorus – 2- Tap Delay) Function This is a multi effector that is related to Auto Wah –… -
Page 101
CTK691E01-01.book 99 ページ 2003年9月29日 月曜日 午後4時47分 Parameters Compressor Depth Distortion Gain Distortion Low Distortion High Distortion Level Delay Time Delay Wet Level Delay Feedback M26 :Multi26 (Auto Wah – Distortion – 2-Tap Delay) Function This is a multi effector that is related to Auto Wah – Distortion –… -
Page 102
CTK691E01-01.book 100 ページ 2003年9月29日 月曜日 午後4時47分 DSP Algorithm List Distortion Level Chorus LFO Rate Chorus LFO Depth Chorus Feedback Chorus Wet Level M31 : Multi31 (Distortion – Flanger) Function This is a multi effector related to Distortion – Flanger. Parameters Distortion Gain Distortion Low Distortion High Distortion Level… -
Page 103: Appendix
Appendix-ES.fm 1 ページ 2003年9月29日 月曜日 午後5時13分 Appendix/Apéndice Appendix/Apéndice Tone List/Lista de sonidos Advanced Tones/Sonidos avanzados Tone Group/ No./ Grupo de Tone Name/Nombre de sonido Nº Sonido PIANO STEREO GRAND PIANO PIANO STEREO MELLOW PIANO PIANO STEREO BRIGHT PIANO PIANO GRAND PIANO PIANO MELLOW PIANO PIANO BRIGHT PIANO…
-
Page 104
Appendix-ES.fm 2 ページ 2003年9月29日 月曜日 午後5時13分 Appendix/Apéndice Tone Group/ No./ Grupo de Tone Name/Nombre de sonido Nº Sonido 49 ORGAN ROCK ORGAN 50 ORGAN ROTARY ELEC. ORGAN 51 ORGAN ROTARY PERC. ORGAN 2 52 ORGAN CHURCH ORGAN 1 53 ORGAN CHAPEL ORGAN 54 ORGAN ACCORDION 55 ORGAN… -
Page 105
Appendix-ES.fm 3 ページ 2003年9月29日 月曜日 午後5時13分 Tone Group/ No./ Grupo de Tone Name/Nombre de sonido Nº Sonido 106 BASS RESO. SAW BASS 1 107 BASS DISTORTION SQR BASS 108 BASS RESO. SAW BASS 2 109 BASS DIGITAL BASS 1 110 BASS RIDE BASS 111 BASS CHORUS FINGERED BASS 112 BASS… -
Page 106
Appendix-ES.fm 4 ページ 2003年9月29日 月曜日 午後5時13分 Appendix/Apéndice Tone Group/ No./ Grupo de Tone Name/Nombre de sonido Nº Sonido 163 BRASS VELO. TRUMPET 164 BRASS VELO. TROMBONE 165 BRASS MUTE TRUMPET 166 BRASS OCTAVE FRENCH HORN 167 BRASS STEREO BRASS 168 BRASS BRASS + SYNTH 169 BRASS DEEP SYNTH-BRASS 1 170 BRASS… -
Page 107
Appendix-ES.fm 5 ページ 2003年9月29日 月曜日 午後5時13分 Tone Group/ No./ Grupo de Tone Name/Nombre de sonido Nº Sonido 220 PIPE SYNTH-PAN FLUTE 221 PIPE SYNTH-RECORDER 222 PIPE WHISTLE 223 SYNTH-LEAD SAW TOOTH LEAD 224 SYNTH-LEAD MELLOW SAW LEAD 225 SYNTH-LEAD GR LEAD 1 226 SYNTH-LEAD SQUARE LEAD 1 227 SYNTH-LEAD… -
Page 108
Appendix-ES.fm 6 ページ 2003年9月29日 月曜日 午後5時13分 Appendix/Apéndice Tone Group/ No./ Grupo de Tone Name/Nombre de sonido Nº Sonido 277 SYNTH-PAD VIBE PAD 278 SYNTH-PAD MOVIE SOUND 279 SYNTH-PAD CRYSTAL PAD 2 280 SYNTH-PAD ATMOSPHERE PAD 281 SYNTH-PAD BRIGHTER 282 SYNTH-PAD GOBLIN PAD 283 SYNTH-PAD STAR THEME 284 SYNTH-PAD… -
Page 109
Appendix-ES.fm 7 ページ 2003年9月29日 月曜日 午後5時13分 Tone Group/ No./ Grupo de Tone Name/Nombre de sonido Nº Sonido 325 GM STEEL GUITAR GM 326 GM JAZZ GUITAR GM 327 GM CLEAN GUITAR GM 328 GM MUTED GUITAR GM 329 GM OVERDRIVE GT GM 330 GM DISTORTION GT GM 331 GM… -
Page 110
Appendix-ES.fm 8 ページ 2003年9月29日 月曜日 午後5時13分 Appendix/Apéndice Tone Group/ No./ Grupo de Tone Name/Nombre de sonido Nº Sonido 382 GM CALLIOPE 383 GM CHIFF 384 GM CHARANG 385 GM PLAIN SOLO VOX 386 GM FIFTH SAW 387 GM BASS LEAD 388 GM FANTASY 389 GM WARM SYNTH… -
Page 111
Appendix-ES.fm 9 ページ 2003年9月29日 月曜日 午後5時13分 Tone Group/ No./ Grupo de Tone Name/Nombre de sonido Nº Sonido 439 VARIOUS PULSE CLAVI GM 440 VARIOUS VIBRAPHONE WIDE 441 VARIOUS MARIMBA WIDE 442 VARIOUS TREMOLO ORGAN GM 443 VARIOUS DRAWBAR ORGAN 2 GM 444 VARIOUS 70’S ORGAN GM 445 VARIOUS JAZZ ORGAN GM… -
Page 112
Appendix-ES.fm 10 ページ 2003年9月29日 月曜日 午後5時13分 Appendix/Apéndice Tone Group/ No./ Grupo de Tone Name/Nombre de sonido Nº Sonido 496 VARIOUS SOPRANO PAD 497 VARIOUS FAST SWEEP 498 VARIOUS WOOD PAD 499 VARIOUS SYNTH-MALLET Drum Sets/Ajustes de batería Tone Group/ No./ Grupo de Tone Name/Nombre de sonido Nº… -
Page 113
Appendix-ES.fm 11 ページ 2003年9月29日 月曜日 午後5時13分 Tone Group/ No./ Grupo de Tone Name/Nombre de sonido Nº Sonido 20 DRAWBAR Even Organ 21 DRAWBAR Flute Organ 1 22 DRAWBAR Chorus Organ 2 23 DRAWBAR Overdrive Organ 3 24 DRAWBAR 16’ Organ 25 DRAWBAR Soul Organ 3 26 DRAWBAR Perc. -
Page 114: Drum Assignment List
Appendix-ES.fm 12 ページ 2003年9月29日 月曜日 午後5時13分 Appendix/Apéndice Drum Assignment List/Lista de asignación de batería “ ” indicates the same sound as STANDARD SET./“ ” indica el mismo sonido que STANDARD SET. A-12 705A-E-222A…
-
Page 115
Appendix-ES.fm 13 ページ 2003年9月29日 月曜日 午後5時13分 Appendix/Apéndice A-13 705A-E-223A… -
Page 116: Rhythm List
Appendix-ES.fm 14 ページ 2003年9月29日 月曜日 午後5時13分 Appendix/Apéndice Rhythm List/Lista de Ritmo No./ Rhythm Name/Nombre de Ritmo Nº 8 BEAT 8 BEAT 1 8 BEAT 2 8 BEAT 3 8 BEAT POP 1 8 BEAT POP 2 8 BEAT POP 3 60’S SOUL 8 BEAT DANCE POP ROCK 1 POP ROCK 2…
-
Page 117
Appendix-ES.fm 15 ページ 2003年9月29日 月曜日 午後5時13分 No./ Rhythm Name/Nombre de Ritmo Nº LATIN/VARIOUS BOSSA NOVA 1 BOSSA NOVA 2 SAMBA MERENGUE CUMBIA CHA-CHA-CHA SALSA BEGUINE BOLERO MAMBO RHUMBA TANGO 1 TANGO 2 REGGAE 1 REGGAE 2 BLUEGRASS COUNTRY COUNTRY SHUFFLE COUNTRY WALTZ FAST GOSPEL SLOW GOSPEL BROADWAY… -
Page 118: Fingered Chord Chart
Appendix-ES.fm 16 ページ 2003年9月29日 月曜日 午後5時13分 Appendix/Apéndice Fingered Chord Chart/Cuadro de acordes Fingered This table shows the fingerings for commonly used chords, including inverted fingerings. Esta tabla muestra las digitaciones para los acordes usados comúnmente, incluyendo las digitaciones invertidas. A-16 705A-E-226A…
-
Page 119
Appendix-ES.fm 17 ページ 2003年9月29日 月曜日 午後5時13分 * You can change the keyboard range of dim7 chords for roots A, B b , and B, and aug chords for roots B b and B by adjusting the split point setting (page E-67). * Puede cambiar la gama del teclado de los acordes dim7 para las notas fundamentales A, B b y acordes aumentados (augment) para las notas fundamentales B b y B mediante el ajuste del punto de división (página S-70). -
Page 120: Effect List
Appendix-ES.fm 18 ページ 2003年9月29日 月曜日 午後5時13分 Appendix/Apéndice Effect List/Lista de efecto REVERB Effect List/ Lista de efectos de reverberación (REVERB) No./ Display Name/Nombre TypeName/Nombre de Nº de display Room 1 Room 1 Room 2 Room 2 Room 3 Room 3 Hall 1 Hall 1 Hall 2 Hall 2…
-
Page 121
Appendix-ES.fm 19 ページ 2003年9月29日 月曜日 午後5時13分 Algorithm Display No./ Name/ Identificación DSP Name/Nombre DSP Nº Nombre de (ID) de display algoritmo Chorus [07] Chorus 1 Chorus 1 [08] Chorus 2 Chorus 2 [09] Chorus 3 Chorus 3 [10] Chorus 4 Chorus 4 [11] Enha Cho Enhancer — Chorus… -
Page 122
CTK691E01-01.book 1 ページ 2003年9月29日 月曜日 午後4時47分 705A-E-234A…
-
Страница 1
CTK691ES01-01_cover1-4. fm 1 ページ 2003 年9月29日 月 曜日 午後4時56 分[…]
-
Страница 2
CTK691ES01-01_cover1-4. fm 2 ページ 2003 年10月23日 木曜日 午後5時2 分[…]
-
Страница 3
Safety Precautions E-1 Safety Precautions Congratulations on your selection of the CASIO electro nic musica l instrum ent. Befor e usin g the instrum ent, be sure to c arefull y read throug h the in struct ions co ntaine d in this manua l. Please ke ep all inform ation for fut ure referenc e. Symbols Various symbol s are used in this user ?[…]
-
Страница 4
Safety Precaution s E-2 AC Adaptor Misuse of the AC adap tor’s el ectric cord can damage or br eak it, creating the risk of fire and electric shock. Always make sure you observe the following precautions. Never pl ace he avy ob ject s on the cor d or subject it to heat. Never try to mo dify the cord or su bject it to excessi ve bending. ?[…]
-
Страница 5
E-3 Safety Precauti ons Location Avoid lo cating th e product on an unstable stand, o n an uneven sur face, or a ny other unstab le loca tion. An u nstable loc ation can cause the pr oduct to fall over, creati ng the ri sk of pers onal i njury. AC Adaptor Misuse of the AC adapt or creates the r isk of fir e and electric shock. Al ways make sure you[…]
-
Страница 6
Safety Precaution s E-4 * Stand is av ailable as an optio n. When usi ng bat teries, be sure to re place th em or shif t to on e of the alt ernat e power sourc es wheneve r you not ice any of t he following symptoms. Dim power indicator Instr ument does no t turn on Display that is flic kering, dim, or dif ficult to rea d Abnormally[…]
-
Страница 7
Introduction E-5 Introduction Congr atula tions upon your s election of this C ASIO musi cal inst rument . This ke yboard pro vides you with the follo wing featur es and f unctions. J 516 Ton es Inc lude Ri ch Advanc ed To nes A total o f 300 Advanc ed Tones a re programmed with DSP tone s to make th em richer a nd more powerful . Advanced tones l […]
-
Страница 8
Introd uction E-6 J Regis tration Memo ry Keyboard setups can be stored in mem ory for later recall and instant set up whenever you need them. Up to 32 setups (4 setups x 8 banks) ca n be sto red in re gistratio n memory. J Data downl oad from your co mpute r You can use your c omputer to download da ta from the CASIO MUS IC SITE. 705A-E-008A CTK69[…]
-
Страница 9
Contents E-7 Safety Precautions …….. E-1 Introduction …….. ……….. E-5 General Guide ….. ……….. E-9 Attaching t he Score S tand …………… … E-10 Playing a Demo Tune …………….. ……… E-11 About the display….. ………………. ……… E-12 Power Supply ………….. E-14 Using ba tteries ………….. ..[…]
-
Страница 10
Contents E-8 Storing a U ser Tone In Me mory . ……… E-49 Registration M emory .. E-50 Registration M emory Features ……… …E-50 To Sav e a Setup in Regist ration Memory ………… ………………. ……………. E-51 To Recall a S etup from Reg istration Memory ………… ………………. ……………. E-52 Song Memory Fun[…]
-
Страница 11
General Guide E-9 Gener al Gui de 705A-E-01 1A CTK691E01-01.book 9 ペ ージ 2003年9 月29日 月曜日 午後4時47分[…]
-
Страница 12
Gene ral G uide E-10 1 POWER button 2 Power i ndicator 3 SONG MEMORY button 4 SYNTH button 5 TRANSPOSE/FUNCTI ON button 6 MIXER butt on 7 EFFECT button 8 SMF PLAYER button 9 VOLUME knob bk MODE button bl ONE TOUCH PRESET button bm ACCOMP VOLUME bu tton bn DATA ACCESS indicator bo RHYTHM button bp TONE button bq DRAWB AR ORGAN bu tton br DSP b utt o[…]
-
Страница 13
E-11 Gene ral Gu ide J Playi ng a D emo Tu ne (*3) P r e s s i n g t h e D E M O b u t t o n s t a r t s d e m o t u n e p l a y . T h e r e a r e 3 d e m o t u n e s , w h i c h c o n t i n u o u s l y p l a y i n s e q u e n c e . T o s t o p d e m o t u n e play, press e ither the DEMO button or the START/STOP button. Pressi ng the [ + ]/[?[…]
-
Страница 14
Gene ral G uide E-12 1. Pointers a ppear h ere to sho w when Transpos e, the Ke yboar d Settin g Mode, th e Mix er Mode, Sy nthesiz er, Effect, Song Memo ry, or SMF p layer is be ing used. 2. The TONE indicat or appe ars when you a re sel ecting or view ing th e TONE s etting, w hile RHY THM a ppears for the RHYTHM setting. 3. Tone num ber (Nume ri[…]
-
Страница 15
E-13 Gene ral Gu ide 12. You can tu rn on th e metro nome to p rovide a refer ence b eat for your keyb oard pl ay. 13. This dis play shows t he note play ed on t he keybo ard, not es bei ng pla yed bac k from Song Mem ory, ch ord forms, an d receive d MIDI data *. 14. The name of the chor d being p layed is show n on the displ ay whil e Auto A ccom[…]
-
Страница 16
Power Supply E-14 Power Supply This key board can be p owered by c urrent from a st andard household wall outlet ( using the specif ied AC adaptor) or by batteries. Always make sure you turn the keyboard off whenever you ar e not using it. Always make sure you turn off the keyboard before loading or r eplacing batter ies. 1. Remove th e battery c o[…]
-
Страница 17
E-15 Power Supply Misuse of batte ries can cause the m to leak result ing in da mage to nearby objects, or to ex plode, cre ating the ris k of fire and persona l injury. A lways ma ke sure you obs erve t he followi ng precaut ions Make sur e that yo u use only t he AC ad aptor specif ied for this keyboard. Rear Panel 1 DC 9V jack 2 AC adaptor AD-5 […]
-
Страница 18
Power Supply E-16 When you are using battery power, keyboard power turn s off automatically whenever you leave i t on without per forming any operat ion for abo ut 6 minu tes. When thi s happens, press the POWER button to turn power back on. Auto Power Off is disabled (it d oes not f unction ) when you are using t he AC adapto r to power th e k[…]
-
Страница 19
Connections E-17 Connect ions Before connec ting phones o r other exter nal equipment, be sure to first turn down the volume setti ngs of the keyboard and the c onnected equipmen t. You can t hen adjust volume to the de sired le vel after c onnec tions are comp lete. Rear Panel J Conne cting Phon es 1 Connecting phones cuts off output f rom the key[…]
-
Страница 20
Connections E-18 J Soft Pedal Depressing the pedal soften s the sound of the notes being played. J Rhyth m Start/Stop Pedal In this case, the pedal performs the same functions as the START/STOP button. Use on ly the acces sories an d options sp ecifie d for this keyboard. Use of non- authorized i tems cr eates the d anger of fire, elect rical shock[…]
-
Страница 21
Basic Operations E-19 Basic Operations This sec tion prov ides info rmation on perform ing basic keyboard operations. 1. Press the POWER bu tton to t urn the ke yboard on. 2. Use the VO LUME kn ob to set the vo lume t o a rela tively low le vel. 3. Play som ething on the ke yboar d. This keyboar d comes with tones built- in, as shown below. A part […]
-
Страница 22
Basic Operati ons E-20 Drawb ar Organ Tones: 50 P reset Ton es + 1 00 User T ones *1: See “Changing Tones and Configu ring DSP Effect Settings” on page E -21. *2: Memory area f or tones c reated by you. See “Synthesi zer Mode” on page E-44. User tone areas 600 throu gh 699 initia lly contain the sam e data as DSP t ypes 000 th rough 099. *3[…]
-
Страница 23
E-21 Basic Operati ons A number of the tones that are available with this keyboard have been recorded and process ed using a technique called digi tal sampli ng. T o ensure a h igh level of ton al quali ty, samples are taken in the low, mid , and high ranges an d then combin ed to provide you with sounds that are am azingly close to the origin als.[…]
-
Страница 24
Using the Drawbar Organ Mode E-22 Using the D rawbar Organ Mode Your keyboard has built-i n “drawbar orga n tones” tha t can be altere d using ni ne digital drawbars whose o perations are simila r t o th e co nt r ol s o n a d r aw ba r or ga n . Y o u c an a ls o se le c t p er cu s si o n o r k ey c l ic k. Th e re i s r oo m in me m or y fo […]
-
Страница 25
E-23 Using the Drawbar Organ Mode 1. Find the dra wbar or gan tone you want to use in the tone l ist an d note its tone n umber. 2. Press the DRAWBAR ORGAN butt on. This causes the drawbar organ tone select ion screen to appear. 1 Tone Nu mber 2 Tone Na me 3. Use the number bu ttons to input the thre e digit tone num ber for th e tone you want […]
-
Страница 26
Using the Dr awbar Organ Mode E-24 The fol lowing provid es deta ils abou t the p aramete rs you can configure using the dr awbar organ tone editi ng scree n. This pa rameter d efines the positi on of each drawba r, and th e volume of each overt one. The l arger the value, th e greater the correspondi ng overtone’ s vol ume. (Ft: Feet) The par am[…]
-
Страница 27
E-25 Using the Drawbar Organ Mode 1. After editin g paramet ers, us e the [ ] and [ ] CURSOR buttons to display “More?”. 2. Press the [ ] CURSOR button three times to displ ay the sc reen fo r input ting a tone name and assigni ng a tone numbe r. 3. Use t he [ + ] and [–] button s to sele ct a to ne numbe r. You can se lect a t one number[…]
-
Страница 28
Applying Effects to Tones E-26 Applying Effe cts to T ones This ke yboard pr ovides you with a selec tion of effec ts that you can apply to tones. The built-i n effect s incl ude a wide va riety o f variati ons that give you ac cess to a selection of genera l digital effects. The following shows how the effects of this keyboard are organized. J DSP[…]
-
Страница 29
E-27 Applying Eff ects to To nes 2. Press the [ ] CURSOR butt on. The DSP type setti ng screen will appea r autom atically about fives second s after you pre ss the button. 3. Use the [+] and [–] button s or the number buttons to select the typ e of DSP y ou want. See th e “Effect L ist” on page A-18 for information about the DSP type[…]
-
Страница 30
Applying Eff ects t o Tones E-28 You can save up to 100 modified DSPs i n the user area f or lat er re ca ll w hen yo u nee d th em. User DSP area s 100 throug h 199 initially contain the same data as DSP types 000 thro ugh 099. 1. After maki ng the DSP param eter se ttings you want, press the [ ] CURSOR button. This causes the DSP number o[…]
-
Страница 31
E-29 Applying Eff ects to To nes 1. After selec ting t he reve rb type you wa nt, use the [ ] and [ ] CURSOR buttons to d isplay the param eter w hose set ting y ou want t o chang e. This displays the parameter sett ing screen. Example : To set the Reverb Time paramet er 2. Use t he [ + ] and [–] button s or the nu mber buttons to inp ut the […]
-
Страница 32
Applying Eff ects t o Tones E-30 3. Press the EFFECT or EXIT button . This returns to the tone or rhythm selecti on screen. Chorus L evel (Range: 000 to 127) Specifies the siz e of the chorus sound. Chorus Ra te (Range: 000 to 127) Specifies the undulation speed of t he chorus sound. A higher val ue produces faster un dulation. Chor[…]
-
Страница 33
Auto Accompaniment E-31 Auto Accompan iment This keyboard automatically plays bass and chord parts in accordance with the chords you finger. The bass and chor d parts are played using sounds and tones that are automatically selected to select the rhythm you are using. All of this m eans tha t you get full, rea listi c accom panimen ts for the melod[…]
-
Страница 34
Auto Accompaniment E-32 This keyboard provides you with 140 exciting rhythms that you c an sele ct usi ng the f ollow ing proc edure. You can al so transfer acc ompanim ent data from your computer and s tore up to 1 6 of them as us er rhythms in keyboard memory. See “Using t he Data Download Service” on page E-82 for mo re inform ation. Ini[…]
-
Страница 35
E-33 Auto Accompaniment The following pro cedure describes h ow to use the keyboard’ s Auto Accompaniment feat ure. Before starti ng, you should first select the rhythm you want to us e and set the tempo of the rhythm to the val ue you want. 1. Use the MO DE button to select FULL RANGE CHORD, FINGER ED, or CASIO CHOR D as the accomp anime nt mod […]
-
Страница 36
Auto Accompaniment E-34 FINGERED provides you with a t otal of 1 5 different chord type s. The foll owing describ es the FIN GER ED “accompaniment keyboard” and “melody keyboar d”, and tells you how to play a C-root chord using FINGERED. J FINGERED A ccompan iment Keyboard a nd Melody Key board The accomp animent keyboa rd can be used f[…]
-
Страница 37
E-35 Auto Accompaniment Exampl e: To play the chor d C maj or. Any of the f ing erin gs sh own i n the il lustr atio n belo w wi ll produce C major. As wit h the FI NGERED mo de (pa ge E-3 4), yo u can p lay the notes th at form a chor d in any combina tion ( 1 ). When the l owest note of a chord is separ ated fr om its neighborin g note by[…]
-
Страница 38
Auto Accompaniment E-36 In additi on to t he standard r hythm patte rn, you ca n also switch to a se condary “v ariation” rhythm pattern for a bit of variety . 1. Press the START/STOP b utton t o start rhythm play. 2. Press the SYNCHRO/F ILL-IN NEXT button. If a Variatio n 1 rhythm is curr ently playing, this plays Fill -in 1, fo llowe d by[…]
-
Страница 39
E-37 Auto Accompaniment One-touch preset automaticall y makes the mai n settings listed b elow in ac cordan ce with the rhythm p attern y ou are using. Keyboard ton e Layer on/o ff Split on/off Auto Ha rmonize on/off Auto Harmonize type Accomp animen t vol ume le vel Tempo Effect sett ings 1. Select the rhythm you w […]
-
Страница 40
Auto Accompaniment E-38 Auto Harmonize lets yo u select f rom among the 10 Aut o Harmonize types. Type changing is performed by the setting item using th e TRANSPOSE/FUNCTION button. See “Changing Other Settings” on page E-71 for more inform ation. The notes yo u play on the ke yboard ar e called “mel ody notes,” whi le the notes added to t[…]
-
Страница 41
Mixer Function E-39 Mixe r Func tion This keyboard lets y ou play multiple different m usical instrument pa rts at the same time during auto-accompa niment play, song memory playback, receipt of data through the MIDI terminal, etc. The Mixer assign s each part to a separate channel (1 through 16) and l ets you control the channel on/off, volume, an[…]
-
Страница 42
Mixer Functi on E-40 Turnin g a channe l off mutes an y instru ment reco rded in the chan nel. 1. Press the MIXER butt on. This causes a po inter to appear on the d isplay next to MI XER. 2. Use the [ ]/[ ] CURSOR butt ons to selec t a chann el. Example : To selec t Channe l 2. 1 Flash This causes t he upper three segments of the selec ted […]
-
Страница 43
E-41 Mixer Functi on 3. Use the [ ] and [ ] CURSOR buttons to sele ct the pa ramet er whose setti ng you wa nt to chang e. Example : Selec t volu me settin g by dis playin g “Volu me”. Each pre ss of the [ ] or [ ] CURSOR b uttons cycles t hrough t he par ameters. You can use the [ ] and [ ] CU RSOR button s to chan ge to another ch ann[…]
-
Страница 44
Mixer Functi on E-42 z Octave Shift (Range: –2 to 0 to +2) You can use octave shift to shift the range o f the to ne up or down. When using the pic colo tone, ther e may be cases when very high notes you want to play are not in cluded withi n the range of the keyboard. When thi s happens, you can use octave shift to shift the keyboard range one o[…]
-
Страница 45
E-43 Mixer Functi on z DSP Syst em Reverb Send (R ange: 000 to 127) This para met er ad jus ts ho w mu ch rev erb is appl ied to al l parts. z DSP System Ch orus Send (Ran ge: 000 to 127) This para met er ad jus ts ch oru s. Changin g the ton e, vol ume, pan p ot, c oarse tune , fi ne t une, reverb send, or chorus send setti ng causes t he corr[…]
-
Страница 46
Synthesizer Mode E-44 Synthes izer Mod e The Syn thesizer M ode of thi s keyboard pro vides th e tools for creating yo ur own origi nal to nes. Simply s elect one of the buil t-in to nes and change its para meter s to cre ate you r own original sound . You can ev en store your so unds in mem ory and select it using the same procedure as t hat used […]
-
Страница 47
E-45 Synthesizer Mode J Tone C haracteris tic Wa veform z Tone Setti ng Specifies which of the preset tones should be used as the origina l tone. J Volume Chara cteristic Parame ters These parameter s cont rol how the t one ch anges over ti me, from when the keyboard key is pressed until the tone decays. You can spe cify changes i n volume an d sou[…]
-
Страница 48
Synthesizer Mode E-46 The group of ton e numbers from 600 through 69 9 (User 001 thro ugh User 100) is cal led the “user are a” because they are reserved for stora ge of user tone s. After you recal l a preset tone an d change its pa rameters to cr eate your ow n user tone, you ca n store it i n the user area f or later reca ll. You can recall […]
-
Страница 49
E-47 Synthesizer Mode Use the fo llowing procedure to select a preset tone and chan ge i ts pa ramet ers to creat e a user ton e. 1. First, sel ect th e pres et tone you wa nt to use as a basis for your us er tone . 2. Press the SYNTH button . This enters the S ynthesi zer Mode , which is indica ted by the pointer next to SYNTH on the display s[…]
-
Страница 50
Synthesizer Mode E-48 z Vibrato Delay (Ra nge: –64 t o 00 to +63) Specifies the amount of tim e before vibrato star ts. z Vibrato Ra te (Range: –64 to 00 to +63) Rate (spe ed) of the vibrat o effect z Vibrato De pth (Range: –64 to 00 to +63) Depth of the vibr ato effe ct z Octave Shift (Range: –2 to 0 to +2) Up/down octa ve shift z Level (R[…]
-
Страница 51
E-49 Synthesizer Mode The foll owing hints pro vide helpfu l advi ce on makin g user tone creat ion a bit quicker and ea sier. Use a preset tone that is similar to the one you ar e trying to create. Whenever you already have a rough idea of the tone you are trying to cre ate, it is always a goo d idea to start with a preset tone that i s simil ar. […]
-
Страница 52
Registration Memory E-50 Registration Memory Registration memory lets you store up to 32 keyboar d setups (4 sets x 8 banks) f or instant recall w henever you need t hem. The fo llowing is a list of se ttings that are save d in regi stration memory . Tone Rhythm Tempo Layer on/o ff Split on/off Split point Auto Harmo niz[…]
-
Страница 53
E-51 Registration Memory You can as sign setups int o one of 32 areas, wh ich you can select usin g BANK bu ttons 1 throug h 4 and the four REGISTRATIO N buttons. Area names range from 1-1 thro ug h 8- 4 as sho wn b elow . Whenever you save a set up and assig n it a set up name, any setup da ta previous ly assi gned to that name is replaced wit[…]
-
Страница 54
Registrati on Memory E-52 1. Use the BAN K butt on or t he numbe r butto ns to select t he bank . If you do not perform any operation for about five seconds after pressing the BANK button, the keyboard automatically clears the registr ation memory re call scree n. 2. Press the REGISTRATION button (1 to 4) for the area who se setup you wa nt to […]
-
Страница 55
Song Memory Function E-53 Song Memo ry Functi on This keyboard lets you record up to five separate songs in song memory for later playba ck. There are t wo methods you can use to record a s ong: real-ti me recording where yo u record th e notes as yo u play them on the keyboard, and step recording where you input chords and notes one-by-one. La[…]
-
Страница 56
Song Memory Function E-54 Use the SONG MEMORY TRACK buttons marked CHORD/ TR1 th rough TR6 to select the track yo u want. J SONG MEMORY TRACK Buttons 1 Track 1 2 Track 2 3 Track 3 4 Track 4 5 Track 5 6 Track 6 The status of t he Song Memory c hanges each ti me you press the SONG MEMORY butto n. With real-time recording, the notes you play on the ke[…]
-
Страница 57
E-55 Song Memory Function 5. Play som ething on the ke yboar d. You can also rec ord Auto Acco mpaniment chords by sel ecting the a pplic able mode with the MODE button. Optional pedal operation is also rec orded. See “Tra ck 1 Con te nts Aft er Re al- tim e Rec ordi ng” . 6. Press the START/STOP b utton t o end recording when y ou are […]
-
Страница 58
Song Memory Function E-56 J To syn chro start Auto Acc ompanim ent with an intro pat tern I n p l a c e o f s t e p 4 , p r e s s t h e S Y N C H R O / F I L L — I N N E X T b u t t o n and then INTR O/ENDING 1 or INTRO/EN DING 2 button. Auto-accompanim ent will start w ith the i ntro patter n when you play a chor d on the accom paniment keyboard. […]
-
Страница 59
E-57 Song Memory Function 1. Press the SONG MEMORY b utton th ree times to enter step recordi ng standb y, and then use the numb er butto ns to s elect the song number (0 to 4) . 1 Flash 2. Make the follo wing settin gs. Rhythm n umber MODE button 3. Press the CHOR D/TR1 button, which is one of the SONG MEMORY TRACK b uttons , to select Tra[…]
-
Страница 60
Song Memory Function E-58 When the acc ompaniment mode is set to NORMAL during step recording, you can specify chords using a method that is different fro m CASIO CHO RD and FING ERED finger ings. This ch ord s pecific ation m etho d can be used to input 18 different chord types using only two keyboard keys, so chords c an be spec ified even if you[…]
-
Страница 61
E-59 Song Memory Function The foll owin g desc ribes a numbe r of di ffere nt vari at ions y ou can use when recording to Track 1 using step r ecording. All of these variations a re based upon t he procedure d escribed under “To rec ord ch ords w ith step recor ding” o n page E-57. J To start accompa nimen t with an intro pattern In step 4, pre[…]
-
Страница 62
Song Memory Function E-60 In additi on to keyboa rd notes, the fol lowing data is also recor ded to the selected track duri ng real-tim e record ing. This data i s applied whenever th e track is played back. Tone number Option al pedal operatio ns The follow ing data i s recorded in t he header whenever you start a record ing of a track. ?[…]
-
Страница 63
E-61 Song Memory Function Channe ls 11 through 16 co rrespond to T racks 1 through 6. Whenever the keyb oard is in record or edit ( page E-62 ) standb y, the level meter display shows w hich tracks alr eady contain r ecorded d ata and which are stil l empty. Tracks wi th four li t seg ment s al read y co ntai ned reco rde d dat a, wh ile tracks wit[…]
-
Страница 64
Song Memory Function E-62 3. Press the [ ] CURSOR button. 4. Press the YES button. This delet es all data from the locatio n you specified and ente rs step r ecord sta ndby. Pressing the [ ] C URSOR button or the NO button cancels deleting t he data. When you reach t he end of the rec ording by pressin g the [ ] CURSOR butt on, the REC […]
-
Страница 65
E-63 Song Memory Function 5. Make any cha nges i n the v alue t hat yo u wan t. The actual pro cedures you use to ch ange a parameter depend o n the type of data it contai ns. See “Editing T echniqu es and Displ ay Contents ” on page E-63 for det ail s. Repe at steps 4 and 5 to e dit ot her para meters . 6. Press the START/STOP b utton […]
-
Страница 66
Song Memory Function E-64 J To chan ge a rh ythm con troller operation * * INTRO /ENDING 1 button , INTRO/ENDING 2 button, VAR IATIO N/FI LL IN 1 b utton , VAR IATIO N/FI LL IN 2 button, SYNCHRO/FILL IN NEXT butt on operation s Press the rhythm controller but ton you want to change to. You c an perfo rm the fol lowing o peratio ns in t he song e di[…]
-
Страница 67
E-65 Song Memory Function You can use a pr ocedure called “Panel Record” to change the initial M ixer, tem po and other settings stor ed in the song header. 1. Press the SONG MEMORY b utton o nce to enter play back stand by. 2. Use the [ + ] a nd [–] buttons t o sel ect th e number of the son g that contai ns the heade r data you want to r ew[…]
-
Страница 68
Keyboard Settings E-66 Keyb oard Se ttings Up to four parts (numbered 1 through 4) can be used simultaneously duri ng keyboard play. Thes e parts c an be used by the layer and split funct ions explai ned bel ow. Layer lets you assi gn two dif ferent tones (a mai n tone an d a layered tone) to the keyboard, both of which play whenever you press a ke[…]
-
Страница 69
E-67 Keyboard Settings 5. Press the LAYER button a gain to unlayer t he tones and return the ke yboard to n ormal . Turning on layering switches the current ly select ed part from Part 1 t o Part 2, and dis plays the layer ed to ne. At t hat time, you can use t he [ ] an d [ ] CURSOR but tons to switch bet ween parts. T urning off la yering r e[…]
-
Страница 70
Keyboard Settings E-68 Turning on sp lit switches th e currentl y selected part to Part 3, and displ ays the split tone. At tha t time, you can use the [ ] and [ ] CURSOR buttons t o switch be tween pa rts. Turnin g off sp lit retur ns to Pa rt 1. The main tone so unds ove r Channe l 1, whil e the sp lit tone sounds ove r Channel 3. You can[…]
-
Страница 71
E-69 Keyboard Settings Transpose lets yo u raise and lower the overall key of the keyboard in semitone units. If you want to play an accom panimen t for a voca list who sing s in a key that’s different fro m the keyboard, fo r example, simpl y use transpose to change the key of the keyboard. 1. Press the TRANSPOSE/FUNCTION b utton. This cause[…]
-
Страница 72
Keyboard Settings E-70 The tuning f eature l ets you f ine tune the keyboard t o match the tuni ng of ano ther musi cal instrument . 1. Press the TRANSPOSE/FUNCTION b utton. 2. Use the [ ] an d [ ] CURSOR b uttons to disp lay th e tuni ng scree n. 3. Use [+] and [–] to c hange the tunin g setti ng of the ke yboard . Example : To lower the tuning […]
-
Страница 73
E-71 Keyboard Settings The tabl e below shows t he parameters whos e settings yo u can change. The above se ttings are all saved when ever you tu rn off the key board. Fo r details, see “Memory Content s” on page E-16 . MIDI settin gs and Delete/I nitialize settings are di sabled while you are usin g the SMF Player or So ng Memory func […]
-
Страница 74
Keyboard Settings E-72 1. Press the TRANSPOSE/FUNCTION b utton. This causes a pointer to appear on t he display n ext to TR ANSPOSE/FUNCTION. 2. Use the [ ] and [ ] CURSOR buttons, and the [ ] and [ ] CURSOR buttons to recall the items whose settings you w ant to c hange. To use the keyboard s ettings menu 705A-E-074A CTK691E01-01.book 72 ペ ー?[…]
-
Страница 75
E-73 Keyboard Settings 3. Use t he [ + ] and [–] button s or the nu mber b uttons to change the v alues. Settings you make ar e applied even if you do n ot press the E XIT button. See the foll owing sectio n titled “Setting Menu Items” for details on each set ting. After makin g the setti ngs you want, press the TR ANSPOSE/FUNCTIO[…]
-
Страница 76
Keyboard Settings E-74 J Auto Harm onize Types You can sele ct from among th e 10 dif ferent types of auto harmoniz e liste d below. J Other Setti ngs Setting Menu Items No. Type Descrip tion 0 Duet1 Adds a 1-part harmony to keyboard play. 1 Duet2 Adds a 1-part harmony to keybo ard play. Duet2 harm ony is more open than Duet1. 2 Country Adds a coun[…]
-
Страница 77
E-75 Keyboard Settings J MIDI Settin gs J Delete /Initia lize Settings Setting me nu Range Default Descrip tion Keyboard Ch annel (Keybd Ch) 01 to 16 01 Specifies th e send cha nnel fo r main tone pla y. MIDI In Chor d Judge (Chord ) on/oFF oFF Specifies w hether acco mpaniment range MIDI Not e On messages receive d from an e xternal de vice shou l[…]
-
Страница 78
Using the SMF Player E-76 Using the SMF Player The lett ers “SMF ” stand for St andard M IDI File, wh ich is a file format that a llows MI DI data to be shared be tween di fferent sof tw are and s equencers. There are actually th ree SMF fo rmats, nam ed SMF 0, SMF 1, and SMF 2. This ke yboard su pports the SMF 0 fo rmat, which is the one t hat[…]
-
Страница 79
E-77 Using the SMF Player SMF Player Mode Operati onal Flow 705A-E-079A CTK691E01-01.book 77 ペ ージ 2003年9 月29日 月曜日 午後4時47分[…]
-
Страница 80
Using the SMF Player E-78 1. Press the SMF PLAYER butto n to disp lay the file selec tion s creen . This causes the SMF pl ayer pointer to appear on the display. SMF are those wh ose file na mes end with the extensi on “MID”. An e rror message appe ars at this tim e if ther e are no SMF fi les curre ntly in Flash Mem ory. 2. Use the [ ][…]
-
Страница 81
E-79 Using the SMF Player 4. Press the [ ] CURSOR button to display the output mode se lectio n scre en. Use the [ ] and [ ] CURSOR buttons or the [ + ] and [–] butto ns to select th e output mo de. You can sele ct fr om amon g th e fol lowi ng t wo output types. Layer, split, and Au to Harmonize ar e automatic ally turne d off in the[…]
-
Страница 82
MIDI E-80 MIDI The lett ers MIDI st and f or Musi cal In st rumen t D igit al Interfac e, which is the name of a worl dwide sta ndard for digital sign als and conne ctors that make it possible to exch ange mus ical data b etween m usical in strumen ts and computers (devices) produced by different manuf acturers. MIDI compatible equipment can exchan[…]
-
Страница 83
E-81 MIDI This keyboard can send notes you play on the keyboard, as well as au to accompani ment patterns and Song Memo ry playbac k as MIDI me ssages to anot her devic e. z Keyboard Pla y Each keyboar d part (Channels 1 throug h 4) is sent ov er its own indiv idual MI DI chann el. Wh en Auto Harm onize is turned on, h armonize notes ar e also sent[…]
-
Страница 84
MIDI E-82 You can downlo ad the foll owing type of data fro m CASIO MUSIC SIT E (htt p://m usic.c asio .com) t o your comput er, an d then trans fer it to the keyboa rd. Tones Tones wit h wa ves Drum sets with waves DSP Rhythms Regi str atio ns Songs SMF z Data a nd App lic atio n Soft ware Data itse lf as well as ap[…]
-
Страница 85
Troubleshooting E-83 Troubleshooting Probl em Possib le Cause Action See pa ge No keyboard Sound 1. Power supply problem. 2. Power is n ot turned on . 3. Volume s etting is too low. 4. Pla ying in th e accomp anime nt keyboard area whi le the MODE button setti ng is CASIO CHORD or FINGERED. 5. Loca l Contro l is off. 6. Mixer channel 1 is tu rned o[…]
-
Страница 86
Troubleshooti ng E-84 Playing the keyboar d sou nds two tones . Layer i s turn ed on. Press the LA YER but ton to tu rn off lay ering . E-66 Different ton es sound when keys in different keyboar d ranges are pressed . Split is t urned on. Press the SPLI T button to turn off split . E-67 The key or tuni ng does n ot match when playing along with ano[…]
-
Страница 87
Specifications E-85 Sp ecif ica tion s Model : CTK-691 Keyboard: 61 stan dard-size keys, 5 octaves wi th touch resp onse (Off / 1 / 2 / 3) Tones: 3 00 Advan ced Tones + 200 Pres et Tones + 16 Drum Se ts + 100 sta ndard user tones + 20 user ton es with wa ves* + 4 drum sets with wa ves* + 50 dra wbar or gan tones + 1 00 user drawbar organ tones (790[…]
-
Страница 88
Specificati ons E-86 * The same me mory ar ea i s use d to sto re wav eform d ata, accompa niment data, a nd SMF d ata. Mixer Functi on Channels: Paramet ers: 16 Tone; part on/off; volume; pan pot; octave shift; coarse tune; fine tune; rever b send; chorus sen d; DSP l ine; DSP level; D SP pan; DSP system r everb sen d; DSP sys tem chorus s[…]
-
Страница 89
Care of your Instrument E-87 Care of your Ins trument J Avoid he at, hum idity or direct sunli ght. Do not over expose the ins trument to direct sunl ight, or pl ace it n ear an air conditioner , or in a ny extremely hot place. J Do not use near a TV or ra dio. This in strumen t can cause video or aud io inter ferenc e with TV and radio rec eption.[…]
-
Страница 90
DSP Algorithm List E-88 DSP Algori thm List J 00 : Auto Pa n Function Continually perfo rms left-rig ht panning of the input signal in accordan ce with an LF O. Paramet ers J 01 :Trem olo Function Adjus ts volume of in put signal in acco rdance with an LFO. Paramet ers J 02 :2Band EQ Function This is a t wo-ban d equa lizer. […]
-
Страница 91
E-89 DSP Algorithm List Paramet ers J 06 :C ompre ssor Function Compresses the i nput signal, which can ha ve the e ffect of suppressi ng level vari ation and ma king it possi ble to sustain dampened sounds longer . Paramet ers J 07 :Limiter Function This is an effe ctor that you can use to set an upper lim it value on the lev el of[…]
-
Страница 92
DSP Algorithm List E-90 Paramet ers J 10
 haser Function This is a mon aura l phas er that modul ate s the ph ase in accor dance wi th a sine wave LF O. Paramet ers J 11 :R otary Function This is a rotary spea ker simul ator. Paramet ers J 12 :Drive Rotary Function This is an overdri ve — rotar y speaker si mulator. Pa[…]
 -
Страница 93
E-91 DSP Algorithm List J 14 :Ri ng Mo dulator Function This is a r ing m odulat or ( AM mod ulato r) that mak es it possible to modulate the frequenc y of in ternal os cillato r (OSC) in accorda nce with an internal L FO. Paramet ers J 15 :Lo-Fi Function This is an e ff ector th at r epro duce s a ret ro -typ e L o-Fi sound using Noise[…]
-
Страница 94
DSP Algorithm List E-92 J 19 :Tri 2 -Phase Ch orus Function This is stereo chorus in accordanc e with trian gular wave LFO. Paramet ers J 20 :S tere o Delay 1 Function This is delay of stereo in put and ou tput. Paramet ers J 21 :S tere o Delay 2 Function This is cross feedb ack delay o f stereo input and output. Paramet ers[…]
-
Страница 95
E-93 DSP Algorithm List Paramet ers J 24 :Reve rse Gate Re verb Function This is gate reverb with a reve rse rotation effect. Paramet ers J 25 :Reflect ion Function This is an effec tor that ex tracts t he first reflect ed sound from a reve rb sound. Para met ers J 26 :Flanger Function This i s a fl anger in accordan ce with[…]
-
Страница 96
DSP Algorithm List E-94 J 28 :2-Tap Delay Function This is left/rig ht 2-tap de lay. Paramet ers The following “Multi” algorithms are used in combinati on with the algorithms described abo ve. Paramet ers are shared by bo th types of algorithm s. J M00 :Mult i00 (Sin 2-Ph ase Cho rus – 2 -Tap Del ay) Function This is a multi e[…]
-
Страница 97
E-95 DSP Algorithm List J M04 : M ulti04 (Ste reo Phas er – Ste reo Delay 1) Function This is a multi ef fector that is related to Stereo Phaser – Stereo Delay 1. Paramet ers J M05 :Multi 05 (Enhanc er – 1-Ph ase Chor us) Function This is a m ulti effect or re lated t o Enha ncer – 1-P hase Chorus. Paramet ers J M06 : M ulti[…]
-
Страница 98
DSP Algorithm List E-96 J M09 :Multi 09 (Sin 2-Ph ase C horus – T remolo ) Function This is a multi effe ctor that is related t o Sin 2-Phase Chorus – Tremol o. Paramet ers J M10 : M ulti10 (Ste reo Phas er – Aut o Pan) Function This is a multi ef fector that is related to Stereo Phaser – Auto Pan. Paramet ers J M11 : Mu lti[…]
-
Страница 99
E-97 DSP Algorithm List J M15 : M ulti15 (D istortion – Lo-Fi ) Function This is a m ulti e ffector relat ed to Distor tion – Lo-Fi. Paramet ers J M16 : Mult i16 (Driv e Rotary – Reflecti on) Function This is a m ulti e ffector relate d to D rive Rotary – Refl ect ion. Paramet ers J M17 : Mu lti1 7 (Rot ary – Re flect ion)[…]
-
Страница 100
DSP Algorithm List E-98 Paramet ers J M21 : Mult i21 ( Auto W ah – T ri 2 -Phase Cho rus – 2- Tap De lay) Function This is a mult i ef fecto r tha t is re lated to Aut o Wah – Tr i 2- Phase Cho rus – 2-Tap Delay. Paramet ers J M22 :Multi2 2 (LFO Wah – Tr i 2-Phase Choru s – 2- Tap De lay) Function This is a multi effect […]
-
Страница 101
E-99 DSP Algorithm List Paramet ers J M26 :Multi 26 (Auto Wah – D istorti on – 2-Tap Delay) Function This is a m ulti e ffect or that is rela ted to Au to Wa h – Distorti on – 2-Tap Delay. Paramet ers J M27 :Multi 27 (LFO W ah – Dis tortion – 2-Tap Delay) Function This is a m ulti e ffector that is rela ted t o LFO W ah […]
-
Страница 102
DSP Algorithm List E-100 J M31 : M ulti31 (Distort ion – Flan ger) Function This is a m ulti ef fector relate d to D istorti on – Flanger. Paramet ers 3: Dist orti on L evel 4: Chorus LFO Ra te 5: Chorus LFO Depth 6: Chorus Feedback 7: Chorus Wet Level 0: Dist orti on Ga in 1: Dist orti on Low 2: Dist orti on High 3: Dist orti on L evel[…]
-
Страница 103
Appendix/Apéndice A-1 Appendix/Apéndice Tone List/Li sta de sonidos Advanced Tones/Sonidos avanza dos No. / Nº Tone Gro up/ Grupo de Soni do Tone Na me/Nombr e de s onido Prog ra m Chang e/C ambio de p rogr ama Bank Sele ct MSB/ MSB de selección de banco Maximu m Pol yphon y/ Polifoní a máxima Range Type / Tipo de gama DSP Type / Tipo DS P 0 […]
-
Страница 104
Appendix/Apéndice A-2 49 ORGAN ROCK OR GAN 18 48 16 N Ro tary 2 50 ORGAN ROTARY ELEC. ORGAN 16 53 32 N Rota ry 2 51 ORGAN ROT ARY PERC. ORG AN 2 17 54 16 N RotRef 1 52 ORGAN CHURCH O RGA N 1 19 48 16 N RvbHal l2 53 ORGAN CHAPEL ORGAN 19 51 32 N GateR vb2 54 ORGAN ACCORDION 21 48 16 N Reflect 55 ORGAN HARMON ICA 22 48 32 N Reflect 56 ORGAN BANDONEO[…]
-
Страница 105
A-3 Appendix/Apéndi ce 106 BASS R ESO. SAW BASS 1 38 53 32 -1 AWhChDly 107 BASS D ISTORTI ON SQR BASS 39 51 16 -1 Di stDly1 108 BASS R ESO. SAW BASS 2 38 49 16 -1 PhaDly 2 109 BASS DIGITAL BASS 1 39 52 32 -1 Comp 2 110 BASS RIDE BASS 32 49 16 -1 RvbRo om1 111 BASS C HORUS FINGER ED BASS 33 49 16 -1 Crn Cho 112 BASS COMP. P I CKED BA SS 34 49 16 -1[…]
-
Страница 106
Appendix/Apéndice A-4 163 BRA SS VELO. TRUMP ET 56 51 16 N Gat eRvb2 164 BRA SS VELO. TRO MBONE 57 50 16 -1 Ga teRv b2 165 BRA SS MUTE TRUMPET 59 48 32 N Enhancer 166 BRA SS OCTAV E FRE NC H HOR N 60 50 16 -1 Rv bHall1 167 BRA SS STEREO BRASS 61 50 16 N Enha D ly 168 BRA SS BRASS + SYNTH 61 51 16 N Enha D ly 169 BRA SS DEEP SYNTH- BRASS 1 62 51 16[…]
-
Страница 107
A-5 Appendix/Apéndi ce 220 PIPE SYNTH- PAN FLUTE 75 49 16 N AWhChDly 221 PIPE SYNTH- RECORDER 74 49 16 N ChoDly 4 222 PIPE WHISTL E 78 48 32 N Od Rot 2 223 SYNTH-LEAD SAW TOOTH LEAD 81 48 16 N Enha Dly 224 SYNTH-LEAD MELLOW SAW LEAD 81 53 16 N Enha Dly 225 SYNTH-LEAD GR LEAD 1 81 54 16 N PhaDly 2 226 SYNTH-LEAD SQUARE LEAD 1 80 48 16 N ChoDly 2 22[…]
-
Страница 108
Appendix/Apéndice A-6 277 SYNTH-PAD VIBE PAD 96 49 16 N Cm pDelay 278 SYNTH-PAD MOVIE SOUND 97 48 16 N FlanDly1 279 SYNTH-PAD CRYST AL PAD 2 98 50 16 N St Delay 280 SYNTH-PAD ATMOSPHERE PAD 99 48 16 N GateRv b1 281 SYNTH-PAD BRIGHTER 100 49 16 N Delay 282 SYNTH-PAD GOBLIN PAD 101 48 16 N Flanger 283 SYNTH-PAD STAR THEME 103 48 16 N PhaAPan 2 284 S[…]
-
Страница 109
A-7 Appendix/Apéndi ce 325 GM STEEL GUITAR GM 25 64 32 N – 326 GM JAZZ GUITAR GM 26 64 32 N – 327 GM CLEAN GUITAR GM 27 64 32 N – 328 GM MUTED GUITAR GM 28 64 32 N – 329 GM OVERDRIVE GT GM 29 64 16 N – 330 GM DIST ORTI ON G T G M 30 64 16 N – 331 GM GUITAR HARMONI CS 31 64 32 N – 332 GM ACOUSTIC BASS GM 32 64 32 N – 333 GM FINGERED[…]
-
Страница 110
Appendix/Apéndice A-8 382 GM CALLIOPE 82 64 16 N – 383 GM CHIF F 83 64 16 N – 384 GM CHARANG 84 64 16 N – 385 GM PLAI N SO LO VOX 85 64 16 N – 386 GM FIFTH SAW 86 64 16 N – 387 GM BASS LEAD 87 64 16 N – 388 GM FANTASY 88 64 16 N – 389 GM WARM S YNT H 89 64 32 N – 390 GM POLY SYN TH 90 64 16 N – 391 GM SPACE VOX 91 64 16 N – 392[…]
-
Страница 111
A-9 Appendix/Apéndi ce 439 VARIOUS PULSE CL AVI GM 7 65 32 N – 440 VARIOUS VIBRAPHONE WIDE 11 65 32 N – 441 VARIOUS MARIMBA WIDE 12 65 32 N – 442 VARIOUS TREMO LO ORGAN GM 16 65 32 N – 443 VARIOUS DRAWBA R ORGAN 2 GM 16 66 32 N – 444 VARIOUS 70’S ORGAN GM 17 65 32 N – 445 VARIOUS JAZZ ORGA N G M 17 66 16 N – 446 VARIOUS CHUR CH OR […]
-
Страница 112
Appendix/Apéndice A-10 496 VARIOUS SOPRAN O PAD 89 68 16 N – 497 VARIOUS FAST SWEEP 95 66 16 N – 498 VARIOUS WOOD PAD 96 66 16 N – 499 VARIOUS SYNTH-MALLET 98 65 16 N – Drum Sets/Ajustes de batería No. / Nº Tone Gr oup/ Grupo de Soni do Tone Na me/Nombr e de s onido Prog ra m Chang e/C ambio de p rogr ama Bank Sele ct MSB/ MSB de selecci[…]
-
Страница 113
A-11 Appendix/Apéndi ce Range Gama 20 DRAWB AR Even Organ 20 96 16 N Ro tary 21 DRAWB AR Flute Organ 1 21 96 16 N Rotary 22 DRAWB AR Chor us Or ga n 2 22 96 16 N Ro tary 23 DRAWB AR Overdrive Organ 3 23 96 16 N Rotary 24 DRAWB AR 16’ Or gan 24 96 16 N Rotary 25 DRAWB AR Soul Organ 3 25 96 16 N Rotary 26 DRAWB AR Perc . O r gan 3 26 96 16 N Rotar[…]
-
Страница 114
Appendix/Apéndice A-12 “ ” in dicates the sam e sound as STANDARD SET. /“ ” in dica el mismo sonido que STANDARD SET. Drum Assignment List/ Lista de asignaci ón de batería 705A-E-222A Appendix-ES.fm 12 ペー ジ 2003年9月 29日 月曜日 午 後5時13分[…]
-
Страница 115
A-13 Appendix/Apéndi ce 705A-E-223A Appendix-ES.fm 13 ペー ジ 2003年9月 29日 月曜日 午 後5時13分[…]
-
Страница 116
Appendix/Apéndice A-14 Rhythm List /List a de Ritmo No./ Nº Rhythm Nam e/Nombre de Ritmo 8 BEAT 0 8 BEAT 1 1 8 BEAT 2 2 8 BEAT 3 3 8 BEAT POP 1 4 8 BEAT POP 2 5 8 BEAT POP 3 6 60’S SOU L 7 8 BEAT DA NCE 8 POP ROC K 1 9 POP ROC K 2 16 BEAT 10 16 BEAT 1 11 16 BEAT 2 12 16 BEAT 3 13 SLOW 16 BEAT 14 16 BEAT SHUFFLE 1 15 16 BEAT SHUFFLE 2 16 FUNK 1 […]
-
Страница 117
A-15 Appendix/Apéndi ce LATIN/ VARIOUS 90 BOSSA NOVA 1 91 BOSSA NOVA 2 92 SAMBA 93 MERENGUE 94 CUMBIA 95 CHA-CHA-C HA 96 SALSA 97 BEGUINE 98 BOLERO 99 MAMBO 100 RH UMBA 101 TANGO 1 102 TANGO 2 103 REGGAE 1 104 REGGAE 2 105 SKA 106 BLUEGRASS 107 COUN TRY 108 COUN TRY SHUFFLE 109 COUN TRY WALTZ 110 FAST GOSPEL 111 SLOW GOSP EL 112 BROADWAY 113 JIVE […]
-
Страница 118
Appendix/Apéndice A-16 This tabl e shows the fi ngerings for commonly used c hords, incl uding inverted fingerings . Esta ta bla mue stra las di gitacio nes para lo s acord es usado s comúnm ente, in cluyen do las dig itaci ones inv ertidas. Fingered Ch ord Chart/Cuadro de acordes Fingered 705A-E-226A Appendix-ES.fm 16 ペー ジ 2003年?[…]
-
Страница 119
A-17 Appendix/Apéndi ce * You ca n change the keybo ard range of di m7 chor ds for root s A, B b , and B, an d au g chor ds fo r ro ots B b an d B by adj ust ing the split poi nt set ting (page E-67) . * Puede cambiar la gama del teclado de los acordes dim7 pa ra la s nota s funda mentales A, B b y acordes aumentado s (augment) para las notas fund[…]
-
Страница 120
Appendix/Apéndice A-18 Settabl e parameters d epend on the DSP type. Al so, the paramet ers for eac h DSP type dep end on the algo rithm* associated with the D SP type. See the DSP Algorithm List on page E-88 for mo re information . * Effector structure and operation type Los parámetr os que pueden ajusta rse depende n en el ti po DSP. También, […]
-
Страница 121
A-19 Appendix/Apéndi ce Chorus [07] 16 Chorus 1 Chorus 1 [08] 17 Chorus 2 Chorus 2 [09] 19 Chorus 3 Chorus 3 [10] 18 Chorus 4 Chorus 4 [11] M05 Enha Cho Enhancer — Chorus Flanger [12] 26 Flanger Flanger [13] M07 EnhaF lan Enhancer — Fl anger Delay [14] 28 Dela y Del ay [15] 22 3Tap De lay 3-Tap Del ay [16] 20 St Delay Stereo Delay [17] 21 StXDelay[…]
-
Страница 122
705A-E-234A CTK691E01-01.book 1 ペ ージ 2003年9 月29日 月曜日 午後4時47分[…]