Илья Александрович
Ученик
(194),
на голосовании
7 лет назад
хотел бы задать вопрос знающим людям! можно ли таким путем (через тюнер) подключить камеру к пк?
Дополнен 7 лет назад
вопрос в том как это сделать?) установил тюнер в мат плату, подключил камеру к тв выходу тюнера, а что дальше?)
Голосование за лучший ответ
НьюПетрол Тюмень Нью Петрол Тюмень
Мудрец
(15474)
7 лет назад
если в тюнере есть видеовход то можно.
Илья Александрович Ученик (194)
7 лет назад
вопрос в том как это сделать?) установил тюнер в мат плату, подключил камеру к тв выходу тюнера, а что дальше?)
НьюПетрол Тюмень Нью Петрол Тюмень
Мудрец
(15474)
Теперь отключи от выхода и подключи ко входу. Потом запусти любую программу которая умеет работать с вебками или тюнерами, да хоть скайп и в ней в настройках камеры выбери нужный вход должен увидеть картинку.
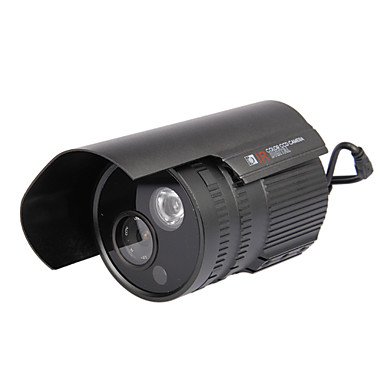
KPC-650BH KT&C — 0,75 Мп черно-белая видеокамера цилиндрической формы производства южнокорейского бренда KT&C (Korea Technology and Communications). Благодаря встроенной ПЗС-матрице Ex-view CCD от фирмы SONY величиной 1/3 дюйма видеокамера способна выводить изображение происходящего в высоком качестве 650 ТВЛ (разрешение составит 1024 горизонтальных на 756 вертикальных пикселей). Устройство позволяет вести видеонаблюдение даже в темноте, практически при полном отсутствии света, т.к. минимальная светочувствительность устройства составляет 0.003 люкса с апертурой 1.2, есть возможность замены объектива. Подходят объективы с креплением C или CS, а также с автоматической диафрагмой с управлением типа AFCS и FCS (VideoDrive, DirectDrive). Соотношение мощности полезного сигнала к мощности шума достигает 48 дБ, но не более. Гамма-коррекция, которая (при значениях меньше 1) способна улучшить распознавание деталей при низкой освещенности, имеет показатель 0,45. Камера питается от источника постоянного тока с напряжением в 12 вольт, значение потребления тока составляет 110 микроампер. Видеовыход является композитным с сопротивлением 75 Ом. Имеется встроенная функция компенсации задней засветки, улучшающая качество изображения при слишком ярком освещении. Значение температуры ниже 0°С, при которой видеокамера нормально функционирует, достигает -10°С, а максимальная температура работы +60°C. Размеры видеокамеры совсем невелики — всего 34×34х55 миллиметров, она достаточно компактна и подходит для скрытой установки.
Технические характеристики:
- Формат ПЗС-матрицы — 1/3 дюйма SONY Ex-view CCD
- Чувствительность — 0.003лк (F1.2)
- Разрешающая способность — 600 ТВЛ
- Выходной сигнал — 1 V, 75 Ом
- Отношение сигнал/шум — 48 Дб
- Гамма-коррекция — 0,45
- Управление диафрагмой — VD/DD
Стандарт видеосигнала — CCIR;EIA - Электронный затвор — CCIR: 1/50-1/100000 c; EIA: 1/60-1/100000
- Напряжение питания — 12 В
- Ток потребления — 110 мА
- Диапазон рабочих температур — от-10°С…+60°С
- Посадочное место объектива — С или CS
- Габаритные размеры — 34×34х55 мм
CCTV Camera Manual
Table of Contents
Model configuration
Precautions
Name of each part and Functions
— Front
— Back
Connection
1. Lens
1) How to use a Fixed Iris lens
2) How to use a DC Iris lens
3) How to use a Video Iris lens
4) How to connect an Auto Iris lens
2. How to adjust C/CS Mount
3. How to connect Power
4. How to connect Monitor
Specification
— Color Camera
— B/W Camera
Trouble shooting guide
Note
4-5
6-11
2
3
12
12-13
13
13-14
15
16
17
18
19
20-21
22
Please study the manual thoroughly in order to get the best performance from the camera.
1
Model configuration
Color Camera
■
STD-Res Series (400 TV Lines, 0.01 Lux/F1.2)
DC12V Only
DC12V~AC24V, Non polarity Dynamic power input
AC230V (AC200~AC240V)
■
STD-Res EX-view Series (400 TV Lines, 0.001 Lux/F1.2 with EX-view HAD CCD)
DC12V Only
DC12V~AC24V, Non polarity Dynamic power input
AC230V (AC200~AC240V)
■
Hi-Res Series (500 TV Lines, 0.03 Lux/F1.2)
DC12V Only
DC12V~AC24V, Non polarity Dynamic power input
AC230V (AC200~AC240V)
■
Hi-Res EX-view Series (500 TV Lines, 0.001 Lux/F1.2 with EX-view HAD CCD)
DC12V Only
DC12V~AC24V, Non polarity Dynamic power input
AC230V (AC200~AC240V)
■
Option
1. IR Sensitive for Day & Night application : Model nr + IR
2. Flickerless Function : Model nr + FL
B/W Camera
■
STD-Res Series (420 TV Lines, 0.05 Lux/F1.2)
DC12V Only
DC12V~AC24V, Non polarity Dynamic power input
AC230V (AC200~AC240V)
■
Hi-Res Series (600 TV Lines, 0.1 Lux/F1.2)
DC12V Only
DC12V~AC24V, Non polarity Dynamic power input
AC230V (AC200~AC240V)
■
Hi-Res EX-view Series (600 TV Lines, 0.001 Lux/F1.2 with EX-view HAD CCD)
DC12V Only
DC12V~AC24V, Non polarity Dynamic power input
AC230V (AC200~AC240V)
This unit has been tested and proved to comply with the limits of FCC rules and CE regulation.
2
Warning !
☞
To prevent the risk of fire or shock hazard, do not expose this camera to water.
☞
Installation of this unit should be carried out by a qualified personnel and should conform to the local codes.
Name of each part & Functions
Front
Precautions
1. Do not drop or shake the carton severely.
The box cannot give perfect protection against heavy shocks.
2. Do not touch the CCD glass by hand, as this may give a blurred picture.
3. Do not expose the camera to water or other liquids.
It can cause fire or electric shock. If water or other liquids contaminate the unit, dry it quickly as it can corrode the electrical components inside.
4. Do not install the camera in the wet area or area of high humidity without adequate protection.
Moisture can corrode the electrical components inside.
5. Do not turn the camera to face strong light.
Direct sunlight or strong reflected light can cause blooming or smearing of the picture.
6. Do not install or use the camera in an environment of extreme temperature.
In temperatures of below -10
° in. In a temperatures of over +60
° apparatus.
7. Do not disassemble the camera.
There are no user serviceable parts inside.
3
1. CCD Protection Cover
Leave the cover in place when the lens is not installed. Take it off to fit the lens.
2. C&CS mount
This holder moves back and forth by sliding the adjustment lever forwards or backwards.
This mechanism is designed for the purpose of using all types of C-Mount or CS-Mount lenses of different manufacturers. Mount the lens on the holder firmly. It is set to CS-Mount position at the factory. Loosen the adjustment lever by turning it counter clockwise a little bit in order to adjust the C&CS mount holder. Set the focus and lock the lever.
3. Adjustment Lever
4. Flange back focus alignment area for C-Mount lens
The mount offers 0.5mm of extra tolerance to enable any type of nonstandard C-Mount lens to be focused. Loosen the adjustment lever by turning it counter clockwise a little bit for fine tune focus.
5. Flange back focus alignment area for CS-Mount lens
The mount offers 0.5mm of extra tolerance to enable any type of nonstandard CS-Mount lens to be focused. Loosen the adjustment lever by turning it counter clockwise a little bit for fine tune focus.
4
6. Mounting the Bracket Holder
Can be attached either on the top or on the bottom. Assemble it with the screws provided. (3 EA)
7. Auto iris lens connector
Please refer to page 13, 14 of this manual for the wiring specification.
8. Iris mode select switch
ES : Electronic auto iris, VI : Video iris, DC : DC Iris
ES mode is used with manual iris lenses. In ES mode the camera controls the electronic shutter automatically from 1/50 to 1/100,000 sec.(PAL/CCIR)or 1/60 to 1/100,000 sec.(NTSC/EIA).
ES mode with a Manual iris lens is suitable for indoor surveillance. Select the slide SW to the ES position.
For outdoor use, ES mode is not sufficient. In this case an Auto Iris lens of either Video driven type or DC driven type is recommended. Move the slide
SW to VI position for the Video iris lens or move it to DC position for the DC
Iris lens. When VI or DC mode is selected, the electronic shutter speed is fixed to 1/50sec(PAL/CCIR) or 1/60sec(NTSC/EIA).
9. DC Level control for DC Iris lens.
It is used for controlling the video output level of the DC driven auto iris lens.
* To make the image brighter, turn the pot clockwise.
* To make the image darker, turn the pot counter clockwise.
5
Back
-Color
1. 6Way Dip Switch
2. Power Input
Terminal
DC 12V
DC 12V/AC 24V
Line Lock
3. Video Out Connector
(BNC Female)
4. Power Indicator
5. Line Lock / White
Balance Push button
AC 230V Power Cord
1-1. 6 Way DIP Switch
DIP Switch configuration (24V AC LineLock, 230V AC LineLock only)
No.
OFF ON
1
2
3
(Phase Push SW up/down)Line Lock Mode
OFF
ON
Manual White Balance
(Adjust the Push Button Up/Down)
ON
OFF
Internal Mode
Auto White Balance
(No need to Adjust the Push Button)
4 =1.0
=0.45
5
6
AGC Max : 26dB
BLC OFF
AGC Normal : 20dB
BLC ON
DIP Switch configuration (DC 12V only)
No.
OFF
1
2
OFF
ON
Manual white Balance
(Adjust the Push Button Up/Down)
3
=1.0
4 AGC Max : 26dB
5
6
BLC OFF
N.C
ON
OFF
ON
Auto White Balance
(No need to Adjust the Push Button)
=0.45
AGC Normal : 20dB
BLC ON
N.C
6
* Color 6 Way Dip Switch Functions
Sync Mode Selection(L/L INT)
* INT(Internal Sync) Mode
This mode is used when the camera is installed outoor with one camera to one monitor operation.
* L/L(Line Lock) Mode : To work with other cameras using 24VAC and 230VAC power, it is required to synchronize the video signals in order to remove picture fluctuation problems. In the case of one camera with one monitor under fluorescent lighting, the picture is affected by the 24VAC and 230VAC power frequency in INT mode. A flickering picture may result from this condition. Set Dip
S/W to L/L mode to remove this problem. It is set to L/L at the factory.
White Balance Control
W
* WBA (White Balance Auto) mode ( )
M
W
B
A
The camera controls the white balance automatically. It is recommended for most applications. It is set to WBA at the factory.
W
* WBM (White Balance Manual) Mode( )
M
W
B
A
White balance is controlled manually under this mode by adjusting the push button up or down. It is not used for normal applications. It may needed for special conditions or when the camera is used under special lighting. The back ground of the picture may become red or blue under manual adjustment.
Gamma Correction Select Mode ( =1.0 0.45)
Select 1.0 when the picture needs to be darker in contrast.
It is set to 0.45 at the factory.
Option : Flickerless Select Mode (
FL ON(NTSC:1/100 sec, PAL:1/120 sec)
FL OFF)
Automatic Gain Control (MAX AGC)
Use this mode for dark illumination or at night. If the MAX(AGC Max) is selected the camera increases the video signals to maximum so that the picture looks brighter.
At MAX mode, unnecessary noise is increased also and the picture may display noise on the screen. This is normal. It is set to AGC at the factory.
7
BLC (Back Light Compensation) ON / OFF (BLC ON)
Under bright lighting conditions from behind the subject, the camera will close the iris automatically. Select BLC mode to counteract this. In normal lighting conditions, select BLC to OFF. It is set to OFF at the factory.
1-2. Power Input Terminal
This terminal provides connections for DC 12V or AC 24V.
It is not polarity sensitive. The unit has a wide power tolerance, within DC
10V~DC 40V or within AC 15V~AC 30V. It is not a special requirement to use a regurated power supply, but using a regurated supply is recommended.
1-3. Video Out Jack (BNC Female)
Connect Coaxial cable from this BNC connector to the monitor. Use a high quality coaxial video cable to ensure good picture quality over long distances.
1-4. Power Indicator
Red power lamp turns on when the power is properly supplied.
1-5. Vertical Phase Adjustment Push Button (Line Lock mode)
White Balance Push button
The up/down push buttons control V phase at L/L mode and control manual white balance at the WBM mode.
◆
At the L/L Mode
When the unit is used with system equipment and other cameras, it is required to synchronize the Vertical Phase between the cameras when using 24VAC. It is recommended to use a multi-channel oscilloscope for correct adjustment.
Push the buttons once at a time up or down when vertical phase of the unit does not match the other cameras or system equipment.
◆
At the WBM (White Balance Manual) Mode
Adjust the white balance with the push buttons when the camera is used with the special lighting such as sodium lamps. Usually it is not used for security applications.
These two functions cannot be adjusted at the same time. Adjust each mode in turn.
8
Back
-B/W
1. 4Way Dip Switch
DC 12V/AC 24V
Line Lock
2. Power Input
Terminal
3. Video Out Connector
(BNC Female)
4. Power Indicator
5. V.R
DC 12V
AC 230V Power Cord
Line Lock Cord
1. 4 Pin DIP Switch
DIP Switch configuration (24V AC LineLock)
No.
OFF
1
2
3
4
INT
=0.45
BLC OFF
AGC Normal : 20dB
DIP Switch configuration (DC 12V & 230V AC)
No.
OFF
1
=0.45
2
BLC ON
3
4
AGC Normal : 20dB
N.C
ON
L/L
=1.0
BLC ON
AGC Max : 32dB
ON
=1.0
BLC OFF
AGC Max : 32dB
N.C
9
* B/W 4 Way Dip Switch Functions
Sync Mode Selection(L/L INT)
* INT(Internal Sync) Mode
This mode is used when the camera is installed outoor with one camera to one monitor operation.
* L/L(Line Lock) Mode : To work with other cameras using 24VAC power, it is required to synchronize the video signals in order to remove picture fluctuation problems. In the case of one camera with one monitor under fluorescent lighting, the picture is affected by the 24VAC power frequency in
INT mode. A flickering picture may result from this condition. Set Dip S/W to
L/L mode to remove this problem. It is set to L/L at the factory.
Gamma Correction Select Mode ( =0.45 1.0)
Select 1.0 when the picture needs to be darker in contrast.
It is set to 0.45 at the factory.
Automatic Gain Control (AGC MAX)
Use this mode for dark illumination or at night. If the MAX(AGC Max) is selected the camera increases the video signals to maximum so that the picture looks brighter.
At MAX mode, unnecessary noise is increased also and the picture may display noise on the screen. This is normal. It is set to AGC at the factory.
BLC (Back Light Compensation) ON / OFF (BLC OFF)
Under bright lighting conditions from behind the subject, the camera will close the iris automatically. Select BLC mode to counteract this. In normal lighting conditions, select BLC to OFF. It is set to OFF at the factory.
10
2-2. Power Input Terminal
This terminal provides connections for DC 12V or AC 24V.
It is not polarity sensitive. The unit has a wide power tolerance, within DC
10V~DC 40V or within AC 15V~AC 30V. It is not a special requirement to use a regurated power supply, but using a regurated supply is recommended.
2-3. Video Out Jack (BNC Female)
Connect Coaxial cable from this BNC connector to the monitor. Use a high quality coaxial video cable to ensure good picture quality over long distances.
2-4. Power Indicator
Red power lamp turns on when the power is properly supplied.
2-5. Vertical Phase Adjustment V.R (Line Lock mode)
◆
At the L/L Mode
When the unit is used with system equipment and other cameras, it is required to synchronize the Vertical Phase between the cameras when using
24VAC. It is recommended to use a multi-channel oscilloscope for correct adjustment.
Adjust vertical phase of the unit with V.R to match with other cameras or system equipment.
Connection
1. Lens
It is recommended to use a good quality lens to improve the picture quality under low light conditions.
The camera is built with a universal mounting mechanism on which any type of lens can be used.
* Lens is not supplied with camera.
How to use a Manual Iris lens
* In this set-up the camera does not control the iris. Instead the camera adjusts the picture automatically for light changes. Set the Iris mode select switch to ES (Electronic Shutter) position.
* Please make sure to check this before operation. When the S/W is positioned at the VI or DC mode, the electronic shutter will be off and will not control the picture.
How to use a DC Iris lens
11
* Set the iris mode select switch to DC (DC driven automatic iris Control) position.
* In this mode, the iris is controlled automatically to react to DC signals from the camera.
* Please make sure to set S/W to DC position before you operate the camera with a DC lens.
* DC level control is on the side of the camera. Please do not touch the DC
Level control when using a fixed or Video iris type of lens.
* The camera is set to DC at the factory. Adjust the pot up or down only when you need the picture to look brighter or darker depending on the situation.
Generally there is no need to adjust the level.
How to use a Video Iris lens
* Set the iris mode select switch to VI (Video signal driven Automatic Iris) position.
* In this mode the lens controls itself automatically to react to Video signals from the camera.
* Remove the cover of the auto iris plug connector(supplied with the camera) and solder the lens cable to the pins as per the following configuration:
* Please make sure to set S/W to VI position before you operate the unit with a Video type auto iris lens. Level control is on the side of the lens .
How to connect an Auto Iris lens (DC / Video)
* Take off the insulation of the lens cable as shown on the drawing.
(approx. 8mm)
* Take off the insulation of the inner cable as shown on the drawing.
(approx. 2mm)
* Video type * DC type
* Video type
No. 1 Pin — Red(Power source)
No. 2 Pin — N.C
No. 3 Pin — Yellow(Video Signal)
No. 4 Pin — Black(GND)
* DC type
No. 1 Pin — DAMP —
No. 2 Pin — DAMP +
No. 3 Pin — Drive +
No. 4 Pin — Drive —
Remove the Protection Cap and attach the lens to the camera.
Set the Iris mode select switch, S/W to VI, ES or DC position according to the type of lens.
Connect the lens plug to the auto iris socket located on the left side of the camera.
2. How to adjust C&CS Mount
Loosen the lens mount holder by turning the adjustment lever clockwise.
Pull the adjustment lever backward and fix it on the “CS” position.
Turn the lever counter clockwise to tighten.
Push the lever forward and fix it on the “C” position.
Turn the lever clockwise to tighten.
CS-Mount
C-Mount
Hold the levers at both side together and move the lens mount holder forward or backward.
3. How to connect power
3-1. Please check the model and power specification before connecting the power.
Color B/W
3-2. AC24V power
The camera has a common power input connector for both
12VDC and 24VAC.
The power input is non polarized.
3-3. The unit has a wide power tolerance, within DC 10V ~ DC
40V or within AC 15V
~ AC 30V.
3-4. DC 12V power
Use regulated DC
12V power supply
ONLY. The power input is non polarized.
3-5. AC 230V power
Use an AC 230V power source.
Connect the power plug to the outlet directly.
WARNING !
CONNECT POWER ONLY AFTER INSTALLATION IS COMPLETED.
Refer to page 4 for any additional information.
4. How to connect to monitor
4-1. Connect the Video out jack to the Video In jack on the monitor.
— Use good quality shielded coaxial video cable to avoid noise interference.
— Connect the cable with the power turned off.
Camera Back Monitor
— When the camera is used with multi-channel equipment or with more than 2 monitors, please set impedance level switch on the interim equipment / monitors to HI-Z position and make sure to set the last monitor to 75 position.
CAMERA
INTERIM EQUIPMENTS
OR MONITOR
LAST MONITOR
MODEL
Image sensor
Effective Pixels
H.Resolution
Synchronizing system
Scanning system
Video output
S/N ratio
Min. Illumination
BLC
Shutter Speed
Gamma correction
White Balance
Gain Control
Smear Effect
MTBF
Power source
Operating current
Lens
Iris Control
Operating Temperature
Humidity
Measurement(mm)
Weight(Approx.g)
IR Sensitivity
Optional
Features
Audio
Dual Power 12~24
Line Lock
BLC
Dip S/W
Control
AGC
Gamma
WBA / WBM
Line Lock
Video Out
Rear
Pannel
Side
Pannel
Power Indicator
Power Input terminal
Line phase push BTN
W/B adjust push BTN
Dip S/W
Auto Iris jack
Iris Mode Slide S/W
DC Iris Adjust volume
Specification (Color)
STD-Res Series Hi-Res Series
1/3″ SONY HAD IT CCD Option : 1/3″ EX-View HAD CCD, SONY
NTSC:512(H)X492(V) PAL:500(H)X582(V) NTSC:768(H)X494(V) PAL:752(H)X582(V)
Internal
400 TV Lines
Internal/Line Lock Line Lock Only Internal
500 TV Lines
Internal/Line Lock Line Lock Only
NTSC 525 Lines PAL 625 Lines 2:1 Interlaced
1.0Vp-p Composite. 75 Ohms
More than 50 dB (AGC Off)
STD : 0.01 Lux at F1.2 High-Res : 0.03 Lux at F1.2 EX-View : 0.001 Lux at F1.2
ON/OFF by Dip Switch
NTSC : 1/60~1/100,000 sec PAL : 1/50~1/100,000 sec
Standard 0.45 Switchable 1.0 by Dip Switch
Standard 2100°K ~ 9100°K Auto Manual setting by Dip S/W & Up/Down by Push BTN
Standard : 8dB~30dB Auto Maximum by Dip switch
0.005%
80,000 hours
DC12V DC12V-AC24V Dynamic AC230V DC12V DC12V-AC24V Dynamic AC230V
130 mA 150 mA, 110 mA 30 mA 130 mA 150 mA, 110 mA 30 mA
C-Mount (17.5mm Frange back) ~ CS-Mount (12.5mm Frange back) & Fine focus 1.0mm
Video Iris/ESC/DC Iris
14° F~122° F ( -10° C~ + 50° C )
Within 90% RH
50(W) x 50(V) x 115(L)
310
Yes
Yes
12V DC Only
ON/OFF
STD/MAX
0.45/1.0
BNC
Red LED
Screw Joint
Up/Down
6 Way
4Pin Jack
VI ES DC
DC Level
310
Yes
Yes
410
Yes
Yes
310
Yes
Yes
12V DC Only
310
Yes
Yes
Yes
Yes
ON/OFF
STD/MAX
Yes
ON/OFF
STD/MAX
ON/OFF
STD/MAX
Yes
Yes
ON/OFF
STD/MAX
0.45/1.0
0.45/1.0
0.45/1.0
0.45/1.0
White Balance Auto/WB Manual adjustment
ON/OFF
BNC
Red LED
Screw Joint
Up/Down
Up/Down
6 Way
4Pin Jack
VI ES DC
DC Level
BNC
Red LED
230V AC VDE Code
Up/Down
Up/Down
6 Way
4Pin Jack
VI ES DC
DC Level
BNC
Red LED
Screw Joint
Up/Down
6 Way
4Pin Jack
VI ES DC
DC Level
ON/OFF
BNC
Red LED
Screw Joint
Up/Down
Up/Down
6 Way
4Pin Jack
VI ES DC
DC Level
410
Yes
Yes
Yes
ON/OFF
STD/MAX
0.45/1.0
BNC
Red LED
230V AC VDE Code
Up/Down
Up/Down
6 Way
4Pin Jack
VI ES DC
DC Level
Specification (B/W)
MODEL
Image sensor
Effective Pixels
H.Resolution
Synchronizing system
Scanning system
Video output
S/N ratio
Min. Illumination
BLC
Shutter Speed
Gamma correction
Gain Control
Smear Effect
MTBF
Power source
Operating current
Lens
Iris Control
Operating Temperature
Humidity
Measurement(mm)
Weight(Approx.g)
Line Lock
Dip S/W
Gamma
Control BLC
Rear
Pannel
Side
Pannel
AGC
Video Out
Power Indicator
Power Input terminal
Phase V.R
Dip S/W
Auto Iris jack
Iris Mode Slide S/W
DC Iris Adjust volume
STD-Res Series
1/3″ Interline CCD, SONY
0.05 Lux at F1.2
Hi-Res Series
1/3″ Interline CCD, SONY
Option : EX-View HAD CCD Version
EIA:512(H)X492(V) CCIR:500(H)X582(V) EIA:768(H)X494(V) CCIR:752(H)X582(V)
Internal
420 TV Lines
Internal/Line Lock Internal Internal
600 TV Lines
Internal/Line Lock Internal
EIA 525 Lines CCIR 625 Lines 2:1 Interlaced
1.0Vp-p Composite. 75 Ohms
More than 50 dB (AGC Off)
0.1 Lux at F1.2
Option : 0.001 Lux at F1.2 (EX-View HAD CCD version)
ON/OFF by Dip Switch
EIA : 1/60~1/100,000 sec CCIR : 1/50~1/100,000 sec
Standard 0.45 Switchable 1.0 by Dip Switch
Standard : 4dB~30dB Auto Maximum by Dip switch
0.005%
80,000 hours
DC12V DC12V-AC24V ( 4V) Dual AC230V( 30V)
110 mA 100 mA, 50 mA 20 mA
DC12V DC12V-AC24V ( 4V) Dual AC230V( 30V)
110 mA 100 mA, 50 mA 20 mA
C-Mount (17.5mm Frange back) ~ CS-Mount (12.5mm Frange back) & Fine focus 1.0mm
Video Iris/ESC/DC Iris
310
0.45/1.0
ON/OFF
STD/MAX
BNC
Red LED
Screw Joint
4Way Slide
4Pin Jack
VI ES DC
DC Level
310
ON/OFF
0.45/1.0
ON/OFF
STD/MAX
BNC
Red LED
Screw Joint
YES
4Way Slide
4Pin Jack
VI ES DC
DC Level
14° F~122° F ( -10° C~ + 50° C )
Within 90% RH
50(W) x 50(V) x 115(L)
410 310
0.45/1.0
ON/OFF
STD/MAX
BNC
Red LED
230V AC VDE Code
4Way Slide
4Pin Jack
VI ES DC
DC Level
0.45/1.0
ON/OFF
STD/MAX
BNC
Red LED
Screw Joint
4Way Slide
4Pin Jack
VI ES DC
DC Level
310
ON/OFF
0.45/1.0
ON/OFF
STD/MAX
BNC
Red LED
Screw Joint
YES
4Way Slide
4Pin Jack
VI ES DC
DC Level
410
0.45/1.0
ON/OFF
STD/MAX
BNC
Red LED
230V AC VDE Code
4Way Slide
4Pin Jack
VI ES DC
DC Level
Trouble Shooting Guide
If the unit continues to be fault after the following adjustments please consult your dealer.
When the picture is not displayed on the monitor
— Please check if the AC-DC power unit is plugged into the AC power outlet firmly
— Please check if there are any misconnection’s in the cabling.
— Please check if the IRIS mode select switch is set to the correct position i.e. to the DC mode for the DC driven auto iris lens or VI mode for the Video driven auto iris lens.
When the picture is blurred
— Please check if the lens is contaminated. Please clean the lens surface
(on both sides) gently with a soft cloth or tissue.
— Please check if the lens is focused properly.
— When you use a manual iris lens, the iris select switch should be positioned to the ES mode.
— Please check if the monitor is set to brightly. Adjust the brightness or contrast level on the monitor correctly.
When the color displayed on the monitor is not correct(for Color)
— Please check if the White Balance switch is set to WBM position.
White balance is controlled automatically under the WBA mode for most situations. When the camera is used under special lighting conditions, please refer to page 7 in this manual.
— Please check if the monitor’s color adjustment is set correctly.
When the picture is too dark
— Please check if the monitor’s contrast is set too dark.
— Please check if the Gamma select switch is set to 1.0 on the 6 th pin of the
DIP switch. If it is please move it to the 0.45 position. Gamma 1.0 position is recommended for use with a LCD monitor.
— Please check if the camera is positioned toward a door or window.
Please set BLC ON is these conditions.
When the picture is too bright
— Please check if the monitor’s brightness control is get too high.
— Please check if the camera is set to BLC ON under normal lighting conditions.( i.e. when the camera is not pointed towards a brightly lit area)
Please move the BLC select switch to the BLC OFF position.
When there is noise on the picture in dark illumination conditions
— The camera picture becomes noisy under AGC MAX mode in order to increase the video gain in poor lighting conditions. Please move the AGC switch to OFF position if it is not required.
When the picture is not clear on the monitor
— Please check if the monitor is set up correctly.
— Please check if the camera is pointer towards an area where too much light comes in. Adjust the direction of the camera in this case.
— Please check if the back focus of the lens is set correctly.
When the picture is flickering
— Please check if the camera is pointed at fluorescent lighting or bright sunlight. Use a visor or adjust the direction of the camera in this case.
— Please check if the Auto iris lens is selected correctly on the IRIS mode select switch. Please move the Iris mode switch to DC position when you use a DC type auto lens or move it to the VI position when you use a
Video type auto iris lens.
— When you don’t use an auto iris lens, please move the iris select switch to the ES position
When the picture is distorted
— Please check if the lens is defective and replace the lens in this case.
— Please check if the camera is PAL/CCIR(50Hz) in an NTSC/EIA(60Hz) area or vice versa.
N o t e
22
Что означает CCD применительно к камерам
CCD означает прибор с зарядовой связью, который впервые был изобретен в конце 1960-х годов. ССD-матрица используется для захвата и сохранения изображений в цифровой памяти, и они оказались жизненно важны во многих областях науки и техники. ССD матрицы используются на копировальных аппаратах, факсах, камерах видеонаблюдения, маммографии, стоматологии, фотоаппаратах и видеокамерах. Большинство цифровых камер сегодня содержат ССD-сенсор для сбора и хранения цифровых отпечатков. В последнее время наиболее популярной областью использования камер CCD являются астрономические исследования.
История появления CCD
Приборы с зарядовой связью (ССD) были изобретены Уиллардом Бойлом и Джордж Э. Смитом в компании Bell Labs в 1969 году. Первоначально, Бойл и Смит считали это изобретение как новый тип компьютерной схемы памяти. Схема заряжается светом, и благодаря кремнию, ССD очень чувствительна к свету. При этом Бойл и Смит знали, что ССD могла захватить лучшие изображения, если их поместить внутрь камеры. Чем больше света, здесь собирается тем более четкое и точное изображение появится. Когда появились цифровые камеры, ССD датчики были помещены внутри них, для того чтобы захватывать свет.
Принцип работы CCD
Сегодня большинство цифровых домашних камер обладают ССD сенсором. Когда свет собирается в камере и помещается на кремнии, создавая образ, датчик преобразует свет в электрический заряд, или электроны, которые позволяют свету превратиться в цифровое изображение. Наиболее описание этого процесса заключается в том, что после открытия затвора камеры, на кремний CCD воздействует свет, этот свет превращается в электроны, которые преобразуются в цифровой сигнал, и этот сигнал захватывается в память и отображается на печати с экрана фотокамеры.
Опции CCD камеры
Все CCD камеры обеспечивают высокое качество с низким уровнем шумности, с высокой светочувствительностью и высоким количеством пикселей. Все цифровые камеры излучают свет в красном, зеленом и синем оттенках, но качество изображения зависит от качества камеры, которую вы покупаете. ССD -камеры содержат 2:59 CCD массивов. Одна ССD матрица расшифровывает всех три оттенка, что делает их более трудными для отделения каждого оттенка от другого. Камеры с одной ССD-матрицей обычно используются для систем безопасности или для других целей, где необходимы точные цвета. Камеры с тремя ССD матрицами обеспечивают один массив для каждого оттенка, что позволяет получить больше точности для получения окончательного результата.
Научные разработки
Хотя большинство цифровых камер содержат датчик изображения CCD, высокотехнологичные ССD-камеры очень популярны в биологии и астрофотографии и используются в телескопах Хаббл. CCD камеры позволяют длительное время удерживать экспозицию при съемке в телескопе. Камера заменяет окуляр телескопа, и она подключается к компьютеру. Кадры снимаются быстро они захватывают большой диапазон яркости и могут сливаться в одно изображение. ССD-камеры реагируют почти на 70 процентов от имеющегося света, по сравнению с двумя процентами, того что могут снять традиционные камеры в ночном небе. Так как эти камеры гораздо более продвинутые, их стоимость колеблется от 500 $ до 10000 $.
×
Почему у нас дешевле?
![]() Наша компания доставляет товары напрямую из США и Европы. Мы сотрудничаем с официальными поставщиками и производителями брендов.
Наша компания доставляет товары напрямую из США и Европы. Мы сотрудничаем с официальными поставщиками и производителями брендов.
![]() В нашем каталоге вы найдете уникальный ассортимент, большинство товаров не продаются в России. За счет прямой логистики до вашего адреса вы не переплачиваете цепочке посредников и конечная цена товара выходит значительно дешевле, чем стоимость в обычном магазине в РФ.
В нашем каталоге вы найдете уникальный ассортимент, большинство товаров не продаются в России. За счет прямой логистики до вашего адреса вы не переплачиваете цепочке посредников и конечная цена товара выходит значительно дешевле, чем стоимость в обычном магазине в РФ.
![]() Покупая на Shopozz, вы можете не сомневаться, что получите оригинальный товар высокого качества по минимальной цене.
Покупая на Shopozz, вы можете не сомневаться, что получите оригинальный товар высокого качества по минимальной цене.
Доставка в
город Москва
: 4 октября
Вопрос по товару?
Мы перезвоним!
Основные характеристики
Оригинальное название:
KT&C DSP Color HI-RES Exvision KPC-650CHQ exview 550 c/cs mount Low Light PAL
Товар из США
Доставим в Ваш город
Артикул:302685478359
Продавец:
dennis6z7a
(45357)
Местонахождение:Comstock Park, Michigan, US
Доставка до склада США
Бесплатно

Товары из магазинов
США и Европы
без наценок!
Отправили
67 000 посылок
с 2008 года!
Знаменитый
каталог eBay
на русском языке!
Доставка курьером
до двери
Почтой или в удобный пункт выдачи!
Похожие товары
KT&C DSP Color HI-RES Exvision KPC-650CHQ exview 550 c/cs mount Low Light PAL
KT&C DSP Color HI-RES Exvision KPC-650CHQ exview 550 c/cs mount Low Light PAL – можно купить на shopozz.ru с доставкой
из Comstock Park, Michigan, US. Все товары из
категории «Камеры» быстро и вовремя доставляются в Россию и страны СНГ.
Полную информацию о доставке можно посмотреть в разделе «Доставка».
На товары категории «Камеры» действует доступная цена,
поэтому KT&C DSP Color HI-RES Exvision KPC-650CHQ exview 550 c/cs mount Low Light PAL можно
приобрести всего за
48500 руб.
Не можете сделать выбор? Посмотрите другие товары продавца
dennis6z7a
(45357)
–
«Смотреть все товары».
Возникли вопросы о товаре, условиях оплаты либо доставки?
Закажи обратный
звонок!
Другие бренды категории
Популярные товары бренда
Покупки в США и Европе — это просто
Вы делаете заказ — мы выкупаем товары и доставляем вам
Склад

$46
Косметика M.A.C.maccosmetics.com

$46
Часы Timexamazon.com

$15
Джинсы levi’sebay.com
К вам домойОтправляем в Россию и
во все страны СНГ
Начать выгодные покупки в зарубежных интернет-магазинах