- Manuals
- Brands
- Siemens Manuals
- Measuring Instruments
- CLINITEK Status+
- Operator’s manual
-
Contents
-
Table of Contents
-
Troubleshooting
-
Bookmarks
Quick Links
Operator’s Guide
This document is:
C:\Documents and Settings\punysh00\Desktop\Version 2.2\Source\0_title_legal.fm
It was last modified August 25, 2011 3:56 pm
It was printed August 25, 2011
10379682 (134798) Rev. B, 2011-06
CLINITEK Status
Analyzer
+
®
Related Manuals for Siemens CLINITEK Status+
Summary of Contents for Siemens CLINITEK Status+
-
Page 1
CLINITEK Status ® Analyzer Operator’s Guide This document is: C:\Documents and Settings\punysh00\Desktop\Version 2.2\Source\0_title_legal.fm It was last modified August 25, 2011 3:56 pm It was printed August 25, 2011 10379682 (134798) Rev. B, 2011-06… -
Page 2
© 2011 Siemens Healthcare Diagnostics Inc. All rights reserved. No part of this operator’s guide or the products it describes may be reproduced by any means or in any form without prior consent in writing from Siemens Healthcare Diagnostics. CLINITEK, CLINITEK Status, CLINITEK Advantus, Clinitest, Multistix, Multistix PRO, Uristix, and Chek-Stix are trademarks of Siemens Healthcare Diagnostics. -
Page 3: Table Of Contents
1 Introduction Intended Use……..7 Summary and Explanation .
-
Page 4
Printing the Cassette Full Test Results ….. 48 Completing the Cassette Full Test ……49 3 Calibration &… -
Page 5
Quick Test ……….95 Full Test . -
Page 6
Analyzer Specifications……135 Analyzer Dimensions……..136 Environmental Specifications . -
Page 7: Introduction
Intended Use The CLINITEK Status+ Urine Chemistry Analyzer is a portable, easy to use analyzer. It is designed to read only Siemens Healthcare Diagnostics Reagent Strips for Urinalysis and ® Clinitest hCG tests. This analyzer is intended for the measurement of the following in…
-
Page 8: Getting Started
® Multistix PRO urinalysis strips are ready to use upon removal from the bottle and the entire strip is disposable. The strips may be read visually, requiring no additional laboratory equipment for testing. The strips can also be read on an instrument, using the ®…
-
Page 9
Note If the power cord is not the style you need, contact your local technical support provider. See Appendix B, Support Information. • Test table CAUTION Do not touch the white calibration bar on the test table. Damage to the calibration bar could affect the test results. •… -
Page 10: Assembling The Clinitek Status+ Analyzer
• Depending on the analyzer model you received, you also could have a Warranty Registration Card, Unpack and Installation Guide, and Quick Reference Card. Figure 1-1: Clinitek Status+ Analyzer Components 1 Clinitek Status+ Analyzer 2 Power supply adaptor and AC power cord (Figure shows US version) 3 Test table with calibration bar 4 Test table insert…
-
Page 11
1. Place the analyzer on a level work surface where the temperature and humidity are fairly constant. CAUTION The best temperature for using the analyzer is between 22° and 26°C (72° and 79°F). Do not place the analyzer outdoors or near windows, ovens, hot plates, or radiators. 2. -
Page 12
Inserting the Batteries (optional) To power the Clinitek Status+ Analyzer by batteries (optional), perform the following steps: 1. Place the analyzer on its side. 2. Remove the battery cover on the bottom of the analyzer by pressing down on the tab and pulling out the cover. 3. -
Page 13
Note The test table insert adapts for use with a Siemens urinalysis strip or an hCG cassette. Use one side for a strip test and the other side for a cassette test. Figure 1-3: The Test Table and Test Table Insert… -
Page 14
Note If you want to connect the analyzer to a CLINITEK Status connector, follow the instructions in the CLINITEK Status Connect Unpacking and Installation Guide and the CLINITEK Status Connect System Operator’s Guide, Section 6, System Configuration. When you connect the analyzer to CLINITEK Status connector, you can use wired (Ethernet) or wireless network connectivity, Quality Control, increased security, bar-code scanning, and additional features with the CLINITEK Status+ analyzer. -
Page 15
6. Feed the edge of the paper through the printer cover. 7. Push the paper holding arm down in the closed position (see Figure 1-4). 8. Close the paper roll and printer covers by clicking them into position. Note By default, the analyzer automatically prints the test results. To disable the automatic print function, see Section 7, System Configuration, Changing the System Settings‚… -
Page 16: Powering On/Off
Powering On/Off If you power on the analyzer for the first time, the Start Up Wizard prompts you through a set-up procedure. Also, you must enter a startup code when you use the analyzer for the first time. To power on the analyzer, perform the following steps: 1.
-
Page 17
2. Press the on/off button for at least 2 seconds. The analyzer pulls in the test table. If no strip or cassette is on the test table, the test table door closes and the analyzer powers off. If a strip or cassette is still on the test table, the analyzer pushes out the test table and powers off. -
Page 18: Hardware Overview
Hardware Overview The CLINITEK Status+ analyzer consists of the following hardware components: • Display • Test table • Printer • Connections and power • Memory card slot Display You interact with the CLINITEK Status+ analyzer through an integrated touch screen display. The touch screen displays messages, options, and requests for information.
-
Page 19: Test Table
Note If you run a CLINITEK Status+ analyzer with a CLINITEK Status connector, you can use a handheld bar-code reader to enter information into the analyzer. Figure 1-5: Touch Screen Display Test Table All testing takes place on the test table. 1.
-
Page 20: Printer
4. You can transfer the test results to a computer by using the RS-232 serial port on the back of the analyzer. If you run a CLINITEK Status+ analyzer with a CLINITEK Status connector, you can transfer the test results through a wireless or wired Ethernet connection.
-
Page 21: Software Overview
Note If you run a CLINITEK Status+ analyzer with a CLINITEK Status connector, you can alternatively insert a memory stick into the USB port on the back of the Status connector. Software Overview The CLINITEK Status+ analyzer user interface consists of a touch screen with an onscreen alphanumeric keyboard.
-
Page 22
Note Depending on the screen that displays, when the analyzer is idle for a period of time, the analyzer returns to the Select Ready screen. Figure 1-7: Select Ready Screen 1 Title bar 2 Recall Results 3 Strip Test 4 Cassette Test 5 Instrument Set Up CLINITEK Status+ Analyzer Operator’s Guide… -
Page 23
Each subsequent screen can display an icon in the upper left corner to indicate an analyzer mode or action (see Figure 1-8). For example, the battery icon indicates that the analyzer is powered by batteries. A screen also can display buttons, instructions, alert messages, and error messages. -
Page 24
The CLINITEK Status+ analyzer provides several screen elements: option, area, button, arrow, and double arrows. Screen Example Description Element Option Round option buttons display on screens where you select an option. The option button with a filled circle is the current selection. -
Page 25
Screen Example Description Element Button Several buttons display at the bottom of the screens, which include Select and Done. To navigate the screens, the analyzer displays left and right arrow buttons. To move to the previous screen, select Previous (left arrow). -
Page 26
Screen Example Description Element Arrow Select the up and down arrows on the right side of the screen to scroll through the items in a list and highlight an item on the left side of the screen. Select the Select button to confirm your selection and move to the next screen. -
Page 27: Entering Information
Entering Information Some options require you to enter information. For example, the analyzer prompts you to enter an Operator ID, Patient Name, and Patient ID. Depending on how you set up your analyzer, an alphabetic or numeric keyboard displays on the screen. To switch between the onscreen keyboards, follow these steps: •…
-
Page 28
CLINITEK Status+ Analyzer Operator’s Guide… -
Page 29: Operations
Operations You can perform a Quick Test or a Full Test with a urinalysis strip or an hCG cassette. Place a strip or a cassette on the test table. The analyzer calibrates and begins testing. Note You can configure the Quick Test or Full Test, as explained in Section 7, System Configuration, Setting up Operator and Patient Information‚…
-
Page 30: Running A Urinalysis Strip Quick Test
Note An ID band is a white or colored area near the handle of a Siemens urinalysis strip. CLINITEK Microalbumin and Multistix PRO urinalysis strips contain a colored ID band. The analyzer reads the ID band to identify the strip type. Therefore, you do not need to select the strip type from a menu.
-
Page 31
1. Select START. The Prepare Test screen displays steps on how to perform the test. A timer displays the amount of time remaining that you have to complete the task. Note To display the strip testing steps on the screen, select Help. 2. -
Page 32: Viewing The Urinalysis Strip Quick Test Results
• A timer counts down the time remaining in the strip analysis process. After the countdown ends, the analyzer displays the first page of the test results on the Results screen. • The results display on the screen for 2 minutes. Then, the display returns to the Select Ready screen.
-
Page 33: Viewing Sample Interference Notes
Viewing Sample Interference Notes Sample interference notes inform you about the test results that can be affected by components detected in the urine sample. By default, sample interference notes display and print. To set up sample interference notes, see Section 7, System Configuration, Setting up Sample Interference Notes‚…
-
Page 34: Completing The Urinalysis Strip Quick Test
Depending on the configuration settings, the test results printout could include any of the following information: • Date • Time • Test number • Results • Sample interference notes (if enabled in Instrument Set Up) For instructions on how to set up the analyzer so that you can print the results automatically or send the results to a computer, see Section 7, System Configuration, Changing the Connectivity Settings‚…
-
Page 35: Performing An Hcg Cassette Quick Test
Performing an hCG Cassette Quick Test With an hCG cassette Quick Test, when you place the hCG cassette on the test table, the analyzer calibrates and starts to perform the analysis. Perform the following tasks to run an hCG cassette Quick Test.
-
Page 36: Running A Cassette Quick Test
5. Remove the test cassette from the foil package and place the cassette on the test table. Running a Cassette Quick Test To run the test, you have 8 seconds to perform the following steps: Note After you select START, you have 8 seconds to draw the urine sample into the pipette and add the urine sample into the well on the cassette.
-
Page 37: Viewing The Cassette Quick Test Results
Note If you set up the analyzer to print the test results automatically, the Printing screen displays until the printout finishes. If you set up the analyzer with a connection to a PC, the analyzer sends the test results to the PC. The Clinitest hCG test results are either negative, positive, or borderline.
-
Page 38: Completing The Cassette Quick Test
Completing the Cassette Quick Test Complete the testing for one cassette or continue testing one cassette at a time until you finish testing all the cassettes you want to analyze. To complete the cassette Quick Test, perform the following steps: 1.
-
Page 39
• If you are a new operator: a. Select Enter New Operator. b. Enter your name (a maximum of 13 characters) on the Enter Operator Name screen. Select Enter. For more information about how to use the keyboard, see Section 1, Introduction. You also can enter the Operator Name from a computer keyboard, or if you run the analyzer with the CLINITEK Status connector, scan it from a bar-coded label using the handheld… -
Page 40: Preparing A Urinalysis Strip Full Test
4. Enter the patient ID (maximum of 13 characters) on the Enter Patient ID screen, and select Enter. Preparing a Urinalysis Strip Full Test Before you run a urinalysis strip Full Test, prepare the strip and the analyzer. To prepare a urinalysis strip Full Test, perform the following steps: Note If you use a reagent strip that has 4 or fewer test pads, such as Uristix 4 reagent strips, use a short test table insert.
-
Page 41: Selecting The Appearance Of The Urine Sample
Note To display the strip testing steps on the screen, select Help. 2. Dip the reagent strip in the urine sample and wet all the pads. The ID band allows auto-strip identification to ensure that the analyzer reports the correct strip configuration when you perform a urinalysis test.
-
Page 42: Viewing The Urinalysis Strip Full Test Results
1. Visually observe the urine sample and determine the appropriate color and clarity. 2. Select the urine sample color and clarity: • If the urine sample is yellow and clear, select Yellow and Clear. • If the urine sample is not yellow and clear, select Other, and select a color.
-
Page 43: Printing The Urinalysis Strip Full Test Results
2. Select Notes to view the sample interference notes, if the analyzer generated them for the test. The Interference notes screen displays up to 5 sample interference notes. Note If you disable the Sample Interference Notes setting in Instrument Set Up, or the analyzer does not generate sample interference notes, the Notes button does not display.
-
Page 44: Completing The Urinalysis Strip Full Test
• Sample interference notes (if enabled in Instrument Set Up) For instructions on how to set up the analyzer so that you can print the results automatically or send the results to a computer, see Section 7, System Configuration, Changing the Connectivity Settings‚…
-
Page 45
To enter operator and patient information, perform the following steps: 1. On the Select Ready screen, select Cassette Test. 2. On the Operator Name screen, to enter the operator name, perform the following steps: • Only if configured, if you are the last operator, select Last Operator. -
Page 46: Preparing A Cassette Full Test
4. Enter the patient ID (maximum of 13 characters) on the Enter Patient ID screen, and select Enter. Preparing a Cassette Full Test Note For more information about the use and storage of test cassettes, see the Clinitest hCG cassette test instructions for use insert. CAUTION Bring the test cassette and urine sample to room temperature 20°…
-
Page 47
1. Select START. The Prepare Test screen displays steps on how to perform the test. A timer displays the amount of time remaining to complete the task. 2. Draw the urine sample to the line marked on the pipette (approximately 0.2 mL). For instructions on the cassette, see the cassette instructions for use insert. -
Page 48: Viewing The Cassette Full Test Results
Note If you set up the analyzer to print the test results automatically, the Printing screen displays until the printout finishes. If you set up the analyzer with a connection to a PC, the analyzer sends the test results to the PC. The Clinitest hCG test results are either negative, positive, or borderline.
-
Page 49: Completing The Cassette Full Test
Completing the Cassette Full Test Complete the testing for one cassette or continue testing one cassette at a time until you finish testing all the cassettes you want to analyze. To complete the cassette Full Test, perform the following steps: 1.
-
Page 50
CLINITEK Status+ Analyzer Operator’s Guide… -
Page 51: Calibration & Qc
National Institute of Standards and Technology (NIST) traceable calibrators, Siemens can show traceability to NIST. Note Keep the calibration bar clean to ensure accurate results. For details about cleaning the calibration bar, see the next section on Cleaning the White Calibration Bar.
-
Page 52
To clean the white calibration bar, perform the following steps: 1. Remove the insert from the test table. 2. Remove the test table by pulling it slowly out of the analyzer. 3. Drain the drip tray, if necessary. 4. Examine the white calibration bar on the test table for dirt or discoloration. -
Page 53: Quality Control Overview
Inspect the surface for dust, foreign material, scratches, or scuffs. If you cannot completely clean the calibration bar or if the bar still has marks, order a new test table. Contact your Siemens representative. d. Place the test table, as described in step 5.
-
Page 54: Urinalysis Strip Quality Control Testing
Water should NOT be used as a negative control. Each laboratory should establish its own goals for adequate standards of performance. For information about control manufacturers, contact the Siemens Customer Service Department. Run QC tests to ensure reagent storage integrity; train new users;…
-
Page 55: Quality Control Troubleshooting
Compare QC results to the QC manufacturer’s acceptable results list. If the QC results are not acceptable, do not test the patient samples until you solve the problem. Repeat QC tests until you have acceptable results. Quality Control Troubleshooting If the control results fall outside the values stated in the product instructions for use insert, try any of the following corrective actions: •…
-
Page 56
CLINITEK Status+ Analyzer Operator’s Guide… -
Page 57: Maintenance
Prevent contamination • Avoid bacterial growth Siemens recommends that you check the calibration bar for cleanliness weekly, and when you clean the test table. Also, check the calibration bar for cleanliness if you remove a strip from inside the analyzer. Clean the calibration bar, only if needed.
-
Page 58: Cleaning The White Calibration Bar
6. Dry the test table thoroughly (except for the white calibration bar) with a soft cloth or lint-free tissue. CAUTION Do not to scratch the white calibration bar. Marks and stains could cause inaccurate test results, especially for hCG tests. Severe marks can cause errors.
-
Page 59
Siemens recommends that you check the calibration bar for cleanliness weekly, and when you clean the test table. Also, check the calibration bar for cleanliness if you remove a strip from inside the analyzer. Clean the calibration bar, only if needed. -
Page 60: Disinfecting The Test Table And Table Insert
Inspect the surface for dust, foreign material, scratches, or scuffs. If you cannot completely clean the calibration bar or if the bar has scratches, order a new test table. Contact your Siemens representative. d. Insert the test table and table insert, as described in step 5.
-
Page 61
To disinfect the test table and the table insert, perform the following steps: 1. Prepare one of the following solutions in a tall, narrow container ® (such as an empty Multistix bottle) to a depth of about 10 cm (or 4 inches): •… -
Page 62: Cleaning The Outside Of The Analyzer
7. Rinse the test table and the table insert thoroughly with water. CAUTION Rinse away all the solution residue, as any remaining solution might affect the reagent pad chemistries. 8. Dry the test table and the table insert thoroughly with a soft cloth, except for the white calibration bar.
-
Page 63: Changing The Batteries
3. Disinfect the display with the same solution you use for the test table, as described in Disinfecting the Test Table and Table Insert‚ page 60. a. Wipe the solution on the display and let it remain for 10 minutes. b.
-
Page 64
The CLINITEK Status+ analyzer uses 6 AA-size batteries. CAUTION Do not use batteries in the analyzer, if you run a CLINITEK Status+ analyzer with a CLINITEK Status connector. Be sure to remove the batteries because they could leak and damage the analyzer and the connector. To change the batteries, perform the following steps: 1. -
Page 65: Troubleshooting
If you think a Siemens urinalysis strip or an hCG cassette is causing the problem, see its product insert for troubleshooting information. After an error occurs, if you power off the analyzer, be sure to retest the sample that was in progress.
-
Page 66: Advisory Error Messages
Advisory Error Messages An advisory error message is of less importance, and displays on the Select Ready screen the next time the Select Ready screen displays. When you perform the corrective action, the analyzer removes the message from the screen. If more than one advisory error occurs, when you clear the first advisory error message, the analyzer displays the next advisory error message.
-
Page 67
Note If you cannot troubleshoot an error, contact your local technical support provider or distributor, as described in Appendix B, Support Information. Error Error Message Action Code Low battery power The battery level is too low to power the analyzer. Replace the batteries by using any of the following instructions: On the screen, select Error Report to… -
Page 68
Error Error Message Action Code Failure of test table The test table is positioned improperly. 1. Make sure that the test table is in place. 2. Move the test table in or out of the analyzer slightly to reposition the test table. 3. -
Page 69
Error Error Message Action Code Low battery power When the battery level becomes too low to power the analyzer, error code E01 displays. Replace the batteries by using any of the following instructions: • On the screen, select Error Report to view the instructions. -
Page 70
Test a yellow and clear ○ sample. Run a Chek-Stix QC test (see ○ Section 3, Calibration & QC). Invalid barcode Repeat the test using the correct Siemens cassette. CLINITEK Status+ Analyzer Operator’s Guide… -
Page 71
Error Error Message Action Code Strip Test selected Repeat the test using the Cassette but cassette Test routine (see Section 2, detected Operations, Performing an hCG Cassette Quick Test‚ page 35). Cassette Test Repeat the test using the Strip Test selected but strip routine (see Section 2, Operations, detected… -
Page 72
Error Error Message Action Code Inverted strip Repeat the test with a fresh strip and positioned on the ensure that the strip is correctly test table positioned on the test table (see Section 2, Operations, Preparing a Urinalysis Strip Quick Test‚ page 29). Tilted strip Repeat the test with a fresh strip and ensure that the strip is correctly… -
Page 73
Error Error Message Action Code E67 or Sampling Error A sample flow issue with the cassette test might have been detected. One or more test indicator lines might be missing or indiscernible from the background, or you applied insufficient or excess sample to the cassette. -
Page 74: Troubleshooting The Analyzer Operation
Troubleshooting the Analyzer Operation The following table contains the analyzer operation icons that can display near the title bar on the Select Ready screen when an operation issue occurs. Icon Description Action Low Battery Power Displays on the Select Ready screen, indicating that the battery power level is low.
-
Page 75
Icon Description Action No Connector Displays only if you run a CLINITEK Status+ analyzer with a CLINITEK Status connector. Indicates that the analyzer is not connected to the connector. You had enabled the Instrument Settings, Connectivity Platform setting but the analyzer cannot communicate with the connector platform. -
Page 76: Calling For Assistance
The following table contains the issues that can occur when you operate the analyzer. Description Action Display shows dashes Dashes in a field indicate where you disabled a an option. Dashes also display when you exclude urinalysis tests for chemistries from the test results.
-
Page 77: Customer Support
For technical support provider or distributor contact information, see Appendix B, Support Information, When to Contact Technical Support‚ page 131. Customer Support For customer support, contact your local technical support provider or distributor. For contact information, see Appendix B, Support Information, When to Contact Technical Support‚…
-
Page 78
6. Does the test table move into and out of the analyzer? 7. Does a quality control solution give the expected result? 8. Is the name of the Siemens Healthcare Diagnostics urinalysis strip or Clinitest immunoassay cassette shown on the display the same as the product being used? 9. -
Page 79: File Management
File Management The system stores the following information: • System configuration settings • Up to 950 patient test results Note When the results list reaches 950 patient tests, the analyzer deletes the oldest test from the list. You cannot recall the deleted test. You can perform the following tasks with the results: •…
-
Page 80: Recalling The Patient Test Results
Recalling the Patient Test Results You can search for the patient test results by patient name or patient ID, or by date. You also can view all the results, and print the patient test results you want. To search for and recall the patient test results, perform the following steps: 1.
-
Page 81: Sending All The Test Results To A Computer
5. Select View all results. The Recall Results Search Results screen displays with the stored patient results, arranged in chronological order. The most recent test results display at the top and the oldest test result displays at the bottom of the list. The most recent test result is highlighted in the list.
-
Page 82: Sending Individual Test Results To A Computer
To automatically send the test results to a PC, host computer, or Laboratory Information System (LIS), enable a Connectivity setting, as explained in Section 7, System Configuration. Note After you set the analyzer to transmit the results automatically, the Send all data button remains enabled. If you inadvertently select Send all data, the system transmits all data contained in the system memory, and might duplicate the patient records on the host computer or LIS.
-
Page 83
Before you delete any test results, be sure that the loss of the test results is acceptable. If you did not send the test results to a host computer or printer, Siemens recommends that you perform those tasks before you delete the results. Keep in mind, the system erases the results from the database, and you can no longer recall them. -
Page 84
CLINITEK Status+ Analyzer Operator’s Guide… -
Page 85: System Configuration
System Configuration You can configure your CLINITEK Status+ analyzer to suit your workplace requirements. If you do not customize any configuration settings, the system uses the default configuration settings. • For instructions on how to unpack and install your CLINITEK Status+ analyzer, see Section 1, Introduction. •…
-
Page 86
Configuration Option Default Setting Keyboard Priority Alphabetic Language English Last Operator Name Disabled Lot information for strip Disabled and cassette Mark Positive Results Network Type Serial connection Operator Name Disabled Parity None Password Disabled (Password protection is not set.) Patient ID Disabled Patient Name Disabled… -
Page 87
Configuration Option Default Setting QC Cassette • QC test prompts – Disabled • Type of prompt – Required • QC confirmed by – Instrument • QC Cassette Lock-out – Enabled • Tests per QC – 2 • Test Interval – Days •… -
Page 88
Configuration Option Default Setting System Settings Printer – Automatic Test Type Quick Test Test Sequence Number 0001 Time Format 12 hour Urine Colors Light Yellow, Yellow, Dark Yellow, Amber, Brown, Red, Orange, Pink Green, Blue, Other Urine Colors Customized None If you connect a CLINITEK Status+ analyzer to a CLINITEK Status connector, the following configuration options are available. -
Page 89
Configuration Option Default Setting Wired connectivity • Connectivity – Disabled • IP Configuration – DHCP • Gateway – No • Comms Protocol – POCT1 • Host – None For details about the gateway default settings, print the system configuration settings, see Viewing and Printing the System Configuration Settings‚… -
Page 90: Changing The System Configuration Settings
Changing the System Configuration Settings You can change the default system configuration settings to customize the system for your point of care needs. To change the system configuration settings, perform the following steps: 1. On the Select Ready screen, select Instrument Set Up. If password protection is enabled, the Enter Password screen displays.
-
Page 91
3. Use the up and down arrows to scroll through the languages and highlight the language you want. 4. Select Select. A confirmation message displays. CAUTION If you change the language, the system deletes all the test results in the current language. If you want to continue using the same language, select No. -
Page 92
7. If you changed the language, the system changes the default values for several settings. The following table contains the default settings for English (US), French, German, and Italian. Setting English French German Italian (US) Password Disabled Disabled Disabled Disabled Required Date Format mm-dd-… -
Page 93
Setting English French German Italian (US) Output of Disabled Disabled Disabled Disabled instrument serial number with results data Power Save Disabled Disabled Disabled Disabled Printer Automatic Automatic Automatic Automatic Sound Enabled Enabled Enabled Enabled The following table contains the default settings for Spanish, Swedish, Japanese, and Chinese. -
Page 94: Setting And Removing A Password
Setting Spanish Swedish Japanese Chinese Color & Clarity None None None None entry required Display results by Patient Patient Patient Patient Patient Name or Name Name Name Name Patient ID Output of Disabled Disabled Disabled Disabled instrument serial number with results data Power Save Disabled…
-
Page 95: Setting Up Operator And Patient Information
2. Enter the password. 3. On the Choose Settings screen, select Remove Password. The Set Password option displays in the Choose Settings menu. You no longer need a password to gain access to Instrument Set 4. Select Done. Setting up Operator and Patient Information The operator and patient information settings provide the following options: •…
-
Page 96: Full Test
Full Test By default, when you run a Full Test, the system prompts you to enter operator, patient, and sample appearance information. However, if you need to set the prompt for a Full Test, perform these steps: 1. On the Select Ready screen, select Instrument Set Up. 2.
-
Page 97
4. Select the settings you want. Select Next or Previous to navigate through the screens. Custom Setting Description Screen 1 of 5 Operator Name • Enabled prompts you to enter an operator name when you run a test. • Disabled (default) does not prompt you to enter an operator name when you run a test. -
Page 98
Custom Setting Description Patient ID • Enabled prompts you to enter a patient ID when you run a test. • Disabled (default) does not prompt you to enter a patient ID when you run a test. The system stores up to 950 patient test results. -
Page 99
Custom Setting Description Screen 3 of 5 Choose which to show in • Patient Name (default) Results list displays the patient name in the results list. • Patient ID Displays the patient ID in the results list. Last Operator’s Name •… -
Page 100: Setting Up The Urine Color And Clarity
Custom Setting Description Screen 5 of 5 Custom Field • Enter Custom Field allows you to create a label for a custom field. For example, if you create a label, PHYSICIAN, the system displays the prompt Enter Patient Information PHYSICIAN. Then, you would enter the physician name.
-
Page 101
Note You can set a prompt for the urine color and clarity only with the Custom Set Up option. Edit and Customize Urine Colors You can select from 10 urine colors and customize up to 4 urine colors for the patient test results. To edit the urine colors, perform the following steps: 1. -
Page 102
Urine Color Option Description Screen 3 of 3 • Custom color 1 Note If you edit a custom color that already exists, the system • Custom color 2 deletes all the patient test results. • Custom color 3 To customize a urine color, perform •… -
Page 103: Changing The Date And Time
6. Select Next 3 times to display the Input Settings-Confirmation screen. 7. Select Done twice to return to the Select Ready screen. Changing the Date and Time The date and time display on the Select Ready screen in the title bar. The system includes the date and time with the test results in the format you specify, on the display and the printout.
-
Page 104: Resetting The Test Sequence Number
Resetting the Test Sequence Number The test sequence numbers run from 0001 to 9999. You can reset the test sequence number to start at 0001 for the next test. To reset the test sequence number, perform the following steps: 1. On the Select Ready screen, select Instrument Set Up. 2.
-
Page 105: Changing The Results Format
Changing the Results Format You can display and print the test results in different formats. You also can specify whether you want to include the instrument serial number with the results. You can select any of the following results formats: •…
-
Page 106
4. Select the results format options. Results Format Option Description Screen 1 of 2 Units Selection • Conventional (default) • SI (Systéme International) • Nordic Note Nordic units are available only in English and Swedish. SI units are available only in Chinese. -
Page 107: Changing The System Settings
Mark Positive Results • Yes displays an asterisk (*) next to the positive results on the screen, a printout, and when you transfer the data to a host computer. For more information, see Appendix D, Specifications, Tables of Results‚ page 137. •…
-
Page 108
4. On the System Settings screen, perform the following steps: a. Select the System Settings options. System Settings Option Description Screen 1 of 2 Printer • Automatic (default) prints the results for each test automatically after you complete the test. •… -
Page 109
System Settings Option Description Power Save • Enabled activates Power Save mode. If you power the system from an electrical outlet and the system remains idle for 5 minutes, the system pulls in the test table and powers down. If you power the system by batteries, Power Save is always activated. -
Page 110: Changing The Display Contrast
Changing the Display Contrast You can increase or decrease the display contrast to suit your work area and lighting where you operate the system. A higher contrast level makes the screen easier to read. The contrast levels range from the darkest at +3 to the lightest at -3. The default contrast level is 0. To change the display contrast, perform the following steps: 1.
-
Page 111
Disabled prevents the analyzer from sending the test results to a PC. Note If you do not use a CLINITEK Status connector, Siemens recommends that you select Disabled. 5. Select Next. The Connectivity 2 of 2 screen displays. 6. Select Serial Connection. -
Page 112: Changing The Urinalysis Test Settings
Siemens strips that are on the list. Using the wrong urinalysis strip gives you incorrect results. Note Some Siemens strips are not on the list of strips, such as CLINITEK Microalbumin and Multistix PRO. The system identifies them through the color ID band on the strip. Other Siemens strips include a white ID band that identifies the strip type.
-
Page 113
BIL, KET, SG, BLO, pH, PRO, URO, NIT, LEU, ALB, and CRE. You can include or exclude chemistries from the test results. The reported chemistries you select apply to all Siemens strip types. To edit the reported chemistries, perform the following steps: 1. -
Page 114: Setting Up The Authorized Operators
• Select a selected chemistry to exclude it. 6. Select Next to display the Reported Chemistries 2 of 2 screen, which contains the rest of the chemistries. • Select a chemistry to include it. • Select a selected chemistry to exclude it. 7.
-
Page 115
• To allow all operators to gain access to the system without entering their name, select Disabled. CAUTION After you add an operator, if you enable or disable the Authorized Operator setting, the system deletes all the patient test results. 5. -
Page 116
Note By default, the operator name does not print or display with the patient test results. If you want to include an operator name with the patient test results, see Custom Set Up‚ page 96. CAUTION After you add an operator, if you enable or disable the Authorized Operator setting, the system deletes all the patient test results. -
Page 117
8. Select the authorized operator options. Authorized Operator Description Option Screen 1 of 2 Patient test • Enabled (default) lets the operator run patient tests. • Disabled prevents the operator from running patient tests. QC test • Enabled lets the operator run QC tests. -
Page 118
• Edit an operator name • Delete an operator • Print the operators list • Delete the operators list To view the operators list, perform the following steps: 1. Select View operators list. The authorized operators display. 2. Use the scroll arrows to view the operators in the list. To edit an operator name, perform the following steps: 1. -
Page 119: Setting Up Sample Interference Notes
2. Select Yes. Note If you want to keep the operators list, select No. The Authorized operator screen displays. The system deletes all the operators in the list and disables the Authorized Operator setting. Setting up Sample Interference Notes Sample interference notes inform you about test results that can be affected by components detected in the urine sample.
-
Page 120
• Operator name • Patient name • Instrument serial number • Patient ID • Urine color • Urine clarity • Up to 2 header lines of customized alphanumeric text You also can specify the following printer options: • Enable or disable an external printer •… -
Page 121: Changing The Quality Control Settings
Note By default, the custom header is disabled. However, if you enter information for the header, the system enables the custom header printout option. • Select Enter Line 1 and enter the information for the first line of the custom header. •…
-
Page 122: Updating The Analyzer Software
Updating the Analyzer Software Periodically, Siemens adds new features and makes improvements to the CLINITEK Status+ analyzer software. These software updates are available on a memory card that you insert beneath the printer cover.
-
Page 123
To upgrade the analyzer software, perform the following steps: CAUTION Ensure you have printed or recorded the most recent patient results before you perform the software upgrade because the upgrade process deletes all patient records and all patient test results in the system. For more information about recall results, see Section 6, File Management. -
Page 124
3. Insert the memory card (label side up, arrow facing the slot) into the memory card slot to the left of the printer mechanism, until the card stops and then clicks (see Figure 7-1). Figure 7-1: Memory Card Slot 1 Memory Card Slot 4. -
Page 125
• Then, you hear repeated beeps at a higher tone for up to 2 minutes. When the installation finishes, the analyzer performs the following operations: • The screen displays the message, Performing a System Diagnostic Test. • The test table retracts and extends. •… -
Page 126: Running Diagnostics
Running Diagnostics You can run the following diagnostics on the analyzer: • Display • Touch Screen • Printer • Test Table • Light Source • Electronics • Check cassette CAUTION Do not run the Check Cassette diagnostics on your own. Run the Check Cassette diagnostic tests only when your local technical support provider or distributor asks you to do so.
-
Page 127: Viewing And Printing The System Configuration Settings
To view the system information, perform the following steps: 1. On the Select Ready screen, select Instrument Set Up. 2. On the Choose Settings screen, select Instrument Settings. 3. On the Instrument Settings screen, select System Information. The System Information screen displays with the serial number and software version.
-
Page 128
CLINITEK Status+ Analyzer Operator’s Guide… -
Page 129: Appendix A: Safety Information
Appendix A: Safety Information Read the following safety information for your protection in the laboratory. Protecting Yourself from Biohazards The established guidelines for handling laboratory biohazards are based on the guidelines developed by the Centers for Disease Control, the Clinical and Laboratory Standards Institute, and the Occupational Safety and Health Administration.
-
Page 130: References
• Wash your hands before going from a contaminated area to a noncontaminated area, or when you remove or change gloves. • Perform procedures carefully to minimize aerosol formation. • Wear facial protection when splatter or aerosol formation are possible. •…
-
Page 131: Appendix B: Support Information
Date of Installation Serial Number Limitations of Liability In no event shall Siemens be liable for indirect, special or consequential damages, even if Siemens has been advised of the possibility of such damages. For warranty service, contact your local technical support provider for assistance, instructions, repair, or replacement of this instrument.
-
Page 132
This information helps your local technical support provider to identify the probable cause of the problem. To order supplies or replacement parts, or to obtain service, contact your local technical support provider or visit www.siemens.com/diagnostics CLINITEK Status+ Analyzer Operator’s Guide… -
Page 133: Appendix C: Orderable Supplies
The following supplies and optional equipment are available for your CLINITEK Status+ analyzer. Contact your local technical support representative to order the supplies. Supplies • Siemens Reagent Strips for Urinalysis • Chek-Stix Combo Pak Control Strips for Urinalysis • Chek-Stix Positive Control Strips for Urinalysis •…
-
Page 134: Documentation
Documentation The following documentation is available for your CLINITEK Status+ analyzer. Contact your local technical support representative to order any documentation. • Clinitek Status+ analyzer (printed manual, multiple languages available) • Clinitek Status+ analyzer multilingual CD • Quick Reference Card (printed manual, multiple languages available) •…
-
Page 135: Appendix D: Specifications
Appendix D: Specifications This appendix contains the analyzer specifications and tables of results. Analyzer Specifications This appendix summarizes the design specifications for the CLINITEK Status+ analyzer and provides summary tables of test results from the CLIA waiver and the physician office studies. CLINITEK Status+ Analyzer Operator’s Guide…
-
Page 136: Analyzer Dimensions
Analyzer Dimensions Dimension Value Depth 272 mm (10.7 inches) Width 171 mm (6.7 inches) Height 158 mm (6.2 inches) Weight 1.66 kg (3.65 lb) CLINITEK Status+ analyzer only (unpacked, without batteries or power supply) Environmental Specifications Specification Value Ambient Operating 18°…
-
Page 137: Safety Standards
Safety Standards The CLINITEK Status+ analyzer is classed as a Class A computing device in accordance with Part 15 of the FCC Rules. Note This equipment has been tested and found to comply with the limits for a Class A digital device, pursuant to Part 15 of the FCC Rules. These limits are designed to provide reasonable protection against harmful interference when the equipment is operated in a commercial environment.
-
Page 138: English, Units — Conventional
English, Units – Conventional If you select English Conventional unit of measurement, the reagent strip and cassette tests display the following results. Reagent Strip Tests The following table contains the test, abbreviation, units, Normal System results, and Plus System results for English Conventional units for reagent strips.
-
Page 139
Test Abbreviation Units Reported Results Normal System Plus System Bilirubin Negative Moderate Negative Small Large Ketone mg/dL Negative Negative Trace Trace >=160 Specific Gravity <=1.005 1.020 No Difference 1.010 1.025 1.015 >=1.030 Occult Blood Negative Small Negative Trace-lysed Moderate Trace-lysed Trace-intact Large Trace-intact… -
Page 140
Test Abbreviation Units Reported Results Normal System Plus System Protein (Multistix mg/dL Negative Negative PRO) (CLINITEK Microalbumin 9) Protein (All other mg/dL Negative Negative reagent strips) Trace >=300 Trace Urobilinogen E.U./dL No Difference >=8.0 Nitrite – Negative Positive No Difference Leukocytes –… -
Page 141
Test Abbreviation Units Reported Results Normal System Plus System Creatinine mg/dL No Difference Albumin: Creatinine mg/g < 30 Normal > 300 High No Difference (CLINITEK Abnormal Microalbumin 2) 30 – 300 Abnormal Albumin: Creatinine mg/g Normal Dilute 30 – 300 No Difference (CLINITEK <… -
Page 142
Test Abbreviation Units Reported Results Normal System Plus System Protein: Creatinine mg/g Normal Dilute 3000 No Difference (CLINITEK Normal Abnormal Microalbumin 9) >=5000 Abnormal Abnormal 1500 Abnormal Cassette Test The following table contains the test, abbreviation, units, Normal System results, and Plus System results for English Conventional units for cassettes. -
Page 143: English Units — International (Si)
English Units – International (SI) If you select English International (SI) unit of measurement, the reagent strip and cassette tests display the following results. Reagent Strip Tests The following table contains the test, abbreviation, units, Normal System results, and Plus System results for English SI units for reagent strips.
-
Page 144
Test Abbreviation Units Reported Results Normal System Plus System Bilirubin – Negative Moderate Negative Small Large Ketone mmol/L Negative Negative Trace Trace >=15.6 Specific Gravity – <=1.005 1.020 No Difference 1.010 1.025 1.015 >=1.030 Occult Blood Ery/µL Negative Ca 25 Negative Trace-lysed Ca 80… -
Page 145
Test Abbreviation Units Reported Results Normal System Plus System Protein (Multistix Negative Negative PRO) 0.15 (CLINITEK Microalbumin 9) Protein (All other Negative Negative reagent strips) Trace >=3.0 Trace Urobilinogen µmol/L No Difference >=131 Nitrite Negative Positive No Difference Leukocytes Leu/µL Negative Ca 125 Negative… -
Page 146
Test Abbreviation Units Reported Results Normal System Plus System Creatinine mmol/L 17.7 No Difference 26.5 Albumin: mg/mmol < 3.4 > 33.9 No Difference Creatinine Normal High (CLINITEK Abnormal Microalbumin 2) 3.4 – 33.9 Abnormal Albumin: mg/mmol Normal Dilute Abnormal No Difference Creatinine <3.4 >… -
Page 147
Test Abbreviation Units Reported Results Normal System Plus System Protein: Creatinine mg/mmol Normal Dilute No Difference (CLINITEK Normal Abnormal Microalbumin 9) 33.9 >=566 Abnormal Abnormal Abnormal Cassette Test The following table contains the test, abbreviation, units, Normal System results, and Plus System results for SI units for cassettes. -
Page 148: English Nordic, Units — Nordic Plus System
English Nordic, Units – Nordic Plus System If you select English Nordic unit of measurement, the reagent strip and cassette tests display the following results. Reagent Strip Tests The following table contains the test, abbreviation, units, Normal System results, and Plus System results for Nordic units for reagent strips.
-
Page 149
Test Abbreviation Units Reported Results Normal System Plus System Bilirubin – Negative No Difference Ketone – Negative Negative Trace Specific Gravity – <=1.005 1.020 No Difference 1.010 1.025 1.015 >=1.030 Occult Blood – Negative No Difference +/- Intact – No Difference >=9.0… -
Page 150
Test Abbreviation Units Reported Results Normal System Plus System Protein (Multistix – Negative No Difference PRO) (CLINITEK Microalbumin 9) Protein (All other – Negative Negative reagent strips) Trace Urobilinogen µmol/L No Difference >=131 Nitrite – Negative Positive No Difference Leukocytes –… -
Page 151
Test Abbreviation Units Reported Results Normal System Plus System Creatinine mmol/L 17.7 No Difference 26.5 Albumin: mg/mmol < 3.4 > 33.9 High No Difference Creatinine Normal Abnormal (CLINITEK 3.4 — 33.9 Microalbumin 2) Abnormal Albumin: mg/mmol Normal Dilute 3.4-33.9 No Difference Creatinine <… -
Page 152
Test Abbreviation Units Reported Results Normal System Plus System Protein: Creatinine mg/mmol Normal Dilute No Difference (CLINITEK Normal Abnormal Microalbumin 9) 33.9 >=566 Abnormal Abnormal Abnormal Cassette Test The following table contains the test, abbreviation, units, Normal System results, and Plus System results for Nordic units for cassettes. -
Page 153: Appendix E: Symbols
Appendix E: Symbols This appendix provides the symbols for the analyzer and packaging. Analyzer and Labeling Symbols The analyzer and labeling symbols are in the following locations: • CLINITEK Status+ analyzer documentation • CLINITEK Status+ analyzer exterior • Power supply provided with the analyzer •…
-
Page 154: Analyzer Symbols
Symbol Description Caution, consult accompanying documents In vitro diagnostic medical device Consult instructions for use Caution, temperature hazard, hot surface Caution for handling electrostatic sensitive devices to avoid causing a hazard to the product Analyzer Symbols This following table contains the symbols on the exterior of the CLINITEK Status+ analyzer and the carton in which the analyzer is delivered.
-
Page 155
Symbol Description Batch code Biohazard This equipment is classified as Waste Electrical and Electronic Equipment under the European WEEE Directive. It must be recycled or disposed of in accordance with applicable local requirements Printed on recycled materials Indicates compliance with the RESY packaging standards Do not reuse a reagent Keep this way up Fragile, handle with care… -
Page 156: Display Icons
Symbol Description Encapsulated safety isolating transformer (short-circuit proof) Positive Temperature Coefficient (PTC) A thermistor device used to protect the transformer from short-circuits or overload. This is an auto reset device Thermal cut-out (TCO) This safety device disconnects the supply voltage to the transformer at a specific temperature.
-
Page 157
Symbol Name Description Data Transfer to Displays the individual data and Personal Computer test results that the CLINITEK Status+ analyzer transfers to a PC. Alert Alerts you to an error message. Battery Power Displays a maximum of four bars, indicating the battery power level of a a battery powered analyzer. -
Page 158
Symbol Name Description Connectivity Displays only if you run a CLINITEK Status+ analyzer with a CLINITEK Status connector. Indicates that the CLINITEK Status+ analyzer is connected to the CLINITEK Status connector, Connectivity is enabled, and the system is connected to the LIS. No Connectivity Displays only if you run a CLINITEK Status+ analyzer with a… -
Page 159: Appendix F: Glossary
Appendix F: Glossary The glossary contains hardware and software terms and acronyms. Hardware Terms The following table defines hardware terms commonly used on the CLINITEK Status+ analyzer. Term Definition bar code Encoded information that is read by an optical scanner. calibration bar The white calibration bar (on the test table) that provides traceable calibration.
-
Page 160: Software Terms
USB port The ports where USB cables are inserted. urinalysis strip A Siemens urinalysis strip with test pads for in vitro diagnostic use. Software Terms The following table defines software terms commonly used on the CLINITEK Status+ analyzer.
-
Page 161
Term Definition authorized operator Operators who can perform certain tasks, where they gain access to the analyzer by entering their operator ID to perform those tasks. auto-check Performs automatic strip quality checks and provides results in about 1 minute. automatic strip Automatically identifies an ID band strip type identification with no need to select it from a menu. -
Page 162
Term Definition default setting A value defined and preset by Siemens. delete A function an operator uses to remove an object, such as test results or an authorized operator, from the system database. diagnostic screen A software UI screen which enables the operator to perform a system diagnostic test when troubleshooting the analyzer. -
Page 163
Term Definition keyboard A software UI display (alphabetic or numeric) that the operator uses to type information. laboratory Laboratory computer system that you can information system connect to the analyzer. Abbreviation: LIS. Menu screen A software UI screen that displays a list of commands and one or more command buttons for the operator to select. -
Page 164
Term Definition ready The state when the analyzer is available to perform tests. recall To access data such as test results stored on the analyzer. restore To restore the analyzer setup to the default settings. required entry A data entry box that must have data entered into it. -
Page 165: Acronyms
Term Definition startup code If your software provides sample interference notes, the Start-Up wizard prompts you to enter a startup code. Start-Up Wizard A wizard that steps you through a quick setup procedure when you power on the analyzer for the first time. stop bits The number of bits that maintain synchronization between the system and a…
-
Page 166
Acronym Full Title Direct Current DHCP Dynamic Host Configuration Protocol Data Management System Domain Name Server Electronic Health Record Electronic Medical Record Glucose Human Chorionic Gonadotrophin Hospital Information System Health Level 7 (protocol) Internet Protocol Ketone Local Area Network Leukocyte Laboratory Information System NIST National Institute of Standards and… -
Page 167: Index
Index error 70 handheld 19 acronyms 165 ordering 133 advisory messages 66 settings 98 alcohol 61 batteries alphabetic keyboard 27 changing 63 inserting 12 Amphyl 61 size 64 analyzer biohazard 129 changing settings 90 bleach strength 61 cleaning 62 connections 13 default settings 85 calibration 51 dimensions 136…
-
Page 168
computer 13 error messages 65 connectivity platform 111 Ethernet LIS 110 connection 14 PC 110 serial 111 Full Test wired 89 hCG cassette 44 wireless 89 – settings contamination 129 lot expiration date 112 Conventional units, settings 105 lot number 112 custom setup 96 urinalysis strip 38 –… -
Page 169
International (SI) enabling 114 setup 114 units 143 operators list isopropyl alcohol 61 deleting 118 editing 118 keyboard printing 118 alphabetic 27 viewing 118 arrows 24 option button 24 numeric 27 optional equipment 133 language settings 90 packaging symbols 153 legal information 131 parts, replacement 133 password setup 94… -
Page 170
42 urinalysis strip 112 urinalysis test 112 screen urine clarity 100 area 24 urine color 100 entering information 27 Siemens option 24 Chek-Stix 133 overview 18 CLINITEK Microalbumin 30 select ready 21 Clinitest hCG Cassettes 7 title bar 21… -
Page 171
glossary terms 160 cleaning 57 installing 124 disinfecting 60 memory card 20 inserting 12 overview 21 overview 19 updating 122 test table insert version 126 disinfecting 60 sound 109 hCG cassette 13 inserting 12 specifications urinalysis strip 13 analyzer 135 testing dimensions 136 electrical 136… -
Page 172
Full Test 38 editing 101 – quality control 54 setup 100 Quick Test 29 – Uristix 9 urinalysis test settings 112 urine water, quality control 54 clarity, setup 100 wired network 89 color wireless network 89 customizing 101 CLINITEK Status+ Analyzer Operator’s Guide…
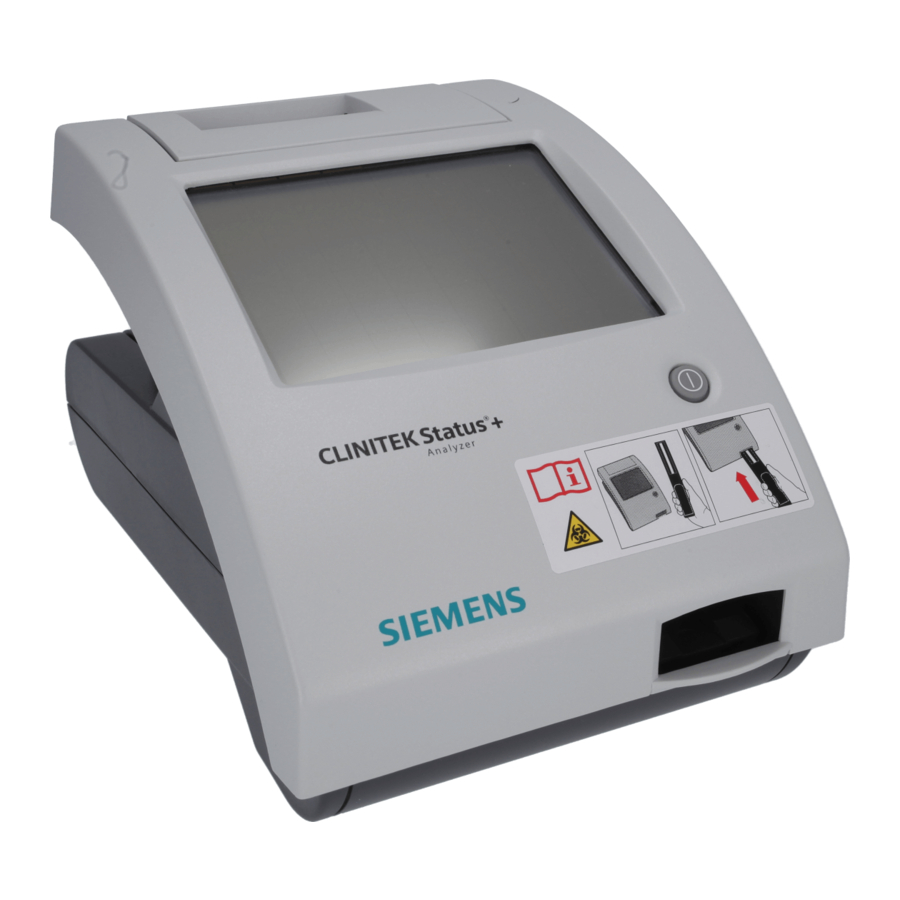
CLINITEK Status® — полуавтоматический анализатор мочи. Идеально подходит для малых лабораторий в поликлиниках и лечебных отделениях больниц, а также для проведения исследований непосредственно у постели больного. Производительность: 40 анализов в час (80 секунд на каждую тест-полоску). Встроенная система автоматической калибровки.
-
Автоматический учет времени, считывание и сохранение результатов анализов сокращает количество ошибок.
-
Полуколичественные результаты для первичных анализов по месту пребывания пациента.
-
Имеются тест-полоски для диабета, болезней почек и инфекционных заболеваний мочевыводящих путей.
-
Получение результатов анализа примерно за 1 минуту позволяет принять решения непосредственно в кабинете врача.
Анализатор мочи Clintek Status
CLINITEK Status ® сочетает в себе новаторские технологии анализа у постели пациента и усовершенствованную программу интегрирования данных, что обеспечивает удобную работу с клинической информацией.
Себестоимость исследования составляет 20 руб.
Полуавтоматический анализатор Clinitek Status Plus Siemens Diagnostics предназначен для лабораторных исследований мочи пациента с применением тест-полосок. Идеально подходит для малых лабораторий в поликлиниках и лечебных отделениях больниц, а также для проведения исследований непосредственно у постели больного. Производительность: 40 анализов в час (80 секунд на каждую тест-полоску). Встроенная система автоматической калибровки.
-
Автоматический учет времени, считывание и сохранение результатов анализов сокращает количество ошибок.
-
Полуколичественные результаты для первичных анализов по месту пребывания пациента.
-
Имеются тест-полоски для диабета, болезней почек и инфекционных заболеваний мочевыводящих путей.
-
Получение результатов анализа примерно за 1 минуту позволяет принять решения непосредственно в кабинете врача.
-
Удобный и простой в использовании:
• простое интуитивно понятное меню на сенсорном экране
• анализатор автоматически отсчитывает время загрузки каждого теста и считывает результаты
• быстрое получение результата ~ 1 минута
• автоматическая распечатка результата
-
Легкость транспортировки: переносной анализатор для семейного врача.
-
Целостность данных
• контроль каждой тест-полоски на воздействие влаги и других факторов
• идентификация тест-полосок на соответствие установленного типа
• распечатка примечания любого потенциально сомнительного результата
• исключена субъективность визуально прочитанных результатов
-
Всеобъемлющее меню анализов
• повседневные анализы осуществляются с использованием тест-полосок CLINITEK Multistix
• соотношение «альбумин / креатинин» используется для диагностики ранних заболеваний почек у пациентов с подтвержденным диабетом
• соотношение «белок / креатинин» используется для диагностики ранних заболеваний почек у пациентов, имеющих высокий риск заболевания
• тестирование беременности с использованием кассет CLINITEST hCG
-
Подключения
• Clinitek Status + может быть подключен к ЛИС или к системе управления данными DMS (необходим апгрейд)
• к анализатору можно подключить сканер штрихкода, что исключит ручной ввод данных
-
Производительность: 60 анализов в час (60 секунд на каждую тест-полоску);
-
Управление прибором с большого сенсорного жидкокристаллического дисплея;
-
вывод результатов анализа на дисплей и распечатка на встроенном термопринтере;
-
наличие памяти (200 последних анализов в хронологическом порядке);
-
архивирование результатов: дата, номер анализа, информация о пациенте (идентификационный номер и фамилия);
-
не требует калибровки;
-
наличие автономного питания (6 батареек по 1.5 V);
-
легкость транспортировки: переносной анализатор для семейного врача.
Тесты/исследования
-
глюкоза, билирубин, рН- мочи, белок, кетоновые тела, относительная плотность мочи, уробилиноген, эритроциты, лейкоциты, нитриты, хорионический гонадотропин
-
альбумин, креатинин, Коэффициент: Albumin/Creatinine, Коэффициент: Protein/Creatinine
Преимущества
CLINITEK Status ® Connect — обеспечивает гибкие возможности обмена информацией, интеграции данных и эксплуатационного управления для быстрого принятия решения и немедленного назначения терапии при работе у постели пациента.
-
Усовершенствованное управление и регистрация операторов для защиты от несанкционированного доступа.
-
Автоматическая блокировка анализа при невыполненном контроле качества улучшает качество работы.
-
Опция — использование штрих-кодов для безошибочного ввода сведений о пациентах и операторах.
-
Гибкие возможности обмена данными с системами электронных медицинских карт (EMR), системами управления данными (DMS), а также лабораторными и больничными информационными системами (LIS/HIS).
-
Усовершенствованная программа интегрирования данных с автоматической проверкой (Auto-Check) каждого анализа.
-
Автоматизированное выполнение анализов и сохранение результатов, отсутствие необходимости ручной регистрации обеспечивает уменьшение вероятности ошибок.
-
Самый широкий спектр исследований: Multistix®, профиль анализов для заболеваний печени и анализы на хорионический гонадотропин человека (ХГЧ).
-
Готовность к интеграции в будущем — беспрепятственное подключение к системам электронных медицинских карт и управления данными.
Код вида мед. изделия — 140890 Анализатор биохимический на сухой химии ИВД, полуавтоматический.
Точную стоимость Clitnek Status можете узнать по телефону, наши менеджеры проконсультируют Вас по всему функционалу данного анализатора и подберут оптимальный вариант оплаты. ООО «АстроМед» — прямой дилер медтехники Siemens Healthcare Diagnostics в России, поэтому наши цены наиболее выгодные.
Характеристики полуавтоматический анализатор мочи Clinitek Status
Основные
-
Функции
Полуколичественные тесты; Вычисление соотношений «альбумин / креатинин» и «белок / креатинин»; Тестирование беременности
-
Пользовательский интерфейс
Сенсорный экран
-
Калибровка
Автоматическая (самокалибровка)
-
Подключение к ЛИС
RS 232C – однонаправленное
-
Подключение сканера штрихкодов
RS 232C
-
Электрическое питание
100 – 240 В – 50 / 60 Гц
-
Работа от аккумулятора
6 неперезаряжающихся батарей AA
-
Габариты
272 × 171 × 158 см
-
Температура окружающей среды
18 – 30 °С
-
Относительная влажность
15 – 80 % (без конденсата)
-
Похожие товары
MD-150 Анализатор мочи на тест-полосках
-
Тип анализатора
Полуавтомат
-
Для экспресс-лаборатории
Да
-
Производительность (тестов/час)
60
-
Память результатов
950
-
Принтер
Встроенный
-
Подключение к ПК
Есть
-
Вес
1,66 кг
Получить предложение на полуавтоматический анализатор мочи Clinitek Status
Запчасти для полуавтоматический анализатор мочи Clinitek Status
Категории раздела
|
Гематологические анализаторы [132] |
|
Биохимические анализаторы (в т.ч. фотометры) [180] |
|
Анализаторы газов и электролитов [40] |
|
ИФА- оборудование [70] |
|
Анализаторы гемостаза [31] |
|
Вспомогательное лабораторное оборудование(pH-метры, центрифуги, весы, боксы, и т.п.) [97] |
Терминал
|
МОМЕНТАЛЬНАЯ ОПЛАТА за WebMoney, RBK Money, MoneyMail, WebCreds, Яндекс.Деньги, терминалы |
|
|

Мини-чат
Для добавления необходима авторизация
Свежие фотографии


Показать все
Друзья сайта
Технический портал Левши
Радио Кот
Ремонт теле-видео-аудио аппаратуры
Электроника и Медтехника
Медтехника-НТ
Ламповые усилители
Создай свой сайт(быстро и бесплатно)
Мы Вконтакте
![]()
Соц. закладки
Статистика
Онлайн всего: 32
Гостей: 30
Пользователей: 2
Tim, makto
Clinitek Status + является преемником модели Clinitek 50 и предоставляет, прежде всего, новые автоматические проверки Auto-Checks, обеспечивающие контроль каждой тест-полоски на воздействие влаги и других факторов, а также идентификацию их на соответствие установленного типа тест-полосок. Эта новая особенность
- дает уверенность в принятии клинических решений на каждом тесте
- гарантирует последовательную интерпретацию результатов автоматическим выбором времени и чтением каждого экземпляра мочи
- дает уверенность в принятии клинических решений на каждом тесте
Clinitek Status + предоставляет
- возможность подключения к системе управления данными DMS, для этого достаточно выполнить простой апгрейд
- простое меню для обычного тестирования, диагностики ранних заболеваний почек и тестирования беременности (ХГЧ)
Удобный и простой в использовании
• простое интуитивно понятное меню на сенсорном экране
• анализатор автоматически отсчитывает время загрузки каждого теста и считывает результаты
• быстрое получение результата ~ 1 минута
• автоматическая распечатка результата
Целостность данных
• контроль каждой тест-полоски на воздействие влаги и других факторов
• идентификация тест-полосок на соответствие установленного типа
• распечатка примечания любого потенциально сомнительного результата
• исключена субъективность визуально прочитанных результатов
Всеобъемлющее меню анализов
• повседневные анализы осуществляются с использованием тест-полосок CLINITEK Multistix
• соотношение «альбумин / креатинин» используется для диагностики ранних заболеваний почек у пациентов с подтвержденным диабетом
• соотношение «белок / креатинин» используется для диагностики ранних заболеваний почек у пациентов, имеющих высокий риск заболевания
• тестирование беременности с использованием кассет CLINITEST hCG
Подключения
• Clinitek Status + может быть подключен к ЛИС или к системе управления данными DMS (необходим апгрейд)
• к анализатору можно подключить сканер штрихкода, что исключит ручной ввод данных
-
Contents
-
Table of Contents
-
Bookmarks
Quick Links
1 INTRODUCTION AND
1 OF 8
GENERAL DESCRIPTION
Introduction …………………………………………………………………………….. 2
Features ………………………………………………………………………………….. 3
General Specifications ………………………………………………………………. 5
NEXT
Chapters
Related Manuals for Bayer HealthCare Clinitek Status
Summary of Contents for Bayer HealthCare Clinitek Status
Онлайн всего: 32 Гостей: 30 Пользователей: 2 Tim, makto Clinitek Status + является преемником модели Clinitek 50 и предоставляет, прежде всего, новые автоматические проверки Auto-Checks, обеспечивающие контроль каждой тест-полоски на воздействие влаги и других факторов, а также идентификацию их на соответствие установленного типа тест-полосок. Эта новая особенность
Clinitek Status + предоставляет
Удобный и простой в использовании Целостность данных Всеобъемлющее меню анализов Подключения
Quick Links1 INTRODUCTION AND 1 OF 8 GENERAL DESCRIPTION Introduction …………………………………………………………………………….. 2 Features ………………………………………………………………………………….. 3 General Specifications ………………………………………………………………. 5 NEXT ChaptersRelated Manuals for Bayer HealthCare Clinitek StatusSummary of Contents for Bayer HealthCare Clinitek Status
Правила добавления: Внимание !!! Перед тем как загрузить файл, убедитесь, что его нет в «Хранилище файлов» для этого воспользуйтесь поиском. При добавлении файлов в поле «Название материала» указываем марку аппарата, так как на шильдике или по паспорту. В поле «Краткое описание» пишем что-это: схема; сервис мануал; руководство по эксплуатации и т.д. Также напишите формат материала, какой программой он сделан. За сохранность и работоспособность файлов(ссылок) загруженных на сторонние файловые хостинги, Администрация сайта ответственности не несет. Для загрузки файлов в «Хранилище» воспользуйтесь архиватором WinRAR или 7-Zip, максимальный объем загружаемого файла должен быть не более 15Mb. Администрация сайта оставляет за собой право удалять и редактировать файлы. Для скачивания с 4Shared.com необходимо зарегистрироваться и создать аккаунт на 4shared.com или пользоваться другим способом скачивания которые там же предлагаются. Анализатор Clinitek Status. инструкция оператора. Гостям запрещено просматривать данную страницу, пожалуйста войдите на сайт как пользователь. [ Регистрация | Вход ] Вопросы по ремонту медицинской техники | Теоретические основы медицинского приборостроения | Информационный раздел | Информация о сайте | Хранилище файлов | Сертификаты и регистрационные удостоверения | Навигатор по сайту | Написать администратору Содержание
Портативный анализатор мочи Clinitek Status создан для определения основных показателей мочи. Благодаря простому и понятному управлению его могут использовать все желающие. Анализатор дает надежные результаты, противоречивость данных исключена, так как автоматическая система не допускает ошибок. Прибор сочетает в себе высокие технологии анализа в любых условиях и программу интеграции данных, что позволяет удобно обрабатывать клиническую информацию.
Плюсы использованияИспользование автоматического анализатора для исследования мочи позволяет ускорить процесс получения результата, что очень важно, когда нужно немедленно определить патологию и назначить соответствующее лечение. Анализатор способен проверять каждую тест-полоску на влажность, а это дает возможность избежать ложноположительных результатов. Основные преимущества:
Вернуться к оглавлению Функции анализатора мочи Clinitek Status
Анализатор мочи предназначен для выполнения таких функций:
Вернуться к оглавлению Технические характеристикиС помощью регулируемых настроек не допускает несанкционированное использование. Анализатор Clinitek Status обнаруживает взаимное увеличение или уменьшение показателей в исследуемом материале и распечатывает примечания в отчете. Технические характеристики прибора указывают на легкость, компактность, способность работать при различных условиях.
Вернуться к оглавлению Как пользоваться?
Распечатка результатов, возможность вносить данные непосредственно в компьютер освобождает врача от переписывания информации вручную. Портативный анализатор удобно использовать, транспортировать, обслуживать, а точность проведенных анализов делает его необходимым для специалистов, которые могут делать исследования не отходя от пациента, тем самым ускоряя процесс постановки диагноза.
Врач-онкоуролог, уролог, андролог. Клиника урологии Первого МГМУ им. И. М. Сеченова. Изучить профиль… Clinitek Status + является преемником модели Clinitek 50 и предоставляет, прежде всего, новые автоматические проверки Auto-Checks, обеспечивающие контроль каждой тест-полоски на воздействие влаги и других факторов, а также идентификацию их на соответствие установленного типа тест-полосок. Эта новая особенность
Clinitek Status + предоставляет
Удобный и простой в использовании Целостность данных Всеобъемлющее меню анализов Подключения В наличии документация на медицинское оборудование фирмы Bayer (в т.ч. на русском языке): Инструкция по применению и обслуживанию (User and Service manual) на Advia 120 [Bayer] Анализаторы
Техническая документация (Technical Documentation/Manual) на Advia 120 — Communication & Host Computer [Bayer] Анализаторы Техническая документация (Technical Documentation/Manual) на Advia 1200 — Communication & Host Computer [Bayer] Анализаторы
Инструкция оператора (Operator manual) на Advia 1650 — Getting Started [Bayer] Анализаторы Техническая документация (Technical Documentation/Manual) на Advia 1650 — Workstation and a Host Computer [Bayer] Анализаторы
Инструкция пользователя (User manual) на Advia 2120 [Bayer] Анализаторы
Техническая документация (Technical Documentation/Manual) на Advia 2120 — Communication & Host Computer [Bayer] Анализаторы Инструкция оператора (Operator manual) на Advia 2400 — Getting Started [Bayer] Анализаторы Руководство оператора (Operators Guide) на Advia 60 [Bayer] Анализаторы
Инструкция пользователя (User manual) на Advia 60 [Bayer] Анализаторы
Техническая документация (Technical Documentation/Manual) на Advia 60 [Bayer] Анализаторы
Инструкция пользователя (User manual) на Advia 60-CT [Bayer] Анализаторы
Инструкция по эксплуатации (Operation (Instruction) manual) на Advia 70 [Bayer] Анализаторы
Сервисная инструкция (Service manual) на Advia 70 [Bayer] Анализаторы Сервисная инструкция (Service manual) на Advia Centaur, Centaur XP Parts and Repair Service Guide [Bayer] Анализаторы
Руководство пользователя (Users guide) на Contour TS [Bayer] Анализаторы
Руководство оператора (Operators Guide) на Express Plus [Bayer] Анализаторы
Инструкция по эксплуатации (Operation (Instruction) manual) на Hema-Tek 1000 Slide Stainer, Hema-Tek Stain Pak [Bayer] Анализаторы
Инструкция пользователя (User manual) на Hema-Tek 2000 [Bayer] Лаборатория
Инструкция по эксплуатации (Operation (Instruction) manual) на Hematek Slide Stainer [Bayer] Лаборатория
Руководство оператора (Operators Guide) на pH/газов крови Rapidlab 348 [Bayer] Анализаторы
Инструкция по эксплуатации (Operation (Instruction) manual) на pH/газов крови RapidLab 800 (840, 850, 860) [Bayer] Анализаторы
Инструкция по эксплуатации (Operation (Instruction) manual) на pH/газов крови RapidLab 800 (840, 850, 860) (Chiron Diagnostics) [Bayer] Анализаторы
Техническая документация (Technical Documentation/Manual) на RA-50 [Bayer] Анализаторы
Руководство оператора (Operators Guide) на RapidChem 744 (электролитов) [Bayer] Анализаторы
Инструкция пользователя (User manual) на Анализатор мочи Clinitek 50 [Bayer] Анализаторы
Сервисная инструкция (Service manual) на Анализатор мочи Clinitek 50 [Bayer] Анализаторы
Сервисная инструкция (Service manual) на Анализатор мочи Clinitek 500 [Bayer] Анализаторы
Инструкция пользователя (User manual) на Анализатор мочи Clinitek 500 [Bayer] Анализаторы
Техническая документация (Technical Documentation/Manual) на Анализатор мочи Clinitek Atlas — Interface Specification [Bayer] Анализаторы
Инструкция по установке и обслуживанию (Servise and Installation manual) на Анализатор мочи Clinitek Status [Bayer] Анализаторы
Инструкция по эксплуатации (Operation (Instruction) manual) на Анализатор мочи Clinitek Status [Bayer] Анализаторы
Инструкция по эксплуатации (Operation (Instruction) manual) на Гемоблобинометр DCA 2000+ [Bayer] Анализаторы
Архив технической документации медицинского оборудования © 2006 … 2023
Это тоже интересно:
Подписаться
авторизуйтесь
0 комментариев
Старые
|


![Инструкция по применению и обслуживанию User and Service manual на Advia 120 [Bayer]](https://medtechnic.net.ua/img_d/0000/576.jpg "Инструкция по применению и обслуживанию User and Service manual на Advia 120 [Bayer]")
![Техническая документация Technical Documentation/Manual на Advia 1200 - Communication & Host Computer [Bayer]](https://medtechnic.net.ua/img_d/3000/3073.jpg "Техническая документация Technical Documentation/Manual на Advia 1200 - Communication & Host Computer [Bayer]")
![Техническая документация Technical Documentation/Manual на Advia 1650 - Workstation and a Host Computer [Bayer]](https://medtechnic.net.ua/img_d/3000/3078.jpg "Техническая документация Technical Documentation/Manual на Advia 1650 - Workstation and a Host Computer [Bayer]")
![Инструкция пользователя User manual на Advia 2120 [Bayer]](https://medtechnic.net.ua/img_d/2000/2840.jpg "Инструкция пользователя User manual на Advia 2120 [Bayer]")
![Руководство оператора Operators Guide на Advia 60 [Bayer]](https://medtechnic.net.ua/img_d/0000/296.jpg "Руководство оператора Operators Guide на Advia 60 [Bayer]")
![Инструкция пользователя User manual на Advia 60 [Bayer]](https://medtechnic.net.ua/img_d/3000/3700.jpg "Инструкция пользователя User manual на Advia 60 [Bayer]")
![Техническая документация Technical Documentation/Manual на Advia 60 [Bayer]](https://medtechnic.net.ua/img_d/2000/2407.jpg "Техническая документация Technical Documentation/Manual на Advia 60 [Bayer]")
![Инструкция пользователя User manual на Advia 60-CT [Bayer]](https://medtechnic.net.ua/img_d/2000/2838.jpg "Инструкция пользователя User manual на Advia 60-CT [Bayer]")
![Инструкция по эксплуатации Operation (Instruction) manual на Advia 70 [Bayer]](https://medtechnic.net.ua/img_d/1000/1738.jpg "Инструкция по эксплуатации Operation (Instruction) manual на Advia 70 [Bayer]")
![Сервисная инструкция Service manual на Advia Centaur, Centaur XP Parts and Repair Service Guide [Bayer]](https://medtechnic.net.ua/img_d/7000/7700.jpg "Сервисная инструкция Service manual на Advia Centaur, Centaur XP Parts and Repair Service Guide [Bayer]")
![Руководство пользователя Users guide на Contour TS [Bayer]](https://medtechnic.net.ua/img_d/8000/8799.jpg "Руководство пользователя Users guide на Contour TS [Bayer]")
![Руководство оператора Operators Guide на Express Plus [Bayer]](https://medtechnic.net.ua/img_d/1000/1608.jpg "Руководство оператора Operators Guide на Express Plus [Bayer]")
![Инструкция по эксплуатации Operation (Instruction) manual на Hema-Tek 1000 Slide Stainer, Hema-Tek Stain Pak [Bayer]](https://medtechnic.net.ua/img_d/9000/9397.jpg "Инструкция по эксплуатации Operation (Instruction) manual на Hema-Tek 1000 Slide Stainer, Hema-Tek Stain Pak [Bayer]")
![Инструкция пользователя User manual на Hema-Tek 2000 [Bayer]](https://medtechnic.net.ua/img_d/0000/363.jpg "Инструкция пользователя User manual на Hema-Tek 2000 [Bayer]")
![Инструкция по эксплуатации Operation (Instruction) manual на Hematek Slide Stainer [Bayer]](https://medtechnic.net.ua/img_d/8000/8802.jpg "Инструкция по эксплуатации Operation (Instruction) manual на Hematek Slide Stainer [Bayer]")
![Руководство оператора Operators Guide на pH/газов крови Rapidlab 348 [Bayer]](https://medtechnic.net.ua/img_d/0000/425.jpg "Руководство оператора Operators Guide на pH/газов крови Rapidlab 348 [Bayer]")
![Инструкция по эксплуатации Operation (Instruction) manual на pH/газов крови RapidLab 800 (840, 850, 860) [Bayer]](https://medtechnic.net.ua/img_d/0000/458.jpg "Инструкция по эксплуатации Operation (Instruction) manual на pH/газов крови RapidLab 800 (840, 850, 860) [Bayer]")
![Инструкция по эксплуатации Operation (Instruction) manual на pH/газов крови RapidLab 800 (840, 850, 860) (Chiron Diagnostics) [Bayer]](https://medtechnic.net.ua/img_d/4000/4507.jpg "Инструкция по эксплуатации Operation (Instruction) manual на pH/газов крови RapidLab 800 (840, 850, 860) (Chiron Diagnostics) [Bayer]")
![Техническая документация Technical Documentation/Manual на RA-50 [Bayer]](https://medtechnic.net.ua/img_d/4000/4828.jpg "Техническая документация Technical Documentation/Manual на RA-50 [Bayer]")
![Руководство оператора Operators Guide на RapidChem 744 (электролитов) [Bayer]](https://medtechnic.net.ua/img_d/0000/431.jpg "Руководство оператора Operators Guide на RapidChem 744 (электролитов) [Bayer]")
![Инструкция пользователя User manual на Анализатор мочи Clinitek 50 [Bayer]](https://medtechnic.net.ua/img_d/1000/1825.jpg "Инструкция пользователя User manual на Анализатор мочи Clinitek 50 [Bayer]")
![Сервисная инструкция Service manual на Анализатор мочи Clinitek 50 [Bayer]](https://medtechnic.net.ua/img_d/1000/1727.jpg "Сервисная инструкция Service manual на Анализатор мочи Clinitek 50 [Bayer]")
![Сервисная инструкция Service manual на Анализатор мочи Clinitek 500 [Bayer]](https://medtechnic.net.ua/img_d/1000/1960.jpg "Сервисная инструкция Service manual на Анализатор мочи Clinitek 500 [Bayer]")
![Инструкция пользователя User manual на Анализатор мочи Clinitek 500 [Bayer]](https://medtechnic.net.ua/img_d/1000/1959.jpg "Инструкция пользователя User manual на Анализатор мочи Clinitek 500 [Bayer]")
![Техническая документация Technical Documentation/Manual на Анализатор мочи Clinitek Atlas - Interface Specification [Bayer]](https://medtechnic.net.ua/img_d/3000/3075.jpg "Техническая документация Technical Documentation/Manual на Анализатор мочи Clinitek Atlas - Interface Specification [Bayer]")
![Инструкция по установке и обслуживанию Servise and Installation manual на Анализатор мочи Clinitek Status [Bayer]](https://medtechnic.net.ua/img_d/1000/1194.jpg "Инструкция по установке и обслуживанию Servise and Installation manual на Анализатор мочи Clinitek Status [Bayer]")
![Инструкция по эксплуатации Operation (Instruction) manual на Анализатор мочи Clinitek Status [Bayer]](https://medtechnic.net.ua/img_d/0000/316.jpg "Инструкция по эксплуатации Operation (Instruction) manual на Анализатор мочи Clinitek Status [Bayer]")
![Инструкция по эксплуатации Operation (Instruction) manual на Гемоблобинометр DCA 2000+ [Bayer]](https://medtechnic.net.ua/img_d/8000/8143.jpg "Инструкция по эксплуатации Operation (Instruction) manual на Гемоблобинометр DCA 2000+ [Bayer]")