Arabic
Chinese (Simplified)
English
French
Portuguese
Spanish
Afrikaans
Albanian
Amharic
Armenian
Azerbaijani
Basque
Belarusian
Bengali
Bosnian
Bulgarian
Catalan
Chichewa
Chinese (Traditional)
Corsican
Croatian
Czech
Danish
Dutch
Esperanto
Estonian
Filipino
Finnish
Frisian
Galician
Georgian
German
Greek
Gujarati
Haitian Creole
Hausa
Hebrew
Hindi
Hungarian
Icelandic
Igbo
Indonesian
Irish
Italian
Japanese
Javanese
Kannada
Kazakh
Khmer
Korean
Kurdish (Kurmanji)
Kyrgyz
Lao
Latin
Latvian
Lithuanian
Luxembourgish
Macedonian
Malagasy
Malay
Malayalam
Maltese
Maori
Marathi
Mongolian
Myanmar (Burmese)
Nepali
Norwegian
Pashto
Persian
Polish
Punjabi
Romanian
Russian
Samoan
Scottish Gaelic
Serbian
Sesotho
Shona
Sindhi
Sinhala
Slovak
Slovenian
Somali
Sundanese
Swahili
Swedish
Tajik
Tamil
Telugu
Thai
Turkish
Ukrainian
Urdu
Uzbek
Vietnamese
Welsh
Xhosa
Yiddish
Yoruba
Zulu
- Обновлено: 13 сентября 2016
- Версия: 3.2.0.0
- Автор: InTime
- Лицензия: Support Users
Описание
Архив содержит руководство пользователя Anviz CrossChex версии 3.2.0.0 и выше, а также переработанный русификатор.
Инструкция по использованию пакета русификации InTime для Anviz CrossChex:
- Распакуйте архив и выберите языковой файл для ПО AIM CrossChex (файл имеет расширение .lng)
- Для работы сохраните его на свой ПК, в подпапку Languages папки с установленной программой. Например, C:Program Files (x86)AnvizCrossChex_StandardLanguages
- После этого перезапустите программу и выберите язык в соответствующем разделе меню программы (см. Руководство пользователя)
- Выбранный язык будет автоматически использоваться при каждом запуске программы.

Примечание: Версия 2.0.0.0 уже имеет установленный русский язык, данную русификацию рекомендуется использовать взамен заводской.
Блог
Назад к статьям
18.08.2018
В прошлой статье мы рассказали, как установить программу CrossChex. Теперь опишем, как добавить устройство в программу и начать с ним работать.
В нашем примере мы используем биометрический терминал учета рабочего времени Anviz W1. Он подключен в сеть и ему присвоен ip адрес 192.168.1.218.
В приборе Anviz W1 предусмотрен пользователь Amdin с идентификатором «0» и с паролем по умолчанию «12345». В целях соблюдения информационной безопасности необходимо сменить пароль для этого пользователя, чтобы избежать случаев несанкционированного доступа к устройству. Далее, опишем, как это сделать.
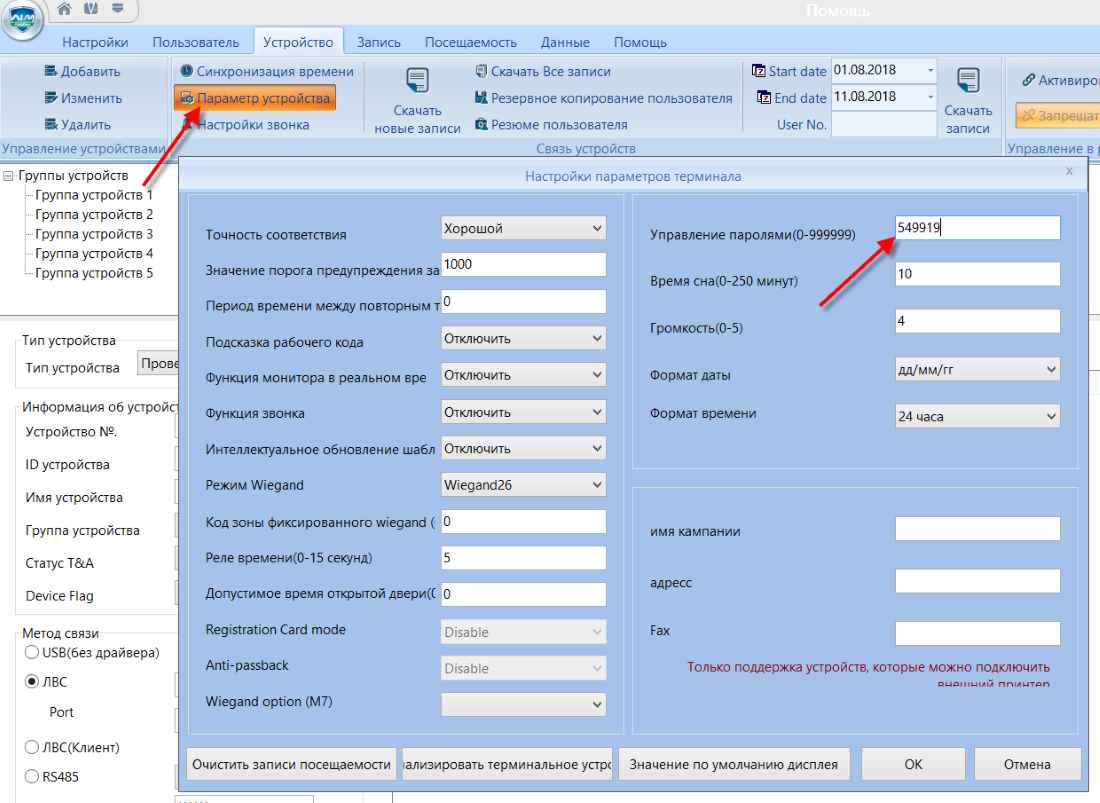
Переходим на вкладку «Устройство», нажимаем на кнопку «Добавить», указываем произвольный номер устройства, произвольный ID устройства, задаем имя устройства, указываем ip адрес и нажимаем на кнопку «плюс», как показано на следующем рисунке. В появившемся окне с сообщением «Добавление терминала успешно..» нажимаем на кнопку «Да».

Нажимаем на кнопку «Параметр устройства» и в открывшемся окне, в поле «Управление паролями….» вместо «12345» указываем новый пароль. Пароль должен быть цифровым длиной не более 6 знаков. Нажимаем на кнопку «Ок».
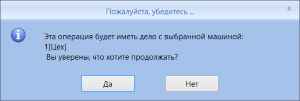
В следующем окне подтверждаем, что хотим продолжить.
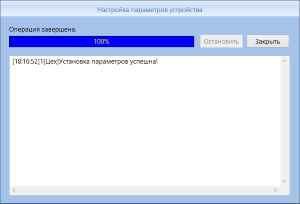
В результате видим, что установка параметров успешна.
Можно проверить пароль на устройстве, вызвав меню через интерфейс Anviz W1. Теперь, человек, не знающий новый пароль, не может получить доступ к Anviz W1 через меню прибора.
Чтобы исключить несанкционированный доступ к Anviz W1 по сети, необходимо активировать «Код связи». Для этого необходимо перейти в меню прибора «Сеть» -> «Comm mode».


Установим другой код связи.
Далее, удалим из CrossChex устройство и вновь добавим его в программу, но при этом укажем установленный в предыдущем шаге новый код связи:
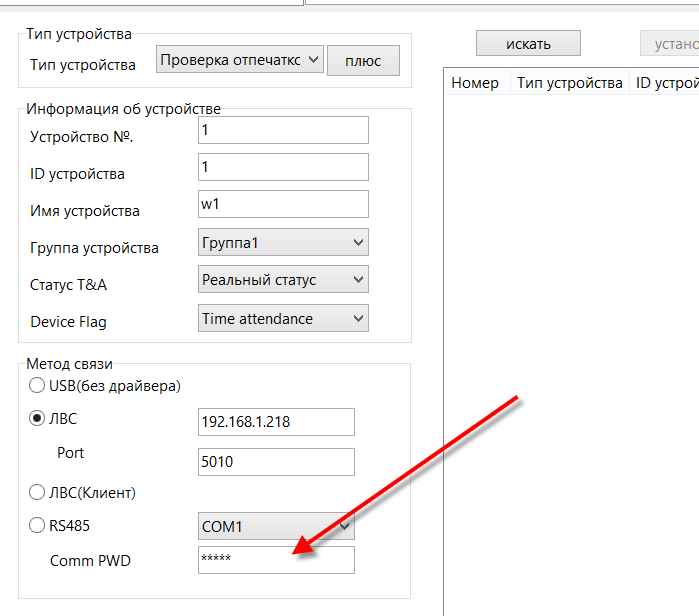
После этой процедуры, устройство не может быть добавлено в программу CrossChex по сети без указания правильного кода связи.
Где купить биометрические приборы учета рабочего времени и СКД?
Купить биометрические приборы учета рабочего времени и СКД Вы можете в интернет магазине Manggis. Мы также предлагаем доставку и установку устройств.
Посмотрите ассортимент наших товаров в интернет-магазине
У Вас появились вопросы?
Оставьте заявку на звонок нашего консультанта


Получите доступ к своим камерам с любой точки мира через интернет!
Anviz CrossChex Standard Software V1.0
Anviz Biometric Recognition
Management Software
CrossChex Standard User Manual
Version: Standard V1.0
Anviz CrossChex Standard Software V1.0
Brief Introduction
Main Functions and Applications of CrossChex Software
Complete user authority management including user operation authority, department management authority and device management authority.
Managing fingerprint, face, iris and other biometric recognition devices and communicating with those devices to transfer data including uploading & downloading user information, recognizing records and setting operation parameter, etc..
Common attendance management function with flexible setting: different shifts (routine shift, changing shift, intelligent shift, etc.), exact records for late, early leave, overtime, not coming, ask for leave and work time, etc.
Different access control group and time zones to manage users.
Application Situation
Complying with our self-developed fingerprint, facial, iris, etc. devices, CrossChex Standard integrates intelligent management of time attendance and relevant functions of access control. It has been widely used in many office buildings and factories across the world, continuously serving access control and management requests from many companies with stable performance, accurate calculation, safe management and high intelligence.
Performance Parameter
Fingerprint Recognition Speed: 1:1000 < 1 second
Anviz Technology Co., Ltd.
Anviz CrossChex Standard Software V1.0
Low CPU, RAM<10MB, Disk<100MB
Applicable to conference call, biometric fingerprint/facial/ iris consumption, ID recognition etc..
Complete and flexible user management, easy setting of different shifts and accurate calculation of daily and monthly attendance of all staff.
Key Technology and Specialties
Using physiological characters like fingerprint, face, iris to identify personnel; safe, secure and accurate performance to avoid forgetting or stealing.
Supporting intelligent updates of fingerprint, face, iris and other physiological characters, increasing recognition safety and accuracy, and providing flexible setting about shifts and time zones to meet time attendance and access control requests from most companies.
Anviz Technology Co., Ltd.
Anviz CrossChex Standard Software V1.0
Contents
1. Software Installation and Uninstallation …………………………………………………………………………………………………………… 11
1.1 Software Installation ……………………………………………………………………………………………………………………………… 11
1.2 Uninstall software …………………………………………………………………………………………………………………………………. 14
2
.
Software Initialization ……………………………………………………………………………………………………………………………………… 15
2.1
Operation Software
……………………………………………………………………………………………………………………………….. 15
2.2 User Guid ………………………………………………………………………………………………………………………………………………… 15
3
.
Software Operation ……………………………………………………………………………………………………………………………………….. 19
3.1 Login ………………………………………………………………………………………………………………………………………………………. 19
3.2 Host interface ………………………………………………………………………………………………………………………………………….. 20
3.3 System Setting ………………………………………………………………………………………………………………………………………. 21
3.3.1 Database Setting …………………………………………………………………………………………………………………………….. 21
3.3.2 Base Parameter ……………………………………………………………………………………………………………………………… 23
3.3.3 Attendance Parameter ……………………………………………………………………………………………………………………. 26
3.3.4 Dept. Setting ………………………………………………………………………………………………………………………………….. 29
3.3.5 Status Setting …………………………………………………………………………………………………………………………………. 30
3.3.6 Leave class …………………………………………………………………………………………………………………………………….. 30
3.3.7 Work Code …………………………………………………………………………………………………………………………………….. 31
3.3.8 Holiday List ……………………………………………………………………………………………………………………………………. 32
3.3.9 Shift settings ………………………………………………………………………………………………………………………………….. 33
3.3.10 Access Setting ………………………………………………………………………………………………………………………………. 39
3.3.11 User setting …………………………………………………………………………………………………………………………………. 41
3.3.12 Modify password ………………………………………………………………………………………………………………………….. 43
3.3.13 Lock Manager ……………………………………………………………………………………………………………………………. 43
3.3.14 Log out ……………………………………………………………………………………………………………………………………… 43
3.3.15 Exit system ………………………………………………………………………………………………………………………………… 44
3.4 Employee Management ……………………………………………………………………………………………………………………………. 44
3.4.1 Add Employee………………………………………………………………………………………………………………………………… 45
3.4.2
Modify employee
………………………………………………………………………………………………………………………….. 48
3.4.3 Delete employee ………………………………………………………………………………………………………………………….. 48
3.4.4 Export employees …………………………………………………………………………………………………………………………… 48
3.4.5 Import employee ……………………………………………………………………………………………………………………………. 49
Anviz Technology Co., Ltd.
Anviz CrossChex Standard Software V1.0
3.4.6 Transfer Dept …………………………………………………………………………………………………………………………………. 51
3.4.7
Employee Separation
…………………………………………………………………………………………………………………… 51
3.4.8
Set Privilege
……………………………………………………………………………………………………………………………… 52
3.4.9
Copy Privilege
……………………………………………………………………………………………………………………………… 53
3.4.10
Download Employee
………………………………………………………………………………………………………………….. 54
3.4.11
Upload employee
……………………………………………………………………………………………………………………….. 55
3.4.13
Upload template
…………………………………………………………………………………………………………………………. 56
3.4.14
Delete from unit
………………………………………………………………………………………………………………………….. 57
3.5 Unit Management ……………………………………………………………………………………………………………………………………. 57
3.5.1 Add Unit………………………………………………………………………………………………………………………………………… 57
3.5.2
Modify Unit
…………………………………………………………………………………………………………………………………… 59
3.5.3 Delete Unit ……………………………………………………………………………………………………………………………………. 60
3.5.4 Synchronize Time ……………………………………………………………………………………………………………………………. 60
3.5.5 Unit Parameter ………………………………………………………………………………………………………………………………. 60
3.5.6 Ring Settings ………………………………………………………………………………………………………………………………….. 63
3.5.7 Download New Records ………………………………………………………………………………………………………………….. 63
3.5.8 Download All Records ……………………………………………………………………………………………………………………… 64
3.5.9 Backup Employee …………………………………………………………………………………………………………………………… 64
3.5.10 Resume Employee ………………………………………………………………………………………………………………………… 65
3.5.11 Activate Realtime …………………………………………………………………………………………………………………………. 65
3.5.12
U Disk Function
………………………………………………………………………………………………………………………….. 65
3.6 Record Management ………………………………………………………………………………………………………………………………… 67
3.6.1 Record Search ………………………………………………………………………………………………………………………………… 67
3.6.2 Export Record ………………………………………………………………………………………………………………………………… 68
3.7 Attendance Management ………………………………………………………………………………………………………………………….. 69
3.7.1 Statistical Analysis ………………………………………………………………………………………………………………………….. 69
3.7.2 Search Results ………………………………………………………………………………………………………………………………… 70
3.7.3 Record Management ………………………………………………………………………………………………………………………. 71
3.7.3 Scheduling Record Analysis ……………………………………………………………………………………………………………… 71
3.7.4 Analysis of Away/Leave …………………………………………………………………………………………………………………… 72
3.7.5 Attendance Statistics ………………………………………………………………………………………………………………………. 73
3.7.6 Report Preview ………………………………………………………………………………………………………………………………. 73
3.8 Data Management ……………………………………………………………………………………………………………………………………. 74
3.8.1 Away On Business/Leave …………………………………………………………………………………………………………………. 74
Anviz Technology Co., Ltd.
Anviz CrossChex Standard Software V1.0
3.8.2 Append Record ………………………………………………………………………………………………………………………………. 74
3.8.3 Group Late/Early …………………………………………………………………………………………………………………………….. 74
3.8.4 Export Record ………………………………………………………………………………………………………………………………… 75
3.8.5 Import Record ………………………………………………………………………………………………………………………………… 76
3.8.6 Export Employee ……………………………………………………………………………………………………………………………. 77
3.8.7 Import Employee ……………………………………………………………………………………………………………………………. 78
3.8.8 Backup Database ……………………………………………………………………………………………………………………………. 79
3.8.9 Restore Database ……………………………………………………………………………………………………………………………. 80
3.8.10 Clear Obsolete Date ………………………………………………………………………………………………………………………. 81
3.8.11 Operation Log ………………………………………………………………………………………………………………………………. 81
3.8.1 Change Log Records………………………………………………………………………………………………………………………… 82
3.9 Help ……………………………………………………………………………………………………………………………………………………….. 82
3.9.1 Software Upgrades …………………………………………………………………………………………………………………………. 83
3.9.2 Submit Question …………………………………………………………………………………………………………………………….. 83
3.9.3 Frequently Asked Questions …………………………………………………………………………………………………………….. 84
3.9.4 About the Software ………………………………………………………………………………………………………………………… 85
3.9.5 Help Documentation ………………………………………………………………………………………………………………………. 86
Anviz Technology Co., Ltd.
Anviz CrossChex Standard Software V1.0
1.
Software Installation and Uninstallation
1.1 Software Installation
Please insert the CrossChex CD into the computer CD-ROM drive. If you turn on the computer automatically run a CD, the installation program will run automatically. Otherwise, open the CD and run their own «setup.exse».
1
、
Please select software language and click «OK» button
2
、
Enter the software installation wizard, click «Next»
Anviz Technology Co., Ltd.
Anviz CrossChex Standard Software V1.0
3
、
Read the license terms, after the reading is complete, choose
,
Then click
«Next».
4
、
Click «Browse» to select a local path as a software installation directory, if the software default path, click
«Next».
Anviz Technology Co., Ltd.
Anviz CrossChex Standard Software V1.0
5
、
Click «Install»
6
、
Installation is in progress, please be patient, depending on the computer configuration takes about 1-5 minutes.
Anviz Technology Co., Ltd.
Anviz CrossChex Standard Software V1.0
7
、
The installation is complete, click on the «Run CrossChex Standard» or «close» button.
1.2 Uninstall software
This software operating system standard uninstall program, you can use the operating system platform uninstaller to uninstall, or you can use the software’s uninstaller to uninstall the following operation is complete.
1
、
Enter into the «Start» menu, expand the «All Programs» list, find «Anviz» directory, enter «CrossChex
Standard» directory, locate the «Uninstall» to uninstall the program and run (or you can enter the software installation directory to find the Uninstall uninstaller)
2
、
Confirm whether to uninstall this software, click «Yes» to continue uninstalling, click «No» to exit.
3
、
Waiting for the uninstall process has been completed.
Anviz Technology Co., Ltd.
Anviz CrossChex Standard Software V1.0
2
.
Software Initialization
2.1
Operation Software
Double-click desk icon or click the software “CrossChex Standard” from menu directory
“Start”- “All” –“Anviz”- “CrossChex Standard”.
2.2 User Guid
The guide will start on its own when software first run, to help you quickly setup and get to know operation.
1
、
Software Registration
CrossChex Standard version is free and standard applies to Anviz devices. To assure you can get better software service and support, please fill in the registration which under encryption on transmission,
Please feel free to fill out. This information is only used in our technical services
Anviz Technology Co., Ltd.
Anviz CrossChex Standard Software V1.0
2, Configuration Database
The system default database is ACCESS, SQL Server supported. Can be optional changed.
Anviz Technology Co., Ltd.
Anviz CrossChex Standard Software V1.0
2
、
Dept. Setting
3
、
Employee Information
3
、
Attendance Setting
Please refer to details in “Attendance Parameter Settings”.
Anviz Technology Co., Ltd.
Anviz CrossChex Standard Software V1.0
4
、
Shift Setting
Please refer to the detail in “ Shift Setting”
5
、
Unit Management
CrossChex software can be one button setup with Anviz device match agreement. No additional device nor configuration. Please refer to details in “ Device management”
Anviz Technology Co., Ltd.
Anviz CrossChex Standard Software V1.0
3
..
Software Operation
3.1 Login
Double-click desk icon or click the software “CrossChex Standard” from menu directory
“Start”- “All” –“Anviz”- “CrossChex Standard”. Once loading over, it will show a window below:
Default User name: ADMIN. Empty password. Press “confirm” to entry. Press “Cancel” to close.
Anviz Technology Co., Ltd.
Anviz CrossChex Standard Software V1.0
3.2 Host interface
Anviz Biometric management software interface divid to 3 parts:
1
、
Window setup
Picture Name Function
Home page Click on the icon, the software will be returned directly to the main interface.
Skin
Language
System supply 3 skin color: bule, black and silver.
Click on the icon can switch software language
2
、
System Function
Name
Settings
Funciton
Set all the system parameters, such as attendance, access control, system parameters , etc.
Anviz Technology Co., Ltd.
Anviz CrossChex Standard Software V1.0
Employee
User information to add, modify, upload, download and so on.
Management
Unit Management Communication with device, uploads and downloads from device.
Screening and searching records according to the attendance record. Record Management
Attendance
Management
Data Management
Searching attendance records and generate report.
Import and export of data, backup database, operation log, etc.
Help Software version information, online upgrade, etc.
3
、
Quick interface
On the left is based on the normal operating procedures of the menu, more convenient and familiar software attendance processes; the right side is common functions as an icon is placed in the main interface, convenient for system administrators to quickly operate.
3.3 System Setting
System setting include database setting, base parameter, attendance parameter; dept. setting, status setting, leave class, work code, holiday list; shift setting, access setting, user setting, modify password, lock manager ect.
3.3.1 Database Setting
Anviz Biometric management software, with default Access database, SQL Server data supported.
Anviz Technology Co., Ltd.
Anviz CrossChex Standard Software V1.0
Can be optional changed by the admin.
Access Database
:
Display database file storage path, press “ ”, choose other mdb data files.
SQL Server Database
:
(Installed MS-SQL Server software is a plus before SQL Server operation)
Server IP: Please entering the Server IP address of MS-SQL Server database.
User name: Setting when MS-SQL Server database installation.
Password: Setting when MS-SQL Server database installation.
Database name: Default as “Att2012”
Anviz Technology Co., Ltd.
Anviz CrossChex Standard Software V1.0
Press “Apply”. Anviz Biometric management software will generate related database in MS-SQL Server database.
3.3.2 Base Parameter
Base Parameter include 4 parts, “Employee field content editing”, “Custom field setting”,
“Communication parameters” and “Downloading record”
Employee Field content editing
:
Add in “Position”, “Education”, “Specially”, “nationality” and “political status”
Field Value
:
Entering the content.
Example, when you selected “political status” and entered in “League member”, press “Add Field
Value”.Then “League member” will be shown in “political status” field.
Del Field Value: Select the field in the list, and press “Del Field Value”. Then the selected field will be deleted.
Clear Field Value: Click “Clear Field Value”, all fields in the list will be cleared.
Anviz Technology Co., Ltd.
Anviz CrossChex Standard Software V1.0
Custom field setting:
Convenient admin to add in fields with more employee information. The field can be effected in
“Employee Management” – “Add employee”.
New Field: Add in new field name.
Press “Add field” to add the field into the page “Employment Management”- “Add Employee”
For example, entering the field “Marital status” into the list. Then it will be shown in the “Employee
Management”-“Add Employee”.
Communication parameters
:
Anviz Technology Co., Ltd.
Anviz CrossChex Standard Software V1.0
Set up communication between ANVIZ biometric management software and device parameters.
Serial communication timeout: When using a serial connection and communication hardware, software and hardware to allow communication delay, when the software and hardware devices are not creating a connection, the communication system within the allowed time delay will prompt communications failure, or the device is not connected. Timeout range that can be set: 1-5 seconds, Default: 3 seconds
Network Communication delay time:
Setting software/hardware delay time when communicate with devices by network. Once connection failed in setting delay time, system will notice the failure or not of connection. Setting range: 1-10 sec, default, 10 sec.
RS485 Communication delay time:
Setting software/hardware delay time when communicate with devices by RS485. Once connection failed in setting delay time, system will notice the failure or not of connection. Setting range: 200-500
Millisecond, default, 300 Millisecond.
IP Port:
The port IP for software/hardware data transmission when communicate with network and hard device.
(Remark: The port IP must be uniformed on software and hardware network communication port.
Or the communication will be failed. To setting the port IP, please refer to the instruction for the hardware setting.)
Press “Apply”. The setting will be kept and applied.
Timing Downloading Record
:
Anviz biometric management software supports five times Point Timing download attendance records,
Anviz Technology Co., Ltd.
Anviz CrossChex Standard Software V1.0 and can be exported to a text file. Facilitate customer attendance record will be imported into ERP and other third-party software.
Downloading record:
5 downloading time supported. Auto-download attendance record.
Remark: Anviz biometric management software cannot be closed when downloading working.
Once downloaded automatically exported to a text file: for the convenience of customers attendance records into the ERP and other third-party software, select «After the download is completed automatically exported to a text file,» the timing of the text and attendance software, save to the designated storage path, and you can select the software provided under content, customers can compile the required attendance record text file based data format required third-party software.
Press “Apply”. The setting will be kept and applied.
Automatically backup the database when exiting the program.
Effected this function, when exiting the program, the database will be backup into the folder “Backup” under installation directory.
3.3.3 Attendance Parameter
Attendance Parameter includes two parts of “Stat. Rule”and “Stat. Items”
Anviz Technology Co., Ltd.
Anviz CrossChex Standard Software V1.0
Stat. Rule
:
Setup the role of attendance statistics
A work day count as
: statistical project which calculate work hours of constant value. The Parameter range
:
60-1200 min
( default
480 min
)
The shortest working time
:
In the statistical report, the minimum effective time intervals for constantly punch card records , lower than this time interval will be ignored for participating statistics.
Parameter range
:
1-480 min
( default 10 min
)
The longest working time
:
In the statistical report, the maximum effective time intervals for constantly punch card records , longer than this time interval will be ignored for participating statistics.
Parameter range
:
60-1440 min
( default 720 min
)
Not clock in count as late
:
Forget work attendance, attendance recognized by the system for the day how many minutes late, as the punishment for forget to go to work
Parameter Range.
:
1-480 min
( default 60 min
)
Not clock out as early: No attendance record for being late to work: forget work attendance, identified by the system for the day and leave early attendance how many minutes, as a sign of punishment for forget work
Parameter range
:
1-480 min
( default 60 min
)
On duty X minutes earlier clock-in count as overtime: A statistics way for overtime, will be recorded as record in this time range before the normal clock-in time
Parameter Range
:
0-480 min
( default 30 min
)
Anviz Technology Co., Ltd.
Anviz CrossChex Standard Software V1.0
Deduct the on duty X minutes earlier
:
Deduct the above recorded time as the over work time.
Off duty X minutes later clock-out count as overtime: A statistics way for overtime, will be recorded as record in this time range before the normal clock-out time
Parameter range
:
0-480 min
( default 30 min
)
Deduct the off duty X minutes later
:
Deduct the above recorded time as the over work time.
Weekend
:
setup the fixed weekend, default is Saturday and Sunday.
Shift over two days
:
When the time over
00:00 AM
, choose this record for the 1 st
day or 2 nd
day.
Overtime calculation:
Setup the overtime rate for normal, weekend and festival
Hit
“
Apply
”
and all the setup would be updated into the system.
Stat. Items
:
In this item we can setup”normal, late, early, business leave, leave, absence, stay away, overtime, free overtime ( overtime means the staff not registered in the system), can setup by the unit of day, hour, and minute.
Definition of Round-off control part
:
Round down: give up the last digit after the minimum unit, for example, if the minimum unit is 1 day, so whatever it’s 1.1 day or 1.9 days, would be calculated as 1 day.
Round up
:
Round up one digit after the minimum unit, for example, if the minimum unit is 1 day, so whatever it’s 1.1 day or 1.9 days, would be calculated as 2 day.
Round off
:
Give up when the last digit lower than 0.5, otherwise round up.
Round at total
:
when you choose it, all the data would be calculated firstly, and then would be processed based on your setup rule.
Accumulate by times
:
only accumulate times, also show on report.
Notice
:
to ensure the accuracy.
Indicating symbol
:
use for marked the attendance record.
(
2 bytes, 1 Chinese characters
)
Hit
“
Apply
”
and all the setup would be updated into the system.
Anviz Technology Co., Ltd.
Anviz CrossChex Standard Software V1.0
3.3.4 Dept. Setting
Setup company name, department and organization structure.
Add department
:
Select a department need to add sub-dept. Hit add, and input the department name at the blank, and choose save.
Notice: if you need do any operation for the new added department, please firstly go to “Admin setup”to add the operation rights( choose the department at “operational Dept.
Modify Department
:
Choose the department, hit: “Modify”, input the name in the blank and press save.
Delete department
:
Choose the department
, hit
【
DEL
】
Press confirm at the blow window.
Notice
:
1
、
The department name could not be repeated.
2
、
if there has staff at deleted dept., the would be added to headquarter automatically.
Anviz Technology Co., Ltd.
Anviz CrossChex Standard Software V1.0
3.3.5 Status Setting
The fingerprint devices provided by Anviz Global support 16 attendance status, and all the client could customized setup the attendance status.
Status value
:
value for
16 different modes
。
Symbol
:
this symbol is matching with hardware setup, not suggest to modify.
Status description
:
Customers can describe the required attendance status, write in here. This description can be synchronized to the device (different models have different character bits wide limit)
Choose the above device and hit: “upload to the selected terminal” to update the devices.
Notice
:
Attendance must be completed in accordance with the state of the state number order.
3.3.6 Leave class
Setup the leave type, use different colors, like annual leave, marriage leave
Anviz Technology Co., Ltd.
Anviz CrossChex Standard Software V1.0
Leave class information
:
Name
:
input name, like annual leave
Color
:
Choose one color
Stat. Rule
:
Setup the time unit unit
:
Day, hour, minutes
Minimum
:
support minimum or 0.5 hour and 1 minutes.
Round-off control
:
refer to round-off control in the Attendance Parameter.
Indicating symbol
:
the symbol would be used to mark leave in the report.
Count as leave
:
Count such data into the leave field in the report
Press
【
ADD
】 to add the name and color into leave class list.
Choose item in
“
Leave class list
”
hit
【
Modify
】
to save changes
;
Choose item in
“
Leave class list
”
hit
【
DEL
】
to Delete the item.
3.3.7 Work Code
Anviz global provide fingerprint devices which supports multiple types of settings. An employee may work in a different identity attendance, for easy to calculate attendance statistics with appropriate time and payroll.
Click page [Leave class], following shows
Anviz Technology Co., Ltd.
Anviz CrossChex Standard Software V1.0
Work code information
:
Number
:
input number
。 e.g.
:
9527
Name
:
input name
。 e.g.
: financial
,
IT, etc.
Stat. rule
:
unit
:
Day, hour, minutes
Minimum
:
support minimum or 0.5 hour and 1 minutes.
Round-off control
:
refer to round-off control in the Attendance Parameter.
Press
【
ADD
】 to add the name and color into work code list.
Choose item in
“ work code list
”
hit
【
Modify
】
to save changes
;
Choose item in
“ work code list
”
hit
【
DEL
】
to Delete the item.
3.3.8 Holiday List
Setup holiday list and will automatically shown on report
Holiday information
Anviz Technology Co., Ltd.
Anviz CrossChex Standard Software V1.0
Name
:
input name
Start date
:
choose start date dates
:
add dates
Press
【
ADD
】 to add the name and color into holiday list.
Choose item in
“ holiday list
”
hit
【
Modify
】
to save changes
;
Choose item in
“ holiday list
”
hit
【
DEL
】
to Delete the item.
3.3.9 Shift settings
The key function, and realize shift setting by three steps.
Time table setting
:
Setup working time period, means the time from start work till off work, e.g. Working time
:
08:00-12:00AM and 13:00-17:00PM
, then we have two time table, if you need add a shift, should have these two time table, and refer to below two parts for details. Here we just know something about relationship with shift and time table.
[Time table name] category of the shift
, e.g.: Day work
[on duty time] start working time
, e.g.: 09:00
[Off duty time] off work time
, e.g.: 17:00
[Begin Clock-In time] effect record after this time. e.g
: 07:00
[End-clock in time]
ineffective record after this time e.g.: 13:00
Anviz Technology Co., Ltd.
Anviz CrossChex Standard Software V1.0
[Begin Clock-Out time] effective work out record after this time
e.g.: 16:00
[End Clock-Out time] ineffective work out record after this time e.g.
: 02:00
[Late error allowance] e.g.
:
5
; then the record before 9:05 would not be treated as late.
[Early errof allowance] e.g.
:
5
; record after 16:55 would not be treated as early
[Count As Work Day] statistics unit for the report. e.g.
:
1
;
[Count As Work Time] e.g.
:
480
(
Work time is auto setup by time table
)
choose[Must C-In] and [Must C-Out]
, hit
【
Save
】
button to add the table
。
Notice
:
each item should be setup and empty item is not permitted. On duty time and Off duty time could cross date, but could not have a different over 24 hours.
[Count As Workingday] and [Count As Work Time] should be used on work leave, over work, etc.
Should be setup accurately.
If you choose [must C-In] and [Must C-Out] will effect the result
, shift, and he is not clock-in and applied for leave, then will be treated as absence, if not choose these two item, then if this staff only clock out and no clock in, will still be treated as normal.
[Free time]
: match the clock zone in system, only calculate time, not mark early or late.
[OT-time]
: marked whether this item used as over work.
Modify timetable
:
Choose name, input new content, press
【
Modify
】 to change.
Delete timetable
:
Choose the timetable
,
Press
【
DEL
】
and confirm at following window to delete.
,
Note: Begin Clock Time and End Clock Time makes the valid time range, the record not in the time period deemed invalid records; check-out time is set as well; please set according to your own situation.
Shift setting
:
Relationship between shift and timetable: 2 steps for shift
, firstly need time table, and then set shift, can choose multi-timetable, but less than 4.
Anviz Technology Co., Ltd.
Anviz CrossChex Standard Software V1.0
Shift name: input name, e.g.: normal shift circle
:
setup range
:
1-100
, default value: 1
Circle unit
:
day
、 week
、 month
;
Add timetable
:
hit add timetable: choose timetable name and date to confirm.
Go back to [Shift setting]. Hit
【
Add
】 to add
Delete timetable
:
choose the timetable
, hit
【
Del timetable
】 to delete.
Clear timetable
:
Clear all timetable in this shift.
Modify shift
:
Choose the shift, and input new name, press
【
Modify
】 to change
Delete shift
:
Anviz Technology Co., Ltd.
Anviz CrossChex Standard Software V1.0
Choose the shift
, hit
【
DEL
】
and confirm to delete
As Default Class
:
Choose this item and the shift will add to new staff automatically.
Employee Scheduling
:
Arrange the shift to according staff, support one or multi staff, and also support to temporally staff
Through”Employee No.
” and
“
Employee name
”
could find the staff and also could find by the list of department at the left side, all the info will show at right blank of this list.
Notice
:
”Left staff could not be chosen.
Use mouse or
shift or ctrl
key to choose multi staff, hit
【 select all
】 【 select none
】 。
Hit
【
Arrange
】 to start arrange shift and go time time range
Anviz Technology Co., Ltd.
Anviz CrossChex Standard Software V1.0
Not Scheduled
:
Suit the company with random attendance
。
If choose this, there will be not late and early status, attendance time will be the first record out deduct first record in, and constantly. If choose this, just press,
【 save
】 to finish arrange
。
Normal Scheduling
:
Suit the company with confirmed work time
。
Choose Normal Scheduling
” shift list
” “ beginning
” “ ending
, hit
【 add
】 and will list at
“ the current shift schedule
”
Then hit
【 save
】 to finish.
Then the staff must follow this timetable and shift, the report will also follow this record.
Anviz Technology Co., Ltd.
Anviz CrossChex Standard Software V1.0
Intelligent scheduling
:
when the staff need different timetable in one time period, then use this intelligent scheduling function to make the setup simple
Choose timetables from
“ timetable name
”
, hit
【 add
】 the timetable will show at
“
The current timetable
” then to realize the current record.
Temporary
:
when a staff need to add a temporary, then hit “add temporary”
Hit
【 yes
】
,then hit
【
Add
】 to open [Add a temporary timetable
Anviz Technology Co., Ltd.
Anviz CrossChex Standard Software V1.0
Choose
“
Select timetable to add
”
and confirm
“
select the dates
”
Press
【
OK
】
and press
【
Save
】 to finish.
Press
【
Cancel
】 to delete.
Press
【
Clear
】 to clear all timetable chosen.
Del Temporary
:
Delete Temporary list.
3.3.10 Access Setting
Group management for door open timetable support access control function support devices
(
VF30
、
VP30
、
TC550
、
OC500 etc.
)
Anviz Technology Co., Ltd.
Anviz CrossChex Standard Software V1.0
Anviz crosschex software support 32 access control timetable and 16 access control group, one group support 4 timetables, the target is to setup access timetable to staff, and connect all timetable to a access rule, and give rights to the according staff.
Steps to setup
:
1
、
Setup time zone list
:
In the list, show first timetable
:
1-Day
,
The time list show Monday to Friday
,
7
:
00—19
:
00
, in this period, the staff could accessed. You can change and set the according 32 time zone and Apply to the system.
2
、
Setup access list
:
In the list has
“
0-NC group
” and
“
1-NO group
” could not be modified.
Anviz Technology Co., Ltd.
Anviz CrossChex Standard Software V1.0
0-NC group
:
all the staff in this group could not be accessed anytime.
1-NO group
:
all the staff in this group could be accessed anytime.
The Administrator could define the other groups
“
Group information
”
Group name
:
input name
Time zone
:
Choose according number
Press
【
Apply
】 to realize the update.
3
、
Employee list
Choose the staff at employee list, hit
“
—>
”
to move to right part or press
“
—>>
” move all staff to
“ employee in group
”
And also realize staff by
“
<—
” or
“
<<—
”
Hit
【
Update access setting to device
】 upload the group to the device.
3.3.11 User setting
Allocate rights for administrator and users
Function module for system authorized management
Anviz Technology Co., Ltd.
Anviz CrossChex Standard Software V1.0
Two parts in User management:
User group list
:
could device multi groups, realize multi level management.
There are two default group in user management
,
”
Admin”group and “User”group
,
Admin has the operation right for the system. And user could be setup by request. Suggest to have one administrator to operate all rights.
Press Add
】
First input name, and hit add
, 。
Press
【
Apply
】 to add according group. This is easily for clients to realize multi-level management.
User list
: : user list
” department list
” “ unit list , this means the rights of administrator could diversified into department management and unit management
( can only operate the staff in this terminal unit
)
Anviz Technology Co., Ltd.
Anviz CrossChex Standard Software V1.0
After create User group
, choose
( admin
、 user
、„„)
in the group list
, and add at
“ user list
” to create an account
, and choose in
“ department list
” to choose department and finally choose terminl in
“ unit list
”
New account default password
:
888888
;
If a password is forgotten, then could let a administrator to hit
【 changed the default password
(
888888
)
to reset the password to
:
888888
。
Press
【
Apply
】 to realize the updated of the system.
3.3.12 Modify password
Modify the password, input old password and two times new password, hit “apply”to setup.
Notice
:
If not input in the new password, then the system would be no password.
3.3.13 Lock Manager
Hit this button, the screen would be locked and need user name and password to restart.
3.3.14 Log out
Hit this button, the screen would be locked and need user name and password to restart.
Anviz Technology Co., Ltd.
Anviz CrossChex Standard Software V1.0
3.3.15 Exit system
Close the system safely.
3.4 Employee Management
Employee management includes employee information for the add, edit, import, export and so on the operation.
In the upper left corner of the employee management menu, you can search employee by clicking
【 search employee
】 button through entering employee number and employee name . And you can click the other menus to modify, delete, upload, download and other operations for the employee you selected.
Anviz Technology Co., Ltd.
Anviz CrossChex Standard Software V1.0
3.4.1 Add Employee
Click menu
【
Add employee
】
,pops up
“ add / modify employee info
”
form
:
1
、
You can enter Employee information According to the field of this information form, the red field is a required field
2
、
Employee ID support 8 digit number,Employee No. support 20 digit number.
3
、
The employee ID and the employee No is the unique identification of an employee, they,cannot repeat and the first number cannot be 0!
4
、
Application of the employee ID and the employee No is mainly convenient the data format which client exported to be flexible meet the third-party software import.
5
、
Group number: refers to the access control group. We can set the employees which access group they belong to.
6
、
User type: you can choose normal user or administrator.
7
、
Identification: Anviz intelligent attendance device supports multiple identification verification. Employees can choose which identification verification to use in hardware
8
、
Software support employee to add photo from the local computer, or directly through the camera to take photos.
9
、
Select the photos on the local computer. Click
】
Edit picture window:
Anviz Technology Co., Ltd.
Anviz CrossChex Standard Software V1.0
Click the button [view], «pops up open dialog box to Select employee photo, click [open] button to open,Use the mouse to select the area as a photo also can use your mouse to drag the picture to their new size:
Zoom in out:
After Set is finished, firstly click the [cut down] button and then click [save] button to save the
Anviz Technology Co., Ltd.
Anviz CrossChex Standard Software V1.0 employee photo and return to the [add / modify info] window.
2, Take photos.
Click
【 】
button to open[take photo] window, as the picture shows below
:
Adjust the image, Click [take pic] button to take photos for employees. The photo took by you will be displayed under the window, use the mouse to select the area for cut down click [cut down]button to cut down photo. The same photo process method with the previous one.
Anviz Technology Co., Ltd.
Anviz CrossChex Standard Software V1.0
Click
【 】
button to delete employee photo.
Attendance statistics related: new employee attendance rules set up directly.
Default work schedule of the new employee: set the default work schedule of the new employee
Custom fields: please refer to the basic parameters of chapter 1.3.2.In order to enrich the information .
3.4.2
Modify employee
Modify employee is to modify employee information in the data sheet.
Select the record that need to modify from the list of employees information, click the button
[modify employee] or simply double-click the employee records can open [add / modify employee info] window to modify employee information .
Modifiy is finished click [save] button to save. Specific operation may refer to add employee step.
3.4.3
Delete employee
Delete employee is to delete employee information form the data sheet from the list of employees you can select the record that need to delete by using [shift] or [ctrl] button. click [delete employee] button pops up confirmation dialog box:.
Click [yes] button to confirm and start to delete the selected information; click [no] button to cancel this operation.
Choose «delete employees from the selected device» to delete the employees in the database at the same time will also delete employee information that saved on the hardware equipment .
Note: when the employee information was deleted from the hardware,it will be deleted completely. Please select this for necessary action.
3.4.4
Export employees
Export selected employee information from the list of employees, in the format of excel export the
Anviz Technology Co., Ltd.
Anviz CrossChex Standard Software V1.0 staff Information form.
Click «export employee» button the following dialog box pops up:
Select the path to export excel file.
After operation is finished click «close» to complete the export.
3.4.5
Import employee
Through the prescribed format of EXCEL To import the employee information
Click «import employee» button, pops up EXCEL file path select dialog box
:
Anviz Technology Co., Ltd.
Anviz CrossChex Standard Software V1.0 select the Excel file you need,click «open» button the following dialog box pops up:
Click «yes» to confirm «no» to give up. After Import is finished click «close» to complete the import.
Anviz Technology Co., Ltd.
Anviz CrossChex Standard Software V1.0
3.4.6 Transfer Dept
When HR adjustment come, Need to replace the employee department,
“ transfer dept
” function: can transfer employees between different departments from the list of employees you can select the employee who need to transfer department by using shift or ctrl button. click [transfer dept] button open the [employee transfer] window as the picture shows below:
Select the department click [ok] button to save the information; click [cancel] button to give up this operation
3.4.7
Employee Separation
Employee separation this operation will put employee to the separating employee column not to delete information directly and the information will be Saved and backup for HR department select the employee who is going to separate from the list of employees, click [employee separation], pops up the following window:
Anviz Technology Co., Ltd.
Anviz CrossChex Standard Software V1.0
Select
“ delete employees from the selected device
”
the employee information will be deleted from the device. Also put this employee to the separating employee
The employee who is in the
“ separating employee
”
, can return to the company by transfer department.
3.4.8
Set Privilege
Set privilege means to set storage privileges for employees on the device.
From the list of employees, you can select the record that need to set privilege by using [Shift] or [Ctrl] button click [set privilege] button open the [set privilege] window :
Tick what you need, click [OK] button to save the privilege.
Look at the staff list [Unit No] and you can see selected employee machine number has been updated to the selected number.
Anviz Technology Co., Ltd.
Anviz CrossChex Standard Software V1.0
3.4.9
Copy Privilege
Copy privilege is to copy the storage privilege and administrative privileges of employees, and then copy to the other employees, they will be unified set with storage and management authority.
From the list of employees you can select the record that need to copy privilege by using [Shift] or
[Ctrl] button click [copy privilege] button to open the [copy function and privilege] window:
Input the number of who is going to be copied If you don’t know the privilege of him, click
【 】 button to open the [set privilege] window to view his settings:
At this moment, is not able to modify privilege. after viewing the employee’s settings Click [Cancel] button return to the [copy function and privilege] window, click [OK] button pops up the confirmation dialog box
:
Click [yes] button to confirm and start copying the employee privilege click [cancelled] button to cancel this operation.
After copy is finished pops up prompt information window
Anviz Technology Co., Ltd.
Anviz CrossChex Standard Software V1.0
Click [OK] button to confirm the completion
3.4.10
Download Employee
Download employee refers to download the employee information and mould information which was saved in the attendance machine to local computer for backup
Click [download employee] button pops up confirmation dialog box:
While downloading employee firstly backup employees data then backup Fingerprint information . after download is finished, you can see all the employee information in the list of employees. Also you can know the registration information in the device, Such as
“ password
” “ fingerprint
”
etc.
Anviz Technology Co., Ltd.
Anviz CrossChex Standard Software V1.0
3.4.11
Upload employee
Upload employee
:
refers to through software upload the employee information that was saved in the data sheet to attendance machine
From the list of employees you can select the record that need to upload fingerprint to attendance machine by using [shift] button and [ctrl] button. click [upload employee] button pops up confirmation window on the process of uploading the status bar shows uploading employee information. After the progress bar shows 100% the upload is finished, the status bar prompt upload employee is finished «
.
3.4.12
Download template
Download template refers to download the employee Fingerprint information that was saved in the attendance machine to local computer for backup. You need to select the employee who is going to download template from the list of employees, click [download template] button pops up confirmation dialog box:
Anviz Technology Co., Ltd.
Anviz CrossChex Standard Software V1.0
After download template is finished, you can see the column of download template fill color. That means the fingerprint has been downloaded.
3.4.13
Upload template
Upload template mainly refers to upload the fingerprint information that was saved in the database to corresponding Attendance device, this function mainly used for sharing employee information between two devices. or by using fingerprint collection device U-BIO to collect fingerprint template, then upload to the device you are going to use.. select the employee who is going to upload template from the list of employees. click [upload template] button:
Anviz Technology Co., Ltd.
Anviz CrossChex Standard Software V1.0 when upload template is finished, the employee can do fingerprint identification with the device that uploaded the fingerprint
3.4.14
Delete from unit
Delete from unit refers to delete employee information in the attendance machine through software.
From the list of employees you can select the record that need to delete by using [Shift] or [Ctrl] button click [delete from unit] button The following dialog box pops up
:
To delete the employee information in attendance machine.
3.5 Unit Management
3.5.1 Add Unit
Click
【
Add Unit
】 button, as the following window
:
Anviz Technology Co., Ltd.
Anviz CrossChex Standard Software V1.0
CrossChex software it has developed its own device discovery protocol defined between the softeware and the device, it can be remove the trouble from the device deployment configuration,
, realize A key installation for device configuration. Through the right side of the device can be found all LAN support discovery protocol.
Search: You can re-search the contents of all LAN device discovery protocol support.
Settings: Select from the search to the device, click on the «Settings» can be configured on the IP address of the device and other information.
Add: filling device information found in the form to the left, click «Save» to save the device to the software.
Terminal ID: users increased attendance custom number
Machine Serial number : PC management software is the unique identifier to identify the machine, so please pay special attention to the uniqueness of the set when the networking. Setting range: 1-99999999;
Machine Name: Alias attendance from the users themselves to a different location, easy to distinguish
;
Group: used to manage the terminal machine
;
Attendance status: divide into three kinds of situations : the actual state, clock in, clock out.
Attendance is based on the actual state of the state machine on the subject terminal
;
Attendance status set at work or off duty attendance is not considered state of the terminal machine, attendance management program to add terminal prevail.
Communication Mode
:
Anviz Technology Co., Ltd.
Anviz CrossChex Standard Software V1.0
USB
:
Using a USB data cable connection
;
Network: Select a network connection, the input terminal of the machine’s IP address. Please be modified according to the actual situation (for network module with attendance)
;
Network (Client): device-side clients need to select the network mode, and set the server IP
。
COM: Serial communication port
RS485
:
By default, COM1 port connection.
After editing is complete, click [Save] button to save the terminal information.
3.5.2
Modify Unit
Select Modify terminal (tick ‘√’ in the corresponding ‘□’ in), click [Modify terminal] button to open the
[Terminal Management] interface:
Modified according to the actual situation of the terminal information, and click [OK (O)] button to confirm the changes; click [Cancel] button to discard the changes.
Tip: When the terminal number or machine number and the existing terminal will be provided with the same message box pops up:
Click [OK] button to reset the machine ID or machine number.
Anviz Technology Co., Ltd.
Anviz CrossChex Standard Software V1.0
3.5.3 Delete Unit
Select the terminal to be deleted (tick the corresponding ‘□’ in ‘√’), click Delete Terminal] button, a confirmation dialog box:
Click [OK] button to confirm to delete the selected terminal; Click [Cancel] button to cancel the deletion.
3.5.4 Synchronize Time
Synchronization time attendance machine connection time on the computer is synchronized with that.
Click [synchronize time] button shows confirmation dialog box: time.
Click [OK] button to confirm the time synchronization; Click [Cancel] button to cancel synchronization
3.5.5 Unit Parameter
Click
【
Unit Parameter
】 button open the
【
Unit Device Parameter Settings
】 window
:
Anviz Technology Co., Ltd.
Anviz CrossChex Standard Software V1.0
[Sleep Time]: Attendance from unattended to go to sleep interval, 0 means not hibernate, maximum sleep time was 250 minutes;
[Volume]: Attendance voice prompt volume level, 0 represents the mute, the maximum volume of 5
;
[Date Display Format]: Attendance in the date format, there are about several formats: yy-mm-dd
( year-month-day
) mm/dd/yy month -day-year
) dd/mm/yy
( day-month-year
)
[Time Display Format]: Attendance, the time display format minute 24-hour and 12-hour two kinds
;
[Alignment accuracy]: Sub-normal, good, accurate three levels, the default is good. The higher accuracy of fingerprint requirements are also higher.
[Record alarm threshold]: When the attendance record set record number is greater than the alarm threshold value, the machine will prompt the user to make the appropriate alarm processing. 0 means no alarm, you can set the maximum number of records in 5000.
[Attendance repeat interval]: The interval between the same user twice attendance, 0 indicates no interval, the maximum interval is 250 minutes. Attendance during the interval times, the system records only one record.
Anviz Technology Co., Ltd.
Anviz CrossChex Standard Software V1.0
[Workcode prompts]: Work code function is enabled and disabled.
[Intelligent fingerprint template update]
:
Fingerprint comparison on the process, it can automatically replaces the previous low-quality storage of fingerprint data for the new high-quality fingerprint data acquisition, thereby maintaining the latest fingerprint data, to avoid duplication of authentication of users.
The default is disabled.
[Bell function]: It is disabled by default, according to the actual needs of their own settings (This feature applies to support a bell function of the model).
[Wiegand Mode]: There are two modes: Encrypted Wiegand and Wiegand 26. Default Wiegand 26 (for supported Wiegand outputs of attendance).
[Fixed Wiegand code]: If you upload the same fingerprint ID number to two different machines than by WG signal output after the number will be different. Wiegand code set at this time if these two machines of the same words, WG signal output on the same number.
[Relay Delay]: Delay means connected with the lock to open the door after attendance. The maximum delay of 15 seconds (for support electric lock signal output attendance).
After setting, click [OK (O)] button to save the settings.
Anviz Technology Co., Ltd.
Anviz CrossChex Standard Software V1.0
3.5.6 Ring Settings
Bell used to set the time, this feature is available for support functions attendance bell.
Click [Setup] button to open the bell rang the bell time [set] window:
Set the desired time bell rang the bell at the time of the entry box. Click [+ Increases (A)] button to add time to time list. When the time list for invalid bell time, you can delete the invalid time. Select delete bell time, click — [Delete (D)] button to bring up the dialog box to confirm the deletion:
Click [OK ] button to delete the selected bell time; Click [Cancel] button to cancel the deletion
3.5.7 Download New Records
New attendance record is to
read the new record in attendance after the last collection record read out, save it to your computer.
Click [Download new record] button message box pops up:
Anviz Technology Co., Ltd.
Anviz CrossChex Standard Software V1.0
Click on [OK] button to start reading the record; click [Cancel] button to abandon the operation.
3.5.8 Download All Records
Download all attendance records is to save all the attendance records to the computer table.
Click [Download all records] button message box pops up:
Click on [OK] button to start reading the record; click [Cancel] button to abandon the operation.
3.5.9 Backup Employee
Backup employee refers to staff information and fingerprint information stored in attendance download and save to your local computer for backup.
Click [Backup Employee] button message box pops up:
Click on [OK] button to confirm and start downloading personnel data, click [Cancel] button to abandon the operation.
Anviz Technology Co., Ltd.
Anviz CrossChex Standard Software V1.0
3.5.10 Resume Employee
Resume Employee refers to the use of all personnel software registration information and fingerprint information uploaded to the attendance of local computer database.
Click [Resume Employee] button message box pops up:
Click [Yes] button to confirm and start the upload personnel information; Click [No] button to abandon the operation.
3.5.11 Activate Realtime
Real-time monitoring means that the function within open time on attendance records to verify information can be displayed in real time in the recording list.
3.5.12
U Disk Function
U Disk management program
the main data processing U disk, databases, and between management.
Read data from the U disk, it must ensure that the read data exists in the U disk G: 00000001 folder.
[G] represents the letter of the name of U disk in the computer is displayed; [00000001] represents attendance machine number.
Reading records from U disk: First select U disk drive letter where the refresh, click [read records from
U disk], the system automatically read U disk attendance records imported into a local database
Att2003.mdb of Checking out table. .
Tip: Before you read attendance record from the U disk, must guarantee the existence of personnel information database.
Click [Read from U disk personnel information], the personnel data into the local database
Att2003.mdb of Userinfo table, the fingerprint template into the Template file directory folder under the program: from U disk read personnel information .
Anviz Technology Co., Ltd.
Anviz CrossChex Standard Software V1.0
Tip: If the record already exists in the local database, you are prompted to «duplicate records.»
Backup personnel information to the U disk: the presence in the database of employee information and fingerprint template, backup to U disk.
Anviz Technology Co., Ltd.
Anviz CrossChex Standard Software V1.0
3.6 Record Management
The main check on attendance records and backup.
3.6.1 Record Search
Records Search is the records that meet the search criteria is retrieved.
Drop-down button to set the record you want to check the start date and end date, you can click the input box after selecting date
After setting the record date Click [Record Search] button, verify records that meet the criteria will appear in the record list:
Anviz Technology Co., Ltd.
Anviz CrossChex Standard Software V1.0
3.6.2
Export Record
Make the attendance record for backup.
Set export the contents of the record export format:
Export Formats
: There are three formats optional: text file (.txt), CSV file (.csv), Excel file (.xls).
Export field
:
Users can choose their own needs important fields to export, or select all.
T ime Format
:
There are four kinds of time formats to choose from.
Staffer No. length
:
Length is set in the exported file in staff numbers, the default is 4.
Symbol interval
:
Delimiter between fields and field.
Space symbol length
:
Space symbol digits.
Set up an export conditions, click [Export record] button, open the «Save As» dialog. Choose to save the file, enter the file name, as shown below:
Anviz Technology Co., Ltd.
Anviz CrossChex Standard Software V1.0
Click [Save (S)] button to save the file, you will be prompted to save the completed information system:
3.7 Attendance Management
3.7.1 Statistical Analysis
Click [Statistical Analysis] in [Attendance Management] menu, the following window pops up:
Anviz Technology Co., Ltd.
Anviz CrossChex Standard Software V1.0
Click
【
Yes
】 button to continue the operation; Click
【
No
】 button to discontinue the operation;
3.7.2 Search Results
On the basis of saving the result of Statistical Analysis or the above operation is invalid.
Click [Search Results] in [Attendance Management] menu, the following window pops up:
Click
【
Yes
】 button to continue the operation; Click
【
No
】 button to discontinue the operation;
Anviz Technology Co., Ltd.
Anviz CrossChex Standard Software V1.0
3.7.3 Record Management
Click [Record Management], the following window pops up:
Select the appropriate conditions are shown on the right.
3.7.3 Scheduling Record Analysis
Click [Scheduling Record Analysis], the following window pops up:
Anviz Technology Co., Ltd.
Anviz CrossChex Standard Software V1.0
Select the appropriate conditions are shown on the right.
3.7.4 Analysis of Away/Leave
Click [
Analysis of Away/Leave
], the following window pops up:
Select the appropriate conditions are shown on the right.
Anviz Technology Co., Ltd.
Anviz CrossChex Standard Software V1.0
3.7.5 Attendance Statistics
Click [Attendance Statistics] menu, the following window pops up:
Select the appropriate conditions are shown on the right.
3.7.6 Report Preview
Click [Report Preview] menu, the following window pops up:
Select the report you need accordingly.
Anviz Technology Co., Ltd.
Anviz CrossChex Standard Software V1.0
3.8 Data Management
3.8.1 Away On Business/Leave
Click [Away On Business/Leave] in [Data Management] menu, the following window pops up:
Select Department, Employee, Leave Class, Reason and Time accordingly to complete setting.
3.8.2 Append Record
Click [Append Record] in [Data Management] menu, the following window pops up:
3.8.3 Group Late/Early
Click [Group Late/Early] in [Data Management] menu, the following window pops up:
Anviz Technology Co., Ltd.
Anviz CrossChex Standard Software V1.0
Select the appropriate condition, and click [OK].
3.8.4 Export Record
Click [Export Record] in [Data Management] menu, the following window pops up:
Choose export conditions, click export, select the path, the following window pops up, click “Save :
Anviz Technology Co., Ltd.
Anviz CrossChex Standard Software V1.0
3.8.5 Import Record
Click [Import Record] in [Data Management] menu, the following window pops up:
Select the relative import attendance record file according to the prompts, click [Open] button to start
Anviz Technology Co., Ltd.
Anviz CrossChex Standard Software V1.0 importing.
Note:’ Attendance record file format ‘must be original record (*.txt).
Number+ Tab key +Attendance Time (time format yyyy-MM-dd HH:mm:ss)+Tab key+ Device Number +
Tab key+ Attendance Status + Tab key+ Work Code + Tab key+ Verification Mode
3.8.6 Export Employee
Click [Export Employee] in [Data Management] menu, the following window pops up:
Select “Export EXCEL file” export path.
Anviz Technology Co., Ltd.
Anviz CrossChex Standard Software V1.0
After a successful export, click
【
Close
】 to complete the export.
3.8.7 Import Employee
To import employee information to the system according to EXCEL prescribed format.
The import employee information EXCEL format is in the software installation directory folder
“
ACMode”
.
Click [Import Employee] in [Data Management] menu, the following window pops up:
Anviz Technology Co., Ltd.
Anviz CrossChex Standard Software V1.0
Select the EXCEL file you want to import, click [Open] to popup a dialogue box:
Click
【
Yes
】 to confirm,
【
No
】
to quite. After a successful import, click
【
Close
】 to complete the export.
3.8.8 Backup Database
For ensuring the safety of data and recoverability, we advise to back up the database regularly. Click
[Backup Database] in [Data Management] menu, then select the relative route to back up the database, click [Save]:
Anviz Technology Co., Ltd.
Anviz CrossChex Standard Software V1.0
3.8.9 Restore Database
Click [
Restore Database
] in [Data Management] menu, the following window pops up:
Select the path to the database you want to restore, click [Open], the following window pops up:
Anviz Technology Co., Ltd.
Anviz CrossChex Standard Software V1.0
Click
【
Confirm
】 to restart the software.
3.8.10 Clear Obsolete Date
Click [
Clear Obsolete Date
] in [Data Management] menu, the following window pops up:
Select the deadline of relative Obsolete Date, click
【
Clear
】 to complete the operation.
3.8.11 Operation Log
Click [
Operation Log
] in [Data Management] menu, the following window pops up:
The log records all the Operation Logs in this management program, select [Admin] and the corresponding time period, click [Search] button, then you can see what operations and what settings the administrator has managed in this time period, which is more convenient for multiple administrators using
Anviz Technology Co., Ltd.
Anviz CrossChex Standard Software V1.0 simultaneously.
3.8.1 Change Log Records
Click [
Change Log Records
] in [Data Management] menu, the following window pops up:
Select Department, Employee ID and Time, click
【
Search
】 button, then matching records will be displayed in the list below.
Note: Change Log Records show all the modified attendance record; if wrongly modify the record in the process of operating the system, you can select the record, and then click [Restore] button to correct the record.
Click
【
Close
】 button to exit this window.
3.9 Help
Help including “Software Upgrades”, “Submit Question”, “About the Software”, “Help Documentation” as below:
Anviz Technology Co., Ltd.
Anviz CrossChex Standard Software V1.0
3.9.1 Software Upgrades
Anviz biometric management software supports online software upgrades. Click [Software Upgrades] button. The system will automatically run, «Update.exe». The application will automatically connect to the software server of Anviz Biometric Technology Co., Ltd., find the latest software upgrade in the server, and download the software upgrade package to install, as below:
In «Online Upgrade» dialog, the version information of the upgrade pack will be prompted. After selecting the latest version, click the «upgrade», the software upgrade package will be downloaded and installed on your system, and prompts the current software version.
Note: The software upgrade is incremental upgrade, it can effectively reduce the download traffic and data loss, use automatic software upgrade will not overwrite database use, ease of use.
3.9.2 Submit Question
Anviz Technology Co., Ltd always pay attention to the user’s software experience, integrating the
«submit questions online» button in the software, enabling customers to submit quickly. Submit the problems and BUG encountered in the process of using software timely, our R&D and technical team will give you the best service.
Click
【
Submit Question
】
requires the customer’s computer must be connected to the Internet , and having been registered as a member of Shanghai Anviz Technology Co., Ltd. is required before submit questions.
Anviz Technology Co., Ltd.
Anviz CrossChex Standard Software V1.0
3.9.3 Frequently Asked Questions
In order to better help customers to solve the software and equipment problems encountered in the process, we integrate
【
Frequently Asked Questions
】 button in the software. Click the button when your computer is with installed system connecting to the Interne. Software also will automatically connect to the technical support page on Shanghai Anviz Technology Co.,Ltd. official website.
Anviz Technology Co., Ltd.
Anviz CrossChex Standard Software V1.0
Users can quickly find the software and equipment problems encountered by «Frequently Asked
Questions Database». Customers can follow the detailed help files to solve their own problems encountered efficiently.
3.9.4 About the Software
Click «About the Software» button, the dialog box of software version information will pops up.
Anviz Technology Co., Ltd.
Anviz CrossChex Standard Software V1.0
The software version name, company name and the official website, and software copy rights will be displayed.
3.9.5 Help Documentation
Click the “Help Documentation” in the software, the system will call System Help Manual; it will be more convenient for the customers to familiar with the software operation and use.
Anviz Technology Co., Ltd.
23 января 2020

ANVIZ Cross Chex Бесплатное ПО для Учета рабочего времени
AIM CrossChex (Anviz Intelligent Management CrossChex) это интеллектуальная система управления контролем доступа и учета рабочего времени, которая работает со всем оборудованием контроля доступа и учета рабочего времени Anviz.
Дружественный пользовательский интерфейс и интерактивный дизайн делает легким управление системой. В систему добавлены новые мощные функции по управлению организационной структурой, персоналом, графиками и сменами, уровнями доступа в соответствии с требованиями пользователей, что повышает эффективность систем учета рабочего времени и контроля доступа под управлением AIM CrossChex.
Основные функции AIM CrossChex
- Управление отделами. Количество вложенных отделов не ограничено
- Управление устройствами, правами доступа, временными зонами и правилами прохода
- Управление сменами, расписаниями персонала, назначение постоянных и временных графиков
- Настройка и ограничение доступа администраторов системы к функциям программы
- Экспорт/импорт данных и отчетов в форматы xls/xlsx, pdf, csv и другие
- Экспорт отчетов в другие системы управления персоналом
- Работа с базами данных MS Access и MS SQL
- Поддержка всех устройств Anviz

Возврат к списку