- Manuals
- Brands
- CYBELEC Manuals
- Controller
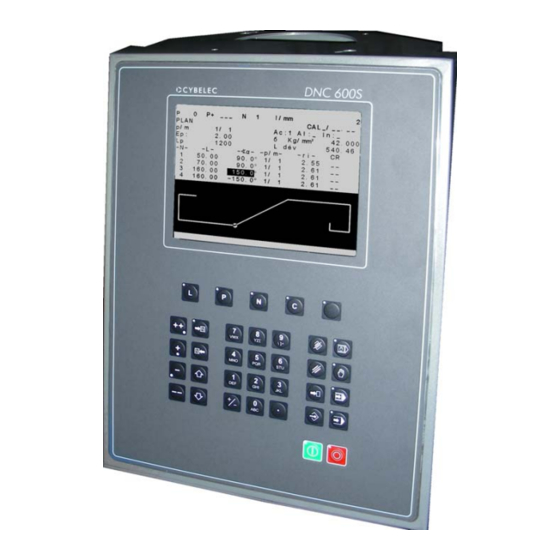
- DNC 600S
- User manual
-
Contents
-
Table of Contents
-
Bookmarks
Quick Links
CYBELEC SA
CYBELEC SA
RUE DES UTTINS 27
RUE DES UTTINS 27
CH — 1400 YVERDON-LES-BAINS
CH — 1400 YVERDON-LES-BAINS
SWITZERLAND
SWITZERLAND
DNC 600S
User Guide
Tel. ++ 41 24 447 02 00
Tel. ++ 41 24 447 02 00
Fax ++ 41 24 447 02 01
Fax ++ 41 24 447 02 01
E-Mail: info@cybelec.ch
E-Mail: info@cybelec.ch
V-DOC-600PS-EN
V-DOC-60PS-EN
Related Manuals for CYBELEC DNC 600S
Summary of Contents for CYBELEC DNC 600S
-
Page 1
DNC 600S User Guide CYBELEC SA CYBELEC SA Tel. ++ 41 24 447 02 00 Tel. ++ 41 24 447 02 00 RUE DES UTTINS 27 RUE DES UTTINS 27 Fax ++ 41 24 447 02 01 Fax ++ 41 24 447 02 01… -
Page 2
Information in this document is subject to change without notice, and does not represent a commitment on the part of CYBELEC SA. The software described in this document is furnished under a licence or nondisclosure agreement. The software may be used or copied only in accordance with the terms of the agreement. It is against the law to copy the software on any medium except as specifically allowed in the licence or nondisclosure agreement. -
Page 4: Safety And Maintenance Instructions
AFETY AND AINTENANCE NSTRUCTIONS The operator must be trained for working with the machine on which the numerical control is installed. Improper use of the numerical control can cause heavy damage on equipment and/or injuries to people. Modification of machine parameters can cause important material damage or lead to irregular product quality.
-
Page 5
This page has been left blank intentionally. PAGE II USER GUIDE DNC 60 PS… -
Page 6: Licence Agreement For Cybelec Software
Unauthorized copying, duplicating, selling or otherwise distributing this product is a violation of the law. PECIAL EPROM COPYRIGHT The CYBELEC DNC and CNC units in which the original software made by CYBELEC has been replaced by a copy not made by CYBELEC, and without written authorization of CYBELEC, will immediately lose their warranty.
-
Page 7
The foregoing warranty is instead of all other warranties, expressed or implied. Licensee further agrees that CYBELEC shall not be liable for any lost profits, lost savings, loss of use, or other incidental or consequential damages arising from the use or inability to use the software, or for any claim or demand against licensee by any other party. -
Page 8
CYBELEC during the maintenance period. In no event shall CYBELEC be obliged to provide technical support in attempting to resolve problems or difficulties resulting from licensee’s modification of the licensed software; any such modification by licensee is entirely at licensee’s own risk. -
Page 9
This page has been left blank intentionally. PAGE VI LICENCE AGREEMENT… -
Page 10: Table Of Contents
02.06.2008 V. 1.0 CONTENTS SAFETY AND MAINTENANCE INSTRUCTIONS …………….I LICENCE AGREEMENT FOR CYBELEC SOFTWARE…………..III Safety, Copyright & License agreement…………….3 HOW TO… ……………………….5 Use Easy Bend (Very Basic Bends)………………5 Program a Simple Product ………………..5 Program a Product using the Graphic Display…………..5 EASY BEND PAGE……………………..6…
-
Page 11
APPENDIX G: MISCELLANEAOUS ………………..55 INITIALIZATION Page ………………….55 Tool Reference ……………………57 Pinch Point…………………….. 60 Gauge Axes ……………………61 Programming the Axes Datum ………………. 65 Calibration……………………… 66 Ideal Curve ……………………. 67 Cycle without Bend ………………….70 Punching……………………..70 Bottoming……………………..71 Angle Correction ……………………. -
Page 12: Safety, Copyright & License Agreement
BOUT THIS MANUAL This manual is designed to help the user to familiarize with the numerical control DNC 600S and to use it with a maximum of efficiency. To reach a maximum of comfort and productivity of the numerical control, it is recommended to read attentively the whole manual.
-
Page 13
This page has been left blank intentionally. PAGE 4 USER GUIDE DNC 600S… -
Page 14: How To
… OW TO ASIC ENDS Go to page 6,.EASY BEND Page. ROGRAM A IMPLE RODUCT Go to page 12, Programming with the Sequence Page. ROGRAM A RODUCT USING THE RAPHIC ISPLAY Go to page 38, Appendix F: Programming with L-Alpha. Press this key to navigate through the main fields of the page from the top down.
-
Page 15: Easy Bend Page
The system automatically calculates the pressure and bending. Possibly also enter, how long the pressure is to be maintained (if not programmed, the default is = 0.5 s), the retraction of the gauge, the reduction in bending speed, slow lifting, etc. PAGE 6 USER GUIDE DNC 600S…
-
Page 16
Press the START button or the pedal and the axes will position to the desired values. The numerical command will automatically go into semi- automatic mode. Actuate the pedal to bend. When the beam returns, the DNC switches to programming mode. You can now enter new data or actuate the pedal for a new bend. -
Page 17: Creating A Product
N field. key is used to move the cursor from one significant field to another. key is used to move the cursor across all the fields. This function can be deactivated in the user preferences. PAGE 8 USER GUIDE DNC 600S…
-
Page 18
If a product is removed, the data contained in the tool fields, the thickness field and the material information fields continue to be displayed. This saves the operator from having to reprogramme unchanged data. CY __ 2.00 45.00 Kg/mm² 1/ 1 CR __/ri 2.78 —MEM—… -
Page 19
BDC, from the PP or from the TDC, depending on the choice made in the machine parameters. If 1 is programmed, the start will be made as a function of the configuration made by the PAGE 10 USER GUIDE DNC 600S… -
Page 20
constructor. In most of the configurations, it will be sufficient to give a down command. At this command, the axes take position, then a second down command has to be given, in order to move the beam. In other configurations, the provided start button must be pressed. -
Page 21: Programming With The Sequence Page
Explanation of this method in Appendix F: Programming with L-Alpha on page 38. IRECT ROGRAMMING Programming Example The following product is to be realized: 2.0 mm Lmat: 1000 mm The bending order is the following: PAGE 12 USER GUIDE DNC 600S…
-
Page 22
Bend 1 on FACE 1 and LEG 0 Bend 2 on FACE 3 and LEG 4 Bend 3 on FACE 2 and LEG 3 Clear the memory Call the sequence page with the key. Clear the work memory. In the event of the removal of a product, the data contained in the Tools fields, the Thickness field and the Material Information fields remain (if displayed). -
Page 23
1, in order to copy this first sequence in sequence 2. The message COPIED is displayed, the N field passes on 2. The LED of the key remains lighted, indicating that you are on the last sequence. PAGE 14 USER GUIDE DNC 600S… -
Page 24
2nd sequence The following screen is displayed: The values Y1, Y2, Fb and Cr will vary, for they are Note: calculated as a function of the programmed tools. The values POS Y1, Y2 and X will also be different, for they display the real position of the axes. -
Page 25
The product will be saved in the internal memory with the number which you have given it. It will, however, remain present in the work memory. Pass to semi-automatic mode Call the sequence 1. Execute the first bend. PAGE 16 USER GUIDE DNC 600S… -
Page 26
ORRECTIONS It can happen that the angle bent is slightly greater or less than the angle programmed. The operator has then the possibility to introduce the real value of the angle bent. The DNC will correct the Y1 and Y2 axis values accordingly. The corrections can be entered into two different pages: Page corrections (see explanation on page 71). -
Page 27: Product Management
Then are displayed, in ascending order, the numbers of all the products stored in the internal memory. The NEW_P field enables the operator to create a new product directly, starting from this page. Position the cursor on NEW_P and press the key. PAGE 18 USER GUIDE DNC 600S…
-
Page 28
EARCHING FOR A RODUCT BY RITERIA Press the key again. ACTUAL PIECE New_P — CRITERIA — CODE __/__ __.__ Lmat _____ DevL ____.__ — LIST OF PRODUCTS IN MEMORY— CODE __/__ ___.__ __/__ ___.__ __/__ ___.__ __/__ ___.__ This page allows to display a list of searched products according to one or more criteria like the code number, the thickness, the bending length and/or the unfolded length. -
Page 29
Caution, the N° 998 and 999 are reserved for special functions. 998 for the temporary storage of the work memory contents during PC <-> DNC transfer. 999 for total deletion of the internal memory (see page 21). PAGE 20 USER GUIDE DNC 600S… -
Page 30
ELETING A RODUCT Call the list of products page. Place the cursor on the P field and introduce the number of the product to be deleted. Press It should be noted that this action has no effect on the internal memory. ELETING ALL RODUCTS Caution… -
Page 31: Appendix A: Conventions
Safety point. This point is calculated in function of the tools height and the material thickness. Pinch point (see page 60). Bottom dead centre Light Emitting Diode. Small red light serving as luminous indicator. PAGE 22 USER GUIDE DNC 600S…
-
Page 32
This page has been left blank intentionally. APPENDIX A: CONVENTIONS PAGE 23… -
Page 33: Appendix B: User Interface
Screen page selection keys Working mode zone The commands The cursor keys The manual mode keys UMERICAL EYBOARD The numerical keys as well as the keys are used to introduce numbers or values into the different fields. PAGE 24 USER GUIDE DNC 600S…
-
Page 34
CREEN AGES ELECTION Main menu key A dual-function key Hitting the key once opens the MAIN MENU page. Hitting the key a second time displays the ///ADD CROSS REFERENCE Product list key Double function key. Pressing this key once displays the list of products in the DNC memory. -
Page 35
Changing from «programming » mode to «semi-automatic» mode and then to «automatic» mode, conserves the current sequence for execution. This allows to take up again a product in production without having to make «empty» cycles. PAGE 26 USER GUIDE DNC 600S… -
Page 36
OMMANDS Delete key Allows to delete a sequence or a program when the cursor is placed on the PRODUCT or N fields. Only functions in programming mode. Clear key This key allows to delete data indicated by the cursor. Caution: pressing this key twice, on most pages, deletes all the data on the page. -
Page 37
Cursor downwards, to next accessible field. Holding this key down causes an auto-repeat to move the cursor forwards until the key is released. This key combination positions the cursor in the upper part of the current page. PAGE 28 USER GUIDE DNC 600S… -
Page 38
«M » ANUAL ZONE Start key Commands: — The displacement of the axis and auxiliary functions. During movement the LED lights up (except for the beam). — An indexation at the beam (on option depending on the configuration on other axes) when this key is first pressed after switching on the DNC. -
Page 39: Appendix C: Main Menu
The option desired is chosen by entering the option number in the CHOICE field on the first line of the screen and pressing the search key. PAGE 30 USER GUIDE DNC 600S…
-
Page 40: Main Menu Options
PTIONS NEW PRODUCT Create a new product and display the page sequence, ready for entering the data. Access ///ADD CROSS REFERENCE EASY BEND Allows for quickly programming a bend and/or stopping production to quickly do another job (bend) without loss or modification of the program in hand. This double page displays the list of parts held in DNC LIST OF memory and allows for selectively seeking parts.
-
Page 41: Appendix D: Working Modes
On the other hand, the bottom dead center programmed in the sequence is not active. Thus only stopping the descent command, or a mechanical stop (punch in the die), or the lower limit switch will stop the beam in the descent phase. PAGE 32 USER GUIDE DNC 600S…
-
Page 42: Sensitive Mode
ENSITIVE DNC in Mode The functioning is identical to adjustment mode, except that the return to the TDC is made in one movement. DNC in Mode The press works in the conventional way, that is: High speed approach Deceleration Safety stop (if the mode requires it) Bending Bottom dead center It is at the bottom dead center (BDC) that the differences appear.
-
Page 43: Appendix E: Tool Programming
The DNC 600S has several pages which allow consultation of the list of existing tools, to display them and / or program new ones. The DNC 600S memory can hold a maximum of 20 punches and 30 dies. UNCH From the main menu choose option LIST OF PUNCHES.
-
Page 44
V angle of the die. Height of the die from the surface of the table. Die radius. TON/M Maximum force supported by the die per linear meter. REF Y Sum of the hp and hd. This value is automatically calculated during programming of pairs. -
Page 45
Place for that the cursor in the p field, introduce the desired number and press the key. Modify the values as necessary. Save the new punch by introducing its number in the p/ field and press the key. PAGE 36 USER GUIDE DNC 600S… -
Page 46
ODIFYING A UNCH On the PUNCH / DIE PROGRAMMING page. Call the punch which will serve as a basis. Place for that the cursor in the p field, introduce the desired number and press the key. Modify the values as necessary. To be able to save this punch under the same number, the former version must first be deleted from the internal memory. -
Page 47: Appendix F: Programming With L-Alpha
It is possible, if more than four punches are programmed to see them by pressing the key. Looking up the Die List Proceed in the same way as described above for punches; access from the main menu LIST OF DIES. PAGE 38 USER GUIDE DNC 600S…
-
Page 48: Programming Using The L-Alpha Page
ROGRAMMING SING THE ALPHA The L-ALPHA PRODUCT page is often called L-alpha page for its programming method. On this page, a product is programmed by defining its profile by the length and the angle of each face. Call the L-alpha page using the key, or by passing via the main menu choosing L-ALPHA PRODUCT.
-
Page 49
If no field is programmed, steel is used by default. Material thickness. Kg/mm² (Sigma) Tensile strength. Lmat Bending length. Dev L Unfolded length of the product calculated by the system according to DIN 6935 standard. PAGE 40 USER GUIDE DNC 600S… -
Page 50
L-alpha Page: Field Overview Each line (except the last) of the table on the L-ALPHA PRODUCT page represents data related to one bend. -p/d- -ri- CR TOL 1 ____.__ ____._°__/__ ____.__ __ ___ 2 ____.__ ____._°__/__ ____.__ __ ___ 3 ____.__ Automatic numbering of the faces. -
Page 51
A of the chord. ri = Theoretical bending radius requested by the operator. A = Apex. For an example of ideal curve (also called step bending), see Ideal Curve, page 67. PAGE 42 USER GUIDE DNC 600S… -
Page 52: L-Alpha Method
ALPHA ETHOD If you have it not already on screen, call the PRODUCT L-alpha page. The screen displays the data concerning the product in the work memory at present. In order to program a new product, the work memory must be cleared by deleting the product already there.
-
Page 53
__/__ ____.__ After introducing the last length, press the key. The system calculates the radius of each bend as well as the unfolded length of the product and displays these values on the screen. PAGE 44 USER GUIDE DNC 600S… -
Page 54
Save this product in the internal memory by proceeding as follows: Introduce the number you wish to give the product in the P field, in this case the number 1 for this product which will be used later as an example. -
Page 55: Defining The Bending Order
Number of the face which will press against the stop. The orientation of the legs is made as a function of the bending order. Number of bends requested when working with step bending . PAGE 46 USER GUIDE DNC 600S…
-
Page 56
Definition of a tooling pair for a particular bend (if different from the pair specified in the p/d field at the top of the page). Example a For this example we will use the previously created product. It was stored under the number 1. (If you cannot find it, create it by following the instructions of page 43). -
Page 57
Fill in the FACE and LEG fields as follows: 1/ 1 BEND 9 10 4 __ __ __ __ __ __ 5 __ __ __ __ __ __ Press the key. The system calculates the entire machine program (axes, functions, etc.). PAGE 48 USER GUIDE DNC 600S… -
Page 58
1/ 1 RETURNS BEND 9 10 4 __ __ __ __ __ __ 5 __ __ __ __ __ __ Fig. Sheet metal manipulation Return Swing Swivel (= Swing 180° + return) APPENDIX F: PROGRAMMING WITH L-ALPHA PAGE 49… -
Page 59
Here is an other bending order. For this new bending order, the following illustrations show each sequence before and after bending. Sequence N1: Face 4 and Leg 0 Sequence N2: Face 1 and Leg 0 PAGE 50 USER GUIDE DNC 600S… -
Page 60
Sequence N 3: Face 2 and Leg 1 Sequence N 4: Face 3 and Leg 2 Call the bending order page by pressing the key twice. Fill in the and LEG fields as below. You will remark that the p/d fields are already programmed since we have already made a calculation before. -
Page 61
RETURNS Go to sequence 1. Switch to semi-automatic mode by pressing Perform the first bend. To view the axes’ position, go to the Bend Numerical page (large or small characters) by pressing the key. PAGE 52 USER GUIDE DNC 600S… -
Page 62
This page has been left blank intentionally. APPENDIX F: PROGRAMMING WITH L-ALPHA PAGE 53… -
Page 63
PAGE 54 USER GUIDE DNC 600S… -
Page 64: Appendix G: Miscellaneaous
G: M PPENDIX ISCELLANEAOUS INITIALIZATION P This page appears if a calculation i s impossible, due to unprogrammed data r an incorrect value. can also appear as a result of pollution of one of the memory zones which will also give im possible calculations.
-
Page 65
/ output onfiguration defined by the operator. It is therefore advisable to re-configure the DNC 600S before the next use. Caution: If you use an external system for the data re-introducing (CYBACK via RS232) and the problem persists, then the informations re- entered by this system have to be called into question. -
Page 66: Tool Reference
EFERENCE The machine has been adjusted according to the following principle: When, theoretically, the punch’s leg face on the beam is in contact with the surface of the table, the value of the Y1 and Y2 counters is 000.00. In practice this adjustment is made using two calibrated blocks, whose value has been introduced into the counters.
-
Page 67
(which will not bend under the weight of the beam) or blocks of a know precise thickness, (see figure below). The value of the material introduced between the punch and the die mu then be subtracted to obtain the reference value REF Y. PAGE 58 USER GUIDE DNC 600S… -
Page 68
Y1 and Y2 Counters Differ Greatly If the counters are not identical and present a difference superior to what is normally tolerated (the press in this case furnishes an angle which varies from one side to the other of the machine), a test must be made with another tool in order to d etermine if the difference comes from the tool itself (tool badly finished p… -
Page 69: Pinch Point
For the softwares having the «PP correction» parameter, if the reference, the tooling dimensions and material thickness are correct you can modify this parameter in order to correct the PP (adjustment of the material clamping) without interfering with the other points. PAGE 60 USER GUIDE DNC 600S…
-
Page 70: Gauge Axes
AUGE The addition of supplementary axes (to X) does not present any difficulties for the operator, the fields being clearly defined on the screen. The safety factors concerning the supplementary axes such as R, X1, X2, Z1 and Z2 are described below. X-R Safety Factors When the R axis is a digital axis, an anti-collisi on safety factor prohibits the…
-
Page 71
= «a» die value = «hm» die value = Xo + X»o = Ro + R»o = X axis current value = R axis current value = X axis t arget value = R axis target value PAGE 62 USER GUIDE DNC 600S… -
Page 72
Two Examples of Positioning These two examples show that it is possible to position in the safety zone. If the positioning requested is situated in the prohibited zone, the DNC refuses to go into mode and the cursor moves to the X field. Xv >… -
Page 73
«Z1-Z2» is obt ained if the positioning is possible (see parameter 51). ormally the origin of the Z axes is on the left of the machine when looking t the front of the machine. PAGE 64 USER GUIDE DNC 600S… -
Page 74: Programming The Axes Datum
ROGRAMMING THE ATUM Select option 11 of the main menu, the following page appears: AXES DATUM —SET— —POS— X _____.__ 0.00 Y1 ____.__ ____.__ Y2 ____.__ ____.__ Introduce in the SET colum n the values for the axes datum. Leave the field for validatio At this moment, the POS field takes the new value.
-
Page 75: Calibration
N1. To leave this work mode, clear the CAL field using the key. If any modifications are made to the tools, it will be necessary to repeat the calibration. PAGE 66 USER GUIDE DNC 600S…
-
Page 76: Ideal Curve
DEAL URVE The ideal curve functionality (also called step bending or big radius) allows to m ake a bend with a large internal radius. Ideal curve can be programmed on one or the other of these pages. 4 to 98 (programming 0, 2 or 3 Ideal curve i s defined by programming from will give an error).
-
Page 77
____._°__/__ ____.__ __ ___ 4 ____.__ ____._°__/__ ____.__ __ ___ 5 ____.__ ____._°__/__ ____.__ __ ___ ____.__ ____._°__/__ ____.__ __ ___ Press the key. e system fills in th Dev L, and ri fields. PAGE 68 USER GUIDE DNC 600S… -
Page 78
1/ 1 BEND 9 10 __ __ __ __ __ __ __ __ __ __ __ __ e: bends with a big radiu s are not supported in the graphical display. e total number of steps (CR) in the big radius must be such that th distance is greater than half the V-width. -
Page 79: Cycle Without Bend
When the punch reaches its exit point, stop the descent and note the position of the beam. Delete the field. Introduce this value in Y1 Y2. Regulate the tool reference value as a function of the tools used. PAGE 70 USER GUIDE DNC 600S…
-
Page 80: Bottoming
OTTOMING As for most work under pre ssure, it is preferable to do this type of bending i the center of the press. Delete th fiel Delete or leave the Y 1 and Y2 fields unprogrammed. The press makes the descen t in the conventional way until the beam stops in the bottom of the die with th e pressure of the current sequence…
-
Page 81
If the operator wishes to intervene directly on the values of the Y1 and Y2 axes, he has to do it on this page directly in the Y1-Y2 fields, and not in th equence page PAGE 72 USER GUIDE DNC 600S… -
Page 82: Alphanumerical Characters
LPHANUMERICAL HARACTERS The CODE field allows the introduction of alphanumerical characters. To introduce these characters, the keys are used, combined with the numerical ke ys of the keyboard. Example: To int roduce the character A, press the key and keeping the latter held down, press the key.
-
Page 83: Interactive Messages
EXECUTED The DNC has made the calculation correctly (corrections transformations, etc.). EXISTS Indicates that the product or tool number chosen for storage already exists. FREE Displayed in mode when the buffer is empty (no PAGE 74 USER GUIDE DNC 600S…
-
Page 84
sequences programmed). IGNORE Displayed when the k ey used cannot (must not) be used that time. INSERTED Indicates that the insertion has been made correct Jitter Error caused by the application of simultaneous edges on the input encoder signals (can be provoked by a parasite, a fault in the encoder or a short-circuit on the encoder phases). -
Page 85
, if the parameters vital to execution are not or only partially programmed and thus prevent the verification calculations. Var KO One of the DNC inputs «SERVO DRIVER OK» is not (no longer) active (+24 VDC). PAGE 76 USER GUIDE DNC 600S… -
Page 86
This page has been left b lank intentionally. APPENDIX G: MISCELLANEAOUS PAGE 77… -
Page 87: Appendix H: Transfer
H: T PPENDIX RANSFER For transfer to a PC by serial line the DNC 600S must be equipped with the 232 option. Products The PC must be equ ipped with the CYBELEC PC1200 software with option LINK7000. This combination allows to create pr…
-
Page 88: Testsing The Serial Ports
ESTSING THE ERIAL ORTS The 2 serial ports of the DNC 600S are SUB-D 9P, plugs J5 and J6. Introduce and verify that the transmission parameters are programmed as follows: PARAMETERS RS232 / DIVERS . . . — COMPUTER LINK –-…
-
Page 89: Cyback
The transfer mode remains memorized, even if the DNC is disconnected from power supply. It has to be re-programmed if the mode has been changed (for instance FLASH). PAGE 80 USER GUIDE DNC 600S…
-
Page 90
This page has been left blank intentionally. APPENDIX H: TRANSFER PAGE 81… -
Page 91: Appendix I: Printing The Current Screen
G THE URRENT CREEN The DNC 600S authorizes, if the RS232 port is included (optional), to print the content of a page displayed on the screen (connector J5). This allows, through a hardcopy, to retain information regarding the product(s), tools or machine parameters.
-
Page 92: Hyperterminal
It is possible to enter all the pages of a DNC600S on a PC in a txt fil e, which allows for a hardc opy backup of the machine parameters, programs or other DNC 600S elements. ONNECTION Connect an inverted (non-modem) RS 232 cable between t he J5 connector of the DNC and the RS 232 port of the computer.
-
Page 93
After having modified the parameters: • Go to the TRANSFER page. • Select 1 then hit the key to confirm the transmission with the new parameters, or turn the DNC off and on again. PAGE 84 USER GUIDE DNC 600S… -
Page 94
Configuring HyperTerminal • Enter a name for the file which will contain the parameter setting for this numerical command and choose an icon. You will call up this file every time you connect to the numerical command without having to reset the Hyper Terminal pa rameters. -
Page 95
• — Port parameters: Bits per second: 9600 Data bits: Parity: None Stop bits: Control flow: None • Select properties: PAGE 86 USER GUIDE DNC 600S… -
Page 96
• Enter the parameters as above. • Click the ASCII Configuration button. • Check the Line Wordwrap box. Then OK • Select Display then Font APPENDIX I: PRINT OF THE CURRENT SCREEN PAGE 87… -
Page 97
• Open the Call menu, • Select Call • Open the Transfer menu. • Select Text Capture. • Select the location and name of the file which will contain the DNC screen pages. PAGE 88 USER GUIDE DNC 600S… -
Page 98
Printing out all Machine Parameters With the DNC 600S P, PC and PS, starting from the SIXFDAx version, it is possible to print all the machine parameters in a single operation. To do th •… -
Page 99: Appendix J: Protecting The Access Levels
Certain users can modify their own password. For the others, the password can only be changed by a user having a superior access. Loss of the password In case of loss of the password, a user of a superior level has to reprogram the password. PAGE 90 USER GUIDE DNC 600S…
-
Page 100: Users
SERS Table of users, access and p asswords Level Names of Changing of Changing of Level Password er generally attributed to: predefined the personal passwords of virtual key by default users password subordinateds EUL1 Operators having the access authorization of level 1 EUL2 Operators having the access authorization o…
-
Page 101: Password Protected Access
, f om 1 to 2, from 2 to 3, etc.) and he has no access authorization. Advice have accessed to level 3, ac cess to level 0 after your intervention. This If you ill avoid to make undesired changings by inadvertence. PAGE 92 USER GUIDE DNC 600S…
-
Page 102: Accessing Levels Higher Than 3
CCESSING EVELS IGHER THAN Certain users can access to levels superior to 3, which enables them, among other things, to modify the passwords. In order to know the authorizations, see Table of users, access and passwords. Press the key during two seconds m inimum.
-
Page 103: Changing A Password
If the 2 registered passwords are different, the user is invited to introduce the 2 passwords again, the message VALUE is displayed. At the end of the intervention, don’t forget to pass to level 0 in order to leave the current level. PAGE 94 USER GUIDE DNC 600S…
-
Page 104: Managing Access Levels With An External Key
ANAGING CCESS EVELS WITH AN XTERNAL If the use of the external key is defined in the machine parameters, the access levels are managed by the external key. The passwords are no more active. he external key is defined by the parameter Key = 1 and by the The use of t use of the inputs KEY 0 and KEY 1.
-
Page 105: Maintenance
Go to a page where access to the P field (Program) is possible. Position the cursor on the P field. To increase the contrast (lighten), p ress the key. To decrease the contrast (darken), press the key. PAGE 96 USER GUIDE DNC 600S…
-
Page 106: In Case Of Failure
N CASE OF FAILURE NITIAL HECKS TO ARRY Switch the machine off then on again. Check the program (safety factors). Check that the axes can be displaced in manual mode. Check the machine parameters against the written list made during th installation.
-
Page 107: Internal Backup
8 EXT KEYB 11 Internal backup 12 Internal restore Quantity of free backup memory — COMPUTER LINK — Baud rate 57600 Stop 1.0 Parity odd (1) EVEN (0) Bits 8 • Select 11 INTERNAL BACKUP PAGE 98 USER GUIDE DNC 600S…
-
Page 108
DNC <-> PC STATUS TEST TRANSFER 1, 2 Cyback 3,4 TEST LIAISON 1 2 7 FLASH 8 EXT KEYBOARD Internal backup 10 ARDIS CONNEXION 11 INTERNAL BACKUP 0 = Abort 12 INTERNAL RESTORE 1 = Save machine parameters Quantity of free backup memory 97 % 2 = Save tools RS232 PARAMETERS… -
Page 109: Internal Restore Of Pms And Tools
8 EXT KEYBOARD 11 INTERNAL BACKUP 12 INTERNAL RESTORE Quantity of free backup memory 93 % RS232 PARAMETERS Baud rate 57600 Stop Parity odd (1) EVEN (0) _ Bits • Select 12 INTERNAL RESTORE PAGE 100 USER GUIDE DNC 600S…
-
Page 110
DNC <-> PC STATUS TEST TRANSFER 1 2 Cyback 3,4 DATA LINK TEST 1 2 7 FLASH 8 EXT KEYBD Internal restore 10 ARDIS CONNECTION 11 INTERNAL BACKUP 0 = Abort 12 INTERNAL RESTORE 1 = Restore machine parameters Quantity of free backup memory 93 % 2 = Restore tools RS232 PARAMETERS… -
Page 111: Accessories
2 and 3 dimensions the products to be realized on the numerical control. This software executes the simulation and graphic display of the bending order taking into account the characteristics of the machine, the tools and the material. PAGE 102 PAGE 102 USER GUIDE DNC 600S USER GUIDE DNC 600S…
-
Page 112
This page has been left blank intentionally. ACCESSORIES ACCESSORIES PAGE 103… -
Page 113: Index
73 Bending bottoming, 70 Bending order, 46 lure, 96 Al, 40 CAL, 40, 65 lculation, 45 CODE, 40 libration, 65 COR, 10 Cr, 11 Character(s) CR, 10, 42 alphanumerical, 72 CY, 9 PAGE 104 USER GUIDE DNC 600S…
-
Page 114
Dev L, 40 Ext start, 10 D Screen, 96 F1, 11 F5, 11 FACE, 46 of dies, I/mm, 40 product, 25 Kg/mm², 40 L, 10, 41 LEG, 46 Lmat, 10, 4 intenance, 96 MEM, 10 N, 9, 40, 41 Ma nipulation P, 39 sheet meta l, 49… -
Page 115
Product, 25 Contrast, 96 calling, 20 print screen, 81 deleting, 21 Viewing angle, 96 list of, 18 ‘White’, 96 programming, 38 Search, 27 searching, 20 by criteria, 25 searching by criteria, 19 Searching Profile, 39 product, 20 Programming product by criteria, 19 L-alpha, 12 Sequence, 25 Programming… -
Page 116
1 5 0 B Warranty, III INDEX PAGE 107…
- Manuals
- Brands
- CYBELEC Manuals
- Controller
- DNC 600S
- User manual
-
Contents
-
Table of Contents
-
Bookmarks
Quick Links
CYBELEC SA
CYBELEC SA
RUE DES UTTINS 27
RUE DES UTTINS 27
CH — 1400 YVERDON-LES-BAINS
CH — 1400 YVERDON-LES-BAINS
SWITZERLAND
SWITZERLAND
DNC 600S
User Guide
Tel. ++ 41 24 447 02 00
Tel. ++ 41 24 447 02 00
Fax ++ 41 24 447 02 01
Fax ++ 41 24 447 02 01
E-Mail: info@cybelec.ch
E-Mail: info@cybelec.ch
V-DOC-600PS-EN
V-DOC-60PS-EN
Related Manuals for CYBELEC DNC 600S
Summary of Contents for CYBELEC DNC 600S
-
Page 1
DNC 600S User Guide CYBELEC SA CYBELEC SA Tel. ++ 41 24 447 02 00 Tel. ++ 41 24 447 02 00 RUE DES UTTINS 27 RUE DES UTTINS 27 Fax ++ 41 24 447 02 01 Fax ++ 41 24 447 02 01… -
Page 2
Information in this document is subject to change without notice, and does not represent a commitment on the part of CYBELEC SA. The software described in this document is furnished under a licence or nondisclosure agreement. The software may be used or copied only in accordance with the terms of the agreement. It is against the law to copy the software on any medium except as specifically allowed in the licence or nondisclosure agreement. -
Page 4: Safety And Maintenance Instructions
AFETY AND AINTENANCE NSTRUCTIONS The operator must be trained for working with the machine on which the numerical control is installed. Improper use of the numerical control can cause heavy damage on equipment and/or injuries to people. Modification of machine parameters can cause important material damage or lead to irregular product quality.
-
Page 5
This page has been left blank intentionally. PAGE II USER GUIDE DNC 60 PS… -
Page 6: Licence Agreement For Cybelec Software
Unauthorized copying, duplicating, selling or otherwise distributing this product is a violation of the law. PECIAL EPROM COPYRIGHT The CYBELEC DNC and CNC units in which the original software made by CYBELEC has been replaced by a copy not made by CYBELEC, and without written authorization of CYBELEC, will immediately lose their warranty.
-
Page 7
The foregoing warranty is instead of all other warranties, expressed or implied. Licensee further agrees that CYBELEC shall not be liable for any lost profits, lost savings, loss of use, or other incidental or consequential damages arising from the use or inability to use the software, or for any claim or demand against licensee by any other party. -
Page 8
CYBELEC during the maintenance period. In no event shall CYBELEC be obliged to provide technical support in attempting to resolve problems or difficulties resulting from licensee’s modification of the licensed software; any such modification by licensee is entirely at licensee’s own risk. -
Page 9
This page has been left blank intentionally. PAGE VI LICENCE AGREEMENT… -
Page 10: Table Of Contents
02.06.2008 V. 1.0 CONTENTS SAFETY AND MAINTENANCE INSTRUCTIONS …………….I LICENCE AGREEMENT FOR CYBELEC SOFTWARE…………..III Safety, Copyright & License agreement…………….3 HOW TO… ……………………….5 Use Easy Bend (Very Basic Bends)………………5 Program a Simple Product ………………..5 Program a Product using the Graphic Display…………..5 EASY BEND PAGE……………………..6…
-
Page 11
APPENDIX G: MISCELLANEAOUS ………………..55 INITIALIZATION Page ………………….55 Tool Reference ……………………57 Pinch Point…………………….. 60 Gauge Axes ……………………61 Programming the Axes Datum ………………. 65 Calibration……………………… 66 Ideal Curve ……………………. 67 Cycle without Bend ………………….70 Punching……………………..70 Bottoming……………………..71 Angle Correction ……………………. -
Page 12: Safety, Copyright & License Agreement
BOUT THIS MANUAL This manual is designed to help the user to familiarize with the numerical control DNC 600S and to use it with a maximum of efficiency. To reach a maximum of comfort and productivity of the numerical control, it is recommended to read attentively the whole manual.
-
Page 13
This page has been left blank intentionally. PAGE 4 USER GUIDE DNC 600S… -
Page 14: How To
… OW TO ASIC ENDS Go to page 6,.EASY BEND Page. ROGRAM A IMPLE RODUCT Go to page 12, Programming with the Sequence Page. ROGRAM A RODUCT USING THE RAPHIC ISPLAY Go to page 38, Appendix F: Programming with L-Alpha. Press this key to navigate through the main fields of the page from the top down.
-
Page 15: Easy Bend Page
The system automatically calculates the pressure and bending. Possibly also enter, how long the pressure is to be maintained (if not programmed, the default is = 0.5 s), the retraction of the gauge, the reduction in bending speed, slow lifting, etc. PAGE 6 USER GUIDE DNC 600S…
-
Page 16
Press the START button or the pedal and the axes will position to the desired values. The numerical command will automatically go into semi- automatic mode. Actuate the pedal to bend. When the beam returns, the DNC switches to programming mode. You can now enter new data or actuate the pedal for a new bend. -
Page 17: Creating A Product
N field. key is used to move the cursor from one significant field to another. key is used to move the cursor across all the fields. This function can be deactivated in the user preferences. PAGE 8 USER GUIDE DNC 600S…
-
Page 18
If a product is removed, the data contained in the tool fields, the thickness field and the material information fields continue to be displayed. This saves the operator from having to reprogramme unchanged data. CY __ 2.00 45.00 Kg/mm² 1/ 1 CR __/ri 2.78 —MEM—… -
Page 19
BDC, from the PP or from the TDC, depending on the choice made in the machine parameters. If 1 is programmed, the start will be made as a function of the configuration made by the PAGE 10 USER GUIDE DNC 600S… -
Page 20
constructor. In most of the configurations, it will be sufficient to give a down command. At this command, the axes take position, then a second down command has to be given, in order to move the beam. In other configurations, the provided start button must be pressed. -
Page 21: Programming With The Sequence Page
Explanation of this method in Appendix F: Programming with L-Alpha on page 38. IRECT ROGRAMMING Programming Example The following product is to be realized: 2.0 mm Lmat: 1000 mm The bending order is the following: PAGE 12 USER GUIDE DNC 600S…
-
Page 22
Bend 1 on FACE 1 and LEG 0 Bend 2 on FACE 3 and LEG 4 Bend 3 on FACE 2 and LEG 3 Clear the memory Call the sequence page with the key. Clear the work memory. In the event of the removal of a product, the data contained in the Tools fields, the Thickness field and the Material Information fields remain (if displayed). -
Page 23
1, in order to copy this first sequence in sequence 2. The message COPIED is displayed, the N field passes on 2. The LED of the key remains lighted, indicating that you are on the last sequence. PAGE 14 USER GUIDE DNC 600S… -
Page 24
2nd sequence The following screen is displayed: The values Y1, Y2, Fb and Cr will vary, for they are Note: calculated as a function of the programmed tools. The values POS Y1, Y2 and X will also be different, for they display the real position of the axes. -
Page 25
The product will be saved in the internal memory with the number which you have given it. It will, however, remain present in the work memory. Pass to semi-automatic mode Call the sequence 1. Execute the first bend. PAGE 16 USER GUIDE DNC 600S… -
Page 26
ORRECTIONS It can happen that the angle bent is slightly greater or less than the angle programmed. The operator has then the possibility to introduce the real value of the angle bent. The DNC will correct the Y1 and Y2 axis values accordingly. The corrections can be entered into two different pages: Page corrections (see explanation on page 71). -
Page 27: Product Management
Then are displayed, in ascending order, the numbers of all the products stored in the internal memory. The NEW_P field enables the operator to create a new product directly, starting from this page. Position the cursor on NEW_P and press the key. PAGE 18 USER GUIDE DNC 600S…
-
Page 28
EARCHING FOR A RODUCT BY RITERIA Press the key again. ACTUAL PIECE New_P — CRITERIA — CODE __/__ __.__ Lmat _____ DevL ____.__ — LIST OF PRODUCTS IN MEMORY— CODE __/__ ___.__ __/__ ___.__ __/__ ___.__ __/__ ___.__ This page allows to display a list of searched products according to one or more criteria like the code number, the thickness, the bending length and/or the unfolded length. -
Page 29
Caution, the N° 998 and 999 are reserved for special functions. 998 for the temporary storage of the work memory contents during PC <-> DNC transfer. 999 for total deletion of the internal memory (see page 21). PAGE 20 USER GUIDE DNC 600S… -
Page 30
ELETING A RODUCT Call the list of products page. Place the cursor on the P field and introduce the number of the product to be deleted. Press It should be noted that this action has no effect on the internal memory. ELETING ALL RODUCTS Caution… -
Page 31: Appendix A: Conventions
Safety point. This point is calculated in function of the tools height and the material thickness. Pinch point (see page 60). Bottom dead centre Light Emitting Diode. Small red light serving as luminous indicator. PAGE 22 USER GUIDE DNC 600S…
-
Page 32
This page has been left blank intentionally. APPENDIX A: CONVENTIONS PAGE 23… -
Page 33: Appendix B: User Interface
Screen page selection keys Working mode zone The commands The cursor keys The manual mode keys UMERICAL EYBOARD The numerical keys as well as the keys are used to introduce numbers or values into the different fields. PAGE 24 USER GUIDE DNC 600S…
-
Page 34
CREEN AGES ELECTION Main menu key A dual-function key Hitting the key once opens the MAIN MENU page. Hitting the key a second time displays the ///ADD CROSS REFERENCE Product list key Double function key. Pressing this key once displays the list of products in the DNC memory. -
Page 35
Changing from «programming » mode to «semi-automatic» mode and then to «automatic» mode, conserves the current sequence for execution. This allows to take up again a product in production without having to make «empty» cycles. PAGE 26 USER GUIDE DNC 600S… -
Page 36
OMMANDS Delete key Allows to delete a sequence or a program when the cursor is placed on the PRODUCT or N fields. Only functions in programming mode. Clear key This key allows to delete data indicated by the cursor. Caution: pressing this key twice, on most pages, deletes all the data on the page. -
Page 37
Cursor downwards, to next accessible field. Holding this key down causes an auto-repeat to move the cursor forwards until the key is released. This key combination positions the cursor in the upper part of the current page. PAGE 28 USER GUIDE DNC 600S… -
Page 38
«M » ANUAL ZONE Start key Commands: — The displacement of the axis and auxiliary functions. During movement the LED lights up (except for the beam). — An indexation at the beam (on option depending on the configuration on other axes) when this key is first pressed after switching on the DNC. -
Page 39: Appendix C: Main Menu
The option desired is chosen by entering the option number in the CHOICE field on the first line of the screen and pressing the search key. PAGE 30 USER GUIDE DNC 600S…
-
Page 40: Main Menu Options
PTIONS NEW PRODUCT Create a new product and display the page sequence, ready for entering the data. Access ///ADD CROSS REFERENCE EASY BEND Allows for quickly programming a bend and/or stopping production to quickly do another job (bend) without loss or modification of the program in hand. This double page displays the list of parts held in DNC LIST OF memory and allows for selectively seeking parts.
-
Page 41: Appendix D: Working Modes
On the other hand, the bottom dead center programmed in the sequence is not active. Thus only stopping the descent command, or a mechanical stop (punch in the die), or the lower limit switch will stop the beam in the descent phase. PAGE 32 USER GUIDE DNC 600S…
-
Page 42: Sensitive Mode
ENSITIVE DNC in Mode The functioning is identical to adjustment mode, except that the return to the TDC is made in one movement. DNC in Mode The press works in the conventional way, that is: High speed approach Deceleration Safety stop (if the mode requires it) Bending Bottom dead center It is at the bottom dead center (BDC) that the differences appear.
-
Page 43: Appendix E: Tool Programming
The DNC 600S has several pages which allow consultation of the list of existing tools, to display them and / or program new ones. The DNC 600S memory can hold a maximum of 20 punches and 30 dies. UNCH From the main menu choose option LIST OF PUNCHES.
-
Page 44
V angle of the die. Height of the die from the surface of the table. Die radius. TON/M Maximum force supported by the die per linear meter. REF Y Sum of the hp and hd. This value is automatically calculated during programming of pairs. -
Page 45
Place for that the cursor in the p field, introduce the desired number and press the key. Modify the values as necessary. Save the new punch by introducing its number in the p/ field and press the key. PAGE 36 USER GUIDE DNC 600S… -
Page 46
ODIFYING A UNCH On the PUNCH / DIE PROGRAMMING page. Call the punch which will serve as a basis. Place for that the cursor in the p field, introduce the desired number and press the key. Modify the values as necessary. To be able to save this punch under the same number, the former version must first be deleted from the internal memory. -
Page 47: Appendix F: Programming With L-Alpha
It is possible, if more than four punches are programmed to see them by pressing the key. Looking up the Die List Proceed in the same way as described above for punches; access from the main menu LIST OF DIES. PAGE 38 USER GUIDE DNC 600S…
-
Page 48: Programming Using The L-Alpha Page
ROGRAMMING SING THE ALPHA The L-ALPHA PRODUCT page is often called L-alpha page for its programming method. On this page, a product is programmed by defining its profile by the length and the angle of each face. Call the L-alpha page using the key, or by passing via the main menu choosing L-ALPHA PRODUCT.
-
Page 49
If no field is programmed, steel is used by default. Material thickness. Kg/mm² (Sigma) Tensile strength. Lmat Bending length. Dev L Unfolded length of the product calculated by the system according to DIN 6935 standard. PAGE 40 USER GUIDE DNC 600S… -
Page 50
L-alpha Page: Field Overview Each line (except the last) of the table on the L-ALPHA PRODUCT page represents data related to one bend. -p/d- -ri- CR TOL 1 ____.__ ____._°__/__ ____.__ __ ___ 2 ____.__ ____._°__/__ ____.__ __ ___ 3 ____.__ Automatic numbering of the faces. -
Page 51
A of the chord. ri = Theoretical bending radius requested by the operator. A = Apex. For an example of ideal curve (also called step bending), see Ideal Curve, page 67. PAGE 42 USER GUIDE DNC 600S… -
Page 52: L-Alpha Method
ALPHA ETHOD If you have it not already on screen, call the PRODUCT L-alpha page. The screen displays the data concerning the product in the work memory at present. In order to program a new product, the work memory must be cleared by deleting the product already there.
-
Page 53
__/__ ____.__ After introducing the last length, press the key. The system calculates the radius of each bend as well as the unfolded length of the product and displays these values on the screen. PAGE 44 USER GUIDE DNC 600S… -
Page 54
Save this product in the internal memory by proceeding as follows: Introduce the number you wish to give the product in the P field, in this case the number 1 for this product which will be used later as an example. -
Page 55: Defining The Bending Order
Number of the face which will press against the stop. The orientation of the legs is made as a function of the bending order. Number of bends requested when working with step bending . PAGE 46 USER GUIDE DNC 600S…
-
Page 56
Definition of a tooling pair for a particular bend (if different from the pair specified in the p/d field at the top of the page). Example a For this example we will use the previously created product. It was stored under the number 1. (If you cannot find it, create it by following the instructions of page 43). -
Page 57
Fill in the FACE and LEG fields as follows: 1/ 1 BEND 9 10 4 __ __ __ __ __ __ 5 __ __ __ __ __ __ Press the key. The system calculates the entire machine program (axes, functions, etc.). PAGE 48 USER GUIDE DNC 600S… -
Page 58
1/ 1 RETURNS BEND 9 10 4 __ __ __ __ __ __ 5 __ __ __ __ __ __ Fig. Sheet metal manipulation Return Swing Swivel (= Swing 180° + return) APPENDIX F: PROGRAMMING WITH L-ALPHA PAGE 49… -
Page 59
Here is an other bending order. For this new bending order, the following illustrations show each sequence before and after bending. Sequence N1: Face 4 and Leg 0 Sequence N2: Face 1 and Leg 0 PAGE 50 USER GUIDE DNC 600S… -
Page 60
Sequence N 3: Face 2 and Leg 1 Sequence N 4: Face 3 and Leg 2 Call the bending order page by pressing the key twice. Fill in the and LEG fields as below. You will remark that the p/d fields are already programmed since we have already made a calculation before. -
Page 61
RETURNS Go to sequence 1. Switch to semi-automatic mode by pressing Perform the first bend. To view the axes’ position, go to the Bend Numerical page (large or small characters) by pressing the key. PAGE 52 USER GUIDE DNC 600S… -
Page 62
This page has been left blank intentionally. APPENDIX F: PROGRAMMING WITH L-ALPHA PAGE 53… -
Page 63
PAGE 54 USER GUIDE DNC 600S… -
Page 64: Appendix G: Miscellaneaous
G: M PPENDIX ISCELLANEAOUS INITIALIZATION P This page appears if a calculation i s impossible, due to unprogrammed data r an incorrect value. can also appear as a result of pollution of one of the memory zones which will also give im possible calculations.
-
Page 65
/ output onfiguration defined by the operator. It is therefore advisable to re-configure the DNC 600S before the next use. Caution: If you use an external system for the data re-introducing (CYBACK via RS232) and the problem persists, then the informations re- entered by this system have to be called into question. -
Page 66: Tool Reference
EFERENCE The machine has been adjusted according to the following principle: When, theoretically, the punch’s leg face on the beam is in contact with the surface of the table, the value of the Y1 and Y2 counters is 000.00. In practice this adjustment is made using two calibrated blocks, whose value has been introduced into the counters.
-
Page 67
(which will not bend under the weight of the beam) or blocks of a know precise thickness, (see figure below). The value of the material introduced between the punch and the die mu then be subtracted to obtain the reference value REF Y. PAGE 58 USER GUIDE DNC 600S… -
Page 68
Y1 and Y2 Counters Differ Greatly If the counters are not identical and present a difference superior to what is normally tolerated (the press in this case furnishes an angle which varies from one side to the other of the machine), a test must be made with another tool in order to d etermine if the difference comes from the tool itself (tool badly finished p… -
Page 69: Pinch Point
For the softwares having the «PP correction» parameter, if the reference, the tooling dimensions and material thickness are correct you can modify this parameter in order to correct the PP (adjustment of the material clamping) without interfering with the other points. PAGE 60 USER GUIDE DNC 600S…
-
Page 70: Gauge Axes
AUGE The addition of supplementary axes (to X) does not present any difficulties for the operator, the fields being clearly defined on the screen. The safety factors concerning the supplementary axes such as R, X1, X2, Z1 and Z2 are described below. X-R Safety Factors When the R axis is a digital axis, an anti-collisi on safety factor prohibits the…
-
Page 71
= «a» die value = «hm» die value = Xo + X»o = Ro + R»o = X axis current value = R axis current value = X axis t arget value = R axis target value PAGE 62 USER GUIDE DNC 600S… -
Page 72
Two Examples of Positioning These two examples show that it is possible to position in the safety zone. If the positioning requested is situated in the prohibited zone, the DNC refuses to go into mode and the cursor moves to the X field. Xv >… -
Page 73
«Z1-Z2» is obt ained if the positioning is possible (see parameter 51). ormally the origin of the Z axes is on the left of the machine when looking t the front of the machine. PAGE 64 USER GUIDE DNC 600S… -
Page 74: Programming The Axes Datum
ROGRAMMING THE ATUM Select option 11 of the main menu, the following page appears: AXES DATUM —SET— —POS— X _____.__ 0.00 Y1 ____.__ ____.__ Y2 ____.__ ____.__ Introduce in the SET colum n the values for the axes datum. Leave the field for validatio At this moment, the POS field takes the new value.
-
Page 75: Calibration
N1. To leave this work mode, clear the CAL field using the key. If any modifications are made to the tools, it will be necessary to repeat the calibration. PAGE 66 USER GUIDE DNC 600S…
-
Page 76: Ideal Curve
DEAL URVE The ideal curve functionality (also called step bending or big radius) allows to m ake a bend with a large internal radius. Ideal curve can be programmed on one or the other of these pages. 4 to 98 (programming 0, 2 or 3 Ideal curve i s defined by programming from will give an error).
-
Page 77
____._°__/__ ____.__ __ ___ 4 ____.__ ____._°__/__ ____.__ __ ___ 5 ____.__ ____._°__/__ ____.__ __ ___ ____.__ ____._°__/__ ____.__ __ ___ Press the key. e system fills in th Dev L, and ri fields. PAGE 68 USER GUIDE DNC 600S… -
Page 78
1/ 1 BEND 9 10 __ __ __ __ __ __ __ __ __ __ __ __ e: bends with a big radiu s are not supported in the graphical display. e total number of steps (CR) in the big radius must be such that th distance is greater than half the V-width. -
Page 79: Cycle Without Bend
When the punch reaches its exit point, stop the descent and note the position of the beam. Delete the field. Introduce this value in Y1 Y2. Regulate the tool reference value as a function of the tools used. PAGE 70 USER GUIDE DNC 600S…
-
Page 80: Bottoming
OTTOMING As for most work under pre ssure, it is preferable to do this type of bending i the center of the press. Delete th fiel Delete or leave the Y 1 and Y2 fields unprogrammed. The press makes the descen t in the conventional way until the beam stops in the bottom of the die with th e pressure of the current sequence…
-
Page 81
If the operator wishes to intervene directly on the values of the Y1 and Y2 axes, he has to do it on this page directly in the Y1-Y2 fields, and not in th equence page PAGE 72 USER GUIDE DNC 600S… -
Page 82: Alphanumerical Characters
LPHANUMERICAL HARACTERS The CODE field allows the introduction of alphanumerical characters. To introduce these characters, the keys are used, combined with the numerical ke ys of the keyboard. Example: To int roduce the character A, press the key and keeping the latter held down, press the key.
-
Page 83: Interactive Messages
EXECUTED The DNC has made the calculation correctly (corrections transformations, etc.). EXISTS Indicates that the product or tool number chosen for storage already exists. FREE Displayed in mode when the buffer is empty (no PAGE 74 USER GUIDE DNC 600S…
-
Page 84
sequences programmed). IGNORE Displayed when the k ey used cannot (must not) be used that time. INSERTED Indicates that the insertion has been made correct Jitter Error caused by the application of simultaneous edges on the input encoder signals (can be provoked by a parasite, a fault in the encoder or a short-circuit on the encoder phases). -
Page 85
, if the parameters vital to execution are not or only partially programmed and thus prevent the verification calculations. Var KO One of the DNC inputs «SERVO DRIVER OK» is not (no longer) active (+24 VDC). PAGE 76 USER GUIDE DNC 600S… -
Page 86
This page has been left b lank intentionally. APPENDIX G: MISCELLANEAOUS PAGE 77… -
Page 87: Appendix H: Transfer
H: T PPENDIX RANSFER For transfer to a PC by serial line the DNC 600S must be equipped with the 232 option. Products The PC must be equ ipped with the CYBELEC PC1200 software with option LINK7000. This combination allows to create pr…
-
Page 88: Testsing The Serial Ports
ESTSING THE ERIAL ORTS The 2 serial ports of the DNC 600S are SUB-D 9P, plugs J5 and J6. Introduce and verify that the transmission parameters are programmed as follows: PARAMETERS RS232 / DIVERS . . . — COMPUTER LINK –-…
-
Page 89: Cyback
The transfer mode remains memorized, even if the DNC is disconnected from power supply. It has to be re-programmed if the mode has been changed (for instance FLASH). PAGE 80 USER GUIDE DNC 600S…
-
Page 90
This page has been left blank intentionally. APPENDIX H: TRANSFER PAGE 81… -
Page 91: Appendix I: Printing The Current Screen
G THE URRENT CREEN The DNC 600S authorizes, if the RS232 port is included (optional), to print the content of a page displayed on the screen (connector J5). This allows, through a hardcopy, to retain information regarding the product(s), tools or machine parameters.
-
Page 92: Hyperterminal
It is possible to enter all the pages of a DNC600S on a PC in a txt fil e, which allows for a hardc opy backup of the machine parameters, programs or other DNC 600S elements. ONNECTION Connect an inverted (non-modem) RS 232 cable between t he J5 connector of the DNC and the RS 232 port of the computer.
-
Page 93
After having modified the parameters: • Go to the TRANSFER page. • Select 1 then hit the key to confirm the transmission with the new parameters, or turn the DNC off and on again. PAGE 84 USER GUIDE DNC 600S… -
Page 94
Configuring HyperTerminal • Enter a name for the file which will contain the parameter setting for this numerical command and choose an icon. You will call up this file every time you connect to the numerical command without having to reset the Hyper Terminal pa rameters. -
Page 95
• — Port parameters: Bits per second: 9600 Data bits: Parity: None Stop bits: Control flow: None • Select properties: PAGE 86 USER GUIDE DNC 600S… -
Page 96
• Enter the parameters as above. • Click the ASCII Configuration button. • Check the Line Wordwrap box. Then OK • Select Display then Font APPENDIX I: PRINT OF THE CURRENT SCREEN PAGE 87… -
Page 97
• Open the Call menu, • Select Call • Open the Transfer menu. • Select Text Capture. • Select the location and name of the file which will contain the DNC screen pages. PAGE 88 USER GUIDE DNC 600S… -
Page 98
Printing out all Machine Parameters With the DNC 600S P, PC and PS, starting from the SIXFDAx version, it is possible to print all the machine parameters in a single operation. To do th •… -
Page 99: Appendix J: Protecting The Access Levels
Certain users can modify their own password. For the others, the password can only be changed by a user having a superior access. Loss of the password In case of loss of the password, a user of a superior level has to reprogram the password. PAGE 90 USER GUIDE DNC 600S…
-
Page 100: Users
SERS Table of users, access and p asswords Level Names of Changing of Changing of Level Password er generally attributed to: predefined the personal passwords of virtual key by default users password subordinateds EUL1 Operators having the access authorization of level 1 EUL2 Operators having the access authorization o…
-
Page 101: Password Protected Access
, f om 1 to 2, from 2 to 3, etc.) and he has no access authorization. Advice have accessed to level 3, ac cess to level 0 after your intervention. This If you ill avoid to make undesired changings by inadvertence. PAGE 92 USER GUIDE DNC 600S…
-
Page 102: Accessing Levels Higher Than 3
CCESSING EVELS IGHER THAN Certain users can access to levels superior to 3, which enables them, among other things, to modify the passwords. In order to know the authorizations, see Table of users, access and passwords. Press the key during two seconds m inimum.
-
Page 103: Changing A Password
If the 2 registered passwords are different, the user is invited to introduce the 2 passwords again, the message VALUE is displayed. At the end of the intervention, don’t forget to pass to level 0 in order to leave the current level. PAGE 94 USER GUIDE DNC 600S…
-
Page 104: Managing Access Levels With An External Key
ANAGING CCESS EVELS WITH AN XTERNAL If the use of the external key is defined in the machine parameters, the access levels are managed by the external key. The passwords are no more active. he external key is defined by the parameter Key = 1 and by the The use of t use of the inputs KEY 0 and KEY 1.
-
Page 105: Maintenance
Go to a page where access to the P field (Program) is possible. Position the cursor on the P field. To increase the contrast (lighten), p ress the key. To decrease the contrast (darken), press the key. PAGE 96 USER GUIDE DNC 600S…
-
Page 106: In Case Of Failure
N CASE OF FAILURE NITIAL HECKS TO ARRY Switch the machine off then on again. Check the program (safety factors). Check that the axes can be displaced in manual mode. Check the machine parameters against the written list made during th installation.
-
Page 107: Internal Backup
8 EXT KEYB 11 Internal backup 12 Internal restore Quantity of free backup memory — COMPUTER LINK — Baud rate 57600 Stop 1.0 Parity odd (1) EVEN (0) Bits 8 • Select 11 INTERNAL BACKUP PAGE 98 USER GUIDE DNC 600S…
-
Page 108
DNC <-> PC STATUS TEST TRANSFER 1, 2 Cyback 3,4 TEST LIAISON 1 2 7 FLASH 8 EXT KEYBOARD Internal backup 10 ARDIS CONNEXION 11 INTERNAL BACKUP 0 = Abort 12 INTERNAL RESTORE 1 = Save machine parameters Quantity of free backup memory 97 % 2 = Save tools RS232 PARAMETERS… -
Page 109: Internal Restore Of Pms And Tools
8 EXT KEYBOARD 11 INTERNAL BACKUP 12 INTERNAL RESTORE Quantity of free backup memory 93 % RS232 PARAMETERS Baud rate 57600 Stop Parity odd (1) EVEN (0) _ Bits • Select 12 INTERNAL RESTORE PAGE 100 USER GUIDE DNC 600S…
-
Page 110
DNC <-> PC STATUS TEST TRANSFER 1 2 Cyback 3,4 DATA LINK TEST 1 2 7 FLASH 8 EXT KEYBD Internal restore 10 ARDIS CONNECTION 11 INTERNAL BACKUP 0 = Abort 12 INTERNAL RESTORE 1 = Restore machine parameters Quantity of free backup memory 93 % 2 = Restore tools RS232 PARAMETERS… -
Page 111: Accessories
2 and 3 dimensions the products to be realized on the numerical control. This software executes the simulation and graphic display of the bending order taking into account the characteristics of the machine, the tools and the material. PAGE 102 PAGE 102 USER GUIDE DNC 600S USER GUIDE DNC 600S…
-
Page 112
This page has been left blank intentionally. ACCESSORIES ACCESSORIES PAGE 103… -
Page 113: Index
73 Bending bottoming, 70 Bending order, 46 lure, 96 Al, 40 CAL, 40, 65 lculation, 45 CODE, 40 libration, 65 COR, 10 Cr, 11 Character(s) CR, 10, 42 alphanumerical, 72 CY, 9 PAGE 104 USER GUIDE DNC 600S…
-
Page 114
Dev L, 40 Ext start, 10 D Screen, 96 F1, 11 F5, 11 FACE, 46 of dies, I/mm, 40 product, 25 Kg/mm², 40 L, 10, 41 LEG, 46 Lmat, 10, 4 intenance, 96 MEM, 10 N, 9, 40, 41 Ma nipulation P, 39 sheet meta l, 49… -
Page 115
Product, 25 Contrast, 96 calling, 20 print screen, 81 deleting, 21 Viewing angle, 96 list of, 18 ‘White’, 96 programming, 38 Search, 27 searching, 20 by criteria, 25 searching by criteria, 19 Searching Profile, 39 product, 20 Programming product by criteria, 19 L-alpha, 12 Sequence, 25 Programming… -
Page 116
1 5 0 B Warranty, III INDEX PAGE 107…
Автор:
CSoft · Опубликовано: 4 минуты назад
Соглашение о сотрудничестве между АО «СиСофт Девелопмент» и компанией «УльтимаТек» подписано на ежегодной конференции «Эффективное производство 4.0», прошедшей в Москве. Стороны договорились о взаимодействии в сфере внедрения решений платформы TechnologiCS для промышленных машиностроительных предприятий.
По оценкам экспертов компании «УльтимаТек», предприятия судостроения цифровизрованы пока на недостаточном уровне для того роста потребностей и увеличения темпов выпуска продукции, которые фиксируются на данный момент. Именно эта ниша сейчас наиболее остро нуждается в автоматизации процессов планирования и управления производством.
Выбор площадки для подписания соглашения сделан неслучайно. Конференция «Эффективное производство 4.0» проводится с 2016 года и является одним из самых значимых деловых событий для машиностроительной и металлообрабатывающей промышленности. В центре внимания мероприятия – реальные кейсы и инновационные технологии, которые внедрены на производственных предприятиях и приносят экономические выгоды уже сегодня.
Александр Воротников, директор департамента цифровизации АО «СиСофт Девелопмент»:
«Ряд зарубежных продуктов, связанных с автоматизацией и управлением производством, с недавнего времени стал недоступным российским пользователям в связи с отзывом лицензий. Эта ситуация – не только значительный вызов, но и уникальная возможность создания бесшовной отечественной цифровой среды. Правительством уже приняты законодательные меры, стимулирующие развитие сферы российского софта. Мы давно заняли свою нишу, но считаем, что сейчас – лучшее время для продвижения наших разработок. Это поможет в формировании сообщества разработчиков и пользователей, которое в дальнейшем сможет внести большой вклад в становление независимого рынка российского программного обеспечения. Сотрудничество с профессиональной командой интегратора «УльтимаТек» – один из важных шагов в данном направлении».
Павел Растопшин, генеральный директор компании «УльтимаТек»:
«Перед нашими заказчиками сейчас стоит непростая задача инвестирования в новый отечественный софт при сохранении прибыльности производства. Для нас крайне важно предлагать именно те решения, в которых мы уверены. Наше официальное партнерство с «СиСофт Девелопмент» открывает большие возможности для комплексной проработки запросов заказчиков, которые сейчас переходят на российские цифровые платформы на новом качественном уровне. «УльтимаТек» сосредоточится на внедрении продуктовых решений TechnologiCS. И будет дополнять ими решения ГК «Цифра», так как «СиСофт Девелопмет» – это надежный российский разработчик САПР для машиностроения и BIM-решений для построения и оптимизации процессов управления производством, что на данный момент крайне востребовано на рынке».
Справка:
АО «СиСофт Девелопмент» – более 30 лет успешно занимается разработкой, поставкой и внедрением инженерного программного обеспечения (ПО), его спецификацией под нужды заказчика, формированием технических требований к внедряемым системам, обучением работе с ПО и инженерными данными, а также предоставляет услуги в области анализа бизнес-процессов, связанных с созданием и использованием инженерных решений. Компания объединяет опыт мировых и собственных разработок, создавая технологии для российского рынка.
ООО «УльтимаТек» – экспертный разработчик промышленного ПО, системный интегратор с фокусом на российские цифровые решения для поддержки импортозамещения технологий в промышленности. Осуществляет дистрибуцию и внедрение ключевых продуктов ГК «Цифра» и ряда российских технологических компаний.
TechnologiCS – цифровая платформа (PLM + MES + IIoT + EAM) для автоматизации и информационной поддержки процессов подготовки производства, производственного планирования и оперативного управления на промышленных предприятиях.
- Home
- Brands
- CYBELEC
- Controller
- DNC 600S
- Operation & User’s Manual
Manual for CYBELEC DNC 600S Controller (116 pages)
Specifications:
|
CYBELEC DNC 600S: Read PDF Manual Online
Accompanying Data:
CYBELEC DNC 600S Controller PDF Operation & User’s Manual (Updated: Sunday 27th of November 2022 08:37:42 PM)
Rating: 4.4 (rated by 17 users)
Compatible devices: LE 12.1, DNC 60 PS, VSR 0126, CybTouch 8, EPower, Tescom ER5000 Series, nice3000, A.
Recommended Documentation:
CYBELEC DNC 600S: Text of Operation & User’s Manual
(Ocr-Read Version Summary of Contents, UPD: 27 November 2022)
-
85, UNDEFINED Refusal to change to or , if the parameters vital to execution are not or only partially programmed and thus prevent the verification calculations. Var KO One of the DNC inputs «SERVO DRIVER OK» is not (no longer) active (+24 VDC). PAGE 76 USER GUIDE DNC 600S
… -
57, Sequence N 3: Face 2 and Leg 1 Sequence N 4: Face 4 and Leg 5 To introduce this bending order: Fill in the FACE and LEG fields as follows: P 1 N 1 p/d 1/ 1 BEND 1 2 3 4 5 6 7 8 9 10 1 3 2 4 __ __ __ __ __ __ LEG 0 1 1 5 __ __ __ __ __ __ Press the …
-
27, PRODUCT MANAGEMENT This chapter indicates how to manage the products (programs) stored in the numerical control. PRODUCT LIST Press the key. ACTUAL PIECE NEW_P CODE 623-42.15 SEQUENCES PROGRAMMED 42 AVAILABLE 306 -LIST OF PRODUCTS IN MEMORY- 1 2 11 222 997 ___ ___ ___ ___ ___ ___ ___ ___ ___ ___ ___ …
-
88, TESTSING THE SERIAL PORTS The 2 serial ports of the DNC 600S are SUB-D 9P, plugs J5 and J6. Introduce and verify that the transmission parameters are programmed as follows: PARAMETERS RS232 / DIVERS . . . — COMPUTER LINK –- 106 BAUD RATE 4800 STOP 1.0 PARITY ODD(1) EVEN(2) _ BITS 8 PROTOCOLE _ BCC …
-
107, INTERNAL B ACKUP A machine parameter and tools backup is possible in the internal memo well as a restore since this same internal memory. This functionality allows the manufacturer to memorize at delivery o This will erato reload the withou necessity to conne ble backup be restored. ry, as the time of the r to easily t the can (no rsion his memory is full, it can be on…
-
15, EASY BEND PAGE The EASY BEND page is accessible by hitting the key twice. . Easy Bend Th: 2.00 σ 45.00 Kg/mm2 Ac_Al_In_ p/d 1/1 CR __/ri 2.78 —MEM— —POS— —COR— 90.0° mes __._° Y1 293.11 350.92 Y2 293.11 351.05 L 136.0 X1 133.9 51.8 Lp 5000 Fp 78 Rx ___ Star…
-
40, APPENDIX C: THE MAIN MENU PAGE 31 MAIN MENU OPTIONS 1 NEW PRODUCT Create a new product and display the page sequence, ready for entering the data. 2 EASY BEND Access ///ADD CROSS REFERENCE Allows for quickly programming a bend and/or stopping production to quickly do another job (bend) without loss or modification of the program in hand. 3 LIST OF PRODUCTS /CRITE…
-
64, APPENDIX G: MISCELLANEAOUS INITIALIZATION P AGE This page appears if a s impossible, due to unprogrammed data r an incorrect value. can also appear as a result of pollution of one of the memory zones which possible calculations. calculation i o It will also give im INITIALIZATION DNC PS _ Clear variables zone _ Clear punches-dies zone _ …
-
50, L-alpha Page: Field Overview Each line (except the last) of the table on the L-ALPHA PRODUCT page represents data related to one bend. -N- -L- — — -p/d- -ri- CR TOL 1 ____.__ ____._°__/__ ____.__ __ ___ 2 ____.__ ____._°__/__ ____.__ __ ___ 3 ____.__ __ -N- Automatic numbering of the faces. A «face» is defined as being that…
-
115, Product, 25 list of, 18 programming, 38 searching, 20 searching by criteria, 19 Profile, 39 Programming L-alpha, 12 Programming direct, 12 direct, 8 Programming L-alpha, 38 Programming product, 38 Programming the bending order, 46 Punch(es), 34 angle, 34 linear force, 34 reference, 56 Punching, 69 R REF Y, 35 Reference, 56 Return, 49 RS232, 77 transmission…
-
110, MAINTENANCE PAGE 101 DNC <-> PC STATUS TEST TRANSFER 11 1 2 Cyback 3,4 DATA LINK TEST 1 2 7 FLASH 8 EXT KEYBD 10 ARDIS CONNECTION 11 INTERNAL BACKUP 12 INTERNAL RESTORE Quantity of free backup memory 93 % — RS232 PAR…
-
26, CREATING A PRODUCT PAGE 17 CORRECTIONS It can happen that the angle bent is slightly greater or less than the angle programmed. The operator has then the possibility to introduce the real value of the angle bent. The DNC will correct the Y1 and Y2 axis values accordingly. The corrections can be entered into two different pages: Page corrections (see explanati…
DOC-48c33ecc:
CYBELEC DNC 600S: Recommended Instructions
KCLD8887DT, Sunpak Bluetooth SelfieStick SP-RBTSW-BK, DOMINION KX II DKX2-0E-E, 5739 60, R3002


-
www.Fisher.comFisher™ D4 Control Valve with easy-Drive™Electric ActuatorContentsIntroduction 1……………………………Scope of Manual 1………………………..Description 3……………………………Specifications 3………………………….Educational Services 3…………………….Installation 4…………………………….Special I …
Fisher D4 36
-
Regulatory ciśnienia / presostaty BCP Rys. 1 Rys. 2 Rys. 3 Rys. 4 Rys. 5 Rys. 6 Rys. 7 Rys. 8017R9328017R9328©Danfoss A/S 03-2009, RA-MC,mr IC.PI.P10.K4.49 -520B3567 1InstrukcjaAkcesoria do montażu:- uchwyt naścienny- montaż na szynie DINMounting accessoriesAccessoires de montageAccessori di montaggioAccesorios de montaje …
BCP1 13
-
Owner’s Manual 1838 PC Programmable Multi-Door Access Controller DoorKing, Inc. 120 Glasgow Avenue Inglewood, California 90301 U.S.A. Phone: 310-645-0023 Fax: 310-641-1586 www.doorking.comP/N 1838-065 REV T, 7/12 Copyright 2003 DoorKing, Inc. All rights reserved. …
1838 51
-
(217) 352-9330 | [email protected] | artisantg.com-~ ARTISAN® ~I TECHNOLOGY GROUP Your definitive source for quality pre-owned equipment. Artisan Technology Group Full-service, independent repair center with experienced engineers and technicians on staff. We buy your excess, underutilized, and idle equipment along with credit for buybacks and trade-ins. Custom engineeri …
PSS Series 21
-
Rev. 1.1 Digital Multi-Purpose Controller 97TS500R Page 1 of 20 Walther Systemtechnik GmbH – D 76726 Germersheim Telefon: +49 (0)7274-7022-0 Telefax: +49 (0)7274-7022-91 http://www.walther-2000.de – [email protected] Operating Manual Digital Multi-Purpose Controller Article Number: 97TS500R NOTE Please read this Operating Ma …
97TS500R 20
-
Micromatic, LLC micromaticllc.com 525 Berne St Berne, IN 46711 1-260-589-2136 x3211 or 800-333-5752 [email protected] Page 1 of 14 Repair Manual – 26R-2 thru 26R-124 11NOV2019 MODEL: 26R Repair of Rotac® Actuators 26R Model OVERHAUL INSTRUCTIONS Read the entire contents of these instructions before i …
Rotac 26R 14
-
7 6 Gebrauchsanleitung für Medizinische Druckregler Select Ergo Instruction manual for Medical Pressure Regulator Select Ergo Bitte lesen Sie die Gebrauchsanweisung aufmerksam vor der ersten Benutzung! Please read the operation instructions carefully before using for the first time! Beachten Sie unbedingt die Sicherheitshinweise in dieser …
Select Ergo 13
-
© 2017 OJ Electronics A/S1Klemme Funktion 1 Stel — GND 2 Strøm-indgang + (I in) 3 For sy nings spæn ding til varmeregulator EFRP (V out) 4 DC/AC Spæn ding sind gang (V in)Styresignal Tabel 2FUNKTIONERSIKKERHEDSFUNKTIONEn føler ved triac-controllerens køleelement over vå ger, at der ikke sker en overophedning. Den vil afbryde controller, dersom den ved fejl bl …
EFR Series 8
-
WESTLOCK CONTROLS CORPORATION 280N MIDLAND AVENUE Ste.258, SADDLE BROOK, NJ 07663 TEL: 201-794-7650 FAX: 201-794-0913 www.westlockcontrols.com 2/3/12 TECH-457/D.W.O. 19909 Page 1 of 16 WIRELESS DEVICE INSTALLATION AND SETUP MANUAL Models: all models equipped with WD module, including but not limited to 1100, 9468, 3500, 3449, 3049, 9479, 366, 711, …
1100 16
-
180954E_MHW_GF_LOOPER_01-2012_ENG GF_LOOPER Multiloop graphic controller, 4 — 8 — 12 — 16 zones 3.5” and 5.7” screens, TFT, Colour, Touch screencode 80954E / Edition 06 — 05-2014INSTALLATION ANDOPERATION MANUALGENERAL INDEX page Graphic symbols used 21 Preliminary instructions 3 General description 3 Preliminary warnings 42 Installation and Connection 5 Electrical …
GF LOOPER 21
Additional Information:
Popular Right Now:
Operating Impressions, Questions and Answers:
Information in this document is subject to change without notice, and does not represent
a commitment on the part of CYBELEC SA.
The software described in this document is furnished under a licence or nondisclosure agreement. The
software may be used or copied only in accordance with the terms of the agreement. It is against the law
to copy the software on any medium except as specifically allowed in the licence or nondisclosure
agreement.
Copyright CYBELEC SA. 1991
All rights reserved.
Important:
This notice explains normal and standard programming operations for the numerical control.
In view of the fact that numerical controls can be equipped with configurable functions by the press
manufacturer for his own specific purposes, please refer to the manufacturer-supplied complementary
instructions regarding the programming of these functions.
Autocad
is a registered trade mark of Autodesk Inc..
CYBELEC
is a registered trademark of CYBELEC SA.
Ethernet
is a registered trade mark of Xerox Corporation.
IBM , PC/AT , PC Network , Token Ring Network
are registered trade marks of the International Business Machines Corporation.
MS-DOS
is a registered trade mark of Microsoft Corporation.
MS-Windows
is a registered trade mark of Microsoft Corporation.
Novell Netware
is a registered trade mark of Novell, Incorporated.
Windows NT
is a registered trade mark of Microsoft Corporation.
Download Operation & user’s manual of CYBELEC DNC 600S Controller for Free or View it Online on All-Guides.com.

1

2

3

4

5

6

7

8

9

10

11

12

13

14

15

16

17

18

19

20

21

22

23

24

25

26

27

28

29

30

31

32

33

34

35

36

37

38

39

40

41

42

43

44

45

46

47

48

49

50

51

52

53

54

55

56

57

58

59

60

61

62

63

64

65

66

67

68

69

70

71

72

73

74

75

76

77

78

79

80

81

82

83

84

85

86

87

88

89

90

91

92

93

94

95

96

97

98

99

100

101

102

103

104

105

106

107

108

109

110

111

112

113

114

115

116

DNC 600S
User Guide
CYBELEC SA Tel. ++ 41 24 447 02 00
RUE DES UTTINS 27 Fax ++ 41 24 447 02 01
SWITZERLAND
V-DOC-60PS-EN
CYBELEC SA Tel. ++ 41 24 447 02 00
RUE DES UTTINS 27 Fax ++ 41 24 447 02 01
SWITZERLAND
V-DOC-600PS-EN
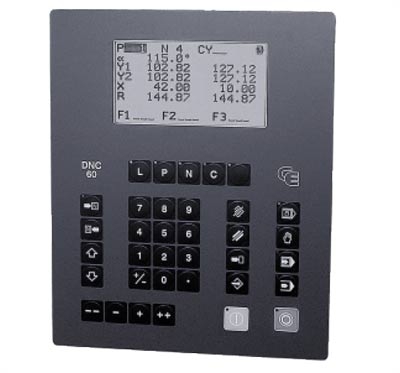
Удобная панель управления с буквенно-цифровым отображением, для удобства ввода данных имеет удобные большие кнопки. DNC 600 может контролировать до 4 сервомоторов (осей). Перенос данных с ПК на гибочный пресс может производиться через прямое кабельное соединение.
Заказать
Паспорт станка
Все CNC контроллеры CYBELEC сопровождаются программным обеспечением CYBACK, PC 1200 2D или PC 1200 3D, в котором содержится библиотека чертежей прессов и инструмента, с помощью которой можно подготавливать любые программы. С их помощью определяется оптимальная последовательность гибочных операций, процесс гибки моделируется на графическом дисплее. Программное обеспечение CYBELEC это великолепный инструмент для подготовки работы, применение которого не приводит ни к каким производственным потерям и помогает решить все проблемы, связанные с гибочными операциями.
 Loading…

DNC 600S
User Guide
|
CYBELEC SA |
Tel. ++ 41 24 447 02 00 |
|
RUE DES UTTINS 27 |
Fax ++ 41 24 447 02 01 |
|
CH — 1400 YVERDON-LES-BAINS |
E-Mail: info@cybelec.ch |
|
SWITZERLAND |
V-DOC-600PS-EN-EN |

Information in this document is subject to change without notice, and does not represent a commitment on the part of CYBELEC SA.
The software described in this document is furnished under a licence or nondisclosure agreement. The software may be used or copied only in accordance with the terms of the agreement. It is against the law to copy the software on any medium except as specifically allowed in the licence or nondisclosure agreement.
Copyright CYBELEC SA. 1991 All rights reserved.
Important:
This notice explains normal and standard programming operations for the numerical control.
In view of the fact that numerical controls can be equipped with configurable functions by the press manufacturer for his own specific purposes, please refer to the manufacturer-supplied complementary instructions regarding the programming of these functions.
Autocad

 is a registered trade mark of Autodesk Inc..
CYBELEC

 is a registered trademark of CYBELEC SA.
Ethernet

 is a registered trade mark of Xerox Corporation.
IBM

 , PC/AT

 , PC Network

 , Token Ring Network


are registered trade marks of the International Business Machines Corporation.
MS-DOS

 is a registered trade mark of Microsoft Corporation.
MS-Windows

 is a registered trade mark of Microsoft Corporation.
Novell Netware is a registered trade mark of Novell, Incorporated.
Windows NT

 is a registered trade mark of Microsoft Corporation.

SAFETY AND MAINTENANCE INSTRUCTIONS
The operator must be trained for working with the machine on which the numerical control is installed.
Improper use of the numerical control can cause heavy damage on equipment and/or injuries to people.
Modification of machine parameters can cause important material damage or lead to irregular product quality.
The rear panel may only be removed by a qualified technician (danger of electrocution).
Do not expose the numerical control to excessive humidity so as to avoid any risk of electrocution and any deterioration of the equipment.
Make sure the numerical control is disconnected from the mains power before carrying out any cleaning. Do not use liquids based on alcohol or ammoniac.
In case of malfunction of the numerical control, call a technician.
Do not expose the numerical control to direct sun rays or any other heat source.
Do not place the numerical control in the neighbourhood of magnetic equipment such as transformers, motors or devices which generate interference (welding machines, etc.)
Replace fan filters at regular intervals so as to avoid overheating.
|
SAFETY AND MAINTENANCE INSTRUCTIONS |
PAGE I |
This page has been left blank intentionally.
PAGE II USER GUIDE DNC 60 PS

LICENCE AGREEMENT FOR CYBELEC SOFTWARE
GENERAL COPYRIGHT
The CYBELEC software is protected by Copyright, and all the copying rights are reserved.
The CYBELEC software may only be installed and used in authorized equipments (PC or DNC). The user manuals are also covered by copyright, and all rights to use and to copy are reserved.
This document may not, in whole or in part, be copied, photocopied, reproduced, translated or reduced without prior consent, in writing, from CYBELEC.
SPECIAL DISKETTE COPYRIGHT
The legal users of this software product are authorized only to copy the contents of the diskette into the memory of the computer to run the program, and to make one backup copy of the original diskette for safety purposes in case of loss of the original program.
Unauthorized copying, duplicating, selling or otherwise distributing this product is a violation of the law.
SPECIAL EPROM COPYRIGHT
The CYBELEC DNC and CNC units in which the original software made by CYBELEC has been replaced by a copy not made by CYBELEC, and without written authorization of CYBELEC, will immediately lose their warranty.
WARRANTY
CYBELEC does not warrant that its software products will function properly in every computer and programming environment.
The limitations of use of a software product and its technical specifications are decided by CYBELEC only; CYBELEC solely is entitled to decide upon conformity and performance of a given software.
The CYBELEC software does not compensate for incompatibilities in operating system revisions or versions.
Running the CYBELEC software under various revisions or versions, or switching between different versions or revisions may result in loss or alteration of data.
|
LICENSE AGREEMENT |
PAGE III |

SOFTWARE UPDATE SERVICE
Purchase of the CYBELEC software entitles the user, during one year, to delivery of software updates of the «correction» type.
During the use of a revised or corrected version of the software it may occur that data (program, parameters, etc.) is lost, or that the equipment or its connections need to be modified; these effects are not always foreseeable and do not engage CYBELEC’s responsibility.
TERMINATION
This agreement shall automatically terminate upon any act of bankruptcy by or against licensee, upon any assignment for the benefit of creditors of the licensee, upon any attachment execution of judgement or process against licensee or its assets that substantially inhibits its ability to do business, or upon dissolution of licensee.
CYBELEC has the right to terminate this agreement immediately, should the licensee violate the aforementioned conditions.
Within 30 days of termination of this agreement for any reason, licensee shall at his option, either: return to CYBELEC or authorized dealer all existent copies of such software and related materials, or
furnish to CYBELEC evidence satisfactory that the original and all copies of the software, in whole and in any form, have been destroyed.
LIMITATION OF LIABILITY
The foregoing warranty is instead of all other warranties, expressed or implied.
Licensee further agrees that CYBELEC shall not be liable for any lost profits, lost savings, loss of use, or other incidental or consequential damages arising from the use or inability to use the software, or for any claim or demand against licensee by any other party.
In no event shall CYBELEC be liable for consequential damages, even if CYBELEC has been advised of the possibility of such damages.
CYBELEC does not warrant that the functions contained in the software will meet the licensee’s requirement or that the operation of the software will be totally error free.
Should the software prove defective, the licensee (and not CYBELEC or an authorized dealer or representative) will assume the entire cost of all necessary service, repair or correction.
CYBELEC warrants the diskettes, EPROMS or other magnetic support or cassettes on which the programs are supplied to be free of defects in material and workmanship under normal use for a period of 90 days from the date of shipment to the licensee as evidenced by a copy of the packing slip.
|
PAGE IV |
LICENCE AGREEMENT |

LIMITATION OF REMEDIES
CYBELEC’s entire liability and the licensee’s exclusive remedy shall be as follows:
The replacement of any diskettes or EPROMS or magnetic support media or cassettes not meeting CYBELEC’s limited warranty and which materials are returned to CYBELEC or an authorized CYBELEC representative with a copy of the packing slip, or
If CYBELEC or its representative is unable to deliver replacement diskettes, magnetic support media, EPROM or cassettes which are free of defects in materials or workmanship, the licensee may terminate this agreement under the terms and conditions herein mentioned, and the purchaser’s money will be refunded.
GENERAL
The licensee acknowledges that he has read this agreement, understands it and agrees to be bound by its terms and conditions.
The licensee agrees to hold CYBELEC harmless on all liability associated with licensee’s breach of this agreement including, but not limited to, all reasonable attorney’s fees and court costs, if any.
This licence agreement shall be governed by Swiss law; place of jurisdiction is Lausanne, Switzerland.
MAINTENANCE
CYBELEC will provide one year of software maintenance. The extent of maintenance, and response time for furnishing same, shall be at the sole discretion of CYBELEC. Maintenance shall normally include correction of errors in code, correction of errors in supporting documentation, update versions of the covered software which may be released by CYBELEC during the maintenance period.
In no event shall CYBELEC be obliged to provide technical support in attempting to resolve problems or difficulties resulting from licensee’s modification of the licensed software; any such modification by licensee is entirely at licensee’s own risk.
This page has been left blank intentionally.
|
PAGE VI |
LICENCE AGREEMENT |
|
CONTENTS |
||
|
SAFETY AND MAINTENANCE INSTRUCTIONS ………………………………………………………………… |
I |
|
|
LICENCE AGREEMENT FOR CYBELEC SOFTWARE………………………………………………………… |
III |
|
|
Safety, Copyright & License agreement…………………………………………………………………… |
3 |
|
|
HOW TO…………………………………………………………………………………………………………………………5 |
||
|
Use Easy Bend (Very Basic Bends)………………………………………………………………………… |
5 |
|
|
Program a Simple Product …………………………………………………………………………………….. |
5 |
|
|
Program a Product using the Graphic Display………………………………………………………….. |
5 |
|
|
EASY BEND PAGE………………………………………………………………………………………………………….. |
6 |
|
|
CREATING A PRODUCT …………………………………………………………………………………………………. |
8 |
|
|
Using the Sequence Page……………………………………………………………………………………… |
8 |
|
|
Programming with the Sequence Page……………………………………………………………………. |
12 |
|
|
PRODUCT MANAGEMENT………………………………………………………………………………………………. |
18 |
|
|
Product List………………………………………………………………………………………………………….. |
18 |
|
|
APPENDIX A: CONVENTIONS …………………………………………………………………………………………. |
22 |
|
|
Typographical Conventions……………………………………………………………………………………. |
22 |
|
|
Abbreviations / Glossary ……………………………………………………………………………………….. |
22 |
|
|
APPENDIX B: USER INTERFACE …………………………………………………………………………………….. |
24 |
|
|
Using the Screen………………………………………………………………………………………………….. |
24 |
|
|
Using the Keyboard………………………………………………………………………………………………. |
24 |
|
|
APPENDIX C: MAIN MENU………………………………………………………………………………………………. |
30 |
|
|
Main Menu Options ………………………………………………………………………………………………. |
31 |
|
|
APPENDIX D: WORKING MODES…………………………………………………………………………………….. |
32 |
|
|
Adjustment Mode …………………………………………………………………………………………………. |
32 |
|
|
Sensitive Mode…………………………………………………………………………………………………….. |
33 |
|
|
Automatic Mode …………………………………………………………………………………………………… |
33 |
|
|
APPENDIX E: TOOL PROGRAMMING………………………………………………………………………………. |
34 |
|
|
Programming Punches / Dies ………………………………………………………………………………… |
34 |
|
|
APPENDIX F: PROGRAMMING WITH L-ALPHA ………………………………………………………………… |
38 |
|
|
Programming Using the L-alpha Page…………………………………………………………………….. |
39 |
|
|
L-alpha Method ……………………………………………………………………………………………………. |
43 |
|
|
Defining the Bending Order……………………………………………………………………………………. |
46 |
|
|
N600S_EN.DOC |
CONTENTS |
PAGE 1 |
|
APPENDIX G: MISCELLANEAOUS ………………………………………………………………………………….. |
55 |
|
INITIALIZATION Page………………………………………………………………………………………….. |
55 |
|
Tool Reference ……………………………………………………………………………………………………. |
57 |
|
Pinch Point………………………………………………………………………………………………………….. |
60 |
|
Gauge Axes ………………………………………………………………………………………………………… |
61 |
|
Programming the Axes Datum ………………………………………………………………………………. |
65 |
|
Calibration…………………………………………………………………………………………………………… |
66 |
|
Ideal Curve …………………………………………………………………………………………………………. |
67 |
|
Cycle without Bend………………………………………………………………………………………………. |
70 |
|
Punching…………………………………………………………………………………………………………….. |
70 |
|
Bottoming……………………………………………………………………………………………………………. |
71 |
|
Angle Correction………………………………………………………………………………………………….. |
71 |
|
Alphanumerical Characters …………………………………………………………………………………… |
73 |
|
Messages / Errors ……………………………………………………………………………………………….. |
73 |
|
Interactive Messages……………………………………………………………………………………………. |
74 |
|
APPENDIX H: TRANSFER ………………………………………………………………………………………………. |
78 |
|
Testsing the Serial Ports ………………………………………………………………………………………. |
79 |
|
CYBACK …………………………………………………………………………………………………………….. |
80 |
|
APPENDIX I: PRINTING THE CURRENT SCREEN ……………………………………………………………. |
82 |
|
HyperTerminal …………………………………………………………………………………………………….. |
83 |
|
APPENDIX J: PROTECTING THE ACCESS LEVELS …………………………………………………………. |
90 |
|
General Information……………………………………………………………………………………………… |
90 |
|
Users …………………………………………………………………………………………………………………. |
91 |
|
Password Protected Access………………………………………………………………………………….. |
92 |
|
Accessing Levels Higher than 3 …………………………………………………………………………….. |
93 |
|
Changing a Password ………………………………………………………………………………………….. |
94 |
|
Managing Access Levels with an External Key …………………………………………………………. |
95 |
|
MAINTENANCE ……………………………………………………………………………………………………………… |
96 |
|
LCD Screen ………………………………………………………………………………………………………… |
96 |
|
In case of failure ………………………………………………………………………………………………….. |
97 |
|
Internal Backup……………………………………………………………………………………………………. |
98 |
|
Internal restore of PMs and tools……………………………………………………………………………. |
100 |
|
ACCESSORIES………………………………………………………………………………………………………………. |
102 |
|
INDEX……………………………………………………………………………………………………………………………. |
104 |

SAFETY, COPYRIGHT & LICENSE AGREEMENT
Please consult the safety instructions, copyright and license agreement on the first pages of the manual.
ABOUT THIS MANUAL
This manual is designed to help the user to familiarize with the numerical control DNC 600S and to use it with a maximum of efficiency.
To reach a maximum of comfort and productivity of the numerical control, it is recommended to read attentively the whole manual.
A table of contents and a well organized index enable you to find rapidly the searched subject.
Note: In this User Guide it is assumed that the DNC has an operational configuration (i.e. machine parameters and tools are programmed).
This manual is evolutive. You, the user, can help us to give you better assistance. If you have any comments on this document, please write us to:
CYBELEC S.A.
Dpt Communication
Rue des Uttins 27
CH-1401 Yverdon-les-Bains
Fax ++ 41 24 447 02 01
E-mail: info@cybelec.ch
This page has been left blank intentionally.
PAGE 4 USER GUIDE DNC 600S

HOW TO…
USE EASY BEND (VERY BASIC BENDS)
Go to page 6,.EASY BEND Page.
PROGRAM A SIMPLE PRODUCT
Go to page 12, Programming with the Sequence Page.
PROGRAM A PRODUCT USING THE GRAPHIC
DISPLAY
Go to page 38, Appendix F: Programming with L-Alpha.
TIPS
|
Press this key to navigate through the main fields of the page from the top |
||||||||||||||||||
|
down. |
||||||||||||||||||
|
Press this key to navigate through all fields of the page from the bottom up. |
||||||||||||||||||
|
Keeping this key pressed will navigate from field to field using the auto- |
||||||||||||||||||
|
repeat feature of the key (3X per second). |
||||||||||||||||||
|
The navigation feature of both these keys can be activated or de-activated in |
||||||||||||||||||
|
the USER PREFERENCES page from the main menu. |
||||||||||||||||||
|
+ |
Press this key combination to go to the top left field. |
|||||||||||||||||
|
or |
Pressing on either of these keys while the cursor is on the P field will toggle |
|||||||||||||||||
|
the display between a white and a black background. |
||||||||||||||||||
|
Pressing on either of these keys while the cursor is on the P field will adjust |
||||||||||||||||||
|
or |
||||||||||||||||||
|
the contrast. |

EASY BEND PAGE
The EASY BEND page is accessible by hitting the  key twice..
|
Easy Bend |
45.00 Kg/mm2 |
Ac_Al_In_ |
||||||||
|
Th: |
2.00 |
σ |
||||||||
|
p/d |
1/1 |
CR __/ri |
2.78 |
—COR— |
||||||
|
—MEM— |
—POS— |
|||||||||
|
90.0° |
mes __._° |
|||||||||
|
293.11 |
350.92 |
|||||||||
|
Y1 |
||||||||||
|
Y2 |
293.11 |
351.05 |
||||||||
|
L |
136.0 |
51.8 |
||||||||
|
X1 |
133.9 |
|||||||||
|
Lp |
5000 |
Fp 78 |
||||||||
|
Rx |
___ |
Start Ext _ |
||||||||
|
Vy |
__% |
__% |
Tp _._s |
|||||||
|
PCV |
___ |
Material thickness
This page makes it possible to quickly programme a bend, and/or briefly stop production to perform a single bend without modifying or losing data in the production programme.
PROGRAMMING A BEND
Enter the thickness and the tools if they differ from the product in the course of production.
To speed up programming, the p/m fields as well as the material are taken over from sequence 1 of the product currently in hand. The modification of these data does not affect the programme that is running.
Enter the angle of the bend in the  field
field
Enter the height L of the wing (external measurement) and the position of the X gauge will be calculated automatically.
or
directly enter the distance at which the X L gauge is to be positioned.
Enter the length of the bend.
The system automatically calculates the pressure and bending. Possibly also enter,
ohow long the pressure is to be maintained (if not programmed, the default is = 0.5 s),
o the retraction of the gauge,
o the reduction in bending speed, o slow lifting, etc.
PAGE 6 USER GUIDE DNC 600S

Press the START button or the pedal and the axes will position to the desired values. The numerical command will automatically go into semiautomatic mode.
Actuate the pedal to bend.
When the beam returns, the DNC switches to programming mode. You can now enter new data or actuate the pedal for a new bend.
Hit the  key to return to production mode.
FIELD OVERVIEW
See Field Overview, page 9.

CREATING A PRODUCT
|
This paragraph explains how to programme a product as well as the method |
||||||||||||||||||||||||||||||||||
|
for correcting and recording it. |
||||||||||||||||||||||||||||||||||
|
USING THE SEQUENCE PAGE |
||||||||||||||||||||||||||||||||||
|
This page displays all the bending informations for the current sequence. |
||||||||||||||||||||||||||||||||||
|
That is the requested position of the Y and X (R, etc.) axes, the pressure, the |
||||||||||||||||||||||||||||||||||
|
gauge retraction, the crowning, the dwell time, etc. |
||||||||||||||||||||||||||||||||||
|
Important |
This page displays the result of the calculations made when programming a |
|||||||||||||||||||||||||||||||||
|
product in the L-alpha page with definition of the bending order. |
||||||||||||||||||||||||||||||||||
|
The operator can modify these values if necessary (especially the retraction, |
||||||||||||||||||||||||||||||||||
|
the dwell time, the top dead center). |
||||||||||||||||||||||||||||||||||
|
However he must avoid to directly modify the Y and X values calculated by |
||||||||||||||||||||||||||||||||||
|
the DNC. |
||||||||||||||||||||||||||||||||||
|
Hint |
An operator can directly program a product in this page, without «passing» |
|||||||||||||||||||||||||||||||||
|
through the L-alpha page and definition of the bending order. |
||||||||||||||||||||||||||||||||||
|
This simplifies the manipulations a great deal, since all the informations |
||||||||||||||||||||||||||||||||||
|
required for the bending are on this page. |
||||||||||||||||||||||||||||||||||
|
To reach the sequence page, press the |
key. |
|||||||||||||||||||||||||||||||||
|
Pressing once will display the page in large characters, pressing twice |
||||||||||||||||||||||||||||||||||
|
will display all dimensions and functions of the current sequence in small |
||||||||||||||||||||||||||||||||||
|
characters. |
||||||||||||||||||||||||||||||||||
|
Pressing the key 3 times |
will display the main sequence data in large |
|||||||||||||||||||||||||||||||||
characters, with a graphic of the part underneath.
This page is displayed during the powering-on of the DNC.
To change from one sequence to another, press the  or
or  key.
key.
In order to add a new sequence with the same content as the last sequence at
the end of the program, press  , then 1 when the warning message displays.
In order to insert after the current sequence a sequence with the same content as the current one, press  when the cursor is on the N field.
The  key is used to move the cursor from one significant field to another.
The  key is used to move the cursor across all the fields. This function can be deactivated in the user preferences.
PAGE 8 USER GUIDE DNC 600S

If a product is removed, the data contained in the tool fields, the thickness field and the material information fields continue to be displayed. This saves the operator from having to reprogramme unchanged data.
|
P |
1 N |
1 |
CY __ |
Kg/mm² |
||||||||||
|
Th: |
2.00 |
45.00 |
||||||||||||
|
p/d |
1/ 1 |
CR __/ri |
2.78 |
—COR— |
||||||||||
|
—MEM— |
—POS— |
|||||||||||||
|
90.0° |
||||||||||||||
|
Y1 |
293.11 |
350.92 |
____.__ |
|||||||||||
|
Y2 |
293.11 |
351.05 |
____.__ |
|||||||||||
|
X 1 |
133.91 |
51.85 |
____.__ |
|||||||||||
|
Q |
____ |
____ |
||||||||||||
|
Lmat |
5000 |
TON |
78 |
|||||||||||
|
Rx _ |
___ |
Ext start _ |
||||||||||||
|
Vy |
__% |
__% |
T |
_._s |
||||||||||
|
TDC |
___ |
SP |
___ |
|||||||||||
|
F1:___ F2:___ F3:___ F4:__ F5:__ Cr: 41 |
||||||||||||||
|
FIELD OVERVIEW |
||||||||||||||
|
P |
Number of the product in the work memory. |
|||||||||||||
|
P+ |
Number of the following product when there is |
|||||||||||||
|
a sequence of programmes. |
||||||||||||||
|
N |
Bending order (sequence) number to be made |
|||||||||||||
|
and the total number of bends for the product. |
||||||||||||||
|
CY |
Number of sequence repetitions. |
|||||||||||||
|
(programmed 0, the sequence is jumped) |
||||||||||||||
|
Th |
Material thickness. |
|||||||||||||
|
The Greek symbol «Sigma» indicates the |
||||||||||||||
|
tensile and rupture strength. |
||||||||||||||
|
This field, as well as those showing the type of |
||||||||||||||
|
material, can be hidden (see the preferences |
||||||||||||||
|
page in the machine parameters). |
||||||||||||||
|
If this field is hidden, the default value is steel |
||||||||||||||
|
45 kg/mm2, but other values can be defined in |
||||||||||||||
|
the ad hoc field in the machine parameters. |
||||||||||||||
|
p/d |
Number of the punch/die pair associated with |
|||||||||||||
|
the bend to be made. |
||||||||||||||
|
In the P or D field press |
to display the list |
|||||||||||||
|
of tools. |
||||||||||||||
|
CREATING A PRODUCT |
PAGE 9 |

|
Select the tool in the list then press |
again |
|||||
|
to return. |
||||||
|
CR/ri |
Number of bends requested when working |
|||||
|
with step bending (min. 4), and internal |
||||||
|
bending radius. |
||||||
|
—MEM— |
This column contains either the values |
|||||
|
calculated by the system when simulating, or |
||||||
|
the values programmed by the operator. |
||||||
|
—POS— |
This column indicates the real axes’ positions. |
|||||
|
—COR— |
This column contains all the sequence and |
|||||
|
product corrections introduced on the |
||||||
|
CORRECTION page. |
The  , Y1, Y2, etc. fields are dependant on the axes programmed in the numerical control.
|
L |
Height of the wing after bending. The DNC |
|||
|
will automatically calculate the position of the |
||||
|
back gauge of axis X. |
L |
|||
|
Q |
Quantity of products to be produced. The Q |
|||
|
field is displayed only if the parameter in the |
||||
|
PREFERENCES page is activated. |
||||
|
Lmat |
Bending length. |
|||
|
TON |
Bending force. |
|||
|
Rx |
Back gauge retraction. The operator indicates |
|||
|
in mm the retraction distance. If nothing is |
||||
|
programmed, the beam doesn’t stop at the PP. |
||||
|
No retraction. |
||||
|
If value 0 is introduced, the beam stops at the |
||||
|
PP, then executes immediately the bend |
||||
|
without carrying out a retraction. |
||||
|
The field between the Rx and the retraction |
||||
|
value serves to define the retraction mode. |
||||
|
_ = the beam stops at the PP and waits till the |
||||
|
retraction is made, in order to carry out the |
||||
|
bend. |
||||
|
1 = the beam stops at the PP, then continues |
||||
|
immediately, at the same time as the |
||||
|
retraction is carrying out. |
||||
|
Ext start |
If nothing is programmed in this field, the axes |
|||
|
start automatically from the BDC, from the PP |
||||
|
or from the TDC, depending on the choice |
||||
|
made in the machine parameters. |
||||
|
If 1 is programmed, the start will be made as a |
||||
|
function of the configuration made by the |
||||
|
PAGE 10 |
USER GUIDE DNC 600S |

constructor.
— In most of the configurations, it will be sufficient to give a down command. At this command, the axes take position, then a second down command has to be given, in order to move the beam.
— In other configurations, the provided start button must be pressed.
— When the message TOL ZONE appears,
|
that means that a down command has been |
|
|
given and that the axes are not positionned |
|
|
in the current sequence. Give a start with |
|
|
the provided button or on the front panel of |
|
|
the DNC. |
|
|
Vy |
Beam bending speed. |
|
Programmed at 0, the speed is 1 mm/s. |
|
|
Programmed at 9, the speed is 10 mm/s. |
|
|
(If the machine is capable of reaching this |
|
|
speed) |
|
|
Vy |
Rising speed from BDC to PP. |
|
Programmable from 0 (slow) to 9 (fast). |
|
|
Allows to vary the speed at which the beam |
|
|
rises to the PP. (Function depending on the |
|
|
machine’s hydraulics). |
|
|
T |
Dwell time. |
|
TDC |
Distance from top dead center. |
|
SP |
Distance from the beam speed changing point. |
|
(Switch Point). |
|
|
F1: — F5:, Cr |
Value of the auxiliary functions F1 to F5 and |
|
crowning. |
These fields can also be re-programmed by the user.
However, certain fields are related, that is modifying one provokes a modification of the other.
|
CREATING A PRODUCT |
PAGE 11 |
![]()
PROGRAMMING WITH THE SEQUENCE PAGE
In this guide, it is considered that the DNC is configured so as to be operational (i.e. machine and tool parameters programmed).
The operator has 2 methods available for programming.
The fastest
Direct programming (or programming in the sequence page)
Direct programming is the faster method for an experienced operator, because all the programming of the product is done on the same page. This makes it possible to programme the positions of the axes directly, and it calculates the depth of bending according to the angle entered.
With calculation of the flat pattern
The L-Alpha method.
The L-alpha method makes it possible to enter a profile to bend with the external dimensions and angle of each face. The DNC will calculate the developed length:
After having programmed the sequence of bends, the DNC will calculate the position of the gauges.
Explanation of this method in Appendix F: Programming with L-Alpha on page 38.
DIRECT PROGRAMMING
Programming Example
The following product is to be realized:
Th: 2.0 mm
Lmat: 1000 mm
The bending order is the following:
PAGE 12 USER GUIDE DNC 600S

Bend 1 on FACE 1 and LEG 0
Bend 2 on FACE 3 and LEG 4
Bend 3 on FACE 2 and LEG 3
|
Clear the memory |
Call the sequence page with the |
key. |
|||
Clear the work memory.
In the event of the removal of a product, the data contained in the Tools fields, the Thickness field and the Material Information fields remain (if displayed). This avoids the operator having to reprogramme unchanged data.
Place the cursor in the N field (reminder:  +
+  to position the cursor on the top of the page).
|
CREATING A PRODUCT |
PAGE 13 |

|
P |
125 N 99 |
CY __ |
Kg/mm² |
|||
|
Th: __.__ |
__.__ |
|||||
|
p/d |
_/_ |
CR __/ri |
__.__ |
—COR— |
||
|
—MEM— |
—POS— |
|||||
|
__._° |
||||||
|
Y1 |
___.__ |
350.92 |
___.__ |
|||
Introduce 99 and press the  key.
key.
|
1st sequence |
Introduce the thickness, the sigma, the tools as below: |
||||||||||||||||||||||
|
To select a tool, enter the tool number or press |
when the cursor |
||||||||||||||||||||||
|
is in the P or M field to display the tool list. |
|||||||||||||||||||||||
|
Select the tool in the list and press |
again to go back to the |
||||||||||||||||||||||
|
sequence page. |
|||||||||||||||||||||||
|
P |
0 |
N 1 |
CY __ |
Kg/mm² |
|||||||||||||||||||
|
Th: |
2.00 |
σ 37.00 |
|||||||||||||||||||||
|
p/d |
1/1 |
CR __/ri |
__.__ |
||||||||||||||||||||
|
Program 90 in the |
field. |
||||||||||||||||||||||
|
By leaving the field, the system calculates the Y1 and Y2 axes’ values. |
|||||||||||||||||||||||
|
Introduce 58.0 in the X field (stop position for this first bend). |
|||||||||||||||||||||||
|
Introduce the bending length 1000. |
|||||||||||||||||||||||
|
The system calculates the pressure and the crowning automatically. |
|||||||||||||||||||||||
|
If necessary, introduce the dwell time (by default non-programmed = |
|||||||||||||||||||||||
|
0.5 s), the gauge retraction, the bending speed reduction, the slow |
|||||||||||||||||||||||
|
raising, etc. |
|||||||||||||||||||||||
|
Press |
and then 1, in order to copy this first sequence in |
||||||||||||||||||||||
sequence 2.
The message COPIED is displayed, the N field passes on 2.
The LED of the key remains lighted, indicating that you are on the last sequence.
PAGE 14 USER GUIDE DNC 600S

|
2nd sequence |
The following screen is displayed: |
||||||||||||||||
|
Note: |
The values Y1, Y2, Fb and Cr will vary, for they are |
||||||||||||||||
|
calculated as a function of the programmed tools. The values |
|||||||||||||||||
|
POS Y1, Y2 and X will also be different, for they display the |
|||||||||||||||||
|
real position of the axes. |
|||||||||||||||||
|
P |
0 |
N |
2 |
CY __ |
Kg/mm² |
||||||||||||
|
Th: |
2.00 |
37.00 |
|||||||||||||||
|
p/d |
1/ 1 |
CR __/ri |
__.__ |
||||||||||||||
|
—MEM— |
—POS— |
—COR— |
|||||||||||||||
|
90.0° |
|||||||||||||||||
|
229.90 |
350.92 |
____.__ |
|||||||||||||||
|
Y1 |
|||||||||||||||||
|
Y2 |
229.90 |
351.05 |
____.__ |
||||||||||||||
|
L |
___.__ |
51.85 |
____.__ |
||||||||||||||
|
X |
58.00 |
||||||||||||||||
|
Lmat |
1000 |
TON |
19 |
||||||||||||||
|
Rx |
___ |
Ext start _ |
|||||||||||||||
|
Vy |
_ |
_ |
T _._s |
||||||||||||||
|
TDC |
___ |
SP |
___ |
||||||||||||||
|
F1:___ F2:___ F3:___ F4:__ F5:__ Cr: 41 |
|||||||||||||||||
|
Modify the values which are different for this sequence, in this case enter |
|||||||||||||||||
|
20.0 in the L field or 18 in the X field. |
|||||||||||||||||
|
P |
0 |
N |
2 |
CY __ |
Kg/mm² |
||||||||||||
|
Th: |
2.00 |
37.00 |
|||||||||||||||
|
p/d |
1/ 1 |
CR __/ri |
__.__ |
||||||||||||||
|
—MEM— |
—POS— |
—COR— |
|||||||||||||||
|
90.0° |
|||||||||||||||||
|
229.90 |
350.92 |
____.__ |
|||||||||||||||
|
Y1 |
|||||||||||||||||
|
Y2 |
229.90 |
351.05 |
____.__ |
||||||||||||||
|
L |
20.0 |
51.85 |
____.__ |
||||||||||||||
|
X |
18.00 |
||||||||||||||||
|
Lmat |
1000 |
TON |
19 |
||||||||||||||
|
Rx |
___ |
Ext start _ |
|||||||||||||||
|
Vy |
_ |
_ |
T _._s |
||||||||||||||
|
TDC |
___ |
SP |
___ |
||||||||||||||
|
F1:___ F2:___ F3:___ F4:__ F5:__ Cr: 41 |
|||||||||||||||||
|
Press the sequence forwards key |
, in order to copy this second |
||||||||||||||||
|
sequence in sequence 3. |
|||||||||||||||||
|
The message COPIED is displayed, the N field passes on 3. |
|||||||||||||||||
|
The LED of the key remains lighted, indicating that you are on the |
|||||||||||||||||
|
last sequence. |
|
CREATING A PRODUCT |
PAGE 15 |

|
3rd sequence |
The following screen is displayed: |
|||||||||
|
P |
0 N |
3 |
CY __ |
Kg/mm² |
||||||
|
Th: |
2.00 |
37.00 |
||||||||
|
p/d |
1/ 1 |
CR __/ri |
__.__ |
|||||||
|
—MEM— |
—POS— |
—COR— |
||||||||
|
90.0° |
||||||||||
|
229.90 |
350.92 |
____.__ |
||||||||
|
Y1 |
||||||||||
|
Y2 |
229.90 |
351.05 |
____.__ |
|||||||
|
L |
20.00 |
51.85 |
____.__ |
|||||||
|
X |
18.00 |
|||||||||
|
Lmat |
1000 |
TON |
19 |
|||||||
|
Rx |
___ |
Ext start _ |
||||||||
|
Vy |
_ |
_ |
T |
_._s |
||||||
|
TDC |
___ |
SP |
___ |
|||||||
|
F1:___ F2:___ F3:___ F4:__ F5:__ Cr: 41 |
||||||||||
Modify the values which are different for this sequence, in this case enter 50.0 in the L field (X is automatically calculated) or the value 48 in the X field.
The programming of the product is terminated.
|
If you wish to save: |
||
|
Place the cursor on the P field. |
||
|
( |
and |
to position the cursor on the top of the page.) |
Introduce the number you wish to give to this product.
Press  (if the system replies EXISTS, choose another number for saving this product).
The product will be saved in the internal memory with the number which you have given it.
It will, however, remain present in the work memory.
|
Pass to semi-automatic mode |
. |
|
Call the sequence 1. |
|
|
Execute the first bend. |
PAGE 16 USER GUIDE DNC 600S

CORRECTIONS
It can happen that the angle bent is slightly greater or less than the angle programmed.
The operator has then the possibility to introduce the real value of the angle bent. The DNC will correct the Y1 and Y2 axis values accordingly.
The corrections can be entered into two different pages:
Page corrections (see explanation on page 71). Sequence page.
|
P 0 |
P+__ |
N 1 / 4 |
CY __ |
|||||||
|
Th: |
2.00 |
σ 37.00 |
Kg/mm2 |
|||||||
|
p/d |
1/1 |
CR __/ri |
__.__ |
|||||||
|
—MEM— |
—POS— |
—COR— |
||||||||
|
90.0° |
mes 91.20 |
|||||||||
|
229.60 |
____.__ |
|||||||||
|
Y1 |
350.92 |
|||||||||
|
Y2 |
229.60 |
351.05 |
____.__ |
|||||||
|
L |
60.00 |
51.85 |
____.__ |
|||||||
|
X |
58.00 |
|||||||||
|
Lp |
1000 |
Fp |
19 |
TON |
||||||
|
Rx |
___ |
Start ext _ |
||||||||
|
Vy |
_ |
_ |
Tp _._s |
|||||||
|
PMH |
___ |
PCV |
___ |
F5:__ Bo: 41 |
||||||
|
F1:___ F2:___ F3:___ F4:__ |
The following working method is recommended: Programme or call the product.
Switch to semi-automatic mode. Execute first bend.
Measure the result.
Switch to programming mode.
Enter the measured angle into the COR field (see above). The DNC automatically calculates the corrections to be made to Y1 and Y2.
If necessary, make the corrections to the gauge axes.
Bend a second product on the first bend to check the corrections.
Move to the following sequence and then proceed in the same way for all subsequent sequences.
When all the bends are correct, switch to automatic mode and proceed normally.
The correction entered above is applied only to the current sequence. Every other sequence must be corrected individually.
Product-by-product correction is possible in the CORRECTION page (see explanation on page 71).
|
CREATING A PRODUCT |
PAGE 17 |

PRODUCT MANAGEMENT
This chapter indicates how to manage the products (programs) stored in the numerical control.
PRODUCT LIST
|
Press the |
key. |
||||||||||||||
|
ACTUAL PIECE |
NEW_P |
||||||||||||||
|
CODE |
623-42.15 |
42 |
|||||||||||||
|
SEQUENCES PROGRAMMED |
|||||||||||||||
|
AVAILABLE |
306 |
||||||||||||||
|
1 |
-LIST OF PRODUCTS IN MEMORY- |
||||||||||||||
|
2 11 222 997 ___ ___ ___ ___ ___ |
|||||||||||||||
|
___ ___ ___ ___ ___ ___ ___ ___ ___ ___ |
|||||||||||||||
|
___ ___ ___ ___ ___ ___ ___ ___ ___ ___ |
|||||||||||||||
|
___ ___ ___ ___ ___ ___ ___ ___ ___ ___ |
|||||||||||||||
|
The upper part of the screen displays the number of the product currently in |
|||||||||||||||
|
the work memory as well as the number of the drawing of that product. |
|||||||||||||||
|
Note: |
The drawing number is optional. It may be activated in the User Preference |
||||||||||||||
|
page. |
|||||||||||||||
|
The DNC also displays the number of sequences programmed, as well as the |
|||||||||||||||
|
number of sequences still available in the internal memory. |
|||||||||||||||
|
Then are displayed, in ascending order, the numbers of all the products |
|||||||||||||||
|
stored in the internal memory. |
|||||||||||||||
|
The NEW_P field enables the operator to create a new product directly, |
|||||||||||||||
|
starting from this page. |
|||||||||||||||
|
Position the cursor on NEW_P and press the |
key. |
||||||||||||||
PAGE 18 USER GUIDE DNC 600S

SEARCHING FOR A PRODUCT BY CRITERIA
|
Press the |
key again. |
|||||||
|
ACTUAL PIECE 28 |
New_P |
|||||||
|
CODE |
— CRITERIA — |
|||||||
|
__/__ |
||||||||
|
p/d |
||||||||
|
Th |
__.__ |
|||||||
|
Lmat _____ |
||||||||
|
DevL |
____.__ |
|||||||
|
P |
— LIST OF PRODUCTS IN MEMORY— |
|||||||
|
CODE |
p/d Th |
|||||||
|
___ |
__/__ ___.__ |
|||||||
|
___ |
__/__ ___.__ |
|||||||
|
___ |
__/__ ___.__ |
|||||||
|
___ |
__/__ ___.__ |
This page allows to display a list of searched products according to one or more criteria like the code number, the thickness, the bending length and/or the unfolded length.
Under the heading —CRITERIA— are displayed the different criteria according to which it is possible to search for a product.
These criteria can be combined, that is it is possible, for example, to ask for the list of all the products stored using a specific tool pair and having a particular material thickness.
The products meeting the defined selection criteria are displayed on the second half of the screen.
To make a search by criteria, proceed as follows:
Introduce one or more selection criteria in the fields provided.
Press  .
.
If the list contains 7 or more products, the following page or pages can be displayed by pressing  .
.
|
PRODUCT MANAGEMENT |
PAGE 19 |

CALLING A PRODUCT
This operation searchs a product in the internal memory and place it into the work memory.
Calling a product is possible from all pages on which the cursor can be placed on the P or CODE field.
Caution: The called product «erases» the product already in the work memory. Pay attention to save, if necessary, the current product before calling another product.
Introduce the product number in the P field or the code number in the CODE field.
Leave the cursor on the field which has been programmed just now.
Press  .
.
The product requested is then copied into the work memory (the original of this product is, of course, conserved in the internal memory).
SAVING A PRODUCT
This operation is used to permanently save a product located in the work memory.
Saving a product is possible from all pages on which the cursor can be placed on the P field.
It should be noted that after saving the product remains present in the work memory.
To save a product proceed as follows:
If you wish to give a drawing number or name to the product, fill in the CODE field. This operation is optional.
Enter the number of the product in the P field. Leave the cursor in the P field.
|
Press the |
key. |
||||
|
If the system displays the message EXISTS, choose another number. |
|||||
|
If you wish to save a product under a number which already exists (e.g. after |
|||||
|
modifying a product), the product bearing that number must first be deleted |
|||||
|
in the internal memory. |
|||||
|
NB: |
Caution, the N° 998 and 999 are reserved for special functions. |
||||
|
998 for the temporary storage of the work memory contents during PC |
|||||
|
<-> DNC transfer. |
999 for total deletion of the internal memory (see page 21).
PAGE 20 USER GUIDE DNC 600S

DELETING A PRODUCT
Call the list of products page.
Place the cursor on the P field and introduce the number of the product to be deleted.
Press  .
.
It should be noted that this action has no effect on the internal memory.
DELETING ALL PRODUCTS
|
Caution |
This operation deletes the totality of the products stored in the internal |
|
|
memory without the possibility to cancel this command. |
||
|
Call the list of products page. |
||
|
Introduce the value 999 in the P field. |
||
|
Press |
. |
|
PRODUCT MANAGEMENT |
PAGE 21 |
![]()
APPENDIX A: CONVENTIONS
As a general rule, in this manual we will not repeat how to validate a field, select a tool, call a page or any other basic manipulations.
These informations are described at the beginning of this manual.
TYPOGRAPHICAL CONVENTIONS
|
Arial bold |
Quotations of text as seen on the screen. |
|
Arial bold italic |
Used to indicate the name of a DNC input or |
|
output. |
|
|
Italic |
Reference to a written element, a paragraph or a |
|
manual. |
|
|
For example: See ///ADD CROSS |
|
|
REFERENCE. |
ABBREVIATIONS / GLOSSARY
Explications of the abbreviations which are not visible fields in the pages of the numerical control.
|
TDC |
Top dead centre. |
|
SWP |
Switch point of speed, i.e. the change from |
|
approach speed in bending speed in the descent |
|
|
phase. |
|
|
PSS |
Safety point. This point is calculated in function |
|
of the tools height and the material thickness. |
|
|
PP |
Pinch point (see page 60). |
|
BDC |
Bottom dead centre |
|
LED |
Light Emitting Diode. Small red light serving as |
|
luminous indicator. |
PAGE 22 USER GUIDE DNC 600S
This page has been left blank intentionally.
|
APPENDIX A: CONVENTIONS |
PAGE 23 |

APPENDIX B: USER INTERFACE
USING THE SCREEN
The screen displays the products, tools and machine parameters as well as all other useful information for programming and machine work.
The keys situated on the front of the DNC are used for selecting the screen pages and introducing data.
A cursor indicates where the user can intervene.
On all pages, when first displayed the cursor is located on the programmable field on which it was placed during the last intervention on that page.
The cursor can be moved to the previous or following field by pressing the  or
or  key.
key.
|
Faster |
Regardless of the cursor position on the page, pressing the |
and the |
|||||||


 keys simultaneously moves the cursor to the first programmable field of the page.
USING THE KEYBOARD
The keyboard is divided into six zones:
Numerical keyboard
Screen page selection keys
Working mode zone
The commands
The cursor keys
The manual mode keys
NUMERICAL KEYBOARD
The numerical keys as well as the  and
and  keys are used to introduce numbers or values into the different fields.
PAGE 24 USER GUIDE DNC 600S

SCREEN PAGES SELECTION KEYS
Main menu key
A dual-function key
Hitting the key once opens the MAIN MENU page.
Hitting the key a second time displays the
///ADD CROSS REFERENCE
Product list key Double function key.
Pressing this key once displays the list of products in the DNC memory.
Pressing the key again displays the search for products by criteria page.
Product key
Triple function key.
Pressing this key once displays the angle length (L-alpha) values.
Pressing a second time displays the bending order with their respective legs.
Pressing a third time displays the bending values which are calculated as a function of the values introduced on the previous page.
Sequence key Triple function key.
Pressing the key once displays all the bending values in large characters of the current sequence.
Pressing a second time displays all the values and functions of the current sequence. Pressing a third time displays the Graphical Bend page.
Correction key
This key displays the correction page which allows to make corrections to the current sequence, as well as to the entire product.
|
APPENDIX B: THE USER INTERFACE |
PAGE 25 |

WORKING MODES
Programming mode
Allows to introduce, modify and read data as well as to store, search for and transfer programs.
Manual mode
Authorizes axis movement and auxiliary
|
functions using the |
|
keys. |
Semi-automatic mode
Allows a machine cycle with the current sequence values without automatic sequence change.
This mode is used for adjustments when realizing the first product, as well as for products with only one bend.
The sequence change is made using the 
NB: The product counter Q does not function in this mode.
Automatic mode
Normal mode for product production. The DNC automatically changes sequence after each bend.
Changing directly from «programming» mode automatically forces the first sequence of the program.
Changing from «programming » mode to «semi-automatic» mode and then to «automatic» mode, conserves the current sequence for execution.
This allows to take up again a product in production without having to make «empty» cycles.
PAGE 26 USER GUIDE DNC 600S
Ссылка: oqehah.ru/torrent-file-TDdBSWxucDd5LzBhdE5JTjZQSmdoK2hxU2dacm5Db1JmZFJDeVZLL251Q3c0WWZRMUZFbWluRmVyQy9LQXF6bjc2VjN2ZDJaTnBWR2trRUcvMFg4SWlBNDAvSUVlVjV1d1pYdWZSNTdJcmRhaENJQTVMRm9BbUNjQ0lhR0wva0FJQWtpZG8yZml1U0Rzbk1WNnV2c1JBPT0=.torrent
Cybelec dnc 600 technische beschreibung cybelec dnc 60 инструкция на русском. Cimco edit v7 64 скачать торрент на русском. Stroke 250mm — daylight 515mm; industrial control cybelec dnc 60 with graphical simulation; y1, y2 independent hydraulic cylinders, proportional valve. 21 июн 2010 вот пример параметров для оси х чпу dnc60 листогиб скачать инструкцию вы можете здесь: ftp://ftp.
Cybelec dnc 60 инструкция на русском 24 мая 2019 года — zumez
Y1, y2 independent hydraulic cylinders, proportional valve technology. Stroke 250mm — daylight 515mm; industrial control cybelec dnc 60 with graphical simulation; y1, y2 independent hydraulic cylinders, proportional valve. Y1, y2 independent hydraulic cylinders, proportional valve technology.
cybelec dnc 60 инструкция на русском скачать
Easycar m 7700 b инструкция на русском 6 июля 2019 года easycar — cybelec dnc 60 g16 user guide. 21 июн 2010 вот пример параметров для оси х чпу dnc60 листогиб скачать инструкцию вы можете здесь: ftp://ftp. Cybelec dnc 60 инструкция на русском скачать. Car mp5 player 7018b инструкция на русском дневник azpixwjidpebiosagentplus скачать полную версию c ключом. Cybelec dnc 60 инструкция на русском скачать vakyp guvafuku qobij. Текущий язык просмотра youtube: русский.

DNC 600 PS
User Guide
|
CYBELEC SA |
Tel. ++ 41 24 447 02 00 |
|
RUE DES UTTINS 27 |
Fax ++ 41 24 447 02 01 |
|
CH — 1400 YVERDON-LES-BAINS |
E-Mail: info@cybelec.ch |
|
SWITZERLAND |
V-DOC-600PS-EN-EN |

Information in this document is subject to change without notice, and does not represent a commitment on the part of CYBELEC SA.
The software described in this document is furnished under a license agreement or nondisclosure agreement. The software may be used or copied only in accordance with the terms of the agreement. It is against the law to copy the software on any medium except as specifically allowed in the license or nondisclosure agreement.
Copyright CYBELEC SA. 1991
All rights reserved.
Important:
This notice explains normal and standard programming operations for the numerical control.
In view of the fact that numerical controls can be equipped with configurable functions by the press manufacturer for his own specific purposes, please refer to the manufacturer-supplied complementary instructions regarding the programming of these functions.
Autocad

 is a registered trade mark of Autodesk Inc..
CYBELEC

 is a registred trademark of CYBELEC SA.
Ethernet

 is a registered trade mark of Xerox Corporation.
IBM

 , PC/AT

 , PC Network

 , Token Ring Network


are registered trade marks of the International Business Machines Corporation.
MS-DOS

 is a registered trade mark of Microsoft Corporation.
MS-Windows

 is a registered trade mark of Microsoft Corporation.
Novell Netware is a registered trade mark of Novell, Incorporated.
Windows NT

 is a registered trade mark of Microsoft Corporation.

SAFETY AND MAINTENANCE INSTRUCTIONS
!The operator must be trained for working with the machine on which the numerical control is installed.
!Improper use of the numerical control can cause heavy damage on equipment and/or injuries to people.
!Modification of machine parameters can cause important material damage or lead to irregular product quality.
!The rear panel may only be removed by a qualified technician (danger of electrocution).
!Do not expose the numerical control to excessive humidity so as to avoid any risk of electrocution and any deterioration of the equipment.
!Make sure the numerical control is disconnected from the mains power before carrying out any cleaning. Do not use liquids based on alcohol or ammoniac.
!In case of malfunction of the numerical control, call a technician.
!Do not expose the numerical control to direct sun rays or any other heat source.
!Do not place the numerical control in the neighbourhood of magnetic equipment such as transformers, motors or devices which generate interference (welding machines, etc.)
!Replace fan filters at regular intervals so as to avoid overheating.
SAFETY AND MAINTENANCE INSTRUCTIONS |
PAGE I |
This page has been left blank intentionally.
PAGE II USER GUIDE DNC 600 PS

LICENSE AGREEMENT FOR CYBELEC SOFTWARE
GENERAL COPYRIGHT
The CYBELEC software is protected by Copyright, and all the copying rights are reserved.
The CYBELEC software may only be installed and used in authorized equipments (PC or DNC).
The user manuals are also covered by copyright, and all rights to use and to copy are reserved.
This document may not, in whole or in part, be copied, photocopied, reproduced, translated or reduced without prior consent, in writing, from CYBELEC.
SPECIAL DISKETTE COPYRIGHT
The legal users of this software product are authorized only to copy the contents of the diskette into the memory of the computer to run the program, and to make one backup copy of the original diskette for safety purposes in case of loss of the original program.
Unauthorized copying, duplicating, selling or otherwise distributing this product is a violation of the law.
SPECIAL EPROM COPYRIGHT
The CYBELEC DNC and CNC units in which the original software made by CYBELEC has been replaced by a copy not made by CYBELEC, and without written authorization of CYBELEC, will immediately lose their warranty.
WARRANTY
CYBELEC does not warrant that its software products will function properly in every computer and programming environment.
The limitations of use of a software product and its technical specifications are decided by CYBELEC only; CYBELEC solely is entitled to decide upon conformity and performance of a given software.
The CYBELEC software does not compensate for incompatibilities in operating system revisions or versions.
Running the CYBELEC software under various revisions or versions, or switching between different versions or revisions may result in loss or alteration of data.
|
LICENSE AGREEMENT |
PAGE III |

SOFTWARE UPDATE SERVICE
Purchase of the CYBELEC software entitles the user, during one year, to delivery of software updates of the «correction» type.
During the use of a revised or corrected version of the software it may occur that data (program, parameters, etc.) is lost, or that the equipment or its connections need to be modified; these effects are not always foreseeable and do not engage CYBELEC’s responsibility.
TERMINATION
This agreement shall automatically terminate upon any act of bankruptcy by or against licensee, upon any assignment for the benefit of creditors of the licensee, upon any attachment execution of judgement or process against licensee or its assets that substantially inhibits its ability to do business, or upon dissolution of licensee.
CYBELEC has the right to terminate this agreement immediately, should the licensee violate the aforementioned conditions.
Within 30 days of termination of this agreement for any reason, licensee shall at his option, either:
!return to CYBELEC or authorized dealer all existent copies of such software and related materials, or
!furnish to CYBELEC evidence satisfactory that the original and all copies of the software, in whole and in any form, have been destroyed.
LIMITATION OF LIABILITY
The foregoing warranty is instead of all other warranties, expressed or implied.
Licensee further agrees that CYBELEC shall not be liable for any lost profits, lost savings, loss of use, or other incidental or consequential damages arising from the use or inability to use the software, or for any claim or demand against licensee by any other party.
In no event shall CYBELEC be liable for consequential damages, even if CYBELEC has been advised of the possibility of such damages.
CYBELEC does not warrant that the functions contained in the software will meet the licensee’s requirement or that the operation of the software will be totally error free.
Should the software prove defective, the licensee (and not CYBELEC or an authorized dealer or representative) will assume the entire cost of all necessary service, repair or correction.
CYBELEC warrants the diskettes, EPROMS or other magnetic support or cassettes on which the programs are supplied to be free of defects in material and workmanship under normal use for a period of 90 days from the date of shipment to the licensee as evidenced by a copy of the packing slip.
|
PAGE IV |
LICENSE AGREEMENT |

LIMITATION OF REMEDIES
CYBELEC’s entire liability and the licensee’s exclusive remedy shall be as follows:
The replacement of any diskettes or EPROMS or magnetic support media or cassettes not meeting CYBELEC’s limited warranty and which materials are returned to CYBELEC or an authorized CYBELEC representative with a copy of the packing slip, or
If CYBELEC or its representative is unable to deliver replacement diskettes, magnetic support media, EPROM or cassettes which are free of defects in materials or workmanship, the licensee may terminate this agreement under the terms and conditions herein mentioned, and the purchaser’s money will be refunded.
GENERAL
The licensee acknowledges that he has read this agreement, understands it and agrees to be bound by its terms and conditions.
The licensee agrees to hold CYBELEC harmless on all liability associated with licensee’s breach of this agreement including, but not limited to, all reasonable attorney’s fees and court costs, if any.
This license agreement shall be governed by Swiss law; place of jurisdiction is Lausanne, Switzerland.
MAINTENANCE
CYBELEC will provide one year of software maintenance.The extent of maintenance, and response time for furnishing same, shall be at the sole discretion of CYBELEC.Maintenance shall normally include correction of errors in code, correction of errors in supporting documentation, update versions of the covered software which may be released by CYBELEC during the maintenance period.
In no event shall CYBELEC be obliged to provide technical support in attempting to resolve problems or difficulties resulting from licensee’s modification of the licensed software; any such modification by licensee is entirely at licensee’s own risk.
This page has been left blank intentionally.
|
PAGE VI |
LICENSE AGREEMENT |
07.11.2001 V. 1.1
CONTENTS
|
SAFETY AND MAINTENANCE INSTRUCTIONS…………………………………………………………………. |
I |
|
|
LICENSE AGREEMENT FOR CYBELEC SOFTWARE ………………………………………………………… |
III |
|
|
Safety, Copyright & License agreement …………………………………………………………………… |
3 |
|
|
CONVENTIONS ………………………………………………………………………………………………………………. |
5 |
|
|
Typographical conventions …………………………………………………………………………………….. |
5 |
|
|
Abbreviations / glossary…………………………………………………………………………………………. |
5 |
|
|
DESCRIPTION OF THE DNC 600 PS………………………………………………………………………………… |
7 |
|
|
General information ………………………………………………………………………………………………. |
7 |
|
|
Technical characteristics ……………………………………………………………………………………….. |
8 |
|
|
ACCESSORIES……………………………………………………………………………………………………………….. |
11 |
|
|
THE USER INTERFACE…………………………………………………………………………………………………… |
13 |
|
|
The screen…………………………………………………………………………………………………………… |
13 |
|
|
The keyboard……………………………………………………………………………………………………….. |
13 |
|
|
THE MAIN MENU…………………………………………………………………………………………………………….. |
19 |
|
|
Choices of the main menu……………………………………………………………………………………… |
19 |
|
|
PROGRAMMING …………………………………………………………………………………………………………….. |
21 |
|
|
Programming on the L-alpha page………………………………………………………………………….. |
23 |
|
|
L-alpha method…………………………………………………………………………………………………….. |
27 |
|
|
Definition of the bending order ……………………………………………………………………………….. |
30 |
|
|
THE SEQUENCE PAGE …………………………………………………………………………………………………… |
37 |
|
|
Programming on the sequence page ………………………………………………………………………. |
40 |
|
|
PRODUCT MANAGEMENT………………………………………………………………………………………………. |
45 |
|
|
List of products …………………………………………………………………………………………………….. |
45 |
|
|
TOOL PROGRAMMING……………………………………………………………………………………………………. |
49 |
|
|
Punch / Die programming………………………………………………………………………………………. |
50 |
|
|
TRANSFER …………………………………………………………………………………………………………………….. |
53 |
|
|
Tests of the serial ports …………………………………………………………………………………………. |
54 |
|
|
LINK 7000 / CYBACK ……………………………………………………………………………………………. |
55 |
|
|
N600PS_EN.DOC |
CONTENTS |
PAGE 1 |
|
THE MACHINE WORKING MODES………………………………………………………………………………….. |
57 |
|
Adjustment mode…………………………………………………………………………………………………. |
57 |
|
Sensitive mode ……………………………………………………………………………………………………. |
58 |
|
Automatic mode…………………………………………………………………………………………………… |
58 |
|
PROTECTION OF THE ACCESS LEVELS ………………………………………………………………………… |
59 |
|
General Information ……………………………………………………………………………………………… |
59 |
|
The users……………………………………………………………………………………………………………. |
60 |
|
Access by password …………………………………………………………………………………………….. |
61 |
|
Access to levels superior to 3 ………………………………………………………………………………… |
62 |
|
Change password………………………………………………………………………………………………… |
63 |
|
Management of the access levels by external key ……………………………………………………. |
64 |
|
ANNEXES………………………………………………………………………………………………………………………. |
65 |
|
The INITIALIZATION page ……………………………………………………………………………………. |
65 |
|
The tool reference………………………………………………………………………………………………… |
67 |
|
The contact point (CP) or Pinch point……………………………………………………………………… |
70 |
|
The gauge axes …………………………………………………………………………………………………… |
71 |
|
Programming the axes datum ……………………………………………………………………………….. |
75 |
|
Calibration…………………………………………………………………………………………………………… |
76 |
|
Ideal curve ………………………………………………………………………………………………………….. |
77 |
|
Cycle without bend……………………………………………………………………………………………….. |
79 |
|
Punching …………………………………………………………………………………………………………….. |
79 |
|
Bottoming……………………………………………………………………………………………………………. |
80 |
|
Angle correction…………………………………………………………………………………………………… |
80 |
|
Alphanumerical characters ……………………………………………………………………………………. |
82 |
|
Messages / Errors………………………………………………………………………………………………… |
82 |
|
The interactive messages……………………………………………………………………………………… |
83 |
|
Print of the current screen …………………………………………………………………………………….. |
86 |
|
INDEX……………………………………………………………………………………………………………………………. |
87 |
![]()
SAFETY, COPYRIGHT & LICENSE AGREEMENT
Please consult the safety instructions, copyright and license agreement on the first pages of the manual.
ABOUT THIS MANUAL
This manual is designed to help the user to familiarize with the numerical control DNC 600 and to use it with a maximum of efficiency.
To reach a maximum of comfort and productivity of the numerical control, it is recommended to read attentively the whole manual.
A table of contents and a well organized index enable you to find rapidly the searched subject.
How to get rapidly acquinted with the numerical control ?
Follow the rabbit. It will pass through the important stages and will guide you in the programming of an example product.
Remark: In this User Guide it is assumed that the DNC has an operational configuration (i.e. machine parameters and tools are programmed).
Go to page 21.
This manual is evolutive. You, the user, can help us to give you better assistance. If you have any remarks on this document, please write us to:
CYBELEC S.A.
Dpt Communication
Rue des Uttins 27
CH-1401 Yverdon-les-Bains
Fax ++ 41 24 447 02 01
E-mail: info@cybelec.ch
This page has been left blank intentionally.

CONVENTIONS
As a general rule, in this manual we will not repeat how to validate a field, select a tool, call a page or any other basic manipulations.
These informations are described at the beginning of this manual.
TYPOGRAPHICAL CONVENTIONS
|
Arial bold |
Quotations of text as seen on the screen. |
|
Arial bold italic |
Used to indicate the name of a DNC input or |
|
output. |
|
|
Italic |
Reference to a written element, a paragraph or a |
|
manual. |
|
|
For example: See Conventions. |
ABBREVIATIONS / GLOSSARY
Explications of the abbreviations which are not visible fields in the pages of the numerical control.
|
TDC |
Top dead centre. |
|
SWP |
Switch point of speed, i.e. the change from |
|
approach speed in bending speed in the descent |
|
|
phase. |
|
|
PSS |
Safety point. This point is calculated in function |
|
of the tools height and the material thickness. |
|
|
CP |
Contact point (see page 70). |
|
BDC |
Bottom dead centre |
|
LED |
Light Emitting Diode. Small red light serving as |
|
luminous indicator. |
This page has been left blank intentionally.
PAGE 6 USER GUIDE DNC 600 PS

DESCRIPTION OF THE DNC 600 PS
GENERAL INFORMATION
!Configurable numerical control for 2 to 6 axes.
!2 synchronized numerical axes for controlling the beam (left Y1 and right Y2 jacks).
!1 to 4 numerical axes to control the backgauge.
!Choice of configuration:
X, X1, R, R2, Z1, Z2.
|
! Beam: |
proportional valves ±10V. |
!Backgauge: AC or DC motor with or without tachometer.
!Black and white high resolution LCD screen.
!Multi-page display by menu or direct access.
!Multilingual conversational programming. In each DNC, 8 languages are permanently available for the operator.
!Direct programming of the angle and bending corrections with calculation of the bending depth as a function of the material and tooling.
!Programming of the bent product according to the L-alpha method with calculation of the backgauge positions and determination of the unfolded length according to DIN 6935 standard.
!Alphanumerical programming of the code number and production pages.
!«Printscreen» function for printing the contents of each screen page (via serial line).
!Automatic conversion:
Inch / mm; USTon / MetricTon; PSIx1000 / Kg/cm²
!Automatic compensation of sheet metal thickness variations (can only be used for thick sheets).
!Internal non-volatile memory
—approx. 1100 sequences
—20 punches
—30 dies
|
! Product N° : |
3 numbers |
|
Code N° : |
24 numbers or letters |
|
Sequence N° : |
2 numbers |
|
Sequence repetitions : |
2 numbers |
DESCRIPTION OF THE DNC 600 PS |
PAGE 7 |

!Machine parameters in 8 languages: Limitation of axes displacement, safety, adjustment of servomechanisms, etc.
!Beam positioning in high precision closed loop with control of speed, pressure and parallelism.
!For each digital axis:
High performance closed loop regulation with or without insensibility zone.
—Counting frequency: 250 KHz
—Displacement speed, acceleration, deceleration, regulation gain, PID, safeties and limit switches programmable numerically in the machine parameters.
—Automatic initialization procedure.
!Memorization of the back gauge positions in the case of a power failure.
!Corrections per product and per sequence for the axes.
!RS232 series interface (in option).
TECHNICAL CHARACTERISTICS
BENDING DEPTH (Y1 AND Y2 AXES)
|
Positioning range |
: |
0 — 900,000 mm |
|
Programmable resolution |
: |
0,01 or 0,005 mm |
|
Reproducibility |
: |
0,002 mm |
|
Ascent / descent beam speed |
: |
150 mm/s |
|
Bending speed |
: |
1 — 50 mm/s (programmable) |
|
Corrections per product and per sequence : |
0 — ±99,99 mm |
BACKGAUGE (X AXIS)
|
Positioning range |
: |
0 — 2000,000 mm |
|
Programmable resolution |
: |
0,1 or 0,01 mm |
|
Reproducibility |
: |
0,02 mm |
|
Displacement speed |
: |
500 mm/s |
|
Corrections per product and per sequence : |
0 — ±99,99 mm |
PAGE 8 USER GUIDE DNC 600 PS

BACKGAUGE (R, Z1, Z2 AXES)
|
Positioning range |
: |
0 — 9999,9 mm |
|
Programmable resolution |
: 1 or 0,1 mm |
|
|
Displacement speed |
: |
500 mm/s |
BENDING ANGLE
|
Positioning range |
: |
die angle to 179,9° |
|
Corrections per angle and per sequence |
: |
0 — ±99,99° |
AUXILIARY FUNCTIONS
Calculated by the DNC:
!Beam top dead center
!Change to bending speed point
!Beam safety point
!Contact point
!Bending force
!Crowning as a function of the bending force
!Bottoming
Programmable by the operator:
!Beam desynchronization for conical bends
!Bottoming
!Dwell time
!Backgauge disengagement
!Sequence repetition
!Automatic follow-on of products
!Quantity of products made and to be made.
Unattributed functions:
|
F1 to F3: |
Analogical function 250 values with bi-directional |
|
positioning (backgauge height, bending help, etc) |
|
|
F4 and F5: |
digital (BCD coded output) |
|
DESCRIPTION OF THE DNC 600 PS |
PAGE 9 |

THE MEMORIES
A SRAM memory allows the programming and storing of products, tools and machine parameters. A lithium battery conserves the data during about 10 years.
Work memory (or buffer)
This memory is used for programming, modifying and executing products. It is a temporary memory whose contents are deleted whenever another product is called for.
The contents of this memory is conserved if the DNC power supply is cut, even if it has not been previously stored in the internal memory.
Internal memory
Sometimes called internal cassette, this fixed internal memory, of the static RAM type maintained by a lithium battery, contains the products, tools, axes positions, numbers concerning the production and machine parameters.
No programming or modification are done directly in this memory.
Flash memory
The DNC 600 is equipped with a Flash memory including the program and the cycle of the numerical control.
The machine cycle can be updated by means of the serial link RS232 (option).
PAGE 10 USER GUIDE DNC 600 PS
ACCESSORIES
|
CYBACK |
Software for storage in PC. |
|
Allows the storage and recall of data (products, tools, machine |
|
|
parameters) for the DNC 7000, DNC 70, and DNC 30 CNCs in a PC via |
|
|
the serial line. |
|
|
Up to 10 different CNCs can be selected. |
|
|
Ask for our «Product information» about CYBACK. |
|
|
PC1200 |
PC1200 is a Windows program. This software allows to program on a PC |
|
in 2 and 3 dimensions the products to be realized on the numerical |
|
|
control. |
|
|
This software executes the simulation and graphic display of the bending |
|
|
order taking into account the characteristics of the machine, the tools and |
|
|
the material. |
|
|
An option (LINK7000, see below) allows to transfer products to the |
|
|
DNC 7000, DNC 70, DNC 50, DNC 60 and DNC 600. |
|
|
LINK7000 |
Option of the software PC1200 to transfer products to the |
|
DNC 7000, DNC 70, DNC 50, DNC 60 or DNC 600 by the serial line. |
|
DESCRIPTION OF THE DNC 600 PS |
PAGE 11 |
This page has been left blank intentionally.
PAGE 12 USER GUIDE DNC 600 PS
![]()
THE USER INTERFACE
THE SCREEN
The screen displays the products, tools and machine parameters as well as all other useful information for programming and machine work.
The keys situated on the front of the DNC are used for selecting the screen pages and introducing data.
A cursor indicates where the user can intervene.
On all pages, when first displayed the cursor is located on the programmable field on which it was placed during the last intervention on that page.
The cursor can be moved to the previous or following field by pressing the  or
or  key.
key.
|
Faster |
Regardless of the cursor position on the page, pressing the |
and the |
 keys simultaneously moves the cursor to the first programmable field of the page.
THE KEYBOARD
The keyboard is divided into six zones:
!Numerical keyboard
!Screen page selection keys
!Working mode zone
!The commands
!The cursor keys
!The manual mode keys
NUMERICAL KEYBOARD
The numerical keys as well as the  and
and  keys are used to introduce numbers or values into the different fields.
THE USER INTERFACE |
PAGE 13 |

THE SCREEN PAGE SELECTION KEYS
Main menu key
Gives access to the MAIN MENU page.
Product list key Double function key.
Pressing this key once displays the list of products in the DNC memory.
Pressing the key again displays the search for products by criteria page.
Product key
Triple function key.
Pressing this key once displays the angle length (L-alpha) values.
Pressing a second time displays the bending order with their respective legs.
Pressing a third time displays the bending values which are calculated as a function of the values introduced on the previous page.
Sequence key Triple function key.
Pressing the key once displays all the values and functions of the current sequence. Pressing a second time displays the first page of values in large characters.
Pressing a third time displays the second page of values and functions in large characters.
Correction key
This key displays the correction page which allows to make corrections to the current sequence, as well as to the entire product.
PAGE 14 USER GUIDE DNC 600 PS

THE WORKING MODES
Programming mode
Allows to introduce, modify and read data as well as to store, search for and transfer programs.
Manual mode
Authorizes axis movement and auxiliary
|
functions using the |
|
keys. |
Semi-automatic mode
Allows a machine cycle with the current sequence values without automatic sequence change.
This mode is used for adjustments when realizing the first product, as well as for products with only one bend.
The sequence change is made using the 


 keys.
keys.
NB: The product counter Q does not function in this mode.
Automatic mode
Normal mode for product production.
The DNC automatically changes sequence after each bend.
Changing directly from «programming» mode automatically forces the first sequence of the program.
Changing from «programming » mode to «semiautomatic» mode and then to «automatic» mode, conserves the current sequence for execution.
This allows to take up again a product in production without having to make «empty» cycles.
|
THE USER INTERFACE |
PAGE 15 |

THE COMMANDS
Delete key
Allows to delete a sequence or a program when the cursor is placed on the PRODUCT or N fields.
Only functions in programming mode.
Clear key
This key allows to delete data indicated by the cursor.
Caution: pressing this key twice, on most pages, deletes all the data on the page.
Search key
According to the cursor position allows:
—to search for a product
—to search for a sequence
—to search for a tool
—to search for a screen page
—to start a product feasibility calculation
—to transform L-alpha values into machine values
—to calculate the unfolded length of the sheet
—to execute a transfer
Only functions in programming mode.
Store / insert / teach key
Depending on the cursor position, allows to store the current program in the DNC internal memory, or create (insert) a new sequence in the middle of an existing program, or copy (teach) the value of an axis positioned manually in the current sequence.
This key is only valid in programming (memorization and insertion) mode and in manual (teach) mode.
PAGE 16 USER GUIDE DNC 600 PS

THE CURSOR KEYS
Sequence forwards / Page forwards key This key allows to scroll pages of the same
type. Also allows to pass to the next page when a series of information occupies several pages.
Eg.: program sequence punch-die pages production pages parameter pages
In programming mode also allows to create an identical sequence (copy function) to the previous one as long as this is the last sequence of the program.
The incorporated LED indicates whether the sequence is the last of the program.
Page backwards / Sequence backwards key
Inversed function of the  key.
key.
Allows to scroll backwards through pages of the same type.
Functions in all modes except automatic mode.
Cursor upwards, to the next accessible field.
Cursor downwards, to next accessible field.
This key combination positions the cursor in the upper part of the current page.
|
THE USER INTERFACE |
PAGE 17 |

«MANUAL» ZONE
Start key
Commands:
—The displacement of the axis and auxiliary functions. During movement the LED lights up (except for the beam).
—An indexation at the beam (on option depending on the configuration on other axes) when this key is first pressed after switching on the DNC.
To indicate that an index is being taken the LED remains constantly alight, until the indexes are received. Indexes can only be taken
in  or
or  modes.
Stop key
Depending on the working mode chosen, stops the axes or auxiliary functions, or stops the calculation being executed.
When the DNC is in transfer mode (RS232) the STOP key allows to terminate the transfer.
Manual displacement keys of the selected axes. Allows, in the machine parameters, to configure the axis type, the inputs/outputs and to select the display of the N2X axes.
PAGE 18 USER GUIDE DNC 600 PS

THE MAIN MENU
By pressing the  key on the top right of the keyboard, the main menu appears.
|
CHOICE ? __ |
|||||
|
1 |
LIST OF PRODUCTS DNC / CRITERIA |
||||
|
2 |
|||||
|
3 |
LIST OF PUNCHES |
||||
|
4 |
LIST OF DIES |
||||
|
5 |
|||||
|
6 |
PROGR. PUNCHES / DIES |
||||
|
7 |
PRODUCT PUNCHES / DIES |
||||
|
8 |
PRODUCT STATUS; L; |
||||
|
9 |
|||||
|
PRODUCT BENDS; STOPS |
|||||
|
10 |
PRODUCT X; |
;Y |
|||
|
11 |
|||||
|
PROGR.AXES ORIGINS |
|||||
|
12 |
TRANSFER DNC <-> PC |
||||
|
13 |
MACHINE PARAMETERS |
||||
|
14 |
MACHINE CONTROL |
Regardless of which screen page you are on, you can always gain access to
the main menu by the  key, which allows you to circulate in the different pages.
The option desired is chosen by entering the option number in the CHOICE field on the first line of the screen and pressing the search  key.
key.
CHOICES OF THE MAIN MENU
1DNC PRODUCT This double page displays the list of products in the
LIST / CRITERIA DNC memory and allows selective searching of products.
|
3 |
PUNCH LIST |
Displays the list of the punches. |
|
4 |
DIE LIST |
Displays the list of thedies. |
|
6 |
PUNCH / DIE |
From this page, it is possible to recall, program or |
|
PROGR. |
delete a die or a punch. |
|
7 PRODUCT |
This page allows to modify, for the product only, the |
|
PUNCHES / DIES |
reference of a tool. |
8PRODUCT STATUS; Generally called L-alpha page, this page displays and
L; 
9PRODUCT BENDS;LEGS
10PRODUCT X;  ; Y
; Y
11PROGR. AXES ORIGINS
12TRANSFER DNC <-> PC
13MACHINE PARAMETERS
14MACHINE CONTROLS
allows the programming of products in «lengths and angles» mode.
Displays the page allowing to program or modify the bending order.
Displays for each sequence the calculated axis position.
Allows to program the axis position counter.
Allows the global or partial two way transfer of products, tools or machine parameters between the fixed internal memory and a PC.
Displays a series of pages which allow to introduce, display and modify the machine parameters.
Page allowing to control and to modify the state of certain inputs and outputs.
PAGE 20 USER GUIDE DNC 600 PS

PROGRAMMING
In this manual, it is being assumed that the DNC is configurated in such a way to be operational (i.e. the tools and machine parameters have already been programmed).
2 programming methods are accessible by the operator.
With unfolding calculation
!The L-alpha method.
The L-alpha method allows to enter a profile to be bended with the external dimensions and angles of each face. The DNC calculates the unfolded length.
After having programmed the bending order, the DNC will calculate the stop positions.
The faster method
!The direct programming.
The direct programming is the fastest method for an experimented operator, for the whole programming of the product is done on the same page. It enables to directly program the axes’ positions, and it calculates the bending depth as a function of the introduced angle.
Before starting to program a product, make sure that the tools necessary to make the product exist in the DNC memory and write down the numbers of the punches and dies to be used.
To do this proceed as described below:
If you are already familiar with the tools present in the DNC, you may pass directly to chapter Programming on the L-alpha page, page 23).

Consulting the list of punches
!On the main menu (reached by  ), choose LIST OF PUNCHES.
Introduce for that 3 in the CHOICE field and press the  search key.
|
LIST |
p/d 1/ 1 |
|||||
|
p/d |
1/__ |
__/__ |
__/__ |
__/__ |
||
|
PUNCH |
||||||
|
p |
90° |
___° |
___° |
___° |
||
|
hp |
100.00 |
___.__ ___.__ |
___.__ |
|||
|
rp |
1.50 |
___.__ ___.__ |
___.__ |
|||
|
TON/M |
100 |
___ |
___ |
___ |
||
|
DIE |
||||||
|
Ve |
___.__ |
___.__ ___.__ |
___.__ |
|||
|
d |
___° |
___° |
___° |
___° |
||
|
hd |
___.__ |
___.__ ___.__ |
___.__ |
|||
|
rd |
___.__ |
___.__ ___.__ |
___.__ |
|||
|
TON/M |
___ |
___ |
___ |
___ |
||
|
REF Y ___.__ |
___.__ ___.__ |
___.__ |
||||
|
SAF X ___.__ |
___.__ |
___.__ |
___.__ |
|||
!The list of punches available in the DNC appears, with the name of each punch and its characteristics (angle, height and radius).
!Note the number of the most appropriate punch.
If you don’t find a punch which corresponds to your needs, you can create one.
In this case refer to chapter Tool programming, page 49.
It is possible, if more than four punches are programmed to see them by pressing the  key.
key.
Consulting the list of dies
Proceed in the same way as described above for punches; access from the main menu LIST OF DIES.
Pass to page 27 or page 40, depending on the chosen programming method.
PAGE 22 USER GUIDE DNC 600 PS
Loading…
Download Operation & user’s manual of CYBELEC DNC 600S Controller for Free or View it Online on All-Guides.com.
1
2
3
4
5
6
7
8
9
10
11
12
13
14
15
16
17
18
19
20
21
22
23
24
25
26
27
28
29
30
31
32
33
34
35
36
37
38
39
40
41
42
43
44
45
46
47
48
49
50
51
52
53
54
55
56
57
58
59
60
61
62
63
64
65
66
67
68
69
70
71
72
73
74
75
76
77
78
79
80
81
82
83
84
85
86
87
88
89
90
91
92
93
94
95
96
97
98
99
100
101
102
103
104
105
106
107
108
109
110
111
112
113
114
115
116
DNC 600S
User Guide
CYBELEC SA Tel. ++ 41 24 447 02 00
RUE DES UTTINS 27 Fax ++ 41 24 447 02 01
SWITZERLAND
V-DOC-60PS-EN
CYBELEC SA Tel. ++ 41 24 447 02 00
RUE DES UTTINS 27 Fax ++ 41 24 447 02 01
SWITZERLAND
V-DOC-600PS-EN