Инструкция для цифрового нивелира Sokkia SDL30
![]()
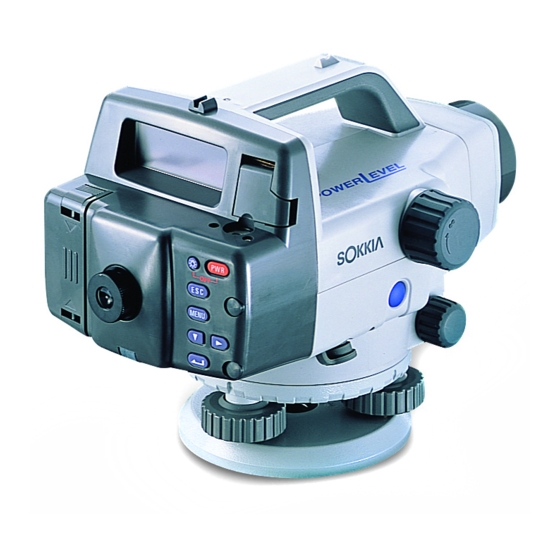
Руководство по эксплуатации цифрового (электронного) нивелира Sokkia SDL30.
| Имя файла: | sokkia_sdl30.pdf |
| Размер файла: | 3.88 MB |
| Тип файла: | application/pdf |
| Посещений: | 8455 Посещений |
| Дата последнего обновления: | 16-12-15 |
-
Скачать -
Просмотр
-
Contents
-
Table of Contents
-
Bookmarks
Quick Links
SURVEYING INSTRUMENTS
SDL30
SDL50
Digital Level
OPERATOR’S MANUAL
Related Manuals for Sokkia SDL30
Summary of Contents for Sokkia SDL30
-
Page 1
SURVEYING INSTRUMENTS SDL30 SDL50 Digital Level OPERATOR’S MANUAL… -
Page 2
Verify that all equipment is included. See «20.1 Standard Equip- ment». • SDL30/50 has a function to output data saved in SDL30/50 to a connected computer. Commands operations from a computer can also be performed. For details, refer to the “Output Formats and Command Explanations (SDL Edition)”… -
Page 3: Table Of Contents
CONTENTS Read This First 1. Precautions for Safe Operation ……4 2. Precautions…………7 Introduction 3. SDL Functions …………9 3.1 Parts of the Instrument and Operation ..9 3.2 Display…………11 3.3 Operating Keys………15 3.4 Operating Modes ……..16 Preliminaries 4. Installing and Removing the Battery ….18 5.
-
Page 4
Managing 13. Displaying Recorded Data ……..49 Recorded Data 13.1 Data Check and Edit………49 13.2 Number of Recorded Points …..50 14. JOB Delete …………51 15. Sending Recorded Data ……..53 15.1 Connecting to a Computer or Data Collector ………..53 15.2 Data Output ……….54 Other 16. -
Page 5: Read This First 1. Precautions For Safe Operation
Precautions for Safe Operation For the safe use of the product and prevention of injury to operators and other persons as well as prevention of property damage, items which should be observed are indicated in this operator’s manual by WARNING and CAUTION indications. The definitions of the indications are listed below.
-
Page 6
Staff Warning • Do not use under thunderous weather conditions. This unit is conductive and if struck by lightning, death or injury could result. • Handle with care when using near high voltage cables or transformers. This unit is conductive and contact could result in electric shock. -
Page 7
• To prevent shorting of the battery in storage, apply insulating tape or equivalent to the terminals. Otherwise shorting could occur resulting in fire or burns. • Do not heat or throw batteries into fire. An explosion could occur, resulting in injury. •… -
Page 8: Precautions
Be careful when removing the instrument from its case. • Do not place the SDL30/50 directly on the ground. • When the operator leaves the SDL30/50, the vinyl cover should be placed on the instrument. • Never carry the SDL30/50 on the tripod to another site.
-
Page 9
• Always close the case when empty to protect the interior from humidity and dust. • Regular checking and adjustment is recommended to maintain instrument precision. Exceptions from responsibility • The user of this product is expected to follow all operating instructions and make periodic checks (hardware only) of the product’s performance. -
Page 10: Introduction 3. Sdl Functions
SDL Functions Important: • Except where stated, screens and illustrations appearing in this manual are of SDL30/50. • In principle, screens used in procedures are based on the factory setting. Parts of the Instrument and Operation Handle Bubble mirror When the instrument is placed high up and cannot be viewed from above, you can use the mirror to check the position of the bubble in the tube.
-
Page 11
Measure key (appears as in this manual) Measure Starts measurement. (See «3.3 Operating Keys».) Horizontal fine motion knobs (both sides) Use these knobs to finely adjust the instrument’s horizontal position. Data output connector You can connect a data collector or computer to this connector. Leveling foot screw Base plate Horizontal circle positioning ring… -
Page 12: Display
Display The display includes the following marks which indicate the operating status and current mode, and help the operator to keep track of the measurement procedure. Version number Currently selected Measurement Mode indicator conditions Attribute•Measure- ment step Battery level indicator Point number Measurement values and other data •…
-
Page 13
• Attribute•Measurement step display Displays the backsight and foresight (in Height difference, Setting out, or Measuring elevation modes). : Backsight : Foresight Displays the attribute of the recorded measurement value (Height difference measurement mode, Elevation measurement mode). : Backsight point : Foresight point : Intermediate sight : Fixed point… -
Page 14
• Battery level (not displayed on menu screens) Displays the current power level of the battery. : Level 3: Full power. : Level 2: Plenty of power remains. : Level 1: Half or less power remains. : Level 0: Little power remains. Charge the battery. : Low: No power remains (A beep tone sounds and the battery symbol blinks.) Charge the battery. -
Page 15
• When the fractional/decimal display format is set to «0.001m» and the unit of measurement is «m», the display is as follows: When measuring mode is «Single», «Average» or «Repeat» Height: Up to 3 decimals Distance: Up to 2 decimals When measuring mode is «Tracking»… -
Page 16: Operating Keys
Note: • The fractional/decimal display format for distance measurements depends on the setting in measuring mode only. Operating Keys Learn main key operations here. • Power ON/OFF : Power the instrument ON (hold) + : Power the instrument OFF • Light up the display : Switch the display backlight ON / OFF •…
-
Page 17: Operating Modes
Operating Modes The SDL has a number of functional modes. This section shows the screens that can be displayed in each mode. : Key operation for selecting each menu : Key operation for returning to previous screen [Instrument information mode] [Screen showing the number of points that can be recorded is displayed]…
-
Page 18
[Height difference measurement mode] [Elevation measurement mode] [Setting out ..] Select [Menu of selected function is displayed] [Config. mode] (Page 1) MENU (Page 2) Select [Menu of selected function is displayed]… -
Page 19: Preliminaries 4. Installing And Removing The Battery
Installing and Removing the Battery Install a fully-charged battery (see «18. Charging the Battery»). Procedure Important: • Always turn off the power before removing the battery from the instrument. If the battery is removed when the power is still on, stored data may be lost.
-
Page 20: Setting Up The Instrument
Setting Up the Instrument Procedure 1 Set up the tripod. Spread the tripod legs about the same distance apart so that the tripod head is approximately level. Tread the tripod shoes firmly into the ground. 2 Mount the instrument on the tripod. Hold the instrument on the tripod head and tighten the centering screw.
-
Page 21: Focusing And Sighting
Focusing and Sighting • Before using the instrument Turn the eyepiece to adjust the eyepiece image. Procedure 1 Using the gunsight, aim the objective lens toward the staff. 2 Gradually turn the eyepiece outward, stopping just before the reticle cross-lines become blurred. 3 Turn the horizontal fine motion knobs until the staff is nearly centered in the field of view, then turn the focusing knob to focus on the staff.
-
Page 22
• Focusing when taking measurements Procedure 1 Using the gunsight, aim the objective lens toward the staff. 2 Turn the horizontal fine motion knobs until the staff is nearly centered in the field of view, then turn the focusing knob to focus on the staff. -
Page 23: Surveying 7. Basic Operation
The following explains how to read the RAB code of the staff. * : RAB code (Random Bi-directional code) is a coded staff used with SOKKIA digital levels. Important: • Set up the staff in an area free of obstacles.
-
Page 24
SDL30/50 reads in measurements up to 0.1mm and minor deviations in the accuracy of the staff will adversely affect accuracy. To obtain high accuracy measurements, it is important to perform temperature corrections for the staff. -
Page 25
• Measuring the height from a ceiling Important: • Not possible with Wave-and-Read function. Attempting such measurement with the Wave-and-Read function will result in an error. Note: Formula for correcting expansion and contraction of the staff due to temperature changes Δ… -
Page 26: Measuring In Status Mode
Warnings and Error Messages»). Shield the eyepiece from the light source using your body or cover the eyepiece with your hand and resume measurement. • If the SDL30/50 is subjected to shocks or vibration during use, measurement may be impossible. Resume measurement during more stable conditions.
-
Page 27: Measuring Using Wave-And-Read
Note: • In Repeat, Average, or Tracking mode: Step 2: Values are renewed at each measurement. Press to stop the reading. Measure Press to cancel the reading. Measuring using Wave-and-Read The Wave-and-Read function reduces measurement error due to the staff not being vertical (i.e. tilting). It also allows measurement using a staff not equipped with a bubble scope.
-
Page 28
The forward and backward movement with respect to vertical position A should be equal and not in excess of 5 to 10°. No good No good Vertical Procedure 1 Turn the power switch on. 2 Set measuring mode to “Waving”. (see «16.1 Measuring Mode») 3 Focus on the staff. -
Page 29
5 Press to start measurement. Measure A beep tone sounds and the display blinks. Consecutive arrows displayed to indicate the progress of measurement. When measurement is completed, a beep tone sounds twice and the staff readings (Rh) and horizontal distance (Hd) are displayed. -
Page 30: Setting Up Data Storage
Setting Up Data Storage Data can be stored in Height difference measurement mode or Elevation measurement mode. JOB setting mode and record setting mode must be set up before data can be recorded. JOB setting mode Record setting mode Notes: •…
-
Page 31
• JOB Selection Procedure 1 In the menu mode, select «JOB,» and then select «Select.» The currently selected JOB and number of data recorded in the JOB are displayed. 2 Select the JOB you will store the data 3 Press to confirm the selected JOB. -
Page 32: Record Conditions
0 1 2 3 4 5 6 7 8 9 ABCDEFGHIJ KLMNOPQRST U V W X Y Z . + — Example: Displaying the word AT 2 Press four times to display «A.» 3 Press to move the cursor to the next character.
-
Page 33: Double-Run Measurement
Double-run Measurement You can set single-run or double-run measurement data as additional information. When data is sent, you can distinguish single-run from double-run measurement data. In menu mode, select «REC» and then «Line.» * Go: Record sent data Return: Record returned data Note: When «Return»…
-
Page 34
Set the backsight point number* Measure the backsight point Check and record the measurement results Set attributes of foresight point* Set the point number of the foresight point* Measure (foresight) point Check and record the measurement results Measure next foresight Move the instrument point point Measure previous point as… -
Page 35
2 Set the point number. 3 Press to confirm the point number. Notes: Advancing the point number If the point number is not set, data is recorded using the automatically set number in the currently selected JOB. Check the measurement results together with the point number. Point number is displayed as follows: •… -
Page 36
• Inputting measurement data (measure the point using the numerical scale side of the staff) Procedure 1 Focus SDL30/50 numerical scale side of the staff and measure the backsight point. 2 Press Measurement data can now be input manually. -
Page 37: Measuring Height Difference
Measuring Height Difference You can measure the height difference ΔH between the backsight (point A) and foresight (point B). ΔH The procedure below is for taking single measurements when «manual» is selected in the Record conditions menu. Important: • When moving the instrument to a new position (step 8 below), press «Yes»…
-
Page 38
5 Measure the foresight. The instrument calculates the height difference ΔH relative to the back- sight, and displays the result. 6 Select «Yes» to accept the point number, attribute and measurement value. The result is saved. 7 Press A message asks whether you want to change the instrument position. -
Page 39
Notes: • Point number input Step 3: Press to ready the instrument for point number input. Step 5: Press twice to ready the instrument for point number input. (See «8.4 Flow of Recording Data».) • Attribute setting Step 5: Press to ready the instrument for attribute setting. -
Page 40: Measuring Elevation
10. Measuring Elevation From a known elevation (point A), you can measure the elevation (HA + ΔH) of a specified ground point (point B). The procedure below is for taking single measurements when «Manual» is selected in the Record conditions menu. Important: •…
-
Page 41
5 Select «Yes» to accept the point number and measurement value. The result is saved and the number of points that can be recorded in available memory is displayed. 6 Measure the foresight. The instrument calculates the foresight elevation (Z), and displays the result. 7 Select «Yes»… -
Page 42
Notes: • Point number input Step 4: Press to ready the instrument for point number input. Step 6: Press twice to ready the instrument for point number input. (See «8.4 Flow of Recording Data».) • Attribute setting Step 6: Press to ready the instrument for attribute setting. -
Page 43: Setting Out Height Difference, Distance, And Elevation
11. Setting Out Height Difference, Distance, and Elevation You can locate ground points that correspond to entered numerical data. The Set-Out menu provides three modes — height difference, distance, and elevation. 11.1 Setting Out Height Difference By entering the height difference (ΔH) from a benchmark (point A), you can find a ground point (point B) at a specified height difference from the benchmark.
-
Page 44
4 Measure the backsight. The instrument takes the backsight reading and displays the measure- ment. 5 Select «Yes» to accept the value. 6 Measure the foresight. The instrument calculates the differ- ence between the measurement and the input value, and displays the result. -
Page 45: Setting Out Distance
11.2 Setting Out Distance By entering the distance (Hd) from a benchmark (point A), you can find a ground point (point B) at a specified distance from the benchmark. The procedure below is for taking single measurements. Procedure 1 Set up the instrument at point A. 2 In menu mode, select «Set-out», then select «Dist.».
-
Page 46: Setting Out Elevation
5 Move the staff by the amount shown on the screen, then take another foresight reading. If «Out» is displayed, move the staff backward. If «In» is displayed, move the staff forward. When the display shows ‘0’, you have found the specified ground point. 6 Press Distance set-out is completed.
-
Page 47
Procedure 1 Set instrument midway between points A and B. 2 In menu mode, select «Set-out», then select «Elev.». 3 Input the backsight elevation. 4 Measure the backsight. The instrument takes the backsight reading and displays the measurement. 5 Select «Yes» to accept the value. 6 Input the elevation that you want to stake out. -
Page 48
9 Press Elevation set-out is completed. Set out the next ground point. Notes: • When in this menu and setting-out has already been taken (for the second or subsequent reading): Step 4: The previous backsight measurement will be displayed and the program skips to step 5. •… -
Page 49: Other Measurement Functions
12.2 Using the Instrument as a Standard Level By using the numeric scale side of the staff, you can use the SDL30/50 as a standard level. Simply focus on the staff and read the scale. In the Height difference measurement mode and Elevation measurement mode, the sighted value can be manually input in the currently selected JOB.
-
Page 50: Managing 13. Displaying Recorded Data
13. Displaying Recorded Data Data recorded in Height difference measurement mode or Elevation measurement mode can be edited. Use the Record Setting Mode to check data and display the number of recorded points. 13.1 Data Check and Edit Check the contents saved in the currently selected JOB. Attributes can be changed.
-
Page 51: Number Of Recorded Points
3 Press The attributes can now be changed. 4 Display the attribute you want to change. 5 Press to confirm the selected attribute. Notes: • «DEL» setting and Number of points that can be recorded If the DEL attribute is selected for recorded data, the data is not displayed.
-
Page 52: Job Delete
14. JOB Delete Delete the JOB and the contents of the JOB. Carry out JOB deletion in the JOB setting mode. (JOBs cannot be deleted when the battery is LOW.) Important: • JOBs that cannot be output (indicated by * next to JOB) cannot be deleted.
-
Page 53
Notes: • JOB Quick Access Step 2: When JOB numbers 1 to 10 are displayed, press jump to JOB number 11. When JOB numbers 11 to 20 are displayed, press to jump back to JOB number 1. • JOB name Step 3: After the JOB is deleted, the default JOB name set at the factory is displayed: JOB01 to JOB20. -
Page 54: Sending Recorded Data
SDL30/50 to carry out measurement, and the measurement results are output. Important: • The SDL30/50 accepts commands only when in status mode or menu mode. Received commands are not executed in any other state. 15.1 Connecting to a Computer or Data Collector Use the dedicated communication cable to connect the SDL30/50 to the data collector or a computer.
-
Page 55: Data Output
• Data recorded in a JOB that has not been sent is indicated by an asterisk (*). Procedure 1 Use a cable to connect the SDL30/50 to a computer. («15.1 Connecting to a Computer or Data Collector») 2 In menu mode, select «JOB» and then «Output.»…
-
Page 56
3 Select the JOB you wish to send. 4 Select the data output format. Data is output. When data output is completed, the SDL30/50 returns to JOB setting mode. Note: • JOB Quick Access Step 2: When JOB numbers 01 to 10 are displayed, press to jump to JOB number 11. -
Page 57: Other 16. Changing The Settings
16. Changing the Settings You can change settings such as the measuring mode and the number of decimals in displayed data. When you select «Config.» in menu mode, the two-page configuration menu is displayed. Page 1 Page 2 • Meas. (measuring mode) •…
-
Page 58: Fractional / Decimal Representation Of Height Unit
Waving: measurement using Wave-and-Read function Repeat: The instrument repeats fine measurements until the operator presses Measure Page 2 Tracking: The instrument repeats coarse measurements until the operator presses Measure Note: • When is pressed in Set-out mode, the Measurement conditions setting screen can be displayed. 16.2 Fractional/Decimal Representation of Height Units You can set the fractional/decimal display format for…
-
Page 59: Communication Parameters
Note: The fractional/decimal display format for distance values depends on the settings only in measuring mode. (See «3.2 Display».) 16.3 Communication Parameters select communication parameters for connecting a data collector or a computer. The baud rate and parity settings can be selected from the following.
-
Page 60: Unit Of Measurement
16.5 Unit of Measurement You can select the display unit to be used. inch Note: • If measurement data has already been saved in the selected JOB, the unit of measurement cannot be changed. • «Inch» here means «fraction of an inch», «fraction of an inch» is the unit used in the United States and expressed like the following example.
-
Page 61: Warnings And Error Messages
17. Warnings and Error Messages The table below shows the warnings and error messages displayed by the SDL30/50 and describes the cause of each warning or error message. Error Message Coded Message Meaning E400 • System error due to a fault E401 in the instrument.
-
Page 62
Error Message Coded Message Meaning E410 • An object other than the E411 staff is being sighted. E412 • The staff is out of focus. E413 • The staff is partly unread- E414 able because obscured E415 by an obstacle or dam- E416 aged. -
Page 63
5m (too near) or greater than 50m (too far) when per- forming Wave-and-Read measurement. E498 • Measurement results not obtained within 20 sec- onds of starting Wave- and-Read measurement. Note: Coded messages are not displayed on SDL30/50 display. -
Page 64: Charging The Battery
18. Charging the Battery Important: • Do not short circuit. Heat or ignition could result. • Batteries cannot be charged, even when the charging lamp is flashing, when the temperature is outside the charging temperature range. • Do not leave the battery anywhere exposed to high temperatures.
-
Page 65
3 Charging takes approximately 2.5 hours. The lamp lights when charging is finished. 4 Remove the battery and unplug the charger. Notes: • Slots 1 and 2 • Step 2: The charger starts charging the battery mounted first. If you place two batteries in the charger, the battery in slot 1 is charged first, and then the battery in slot 2. -
Page 66: Checks And Adjustments
19. Checks and Adjustments Always check adjust before ensure accurate measurements. • Make sure the instrument is securely set up and stable before performing checks and adjustments. • Do not perform checks and adjustments with “Waving” selected as measuring mode. 19.1 Adjusting the Circular Level Check that the bubble remains centered in the circular level.
-
Page 67: Adjusting The Reticle
4 Eliminate the remaining shift by Adjusting screws turning the circular level adjusting screws with the hexagonal wrench until the bubble is centered. Adjust with the level adjusting screw 5 Turn the instrument 180°. If the bubble stays in the center, adjustment is completed.
-
Page 68
Place staffs to within 50cm (20 inch) of the distances described in the procedure. Otherwise, measurement accuracy may be adversely affected. 3 Press 4 Measure staff a. 5 Select «Yes» to accept the value. 6 Measure staff b. 7 Select «Yes» to accept the value. 8 Select «Yes». -
Page 69
15 Check the difference between the results and decide whether correcting the reference value of the sensor is required. If the difference is 0.3mm or less, no adjustment is necessary. If the difference exceeds the 0.3mm permissible range, adjustment is necessary. -
Page 70
If correcting the reference value is not necessary: 16 Select «No». 17 Select «Yes» to exit from the Adjust menu. If correcting the reference value is required: 16 Select «Yes». The instrument calculates and records the required reticle adjustment from the measurement results, and then returns to the menu selection. -
Page 71
4 Remove the adjusting screw cover and insert a hexagonal wrench (M3) in the adjusting screw. 5 Turn the adjusting screw, then repeat steps 1 and 2. Adjust so that the difference between the two measure- ments is less than 2mm. If the measurement at step 2 is larger than the measurement at step 1, lower the cross-line by slightly loosening the… -
Page 72
Notes: • Saving measurement values during correcting the reference value of the sensor and power off • Steps 9, 12 and 14: «Data keep» screen asks whether or not you want to save the measurement values during setting internal constants. Select «Yes»… -
Page 73: Equipment And Accessories
20. Equipment and Accessories 20.1 Standard Equipment Before using your SDL30/50, first make sure that all the follow-ing products were supplied. • Layout Plan (2 batteries can be placed here) SDL30/50 ……………1 Battery (BDC46B) …………1 Charger (CDC68)…………1 Power cable (EDC113A/113B/113C)……1 Hexagonal wrench M2.5 (for circular level)….1…
-
Page 74: Optional Accessory
20.2 Optional Accessory • Diagonal eyepiece (DE23) The diagonal eyepiece is useful for taking measurements in confined spaces. First remove the standard SDL30/50 eyepiece by turning it counter-clockwise. Then, screw the diagonal eyepiece in place of the standard eyepiece.
-
Page 75: Staffs
20.3 Staffs • Staff types Name Material Length/Front/Reverse Feature BIS20 Invar 2.0m (6.6ft) ISO 12858-1: Front: RAB code 1999 compatible BIS30 Invar 3.038m (9.8ft) ISO 12858-1: Front: RAB code 1999 compatible high precision leveling BGS40 Glass fiber 4.08m (3 sections) With handle Front: RAB code Reverse: graduated…
-
Page 76
*:RAB code (RAndom Bi-directional code) is a coded staff used with SOKKIA digital levels. -
Page 77: Specifications 21. Specifications
21. Specifications Except where stated, the following specifications apply to all SDLs. Telescope Length 260 mm Objective aperture: SDL30: Ø45mm SDL50: Ø36mm Magnification: SDL30: 32x SDL50: 28x Image: Erect Resolving power: SDL30: 3″ SDL50: 3.5″ Field of view: 1°20′ Minimum focus: 1.5m (5.0 ft)
-
Page 78
Distance 0.01m (0.1ft) (single, repeat or average mode) 0.1m (1 ft) (tracking or Wave-and-Read mode) Accuracy:*1 (with SOKKIA staff BGS40/50 or BIS20/30) Height Standard deviation for 1 km of double-run SDL30: Electronic Measurement 0.6mm (0.03in.) (with BIS20/30) 1.0mm (0.04in.) (with BGS40/50/50G) 1.2mm (0.047in.) (with BAS55) -
Page 79
SDL50: Electronic Measurement 0.8mm (0.03in.) (with BIS20/30) 1.5mm (0.06in.) (with BGS40/50/50G) 1.7mm (0.047in.) (with BAS55) Visual Measurement 2.0mm (0.08in.) (with BGS40/50/50G) 2.5mm (0.06in.) (with BAS55) Distance ±10mm (less than 10m measurement) ±(0.1% x D) (10 to 50m measurement) ±(0.2% x D) (more than 50m measurement) (D: measured distance, unit: m) Measuring modes: Single / Repeat / Average / Tracking /… -
Page 80
Staff face remains sighted in the reticle throughout the entire waving movement. Power Power supply: Rechargeable Li-ion battery (BDC46B) Battery state indicator: 4 levels Working duration: more than 16 hours (at 25°C) Charging time: about 2.5 hours*4 (using CDC68) (BDC46B) Nominal voltage: 7.2V Storage temperature range:-20 to 35°C (-4 to 95°F) -
Page 81: Regulations 22. Regulations
22. Regulations For users in the US WARNING: Changes or modifications to this unit not expressly approved by the party responsible for compliance could void the user’s authority to operate the equipment. NOTE: This equipment has been tested and found to comply with the limits for a Class A digital device pursuant to Part 15 of the FCC Rules.
-
Page 82
For users in the Republic of Korea… -
Page 83
MEMO… -
Page 84
MEMO… -
Page 85
MEMO… -
Page 86
S Li-ion Li-ion This is the mark of the Japan Surveying Instruments Manufacturers Association. -
Page 87
13th ed. 16-1003 ©2000 SOKKIA TOPCON CO., LTD.
This manual is also suitable for:
Sdl50
Sokkia SDL30 Measuring Instruments PDF User Guides and Manuals for Free Download: Found (1) Manuals for Sokkia SDL30 Device Model (Operator’s Manual)
More Measuring Instruments Device Models:
-
Rosemount Analytical
880A
Artisan Technology Group is your source for quality new and certied-used/pre-owned equipment• FAST SHIPPING AND DELIVERY• TENS OF THOUSANDS OF IN-STOCK ITEMS• EQUIPMENT DEMOS• HUNDREDS OF MANUFACTURERS SUPPORTED• LEASING/MONTHLY RENTALS• ITAR CERTIFIED SECURE ASSET SOLUTIONSSERVICE CENTER …
880A Measuring Instruments, 88
-
Global Water
RG200
Global Water 800-876-1172 • globalw.com — 1 — Global Water Instrumentation, Inc. 11390 Amalgam Way Gold River, CA 95670 T: 800-876-1172 Int’l: (916) 638-3429, F: (916) 638-3270 6” Tipping Bucket: RG200 02/05/10 01-343 …
RG200 Measuring Instruments, 10
-
Flomec
G2
1 Owner’s Manual G2 Industrial Grade Turbine Housing Includes Aluminum and Stainless Steel Housings ANSI Flange Fittings and Tri-Clover® Flange Fittings 01/2021 920708-3 Rev K …
G2 Measuring Instruments, 24
-
HMP
LFGpro
The Light Weight Deflectometer HMP LFGpro Brief instructions* Key functions Switch on / off measuring instrument Select upward Select downward Select to the left / Scroll Select to the right / Scroll Confirm selection / Start action Buttons/Symbols Main menu Measuring (precompaction, measur …
LFGpro Measuring Instruments, 2
Recommended Documentation:
Thank you for selecting the Digital Level SDL30/50.
•
Please read this operator’s manual carefully before using this
product.
•
Verify that all equipment is included. See «20.1 Standard Equip-
ment».
•
SDL30/50 has a function to output data saved in SDL30/50 to a
connected computer. Commands operations from a computer
can also be performed. For details, refer to the «Output Formats
and Command Explanations (SDL Edition)» manual and ask your
local dealer.
•
The specifications and general appearance of the instrument are
subject to change without prior notice and without obligation by
Sokkia Topcon Co., Ltd. and may differ from those appearing in
this manual.
•
The content of this manual is subject to change without notice.
•
Some of the diagrams in this manual may be simplified for easier
understanding.
1
SURVEYING INSTRUMENTS
Digital Level
OPERATOR’S MANUAL
SDL30
SDL50
Добро пожаловать!
Войдите или зарегистрируйтесь сейчас!
Войти
Страница 2 из 4
-

Форумчанин
- Регистрация:
- 6 май 2012
- Сообщения:
- 35
- Симпатии:
- 1
Господа! Помогите пожалуйста найти руководство пользователя «Sokkia SDL30». Устроился на работу, лежит оный нивелир а с ним инструкция только на англицком . Местные прорабы пользуют его как оптический. Отобрал , а инструкции на русском то и нету.
#21
-

Форумчанин
Попробуй связаться с Геостройизысканиями, наверняка, есть инструкция в электронном виде
#22
-
Форумчанин
- Регистрация:
- 6 май 2012
- Сообщения:
- 35
- Симпатии:
- 1
Романыч , спасибо! Попробую. Искал по инету , нигде нет.
#23
-

Форумчанин
-
Форумчанин
- Регистрация:
- 6 май 2012
- Сообщения:
- 35
- Симпатии:
- 1
Спасибо большое! Пошел я осваивать его!

#25
-
Форумчанин
Удачи! Сложного нет абсолютно ничего: машина простая и надёжная.
#26
-
Форумчанин
Блииин. Нравится в этом нивелире АБСОЛЮТНО ВСЁ, за исключением мааааленькой вещи.При работе прибора в режиме «усреднённые измерения» Average (у меня по умолчанию стоит количество измерений=5), очень трудно ловить «писк» каждого измерения, особенно когда вокруг работает «не меряное» количество техники…..Приходится, как доктор «ухо к груди больного» и слушать, слушать, слушать, слушать….
#27
-

Форумчанин
Пожалуйста, выложите, у кого есть, а то ссылка не пашет.
Нашел сам, держите, может кому ещё понадобится.Вложения:
-
SDL30.pdf
- Размер файла:
- 3,7 МБ
- Просмотров:
- 236
#28
-
-
Форумчанин
Лови в личку.
Зря выложил, модеры всё-равно удалят…
Кстати, к плюсом оного прибора: в силу обстоятельств, пришлось его поюзать при температуре= — 32-выдержал 40 минут!!!!#29
-

Форумчанин
- Регистрация:
- 3 июн 2008
- Сообщения:
- 7.993
- Симпатии:
- 3.059
- Адрес:
-
Пермь
Говорят Тримбле дини в этом вопросе рулит. Батареи при обычных условиях на неделю хватает. Вообще хотелось бы полный отзыв о приборе услышать, а то их мало кто пользует информации вообще мало.
#30
-
Форумчанин
Работал им при -25 пятилетней батареей, хватало на 1,5-2 часа, но стоило разряженную в ноль батарею погреть подмышкой минут 7-10 и он снова пашет 10-15 минут.
Про какой прибор отзыв хочешь услышать, про DiNi или SDL? Есть оба в наличии, и если честно, слой пыли на кейсе с Дини красноречиво говорит в пользу Соккии.
Батарейки у Дини действительно хватает очень надолго. Работ с ним при -22, тормозил экран (у меня Dini 0.3 — с большим экраном), несильно — но раздражало.#31
-
Форумчанин
- Регистрация:
- 3 июн 2008
- Сообщения:
- 7.993
- Симпатии:
- 3.059
- Адрес:
-
Пермь
Конечно про оба из первых уст!!! Что лучше у кого, что хуже?. Чем удобнее и почему?. В чем обрабатываете и какие особенности? Еще вроде об этих приборах никто особо не рассказывал. Можно стать лидером в этом вопросе))
#32
-
Форумчанин
Сравнить оба прибора не могу, т.к. у меня в наличии только Сокол.
Плюсы:
1. Надежная машина.
2. Проста в усвоении.
3.Работает при более низких температурах, чем заявлено производителем (кстати, когда писал про работу в 40 минут, я подразумевал не «издыхание» батарейки, а то, что замерз дисплей…)
Минусы (в основном, это уже мои придирки):
1. В стандартный набор входит только одна батарея.
2. Нет порта подключения внешней АКБ.
3.При работе прибора в режиме «усреднённые измерения» Average (у меня по умолчанию стоит количество измерений=5), очень трудно ловить «писк» каждого измерения (дабы понять, когда измерения закончились), особенно когда вокруг работает «не меряное» количество техники…..Приходится, как доктор «ухо к груди больного» и слушать, слушать, слушать, слушать….
4. При переходе, например, из режима «вынос высоты» в «определении высоты», прибор запоминает высоту репера, но не запоминает уже измеренные значения превышения и расстояния «задней рейки» или BS-терминология прибора (приходится помощника снова гонять на реперок).
Пы. Сы. На каком-то из форумах, я уже писал, что мной была достигнута точность порядка 1мм при проложении нивелирного хода почти в 1 км.
Рекомендую, пацаны!#33
geo_rva и max7 нравится это.
-

Форумчанин
- Регистрация:
- 9 апр 2009
- Сообщения:
- 549
- Симпатии:
- 112
- Адрес:
-
Москва
Романыч, 1 мм на какую рейку получилось?
#34
-
Форумчанин
Работаю со стандартными рейками BGS ( в основном, BGS-50), при этом, обязательно к нивелиру использую только те рейки, которые прописаны к нему (то бишь к нивелиру) в свидетельстве о поверке.
#35
-
Форумчанин
Оба прибора у нас используются в основном для наблюдения за осадками, ну и прочие работы)
С Дини работал с инварными рейками и алюминиевыми –раздвижными, с Соккией – с фиберглассывыми и также алюминиевыми –раздвижными. Причем разница в цене раздвижных реек приличная – для Дини 12 т.р., для Соккии – 4 т.р. А учитывая то, что при интенсивной эксплуатации штих-код стирается, и отчеты берутся хуже (Соккиа), или вообще не берутся (Дини – при том же уровне изношенности рейки) – это плюс в сторону Соккии.
Вообще, сравнивая работу с этими нивелирами, отдаю преимущество Соккии главным образом по причине неприхотливости при измерениях. Грубо говоря он «жрет» почти все: и обшарпанный и подкрашенный маркером штрих-код, и подсвеченную телефоном рейку в абсолютной темноте подвала, и различные фрагменты штрих кода (т.е. когда рейку закрывает препятствие, причем даже перекрестие сетки нитей).
Дини же требуется видимость не менее 30 см рейки, причем полностью, причем хорошо, равномерно освещенной. И со временем её сообщения «Рейка не читается» начинают выбешивать, так как очевидной причины «не читаемости» вроде бы и нет.
Но зато у Дини гораздо разнообразнее внутреннее ПО. Можно задавать различные допуски на плечи, на накопление плеч, на СКО на станции и прочее. Применять различные методы нивелировки с чередованием и повторением задних и передних реек, уравнивать одиночный ход. У Дини более информативный формат файла измерений, есть подсветка уровня, большой экран, долгоиграющая батарейка, USBкабель. Вообщем, всё что нужно для комфортной работы, но в комфортных условиях))).
Обрабатываю измерения в Кредо Нивелир, туда измерения скидываются напрямую с приборов. Из-за более богатого ПО Дини в Кредо сразу пишет много чего, в отличии от Соккии – там всё по минимуму.#36
-
Форумчанин
- Регистрация:
- 3 июн 2008
- Сообщения:
- 7.993
- Симпатии:
- 3.059
- Адрес:
-
Пермь
Видимо для «технички» и рядовой рутинной нивелировки, например урезов рек -лучше SDL30. Если нужна большая точность и нивелировка 1 — 2 класса лучше DINI 0.3
#37
-
Форумчанин
-

Форумчанин
- Регистрация:
- 9 окт 2010
- Сообщения:
- 1.546
- Симпатии:
- 937
Работал DINI 07, DINI 12. По непонятным причинам, иногда не читается рейка, но есть для таких случаев ввод вручную. Батареи хватает на неделю работы в минусовых температурах. меряет долго 3-5сек. Различные комбинации измерений задней передней рейки. Меню простое, работал с английскими прошивками без проблем. Английский мой — школьная программа. Предпочитаю оптику, особенно если площадная нив. по квадратам для пирогов.
#39
-
Форумчанин
- Регистрация:
- 3 июн 2008
- Сообщения:
- 7.993
- Симпатии:
- 3.059
- Адрес:
-
Пермь
Может такое быть что из за качения её реечником?
#40
Страница 2 из 4