Комментарии
7
Войдите или зарегистрируйтесь, чтобы писать комментарии, задавать вопросы и участвовать в обсуждении.

Ура! А я думал, что по правой стороне что то не работает, хотел все разбирать, а оказалось все элементарно, просто потянуть на себя регулятор громкости! 😁

Спасибо, очень полезная информация

Я поменял свой, Щас родной лежит пылится, но у меня и руль не мультимедийный ( (

может в будущем замучу ченибудь в бардачок воткну 
У меня СД ченчер в бардачке стоял, я ее вытащил, а магнитола не родная стоит, . Теперь дыра . Нужен целый бардачек .
чет не хочится не чего менять, щас поставь другое, кнопки на руле, дисплей уже не будет функционировать. играет он неплохо, через модулятор слушаю.

А лучше не заморачиваться с ней и поставить что-то другое
![]()
OPEL
RADIO DELCO CDR 500
Инструкция пользователя
|
Printec Systems Oy Ltd |
|
|
Предлагаем все для полиграфии из |
|
|
Финляндии. Передовые технологии и |
|
|
оригинальные расходные материалы. |
|
|
тел: (812) 712-46-78 |
|
|
1 |
http://www.printecsystems.ru |

|
2 |
http://www.printecsystems.ru |

Краткое описание
Радио CDR 500 принимает сигнал в диапазоне коротких средних и длинных волн. Обеспечивается прием сообщений о дорожной обстановке (TP) и работа радиоинформационной системы (RDS). В памяти можно сохранить до 30 станций.
Проигрыватель CD обеспечивает прослушивание стандартных CD дисков
Органы управления
Nr Символ Описание
вкл/выкл: нажать
громкость: повернуть
баланс лев/прав: тянуть повернуть
низкие: повернуть высокие: тянуть повернуть
баланс фронт/тыл: повернуть
— CD-слот
кнопка выброса CD
— кнопка снятия панели
— индикатор охраны
[1]-[6] кнопки радио станций
[RDS] режим радиоинформационной системы
[TP] режим дорожной обстановки
кнопка поиска вперед
кнопка поиска назад
[AS] автоматическая настройка радиостанций
 [UML] выбор диапазона
— съемная панель управления
Дистанционное управление с рулевого колеса
Nr символ описание
радио: переход на одну станцию,
CD: начало диска
кнопка поиска вперед
кнопка поиска назад
увеличение громкости уменьшение громкости радио/CD переключение
3
Дисплей
Дисплей в автомобиле используется для отображения информации аудиосистемы. Возможны два базовых варианта исполнения дисплея:
8-ми цифровой
10-ти цифровой
В этом руководстве описывается работа 10 цифрового дисплея. Содержание 8-и цифрового дисплея соответствует 10-ти цифровому дисплею за исключением диапазона волн, предварительно установленных станций и некоторых радио-функций
http://www.printecsystems.ru

Система охраны
Кодирование
Аудиосистема — оснащена пассивной системой защиты. Закодированной аудиосистемой, вор воспользоваться не может. Код аудиосистемы указан в паспорте на аудиосистему или в паспорте автомобиля. Никогда не оставляйте паспорт в автомобиле.
При каждом включении аудиосистемы на дисплее на короткое время появляется индикация “CODE” если система закодирована, светодиод
индикатора охраны  на кнопке снятия панели
  , начинает мигать. Код аудиосистемы предварительно установлен производителем.
Съемная панель управления
Для дополнительной защиты от кражи аудиосистема имеет съемную панель управления. Каждый раз, покидая автомобиль, берите с собой съемную панель в специальном защитном футляре. Система функционирует только с оригинальной панелью. В случае потери панели, используют замененную съемную панель и проводят операцию адаптации новой панели посредством кодирования.
Снятие панели
Нажмите кнопку освобождения  и снимите панель
  .
.
Установка панели
Вставьте панель на место и нажмите с обеих сторон до щелчка.
Если панель установлена неправильно, при включении аудиосистемы на дисплее появится обозначение “PANEL”.
Убедитесь, что панель правильно установлена с обеих сторон (защелкнулась).
Вкл/Выкл аудиосистемы
нажать кнопку  для включения или выключения
Автоматическое включение
Если Вы включили аудиосистему
нажатием кнопки  , Вы можете выключить ее выключив зажигание автомобиля.
Вы можете отключить автоматическое включение следующими шагами:
Включите зажигание.
Выключите систему кнопкой  .
.
Нажмите кнопки радиостанции
[1] и [3]  и удерживайте их.
Включите аудиосистему. Появиться сообщение на дисплее “IGNI ON”. Удерживайте кнопки радиостанции [1] и [3] пока не услышите звуковой сигнал.
На дисплее появиться сообщение “IGNI OFF”. Аудиосистема теперь может включена и выключена только с
помощью кнопки  .
.
|
4 |
http://www.printecsystems.ru |

Те же самые шаги как описано выше выполняются, чтобы активировать автоматическое включение.
После подтверждающего звукового сигнала на дисплее появиться сообщение “IGNI ON”.
Автоматическое включение — активизируется, когда отключается рабочее напряжение питания.
Автоматическое воспроизведение CD
Если CD-диск будет вставлен в аудиосистему когда она выключена, аудиосистема включится автоматически и будет проигрывать
CD-диск.
Если CD-диск будет извлечен, то аудиосистема выключится.
Автоматическое выключение
Аудиосистема автоматически выключится через один час после выключения зажигания автомобиля. Эта функция, не зависит от настройки автоматического включения.
Регулировка звука
Регулировка громкости
Поверните регулятор  .
.
Регулировка баланс лев/прав.
Вытянуть кнопку  .
.
Повернуть регулятор.
 Регулировка фейдер пер/тыл.
Нажать для извлечения выдвигающейся кнопки  .
.
Повернуть регулятор.
Нажать на кнопку для возврата в исходное положение
5
Автоматическая регулировка звука
Автоматическая регулировка уровня громкости компенсирует окружающий шум автомобиля путем настройки уровня громкости в зависимости от скорости движения автомобиля.
Регулировка уровня звука.
Нажмите и удерживайте кнопку [UML]  , пока не услышите звуковой сигнал.
При помощи кнопок  или
или  настройте желаемый уровень громкости. Информация на дисплее
“SD-VOL +0” или “SD-VOL +1” до уровня “SD-VOL +5”.
Для сохранения выбранной установки уровня громкости снова
нажмите кнопку [UML]  , пока не услышите звуковой сигнал.
При установке уровня “SD-VOL +0” автоматическая регулировка звука не активна.
Если вы не нажмете кнопку в течение 10 секунд после настройки, изменения не сохранятся, возобновится работа в обычном режиме.
http://www.printecsystems.ru
Настройка звука
Вы можете настраивать тональность звука с помощью выдвигающейся кнопки  . Возможна независимая настройка высоких и низких частот звука. Кнопка имеет два положения регулировки.
 Настройка низких частот (бас)
Нажать кнопку  , кнопка выдвинется.
Повернуть кнопку (налево, чтобы уменьшить уровень, направо увеличить уровень)
Нажать на кнопку для возврата в исходное положение.
 Настройка высоких частот (трабл)
Нажать кнопку  , кнопка выдвинется.
Вытянуть кнопку далее.
Повернуть кнопку (налево, чтобы уменьшить уровень, направо увеличить уровень)
Нажать на кнопку для возврата в исходное положение.
Радио
Выбор диапазона волн
При включении радио автоматически выберет предварительно настроенный диапазон волн.
Другой диапазон волн может быть выбран при помощи кнопки [UML]  .
.
Нажмите кнопку [UML] для выбора диапазона волн.
Выбранный диапазон волн отображается на дисплее («U», «M» или
«L»).
На дисплее станция диапазона VHF
U = VHF (ультракороткие волны) М = MW (средние волны)
L = LW (длинные волны)
Ручной поиск и настройка радиостанций
Кратковременное нажатие на кнопку поиска  дает уменьшение частоты на
100 kHz
Кратковременное нажатие на кнопку
поиска  дает увеличение частоты на
100 kHz
Старт поиска радиостанций
Более длительное нажатие кнопки поиска  или
или  запускает автоматический поиск станций. Будет настроена ближайшая доступная станция.
Нажатие и удерживание кнопки поиска  или
или  изменяет частоту настройки радио пока кнопка не отпущена.
Звук радио приглушается до тех пор, пока будет найдена радиостанция. Если функция RDS была активизирована, радио настраивает только станции с RDS.
|
6 |
http://www.printecsystems.ru |
 Loading…
You can only view or download manuals with
Sign Up and get 5 for free
Upload your files to the site. You get 1 for each file you add
Get 1 for every time someone downloads your manual
Buy as many as you need
| Language | Type | Pages | |
|---|---|---|---|
| English | User Manual | 18 | > Go to the manual |
| German | User Manual | 16 | Go to the manual |
574975
Report abuse
Libble takes abuse of its services very seriously. We’re committed to dealing with such abuse according to the laws in your country of residence. When you submit a report, we’ll investigate it and take the appropriate action. We’ll get back to you only if we require additional details or have more information to share.
Product: Delco Electronics CDR 500
Forumrules
To achieve meaningful questions, we apply the following rules:
- First, read the manual;
- Check if your question has been asked previously;
- Try to ask your question as clearly as possible;
- Did you already try to solve the problem? Please mention this;
- Is your problem solved by a visitor then let him/her know in this forum;
- To give a response to a question or answer, do not use this form but click on the button ‘reply to this question’;
- Your question will be posted here and emailed to our subscribers. Therefore, avoid filling in personal details.
Your question has been posted on this page
Would you like to receive an email when new answers and questions are posted? Please enter your email address.
Handleiding ae abo
AUTORADIO
MANUAL
DELCO CDR 500 Car Radio
Delco CDR 500
OPEL CORSA - B
BOUWJAAR 2000 OPEL €
i
||
|| | ir
a
dE
|
LE Г.
ore
CP
i
Г
=— DA AO Le
English
Short Overview .......... ET ss ON
Theft Prevention еее, 21
CAVE as 21
VOS GOMÍPÓL ¿occ ir rra 22
TOREO ao 23
Раю oo ee ees 23
Traffic Announcements ............. 25
ADSEON issus sors A
Radio Station Keys ,.,,.,...,,,,.,.. ef
e E sance ea 29
Car Telaphong neue 30
Steering Wheel Remote Control ..... 31
OHS: nr qe
General Information .....,....:..... a4
© 1999 Adam Opel AG
Short Overview
The radio CDR 500 enables reception of
VHF, medium and long wave wavebands.
It is equipped with a traffic radio decoder
(TP) and receives data for Radio Data
System (RDS). Six radio station keys en-
able the storage of a total of 30 radio sta-
tions.
The unit is equipped with a CD drive unit
for playing standard CD's.
Operating Elements
no. symbol denotes
о ol on/off: depress
— volume control: turn
„+ left/right balance:
pull and turn
df bass: turn
treble: pull and tum
F4 front/back fader: turn
- CD aperture
A eject key and CD'radio
unlock operating console
- LED unlock key
[1]-[6] radio station keys
[ADS] Radio Data System
[TP] traffic radio
60000000 ©
20
@ > forward search key
© + reverse search key
(Bb [AS] automatic radio station
allocation
@ [UML] change waveband
ŒE . detachable operating console
Steering Wheel Remote Control
no. symbol denotes
— radio: advance one station
CD: restart
reverse search key
forward search key
increase volume
reduce volume
radio/CD selection mode
660666
OI+YA
Display
The display in the vehicle (see vehicle ope-
rating instructions) is also used for external
display of information from the radio. Two
basic types of displays can be installed in
the vehicle
8 digit display
ÉLLLLLLILE
10 digit display
The displays of the 10 digit display are
described in these operating instructions.
The displays of the 8 digit display corre-
spond to those of the 10 digit display with
the exception of the waveband and certain
radio functions.
Theft Prevention
Coding
The unit is equipped with a safety system
against theft. A coded radio is of no value
to the thief and therefore you should code
your unit (see the section “Coding” on
page 32) and do not leave the Radio or Car
pass with the code number in the vehicle.
The radio is coded before it leaves the
plant.
Detachabie Operating Console
The unit has a detachable operating con-
sole as an additional theft protection. A
LED in the release key @ for the operating
console blinks @ after switching off the
radio and the car ignition.
Take the operating console in its case
when you leave your car. The unit will only
work with its original operating console.
Should this be lost, a replacement opera-
ting console must be first adapted by
appropriate coding (see section "Adaptation
of the Operating Console” on page 33).
Removing the Operating Console
Press the release key @ and detach the
operating console ©.
Refitting the Operating Console
Put the operaling console back into the
recess and press on both sides to lock.
On/Off Switch ©
Ol Depress knob @ to turn the radio
on or off.
Automatic Switch-On
If the unit has been tumed on by depres-
sing knob @,, it is turned off by switching
off the ignition and removing the key, or
simply by turning the ignition off (in some
types of cars). The radio comes on again
automatically when the ignition is turned
on,
You can deactivate and reactivate this
automatic switch-on by the following steps:
* Switch ignition on.
* Turn radio of with knob @.
* Keep radio station keys [1] and [3] ©
depressed.
* Turn radio on. The message "GN! ON" is
shown on the display, Release the
depressed radio station keys only after
the confirmation signal has given.
The message "IGNI OFF" is shown on the
display. The unit may now only be turned
on and off with knob @.
21
The same steps as described above are
followed to reactivate the automatic switch-
on. The message "IGNI ON” is shown on
the display.
The automatic switch-on is activated when
the unit has been disconnected and then
connected again to the operating voltage.
Automatic CD Play-Back
lf a CD has been inserted into the unit
when switched off (see section "Insert CD”
on page 29), the unit will switch on automa-
tically and play the CD.
Automatic Switch-Off
The unit will automatically switch off one
hour after the car ignition has been turned
off. The automatic switch-off function is
independent of the automatic switch-on,
Volume Conitrol
——a Set volume
«Tum knob O.
mi Set Balance left/right
* Pull knob @.
* Turn knob.
fj_ Set Fader forward/back
» Depress retractable knob ©.
* Turn the knob.
The knob retracts out,
« Depress the knob to return it to retracted
position.
When switching on the set, the radio is set
to the volume level you last adjusted, if this
level did not exceed the factory set basic
volume level.
If the volume level was higher, the radio is
sei to it's basic level.
Automatic Volume Control
The volume is regulated in accordance with
the speed of the vehicle. You can regulate
this volume control.
Set Volume Regulation
* Keep [UML] © key depressed until the
confirmation signal is given.
* Set the desired volume increase using the
search butions @ and @.
"SD-VOL O° or "SD-VOL +1" to
"SD-VOL +5" appears on the display.
* Depress the [UML] @ key again until the
confirmation signal is given in order to
store the setting.
The automatic volume regulation is not
active in the setting "SD-VOL 0” -
If you do not depress any key within 10 sec-
onds, then the previous setting will remain
slored.
Tone Control
You can adjust the tone using the retract-
able knob @. You can adjust the bass
and the treble independently from each
other. The knob retracts into the neutral
position (middle setting).
J Adjustment of the Bass
* Depress the retractable knob @.
The knob retracts out.
« Tum the knob (to the left to reduce the
bass; to the right to increase the bass).
« Depress the knob to return it to its retrac-
ted position.
f Adjustment of the Treble
* Depress the retractable knob @.
The knob retracts out.
« Pull the knob out further.
* Turn the knob (to the left to reduce the
trable: to the right to increase the treble).
« Depress the knob to return it to its retrac-
ted position.
Radio |
Select Waveband
Tuning he radio on will automatically se-
lect the waveband previously tuned. À dif-
ferent waveband can be selected using the
[UML] MD key.
Dopross the [UML] key repeatedly until the
dealred waveband is selected.
Depressing the key once from the VHF
waveband (Very High Frequency) will se-
lec! (he MW waveband (Medium Wave).
Depressing the key again will select the LW
waveband (Long Wave). Depressing the
[UML] koy again will switch back to the
VHF waveband again.
The waveband currently selected is shown
on the display ("U”, "U AS”, "MP, "MAS" or
Ч“.
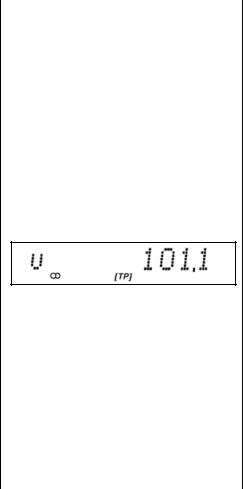
u 1011]
со [ТР]
Frequency Display of a VHF Radio Station
Manual Adjustment to the
Transmitter Frequency
« Touching the search key © will drop the
frequency by 100 kHz.
« Touching Ihe search key ( will raise the
frequency by 100 kHz.
Start Radio Station Search
Depress search key @ or @ until the
automatic search starts. Reception of the
next radio station will be selected.
Keeping one of the search keys depressed
will sweep the frequency band as long as
the key is released again.
The reception remains dormant until a radio
station is locked in. If the RDS function has
been activated, reception of the next RDS
transmitter station will be selected.
23
Use of the RDS Function
"What is ADS?"
Radio
R-D-S Das
RADO DATA SYSTEM System
RDS is a service of the public radio institu-
tions which has been introduced Europe-
wide to facilitate the search for the desired
VHF radio station and its interference-free
reception.
In addition to the programs transmitted,
RDS transmitters also radiate a digital data
telegram containing information which is
automatically interpreted by RDS receivers.
if RDS is switched on, the designation of
the radio station is shown on the display.
24
Each RDS station transmits at several fre-
quencies. The radio receiver continually
compares the signal quality of these fre-
quencies during travel and changes fre-
quencies to maintain reception of the stron-
gest frequency at all times (best reception
of the selected radio station). The radio
station designation on the display remains
unchanged.
Activate RDS
* Select the VHF waveband
* Depress [RDS] ©.
и UDR 1
со ROS TP
Display: RDS activated
The symbol "RDS” is displayed. The
search function will now only react to RDS
transmitters. The radio will automatically
select the frequency as well as the radio
station which can be received best.
If the radio station set is not a RDS trans-
mitter, then a MEMORY search will be con-
ducted and the VHF additional memory will
be automatically updated (see section
"Update VHF Additional Memory”, page 28).
Deactivate RDS
Depress [RDS) O key again.
The symbol "RDS” is no longer displayed.
The frequency is displayed instead of the
radio station designation. The radio no lon-
ger determines the best reception frequen-
cy for that radio station.
Display the Frequency of a RDS
Transmitter.
Depress the [UML] © key (approx.
1 second) until the display switches from
the radio station designation over to the
reception frequency.
The frequency is displayed for approx.
5 seconds.
Selection of Regional Radio Stations
Some RDS radio stations transmit regional
programs. They can be allocated to each
radio station key so that alternative trans-
mitter frequencies should be selected for
only those regional programs previously
heard.
Keep the radio station keys depressed, i.e.
[1] to [6] O, for those which are to be allo-
cated to regional programs, until the confir-
mation signal is given.
"REG ON” will be displayed.
Repeat ihe same steps to deactivate this
function.
"REG OFF” will be displayed.
Traffic Announcements
The functions for traffic radio are internatio-
nal and are designated by the symbol TP =
Traffic Program. Reception of a radio sta-
tion with traffic is shown on the display by
the symbol TP"
Activate Traffic Radio (TP)
. Select VHF waveband.
+ Depress key [TP] @.
The symbol {TP is shown on the display.
The symbol Y "is shown on the display
when search is being conducted or if the
reception of the radio station is not pos-
sible,
When a CD is being played, the play-back
is interrupted by traffic announcements.
The traffic radio function (TP) can also be
activated during CD play-back. In this
case, the designation of the radio station
last heard is displayed for 5 seconds. Hf the
reception had been that of a radio station
not transmitting traffic radio, then the stron-
gest traffic radio transmitter will be sear-
ched.
If traffic radio is activated and a transmitter
is selected not transmitting traffic radio,
then the strongest traffic radio transmitter
will be searched.
With the automatic radio station memory
activated by the [AS] @® key, the sweep
will be continued until at least one traffic
radio transmitter has been found, provided
the traffic radio function has been activated
beforehand. After memorizing, the radio
will switch over to a memory slot with a traf-
fic radio transmitter, provided there is one
available.
Deactivate Traffic Radio
Depress the [TP] @ key again. The sym-
bol T J’ will no longer be displayed.
lf a traffic announcement is given, the but-
ton [TP] must be depressed twice in order
to deactivate the traffic radio.
The alternatives TP on or TP off are not
memorzed when allocating transmitters to
the radio station keys.
25
Adjustment of the Volume for
Traffic Announcements
The volume for the traffic announcements
can be preset and independently of the nor-
mal volume level for the radio.
| PROG
TP-UgL +2
т =
Preset the volume level for traffic
announcements.
* Depress the [TP] © key (approx.
3 seconds) until the confirmation signal is
given,
The preset volume will appear on the dis-
play, for example "TP-VOL +1"
* The desired setting between -3 and +3
can be selected using the search keys
Ф and ®.
* Keep the [TP] @ key depressed again
until the Confirmation signal is given.
The setting is then memorized.
26
lf you do not depress the [TP] key within
10 seconds, the unit will revert to the nor-
mal operation without memorizing any
change in the setting.
During traffic announcement playback you
can adjust the volume with the @ key.
The radio returns to the volume set only by
increasing the volume after the traffic anno-
uncement has finished.
Hearing Traffic Announcements
only
If you only want to hear the traffic an-
houncements, tum traffic on. Turn knob
O to the left until the normal sound volu-
me ls reduced to zero.
Only the traffic announcements are then
heard at the preset volume.
Interrupt Traffic Announcements
Depress the [TP] @ key for a short time,
in order to interrupt the traffic announce-
ments (for example during CD play-back),
The traffic radio function remains activated,
RDS-EON
An extension of RDS is the EON function.
EON is an abbreviation for: Enhanced
Other Networks (support of other transmit-
ters).
With RDS-EON, certain Transmitting Insti-
tutions offer the possibility of hearing traffic
announcements even by reception of non-
traffic radio transmitters. The radio unit
interprets information from ADS data from
alternative radio stations transmitting traffic
radio.
Non-traffic radio transmitters with associa-
ted RDS-EON are treated as traffic radio
transmitters by the radio unit.
The symbol "EON" (10 digit display) or "TP"
(8 digit display) is displayed for these trans-
mitters.
Hearing Traffic Announcements via
ADS-EON
Depress key [TP] @. The symbol TTP]"is
displayed. When a traffic announcement is
given, the radio unit will switch over to a
traffic radio transmitter which is in the EON
network.
After the announcement, the unit will revert
to the radio station previously heard.
During the traffic announcement, the des-
ignation of the radio station is shown on the
display.
The RDS-EON function is also in operation
during CD play-back if the traffic radio (TP)
has been activated.
Radio Station Keys
There are memory slots available for a total
of 30 radio stations:
6 x U (VHF)
6 x M (MW)
6 x L (LW)
6 x U AS (VHF, automatic storage)
6 x M AS (MW, automatic storage)
Memorize Radio Station
* Select desired waveband.
* Tune to desired radio station.
* Keep one of the radio station keys
depressed [1] to [6] © until the radio
station selected can be heard again.
During the search, the radio station is dis-
played which was previously stored and
allocated to that key.
The radio station set is thus stored and
allocated to this radio station key. The
memory slot selected is shown on the
display.
Automatic Storage of Radio Stations
* Select desired wavelength.
« Keep [AS] ® key depressed until the
confirmation signal is given.
The radio station search commences and
the symbol "AS" is shown on the display.
After the search has been completed, six of
the strongest transmitters in that waveband
are stored. They are allocated to the AS
memory slots of the radio station keys.
RDS transmitters will automatically be pre-
ferentially stored and allocated to the first
memory slots.
When the traffic radio function (TP) is turn-
ed on either before or during automatic
storage of radio stations, the unit will recall
a memory slot with a stored traffic radio
transmitter (not necessarily memory slot 1).
ef
Recall Stored Radio Station
+ Select desired waveband.
+ Depress one of the radio station keys [1]
to [6] © for a short time.
us SUF 3 |
AS OD RDS [TP] de
Radio station on button 3, waveband
VHF-AS (automatic storage).
If you want to recall a radio station stored
with AS:
* Select desired waveband.
‚ Оергезз [AS] ® key for a short time.
« Depress one of the radio station keys [1]
to [6] © for a short time.
28
a.
Use of VHF Additional Memory
In addition to the radio station buttons, the
unit has an additional memory for VHF in
which all VHF radio stations are stored
which can be received. This memory can
be “paged through” using the search keys.
The VHF additional memory can be re-
assigned either manually or automatically
using the automatic storage (AS).
Paging Through the VHF Additional
Memory
« Turn the ADS function on.
+ Depress one of the search keys @ or
(B for a short time.
The fraquencies or designations of those
radio stations are given on the display
which are stored in tne VHF additional
memory.
Update VHF Additional Memory
Keep the [RDS] © key depressed until the
confirmation signal is given. The display
shows "MEMORY-U" for a short time, fol-
lowed by "MEMO" and the frequencies
(sequentially).
The memory sweep is completed after
approx. 30 seconds and the radio will then
return to its normal mode of operation,
whereby the strongest transmitter received
will be selected.
The radio stations allocated to the radio
station keys will not be replaced by this
function.
A further possibility is to recall the function
of the automatic storage (AS) of radio sta-
tions. This function will replace the radio
stations which were allocated to the AS
memory slots for those radio stations.
CD Operation
insert CD
Insert the CD (lettered side up) into the slot
until the CD is automatically received and
taken. The display shows "J-- CD" during
this.
After the CD has been accepted, the player
begins with first track on the CD. On the
display, initially the total number of tracks
on the CD is shown “Txx CD", followed by
"T 1 CÉEF.
Alter the last track has been played, play-
back of ihe CD begins again, starting with
the first track,
li the CD has been inserted incorrectly, the
display will show "EA-CD".
interrupt CD Play-Back
« Depress eject key @ for a short time.
The radio unit will revert from CD mode to
radio operation.
+ Depress eject key again for a short time
to return the unit to CD play-back mode.
Title Selection
Depress search keys ® oder ® fora
short time and until the number for the de-
sired track appears on the display. If you
depress the search key «€ for a short time,
the track just played will be repeated.
Use of Search
Keep search key @ oder @® depressed
until the desired track on the CD has been
reached,
The display will show the number of the
track as well as its duration in minutes and
seconds, e.g. "3 02-42". A fast play-back,
initially at 10 times and then at 30 times the
normal speed occurs at a reduced volume
level,
Eject CD
Depress eject key © until “EJECT CD’ is
displayed. The CD is ejected and the radio
unit reverts to the radio mode of operation.
lf you do not take the CD out of the unit
within approx, 20 seconds, it will be re-
turned into the CD player again (to protect
the CD from damage).
In this case, the unit will remain in radio
mode. The display will show the symbol
"CD IN”.
You can remove the CD from the unit as
described above, even when the radio is
switched off. If you do not take the CD out,
it will be returned back into the unit after
approx. 5 seconds. The radio unit subse-
quently switches off again.
Radio Display During CD Play-Back
During CD Play-back, the transmitter fre-
quency or the radio station designation (for
RDS transmitters) of the VHF station last
heard can be displayed.
Depress the [UML] © key for a short time.
The desired information will be displayed
for 5 seconds, e.g. "UT 101.2".
During these 5 seconds, a different radio
station can be recalled, or a search can be
started using the search keys.
lf the traffic radio (TP) function is active, or
if it is activated during play-back of a CD,
the radio unit will automatically search for
the strongest traffic radio transmitter if the
radio station last heard can no longer be
received.
Car Telephone
lf an installed car telephone is connected to
the unit, the radio will go into telephone
mode when a call comes in. The display
will show "MESSAGE". In order to utilize
the telephone mode, the car telephone
must be connected to the radio by an aut-
horized Opel dealer.
Set Telephone Volume Level
You can preset the volume level for the
telephone and independently from the nor-
mal volume for the radio unit.
* Turn radio off.
* Keep [TP] @ key depressed and turn
the radio on again.
The confirmation signal will be given. The
preset volume level will appear on the dis-
play, e.g. "MS-VOL + 7.
« Select the desired setting between -3 and
+3 using the search keys @ and ®,
« Again keep the [TP] key depressed until
the confirmation signal is given.
The setting will be stored.
If the [TP] key is not depressed within
10 seconds, the unit will revert to its original
setting without storing any changes.
The volume level can be adjusted during an
incoming call by using the knob @.
interchanging of Incoming Calls
and Traffic Announcements
When the traffic radio is activated (symbol
TP" on the display) and a telephone call
is received during a traffic announcement,
the incoming call will be given precedence.
By use of the button [TP] @, you are able
to interchange in such cases between the
running traffic announcement and the tele-
phone call.
Steering Wheel Remote
Control
Not included on all vehicles.
Adjust Volume
* Depress key + © to increase the
volume.
«Depress key — €) to decrease the
volume.
Mode Switch
Depress key O @ to interchange bet-
ween radio operation and CD play-back
operation.
Tune Radio Station
Depress one of the search keys @ or ©
for a short time in order to activate the
automatic search function or to page
through the VHF memory. The radio
remains dormant until a transmitter has
been locked in.
Keep one of the search keys depressed in
order to manually tune to a radio station.
Recall Memorized Radio Station
Depress key + ( to select the desired
radio station from the allocated keys in the
memory. Each depression of the key will
advance the selection by one stored radio
station from the waveband in current selec-
tion.
Select CD Track
Depress one of the search keys @ or ©
to advance to the next track on tha CD. If
you depress the search key <4 once fora
short time, play-back of the track currently
being played will be repeated.
Use of CD Search
Keep one of the search keys depressed
until the desired track on the CD has been
found,
CD Repeat
Depress key —* (BD. Play-back of the
CD starts again at the first track.
31
Coding
Secure your unit by coding it. A coded
radio is of no value to the thief. The code
number is to be found in the radio or car
pass.
The coding of the unit is only possible when
the ignition is turned on.
lf the unit is detached from the operating
voltage, for example by removal of the unit
(theft) or detachment of the battery, itis
electronically sateguarded.
Only you can put the unit back into opera-
tion by entering the correct code (see "Put-
ting the Unit back into Operation”, page 33).
Should the theft protection be dispensed
with, 6.9. by sale of the unit, it must first be
decoded (see “Decoding the Unit", page 33),
in order that the attempt to put the unit into
operation by trial and error be not made,
waiting times take effect following unsuc-
cessful decoding attempts. The number of
remaining decoding attempts is shown on
the display.
During the waiting period, the radio must
remain switched on.
The waiting time after the first two unsuc-
cessful attempts is approximately 20 se-
conds, after which the waiting time increa-
ses to 10 minutes following the third
attempt. Following the ninth unsuccessful
attempt, the waiting time has reached to
640 minutes.
The unit will lock after the tenth unsuc-
cessful attempt ("SAFE” is shown on the
display}. A replacement against invoice by
an authorized Opel dealer is then neces-
sary.
It is therefore recommended to let an
authorized Opel dealer put the unit back
into operation after the sixth unsuccessful
attempt.
Check Coding
The following function can be used to
check whether the unit is coded or not.
The coded unit indicates "CODE" on the
display for a short period every time after it
is turned on and provided the ignition is
switched on.
Coding the Unit
The theft protection is activated by coding
the unit.
« Switch on the ignition.
* Tum the radio off.
* Turn radio on while keeping the [AS] ®
key depressed. The display shows
"CODE" and after 3 seconds *- - - -*
appears.
* Enter the first digit of the code number
using the radio station key [1] @. Each
depression of the key will raise the digit
on the display by one.
Depress the key as often as necessary to
reach the correct digit in the first position
of the display.
* Enter the next three digits of the code
number using the radio station keys [2]
and [4] ©.
* Keep the [AS] key depressed until the
confirmation signal is given.
The radio subsequently goes out of dor-
mant mode.
The correct way to proceed is highlighted
by the following example:
Example: code number: 0 3 6 5
radio station key display
depress key [1] 1 x 0 | -
| depress key [2] 4 x 0.1:8
depress key [3] 7 x 0316
depress key [4] 6 x 0131615
10 03b-
Code number entry; the fourth position is
still missing.
Putting the Unit back into Operation
When the operating voltage has been inter-
rupted because the unit has been removed
or the battery disconnected, the unit goes
into a special "safe" mode. The unit
remains dormant in this mode.
If you then want to return the unit to opera-
ting mode, the following steps must be car-
ned out.
* Switch the ignition on, turn radio unit off.
* Keep the [AS] ® key depressed and
turn the radio on. Initially "SAFE" will be
shown on the display, followed by
"T0- - = =". The number 10 indicates the
number of attempts left to enter the cor-
rect code number.
« Enter the code number given in the radio
pass using the radio station keys [1] to [4]
© as described in “Coding the Unit”.
Overwrite the code number if an incorrect
entry is made, ¡.e. the whole number must
be re-entered.
«When the correct code number is visible
on the display, depress the [AS] ® key
until the confirmation signal is given. If
the code number is correct, the unit will
go out of dormant mode.
If the code number entered is incorrect
and the [AS] key for confirmation has
been depressed, the display will show
"9 SAFE”, after the waiting tima "9- - - -".
The correct code number can then only
be entered after allowing for the waiting
lime to elapse.
Decoding the Unit
The theft protection is cancelled when the
unit is decoded.
Proceed as described in "Coding the Unit”.
After the unit has been successfully deco-
ded, the unit will go out of dormant mode.
The radio unit is thus no longer protected
against theft, and can be put back into ope-
ration following an interruption of the opera-
ting voltage.
Adaptation of the Operating Console
The radio unit will only operate using the
original operating console. If this is lost, a
replacement operating console must first
be adapted to the unit by coding,
* Set operating console ©.
* Switch the radio unit on.
The radio is in dormant mode and the dis-
play will show “PANEL”. To adapt the new
operating console, conduct those steps
which are described in the section "Coding
the Unit".
33
General Information
Consult an authorized Opel dealer
should functional interferences
occur.
VHF Reception
In spite of the high technical quality, VHF
reception in vehicles can differ from that
with stationary receivers (HiFi equipment).
Interferences can therefore also occur in
the reception from ADS transmitters.
The technical causes of such interterences
can be found in the operating instructions
for the vehicle.
Handling of CD's
Avoid fingerprints when inserting the CD
into the unit. Return the CD to the CD box
immediately after removal from the unit, in
order to protect it from damage and dirt.
Protect CD's from heat and direct sunshine.
Interruption of Voltage Supply
The memorized data but not the radio sta-
tion designation will remain stored if the
battery is changed. The unit can be elec-
tronically locked by the theft protection.
Enter the code number in order to return
the unit to normal operation (see "Putting
the Unit back into Operation’, page 33).
If the code number is lost, consult an au-
thorized Opel dealer. The return to operati-
on of the unit will only be carried out upon
proof of identity and will be invoiced.
These Operating Instructions
have been printed on chiorine
free bleached paper, as a contri-
bution to the protection of the environment.
|
10 898 торговых марок |
Скачайте инструкцию БЕСПЛАТНО! Diplodocs позволяет скачать несколько типов инструкций для наилучшего использования OPEL RADIO DELCO CDR 500 |

|
Вам требуется помощь по использованию изделия? Все инструкции по категориям |
инструкция по эксплуатации OPEL RADIO DELCO CDR 500Diplodocs поможет скачать инструкцию OPEL RADIO DELCO CDR 500 .
Введите модель изделия OPEL…
Фрагмент инструкции: руководство пользователя OPEL RADIO DELCO CDR 500
|

Copyright © 2005 — 2012 — Diplodocs —
Все права защищены.
Торговые марки принадлежат их соответствующим владельцам.