Код: 1591237
1 отзыв


О товаре


Показать еще
Характеристики
Возраст
От 7 лет
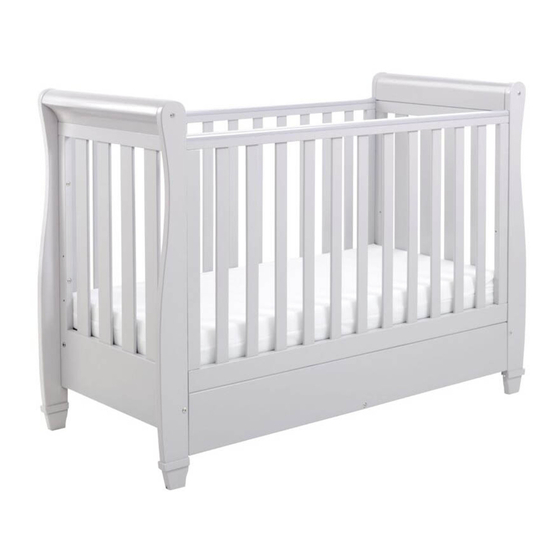
Рекомендуемая высота матраса
до 21 см
Каркас
МДФ + ДСП
Показать еще
Гарантия
Гарантия на товар 1.5 года
Документация
Декларация о соответствии детские кровати до 16.11.2027.pdf
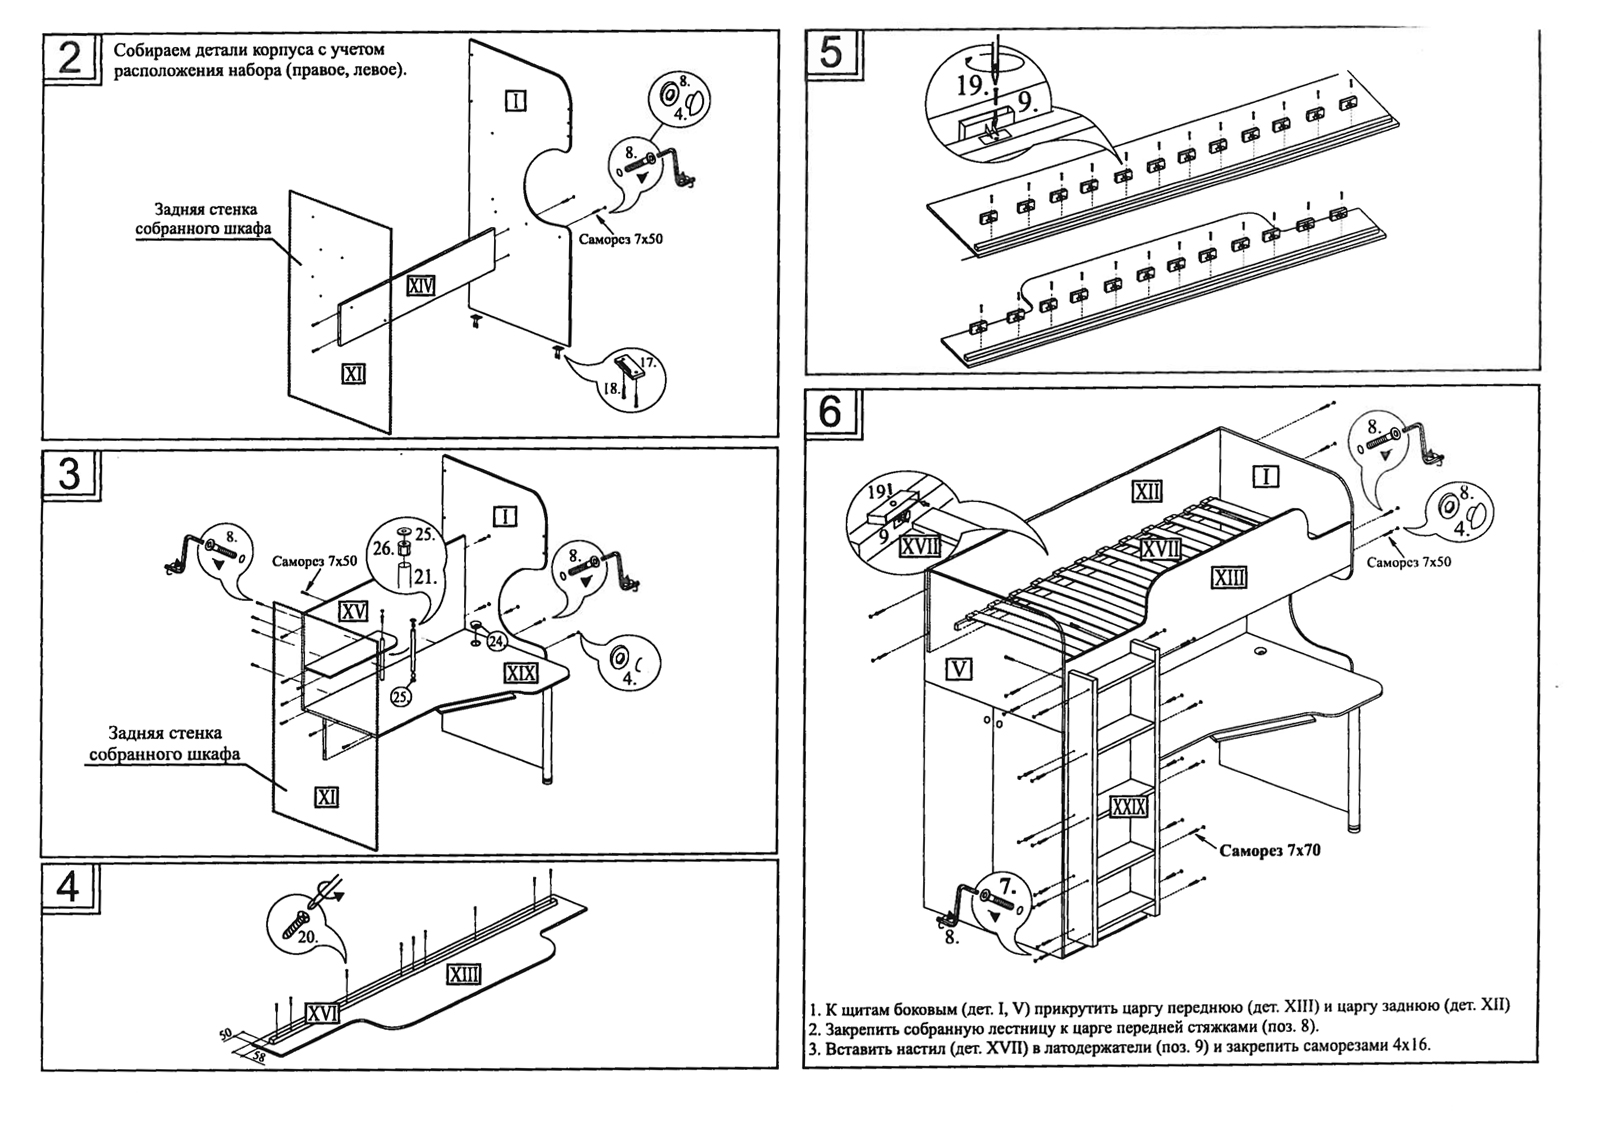
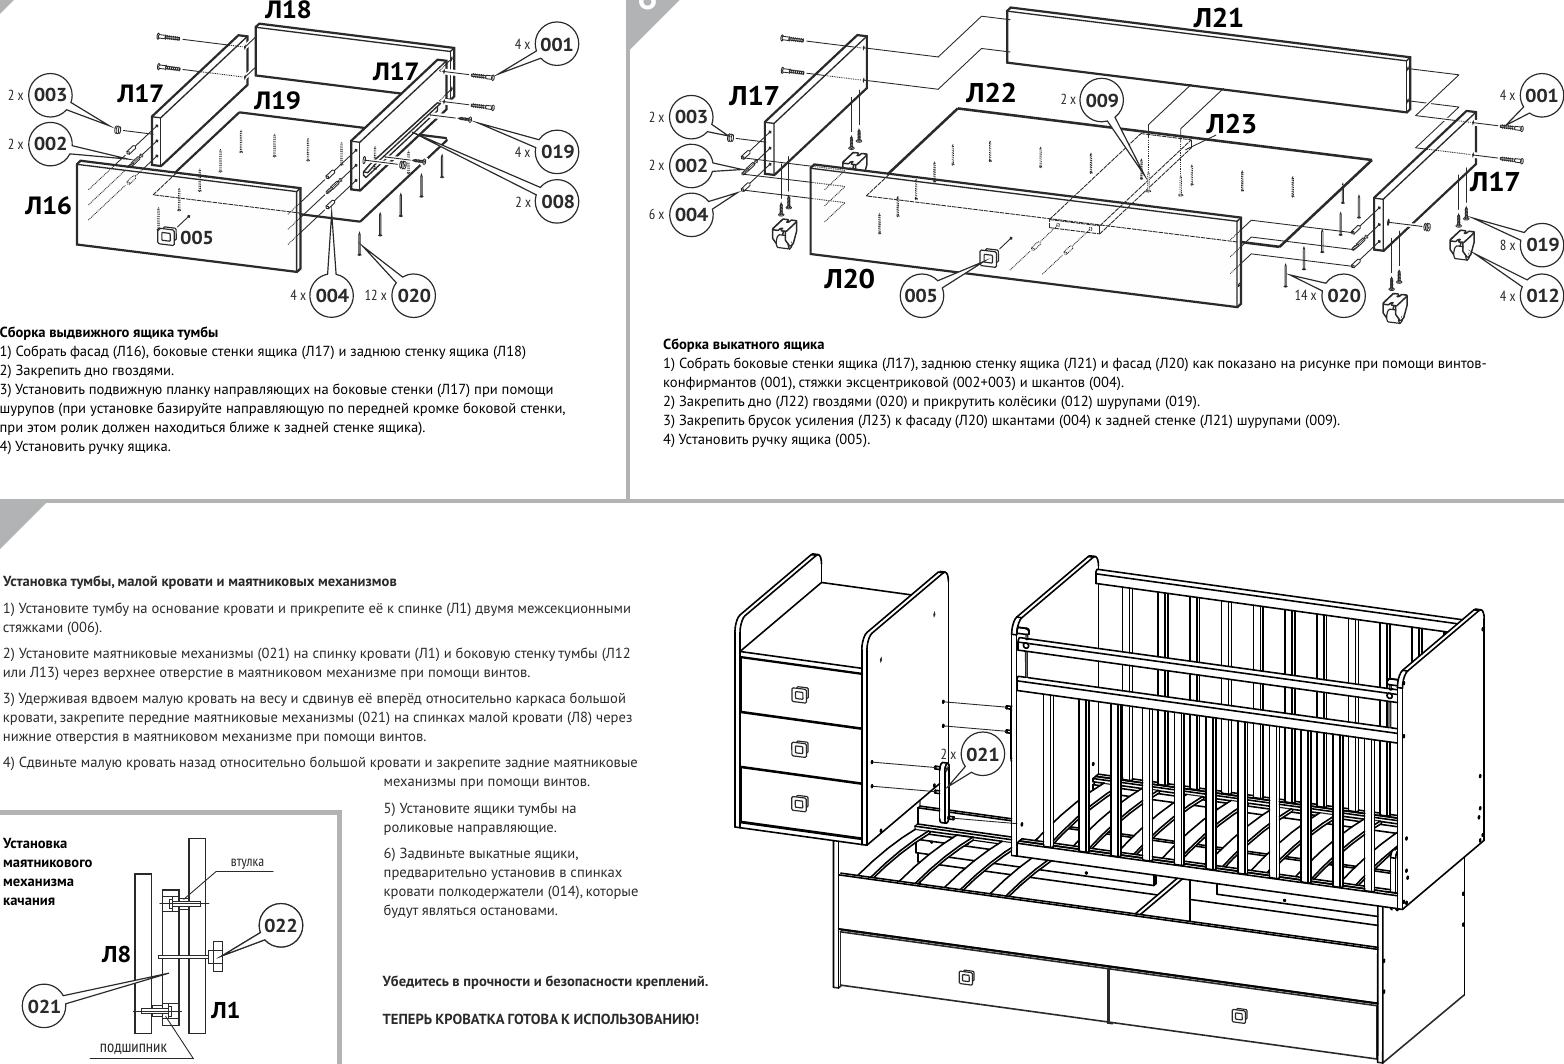
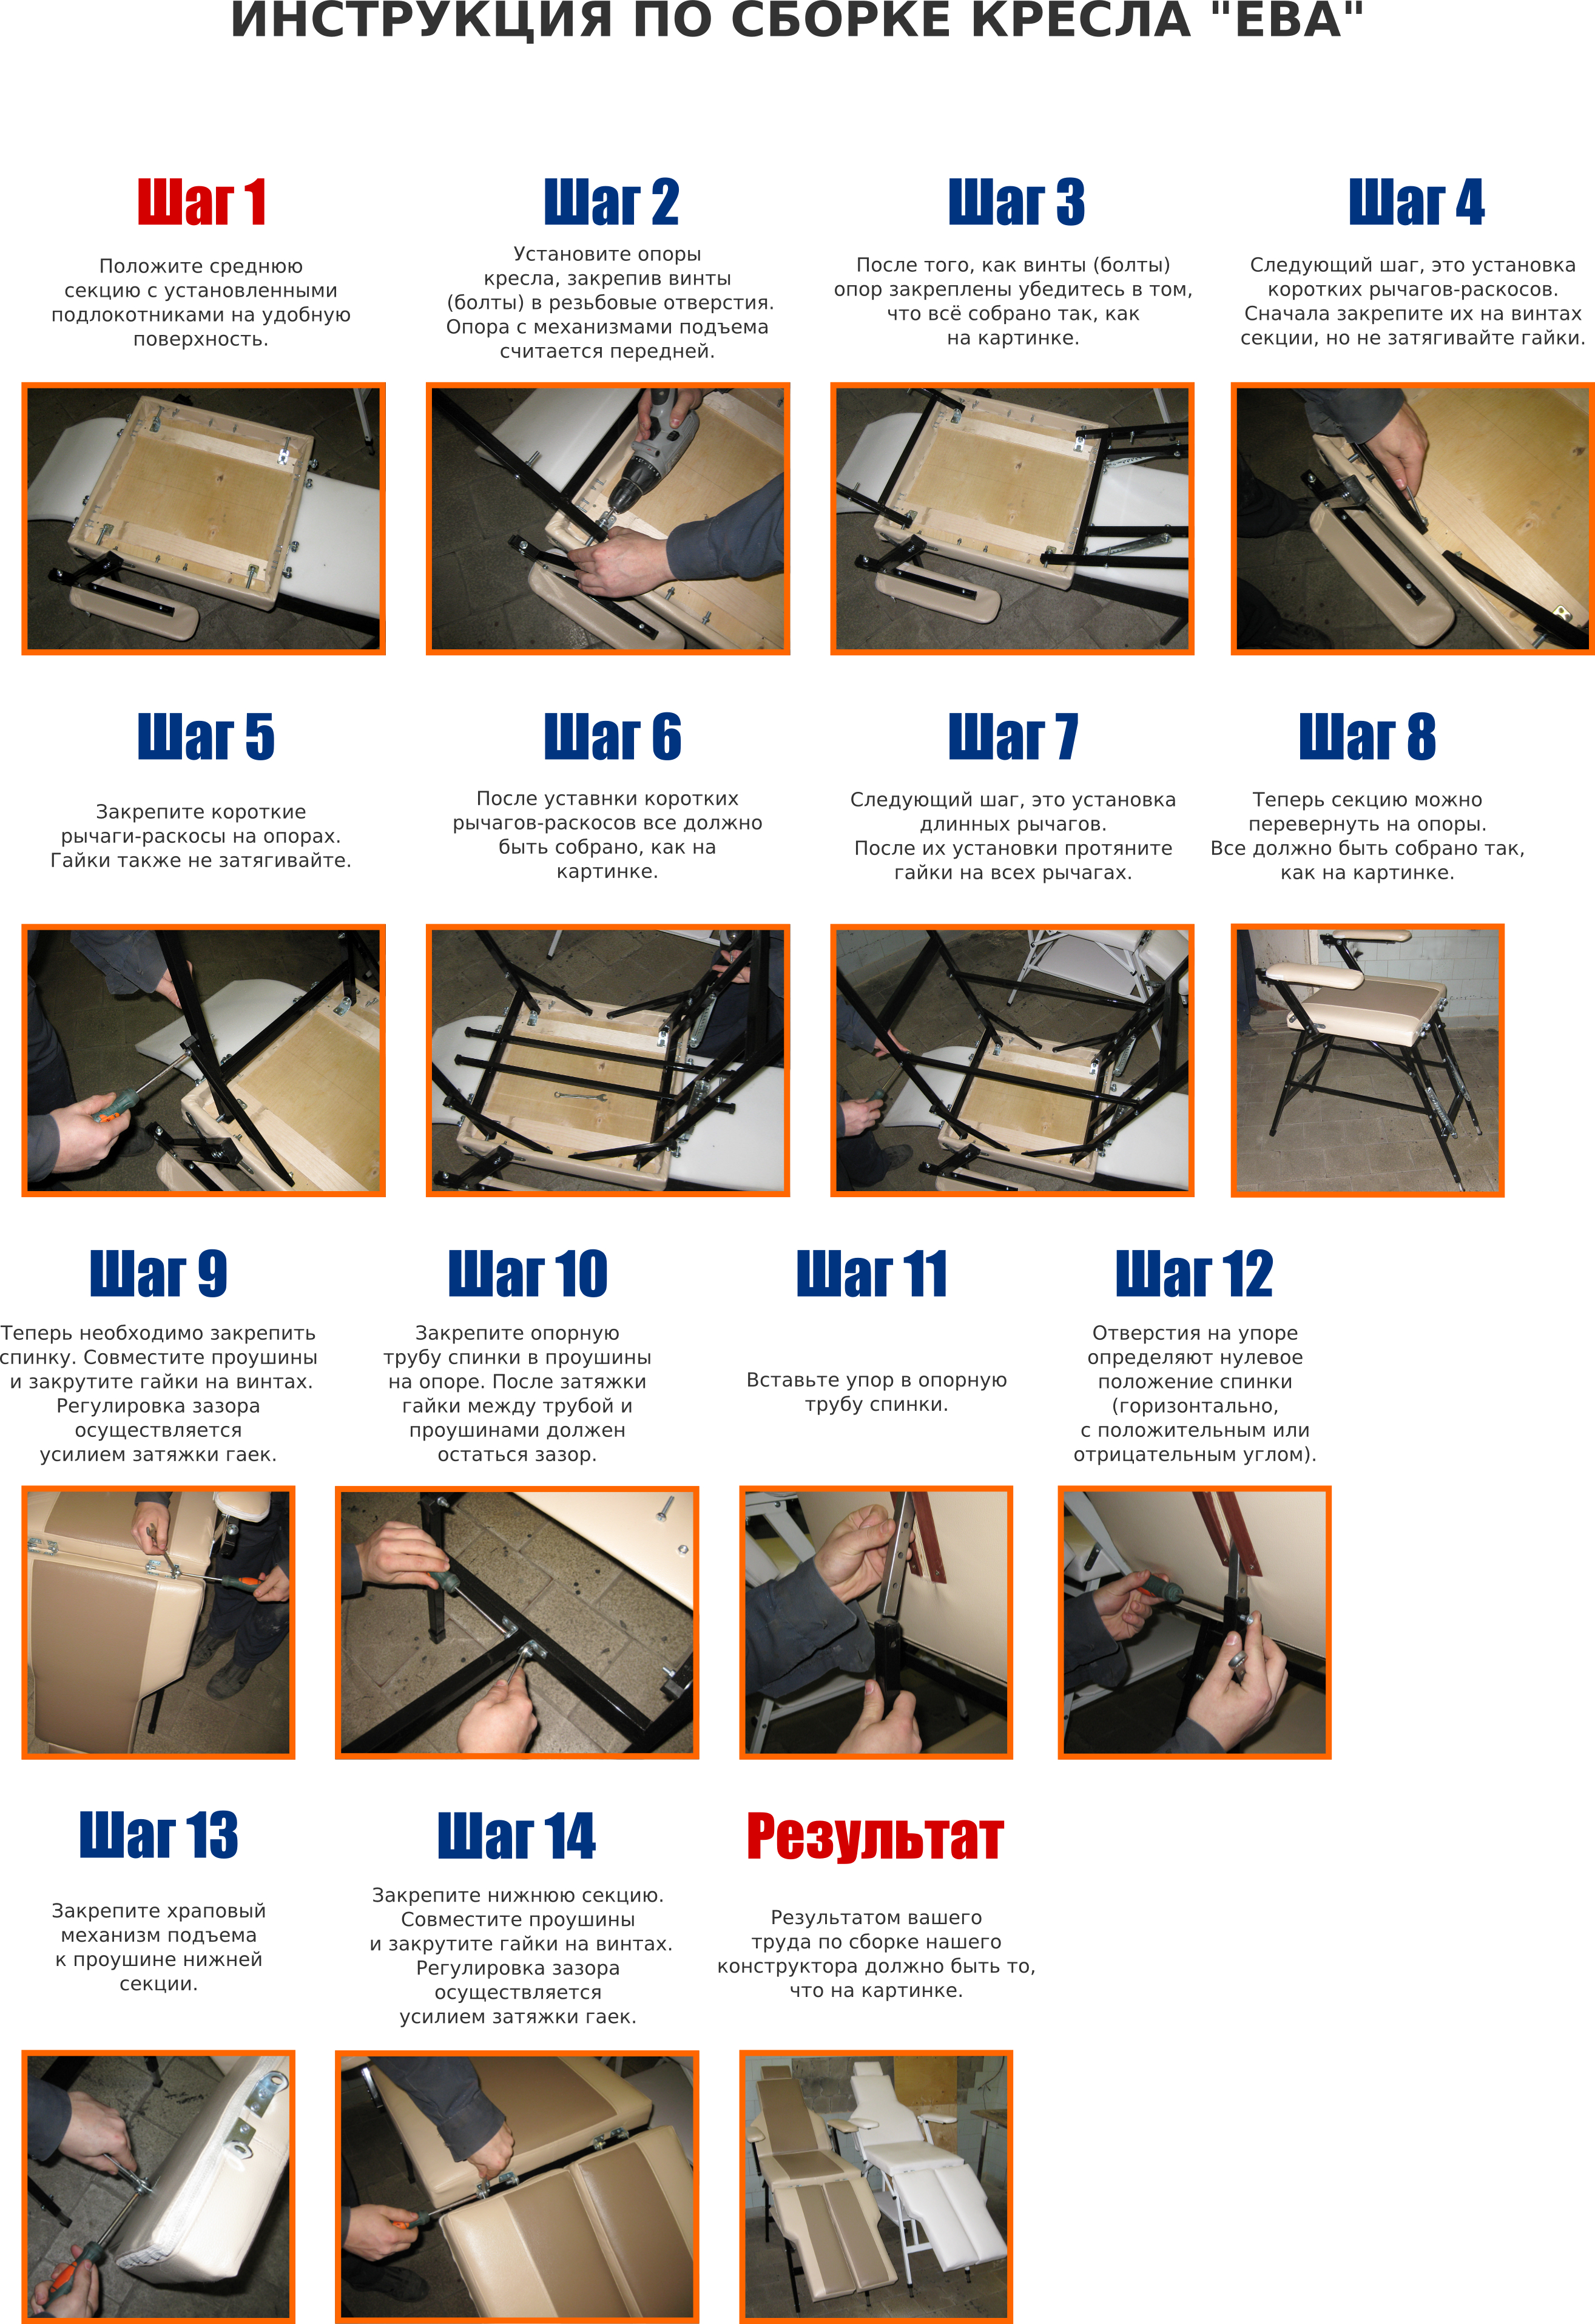
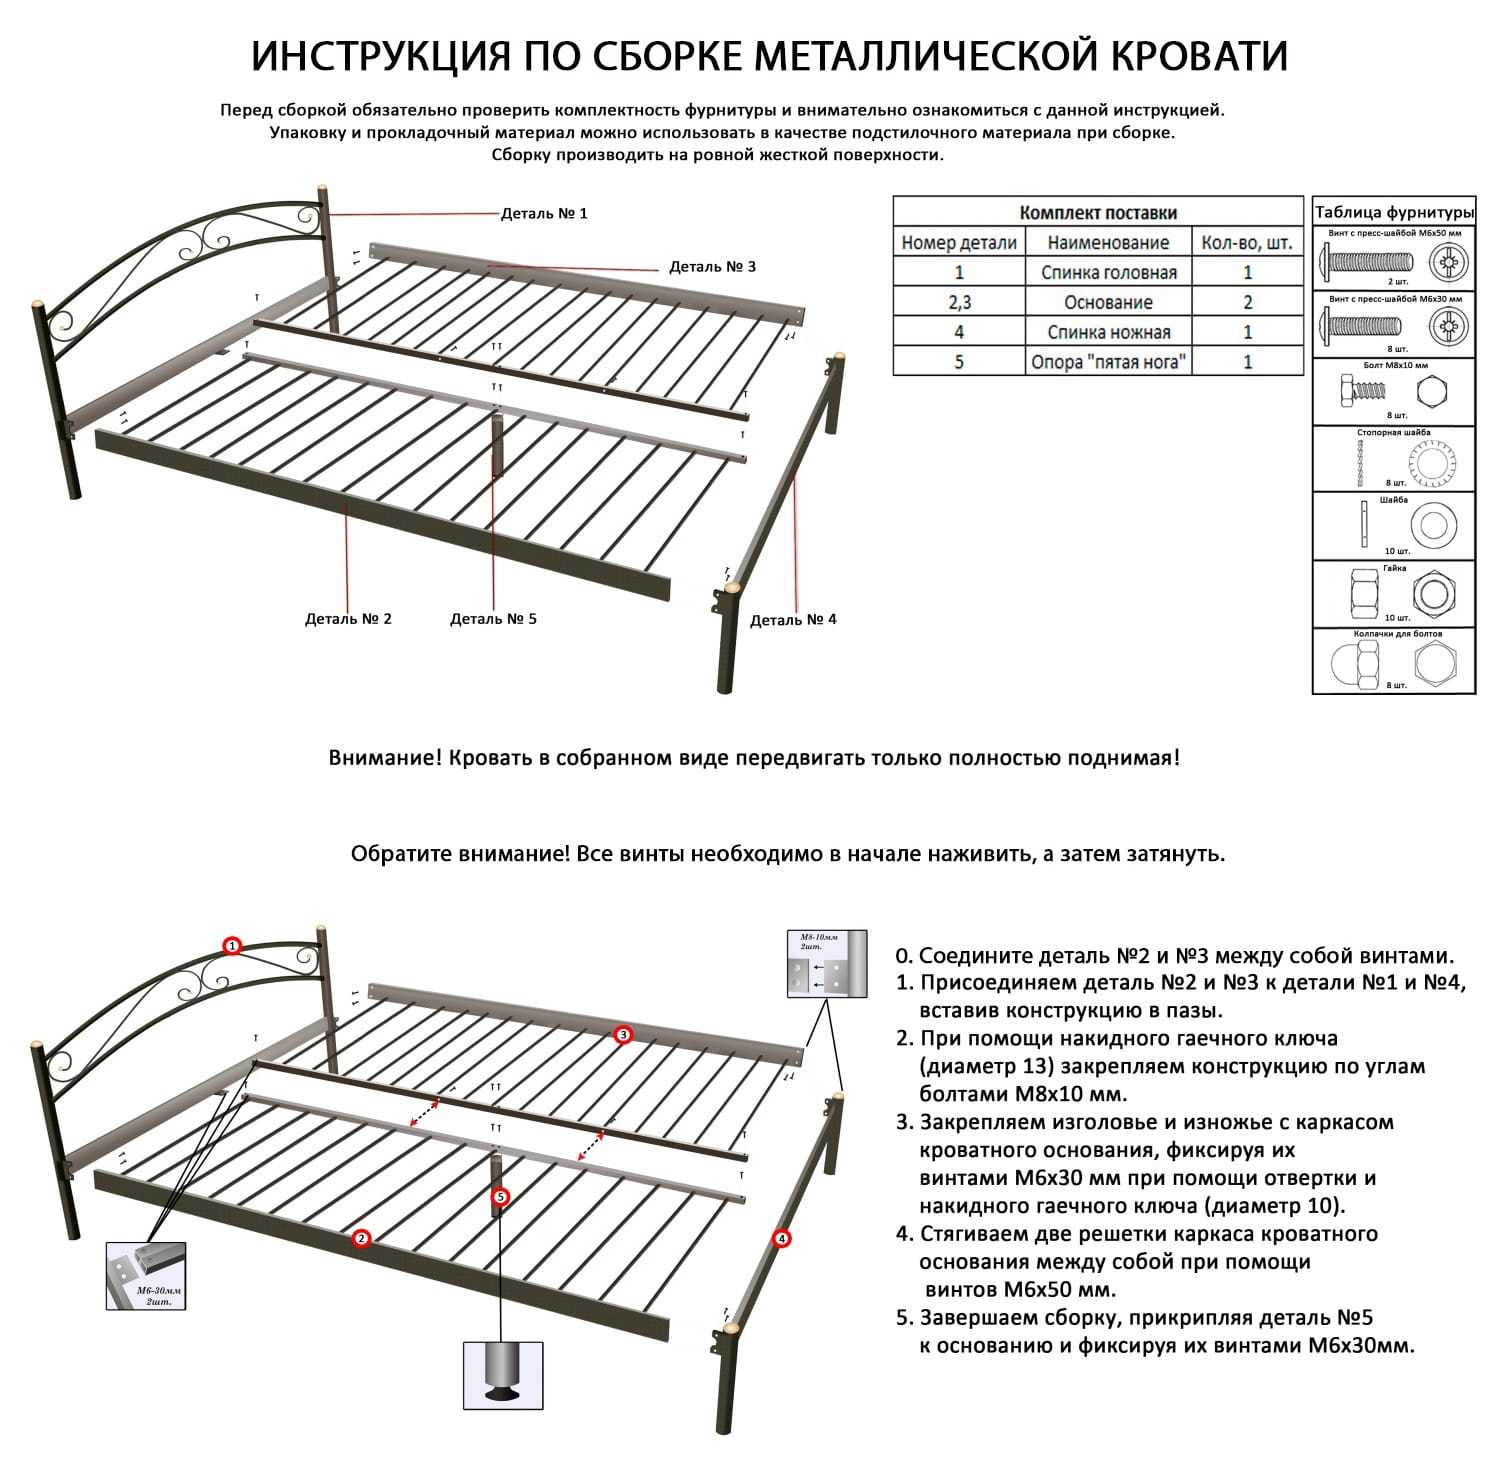
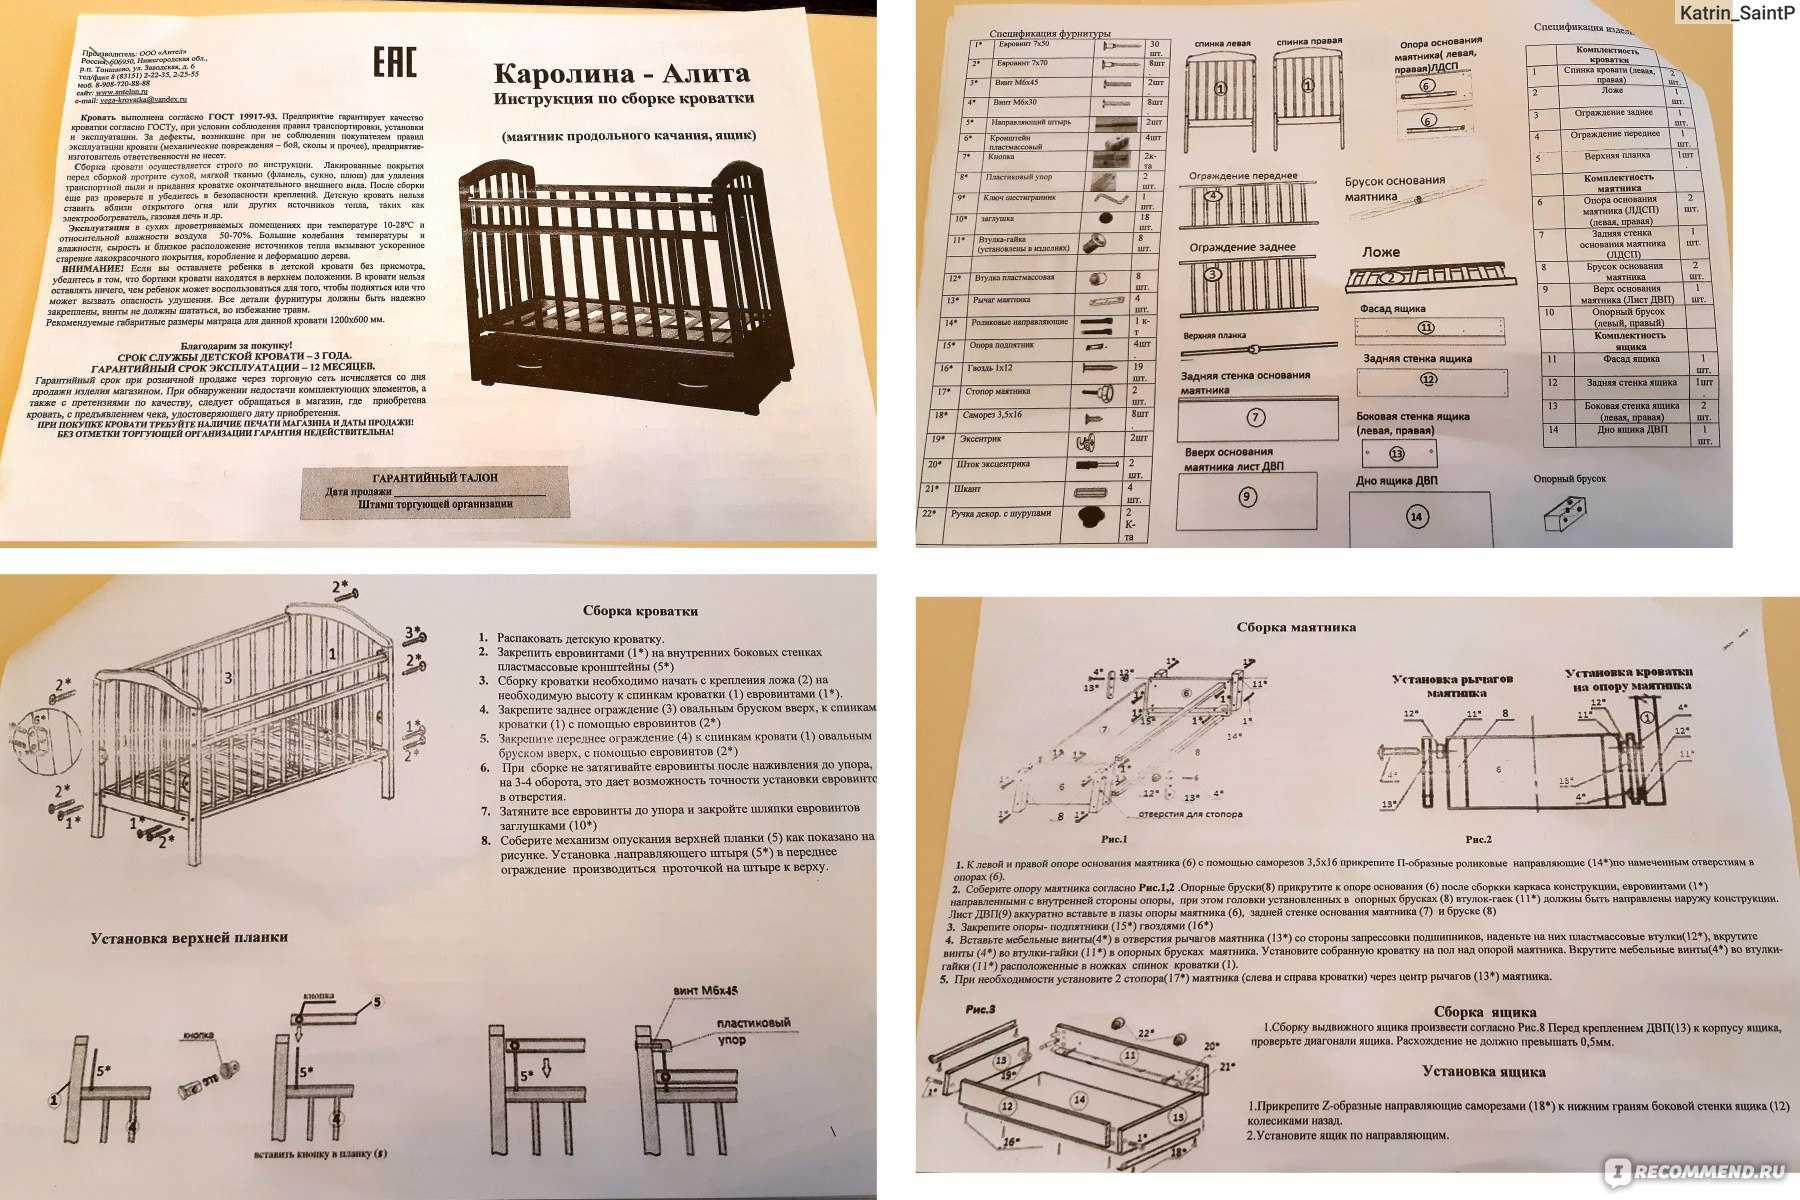
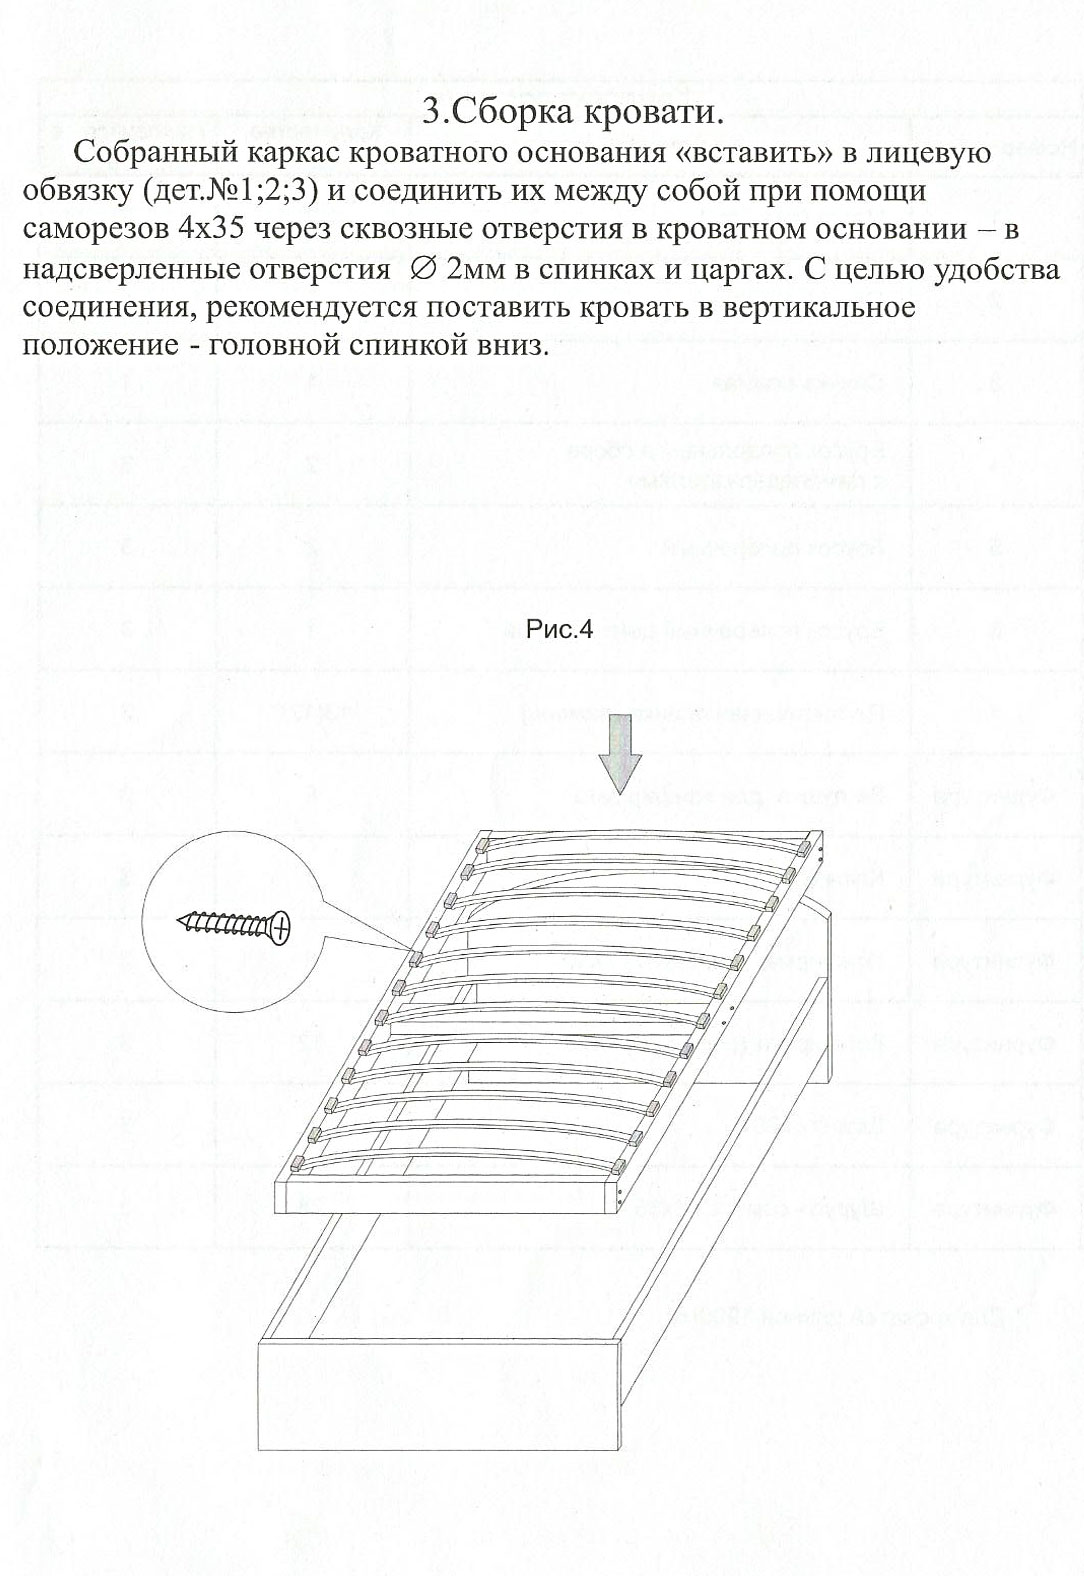
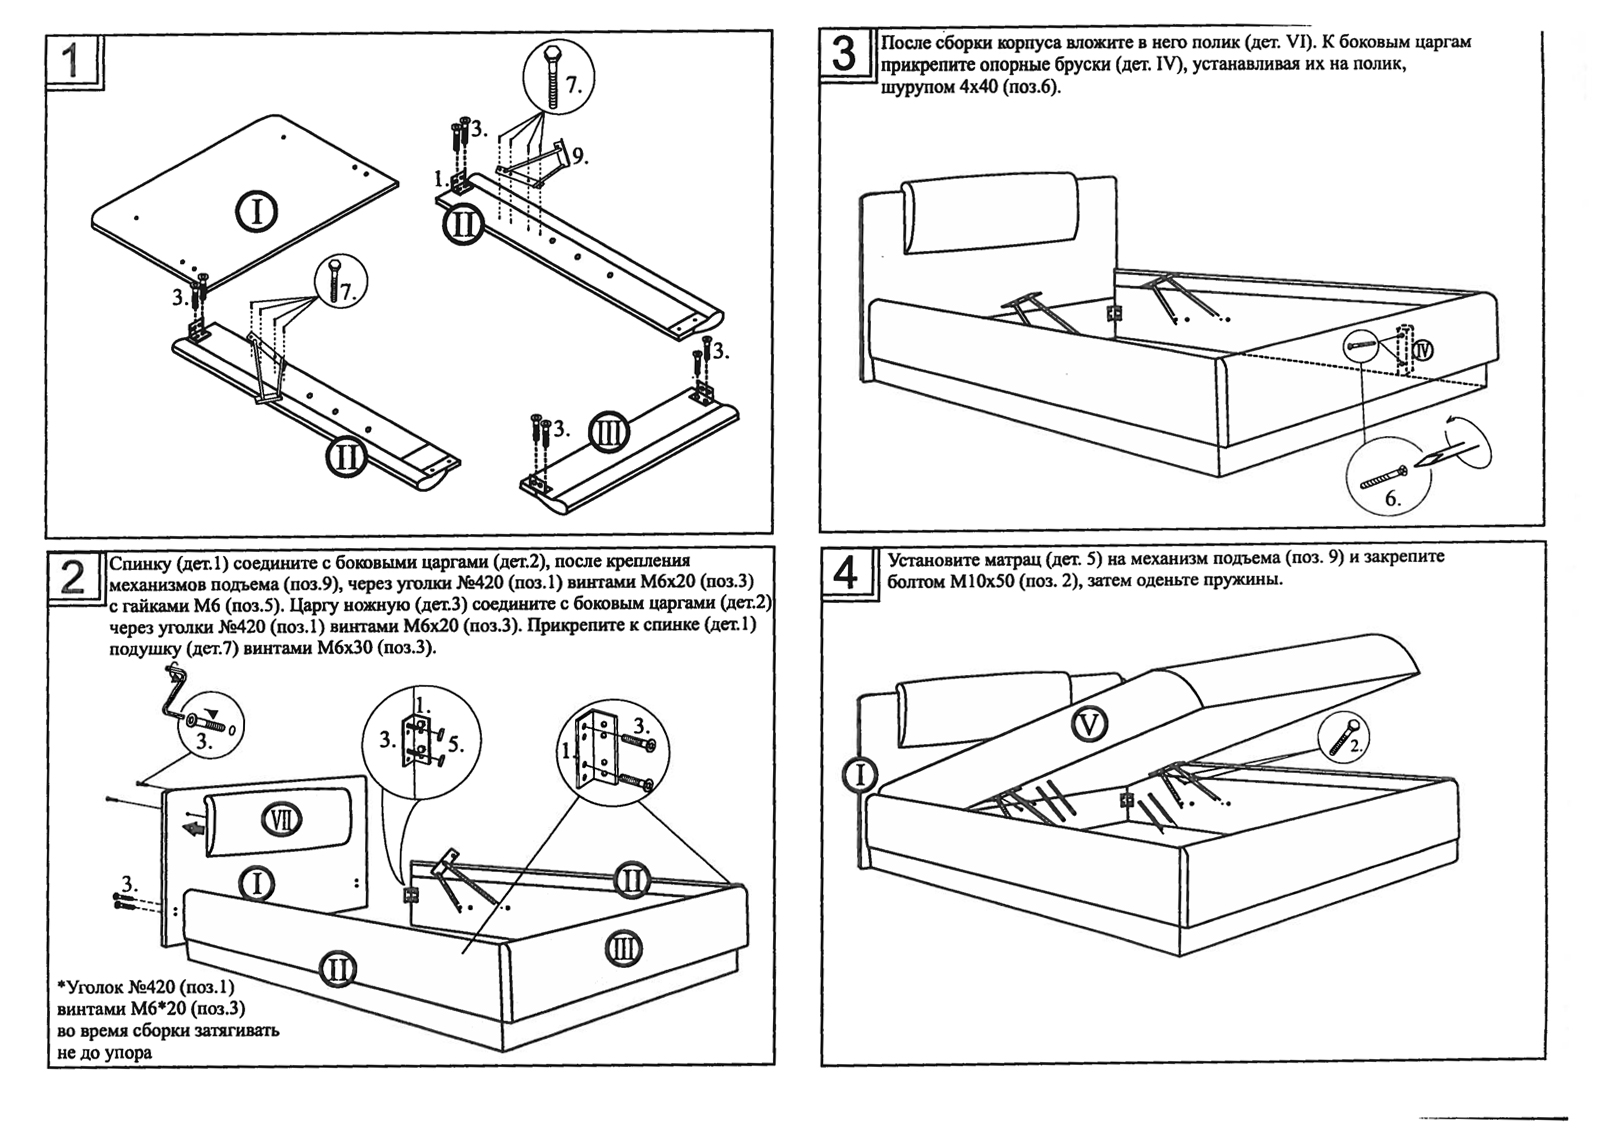
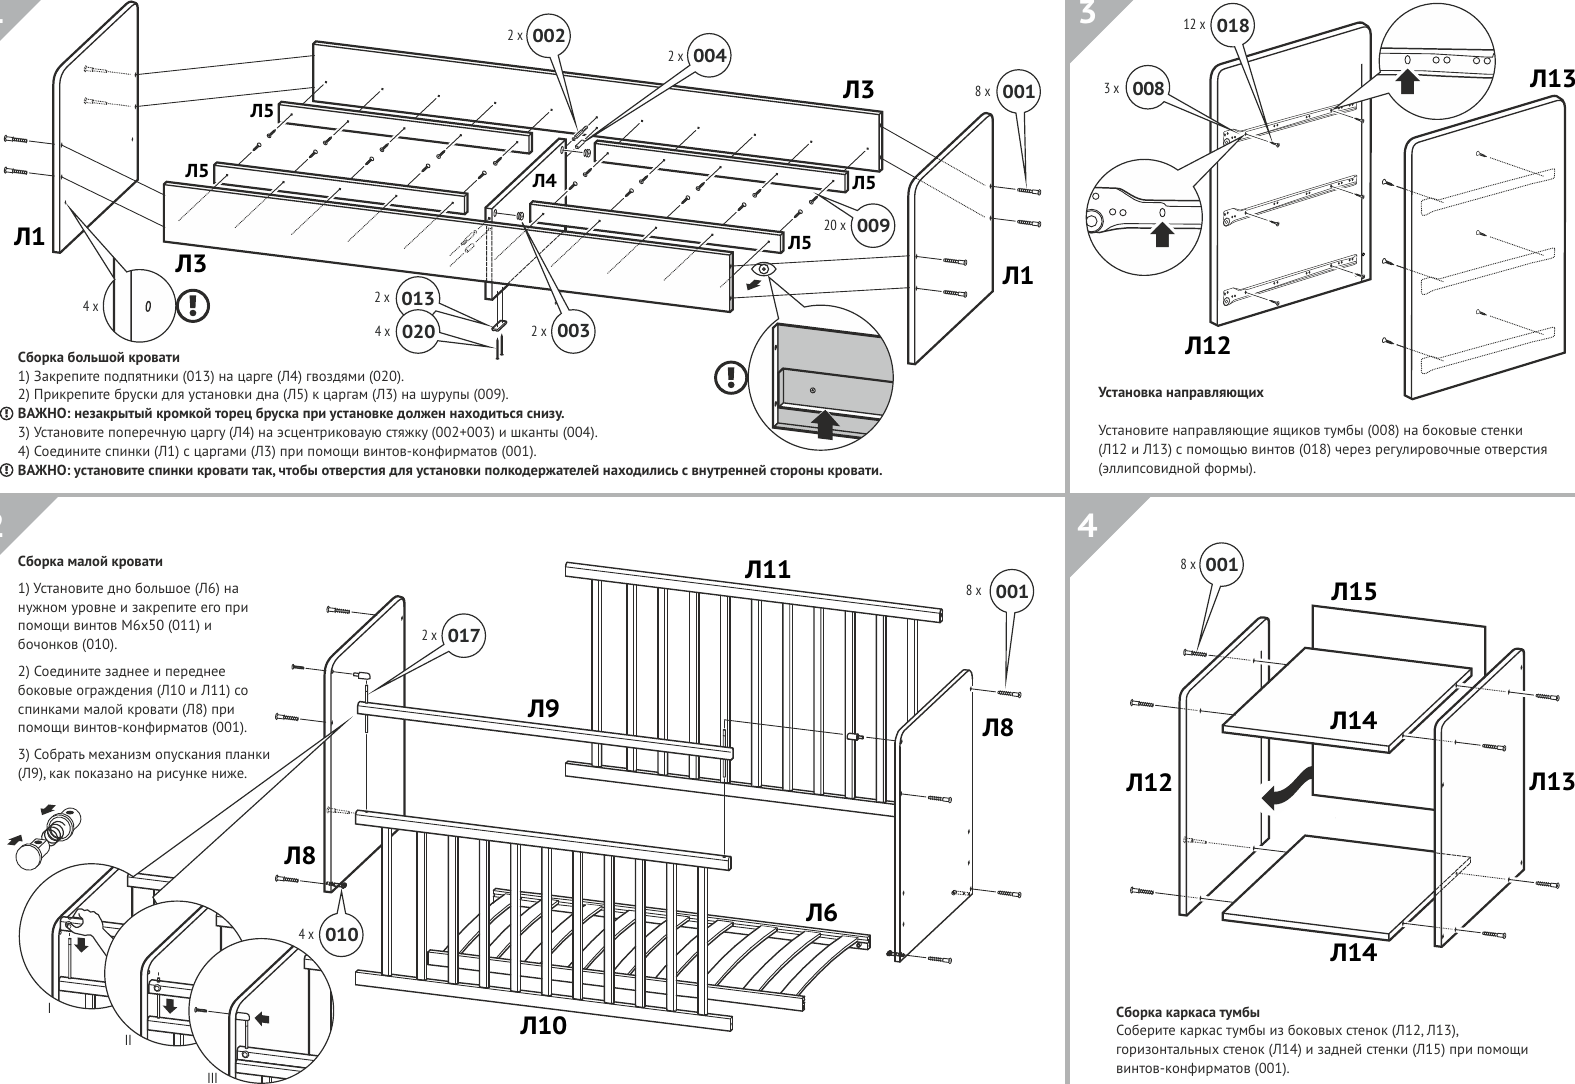
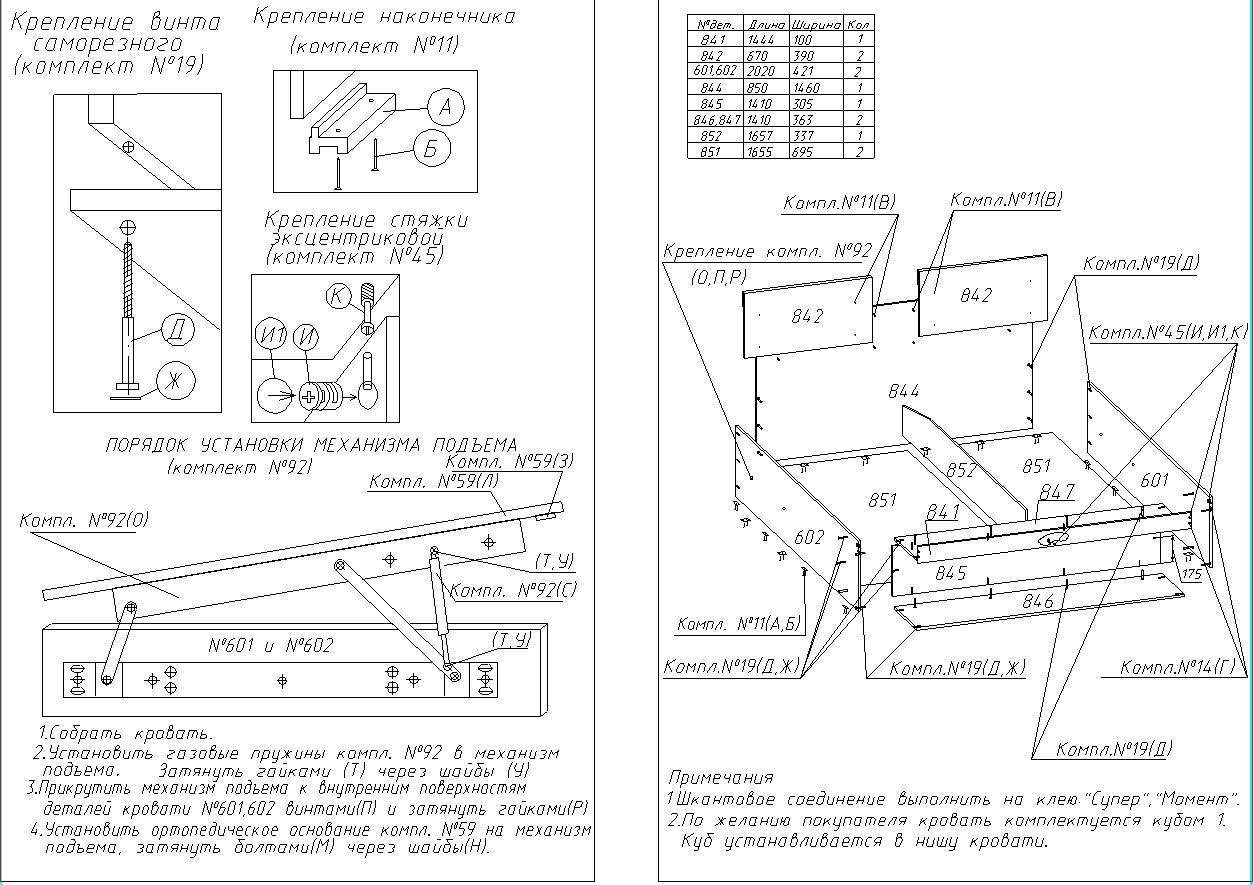
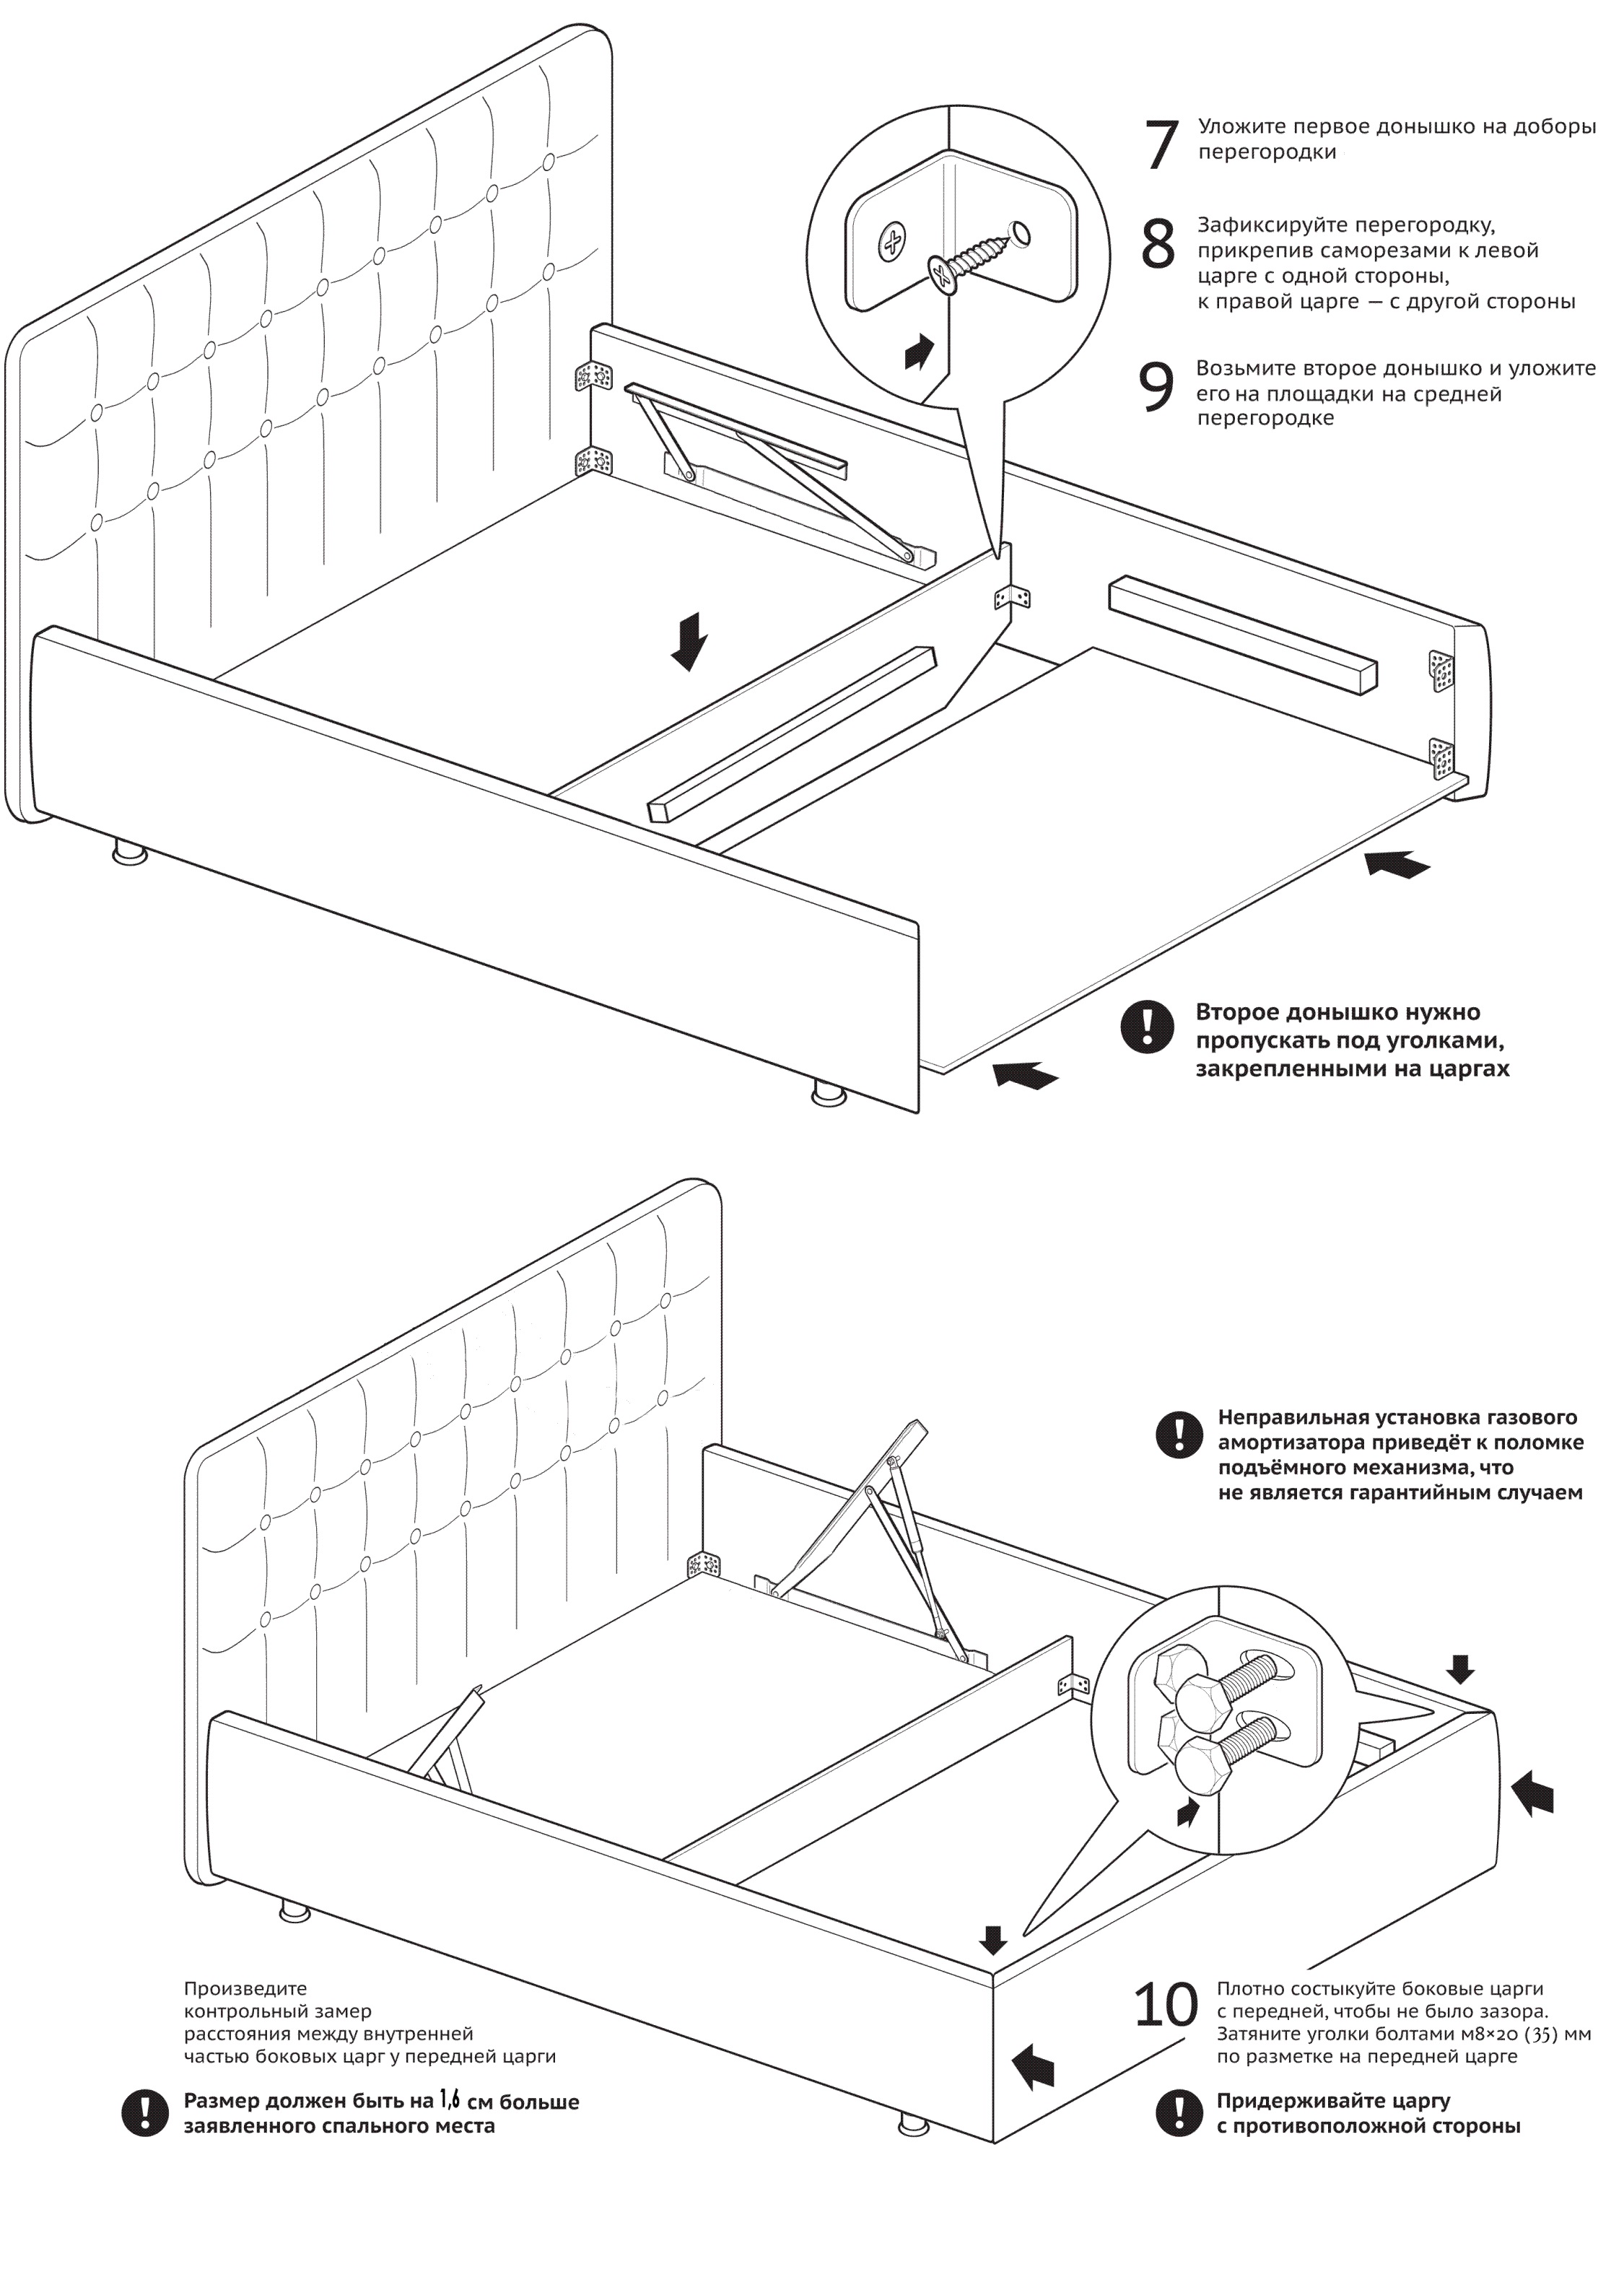
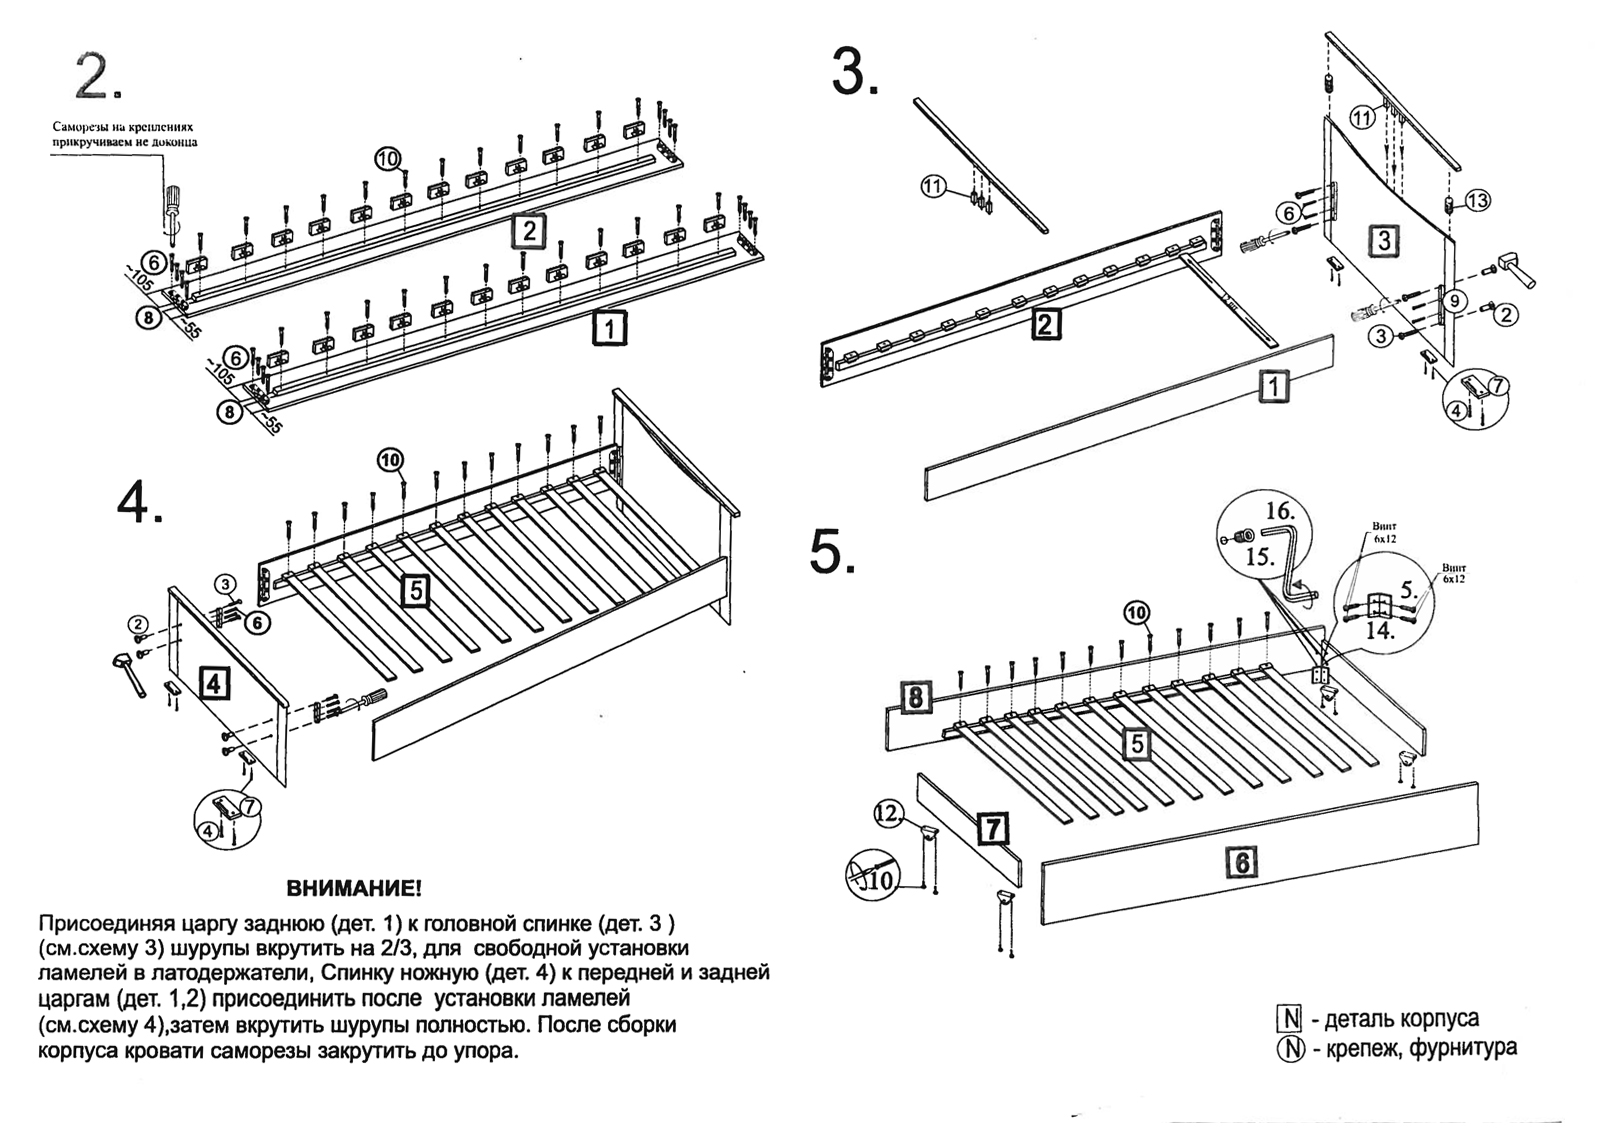
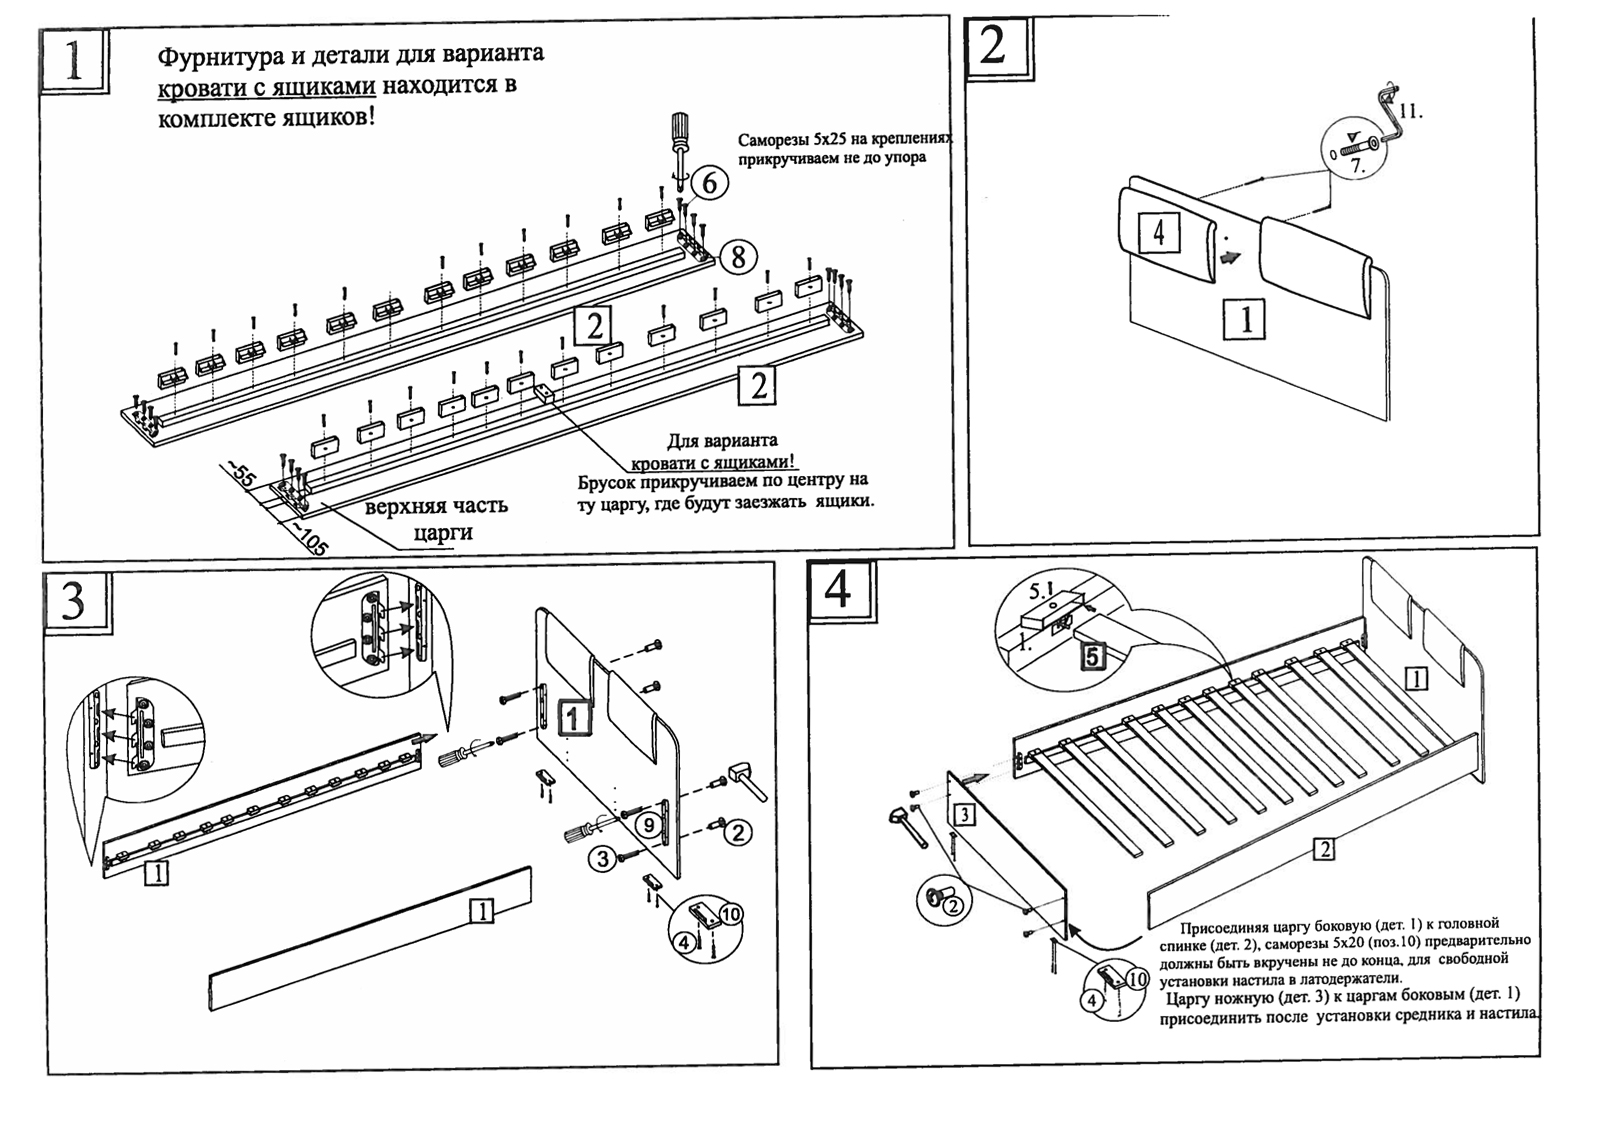
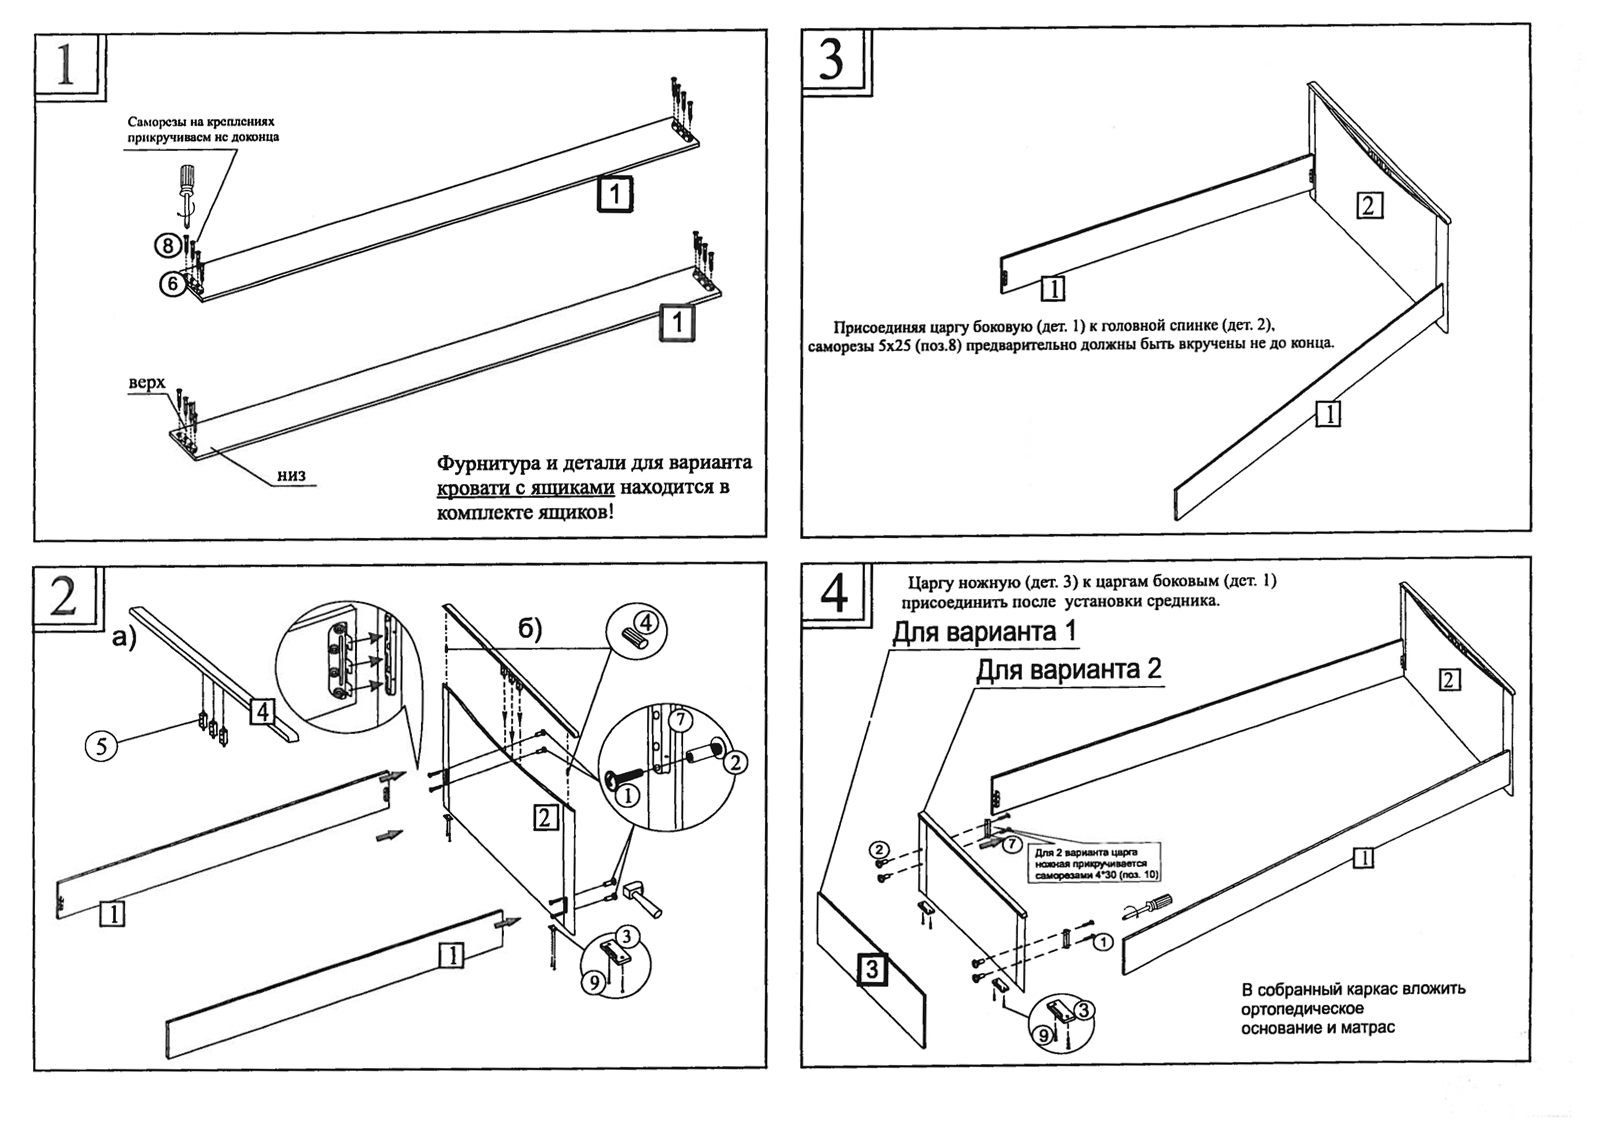
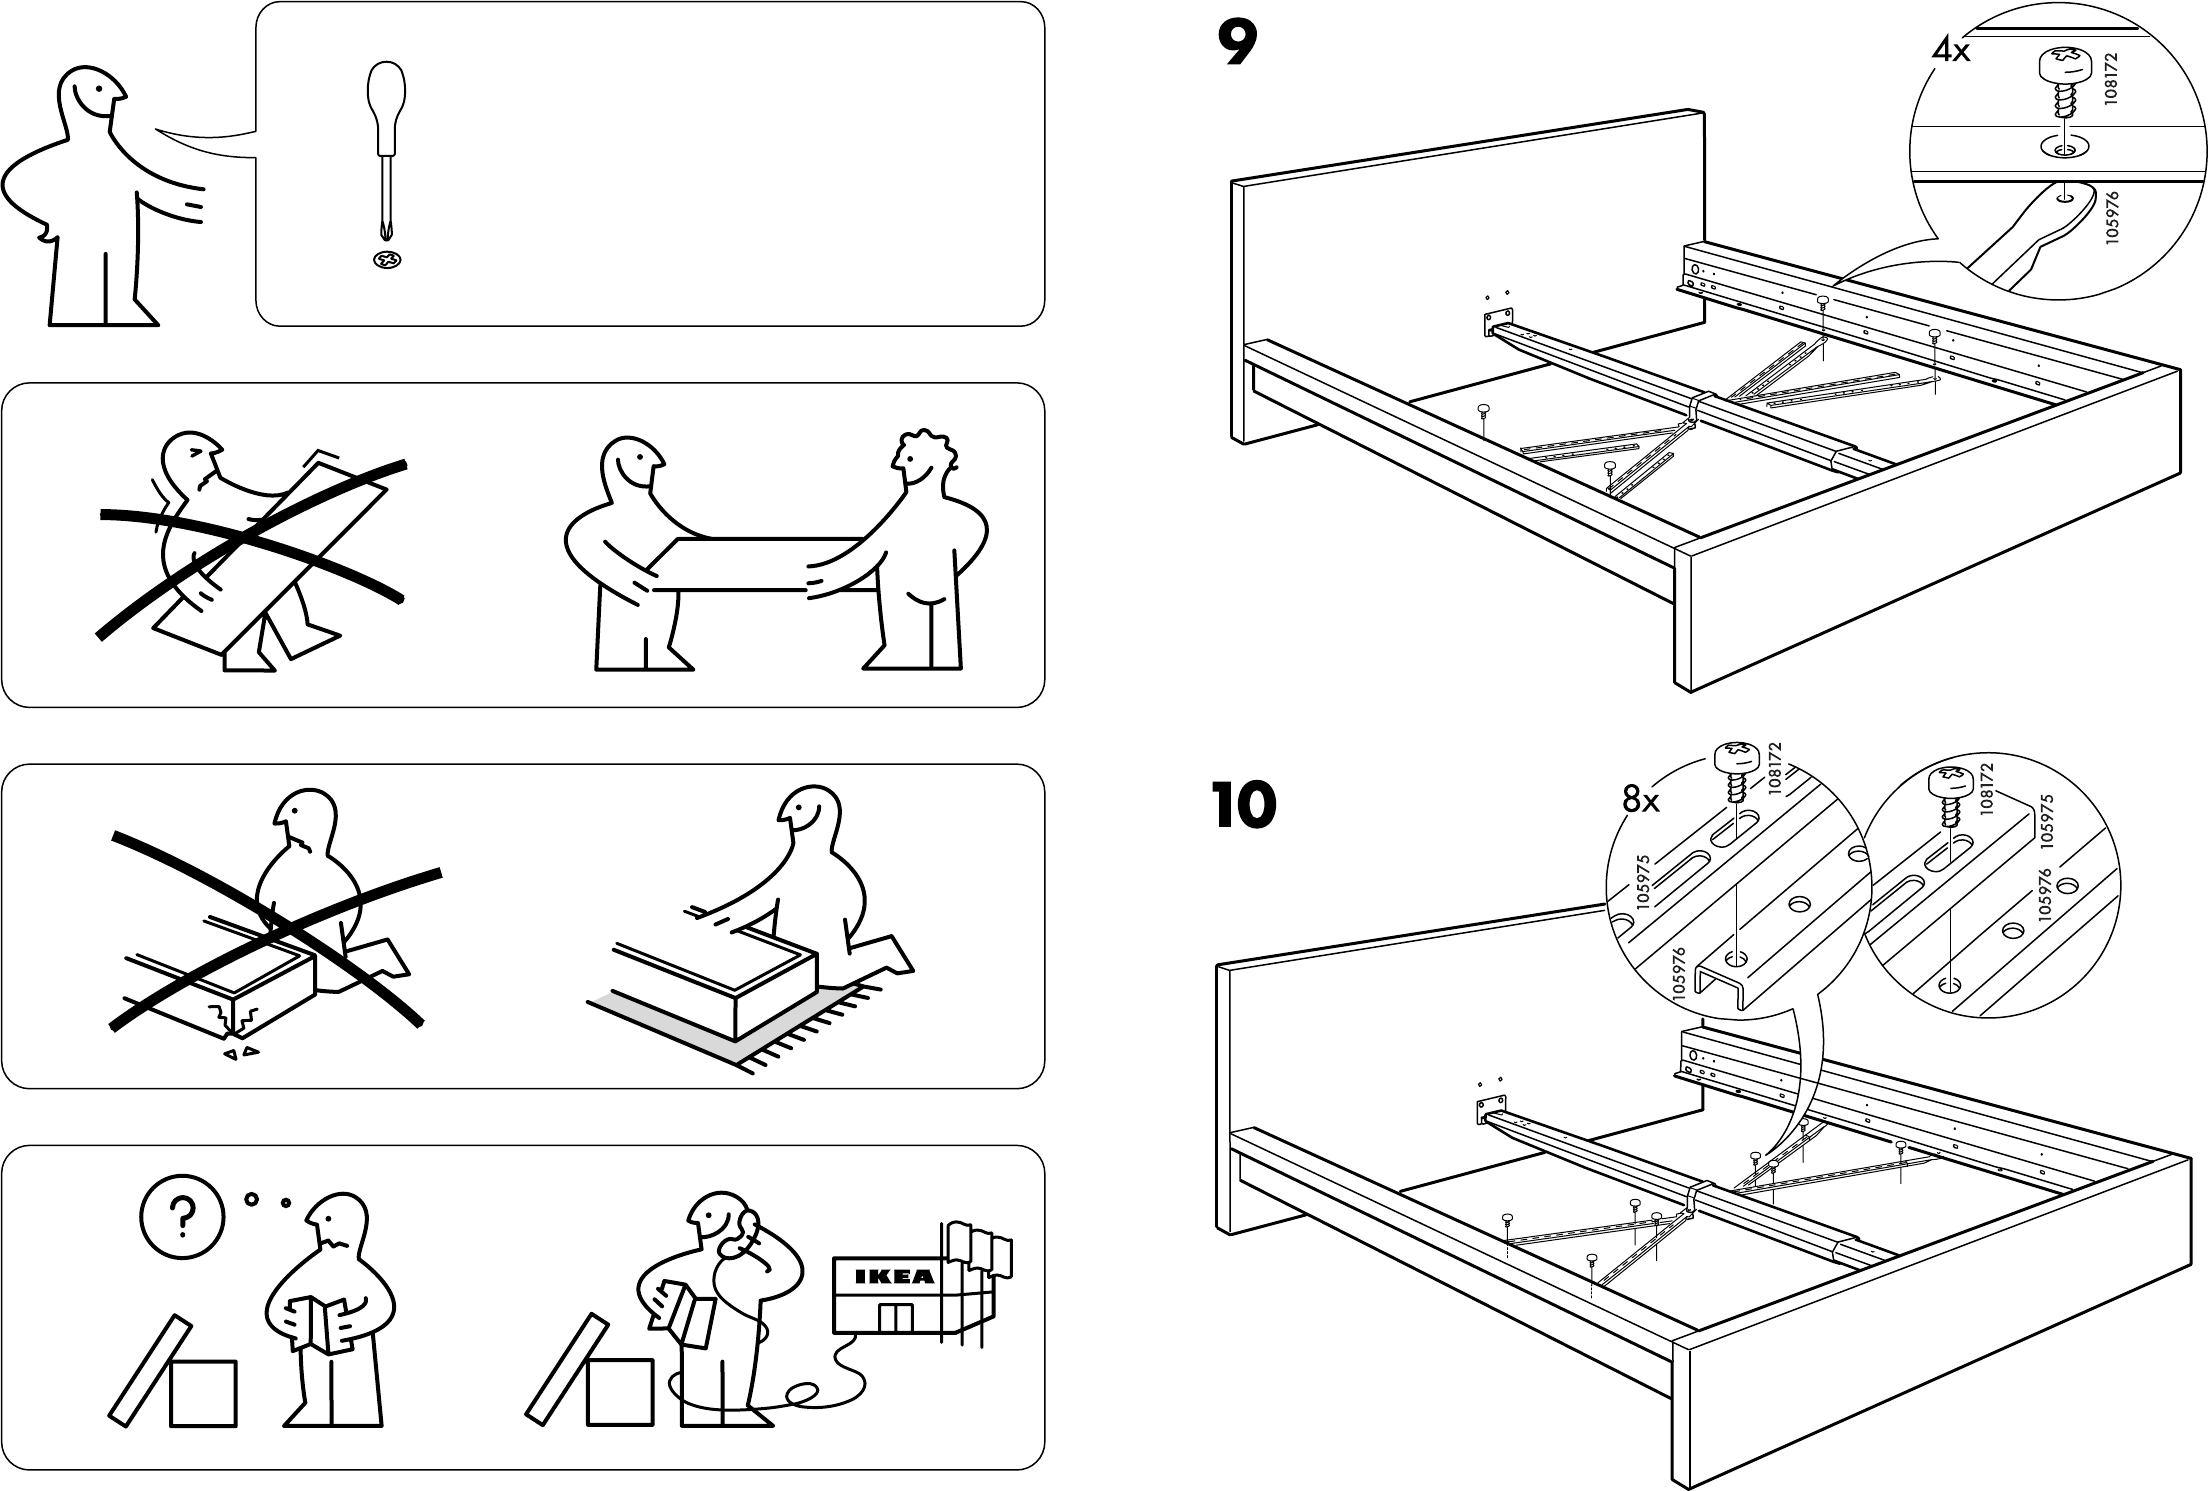
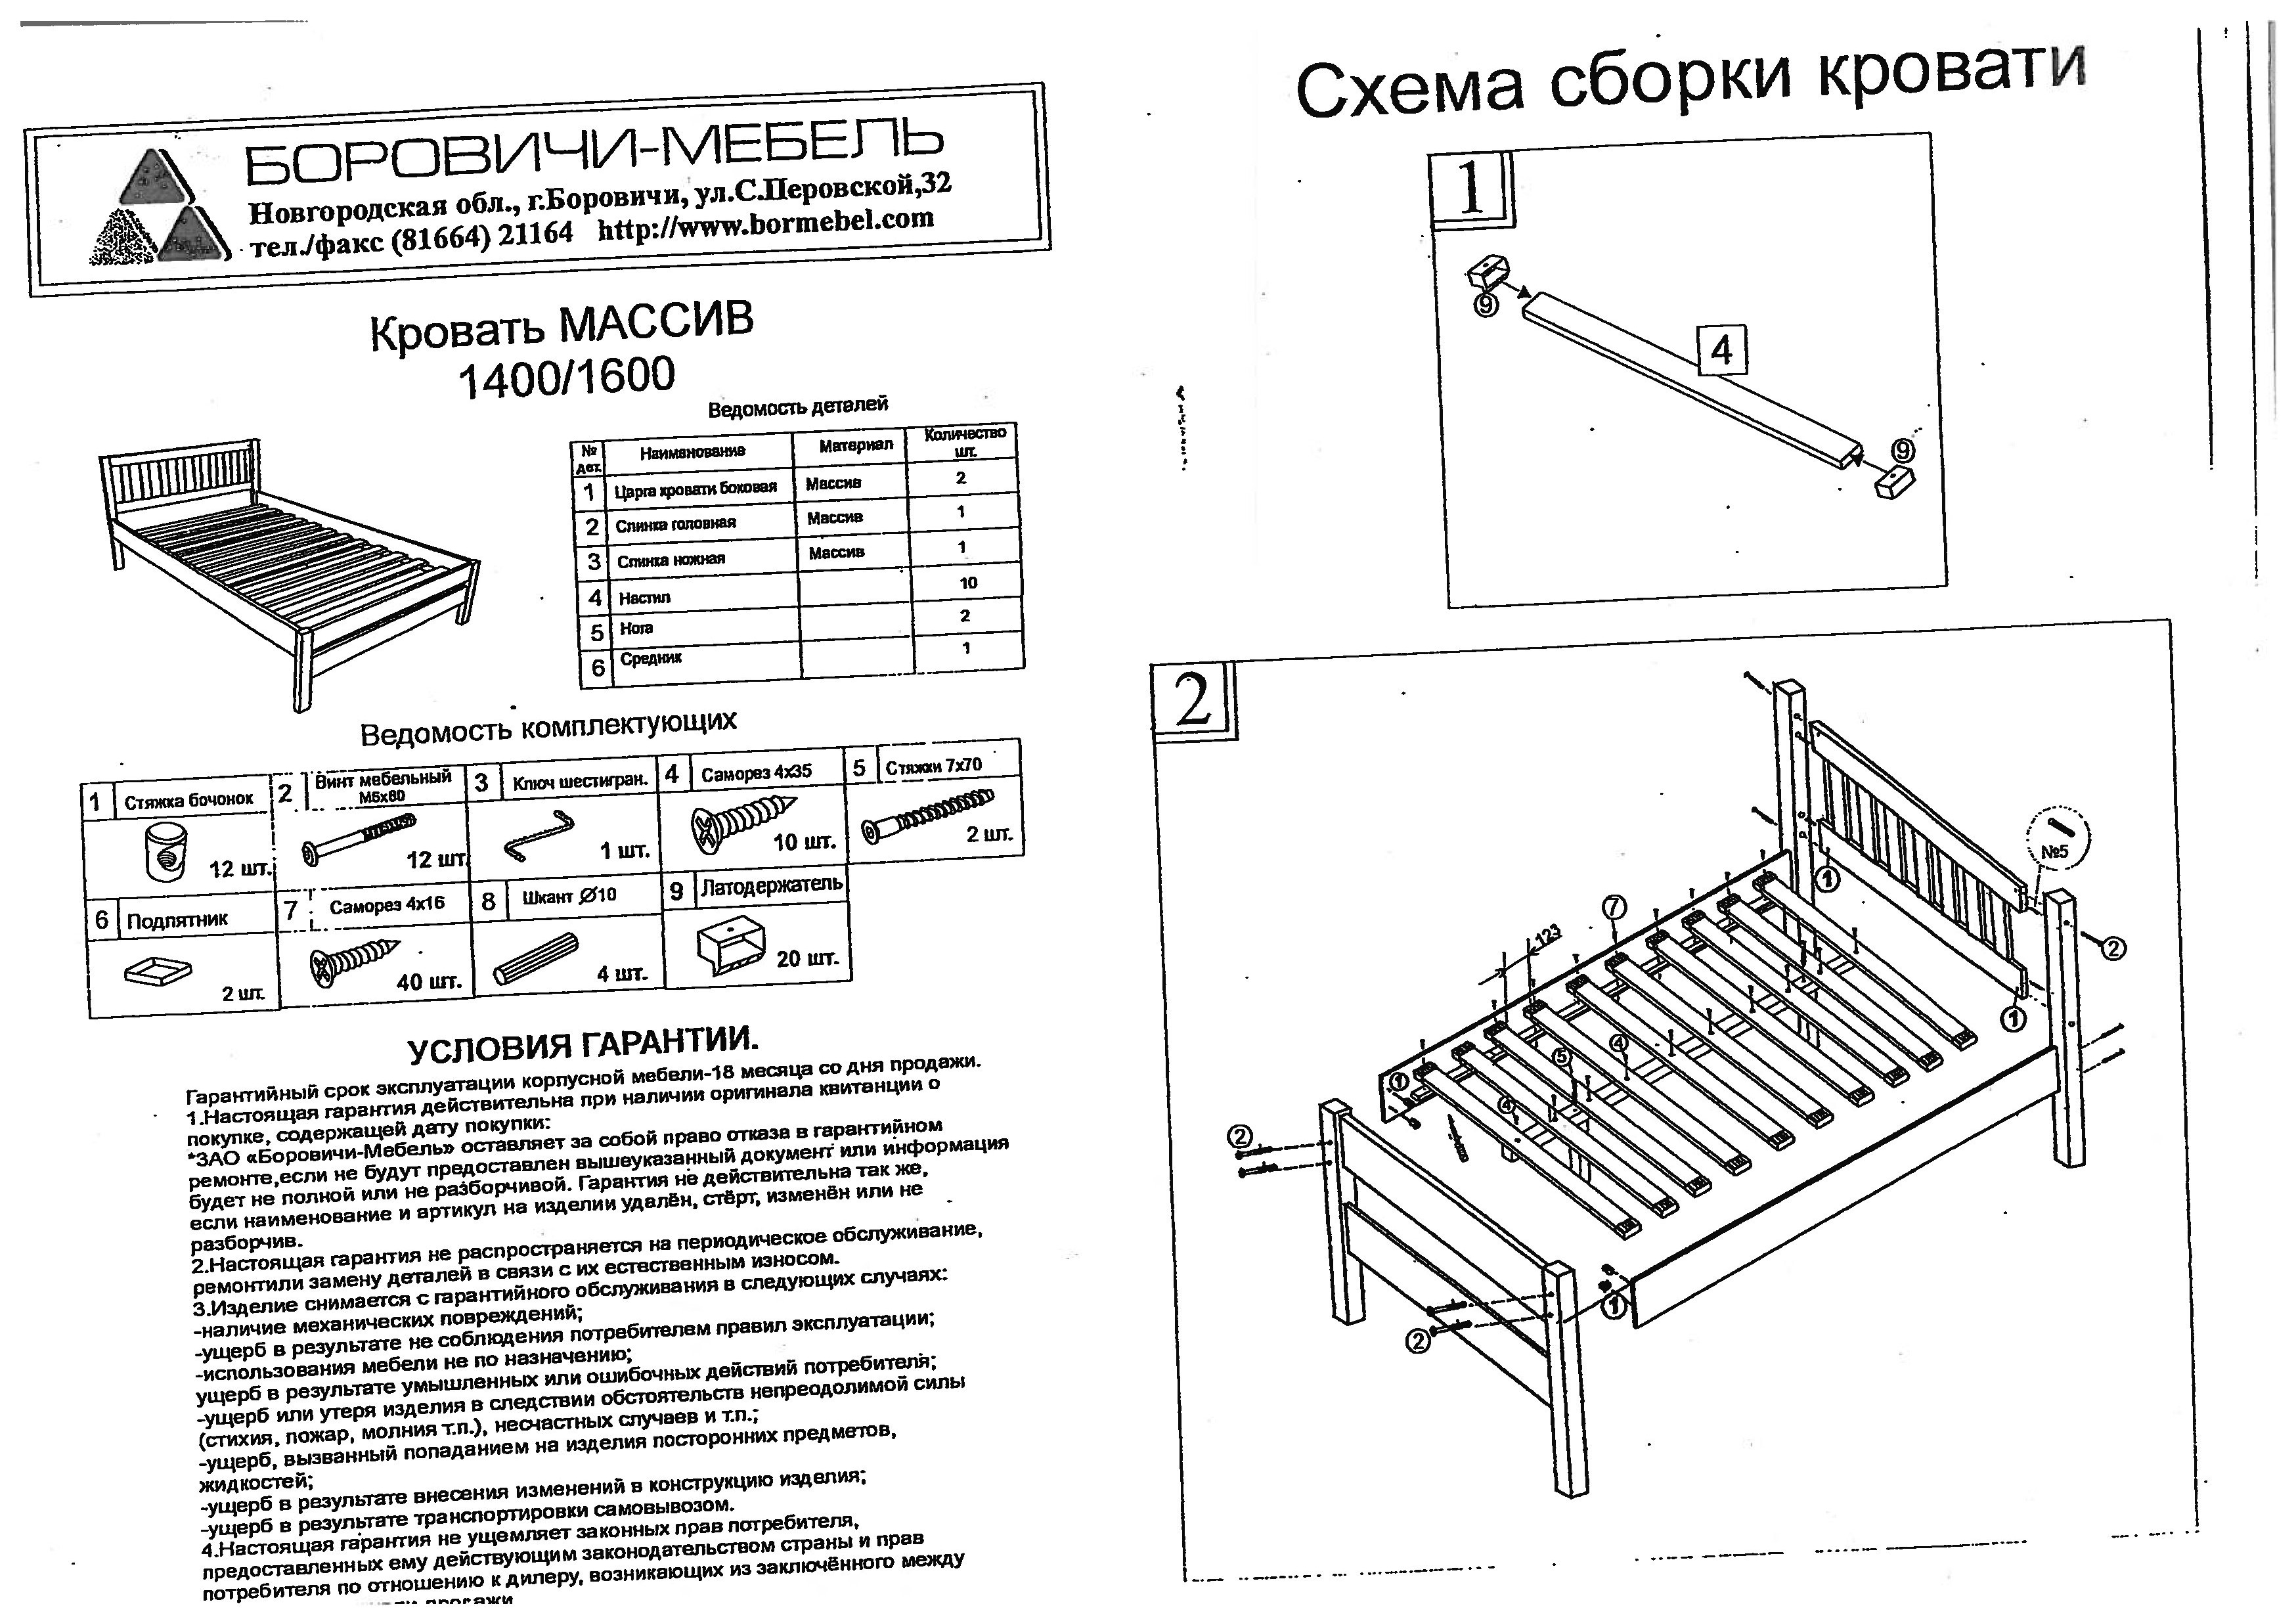
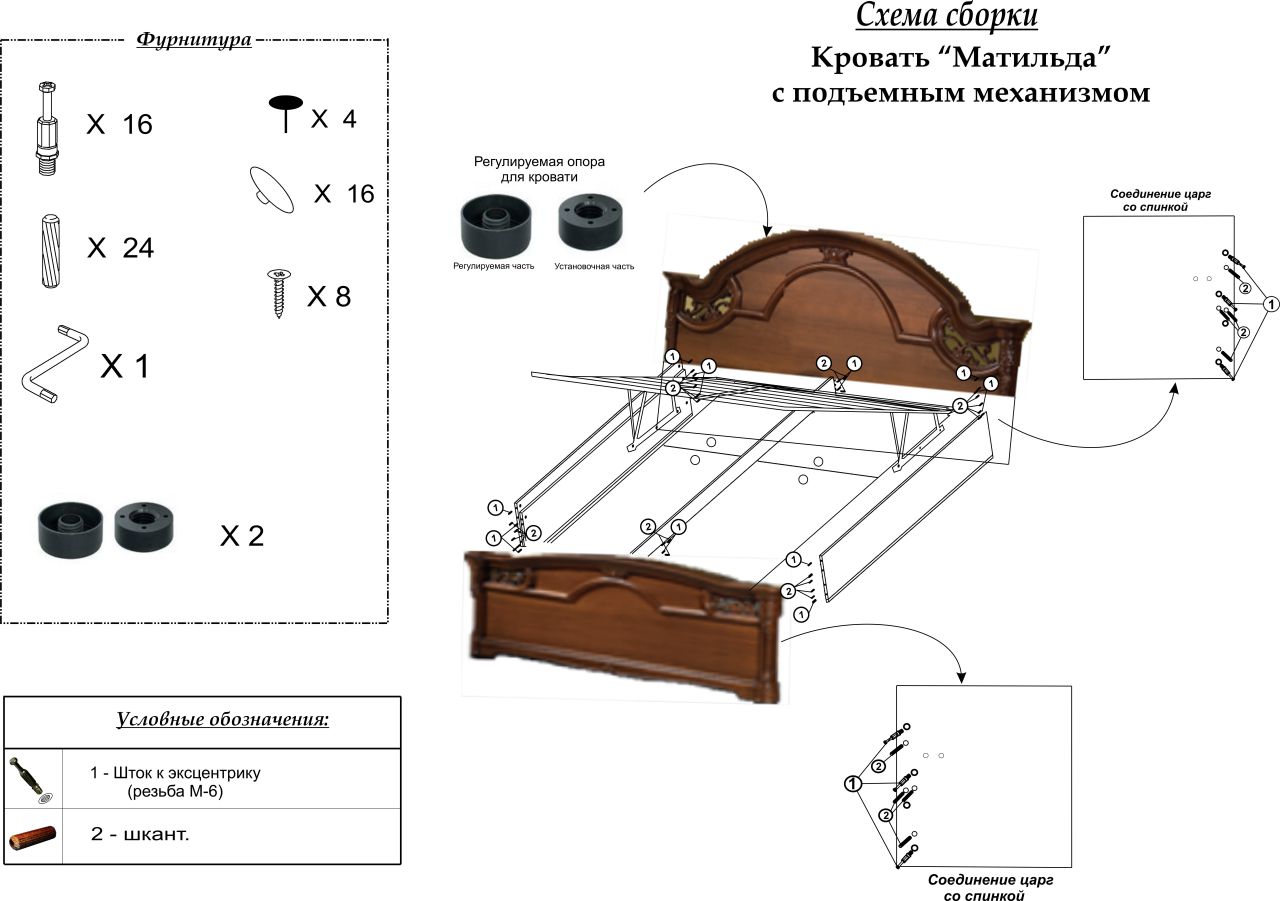
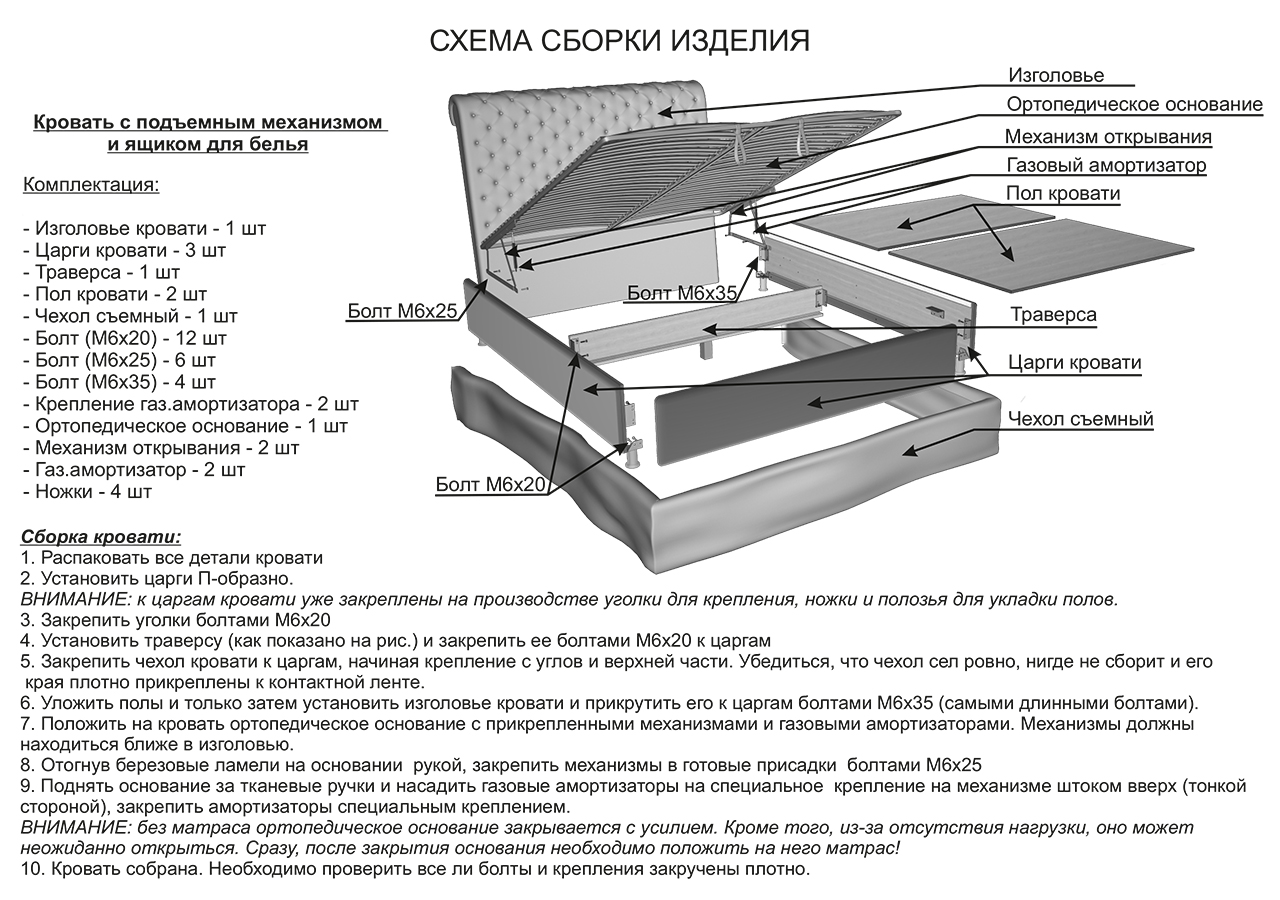
Инструкция по сборке угловых кроватей Oliva, Camila New, Eva New.pdf
19 145 ₽
-46%
35 453 ₽
+ 957 бонусов

Всего: 88
Конфигурация
Закажите дополнительно

Бортик универсальный
Купить в 1 клик
Покажем товар по видео и ответим на вопросы
Камеру включать не понадобится. Менеджер не будет вас видеть.
- Manuals
- Brands
- Babymore Manuals
- Baby & Toddler Furniture
- EVA COT
- Instructions manual
-
Contents
-
Table of Contents
-
Bookmarks
Quick Links
EVA: V1/15
Babymore Ltd. 2012
INSTRUCTIONS
EVA COT/ BED
Babymore
Animated Assembly Video
YouTube — search «Babymore Eva Cot Assembly»
Product Page — www.babymore.co.uk
1 |
P a g e
Related Manuals for Babymore EVA COT
Summary of Contents for Babymore EVA COT
-
Page 1
EVA: V1/15 Babymore Ltd. 2012 INSTRUCTIONS EVA COT/ BED Babymore Animated Assembly Video YouTube — search «Babymore Eva Cot Assembly» Product Page — www.babymore.co.uk P a g e… -
Page 2
• WARNING: Do not use the cot/bed if any part is broken, torn or missing and use only spare parts approved by Babymore. • WARNING: Do not leave anything in the cot or place the cot close to another product which could provide a foothold or present a danger of suffoca on or strangula on, e.g. -
Page 3
Thank you for purchasing Babymore If you need assistance, spare parts or you are unhappy with the goods 020 3475 5588 customerservices@babymore.co.uk Call : Or email us at Improper assembly can result in damage to your furniture or cause harm to to ensure a safe and comfortable end assembly and keep for future use. -
Page 4
COMPONENTS Item Description Item Description Cot End Panel Drawer Back 11-L Cot End Top Drawer Left 11-R Leg A Drawer Right Drawer Centre Leg B Support Drop side Drawer Base Fixed side Drawer Runner Base Slat Stabilizer Bar Base Support Bar Bed Convert Bar Drawer Front Bed Side Support… -
Page 5
ASSEMBLING THE COT 11-R A / Bolts 30mm x 8 B / Bolts 55mm x 2 E / Bolts Nut x 2 11-L Step 1 Assembly of drawer as show, with (A,B,E) provided. 11-R Note: B & E used for assembly of center support. -
Page 6
B / Bolts 55mm x 4 E/ Bolts Nut x 4 Step 3 Choose 1 of 3 mattress base position as show. Main diagram show base support bars install onto the two end panels. Use above fittings. Leave bolts connections loosen until complete step 8. -
Page 7
D / Bolts 25mm x 6 Step 5 Align and install base slat onto base support bars. Use bolts (D ) secure slat onto the support bar, as diagram show. B / Bolts 55mm x 4 Step 6 Connect fixed side (6) to end panels by passing (B) bolts through pre-drilled… -
Page 8
Step 7 Refer to the magnified diagram, fully attach top pin (H) and insert low pin (G) onto the bed ends. IMORTANT: Ensure correct way (Outside/Inside) of Dropside Panel. Align and insert top gilde pin into top OUTSIDE recess of dropside panel, if required, push top of end panels outward to… -
Page 9
Step 9 To lower or raise the dropside panel: Lift up the dropside to top, hold, while using your leg push lower centre of panel inward, then allow panel to slide down/up until it clicks into locking position . Always verify that both ends of the dropside are locked in the raised position… -
Page 10
CONVERT TO DAY BED / BED I / Allen Key x 1 Step 1 Remove the dropside, insert ( I ) Allen key through the holes on the side of the dropside panel , push down lower pins of cot ends, to allow remove of dropside by reverse the assembly step 5, 8 &… -
Page 11
B / Bolts 55mm x 2 Step 3 Use Bolts E, attach side support panel end panels. onto bed Fully tighten all connections. Bed ready for use. Page… -
Page 12
This in no way affects your statutory rights Each Babymore item is a unique piece, made of high quality wood and material. Due to the handcra ed nature of our products and our use of solid woods, each piece is unique and may contain irregular quali es, there will occasionally be natural markings, miniscule burrs, or slight discolora ons.
This manual is also suitable for:
Eva bed
Домашний дизайнер
МЕНЮ
Обновлено: 04.09.2023

.jpg)


Читайте также:
- Шкаф угловой цвет дуб молочный 89 фото
- Дома дом лысьва диваны 97 фото
- Шторки для детской двухъярусной кровати 95 фото