-
Page 2
Reproduction of this document in any manner whatsoever without the written permission of D-Link Corporation is strictly forbidden. Trademarks used in this text: D-Link and the D-LINK logo are trademarks of D-Link Corporation; Microsoft and Windows are registered trademarks of Microsoft Corporation. -
Page 3: Table Of Contents
DGS-3000 Series Gigabit Ethernet Switch Web UI Reference Guide Table of Contents Intended Readers …………………………..1 Typographical Conventions ……………………….1 Notes, Notices and Cautions ……………………….1 Safety Instructions …………………………..2 Safety Cautions …………………………..2 General Precautions for Rack-Mountable Products ………………….. 3 Protecting Against Electrostatic Discharge ……………………
-
Page 4
DGS-3000 Series Gigabit Ethernet Switch Web UI Reference Guide IPv6 Neighbor Settings …………………………36 IP Interface …………………………….. 37 System IP Address Settings ……………………….. 37 Interface Settings …………………………39 Management Settings …………………………41 Session Table …………………………..43 Session Timeout …………………………..43 Single IP Management ………………………… -
Page 5
DGS-3000 Series Gigabit Ethernet Switch Web UI Reference Guide Voice VLAN Settings …………………………85 VLAN Trunk Settings …………………………88 Browse VLAN …………………………..88 Show VLAN Ports …………………………89 QinQ ………………………………. 89 QinQ Settings …………………………..91 VLAN Translation Settings ……………………….92 Layer 2 Protocol Tunneling Settings …………………….. -
Page 6
DGS-3000 Series Gigabit Ethernet Switch Web UI Reference Guide DSCP Trust Settings …………………………. 162 DSCP Map Settings …………………………162 HOL Blocking Prevention ……………………….164 Scheduling Settings …………………………165 QoS Scheduling …………………………165 QoS Scheduling Mechanism……………………… 166 Chapter 7 ACL……………………168 ACL Configuration Wizard ………………………. -
Page 7
DGS-3000 Series Gigabit Ethernet Switch Web UI Reference Guide Web-based Access Control (WAC) ……………………..234 WAC Global Settings ………………………… 236 WAC User Settings …………………………237 WAC Port Settings …………………………237 WAC Authentication State ……………………….238 WAC Customize Page ……………………….239 Compound Authentication ………………………. -
Page 8
DGS-3000 Series Gigabit Ethernet Switch Web UI Reference Guide DNS Resolver …………………………..291 DNS Resolver Global Settings ……………………..291 DNS Resolver Static Name Server Settings ………………….291 DNS Resolver Dynamic Name Server Table ………………….292 DNS Resolver Static Host Name Settings ………………….292 DNS Resolver Dynamic Host Name Table …………………. -
Page 9
DGS-3000 Series Gigabit Ethernet Switch Web UI Reference Guide Chapter 12 Save and Tools ………………… 339 Save Configuration / Log ……………………….339 Download firmware …………………………339 Download Firmware From TFTP ……………………..339 Download Firmware From FTP ……………………..340 Download Firmware From HTTP ……………………..341 Upload Firmware ………………………….. -
Page 10: Intended Readers
General Precautions for Rack-Mountable Products Protecting Against Electrostatic Discharge The DGS-3000 Series Web UI Reference Guide contains information for setup and management of the Switch. This manual is intended for network managers familiar with network management concepts and terminology. Typographical Conventions…
-
Page 11: Safety Instructions
DGS-3000 Series Gigabit Ethernet Switch Web UI Reference Guide Safety Instructions Use the following safety guidelines to ensure your own personal safety and to help protect your system from potential damage. Throughout this safety section, the caution icon ( ) is used to indicate cautions and precautions that need to be reviewed and followed.
-
Page 12: General Precautions For Rack-Mountable Products
DGS-3000 Series Gigabit Ethernet Switch Web UI Reference Guide • Position system cables and power cables carefully; route cables so that they cannot be stepped on or tripped over. Be sure that nothing rests on any cables. • Do not modify power cables or plugs. Consult a licensed electrician or your power company for site modifications.
-
Page 13: Protecting Against Electrostatic Discharge
DGS-3000 Series Gigabit Ethernet Switch Web UI Reference Guide CAUTION: The system chassis must be positively grounded to the rack cabinet frame. Do not attempt to connect power to the system until grounding cables are connected. Completed power and safety ground wiring must be inspected by a qualified electrical inspector.
-
Page 14: Chapter 1 Web-Based Switch Configuration
Web Pages Introduction Most software functions of the DGS-3000 Series switches can be managed, configured and monitored via the embedded web-based (HTML) interface. Manage the Switch from remote stations anywhere on the network through a standard browser. The browser acts as a universal access tool and can communicate directly with the Switch using the HTTP protocol.
-
Page 15: Areas Of The User Interface
Select the menu or window to display. Open folders and click the hyperlinked menu buttons and Area 1 subfolders contained within them to display menus. Click the D-Link logo to go to the D-Link website. Presents a graphical near real-time image of the front panel of the Switch. This area displays the Switch’s ports, console and management port, showing port activity.
-
Page 16: Web Pages
DGS-3000 Series Gigabit Ethernet Switch Web UI Reference Guide Web Pages When connecting to the management mode of the Switch with a web browser, a login screen is displayed. Enter a user name and password to access the Switch’s management mode.
-
Page 17: Chapter 2 System Configuration
DGS-3000 Series Gigabit Ethernet Switch Web UI Reference Guide Chapter 2 System Configuration Device Information System Information Settings Port Configuration Serial Port Settings Warning Temperature Settings System Log Configuration Time Range Settings Time Settings User Accounts Settings Command Logging Settings…
-
Page 18: Port Configuration
DGS-3000 Series Gigabit Ethernet Switch Web UI Reference Guide Figure 2-2 System Information Settings window The fields that can be configured are described below: Parameter Description System Name Enter a system name for the Switch, if so desired. This name will identify it in the Switch network.
-
Page 19
DGS-3000 Series Gigabit Ethernet Switch Web UI Reference Guide Figure 2-3 DDM Settings window The fields that can be configured are described below: Parameter Description Trap State Specify whether to send the trap, when the operating parameter exceeds the alarm or warning threshold. -
Page 20
DGS-3000 Series Gigabit Ethernet Switch Web UI Reference Guide Figure 2-4 DDM Temperature Threshold Settings window The fields that can be configured are described below: Parameter Description From Port / To Port Select a range of ports to be configured. -
Page 21
DGS-3000 Series Gigabit Ethernet Switch Web UI Reference Guide Figure 2-5 DDM Voltage Threshold Settings window The fields that can be configured are described below: Parameter Description From Port / To Port Select a range of ports to be configured. -
Page 22
DGS-3000 Series Gigabit Ethernet Switch Web UI Reference Guide Figure 2-6 DDM Bias Current Threshold Settings window The fields that can be configured are described below: Parameter Description From Port / To Port Select a range of ports to be configured. -
Page 23
DGS-3000 Series Gigabit Ethernet Switch Web UI Reference Guide Figure 2-7 DDM TX Power Threshold Settings window The fields that can be configured are described below: Parameter Description From Port / To Port Select a range of ports to be configured. -
Page 24
DGS-3000 Series Gigabit Ethernet Switch Web UI Reference Guide Figure 2-8 DDM RX Power Threshold Settings window The fields that can be configured are described below: Parameter Description From Port / To Port Select a range of ports to be configured. -
Page 25: Port Settings
DGS-3000 Series Gigabit Ethernet Switch Web UI Reference Guide Figure 2-9 DDM Status Table window Port Settings This page used to configure the details of the switch ports. To view the following window, click System Configuration > Port Configuration > Port Settings as shown below:…
-
Page 26
DGS-3000 Series Gigabit Ethernet Switch Web UI Reference Guide Figure 2-10 Port Settings window To configure switch ports: 1. Choose the port or sequential range of ports using the From Port and To Port drop-down menus. 2. Use the remaining drop-down menus to configure the parameters described below:… -
Page 27: Port Description Settings
DGS-3000 Series Gigabit Ethernet Switch Web UI Reference Guide Fiber. Click the Apply button to implement changes made. Click the Refresh button to refresh the display section of this page. Port Description Settings The Switch supports a port description feature where the user may name various ports.
-
Page 28: Port Media Type
DGS-3000 Series Gigabit Ethernet Switch Web UI Reference Guide Figure 2-12 Port Error Disabled The fields that can be displayed are described below: Parameter Description Port Display the port that has been error disabled. Port State Describe the current running state of the port, whether enabled or disabled.
-
Page 29: Eee Settings
DGS-3000 Series Gigabit Ethernet Switch Web UI Reference Guide Figure 2-14 Jumbo Frame Settings window The fields that can be configured are described below: Parameter Description Jumbo Frame Use the radio buttons to enable or disable the Jumbo Frame function on the Switch. The default is Disabled.
-
Page 30: Poe
Powered Devices (PDs) over Category 5 or Category 3 UTP Ethernet cables. The Switch follows the standard Power Sourcing Equipment (PSE) pinout Alternative A, whereby power is sent out over pins 1, 2, 3 and 6. The Switches work with all D-Link 802.3af capable devices. Alternative…
-
Page 31: Poe Port Settings
DGS-3000 Series Gigabit Ethernet Switch Web UI Reference Guide To view the following window, click System Configuration > PoE > PoE System Settings as shown below: Figure 2-16 PoE System Settings window The following parameters can be configured: Parameter Description Power Limit Sets the limit of power to be used from the Switch’s power source to PoE ports.
-
Page 32
DGS-3000 Series Gigabit Ethernet Switch Web UI Reference Guide Figure 2-17 PoE Port Settings window The following parameters can be configured: Parameter Description From Port / To Port Select a range of ports from the drop-down menus to be enabled or disabled for PoE. -
Page 33: Pd Alive Settings
DGS-3000 Series Gigabit Ethernet Switch Web UI Reference Guide Class 0 – 16200mW Class 1 – 4200mW Class 2 – 7400mW Class 3 – 16200mW User Define – 1000 to 35000mW Click Apply to implement changes made. The port status of all PoE configured ports is displayed in the table in the bottom half of the screen shown above.
-
Page 34: Serial Port Settings
DGS-3000 Series Gigabit Ethernet Switch Web UI Reference Guide choose from are Reset, Notify, and Both. Reset — Select to reset the PoE port state. Notify — Select to send logs and traps to notify the administrator. Both — Select to send log and trap first, and then reset the PoE port state.
-
Page 35: System Log Configuration
DGS-3000 Series Gigabit Ethernet Switch Web UI Reference Guide temperature setting. Log State Use the drop-down menu to enable or disable the log state option of the warning temperature setting. High Threshold (-500-500) Enter the high threshold value of the warning temperature setting.
-
Page 36: System Log
DGS-3000 Series Gigabit Ethernet Switch Web UI Reference Guide Figure 2-22 System Log Server Settings The fields that can be configured are described below: Parameter Description Server ID Syslog server settings index (1 to 4). Severity Use the drop-down menu to select the higher level of messages that will be sent. All messages which level is higher than selecting level will be sent.
-
Page 37: System Log & Trap Settings
DGS-3000 Series Gigabit Ethernet Switch Web UI Reference Guide Log Type In the drop-down menu the user can select the log type that will be displayed. Severity — When selecting Severity from the drop-down menu, a secondary tick must be made.
-
Page 38: Time Range Settings
DGS-3000 Series Gigabit Ethernet Switch Web UI Reference Guide To view the following window, click System Configuration > System Log Configuration > System Severity Settings as shown below: Figure 2-25 System Severity Settings window The fields that can be configured are described below:…
-
Page 39: Time Settings
DGS-3000 Series Gigabit Ethernet Switch Web UI Reference Guide minutes and seconds, based on the 24-hour time system. Weekdays Use the check boxes to select the corresponding days of the week that this time range is to be enabled. Select the Select All Days check box to configure this time range for every day of the week.
-
Page 40: Command Logging Settings
DGS-3000 Series Gigabit Ethernet Switch Web UI Reference Guide Network Monitoring Read/Write Read/Write Read-only Read-only Community Strings and Trap Read/Write Read-only Read-only Read-only Stations Update Firmware and Configuration Read/Write Read/Write Files System Utilities Read/Write Read-only Read-only Read-only Factory Reset Read/Write…
-
Page 41: Auto Backup Settings
DGS-3000 Series Gigabit Ethernet Switch Web UI Reference Guide NOTE: When the Switch is booting, no configuration commands will be logged. NOTE: When the user uses AAA authentication to log in, the username should not be changed if the user has used the Enable Admin function to replace its privilege.
-
Page 42
DGS-3000 Series Gigabit Ethernet Switch Web UI Reference Guide TimePeriod — Click to upload the running configuration file to the remote server based on the time schedule configured in Auto Backup Time Schedule. All — Click to upload the running configuration file to the remote server for both events. -
Page 43: Chapter 3 Management
DGS-3000 Series Gigabit Ethernet Switch Web UI Reference Guide Chapter 3 Management Gratuitous ARP IPv6 Neighbor Settings IP Interface Management Settings Session Table Session Timeout Single IP Management SNMP Settings Telnet Settings Power Saving D-Link Discovery Protocol ZTP Settings NTP Settings Static ARP Settings The Address Resolution Protocol is a TCP/IP protocol that converts IP addresses into physical addresses.
-
Page 44: Arp Table
DGS-3000 Series Gigabit Ethernet Switch Web UI Reference Guide ARP Table Users can display current ARP entries on the Switch. To view the following window, click Management > ARP > ARP Table as shown below: Figure 3-2 ARP Table window…
-
Page 45: Gratuitous Arp Settings
DGS-3000 Series Gigabit Ethernet Switch Web UI Reference Guide duplicate IP detected means that the system received an ARP request packet that is sent by an IP address that match the system’s own IP address. In this case, the system knows that somebody out there uses an IP address that is conflict with the system.
-
Page 46: Ip Interface
DGS-3000 Series Gigabit Ethernet Switch Web UI Reference Guide Figure 3-5 IPv6 Neighbor Settings window The fields that can be configured are described below: Parameter Description Interface Name Enter the interface name of the IPv6 neighbor. Neighbor IPv6 Address Enter the neighbor IPv6 address.
-
Page 47
DGS-3000 Series Gigabit Ethernet Switch Web UI Reference Guide NOTE: The Switch’s factory default IP address is 10.90.90.90 with a subnet mask of 255.0.0.0 and a default gateway of 0.0.0.0. To view the following window, click Management > IP Interface > System IP Address Settings as shown below:… -
Page 48: Interface Settings
DGS-3000 Series Gigabit Ethernet Switch Web UI Reference Guide Gateway IP address that determines where packets with a destination address outside the current subnet should be sent. This is usually the address of a router or a host acting as an IP gateway.
-
Page 49
DGS-3000 Series Gigabit Ethernet Switch Web UI Reference Guide Interface Admin State Use the drop-down menu to enable or disable the Interface Admin State. Click the Apply button to accept the changes made. Click the <<Back button to discard the changes made and return to the previous page. -
Page 50: Management Settings
DGS-3000 Series Gigabit Ethernet Switch Web UI Reference Guide Figure 3-10 IPv6 Interface Settings window The fields that can be configured or displayed are described below: Parameter Description Interface Name Display the IPv6 interface name. IPv6 State Use the drop-down menu to enable or disable IPv6 State.
-
Page 51
DGS-3000 Series Gigabit Ethernet Switch Web UI Reference Guide For more information about loading a configuration file for use by a client, refer to the DHCP server and/or TFTP server software instructions. The user may also refer to Save and Tools > Upload Log File. -
Page 52: Session Table
Click the Apply button to accept the changes made. Single IP Management D-Link Single IP Management is a concept that will stack switches together over Ethernet instead of using stacking ports or modules. There are some advantages in implementing the “Single IP Management” feature: •…
-
Page 53
6. The CaS can be configured through the CS to become a MS. After configuring one switch to operate as the CS of a SIM group, additional DGS-3000 Series switches may join the group by manually configuring the Switch to be a MS. The CS will then serve as the in band entry point for access to the MS. -
Page 54: Single Ip Settings
CS, do not belong. Upgrade to v1.61 To better improve SIM management, the DGS-3000 Series switches have been upgraded to version 1.61 in this release. Many improvements have been made, including: a.
-
Page 55: Topology
DGS-3000 Series Gigabit Ethernet Switch Web UI Reference Guide will render all SIM functions on the Switch inoperable. Trap State Use the drop-down menu to enable or disable sending the trap. Role State Use the drop-down menu to change the SIM role of the Switch. The two choices are: Candidate –…
-
Page 56
DGS-3000 Series Gigabit Ethernet Switch Web UI Reference Guide Figure 3-16 Single IP Management window — Tree View The Topology window holds the following information on the Data tab: Parameter Description Device Name This field will display the Device Name of the switches in the SIM group configured by the user. -
Page 57
DGS-3000 Series Gigabit Ethernet Switch Web UI Reference Guide Figure 3-17 Topology view This window will display how the devices within the Single IP Management Group connect to other groups and devices. Possible icons on this window are as follows:… -
Page 58
DGS-3000 Series Gigabit Ethernet Switch Web UI Reference Guide Figure 3-18 Device Information Utilizing the Tool Tip Setting the mouse cursor over a line between two devices will display the connection speed between the two devices, as shown below: Figure 3-19 Port Speed Utilizing the Tool Tip… -
Page 59
DGS-3000 Series Gigabit Ethernet Switch Web UI Reference Guide • Collapse – To collapse the group that will be represented by a single icon. • Expand – To expand the SIM group, in detail. • Property – To pop up a window to display the group information. -
Page 60
DGS-3000 Series Gigabit Ethernet Switch Web UI Reference Guide Figure 3-23 Right-clicking a Member icon The following options may appear for the user to configure: • Collapse – To collapse the group that will be represented by a single icon. -
Page 61: Firmware Upgrade
DGS-3000 Series Gigabit Ethernet Switch Web UI Reference Guide • Add to group – Add a candidate to a group. Clicking this option will reveal the following dialog box for the user to enter a password for authentication from the Candidate Switch before being added to the SIM group.
-
Page 62: Configuration File Backup/Restore
DGS-3000 Series Gigabit Ethernet Switch Web UI Reference Guide Interface Name Enter the IP interface name here if the IPv6 address is a link-local address. Path Filename Enter the file path of the firmware file. Select the corresponding check box of the member switch in the table or click Select All to select all member switches.
-
Page 63: Snmp Settings
DGS-3000 Series Gigabit Ethernet Switch Web UI Reference Guide Server IPv6 Address Enter the IPv6 address of the TFTP server. Interface Name Enter the IP interface name here if the IPv6 address is a link-local address. Path Filename Enter the file path of the local PC to save the log file.
-
Page 64: Snmp Global Settings
DGS-3000 Series Gigabit Ethernet Switch Web UI Reference Guide The Switch incorporates a flexible SNMP management for the switching environment. SNMP management can be customized to suit the needs of the networks and the preferences of the network administrator. Use the SNMP V3 menus to select the SNMP version used for specific tasks.
-
Page 65: Snmp Linkchange Traps Settings
DGS-3000 Series Gigabit Ethernet Switch Web UI Reference Guide Coldstart Traps Enable this option to use the SNMP Cold Start Traps feature. Warmstart Traps Enable this option to use the SNMP Warm Start Traps feature. Click the Apply button to accept the changes made.
-
Page 66: Snmp Community Table Settings
DGS-3000 Series Gigabit Ethernet Switch Web UI Reference Guide Figure 3-35 SNMP View Table Settings window The fields that can be configured are described below: Parameter Description View Name Type an alphanumeric string of up to 32 characters. This is used to identify the new SNMP view being created.
-
Page 67: Snmp Group Table Settings
DGS-3000 Series Gigabit Ethernet Switch Web UI Reference Guide Parameter Description Community Name Type an alphanumeric string of up to 32 characters that is used to identify members of an SNMP community. This string is used like a password to give remote SNMP managers access to MIB objects in the Switch’s SNMP agent.
-
Page 68: Snmp Engine Id Settings
SNMP management private enterprise number as assigned by IANA (D-Link is 171). The fifth octet is 03 to indicate the rest is the MAC address of this device. The sixth to eleventh octets is the MAC address.
-
Page 69: Snmp Host Table Settings
DGS-3000 Series Gigabit Ethernet Switch Web UI Reference Guide The fields that can be configured are described below: Parameter Description User Name An alphanumeric string of up to 32 characters. This is used to identify the SNMP users. Group Name This name is used to specify the SNMP group created can request SNMP messages.
-
Page 70: Snmp V6Host Table Settings
DGS-3000 Series Gigabit Ethernet Switch Web UI Reference Guide Community String / Type in the community string or SNMP V3 user name as appropriate. SNMPv3 User Name Click the Apply button to accept the changes made. Click the Delete button to remove the specific entry.
-
Page 71: Telnet Settings
DGS-3000 Series Gigabit Ethernet Switch Web UI Reference Guide The fields that can be configured are described below: Parameter Description RMON Rising Alarm Trap Enable this option to use the RMON Rising Alarm Trap Feature. RMON Falling Alarm Trap Enable this option to use the RMON Falling Alarm Trap Feature.
-
Page 72: Power Saving
DGS-3000 Series Gigabit Ethernet Switch Web UI Reference Guide Power Saving LED State Settings This window is used to configure the port LED state. To view the following window, click Management > Power Saving > LED State Settings, as shown below:…
-
Page 73: Power Saving Led Settings
DGS-3000 Series Gigabit Ethernet Switch Web UI Reference Guide Power Saving Mode Click the radio buttons to enable or disable hibernation state. When enabled, the Switch Hibernation State will go into a low power state and be idle during the configured time range. It will shut down all the ports, all network function (telnet, ping, etc.) will not work, and only the…
-
Page 74: D-Link Discovery Protocol
D-Link Discovery Protocol This window is used to configure D-Link discovery protocol. To view the following window, click Management > D-Link Discovery Protocol as shown below: Figure 3-49 D-Link Discovery Protocol window The fields that can be configured are described below:…
-
Page 75: Ntp Settings
DGS-3000 Series Gigabit Ethernet Switch Web UI Reference Guide Figure 3-50 ZTP Settings window The fields that can be configured are described below: Parameter Description Reset Button Reboot Click to enable or disable the reboot state of the reset button on the Switch. When…
-
Page 76: Ntp Server Settings
DGS-3000 Series Gigabit Ethernet Switch Web UI Reference Guide NTP Max Association Enter the maximum number of NTP peers and clients on the Switch. (1-64) Click the Apply button to accept the changes made for each individual section. NTP Server Settings This window is used to view and configure the NTP server settings.
-
Page 77: Ntp Access Group Settings
DGS-3000 Series Gigabit Ethernet Switch Web UI Reference Guide Parameter Description IP Address Click to enter the IP address of the NTP peer. IPv6 Address Click to enter the IPv6 address of the NTP peer. Version (1-4) Enter the NTP version number.
-
Page 78: Ntp Key Settings
DGS-3000 Series Gigabit Ethernet Switch Web UI Reference Guide NTP Key Settings This window is used to view and configure the NTP key settings. To view the following window, click Management > NTP > NTP Key Settings, as shown below:…
-
Page 79: Ntp Associations
DGS-3000 Series Gigabit Ethernet Switch Web UI Reference Guide Parameter Description NTP State Select to enable or disable the NTP state on the interface. Click the Apply button to accept the changes made. NTP Associations This window is used to view a list of NTP associations.
-
Page 80: Chapter 4 L2 Features
DGS-3000 Series Gigabit Ethernet Switch Web UI Reference Guide Chapter 4 L2 Features VLAN QinQ Layer 2 Protocol Tunneling Settings Spanning Tree Link Aggregation L2 Multicast Control Multicast Filtering ERPS Settings LLDP NLB FDB Settings Flex Link Settings VLAN Understanding IEEE 802.1p Priority Priority tagging is a function defined by the IEEE 802.1p standard designed to provide a means of managing traffic on…
-
Page 81
DGS-3000 Series Gigabit Ethernet Switch Web UI Reference Guide A VLAN is a collection of end nodes grouped by logic instead of physical location. End nodes that frequently communicate with each other are assigned to the same VLAN, regardless of where they are physically on the network. -
Page 82
DGS-3000 Series Gigabit Ethernet Switch Web UI Reference Guide Figure 4-1 IEEE 802.1Q Packet Forwarding The main characteristics of IEEE 802.1Q are as follows: 1. Assigns packets to VLANs by filtering. 2. Assumes the presence of a single global spanning tree. -
Page 83
DGS-3000 Series Gigabit Ethernet Switch Web UI Reference Guide Destination Address (6 octets) Source Address (6 octets) EtherType=0x8100 Tag Control Information MAC Length/Type Beginning of Data Cyclic Redundancy Check (4 octets) User Prlorlty VLAN ID (VID) (12 bits) Figure 4-2 IEEE 802.1Q Tag The EtherType and VLAN ID are inserted after the MAC source address, but before the original EtherType/Length or Logical Link Control. -
Page 84
DGS-3000 Series Gigabit Ethernet Switch Web UI Reference Guide Packets that are tagged (are carrying the 802.1Q VID information) can be transmitted from one 802.1Q compliant network device to another with the VLAN information intact. This allows 802.1Q VLANs to span network devices (and indeed, the entire network, if all network devices are 802.1Q compliant). -
Page 85: 802.1Q Vlan Settings
DGS-3000 Series Gigabit Ethernet Switch Web UI Reference Guide Switch then determines if the destination port is a member of the 802.1Q VLAN. If it is not, the packet is dropped. If the destination port is a member of the 802.1Q VLAN, the packet is forwarded and the destination port transmits it to its attached network segment.
-
Page 86
DGS-3000 Series Gigabit Ethernet Switch Web UI Reference Guide Figure 4-4 802.1Q VLAN Settings –VLAN List Tab window Click the Edit button to re-configure the specific entry. Click the Delete button to remove the specific entry. Enter a page number and click the Go button to navigate to a specific page when multiple pages exist. -
Page 87
DGS-3000 Series Gigabit Ethernet Switch Web UI Reference Guide Port Display all ports of the Switch for the configuration option. Tagged Specify the port as 802.1Q tagging. Clicking the radio button will designate the port as tagged. Click the All button to select all ports. -
Page 88: 802.1V Protocol Vlan
DGS-3000 Series Gigabit Ethernet Switch Web UI Reference Guide The fields that can be configured are described below: Parameter Description VID List Enter a VLAN ID List that can be added, deleted or configured. Advertisement Enabling this function will allow the Switch to send out GVRP packets to outside sources, notifying that they may join the existing VLAN.
-
Page 89
DGS-3000 Series Gigabit Ethernet Switch Web UI Reference Guide Protocol Value (0- Enter a value for the Group. The protocol value is used to identify a protocol of the frame FFFF) type specified. The form of the input is 0x0 to 0xffff. Depending on the frame type, the octet string will have one of the following values: For Ethernet II, this is a 16-bit (2-octet) hex value. -
Page 90: Gvrp
DGS-3000 Series Gigabit Ethernet Switch Web UI Reference Guide section of this manual. Port List Enter the port number or select the All Ports check box. Search Port List This function allows the user to search all previously configured port list settings and display them on the lower half of the table.
-
Page 91
DGS-3000 Series Gigabit Ethernet Switch Web UI Reference Guide NOTE: The Leave Time value should be greater than twice the Join Time value. The Leave All Time value should be greater than the Leave Time value. GVRP Port Settings On this page the user can configure the GVRP port parameters. -
Page 92: Mac-Based Vlan Settings
DGS-3000 Series Gigabit Ethernet Switch Web UI Reference Guide is enabled by default. Click the Apply button to accept the changes made. MAC-based VLAN Settings Users can create new MAC-based VLAN entries, search and delete existing entries. When a static MAC-based VLAN entry is created for a user, the traffic from this user will be able to be serviced under the specified VLAN.
-
Page 93
DGS-3000 Series Gigabit Ethernet Switch Web UI Reference Guide Figure 4-13 Private VLAN Settings window The fields that can be configured are described below: Parameter Description VLAN Name Enter a VLAN name. VID (2-4094) Enter a VID value. VLAN List Enter a list of VLAN ID. -
Page 94: Pvid Auto Assign Settings
DGS-3000 Series Gigabit Ethernet Switch Web UI Reference Guide PVID Auto Assign Settings Users can enable or disable PVID Auto Assign Status. The default setting is enabled. To view the following window, click L2 Features > VLAN > PVID Auto Assign Settings as shown below: Figure 4-15 PVID Auto Assign Settings window Click the Apply button to accept the changes made.
-
Page 95
DGS-3000 Series Gigabit Ethernet Switch Web UI Reference Guide Log State Used to enable or disable sending of issue of voice VLAN log. Click the Apply button to accept the changes made for each individual section. Voice VLAN Port Settings This window is used to show the ports voice VLAN information. -
Page 96
DGS-3000 Series Gigabit Ethernet Switch Web UI Reference Guide Figure 4-18 Voice VLAN OUI Settings window The fields that can be configured are described below: Parameter Description OUI Address Enter the user-defined OUI MAC address. Mask Enter the user-defined OUI MAC address mask. -
Page 97: Vlan Trunk Settings
DGS-3000 Series Gigabit Ethernet Switch Web UI Reference Guide VLAN Trunk Settings Enable VLAN on a port to allow frames belonging to unknown VLAN groups to pass through that port. This is useful if you want to set up VLAN groups on end devices without having to configure the same VLAN groups on intermediary devices.
-
Page 98: Show Vlan Ports
DGS-3000 Series Gigabit Ethernet Switch Web UI Reference Guide Figure 4-23 Browse VLAN window Enter a page number and click the Go button to navigate to a specific page when multiple pages exist. NOTE: The abbreviations used on this page are Tagged Port (T), Untagged Port (U) and Forbidden Port (F).
-
Page 99
DGS-3000 Series Gigabit Ethernet Switch Web UI Reference Guide Here is an example Double VLAN tagged packet. 802.1Q SPVLAN (TPID CEVLAN Tag Destination + Service Source Address (TPID + Ether Type Payload Address Provider VLAN Customer VLAN Tag) Tag) Consider the example below:… -
Page 100: Qinq Settings
DGS-3000 Series Gigabit Ethernet Switch Web UI Reference Guide • Once Double VLANs are enabled, GVRP must be disabled. • All packets sent from the CPU to the Access ports must be untagged. • The following functions will not operate when the switch is in Double VLAN mode: Guest VLANs.
-
Page 101: Vlan Translation Settings
DGS-3000 Series Gigabit Ethernet Switch Web UI Reference Guide Outer TPID Enter an Outer TPID in SP-VLAN tag here. Add Inner Tag Specifies that an Inner Tag will be added to the entry. By default, the Disabled check box is selected.
-
Page 102: Spanning Tree
802.1Q-2005 MSTP. 802.1D-1998 STP will be familiar to most networking professionals. However, since 802.1D-2004 RSTP and 802.1Q-2005 MSTP have been recently introduced to D-Link managed Ethernet switches, a brief introduction to the technology is provided below followed by a description of how to set up 802.1D-1998 STP, 802.1D- 2004 RSTP, and 802.1Q-2005 MSTP.
-
Page 103
DGS-3000 Series Gigabit Ethernet Switch Web UI Reference Guide Each switch utilizing the MSTP on a network will have a single MSTP configuration that will have the following three attributes: 1. A configuration name defined by an alphanumeric string of up to 32 characters (defined in the MST Configuration Identification window in the Configuration Name field). -
Page 104: Stp Bridge Global Settings
DGS-3000 Series Gigabit Ethernet Switch Web UI Reference Guide topology to stabilize before transitioning to a forwarding state. In order to allow this rapid transition, the protocol introduces two new variables: the edge port and the point-to-point (P2P) port. Edge Port The edge port is a configurable designation used for a port that is directly connected to a segment where a loop cannot be created.
-
Page 105: Stp Port Settings
DGS-3000 Series Gigabit Ethernet Switch Web UI Reference Guide Forwarding BPDU This field can be Enabled or Disabled. When Enabled, it allows the forwarding of STP BPDU packets from other network devices. The default is Disabled. Bridge Max Age (6-40)
-
Page 106
DGS-3000 Series Gigabit Ethernet Switch Web UI Reference Guide Figure 4-30 STP Port Settings window The fields that can be configured are described below: Parameter Description From Port / To Port Select the starting and ending ports to be configured. -
Page 107: Mst Configuration Identification
DGS-3000 Series Gigabit Ethernet Switch Web UI Reference Guide the Auto option is available. Restricted Role Use the drop-down menu to toggle Restricted Role between True and False. If set to True, the port will never be selected to be the Root port. The default is False.
-
Page 108: Mstp Port Information
DGS-3000 Series Gigabit Ethernet Switch Web UI Reference Guide Figure 4-32STP Instance Settings window The fields that can be configured are described below: Parameter Description MSTI ID Enter the MSTI ID in this field. An entry of 0 denotes the CIST (default MSTI).
-
Page 109: Link Aggregation
DGS-3000 Series Gigabit Ethernet Switch Web UI Reference Guide will designate the interface to forward packets first. A lower number denotes a higher priority. Click the Find button to locate a specific entry based on the information entered. Click the Apply button to accept the changes made.
-
Page 110: Port Trunking Settings
DGS-3000 Series Gigabit Ethernet Switch Web UI Reference Guide Link aggregation is most commonly used to link a bandwidth intensive network device or devices, such as a server, to the backbone of a network. All of the ports in the group must be members of the same VLAN, and their STP status, static multicast, traffic segmentation and 802.1p default priority configurations must be identical.
-
Page 111: Lacp Port Settings
DGS-3000 Series Gigabit Ethernet Switch Web UI Reference Guide network device or to have an absolute backup aggregation group that is not under automatic control. Member Ports Choose the members of a trunked group. Up to eight ports per group can be assigned to a group.
-
Page 112: Fdb
DGS-3000 Series Gigabit Ethernet Switch Web UI Reference Guide frames. In order to allow the linked port group to negotiate adjustments and make changes dynamically, one end of the connection must have «active» LACP ports (see above). Click the Apply button to accept the changes made.
-
Page 113: Mac Notification Settings
DGS-3000 Series Gigabit Ethernet Switch Web UI Reference Guide Figure 4-38 Multicast Static FDB Settings window The fields that can be configured are described below: Parameter Description The VLAN ID of the VLAN the corresponding MAC address belongs to. Multicast MAC Address The static destination MAC address of the multicast packets.
-
Page 114: Mac Address Aging Time Settings
DGS-3000 Series Gigabit Ethernet Switch Web UI Reference Guide Figure 4-39 MAC Notification Settings window The fields that can be configured are described below: Parameter Description State Enable or disable MAC notification globally on the Switch Interval (1-2147483647) The time in seconds between notifications. Value range to use is 1 to 2147483647.
-
Page 115: Mac Address Table
DGS-3000 Series Gigabit Ethernet Switch Web UI Reference Guide Parameter Description MAC Address Aging This field specify the length of time a learned MAC Address will remain in the Time (10-1000000) forwarding table without being accessed (that is, how long a learned MAC Address is allowed to remain idle).
-
Page 116: L2 Multicast Control
DGS-3000 Series Gigabit Ethernet Switch Web UI Reference Guide To view the following window, click L2 Features > FDB > ARP & FDB Table as shown below: Figure 4-42 ARP & FDB Table window The fields that can be configured are described below:…
-
Page 117
DGS-3000 Series Gigabit Ethernet Switch Web UI Reference Guide Figure 4-43 IGMP Snooping Settings window The fields that can be configured are described below: Parameter Description IGMP Snooping State Click to enable or disable the IGMP Snooping state. Max Learned Entry Enter the maximum learning entry value. -
Page 118
DGS-3000 Series Gigabit Ethernet Switch Web UI Reference Guide Proxy Reporting Source Enter the source IP of proxy reporting integrated report. Proxy Reporting State Use the drop-down menu to enable or disable the proxy reporting. If enabled, multiple IGMP reports or leave for a specific (S, G) will be integrated into one report only before sending to the router port. -
Page 119
DGS-3000 Series Gigabit Ethernet Switch Web UI Reference Guide configuration. Click the Select All button to select all the ports for configuration. Click the Clear All button to unselect all the ports for configuration. Click the Apply button to accept the changes made. -
Page 120
DGS-3000 Series Gigabit Ethernet Switch Web UI Reference Guide The fields that can be configured are described below: Parameter Description VLAN Name Enter the VLAN name of the multicast group. VID List Enter the VID list or of the multicast group. -
Page 121
DGS-3000 Series Gigabit Ethernet Switch Web UI Reference Guide NOTE: The abbreviations used on this page are Static Router Port (S), Dynamic Router Port (D) and Forbidden Router Port (F). IGMP Snooping Group Users can view the Switch’s IGMP Snooping Group Table. IGMP Snooping allows the Switch to read the Multicast Group IP address and the corresponding MAC address from IGMP packets that pass through the Switch. -
Page 122
DGS-3000 Series Gigabit Ethernet Switch Web UI Reference Guide The fields that can be configured are described below: Parameter Description VLAN Name The VLAN Name of the multicast group. VID List The VLAN ID list of the multicast group. Click the Find button to locate a specific entry based on the information entered. -
Page 123
DGS-3000 Series Gigabit Ethernet Switch Web UI Reference Guide Figure 4-53 Browse IGMP Snooping Counter window Click the Clear Counter button to clear all the information displayed in the fields. Click the Refresh button to refresh the display table so that new information will appear. -
Page 124: Mld Snooping
DGS-3000 Series Gigabit Ethernet Switch Web UI Reference Guide To view the following window, click L2 Features > L2 Multicast Control > IGMP Snooping > CPU Filter L3 control Packet Settings as shown below: Figure 4-55 CPU Filter L3 Control Packet Settings window…
-
Page 125
DGS-3000 Series Gigabit Ethernet Switch Web UI Reference Guide traffic to that port. This entry in the multicast routing table records the port, the VLAN ID, and the associated multicast IPv6 multicast group address, and then considers this port to be an active listening port. The active listening ports are the only ones to receive multicast group data. -
Page 126
DGS-3000 Series Gigabit Ethernet Switch Web UI Reference Guide Figure 4-56 MLD Snooping Settings window The fields that can be configured are described below: Parameter Description MLD Snooping State Click to enable or disable the MLD snooping state. Max Learning Entry Value Enter the maximum learning entry value. -
Page 127
DGS-3000 Series Gigabit Ethernet Switch Web UI Reference Guide By default, the robustness variable is set to 2. You might want to increase this value if you expect a subnet to be loosely. Last Listener Query The maximum amount of time between group-specific query messages, including Interval (1-25) those sent in response to done-group messages. -
Page 128
DGS-3000 Series Gigabit Ethernet Switch Web UI Reference Guide configuration. Click the Select All button to select all the ports for configuration. Click the Clear All button to unselect all the ports for configuration. Click the Apply button to accept the changes made. -
Page 129
DGS-3000 Series Gigabit Ethernet Switch Web UI Reference Guide Figure 4-60 MLD Snooping Static Group Settings window The fields that can be configured are described below: Parameter Description VLAN Name The name of the VLAN on which the static group resides. -
Page 130
DGS-3000 Series Gigabit Ethernet Switch Web UI Reference Guide Figure 4-62 MLD Router Port window Parameter Description Enter a VLAN ID. Click the Find button to locate a specific entry based on the information entered. Enter a page number and click the Go button to navigate to a specific page when multiple pages exist. -
Page 131
DGS-3000 Series Gigabit Ethernet Switch Web UI Reference Guide MLD Snooping Forwarding Table This page displays the switch’s current MLD snooping forwarding table. It provides an easy way for user to check the list of ports that the multicast group comes from and specific sources that it will be forwarded to. The packet comes from the source VLAN. -
Page 132
DGS-3000 Series Gigabit Ethernet Switch Web UI Reference Guide Click the Packet Statistics link to view the MLD Snooping Counter Settings for the specific entry. After clicking the Packet Statistics link, the following window will appear: Figure 4-66 Browse MLD Snooping Counter window Click the Clear Counter button to clear all the information displayed in the fields. -
Page 133: Multicast Vlan
DGS-3000 Series Gigabit Ethernet Switch Web UI Reference Guide Multicast VLAN In a switching environment, multiple VLANs may exist. Every time a multicast query passes through the Switch, the switch must forward separate different copies of the data to each VLAN on the system, which, in turn, increases data traffic and may clog up the traffic path.
-
Page 134
DGS-3000 Series Gigabit Ethernet Switch Web UI Reference Guide After clicking the Group List link, the following window will appear: Figure 4-69 Multicast Group Profile Multicast Address Settings window The fields that can be configured are described below: Parameter Description Multicast Address List Enter the multicast address list value. -
Page 135
DGS-3000 Series Gigabit Ethernet Switch Web UI Reference Guide Click the Profile List link to configure the IGMP Snooping Multicast VLAN Settings for the specific entry. Click the Edit button to configure the IGMP Snooping Multicast VLAN Settings for the specific entry. -
Page 136
DGS-3000 Series Gigabit Ethernet Switch Web UI Reference Guide Figure 4-72 IGMP Snooping Multicast VLAN Group List Settings window The fields that can be configured are described below: Parameter Description Profile Name Use the drop-down menu to select the IGMP Snooping Multicast VLAN Group Profile name. -
Page 137
DGS-3000 Series Gigabit Ethernet Switch Web UI Reference Guide Figure 4-74 Multicast Group Profile Multicast Address Settings window The fields that can be configured are described below: Parameter Description Multicast Address List Enter the multicast address list. Click the Add button to add a new entry based on the information entered. -
Page 138
DGS-3000 Series Gigabit Ethernet Switch Web UI Reference Guide Click the Edit button to configure the MLD Snooping Multicast VLAN Settings for the specific entry. Click the Delete button to remove the specific entry. After clicking the Edit button, the following window will appear: Figure 4-76 MLD Snooping Multicast VLAN Settings –… -
Page 139: Multicast Filtering
DGS-3000 Series Gigabit Ethernet Switch Web UI Reference Guide Figure 4-77 MLD Snooping Multicast VLAN Group List Settings window The fields that can be configured are described below: Parameter Description Profile Name Use the drop-down menu to select the MLD Snooping Multicast VLAN Group Profile name.
-
Page 140
DGS-3000 Series Gigabit Ethernet Switch Web UI Reference Guide After clicking the Group List link, the following window will appear: Figure 4-79 Multicast Address Group List Settings window The fields that can be configured are described below: Parameter Description Multicast Address List Enter the multicast address list. -
Page 141: Ipv6 Multicast Filtering
DGS-3000 Series Gigabit Ethernet Switch Web UI Reference Guide Enter a page number and click the Go button to navigate to a specific page when multiple pages exist. IPv4 Max Multicast Group Settings This window is used to configure the ports and VLANs on the Switch that will be a part of the maximum filter group, up to a maximum of 1024.
-
Page 142
DGS-3000 Series Gigabit Ethernet Switch Web UI Reference Guide Figure 4-82 IPv4 Multicast Profile Settings window The fields that can be configured are described below: Parameter Description Profile ID (1-24) Enter a Profile ID between 1 and 24. Profile Name Enter a name for the IP Multicast Profile. -
Page 143
DGS-3000 Series Gigabit Ethernet Switch Web UI Reference Guide Figure 4-84 IPv6 Limited Multicast Range Settings window The fields that can be configured are described below: Parameter Description Ports / VID List Select the appropriate port(s) or VLAN IDs used for the configuration here. -
Page 144: Multicast Filtering Mode
DGS-3000 Series Gigabit Ethernet Switch Web UI Reference Guide Enter a page number and click the Go button to navigate to a specific page when multiple pages exist. Multicast Filtering Mode Users can configure the multicast filtering mode. To view the following window, click L2 Features > Multicast Filtering > Multicast Filtering Mode as shown below:…
-
Page 145
DGS-3000 Series Gigabit Ethernet Switch Web UI Reference Guide This window is used to enable the ERPS function on the switch. EEE and ERPS are mutually exclusive functions. NOTE: STP and LBD should be disabled on the ring ports before enabling ERPS. The ERPS cannot be enabled before the R-APS VLAN is created, and ring ports, RPL port, RPL owner, are configured. -
Page 146
DGS-3000 Series Gigabit Ethernet Switch Web UI Reference Guide Figure 4-88 Edit ERPS Ring window The fields that can be configured or displayed are described below: Parameter Description Ring ID Select to enter the ID of the physical ring. Instance ID Select to enter the ID of the ring instance. -
Page 147
DGS-3000 Series Gigabit Ethernet Switch Web UI Reference Guide Click the Back button to return to the previous window. After click the Edit Instance button, the following window will appear: Figure 4-91 Ring Instance Settings window The fields that can be configured or displayed are described below:… -
Page 148: Lldp
DGS-3000 Series Gigabit Ethernet Switch Web UI Reference Guide Click the Apply button to accept the changes made for each individual section. Click the Clear button to clear all the information entered in the fields. Click the Back button to return to the previous window.
-
Page 149
DGS-3000 Series Gigabit Ethernet Switch Web UI Reference Guide from an LLDP neighbor. To set the LLDP Notification Interval, enter a value in seconds (5 to 3600). Click the Apply button to accept the changes made for each individual section. -
Page 150
DGS-3000 Series Gigabit Ethernet Switch Web UI Reference Guide Click the Apply button to accept the changes made. NOTE: The IPv4 or IPv6 address entered here should be an existing LLDP management IP address. LLDP Management Address List This window is used to view the LLDP management address list. -
Page 151
DGS-3000 Series Gigabit Ethernet Switch Web UI Reference Guide Figure 4-95 LLDP Basic TLVs Settings window The fields that can be configured are described below: Parameter Description From Port / To Port Select the port range to use for this configuration. -
Page 152
DGS-3000 Series Gigabit Ethernet Switch Web UI Reference Guide Figure 4-96 LLDP Dot1 TLVs Settings window The fields that can be configured are described below: Parameter Description From Port / To Port Use the drop-down menu to select the port range to use for this configuration. -
Page 153
DGS-3000 Series Gigabit Ethernet Switch Web UI Reference Guide Figure 4-97 LLDP Dot3 TLVs Settings window The fields that can be configured are described below: Parameter Description From Port / To Port Use the drop-down menu to select the port range to use for this configuration. -
Page 154
DGS-3000 Series Gigabit Ethernet Switch Web UI Reference Guide Figure 4-98 LLDP Statistics System window The fields that can be configured are described below: Parameter Description Port Use the drop-down menu to select a port. Click the Find button to locate a specific entry based on the information entered. -
Page 155
DGS-3000 Series Gigabit Ethernet Switch Web UI Reference Guide Figure 4-100 LLDP Local Port Information – Show Normal window The fields that can be configured are described below: Parameter Description Port Use the drop-down menu to select a port. Click the Find button to locate a specific entry based on the information entered. -
Page 156: Lldp-Med
DGS-3000 Series Gigabit Ethernet Switch Web UI Reference Guide After clicking the Show Normal button, the following window will appear: Figure 4-103 LLDP Remote Port Information – Show Normal window Click the <<Back button to return to the previous page.
-
Page 157
DGS-3000 Series Gigabit Ethernet Switch Web UI Reference Guide Figure 4-105 LLDP-MED Port Settings window The fields that can be configured are described below: Parameter Description From Port / To Port Select the port range to use for this configuration. -
Page 158: Nlb Fdb Settings
DGS-3000 Series Gigabit Ethernet Switch Web UI Reference Guide The fields that can be configured are described below: Parameter Description Port Use the drop-down menu to select a port. Click the Find button to locate a specific entry based on the information entered.
-
Page 159: Flex Link Settings
DGS-3000 Series Gigabit Ethernet Switch Web UI Reference Guide Figure 4-109 NLB FDB Settings window The fields that can be configured are described below: Parameter Description Unicast Click to create NLB unicast FDB entry. Multicast Click to NLB multicast FDB entry.
-
Page 160
DGS-3000 Series Gigabit Ethernet Switch Web UI Reference Guide Backup Port Select a port to be the backup port in the Flex Link group. Click the Apply button to accept the changes made. Click the Refresh button to refresh the display table so that new entries will appear. -
Page 161: Chapter 5 L3 Features
DGS-3000 Series Gigabit Ethernet Switch Web UI Reference Guide Chapter 5 L3 Features IPv4 Static/Default Route Settings IPv4 Route Table IPv6 Static/Default Route Settings IPv4 Static/Default Route Settings The Switch supports static default routing for IPv4 formatted addressing. Users can create a gateway for IPv4. Once the gateway has been set, the Switch will send an ARP request packet to the next hop router that has been set by the user.
-
Page 162: Ipv6 Static/Default Route Settings
DGS-3000 Series Gigabit Ethernet Switch Web UI Reference Guide Figure 5-2 IPv4 Route Table window The fields that can be configured are described below: Parameter Description Network Address Click the radio button and enter the destination network address of the route to be displayed.
-
Page 163: Chapter 6 Qos
DGS-3000 Series Gigabit Ethernet Switch Web UI Reference Guide Chapter 6 802.1p Settings Bandwidth Control Traffic Control Settings DSCP HOL Blocking Prevention Scheduling Settings The Switch supports 802.1p priority queuing Quality of Service. The following section discusses the implementation of QoS (Quality of Service) and benefits of using 802.1p priority queuing.
-
Page 164: 802.1P Settings
DGS-3000 Series Gigabit Ethernet Switch Web UI Reference Guide quickly as possible, thus prioritizing the queue and allowing for an uninterrupted stream of packets, which optimizes the use of bandwidth available for the video conference. Understanding QoS The Switch supports 802.1p priority queuing. The Switch has eight priority queues. These priority queues are numbered from 7 (Class 7) —…
-
Page 165: 802.1P User Priority Settings
DGS-3000 Series Gigabit Ethernet Switch Web UI Reference Guide Figure 6-2 Default Priority Settings window The fields that can be configured are described below: Parameter Description From Port / To Port Select the starting and ending ports to use. Priority Use the drop-down menu to select a value from 0 to 7.
-
Page 166: 802.1P Map Settings
DGS-3000 Series Gigabit Ethernet Switch Web UI Reference Guide 802.1p Map Settings This window is used to the mapping of 802.1p to the packet’s initial color. To view the following window, click QoS > 802.1p Settings > 802.1p Map Settings as shown below: Figure 6-4 802.1p Map Settings window…
-
Page 167: Queue Bandwidth Control Settings
DGS-3000 Series Gigabit Ethernet Switch Web UI Reference Guide Figure 6-5 Bandwidth Control Settings window The fields that can be configured or displayed are described below: Parameter Description From Port / To Port Use the drop-down menu to select the port range to use for this configuration.
-
Page 168: Traffic Control Settings
DGS-3000 Series Gigabit Ethernet Switch Web UI Reference Guide To view the following window, click QoS > Bandwidth Control > Queue Bandwidth Control Settings as shown below: Figure 6-6 Queue Bandwidth Control Settings window The fields that can be configured are described below:…
-
Page 169
DGS-3000 Series Gigabit Ethernet Switch Web UI Reference Guide Packet storms are monitored to determine if too many packets are flooding the network based on threshold levels provided by the user. Once a packet storm has been detected, the Switch will drop packets coming into the Switch until the storm has subsided. -
Page 170
DGS-3000 Series Gigabit Ethernet Switch Web UI Reference Guide Shutdown – Utilizes the Switch’s software Traffic Control mechanism to determine the Packet Storm occurring. Once detected, the port will deny all incoming traffic to the port except STP BPDU packets, which are essential in keeping the Spanning Tree operational on the Switch. -
Page 171: Dscp
DGS-3000 Series Gigabit Ethernet Switch Web UI Reference Guide NOTE: Ports that are in Shutdown Forever mode will be seen as link down in all windows and screens until the user recovers these ports. NOTE: The minimum granularity of storm control on each port is 1 packet per second.
-
Page 172
DGS-3000 Series Gigabit Ethernet Switch Web UI Reference Guide The DSCP-to-DSCP mapping is used in the swap of DSCP of the packet when the packet is ingresses to the port. The remaining processing of the packet will base on the new DSCP. By default, the DSCP is mapped to the same DSCP. -
Page 173: Hol Blocking Prevention
DGS-3000 Series Gigabit Ethernet Switch Web UI Reference Guide Figure 6-11 DSCP Map Settings — DSCP Color window The fields that can be configured are described below: Parameter Description From Port / To Port Use the drop-down menu to select a range of port to configure.
-
Page 174: Scheduling Settings
DGS-3000 Series Gigabit Ethernet Switch Web UI Reference Guide Figure 6-12 HOL blocking Prevention window The fields that can be configured are described below: Parameter Description HOL Blocking Click the radio buttons to enable or disable the HOL blocking prevention global Prevention State setting.
-
Page 175: Qos Scheduling Mechanism
DGS-3000 Series Gigabit Ethernet Switch Web UI Reference Guide Parameter Description From Port / To Port Enter the port or port list you wish to configure. Class ID Select the Class ID, from 0-7 to configure for the QoS parameters.
-
Page 176
DGS-3000 Series Gigabit Ethernet Switch Web UI Reference Guide NOTE: The settings you assign to the queues, numbers 0-7, represent the IEEE 802.1p priority tag number. -
Page 177: Chapter 7 Acl
DGS-3000 Series Gigabit Ethernet Switch Web UI Reference Guide Chapter 7 ACL Configuration Wizard Access Profile List CPU Access Profile List ACL Finder ACL Flow Meter ACL Configuration Wizard The ACL Configuration Wizard will aid the user in the creation of access profiles and ACL Rules automatically by simply inputting the address or service type and the action needed.
-
Page 178: Access Profile List
DGS-3000 Series Gigabit Ethernet Switch Web UI Reference Guide IPv6 – Selecting this option will allow the user to enter a range of IPv6 addresses for this rule. Action Select Permit to specify that the packets that match the access profile are forwarded by the Switch, according to any additional rule added (see below).
-
Page 179: Add An Ethernet Acl Profile
DGS-3000 Series Gigabit Ethernet Switch Web UI Reference Guide Click the Add/View Rules button to view or add ACL rules within the specified profile ID. For profile IDs 1 and 2, click the Delete button to remove all the settings within these profiles. For profile ID 3 or higher, click the Delete button to remove the specific entry.
-
Page 180
DGS-3000 Series Gigabit Ethernet Switch Web UI Reference Guide Select IPv4 ACL to instruct the Switch to examine the IPv4 address in each frame’s header. Select IPv6 ACL to instruct the Switch to examine the IPv6 address in each frame’s header. -
Page 181
DGS-3000 Series Gigabit Ethernet Switch Web UI Reference Guide Figure 7-6 Add Access Rule window (Ethernet ACL) The fields that can be configured are described below: Parameter Description Access ID (1-128) Type in a unique identifier number for this access. This value can be set from 1 to 128. -
Page 182: Adding An Ipv4 Acl Profile
DGS-3000 Series Gigabit Ethernet Switch Web UI Reference Guide Otherwise, a packet will have its incoming 802.1p user priority re-written to its original value before being forwarded by the Switch. For more information on priority queues, CoS queues and mapping for 802.1p, see the QoS section of this manual.
-
Page 183
DGS-3000 Series Gigabit Ethernet Switch Web UI Reference Guide Figure 7-8 Add ACL Profile window (IPv4 ACL) The fields that can be configured are described below: Parameter Description Profile ID (1-512) Enter a unique identifier number for this profile set. This value can be set from 1 to 512. -
Page 184
DGS-3000 Series Gigabit Ethernet Switch Web UI Reference Guide Select ICMP to instruct the Switch to examine the Internet Control Message Protocol (ICMP) field in each frame’s header. Select Type to further specify that the access profile will apply an ICMP type value, or specify Code to further specify that the access profile will apply an ICMP code value. -
Page 185
DGS-3000 Series Gigabit Ethernet Switch Web UI Reference Guide Figure 7-10 Access Rule List window (IPv4 ACL) Click the Add Rule button to create a new ACL rule in this profile. Click the <<Back button to return to the previous page. -
Page 186
DGS-3000 Series Gigabit Ethernet Switch Web UI Reference Guide Destination IP Enter the destination IP address. Address Destination IP Select and enter the destination IP address mask. Address Mask DSCP Enter the DSCP value. Protocol Selecting this option instructs the Switch to examine the protocol type value in each frame’s header. -
Page 187: Adding An Ipv6 Acl Profile
DGS-3000 Series Gigabit Ethernet Switch Web UI Reference Guide Priority (0-7) Select the corresponding check box if you want to re-write the 802.1p default priority of a packet to the value entered in the Priority field, which meets the criteria specified previously in this command, before forwarding it on to the specified CoS queue.
-
Page 188
DGS-3000 Series Gigabit Ethernet Switch Web UI Reference Guide Figure 7-13 Add ACL Profile window (IPv6 ACL) The fields that can be configured are described below: Parameter Description Profile ID (1-512) Enter a unique identifier number for this profile set. This value can be set from 1 to 512. -
Page 189
DGS-3000 Series Gigabit Ethernet Switch Web UI Reference Guide apply an ICMP code value. IPv6 Source Mask The user may specify an IP address mask for the source IPv6 address by selecting the corresponding check box and entering the IP address mask. -
Page 190
DGS-3000 Series Gigabit Ethernet Switch Web UI Reference Guide Figure 7-16 Add Access Rule (IPv6 ACL) The fields that can be configured are described below: Parameter Description Access ID (1-128) Type in a unique identifier number for this access. This value can be set from 1 to 128. -
Page 191
DGS-3000 Series Gigabit Ethernet Switch Web UI Reference Guide Replace ToS Specify that the IP precedence of the outgoing packet is changed with the new value. If Precedence (0-7) used without an action priority, the packet is sent to the default TC. -
Page 192: Adding A Packet Content Acl Profile
DGS-3000 Series Gigabit Ethernet Switch Web UI Reference Guide Figure 7-17 Access Rule Detail Information (IPv6 ACL) Click the Show All Rules button to navigate back to the Access Rule List. Adding a Packet Content ACL Profile The window shown below is the Add ACL Profile window for Packet Content: To use specific filtering masks in this ACL profile, click the packet filtering mask field to highlight it red.
-
Page 193
DGS-3000 Series Gigabit Ethernet Switch Web UI Reference Guide Select IPv4 ACL to instruct the Switch to examine the IPv4 address in each frame’s header. Select IPv6 ACL to instruct the Switch to examine the IPv6 address in each frame’s header. -
Page 194
DGS-3000 Series Gigabit Ethernet Switch Web UI Reference Guide Click the Add Rule button to create a new ACL rule in this profile. Click the <<Back button to return to the previous page. Click the Show Details button to view more information about the specific rule created. -
Page 195: Cpu Access Profile List
DGS-3000 Series Gigabit Ethernet Switch Web UI Reference Guide original value before being forwarded by the Switch. For more information on priority queues, CoS queues and mapping for 802.1p, see the QoS section of this manual. Replace Priority Select to replace the Priority value in the adjacent field.
-
Page 196: Adding A Cpu Ethernet Acl Profile
DGS-3000 Series Gigabit Ethernet Switch Web UI Reference Guide Creating an access profile for the CPU is divided into two basic parts. The first is to specify which part or parts of a frame the Switch will examine, such as the MAC source address or the IP destination address. The second part is entering the criteria the Switch will use to determine what to do with the frame.
-
Page 197
DGS-3000 Series Gigabit Ethernet Switch Web UI Reference Guide Figure 7-24 Add CPU ACL Profile (Ethernet ACL) The fields that can be configured are described below: Parameter Description Profile ID (1-5) Enter a unique identifier number for this profile set. This value can be set from 1 to 5. -
Page 198
DGS-3000 Series Gigabit Ethernet Switch Web UI Reference Guide Figure 7-25 CPU Access Profile Detail Information (Ethernet ACL) Click the Show All Profiles button to navigate back to the CPU ACL Profile List Page. After clicking the Add/View Rules button, the following window will appear: Figure 7-26 CPU Access Rule List (Ethernet ACL) Click the Add Rule button to create a new CPU ACL rule in this profile. -
Page 199: Adding A Cpu Ipv4 Acl Profile
DGS-3000 Series Gigabit Ethernet Switch Web UI Reference Guide Auto Assign – Select this check box will instruct the Switch to automatically assign an Access ID for the rule being created. VLAN Name Enter the VLAN name. VLAN ID Enter the VLAN ID.
-
Page 200
DGS-3000 Series Gigabit Ethernet Switch Web UI Reference Guide Figure 7-29 Add CPU ACL Profile (IPv4 ACL) The fields that can be configured are described below: Parameter Description Profile ID (1-5) Enter a unique identifier number for this profile set. This value can be set from 1 to 5. -
Page 201
DGS-3000 Series Gigabit Ethernet Switch Web UI Reference Guide Select IGMP to instruct the Switch to examine the Internet Group Management Protocol (IGMP) field in each frame’s header. Select Type to further specify that the access profile will apply an IGMP type value. -
Page 202
DGS-3000 Series Gigabit Ethernet Switch Web UI Reference Guide Click the <<Back button to return to the previous page. Click the Show Details button to view more information about the specific rule created. Click the Delete Rules button to remove the specific entry. -
Page 203: Adding A Cpu Ipv6 Acl Profile
DGS-3000 Series Gigabit Ethernet Switch Web UI Reference Guide Select TCP to use the TCP port number contained in an incoming packet as the forwarding criterion. Selecting TCP requires that you specify a source port mask and/or a destination port mask.
-
Page 204
DGS-3000 Series Gigabit Ethernet Switch Web UI Reference Guide After clicking the Add CPU ACL Profile button, the following window will appear: Figure 7-34 Add CPU ACL Profile (IPv6 ACL) The fields that can be configured are described below: Parameter… -
Page 205
DGS-3000 Series Gigabit Ethernet Switch Web UI Reference Guide After clicking the Show Details button, the following window will appear: Figure 7-35 CPU Access Profile Detail Information (IPv6 ACL) Click the Show All Profiles button to navigate back to the CPU ACL Profile List Page. -
Page 206: Adding A Cpu Packet Content Acl Profile
DGS-3000 Series Gigabit Ethernet Switch Web UI Reference Guide Parameter Description Access ID (1-100) Enter a unique identifier number for this access. This value can be set from 1 to 100. Auto Assign – Select this check box will instruct the Switch to automatically assign an Access ID for the rule being created.
-
Page 207
DGS-3000 Series Gigabit Ethernet Switch Web UI Reference Guide Figure 7-39 Add CPU ACL Profile (Packet Content ACL) The fields that can be configured are described below: Parameter Description Profile ID (1-5) Enter a unique identifier number for this profile set. This value can be set from 1 to5. -
Page 208
DGS-3000 Series Gigabit Ethernet Switch Web UI Reference Guide Figure 7-40 CPU Access Profile Detail Information (Packet Content ACL) Click the Show All Profiles button to navigate back to the CPU ACL Profile List Page. After clicking the Add/View Rules button, the following window will appear: Figure 7-41 CPU Access Rule List (Packet Content ACL) Click the Add Rule button to create a new CPU ACL rule in this profile. -
Page 209: Acl Finder
DGS-3000 Series Gigabit Ethernet Switch Web UI Reference Guide Offset This field will instruct the Switch to mask the packet header beginning with the offset value specified: Offset 0-15 — Enter a value in hex form to mask the packet from the beginning of the packet to the 15th byte.
-
Page 210: Acl Flow Meter
DGS-3000 Series Gigabit Ethernet Switch Web UI Reference Guide Port Enter the port number for the ACL rule finder to identify the rule. State Use the drop-down menu to select the state. Normal — Allow the user to find normal ACL rules.
-
Page 211
DGS-3000 Series Gigabit Ethernet Switch Web UI Reference Guide Figure 7-45 ACL Flow Meter The fields that can be configured are described below: Parameter Description Profile ID Use the drop-down menu to select it and enter the Profile ID for the flow meter. -
Page 212
DGS-3000 Series Gigabit Ethernet Switch Web UI Reference Guide Profile Name Click the radio button and enter the Profile Name for the flow meter. Access ID (1-128) Enter the Access ID for the flow meter. Mode Rate – Specify the rate for single rate two color mode. -
Page 213: Chapter 8 Security
DGS-3000 Series Gigabit Ethernet Switch Web UI Reference Guide Chapter 8 Security 802.1X RADIUS IP-MAC-Port Binding (IMPB) MAC-based Access Control (MAC) Web-based Access Control (WAC) Compound Authentication Port Security ARP Spoofing Prevention Settings BPDU Attack Protection Loopback Detection Settings Traffic Segmentation Settings…
-
Page 214
DGS-3000 Series Gigabit Ethernet Switch Web UI Reference Guide Utilizing this method, unauthorized devices are restricted from connecting to a LAN through a port to which the user is connected. EAPOL packets are the only traffic that can be transmitted through the specific port until authorization is granted. -
Page 215
DGS-3000 Series Gigabit Ethernet Switch Web UI Reference Guide Figure 8-3 The Authentication Server Authenticator The Authenticator (the Switch) is an intermediary between the Authentication Server and the Client. The Authenticator serves two purposes when utilizing the 802.1X function. The first purpose is to request certification information from the Client through EAPOL packets, which is the only information allowed to pass through the Authenticator before access is granted to the Client. -
Page 216
DGS-3000 Series Gigabit Ethernet Switch Web UI Reference Guide 1. The 802.1X State must be Enabled. (Security / 802.1X /802.1X Global Settings) 2. The 802.1X settings must be implemented by port (Security / 802.1X / 802.1X Port Settings) A RADIUS server must be configured on the Switch. (Security / RADIUS / Authentication RADIUS Server Settings) Client The Client is simply the end station that wishes to gain access to the LAN or switch services. -
Page 217
DGS-3000 Series Gigabit Ethernet Switch Web UI Reference Guide Figure 8-6 The 802.1X Authentication Process The D-Link implementation of 802.1X allows network administrators to choose between two types of Access Control used on the Switch, which are: 1. Port-Based Access Control – This method requires only one user to be authenticated per port by a remote RADIUS server to allow the remaining users on the same port access to the network. -
Page 218: 802.1X Global Settings
DGS-3000 Series Gigabit Ethernet Switch Web UI Reference Guide become Unauthorized. Hence, if the Port is actually connected to a shared media LAN segment with more than one attached device, successfully authenticating one of the attached devices effectively provides access to the LAN for all devices on the shared segment.
-
Page 219: 802.1X Port Settings
DGS-3000 Series Gigabit Ethernet Switch Web UI Reference Guide To view this window, click Security > 802.1X > 802.1X Global Settings as shown below: Figure 8-9 802.1X Global Settings window The fields that can be configured are described below: Parameter…
-
Page 220
DGS-3000 Series Gigabit Ethernet Switch Web UI Reference Guide Figure 8-10 802.1X Port Settings The fields that can be configured are described below: Parameter Description From Port / To Port Select a range of ports you wish to configure. QuietPeriod (0-65535) This allows the user to set the number of seconds that the Switch remains in the quiet state following a failed authentication exchange with the client. -
Page 221: 802.1X User Settings
DGS-3000 Series Gigabit Ethernet Switch Web UI Reference Guide default setting is Disabled. Port Control This allows the user to control the port authorization state. Select ForceAuthorized to disable 802.1X and cause the port to transition to the authorized state without any authentication exchange required. This means the port transmits and receives normal traffic without 802.1X-based authentication of the…
-
Page 222: Guest Vlan Settings
DGS-3000 Series Gigabit Ethernet Switch Web UI Reference Guide Parameter Description 802.1X User The user can enter an 802.1X user’s username in here. Password The user can enter an 802.1X user’s password in here. Confirm Password The user can re-enter an 802.1X user’s password in here.
-
Page 223: Authenticator State
DGS-3000 Series Gigabit Ethernet Switch Web UI Reference Guide Figure 8-13 Guest VLAN Settings window The fields that can be configured are described below: Parameter Description VLAN Name Enter the pre-configured VLAN name to create as an 802.1X guest VLAN.
-
Page 224: Authenticator Session Statistics
DGS-3000 Series Gigabit Ethernet Switch Web UI Reference Guide Figure 8-15 Authenticator Statistics window The fields that can be configured are described below: Parameter Description Time Interval Use the drop-down menu to select the interval to update the statistics. Click the OK button to accept the changes made.
-
Page 225: Authenticator Diagnostics
DGS-3000 Series Gigabit Ethernet Switch Web UI Reference Guide Figure 8-16 Authenticator Session Statistics window The fields that can be configured are described below: Parameter Description Time Interval Use the drop-down menu to select the interval to update the statistics.
-
Page 226: Initialize Port-Based Port(S)
DGS-3000 Series Gigabit Ethernet Switch Web UI Reference Guide Figure 8-17 Authenticator Diagnostics window The fields that can be configured are described below: Parameter Description Time Interval Use the drop-down menu to select the interval to update the statistics. Click the OK button to accept the changes made.
-
Page 227: Initialize Host-Based Port(S)
DGS-3000 Series Gigabit Ethernet Switch Web UI Reference Guide Parameter Description From Port / To Port Select a range of ports to be displayed. Click the Apply button to accept the changes made. NOTE: The user must first globally enable Authentication Mode in the 802.1X Global Settings window before initializing ports.
-
Page 228: Reauthenticate Host-Based Port(S)
DGS-3000 Series Gigabit Ethernet Switch Web UI Reference Guide Reauthenticate Host-based Port(s) This window is used to display the current status of the re-authenticated host-based port(s). To view this window, click Security > 802.1X > Reauthenticate Host-based Port(s) as shown below:…
-
Page 229: Radius Accounting Settings
DGS-3000 Series Gigabit Ethernet Switch Web UI Reference Guide Server IP Set the RADIUS server IP address. Authentication Port (1- Set the RADIUS authentic server(s) UDP port which is used to transmit RADIUS 65535) data between the Switch and the RADIUS server. The default port is 1812.
-
Page 230
DGS-3000 Series Gigabit Ethernet Switch Web UI Reference Guide Figure 8-24 RAIUS Authentication window The user may also select the desired time interval to update the statistics, between 1s and 60s, where “s” stands for seconds. The default value is one second. -
Page 231: Radius Account Client
DGS-3000 Series Gigabit Ethernet Switch Web UI Reference Guide AccessChallenges The number of RADIUS Access-Challenge packets (valid or invalid) received from this server. AccessResponses The number of malformed RADIUS Access-Response packets received from this server. Malformed packets include packets with an invalid length. Bad authenticators or Signature attributes or known types are not included as malformed access responses.
-
Page 232
DGS-3000 Series Gigabit Ethernet Switch Web UI Reference Guide Figure 8-25 RADIUS Account Client window The user may also select the desired time interval to update the statistics, between 1s and 60s, where “s” stands for seconds. The default value is one second. -
Page 233: Ip-Mac-Port Binding (Impb)
DGS-3000 Series Gigabit Ethernet Switch Web UI Reference Guide BadAuthenticators The number of RADIUS Accounting-Response packets, which contained invalid authenticators, received from this server. PendingRequests The number of RADIUS Accounting-Request packets sent to this server that have not yet timed out or received a response. This variable is incremented when an Accounting- Request is sent and decremented due to receipt of an Accounting-Response, a timeout or a retransmission.
-
Page 234: Impb Port Settings
DGS-3000 Series Gigabit Ethernet Switch Web UI Reference Guide Parameter Description Roaming State Click to enable or disable the IMPB roaming. Trap / Log Click to enable or disable the sending of trap/log messages for IP-MAC-port binding. When Enabled, the Switch will send a trap message to the SNMP agent and the Switch log when an ARP packet is received that doesn’t match the IP-MAC-port…
-
Page 235: Impb Entry Settings
DGS-3000 Series Gigabit Ethernet Switch Web UI Reference Guide The fields that can be configured are described below: Parameter Description From Port / To Port Select a range of ports to set for IP-MAC-port binding. ARP Inspection When the ARP inspection function is enabled, the legal ARP packets are forwarded, while the illegal packets are dropped.
-
Page 236: Mac Block List
DGS-3000 Series Gigabit Ethernet Switch Web UI Reference Guide MAC Address Enter the MAC address to bind to the IP Address set above. Ports Specify the switch ports for which to configure this IP-MAC binding entry (IP Address + MAC Address). Select the All Ports check box to configure this entry for all ports on the Switch.
-
Page 237
DGS-3000 Series Gigabit Ethernet Switch Web UI Reference Guide Figure 8-30 DHCP Snooping Max Entry Settings window The fields that can be configured are described below: Parameter Description From Port / To Port Use the drop-down menus to select a range of ports to use. -
Page 238: Nd Snooping
DGS-3000 Series Gigabit Ethernet Switch Web UI Reference Guide Ports Specify the port number. Select the All Ports check box to clear entries for all ports. Select the IPv4 check box to select IPv4 DHCP snooping learned entries. Select the IPv6 check box to select IPv6 DHCP snooping learned entries.
-
Page 239: Dhcp-Pd Snooping
DGS-3000 Series Gigabit Ethernet Switch Web UI Reference Guide Figure 8-33 ND Snooping Entry window The fields that can be configured are described below: Parameter Description Port Use the drop-down menu to select the desired port. Ports Specify the ports for ND snooping entries. Select the All Ports check box to clear entries for all ports.
-
Page 240: Mac-Based Access Control Settings
DGS-3000 Series Gigabit Ethernet Switch Web UI Reference Guide If a port is granted clearance for a MAC address in a VLAN that is not a Guest VLAN, other MAC addresses on that port must be authenticated for access and otherwise will be blocked by the Switch.
-
Page 241: Mac-Based Access Control Local Settings
DGS-3000 Series Gigabit Ethernet Switch Web UI Reference Guide in the MAC-based access control Local Database Settings window. RADIUS – Use this method to utilize a remote RADIUS server as the authenticator for MAC-based access control. Password Enter the password for the RADIUS server, which is to be used for packets being sent requesting authentication.
-
Page 242: Mac-Based Access Control Authentication State
DGS-3000 Series Gigabit Ethernet Switch Web UI Reference Guide VLAN Name Enter the VLAN name of the corresponding MAC address here. VID (1-4094) Enter the VLAN ID of the corresponding MAC address here. Click the Add button to add a new entry based on the information entered.
-
Page 243: Web-Based Access Control (Wac)
WAC by attempting to gain Web access. D-Link’s implementation of WAC uses a virtual IP that is exclusively used by the WAC function and is not known by any other modules of the Switch. In fact, to avoid affecting a Switch’s other features, WAC will only use a virtual IP address to communicate with hosts.
-
Page 244
DGS-3000 Series Gigabit Ethernet Switch Web UI Reference Guide Conditions and Limitations 1. If the client is utilizing DHCP to attain an IP address, the authentication VLAN must provide a DHCP server or a DHCP relay function so that client may obtain an IP address. -
Page 245: Wac Global Settings
DGS-3000 Series Gigabit Ethernet Switch Web UI Reference Guide WAC Global Settings Users can configure the Switch for the Web-based access control function. To view this window, click Security > Web-based Access Control (WAC) > WAC Global Settings as shown below:…
-
Page 246: Wac User Settings
DGS-3000 Series Gigabit Ethernet Switch Web UI Reference Guide WAC User Settings Users can view and set local database user accounts for Web authentication. To view this window, click Security > Web-based Access Control (WAC) > WAC User Settings as shown below:…
-
Page 247: Wac Authentication State
DGS-3000 Series Gigabit Ethernet Switch Web UI Reference Guide Figure 8-42 WAC Port Settings window The fields that can be configured are described below: Parameter Description From Port / To Port Use the drop-down menus to select a range of ports to be enabled as WAC ports.
-
Page 248: Wac Customize Page
DGS-3000 Series Gigabit Ethernet Switch Web UI Reference Guide Figure 8-43 WAC Authentication State window The fields that can be configured are described below: Parameter Description Port List Enter the desired range of ports and select the appropriate check box(s), Authenticated, Authenticating, and Blocked.
-
Page 249: Compound Authentication
DGS-3000 Series Gigabit Ethernet Switch Web UI Reference Guide Figure 8-44 WAC Customize Page window Complete the WAC authentication information in this window to set the WAC page settings. Click the Apply button to implement the changes made. Click the Set to default button to go back to the default settings of all elements.
-
Page 250
DGS-3000 Series Gigabit Ethernet Switch Web UI Reference Guide Figure 8-45 Compound Authentication Settings window The fields that can be configured are described below: Parameter Description Authorization Attributes State Click the radio buttons to enable or disable the Authorization Network State. -
Page 251: Compound Authentication Guest Vlan Settings
DGS-3000 Series Gigabit Ethernet Switch Web UI Reference Guide authentication methods need to be passed. Authorized Mode Toggle between Host-based and Port-based. When Port-based is selected, if one of the attached hosts passes the authentication, all hosts on the same port will be granted access to the network.
-
Page 252
DGS-3000 Series Gigabit Ethernet Switch Web UI Reference Guide Figure 8-47 Port Security Settings window The fields that can be configured are described below: Parameter Description Port Security Trap/Log Click to enable or disable Port Security Traps and Logs on the Switch. -
Page 253: Port Security Vlan Settings
DGS-3000 Series Gigabit Ethernet Switch Web UI Reference Guide Click the Edit button to re-configure the specific entry. Click the View Details button to display the information of the specific entry. After clicking the View Details button, the following window will appear:…
-
Page 254: Port Security Entries
DGS-3000 Series Gigabit Ethernet Switch Web UI Reference Guide Click the Edit button to re-configure the specific entry. Enter a page number and click the Go button to navigate to a specific page when multiple pages exist. Port Security Entries Users can remove an entry from the port security entries learned by the Switch and entered into the forwarding database.
-
Page 255: Bpdu Attack Protection
DGS-3000 Series Gigabit Ethernet Switch Web UI Reference Guide Figure 8-51 ARP Spoofing Prevention Settings window The fields that can be configured are described below: Parameter Description Log State Click to enable or disable the log state of the ARP spoofing prevention.
-
Page 256: Loopback Detection Settings
DGS-3000 Series Gigabit Ethernet Switch Web UI Reference Guide Figure 8-52 BPDU Attack Protection window The fields that can be configured are described below: Parameter Description BPDU Attack Protection Click the radio buttons to enable or disable the BPDU Attack Protection state.
-
Page 257: Traffic Segmentation Settings
DGS-3000 Series Gigabit Ethernet Switch Web UI Reference Guide Loopback Detection port will restart (change to normal state) when the Loopback Detection Recover Time times out. The Loopback Detection function can be implemented on a range of ports at a time. The user may enable or disable this function using the drop-down menu.
-
Page 258: Netbios Filtering Settings
DGS-3000 Series Gigabit Ethernet Switch Web UI Reference Guide To view this window, click Security > Traffic Segmentation Settings as shown below: Figure 8-54 Traffic Segmentation Settings window The fields that can be configured are described below: Parameter Description Port List Enter a list of ports to be included in the traffic segmentation setup.
-
Page 259: Dhcp Server Screening
DGS-3000 Series Gigabit Ethernet Switch Web UI Reference Guide Figure 8-55 NetBIOS Filtering Settings window The fields that can be configured are described below: Parameter Description NetBIOS Filtering Ports Select the appropriate port to include in the NetBIOS filtering configuration.
-
Page 260: Dhcp Offer Permit Entry Settings
DGS-3000 Series Gigabit Ethernet Switch Web UI Reference Guide Figure 8-56 DHCP Server Screening Port Settings window The fields that can be configured are described below: Parameter Description DHCP Server Screening Click to enable or disable filtering DHCP server trap.
-
Page 261: Filter Dhcpv6 Server
DGS-3000 Series Gigabit Ethernet Switch Web UI Reference Guide Figure 8-57 DHCP Offer Permit Entry Settings window The fields that can be configured are described below: Parameter Description Server IP Address Enter the IP address of the DHCP server to be permitted.
-
Page 262: Filter Icmpv6
DGS-3000 Series Gigabit Ethernet Switch Web UI Reference Guide Figure 8-58 Filter DHCPv6 Server window The fields that can be configured are described below: Parameter Description Log State Click to enable or disable filtering DHCPv6 server log. Trap State Click to enable or disable filtering DHCPv6 server trap.
-
Page 263: Access Authentication Control
DGS-3000 Series Gigabit Ethernet Switch Web UI Reference Guide Figure 8-59 Filter ICMPv6 window The fields that can be configured are described below: Parameter Description Log State Click to enable or disable the filter ICMPv6 RA all-nodes log state. Trap State Click to enable or disable the filter ICMPv6 RA all-nodes trap state.
-
Page 264: Enable Admin
DGS-3000 Series Gigabit Ethernet Switch Web UI Reference Guide In order for the TACACS / XTACACS / TACACS+ / RADIUS security function to work properly, a TACACS / XTACACS / TACACS+ / RADIUS server must be configured on a device other than the Switch, called an Authentication Server Host and it must include usernames and passwords for authentication.
-
Page 265: Authentication Policy Settings
DGS-3000 Series Gigabit Ethernet Switch Web UI Reference Guide When this window appears, click the Enable Admin button revealing a window for the user to enter authentication (password, username), as shown below. A successful entry will promote the user to Administrator level privileges on the Switch.
-
Page 266: Application Authentication Settings
DGS-3000 Series Gigabit Ethernet Switch Web UI Reference Guide Application Authentication Settings Users can configure Switch configuration applications (Console, Telnet, SSH, HTTP) for login at the user level and at the administration level (Enable Admin) utilizing a previously configured method list.
-
Page 267: Authentication Server Group Settings
DGS-3000 Series Gigabit Ethernet Switch Web UI Reference Guide The fields that can be configured are described below: Parameter Description Network Use the drop-down menu to enable or disable the accounting service for 802.1X port access control. Shell Use the drop-down menu to enable or disable the accounting service for shell events.
-
Page 268: Authentication Server Settings
DGS-3000 Series Gigabit Ethernet Switch Web UI Reference Guide Parameter Description Group Name Enter the name of the authentication server host. Click the Add button to add a new entry based on the information entered. Click the Edit button to re-configure the specific entry.
-
Page 269: Login Method Lists Settings
DGS-3000 Series Gigabit Ethernet Switch Web UI Reference Guide host but, remember that TACACS / XTACACS / TACACS+ / RADIUS are separate entities and are not compatible with each other. The maximum supported number of server hosts is 16. To view this window, click Security > Access Authentication Control > Authentication Server Settings as shown…
-
Page 270: Enable Method Lists Settings
DGS-3000 Series Gigabit Ethernet Switch Web UI Reference Guide authentication request to the first TACACS host in the server group. If no response comes from the server host, the Switch will send an authentication request to the second TACACS host in the server group and so on, until the list is exhausted.
-
Page 271: Accounting Method Lists Settings
DGS-3000 Series Gigabit Ethernet Switch Web UI Reference Guide The sequence of methods implemented in this command will affect the authentication result. For example, if a user enters a sequence of methods like TACACS — XTACACS — Local Enable, the Switch will send an authentication request to the first TACACS host in the server group.
-
Page 272: Local Enable Password Settings
DGS-3000 Series Gigabit Ethernet Switch Web UI Reference Guide To view this window, click Security > Access Authentication Control > Accounting Method Lists Settings as shown below: Figure 8-70 Accounting Method Lists Settings window The fields that can be configured are described below:…
-
Page 273: Ssl Settings
DGS-3000 Series Gigabit Ethernet Switch Web UI Reference Guide Parameter Description Encryption Use the drop-down menu to select the encryption type. Old Local Enable If a password was previously configured for this entry, enter it here in order to change…
-
Page 274
DGS-3000 Series Gigabit Ethernet Switch Web UI Reference Guide Users can download a certificate file for the SSL function on the Switch from a TFTP server. The certificate file is a data record used for authenticating devices on the network. It contains information on the owner, keys for authentication and digital signatures. -
Page 275: Ssh
DGS-3000 Series Gigabit Ethernet Switch Web UI Reference Guide Parameter Description RSA_WITH_RC4_128_MD5 This cipher suite combines the RSA key exchange, stream cipher RC4 encryption with 128-bit keys and the MD5 Hash Algorithm. Use the radio buttons to enable or disable this cipher suite. The default is Disabled.
-
Page 276: Ssh Settings
DGS-3000 Series Gigabit Ethernet Switch Web UI Reference Guide hosts. SSH, with its array of unmatched security features is an essential tool in today’s networking environment. It is a powerful guardian against numerous existing security hazards that now threaten network communications.
-
Page 277: Ssh Authentication Method And Algorithm Settings
DGS-3000 Series Gigabit Ethernet Switch Web UI Reference Guide SSH Authentication Method and Algorithm Settings Users can configure the desired types of SSH algorithms used for authentication encryption. There are three categories of algorithms listed and specific algorithms of each may be enabled or disabled by selecting their corresponding check boxes.
-
Page 278: Ssh User Authentication List
DGS-3000 Series Gigabit Ethernet Switch Web UI Reference Guide default is enabled. Twofish192 Use the check box to enable or disable the twofish192 encryption algorithm. The default is enabled. Twofish256 Use the check box to enable or disable the twofish256 encryption algorithm. The default is enabled.
-
Page 279: Trusted Host Settings
DGS-3000 Series Gigabit Ethernet Switch Web UI Reference Guide for confirmation. Public Key – This parameter should be chosen if the administrator wishes to use the public key on a SSH server for authentication. Host Name Enter an alphanumeric string of no more than 32 characters to identify the remote SSH user.
-
Page 280: Safeguard Engine Settings
DGS-3000 Series Gigabit Ethernet Switch Web UI Reference Guide Parameter Description IPv4 Address Click and enter an IPv4 address to add to the trusted host list. IPv6 Address Click and enter an IPv6 address to add to the trusted host list.
-
Page 281
DGS-3000 Series Gigabit Ethernet Switch Web UI Reference Guide For every consecutive checking interval that reveals the high CPU utilization issue, the Switch will double the time to enter the Exhausted mode to limit the specified traffic to the Switch. In the example above, the Switch doubled the time in the Exhausted mode when consecutive high CPU utilization issues were detected at 5-second intervals. -
Page 282: Dos Attack Prevention Settings
DGS-3000 Series Gigabit Ethernet Switch Web UI Reference Guide DoS Attack Prevention Settings This window is used to configure the Denial-of-Service (DoS) attach prevention settings. To view this window, click Security > DoS Attack Prevention Settings as shown below: Figure 8-79 DoS Attack Prevention Settings window…
-
Page 283: Igmp Access Control Settings
DGS-3000 Series Gigabit Ethernet Switch Web UI Reference Guide Figure 8-80 DoS Attack Prevention Detail — View Detail window Click the <<Back button to discard the changes made and return to the previous page. IGMP Access Control Settings Users can set IGMP authentication, otherwise known as IGMP access control, on individual ports on the Switch.
-
Page 284
DGS-3000 Series Gigabit Ethernet Switch Web UI Reference Guide The fields that can be configured are described below: Parameter Description From Port / To Port Use the drop-down menus to select a range of ports to be enabled as compound authentication ports. -
Page 285: Chapter 9 Network Application
DGS-3000 Series Gigabit Ethernet Switch Web UI Reference Guide Chapter 9 Network Application DHCP DNS Resolver PPPoE Circuit ID Insertion Settings SMTP Settings SNTP Flash File System Settings DHCP DHCP Relay DHCP Relay Global Settings This window is used to enable and configure DHCP Relay Global Settings. The relay hops count limit allows the maximum number of hops (routers) that the DHCP messages can be relayed through to be set.
-
Page 286
DGS-3000 Series Gigabit Ethernet Switch Web UI Reference Guide State Option 82 on the Switch. The default is Disabled. Enabled –When this field is toggled to Enabled, the relay agent will insert and remove DHCP relay information (Option 82 field) in messages between DHCP servers and clients. -
Page 287
DGS-3000 Series Gigabit Ethernet Switch Web UI Reference Guide relay DHCP packets. Disabled — Select this option to disable the DHCP Relay Option 61 state. Click the Apply button to accept the changes made for each individual section. NOTE: If the Switch receives a packet that contains the Option 82 field from a DHCP client and the information-checking feature is enabled, the Switch drops the packet because it is invalid. -
Page 288
DGS-3000 Series Gigabit Ethernet Switch Web UI Reference Guide DHCP Relay Interface Settings This window is used to set up a server, by IP address, for relaying DHCP information to the Switch. The user may enter a previously configured IP interface on the Switch that will be connected directly to the DHCP server using this window. -
Page 289
DGS-3000 Series Gigabit Ethernet Switch Web UI Reference Guide DHCP Relay Option 60 Server Settings This window is used to configure the DHCP relay Option 60 server parameters. To view this window, click Network Application > DHCP > DHCP Relay > DHCP Relay Option 60 Server Settings… -
Page 290
DGS-3000 Series Gigabit Ethernet Switch Web UI Reference Guide Match Type Enter the DHCP Relay Option 60 Match Type value. Exact Match – The Option 60 string in the packet must full match with the specified string. Partial Match – The Option 60 string in the packet only need partial match with the specified string. -
Page 291: Dhcp Server
DGS-3000 Series Gigabit Ethernet Switch Web UI Reference Guide DHCP Server DHCP, or Dynamic Host Configuration Protocol, allows the switch to delegate IP addresses, subnet masks, default gateways and other IP parameters to devices that request this information. This occurs when a DHCP enabled device is booted on or attached to the locally attached network.
-
Page 292
DGS-3000 Series Gigabit Ethernet Switch Web UI Reference Guide To view this window, click Network Application > DHCP > DHCP Server > DHCP Server Exclude Address Settings as shown below: Figure 9-10 DHCP Server Exclude Address Settings window The fields that can be configured are described below:… -
Page 293
DGS-3000 Series Gigabit Ethernet Switch Web UI Reference Guide Figure 9-12 DHCP Server Pool Settings — Edit window The fields that can be configured are described below: Parameter Description IP Address Enter the network address of the pool. Netmask Enter the Netmask for the network address. -
Page 294
DGS-3000 Series Gigabit Ethernet Switch Web UI Reference Guide To view this window, click Network Application > DHCP > DHCP Server > DHCP Server Manual Binding as shown below: Figure 9-13 DHCP Server Manual Binding window The fields that can be configured are described below:… -
Page 295: Dhcpv6 Relay
DGS-3000 Series Gigabit Ethernet Switch Web UI Reference Guide To view this window, click Network Application > DHCP > DHCP Server > DHCP Conflict IP as shown below: Figure 9-15 DHCP Conflict IP window Click the Clear All button to remove all the entries listed in the table.
-
Page 296
DGS-3000 Series Gigabit Ethernet Switch Web UI Reference Guide Figure 9-17 DHCPv6 Relay Settings window The fields that can be configured are described below: Parameter Description Interface Name Enter the name of the IPv6 interface. Select the All check box to select all IPv6 interfaces. -
Page 297
DGS-3000 Series Gigabit Ethernet Switch Web UI Reference Guide Figure 9-19 DHCPv6 Relay Option 37 Settings window The fields that can be configured are described below: Parameter Description State Select the DHCPv6 relay Option 37 state. Enabled — When enabled, the DHCP packet will be inserted with the Option 37 field before being relayed to server. -
Page 298: Dhcp Local Relay Settings
DGS-3000 Series Gigabit Ethernet Switch Web UI Reference Guide Check Select the check state. Enabled — Specify that the check option is enabled. When enabled, packets coming from the client side should not have the Option 18 field. If the client originating packets have the Option 18 field set they will be dropped.
-
Page 299: Dhcpv6 Local Relay Settings
DGS-3000 Series Gigabit Ethernet Switch Web UI Reference Guide Figure 9-22 DHCP Local Relay Option 82 Settings window The fields that can be configured are described below: Parameter Description From Port / To Port Use the drop-down menus to select a range of ports to use.
-
Page 300: Dns Resolver
DGS-3000 Series Gigabit Ethernet Switch Web UI Reference Guide State VLAN Name Click the radio button and enter the name of VLAN. VLAN ID Click the radio button and enter the VLAN ID. There are up to 48 VLANs that can apply to the DHCPv6 local relay operation.
-
Page 301: Dns Resolver Dynamic Name Server Table
DGS-3000 Series Gigabit Ethernet Switch Web UI Reference Guide The fields that can be configured are described below: Parameter Description Server IP Address Enter a DNS Resolver name server IPv4 address here. Server IPv6 Address Enter a DNS Resolver name server IPv6 address here.
-
Page 302: Pppoe Circuit Id Insertion Settings
DGS-3000 Series Gigabit Ethernet Switch Web UI Reference Guide Figure 9-28 DNS Resolver Dynamic Host Name Table window PPPoE Circuit ID Insertion Settings This window is used to configure the PPPoE circuit ID insertion function. To view this window, click Network Application > PPPoE Circuit ID Insertion Settings as shown below:…
-
Page 303: Sntp
DGS-3000 Series Gigabit Ethernet Switch Web UI Reference Guide management of small workgroups or wiring closets, increasing the speed of handling emergency Switch events, and enhancing security by recording questionable events occurring on the Switch. Users can set up the SMTP server for the Switch, along with setting e-mail addresses to which switch log files can be sent when a problem arises on the Switch.
-
Page 304: Sntp Settings
DGS-3000 Series Gigabit Ethernet Switch Web UI Reference Guide SNTP Settings Users can configure the time settings for the Switch. To view this window, click Network Application > SNTP > SNTP Settings as shown below: Figure 9-31 SNTP Settings window…
-
Page 305
DGS-3000 Series Gigabit Ethernet Switch Web UI Reference Guide Figure 9-32 Time Zone Settings window The fields that can be configured are described below: Parameter Description Daylight Saving Time Use this drop-down menu to enable or disable the DST Settings. -
Page 306: Udp
DGS-3000 Series Gigabit Ethernet Switch Web UI Reference Guide To: Month Enter the month that DST will end. To: Time In HH:MM Enter the time DST will end. Parameter Description DST Annual Settings Using annual mode will enable DST seasonal time adjustment. Annual mode requires that the DST beginning and ending date be specified concisely.
-
Page 307: Flash File System Settings
DGS-3000 Series Gigabit Ethernet Switch Web UI Reference Guide To view this window, click Network Application > UDP > UDP Helper > UDP Helper Server Settings as shown below: Figure 9-34 UDP Helper Server Settings window The fields that can be configured are described below:…
-
Page 308
DGS-3000 Series Gigabit Ethernet Switch Web UI Reference Guide Figure 9-36 Flash File System Settings window Enter the Current Path string and click the Go button to navigate to the path entered. Click the link to navigate the C: drive… -
Page 309
DGS-3000 Series Gigabit Ethernet Switch Web UI Reference Guide Figure 9-39 Flash File System Settings – Move window When moving a file to another place, the user must enter the Source and Destination path. Click the Apply button to initiate the copy. -
Page 310: Chapter 10 Oam
DGS-3000 Series Gigabit Ethernet Switch Web UI Reference Guide Chapter 10 Ethernet OAM DULD Settings Cable Diagnostics CFM Settings This window is used to configure the CFM parameters. To view this window, click OAM > CFM > CFM Settings as shown below:…
-
Page 311
DGS-3000 Series Gigabit Ethernet Switch Web UI Reference Guide Click the Edit button to re-configure the specific entry. Click the Delete button to remove the specific entry. Click the Add MA button to add a maintenance association (MA). NOTE: The MD Name value should be less than 22 characters. -
Page 312
DGS-3000 Series Gigabit Ethernet Switch Web UI Reference Guide Figure 10-4 CFM MA Settings — Edit Window The fields that can be configured are described below: Parameter Description This is the control creation of MIPs. None — Don’t create MIPs. -
Page 313
DGS-3000 Series Gigabit Ethernet Switch Web UI Reference Guide Figure 10-5 CFM MEP Settings Window The fields that can be configured are described below: Parameter Description MEP Name MEP name. It is unique among all MEPs configured on the device. -
Page 314
DGS-3000 Series Gigabit Ethernet Switch Web UI Reference Guide Click the Edit AIS button to configure CFM extension AIS settings. Click the Edit LCK button to configure CFM extension LCK settings. Click the <<Back button to discard the changes made and return to the previous page. -
Page 315
DGS-3000 Series Gigabit Ethernet Switch Web UI Reference Guide Click the Apply button to accept the changes made. Click the <<Back button to discard the changes made and return to the previous page. After clicking the Edit AIS button, the following window will appear:… -
Page 316: Cfm Port Settings
DGS-3000 Series Gigabit Ethernet Switch Web UI Reference Guide Figure 10-10 CFM Extension LCK Settings Window The fields that can be configured are described below: Parameter Description State Select to start or stop the management lock function. Click the Apply button to accept the changes made.
-
Page 317: Cfm Mipccm Table
DGS-3000 Series Gigabit Ethernet Switch Web UI Reference Guide Figure 10-12 CFM Port Settings Window The fields that can be configured are described below: Parameter Description From Port / To Port Use the drop-down menus to select a range of ports to be configuration.
-
Page 318: Cfm Linktrace Settings
DGS-3000 Series Gigabit Ethernet Switch Web UI Reference Guide Figure 10-14 CFM Loopback Settings Window The fields that can be configured are described below: Parameter Description MEP Name Select and enter the Maintenance End Point name used. MEP ID (1-8191) Select and enter the Maintenance End Point ID used.
-
Page 319: Cfm Packet Counter
DGS-3000 Series Gigabit Ethernet Switch Web UI Reference Guide Figure 10-15 CFM Linktrace Settings Window The fields that can be configured are described below: Parameter Description MEP Name Select and enter the Maintenance End Point name used. MEP ID (1-8191) Select and enter the Maintenance End Point ID used.
-
Page 320: Cfm Fault Table
DGS-3000 Series Gigabit Ethernet Switch Web UI Reference Guide Figure 10-16 CFM Packet Counter Window The fields that can be configured are described below: Parameter Description Port List Enter a list of ports to be displayed. Select the All Ports check box to display all ports.
-
Page 321: Cfm Mp Table
DGS-3000 Series Gigabit Ethernet Switch Web UI Reference Guide MD Index Select and enter the Maintenance Domain index used. MA Name Select and enter the Maintenance Association name used. MA Index Select and enter the Maintenance Association index used. Click the Find button to locate a specific entry based on the information entered.
-
Page 322: Ethernet Oam Configuration Settings
DGS-3000 Series Gigabit Ethernet Switch Web UI Reference Guide Figure 10-19 Ethernet OAM Settings window The fields that can be configured are described below: Parameter Description From Port / To Port Select a range of ports you wish to configure.
-
Page 323: Ethernet Oam Event Log
DGS-3000 Series Gigabit Ethernet Switch Web UI Reference Guide Figure 10-20 Ethernet OAM Configuration Settings window The fields that can be configured are described below: Parameter Description From Port / To Port Select a range of ports you wish to configure.
-
Page 324: Ethernet Oam Statistics
DGS-3000 Series Gigabit Ethernet Switch Web UI Reference Guide Figure 10-21 Ethernet OAM Event Log window The fields that can be configured are described below: Parameter Description Port Use the drop-down menu to select the port number to view. Port List Enter a list of ports.
-
Page 325: Duld Settings
DGS-3000 Series Gigabit Ethernet Switch Web UI Reference Guide Figure 10-22 Ethernet OAM Statistics window The fields that can be configured are described below: Parameter Description Port List Enter a list of ports. Select the All Ports check box to select all ports.
-
Page 326: Cable Diagnostics
DGS-3000 Series Gigabit Ethernet Switch Web UI Reference Guide Figure 10-23 DULD Settings window The fields that can be configured are described below: Parameter Description DULD Recover Timer Enter the automatic recovery time. Enter 0 to disable this function. (0 or 60-1000000) DULD Operation Select when to operate DULD.
-
Page 327
DGS-3000 Series Gigabit Ethernet Switch Web UI Reference Guide Figure 10-24 Cable Diagnostics window The fields that can be configured are described below: Parameter Description Port Select a port you wish to display. Click the Test button to view the cable diagnostics for a particular port. -
Page 328: Chapter 11 Monitoring
DGS-3000 Series Gigabit Ethernet Switch Web UI Reference Guide Chapter 11 Monitoring Utilization Statistics Mirror sFlow Ping Test Trace Route Peripheral Utilization CPU Utilization Users can display the percentage of the CPU being used, expressed as an integer percentage and calculated as a simple average by time interval.
-
Page 329: Port Utilization
DGS-3000 Series Gigabit Ethernet Switch Web UI Reference Guide To view this window, click Monitoring > Utilization > DRAM & Flash Utilization as shown below: Figure 11-2 DRAM & Flash Utilization window Port Utilization Users can display the percentage of the total available bandwidth being used on the port.
-
Page 330: Port Statistics
DGS-3000 Series Gigabit Ethernet Switch Web UI Reference Guide Port Statistics Packets The Web manager allows various packet statistics to be viewed as either a line graph or a table. Six windows are offered. Received (RX) To select a port to view these statistics for, select the port by using the Port drop-down menu. The user may also use the real-time graphic of the Switch at the top of the web page by simply clicking on a port.
-
Page 331
DGS-3000 Series Gigabit Ethernet Switch Web UI Reference Guide Figure 11-5 RX Packets Analysis Table window The fields that can be configured or displayed are described below: Parameter Description Port Use the drop-down menu to choose the port that will display statistics. -
Page 332
DGS-3000 Series Gigabit Ethernet Switch Web UI Reference Guide Figure 11-6 UMB_cast (RX) window (for Unicast, Multicast, and Broadcast Packets) Click the View Table link to display the information in a table rather than a line graph. Figure 11-7 RX Packets Analysis window (table for Unicast, Multicast, and Broadcast Packets) -
Page 333
DGS-3000 Series Gigabit Ethernet Switch Web UI Reference Guide Multicast Counts the total number of good packets that were received by a multicast address. Broadcast Counts the total number of good packets that were received by a broadcast address. Show/Hide Check whether or not to display Multicast, Broadcast, and Unicast Packets. -
Page 334
DGS-3000 Series Gigabit Ethernet Switch Web UI Reference Guide Figure 11-9 TX Packets Analysis window (table for Bytes and Packets) The fields that can be configured or displayed are described below: Parameter Description Port Use the drop-down menu to choose the port that will display statistics. -
Page 335
DGS-3000 Series Gigabit Ethernet Switch Web UI Reference Guide Figure 11-10 Received (RX) window (for errors) Click the View Table link to display the information in a table rather than a line graph. Figure 11-11 RX Error Analysis window (table) -
Page 336
DGS-3000 Series Gigabit Ethernet Switch Web UI Reference Guide OverSize Counts valid packets received that were longer than 1518 octets and less than the MAX_PKT_LEN. Internally, MAX_PKT_LEN is equal to 1536. Fragment The number of packets less than 64 bytes with either bad framing or an invalid CRC. -
Page 337: Packet Size
DGS-3000 Series Gigabit Ethernet Switch Web UI Reference Guide Figure 11-13 TX Error Analysis window (table) The fields that can be configured or displayed are described below: Parameter Description Port Use the drop-down menu to choose the port that will display statistics.
-
Page 338
DGS-3000 Series Gigabit Ethernet Switch Web UI Reference Guide Figure 11-14 Packet Size window Click the View Table link to display the information in a table rather than a line graph. Figure 11-15 RX Size Analysis window (table) The fields that can be configured or displayed are described below:… -
Page 339: Mirror
DGS-3000 Series Gigabit Ethernet Switch Web UI Reference Guide 127 octets in length inclusive (excluding framing bits but including FCS octets). 128-255 The total number of packets (including bad packets) received that were between 128 and 255 octets in length inclusive (excluding framing bits but including FCS octets).
-
Page 340: Rspan Settings
DGS-3000 Series Gigabit Ethernet Switch Web UI Reference Guide Figure 11-17 Port Mirror Settings — Modify window The fields that can be configured are described below: Parameter Description Target Port Use the drop-down menu to select the Target Port used for Port Mirroring.
-
Page 341: Sflow
DGS-3000 Series Gigabit Ethernet Switch Web UI Reference Guide Figure 11-18 RSPAN Settings window The fields that can be configured are described below: Parameter Description RSPAN State Click the radio buttons to enable or disable the RSPAN feature. VLAN Name Create the RSPAN VLAN by VLAN name.
-
Page 342: Sflow Global Settings
DGS-3000 Series Gigabit Ethernet Switch Web UI Reference Guide sFlow Collector. The architecture and sampling techniques used in the sFlow monitoring system were designed for providing continuous site-wide (and enterprise-wide) traffic monitoring of high speed switched and routed networks. sFlow Global Settings This window is used to enable or disable the sFlow feature.
-
Page 343: Sflow Flow Sampler Settings
DGS-3000 Series Gigabit Ethernet Switch Web UI Reference Guide Parameter Description Analyzer Server ID (1- Specify the ID of a server analyzer where the packet will be forwarded. Owner Name The entity making use of this sFlow analyzer server. When owner is set or modified, the timeout value will become 400 automatically.
-
Page 344: Sflow Counter Poller Settings
DGS-3000 Series Gigabit Ethernet Switch Web UI Reference Guide Click the Apply button to accept the changes made. Click the Delete All button to remove all the entries listed. Click the Edit button to re-configure the specific entry. Click the Delete button to remove the specific entry.
-
Page 345
DGS-3000 Series Gigabit Ethernet Switch Web UI Reference Guide Figure 11-24 Ping Test window The user may click the Infinite times radio button, in the Repeat Pinging for field, which will tell the ping program to keep sending ICMP Echo packets to the specified IP address until the program is stopped. The user may opt to choose a specific number of times to ping the Target IP Address by clicking its radio button and entering a number between 1 and 255. -
Page 346: Trace Route
DGS-3000 Series Gigabit Ethernet Switch Web UI Reference Guide Figure 11-25 Ping Test Result window Click the Stop button to halt the Ping Test. Click the Resume button to resume the Ping Test. Trace Route The trace route page allows the user to trace a route between the switch and a given host on the network.
-
Page 347: Peripheral
DGS-3000 Series Gigabit Ethernet Switch Web UI Reference Guide Click the Start button to initiate the Trace Route. After clicking the Start button, the following window will appear: Figure 11-27 Trace Route Result window Click the Stop button to halt the Trace Route.
-
Page 348: Chapter 12 Save And Tools
DGS-3000 Series Gigabit Ethernet Switch Web UI Reference Guide Chapter 12 Save and Tools Save Configuration / Log Download firmware Upload Firmware Download Configuration Upload Configuration Upload Log File Reset Reboot System Save Configuration / Log To view this window, click Save > Save Configuration / Log, as shown below: Save Configuration allows the user to back up the configuration of the Switch.
-
Page 349: Download Firmware From Ftp
DGS-3000 Series Gigabit Ethernet Switch Web UI Reference Guide Figure 12-4 Download Firmware – TFTP window The fields that can be configured are described below: Parameter Description TFTP Server IP Enter the TFTP server IP address used. IPv4 Click the radio button to enter the TFTP server IP address used.
-
Page 350: Download Firmware From Http
DGS-3000 Series Gigabit Ethernet Switch Web UI Reference Guide Boot Up Select this option to use this firmware as the boot-up firmware. Click Download to initiate the download. Download Firmware From HTTP This window is used to download firmware from a computer to the Switch and updates the switch.
-
Page 351: Upload Firmware To Ftp
DGS-3000 Series Gigabit Ethernet Switch Web UI Reference Guide Domain Name Click the radio button to enter the TFTP server domain name used. Destination File Enter the file name that will be stored in the TFTP server, e.g. runtime.had. Source File Enter the location of the Source File, e.g.
-
Page 352: Download Configuration
DGS-3000 Series Gigabit Ethernet Switch Web UI Reference Guide Download Configuration The following window is used to download the configuration file for the Switch. Download Configuration From TFTP This window is used to download the configuration file from a TFTP Server to the Switch and updates the switch.
-
Page 353: Download Configuration From Http
DGS-3000 Series Gigabit Ethernet Switch Web UI Reference Guide Parameter Description FTP Server IP Enter the FTP Server IP Address used. User Name Enter the appropriate Username used. Password Enter the appropriate Password used. TCP Port (1-65535) Enter the TCP Port number used.
-
Page 354: Upload Configuration To Ftp
DGS-3000 Series Gigabit Ethernet Switch Web UI Reference Guide Figure 12-13 Upload Configuration – TFTP window The fields that can be configured are described below: Parameter Description TFTP Server IP Enter the TFTP server IP address used. IPv4 Click the radio button to enter the TFTP server IP address used.
-
Page 355: Upload Configuration To Http
DGS-3000 Series Gigabit Ethernet Switch Web UI Reference Guide User Name Enter the appropriate Username used. Password Enter the appropriate Password used. TCP Port (1-65535) Enter the TCP Port number used. Destination File Enter the file name that will be stored in the FTP server, e.g. config.cfg.
-
Page 356: Upload Log To Ftp
DGS-3000 Series Gigabit Ethernet Switch Web UI Reference Guide Parameter Description TFTP Server IP Enter the TFTP server IP address used. IPv4 Click the radio button to enter the TFTP server IP address used. IPv6 Click the radio button to enter the TFTP server IPv6 address used.
-
Page 357: Reset
DGS-3000 Series Gigabit Ethernet Switch Web UI Reference Guide Figure 12-18 Upload Log – HTTP window The fields that can be configured are described below: Parameter Description Log Type Select the type of log to be transferred. Click Common Log to upload the common log entries.
-
Page 358
DGS-3000 Series Gigabit Ethernet Switch Web UI Reference Guide Figure 12-20 Reboot System Window Selecting the Yes radio button will instruct the Switch to save the current configuration to non-volatile RAM before restarting the Switch. Selecting the No radio button instructs the Switch not to save the current configuration before restarting the Switch. All of the configuration information entered from the last time Save was executed will be lost. -
Page 359: Appendix A Password Recovery Procedure
This document will explain how the Password Recovery feature can help network administrators reach this goal. The following steps explain how to use the Password Recovery feature on D-Link devices to easily recover passwords. Complete these steps to reset the password: 1.
-
Page 360: Appendix B System Log Entries
DGS-3000 Series Gigabit Ethernet Switch Web UI Reference Guide Appendix B System Log Entries The following table lists all possible entries and their corresponding meanings that will appear in the System Log of this Switch. Category Event Description Log Information…
-
Page 361
DGS-3000 Series Gigabit Ethernet Switch Web UI Reference Guide Category Event Description Log Information Severity Log message upload was Log message upload by <session> was unsuccessful! Warning unsuccessful by (Username: <username>, IP: <ipaddr | ipv6addr>, Web/SNMP/Telnet/SSH/SIM MAC: <macaddr>) Firmware upgraded successfully… -
Page 362
DGS-3000 Series Gigabit Ethernet Switch Web UI Reference Guide Category Event Description Log Information Severity New root port New root port selected (Instance: <InstanceID>, Port: Notice <portNum>) Spanning Tree port status Spanning Tree port status changed (Instance: Notice changed <InstanceID>, Port: <portNum>) <old_status> ->… -
Page 363
DGS-3000 Series Gigabit Ethernet Switch Web UI Reference Guide Category Event Description Log Information Severity method Successful login through Successful login through Console authenticated by Informational Console authenticated by AAA AAA server <ipaddr | ipv6addr> (Username: server <username>) Login failed through Console… -
Page 364
DGS-3000 Series Gigabit Ethernet Switch Web UI Reference Guide Category Event Description Log Information Severity Enable Admin failed through Enable Admin failed through <session> from <ipaddr | Warning Web/Web(SSL)/Telnet/SSH due ipv6addr> due to AAA server timeout or improper to AAA server timeout or configuration (Username: <username>) -
Page 365
DGS-3000 Series Gigabit Ethernet Switch Web UI Reference Guide Category Event Description Log Information Severity This VID will assign to the port and this port will be the VLAN untagged port member. Ingress bandwidth assigned Radius server <ipaddr | ipv6addr> assigned ingress… -
Page 366
DGS-3000 Series Gigabit Ethernet Switch Web UI Reference Guide Category Event Description Log Information Severity a port reaches the maximum stop learning state user limit The authorized user number on Port <portNum> recovers from MAC-based Access Warning a port is below the maximum… -
Page 367
DGS-3000 Series Gigabit Ethernet Switch Web UI Reference Guide Category Event Description Log Information Severity DDM recover from DDM warning Port <portNum> SFP <thresholdType> recover from the Warning threshold <thesholdSubType> warning threshold DDM recover from DDM alarm Port <portNum> SFP <thresholdType> recover from the… -
Page 368
DGS-3000 Series Gigabit Ethernet Switch Web UI Reference Guide Category Event Description Log Information Severity aging interval for that port, the log message will be sent DHCPv6 Relay DHCPv6 relay on a specific [DHCPv6_RELAY(1):]DHCPv6 relay on interface <intf- Informational interface’s administrator state name>… -
Page 369: Appendix C Trap Log Entries
DGS-3000 Series Gigabit Ethernet Switch Web UI Reference Guide Appendix C Trap Log Entries This table lists the trap logs found on the Switch. Trap Name Variable Bind Format MIB Name coldStart RFC-1215 (Rfc-1215.mib) SNMPv2-MIB (SNMPv2-MIB.mib) warmStart RFC-1215 (Rfc-1215.mib) SNMPv2-MIB (SNMPv2-MIB.mib)
-
Page 370
DGS-3000 Series Gigabit Ethernet Switch Web UI Reference Guide Trap Name Variable Bind Format MIB Name 4: dot3OamEventLogLocation 5: dot3OamEventLogWindowHi 6: dot3OamEventLogWindowLo 7: dot3OamEventLogThresholdHi 8: dot3OamEventLogThresholdLo 9: dot3OamEventLogValue 10: dot3OamEventLogRunningTotal 11: dot3OamEventLogEventTotal swPowerFailure 1: swPowerUnitIndex EQUIPMENT-MIB (Equipment.mib) 2: swPowerID 3: swPowerStatus… -
Page 371
DGS-3000 Series Gigabit Ethernet Switch Web UI Reference Guide Trap Name Variable Bind Format MIB Name (mba.mib) 2: swMacBasedAuthInfoPortIndex 3: swMacBasedAuthVID swFilterDetectedTrap 1: swFilterDetectedIP FILTER-MIB (Filter.mib) 2: swFilterDetectedport swFilterDHCPv6ServerDetectedTrap 1: swFilterDetectedIPv6 FILTER-MIB (Filter.mib) 2: swFilterDetectedport swFilterICMPv6RaAllNodeDetectedTra 1: swFilterDetectedIPv6 FILTER-MIB (Filter.mib) -
Page 372
DGS-3000 Series Gigabit Ethernet Switch Web UI Reference Guide Trap Name Variable Bind Format MIB Name swSingleIPMSLinkUp 1: swSingleIPMSID SINGLE-IP-MIB (SingleIP.mib) 2: swSingleIPMSMacAddr 3: ifIndex swSingleIPMSAuthFail 1: swSingleIPMSID SINGLE-IP-MIB (SingleIP.mib) 2: swSingleIPMSMacAddr swSingleIPMSnewRoot 1: swSingleIPMSID SINGLE-IP-MIB (SingleIP.mib) 2: swSingleIPMSMacAddr swSingleIPMSTopologyChange 1: swSingleIPMSID SINGLE-IP-MIB (SingleIP.mib) -
Page 373
DGS-3000 Series Gigabit Ethernet Switch Web UI Reference Guide Trap Name Variable Bind Format MIB Name ntpEntNotifModeChange 1: ntpEntStatusCurrentMode NTPv4-MIB (Ntpv4.mib) ntpEntNotifStratumChange 1: ntpEntStatusDateTime NTPv4-MIB (Ntpv4.mib) 2: ntpEntStatusStratum 3: ntpEntNotifMessage ntpEntNotifSyspeerChanged 1: ntpEntStatusDateTime NTPv4-MIB (Ntpv4.mib) 2: ntpEntStatusActiveRefSourceId 3: ntpEntNotifMessage ntpEntNotifAddAssociation 1: ntpEntStatusDateTime NTPv4-MIB (Ntpv4.mib) -
Page 374: Appendix D Radius Attributes Assignment
DGS-3000 Series Gigabit Ethernet Switch Web UI Reference Guide Appendix D RADIUS Attributes Assignment The RADIUS Attributes Assignment on the DGS-3000 series is used in the following modules: 802.1X (Port-based and Host-based), and MAC-based Access Control. The description that follows explains the following RADIUS Attributes Assignment types: •…
-
Page 375
DGS-3000 Series Gigabit Ethernet Switch Web UI Reference Guide to be used (in the case of a tunnel initiator) or the tunneling protocol in use (in the case of a tunnel terminator). Tunnel-Medium-Type This attribute indicates the transport medium 6 (802) Required being used. -
Page 376: Appendix E Ietf Radius Attributes Support
RADIUS attributes are supported by the IETF standard and Vendor-Specific Attribute (VSA). VSA allows the vendor to create an additionally owned RADIUS attribute. For more information about D-Link VSA, refer to Appendix E RADIUS Attributes Assignment.
-
Page 377
DGS-3000 Series Gigabit Ethernet Switch Web UI Reference Guide NAS-IPv6-Address 2. RADIUS Accounting Attributes Number IETF Attribute User-Name NAS-IP-Address NAS-Port Service-Type Framed-IP-Address Calling-Station-ID NAS-Identifier Acct-Status-Type Acct-Delay-Time Acct-Input-Octets Acct-Output-Octets Acct-Session-ID Acct-Authentic Acct-Session-Time Acct-Input-Packets Acct-Output-Packets Acct-Terminate-Cause Acct-Input-Gigawords Acct-Output-Gigawords NAS-Port-Type NAS-IPv6-Address… -
Page 378: Appendix F Erps Information
DGS-3000 Series Gigabit Ethernet Switch Web UI Reference Guide Appendix F ERPS Information The following switch ports support the ERPS Fast Link Drop Interrupt feature with a recovery time of less than 50 ms: Model Name Port 1 to 8…

Основные характеристики
Коммутатор уровня доступа для сетей Metro Ethernet
Экономически выгодное решение для уровня доступа: наличие гигабитных портов и uplink-портов 10G обеспечивает необходимую полосу пропускания для предоставления широкополосного доступа. Поддержка протокола IPv6 позволяет плавно перейти к сетям нового поколения.
Поддержка Triple Play
Функционал для предоставления IPTV-сервисов и обеспечения качества обслуживания (QoS) позволяет провайдерам повысить рентабельность выделенной линии.
Комплексная защита
Совокупность аппаратных и программных средств обеспечивает комплексную защиту сети от физического воздействия и скрытых атак.
DGS-3000-28SC
Управляемый стекируемый коммутатор 2 уровня
Функции
Решение уровня доступа для сетей Metro Ethernet
20 портов 100/1000Base-X SFP, 4 комбо-порта 10/100/1000Base-T/SFP и 4 uplink-порта 10GBase-X SFP+
Физическое стекирование
Полоса пропускания для стекирования – до 40 Гбит/c (полный дуплекс)
До 6 устройств, объединенных в стек
Надежность аппаратного и программного обеспечения
Порты Ethernet со встроенной защитой от статического электричества до 6 кВ
Возможность подключения резервного источника питания
Восстановление работоспособности в различных топологиях после сбоя менее чем за 50 мс
Функция защиты от петель
Поддержка сервиса Triple Play
Возможность предоставления услуги цифрового телевидения
Простое управление пакетами каналов и сервисов
Строгая аутентификация для подписчиков IPTV
Предотвращение утечки информации
Различные методы аутентификации пользователя/устройства
Возможность аутентификации абонента без необходимости установки клиентского ПО
Строгая привязка по адресам для предотвращения вредоносных атак
Коммутатор DGS-3000-28SC входит в линейку управляемых коммутаторов D-Link 2 уровня и предназначен для использования в сетях Metro Ethernet. Коммутатор оснащен 4 портами 10GBase-X SFP+, что гарантирует высокую производительность при агрегации большого количества гигабитных соединений. DGS-3000-28SC выполнен в корпусе высотой 1U и подходит как для настольной установки, так и для монтажа в телекоммуникационный шкаф.
Надежность
Все Ethernet-порты коммутатора DGS-3000-28SC оснащены встроенной защитой от статического электричества до 6 кВ, что позволяет обезопасить устройство от скачков напряжения, в особенности, если Ethernet-кабели расположены на открытом пространстве или в старых зданиях. На случай перебоев с электроснабжением в коммутаторе предусмотрен дополнительный разъем для подключения резервного источника питания DPS-200A/500A и DPS-500DC/B1 или источника питания постоянного тока с напряжением 12 В. Для обеспечения отказоустойчивости Ethernet-каналов в коммутаторе реализована поддержка протоколов 802.1D Spanning Tree (STP), 802.1w Rapid Spanning Tree (RSTP) и 802.1s Multiple Spanning Tree (MSTP), применение которых позволяет автоматически резервировать маршруты передачи данных. Использование данного функционала обеспечивает передачу и прием кадров даже при возникновении сбоев в сети. Коммутаторы также поддерживают технологию
Ethernet Ring Protection Switching (ERPS, ITU-T G.8032), благодаря которой время восстановления работы кольца после сбоя не превышает 50 мс. Использование функции обнаружения петель Loopback Detection (LBD) предотвращает перегрузку на неконтролируемых сегментах сети, администрируемых абонентами или построенных на базе неуправляемых коммутаторов. Помимо этого, коммутатор DGS-3000-28SC поддерживает функционал агрегирования портов на основе стандарта 802.1AX, применение которого позволяет объединять несколько портов в группу, увеличивая при этом полосу пропускания и повышая отказоустойчивость соединений для обеспечения бесперебойной работы и распределения нагрузки между несколькими сетевыми устройствами.

DGS-3000-28SC
Управляемый стекируемый коммутатор 2 уровня
|
Сервис Triple Play |
Высокий |
уровень |
безопасности |
и |
||||||||||||||
|
В коммутаторе DGS-3000-28SC реализован широкий набор функций |
работоспособности |
|||||||||||||||||
|
многоадресной рассылки 2 уровня, включая IGMP/MLD Snooping, |
В коммутаторе DGS-3000-28SC предусмотрен расширенный |
|||||||||||||||||
|
Fast Leave и фильтрацию. Поддержка данного функционала |
функционал аутентификации пользователя/устройства, включая |
|||||||||||||||||
|
предоставляет возможность работы с IPTV-сервисами, которые |
802.1X, управление доступом на основе Web-интерфейса (WAC) и |
|||||||||||||||||
|
набирают популярность и с каждым годом пользуются все большим |
MAC-адресов (MAC). Функции WAC и MAC позволяют сетевым |
|||||||||||||||||
|
спросом на рынке услуг. Применение функций IGMP/MLD Snooping |
администраторам |
проводить |
аутентификацию |
|||||||||||||||
|
на основе хоста обеспечивает подключение нескольких IPTV- |
пользователя/устройства и управлять безопасностью сети без |
|||||||||||||||||
|
подписчиков к одному сетевому интерфейсу. Профили ISM VLAN |
необходимости установки клиентского программного обеспечения, |
|||||||||||||||||
|
позволяют пользователям быстро и легко назначить или заменить |
что очень важно, в случае, если установка ПО на оборудовании |
|||||||||||||||||
|
предустановленные |
настройки |
для |
портов |
подписчиков |
клиента |
невозможна. |
Также |
коммутатор |
DGS-3000-28SC |
|||||||||
|
многоадресной рассылки. Поддержка IGMP Authentication исключает |
поддерживает функционал Compound Authentication, предоставляя |
|||||||||||||||||
|
возможность несанкционированной IPTV-подписки благодаря |
сетевым администраторам на выбор несколько методов |
|||||||||||||||||
|
проведению аутентификации телевизионных приставок. |
аутентификации для одного устройства. Аутентификация на основе |
|||||||||||||||||
|
Коммутатор |
DGS-3000-28SC |
поддерживает |
расширенный |
узла обеспечивает точное управление доступом для каждого |
||||||||||||||
|
устройства сети. Для интеграции с биллинговыми системами и |
||||||||||||||||||
|
функционал QoS (Quality of Service) для предоставления |
сервисами реализована поддержка протоколов RADIUS и TACACS. |
|||||||||||||||||
|
качественного сервиса Triple Play. Классификация пакетов |
Предусмотренная в коммутаторе DGS-3000-28SC функция IP-MAC- |
|||||||||||||||||
|
осуществляется на основе различных полей заголовка или |
Port Binding (IMPB) обеспечивает строгую привязку по адресам и |
|||||||||||||||||
|
определяемого пользователем содержимого пакета, обеспечивая |
интерфейсам, а ARP Spoofing Prevention – защиту сети от атак типа |
|||||||||||||||||
|
возможность приоритизации трафика. |
С помощью |
функции |
Man-In-The-Middle и ARP Spoofing. |
|||||||||||||||
|
управления полосой пропускания провайдеры смогут определить |
Для обеспечения бесперебойной работы сети в коммутаторе DGS- |
|||||||||||||||||
|
уровень пропускной способности входящего/исходящего канала для |
3000-28SC реализован механизм D-Link Safeguard Engine для защиты |
|||||||||||||||||
|
каждого порта с шагом до 64 Кбит/с. |
центрального |
процессора |
от |
перегрузки |
вредоносным |
|||||||||||||
|
Простота обслуживания, эффективный поиск и |
широковещательным |
трафиком, |
обусловленным |
вирусной |
||||||||||||||
|
активностью. Коммутатор также поддерживает функцию DHCP |
||||||||||||||||||
|
устранение неисправностей |
Screening, обеспечивающую фильтрацию DHCP-запросов от |
|||||||||||||||||
|
Реализованная в коммутаторах поддержка расширенного |
неавторизованных |
DHCP-серверов |
или |
маршрутизаторов. |
||||||||||||||
|
функционала OAM (Operation, Administration and Management) |
Применение функций защиты от BPDU/DoS-атак и фильтрации L3 |
|||||||||||||||||
|
позволяет значительно упростить обслуживание, поиск и устранение |
Control Packet Filtering позволяет повысить уровень безопасности |
|||||||||||||||||
|
неисправностей. С помощью функции диагностики кабеля можно |
сети. |
|||||||||||||||||
|
удаленно контролировать состояние Ethernet-кабеля и определять |
Поддержка IPv6 |
|||||||||||||||||
|
место возникновения неисправности, что позволит провайдеру |
||||||||||||||||||
|
снизить расходы на обслуживание оборудования. Функция |
В |
коммутаторе |
DGS-3000-28SC |
реализована |
поддержка |
|||||||||||||
|
Connectivity Fault Management (CFM, IEEE 802.1ag) предназначена |
функционала IPv6, включая MLD Snooping, WAC, IPv6 ACL/QoS и |
|||||||||||||||||
|
для контроля, поиска и устранения неисправностей в End-To-End |
IMPBv6, что способствует легкой интеграции оборудования в сети |
|||||||||||||||||
|
Ethernet-сетях, предоставляя провайдерам возможность выполнять |
следующего поколения. Помимо этого, данная серия поддерживает |
|||||||||||||||||
|
проверку соединения, изолировать проблемные сегменты сети и |
функции обоих стеков протоколов IPv4/v6, позволяя коммутаторам |
|||||||||||||||||
|
идентифицировать пользователей таких сегментов. Технология D- |
выступать в роли моста между сетями IPv4 и IPv6. |
|||||||||||||||||
|
Link Unidirectional Link Detection (DULD) позволяет отследить |
||||||||||||||||||
|
проблемы |
волоконно-оптического |
соединения, и |
тем |
самым |
повысить стабильность работы кабельной инфраструктуры в сетях
MAN (Metropolitan Area Network).
Технические характеристики
Интерфейс
|
Порты |
20 портов 100/1000Base-X SFP |
4 порта 10GBase-X SFP+ |
|
4 комбо-порта 10/100/1000Base-T/SFP |
||
|
Резервные источники |
DPS-200A/500A и DPS-500DC/B11 |
|
|
питания |
||
|
Консольный порт |
RJ-45 |
|
|
Производительность |
||
|
Коммутационная матрица |
128 Гбит/с |
|
|
Скорость |
95,24 Mpps |
|
|
перенаправления 64- |
||
|
байтных пакетов |
||
|
Таблица MAC-адресов |
16K записей |
|
|
DRAM для CPU |
256 МБ |

DGS-3000-28SC
Управляемый стекируемый коммутатор 2 уровня
|
Буфер пакетов |
1,5 МБ |
|
Flash-память |
32 МБ |
|
Jumbo-фрейм |
13 Кбайт |
|
Физические параметры и условия эксплуатации |
|
|
MTBF (часы) |
567884,3 |
|
Уровень шума |
49,5 дБ |
|
Тепловыделение |
118,69 BTU/ч |
|
Питание на входе |
100-240 В переменного тока, 50-60 Гц, внутренний универсальный источник питания |
|
Макс. потребляемая |
56,2 Вт |
|
мощность |
|
|
Размеры |
440 х 209,9 х 44 мм |
|
Вес |
2,156 кг |
|
Система вентиляции |
Smart Fan |
|
Защита от |
Все порты Ethernet поддерживают стандарт IEC61000-4-5 10/700us встроенной защиты от перенапряжений до 6 |
|
перенапряжений |
кВ |
|
Рабочая температура |
От 0 до 50° C |
|
Температура хранения |
От -20 до 70° C |
|
Рабочая влажность |
От 0% до 95% без конденсата |
|
Влажность хранения |
От 0% до 95% без конденсата |
|
EMI |
CE |
|
Безопасность |
CE (LVD) |
Описание
Коммутатор DGS-3000-28SC входит в линейку управляемых коммутаторов D-Link 2 уровня и предназначен для использования в сетях Metro Ethernet. Коммутатор оснащен 4 портами 10GBase-X SFP+, что гарантирует высокую производительность при агрегации большого количества гигабитных соединений. DGS-3000-28SC выполнен в корпусе высотой 1U и подходит как для настольной установки, так и для монтажа в телекоммуникационный шкаф.
Надежность
Все Ethernet-порты коммутатора DGS-3000-28SC оснащены встроенной защитой от статического электричества до 6 кВ, что позволяет обезопасить устройство от скачков напряжения, в особенности, если Ethernet-кабели расположены на открытом пространстве или в старых зданиях. На случай перебоев с электроснабжением в коммутаторе предусмотрен дополнительный разъем для подключения резервного источника питания DPS-200A/500A и DPS-500DC/B1 или источника питания постоянного тока с напряжением 12 В. Для обеспечения отказоустойчивости Ethernet-каналов в коммутаторе реализована поддержка протоколов 802.1D Spanning Tree (STP), 802.1w Rapid Spanning Tree (RSTP) и 802.1s Multiple Spanning Tree (MSTP), применение которых позволяет автоматически резервировать маршруты передачи данных. Использование данного функционала обеспечивает передачу и прием кадров даже при возникновении сбоев в сети. Коммутаторы также поддерживают технологию Ethernet Ring Protection Switching (ERPS, ITU-T G.8032), благодаря которой время восстановления работы кольца после сбоя не превышает 50 мс. Использование функции обнаружения петель Loopback Detection (LBD) предотвращает перегрузку на неконтролируемых сегментах сети, администрируемых абонентами или построенных на базе неуправляемых коммутаторов. Помимо этого, коммутатор DGS-3000-28SC поддерживает функционал агрегирования портов на основе стандарта 802.1AX, применение которого позволяет объединять несколько портов в группу, увеличивая при этом полосу пропускания и повышая отказоустойчивость соединений для обеспечения бесперебойной работы и распределения нагрузки между несколькими сетевыми устройствами.
Сервис Triple Play
В коммутаторе DGS-3000-28SC реализован широкий набор функций многоадресной рассылки 2 уровня, включая IGMP/MLD Snooping, Fast Leave и фильтрацию. Поддержка данного функционала предоставляет возможность работы с IPTV-сервисами, которые набирают популярность и с каждым годом пользуются все большим спросом на рынке услуг. Применение функций IGMP/MLD Snooping на основе хоста обеспечивает подключение нескольких IPTV-подписчиков к одному сетевому интерфейсу. Профили ISM VLAN позволяют пользователям быстро и легко назначить или заменить предустановленные настройки для портов подписчиков многоадресной рассылки. Поддержка IGMP Authentication исключает возможность несанкционированной IPTV-подписки благодаря проведению аутентификации телевизионных приставок.
Коммутатор DGS-3000-28SC поддерживает расширенный функционал QoS (Quality of Service) для предоставления качественного сервиса Triple Play. Классификация пакетов осуществляется на основе различных полей заголовка или определяемого пользователем содержимого пакета, обеспечивая возможность приоритизации трафика. С помощью функции управления полосой пропускания провайдеры смогут определить уровень пропускной способности входящего/исходящего канала для каждого порта с шагом до 64 Кбит/с.
Простота обслуживания, эффективный поиск и устранение неисправностей
Реализованная в коммутаторах поддержка расширенного функционала OAM (Operation, Administration and Management) позволяет значительно упростить обслуживание, поиск и устранение неисправностей. С помощью функции диагностики кабеля можно удаленно контролировать состояние Ethernet-кабеля и определять место возникновения неисправности, что позволит провайдеру снизить расходы на обслуживание оборудования. Функция Connectivity Fault Management (CFM, IEEE 802.1ag) предназначена для контроля, поиска и устранения неисправностей в End-To-End Ethernet-сетях, предоставляя провайдерам возможность выполнять проверку соединения, изолировать проблемные сегменты сети и идентифицировать пользователей таких сегментов. Технология D-Link Unidirectional Link Detection (DULD) позволяет отследить проблемы волоконно-оптического соединения, и тем самым повысить стабильность работы кабельной инфраструктуры в сетях MAN (Metropolitan Area Network).
Высокий уровень безопасности и работоспособности
В коммутаторе DGS-3000-28SC предусмотрен расширенный функционал аутентификации пользователя/устройства, включая 802.1X, управление доступом на основе Web-интерфейса (WAC) и MAC-адресов (MAC). Функции WAC и MAC позволяют сетевым администраторам проводить аутентификацию пользователя/устройства и управлять безопасностью сети без необходимости установки клиентского программного обеспечения, что очень важно, в случае, если установка ПО на оборудовании клиента невозможна. Также коммутатор DGS-3000-28SC поддерживает функционал Compound Authentication, предоставляя сетевым администраторам на выбор несколько методов аутентификации для одного устройства. Аутентификация на основе узла обеспечивает точное управление доступом для каждого устройства сети. Для интеграции с биллинговыми системами и сервисами реализована поддержка протоколов RADIUS и TACACS. Предусмотренная в коммутаторе DGS-3000-28SC функция IP-MAC-Port Binding (IMPB) обеспечивает строгую привязку по адресам и интерфейсам, а ARP Spoofing Prevention – защиту сети от атак типа Man-In-The-Middle и ARP Spoofing.
Для обеспечения бесперебойной работы сети в коммутаторе DGS-3000-28SC реализован механизм D-Link Safeguard Engine для защиты центрального процессора от перегрузки вредоносным широковещательным трафиком, обусловленным вирусной активностью. Коммутатор также поддерживает функцию DHCP Screening, обеспечивающую фильтрацию DHCP-запросов от неавторизованных DHCP-серверов или маршрутизаторов. Применение функций защиты от BPDU/DoS-атак и фильтрации L3 Control Packet Filtering позволяет повысить уровень безопасности сети.
Поддержка IPv6
В коммутаторе DGS-3000-28SC реализована поддержка функционала IPv6, включая MLD Snooping, WAC, IPv6 ACL/QoS и IMPBv6, что способствует легкой интеграции оборудования в сети следующего поколения. Помимо этого, данная серия поддерживает функции обоих стеков протоколов IPv4/v6, позволяя коммутаторам выступать в роли моста между сетями IPv4 и IPv6.
Характеристики
| Аппаратное обеспечение | |
| Интерфейсы |
• 20 портов 100/1000Base-X SFP • 4 комбо-порта 10/100/1000Base-T/SFP • 4 порта 10GBase-X SFP+ • Консольный порт: RJ-45 • Разъем RPS для подключения резервного источника питания |
| Производительность | |
| Коммутационная матрица | • 128 Гбит/с |
| Скорость перенаправления 64-байтных пакетов | • 95,24 Mpps |
| Таблица MAC-адресов | • 16K записей |
| DRAM для CPU | • 256 МБ |
| Буфер пакетов | • 1,5 МБ |
| Flash-память | • 32 МБ |
| Jumbo-фрейм | • 13 Кбайт |
| Программное обеспечение | |
| Стекирование |
• Физическое стекирование • Полоса пропускания для стекирования – до 40 Гбит/с в режиме полного дуплекса • До 6 устройств в стеке • Виртуальное стекирование • D-Link Single IP Management (SIM) • До 32 устройств в виртуальном стеке |
| Функции 2 уровня |
• Таблица MAC-адресов: 16K записей • Управление потоком: • 802.3x • Предотвращение блокировок HOL • Jumbo-фрейм до 13 Кбайт • Spanning Tree Protocol: • 802.1D STP • 802.1w RSTP • 802.1s MSTP • Root Restriction • RSPAN • Функция Loopback Detection • Link Aggregation: • Соответствие стандарту 802.1AX • До 32 групп на устройство/8 портов на группу • Зеркалирование портов: • До 4 групп зеркалирования • Поддержка One-to-One, Many-to-One, на основе потока (ACL) • Ethernet Ring Protection Switching (ERPS) • Протокол туннелирования 2 уровня (L2PT) |
| Многоадресная рассылка 2 уровня |
• IGMP Snooping: • IGMP v1/v2/v3 Snooping, v3 awareness • До 960 групп • Fast Leave на основе узла • Функция Report Suppression • IGMP Authentication • IGMP/MLD Proxy Reporting • Ограничение многоадресной рассылки по IP-адресам (IGMP-фильтрация) • MLD Snooping: • MLD v1/v2, MLD v2 awareness • До 960 групп • Fast Leave на основе узла |
| VLAN |
• Группы VLAN: • До 4094 VLAN групп • VLAN на основе порта • VLAN на основе MAC-адреса • GVRP • До 4094 динамических VLAN групп • 802.1v Protocol VLAN • 802.1Q Tagged VLAN • Double VLAN (Q-in-Q): • Port-based Q-in-Q • Selective Q-in-Q • ISM VLAN • VLAN Translation • Voice VLAN • VLAN Trunking • Asymmetric VLAN • Auto Surveillance VLAN • Surveillance VLAN • Private VLAN |
| Функции 3 уровня |
• 10 IP интерфейсов • До 1024 ARP-записей • Gratuitous ARP • IPv6 Neighbor Discovery (ND) • 64 статических маршрута IPv4 • 32 статических маршрута IPv6 |
| Качество обслуживания (QoS) |
• 8 очередей на порт • DSCP • 802.1p • Управление полосой пропускания: • На основе порта (входящее/исходящее, мин. шаг до 64 Кбит/с) • На основе потока (входящее/исходящее, мин. шаг до 64 Кбит/с) • Для выходной очереди (мин. шаг до 64 Кбит/с) • Механизмы обработки очередей: • Strict Priority Queue (SPQ) • Weighted Round Robin (WRR) • SPQ + WRR • Поддержка следующих действий для потоков: • Добавление тега приоритета 802.1p • Добавление тега приоритета TOS/DSCP • QoS по расписанию • Три цвета маркировки • trTCM • srTCM • CoS на основе: • Очереди приоритетов 802.1p • VLAN ID • MAC-адреса • Ether Type • IPv4/v6-адреса • Класса трафика IPv6 • Метки потока IPv6 • DSCP • Типа протокола • TCP/UDP-порта • Содержимого пакета, определяемого пользователем |
| Списки управления доступом (ACL) |
• ACL на основе: • Порта коммутатора • Приоритета 802.1p • VLAN ID • MAC-адреса • IPv4/v6-адреса • Типа протокола • Номера TCP/UDP-порта • Содержимого пакета, определяемого пользователем • Поддержка до 1536 правил доступа для входящего трафика • Поддержка до 768 правил доступа для исходящего трафика • ACL по расписанию • CPU Interface Filtering |
| Безопасность |
• SSH v2 • SSL v3 • Port Security • Поддержка до 3072 MAC-адресов на порт • Защита от широковещательного/многоадресного/одноадресного шторма • Привязка IP-MAC-Port (IMPB): • Проверка ARP-пакетов • Проверка IP-пакетов • DHCP Snooping • Сегментация трафика • D-Link Safeguard Engine • Фильтрация NetBIOS/NetBEUI • DHCP Server Screening1 • Фильтрация DHCP-клиента • Предотвращение атак ARP Spoofing • Защита от атак BPDU • Предотвращение атак DoS |
| AAA |
• 802.1X: o Управление доступом на основе портов o Управление доступом на основе узлов o Динамическое назначение VLAN • Управление доступом на основе MAC-адресов(MAC) o Управление доступом на основе портов o Управление доступом на основе узлов o Динамическое назначение VLAN • Управление доступом на основе Web (WAC) o Управление доступом на основе портов o Управление доступом на основе узлов o Динамическое назначение VLAN • Compound Authentication • Microsoft® NAP (IPv4/v6) o Поддержка 802.1x NAP o Поддержка DHCP NAP • Guest VLAN • RADIUS (IPv4/v6) • TACACS • TACACS+ • XTACACS+ • Trusted Host • RADIUS Accounting • TACACS+ Accounting • Учетные записи с 4 уровнями прав доступа |
| OAM |
• Диагностика кабеля • 802.3ah Ethernet Link OAM • 802.1ag Connectivity Fault Management (CFM) • 802.3ah D-Link Unidirectional Link Detection (DULD) • Y.1731 OAM • sFlow • Функция цифрового контроля параметров трансивера DDM (Digital Diagnosics Monitoring) |
| Технология Green |
• IEEE 802.3az Energy Efficient Ethernet (EEE) • Снижение энергопотребления • На основе статуса соединения • Выключение индикаторов • Выключение питания портов • Гибернация |
| Управление |
• Web-интерфейс (поддержка IPv4/v6) • Интерфейс командной строки (CLI) • D-View 7 (EOL|EOS) • Telnet-сервер/клиент (поддержка IPv4/v6) • TFTP-клиент (поддержка IPv4/v6) • FTP-клиент (поддержка IPv4/v6) • ZModem • Запись выполняемых команд в журнал (Command Logging) • SNMP v1/v2c/v3 • SNMP Traps • Системный журнал • RMON v1: • Поддержка 1,2,3,9 групп • RMON v2: • Поддержка группы Probe Config • 802.1AB LLDP • LLDP-MED • BootP/DHCP-клиент • Автоконфигурация по DHCP • DHCP Relay • DHCP Relay Option 60, 61, 82 и 125 • DHCP Client Option 12 • Добавление метки PPPoE Circuit-ID • Поддержка нескольких версий ПО • Файловая система Flash • CPU Monitoring • Просмотр загрузки памяти • SNTP • Команда отладки (Debug Command) • Восстановление пароля • Шифрование пароля • Ping (поддержка IPv4/v6) • Traceroute • Microsoft® NLB (Балансировка нагрузки сети) |
| MIB |
• RFC1065, 1066, 1155, 1156, 2578 MIB Structure • RFC1212 Concise MIB Definitions • RFC1213 MIB II • RFC1215 MIB Traps Convention • RFC1493, 4188 Bridge MIB • RFC1157, 2571-2576 SNMP MIB • RFC1901-1908, 3418, 3636, 1442, 2578 SNMPv2 MIB • RFC271,1757, 2819 RMON MIB • RFC2021 RMONv2 MIB • RFC1398, 1643, 1650, 2358, 2665, 3635 Ether-like MIB • RFC2668 802.3 MAU MIB • RFC2674, 4363 802.1p MIB • RFC2618 RADIUS Authentication Client MIB • RFC4022 MIB для TCP • RFC4113 MIB для UDP • RFC2620 RADIUS Accounting Client MIB • RFC 2925 Ping и Traceroute MIB • Резервирование конфигурации • Возможность работы по протоколу TFTP • Trap MIB • RFC 4293 IPv6 MIB • RFC 4293 ICMPv6 MIB • RFC 2737 Entity MIB • RFC 4293 IPv6 SNMP Mgmt Interface MIB • Private MIB |
| Стандарты IETF® |
• RFC768 UDP • RFC791 IP • RFC792 ICMPv4 • RFC2463, 4443 ICMPv6 • RFC793 TCP • RFC826 ARP • RFC1338, 1519 CIDR • RFC2474, 3168, 3260 Definition of the DS Field in the IPv4 and IPv6 Header • RFC1321, 2284, 2865, 2716, 1759, 3580, 3748 Extensible Authentication Protocol (EAP) • RFC2571, RFC2572, RFC2573, RFC2574 SNMP |
| IPv6 |
• RFC2460 IPv6 • RFC2461, 4861 Neighbor Discovery • RFC2462, 4862 IPv6 Stateless Address Auto-configuration • RFC2464 IPv6 Neighbor over Ethernet and definition • RFC3513, 4291 IPv6 Addressing Architecture • RFC2893, 4213 IPv4/IPv6 dual stack function |
| Физические параметры | |
| Размеры | • 440 x 209,9 x 44 мм |
| Вес | • 2,156 кг |
| Условия эксплуатации | |
| Питание на входе | • 100-240 В переменного тока, 50-60 Гц, внутренний универсальный источник питания |
| Макс. потребляемая мощность | • 56,2 Вт |
| Тепловыделение | • 118,69 БТЕ/час |
| MTBF (часы) | • 567884,3 |
| Уровень шума | • 49,5 дБ |
| Система вентиляции | • Smart Fan |
| Защита от перенапряжений | • Все порты Ethernet поддерживают стандарт IEC61000-4-5 10/700us встроенной защиты от перенапряжений до 6 кВ |
| Температура |
• Рабочая: от 0 до 50 °C • Хранения: от -20 до 70 °C |
| Влажность |
• При эксплуатации: от 0% до 95% без конденсата • При хранении: от 0% до 95% без конденсата |
| Прочее | |
| EMI | • CE |
| Сертификаты | • CE (LVD) |
| Комплект поставки |
|
• Коммутатор DGS-3000-28SC • Кабель питания АС • Клеммный блок для подключения источника питания DC • Консольный кабель (с разъемами RJ-45 и RS-232) • Фиксатор для кабеля питания • 2 кроншейна для установки в 19″ стойку • 4 резиновые ножки • Краткое руководство по установке и гарантийный талон |
1В настройках по умолчанию включена функция filter dhcp_server
Сертификаты
Заказ
|
DGS-3000-28SC/A1A |
Управляемый L2 коммутатор, стек, 20x1000Base-X SFP, 4x10GBase-X SFP+, 4xCombo 1000Base-T/SFP |
|
DGS-3000-28SC/DC |
Управляемый L2 коммутатор, стек, 20x1000Base-X SFP, 4x10GBase-X SFP+, 4xCombo 1000Base-T/SFP, БП DC |
|
DGS-3000-28SC/UPS* |
Управляемый L2 коммутатор, стек, 20x1000Base-X SFP, 4x10GBase-X SFP+, 4xCombo 1000Base-T/SFP, ИБП (функция ИБП при подключении внешнего аккумулятора DC 12 В с возможностью его подзарядки) |
|
Дополнительные SFP-трансиверы |
|
|
DEM-210 |
SFP-трансивер, 100Base-LX (Duplex LC), 1310нм, одномод, до 15км |
|
DEM-211 |
SFP-трансивер, 100Base-FX (Duplex LC), 1310нм, многомод, до 2км |
|
DGS-712 |
SFP-трансивер, 1000Base-T (RJ45), до 100м |
|
DEM-310GT |
SFP-трансивер, 1000Base-LX (Duplex LC), 1310нм, одномод, до 10км |
|
DEM-311GT |
SFP-трансивер, 1000Base-SX (Duplex LC), 850нм, многомод, до 550м |
|
DEM-312GT2 |
SFP-трансивер, 1000Base-SX+ (Duplex LC), 1310нм, многомод, до 2км |
|
DEM-314GT |
SFP-трансивер, 1000Base-LX (Duplex LC), 1550нм, одномод, до 50км1 |
|
DEM-315GT |
SFP-трансивер, 1000Base-ZX (Duplex LC), 1550нм, одномод, до 80км1 |
|
Дополнительные WDM SFP-трансиверы |
|
|
DEM-220T |
WDM SFP-трансивер, 100Base-BX-D (Simplex LC), TX:1550нм, RX:1310нм, одномод, до 20км |
|
DEM-220R |
WDM SFP-трансивер, 100Base-BX-U (Simplex LC), TX:1310нм, RX:1550нм, одномод, до 20км |
|
DEM-330T/3KM |
WDM SFP-трансивер, 1000Base-BX-D (Simplex SC), TX:1550нм, RX:1310нм, одномод, до 3км |
|
DEM-330R/3KM |
WDM SFP-трансивер, 1000Base-BX-U (Simplex SC), TX:1310нм, RX:1550нм, одномод, до 3км |
|
DEM-330T/10KM |
WDM SFP-трансивер, 1000Base-BX-D (Simplex LC), TX:1550нм, RX:1310нм, одномод, до 10км |
|
DEM-330R/10KM |
WDM SFP-трансивер, 1000Base-BX-U (Simplex LC), TX:1310нм, RX:1550нм, одномод, до 10км |
|
DEM-331T/20KM |
WDM SFP-трансивер, 1000Base-BX-D (Simplex LC), TX:1550нм, RX:1310нм, одномод, до 20км |
|
DEM-331R/20KM |
WDM SFP-трансивер, 1000Base-BX-U (Simplex LC), TX:1310нм, RX:1550нм, одномод, до 20км |
|
DEM-331T/40KM |
WDM SFP-трансивер, 1000Base-BX-D (Simplex LC), TX:1550нм, RX:1310нм, одномод, до 40км1 |
|
DEM-331R/40KM |
WDM SFP-трансивер, 1000Base-BX-U (Simplex LC), TX:1310нм, RX:1550нм, одномод, до 40км1 |
|
Дополнительные трансиверы SFP+ |
|
| DEM-431XT | Трансивер SFP+, 10GBase-SR (Duplex LC), 850нм, многомод, до 300м |
| DEM-432XT | Трансивер SFP+, 10GBase-LR (Duplex LC), 1310нм, одномод, до 10км |
| DEM-433XT | Трансивер SFP+, 10GBase-ER (Duplex LC), 1550нм, одномод, до 40км1 |
| DEM-434XT | Трансивер SFP+, 10GBase-ZR (Duplex LC), 1550нм, одномод, до 80км1 |
| DEM-435XT | Трансивер SFP+, 10GBase-LRM (Duplex LC), 1310нм, многомод, до 200м |
| Дополнительные трансиверы WDM SFP+ | |
| DEM-436XT-BXD/40КМ | WDM трансивер SFP+, 10GBase-LR (Simplex LC), TX:1330нм, RX:1270нм, одномод, до 40км1 |
| DEM-436XT-BXU/40КМ | WDM трансивер SFP+, 10GBase-LR (Simplex LC), TX:1270нм, RX:1330нм, одномод, до 40км1 |
| DEM-436XT-BXD/20КМ | WDM трансивер SFP+, 10GBase-LR (Simplex LC), TX:1330нм, RX:1270нм, одномод, до 20км |
| DEM-436XT-BXU/20КМ | WDM трансивер SFP+, 10GBase-LR (Simplex LC), TX:1270нм, RX:1330нм, одномод, до 20км |
|
Дополнительные кабели 10G SFP+ |
|
|
DEM-CB100S |
Пассивный кабель 10GBase-X SFP+ для прямого подключения, 1м |
|
DEM-CB300S |
Пассивный кабель 10GBase-X SFP+ для прямого подключения, 3м |
|
DEM-CB700S |
Пассивный кабель 10GBase-X SFP+ для прямого подключения, 7м |
|
Дополнительные кабели 40G QSPF+ |
|
|
DEM-CB100QXS-4XS |
Пассивный кабель 40G QSFP+, 1xQSFP+, 4x10GBase-X SFP+, 1м |
|
Резервный источник питания2 |
|
|
DPS-500A |
Резервный источник питания AC для коммутаторов, 140Вт |
|
DPS-500DC/B |
Резервный источник питания DC для коммутаторов, 140Вт |
|
DPS-CB150-2PS/B |
Кабель питания для подключения резервного источника питания к коммутаторам, 1,5м |
*Штатный разъем RPS может использоваться только для подключения внешнего аккумулятора DC 12 В в качестве ИБП.
1Работа на коротких расстояниях возможна только с использованием аттенюатора. Не входит в комплект поставки.
2Не входит в комплект поставки.
Изображения
DGS-3000-28SC/DC
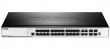
Вид спереди

Вид справа

Вид сзади
DGS-3000-28SC/A

Вид спереди

Вид справа
Вид сзади
Загрузки
Смотрите также
- Manuals
- Brands
- D-Link Manuals
- Switch
- DGS-3000-28SC
Manuals and User Guides for D-Link DGS-3000-28SC. We have 2 D-Link DGS-3000-28SC manuals available for free PDF download: Hardware Installation Manual, Quick Installation Manual
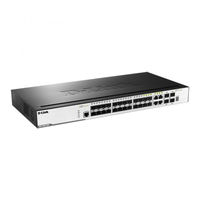
D-Link DGS-3000-28SC Hardware Installation Manual (45 pages)
Layer 2 Gigabit Stackable Managed Switch
Brand: D-Link
|
Category: Switch
|
Size: 1.42 MB
Table of Contents
-
Table of Contents
3
-
Intended Readers
5
-
Notes, Notices, and Cautions
5
-
Typographical Conventions
5
-
Safety Cautions
6
-
Safety Instructions
6
-
General Precautions for Rack-Mountable Products
7
-
Protecting against Electrostatic Discharge
8
-
Chapter 1 Introduction
9
-
Switch Description
9
-
Features
9
-
Ports
11
-
Front Panel Components
11
-
LED Indicators
11
-
Rear Panel Description
12
-
Side Panel Description
13
-
-
Chapter 2 Installation
14
-
Package Contents
14
-
Installation Guidelines
14
-
Installing the Switch Without a Rack
15
-
Attaching Brackets to a Switch for Rack Mounting
15
-
Mounting the Switch in a Standard 19″ Rack
16
-
Power on (AC Power)
16
-
Power Failure (AC Power)
16
-
Connecting a DC Power Supply
16
-
Installing Power Cord Retainer
17
-
Installing SFP and SFP+ Ports
21
-
Connecting the RPS to the RPS Port
22
-
Installing the RPS into a Rack-Mount Chassis
23
-
DPS-800 Rack-Mount Chassis
23
-
-
Chapter 3 Connecting the Switch
25
-
Switch to End Node
25
-
Switch to Switch
26
-
Connecting to Network Backbone or Server
27
-
-
Chapter 4 Introduction to Switch Management
28
-
Management Options
28
-
Connecting the Console Port
28
-
First Time Connecting to the Switch
30
-
Password Protection
30
-
IP Address Assignment
31
-
SNMP Settings
31
-
Traps
32
-
Mibs
32
-
-
Chapter 5 Web-Based Switch Configuration
33
-
Introduction
33
-
Logging Onto the Web Manager
33
-
Web-Based User Interface
34
-
Areas of the User Interface
34
-
Web Pages
35
-
-
Appendix A — Technical Specifications
36
-
General
36
-
Physical and Environmental
36
-
Performance
37
-
LED Indicators
37
-
Port Functions
39
-
-
Appendix Section
36
-
Appendix B — Cables and Connectors
41
-
Ethernet Cable
41
-
Console Cable
42
-
Redundant Power Supply (RPS) Cable
43
-
Warranties
44
-
Technical Support Information
45
-
Advertisement
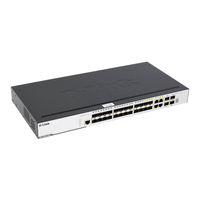
D-Link DGS-3000-28SC Quick Installation Manual (25 pages)
20-port 100/1000Base-X SFP, 4-port 100/1000Base-T/SFP combo and 4-port 10GBase-X SFP+ Stackable Managed L2 Switch
Brand: D-Link
|
Category: Switch
|
Size: 1.61 MB
Table of Contents
-
Package Contents
2
-
Hardware Overview
2
-
Led Indicators
2
-
Installing the Switch Without a Rack
3
-
Installing the Switch in a Standard 19» Rack
3
-
Installing Transceivers into the Transceiver Ports
4
-
Connecting to Power
4
-
Connecting a DC Power Supply
6
-
Installing the RPS into a Rack-Mount Chassis
7
-
Switch Connections
8
-
Switch to Another Switch
8
-
Management Options
9
-
Additional Information
11
-
Комплект Поставки
13
-
Установка Коммутатора
14
-
Подключение Питания
15
-
Дополнительная Информация
22
-
Технические Характеристики
23
Advertisement
Related Products
-
D-Link DGS-3000-28X
-
D-Link DGS-3000-28L
-
D-Link DGS-3000-28XS
-
D-Link DGS-3000-28LP
-
D-Link DGS-3000-28SC/A1A
-
D-Link DGS-3000-20L
-
D-Link DGS-3000-20L/B1A
-
D-Link DGS-3000-28XMP
-
D-Link DGS-3000-28X/B1A
-
D-Link DGS-3000-52L/B1A
D-Link Categories
![]()
Network Router
Wireless Router
![]()
Switch
Adapter
![]()
Security Camera
More D-Link Manuals
DFRobot proudly presents Devastator Tank Mobile Platform, our newest track mobile robot platform. It is fully compatible with most popular controllers in the market such as Arduino, Raspberry Pi and so on.
The Devastator uses high strength aluminum alloy which makes it extremely solid and durable. The high speed motors and premium tracks also allows it to move swiftly everywhere. Whats more, it benefits from a high performance suspension and enjoys an outstanding mobility across even the toughest terrains.
Users are able to add various sensors, servos, turntables and controllers (e.g. Romeo All-in-one, Raspberry Pi Model B+) with multiple mounting holes on the Devastator platform. It is perfect for hobbyists, educational, competitions and research projects.
Платформа для мобильных роботов \ Devastator Tank Mobile Robot Platform
How To Wireless Control Raspberry Pi Tank | Mert Arduino and Tech
DFrobot DEVASTATOR | Robotics TanK Platform
Notice: The Ultrasonic sensor and control board are not included in this kit.
The new version of the product changed the hex socket screw to Philip’s head screw which is easier to assemble. Besides,instruction manual has been updated.