dji OSMO MOBILE 2 Manual

 Searching for Keywords
Search for keywords such as «battery» and «install» to find a topic. If you are using Adobe Acrobat Reader to read this document, press Ctrl+F on Windows or Command+F on Mac to begin a search. Navigating to a Topic
View a complete list of topics in the table of contents. Click on a topic to navigate to that section. Printing this Document
This document supports high resolution printing.
Using this Manual
Legend
Important
 Hints and Tips
Download the DJI GO App

Scan the QR code to the right or search for ‘DJI GO’ on the App Store or Google Play. The Android version of DJI GO is compatible with Android v4.4 and later. The iOS version of DJI GO is compatible with iOS v10.0 and later.
Introduction
Equipped with 3-axis stabilization and SmoothTrack technology, the OSMO™ Mobile 2 turns your mobile phone into a smart motion camera by stabilizing it during movement. Its light and ergonomic design puts seamlessly smooth video creation at your fingertips.
A mobile phone can be mounted to the Osmo Mobile 2 either horizontally or vertically. It is easy to use and in Follow mode allows you to position your phone by hand. Features such as ActiveTrack, Timelapse, and Pano are available through the DJI GO app.
At a Glance


- Mobile Phone Holder
- Pan Motor
- Joystick
- Power/Mode Button
- Charging Port (Micro USB)
- Shutter/Record Button
- System Status LED
- Battery Level Indicators
- Tilt Motor
- Adjustable Arm
- Balance Adjustment Knob
- Roll Motor
- Holder Lock Knob
- USB Port
- 1/4″-20 UNC Port
- Zoom Slider
* Mobile phone not included.
Charging the Osmo Mobile 2
To charge the Osmo Mobile 2, connect a USB adapter (not included) to the Charging port using the provided power cable. During charging the battery level indicators blink to indicate the current battery level. The battery is fully charged when the battery level indicators turn solid white. With the battery fully charged, the Osmo Mobile 2’s max run-time is 15 hours*.
Charging Time: 2 hours (when charging at 2 A)


* Max run-time was tested with the gimbal balanced and held steadily. This value should be taken for reference only.
Mounting and Balancing a Mobile Phone
Only mount and balance a mobile phone while the Osmo Mobile 2 is powered off.
Mounting the Mobile Phone Horizontally
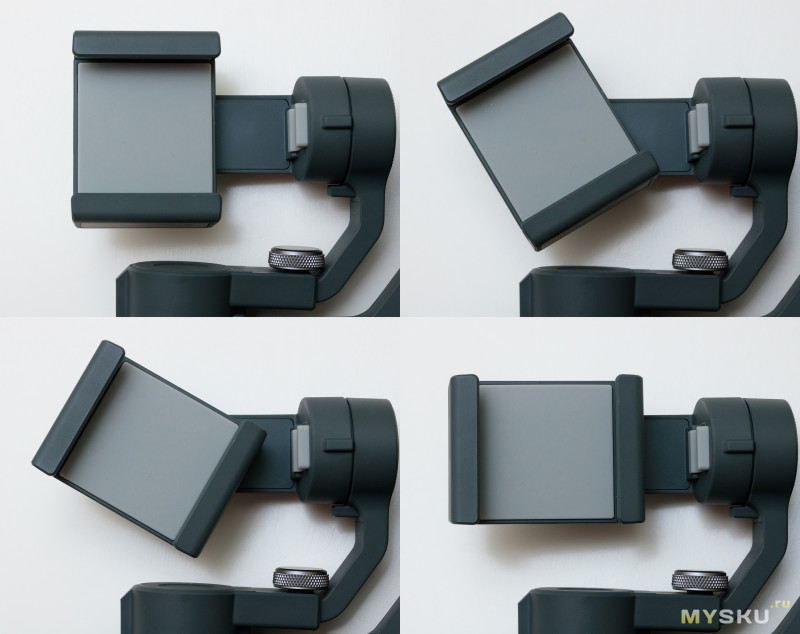
- Place the mobile phone in the mobile phone holder while pulling the sides of the holder outwards, then release the sides of the holder so they hold phone in place. It is recommended that you position the mobile phone close to the tilt motor.

- Turn the mobile phone over (so that it is facing downwards) and adjust the position of the phone (in the holder) to balance the tilt axis. The tilt axis is balanced if the mobile phone remains level when released.

- Adjust roll axis balance by loosening the Balance Adjustment knob and pulling out the Adjustable Arm. The roll axis is balanced if the mobile phone remains level when released.

If the roll axis tilts to the left, pull out the arm until the roll axis remains level.
Mounting the Mobile Phone Vertically
- To mount the mobile phone vertically, loosen the Holder Lock knob and rotate the mobile phone holder 90 degrees.

- Place the mobile phone in the mobile phone holder while pulling the sides of the holder outwards, then release the sides of the holder so they hold the phone in place. Hold the Osmo Mobile 2 horizontally and adjust the position of the phone (in the holder) to balance the tilt axis. The tilt axis is balanced if the mobile phone remains level when released.

- Adjust roll axis balance by either loosening the Balance Adjustment knob and stretching the Adjustable Arm or by adjusting the position of the mobile phone holder. The roll axis is balanced if the mobile phone remains level when released.


Adjust the Adjustable Arm to obtain roll axis balance.
If the roll axis cannot be balanced by adjusting the arm, pull the mobile phone holder left to balance.
- Ensure the mobile phone is properly installed in the holder and the system is balanced before each use. Make sure the mobile phone is flush with the holder and the Balance Adjustment knob and Holder Lock knob are tightened before use.
- It is important to balance the mobile phone in order to achieve optimal performance. The Osmo Mobile 2 should only be balanced when powered off.
Using the Osmo Mobile 2
Controls and Operations
The buttons on the handle allow fine control over the gimbal and mobile phone. The gimbal converts joystick movements into smooth pan and tilt transitions, and uses SmoothTrack technology to reduce the impact of natural vibrations. In Follow mode the mobile phone can also be positioned directly by hand.

- Power/Mode Button
Press and hold the Power/Mode button for 1.5 seconds to power the Osmo Mobile 2 on/off. With the Osmo Mobile 2 powered off, press the Power/Mode button once to check the battery level. The current battery level will be displayed on the battery level indicators.
- Hold the Osmo Mobile 2 steady and upright while it is starting up.
- The Osmo Mobile 2 starts up in Follow mode each time it is powered on.
With the Osmo Mobile 2 powered on: - Press the Power/Mode button once to switch the gimbal mode. The Osmo Mobile 2 will switch to Free mode from Follow mode. In Free mode the mobile phone stays in its current position regardless of handle movements. Press the Power/Mode button again to return to Follow mode.
- Press the Power/Mode button twice quickly to center the mobile phone.
- Press the Power/Mode button three times quickly to switch between the mobile phone’s front and rear cameras.
- You cannot switch between front and rear cameras while recording video.
- Tracking will stop if you switch between front and rear cameras while using ActiveTrack.
- Battery Level Indicators
With the Osmo Mobile 2 powered off, press the Power/Mode button once to check the battery level.
Battery Level Indicators  : LED is on.
  : LED is blinking.
  : LED is off.
 LED1 LED2 LED3 Battery Level* 67% — 100% 34% — 66% 16% — 33% 1% — 15% 0% * Battery level indications should be taken for reference only.

- System Status LED
Indicates the current system status of the Osmo Mobile 2.
LED State Description 

Solid green The Osmo Mobile 2 is functioning normally or firmware upgrade was successful 
Blinking green The Osmo Mobile 2 is initializing or taking photos 
Solid yellow The gimbal is locked or re-centered Blinking yellow The gimbal is not functioning normally 
Blinking red Recording Blinking red and green Firmware is being upgraded Solid red Firmware upgrade failed If the System Status LED blinks yellow a gimbal error has occurred. Press the Power/Mode button twice quickly to try to re-center the mobile phone. - Joystick
Move vertically to tilt the mobile phone. Move horizontally to pan the mobile phone. Joystick control direction can be set in the DJI GO app.
- Shutter/Record Button
Press the Shutter/Record button once to start or stop recording, or to take a photo. (To switch between photo and video modes tap the Photo/Video switch in the DJI GO app). Press and hold the Shutter/Record button for burst capture (available on iOS only).
- Zoom Slider
Push up/down to zoom in/out.
- Charging Port (Micro USB)
Charge the Osmo Mobile 2 by connecting a USB adapter to this port. Refer to the Charging section for more information.")
- USB Port
The USB port can be used to charge mobile phones.
Connect the USB port to your mobile phone using a standard Micro USB cable. If the Osmo Mobile 2 is powered on charging will start. If the Osmo Mobile 2 is powered off press the Power/Mode button once to start charging.The Osmo Mobile 2 cannot charge mobile phones while being charged itself. Do not connect the USB port to a mobile phone while charging the Osmo Mobile 2.
Operation Modes
The figures below depict the operation modes when using the Osmo Mobile 2 with a mobile phone mounted horizontally; the same operation modes apply when using with a mobile phone mounted vertically.
Upright Mode
Upright mode can be used without any user input. In this mode, press the Power/Mode button twice quickly to center the mobile phone.
Underslung Mode
Holding the Osmo Mobile 2 upside down will cause it to enter Underslung mode, in which the mobile phone can easily capture images from a lower position.
Flashlight Mode
Rotate the Osmo Mobile 2 forward 90 degrees to go from Upright mode to Flashlight mode. To make the mobile phone vertical press the Power/Mode button twice quickly. In Flashlight mode, pushing the joystick up and down tilts the gimbal and pushing the joystick left and right has no effect.
With a mobile phone mounted vertically, do not center the mobile phone in Flashlight mode if doing so will cause the end of the mobile phone to collide with the gimbal.
Portrait Mode
Rotate the Osmo Mobile 2 90 degrees to the left or right to go from Upright mode to Portrait mode. ActiveTrack is disabled when using Portrait mode.
- Due to sensor noise the handle may vibrate slightly when the gimbal is moving. This phenomenon is normal and does not affect shooting stability.
- In Follow mode, to ensure the gimbal can be centered quickly and resume tracking the center function centers the mobile phone to within ±1.5° of the true center. The joystick can be used to fine-tune the mobile phone position after using the center function.
DJI GO App
Watch a live HD video feed on your mobile screen through the DJI GO app. The app also allows you to use the ActiveTrack, Timelapse, and Pano functions, or configure camera and gimbal settings in just a few taps.
Installing the DJI GO App
Download the DJI GO app as described in the Using this Manual section and install it on your mobile phone.
Connecting to the DJI GO App
- Enable Bluetooth and turn off portrait orientation lock on your mobile phone to allow horizontal screen display.
- Power on the Osmo Mobile 2. Do not touch the gimbal and hold the Osmo Mobile 2 still and upright while it is starting up.


- Lanuch the DJI GO app. If you are using the Osmo Mobile 2 for the first time, follow the on-screen instructions to activate it. You will need to log in to your DJI account through an Internet connection.
- Enter Camera view. If the mobile phone is successfully connected to the Osmo Moblie 2, Camera view gives a real-time display of what the camera is capturing.There will be a tutorial on how to use your Osmo Mobile 2 after entering Camera view.
The gimbal will stop working if you answer a call.
Key Pages
Equipment > Camera

- Connection Status
Indicates the status of the connection between the DJI GO app and the Osmo Mobile 2. - Photo/Video Switch
Slide to switch between photo and video modes. - Photo/Video Modes
 Current Photo Mode
 - Shutter/Record Button
 Tap to start or stop recording, or take a photo.
 - Front/Rear Camera Switch
 Tap to switch between your phone’s front and rear cameras.
 - Playback
 Tap to view photos and videos.
 - Metering Mode/ActiveTrack
Tap to switch between Metering mode and ActiveTrack. Metering Mode
 - Settings
 Tap to set the camera or gimbal settings, check the device information, or start livestreaming to social media platforms.
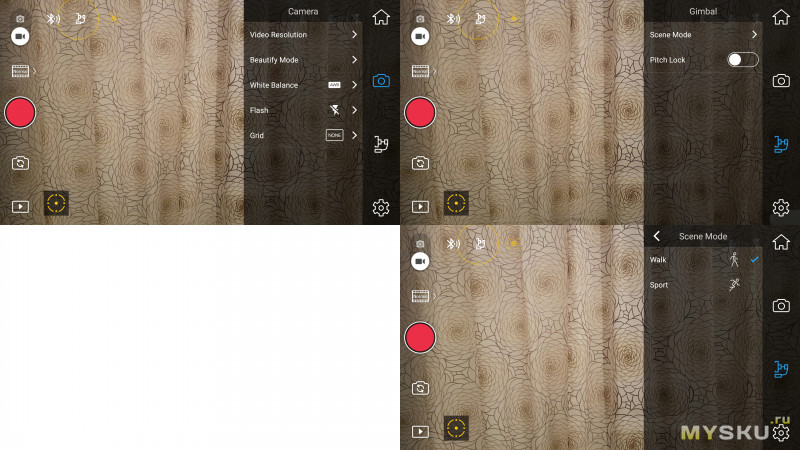
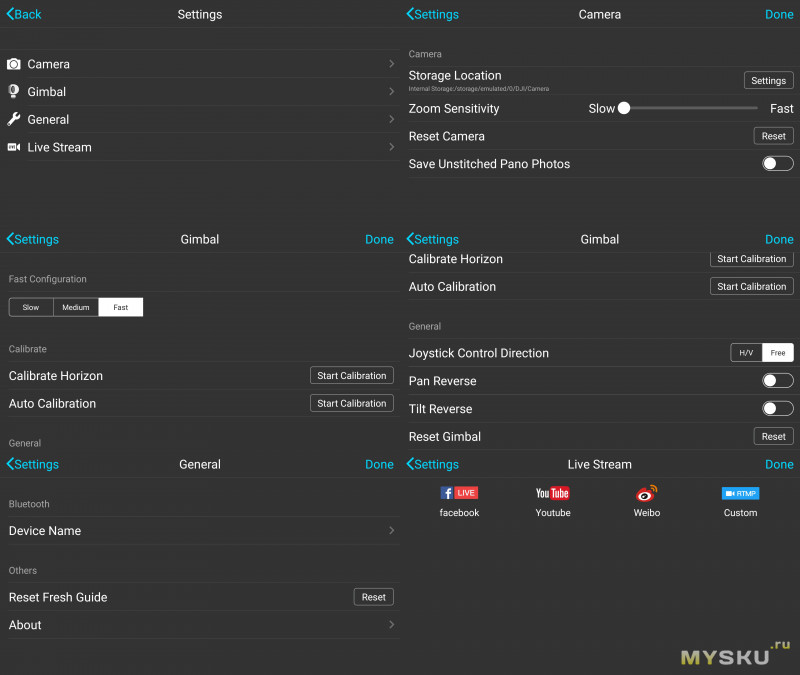
Camera
Adjust video resolution settings (phone dependent), Panoroma quality, and reset camera settings here.
Gimbal- Horizontal Calibration
Adjust positive and negative values to bring the horizon to level if it is skewed. - Auto Calibration
Reduces drift caused by nearby magnetic interference or human error. Do not touch the gimbal and hold the Osmo Mobile 2 still and upright during calibration.With a mobile phone mounted vertically auto calibration is not supported.
- Joystick Control Direction
Tilt and pan axis can be controlled simultaneously by setting the Joystick control direction to Free. - Invert Joystick Left/Right Operation
Inverts left and right joystick directions, so that pushing right turns the phone left and vice versa. - Invert Joystick Up/Down Operation
Inverts up and down joystick directions, so that pushing the joystick up tilts the phone down and vice versa.
General
Displays the firmware version and device name.
Live
Livestream to live social network platforms such as YouTube live or Facebook live.
- Horizontal Calibration
- Gimbal Preferences
 Tap to enter the gimbal preferences screen.
Scene Mode
SmoothTrack speed varies depending on the scene mode. In Sport mode, it is higher, while in Walk mode it is lower.
Tilt Axis Lock
Locks the tilt axis at the current angle when enabled. - Camera Preferences
 Set the video resolution and flash status, and enable beautification effects or onscreen composition grids. Enable Manual Adjustment for ISO, Shutter Speed and White Balance control (currently available on iOS only).
 - Home
 Tap to navigate to the home screen.
 - Flash Status
Displays the current status of the flash. - Battery Level
Displays the current battery level of the Osmo Mobile 2. - Gimbal Mode
Displays the current gimbal mode ( Follow or  Free).
Zooming
Put two fingers on the screen and move them apart to zoom in or move them together to zoom out. Note that zooming is only available in Metering mode.
Editor
View, edit and share your masterpieces all in one place. The Editor has a range of simple but powerful tools that let you edit your videos and photos before sharing them online minutes after they are captured.
Once you log in with a DJI account you are be able to conveniently upload and share your creations. The saved photos and videos can be uploaded to Skypixel (www.skypixel.com) and shared on social networks such as Facebook, Twitter, WeChat Moments, and Sina Weibo.
Skypixel
You can view and share photos and videos here.
Me
If you already have a DJI account, you can participate in forum discussions, and visit the DJI online store here. You can also tap and go to Reset Beginner Guide to have the tutorial launch next time you open the app and go to Camera view.
Updating the Firmware
Use the DJI GO App to update the Osmo Mobile 2 firmware. It takes approximately 10 minutes to complete an update.
How to Update
Ensure that the battery has at least 30% charge before starting an update. Connect the Osmo Mobile 2 to your mobile device and then launch the DJI GO app. You will be reminded if a new firmware update is available. To start updating, connect your mobile device to the Internet and follow the on-screen instructions.
Do not exit the DJI GO app during the update process. Pay attention to on-screen prompts. The System Status Indicator will become solid green once the firmware update has completed successfully. Restart the Osmo Mobile 2 and DJI GO app after updating. If an update is unsuccessful, retry.
Specifications
| General | |
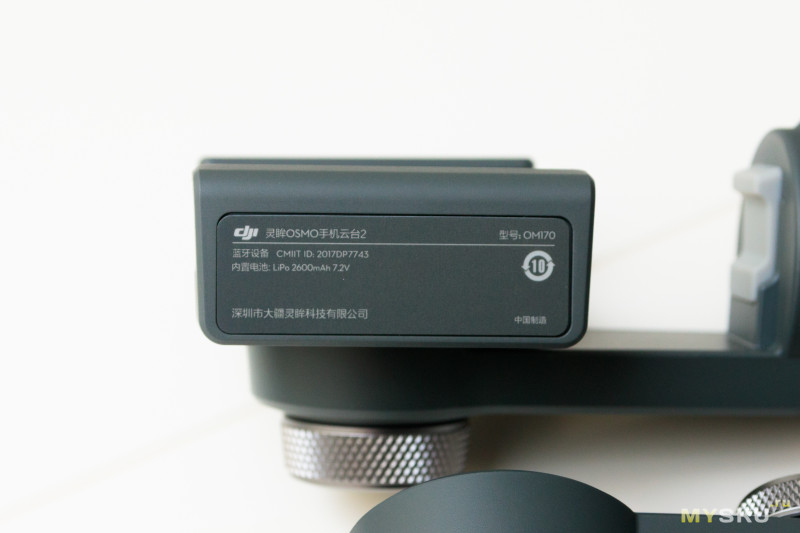
| Name | OSMO MOBILE 2 |
| Model | OM170 |
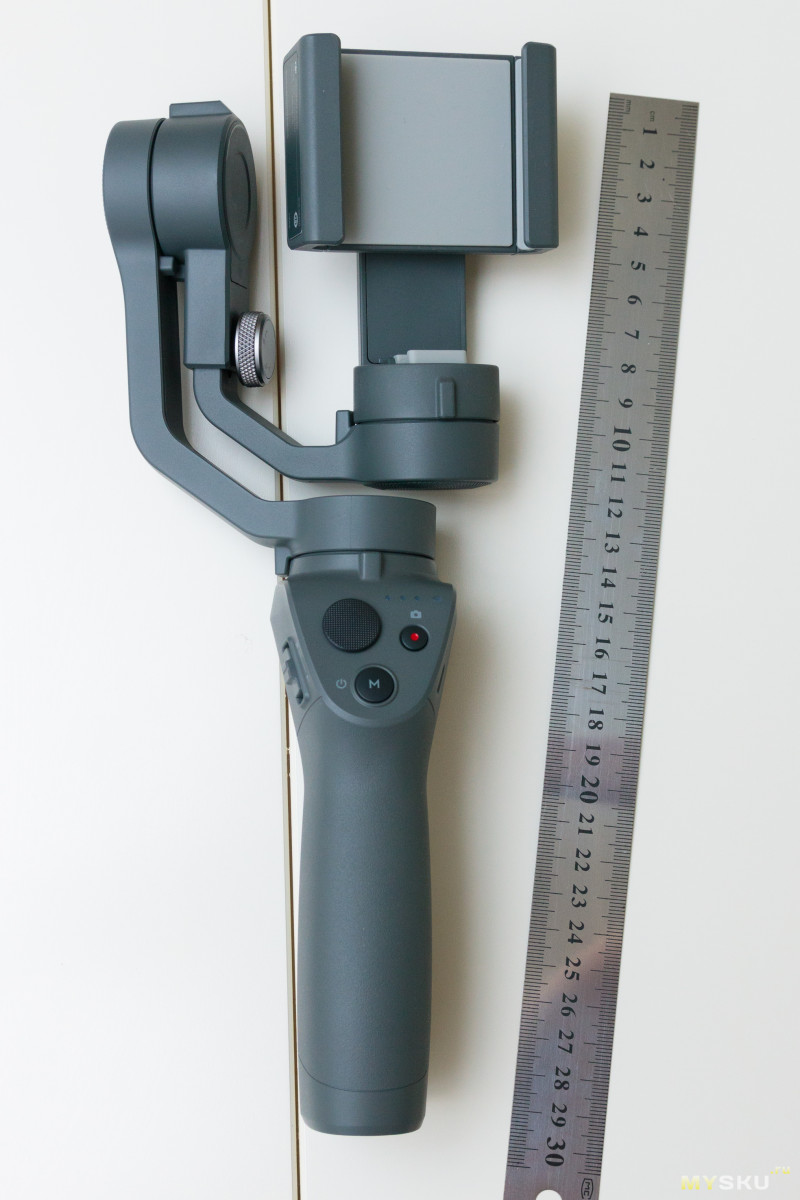
| Dimensions | 295×113×72 mm (folded) |
| Weight | 485 g |
| Power Consumption | 1.2 W (when steady and balanced) |
| Controllable Range | Pan: ±160°; Tilt: ±155° (with the mobile phone mounted horizontally) |
| Mechanical Range | Pan: ±170°; Roll: -90° to +70°; Tilt: ±170° |
| Max Controllable Speed | 120 °/s |
| Mobile Phone Width Range | 58.6 to 85 mm |
| Wireless | |
| Mode | Bluetooth Low Energy 4.0 |
| Transmitter Power (EIRP) | < 1 dBm |
| Battery | |
| Type | 18650 LiPo |
| Capacity | 2600 mAh |
| Energy | 18 Wh |
| Voltage | 7.2 V |
| Charging Temperature | 41° to 104°F (5° to 40°C) |
| Operating Temperature | 32° to 104°F (0° to 40°C) |
This content is subject to change.
Download the latest version from https://www.dji.com/osmo-mobile-2
If you have any questions about this document, please contact DJI by sending a message to DocSupport@dji.com.

OSMO is a trademark of DJI.
Copyright © 2018 DJI All Rights Reserved.
Videos
DJI Osmo Mobile 2 — How to Operate Video
DJI Osmo Mobile 2 — How to Prepare Video
DJI Osmo Mobile 2 — Setup and Review Video
Documents / Resources
References
Download manual
Here you can download full pdf version of manual, it may contain additional safety instructions, warranty information, FCC rules, etc.
Download dji OSMO MOBILE 2 Manual
Посмотреть инструкция для DJI Osmo Mobile 2 бесплатно. Руководство относится к категории штативы, 1 человек(а) дали ему среднюю оценку 7.5. Руководство доступно на следующих языках: английский. У вас есть вопрос о DJI Osmo Mobile 2 или вам нужна помощь? Задайте свой вопрос здесь
Не можете найти ответ на свой вопрос в руководстве? Вы можете найти ответ на свой вопрос ниже, в разделе часто задаваемых вопросов о DJI Osmo Mobile 2.
Инструкция DJI Osmo Mobile 2 доступно в русский?
К сожалению, у нас нет руководства для DJI Osmo Mobile 2, доступного в русский. Это руководство доступно в английский.
Не нашли свой вопрос? Задайте свой вопрос здесь
Всем привет!
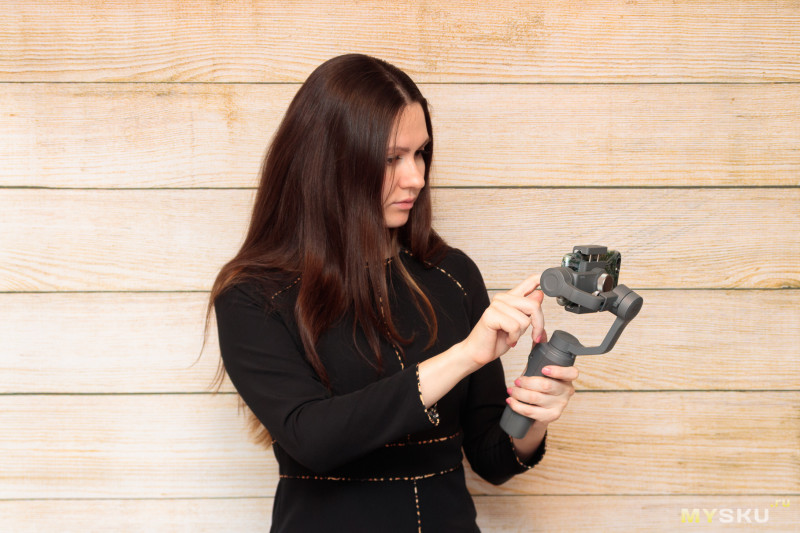
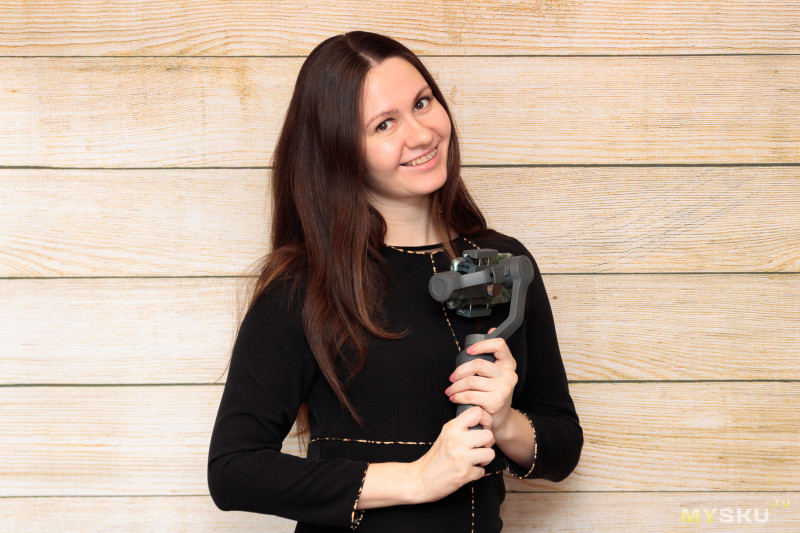
Сейчас довольно популярно снимать видео на смартфон, но зачастую ожидаемое и реальное качество записи не совпадают (сейчас сниму «шедевр», а там… «далеко не шедевр» ;-). На запись влияет не только качество камеры, но и «оператор»))) Итак, сегодня будет обзор на стабилизатор для мобильного телефона Osmo Mobile 2 от компании DJI.
Доставка, упаковка
Стабилизатор был доставлен ePacket’ом за 15 дней. Упакован он был только лишь в пупырчатый пакет, поэтому углы коробки замялись. Видимо китайцы посчитали, что комплектного противоударного кейса достаточно для защиты.
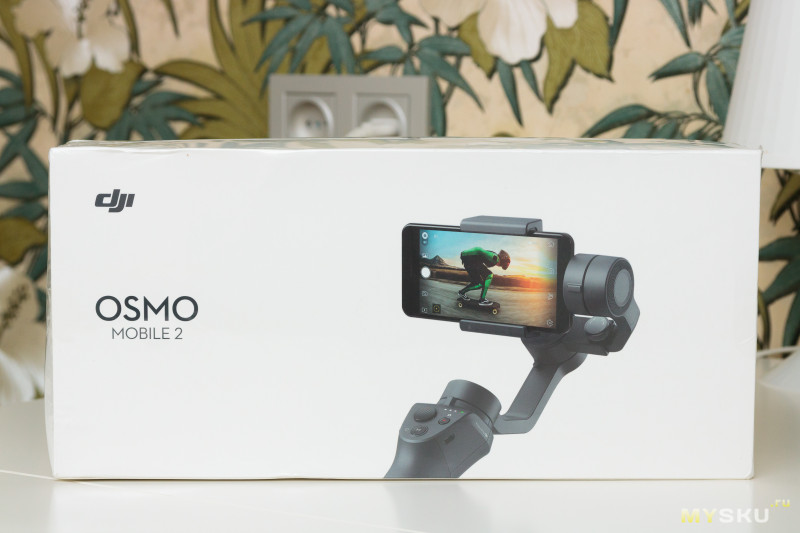
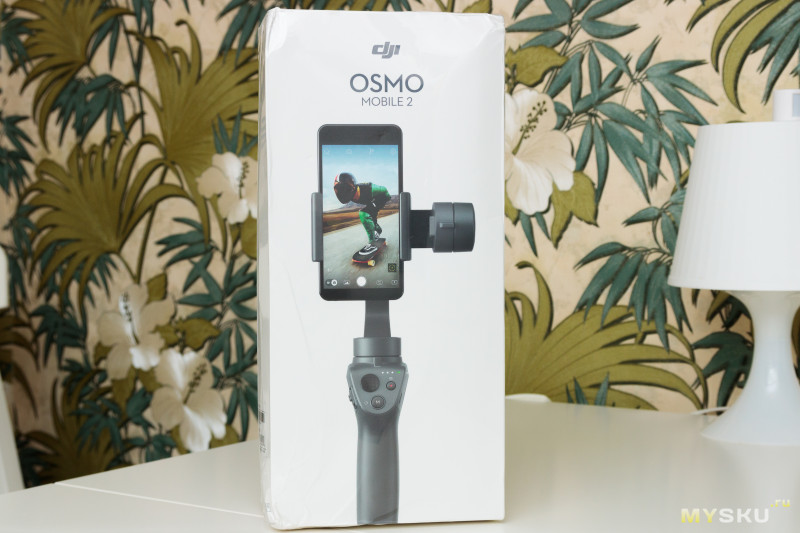
Спереди и сзади на коробке изображен сам стабилизатор в работе:
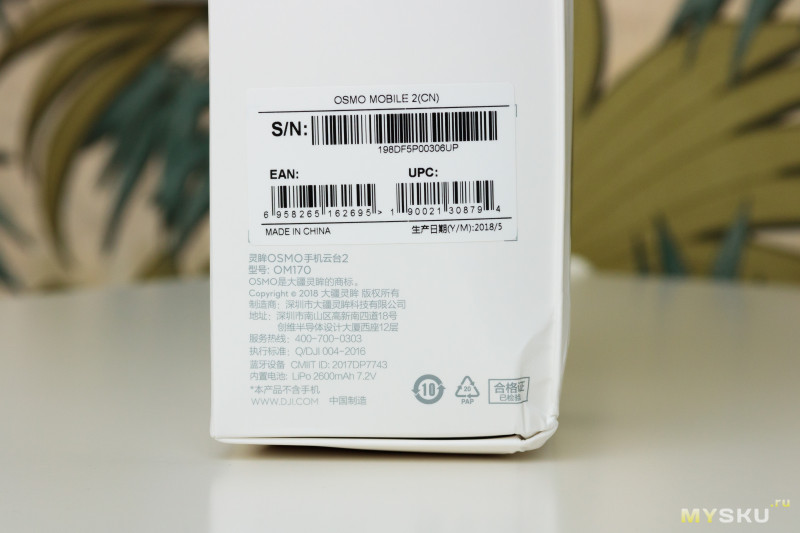
С боковых сторон — логотип DJI и информация об изготовителе:

Информация крупнее:
Внутри — противоударный кейс из темно-серого пенопласта с логотипом DJI:
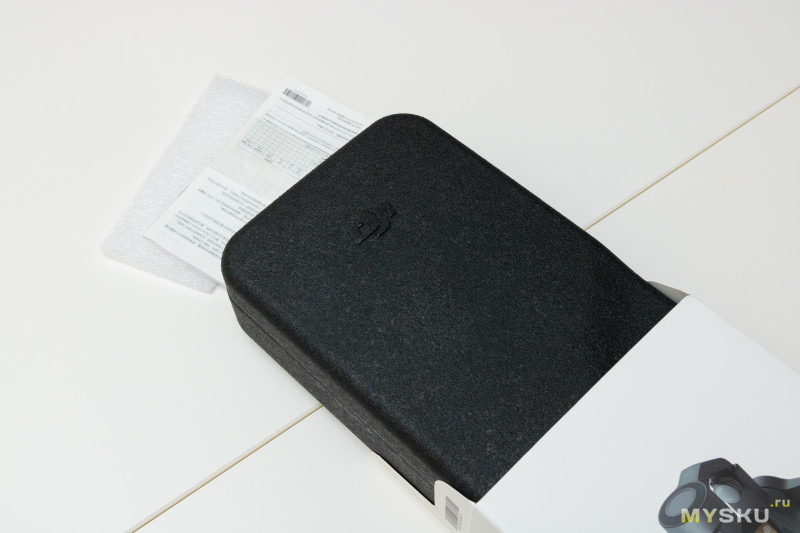
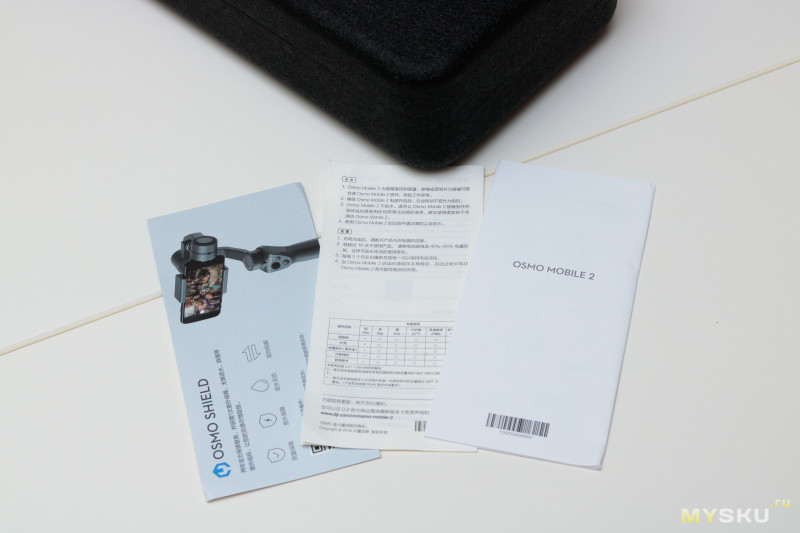
А также инструкция и гарантийный талон:
А в кейсе — сам стабилизатор:
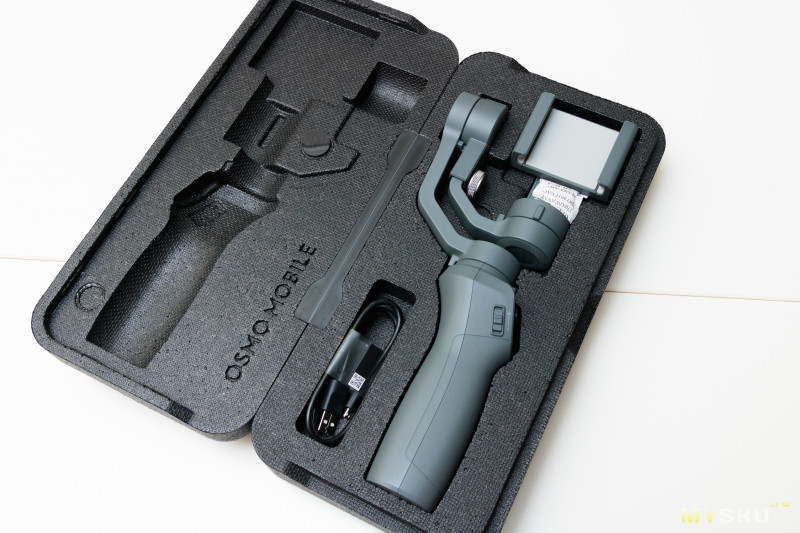
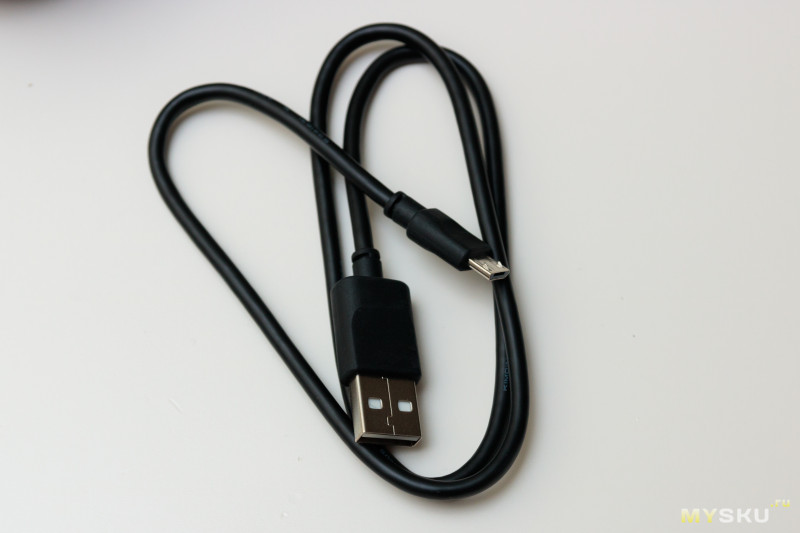
И коротенький провод microUSB:
Я считаю, наличие кейса — большой плюс, так как без него стабилизатор постоянно перекручивается и может сломаться при транспортировке.
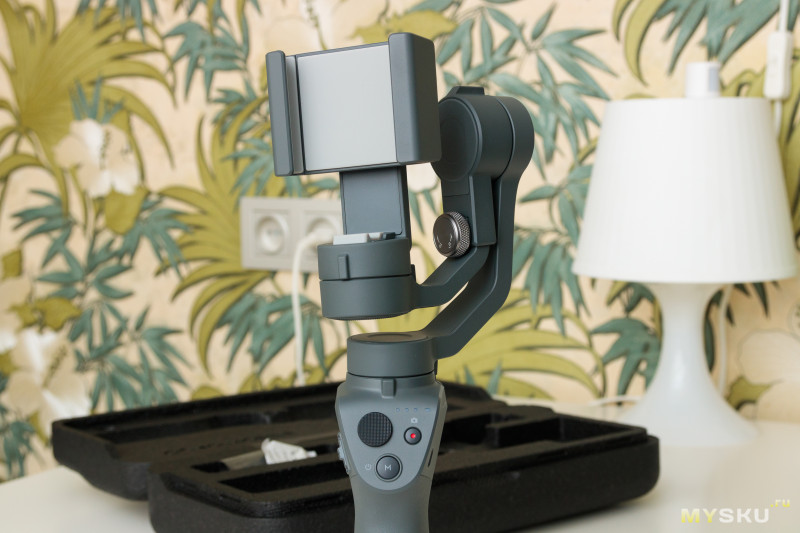
Внешний вид
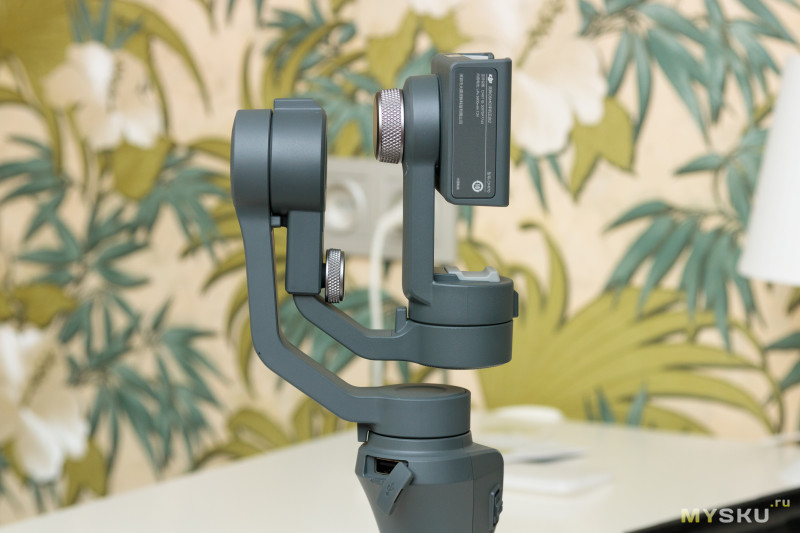
На мой взгляд, стабилизатор довольно громоздкий и увесистый, но это мое первое устройство такого типа, поэтому сравнивать не с чем.
При выключенном питании шарниры свободно вращаются примерно на 340-350 градусов, больше не дают ограничители:
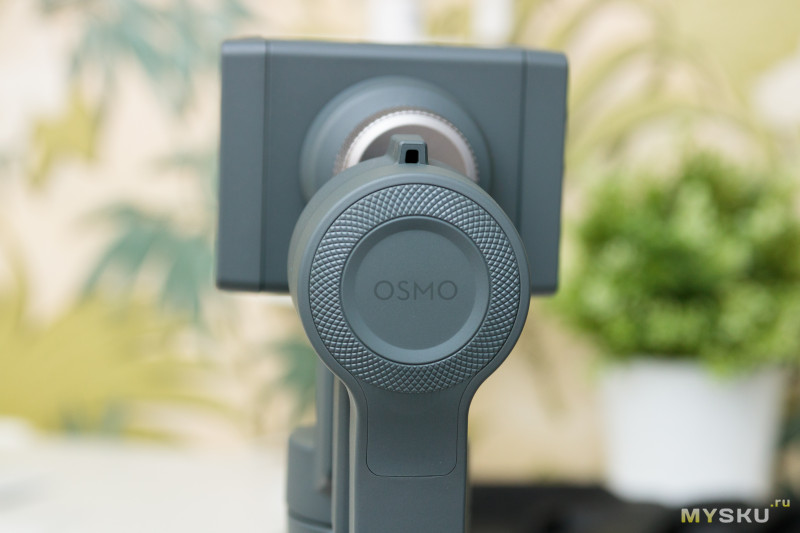
Из логотипов имеется лишь надпись OSMO на одном из моторов:
А также наклейка с указанием модели и емкости встроенного аккумулятора на одном из зажимов:
Сами зажимы имеют вставки из мягкой резины и довольно сильные пружины, да и в целом все сделано так, чтобы телефон ни за что не выскочил:
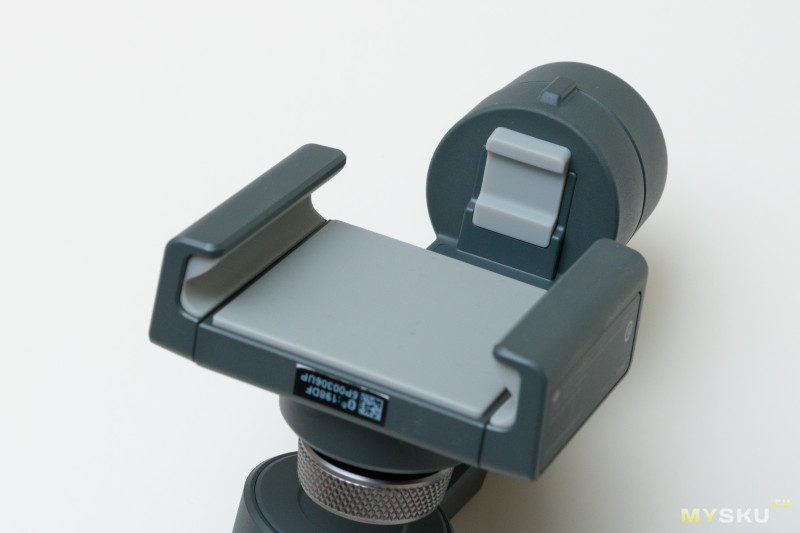
Максимальная ширина зажимаемого телефона 8.5-9 см в зависимости от толщины.
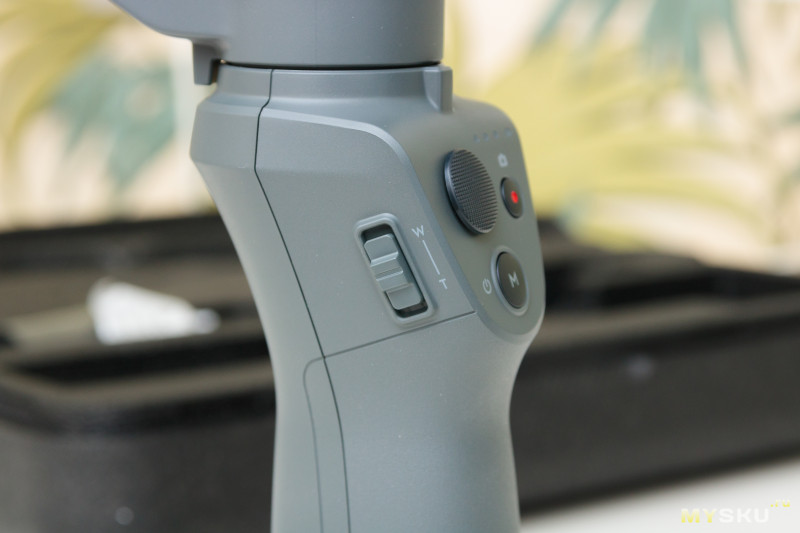
Стедикам имеет два винта для настройки, первый служит для балансировки телефона по оси крена:
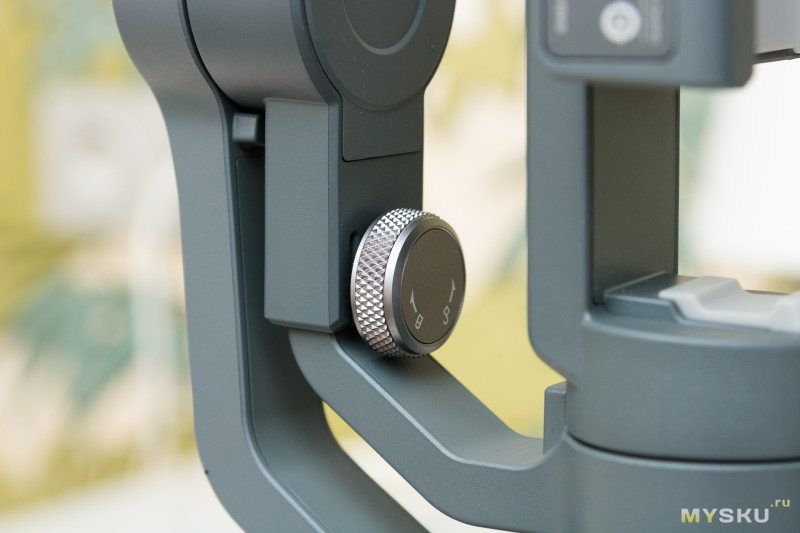
Опору можно выдвинуть на 1.5 сантиметра.
Но в выдвинутом состоянии стабилизатор уже невозможно компактно сложить, так как один мотор упирается в другой.
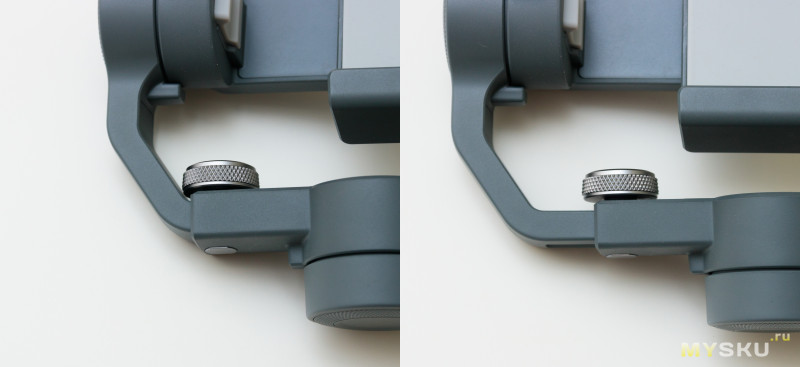
Второй винт настраивает угол поворота зажима:
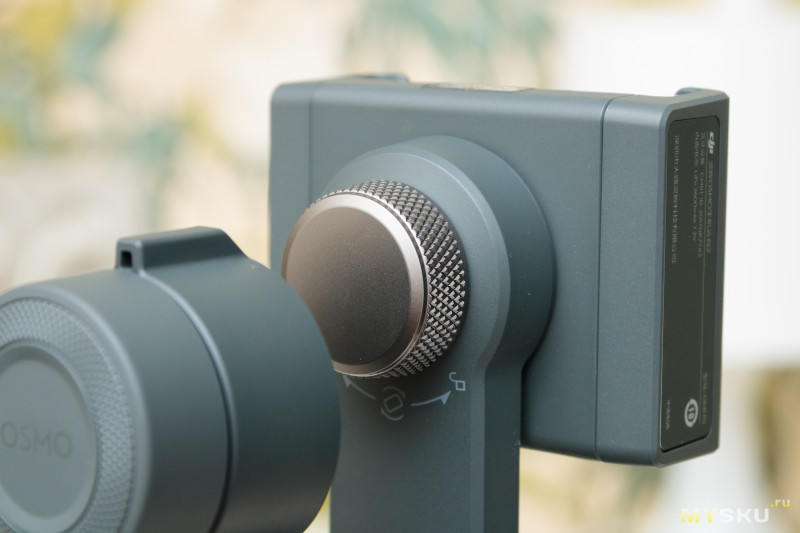
Всего доступно четыре фиксированных угла:
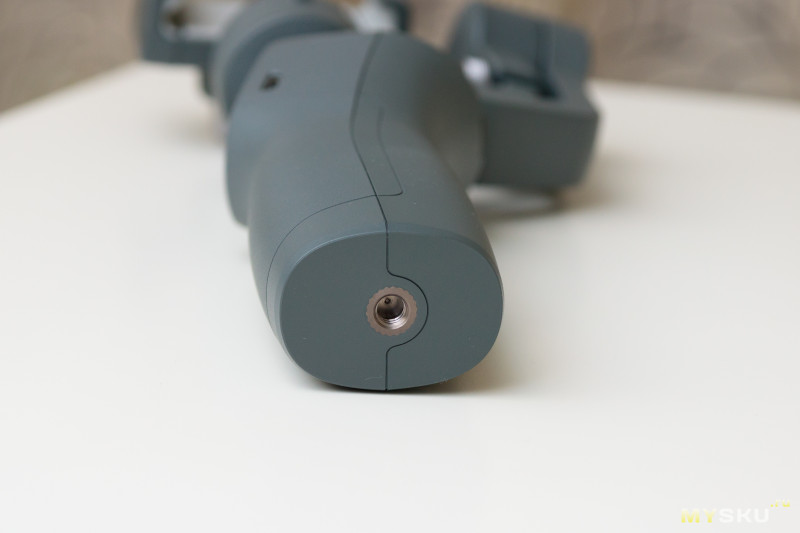
Внизу ручки имеется резьба 1/4″ для установки стедикама на штатив:
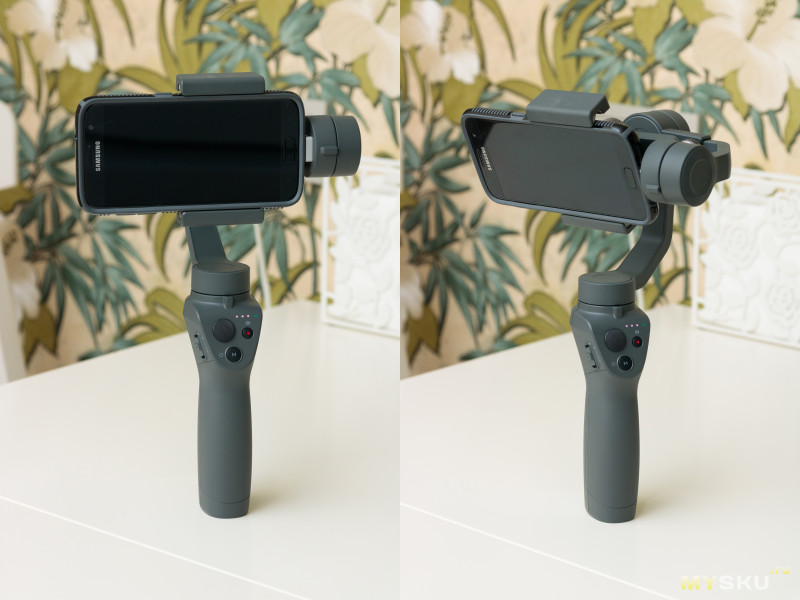
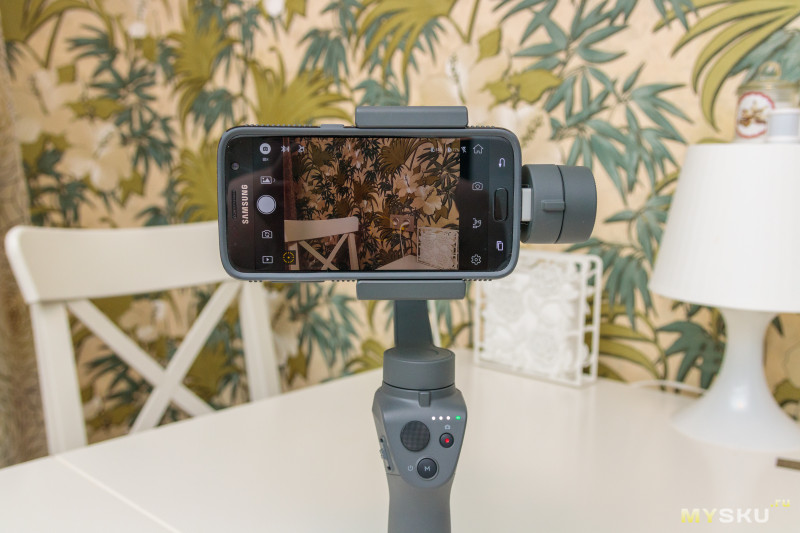
А вот так выглядит стабилизатор с зажатым в нем телефоном:
Управление
Из органов управления стабилизатор имеет две кнопки, джойстик и ползунок зума. А также три белых светодиода индикации заряда батареи и один зеленый/желтый для индикации режима работы:
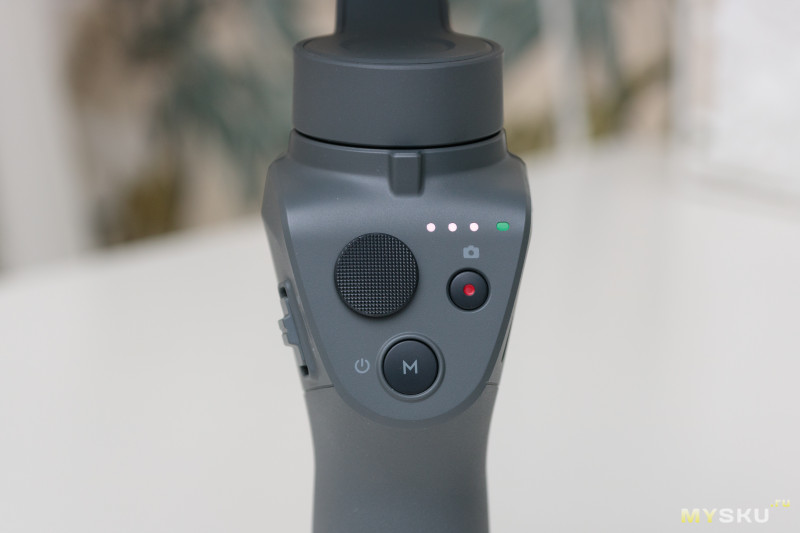
Кнопка «М» длительным нажатием включает и выключает стедикам, а коротким — переключает режим работы между плавающим (светодиод горит зеленым) и фиксированным (светодиод желтый). В плавающем режиме стабилизатор как бы сглаживает повороты ручки. То есть поворачиваем ручку влево, поворачивается и камера, но плавно. То же самое и с наклоном, наклонили вперед ручку — плавно наклонилась и камера. Кстати заблокировать ось тангажа в этом режиме можно в приложении, что очень удобно.
В фиксированном режиме как бы мы ни крутили ручку, камера не изменит своего углового положения.
Джойстик отвечает за ручное изменение углов, чувствительность его можно так же настроить в приложении, кнопка записи начинает и останавливает запись, а ползунок зума соответственно увеличивает и уменьшает картинку.
Однако зум и запись работают только в родном приложении и без него бесполезны.
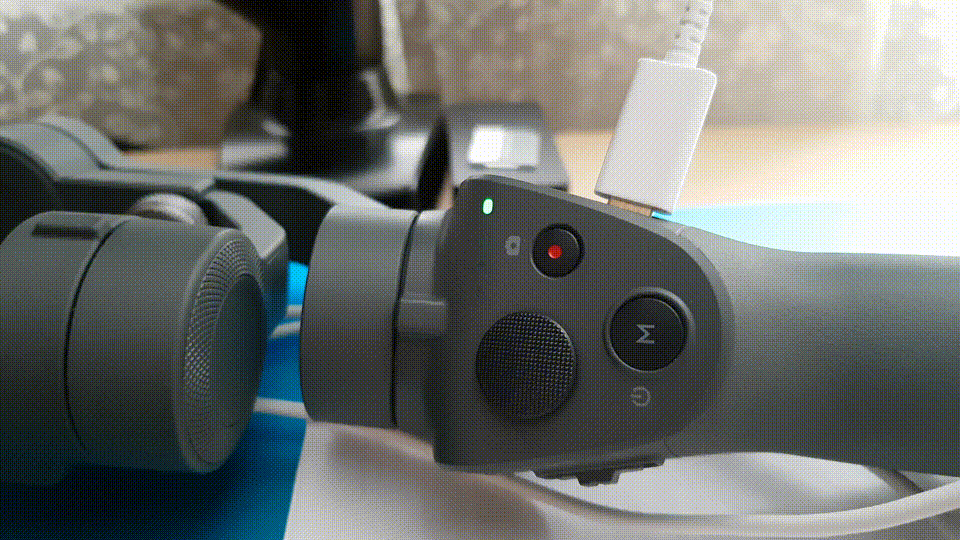
Сзади под резиновой заглушкой расположился USB-порт:
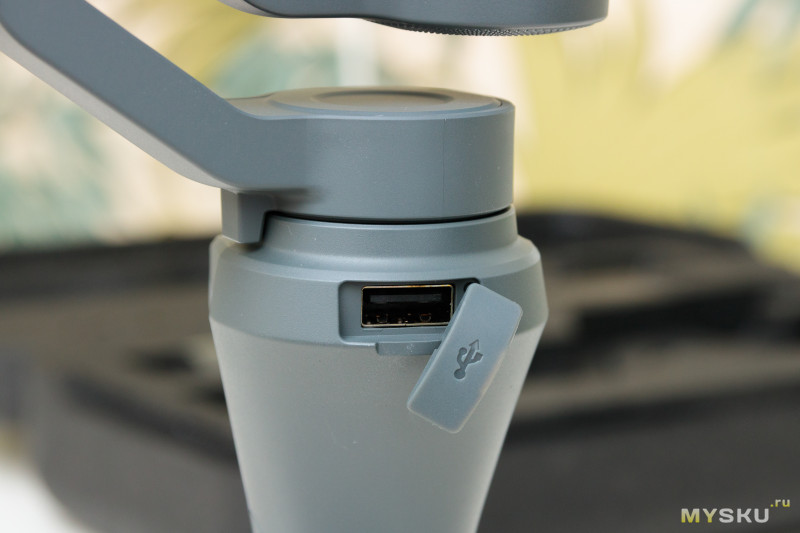
Да, DJI Osmo Mobile 2 может работать как power bank. Вот только полезно это будет только тем, у кого порт для зарядки расположен сверху телефона, в противном случае снимать и заряжать одновременно не получится.
На правой грани ручки расположен порт micro-USB для зарядки самого стедикама.
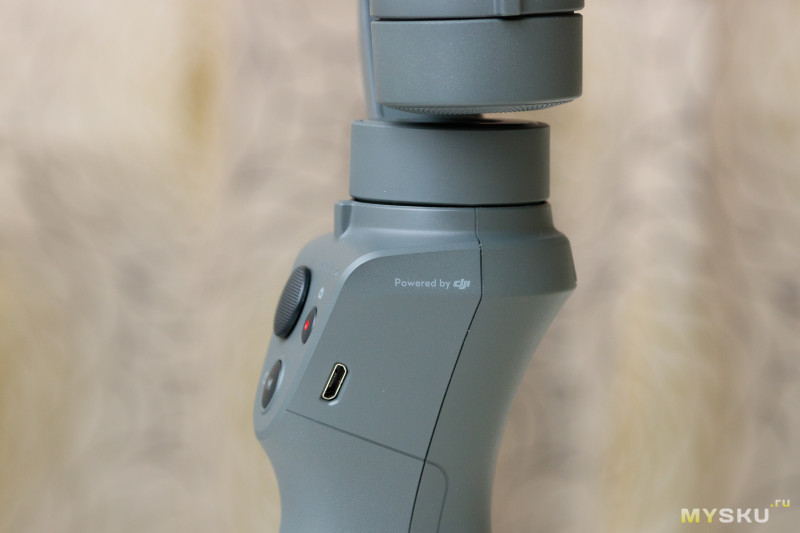
При зарядке мигают светодиоды уровня заряда, чем больше светодиодов мигает, тем ближе к полному заряду:
Приложение
Чтобы полностью раскрыть функционал стабилизатора необходимо установить приложение DJI Go (доступно на Android и iOS). Приложение универсальное (подходит также для дронов и камер), поэтому необходимое устройство в нем еще нужно поискать, благо выбор сохраняется и при последующих запусках повторно искать не нужно.
При первом запуске, приложение предлагает активировать устройство:
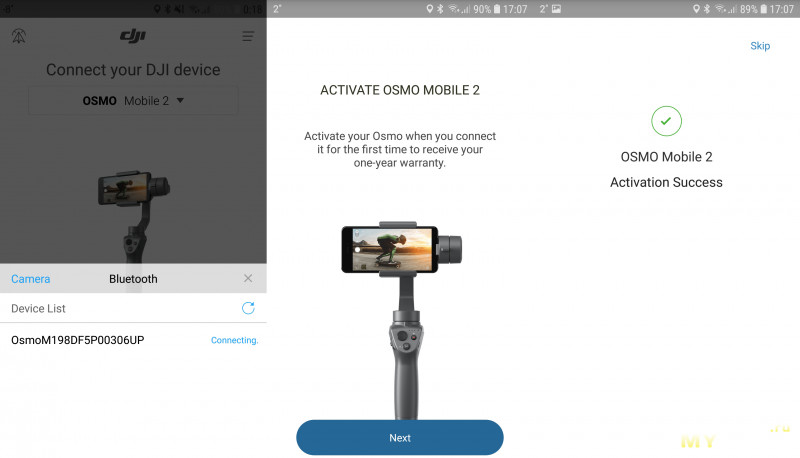
С этого момента начинает действовать гарантия 1 год.
Так выглядит основное окно приложения:
На нем присутствуют иконки настроек (как текущего режима, так и общие), индикаторы подключения к стабилизатору, а также индикаторы заряда батареи (телефона и стабилизатора).
Видео
Режимов записи видео четыре — это auto, timelapse, hyperlapse и m-timelapse:
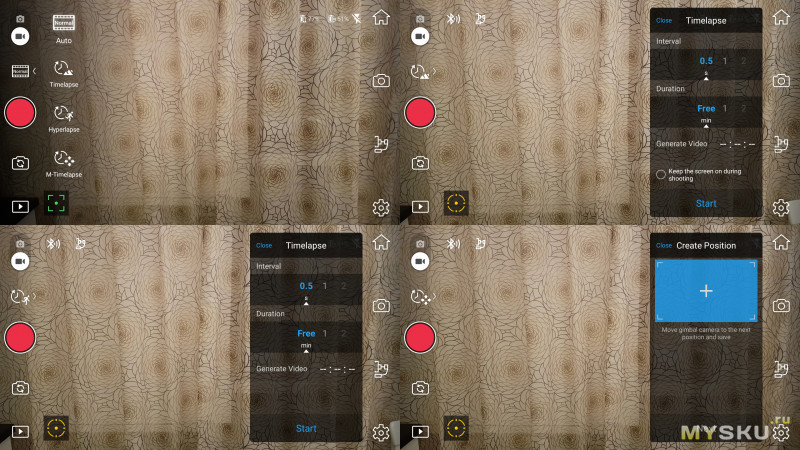
Рассмотрим их поподробнее:
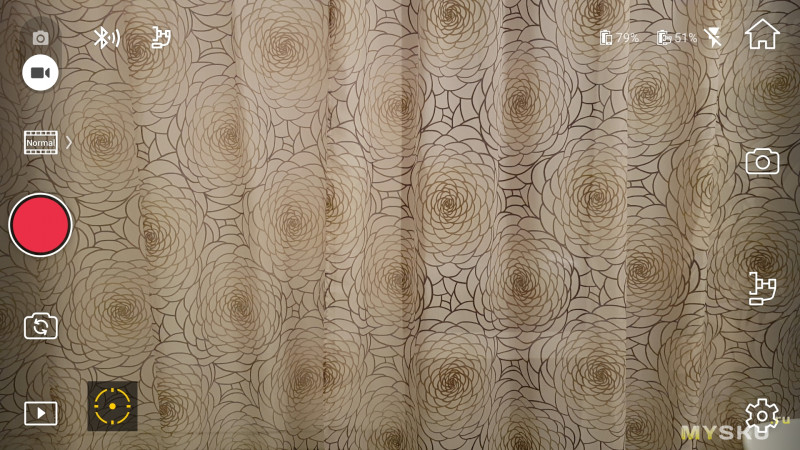
1.Auto. Это обычная запись видео со стабилизацией. Из дополнительных возможностей здесь только функция слежения — Active Track. Активируется она нажатием на прицел в левом нижнем углу, после чего на экране можно тапнуть на объект за которым хотим следить. И все, теперь стабилизатор будет стараться держать этот объект в центре кадра автоматически. При этом даже если объект будет чем-либо загорожен или исчезнет, устройство будет пытаться продолжать его вести на основании данных гироскопа, а также узнает объект если он снова попадет в кадр.
2. Timelapse. Это обычный timelapse, т.е. ускоренное многократно видео снятое с частотой менее 1 к./сек. Тут ничего интересного, такое можно и со штативом за три доллара снимать, разве что со стабилизатором удобнее настраивать вид, да и горизонт выставляется автоматически.
3. Hyperlapse. То-же что и timelapse, только при этом можно перемещаться при съемке, конечно со стабилизацией. Особенно интересно применение функции совместно с Active Track.

4. M-Timelapse. Или Motion-Timelapse. В этом режиме можно задать до 5-ти точек (точнее позиций) стабилизатора, которые он медленно обойдет в процессе съемки timelapse. То есть получается timelapse с плавным изменением угла.
Фото
Режимов съемки фото три: Single, PANO и Long Exposure
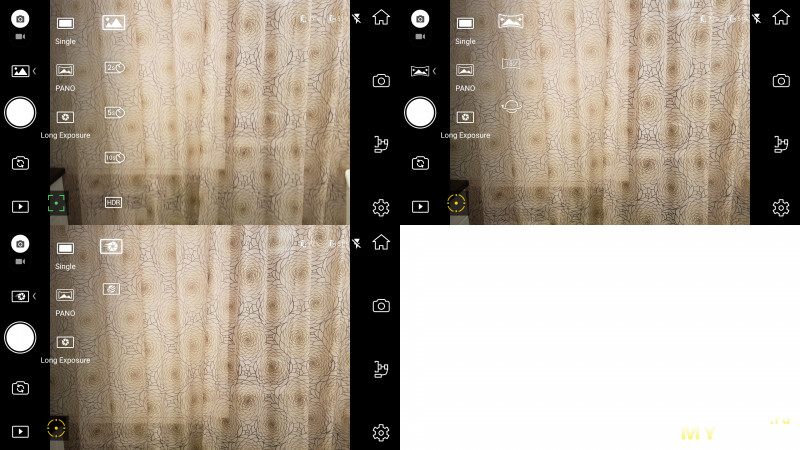
1.Single Обычная фотосъемка. Не совсем понимаю зачем тут стабилизатор, можно ведь и просто с телефона сфотографировать. Возможно производитель предполагал использование стабилизатора в качестве штатива для фотографирования себя с кем-нибудь или на фоне чего-то (настройка автоспуска на это намекает). Только вот стоять сам по себе стабилизатор будет только на идеально ровной поверхности.
2.PANO Самый интересный режим. В нем стабилизатор сам делает панорамные снимки. То есть направляем камеру в центр предполагаемого кадра, нажимаем на спуск и он начинает крутиться параллельно делая фотографии а после склеивает их. В зависимости от настройки можно склеить панораму из 9, 15 или 27 кадров. Для лучшего качества желательно как-нибудь зафиксировать ручку стабилизатора, но и с рук тоже снимает неплохо. Панорамные снимки при этом получаются куда лучше чем при использовании штатной функции телефона, т.к. минимизируются перемещения телефона при съемке.
3.Long Exposure Как видно из названия это фото с длинной выдержкой. При этом стабилизатор должен уменьшить шевеленку при съемке. Да, эффект есть, но идеально четкой картинки с рук добиться сложно, смазанность все-равно присутствует, хоть и меньшая чем если снимать с рук.
Справа на основном экране находится панель настроек:
Самая верхняя кнопка домой, выходит из режима камеры в меню выбора устройства. Ниже находится кнопка настроек изображения.
Тут можно выбрать разрешение видео, настроить баланс белого, включить сетку.
Еще ниже — кнопка быстрых настроек стабилизатора, здесь можно включить режим спорт, а так же заблокировать тангаж в плавающем режиме.
И наконец в самом низу расположена кнопка всех остальных настроек:
Тут можно откалибровать горизонт, настроить поведение и скорость реакции на джойстик, а так же настроить стриминг на фейсбук, ютуб и другие сервисы.
За все время использования каких-либо зависаний или «вылетов» ни на Android, ни на iOS устройстве мною замечено не было.
Примеры фото и видео
Фото Ultrawide Angle:
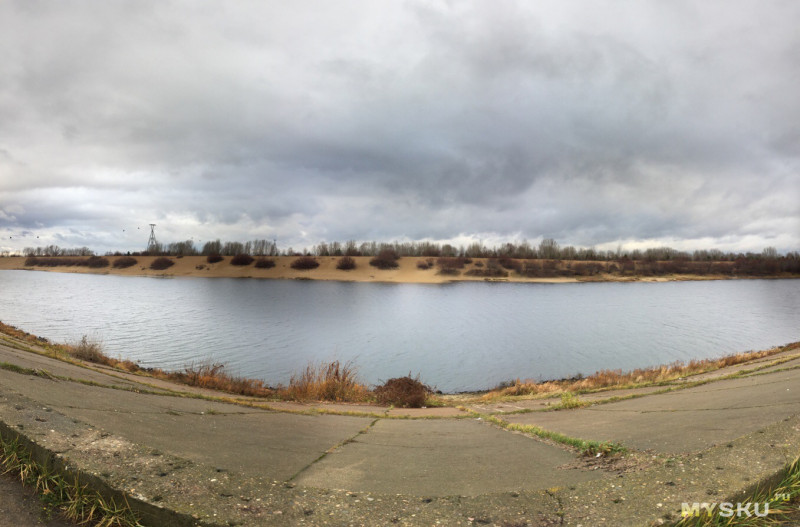
Фото 180°:
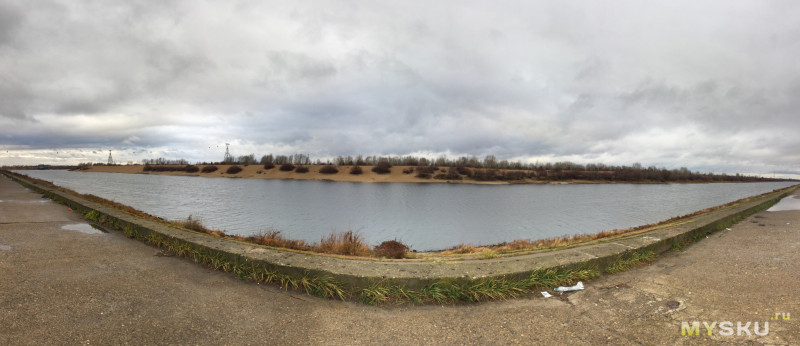
Фото Panorama:

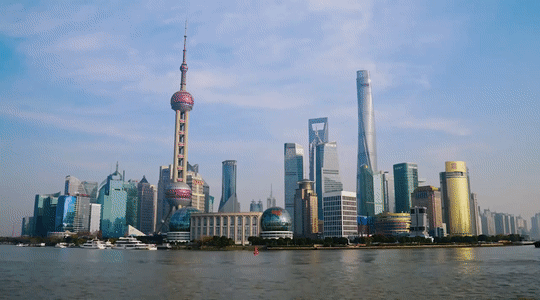
Видео во время ходьбы:
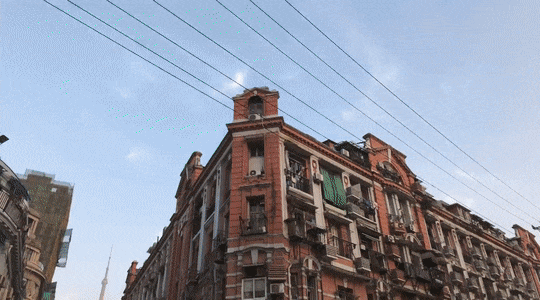
Во время бега:
Ну и небольшая импровизация 
Выводы

Поскольку до этого я не держала подобные устройства в руках, то первые мысли у меня были: «Вау, как здорово, можно вертеть ручкой как хочешь, при этом телефон остается неподвижен!». И это действительно завораживает. Но на практике, чтобы снимать хорошие видео к стедикаму нужно привыкать. Привыкать к управлению джойстиком, чтобы не было промахов. Привыкать держать его чуть наклонив вперед, чтобы лучше гасить тряску от шагов.
Правда, если задачи снять идеальное кинематографически плавное видео не стоит, то все намного проще. При съемке спортивных сцен в условиях сильной тряски стабилизатор реально выручает.
К плюсам устройства можно отнести идеальную стабилизацию, бесшумную работу моторов, емкий аккумулятор а так-же хорошее приложение с множеством режимов съемки. Из минусов — моторчики все-таки слабоваты и рассчитаны только под относительно легкие телефоны. При использовании с экшн-камерой Xiaomi MiJia 4K с алюминиевым адаптером и несколькими грузиками для балансировки в некоторых случаях моторы начинают сильно вибрировать и шуметь, то есть такая нагрузка великовата для устройства. Еще стабилизатор подходит не для всех телефонов, так, на Samsung S7 камера расположена слишком далеко от верхнего края и в некоторых положениях мотор стабилизатора попадает в кадр. При попытке отодвинуть телефон влево — сильно нарушается балансировка и устройство выключается.
Купила бы я этот стабилизатор за свой счет? Скорее всего нет — на мой взгляд цена подобных устройств сильно завышена, возможно в силу отсутствия большого спроса. Однако никаких претензий к работе стедикама у меня нет, стабилизирует хорошо. Так что если он вам действительно нужен могу смело рекомендовать.
Спасибо за внимание!
Товар для написания обзора предоставлен магазином. Обзор опубликован в соответствии с п.18 Правил сайта.