Время на прочтение
7 мин
Количество просмотров 12K
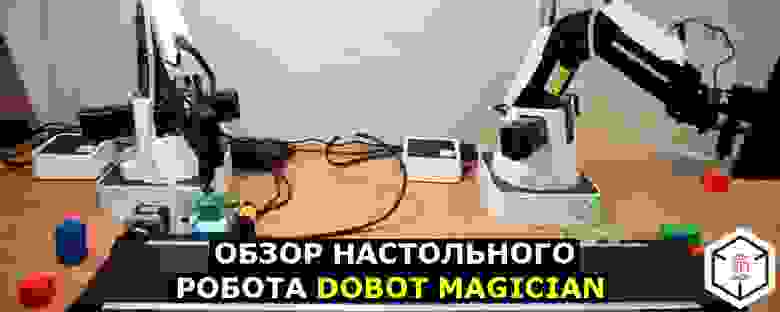
Здравствуйте! Сегодня мы рассказываем о небольшом настольном многофункциональном роботе манипуляторе DoBot Magician, предназначенном для образования — знакомства с робототехникой, ЧПУ и аддитивными технологиями, основами программирования.

Видео
Небольшой видеообзор даст первое представление об этой роборуке. Подробнее — далее в статье.
DoBot Magician
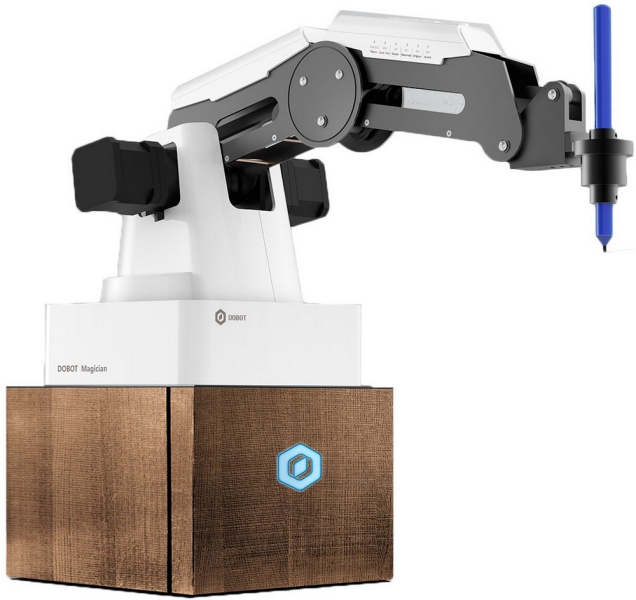
Характеристики
- Осей: 4
- Загрузка: 500г
- Дальность действия манипулятора: 320мм
- Точность: 0,2 мм
- Соединение: USB / Wi-Fi / Bluetooth
- Питание от сети: 100-240В, 50/60 Гц
- Выход блока питания: 12В/7A
- Потребление максимальное, Ватт: 60
- Рабочие температуры, °C: -10 — +60
- Вес робота без насадок, кг: 3,4
- Вес стандартного набора в упаковке, кг: 7,2
- Вес образовательного набора в упак., кг: 8
- Диаметр подставки: 158мм
- Материалы: Алюминиевый сплав 6061, ABS
- Форм-фактор: Настольный
- 3D-принтер: принт макс., мм: 150 × 150 × 150; материал печати: PLA; разрешение: 0,1мм
- Лазер: мощность: 0,5Вт; длина волны: 405нм; напряжение: 12В; TTL trigger ( With PWM Driver )
- Держатель пера: диаметр инструмента: 10мм
- Вакуумная присоска: диаметр: 20мм, давление -35 кПа
- Захват: пневматический, раскрытие до 27,5мм, сила: 8 Ньютонов
- Цена: 106 120 рублей
Уникальный миниробот имеет открытую аппаратно-программную платформу — он оснащен 13 портами ввода-вывода и может работать с двумя десятками языков программирования.
Благодаря комплекту насадок DOBOT Magician может перемещать объекты, выполнять гравировку лазером и 3D-печать, чертить и рисовать.
Распаковка
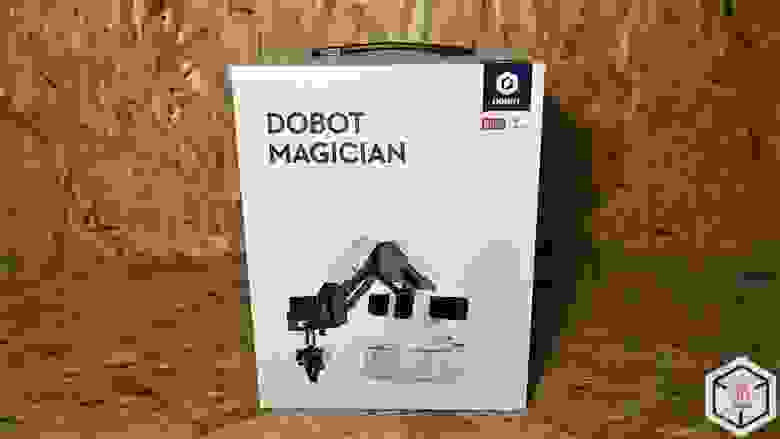
Робот приходит в такой коробке:
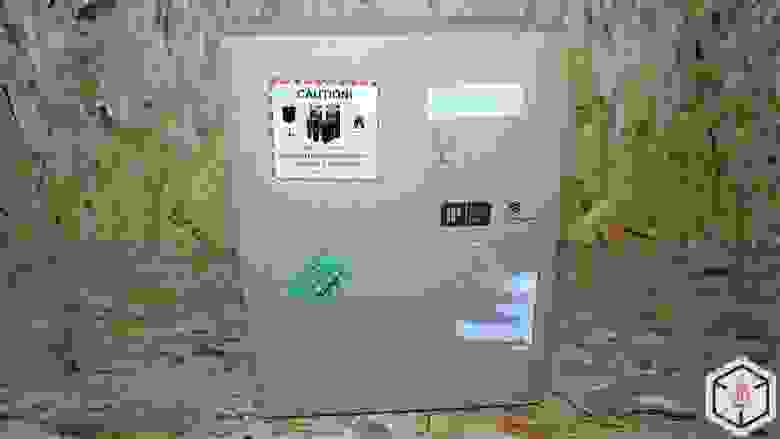
Внутри еще одна.
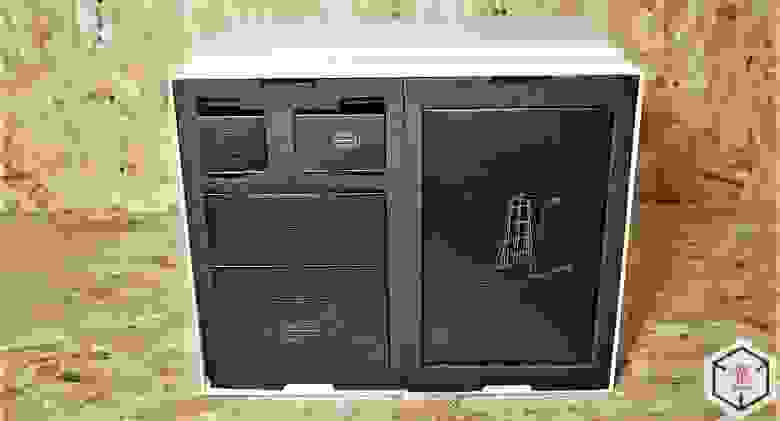
А в ней, в транспортировочной пене, коробочки поменьше.
Комплектация

DoBot Magician поставляется в двух вариантах комплектации: Базовый и Образовательный. У нас на обзоре Образовательный набор, базовый отличается от него лишь отсутствием модулей Bluetooth и Wi-Fi, джойстика, лазера и очков для работы с ним.
В комплект поставки образовательного робота манипулятора Dobot Magician входят: механический захват, вакуумная присоска, комплект для 3D-печати, лазер, держатель для ручки. Производитель постоянно расширяет ассортимент доступных насадок и аксессуаров, возможен предварительный заказ слайдера, миниатюрного конвейера и модуля компьютерного зрения. В ближайших планах DoBot — выпуск насадки для фрезерования.
Подробнее:
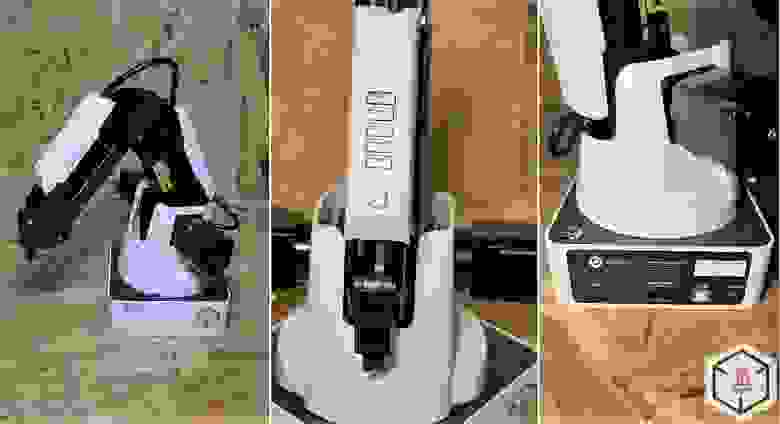
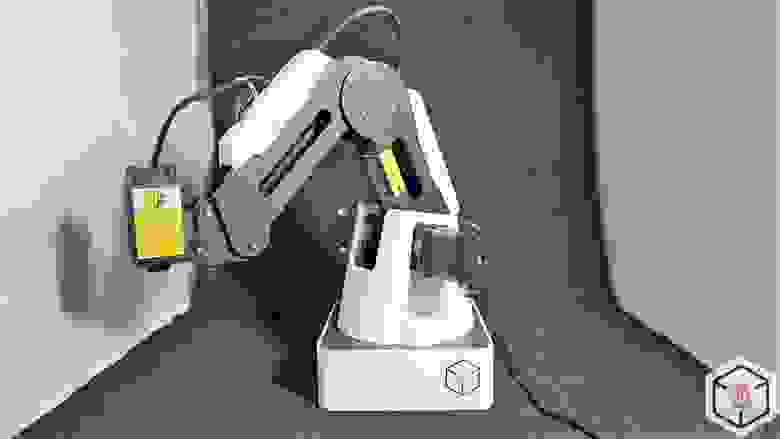
Сам манипулятор, который имеет слоты подключения периферии на втором сочленении и на задней стенке базы робота. Манипулятор приводится в движение тремя шаговыми двигателями, которые оснащены датчиками обратной связи и редукторами.
Серводвигатель, который выступает в роли четвертой оси робота. На нем можно закрепить вакуумный или механический захват.
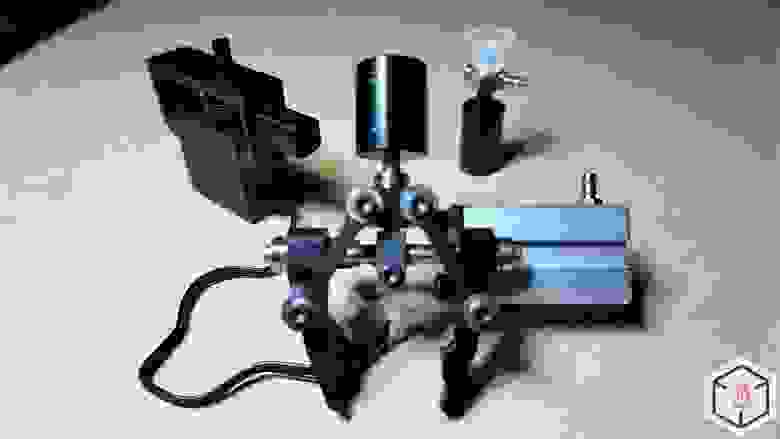
Захваты приводятся в движение воздушной помпой.
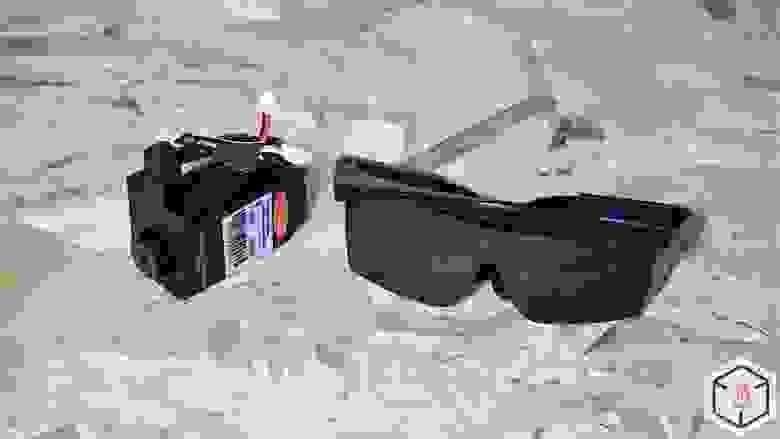
В качестве рабочего инструмента можно установить лазерную головку. В комплекте, для защиты зрения пользователя, есть специальные очки.
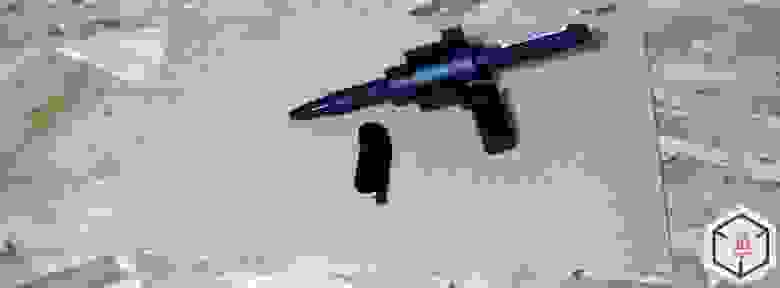
Есть держатель пера, для написания текста или рисования, в него можно установить авторучку, лайнер или карандаш диаметром до 10мм.
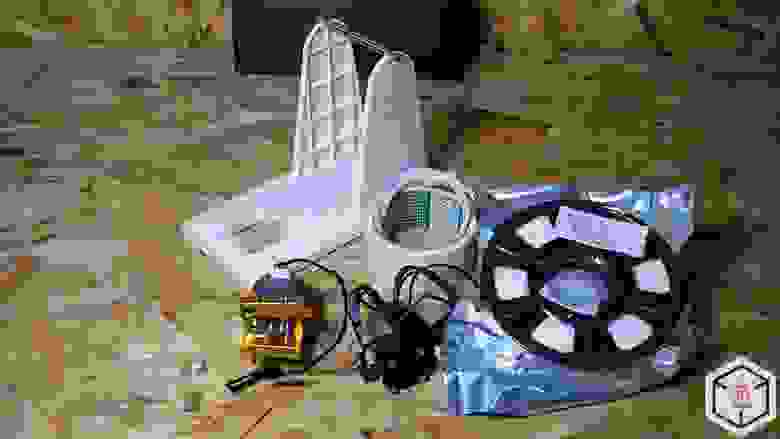
Набор для 3D-печати: блок экструдера, подставка под катушку пластика, катушка PLA, тефлоновая трубка, стекло и малярный скотч. Скотч служит для закрепления стекла на столе.
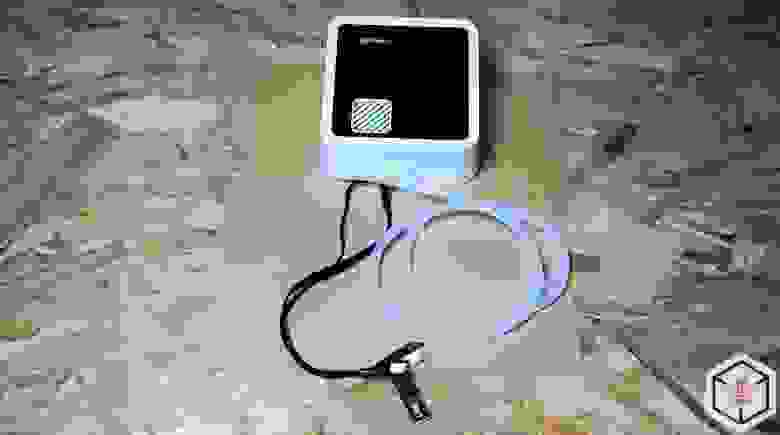
Управлять манипулятором можно не только с компьютера, но и дистанционно, с помощью джойстика подключенного по Bluetooth. Кабель USB нужен для зарядки аккумулятора в джойстике.

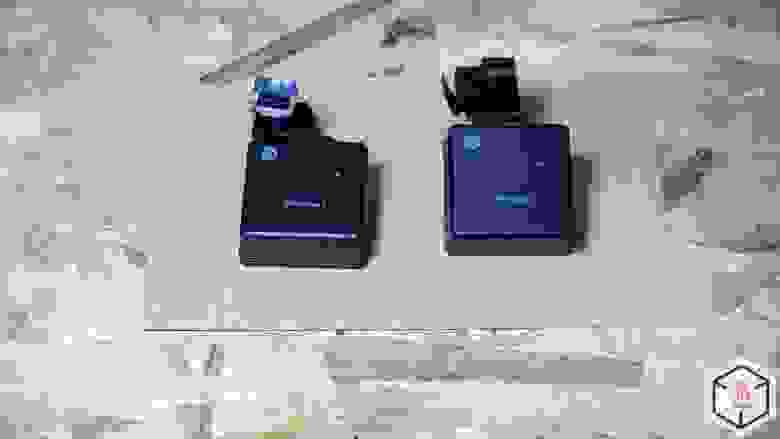
Модули Bluetooth и Wi-Fi.
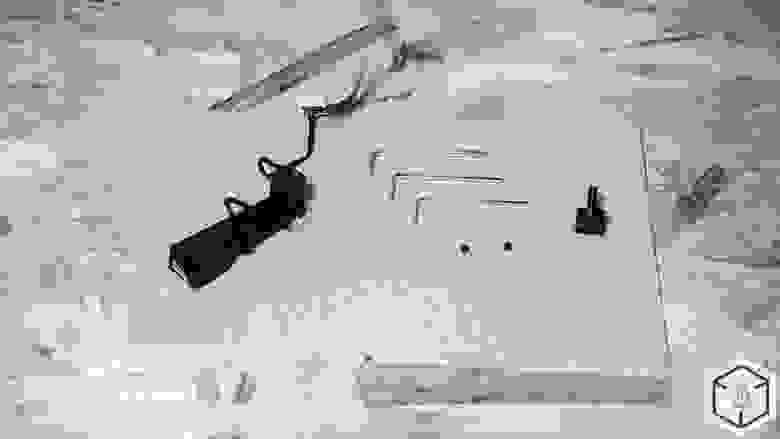
Устройство для автоматической калибровки, запасные винты и шестигранники.
Блок питания, кабель USB для соединения с ПК.

Краткая инструкция.

ПО
Для управления манипулятором надо установить драйвер и программу DoBot Studio, которые можно скачать с официального
сайта
.
Magician совместим со многими актуальными аппаратными и программными средствами, которые широко используются в робототехнике. Например, заявлена поддержка программной платформы ROS (Robot Operating System) и микроконтроллеров Arduino.
Так выглядит основной экран Dobot Studio.
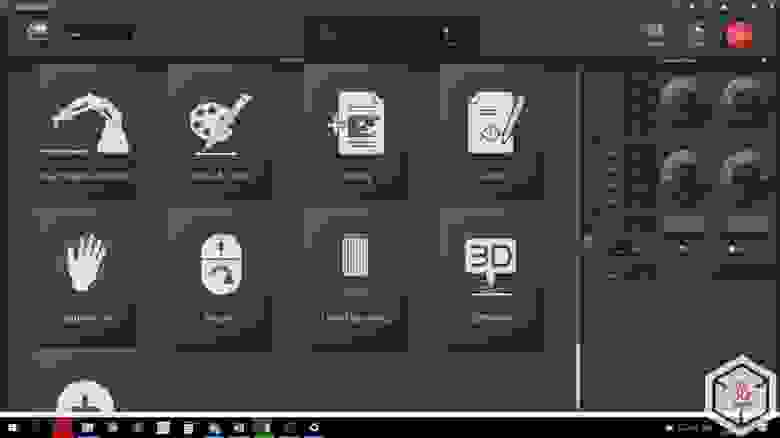
В основном окне мы видим выбор режимов работы робота, справа располагается панель управления манипулятором, чуть выше находится меню настроек, кнопка экстренной остановки и кнопка «Home», а посередине окно выбора инструмента.
Софт DoBot Studio допускает управление несколькими роботами одновременно. По сути, прямо на столе можно создать имитацию сборочной линии, этому также способствует совокупность технических параметров, среди которых приемлемая повторяемость.
Управление
DoBot Magician гибок в управлении — программировать роборуку и управлять ею в режиме реального времени можно с помощью компьютера, смартфона или планшета. В качестве канала связи используется как Wi-Fi или Bluetooth, так и проводное USB-соединение. Робот может распознавать голосовые команды и жесты.
Режимы программирования
Основным режимом является «Обучение и повторение».
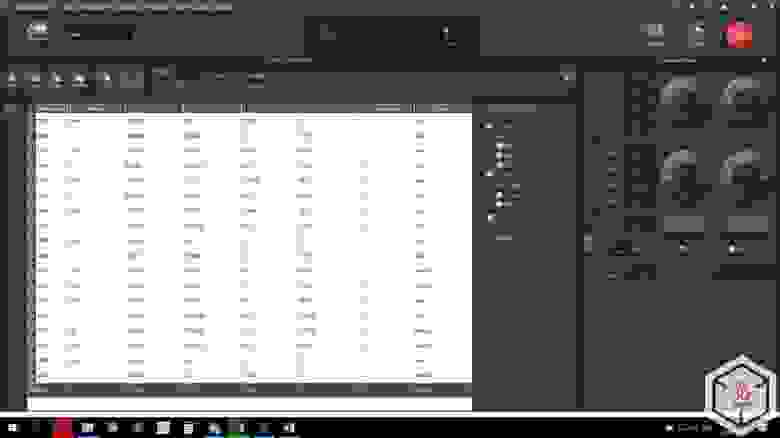
В этом режиме можно создавать управляющие программы, которые робот сможет выполнять единожды или циклично. Обучать робота можно двумя способами:
1.: На втором сочленении располагается кнопка, при нажатии на которую с двигателей снимается ток удержания и, благодаря этому, появляется возможность свободно перемещать манипулятор вручную. После перемещения инструмента и отпускания кнопки, координаты запишутся в таблицу.
2.: Переместить инструмент в нужное положение можно и с помощью панели управления, которая расположена в правой части экрана. Двигать можно как линейно, по осям, так и каждое сочленение поочередно. После перемещения, соответствующая координата сохраняется путем нажатия кнопки “+ Point”.
После записи всех координат и настройки способов движения, нажатием кнопки Play, мы запустим выполнение управляющей программы.
Управляющую программу можно загрузить в память манипулятора, чтобы он выполнял работу в режиме офлайн.
Для отладки существует кнопка Step Run, позволяющая запустить программу пошагово, чтобы убедиться в правильности движения.
Два следующих режима, «Блочное программирование» и «Скрипт», созданы для более глубокого изучения программирования и робототехники. В них возможно создание гораздо более сложных алгоритмов поведения, добавление условий выполнения различных сценариев.
Для начинающих, которые еще плохо знакомы с языками программирования, отлично подойдет режим Блочного программирования. Вместо запоминания сложных синтаксических форм и обозначений здесь используются блоки обозначающие условия, циклы, функции, математические преобразования. Тело программы выстраивается путем вставки одних блоков в другие.

Для продвинутых пользователей существует режим «Скрипты», где они смогут использовать весь потенциал этого робота, используя язык программирования Python.

Режимы работы
Для того, чтобы оценить максимально возможную область перемещения инструмента “живьем”, можно воспользоваться функцией управления манипулятором с помощью «мыши».
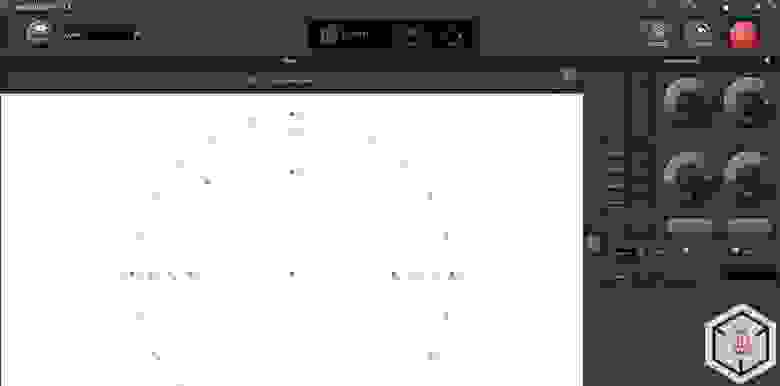
Следующий режим — «Рисование». В качестве инструмента на манипулятор, в специальный подпружиненный держатель, устанавливается ручка.

Можно создать надпись, вставить рисунок из встроенной библиотеки или добавить собственный.
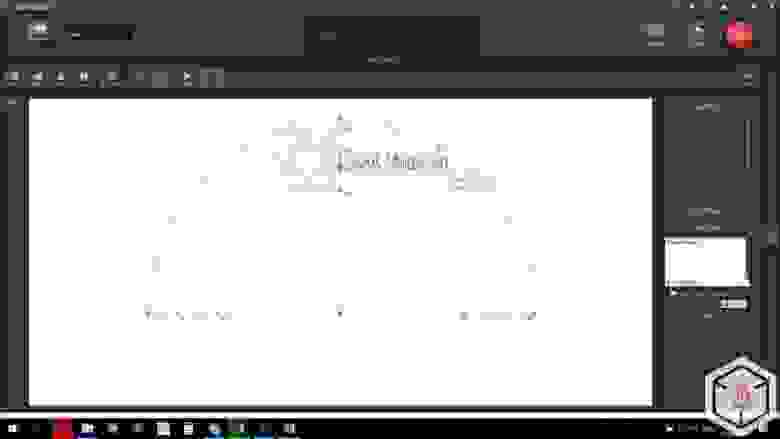
Контуры воспроизводятся с высокой точностью.
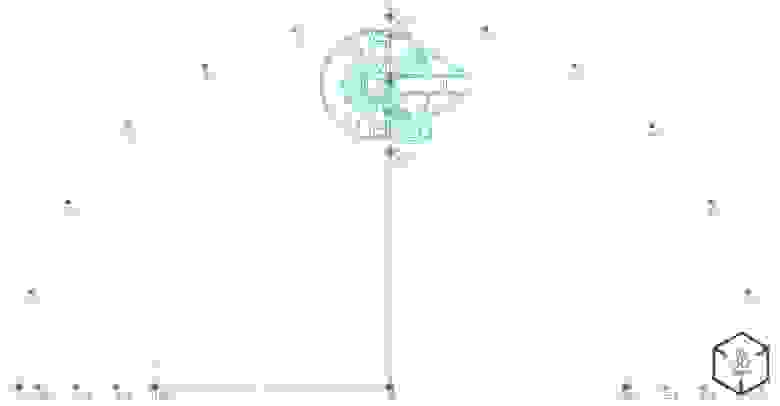
Лазерный гравер. С помощью лазера можно выжигать или гравировать изображения.
Из настроек доступны «Диапазон оттенков серого», минимальная и максимальная мощность, в общих настройках можно отрегулировать скорость и ускорение.

Обработке поддаются многие материалы, такие как дерево, кожа, бумага, картон, акрил.

3D-печать. Для того, чтобы перейти к подготовке файла для печати, потребуется загрузка новой прошивки. При нажатии на кнопку “3D-печать” в главном меню, программа сама предложит изменить прошивку, вам просто нужно дождаться окончания загрузки и установки.
После этого откроется довольно привычное многим 3D-печатникам окно программы Repitier Host.
Здесь мы вбиваем параметры принтера, подгружаем профили печати и можно приступать к слайсингу.

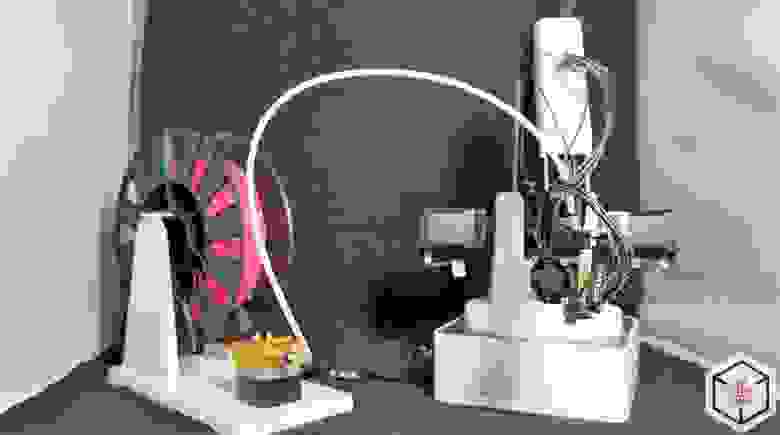
Представленные ниже детали печатались на скорости всего 4 мм/с, поэтому печать заняла около 14 часов. Это стандартное значение скорости, взятое из родного профиля. Для облегчения веса экструдера, двигатель подачи пластика вынесен отдельно на платформу держателя катушки. Из-за этого приходится сокращать или вовсе убирать ретракты в настройках слайсера.

Вот так происходит печать.
К сожалению, из-за специфики строения аппарата, манипулятор имеет значительный люфт на инструменте. Это не мешает точному позиционированию при малых значениях ускорений и при использовании вакуумного или механического захвата. При использовании лазерного модуля и хотэнда, которые имеют немалый вес, этот люфт становится заметен.
Режим ручного управления. Управляя роботом с помощью джойстика, можно совершенствовать свои навыки в управлении подобным устройством и просто весело проводить время.
Если требуется более глубокое понимание принципов работы роботов манипуляторов и их сфер применения, то, с помощью второго DoBot,
конвейера
, инфракрасного и цветового датчика можно собрать небольшую производственную линию.
Для их синхронизации и запуска потребуется подключить оба робота к одному компьютеру и открыть два окна Dobot Studio, в которые загружаются исполняемые программы, которые скачиваются с сайта производителя, для каждого отдельного робота. Перед первым запуском систему нужно откалибровать, для этого в программе есть специальные переменные, которые можно изменять.
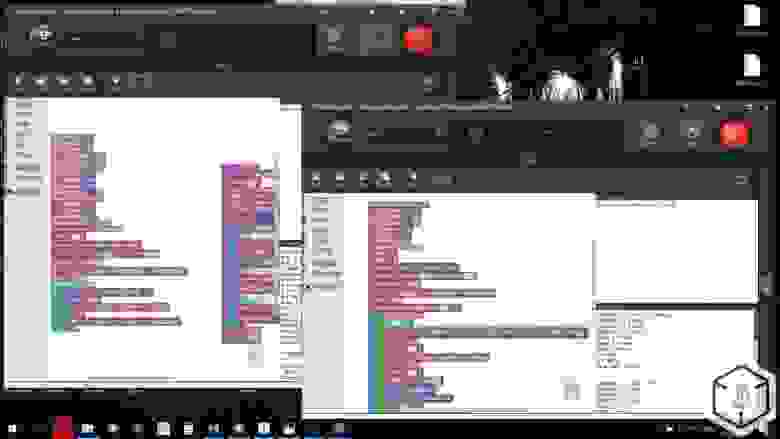
Правый манипулятор, по заданному алгоритму и с заданной периодичностью, выкладывает кубики на конвейерную ленту, а левый манипулятор регистрирует наличие кубика на ленте (с помощью инфракрасного датчика), определяет его цвет (с помощью цветового датчика) и помещает кубик в соответствующую стопку.
Назначение
Пример применения DoBot компанией Volkswagen.
DoBot Magician отлично подойдет для обучения детей. Учебный процесс с его участием может начинаться с простейшей игровой формы, благодаря наличию джойстика. Следующий шаг — основы программирования, сначала в блочном редакторе, а потом и скрипты.
Столь наглядное и интерактивное обучение намного эффективнее работы с “сухим” кодом, особенно в самом начале.
Учитывая интересы более продвинутых потенциальных пользователей, разработчики предусмотрели возможность подключения разнообразной периферии, которая не поставляется в комплекте. Это могут быть всевозможные датчики, сервоприводы и шаговые двигатели, светодиодные приборы и множество других электронных устройств, включая микрокомпьютеры и микроконтроллерные платформы, такие как Arduino. Учитывая это, можно рекомендовать DoBot Magician не только школам, но и техникумам, и вузам, как исключительно удачное наглядное пособие.
Уже сегодня этот миниробот используется как одно из основных средств STEM-обучения в ведущих китайских вузах — Университете Цинхуа и Шаньдунском политехе, а также в Австралии — в Сиднейском технологическом университете.
Выводы
Рассматривать качество работы DoBot Magician в сравнении с обычным 3D-принтером или лазерным гравером нельзя. Он никогда не даст качество 3D-печати сравнимое даже с бюджетными принтерами, но это естественно: это не принтер и не гравер, это совершенно другой аппарат, с иными задачами, которые он выполняет отлично.
Если вы работаете в сфере образования и ищете максимально эффективные средства обучения, обратитесь в
Top 3D Shop
— наши сотрудники подберут оптимальное для выполнения ваших задач оборудование.

Хотите больше интересных новостей из мира 3D-технологий?
Подписывайтесь на нас в соц. сетях:


Подписывайтесь на наш телеграм-канал с отборными кейсами роботизации и автоматизации со всего мира: https://tglink.ru/easy_robotics
Перейти к основному содержанию
+7 (800) 555-19-56,+7 (495) 221-26-45
Руководство по работе с роботом-манипулятором Dobot Magician содержит подробное описание основных этапов установки, наладки и эксплуатации этого мощного оборудования.
- Установка драйвера и проверка правильности работы оборудования.
- Работа со студией DobotStudio.
- Обучение и воспроизведение. Функции Teaching & Playback.
- Письмо и рисование.
- Лазерная гравировка и гравировка с тенями.
- 3D-печать. Установка инструментов и обзор параметров 3D-печати.
- Приложения Repetier Host и Cura для 3D-печати.
- Оборудования Bluetooth и WIFI.
- Работа с контроллером для джойстика и компьютерной мышью.
- Базовая калибровка.
- Ручное и автоматическое выравнивание.
- Платформа программирования Dobot Blockly.
Многофункциональная образовательная инженерная платформа DOBOT Magician является полной и доступной обучающей системой, охватывающей все аспекты образовательной робототехники, включая программирование и эксплуатацию промышленных роботов.

Учебные станции инженерной платформы DOBOT Magician могут управляться и программироваться с помощью пульта управления или от главного компьютера через программную среду Dobot Studio. Программа даёт ученикам возможность подготовить свои исследования в трёхмерной среде моделирования, имитировать их, а затем перейти в режим управления, чтобы выполнить последовательность определённых действий в реальном мире.
Комплектация DOBOT Magician:
|
|

|
Спецификация:
|
Движение по осям: Диапазон / Макс. скорость (при нагрузке 250 г.)
|
Характеристики насадок:
|
Блок FDM 3D-печати
Пневмо-захват
|
Лазерный гравер
Держатель пера Диаметр ручки: 10 мм Вакуумная присоска
|
Программное обеспечение DOBOT Magician:

|
Языки программирования:
|
Программное обеспечение:
|
Программное обеспечение для разработчиков (SDK):
- Описание протокола взаимодействия, библиотеки программ Dobot
- Расширяемые порты ввода/вывода (I/O Interface)
- Настраиваемые аналоговые порты ввода или ШИМ вывода х 10 шт
- Управляемые порты подачи питания 12 В × 4 шт
- Интерфейсы (UART, Reset, Stop, 12В, 5В и два ввода/вывода)
- Порты подключения шаговых двигателей х 2 шт
Актуальную версию программного обеспечения и среду разработки для образовательного манипулятора DOBOT Magician можно скачать с официального сайта.
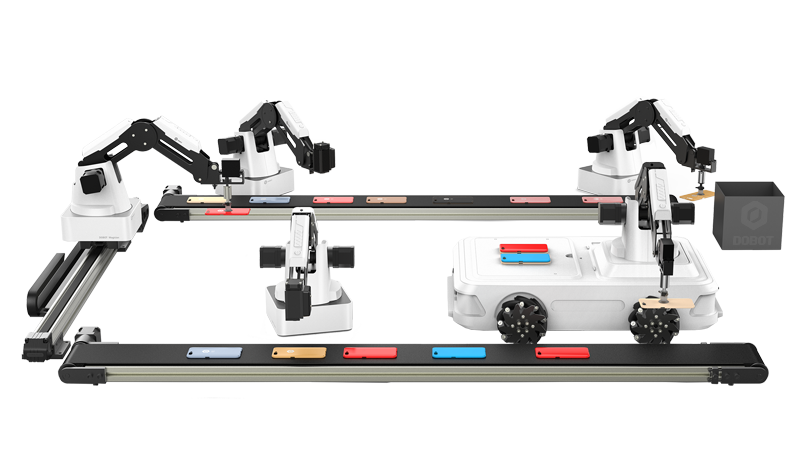
При помощи дополнительных модулей (в комплект не входят), специально разработанных для использования в школах, ученики смогут ознакомится с одной из наиболее важных областей применения автоматических систем — их применения в промышленном производстве.
|
Комплект линейных перемещений DOBOT Magician
Комплект направляющих рельсов для моделирования производственных линий |
Конвейерная лента DOBOT Magician
Конвейерная лента с датчиком цвета для моделирования производственных линий |
Модуль технического зрения DOBOT Magician

Набор аппаратной платформы для разработки
системы технического зрения
|
Модули могут быть объединены в более сложные «производственные» линии для расширения возможностей обучения и совместной работы над проектом. На практике доказано, что после непродолжительного начального обучения, ученики могут взять на себя роль инженеров и начать создавать на базе учебных станций собственные автоматизированные системы. |
 |

Для данного товара еще нет отзывов, ваш отзыв может стать первым!
Magician Robot
The Magician is the world’s first desktop grade 4-axis robot. It can perform a wide range of tasks such as 3D printing, laser graving, calligraphy and drawing. 13 interface ports are available to support secondary developement, lab projects and robotics curricula.
Studies such as robotic systems, the DH convention, control of robot movement and robot programming can be taught to different levels of students. A variety of application scenarios can be developed through the use of programming software and hardware accessories.
Operable by
One Person
The Magician is designed for students and consumers in mind. It is extremely portable and capable of various automation tasks. Users can interact with the Magician using quick access command buttons or wirelessly with portable computing devices.
Teach Robot
Physically
The Magician is capable of drag-to-teach. Simply by moving the robotic arm through desired paths to program it. It’s that simple.
High Expandability with Secondary Development
The Magician has 13 interface ports and wireless connectivity for secondary development. Controller support is available for beginners.
Wide Selection of Accessories
A wide variety of accessories such as grippers, rails, conveyor belts, mobility and vision modules are available to allow the Magician to complete different tasks.
Questions? We’re here to help!
Our experts are ready to assist you in planning your path to automation success.
They can provide answers to all your Dobot-related queries, including:
√ Our Information on our product portfolio and pricing
√ Tailored solutions that suit your business needs
√ Distributor partnership policy and more…
Dobot Magician
DOBOT Magician is a multifunctional desktop robotic arm for practical training education. Installed with different end-tools, DOBOT Magician can realize interesting functions such as 3D printing, laser engraving, writing and drawing. It supports secondary development by 13 extensible interfaces and over 20 programming languages, which really makes your creativity and imagination increase without any limitation. As the good performance both in hardware design and software application, DOBOT Magician has won the CES 2018 Innovation Award and iF DESIGN AWARD 2018.
Content
- Where To Find
- In The Box
- How To Make It Works
- Assembly
- SuctionCup
- Gripper
- Pen
- 3D Printing
- Laser Engraving
- WIFI Kit
- Bluetooth Kit
- Connecting With PC And Software Setup
- Assembly
- Operation
- Quick start 1 — Teaching and Playback
- Quick start 2 — Writing and Drawing
- Quick start 3 — Blockly
- Functions
- SDK
- SDK Demos Content
- Source code
- API Interface Description
- Examples On Github
- Putting The Device Back
- More Documentations
Where To Find
Storage room — shelve C
In The Box
Here you can see the included components and their locations. The Dobot Magician box has two layers and many boxes. Please check the content list when you get and place them well by following the presented pictures before you return since the components are fragile.
- Robot Arm
- Power Cable Box
2.1 Power Adapter
2.2 USB Cable
2.3 Charger - Masking Tape (3D Printing)
- Feed Pipe (3D Printing)
- Accessories Box
5.1 Shipping list
5.2 User Manual
5.3 Glass Plate (3D Printing)
5.4 Sensor Calibration Board
5.5 Kraft Linner Paper (Laser Engraving) - Wireless module box
6.1 Bluetooth Module (wireless-1)
6.2 WIFI Module (wireless-2) - Laser controller box
7.1 Joystick controller kit
7.2 Laser Module
7.3 USB Connector Host - Laser Protective Glasses
- Laser Engraving Kit
- Main kit box
10.1 Writing Drawing Kit (Pen Holder, Pen)
10.2 Pneumatic Kit (Pneumatic Gripper, Suction Cup & Joint 4, Air Pump Controller)
10.3 Tool Package (Hexagon Screwdriver M1.5 M2 M2.5, Quick Fix Screw, Calibration Tool, Jackscrew * 2) - Extruder
- Hot End
- 3D Printing Filament Holder
- Filament 200g


How to make it works
Assembly
The robot already assembled and just few steps is needed to get it to work
- Choose the tool you want to Connect
- Put it at the end of the robot arm by losing the screw below
- Follow the steps below for the tool you chose
Below is the picture which showing the official name of the different parts in Dobot Magician arm.

SuctionCup
For connecting SuctionCup, you need the suction cup kit and an air pump.
- Connect the air pump’s power cable SW1 to the SW1 connector on the Dobot Magician base’ rear panel and the siganl cable GP1 to the GP1 connector.
- Insert a suction cup kit into the end’s port, and fasten it with clamp fixing screw.
- Connect the air pump’s air tube to the air tube connector of the suction cup kit
- Connect the servo’s GP3 cable to the GP3 connector on the Forearm
Gripper
For connecting Gripper, you need the Gripper kit and an air pump which helps open and close the gripper.
- Dismantle the suction cup by unfastening its terminal strand with a 1.5mm hexagon wrench.
- Install a gripper kit to the servo with a 2.5mm hexagon wrench
- Connect the gripper kit and an air pump to the Dobot Magician in the same way as the suction cup kit is installed
Pen
A writing and drawing kit consists of a pen and a pen holder.
- Install a pen in the pen holder
- Fasten the writing and drawing kit to the Dobot Magician’s end with clam fixing screw
- Posistion a sheet of paper on the work surface within the workspace of the Dobot Magician
3D Printing
3D printing kit contains extruder, hot end, motor cable, filament, and filament holder.
- Press down the lever on the extruder, and push down the filament to the bottom of the hole via the pulley
- Connect the end of the PTFE tube to the hot end and push it down to the bottom of the hot end, and connect the other end to the extruder
- Insert the filament intto the PTFE tube and push it down to the bottom of the hot end
- Fix the hot end on the Dobot Magician with lamp fixing screw
- Insert the heating cable to the interface4 on the Forearm, the fan cable to the interface5 and the thermistor cable to the interface6
- Connect the extruder to the Stepper1 interface on the back of the base with motor cable
- Place the filament and the extruder to the filament holder
Laser Engraving
A laser kit includes a laser. Both grayscale-engraving and laser-engraving use the laser kit as the end-effector.
- Fasten the laser kit to the Dobot Magician’s end with clamp fixing screw.
- Connect the laser’s power cable to the SW4 connector on the Forearm and the TTL control cable to the GP5 connector
WIFI Kit
You can connect Dobot Magician to a PC via WIFI kit without USB cable, making Dobot Magician and PC in the same WLAN.
Prerequisites:
- Dobot Magician has been connected to a PC via USB cable
- Dobot Magician has been connected to the power adapter
- The WIFI name and password have been obtained and must be the same as that of PC
Procedure:
- Connect the WIFI kit to the UART interface on the base
- Press down the power button to turn on the Dobot Magician
- Select the corresponding serial port from the serial drop-down list, and click Connect
- Click Setting>Wi-Fi. The Set Dobot Wi-Fi page is displayed.
- Set the related parameters on the Set Dobot Wi-Fi page
- Click OK.
- Click Disconnect on the lft pane of the DobotStudio page.
- After 2 second later, select IP address from the drop-down list on the upper left pane of the DobotStudio page and click Connect.
Bluetooth Kit
Dobot Magician can be connected to smart phone with Bluetooth.
Please download the matched DobotStudio APP from the website https://cn.dobot.cc/downloadcenter.html?sub_cat=69#sub-download.
Prerequisites:
- Dobot Magician has been connected to the power adapter
- The DobotStudio APP has been downloaded
Procedure:
- Connect the Bluetooth kit to the UART interface on the base
- Press down the power button to turn on the Dobot Magician.
After turning on, there are three short beep sounds and the blue LED indicator on the Bluetooth module is on and the green one is blinking. Turn on the Bluetooth and launch DobotStudio APP on your phone. And click Connect to connect with Dobot Magician.
Connecting With PC And Software Setup
Here is the brief introduction of how to operate the Dobot Magician with the software DobotStudio, allowing you to quickly know and use the robotic arm. For details, please go here to download the manuals.
-
Connecting Cables to the Dobot Magician
Step 1 Connect the Dobot Magician to your computer with the supplied USB cable
Step 2 Connect the Dobot Magician to the electrical outlet with the supplied power adapter
-
Installing the DobotStudio
-
System Requirements
- Windows 7, Windows 7, Windows 8, and Windows 10 (This manual is explained based on this version)
- macOS 10.10, macOS 10.11, and macOS 10.12
-
Obtaining the DobotStudio Package
Before using Dobot Magician, download the Windows DobotStudio package from https://www.dobot.cc/downloadcenter.html. The macOS version is also downloadable in this URL
-
Installing the DobotStudio
Prerequisites
The DobotStudio package has been obtained.
Procedure
Step 1 Unpack the DobotStudio package to a destination directory.
For example, this directory is Installation DirectoryDobotStudio. You can install the DobotStudio to another location based on site requirements.
Step 2 In the installation directory double-click DobotStudioSetup.exe. The Select Setup Language dialog box is displayed.
Step 3 Choose a setup language such as English
Step 4 Click OK to follow the on-screen instructions to continue with the installation. During the installation, the Driver Installation dialog box is displayed.
Step 5 Click Next to install the first driver, and then click INSTALL to install the second driver.
When the drivers are installed successfully, the Completing the Device Driver Installation Wizard dialog box is displayed . Click Finish.
Step 6 Click Next to continue to install the DootStudio by following the prompts on the Setup-DobotStudio dialog box.
When the installation is complete, the Completing the DoobotStudio Setup Wizard dialog box is displayed, click Finish.
Verifying the Installation
- Verifying the DobotStudio
If the DobotStudio is launched and runs properly by double-clicking the desktop shortcut to this program, it means that it is installed successfully. - Verifying the Dobot Magician Driver
If an available COM port is displayed on the upper left corner of the DobotStudio page after the robotic arm is powered on, the Dobot Magician driver is installed successfully.
- Verifying the DobotStudio
-
-
Powering On/Off the Dobot Magician
-
Power on: align the Dobot Magician into its neutral position with its Forearm and Rear Arm constructing a 45-degree angle, and press down the power button in the base. Once the robotic arm is powered on, the LED indicator turns yellow, and all the stepper motors lock. And then wait about seven seconds, a short beep sound will be heard, and the LED indicator turns from yellow to green. Now the Dobot Magician is ready to use.
-
Power off: When the LED indicator is green, press down the power button to turn off the robotic arm. In this case, the Forearm moves slowly to the Rear Arm while the angle between them becomes small. Finally, the two arms reach a specific position.
-
-
Getting Started
This topic describes how to use the Dobot Magician to complete the teaching & playback function by saving three points in the MOVJ mode, allowing you to get the basic knowledge of the usage of the robotic arm.
Prerequisites
- The DobotStudio has been installed. For details, see 2. Installing the DobotStudio.
- The Dobot Magician is powered on. For details, see 3. Powering On/Off the Dobot Magician.
Procedure
- Step 1 Double-click the desktop shortcut to the DobotStudio.
- Step 2 Click Connect on the DobotStudio page.
- Step 3 Click Link Now.
- Step 4 Use DobotStudio to accomplish a teaching & playback task.
- Step 5 Enter times in Loop text box.
- Step 6 Click Start to perform the motions.
- Step 7 Click Exit to exit the Teaching & Playback page.
Operation
Quick start 1 — Teaching and Playback
- Step 1 Preparation: mount the suction cup on the robot arm
- Step 2 Choose tool suction cup in DobotStudio: click Teaching & Playback i DobotStudio and choose SuctionCup in tools dropdown menu
- Step 3 Set and save date for point A: use DobotStudio to run the Dobot Magician to point A where the item is available so that the suction cup nudeges article. Click on the Suction Cup and then + Point.
- Step 4 Set and save data for Point B: use DobotStudio to run Dobot Magician to point B where the object is to placed, click out the check mark at SuctionCup, and click + Point.
- Step 5 Run the recorded program: Press Start to run the program, Dobot Magician will move item from point A to point B as they have been saved in the list.
You can also set the Dobot Magician by holding the button on the arm. Each time the button is released, a point is added to the list.
Quick Start 2 — Writing and Drawing
- Step 1 Preparation: Mount the pen on the robot arm and place one paper in the robot’s working area.
- Step 2 Select tool get pencil: click on Write & Draw and select the Pen tool
- Step 3 Select a figure: select a pre-programmed figure from input Shapes.
- Step 4 Adjust the tip height: click Z + or Z- to adjust the arm iZ-point so that the tip touches the paper. Press AutoZ.
- Step 5 Run writing and drawing function: click Start to get the Dobot Magician to draw and write.
Quick Start 3 — Blockly
- Step 1 Start programming with Blockly: click on any command (such as Logic, Loop, or Variable) in the list on the left edge and pull out any block to the programming surface.
- Step 2 Select a block from the Dobot API and customize it: drag a JumpTo block to the programming area (Dobot API> Motion) and set (x,y,z) to (200,10,10)
- Step 3 Extract another Dobot API block: pull out a JumpTo block to and set (x,y,z) to (300,10,10). put them together both blocks to create the desired program.
- Step 4 Run the program in Blockly: click Start to get the Dobot Magition to perform the movements of the blocks discloses. In this case, from (200,10,10) to (300,10,10).
Functions
- 3D Printing
- As a robotic arm, Dobot Magician is precise enough for 3D printing models with nice finishing, it is comparable with many other 3D printers on the market. Thanks to its two extra stepper motor ports, Dobot Magician can also do double color 3D printing. Dobot Magician is compatible with mainstream open-source 3D printing
- Laser Engraving (available in Educational version only)
- Dobot Magician can engrave not just lines, it can also sketch images with shades. Its powerful laser head is capable of engraving on harder materials like leather and wood. Only available in the Educational version.
- Grabbing and Sucking
- With grabber and sucker accessories, Dobot Magician can move small objects. By customizing its movements, you can use it to help you out in some situations.
- Teach & Playback
- You can build up a list of movements for Dobot Magician to execute. You can also make Dobot Magician memorize movements by simply dragging it, and make it repeat by one click. You can also customize its movements by more accurately setting parameters on its PC
software, where the playback list can be manually edited.
- You can build up a list of movements for Dobot Magician to execute. You can also make Dobot Magician memorize movements by simply dragging it, and make it repeat by one click. You can also customize its movements by more accurately setting parameters on its PC
- Visualized Programming
- Dobot Blockly is a visualized programming environment developed for Dobot Magician, based on Google’s open-source platform Google Blockly. On Dobot Blockly you can program by simply putting puzzles together, it is intuitive and highly readable. It also integrated exclusive API for Dobot Magician, you can use them right away.
- Multi-Dobot Cooperation
- Through WIFI connection or connecting both machines to an external board, you can control multiple Dobot Magicians all at once. This not only saves you controlling devices, but also improved efficiency in operating and calibrating.
SDK
Here document describes the secondary development environment building and demo codes in multiple languages, frameworks, and systems, aiming to help secondary developer to understand common API of Dobot Magician and build development environment quickly.
To start developing apps for Dobot Magician, go to the download center. Here you can find all the required documentation, SDKs and tools needed to develop applications for Dobot Magician.
- Download Dobot Demo by going to download center->dobot magician -> development protocol -> dobot demo.
- Extract the package content somewhere on your computer using compression tool.
- The package contains demos for all the supported platforms and programming languages.
- Open the demo for the desired programming language or platform using your preferred IDE.
- Inside you will find the API for the Dobot Magician as well an example code.
- Connect the Dobot Magician to your computer and run the demo. Note: in case you are using mobile application and would like to run the mobile demo, you will need to connect the Bluetooth module to be able to communicate with the robot. Go to the Bluetooth module section to learn how to connect it.
For common system, we have supported DLLs for secondary developer. You can call DLL directly to control Dobot Magician without development related to communication protocol.
SDK Demos Content
- MFC based on Visual studio C++2008 and above;
- Demo based on QT5.6;
- C# Demo based on Visual studio 2013 and above;
- Demo based on Python 3.5;
- STM32 Demo for embedded controller;
- Arduino Demo based on communication protocol (arduino mega board);
- VB Demo based on Visual Basic.net;
- Java Demo based on 32/64 bit JDK;
- Multi-control DemoForQt5.6;
- Dobot SDK Demo V1.0.0 for iOS;
- Bluetooth Demo for Android.
Source Code
-
Dobot DLL
The source codes and precompiled files can be found in DobotDLL directory. Please use Qt 5.6 software to check source codes. In addition, the corresponding DLLs for Windows 32-bit, Windows 64-bit, Linux and Mac can also be found in this directory.
-
Compiling
- Please download the Qt version for your system and install it. The download path is here.
- NOTICE: If the Qt library is used when compiling DLLs, please use the Qt software with MSVC compiler and compile Dobot DLLs with MSVC.
-
Usage
- For Windows OS, please add the DLLs directory to environment variable Path.
- For Linux OS, please add the following statement at the end of ~/.bash_profile file and restart computer.
Program 1.1 Add statement in Linux OS
export LD_LIBRARY_PATH=$LD_LIBRARY_PATH:DOBOT_LIB_PATH- For Mac OS, please add the following statement at the end of ~/.bash_profile file and restart computer.
Program 1.2 Add statement in Max OS
export DYLD_LIBRARY_PATH=$DYLD_LIBRARY_PATH: DOBOT_LIB_PATH
API Interface Description
There are two features of communication commands when communicating with Dobot controller:
- All commands can be returned to the controller; regarding to setup commands, the controller can cut command parameter domain and then return; while for getting commands, the controller can fill the parameters got in parameter domain and then return.
- Dobot controller supports two kind of commands: Immidinate instruction and queen instruction:
- Immidinate instruction: Dobot controller will process the command once received regardless of whether there is the rest commands processing or not in the current controller;
- Queue command: Dobot controller receives the queue instruction, the command is pressed into the controller internal instruction queue. Dobot controller will execute instructions in the order in which the instruction was pushed into the queue.
For more detailed information about Dobot commands, please refer to Dobot protocol
here
Examples On Github
- Python library could be found on github repository
- More libraries and examples could be found on github as well
Putting The Device Back
After finish using the device, it is important to turn off, disassemble and put it back in the box as it was found, then put the box back in its place.
More information
- For details how to operate Dobot Magician with DobotStudio APP, please see here
- For more detailed tutorial videos, you can find it here.


