|
Учебное пособие «Программирование манипулятора в среде Google Blockly» Совместимость: Dobot Magician;Dobot Magician Lite; Данное пособие поможет в организации работы на уроках робототехники. В книге предлагаются практические работы, рекомендуемые для проведения учащимися основной и средней школы физико-математического профиля. Эксперименты рассчитаны на использование учебного оборудования Dobot Magician. С помощью универсального комплекта сменных рабочих инструментов Dobot Magician способен реализовывать такие функции, как 3D-печать, лазерная гравировка, манипуляция с объектами и рисование. |
Скачать |
|
Руководство пользователя по Dobot Magician Совместимость: Dobot Magician; |
Скачать |
|
DobotStudio Совместимость: Dobot Magician;Dobot Magician Lite; Программное обеспечение для управления роботом Dobot, включая файлы драйверов. Включает такие функции, как обучение и воспроизведение, запись и рисование, блокирование, сценарии и т. д |
Windows Mac OS |
|
DobotBlock Совместимость: Dobot Magician;Dobot Magician Lite; Программное обеспечение позволяет пользователям программировать роботов и другие аппаратные устройства Dobot простым перетаскиванием. Тем не менее, пользователи могут контролировать каждое движение робота, получая удовольствие от изучения ИИ и других технологий. |
Windows Mac OS |
|
Демонстрационные программы Совместимость: Dobot Magician;Dobot Magician Lite; |
Скачать |
|
Набор библиотек для программирования Совместимость: Dobot Magician;Dobot Magician Lite; |
Скачать |
|
Мобильное приложение Dobot Magician Совместимость: Dobot Magician;Dobot Magician Lite; Вы можете программировать, создавать игры и анимацию для роботов и других аппаратных устройств Dobot, перетаскивая и перемещая их, чтобы управлять роботом, изучать ИИ и получать удовольствие от мульти-технологий. |
Google Play App Store |
|
Руководство пользователя Совместимость: Dobot MOOZ 2 Plus; |
Скачать |
|
Ultimaker Cura (мультиязычный) Совместимость: Dobot MOOZ 2 Plus;Dobot MOOZ 3Z; Программное обеспечение для нарезки 3D-печати. Каждая модель, которую вы разрабатываете для печати, должна быть преобразована программным обеспечением для нарезки в инструкции, понятные вашему 3D-принтеру. |
Windows Mac OS |
|
Прошивка для платы управления (версия с Wi-Fi) Совместимость: Dobot MOOZ 2 Plus; |
Скачать |
|
Прошивка для платы управления (версия без Wi-Fi) Совместимость: Dobot MOOZ 2 Plus; |
Скачать |
|
Прошивка для пульта управления (версия с Wi-Fi) Совместимость: Dobot MOOZ 2 Plus; |
Скачать |
|
Прошивка для пульта управления (версия без Wi-Fi) Совместимость: Dobot MOOZ 2 Plus; |
Скачать |
|
Драйвер CH341SER Совместимость: Dobot MOOZ 2 Plus;Dobot MOOZ 3Z; |
Windows Mac OS |
|
Dobot MOOZStudio Совместимость: Dobot MOOZ 3Z; Специально разработанное программное обеспечение для лазерной гравировки и резьбы на станках с ЧПУ. |
Windows Mac OS |
|
Прошивка для платы управления Совместимость: Dobot MOOZ 3Z; |
Скачать |
|
Прошивка для пульта управления Совместимость: Dobot MOOZ 3Z; |
Скачать |
|
Краткое руководство Совместимость: Конвейерная лента; |
Скачать |
|
Краткое руководство Совместимость: Комплект линейных перемещений; |
Скачать |
|
Краткое руководство Совместимость: Ресурсный набор Arduiono AI; |
Скачать |
|
Arduino IDE (мультиязычный) Совместимость: Ресурсный набор Arduiono AI; Интегрированная среда разработки для Windows, MacOS и Linux, разработанная на Си и C ++, предназначенная для создания и загрузки программ на Arduino-совместимые платы, а также на платы других производителей. |
Windows Mac OS |
|
PixyMon Совместимость: Ресурсный набор Arduiono AI; Приложение, которое позволяет настраивать устройство Pixy, устанавливать выходной порт и управлять цветовыми подписями |
Windows Mac OS |
|
Демонстрационные программы Совместимость: Ресурсный набор Arduiono AI; |
Скачать |
|
Краткое руководство Совместимость: Комплект технического зрения; |
Скачать |
|
Руководство по сборке Совместимость: Комплект технического зрения; |
Скачать |
|
Dobot Vision Studio Совместимость: Комплект технического зрения; Программное обеспечение платформы технического зрения совместимое с модулями движения робота DOBOT Magician. С помощью этого программного обеспечения пользователи могут использовать модули корреляции зрения и управлять роботом DOBOT Magician. |
Windows |
-
Contents
-
Table of Contents
-
Troubleshooting
-
Bookmarks
Quick Links
深圳市越疆科技有限公司
-2 PLUS
INDUSTRIAL GRADE TRANSFORMABLE METALLIC 3D PRINTER
V1.0 2020-07
Related Manuals for Dobot MOOZ-2 PLUS

Summary of Contents for Dobot MOOZ-2 PLUS
-
Page 1
深圳市越疆科技有限公司 -2 PLUS INDUSTRIAL GRADE TRANSFORMABLE METALLIC 3D PRINTER V1.0 2020-07… -
Page 3: Table Of Contents
Note: Updated Firmwares, User Manuals, Softwares and Tutorial Videos will be uploaded to our official website www.dobot.cc constantly, please use them for better experience. Any support, please contact us: mooz@dobot.cc.
-
Page 4: I.operation Panel
Operation Panel 1.1 Home Page 1.2 Calibration Page 3-Point Leveling Interface Calibrate Automatic levelling 调平 Manual levelling Control Tools Interface X: 20 Y: 20 Z: 20 Entrance to zero point setting File Directory Interface interface Calibration Tool 0.06 mm 1 mm 10 mm Auto Level Manual Level…
-
Page 5: Print Functional Module Control Interface
1.5 3D Print Functional Module Control Interface 1.6 Laser Engraving Functional Module Control Interface Set nozzle preheat target temperature Set heated bed preheat target temperature Display current laser intensity Preheat nozzle: For testing whether Tool Tool the nozzle heating is normal, press LASER again to stop heating Laser intensity adjustment +/-:…
-
Page 6: X/Y/Z Motion Control Interface
1.9 X/Y/Z Motion Control Interface 1.10 Working Process Control Interface Display execution progress of Control motion of X/Y/Z axis linear current file actuators, the corresponding operations Display time elapsed will not change any settings Printing 移动 Display current coordinates Model1.gcode X: 20 Y: 20 Z: 20…
-
Page 7: Printing
3D Printing 2.1 3-Point Leveling-Manual levelling Please follow the guide of the machine to record three different points to define a plane parallel to the heated bed, these three points must be recorded in order with nozzle in the areas shown in the drawing below, one in each. The calibration requires to be set only for the first use. Operation steps: 校准…
-
Page 8: Set The Zero Point
2.2 Set the Zero Point Zero point is the start point for the machine to print, which requires to be set only for the first use.Operation steps: 校准 校准 Zeroing Zeroing X: 20 Y: 20 Z: 20 X: 20 Y: 20 Z: 20 Fine Tune: 0 mm…
-
Page 9: Use The Slicing Software
2.3 Use the Slicing Software Description: MOOZ supports most third-party printing softwares, such as Cura, Repetier-Host, etc. Cura 3.1.0 is described here as an example. 2.3.1 Install the Slicing Software Operation steps: ① Double-click to install the software: Cura3.1.0.exe ② Select the installation directory. It is recommended to keep the ③…
-
Page 10
G28 X0 Y0 Z0 G92 E0 Back Finish Cancle Note: Origin of MOOZ-2 PLUS is defaulted at left-bottom corner of the heated bed, so do not check the “Origin at center” box, otherwise the model will be printed outside of the heated bed. -
Page 11: Features
2.4 Features Profile the model: ① Adjust the model: left click on the model, four options “ ”, “ ” , “ ” and “ ” will appear on the left side of the interface, and you can adjust as needed. ②…
-
Page 12
Description of key profile settings: Quality Layer Height Layer Height: Line Width For the height of each layer of printing, smaller value will produce finer surface, but cost more printing time. Suggested range is 0.05 to 0.3, not exceeding Support Line Width 3/4 of the diameter of the nozzle. -
Page 13: Offline Printing
2.5 Offline Printing Warning: After printing started, please make sure the first layer is in good bonding condition, and sort out the filament before leaving. Loose bonding may cause falling off of the model, and result in clogging of the print head. “Raft” build plate adhesion type is suggested for better bonding and easy removal of finished model. 2.
-
Page 14: Printing Control
2.6 Printing Control Printing Control 1.Speed Control: Change printing speed in real-time. Note that too high speed may sacrifice accuracy and service life of themachine. 2. Process Control—Pause/Continue: Press to pause the printing process, press again to continue. Change filament: If the filament is about to run out, please click Change filamen button. The current process will be paused and the old filament will be aborted.
-
Page 15: Power-Loss Resume
2.7 Power-Loss Resume In case of abrupt power failure during printing, the machine will save current printing process and move the functional module away from the print. You may resume or cancle the process after power recovery. Resume Unfinished mission detected ! ! Description Confirm to continue/cancle/skip? Continue: Resume the unfinished printing process…
-
Page 16: Laser Engraving
Laser Engraving Warning Protective Shield No Touch Note: Please be sure to wear the goggles and use the protective shield for safety! 3.1 Fix the Workpiece and Replace the Functional Module Operation steps: Stick a small piece of tape to the bottom of workpiece (traceless double-sided tape is recommended), keeping the edges of the workpiece aligned with grids and adhere it to the heated bed.
-
Page 17
Zero Setting Zero Setting Zero Setting X: 20 Y: 20 Z: 20 X: 20 Y: 20 Z: 20 X: 20 Y: 20 Z: 20 Fine Tune: 0 mm Fine Tune: 0 mm Fine Tune: 0 mm Home Home Home Home Home Home 0.06 mm… -
Page 18: Use Software To Generate Gcodes
3.3 Use Software to Generate Gcodes Prerequisites : Computer has downloaded and installed MOOZStudio. The download path is https://www.dobot.cc/downloadcenter/dobot-mooz.html#most-download . Step 1 : Double-click MOOZStudio to enter the software Step 2 : Click Open File to import image. interface., select Laser.
-
Page 19: Cnc Carving
CNC Carving Warning Protective Shield No Touch Note: Please be sure to wear the goggles and use the protective shield for safety! 4.1 Install the CNC Platform and Workpiece Warning : Heated bed (including the glass and magnets) is a fragile component, please operate with care! Do not mount and dismount it regularly during daily use. Gently separate the heated bed glass and workbench.
-
Page 20: Install The Cnc Bit
4.2 Install the CNC Bit ① Rotate counterclockwise to expand ② Insert the CNC bit into Operation steps: ③ Rotate clockwise to clamp the CNC bit the chuck with the wrench the chuck as far as you can 4.3 Set the Zero Point Operation steps: Similar to laser engraving (Refer to Section 3.2 for details on setting the zero point) Zero point Warning: When setting the zero point, use a small step distance in the end (0.1 / 1mm) so that the CNC bit does not accidentally hit the workpiece.
-
Page 21: Use Software To Generate Gcodes
4.4 Use Software to Generate Gcodes Prerequisites : Computer has downloaded and installed MOOZStudio. The download path is https://www.dobot.cc/downloadcenter/dobot-mooz.html#most-download . Step 1: Double-click MOOZStudio to enter the software Step 2 : Click Open File to import image. interface. Select CNC.
-
Page 22
Step 4 : Click Generate G-code to generate a G-code file. Step 5 : Click Export G-code to save the G-code file to a USB flash drive. File File Open File Open File Generate G-code Generate G-code Export G-code Export G-code Setting Description: ①… -
Page 23: Wifi Transfer And Usb Control
WiFi Transfer and USB Control 5.1 WiFi Transfer You can transfer a G-code file from PC to MOOZ-2 PLUS via WiFi. Prerequisites: MOOZ-2 PLUS and PC must be in the same LAN segment. Step 1 : Click Setting>WiFi>Router on the Step 2 :…
-
Page 24: Usb Control
5.2 USB Control Users can control each axis of MOOZ-2 PLUS, set working origin, or print, etc. on MOOZStudio using USB online function. Prerequisites: MOOZ-2 PLSU and PC have been connected via USB cable Step 1 : Open MOOZStudio, select the serial port, and click Connect.
-
Page 25: Troubleshooting
Troubleshooting 6.1 3D Printing Failure Q : Print center is at left-bottom A : Wrong machine setting in slicing software, the “ Origin at center ” box shall not be checked, refer to corner of the heated bed Section 2.3.2. A : 1.
-
Page 26
A : 1. Unplug the cables, U disk orderly, restart the machine to decide if the failure is caused by corresponding faulty Q : Unable to exit “starting…” component. interface after power up 2. Update the mainboard firmware. 3. Check if green indicator light inside the functional module is on. Update the touch pad firmware if so. A : 1. -
Page 27
Q : Abnormal nozzle temperature A : If the auto-leveling module is installed, the nozzle temperature will display 300, please remove the display: 300℃ auto-leveling module to display the normal temperature. 6.4 Appendix Disassemble 3D print module Step 1 : Remove the print head housing after Step 2 :… -
Page 30
This equipment should be installed and operated with a minimum distance of 20cm between the radiator & your body. This transmitter must not be co-located or operating in conjunction with any other antenna or transmitter. All RF frequencies are not restricted in EU member states FCC ID: 2AHI4-MOOZ-2-PLUS 214-106455 www.dobot.cc…
перейти к содержанию
Руководства пользователя, инструкции и руководства для продуктов Dobot.
Найти
DOBOT Magician Go Quick Start ОТКАЗ ОТ ОТВЕТСТВЕННОСТИ В максимальной степени, разрешенной применимым законодательством, продукт, описанный в данном руководстве (включая оборудование, программное обеспечение, прошивку и т. д.), предоставляется «КАК ЕСТЬ». В случае несоблюдения правил использования или хранения, содержащихся в данном руководстве, могут возникнуть дефекты, ошибки или неисправности. ДОБОТ производит …
Подробнее «DOBOT DT-MB-CTR01 Руководство пользователя роботизированной руки Magician Go»
Руководство пользователя настольного робота DOBOT Magician Go ОТКАЗ ОТ ОТВЕТСТВЕННОСТИ В максимальной степени, разрешенной применимым законодательством, продукт, описанный в данном руководстве (включая аппаратное обеспечение, программное обеспечение, прошивку и т. д.), предоставляется «КАК ЕСТЬ». В случае несоблюдения правил использования или хранения, содержащихся в данном руководстве, могут возникнуть дефекты, ошибки или неисправности. …
Подробнее «Руководство пользователя настольного робота DOBOT Magician Go»
Роботизированная рука DOBOT M1 Pro Выпуск: V1.1 Дата: 2021 Copyright © Shenzhen Yuejiang Technology Co., Ltd, 07. Все права защищены. Никакая часть этого документа не может быть воспроизведена или передана в любой форме и любыми средствами без предварительного письменного согласия Yuejiang Technology Co., Ltd. Отказ от ответственности В максимальной степени, разрешенной применимыми…
Подробнее «Руководство пользователя робота-манипулятора DOBOT M1 Pro»
Трехцветный 3D-принтер Dobot MOOZ-3 Об этом принтере Трехцветный принтер Dobot MOOZ-3 — это уникальный продукт, предлагающий возможность смешивания волокон на небольшой подогреваемой платформе. Принтер поставляется с 3 цветами для цветового пространства CYM, которые можно смешивать вместе внутри сопла для получения широкого диапазона цветов; Смешивание…
Подробнее «Руководство пользователя трехцветного 3D-принтера Dobot MOOZ-3»
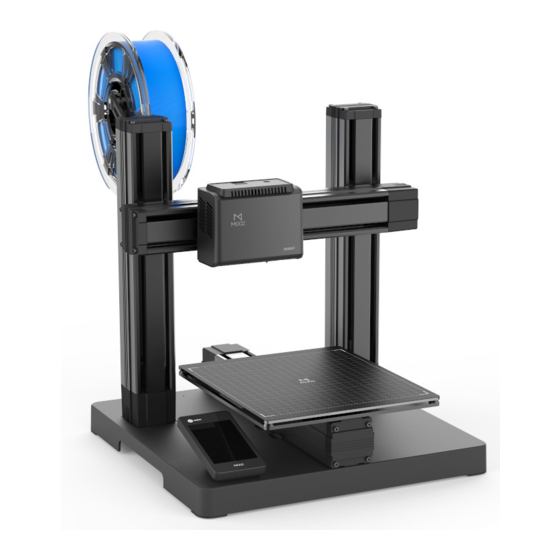
3D принтер DOBOT MOOZ-2 PLUS — многофункциональное устройство для 3D печати, лазерной гравировки и резьбы с ЧПУ. Модульный FDM принтер можно собрать всего за 10 минут. Оборудование подходит для использования новичками и преподавателями в образовательных учреждениях.
Область построения составляет 200х200х190 мм. Корпус принтера выполнен из авиационного алюминиевого сплава, что делает печать стабильной даже на высоких скоростях. Линейные направляющие промышленного класса, шаговый двигатель и винтовые стержни обеспечивают точность печати до 20 мкм.
Сменные блоки для гравировки и резки позволяют быстро переходить от одного вида работ к другому. Максимальная область гравировки составляет 200х200 мм. С помощью модулей гравировки и резки с ЧПУ можно обрабатывать дерево, акрил, пластик и другие материалы.
MOOZ-2 PLUS оснащен контроллером с дисплеем, с помощью которого можно управлять принтером, когда к нему подключен USB-накопитель или SD-карта. Автономная работа без подключения к компьютеру позволяет расширить возможности печати.
В набор для лазерной гравировки входит защитный корпус и защитные очки, которые обеспечивают безопасность.
Модульный многофункциональный 3D принтер — отличный выбор для домашнего использования, обучения и бизнеса. Быстрая сборка, удобное управление и надежная конструкция делают работу с оборудованием максимально комфортной.
Особенности DOBOT MOOZ-2 PLUS:
- модульная конструкция;
- область построения 200х200х190 мм;
- область гравировки 200х200 мм;
- датчик окончания нити;
- удобное управление.
Вы можете купить 3D принтер DOBOT MOOZ-2 PLUS в нашем офисе в Москве, с гарантией и доставкой по России от официального дилера.
Description of key profile settings:
Layer Height:
For the height of each layer of printing, smaller value will produce finer
surface, but cost more printing time. Suggested range is 0.05 to 0.3, not exceeding
3/4 of the diameter of the nozzle. MOOZ used 0.4mm nozzle, means not exceeding 0.3.
Wall Thickness:
For the printing thickness of the outer surface of the model, the
setting of 1.2 indicates that the outer surface will go three rounds, since the width of
each round equals to the diameter of the nozzle, namely 0.4.
Top/Bottom Thickness:
Determine the bottom/top thickness of the model.
Infill Density:
Determine the filling density of the internal grid of the model, generally set
at 15% or less.
Printing Temperature:
Need to be set according to filament type. Suggested value
for PLA is 190~220℃, and for TPU is 210~230℃.
Build Plate Temperature:
Need to be set according to filament type. Suggested
value for PLA is 60℃~80℃, and for TPU is 60℃~80℃, and for PETG is 75℃~80℃, and for
Wood is 30℃~50℃。
Diameter:
Set filament diameter to 1.75.
Travel Speed:
Travel speed should be set no greater than 40mm/s, otherwise the
Z linear actuators may lose some steps when traveling downward from home position
too fast and cause zero point deviation.
Support Placement:
If the model has any hovering part, the option must be
switched on. Generally, «Everywhere» indicates that support can be added on the model
itself. If you select «Touching build plate», it indicates that support can be added only
between the print platform and the model hovering position, not on the model.
Build Plate Adhesion:
Brim: A few layers of outer ring should be added on the bottom
edge of the model so as to prevent warping.
Raft: Get the whole model raised by adding a raft-like base on the bottom when the
heated bed leveling status is small or not satisfying.
Note:
1. Hover the mouse over the option, and the corresponding hint will appear.
2. Right-click anywhere within the parameter setting area, you can «Configure setting visibility».
9
Quality
Layer Height
Line Width
Support Line Width
Shell
Wall Thickness
Top/Bottom Thickness
Print Thin walls
Infill
Infill Density
Gradual Infill Steps
Material
Printing Temperature
Build Plate Temperature
Diameter
Flow
Enable Retraction
Retraction Distance
Retraction speed
Speed
Print Speed
Infill Speed
Wall Speed
Outer Wall Speed
Inner Wall Speed
Top/Bottom Speed
Cooling
Enable Print Cooling
Support
Generate Support
Support Placement
Everywhere
Support Pattern
Zig Zag
Support Density
Build Plate Adhesion
Build Plate Adhesion Type
Raft Extra Margin
Raft Air Gap
Initial Layer Z Overlap
Raft Top Layers
Raft Base Line Width
Raft Line Spacing
Raft Print Speed
Special Modes
Print Sequence
All at Once
Surface Mode
Normal
3D принтер DOBOT MOOZ-2 PLUS — многофункциональное устройство для 3D печати, лазерной гравировки и резьбы с ЧПУ. Модульный FDM принтер можно собрать всего за 10 минут. Оборудование подходит для использования новичками и преподавателями в образовательных учреждениях.
Область построения составляет 200х200х190 мм. Корпус принтера выполнен из авиационного алюминиевого сплава, что делает печать стабильной даже на высоких скоростях. Линейные направляющие промышленного класса, шаговый двигатель и винтовые стержни обеспечивают точность печати до 20 мкм.
Сменные блоки для гравировки и резки позволяют быстро переходить от одного вида работ к другому. Максимальная область гравировки составляет 200х200 мм. С помощью модулей гравировки и резки с ЧПУ можно обрабатывать дерево, акрил, пластик и другие материалы.
MOOZ-2 PLUS оснащен контроллером с дисплеем, с помощью которого можно управлять принтером, когда к нему подключен USB-накопитель или SD-карта. Автономная работа без подключения к компьютеру позволяет расширить возможности печати.
В набор для лазерной гравировки входит защитный корпус и защитные очки, которые обеспечивают безопасность.
Преимущества 3D принтера DOBOT MOOZ-2 PLUS
Модульный многофункциональный 3D принтер — отличный выбор для домашнего использования, обучения и бизнеса. Быстрая сборка, удобное управление и надежная конструкция делают работу с оборудованием максимально комфортной.
Особенности DOBOT MOOZ-2 PLUS:
- модульная конструкция;
- область построения 200х200х190 мм;
- область гравировки 200х200 мм;
- датчик окончания нити;
- удобное управление.
Вы можете купить 3D принтер DOBOT MOOZ-2 PLUS в нашем офисе в Москве, с гарантией и доставкой по России от официального дилера.
-
Contents
-
Table of Contents
-
Troubleshooting
-
Bookmarks
Quick Links
深圳市越疆科技有限公司
-2 PLUS
INDUSTRIAL GRADE TRANSFORMABLE METALLIC 3D PRINTER
V1.0 2020-07
Related Manuals for Dobot MOOZ-2 PLUS
Summary of Contents for Dobot MOOZ-2 PLUS
-
Page 1
深圳市越疆科技有限公司 -2 PLUS INDUSTRIAL GRADE TRANSFORMABLE METALLIC 3D PRINTER V1.0 2020-07… -
Page 3: Table Of Contents
Note: Updated Firmwares, User Manuals, Softwares and Tutorial Videos will be uploaded to our official website www.dobot.cc constantly, please use them for better experience. Any support, please contact us: mooz@dobot.cc.
-
Page 4: I.operation Panel
Operation Panel 1.1 Home Page 1.2 Calibration Page 3-Point Leveling Interface Calibrate Automatic levelling 调平 Manual levelling Control Tools Interface X: 20 Y: 20 Z: 20 Entrance to zero point setting File Directory Interface interface Calibration Tool 0.06 mm 1 mm 10 mm Auto Level Manual Level…
-
Page 5: Print Functional Module Control Interface
1.5 3D Print Functional Module Control Interface 1.6 Laser Engraving Functional Module Control Interface Set nozzle preheat target temperature Set heated bed preheat target temperature Display current laser intensity Preheat nozzle: For testing whether Tool Tool the nozzle heating is normal, press LASER again to stop heating Laser intensity adjustment +/-:…
-
Page 6: X/Y/Z Motion Control Interface
1.9 X/Y/Z Motion Control Interface 1.10 Working Process Control Interface Display execution progress of Control motion of X/Y/Z axis linear current file actuators, the corresponding operations Display time elapsed will not change any settings Printing 移动 Display current coordinates Model1.gcode X: 20 Y: 20 Z: 20…
-
Page 7: Printing
3D Printing 2.1 3-Point Leveling-Manual levelling Please follow the guide of the machine to record three different points to define a plane parallel to the heated bed, these three points must be recorded in order with nozzle in the areas shown in the drawing below, one in each. The calibration requires to be set only for the first use. Operation steps: 校准…
-
Page 8: Set The Zero Point
2.2 Set the Zero Point Zero point is the start point for the machine to print, which requires to be set only for the first use.Operation steps: 校准 校准 Zeroing Zeroing X: 20 Y: 20 Z: 20 X: 20 Y: 20 Z: 20 Fine Tune: 0 mm…
-
Page 9: Use The Slicing Software
2.3 Use the Slicing Software Description: MOOZ supports most third-party printing softwares, such as Cura, Repetier-Host, etc. Cura 3.1.0 is described here as an example. 2.3.1 Install the Slicing Software Operation steps: ① Double-click to install the software: Cura3.1.0.exe ② Select the installation directory. It is recommended to keep the ③…
-
Page 10
G28 X0 Y0 Z0 G92 E0 Back Finish Cancle Note: Origin of MOOZ-2 PLUS is defaulted at left-bottom corner of the heated bed, so do not check the “Origin at center” box, otherwise the model will be printed outside of the heated bed. -
Page 11: Features
2.4 Features Profile the model: ① Adjust the model: left click on the model, four options “ ”, “ ” , “ ” and “ ” will appear on the left side of the interface, and you can adjust as needed. ②…
-
Page 12
Description of key profile settings: Quality Layer Height Layer Height: Line Width For the height of each layer of printing, smaller value will produce finer surface, but cost more printing time. Suggested range is 0.05 to 0.3, not exceeding Support Line Width 3/4 of the diameter of the nozzle. -
Page 13: Offline Printing
2.5 Offline Printing Warning: After printing started, please make sure the first layer is in good bonding condition, and sort out the filament before leaving. Loose bonding may cause falling off of the model, and result in clogging of the print head. “Raft” build plate adhesion type is suggested for better bonding and easy removal of finished model. 2.
-
Page 14: Printing Control
2.6 Printing Control Printing Control 1.Speed Control: Change printing speed in real-time. Note that too high speed may sacrifice accuracy and service life of themachine. 2. Process Control—Pause/Continue: Press to pause the printing process, press again to continue. Change filament: If the filament is about to run out, please click Change filamen button. The current process will be paused and the old filament will be aborted.
-
Page 15: Power-Loss Resume
2.7 Power-Loss Resume In case of abrupt power failure during printing, the machine will save current printing process and move the functional module away from the print. You may resume or cancle the process after power recovery. Resume Unfinished mission detected ! ! Description Confirm to continue/cancle/skip? Continue: Resume the unfinished printing process…
-
Page 16: Laser Engraving
Laser Engraving Warning Protective Shield No Touch Note: Please be sure to wear the goggles and use the protective shield for safety! 3.1 Fix the Workpiece and Replace the Functional Module Operation steps: Stick a small piece of tape to the bottom of workpiece (traceless double-sided tape is recommended), keeping the edges of the workpiece aligned with grids and adhere it to the heated bed.
-
Page 17
Zero Setting Zero Setting Zero Setting X: 20 Y: 20 Z: 20 X: 20 Y: 20 Z: 20 X: 20 Y: 20 Z: 20 Fine Tune: 0 mm Fine Tune: 0 mm Fine Tune: 0 mm Home Home Home Home Home Home 0.06 mm… -
Page 18: Use Software To Generate Gcodes
3.3 Use Software to Generate Gcodes Prerequisites : Computer has downloaded and installed MOOZStudio. The download path is https://www.dobot.cc/downloadcenter/dobot-mooz.html#most-download . Step 1 : Double-click MOOZStudio to enter the software Step 2 : Click Open File to import image. interface., select Laser.
-
Page 19: Cnc Carving
CNC Carving Warning Protective Shield No Touch Note: Please be sure to wear the goggles and use the protective shield for safety! 4.1 Install the CNC Platform and Workpiece Warning : Heated bed (including the glass and magnets) is a fragile component, please operate with care! Do not mount and dismount it regularly during daily use. Gently separate the heated bed glass and workbench.
-
Page 20: Install The Cnc Bit
4.2 Install the CNC Bit ① Rotate counterclockwise to expand ② Insert the CNC bit into Operation steps: ③ Rotate clockwise to clamp the CNC bit the chuck with the wrench the chuck as far as you can 4.3 Set the Zero Point Operation steps: Similar to laser engraving (Refer to Section 3.2 for details on setting the zero point) Zero point Warning: When setting the zero point, use a small step distance in the end (0.1 / 1mm) so that the CNC bit does not accidentally hit the workpiece.
-
Page 21: Use Software To Generate Gcodes
4.4 Use Software to Generate Gcodes Prerequisites : Computer has downloaded and installed MOOZStudio. The download path is https://www.dobot.cc/downloadcenter/dobot-mooz.html#most-download . Step 1: Double-click MOOZStudio to enter the software Step 2 : Click Open File to import image. interface. Select CNC.
-
Page 22
Step 4 : Click Generate G-code to generate a G-code file. Step 5 : Click Export G-code to save the G-code file to a USB flash drive. File File Open File Open File Generate G-code Generate G-code Export G-code Export G-code Setting Description: ①… -
Page 23: Wifi Transfer And Usb Control
WiFi Transfer and USB Control 5.1 WiFi Transfer You can transfer a G-code file from PC to MOOZ-2 PLUS via WiFi. Prerequisites: MOOZ-2 PLUS and PC must be in the same LAN segment. Step 1 : Click Setting>WiFi>Router on the Step 2 :…
-
Page 24: Usb Control
5.2 USB Control Users can control each axis of MOOZ-2 PLUS, set working origin, or print, etc. on MOOZStudio using USB online function. Prerequisites: MOOZ-2 PLSU and PC have been connected via USB cable Step 1 : Open MOOZStudio, select the serial port, and click Connect.
-
Page 25: Troubleshooting
Troubleshooting 6.1 3D Printing Failure Q : Print center is at left-bottom A : Wrong machine setting in slicing software, the “ Origin at center ” box shall not be checked, refer to corner of the heated bed Section 2.3.2. A : 1.
-
Page 26
A : 1. Unplug the cables, U disk orderly, restart the machine to decide if the failure is caused by corresponding faulty Q : Unable to exit “starting…” component. interface after power up 2. Update the mainboard firmware. 3. Check if green indicator light inside the functional module is on. Update the touch pad firmware if so. A : 1. -
Page 27
Q : Abnormal nozzle temperature A : If the auto-leveling module is installed, the nozzle temperature will display 300, please remove the display: 300℃ auto-leveling module to display the normal temperature. 6.4 Appendix Disassemble 3D print module Step 1 : Remove the print head housing after Step 2 :… -
Page 30
This equipment should be installed and operated with a minimum distance of 20cm between the radiator & your body. This transmitter must not be co-located or operating in conjunction with any other antenna or transmitter. All RF frequencies are not restricted in EU member states FCC ID: 2AHI4-MOOZ-2-PLUS 214-106455 www.dobot.cc…
Руководства пользователя, инструкции и руководства для продуктов Dobot.
Найти
Узнайте, как с легкостью использовать SmartRobot серии DOBOT Nova, из этого подробного руководства пользователя. Благодаря различным моделям, от Nova 2 до Nova 3, и различным характеристикам, таким как вес, полезная нагрузка и рабочий радиус, этот коллаборативный робот идеально подходит для коммерческого сектора. Узнайте, как обучить робота с помощью ручного управления и графического программирования всего за 10 минут, и использовать его для различных целей, таких как приготовление лапши и массаж. Серия Nova отличается лаконичным дизайном с настраиваемыми функциями безопасности, которые легко вписываются в окружающую среду.
В этом руководстве пользователя содержатся важные инструкции по технике безопасности и краткое руководство по эксплуатации манипулятора DOBOT Magician Go, включая номера моделей 2AHI4-DT-MB-CTR01 и DT-MB-CTR01. Пользователям рекомендуется внимательно прочитать и следовать инструкциям, чтобы избежать повреждений или травм. DOBOT не дает никаких гарантий, и пользователи несут ответственность за соблюдение применимых законов и правил.
В этом руководстве пользователя содержатся важные инструкции по технике безопасности и техническая информация о настольном роботе DOBOT Magician Go, включая номера моделей 2AHI4-GOBT01 и 2AHI4GOBT01. Пользователи должны соблюдать применимые законы и правила, а также использовать их под профессиональным руководством, чтобы избежать повреждений или травм. Узнайте, как правильно использовать и хранить оборудование, чтобы предотвратить дефекты или неисправности.
Узнайте, как полностью понять и использовать роботизированную руку Dobot M1-Pro с помощью этого подробного руководства пользователя. Получите технические характеристики и руководство по установке модели Dobot M1-Pro.
Узнайте об уникальных особенностях трехцветного 3D-принтера Dobot MOOZ-3 из этого подробного руководства пользователя. Узнайте, как настроить принтер и получить широкий диапазон цветов, используя возможности смешивания нитей. Идеально подходит как для начинающих, так и для опытных пользователей.
Description of key profile settings:
Layer Height:
For the height of each layer of printing, smaller value will produce finer
surface, but cost more printing time. Suggested range is 0.05 to 0.3, not exceeding
3/4 of the diameter of the nozzle. MOOZ used 0.4mm nozzle, means not exceeding 0.3.
Wall Thickness:
For the printing thickness of the outer surface of the model, the
setting of 1.2 indicates that the outer surface will go three rounds, since the width of
each round equals to the diameter of the nozzle, namely 0.4.
Top/Bottom Thickness:
Determine the bottom/top thickness of the model.
Infill Density:
Determine the filling density of the internal grid of the model, generally set
at 15% or less.
Printing Temperature:
Need to be set according to filament type. Suggested value
for PLA is 190~220℃, and for TPU is 210~230℃.
Build Plate Temperature:
Need to be set according to filament type. Suggested
value for PLA is 60℃~80℃, and for TPU is 60℃~80℃, and for PETG is 75℃~80℃, and for
Wood is 30℃~50℃。
Diameter:
Set filament diameter to 1.75.
Travel Speed:
Travel speed should be set no greater than 40mm/s, otherwise the
Z linear actuators may lose some steps when traveling downward from home position
too fast and cause zero point deviation.
Support Placement:
If the model has any hovering part, the option must be
switched on. Generally, «Everywhere» indicates that support can be added on the model
itself. If you select «Touching build plate», it indicates that support can be added only
between the print platform and the model hovering position, not on the model.
Build Plate Adhesion:
Brim: A few layers of outer ring should be added on the bottom
edge of the model so as to prevent warping.
Raft: Get the whole model raised by adding a raft-like base on the bottom when the
heated bed leveling status is small or not satisfying.
Note:
1. Hover the mouse over the option, and the corresponding hint will appear.
2. Right-click anywhere within the parameter setting area, you can «Configure setting visibility».
9
Quality
Layer Height
Line Width
Support Line Width
Shell
Wall Thickness
Top/Bottom Thickness
Print Thin walls
Infill
Infill Density
Gradual Infill Steps
Material
Printing Temperature
Build Plate Temperature
Diameter
Flow
Enable Retraction
Retraction Distance
Retraction speed
Speed
Print Speed
Infill Speed
Wall Speed
Outer Wall Speed
Inner Wall Speed
Top/Bottom Speed
Cooling
Enable Print Cooling
Support
Generate Support
Support Placement
Everywhere
Support Pattern
Zig Zag
Support Density
Build Plate Adhesion
Build Plate Adhesion Type
Raft Extra Margin
Raft Air Gap
Initial Layer Z Overlap
Raft Top Layers
Raft Base Line Width
Raft Line Spacing
Raft Print Speed
Special Modes
Print Sequence
All at Once
Surface Mode
Normal
|
Учебное пособие «Программирование манипулятора в среде Google Blockly» Совместимость: Dobot Magician;Dobot Magician Lite; Данное пособие поможет в организации работы на уроках робототехники. В книге предлагаются практические работы, рекомендуемые для проведения учащимися основной и средней школы физико-математического профиля. Эксперименты рассчитаны на использование учебного оборудования Dobot Magician. С помощью универсального комплекта сменных рабочих инструментов Dobot Magician способен реализовывать такие функции, как 3D-печать, лазерная гравировка, манипуляция с объектами и рисование. |
Скачать |
|
Руководство пользователя по Dobot Magician Совместимость: Dobot Magician; |
Скачать |
|
DobotStudio Совместимость: Dobot Magician;Dobot Magician Lite; Программное обеспечение для управления роботом Dobot, включая файлы драйверов. Включает такие функции, как обучение и воспроизведение, запись и рисование, блокирование, сценарии и т. д |
Windows Mac OS |
|
DobotBlock Совместимость: Dobot Magician;Dobot Magician Lite; Программное обеспечение позволяет пользователям программировать роботов и другие аппаратные устройства Dobot простым перетаскиванием. Тем не менее, пользователи могут контролировать каждое движение робота, получая удовольствие от изучения ИИ и других технологий. |
Windows Mac OS |
|
Демонстрационные программы Совместимость: Dobot Magician;Dobot Magician Lite; |
Скачать |
|
Набор библиотек для программирования Совместимость: Dobot Magician;Dobot Magician Lite; |
Скачать |
|
Мобильное приложение Dobot Magician Совместимость: Dobot Magician;Dobot Magician Lite; Вы можете программировать, создавать игры и анимацию для роботов и других аппаратных устройств Dobot, перетаскивая и перемещая их, чтобы управлять роботом, изучать ИИ и получать удовольствие от мульти-технологий. |
Google Play App Store |
|
Руководство пользователя Совместимость: Dobot MOOZ 2 Plus; |
Скачать |
|
Ultimaker Cura (мультиязычный) Совместимость: Dobot MOOZ 2 Plus;Dobot MOOZ 3Z; Программное обеспечение для нарезки 3D-печати. Каждая модель, которую вы разрабатываете для печати, должна быть преобразована программным обеспечением для нарезки в инструкции, понятные вашему 3D-принтеру. |
Windows Mac OS |
|
Прошивка для платы управления (версия с Wi-Fi) Совместимость: Dobot MOOZ 2 Plus; |
Скачать |
|
Прошивка для платы управления (версия без Wi-Fi) Совместимость: Dobot MOOZ 2 Plus; |
Скачать |
|
Прошивка для пульта управления (версия с Wi-Fi) Совместимость: Dobot MOOZ 2 Plus; |
Скачать |
|
Прошивка для пульта управления (версия без Wi-Fi) Совместимость: Dobot MOOZ 2 Plus; |
Скачать |
|
Драйвер CH341SER Совместимость: Dobot MOOZ 2 Plus;Dobot MOOZ 3Z; |
Windows Mac OS |
|
Dobot MOOZStudio Совместимость: Dobot MOOZ 3Z; Специально разработанное программное обеспечение для лазерной гравировки и резьбы на станках с ЧПУ. |
Windows Mac OS |
|
Прошивка для платы управления Совместимость: Dobot MOOZ 3Z; |
Скачать |
|
Прошивка для пульта управления Совместимость: Dobot MOOZ 3Z; |
Скачать |
|
Краткое руководство Совместимость: Конвейерная лента; |
Скачать |
|
Краткое руководство Совместимость: Комплект линейных перемещений; |
Скачать |
|
Краткое руководство Совместимость: Ресурсный набор Arduiono AI; |
Скачать |
|
Arduino IDE (мультиязычный) Совместимость: Ресурсный набор Arduiono AI; Интегрированная среда разработки для Windows, MacOS и Linux, разработанная на Си и C ++, предназначенная для создания и загрузки программ на Arduino-совместимые платы, а также на платы других производителей. |
Windows Mac OS |
|
PixyMon Совместимость: Ресурсный набор Arduiono AI; Приложение, которое позволяет настраивать устройство Pixy, устанавливать выходной порт и управлять цветовыми подписями |
Windows Mac OS |
|
Демонстрационные программы Совместимость: Ресурсный набор Arduiono AI; |
Скачать |
|
Краткое руководство Совместимость: Комплект технического зрения; |
Скачать |
|
Руководство по сборке Совместимость: Комплект технического зрения; |
Скачать |
|
Dobot Vision Studio Совместимость: Комплект технического зрения; Программное обеспечение платформы технического зрения совместимое с модулями движения робота DOBOT Magician. С помощью этого программного обеспечения пользователи могут использовать модули корреляции зрения и управлять роботом DOBOT Magician. |
Windows |
-
Contents
-
Table of Contents
-
Troubleshooting
-
Bookmarks
Quick Links
深圳市越疆科技有限公司
-2 PLUS
INDUSTRIAL GRADE TRANSFORMABLE METALLIC 3D PRINTER
V1.0 2020-07
Related Manuals for Dobot MOOZ-2 PLUS
Summary of Contents for Dobot MOOZ-2 PLUS
- Page 1
深圳市越疆科技有限公司 -2 PLUS INDUSTRIAL GRADE TRANSFORMABLE METALLIC 3D PRINTER V1.0 2020-07… -
Page 3: Table Of Contents
Note: Updated Firmwares, User Manuals, Softwares and Tutorial Videos will be uploaded to our official website www.dobot.cc constantly, please use them for better experience. Any support, please contact us: mooz@dobot.cc.
-
Page 4: I.operation Panel
Operation Panel 1.1 Home Page 1.2 Calibration Page 3-Point Leveling Interface Calibrate Automatic levelling 调平 Manual levelling Control Tools Interface X: 20 Y: 20 Z: 20 Entrance to zero point setting File Directory Interface interface Calibration Tool 0.06 mm 1 mm 10 mm Auto Level Manual Level…
-
Page 5: Print Functional Module Control Interface
1.5 3D Print Functional Module Control Interface 1.6 Laser Engraving Functional Module Control Interface Set nozzle preheat target temperature Set heated bed preheat target temperature Display current laser intensity Preheat nozzle: For testing whether Tool Tool the nozzle heating is normal, press LASER again to stop heating Laser intensity adjustment +/-:…
-
Page 6: X/Y/Z Motion Control Interface
1.9 X/Y/Z Motion Control Interface 1.10 Working Process Control Interface Display execution progress of Control motion of X/Y/Z axis linear current file actuators, the corresponding operations Display time elapsed will not change any settings Printing 移动 Display current coordinates Model1.gcode X: 20 Y: 20 Z: 20…
-
Page 7: Printing
3D Printing 2.1 3-Point Leveling-Manual levelling Please follow the guide of the machine to record three different points to define a plane parallel to the heated bed, these three points must be recorded in order with nozzle in the areas shown in the drawing below, one in each. The calibration requires to be set only for the first use. Operation steps: 校准…
-
Page 8: Set The Zero Point
2.2 Set the Zero Point Zero point is the start point for the machine to print, which requires to be set only for the first use.Operation steps: 校准 校准 Zeroing Zeroing X: 20 Y: 20 Z: 20 X: 20 Y: 20 Z: 20 Fine Tune: 0 mm…
-
Page 9: Use The Slicing Software
2.3 Use the Slicing Software Description: MOOZ supports most third-party printing softwares, such as Cura, Repetier-Host, etc. Cura 3.1.0 is described here as an example. 2.3.1 Install the Slicing Software Operation steps: ① Double-click to install the software: Cura3.1.0.exe ② Select the installation directory. It is recommended to keep the ③…
- Page 10
G28 X0 Y0 Z0 G92 E0 Back Finish Cancle Note: Origin of MOOZ-2 PLUS is defaulted at left-bottom corner of the heated bed, so do not check the “Origin at center” box, otherwise the model will be printed outside of the heated bed. -
Page 11: Features
2.4 Features Profile the model: ① Adjust the model: left click on the model, four options “ ”, “ ” , “ ” and “ ” will appear on the left side of the interface, and you can adjust as needed. ②…
- Page 12
Description of key profile settings: Quality Layer Height Layer Height: Line Width For the height of each layer of printing, smaller value will produce finer surface, but cost more printing time. Suggested range is 0.05 to 0.3, not exceeding Support Line Width 3/4 of the diameter of the nozzle. -
Page 13: Offline Printing
2.5 Offline Printing Warning: After printing started, please make sure the first layer is in good bonding condition, and sort out the filament before leaving. Loose bonding may cause falling off of the model, and result in clogging of the print head. “Raft” build plate adhesion type is suggested for better bonding and easy removal of finished model. 2.
-
Page 14: Printing Control
2.6 Printing Control Printing Control 1.Speed Control: Change printing speed in real-time. Note that too high speed may sacrifice accuracy and service life of themachine. 2. Process Control—Pause/Continue: Press to pause the printing process, press again to continue. Change filament: If the filament is about to run out, please click Change filamen button. The current process will be paused and the old filament will be aborted.
-
Page 15: Power-Loss Resume
2.7 Power-Loss Resume In case of abrupt power failure during printing, the machine will save current printing process and move the functional module away from the print. You may resume or cancle the process after power recovery. Resume Unfinished mission detected ! ! Description Confirm to continue/cancle/skip? Continue: Resume the unfinished printing process…
-
Page 16: Laser Engraving
Laser Engraving Warning Protective Shield No Touch Note: Please be sure to wear the goggles and use the protective shield for safety! 3.1 Fix the Workpiece and Replace the Functional Module Operation steps: Stick a small piece of tape to the bottom of workpiece (traceless double-sided tape is recommended), keeping the edges of the workpiece aligned with grids and adhere it to the heated bed.
- Page 17
Zero Setting Zero Setting Zero Setting X: 20 Y: 20 Z: 20 X: 20 Y: 20 Z: 20 X: 20 Y: 20 Z: 20 Fine Tune: 0 mm Fine Tune: 0 mm Fine Tune: 0 mm Home Home Home Home Home Home 0.06 mm… -
Page 18: Use Software To Generate Gcodes
3.3 Use Software to Generate Gcodes Prerequisites : Computer has downloaded and installed MOOZStudio. The download path is https://www.dobot.cc/downloadcenter/dobot-mooz.html#most-download . Step 1 : Double-click MOOZStudio to enter the software Step 2 : Click Open File to import image. interface., select Laser.
-
Page 19: Cnc Carving
CNC Carving Warning Protective Shield No Touch Note: Please be sure to wear the goggles and use the protective shield for safety! 4.1 Install the CNC Platform and Workpiece Warning : Heated bed (including the glass and magnets) is a fragile component, please operate with care! Do not mount and dismount it regularly during daily use. Gently separate the heated bed glass and workbench.
-
Page 20: Install The Cnc Bit
4.2 Install the CNC Bit ① Rotate counterclockwise to expand ② Insert the CNC bit into Operation steps: ③ Rotate clockwise to clamp the CNC bit the chuck with the wrench the chuck as far as you can 4.3 Set the Zero Point Operation steps: Similar to laser engraving (Refer to Section 3.2 for details on setting the zero point) Zero point Warning: When setting the zero point, use a small step distance in the end (0.1 / 1mm) so that the CNC bit does not accidentally hit the workpiece.
-
Page 21: Use Software To Generate Gcodes
4.4 Use Software to Generate Gcodes Prerequisites : Computer has downloaded and installed MOOZStudio. The download path is https://www.dobot.cc/downloadcenter/dobot-mooz.html#most-download . Step 1: Double-click MOOZStudio to enter the software Step 2 : Click Open File to import image. interface. Select CNC.
- Page 22
Step 4 : Click Generate G-code to generate a G-code file. Step 5 : Click Export G-code to save the G-code file to a USB flash drive. File File Open File Open File Generate G-code Generate G-code Export G-code Export G-code Setting Description: ①… -
Page 23: Wifi Transfer And Usb Control
WiFi Transfer and USB Control 5.1 WiFi Transfer You can transfer a G-code file from PC to MOOZ-2 PLUS via WiFi. Prerequisites: MOOZ-2 PLUS and PC must be in the same LAN segment. Step 1 : Click Setting>WiFi>Router on the Step 2 :…
-
Page 24: Usb Control
5.2 USB Control Users can control each axis of MOOZ-2 PLUS, set working origin, or print, etc. on MOOZStudio using USB online function. Prerequisites: MOOZ-2 PLSU and PC have been connected via USB cable Step 1 : Open MOOZStudio, select the serial port, and click Connect.
-
Page 25: Troubleshooting
Troubleshooting 6.1 3D Printing Failure Q : Print center is at left-bottom A : Wrong machine setting in slicing software, the “ Origin at center ” box shall not be checked, refer to corner of the heated bed Section 2.3.2. A : 1.
- Page 26
A : 1. Unplug the cables, U disk orderly, restart the machine to decide if the failure is caused by corresponding faulty Q : Unable to exit “starting…” component. interface after power up 2. Update the mainboard firmware. 3. Check if green indicator light inside the functional module is on. Update the touch pad firmware if so. A : 1. - Page 27
Q : Abnormal nozzle temperature A : If the auto-leveling module is installed, the nozzle temperature will display 300, please remove the display: 300℃ auto-leveling module to display the normal temperature. 6.4 Appendix Disassemble 3D print module Step 1 : Remove the print head housing after Step 2 :… - Page 30
This equipment should be installed and operated with a minimum distance of 20cm between the radiator & your body. This transmitter must not be co-located or operating in conjunction with any other antenna or transmitter. All RF frequencies are not restricted in EU member states FCC ID: 2AHI4-MOOZ-2-PLUS 214-106455 www.dobot.cc…
перейти к содержанию
Руководства пользователя, инструкции и руководства для продуктов Dobot.
Найти
DOBOT Magician Go Quick Start ОТКАЗ ОТ ОТВЕТСТВЕННОСТИ В максимальной степени, разрешенной применимым законодательством, продукт, описанный в данном руководстве (включая оборудование, программное обеспечение, прошивку и т. д.), предоставляется «КАК ЕСТЬ». В случае несоблюдения правил использования или хранения, содержащихся в данном руководстве, могут возникнуть дефекты, ошибки или неисправности. ДОБОТ производит …
Подробнее «DOBOT DT-MB-CTR01 Руководство пользователя роботизированной руки Magician Go»
Руководство пользователя настольного робота DOBOT Magician Go ОТКАЗ ОТ ОТВЕТСТВЕННОСТИ В максимальной степени, разрешенной применимым законодательством, продукт, описанный в данном руководстве (включая аппаратное обеспечение, программное обеспечение, прошивку и т. д.), предоставляется «КАК ЕСТЬ». В случае несоблюдения правил использования или хранения, содержащихся в данном руководстве, могут возникнуть дефекты, ошибки или неисправности. …
Подробнее «Руководство пользователя настольного робота DOBOT Magician Go»
Роботизированная рука DOBOT M1 Pro Выпуск: V1.1 Дата: 2021 Copyright © Shenzhen Yuejiang Technology Co., Ltd, 07. Все права защищены. Никакая часть этого документа не может быть воспроизведена или передана в любой форме и любыми средствами без предварительного письменного согласия Yuejiang Technology Co., Ltd. Отказ от ответственности В максимальной степени, разрешенной применимыми…
Подробнее «Руководство пользователя робота-манипулятора DOBOT M1 Pro»
Трехцветный 3D-принтер Dobot MOOZ-3 Об этом принтере Трехцветный принтер Dobot MOOZ-3 — это уникальный продукт, предлагающий возможность смешивания волокон на небольшой подогреваемой платформе. Принтер поставляется с 3 цветами для цветового пространства CYM, которые можно смешивать вместе внутри сопла для получения широкого диапазона цветов; Смешивание…
Подробнее «Руководство пользователя трехцветного 3D-принтера Dobot MOOZ-3»
3D принтер DOBOT MOOZ-2 PLUS — многофункциональное устройство для 3D печати, лазерной гравировки и резьбы с ЧПУ. Модульный FDM принтер можно собрать всего за 10 минут. Оборудование подходит для использования новичками и преподавателями в образовательных учреждениях.
Область построения составляет 200х200х190 мм. Корпус принтера выполнен из авиационного алюминиевого сплава, что делает печать стабильной даже на высоких скоростях. Линейные направляющие промышленного класса, шаговый двигатель и винтовые стержни обеспечивают точность печати до 20 мкм.
Сменные блоки для гравировки и резки позволяют быстро переходить от одного вида работ к другому. Максимальная область гравировки составляет 200х200 мм. С помощью модулей гравировки и резки с ЧПУ можно обрабатывать дерево, акрил, пластик и другие материалы.
MOOZ-2 PLUS оснащен контроллером с дисплеем, с помощью которого можно управлять принтером, когда к нему подключен USB-накопитель или SD-карта. Автономная работа без подключения к компьютеру позволяет расширить возможности печати.
В набор для лазерной гравировки входит защитный корпус и защитные очки, которые обеспечивают безопасность.
Модульный многофункциональный 3D принтер — отличный выбор для домашнего использования, обучения и бизнеса. Быстрая сборка, удобное управление и надежная конструкция делают работу с оборудованием максимально комфортной.
Особенности DOBOT MOOZ-2 PLUS:
- модульная конструкция;
- область построения 200х200х190 мм;
- область гравировки 200х200 мм;
- датчик окончания нити;
- удобное управление.
Вы можете купить 3D принтер DOBOT MOOZ-2 PLUS в нашем офисе в Москве, с гарантией и доставкой по России от официального дилера.
Description of key profile settings:
Layer Height:
For the height of each layer of printing, smaller value will produce finer
surface, but cost more printing time. Suggested range is 0.05 to 0.3, not exceeding
3/4 of the diameter of the nozzle. MOOZ used 0.4mm nozzle, means not exceeding 0.3.
Wall Thickness:
For the printing thickness of the outer surface of the model, the
setting of 1.2 indicates that the outer surface will go three rounds, since the width of
each round equals to the diameter of the nozzle, namely 0.4.
Top/Bottom Thickness:
Determine the bottom/top thickness of the model.
Infill Density:
Determine the filling density of the internal grid of the model, generally set
at 15% or less.
Printing Temperature:
Need to be set according to filament type. Suggested value
for PLA is 190~220℃, and for TPU is 210~230℃.
Build Plate Temperature:
Need to be set according to filament type. Suggested
value for PLA is 60℃~80℃, and for TPU is 60℃~80℃, and for PETG is 75℃~80℃, and for
Wood is 30℃~50℃。
Diameter:
Set filament diameter to 1.75.
Travel Speed:
Travel speed should be set no greater than 40mm/s, otherwise the
Z linear actuators may lose some steps when traveling downward from home position
too fast and cause zero point deviation.
Support Placement:
If the model has any hovering part, the option must be
switched on. Generally, «Everywhere» indicates that support can be added on the model
itself. If you select «Touching build plate», it indicates that support can be added only
between the print platform and the model hovering position, not on the model.
Build Plate Adhesion:
Brim: A few layers of outer ring should be added on the bottom
edge of the model so as to prevent warping.
Raft: Get the whole model raised by adding a raft-like base on the bottom when the
heated bed leveling status is small or not satisfying.
Note:
1. Hover the mouse over the option, and the corresponding hint will appear.
2. Right-click anywhere within the parameter setting area, you can «Configure setting visibility».
9
Quality
Layer Height
Line Width
Support Line Width
Shell
Wall Thickness
Top/Bottom Thickness
Print Thin walls
Infill
Infill Density
Gradual Infill Steps
Material
Printing Temperature
Build Plate Temperature
Diameter
Flow
Enable Retraction
Retraction Distance
Retraction speed
Speed
Print Speed
Infill Speed
Wall Speed
Outer Wall Speed
Inner Wall Speed
Top/Bottom Speed
Cooling
Enable Print Cooling
Support
Generate Support
Support Placement
Everywhere
Support Pattern
Zig Zag
Support Density
Build Plate Adhesion
Build Plate Adhesion Type
Raft Extra Margin
Raft Air Gap
Initial Layer Z Overlap
Raft Top Layers
Raft Base Line Width
Raft Line Spacing
Raft Print Speed
Special Modes
Print Sequence
All at Once
Surface Mode
Normal
3D принтер DOBOT MOOZ-2 PLUS — многофункциональное устройство для 3D печати, лазерной гравировки и резьбы с ЧПУ. Модульный FDM принтер можно собрать всего за 10 минут. Оборудование подходит для использования новичками и преподавателями в образовательных учреждениях.
Область построения составляет 200х200х190 мм. Корпус принтера выполнен из авиационного алюминиевого сплава, что делает печать стабильной даже на высоких скоростях. Линейные направляющие промышленного класса, шаговый двигатель и винтовые стержни обеспечивают точность печати до 20 мкм.
Сменные блоки для гравировки и резки позволяют быстро переходить от одного вида работ к другому. Максимальная область гравировки составляет 200х200 мм. С помощью модулей гравировки и резки с ЧПУ можно обрабатывать дерево, акрил, пластик и другие материалы.
MOOZ-2 PLUS оснащен контроллером с дисплеем, с помощью которого можно управлять принтером, когда к нему подключен USB-накопитель или SD-карта. Автономная работа без подключения к компьютеру позволяет расширить возможности печати.
В набор для лазерной гравировки входит защитный корпус и защитные очки, которые обеспечивают безопасность.
Модульный многофункциональный 3D принтер — отличный выбор для домашнего использования, обучения и бизнеса. Быстрая сборка, удобное управление и надежная конструкция делают работу с оборудованием максимально комфортной.
Особенности DOBOT MOOZ-2 PLUS:
- модульная конструкция;
- область построения 200х200х190 мм;
- область гравировки 200х200 мм;
- датчик окончания нити;
- удобное управление.
Вы можете купить 3D принтер DOBOT MOOZ-2 PLUS в нашем офисе в Москве, с гарантией и доставкой по России от официального дилера.
Types of Manuals:
The main types of Dobot MOOZ-2 PLUS instructions:
- User guide — rules of useing and characteristics
- Service manual — repair, diagnostics, maintenance
- Operation manual — description of the main functions of equipment
3D Printers Instructions by Dobot:
-
Snapmaker Snapmaker
Quick Start GuideQuick Start Guide | Guide de démarrage | Guía de inicio rápido …
Snapmaker 3D Printers, 36
-
3D Systems CubePro
Unpacking And Setting Up Your CubeProContents*The number of cartridges depends on the ordered configuration.NOTE: The appearance of some components may vary. Unpacking And Initial SetupCAUTION: Due to the size and weight of the printer, this procedure mayrequire more than one person. Ensure there are enough people to …
CubePro 3D Printers, 24
-
EPAX X1
Read the User Manual before operating the product, and keep it at a convenient place near the printer. …
X1 3D Printers, 20
-
Ultimaker 3 Extended
Ultimaker Support›3D Printers›Ultimaker 3›MaintenanceCleaning the Ultimaker 3January 28, 2020 09:46For the best print results it is important to keep the Ultimaker 3 clean while using it.Therefore it is advised not to use the Ultimaker 3 in a room where it can easily becovered with dust and to remove sma …
3 Extended 3D Printers, 6
-
Deezmaker Bukito
1/29/14&&Page&1&of&23&&&Steps&for&assembly&of&a&Bukito.&Beta&version&3.0,&February&7,&2014&!»#$%&'(&)’*+%*+,&&Table&of&contents&…………………………………………………………… …
Bukito 3D Printers, 23
-
FabLab Mendel
806 Montana Ave. El Paso, TX 79902 fablabelpaso.org ! 915.209.2656 ! [email protected] !!!Mendel 3D Printer ABOUT Welcome, new user! Mendel is an open-source Cartesian 3D printer. It is part of the RepRap line of self-replicating 3D printers. It uses fused deposition modeling to build up three-dimensional objects …
Mendel 3D Printers, 2
-
MiiCraft Profession Series
MIICRAFT 3D Production System —> An important step in making a better world 1 Maintenance Manual Profession Series / Advance Series Version 1.0 MiiCraft Profession & Advance series printer are well designed by the finest design & optical engineers to provide additive manufacturing process more compa …
Profession Series 3D Printers, 17
-
MUTOH XPJ-661UF
Daily Maintenance Sheet for XPJ-661UFDaily maintenancebcefag hdijk lCS3015-00 -1-Preparation:Wear the polyethylene gloves (white) over the plastic gloves (pink).Wear personal protective equipment such as goggles, protective mask or clothing.Important!Before performing maintenance, make sure to read “How to handle UV …
XPJ-661UF Safety Equipment, 4