-
Contents
-
Table of Contents
-
Bookmarks
Quick Links
R A M T R U C K
2 0 1 7
D I E S E L S U P P L E M E N T
O W N E R ‘ S M A N U A L
Related Manuals for Dodge RAM 2017
Summary of Contents for Dodge RAM 2017
-
Page 1
R A M T R U C K 2 0 1 7 D I E S E L S U P P L E M E N T O W N E R ’ S M A N U A L… -
Page 2
VEHICLES SOLD IN CANADA This manual illustrates and describes the operation of With respect to any Vehicles Sold in Canada, the name FCA features and equipment that are either standard or op- US LLC shall be deemed to be deleted and the name FCA tional on this vehicle. -
Page 3
RAM DIESEL SUPPLEMENT RAM 1500 …………… 3 RAM 2500 / 3500 / 4500 / 5500 . -
Page 5
RAM 1500… -
Page 7: Maintaining Your Vehicle 53
TABLE OF CONTENTS SECTION PAGE INTRODUCTION …………..7 THINGS TO KNOW BEFORE STARTING YOUR VEHICLE .
-
Page 9: Introduction 7
INTRODUCTION CONTENTS A MESSAGE FROM FCA US LLC ….8…
-
Page 10
8 INTRODUCTION • Any chassis/suspension or tire size modifications to the A MESSAGE FROM FCA US LLC vehicle will effect the performance of the Adaptive FCA US LLC welcomes you as a turbocharged diesel- Cruise Control and Forward Collision Warning System. powered truck owner. -
Page 11
THINGS TO KNOW BEFORE STARTING YOUR VEHICLE CONTENTS REMOTE STARTING SYSTEM ….10 ENGINE BREAK-IN RECOMMENDATIONS ..11 ▫ How To Use Remote Start….10… -
Page 12: Things To Know Before Starting Your Vehicle 9
10 THINGS TO KNOW BEFORE STARTING YOUR VEHICLE REMOTE STARTING SYSTEM How To Use Remote Start All of the following conditions must be met before the This system uses the key fob to start the engine engine will remote start: conveniently from outside the vehicle while still •…
-
Page 13: Engine Break-In Recommendations
THINGS TO KNOW BEFORE STARTING YOUR VEHICLE 11 • Observe vehicle oil pressure and temperature indicators. WARNING! • Check the coolant and oil levels frequently. • Do not start or run an engine in a closed garage or • Vary throttle position at highway speeds when carrying confined area.
-
Page 15
UNDERSTANDING YOUR INSTRUMENT PANEL CONTENTS ▫ Displays ……26 INSTRUMENT CLUSTER ….14 ▫… -
Page 16
14 UNDERSTANDING YOUR INSTRUMENT PANEL INSTRUMENT CLUSTER Instrument Cluster 1. Tachometer 2. Instrument Cluster Display • Indicates the engine speed in revolutions per minute • When the appropriate conditions exist, this display (RPM x 1000). shows the Instrument Cluster Display messages. Refer to “Instrument Cluster Display”… -
Page 17
UNDERSTANDING YOUR INSTRUMENT PANEL 15 3. Speedometer WARNING! (Continued) • Indicates vehicle speed. service if your vehicle overheats. If you decide to look 4. Fuel Gauge under the hood yourself, see “Maintaining Your Ve- • The pointer shows the level of fuel in the fuel tank hicle.”… -
Page 18
16 UNDERSTANDING YOUR INSTRUMENT PANEL • The DEF gauge may also not immediately update after a • Outside temperature can affect DEF consumption. In refill if the temperature of the DEF fluid is below 12F cold conditions, 12° F (-11° C) and below, the DEF gauge (-11C). -
Page 19
UNDERSTANDING YOUR INSTRUMENT PANEL 17 1. Tachometer CAUTION! • Indicates the engine speed in revolutions per minute Driving with a hot engine cooling system could dam- (RPM x 1000). age your vehicle. If the temperature gauge reads “H” 2. Engine Coolant Temperature pull over and stop the vehicle. -
Page 20
18 UNDERSTANDING YOUR INSTRUMENT PANEL • The gauge may take up to five seconds to update after 6. Instrument Cluster Display • When the appropriate conditions exist, this display adding a gallon or more of Diesel Exhaust Fluid (DEF) to the DEF tank. -
Page 21
UNDERSTANDING YOUR INSTRUMENT PANEL 19 are indicative and precautionary and as such must not be CAUTION! (Continued) considered as exhaustive and/or alternative to the informa- air conditioner turned off until the pointer drops back tion contained in the Owner’s Manual, which you are into the normal range. -
Page 22
20 UNDERSTANDING YOUR INSTRUMENT PANEL Water in Fuel Indicator Light — If Equipped Yellow Telltale What It Means Light Water in Fuel Indicator Light The “Water In Fuel Indicator Light” will illuminate when there is water detected in the fuel fil- ters. -
Page 23: Instrument Cluster Display
UNDERSTANDING YOUR INSTRUMENT PANEL 21 INSTRUMENT CLUSTER DISPLAY Instrument Cluster Display — Premium The Instrument Cluster Display features a driver- interactive display that is located in the instrument cluster. Instrument Cluster Display — Base This system allows the driver to select a variety of useful information by pushing the switches mounted on the steering wheel.
-
Page 24
22 UNDERSTANDING YOUR INSTRUMENT PANEL • Trip B • Stop/Start Info (If Equipped) • Trailer Tow • Audio • Stored Messages • Screen Setup • Vehicle Settings (Not Equipped with a Uconnect 5.0 & 8.4 radio) • Settings Steering Wheel Buttons •… -
Page 25
UNDERSTANDING YOUR INSTRUMENT PANEL 23 • RIGHT Arrow Button Vehicles Equipped With Passive Entry Push and release the RIGHT arrow button to 1. Without pushing the brake pedal, push the ENGINE access/select the information screens or sub- START/STOP button and place the ignition to the menu screens of a main menu item. -
Page 26: Fuel Filter Life Reset
24 UNDERSTANDING YOUR INSTRUMENT PANEL 3. Push and release the right arrow button to access the Vehicles Equipped With Passive Entry “Oil Life” screen. 1. Without pushing the brake pedal, push the ENGINE 4. Push and hold the right arrow button to select the START/STOP button and cycle the ignition to the ON/ Oil Life Reset.
-
Page 27: Diesel Particulate Filter (Dpf) Messages
UNDERSTANDING YOUR INSTRUMENT PANEL 25 3. Push and release the RIGHT arrow button to access WARNING! the ”Fuel Filter Life” screen. A hot exhaust system can start a fire if you park over 4. Push and release the appropriate arrow button to access materials that can burn.
-
Page 28
26 UNDERSTANDING YOUR INSTRUMENT PANEL you of this condition. By simply driving your vehicle at CAUTION! highway speeds for up to 20 minutes, you can remedy the condition in the particulate filter system and allow See your authorized dealer, as damage to the exhaust your diesel engine and exhaust after-treatment system to system could occur soon with continued operation. -
Page 29
UNDERSTANDING YOUR INSTRUMENT PANEL 27 • Exhaust Filter Full Safely Drive at Highway Speeds To Vehicle Information (Customer Information Remedy Features) • Exhaust Filter XX% Full – Power Reduced See Dealer Vehicle Information Submenus • Battery Voltage • Exhaust Service Required – See Dealer Now Displays the actual battery voltage. -
Page 30: Diesel Exhaust Fluid (Def) Warning Messages
28 UNDERSTANDING YOUR INSTRUMENT PANEL • Engine Hours • Engine Will Not Restart in XXXX mi Refill DEF — This message will display when DEF driving range is less Displays the actual engine hours. than 200 miles. It is also displayed at 150 miles and Gauge Summary (Coolant Temp, Trans Temp, Oil Temp, 100 miles.
-
Page 31
UNDERSTANDING YOUR INSTRUMENT PANEL 29 Diesel Exhaust Fluid (DEF) Fault Warning 30 miles, vehicle will enter the “Engine Will not restart in XXX mi Service DEF See dealer” warning stage and Messages message. There are different messages which are displayed if the •… -
Page 32
30 UNDERSTANDING YOUR INSTRUMENT PANEL chime. Your Malfunction Indicator Light will be continu- ously illumined. We highly recommend you drive to your nearest authorized dealer if the message appears while engine is running. • Engine Will Not Start Service DEF System See Dealer —… -
Page 33: Table Of Contents
STARTING AND OPERATING CONTENTS STARTING PROCEDURES ….32 ENGINE BLOCK HEATER — IF EQUIPPED ..40 ▫ Normal Starting……33 FUEL REQUIREMENTS .
-
Page 34: Starting Procedures
32 STARTING AND OPERATING STARTING PROCEDURES WARNING! (Continued) Before starting your vehicle, adjust your seat, both inside • Do not leave the key fob in or near the vehicle, or in and outside mirrors, and fasten your seat belts. a location accessible to children, and do not leave the ignition of a vehicle equipped with Keyless Enter- The starter is allowed to crank for up to 30-second inter- N-Go in the ACC or ON/RUN mode.
-
Page 35: Normal Starting
STARTING AND OPERATING 33 Tip Start Feature CAUTION! (Continued) Do not press the accelerator. Cycle the ignition switch • If the “Water in Fuel Indicator Light” remains on, briefly to the START position and release it. The starter DO NOT START engine before you drain the water motor will continue to run but will automatically disen- from the fuel filters to avoid engine damage.
-
Page 36: Extreme Cold Weather
34 STARTING AND OPERATING 2. Press and hold the brake pedal while pushing the Extreme Cold Weather ENGINE START/STOP button once. The engine block heater is a resistance heater installed in the water jacket of the engine. It requires a 110–115 Volt AC NOTE: A delay of the start of up to five seconds is possible electrical outlet with a grounded, three-wire extension cord.
-
Page 37: Normal Operation
STARTING AND OPERATING 35 NORMAL OPERATION WARNING! Observe the following when the diesel engine is operating. • Do not leave children or animals inside parked • All message center lights are off. vehicles in hot weather. Interior heat build up may •…
-
Page 38: Cold Weather Precautions
36 STARTING AND OPERATING Cold Weather Precautions Fuel Operating Range Operation in ambient temperature below 32°F (0°C) may NOTE: Use “Ultra Low Sulfur Diesel Fuels” ONLY. require special considerations. The following charts sug- gest these options: Fuel Operating Range Chart *No.
-
Page 39
STARTING AND OPERATING 37 NOTE: Winter Front Usage • Use of Climatized Ultra Low Sulfur Diesel Fuel or Number 1 Ultra Low Sulfur Diesel Fuel results in a noticeable decrease in fuel economy. • Climatized Ultra Low Sulfur Diesel Fuel is a blend of Number 2 Ultra Low Sulfur and Number 1 Ultra Low Sulfur Diesel Fuels which reduces the temperature at which wax crystals form in fuel. -
Page 40: Engine Idling
38 STARTING AND OPERATING below 0°F (-17°C) the four flaps need to be closed. A completely. Incomplete combustion allows carbon and suitable cold weather cover is available from your MOPAR varnish to form on piston rings, cylinder head valves, and dealer.
-
Page 41: Cooling System Tips — Automatic Transmission
STARTING AND OPERATING 39 Idle Time (min.) Before Driving Condition Load Turbocharger Temperature Engine Shutdown Highway Speeds Maximum GCWR Uphill Grade Maximum GCWR NOTE: Under certain conditions the engine fan will run Do Not Operate The Engine With Low Oil Pressure after the engine is turned off.
-
Page 42: Engine Block Heater — If Equipped
40 STARTING AND OPERATING Do Not Operate The Engine With Failed Parts plugged in two hours prior to start. Its use is required for cold starts with temperatures under -20°F (-28°C). All engine failures give some warning before the parts fail. Be on the alert for changes in performance, sounds, and To ensure reliable starting at these temperatures, use of an visual evidence that the engine requires service.
-
Page 43
STARTING AND OPERATING 41 provide good performance. If the vehicle is exposed to CAUTION! extreme cold (below 20°F or -7°C), or is required to operate at colder-than-normal conditions for prolonged periods, If the “Water in Fuel Indicator Light” remains on, DO use climatized No. -
Page 44: Biodiesel Fuel Requirements
42 STARTING AND OPERATING • Commercially available fuel additives are not necessary CAUTION! for the proper operation of your diesel engine. Failure to comply with Oil Change requirements for • No. 1 Ultra Low Sulfur diesel fuel should only be used vehicles operating on biodiesel blends between 6% where extended arctic conditions (-10°F or -23°C) exist.
-
Page 45
STARTING AND OPERATING 43 Biodiesel Fuel Properties — Low Ambient Fuel Water Separation — Must Use MOPAR Temperatures Approved Fuel Filter Elements Biodiesel fuel may gel or solidify at low ambient tempera- Biodiesel fuel has a natural affinity to water and water tures, which may pose problems for both storage and accelerates microbial growth. -
Page 46: Diesel Exhaust Fluid
44 STARTING AND OPERATING suggested schedule. When operating on biodiesel between into the exhaust upstream of a catalyst where, when 6% and 20%, fuel filter replacement intervals must not vaporized, it converts smog-forming nitrogen oxides exceed 20,000 Miles (40,233 km). (NOx) into harmless nitrogen (N2) and water vapor (H2O), two natural components of the air we breathe.
-
Page 47: Adding Fuel — 1500 Diesel Models
STARTING AND OPERATING 45 The DEF injection system and SCR catalyst enable the achievement of diesel emissions requirements; while main- taining outstanding fuel economy, drivability, torque and power ratings. Refer to “Instrument Cluster Display” in “Understanding Your Instrument Panel” for system messages and warn- ings.
-
Page 48: Starting And Operating 31
46 STARTING AND OPERATING 3. Fill the vehicle with fuel – when the fuel nozzle “clicks” or shuts off the fuel tank is full. 4. Remove the fuel nozzle and close the fuel door. Emergency Fuel Can Refueling Most fuel cans will not open the flapper door. A funnel is provided to open the flapper door to allow emergency refueling with a fuel can.
-
Page 49: Avoid Using Contaminated Fuel
STARTING AND OPERATING 47 WARNING! • Never have any smoking materials lit in or near the vehicle when the fuel door is open or the tank is being filled. • Never add fuel when the engine is running. This is in violation of most state and federal fire regulations and may cause the “Malfunction Indicator Light”…
-
Page 50: Bulk Fuel Storage — Diesel Fuel
48 STARTING AND OPERATING Bulk Fuel Storage — Diesel Fuel Diesel Exhaust Fluid Storage If you store quantities of fuel, good maintenance of the Diesel Exhaust Fluid (DEF) is considered a very stable stored fuel is also essential. Fuel contaminated with water product with a long shelf life.
-
Page 51: Adding Diesel Exhaust Fluid
STARTING AND OPERATING 49 Adding Diesel Exhaust Fluid DEF Fill Procedure The DEF gauge (located on the instrument cluster) will NOTE: Refer to “Fluids, Lubricants, and Genuine Parts” in display the level of DEF remaining in the tank. Refer to “Maintaining Your Vehicle”…
-
Page 52
50 STARTING AND OPERATING 2. Insert DEF fill adapter/nozzle into DEF tank filler neck. CAUTION! NOTE: • To avoid DEF spillage, and possible damage to the • The DEF gauge may take up to five seconds to update DEF tank from overfilling, do not “top off” the DEF after adding a gallon or more of Diesel Exhaust Fluid tank after filling. -
Page 53
STARTING AND OPERATING 51 Filling The Def Tank In Cold Climates CAUTION! (Continued) Since DEF will begin to freeze at 12°F (-11°C), your vehicle • Never add anything other than DEF to the tank – is equipped with an automatic DEF heating system. This especially any form of hydrocarbon such as diesel allows the DEF injection system to operate properly at fuel, fuel system additives, gasoline, or any other… -
Page 55: Maintaining Your Vehicle
MAINTAINING YOUR VEHICLE CONTENTS ▫ Maintenance-Free Batteries ….64 ENGINE COMPARTMENT — 3.0L DIESEL ..54 ▫ Cooling System ……65 MAINTENANCE PROCEDURES .
-
Page 56
54 MAINTAINING YOUR VEHICLE ENGINE COMPARTMENT — 3.0L DIESEL 1 — Air Cleaner Filter 5 — Battery 2 — Engine Oil Dipstick 6 — Power Distribution Center (PDC) 3 — Engine Oil Fill 7 — Washer Fluid Reservoir 4 — Brake Fluid Reservoir 8 —… -
Page 57
MAINTAINING YOUR VEHICLE 55 MAINTENANCE PROCEDURES CAUTION! (Continued) The pages that follow contain the required maintenance Limited Warranty. If a flush is needed because of services determined by the engineers who designed your component malfunction, use only the specified fluid vehicle. -
Page 58
56 MAINTAINING YOUR VEHICLE CAUTION! Overfilling or underfilling the crankcase will cause oil aeration or loss of oil pressure. This could damage your engine. NOTE: It is possible for your oil level to be slightly higher than a previous check. This would be due to diesel fuel that may temporarily be in the crankcase due to operation of the diesel particulate filter regeneration strategy. -
Page 59
MAINTAINING YOUR VEHICLE 57 environment. Contact your authorized dealer, service sta- CAUTION! (Continued) tion or governmental agency for advice on how and where into the atmosphere. The durability of your engine and used oil and oil filters can be safely discarded in your area. life expectancy of this diesel particulate filter emission Engine Air Cleaner Filter device is highly dependent on the use of the correct… -
Page 60
58 MAINTAINING YOUR VEHICLE CAUTION! Many aftermarket performance air filter elements do not adequately filter the air entering the engine. Use of such filters can severely damage your engine. Engine Air Cleaner Filter Selection The quality of replacement engine air cleaner filters varies considerably. -
Page 61
MAINTAINING YOUR VEHICLE 59 Open Air Cleaner Filter Assembly Air Cleaner Filter 1 — Air Cleaner Cover 1 — Air Cleaner Filter 2 — Air Cleaner Filter 2 — Air Cleaner Filter Inspection Surface 3. Remove the air cleaner filter element from the housing Engine Air Cleaner Filter Installation assembly. -
Page 62
60 MAINTAINING YOUR VEHICLE 2. Install the air cleaner cover onto the housing assembly locating tabs. 3. Latch the spring clips and lock the air cleaner cover to the housing assembly. Draining Fuel/Water Separator Filter The fuel filter/water separator filter housing is located above the rear axle next to the fuel tank. -
Page 63
MAINTAINING YOUR VEHICLE 61 in the ON position, there may be a problem with your If more than two ounces or 60 milliliters of fuel have been water separator wiring or sensor. See your authorized drained, follow the directions for “Priming If The Engine dealer for service. -
Page 64
62 MAINTAINING YOUR VEHICLE 5. Remove bottom cover using a strap wrench. Rotate counterclockwise for removal. Remove the used o-ring and discard it. 6. Remove the used filter cartridge from the housing and dispose of it according to your local regulations. 7. -
Page 65
MAINTAINING YOUR VEHICLE 63 2. Press ignition switch twice without your foot on brake CAUTION! to put vehicle in Run position. This will activate the in tank fuel pump for approximately 30 seconds. Repeat Due to lack of lubricants in alcohol or gasoline, the use this process twice. -
Page 66
64 MAINTAINING YOUR VEHICLE Intervention Regeneration Strategy — Message Maintenance-Free Batteries Process Flow Your vehicle is equipped with a maintenance-free battery. This engine meets all required diesel engine emissions The top of the maintenance-free battery is permanently standards. To achieve these emissions standards, your sealed. -
Page 67
MAINTAINING YOUR VEHICLE 65 Cooling System With the engine at normal operating temperature (but not running), check the cooling system pressure cap for proper vacuum sealing by draining a small amount of engine WARNING! coolant (antifreeze) from the radiator drain cock. The You or others can be badly burned by hot engine radiator drain cock is located in the lower radiator tank. -
Page 68
66 MAINTAINING YOUR VEHICLE Adding Coolant CAUTION! Your vehicle has been built with an improved engine • Mixing of engine coolant (antifreeze) other than coolant (OAT coolant conforming to MS.90032) that allows specified Organic Additive Technology (OAT) en- extended maintenance intervals. This engine coolant (anti- gine coolant (antifreeze), may result in engine dam- freeze) can be used up to ten years or 150,000 miles age and may decrease corrosion protection. -
Page 69
MAINTAINING YOUR VEHICLE 67 • Use only high purity water such as distilled or deionized Cooling System Pressure Cap water when mixing the water/engine coolant (anti- The cap must be fully tightened to prevent loss of engine freeze) solution. The use of lower quality water will coolant (antifreeze), and to ensure that the engine coolant reduce the amount of corrosion protection in the engine (antifreeze) will return to the radiator from the coolant… -
Page 70
68 MAINTAINING YOUR VEHICLE • Check the coolant freeze point in the radiator and in the Disposal Of Used Engine Coolant coolant expansion bottle. If engine coolant (antifreeze) Used ethylene glycol-based engine coolant (antifreeze) is a needs to be added, the contents of the coolant expansion regulated substance requiring proper disposal. -
Page 71
MAINTAINING YOUR VEHICLE 69 Charge Air Cooler — Inter-Cooler The brake master cylinder has a translucent plastic reser- voir. On the outboard side of the reservoir, there is a The charge air cooler is positioned in front of the radiator “MAX”… -
Page 72
70 MAINTAINING YOUR VEHICLE WARNING! (Continued) WARNING! (Continued) • To avoid contamination from foreign matter or mois- • Overfilling the brake fluid reservoir can result in ture, use only new brake fluid or fluid that has been spilling brake fluid on hot engine parts, causing the in a tightly closed container. -
Page 73
MAINTAINING YOUR VEHICLE 71 FLUID CAPACITIES U.S. Metric Fuel (Approximate) 3.0L Diesel Engine 26 Gallons 98.5 Liters Diesel Exhaust Fluid Tank 8 Gallons 30.3 Liters Engine Oil With Filter 3.0L Liter Diesel Engine (SAE 5W-40 10.5 Quarts 10 Liters Synthetic, ACEA C3) Cooling System 3.0L Turbo Diesel Engine (MOPAR 11.6 Quarts… -
Page 74
72 MAINTAINING YOUR VEHICLE FLUIDS, LUBRICANTS AND GENUINE PARTS Engine Component Fluid, Lubricant, or Genuine Part Engine Coolant We recommend you use MOPAR Antifreeze/Coolant 10 Year/150,000 Mile Formula OAT (Organic Additive Technology). Engine Oil We recommend you use 5W-40 synthetic engine oil such as MOPAR or Shell Rotella that meets FCA Material Standard MS-10902 and the API CJ-4 engine oil category is required. -
Page 75
MAINTAINING YOUR VEHICLE 73 Component Fluid, Lubricant, or Genuine Part Fuel Selection Use good quality diesel fuel from a reputable supplier in your vehicle. Federal law requires that you must fuel this vehicle with Ultra Low Sulfur Highway Diesel fuel (15 ppm Sulfur maximum) and prohibits the use of Low Sulfur Highway Diesel fuel (500 ppm Sulfur maximum) to avoid damage to the emissions control system. -
Page 76
74 MAINTAINING YOUR VEHICLE CAUTION! CAUTION! (Continued) • Do not use water alone or alcohol-based engine • Mixing of engine coolant (antifreeze) other than speci- coolant (antifreeze) products. Do not use additional fied Organic Additive Technology (OAT) engine cool- rust inhibitors or antirust products, as they may not ant (antifreeze), may result in engine damage and may be compatible with the radiator engine coolant and decrease corrosion protection. -
Page 77
MAINTAINING YOUR VEHICLE 75 Chassis Component Fluid, Lubricant, or Genuine Part Automatic Transmission (3.0L Diesel, Only use MOPAR ZF 8&9 Speed ATF Automatic Transmis- 8-Speed Transmission) sion Fluid or equivalent. Failure to use the correct fluid may affect the function or performance of your transmis- sion. -
Page 79
MAINTENANCE SCHEDULE CONTENTS ▫ Additional Maintenance — B6 To B20 Biodiesel . .82 MAINTENANCE SCHEDULE ….78 ▫ Maintenance Chart — Diesel Fuel Up To B5 Biodiesel ……79… -
Page 80
78 MAINTENANCE SCHEDULE MAINTENANCE SCHEDULE your authorized dealer, the message can be reset by referring to the steps described under “Instrument Cluster Your vehicle is equipped with an automatic oil change Display” in “Understanding Your Instrument Panel” for indicator system. The oil change indicator system will further information. -
Page 81
MAINTENANCE SCHEDULE 79 Maintenance Chart — Diesel Fuel Up To B5 At Every Oil Change Interval As Indicated By Oil Biodiesel Change Indicator System: • Inspect brake pads, shoes, rotors, drums, hoses and Required Maintenance park brake. Refer to the Maintenance Schedules on the following pages •… -
Page 82
80 MAINTENANCE SCHEDULE Mileage or time passed (whichever comes first) Or Years: 1 Or Kilometers: Additional Inspections Completely fill the Diesel Exhaust Fluid tank. Inspect the CV/Universal joints. Inspect front suspension, tie rod ends, and replace if necessary. Inspect the front and rear axle fluid. If gear oil leak- age is suspected, check the fluid level. -
Page 83
MAINTENANCE SCHEDULE 81 Mileage or time passed (whichever comes first) Or Years: 1 Or Kilometers: Flush and replace the engine coolant at 10 years or 150,000 miles (240,000 km) whichever comes first. Replace accessory drive belt(s). Inspect the transfer case fluid, change for any of the following: police, taxi, fleet, or frequent trailer towing. -
Page 84
82 MAINTENANCE SCHEDULE • The owner is required to monitor mileage for B6-B20 Additional Maintenance — B6 To B20 Biodiesel biodiesel, the automatic oil change indicator system NOTE: does not reflect the use of biofuels. • Under no circumstances should oil change intervals exceed 8,000 miles (12,875 km) or six months, whichever comes first when using biodiesel blends greater than 5% (B5). -
Page 85
MAINTENANCE SCHEDULE 83 WARNING! • You can be badly injured working on or around a motor vehicle. Do only service work for which you have the knowledge and the right equipment. If you have any doubt about your ability to perform a service job, take your vehicle to a competent me- chanic. -
Page 86
84 MAINTENANCE SCHEDULE… -
Page 87
RAM 2500 / 3500 / 4500 / 5500… -
Page 89
TABLE OF CONTENTS SECTION PAGE INTRODUCTION …………..89 THINGS TO KNOW BEFORE STARTING YOUR VEHICLE . -
Page 91
INTRODUCTION CONTENTS A MESSAGE FROM FCA US LLC … . .90… -
Page 92
90 INTRODUCTION A MESSAGE FROM FCA US LLC NOTE: Some aftermarket products may cause severe engine/transmission and/or exhaust system damage. Your FCA US LLC and Cummins welcome you as a Cummins vehicle’s Powertrain Control Systems can detect and store turbocharged diesel-powered truck owner. Your diesel information about vehicle modifications that increase truck will sound, feel, drive, and operate differently from a horsepower and torque output such as whether or not… -
Page 93
THINGS TO KNOW BEFORE STARTING YOUR VEHICLE CONTENTS ▫ To Exit Remote Start Mode And Drive The REMOTE STARTING SYSTEM — IF EQUIPPED . . .92 Vehicle …….93 ▫… -
Page 94
92 THINGS TO KNOW BEFORE STARTING YOUR VEHICLE • HAZARD switch off REMOTE STARTING SYSTEM — IF EQUIPPED • BRAKE switch inactive (brake pedal not pushed) This system uses the key fob to start the engine • Ignition key removed from ignition switch conveniently from outside the vehicle while still •… -
Page 95
THINGS TO KNOW BEFORE STARTING YOUR VEHICLE 93 Remote Start Abort Message NOTE: • The park lamps will turn on and remain on during The following messages will display in the Instrument Cluster Display if the vehicle fails to remote start or exits Remote Start mode. -
Page 96
94 THINGS TO KNOW BEFORE STARTING YOUR VEHICLE • Warm up the engine before placing it under load. Vehicle Security Alarm System (if equipped). Then, prior to the end of the 15-minute cycle, place the ignition to the • Do not operate the engine at idle for prolonged periods. ON/RUN position. -
Page 97
UNDERSTANDING THE FEATURES OF YOUR VEHICLE CONTENTS ▫ To Resume Speed ….. . .97 ELECTRONIC SPEED CONTROL … . .96 ▫… -
Page 98
96 UNDERSTANDING THE FEATURES OF YOUR VEHICLE ELECTRONIC SPEED CONTROL NOTE: In order to ensure proper operation, the Electronic Speed Control System has been designed to shut down if When engaged, the Electronic Speed Control takes over multiple speed control functions are operated at the same accelerator operations at speeds greater than 25 mph time. -
Page 99
UNDERSTANDING THE FEATURES OF YOUR VEHICLE 97 To Set A Desired Speed To Vary The Speed Setting Turn the Electronic Speed Control on. When the vehicle has To Increase Speed reached the desired speed, push the SET (-) button and When the Electronic Speed Control is set, you can increase release. -
Page 100
98 UNDERSTANDING THE FEATURES OF YOUR VEHICLE Metric Speed (km/h) U.S. Speed (mph) • Pushing the RES (+) button once will result in a 1 km/h • Pushing the SET (-) button once will result in a 1 mph increase in set speed. Each subsequent tap of the button decrease in set speed. -
Page 101
UNDERSTANDING THE FEATURES OF YOUR VEHICLE 99 To Accelerate For Passing WARNING! Press the accelerator as you would normally. When the Electronic Speed Control can be dangerous where the pedal is released, the vehicle will return to the set speed. system cannot maintain a constant speed. -
Page 103
UNDERSTANDING YOUR INSTRUMENT PANEL CONTENTS ▫ Instrument Cluster Display Messages ..115 INSTRUMENT CLUSTER ….102 ▫ Cold Ambient Derate Mode Messages ..116 WARNING AND INDICATOR LIGHTS . -
Page 104
102 UNDERSTANDING YOUR INSTRUMENT PANEL INSTRUMENT CLUSTER Instrument Cluster 1. Tachometer 2. Instrument Cluster Display • Indicates the engine speed in revolutions per minute • When the appropriate conditions exist, this display (RPM x 1000). shows the Instrument Cluster Display messages. Refer to “Instrument Cluster Display”… -
Page 105
UNDERSTANDING YOUR INSTRUMENT PANEL 103 3. Speedometer WARNING! (Continued) • Indicates vehicle speed. service if your vehicle overheats. If you decide to look 4. Fuel Gauge under the hood yourself, see “Maintaining Your Ve- • The pointer shows the level of fuel in the fuel tank hicle.”… -
Page 106
104 UNDERSTANDING YOUR INSTRUMENT PANEL • The DEF gauge may also not immediately update after a • Outside temperature can affect DEF consumption. In refill if the temperature of the DEF fluid is below 12F cold conditions, 12° F (-11° C) and below, the DEF gauge (-11C). -
Page 107
UNDERSTANDING YOUR INSTRUMENT PANEL 105 1. Tachometer CAUTION! • Indicates the engine speed in revolutions per minute Driving with a hot engine cooling system could dam- (RPM x 1000). age your vehicle. If the temperature gauge reads “H” 2. Engine Coolant Temperature pull over and stop the vehicle. -
Page 108
106 UNDERSTANDING YOUR INSTRUMENT PANEL • The gauge may take up to five seconds to update after 6. Instrument Cluster Display • When the appropriate conditions exist, this display adding a gallon or more of Diesel Exhaust Fluid (DEF) to the DEF tank. -
Page 109
UNDERSTANDING YOUR INSTRUMENT PANEL 107 are indicative and precautionary and as such must not be CAUTION! (Continued) considered as exhaustive and/or alternative to the infor- air conditioner turned off until the pointer drops back mation contained in the Owner’s Manual, which you are into the normal range. -
Page 110
108 UNDERSTANDING YOUR INSTRUMENT PANEL Water in Fuel Indicator Light — If Equipped Yellow Telltale What It Means Light Water in Fuel Indicator Light The “Water In Fuel Indicator Light” will illuminate when there is water detected in the fuel fil- ters. -
Page 111
UNDERSTANDING YOUR INSTRUMENT PANEL 109 INSTRUMENT CLUSTER DISPLAY Instrument Cluster Display — Premium The Instrument Cluster Display features a driver- interactive display that is located in the instrument cluster. Instrument Cluster Display — Base This system allows the driver to select a variety of useful information by pushing the switches mounted on the steering wheel. -
Page 112
110 UNDERSTANDING YOUR INSTRUMENT PANEL • Trip B • Stop/Start Info (If Equipped) • Trailer Tow • Audio • Stored Messages • Screen Setup • Vehicle Settings (Not Equipped with a Uconnect 5.0 & 8.4 radio) • Settings Steering Wheel Buttons •… -
Page 113
UNDERSTANDING YOUR INSTRUMENT PANEL 111 • RIGHT Arrow Button Vehicles Equipped With Passive Entry Push and release the RIGHT arrow button to 1. Without pushing the brake pedal, push the ENGINE access/select the information screens or sub- START/STOP button and place the ignition to the menu screens of a main menu item. -
Page 114
112 UNDERSTANDING YOUR INSTRUMENT PANEL 3. Push and release the right arrow button to access the Vehicles Equipped With Passive Entry “Oil Life” screen. 1. Without pushing the brake pedal, push the ENGINE 4. Push and hold the right arrow button to select the START/STOP button and cycle the ignition to the ON/ Oil Life Reset. -
Page 115
UNDERSTANDING YOUR INSTRUMENT PANEL 113 3. Push and release the RIGHT arrow button to access WARNING! the ”Fuel Filter Life” screen. A hot exhaust system can start a fire if you park over 4. Push and release the appropriate arrow button to access materials that can burn. -
Page 116
114 UNDERSTANDING YOUR INSTRUMENT PANEL • Exhaust System — Regeneration Required Now — • Exhaust System — Regeneration Completed — This Exhaust Filter XX% Full Safely Drive at Highway message indicates that the Diesel Particulate Filter (DPF) Speeds to Remedy will be displayed in the Instrument self-cleaning is completed. -
Page 117
UNDERSTANDING YOUR INSTRUMENT PANEL 115 • Exhaust System – Regeneration Completed CAUTION! • Speed Limited to 5 MPH in XXX mi Refill DEF See your authorized dealer, as damage to the exhaust • 5 MPH Max Speed on Restart, Long Idle or Refuel Refill system could occur soon with continued operation. -
Page 118
116 UNDERSTANDING YOUR INSTRUMENT PANEL Cold Ambient Derate Mode Messages 350 miles (560 km). If the following warning message sequence is ignored, your vehicle may be limited to a The vehicle will display messages when a derate (engine maximum speed of 5 MPH (8 km/H) unless DEF is added. power reduction) is activated to protect the turbocharger •… -
Page 119
UNDERSTANDING YOUR INSTRUMENT PANEL 117 • If the vehicle is shutoff and restarted. When the DEF system needs to be serviced the following • If the vehicle is idled for an extended period of time, warnings will display: approximately one hour or greater. •… -
Page 120
118 UNDERSTANDING YOUR INSTRUMENT PANEL • 5 MPH Max Speed on Restart, Long Idle or Refuel • Incorrect DEF Detected See Dealer — This message will Service DEF See Dealer — This message will continu- display when the fault is initially detected, each time the ously display when the mileage counter reaches zero, vehicle is started, and periodically during driving. -
Page 121
STARTING AND OPERATING CONTENTS STARTING PROCEDURES ….121 NORMAL OPERATION — DIESEL ENGINE ..130 ▫ Manual Transmission — If Equipped ..121 ▫… -
Page 122
120 STARTING AND OPERATING AUTOMATIC TRANSMISSION — IF EQUIPPED .140 ENGINE RUNAWAY …..156 ▫ Key Ignition Park Interlock ….141 FUEL REQUIREMENTS . -
Page 123
STARTING AND OPERATING 121 STARTING PROCEDURES WARNING! (Continued) Before starting your vehicle, adjust your seat, adjust both • Do not leave the key fob in or near the vehicle, or in inside and outside mirrors, and fasten your seat belts. a location accessible to children, and do not leave the ignition of a vehicle equipped with Keyless Enter- The starter should not be operated for more than 15-second… -
Page 124
122 STARTING AND OPERATING Keyless Enter-N-Go — If Equipped NOTE: • Normal starting of either a cold or a warm engine is This feature allows the driver to operate obtained without pumping or pressing the accelerator the ignition switch with the push of a pedal. -
Page 125
STARTING AND OPERATING 123 3. If the gear selector is not in PARK, the ENGINE START/ NOTE: If the ignition is left in the ACC or RUN (engine not STOP button must be held for two seconds or three short running) position and the transmission is in PARK, the pushes in a row with the vehicle speed above 5 mph system will automatically time out after 30 minutes of… -
Page 126
124 STARTING AND OPERATING Keyless Enter-N-Go Starting Procedure — Engine 3. While the Wait to Start telltale is on, the instrument Manifold Air Temperature 0° F To 66° F (–18° C to cluster will additionally display a gauge or bar whose 19°… -
Page 127
STARTING AND OPERATING 125 5. After engine start-up, check to see that there is oil Extreme Cold Weather pressure. The Cummins diesel engine is equipped with several features designed to assist cold weather starting and op- 6. Allow the engine to idle about three minutes until the eration: manifold heaters have completed the post-heat cycle. -
Page 128
126 STARTING AND OPERATING Normal Starting Procedure — Engine Manifold Air 4. Turn the ignition switch to the START position and Temperature Above 66° F (19° C) crank the engine. Do not press the accelerator during starting. Observe the instrument panel cluster lights when starting the engine. -
Page 129
STARTING AND OPERATING 127 Follow the steps in the “Normal Starting” procedure CAUTION! except: Do not crank engine for more than 15 seconds at a time 1. The “Wait To Start” telltale will remain on for a period of or starter motor damage may result. Turn the ignition time that varies depending on the engine temperature. -
Page 130
128 STARTING AND OPERATING abort the start process before it completes, the driver’s 1. If the engine stalls after the initial start, the ignition must foot should be fully removed from the brake pedal prior be turned to the OFF position for at least five seconds to pushing the start button again in order for the ignition and then to the ON position to recycle the manifold to move directly to off. -
Page 131
STARTING AND OPERATING 129 NOTE: Starting Fluids • Engine idle speed will automatically increase to WARNING! 1,000 RPM and engage the Variable Geometry Turbo- charger at low coolant temperatures to improve engine Starting fluids or flammable liquids must never be warm-up. -
Page 132
130 STARTING AND OPERATING NORMAL OPERATION — DIESEL ENGINE WARNING! (Continued) Observe the following when the engine is operating. • Never leave children alone in a vehicle, or with • All message center lights are off. access to an unlocked vehicle. Allowing children to be in a vehicle unattended is dangerous for a number •… -
Page 133
STARTING AND OPERATING 131 Cold Weather Precautions Fuel Operating Range Operation in ambient temperature below 32°F (0°C) may NOTE: Use “Ultra Low Sulfur Diesel Fuels” ONLY. require special considerations. The following charts sug- gest these options: Fuel Operating Range Chart *No. -
Page 134
132 STARTING AND OPERATING NOTE: Winter Front Cover Usage • Use of Climatized Ultra Low Sulfur Diesel Fuel or A winter front or cold weather cover is to be used in ambient temperatures below 32°F (0°C), especially during Number 1 Ultra Low Sulfur Diesel Fuel results in a extended idle conditions. -
Page 135
STARTING AND OPERATING 133 • Automatic transmission is in PARK. Engine Warm-Up • Vehicle speed is 0 mph (0 km/h). Avoid full throttle operation when the engine is cold. When starting a cold engine, bring the engine up to operating •… -
Page 136
134 STARTING AND OPERATING be noticeable at speeds below 20 mph (32 kmh). This The Idle-Up feature uses the speed control switches to operating mode may last for up to an hour of idle time, or increase engine idle speed and quickly warm the vehicle’s around 20 minutes of driving time. -
Page 137
STARTING AND OPERATING 135 NOTE: Turbo- Idle Time • During engine shut down on vehicles equipped with Driving charger (min.) Be- Load Condition Tempera- fore Engine manual transmissions, it is normal for the diesel engine ture Shutdown to resonate heavily for a moment during engine shut off. When the engine is connected to a manual transmission, Highway Medium… -
Page 138
136 STARTING AND OPERATING Programmable Maximum Vehicle Speed (Chassis Avoid Low Coolant Temperature Operation Cab Only) Continual operation at low engine coolant (antifreeze) This feature allows the owner to set a maximum vehicle temperature below the normal range on the gauge 140°F speed for the vehicle. -
Page 139
STARTING AND OPERATING 137 • Fuel, oil or coolant leaks. Do Not Operate The Engine With Low Oil Pressure • Sudden change, outside the normal operating range, in When the engine is at normal operating temperature, the minimum oil pressures required are: the engine operating temperature. -
Page 140
138 STARTING AND OPERATING • Reduced brake fade. WARNING! • Longer brake life. Remember to disconnect the cord before driving. • Faster cab warm-up. Damage to the 110–115 Volt electrical cord could cause electrocution. The exhaust brake feature will only function when the driver toggles it on by pushing the exhaust brake button NOTE: The block heater will require 110 Volts AC and until the Exhaust Brake Indicator is illuminated. -
Page 141
STARTING AND OPERATING 139 pressure from the accelerator pedal. Exhaust braking is The exhaust brake feature can also be used to reduce the most effective when the engine RPM is higher. The auto- engine warm up time. To use the exhaust brake as a matic transmission will downshift more aggressively in warm-up device, the vehicle must be stopped or moving TOW/HAUL mode when the exhaust brake is enabled to… -
Page 142
140 STARTING AND OPERATING AUTOMATIC TRANSMISSION — IF EQUIPPED WARNING! (Continued) • When leaving the vehicle, always make sure the WARNING! ignition is in the OFF mode, remove the key fob from • It is dangerous to shift out of PARK or NEUTRAL if the vehicle, and lock the vehicle. -
Page 143
STARTING AND OPERATING 141 ignition can be turned to the LOCK/OFF (key removal) WARNING! (Continued) position. The key fob can only be removed from the • Do not leave the key fob in or near the vehicle (or in ignition when the ignition is in the LOCK/OFF position, a location accessible to children), and do not leave and the transmission is locked in PARK whenever the the ignition (in a vehicle equipped with Keyless… -
Page 144
142 STARTING AND OPERATING the gear selector out of PARK (refer to “Brake/ 1, 2, 3, etc. Some models will display both the selected gear Transmission Shift Interlock System” in this section). To limit, and the actual current gear, while in ERS mode. drive, move the gear selector from PARK or NEUTRAL to Gear Ranges the DRIVE position. -
Page 145
STARTING AND OPERATING 143 precaution, turn the front wheels toward the curb on a WARNING! (Continued) downhill grade and away from the curb on an uphill grade. • It is dangerous to shift out of PARK or NEUTRAL if When exiting the vehicle, always: the engine speed is higher than idle speed. -
Page 146
144 STARTING AND OPERATING The following indicators should be used to ensure that you WARNING! (Continued) have engaged the transmission into the PARK position: • Never leave children alone in a vehicle, or with • When shifting into PARK, pull the gear selector toward access to an unlocked vehicle. -
Page 147
STARTING AND OPERATING 145 When frequent transmission shifting occurs (such as when WARNING! operating the vehicle under heavy loading conditions, in hilly terrain, traveling into strong head winds, or while Do not coast in NEUTRAL and never turn off the towing a heavy trailer), use the Electronic Range Select ignition to coast down a hill. -
Page 148
146 STARTING AND OPERATING NOTE: Use caution when operating a heavily loaded vehicle to accelerate under heavily loaded conditions may vehicle at low speeds (such as towing a trailer up a steep be reduced. In all cases, normal operation will resume once grade, or in stop-and-go traffic) during hot weather. -
Page 149
STARTING AND OPERATING 147 3. Turn the ignition to the OFF position. position, the transmission will operate automatically, shift- ing between all available gears. Tapping the ERS (-) switch 4. Wait approximately 10 seconds. will activate ERS mode, display the current gear in the 5. -
Page 150
148 STARTING AND OPERATING Overdrive Operation WARNING! The automatic transmission includes an electronically con- Do not downshift for additional engine braking on a trolled Overdrive (fifth and sixth gears). The transmission slippery surface. The drive wheels could lose their grip will automatically shift into Overdrive if the following and the vehicle could skid, causing a collision or conditions are present:… -
Page 151
STARTING AND OPERATING 149 will automatically downshift (for engine braking) when the WARNING! throttle is closed and/or during steady braking maneu- vers. Do not use the “TOW/HAUL” feature when driving in icy or slippery conditions. The increased engine brak- ing can cause the rear wheels to slide, and the vehicle to swing around with the possible loss of vehicle control, which may cause an accident possibly result- ing in personal injury or death. -
Page 152
150 STARTING AND OPERATING NOTE: MANUAL TRANSMISSION — IF EQUIPPED • The torque converter clutch will not engage (and 68RFE- WARNING! equipped trucks will not shift to sixth gear), until the transmission fluid and engine coolant are warm [usually You or others could be injured if you leave the vehicle after 1 to 3 miles (2 to 5 km) of driving]. -
Page 153
STARTING AND OPERATING 151 Shifting This transmission has a “creeper” first gear which should be used to start from a standing position when carrying a payload or towing a trailer. Damage to the clutch can result from starting in second or third gear with a loaded vehicle. An unloaded vehicle may be launched in second gear. -
Page 154
152 STARTING AND OPERATING Maximum Recommended Up-Shift Speeds Gear Selection 1 to 2 2 to 3 3 to 4 4 to 5 5 to 6 7 mph 15 mph 25 mph 40 mph 45 mph Maximum Speed (11 km/h) (24 km/h) (40 km/h) (64 km/h) (72 km/h) -
Page 155
STARTING AND OPERATING 153 Maximum Recommended Downshifting Speeds Gear Selection 6 to 5 5 to 4 4 to 3 3 to 2 2 to 1 Maximum Speed 68 mph 50 mph 32 mph 19 mph 10 mph (109 km/h) (80 km/h) (51 km/h) (31 km/h) (16 km/h) -
Page 156
154 STARTING AND OPERATING You have the ability to configure the functionality of the Details of the PTO selection modes and further PTO auxiliary switches via the instrument cluster display. All information is available at the Ram Truck Bodybuilders switches can now be configured for setting the switch type web site. -
Page 157
STARTING AND OPERATING 155 • PTO must be correctly installed using the vehicle pro- To operate the PTO via a remote switch, the customer must vided circuits. make sure the above conditions are met. It is vital for proper operation that the PTO and remote have been The instrument cluster will display a PTO On message for installed correctly, paying special attention to ensure the five seconds if the above conditions are met. -
Page 158
156 STARTING AND OPERATING • Parking brake must not be applied. ENGINE RUNAWAY • Brake pedal must not be applied. Diesel engine runaway is a rare condition affecting diesel engines, where the engine consumes its own lubrication oil • No vehicle, brake or clutch switch faults present. and runs at higher and higher RPM until it overspeeds to •… -
Page 159
STARTING AND OPERATING 157 FUEL REQUIREMENTS Diesel fuel is seldom completely free of water. To prevent fuel system trouble, drain the accumulated water from the Use good quality diesel fuel from a reputable supplier in fuel/water separator using the fuel/water separator drain your vehicle. -
Page 160
158 STARTING AND OPERATING NOTE: Bio-Diesel Fuel Requirements • If you accidentally fill the fuel tank with gasoline on Chassis Cab Models your diesel vehicle, Do not start the vehicle. If you A maximum blend of 5% biodiesel meeting ASTM specifi- restart your vehicle you risk damaging the engine and cation D975 may be used with your Cummins diesel fuel system. -
Page 161
STARTING AND OPERATING 159 following requirements if you use blends of biodiesel Fuel Water Separation — Must Use MOPAR/ greater then 5% but not greater than 20% (B6-B20). There Cummins Approved Fuel Filter Elements are no unique restrictions for the use of B5. Use of blends You must use MOPAR/Cummins approved fuel filter greater than 20% is not approved. -
Page 162
160 STARTING AND OPERATING • Ram PickUp 2500/3500 Only — 15,000 Miles* • Ram 3500/4500/5500 Chassis Cab — 12,500 Miles* (*unless otherwise notified with a oil service message) CAUTION! • Under no circumstances should oil change intervals exceed 15,000 miles (24 000 km) pickup or 12,500 miles (20 000 km) chassis cab if operation occurs with greater than 5% biodiesel blends. -
Page 163
STARTING AND OPERATING 161 Emergency Fuel Can Refueling Most fuel cans will not open the flapper door. A funnel is provided to open the flapper door to allow emergency refueling with a fuel can. Fuel Fill Funnel Location 2500/3500 Models 2. -
Page 164
162 STARTING AND OPERATING WARNING! • Never have any smoking materials lit in or near the vehicle when the fuel door is open or the tank is being filled. • Never add fuel when the engine is running. This is in violation of most state and federal fire regulations and may cause the “Malfunction Indicator Light”… -
Page 165
STARTING AND OPERATING 163 • Tighten the fuel filler cap until you hear a “clicking” WARNING! sound. This is an indication that the fuel filler cap is • Never have any smoking materials lit in or near the properly tightened. vehicle when the fuel filler cap is removed or the •… -
Page 166
164 STARTING AND OPERATING If the vehicle will not start, refer to “Maintenance Copper, brass, aluminum, iron or non-stainless steel Procedures/Priming If The Engine Has Run Out Of Fuel” should be avoided as they are subject to corrosion by in “Maintaining Your Vehicle” for further information. DEF. -
Page 167
STARTING AND OPERATING 165 • There is an electric heater inside the DEF tank that automatically works when necessary. And if the DEF supply does freeze, the truck will operate normally until it thaws. DEF Fill Procedure NOTE: Refer to “Fluids, Lubricants, and Genuine Parts” in “Maintaining Your Vehicle”… -
Page 168
166 STARTING AND OPERATING CAUTION! (Continued) • When DEF is spilled, clean the area immediately with water and use an absorbent material to soak up the spills on the ground. • Do not attempt to start your engine if DEF is acci- dentally added to the diesel fuel tank as it can result in severe damage to your engine, including but not limited to failure of the fuel pump and injectors. -
Page 169
STARTING AND OPERATING 167 4. Reinstall cap onto DEF tank. full. So drivers can consume 25 percent of a truly full DEF tank without seeing any visible change in the gauge Filling The Def Tank In Cold Climates reading. Since DEF will begin to freeze at 12°F (-11°C), your vehicle Extra care should be taken when filling with portable is equipped with an automatic DEF heating system. -
Page 170
168 STARTING AND OPERATING two natural components of the air we breathe. You can The DEF injection system and SCR catalyst enable the operate with the comfort that your vehicle is contributing achievement of diesel emissions requirements; while main- to a cleaner, healthier world environment for this and taining outstanding fuel economy, drivability, torque and generations to come. -
Page 171: What To Do In Emergencies
WHAT TO DO IN EMERGENCIES CONTENTS ▫ With Portable Starting Unit ….172 JUMP STARTING ……170…
-
Page 172
170 WHAT TO DO IN EMERGENCIES JUMP STARTING indicator (if equipped) is light or yellow on either battery, replace that battery. WARNING! CAUTION! • To prevent personal injury or damage to clothing, do not allow battery fluid to contact eyes, skin or Use the jump start procedure only when the charge indicator (if equipped) in both batteries is dark in the fabrics. -
Page 173
WHAT TO DO IN EMERGENCIES 171 • The negative connection must provide good electrical conductivity and current carrying capacity. WARNING! • Do not connect the cable to the negative post of the discharge battery. The resulting electrical spark could cause the battery to explode. •… -
Page 174
172 WHAT TO DO IN EMERGENCIES With Portable Starting Unit WARNING! There are many types of these units available. Follow the Any procedure other than above could result in: manufacturer’s instructions for necessary precautions and • Personal injury caused by electrolyte squirting out operation. -
Page 175
MAINTAINING YOUR VEHICLE CONTENTS ▫ Maintenance-Free Batteries ….190 ENGINE COMPARTMENT — 6.7L DIESEL — SIX-SPEED 68RFE (2500/3500 Models) ..174 ▫… -
Page 176
174 MAINTAINING YOUR VEHICLE ENGINE COMPARTMENT — 6.7L DIESEL — SIX-SPEED 68RFE (2500/3500 Models) 1 — Battery 7 — Washer Fluid Reservoir 2 — Engine Coolant Reservoir 8 — Power Steering Fluid Reservoir 3 — Automatic Transmission Dipstick 9 — Power Distribution Center 4 —… -
Page 177
MAINTAINING YOUR VEHICLE 175 ENGINE COMPARTMENT — 6.7L DIESEL — SIX-SPEED AS69RC HD (3500/CHASSIS CAB MODELS) 1 — Battery 7 — Washer Fluid Reservoir 2 — Engine Coolant Reservoir 8 — Power Steering Fluid Reservoir 3 — Automatic Transmission Dipstick 9 —… -
Page 178
176 MAINTAINING YOUR VEHICLE MAINTENANCE PROCEDURES CAUTION! (Continued) The pages that follow contain the required maintenance • Your vehicle has been built with improved fluids services determined by the engineers who designed your that protect the performance and durability of your vehicle. -
Page 179
MAINTAINING YOUR VEHICLE 177 CAUTION! Overfilling or underfilling the crankcase will cause oil aeration or loss of oil pressure. This could damage your engine. Never operate the engine with oil level below the “ADD” mark or above the upper “SAFE” mark. Change Engine Oil Refer to the “Maintenance Schedule”… -
Page 180
178 MAINTAINING YOUR VEHICLE American Petroleum Institute (API) Engine Oil Engine Oil Viscosity (SAE Grade) Identification Symbol In ambient temperatures above 0°F (-18°C), we recommend you use SAE 15W-40 engine oil such as MOPAR, Shell This symbol means that the oil has been Rotella and Shell Rimula that meets FCA Material Standard certified by the American Petroleum In- MS-10902 and the API CJ-4 engine oil category is required. -
Page 181
MAINTAINING YOUR VEHICLE 179 Materials Added To Engine Oil The manufacturer strongly recommends against the addi- tion of any additives (other than leak detection dyes) to the engine oil. Engine oil is an engineered product and its performance may be impaired by supplemental additives. Engine Oil Filter Refer to “Fluids, Lubricants, And Genuine Parts”… -
Page 182
180 MAINTAINING YOUR VEHICLE Engine Air Cleaner Filter The “SERVICE AIR FILTER” message could be displayed periodically. This is because engine air flow requirements CAUTION! change based on driving conditions. As the filter becomes more restrictive and air flow requirements increase the All air entering the engine intake must be filtered. -
Page 183
MAINTAINING YOUR VEHICLE 181 If the vehicle experiences a sudden loss of engine power recommended every 15,000 miles (24,000km) or 12 months – while being driven in heavy snow or rain, or when whichever occurs first. Under no circumstances should the plowing snow, and/or the “SERVICE AIR FILTER”… -
Page 184
182 MAINTAINING YOUR VEHICLE Engine Air Cleaner Filter Inspection and Replacement Inspect engine air cleaner filter for dirt and or debris, if you find evidence of either dirt or debris you should change your air cleaner filter. Engine Air Cleaner Filter Removal 1. -
Page 185
MAINTAINING YOUR VEHICLE 183 Open Air Cleaner Filter Assembly Air Cleaner Filter 1 — Air Cleaner Cover 1 — Air Cleaner Filter 2 — Air Cleaner Filter 2 — Air Cleaner Filter Inspection Surface 3. Remove the air cleaner filter element from the housing Engine Air Cleaner Filter Installation assembly. -
Page 186
184 MAINTAINING YOUR VEHICLE 2. Install the air cleaner cover onto the housing assembly point you should stop the engine and drain the water from locating tabs. both of the filters. 3. Install screws to secure the air cleaner cover to the CAUTION! housing assembly. -
Page 187
MAINTAINING YOUR VEHICLE 185 Drain the fuel/water separator filters when the “Water In 1. No filter is installed. Fuel Indicator Light” is ON. Within 10 minutes of vehicle 2. Inferior/Non-approved filter is used. Use of OEM filter shutdown, turn the engine mounted filter drain valve is required to ensure vehicle will run. -
Page 188
186 MAINTAINING YOUR VEHICLE 8. Install new o-ring back into ring groove on the filter CAUTION! housing and lubricate with clean engine oil. • Diesel fuel will damage blacktop paving surfaces. 9. Remove new filter cartridge from plastic bag and install Drain the filter into an appropriate container. -
Page 189
MAINTAINING YOUR VEHICLE 187 1. No filter is installed. CAUTION! (Continued) • Do not prefill the fuel filter when installing a new fuel filter. There is a possibility debris could be introduced into the fuel filter during this action. It is best to install the filter dry and allow the in-tank lift pump to prime the fuel system. -
Page 190
188 MAINTAINING YOUR VEHICLE NOTE: WIF sensor is re-usable. Service kit comes with new CAUTION! o-ring for filter canister and WIF sensor. Do not engage the starter motor for more than 15 Priming If The Engine Has Run Out Of Fuel seconds at a time. -
Page 191
MAINTAINING YOUR VEHICLE 189 • A maximum blend of 20% biodiesel, meeting ASTM Emissions Standards. These systems are seamlessly inte- specification D-7467 may be used with your Cummins grated into your vehicle and managed by the Cummins diesel engine. (Pickup models and Chassis Cab models Powertrain Control Module (PCM). -
Page 192
190 MAINTAINING YOUR VEHICLE Maintenance-Free Batteries WARNING! The top of the maintenance-free batteries are permanently A hot exhaust system can start a fire if you park over sealed. You will never have to add water, nor is periodic materials that can burn. Such materials might be grass maintenance required. -
Page 193
MAINTAINING YOUR VEHICLE 191 Engine Coolant Checks WARNING! Check the engine coolant (antifreeze) protection every Battery posts, terminals, and related accessories con- 12 months (before the onset of freezing weather, where tain lead and lead compounds. Always wash hands applicable). If the engine coolant (antifreeze) is dirty or after handling the battery. -
Page 194
192 MAINTAINING YOUR VEHICLE Cooling System — Drain Flush And Refill CAUTION! (Continued) If the engine coolant (antifreeze) is dirty or contains a engine coolant (antifreeze) is introduced into the cool- considerable amount of sediment, clean and flush with a ing system in an emergency, the cooling system will reliable cooling system cleaner. -
Page 195
MAINTAINING YOUR VEHICLE 193 the same engine coolant (OAT coolant conforming to NOTE: MS.90032) throughout the life of your vehicle. • It is the owner’s responsibility to maintain the proper Please review these recommendations for using Organic level of protection against freezing according to the Additive Technology (OAT) engine coolant (antifreeze) temperatures occurring in the area where the vehicle is that meets the requirements of FCA Material Standard… -
Page 196
194 MAINTAINING YOUR VEHICLE The cap should be inspected and cleaned if there is any Points To Remember accumulation of foreign material on the sealing surfaces. NOTE: When the vehicle is stopped after a few miles/ kilometers of operation, you may observe vapor coming WARNING! from the front of the engine compartment. -
Page 197
MAINTAINING YOUR VEHICLE 195 MS.90032) and distilled water for proper corrosion pro- the engine has been cooled by about 50° to 100°F (10° to tection of your engine which contains aluminum com- 38°C). This cooling process enables more efficient burning ponents. -
Page 198
196 MAINTAINING YOUR VEHICLE With disc brakes, the fluid level can be expected to fall as WARNING! (Continued) the brake linings wear. However, an unexpected drop in • To avoid contamination from foreign matter or mois- fluid level may be caused by a leak and a system check ture, use only new brake fluid or fluid that has been should be conducted. -
Page 199
MAINTAINING YOUR VEHICLE 197 Transfer Case — If Equipped level ground, enough lubricant should be added to bring the level to 1/4 in (6 mm) below the bottom of the filler Drain And Refill hole. Refer to the “Maintenance Schedule” for the proper main- Automatic Transmission —… -
Page 200
198 MAINTAINING YOUR VEHICLE Special Additives instrument cluster display (refer to “Instrument Cluster Display” in “Understanding Your Instrument Panel” for The manufacturer strongly recommends against using any further information). special additives in the transmission. Automatic Transmis- sion Fluid (ATF) is an engineered product and its perfor- Use the following procedure to check the transmission mance may be impaired by supplemental additives. -
Page 201
MAINTAINING YOUR VEHICLE 199 7. Remove the dipstick again and note the fluid level on CAUTION! both sides. The fluid level reading is only valid if there is a solid coating of oil on both sides of the dipstick. If the fluid temperature is below 50°F (10°C) it may not Note that the holes in the dipstick will be full of fluid if register on the dipstick. -
Page 202
200 MAINTAINING YOUR VEHICLE Noise Control System Required Maintenance & systems. In addition, inspection and service should be Warranty performed anytime a malfunction is observed or sus- pected. Proper maintenance of the entire vehicle will help All vehicles built over 10,000 lbs. (4 535 kg) Gross Vehicle the effectiveness of the noise control systems. -
Page 203
MAINTAINING YOUR VEHICLE 201 replacement, of any device or element of design incorpo- ENGINE COOLING SYSTEM rated into any new vehicle for the purpose of noise control • Removal or rendering inoperative the fan clutch. prior to its sale or delivery to the ultimate purchaser or •… -
Page 204
202 MAINTAINING YOUR VEHICLE Maintenance Log and Service Chart (Diesel Engines) Noise Systems Maintenance Chart and Service Log — Insert Month, Day, Year under column mileage closest to the mileage at which service was performed. MILES 7,500 15,000 22,500 30,000 37,500 45,000 52,500… -
Page 205
MAINTAINING YOUR VEHICLE 203 Noise Systems Maintenance Chart and Service Log — Insert Month, Day, Year under column mileage closest to the mileage at which service was performed. MILES 67,500 75,000 82,500 90,000 97,500 105,000 112,500 120,000 KILOME- 108 000 120 000 132 000 144 000… -
Page 206
204 MAINTAINING YOUR VEHICLE FLUID CAPACITIES U.S. Metric Fuel (Approximate) 2500/3500 Standard Cab Longbed Models 28 Gallons 106 Liters 2500/3500 Crew/Mega Cab Shortbed Models 31 Gallons 129 Liters 2500/3500 Crew Cab Longbed Models 32 Gallons 132 Liters Standard Rear Tank – Chassis Cab Only 52 Gallons 197 Liters Optional Midship Tank –… -
Page 207
MAINTAINING YOUR VEHICLE 205 FLUIDS, LUBRICANTS AND GENUINE PARTS Engine Component Fluid, Lubricant, or Genuine Part Engine Coolant We recommend you use MOPAR Antifreeze/Coolant 10 Year/150,000 Mile Formula OAT (Organic Additive Technology). Engine Oil In ambient temperatures above 0°F (-18°C), we recommend you use 15W-40 engine oil such as MOPAR, Shell Rotella and Shell Rimula that meets FCA Material Standard MS-10902 and the API CJ-4 engine oil category is required. -
Page 208
206 MAINTAINING YOUR VEHICLE Component Fluid, Lubricant, or Genuine Part Fuel Selection Use good quality diesel fuel from a reputable supplier in your vehicle. Federal law requires that you must fuel this vehicle with Ultra Low Sulfur Highway Diesel fuel (15 ppm Sulfur maximum) and prohibits the use of Low Sulfur Highway Diesel fuel (500 ppm Sulfur maximum) to avoid damage to the emissions control system. -
Page 209
MAINTAINING YOUR VEHICLE 207 Chassis Component Fluid, Lubricant, or Genuine Part Automatic Transmission – If Equipped 6.7L Diesel with Only use ATF+4 Automatic Transmission Fluid. Failure to (Six-Speed 68RFE) – 2500/3500 Pickup models without use ATF+4 fluid may affect the function or performance of your transmission. -
Page 211: Maintenance Schedule
MAINTENANCE SCHEDULE CONTENTS ▫ Perform Service Indicator — Cummins MAINTENANCE SCHEDULE — DIESEL ENGINE ……210 Diesel .
-
Page 212
210 MAINTENANCE SCHEDULE • Check the coolant level, hoses, and clamps. MAINTENANCE SCHEDULE — DIESEL ENGINE • Lubricate outer tie rod ends. CAUTION! Inspection and service should also be performed anytime a Failure to perform the required maintenance items malfunction is observed or suspected. Retain all receipts. may result in damage to the vehicle. -
Page 213
MAINTENANCE SCHEDULE 211 referring to the steps described under “Instrument Cluster Perform Service Indicator — Cummins Diesel Display” in “Understanding Your Instrument Panel” for Your vehicle will require emissions maintenance at a set further information. interval. To help remind you when this maintenance is due, the instrument cluster will display “Perform Service”. -
Page 214
212 MAINTENANCE SCHEDULE Maintenance Chart — Cummins Diesel Engine Mileage or time passed (which- ever comes first): Or Months: 12 18 24 30 36 42 48 54 60 66 72 78 84 90 96 102 108 114 120 Or Kilometers: Change engine oil every 15,000 miles (24 000 km) or six months or 500 Hours or sooner if prompted by… -
Page 215
MAINTENANCE SCHEDULE 213 Mileage or time passed (which- ever comes first): Or Months: 12 18 24 30 36 42 48 54 60 66 72 78 84 90 96 102 108 114 120 Or Kilometers: Inspect the front suspension, tie rod ends and boot seals for cracks or leaks and all parts for damage, wear, improper looseness or end… -
Page 216
214 MAINTENANCE SCHEDULE Mileage or time passed (which- ever comes first): Or Months: 12 18 24 30 36 42 48 54 60 66 72 78 84 90 96 102 108 114 120 Or Kilometers: Replace chassis mounted fuel filter element. Inspect the front and rear axle surfaces. -
Page 217
MAINTENANCE SCHEDULE 215 Mileage or time passed (which- ever comes first): Or Months: 12 18 24 30 36 42 48 54 60 66 72 78 84 90 96 102 108 114 120 Or Kilometers: Change automatic transmission fluid and filter(s) if using your vehicle for any of the following: police, fleet, or frequent trailer towing (68RFE transmission only). -
Page 218
216 MAINTENANCE SCHEDULE Inspection and service should also be performed anytime a WARNING! malfunction is observed or suspected. Retain all receipts. • You can be badly injured working on or around a * Inspect the front and rear axle surfaces every 20,000 miles motor vehicle. -
Page 219
INDEX 217 INDEX… -
Page 220
218 INDEX — RAM 1500 Adding Engine Coolant (Antifreeze) ….66 Coolant Capacity ……71 Adding Fuel . -
Page 221
INDEX — RAM 1500 219 Oil ……. . .55 , 72 Intervention Regeneration Strategy . -
Page 222
220 INDEX — RAM 1500 Starting ……..32 Automatic Transmission . -
Page 223
INDEX — RAM 2500 / 3500 / 4500 / 5500 221 Adding Engine Coolant (Antifreeze) … . .192 Caps, Filler Oil (Engine) ……178 Adding Fuel . -
Page 224
222 INDEX — RAM 2500 / 3500 / 4500 / 5500 Electronic Range Select (ERS) ….147 Fluid Level Checks Electronic Speed Control (Cruise Control) ..96 Brake . -
Page 225
INDEX — RAM 2500 / 3500 / 4500 / 5500 223 Keyless Enter-N-Go ……122 Synthetic ……179 Viscosity . -
Page 226
224 INDEX — RAM 2500 / 3500 / 4500 / 5500 Engine Block Heater ….125 , 137 Manual Transmission ….. .121 Remote . -
Page 227
INSTALLATION OF RADIO TRANSMITTING EQUIPMENT Special design considerations are incorporated into this The antenna cable should be as short as practical and vehicle’s electronic system to provide immunity to radio routed away from the vehicle wiring when possible. Use frequency signals. Mobile two-way radios and telephone only fully shielded coaxial cable. -
Page 228
® STICK WITH THE SPECIALISTS 17D241-226-AA ©2016 FCA US LLC. All Rights Reserved. First Edition Ram is a registered trademark of FCA US LLC. Printed in U.S.A.

ФАЙЛОВЫЙ АРХИВ
Файлы, мануалы, книги, инструкции по ремонту и эксплуатации Dodge Ram. Часть файлов может быть доступна только членам клуба. Если архив требует пароль, то этот пароль – «dodgeram.ru».
Официальные мануалы с 2014 года доступны только онлайн в дилерской программе. Если у вас есть документы, которыми вы хотели бы поделиться, отправьте их Дмитрию в Телеграм.
Dodge Ram – инструкции по ремонту и эксплуатации
Все, что есть на Dodge Ram различных поколений и модификаций в виде файлов.
Раритеты всех времен. От буклетов американских выставок в СССР и фотоальбомов знаменитых кастомайзеров до подшивок культового американского журнала Lowrider. Есть книги на русском языке.
Другие американские марки
Наиболее полная в Интернете коллекция файлов, мануалов и книг по другим американским маркам автомобилей. Есть редкие переведенные на русский язык книги по ремонту и обслуживанию.
Новые материалы в RAM FAQ
В разделе представлены сотни ответов на вопросы ремонта, обслуживания и эксплуатации Dodge Ram всех моделей и и поколений.
В свое время искал книгу — мануал по Додж Рам для общего развития об этой машине. Но еще бортовой компьютер у Dodge Ram достаточно умный. С помощью БК на Рэме можно много чего изменить. Но что там конкретно можно поменять я не совсем понимал. да и времени возить с этим на улице не находил, был занят другим ))) В файле руководство по эксплуатации для Додж РЭМ Модельного ряда 1500/2500/3500 с 2012г.в. Но IV поколение пошло с 2009г.в. сенсационных отличий как таковых нет. Разве что есть отличия в доп. функциях у Додж Рам в разных комплектациях. 1500 это самый легкий РЭМ который идет категории B и имеет независимую подвеску. на 2500 уже идет передний мост и категория С, 3500 так же категория С и идет со спаркой сзади (2 колеса на каждой стороне), ну и грузоподъемностью отличаются эти пикапы.
Открыв файл Вы сможете узнать наверное все возможности Додж Рам и за что отвечает каждая кнопка, рычажок, как обслуживать свой любимый пикап и многое другое :
1. ВВЕДЕНИЕ
2. ЧТО НЕОБХОДИМО ЗНАТЬ ПЕРЕД ЗАПУСКОМ
3. ОРГАНЫ УПРАВЛЕНИЯ. ОБОРУДОВАНИЕ САЛОНА
4. ПАНЕЛЬ УПРАВЛЕНИЯ
5. ЗАПУСК И ЭКСПЛУАТАЦИЯ
6. ЧТО ДЕЛАТЬ В АВАРИЙНЫХ СИТУАЦИЯХ
7. ТЕХНИЧЕСКОЕ ОБСЛУЖИВАНИЕ АВТОМОБИЛЯ
8. ГРАФИК ТЕХНИЧЕСКОГО ОБСЛУЖИВАНИЯ
9. СЕРВИСНЫЕ ЦЕНТРЫ И СЛУЖБА ПОДДЕРЖКИ
10. АЛФАВИТНЫЙ УКАЗАТЕЛЬ
Для себя много вычитал про сигнализацию, про доп функции которые устанавливаются в БК Додж Рам, достаточно поставить или снять галку… И наверное еще что то, но очень много букв в этом руководстве по эксплуатации Додж Рам (700 страниц ![]() ), рекомендую запастись ручкой-карандашом и делать нужные заметки для себя. В противном случаи можно будет перечитывать сначала.
), рекомендую запастись ручкой-карандашом и делать нужные заметки для себя. В противном случаи можно будет перечитывать сначала.
П.С. Выражаю благодарность человеку (нашему форумчанину), который предоставил данный файл. А то для многих простых пользователей Додж Рам заиметь такой файл не получится так просто ![]()
Ознакомительные картинки файла для Dodge Ram IV
скачать инструкцию для Додж Рам можно кликнув ниже:
Dodge RAM +2009 инструкция пользователя авто.pdf
Руководство на английском языке по ремонту и техническому обслуживанию Dodge Ram Truck 1500-3500 1996 года выпуска.
- Автор: —
- Издательство: Chrysler Corporation
- Год издания: 1995
- Страниц: 1985
- Формат: PDF
- Размер: 82,5 Mb
Руководство на английском языке по ремонту и техническому обслуживанию Dodge Ram 2004 года выпуска.
- Автор: —
- Издательство: DaimlerChrysler Corporation
- Год издания: —
- Страниц: 642
- Формат: PDF
- Размер: 1,5 Mb
Руководство на английском языке по ремонту и техническому обслуживанию Dodge Ram Truck 1500-2500-3500 2005 года выпуска.
- Автор: —
- Издательство: DaimlerChrysler Corporation
- Год издания: 2004
- Страниц: 8395
- Формат: PDF
- Размер: 128,0 Mb
Руководство на английском языке по ремонту и техническому обслуживанию Dodge Ram Truck 1500 2009 года выпуска.
- Автор: —
- Издательство: —
- Год издания: —
- Страниц: —
- Формат: HTML
- Размер: 157,7 Mb
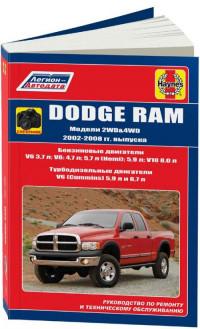
Руководство по техническому обслуживанию и ремонту автомобиля Dodge Ram 2002-2008 годов выпуска с бензиновыми и дизельными двигателями.
- Автор: —
- Издательство: Легион-Автодата
- Год издания: —
- Страниц: 306
- Формат: —
- Размер: —
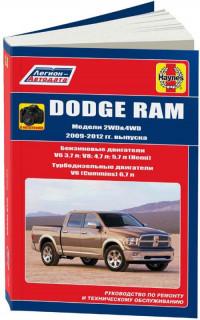
Руководство по техническому обслуживанию и ремонту автомобиля Dodge Ram 2009-2012 годов выпуска с бензиновыми и дизельными двигателями.
- Автор: —
- Издательство: Легион-Автодата
- Год издания: —
- Страниц: 294
- Формат: —
- Размер: —

2022 RAM 2500 Грузовик
ОЗУ 2500/3500
ИНСТРУКЦИЯ ПО НАЧАЛУ РАБОТЫ
Кнопки HomeLink®
Верхнее освещение / Люк / Органы управления задним стеклом (при наличии)
Комбинация приборов / элементы управления VR
Кнопки круиз-контроля
Органы управления зеркалами с электроприводом
Встроенный тормозной модуль прицепа
Управление освещением
Электронный переключатель диапазонов
Выключатель стояночного тормоза Выключатель капота Органы управления 4WD / Shift
АВТОМОБИЛЬ НАДVIEW
Цифровой заднийview Открытие отсека для зеркала Порты AUX / USB (C / A)
Устройство для открывания гаражных ворот
1
Когда автомобиль включен, удерживайте ручной передатчик для ворот гаража на расстоянии 1–3 дюймов от кнопки HomeLink®, которую вы хотите запрограммировать в автомобиле.
2 Нажмите и удерживайте одновременно программируемую кнопку HomeLink® и кнопку на передатчике ворот гаража.
ЧТОБЫ УДАЛИТЬ ВСЕ УСТАНОВЛЕННЫЕ КАНАЛЫ: Нажмите и удерживайте две внешние кнопки HomeLink® в течение 20 секунд, пока не замигает оранжевый индикатор. Отдельный канал стереть нельзя.
ПРОГРАММИРУЙТЕ ГАРАЖНУЮ ДВЕРЬ
?
ПРОКАТКА ИЛИ НЕКАТКА?
Проверьте мотор открывания ворот гаража в гараже на наличие кнопки «УЧИТЬСЯ» или «ПОЕЗДКА» на подвешенной антенне. Если у вас есть один из них, у вас есть устройство для открывания гаражных ворот с подвижным кодом.
3
Для устройств открывания гаражных ворот без кодов Rolling Code: следите за тем, чтобы световой индикатор загорелся.
Для открывателей гаражных ворот Rolling Code следите за тем, чтобы световой индикатор перешел от медленного мигания к быстрому.
4
Только для устройств открывания гаражных ворот Rolling Code: нажмите и отпустите кнопку «LEARN» или «TRAIN» на двигателе устройства открывания гаражных ворот в гараже, затем нажмите кнопку HomeLink® в своем автомобиле и сделайте два долгих нажатия.
5
Если программирование прошло успешно, ваши гаражные ворота должны открыться и
закройте выбранную вами кнопку HomeLink®.
Поиск видео HomeLink®
НУЖНА ПОМОЩЬ?
1-800-355-3515
Подключить телефон
1 Убедитесь, что на вашем мобильном устройстве включен Bluetooth®.
СКАНИРОВАНИЕ
2 Когда автомобиль находится в положении ACC или ON / RUN, нажмите кнопку «Телефон» в строке меню сенсорного экрана автомобиля.
3 Нажмите «Диспетчер устройств», а затем «Добавить устройство». Следуйте инструкциям на телефоне и на сенсорном экране.
Готовы удалить телефон или аудиоустройство?
1 Нажмите кнопку «Диспетчер устройств» на сенсорном экране.
2
Нажмите значок шестеренки в настройках рядом с телефоном или устройством, которое хотите удалить.
3 Нажмите «Удалить устройство». Устройство следует удалить.
ПОДКЛЮЧИТЕ СВОИ ПРИЛОЖЕНИЯ
Подключите свой смартфон к медиа-порту USB или выполните сопряжение смартфона в диспетчере устройств. Значок Android AutoTM или Apple CarPlay® заменит значок телефона на сенсорном экране.
СОПРЯЖЕНИЕ ТЕЛЕФОНА И НАСТРОЙКА КЛАСТЕРНОГО ДИСПЛЕЯ
Настройте дисплей комбинации приборов
В МЕНЮ НАСТРОЙКИ ЭКРАНА
В различных областях дисплея комбинации приборов может отображаться следующее: компас, внешняя температура, время, диапазон, экономия топлива, информация о поездке, поездка прицепа, тормоз прицепа, давление масла, температура охлаждающей жидкости, температура масла, объем аккумулятора.tage, температура трансмиссии, срок службы масла и т. д.
Верхний центр
Верхний левый
Верхний правый
Левая сторона
Правая сторона
Нижний левый
Нижний правый
ПО УМОЛЧАНИЮ: Вверху по центру: Спидометр Вверху справа: Наружная температура
Поиск комбинации приборов
Показать видео
Вверху слева: компас
Внизу справа: давление масла (газ)
Слева внизу: Объем батареиtage
Температура охлаждающей жидкости (дизель)
Левая сторона: значок меню
Правая сторона: Диапазон
Связанные сервисы
С ПОДКЛЮЧЕННЫМИ УСЛУГАМИ ВЫ МОЖЕТЕ…
Заблокируйте автомобиль Разблокируйте автомобиль Дистанционный запуск автомобиля Отмена дистанционного запуска
АКТИВИРУЙТЕ УДАЛЕННЫЕ УСЛУГИ
1 Нажмите «Приложения» на сенсорном экране.
2 Нажмите «Активировать услуги».
3 Нажмите «Активировать сейчас».
4 Активировать можно двумя способами: по электронной почте или через агента. На следующей странице вы можете либо ввести свое имя и адрес электронной почты, либо нажать «Позвонить агенту», чтобы напрямую поговорить с агентом.
Активируйте свой рог
Mopar® ТВОЙ путь
СОЗДАЙТЕ ПРО СВОЕМУ ВЛАДЕЛЬЦАFILE CЕГОДНЯ!
Получите круглосуточный доступ ко всему, что вам нужно. Индивидуальная приборная панель автомобиля. Доступ к информации о владельце вашего автомобиля. Легкость работы с дилером. Получите специальные предложения по услуге Mopar®. View Журнал технического обслуживания ** Команды мобильного автомобиля **
** Требуется активная подписка на Uconnect Connected Services.
!
Регистрация проста. Отсканируйте QR-код
ниже и укажите свой адрес электронной почты, чтобы начать.
* Резиденты Канады не обязаны создавать профи.file, поскольку он создается при активации учетной записи Uconnect Connected Services.
ПЕРСОНАЛИЗИРУЙТЕСЬ, РЕГИСТРАЦИЯ
Усовершенствованные системы помощи водителю
Отсканируйте QR-коды, чтобы увидеть обучающие видеоролики по этим расширенным системам помощи водителю.
Включите или выключите систему предупреждения о лобовом столкновении, а также отрегулируйте чувствительность и статус активного торможения с помощью радио.
Отрегулируйте настройки мощности и чувствительности системы LaneSense
через ваше радио.
Адаптивный круиз-контроль
чувство парка
Используйте радио, чтобы выбрать один из трех режимов системы мониторинга слепых зон:
· Только световые сигналы для слепых зон
Система Trailer Merge Assist расширяет слепую зону, когда обнаруживает, что ваш автомобиль тянет за собой прицеп. Вы можете выбирать между автоматическим и максимальным режимами в вашем радио. Эта функция НЕ доступна для седельно-сцепных устройств или прицепов с гибкой стойкой.
СИСТЕМЫ ПОМОЩИ ВОЖДЕНИЮ И ЦИФРОВОЕ ЗЕРКАЛО
Цифровой заднийview Зеркало
ОБЕСПЕЧИВАЕТ ВЫСОКОЕ ОПРЕДЕЛЕНИЕ И НЕОГРАНИЧЕННЫЙ VIEW ДОРОГИ ПОЗАДИ
Включение / выключение управления
Кнопки прокрутки влево / вправо
Кнопка меню
ЧТОБЫ АКТИВИРОВАТЬ: Потяните ручку внизу зеркала назад по направлению к водителю.
параметры меню
· Яркость · Наклон · Режим буксировки (при наличии)
ЧТОБЫ ОТКЛЮЧИТЬ: нажмите ручку внизу зеркала вперед, к лобовому стеклу. Зеркало вернется к обычному зеркалу с автоматическим затемнением.
Буксирный режим Дополнительная камера прицепа может быть установлена на задней части прицепа. При подключении дисплей на цифровой задней панелиview Зеркало автоматически переключается на камеру прицепа.
Чтобы вернуться в тыл view дисплея камеры, переключаться между пунктами меню с помощью кнопок управления на зеркале.
Сканировать на цифровой заднийview
Зеркальное видео
Проверка света прицепа
Доступно на дисплее комбинации приборов в разделе «Буксировка прицепа». После активации проверка освещения включает все внешние фонари последовательно на срок до двух минут.
Для активации должны быть выполнены следующие условия:
· Автомобиль оборудован
Управление тормозами прицепа
· Автомобиль находится в PARK · Зажигание в ACC или RUN
· Дистанционный запуск не активен · Тормоза не задействованы · Сигналы поворота не включены · Не включены аварийные огни
Системы камер
Доступные функции камеры: · Задняя камера заднего вида · Объемный звук. View камера
Нажатие кнопки обратной навигации прицепа открывает полноэкранный режим. view грузового пространства и прицепа.
· Объемный звук трейлера View · Вспомогательные камеры
Нажатие разделенного экрана левого и правого буксировочного зеркала View кнопка внутри
Экран обратной навигации прицепа отображает разделенный экран view как
стороны прицепа.
Сканирование систем видеонаблюдения
ПРИЦЕП, КАМЕРЫ И ДИЗЕЛЬНЫЙ ДВИГАТЕЛЬ
Жидкость для выхлопных газов дизельных двигателей (DEF)
Ваш автомобиль оборудован системой впрыска дизельной выхлопной жидкости (DEF) и катализатором избирательного каталитического восстановления (SCR) для соответствия требованиям по выбросам.
Датчик DEF на комбинации приборов покажет уровень DEF, оставшийся в баке.
МЕСТО ЗАПОЛНЕНИЯ DEF
СНИМИТЕ КРЫШКУ, ЧТОБЫ ДОБАВИТЬ ЖИДКОСТЬ
Во время процесса заполнения может наблюдаться задержка показания индикатора индикатора кластера заполненным. Не продолжайте доливать бак после того, как он был наполнен.
ИМЕТЬ ВВИДУ:
Видео о сканировании дизельной выхлопной жидкости
Любые емкости или детали, контактирующие с DEF, должны быть пластиковыми или нержавеющими.
Если DEF пролился, его следует немедленно стереть.
Климат-контроль
Вращение ручки управления вентилятором регулирует количество воздуха, проходящего через систему в любом режиме.
рециркуляция
Передняя разморозка
A / C
OFF
Выбор режима
Заднее размораживание
Отсканируйте QR-коды для получения обучающих видео.
Управление освещением
Регулировка подголовника
Климат-контроль
AUTO
УПРАВЛЯЙТЕ КЛИМАТОМ И РАДИО
Uconnect 5/5 NAV
ДОМ:
Настройте свою домашнюю страницу.
СМИ:
Слушайте радиостанции и воспроизводите медиа.
КОМФОРТ:
Отрегулировать систему климат-контроля.
ТЕЛЕФОН:
Подключите смартфон и звоните по громкой связи.
НАВИГАЦИЯ:
Отправляйтесь в любой пункт назначения.
ТРАНСПОРТНОЕ СРЕДСТВО:
Доступ к настройкам автомобиля.
Приложения:
Доступ к установленным приложениям.
Проведите вниз, чтобы настроить Profile опционы
ДОСТУП К ВНЕДОРОЖНЫМ СТРАНИЦАМ:
1 Нажмите «Автомобиль» на сенсорном экране.
2 Нажмите «Off-Road Pages».
3
Выбирайте страницы в левой части сенсорного экрана.
Поиск радио-видео
Нажмите и перетащите значок, чтобы изменить порядок
Предупреждающие и контрольные лампы
Воздушная подушка
Температура охлаждающей жидкости двигателя Тормоз прицепа отключен
4WD низкий
Защита полезной нагрузки пневматической подвески
Проверка двигателя / неисправность в режиме снижения мощности при низких температурах
Низкий уровень охлаждающей жидкости
Замок заднего моста
Режим снегоочистителя
Система помощи при слиянии прицепа, автоматический дизельный выхлопной тормоз
Парковка / Фары
Lanesense
Заряд батареи
Капот открытый
Круизный режим с адаптацией к температуре трансмиссии
Неисправность системы управления (ACC), ходовая часть пневматической подвески
Неисправность круиз-контроля опускания высоты
Предупреждение о прямом столкновении (FCW) Off Low Diesel Exhaust
Жидкость (DEF) Неисправность фиксатора заднего моста
Уровень власти
Подождите, чтобы начать
Комплект круиз-контроля
Сигнал поворота
Дальний свет
тормоз
Давление масла
Альтернативная пневматическая подвеска безопасности автомобиля
Высота прицепа с пневматической подвеской
Дизельный выхлопной тормоз с подъемом на высоту
Блокировка передней и задней оси
Малый запас топлива
Обслуживание 4WD
Неисправность стабилизатора поперечной устойчивости
Вода в топливе
Адаптивный круиз-контроль в режиме ECO
(ACC) Готов
Открытая дверь
Температура масла
4WD высокий
Антиблокировочная тормозная система (ABS) в режиме опускания станины с пневмоподвеской
Электронный контроль устойчивости (ESC) активен
Lanesense
Низкий уровень омывающей жидкости
Система предупреждения о лобовом столкновении (FCW) Мониторинг давления в шинах
Система (TPMS) Адаптивный круиз-контроль (ACC) установлена без цели
Передние противотуманные фары
Круиз-контроль готов
Для получения дополнительной информации по любой из тем в этой публикации, пожалуйста, обратитесь к руководству пользователя.
© 2021 FCA US LLC. Все права защищены. Tous droits réservés. Ram является зарегистрированным товарным знаком FCA US LLC. Ram est une marque déposée de FCA US LLC. App Store является зарегистрированным товарным знаком Apple Inc. Google Play Store является зарегистрированным товарным знаком Google.
Электронное управление дроссельной заслонкой (ETC)
Напоминание о ремне безопасности 4WD Lock
Грузовой светильник с пневматической подвеской
Электронный контроль устойчивости (ESC) ВЫКЛ. Неплотная крышка топливного бака
НЕЙТРАЛЬНО Service LaneSense
Адаптивный круиз-контроль TOW / HAUL
(ACC) Задано с помощью Target LaneSense
Система контроля спуска с холма (HDC)
Первое издание DJD2_QSG_EN_USC_BA