-
Contents
-
Table of Contents
-
Bookmarks
Quick Links
ECO
C
CLEAN
MENU
1143.4TdYDbHaOQVS
INSTRUCTION MANUAL
BUILT-IN ELECTRIC OVEN
IOAK-1718 / 8048866
(10.2010./1)
Related Manuals for Amica 1143.4TdYDbHaOQVS
Summary of Contents for Amica 1143.4TdYDbHaOQVS
-
Page 1
CLEAN MENU 1143.4TdYDbHaOQVS INSTRUCTION MANUAL BUILT-IN ELECTRIC OVEN IOAK-1718 / 8048866 (10.2010./1) -
Page 2: Dear Customer
DEAR CUSTOMER, The oven is exceptionally easy to use and extremely efficient. After reading the instruction manual, operating the oven will be easy. Before being packaged and leaving the manufacturer, the oven was thoroughly checked with regard to safety and functionality. Before using the appliance, please read the instruction manual carefully.
-
Page 3: Table Of Contents
TABLE Of CONTENTS Safety instructions ………………….4 Description of the appliance ………………… 7 Installation ……………………… 9 Operation ……………………..11 Baking in the oven – practical hints …………….27 Cleaning and maintenance ………………..29 Technical data ……………………33…
-
Page 4: Safety Instructions
SAfETY INSTRUCTIONS The appliance becomes hot during operation. Take care not to touch the hot parts inside the oven. Always keep children away from the oven. While in operation direct contact with the oven may cause burns! Ensure that small items of household equipment, including connection leads, do not touch the hot oven as the insulation material of this equipment is usually not resistant to high temperatures.
-
Page 5: How To Save Energy
HOW TO SAVE ENERGY Using energy in a respon- sible way not only saves money but also helps the environment. So let’s save energy! And this is how you can do it: Do not uncover the pan too often (a watched pot never boils!).
-
Page 6
DISPOSAL Of THE APPLIANCE UNPACKING During transportation, protec- Old appliances should not sim- tive packaging was used to ply be disposed of with normal protect the appliance against household waste, but should any damage. After unpack- be delivered to a collection and ing, please dispose of all recycling centre for electric and elements of packaging in a… -
Page 7: Description Of The Appliance
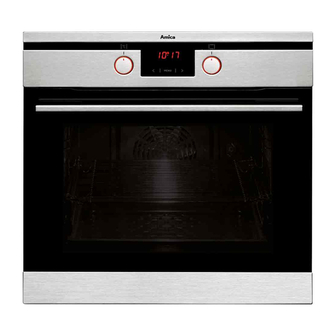
DESCRIPTION Of THE APPLIANCE Electronic programmer CLEAN MENU Control knob Oven function (-) and (+) selection knob Oven door handle preset programmes ECO button button CLEAN MENU button CLEAN (oven cleaning) temperature selec- tion button menu button…
-
Page 8
SPECIfICATIONS Of THE APPLIANCE Cooker fittings: Grill grate Baking tray (drying rack) Fork and rotisserie frame Roasting tray Side racks Telescopic runners* *optional… -
Page 9: Installation
INSTALLATION Installing the oven The kitchen area should be dry and aired and equipped with efficient ventillation. When installing the oven, easy access to all control elements should be ensured. This is a Y–type design built–in oven, which means that its back wall and one side wall can be placed next to a high piece of furniture or a wall.
-
Page 10
INSTALLATION Electrical connection 230V 1N~ Warning: This appliance must be earthed. The appliance must be installed by a com- Neutral (Black or Blue) petent electrician using a double pole control unit of 16 ampere minimum capacity with Earth 3mm minimum contact separation at all (Green/Yellow poles. -
Page 11: Operation
OPERATION Important! Before using the oven for the first time To clean the oven, only use a cloth well rang out with warm water to Remove packaging, clean the interior of which a little washing-up liquid has the oven, been added.
-
Page 12: Oven Control
OPERATION Electronic programmer operation and oven control CLEAN MENU function symbols — preset programmes button — kitchen timer — temperature selection button — ECO function — menu button — probe MENU — ECO button — preset program — oven cleaning button — oven cleaning CLEAN — oven lighting…
-
Page 13
OPERATION 1.Switch on the oven. 2.Setting kitchen timer Important! Electronic programmer is Press the button repeatedly until MENU ready for operation after correct time has symbol (kitchen timer) flashes. “00:00” will been set. be displayed instead of current time. Set the timer using the control knob (with one When the appliance is switched on for the… -
Page 14
OPERATION End Time will be set if setting is not changed 3.Setting cook time within 5 seconds and the menu button MENU Press the button until symbol (Cook is not pressed. End Time symbol is dis- MENU Time) is flashing (it is only possible when the played. When then delay time has elapsed, the function selector knob is set to a position other than “0”). -
Page 15
OPERATION 5.Operating the oven Top heater, bottom heater and fan are on. 5.1 Available oven function selector knob This knob setting is most suitable for settings. baking cakes. Convection baking (re- commended for baking) Temperature Oven is off range: 30-280°C. Independent oven lighting Set the knob in this position to light up the oven interior. -
Page 16
OPERATION Convection roasting Convection with ring heating ele- In this knob setting, the oven’s co- ment nvection roasting function is on. In Setting the knob in this position allows this mode the roasting process is the oven to be heated up by a heating speeded up, which enhances the element with air circulation forced by a taste of a cooked dish. -
Page 17
OPERATION Bottom heater on Convection with ring heating ele- When the knob is set to this position ment and bottom heater on the oven is heated using only the With this setting the convection fan bottom heater. Baking of cakes from and bottom heater are on, which the bottom until done (moist cakes increases the temperature at the bot-… -
Page 18
OPERATION 5.2 Displaying and changing temperature 5.3 ECO function setting ECO function saves energy by making use of Default temperature setting for a programme residual heat. When a ECO function is activa- is displayed after selecting . oven func- ted, electronic programmer switches off the tion. This is indicated by the flashing °C on the appliance before reaching the End Time. -
Page 19
OPERATION To deactivate the alarm press any button 5.4 Aqualytic function or turn oven function selector knob to „0” or Cleaning of the oven chamber with steam. operate the control knob . Once cooking is finished, current time is displayed along Pour 50 cl (two glasses) of water at the bottom with the selected oven function.If you wish of the oven chamber. -
Page 20
OPERATION To deactivate the alarm press any button 5.5 Using the probe or turn oven function selector knob to „0” or To use the meat temperature probe, it must operate the control knob. Once the process be connected to an appropriate socket in the is finished, current time is displayed. -
Page 21
OPERATION Set the function selector knob on the 5.6 Preset programmes function recommended by the programme. Preset programmes incorporate ready co- Electronic programmer confirms the correct oking recipes. Preset programmes combine setting by a short acoustic signal. Cook time a given oven function or a number of oven and temperature are shown on the display. -
Page 22
OPERATION For programmes which do not require the oven and press button. For preset pro- use of temperature probe, an acoustic signal grammes incorporating the preheat function, is sounded (4 beeps — a pause — 4 beeps) it is not possible to set the End Time. after the initially set time has elapsed. -
Page 23
OPERATION Preset programmes Programme Oven function / Cook Time / probe Temperature set Oven level preheated temperature 85°C 180°C Pork 80°C 180°C Beef 75°C 170°C Veal 85 min 190°C Poultry — chicken 90 min 180°C Poultry — duck 115 min 170°C Poultry — goose 40 min… -
Page 24
OPERATION 5.7 Child Lock 5.9 Muting the sound To activate the child lock simultaneously It is possible to mute the sound emitted by the electronic programmer. To mute the sound press and hold buttons for MENU turn the control knob anticlockwise and approximately 3 seconds symbol will be… -
Page 25
OPERATION fast oven heat-up Important! When the fast oven heat-up func- tion has been selected, the chamber In ovens with automatic air circulation, should not contain a baking tray with equipped with a fan and an ultra-fan heater, dough or other elements that do not the fast heat-up function may be used –… -
Page 26
OPERATION Use of the grill Use of the rotisserie The grilling process operates through infrared The rotisserie enables rotating grilling in the rays emitted onto the dish by the incandes- oven. It is intended for grilling poultry, kebabs, cent grill heater. sausages and similar dishes. -
Page 27: Baking In The Oven — Practical Hints
BAKING IN THE OVEN – PRACTICAL HINTS Baking we recommend using the baking trays which were provided with your cooker; it is also possible to bake in cake tins and trays bought elsewhere which should be put on the drying rack; for baking it is better to use black trays which conduct heat better and shorten the baking time;…
-
Page 28
BAKING IN THE OVEN – PRACTICAL HINTS Type P — program Oven Temperature Level Time in minutes M — manual functions dish 160 — 200 2 — 3 30 — 50 160 — 180 20 — 40* 140 — 160 10 — 40* 200 — 230 1 — 3… -
Page 29: Cleaning And Maintenance
CLEANING AND MAINTENANCE Replacing halogen lighting in the oven By ensuring proper cleaning and mainte- nance of your cooker you can have a sig- Before replacing the halogen bulb, make nificant influence on the continuing fault-free sure the appliance is disconnected from operation of your appliance. electric mains to avoid possible electric shock.
-
Page 30
CLEANING AND MAINTENANCE Dismounting the side racks Ovens types marked with the letters Db in the model number have moveable stainless Ovens marked with the letter D are equipped telescopic runners* attached to the side with easily removable wire guides (side racks. -
Page 31
CLEANING AND MAINTENANCE CLEANING AND MAINTENANCE Door removal In order to obtain easier access to the oven chamber for cleaning, it is possible to remove the door. To do this, tilt the safety catch part of the hinge upwards. Close the door lightly, lift and pull it out towards you. In order to fit the door back on to the cooker, do the inverse. -
Page 32
CLEANING AND MAINTENANCE Regular inspections Caution! Besides keeping the oven clean, you All repairs and regulatory activities should: should be carried out by the ap- carry out periodic inspections of the con- propriate service centre or by an trol elements and cooking units of the appropriately authorised fitter. -
Page 33: Technical Data
TECHNICAL DATA Electrical supply 220-240V ~50Hz Maximum load 3,3 kW Oven: bottom heater 1,3 kW top heater 0,9 kW grill 2,0 kW ultra-fan 2,0 kW Usable capacity of the oven* 53 litres Energy rating on the energy label Cooker dimensions H/W/D 59,5 / 59,5 / 57,5 cm Weight approx. 35 kg Complies with EU regulations…
-
Page 36
Service Help Line 0844 815 8880 For the UK: please call 0818 46 46 46 For Ireland: please call…
-
Contents
-
Table of Contents
-
Bookmarks
Quick Links
O
C
MENU
1143.4TsYDpHaOQXSp
INSTRUCTION MANUAL
BUILT-IN ELECTRIC OVEN
IOAK-1720 / 8048868
(10.2010./1)
Related Manuals for Amica 1143.4TsYDpHaOQXSp
Summary of Contents for Amica 1143.4TsYDpHaOQXSp
-
Page 1
MENU 1143.4TsYDpHaOQXSp INSTRUCTION MANUAL BUILT-IN ELECTRIC OVEN IOAK-1720 / 8048868 (10.2010./1) -
Page 2: Dear Customer
DEAR CUSTOMER, The oven is exceptionally easy to use and extremely efficient. After reading the instruction manual, operating the oven will be easy. Before being packaged and leaving the manufacturer, the oven was thoroughly checked with regard to safety and functionality. Before using the appliance, please read the instruction manual carefully.
-
Page 3: Table Of Contents
TABLE Of CONTENTS Safety instructions ………………….4 Description of the appliance ………………… 7 Installation ……………………… 9 Operation ……………………..11 Baking in the oven – practical hints …………….18 Cleaning and maintenance ………………..24 Technical data ……………………28…
-
Page 4: Safety Instructions
SAfETY INSTRUCTIONS The appliance becomes hot during operation. Take care not to touch the hot parts inside the oven. Always keep children away from the oven. While in operation direct contact with the oven may cause burns! Ensure that small items of household equipment, including connection leads, do not touch the hot oven as the insulation material of this equipment is usually not resistant to high temperatures.
-
Page 5: How To Save Energy
HOW TO SAVE ENERGY Using energy in a respon- sible way not only saves money but also helps the environment. So let’s save energy! And this is how you can do it: Do not uncover the pan too often (a watched pot never boils!).
-
Page 6
DISPOSAL Of THE APPLIANCE UNPACKING During transportation, protec- Old appliances should not sim- tive packaging was used to ply be disposed of with normal protect the appliance against household waste, but should any damage. After unpacking, be delivered to a collection and please dispose of all elements recycling centre for electric and of packaging in a way that will… -
Page 7: Description Of The Appliance
DESCRIPTION Of THE APPLIANCE Electronic program- Oven operation pilot Temperature regula- light tor pilot light MENU Oven function Pokrętło regulatora selector knob temperatury MENU Setting selection Setting selection button „-” button ”+” Button MENU…
-
Page 8
SPECIfICATIONS Of THE APPLIANCE Cooker fittings: Grill grate Baking tray (drying rack) Fork and rotisserie frame Roasting tray Side racks Telescopic runners* *optional… -
Page 9: Installation
INSTALLATION Installing the oven The kitchen area should be dry and aired and equipped with efficient ventillation. When installing the oven, easy access to all control elements should be ensured. This is a Y–type design built–in oven, which means that its back wall and one side wall can be placed next to a high piece of furniture or a wall.
-
Page 10
INSTALLATION Electrical connection 230V 1N~ Warning: This appliance must be earthed. The appliance must be installed by a com- Neutral petent electrician using a double pole control (Black or Blue) unit of 16 ampere minimum capacity with Earth 3mm minimum contact separation at all (Green/Yellow poles. -
Page 11: Before Using Appliance
OPERATION Important! Before using the appliance for the first time In ovens equipped with the electronic pro- with the electronic pro- grammer Ts, the time “0.00” will start flashing Remove packaging, clean the interior of in the display field upon connection to the the oven, power supply.
-
Page 12
OPERATION Electronic programmer Timer The timer can be activated at any time, re- A – display field gardless of the status of other functions. The B – functions timer can be set for from 1 minute to up to 23 hours and 59 minutes. functions To set the timer you should: 1 –… -
Page 13: Automatic Operation
OPERATION Semi–automatic operation Automatic operation If the oven is to be switched off at a given If the oven is to be switched on for a specified time, then you should: period of time and switched off at a fixed hour then you should set the operation time and Set the oven function knob and the tem- the operation end time: perature regulator knob to the setting at which you want the oven to operate.
-
Page 14
OPERATION The function AUTO is now on; the oven will Cancel settings start operating from the point when the differ- Timer and automatic function settings may ence between the set operation end time and be cancelled at any time. the operation duration time occurs (e.g. the operation time is set to 1 hour, the operation Cancel automatic function settings: end time is set to 14.00, so the oven will start… -
Page 15: Oven Functions And Operation
OPERATION Oven functions and operation. Oven is off Oven with automatic air circulation (including a fan and an ultra-fan Independent oven lighting heater). Set the knob in this position to light up the oven interior. The oven can be heated up using the bot- tom and top heaters, the grill or the ultra-fan heater.
-
Page 16: Signal Lights
OPERATION Top heater on Convection roasting Setting the knob to this position allows In this knob setting, the oven’s co- the oven to be heated only by the top nvection roasting function is on. In this heater. Browning on top, finishing mode the roasting process is speeded baking, grilling up, which enhances the taste of a…
-
Page 17
OPERATION Use of the rotisserie Use of the grill The grilling process operates through infrared The rotisserie enables rotating grilling in the rays emitted onto the dish by the incandes- oven. It is intended for grilling poultry, kebabs, cent grill heater. sausages and similar dishes. -
Page 18: Baking In The Oven — Practical Hints
BAKING IN THE OVEN – PRACTICAL HINTS Baking we recommend using the baking trays which were provided with your cooker; it is also possible to bake in cake tins and trays bought elsewhere which should be put on the drying rack; for baking it is better to use black trays which conduct heat better and shorten the baking time;…
-
Page 19
BAKING IN THE OVEN – PRACTICAL HINTS Type Oven Temperature Level Time in minutes functions dish 160 — 200 2 — 3 30 — 50 160 — 180 20 — 40* 140 — 160 10 — 40* 200 — 230 1 — 3 10 — 20 210 — 220… -
Page 20
BAKING IN THE OVEN – PRACTICAL HINTS By ensuring proper cleaning and mainte- Replacement of the oven light bulb nance of your cooker you can have a sig- nificant influence on the continuing fault-free In order to avoid the possibility of an operation of your appliance. electric shock ensure that the appliance is switched off before replacing the bulb. -
Page 21: Cleaning And Maintenance
CLEANING AND MAINTENANCE Dismounting the side racks Ovens marked with the letter D are equipped with easily removable wire guides (side racks*) of oven inserts. To remove them for washing purposes, pull the front catch (Z1), then tilt the guide and remove it from the rear catch (Z2).
-
Page 22
CLEANING AND MAINTENANCE Door removal In order to obtain easier access to the oven chamber for cleaning, it is possible to remove the door. To do this, tilt the safety catch part of the hinge upwards. Close the door lightly, lift and pull it out towards you. In order to fit the door back on to the cooker, do the inverse. -
Page 23
CLEANING AND MAINTENANCE Regular inspections Caution! Besides keeping the oven clean, you All repairs and regulatory activities should: should be carried out by the appropri- carry out periodic inspections of the con- ate service centre or by an appropri- trol elements and cooking units of the ately authorised fitter. -
Page 24: Technical Data
TECHNICAL DATA Electrical supply 220-240V ~50Hz Maximum load 3,3 kW Oven: bottom heater 1,3 kW top heater 0,9 kW grill 2,0 kW ultra-fan 2,0 kW Usable capacity of the oven* 53 litres Energy rating on the energy label Cooker dimensions H/W/D 59,5 / 59,5 / 57,5 cm Weight approx. 35 kg Complies with EU regulations…
-
Page 28
Service Help Line 0844 815 8880 For the UK: please call 0818 46 46 46 For Ireland: please call…
Постоянных Перепадов Напряжения
Проникновения Внутрь Насекомых Или Грызунов
Неисправность Тэна
Поломка Термостата
Коды Ошибок
Автоподжик
Включает Когда Захочет И Трещит Пока Не Сдохнет
Горит Стоп Не Включается
Кроме Чаов Ниче Не Работает
Только Мигают Чаы
Не Закрывается Дверь
Ручка Дверцы
Как Снять Дверцу, Чтоб Прикрутить Ручку?
Не Работают Часы, Не Включается Нагрев, Вентилятор
Утоплена Ручка Включения Духового Шкафа
Ручка Переключения Режимов Духового Шкафа Утоплена И В Рабочее Положение Не Возвращается
Горит Режим Auto
На Дисплее Горит Режим Auto 00.00 Духовка Не Включается
Не Отключается Таймер
После Очередного Выпекания Вдруг Вообще Отключилась Панель И Не Включается, Когда Вырубаю Рубильник Слышу Щелчки ,Но Сама Панель Темная Не Горит Ничего
Не Работает
Подцеплена Правильно. Напряжение В Проводах Есть, Но Ничего Не Работает
Не Горит Лампочка Подсветки . Как Починить?
Не Горит Лампа И Не Работает Тэн
Вместе Перестали Работать: Лампочка Подсветки И Тэн ( При Установке Режима И Температуры Нагревания Не Происходит). При Этом При Выборе Режима Вентилятор Работает. При Последнем Использовании Духовка Работала, Но Несколько Раз Гасла И Загоралась Лампа По
Сброс Таймера Установленного Режима В Первоначальное Состояние.
Периодически При Выполнении Программы Происходит Сброс Таймера И Установленного Режима Выпекания В Первоначальное Состояние.
Лопнуло Внутреннее Стекло
После Очередной Помывки Просто Раскрошилось На Мелкие Части?Что Делать И Где Заказать?
Набор Температуры Не Происходит До Установленной (Нужной)
При Включении, Духовка Медленнее Разогревается И Не Набирает Нужную
Код Ошибки F12
Горит Код Ошибки F12, Что Это Значит?
Електронный Цифровой Таймер, Электронный Программатор
Сенсорные Клавиши >,+,-, Когда Проходишь Быстро Мимо Таймера Близко Пикают. В Чем Проблема И Как Ее Устранить Помогите Пожалуйста Или Это Нормально. Отпишите На Почту [email protected] Отпишите На Почту Как Устранить Проблему Подробно Если Ее Вообще Мо
Не Включается
Вышибает Автомат
Не Работает Звук
Не Работает Звуковой Сигнал
Высвечивается Err18
На Дисплее Высвечивается Ошибка Err18
Как Отключить Режим Demo
Код Ошибки Е-03
После Тестирования На Панели Загорается Er-03
Работает Только Ручка Функций.
При Включении Работают Функций И Больше Ни Чево
Часы На Дисплее Тухнут
Код Ошибки Er-01
Не Работает Нижняя Комфорка
Пока Держишь Ручку Нижняя Комфорка Горит , Только Отпускаешь Она Сразу Тухнет
Помилка Er-2
Er-2
Вентелятор Охлаждения Плат
После Того Как Подал Питание На Печку Совместную С Плетой Включаеться Вентилятор Охлаждения Плат И Невыключается Все Время Работает На 1 Скоростей А Когда Работает Печка Может Включить И 2 Скорость Подскажите Где Искать Поломку
Hansa Boei68490020
Горит Ошибка F04 Часы Настроены Но Не Включаются Сенсорные Кнопки
Руководства пользователя, инструкции и руководства для продуктов Amica.
Найти
ИНСТРУКЦИЯ ПО ЭКСПЛУАТАЦИИ Посудомоечная машина GSP 546 110 Вт IO-DWS-3097/1 (10.2021) GSP 546 110 Вт Посудомоечная машина стоячего типа Уважаемый покупатель! Отныне ваша ежедневная работа по дому станет проще, чем когда-либо прежде. Ваш прибор Amica исключительно прост в использовании и чрезвычайно эффективен. После прочтения настоящей Инструкции по эксплуатации управление прибором станет легким. Перед упаковкой и…
Подробнее «Руководство по эксплуатации стационарной посудомоечной машины Amica GSP 546 110 Вт»
Amica EKGCS 387 985 Холодильник с морозильной камерой Информация о продукте EKGCS 387 985 — это холодильник с морозильной камерой, который оснащен различными функциями, чтобы ваши продукты оставались свежими и здоровыми. Он имеет отдельную морозильную камеру и холодильную секцию, с различными регуляторами температуры для каждой. Прибор имеет функцию автоматической разморозки холодильника и ручную…
Подробнее «Руководство по эксплуатации холодильника с морозильной камерой Amica EKGCS 387 985»
EGSP 14797-1 E Посудомоечная машина Информация о продукте Изделие представляет собой посудомоечную машину, предназначенную для бытового использования. В нем можно хранить посуду и столовые приборы для очистки, используя несколько программ для эффективной и действенной очистки. Для оптимальной работы прибору требуется подключение к водопроводу, электричеству и дозаторам соли и моющих средств. Посудомоечная машина также имеет безопасность…
Подробнее «Руководство пользователя посудомоечной машины Amica EGSP 14797-1 E»
Морозильная камера Amica GS15496W Уважаемый покупатель! Отныне ваша ежедневная работа по дому станет проще, чем когда-либо прежде. Ваш прибор исключительно прост в использовании и чрезвычайно эффективен. После прочтения настоящей Инструкции по эксплуатации управление прибором станет легким. Перед упаковкой и отправкой с завода-изготовителя прибор был тщательно проверен на предмет безопасности и …
Подробнее «Руководство пользователя морозильной камеры Amica GS15496W»
OTP6253BG Кухонная вытяжка Руководство по эксплуатации Кухонная вытяжка OTP6253BG / OTP6243WG / OTP6243BG / ST 62 BBG / ST 63 CW Кухонная вытяжка OTP6253BG Уважаемый покупатель! Отныне ваша повседневная работа по дому станет проще, чем когда-либо прежде. Ваш прибор исключительно прост в использовании и чрезвычайно эффективен. После прочтения этих операционных…
Подробнее «Руководство по эксплуатации кухонной вытяжки Amica OTP6253BG»
Amica TF 3043 Toster БЛАГОДАРИМ ВАС ЗА ВЫБОР НАШЕГО ПРИБОРА УВАЖАЕМЫЙ ПОКУПАТЕЛЬ, Ваш прибор исключительно прост в использовании и чрезвычайно эффективен. Перед упаковкой и отправкой с завода-изготовителя прибор был тщательно проверен на предмет безопасности и функциональности. Перед использованием прибора, пожалуйста, внимательно прочтите настоящую инструкцию по эксплуатации Символы, встречающиеся в данной инструкции …
Подробнее «Руководство пользователя тостера Amica TF 3043»
Руководство по эксплуатации пылесоса Aqua Joran VM 9003 Пылесос Aqua Joran VM 9003 БЛАГОДАРИМ ВАС ЗА ПРИОБРЕТЕНИЕ ПРИБОРА AMICA УВАЖАЕМЫЙ ПОКУПАТЕЛЬ! Ваш пылесос Amica исключительно прост в использовании и чрезвычайно эффективен. Перед упаковкой и отправкой с завода-изготовителя прибор был тщательно проверен на предмет безопасности и функциональности. Перед использованием…
Подробнее «Руководство по эксплуатации пылесоса Amica Aqua Joran VM 9003»
ИНСТРУКЦИЯ ПО ЭКСПЛУАТАЦИИ Кухонная вытяжка KH 17285-3 E / KH 17286-3 E / KH 17802-1 E / KH 17801-1 E / KH 17803 S / KH 17804 S / KH 17285 S / KH 17286 S IO-HOO-0686/ 3 (03.2022) Уважаемый клиент! Отныне ваша ежедневная работа по дому станет проще, чем когда-либо прежде. Ваш прибор Амика…
Подробнее «Руководство пользователя кухонной вытяжки Amica KH 17285-3 E»
Кухонная вытяжка Amica OWC4441BK Уважаемый покупатель! Отныне ваша ежедневная работа по дому станет проще, чем когда-либо прежде. Ваш прибор исключительно прост в использовании и чрезвычайно эффективен. После прочтения настоящей Инструкции по эксплуатации управление прибором станет легким. Перед упаковкой и отправкой с завода-изготовителя прибор был тщательно проверен на предмет…
Подробнее «Руководство пользователя кухонной вытяжки Amica OWC4441BK»
Amica KHF 695 605 S Кухонная вытяжка Уважаемый покупатель! Отныне ваша ежедневная работа по дому станет проще, чем когда-либо прежде. Ваш прибор исключительно прост в использовании и чрезвычайно эффективен. После прочтения настоящей Инструкции по эксплуатации управление прибором станет легким. Перед упаковкой и отправкой с завода-изготовителя прибор прошел тщательную проверку…
Подробнее «Руководство по эксплуатации кухонной вытяжки Amica KHF 695 605 S»
Посмотреть инструкция для Amica 1053.3TsPrXPYRO бесплатно. Руководство относится к категории Печи, 1 человек(а) дали ему среднюю оценку 5.9. Руководство доступно на следующих языках: английский. У вас есть вопрос о Amica 1053.3TsPrXPYRO или вам нужна помощь? Задайте свой вопрос здесь
Не можете найти ответ на свой вопрос в руководстве? Вы можете найти ответ на свой вопрос ниже, в разделе часто задаваемых вопросов о Amica 1053.3TsPrXPYRO.
Какой вес Amica 1053.3TsPrXPYRO?
Правильно ли, что вентилятор продолжает работать, когда духовка уже выключена?
Что происходит при использовании функции «гриль»?
Обязательно ли предварительно разогревать духовку Amica?
Как очистить духовку от пригоревшего жира?
Какой способ лучше всего подходит для очистки решетки в духовке?
Какая высота Amica 1053.3TsPrXPYRO?
Какая ширина Amica 1053.3TsPrXPYRO?
Какая толщина Amica 1053.3TsPrXPYRO?
Какую маркировку энергоэффективности Amica 1053.3TsPrXPYRO имеет?
Инструкция Amica 1053.3TsPrXPYRO доступно в русский?
Не нашли свой вопрос? Задайте свой вопрос здесь
-
Инструкции
- Духовые шкафы
Инструкции для Духовых шкафов

Инструкция по установке
PDF, 410.31 Кб

Инструкция к Smeg SF800PO
PDF, 1.46 Мб

Схема встраивания
PDF, 52.36 Кб

Схема встраивания
PDF, 27.24 Кб

Инструкция к Asko OP8664A
PDF, 2.28 Мб
Инструкция по установке
PDF, 410.31 Кб

Инструкция к Smeg SF6381X
PDF, 1.61 Мб

Инструкция к Bosch HBJ558YB0Q
PDF, 2.3 Мб
Схема встраивания 1
JPG, 100.94 Кб
Схема встраивания 2
JPG, 93.01 Кб
Схема встраивания 3
JPG, 41.71 Кб

Инструкция к Smeg SF800P
PDF, 3.59 Мб

Схема монтажа
JPG, 139.54 Кб

Инструкция к Asko OCS8678G
PDF, 2.82 Мб
Инструкция по установке
PDF, 223.66 Кб

Схема встраивания
JPG, 425.83 Кб
Инструкция к Asko OCM8487B
PDF, 1.67 Мб

Инструкция к Smeg SF800B
PDF, 3.59 Мб

Инструкция к Smeg SFP805PO
PDF, 3.86 Мб

Инструкция к Korting OKB 7951 CMN
PDF, 4.52 Мб
Схема встраивания
JPG, 58.92 Кб

Инструкция к Bosch HBJ558YS0Q
PDF, 2.3 Мб
Схема встраивания 1
JPG, 100.94 Кб
Схема встраивания 2
JPG, 93.01 Кб
Схема встраивания 3
JPG, 41.71 Кб

Инструкция к Gorenje BCMS598S19X
PDF, 4.09 Мб
Схема встраивания с размерами
JPEG, 268.81 Кб
1
-
- 1.78 mb
- 84 stron
-
- 1.75 mb
- 80 stron
-
- 1.75 mb
- 84 stron
-
- 1.75 mb
- 84 stron
-
- 0 mb
- 32 stron
-
- 0 mb
- 28 stron
-
- 0 mb
- 28 stron
-
- 0 mb
- 24 stron
-
- 0 mb
- 24 stron
E
-
- 1.75 mb
- 80 stron
-
- 1.78 mb
- 80 stron
-
- 1.78 mb
- 80 stron
-
- 0 mb
- 56 stron
-
- 4.14 mb
- 56 stron
-
- 1.25 mb
- 60 stron
-
- 1.25 mb
- 68 stron
-
- 1.25 mb
- 68 stron
-
- 1.38 mb
- 56 stron
-
- 1.5 mb
- 68 stron
-
- 3.7 mb
- 84 stron
-
- 0.91 mb
- 48 stron
-
- 1.11 mb
- 56 stron
-
- 1.27 mb
- 52 stron
-
- 3.7 mb
- 84 stron
-
- 1.34 mb
- 60 stron
-
- 1.02 mb
- 52 stron
-
- 1.38 mb
- 56 stron
-
- 1.38 mb
- 56 stron
-
- 1.14 mb
- 68 stron
-
- 1.75 mb
- 80 stron
-
- 2 mb
- 28 stron
-
- 2.4 mb
- 28 stron
-
- 1.23 mb
- 28 stron
-
- 4.16 mb
- 56 stron
-
- 1.32 mb
- 60 stron
-
- 3.68 mb
- 56 stron
-
- 4.27 mb
- 56 stron
-
- 3.93 mb
- 84 stron
-
- 3.68 mb
- 56 stron
Перейти к контенту
Постоянных Перепадов Напряжения
Проникновения Внутрь Насекомых Или Грызунов
Неисправность Тэна
Поломка Термостата
Коды Ошибок
Автоподжик
Включает Когда Захочет И Трещит Пока Не Сдохнет
Горит Стоп Не Включается
Кроме Чаов Ниче Не Работает
Только Мигают Чаы
Не Закрывается Дверь
Ручка Дверцы
Как Снять Дверцу, Чтоб Прикрутить Ручку?
Не Работают Часы, Не Включается Нагрев, Вентилятор
Утоплена Ручка Включения Духового Шкафа
Ручка Переключения Режимов Духового Шкафа Утоплена И В Рабочее Положение Не Возвращается
Горит Режим Auto
На Дисплее Горит Режим Auto 00.00 Духовка Не Включается
Не Отключается Таймер
После Очередного Выпекания Вдруг Вообще Отключилась Панель И Не Включается, Когда Вырубаю Рубильник Слышу Щелчки ,Но Сама Панель Темная Не Горит Ничего
Не Работает
Подцеплена Правильно. Напряжение В Проводах Есть, Но Ничего Не Работает
Не Горит Лампочка Подсветки . Как Починить?
Не Горит Лампа И Не Работает Тэн
Вместе Перестали Работать: Лампочка Подсветки И Тэн ( При Установке Режима И Температуры Нагревания Не Происходит). При Этом При Выборе Режима Вентилятор Работает. При Последнем Использовании Духовка Работала, Но Несколько Раз Гасла И Загоралась Лампа По
Сброс Таймера Установленного Режима В Первоначальное Состояние.
Периодически При Выполнении Программы Происходит Сброс Таймера И Установленного Режима Выпекания В Первоначальное Состояние.
Лопнуло Внутреннее Стекло
После Очередной Помывки Просто Раскрошилось На Мелкие Части?Что Делать И Где Заказать?
Набор Температуры Не Происходит До Установленной (Нужной)
При Включении, Духовка Медленнее Разогревается И Не Набирает Нужную
Код Ошибки F12
Горит Код Ошибки F12, Что Это Значит?
Електронный Цифровой Таймер, Электронный Программатор
Сенсорные Клавиши >,+,-, Когда Проходишь Быстро Мимо Таймера Близко Пикают. В Чем Проблема И Как Ее Устранить Помогите Пожалуйста Или Это Нормально. Отпишите На Почту [email protected] Отпишите На Почту Как Устранить Проблему Подробно Если Ее Вообще Мо
Не Включается
Вышибает Автомат
Не Работает Звук
Не Работает Звуковой Сигнал
Высвечивается Err18
На Дисплее Высвечивается Ошибка Err18
Как Отключить Режим Demo
Код Ошибки Е-03
После Тестирования На Панели Загорается Er-03
Работает Только Ручка Функций.
При Включении Работают Функций И Больше Ни Чево
Часы На Дисплее Тухнут
Код Ошибки Er-01
Не Работает Нижняя Комфорка
Пока Держишь Ручку Нижняя Комфорка Горит , Только Отпускаешь Она Сразу Тухнет
Помилка Er-2
Er-2
Вентелятор Охлаждения Плат
После Того Как Подал Питание На Печку Совместную С Плетой Включаеться Вентилятор Охлаждения Плат И Невыключается Все Время Работает На 1 Скоростей А Когда Работает Печка Может Включить И 2 Скорость Подскажите Где Искать Поломку
Hansa Boei68490020
Горит Ошибка F04 Часы Настроены Но Не Включаются Сенсорные Кнопки
Посмотреть инструкция для Amica SHGG 11598 W бесплатно. Руководство относится к категории кухонные плиты, 3 человек(а) дали ему среднюю оценку 7.9. Руководство доступно на следующих языках: английский. У вас есть вопрос о Amica SHGG 11598 W или вам нужна помощь? Задайте свой вопрос здесь
Не можете найти ответ на свой вопрос в руководстве? Вы можете найти ответ на свой вопрос ниже, в разделе часто задаваемых вопросов о Amica SHGG 11598 W.
Какой вес Amica SHGG 11598 W?
Могу ли я использовать свои сковороды на индукционных плитах?
Как перезагрузить индукционную плиту?
Что такое разъем Perilex?
Опасны ли индукционные панели?
Какая высота Amica SHGG 11598 W?
Какая ширина Amica SHGG 11598 W?
Какая толщина Amica SHGG 11598 W?
Инструкция Amica SHGG 11598 W доступно в русский?
Не нашли свой вопрос? Задайте свой вопрос здесь
Инструкции Amica из категории Духовка
Нажмите на букву алфавита ниже, чтобы перейти в список моделей, которые начинаются с данного знака
- 1
- E
1
E
-
Инструкции
- Духовые шкафы
Инструкции для Духовых шкафов
Инструкция по установке
PDF, 410.31 Кб
Инструкция к Smeg SF800PO
PDF, 1.46 Мб
Схема встраивания
PDF, 52.36 Кб
Инструкция к Asko OP8664A
PDF, 2.28 Мб
Инструкция по установке
PDF, 410.31 Кб

Схема встраивания
JPG, 124.42 Кб
Инструкция к Smeg SF6381X
PDF, 1.61 Мб
Схема монтажа
JPG, 139.54 Кб
Инструкция к Smeg SF800P
PDF, 3.59 Мб
Инструкция к Asko OCS8678G
PDF, 2.82 Мб
Инструкция по установке
PDF, 223.66 Кб
Схема встраивания
JPG, 425.83 Кб
Инструкция к Asko OCM8487B
PDF, 1.67 Мб
Инструкция к Korting OKB 7951 CMN
PDF, 4.52 Мб
Схема встраивания
JPG, 58.92 Кб
Инструкция к Smeg SF800B
PDF, 3.59 Мб
Инструкция к Gorenje BCMS598S19X
PDF, 4.09 Мб
Схема встраивания с размерами
JPEG, 268.81 Кб
Инструкция к Bosch HBJ558YS0Q
PDF, 2.3 Мб
Схема встраивания 1
JPG, 100.94 Кб
Схема встраивания 2
JPG, 93.01 Кб
Схема встраивания 3
JPG, 41.71 Кб

Инструкция к Korting OKB 7931 CMX
PDF, 4.52 Мб
Схема встраивания
JPG, 58.92 Кб
Инструкция к Smeg SFP805PO
PDF, 3.86 Мб
Руководстве по эксплуатации Amica 1053.3X — вам приходилось его терять? Поскольку вы попали сюда, наверняка с вами это случилось. Но вы не единственный человек, сталкивающийся с проблемами с хранением руководства по эксплуатации всех домашних устройств. Ниже несколько советов, касающихся того, зачем собирать руководства по эксплуатации.
Руководстве по эксплуатации Amica 1053.3X это определенный вид технической документации, являющейся неразлучным элементом каждого устройства, которое мы приобретаем. Они отличаются между собой количеством информации, которую можно найти на тему данного устройства: напр. Amica 1053.3X. Конечно же, если производитель считает что необходимо передать нам большее количество информации, касающейся устройства Amica 1053.3X, то стоит ее хоть раз прочитать — в начале, сразу же после покупки данной вещи. Однако мы считаем, что инструкции должны заключать самую важную, наиболее необходимую информацию о Amica 1053.3X, так, чтобы не отнимать желания пользователя прочесть ее уже в самом начале. Несомненно, если устройство Amica 1053.3X имеет много продвинутых функций, неизбежно большое количество информации в содержании этого документа.
Które из информации в инструкции Amica 1053.3X необходимо обязательно прочитать?
- Информацию, касающуюся правильного использования и ухода за устройством Amica 1053.3X — нам необходимо ознакомиться с основными правилами, чтобы в случае проблем с устройством сервисный центр не отказал нам в гарантийном обслуживании, из-за неправильного использования
- Информация, касающаяся самых частых проблем с Amica 1053.3X и способы их решения
- Информация, касающаяся гарантии устройства Amica 1053.3X и ближайших сервисных центров, способных починить устройство в соответствии с рекомендациям производителя Amica
Как хранить инструкции дома?
Хорошей идеей является предназначение одного ящика, в котором бы хранилась инструкция Amica 1053.3X а также всех других домашних устройств которыми мы пользуемся. Тогда значительно легче вам будет ее найти, чем искать в родных коробках, которые наверняка уже выбросили вы, или другие домочадцы. Раз в год достаточно просмотреть ящик и выбросить инструкции, которые касаются устройств, которыми вы уже не пользуетесь. Таким образом вы избежите хранения ненужных документов, а останутся только актуальные. Вы можете также скачать и распечатать инструкцию Amica 1053.3X чтобы разместить ее в своем ящике.