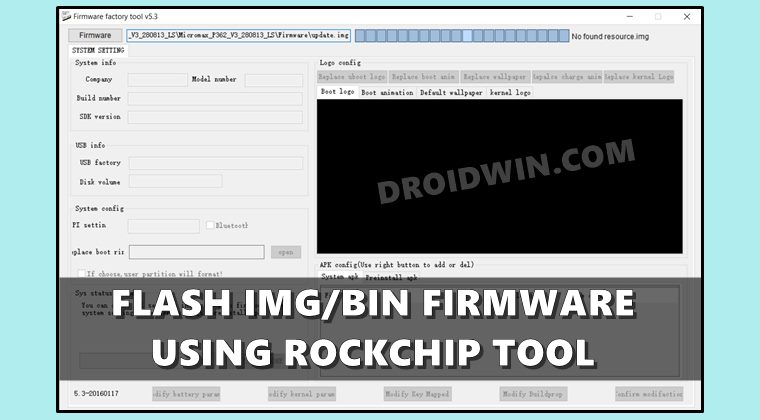
В этом руководстве мы покажем вам, как прошить прошивку IMG или BIN с помощью RockChip Factory Tool. Такие компании, как Qualcomm, MediaTek и SPreadTrum/Unisoc, в настоящее время лидируют в индустрии смартфонов. Однако есть еще одно имя, которое, вероятно, не привлекает особого внимания. Это чипсет от RockChip, который в настоящее время используется во многих Android-устройствах. Их популярность медленно, но верно растет с каждым днем.
Как и их производительность в индивидуальной разработке. Существует множество настроек и настроек, которые вы можете опробовать на этих устройствах. К ним относятся, например, прошивка пользовательских ПЗУ, установка пользовательских восстановлений или рутирование устройства через Magisk. Последний даст вам доступ к системному разделу и позволит вам устанавливать множество модов, включая темы Substratum, Xposed Framework, модули Magisk и Viper4Android.
Однако каждая из этих настроек также может оказаться рискованной. Если вы не выполняете шаги правильно, то вы провоцируете проблемы. Перепрошивка неправильного двоичного файла или правильного двоичного файла в неправильный слот может привести к ряду проблем. Bootloop или кирпичное устройство также на картах. К счастью, вы можете легко исправить все эти проблемы, вручную перепрограммировав прошивку IMG или BIN с помощью RockChip Factory Tool. И в этом руководстве мы покажем вам, как это сделать. Следуйте вместе.
RockChip Factory Tool — это программное приложение, специально разработанное для устройств с базовым набором микросхем RockChip. Они видят множество отличных функций, в том числе следующие примечательные:
Флэш-прошивка
Если ваше устройство еще не получило OTA-обновление, вы можете вручную прошить файл обновления с помощью этого инструмента.
Исправить проблему с бутлупом/кирпичиком
Если ваше устройство становится кирпичным или переходит в режим мягкого кирпича, вы можете использовать RockChip Factory Tool, чтобы принудительно прошить прошивку и, следовательно, разблокировать устройство.
Автоматическое определение набора микросхем
Как только вы установите успешное соединение, инструмент автоматически подберет правильную версию чипсета без необходимости ручного вмешательства.
Поддержка различных форматов прошивки
Он поддерживает перепрошивку файлов прошивки IMG и BIN.
Чтение информации об устройстве
Он также может считывать информацию о подключенном устройстве и отображать все значения прямо перед вами.
Как использовать RockChip Factory Tool
Приведенные ниже инструкции перечислены в отдельных разделах для простоты понимания. Обязательно следуйте в той же последовательности, как указано. Droidwin и его участники не будут нести ответственность в случае термоядерной войны, если ваш будильник не разбудит вас, или если что-то случится с вашим устройством и данными, выполнив следующие шаги.
ШАГ 1: Загрузите инструмент RockChip Factory
Для начала возьмите RockChip Factory Tool по ссылке ниже. Кроме того, после загрузки извлеките его в любое удобное место на вашем ПК.
ШАГ 2: Загрузите драйвер RockChip
- Чтобы установить успешное соединение между вашим устройством и Инструментом, вам также может потребоваться установить программное обеспечение RockChip Driver Assitant.
- Итак, скачайте его отсюда: Rockchip_DriverAssitant_v4.8.zip
- После загрузки извлеките его в любое удобное место на вашем ПК.
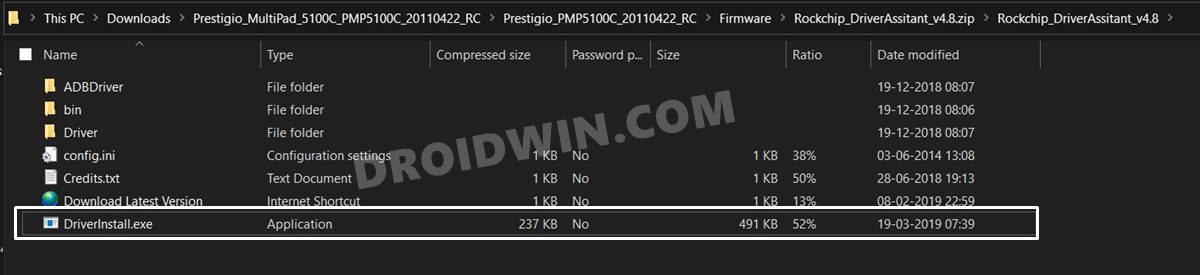
- После этого дважды щелкните файл DriverInstall.exe, чтобы начать установку. Затем следуйте инструкциям на экране, чтобы установить его.
ШАГ 3: Загрузите прошивку устройства RockChip
Затем загрузите стандартную прошивку для вашего устройства на базе RockChip. Официального сайта как такового нет, но поиска в Google будет достаточно, чтобы найти немало имен. Поэтому загрузите его с надежного веб-сайта, а затем извлеките загруженную прошивку в любое место на вашем ПК.
ШАГ 4: Запишите прошивку IMG/BIN с помощью RockChip Factory Tool
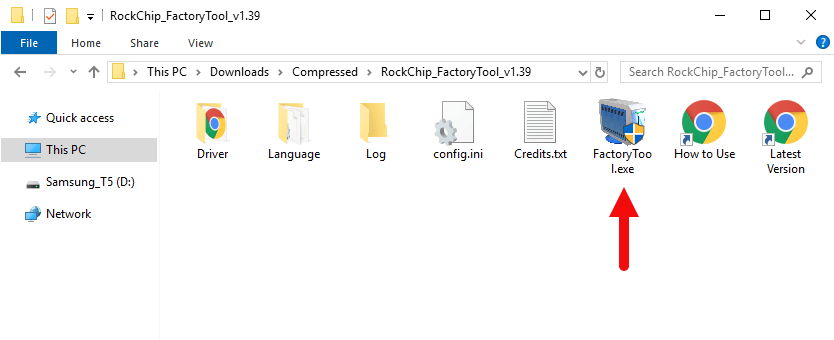
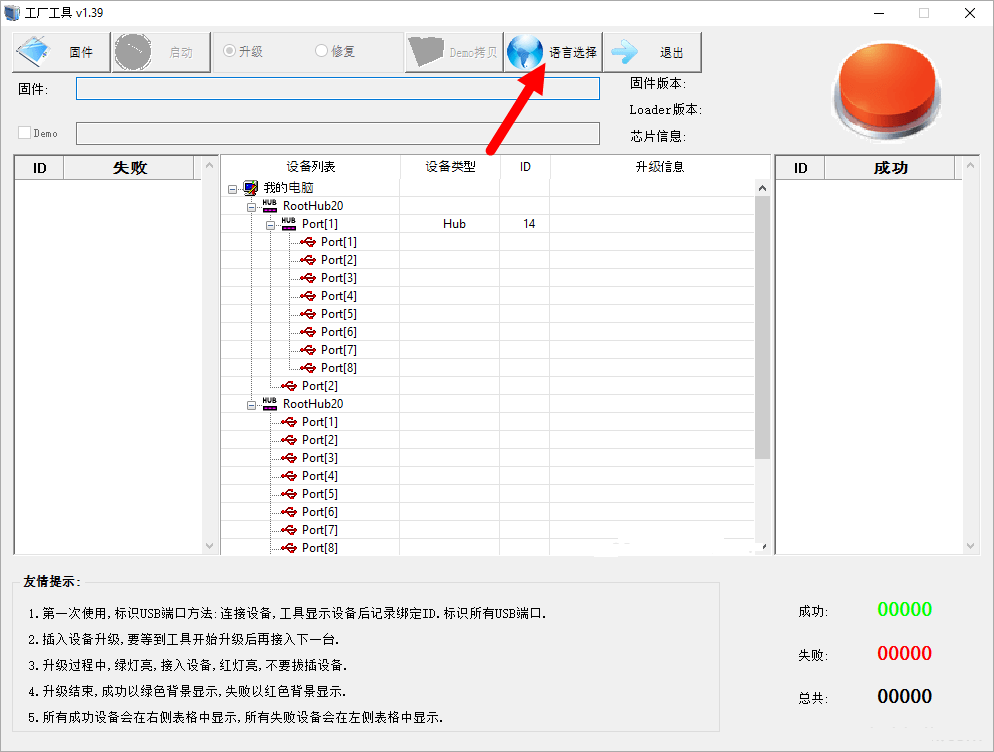
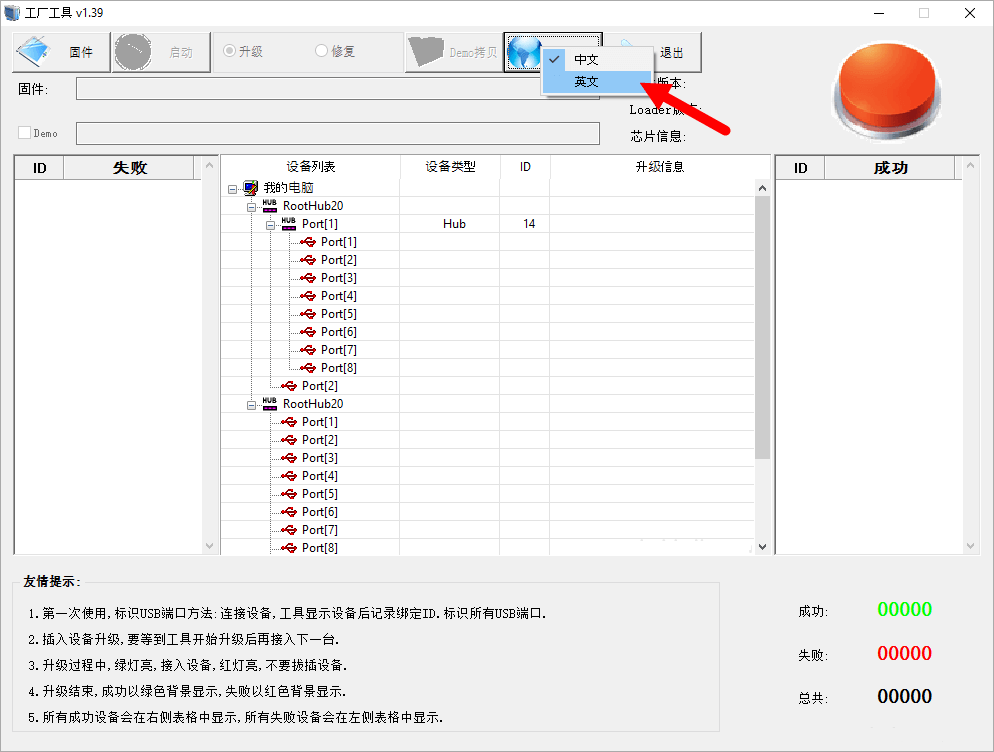
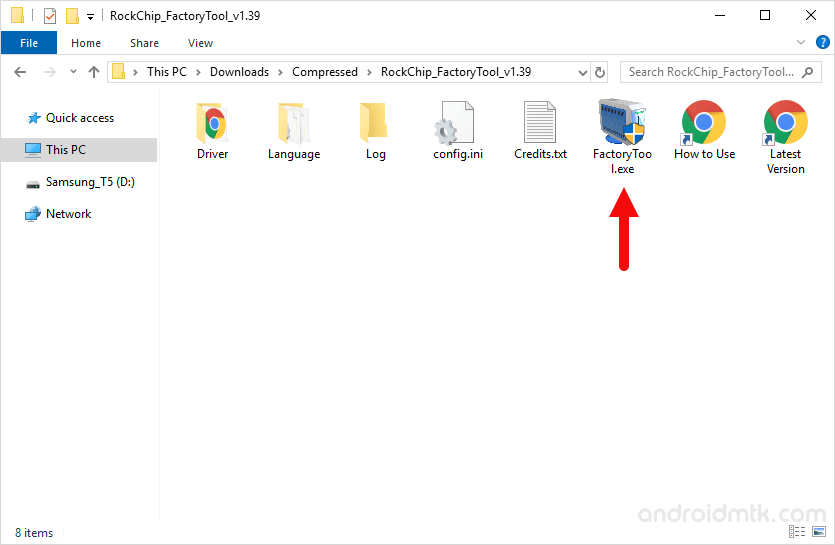
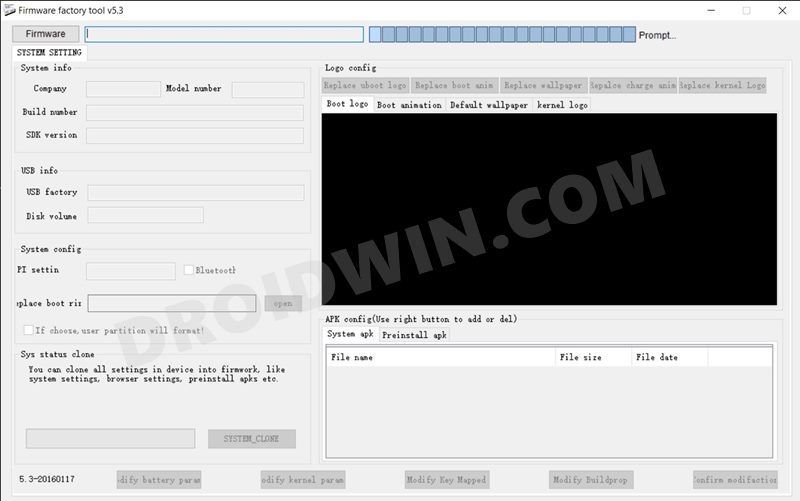
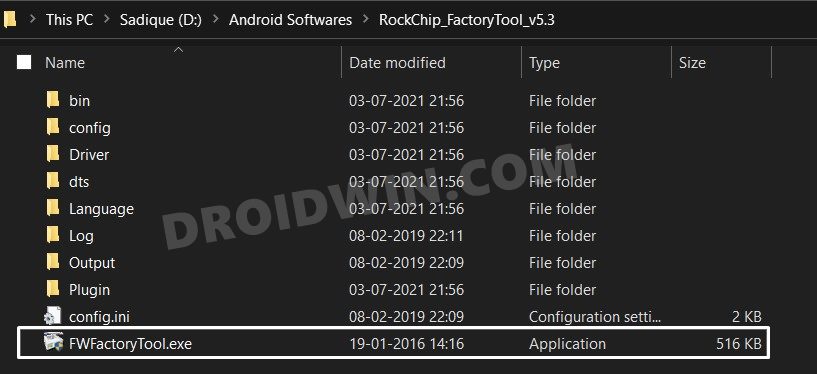
- Для начала запустите инструмент через файл FWFactoryTool.exe.
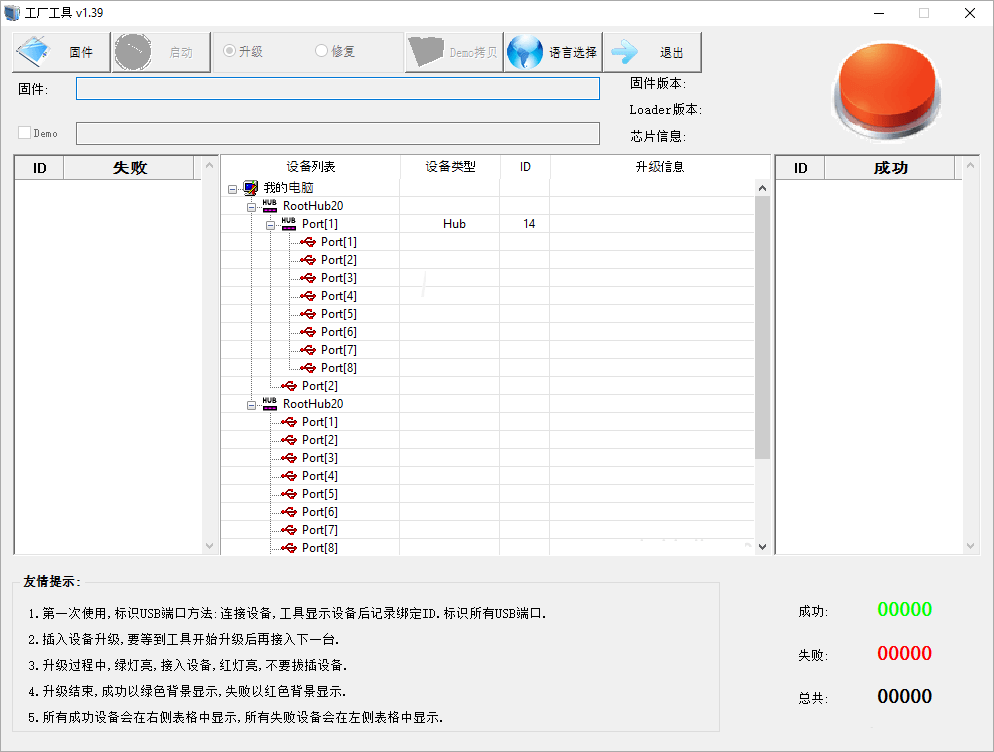
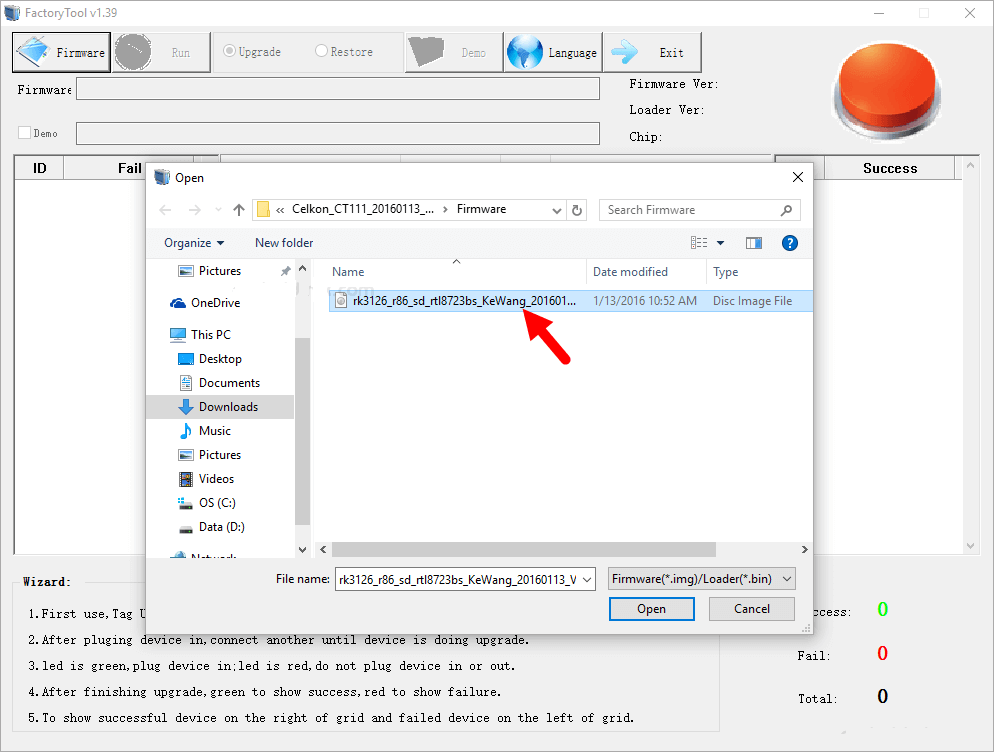
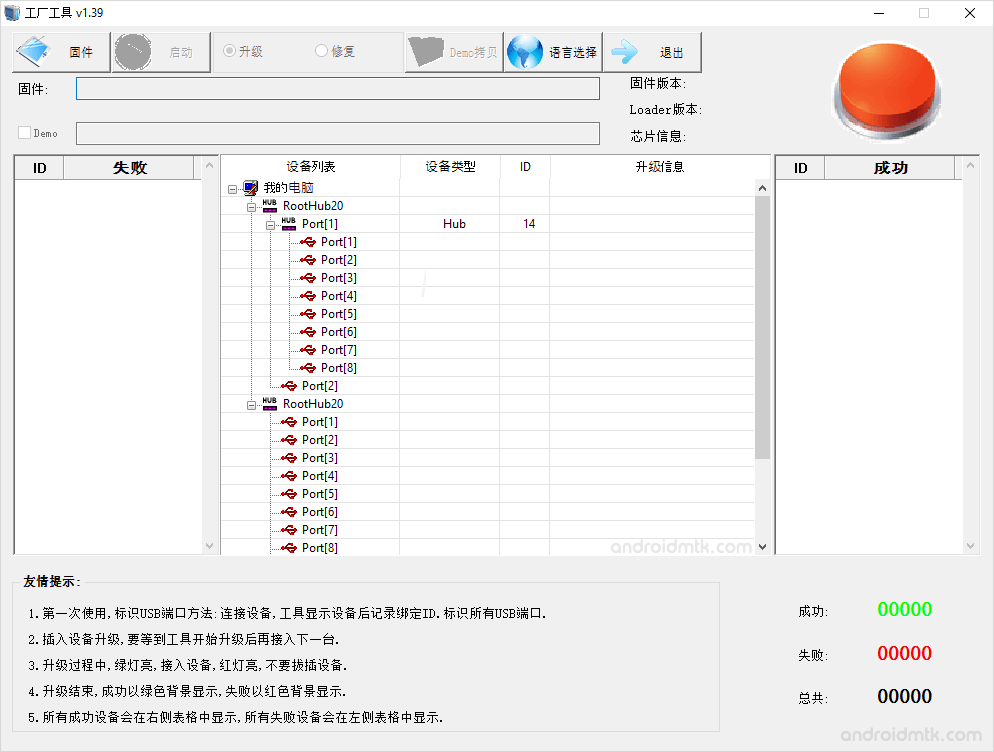
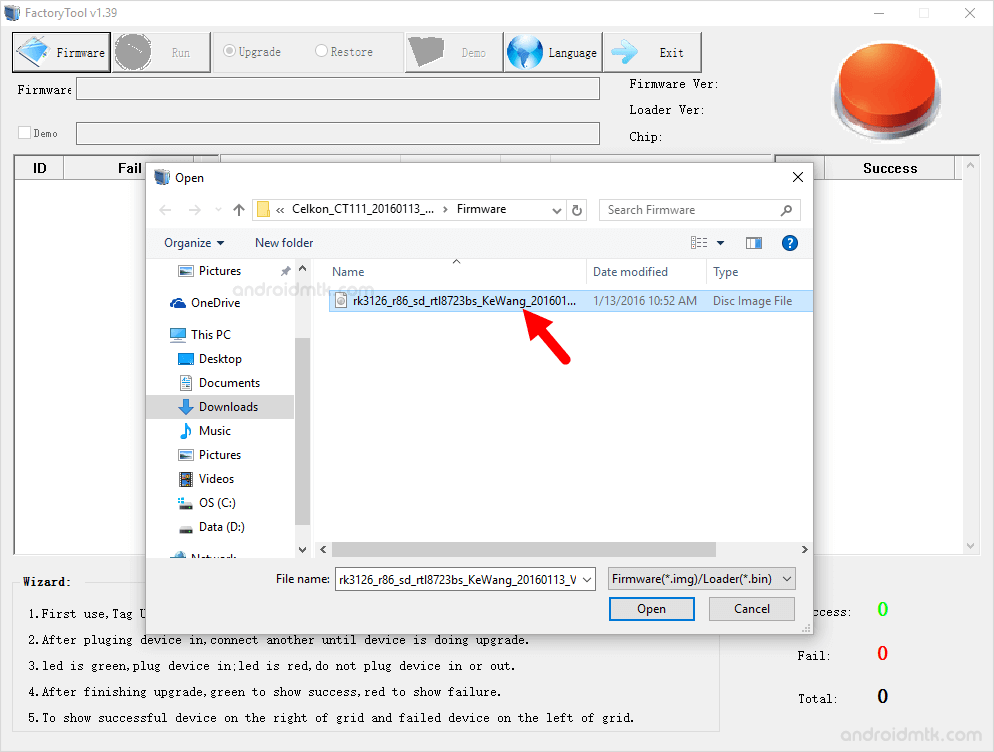
- Затем нажмите кнопку «Прошивка» в левом верхнем углу.
- Затем перейдите к загруженной прошивке и выберите файл IMG или BIN.
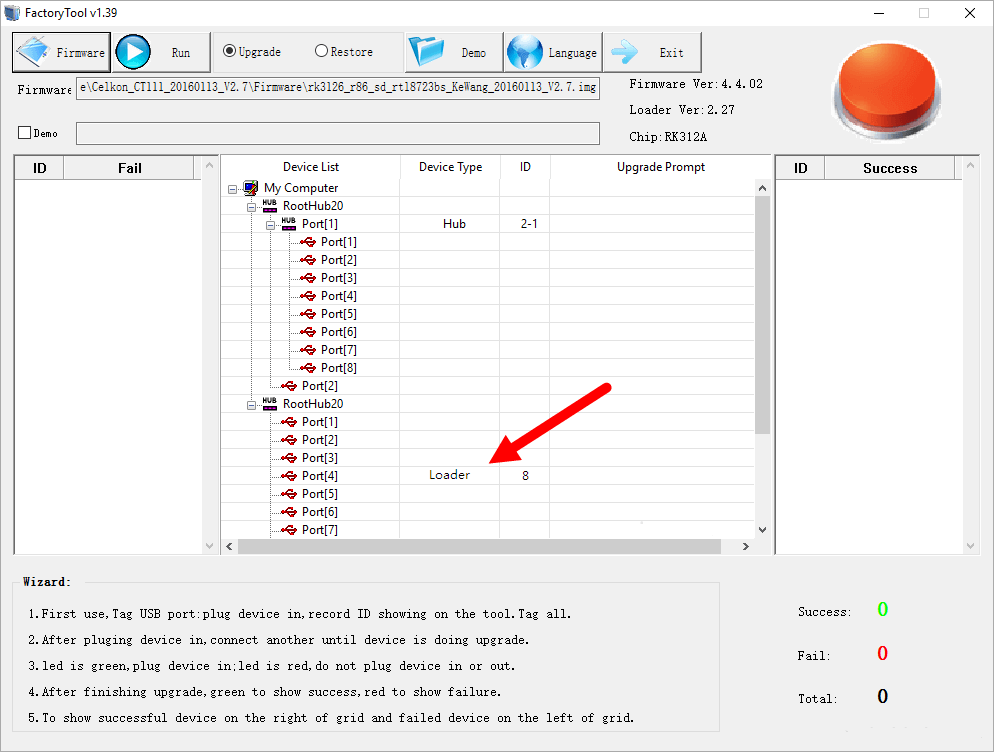
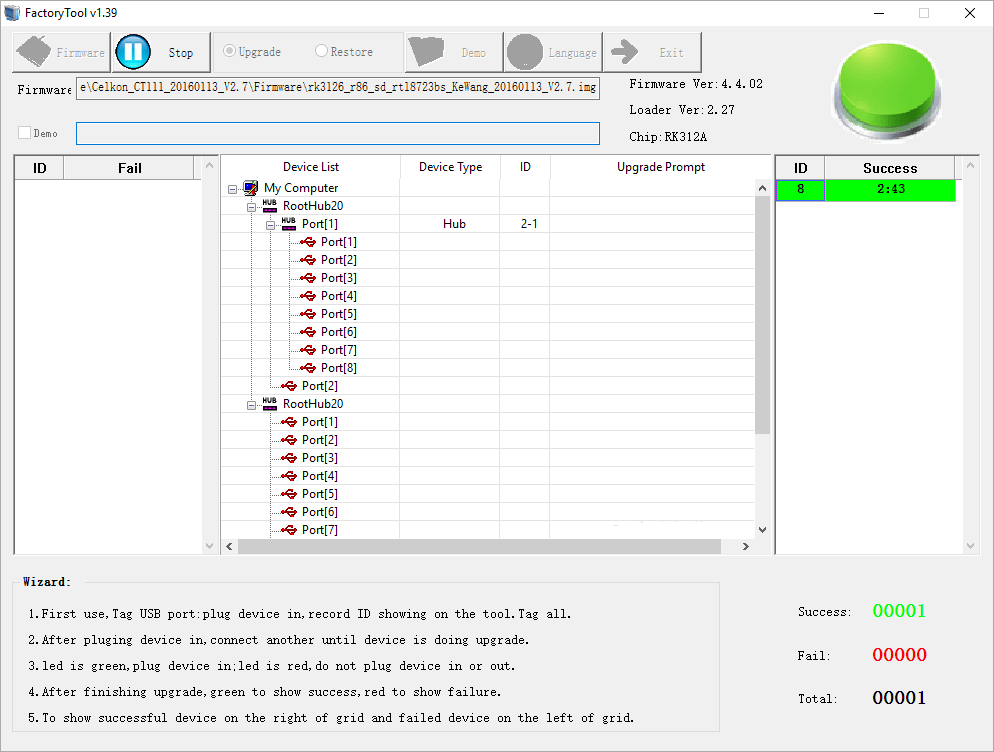
- Как только прошивка загружена, инструмент покажет информацию, связанную с прошивкой.
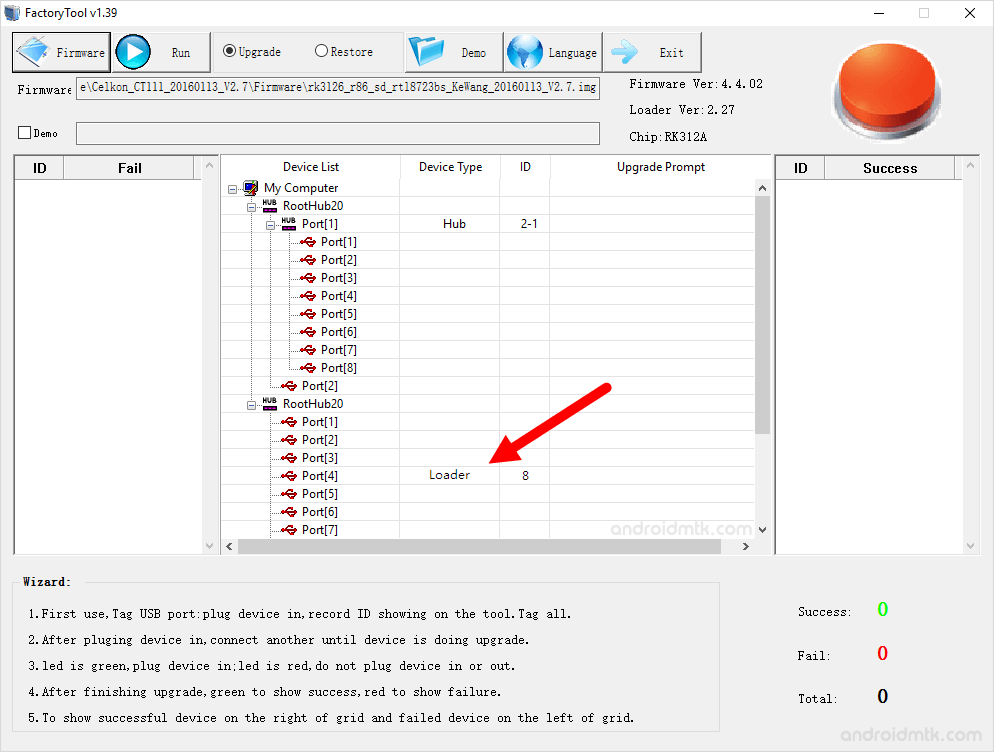
- Теперь выключите устройство. Затем нажмите и удерживайте клавишу увеличения громкости и подключите устройство к ПК через USB-кабель.
- Теперь ваше устройство должно быть распознано как загрузчик, и вы готовы к прошивке.
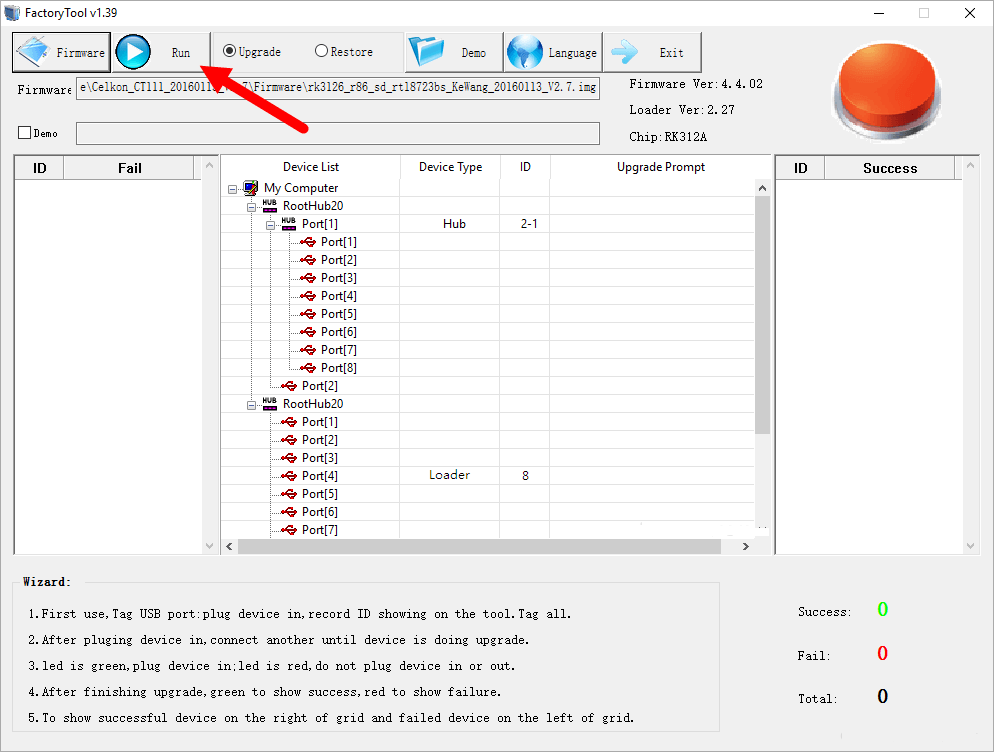
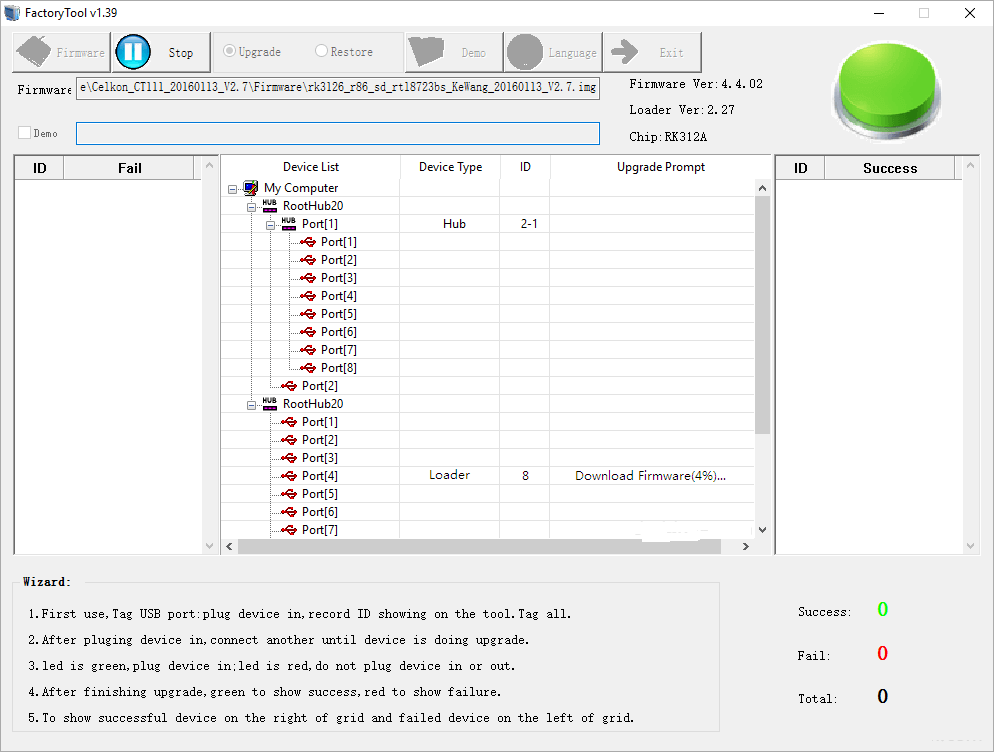
- Итак, нажмите кнопку «Выполнить», и начнется перепрошивка.
- После этого вы будете уведомлены об этом с помощью зеленого сообщения об успехе в правой строке меню.
- Вот и все. Теперь вы можете закрыть инструмент, отключить устройство и загрузить его (если это не произойдет автоматически).
На этом мы завершаем это руководство о том, как прошить прошивку IMG или BIN с помощью RockChip Factory Tool. Если у вас есть какие-либо вопросы относительно вышеупомянутых шагов, сообщите нам об этом в комментариях. Мы вернемся к вам с решением в ближайшее время.
In this guide, we will show you the steps to flash the IMG or BIN firmware using RockChip Factory Tool. The likes of Qualcomm, MediaTek, and SPreadTrum/Unisoc are currently reigning supreme in the smartphone industry. However, there’s another name that probably doesn’t get much attention. It is the chipset from RockChip that is currently powering quite a few Android devices. Their popularity is slowly but surely increasing with each passing day.
And so is their performance in custom development. There are a plethora of tweaks and customizations that you could try out on these devices. These include the likes of flashing custom ROMs, installing custom recoveries, or rooting the device via Magisk. The latter one would give you access to the system partition and would allow you to flash tons of mods, including the likes of Substratum Themes, Xposed Framework, Magisk Modules, and Viper4Android.
However, each of these tweaks could prove to be risky as well. If you don’t perform the steps correctly, then you are inviting trouble. Flashing an incorrect binary or the correct binary to the incorrect slot could result in quite a few issues. A bootloop or bricked device is on the cards as well. Fortunately, you could easily fix all these issues by manually flashing the IMG or BIN firmware using the RockChip Factory Tool. And in this guide, we will show you how to do just that. Follow along.
- How to Backup MediaTek Firmware using SP Flash Tool [2021]
- How to Remove FRP Lock on MediaTek using Scatter File and SP Flash Tool
- Root any MediaTek Device on Locked Bootloader
- Bypass MediaTek SP Flash Tool SLA DAA Authentication
RockChip Factory Tool is a software application specifically designed for devices with an underlying RockChip chipset. They behold a plethora of nifty functionalities, including the following noteworthy ones:
Flash Firmware
If your device hasn’t yet received the OTA update, then you may manually flash the update file using this tool.
Fix Bootloop/Brick Issue
If your device gets bricked or goes into a soft brick, then you could use the RockChip Factory Tool to force flash the firmware and hence unbrick the device.
Auto-Detection of Chipset
As soon as you establish a successful connection, the tool will automatically pick up the correct chipset version, without the need for manual intervention.
Support Various Firmware Format
It supports the flashing of both the IMG and BIN firmware files.
Read Device Information
It is also able to read the connected device’s information and display all the values right in front of you.
How to Use RockChip Factory Tool
The below instructions are listed under separate sections for ease of understanding. Make sure to follow in the exact same sequence as mentioned. Droidwin and its members wouldn’t be held responsible in case of a thermonuclear war, your alarm doesn’t wake you up, or if anything happens to your device and data by performing the below steps.
STEP 1: Download RockChip Factory Tool
To begin with, grab hold of the RockChip Factory Tool from the below link. Moreover, once downloaded, extract it to any convenient location on your PC.
- Download RockChip Tool: RockChip_FactoryTool_v5.3.zip
STEP 2: Download RockChip Driver
- In order to establish a successful connection between your device and the Tool, you might need to install the RockChip Driver Assitant software as well.
- So download it from here: Rockchip_DriverAssitant_v4.8.zip
- Once downloaded, extract it to any convenient location on your PC.
- After that, double-click on the DriverInstall.exe file to start the setup. Then proceed with the on-screen instructions to install it.
STEP 3: Download RockChip Device Firmware
Next up, download the stock firmware for your RockChip powered device. There isn’t any official site as such, but a Google search will be enough to bring in quite a few names. So download it from a trustworthy website and then extract that downloaded firmware to any location on your PC.
STEP 4: Flash IMG/BIN Firmware using RockChip Factory Tool
- To begin with, launch the tool via the FWFactoryTool.exe file.
- Then click on the Firmware button present at the top left.
- Then browse to the downloaded firmware and select the IMG or BIN file.
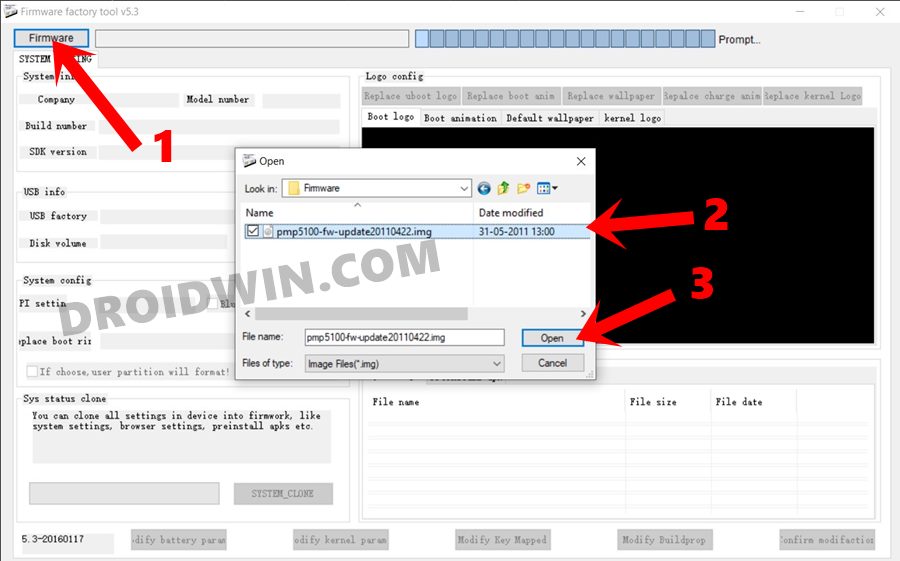
- As soon as the firmware is loaded, the tool will show the firmware-related information.
- Now power off your device. Then press and hold the Volume Up key and connect the device to the PC via USB cable.
- Your device shall now be recognized as Loader and you are ready to flash the firmware.
- So click on the Run button and the flashing will begin.
- Once done, you shall be notified of the same via the green success message in the right menu bar.
- That’s it. You may now close the tool, unplug the device and boot it up (if that doesn’t happen automatically).
So with this, we round off this guide on how to flash the IMG or BIN firmware using RockChip Factory Tool. If you have any queries concerning the aforementioned steps, do let us know in the comments. We will get back to you with a solution at the earliest.
About Chief Editor

Sadique Hassan
administrator
A technical geek by birth, he always has a keen interest in the Android platform right since the birth of the HTC Dream. The open-source environment always seems to intrigue him with the plethora of options available at his fingertips. “MBA by profession, blogger by choice!”
These are the guidelines to utilize RockChip FactoryTool to streak or introduce Stock Firmware (ROM) on any RockChip Smartphone and Tablet.
Alert: Flashing or introducing firmware utilizing the FactoryTool, will wipe the information from the gadget. In this manner, it is prescribed to take a reinforcement of your information prior to utilizing the FactoryTool.
Introduce .img or .receptacle firmware utilizing the RockChip FactoryTool
step 1
Download and Install RockChip Driver Assistant on the Windows Computer (assuming on the off chance that Rockchip Drivers are now introduced on the PC, SKIP this progression).

Sadique Hassan
administrator
A technical geek by birth, he always has a keen interest in the Android platform right since the birth of the HTC Dream. The open-source environment always seems to intrigue him with the plethora of options available at his fingertips. “MBA by profession, blogger by choice!”