- Manuals
- Brands
- Fanvil Manuals
- IP Phone
- C62
- User manual
-
Contents
-
Table of Contents
-
Bookmarks
Quick Links
Fanvil Product User Manual
IP Phone
Model: C62
Corporate Headquarters
Fanvil Technology Co., Ltd
Address: Unit 4A, Building NO.7,
Tian An Industrial Park, Nan Shan District, Shenzhen 518054 China
Web Site: www. Fanvil.com
Tel: +86 755 26402199
Fax: +86 755 26402618
Related Manuals for Fanvil C62
Summary of Contents for Fanvil C62
-
Page 1
Fanvil Product User Manual IP Phone Model: C62 Corporate Headquarters Fanvil Technology Co., Ltd Address: Unit 4A, Building NO.7, Tian An Industrial Park, Nan Shan District, Shenzhen 518054 China Web Site: www. Fanvil.com Tel: +86 755 26402199 Fax: +86 755 26402618… -
Page 2: Safety Notices
Safety Notices Please read the following safety notices before installing or using this phone. They are crucial for the safe and reliable operation of the device. Please use the external power supply that is included in the package. Other power supplies may cause damage to the phone, affect the behavior or induce noise.
-
Page 3: Table Of Contents
Table of Content INTRODUCING C62 VOIP PHONE ………………6 C62 …………….6 HANK YOU FOR YOUR PURCHASING ………………….6 ELIVERY ONTENT ……………………..6 EYPAD ………………….. 8 ORT FOR CONNECTING ………………….8 CON INTRODUCTION ………………….9 INTRODUCTION INITIAL CONNECTING AND SETTING…………….11 ………………….
-
Page 4
C62’S BASIC SETTING ………………….23 ……………………. 23 EYBOAD ……………………23 CREEN ……………………23 INGER ……………………. 23 OICE OLUME & D ……………………23 ………………….24 REETING ……………………. 24 ANGUAGE C62’S ADVANCED SETTINGS ……………….. 25 ……………………. 25 CCOUNT ……………………. 25 ETWORK ……………………. 25 ECURITY …………………… -
Page 5
7.3.4.5 Function Key ……………………60 7.3.5 Maintenance ……………………. 64 7.3.5.1 Auto Provision……………………64 7.3.5.2 Syslog Config ……………………65 7.3.5.3 Config Setting……………………66 7.3.5.4 Update……………………..67 7.3.5.5 Account Config ……………………. 68 7.3.5.6 Reboot……………………..69 7.3.6 Security……………………70 7.3.6.1 MMI Filter……………………. 70 7.3.6.2 Firewall …………………….. -
Page 6: Introducing C62 Voip Phone
1 Introducing C62 VoIP Phone 1.1 Thank you for purchasing C62 Thank you for purchasing C62. C62 is a full-feature telephone that provides voice communication over the same IP network that your computer uses. This phone functions not only much like a traditional phone, allowing to place and…
-
Page 7: Keypad
1.3 Keypad Key name Function Description Navigation key assist users for operating. In idle state they have special function. Navigation You can configure through the web page according to your patterns of use. Access to phone book, and check the record list by Phone adding new records and revising the record.
-
Page 8
Line1/2 Here are four SIP lines; user could select any one /3/4 to make the call, if it has been registered. Turn down or turn up the volume by pressing these Volume -/+ two keys. 1. In the hook off /hands-free mode, use the key to dial the last call number;… -
Page 9: Port For Connecting
1.4 Port for connecting Port Port name description Power switch Input: 5V AC, 1A 10/100M Connect it to ether Network 10/100M Connect it to PC Headset Port type: RJ-9 connector Handset Port type: RJ-9 connector External console Port type: RJ-45 direct connector interface 1.5 Icon introduction Icon…
-
Page 10: Led Introduction
In hand free mode In handset mode In headset mode Missed call Call forward 1.6 LED introduction Table 1 Call/Line Appearance Button LEDs for BLF LED Status Description Steady green The object is in idle status Slow blinking red The object is ringing Steady red The object is active Fast blinking red…
-
Page 11
Power off… -
Page 12: Initial Connecting And Setting
2 Initial connecting and Setting 2.1 Connect the phone Connect to network 2.1.1 Step 1: Connect the IP Phone to the corporate IP network. Before you connect the phone to the network, please check if your network can be accessed normally.
-
Page 13: Power Adaptor Connection
1. Plug power adaptor to power socket. 2. Plug power adaptor’s DC output to the DC5V port of C62 to start up. 3. There will be displayed “initializing” on the screen. After finishing startup, phone will show current date and time and so forth.
-
Page 14
Setting PPPoE mode (for ADSL connection) 1. Get PPPoE account and password first. 2. Press soft4 (Menu)->Settings->Advanced Setting, then enter passwords(123), and choose network ->WAN->Net Mode, enter and choose PPPoE through navigation keys and press the Save key. 3. Press Soft4 (Quit), then choose PPPoE Set, press soft3 (enter). 4. -
Page 15: C62’S Basic Function
3 C62’s basic function 3.1 Making a call How to make/answer calls 3.1.1 You can make a phone call via the following devices: 1. Pick up the handset, icon will be showed in the idle screen. 2. Press the Speaker button, icon will be showed in the idle screen.
-
Page 16: Dnd
3.3 DND Press DND softkey to active DND Mode. Further incoming calls will be rejected and the display shows: icon. Press DND softkey again to deactivate DND mode. If there are some incoming calls rejected in DND mode, you can find the incoming call records in the Call History. 3.4 Call Forward This feature allows you to forward an incoming call to another phone number.
-
Page 17: Mute
3.7 Mute Press Mute button during the conversation, icon will be showed in the LCD. Then the other side will not hear you, but you can hear him. Press it again to get the phone to normal conversation. 3.8 Call transfer 1.
-
Page 18
can press the arrow keys to select a call. -
Page 19: C62’S Advanced Function
4 C62’s advanced function 4.1 Call pickup Call pickup is implemented by simulating pickup function of PBX. it’s that, when A calls B, B rings but no answer, at this moment, C can hook off and input an appointed prefix plus B’s number, pick up A’s call and talk with A.
-
Page 20: Click To Dial
*3* is appointed prefix code. After making the above configuration, A can dial *3* plus B’s phone number to make the redial function. *4* is appointed prefix code. After configuration, A can dial *4* to cancel redial function. User can set prefix in random, in the case of no affecting current dialing rules. 4.4 Click to dial When user A browses in an appointed Web page, user A can click to call user B via a link (this link to user B), then user A’s phone will ring, after A hooks…
-
Page 21: Memo
press OK, then use the navigation keys to select the line from which you want to send, then Send. 4) If you want to write a message, you can press New and enter message. Use the 123 softkey to change the Input Method. When you input the message you want to send, press OK, then use the navigation keys to select the line from which you want to send, then Send.
-
Page 22
allows you to easily access your most dialed numbers. Intercom You can configure the key for Intercom code and it is useful in an office environment as a quick access to connect to the operator or the secretary. Note: Your VoIP PBX must support this feature. And make sure the intercom extension enable the Auto-answer function. -
Page 23
Memo Headset Release: Press the key you can end the call. Lock: Press the key you can lock the keyboard. SMS Call Back 4. Set the type as Dtmf You can configure the key as Dtmf. This key function allows you to easily dial or edit dial number. -
Page 24: C62’S Basic Setting
5 C62’s basic setting 5.1 Keyboad 1. Press Menu ->Settings-> Enter->Basic Setting-> Enter->Keyboard->Enter. 2. There are four items: DSS Keys, Multiplex, Long Click, SoftKey. You can set up respectively on them. Press the key Enter to the interface, then use the navigation keys to choose the function for the key according to you want.
-
Page 25: Greeting Word
2. You can enter the message and press Save, it will display in the phone screen when the phone start up. 5.7 Language Set 1. Press Menu ->Settings-> Enter->Basic Setting-> Enter->Language Set->Enter. 2. C62 supports 2 languages, you can use the navigation keys to choose. Now there are English and Chinese as 2 default languages.
-
Page 26: C62’S Advanced Settings
6 C62’s advanced settings 6.1 Account Press Menu->Enter->Advanced settings, and then input the password to enter the interface, the default password is 123. You can set it through the web page. Then choose Account then press Enter, you can do some sip settings.
-
Page 27: Web Configuration
7 Web configuration 7.1 Introduction of configuration Ways to configure 7.1.1 C62 has three different ways to different users. Use phone keypad. Use web browser(recommendatory way). Use telnet with CLI command. Password Configuration 7.1.2 There are two levels to access to phone: root level and general level. User with root level can browse and set all configuration parameters, while user with general level can set all configuration parameters except SIP (1-2) or IAX2’s…
-
Page 28: Configuration Via Web
pressing Status button. The login page is as below picture After you configure the ip phone, you need click save button in config under Maintenance in the left catalog to save your configuration. Otherwise the phone will lose your modification after power off and on. 7.3 Configuration via WEB BASIC 7.3.1…
-
Page 29: Wizard
of WAN port and LAN port, ON or OFF of DHCP mode of LAN port. Phone Number Shows the phone numbers provided by the SIP LINE 1-4 servers and IAX2. The last line shows the version number and issued date. Wizard 7.3.1.2 Wizard…
-
Page 30
Static IP Address Input the IP address distributed to you. Netmask Input the Netmask distributed to you. Gateway Input the Gateway address distributed to you. DNS Domain Set DNS domain postfix. When the domain which you input cannot be parsed, phone will automatically add this domain to the end of the domain which you input before and parse it again. -
Page 31: Call Log
Display detailed information that you manual config. Choose DHCP MODE,click【NEXT】can config SIP(default SIP1)simply, also can browse too. Click 【 BACK】 can return to the last page. Like Static IP MODE。 Choose PPPoE MODE,click【NEXT】can config the PPPoE account/password and SIP(default SIP1)simply, also can browse too. Click 【BACK】can return to the last page.
-
Page 32: Mmi Set
Call Log Field name explanation Start Time Display the start time of the outgoing record. Last Time Display the conversation time of the outgoing record. Called Number Display the account/protocol/line of the outgoing record. MMI SET 7.3.1.4 MMI SET Field name explanation Language Set Set the language of phone, English is default.
-
Page 33: Network
Network 7.3.2 WAN Config 7.3.2.1 WAN Config Active IP The current IP address of the phone. Current Netmask The current Netmask address. MAC Address The current MAC address of the phone. Current Gateway The current Gateway IP address. Get MAC Time Shows the time of getting MAC address…
-
Page 34
Please select the proper network mode according to the network condition. BW530 provide three different network settings: Static: If your ISP server provides you the static IP address, please select this mode, then finish Static Mode setting. If you don’t know about parameters of Static Mode setting, please ask your ISP for them. -
Page 35: Lan Config
1) Click “Apply” button after finished your setting, IP Phone will save the setting automatically and new setting will take effect. 2) If you modify the IP address, the web will not response by the old IP address. Your need input new IP address in the address column to logon in the phone.
-
Page 36: Qos Config
Notice: If you choose the bridge mode, the LAN configuration will be disabled. Qos Config 7.3.2.3 The VOIP phone support 802.1Q/P protocol and DiffServ configuration. VLAN functionality can use different VLAN IDs for WAN and LAN port. The VLAN application of this phone is very flexible. In chart 1, there is a layer 2 that switches without setting VLAN.
-
Page 37: Qos Configuration
other port in the red VLAN and not transmit it to port3 and port 4 in blue VLAN. By this means, VLAN divide the broadcast domain via restricting the range of broadcast frame transition. Note: chart 2 use red and blue to identify the different VLAN, but in practice, VLAN uses different VLAN IDs to identify.
-
Page 38: Service Port
package. Service Port 7.3.2.4 You can set the port of telnet/HTTP/RTP by this page. SERVICE PORT Field name explanation set web browser port, the default is 80 port,if you HTTP Port want to enhance system safety,you’d better change it into non-80 standard port; Example: The IP address is 192.168.1.70.
-
Page 39: Dhcp Server
DHCP SERVER 7.3.2.5 DHCP SERVER Field name explanation DHCP Leased IP-MAC mapping table. If the LAN port of the phone Table connects to a device, this table will show the IP and MAC address of this device. Shows the DHCP Lease Table, the unit of Lease time is Minute. Lease Table Name Specify the name of the lease table Start IP…
-
Page 40: Sntp
Set the default DNS server IP of the lease table; Click the Add button to submit and add this lease table Select name of lease table, click the Delete button will delete the selected lease table from DHCP lease table. DNS Relay Select DNS Relay, the default is enabled.
-
Page 41
SNTP Field name explanation Server Set SNTP Server IP address. Time Zone Select the Time zone according to your location. Time Out Set the time out, the default is 60 seconds. 12 Hours Systems Switch the time mechanism between 12 hours and 24 hours. -
Page 42: Voip
Minute Setup start and end minutes Notice: You need specify the above all items. VOIP 7.3.3 SIP Config 7.3.3.1 Set your SIP server in the following interface.
-
Page 43
SIP Config Field name explanation Choose line to set info about SIP, there are 3 lines to choose. You can switch by 【Load】 button. Register Status Shows if the phone has been registered the SIP server or not; or so, show Unapplied. Server Name Set the server name. -
Page 44
Password Input your SIP register password. Phone Number Input the phone number assigned by your VoIP service provider. Phone will not register if there is no phone number configured. Display Name Set the display name. Set proxy server IP address(Usually, Register SIP Proxy Server Address Server configuration is the same as Proxy SIP Server. -
Page 45
authentication by server to the request packet. It will decrease the server’s repeat authorization work, if it is enable. Enable/Disable keeps NAT of SIP alive. NAT Keep Alive If some server refuse to register with too short interval time, and has no packets sending to device in private network to keep NAT alive, user could set this function ON. -
Page 46
RFC Protocol Edition server which uses the same version as you select. For example, if the server is CISCO5300, you need to change to RFC2543, else phone may not cancel call normally. System uses RFC3261 as default. Transport Protocol Set transport protocols, TCP or UDP; RFC Privacy Edition Set Anonymous call out safely;… -
Page 47: Iax2 Config
IAX2 Config 7.3.3.2 IAX2 Config Field name explanation Register Status Shows if the phone has been registered the IAX2 server or not. IAX2 Server Addr Input your IAX2 server address. IAX2 Server Port Set your IAX2 server port, the default is 4569. Account Name Input your IAX2 register account name.
-
Page 48: Stun Config
Voice Mail Text Specify the voice mail’s name. Set echo test number. If IAX2 server supports echo test, Echo Test and echo test number is non- numeric, system could set Number an echo test number to replace the echo test text. So user can dial the numeric number to test echo voice test.
-
Page 49
STUN Field name explanation STUN NAT Transverse Shows STUN NAT Transverse estimation, true means STUN can penetrate NAT, while False means not. STUN Server Addr Set your SIP STUN Server IP address STUN Server Port Set your SIP STUN Server Port Set STUN Effective Time. -
Page 50: Dial Peer Setting
DIAL PEER setting 7.3.3.4 This functionality offers you more flexible dial rule, you can refer to the following content to know how to use this dial rule. When you want to dial an IP address, the entry of IP addresses is very cumbersome, but by this functionality, you can set number 156 to replace 192.168.1.119 here.
-
Page 51
DIAL PEER Field name explanation There are two types of matching conditions: one is full matching, the other is prefix matching. In the Full matching, you need input your desired phone number Phone number in this blank, and then you need dial the phone number to realize calling to what the phone number is mapped. -
Page 52
4) Rep: It means that phone will replace the number with length and number appointed. You can refer to the following examples of different alias application to know more how to use different aliases and this dial rule. Call Mode Select different signal protocol, SIP or IAX2 Suffix Set suffix, this is optional config item. -
Page 53: Phone
You need set Phone When you dial Number, Alias and Delete “0106228”, the Length. Phone number is SIP1 server will XXXT and Alias is rep: receive “86106228” If your dialed phone number starts with your set phone number, the first digits same as your set phone number will be replaced by the alias number specified and…
-
Page 54: Call Service
DSP Configuration Field name explanation First Codec The fist preferential DSP codec: G.711A/u, G.722, G.723, G.729, G.726, AMR Second Codec The second preferential DSP codec: G.711A/u, G.722, G.723, G.729, G.726, AMR Third Codec The third preferential DSP codec: G.711A/u, G.722, G.723, G.729, G.726, AMR Forth Codec The forth preferential DSP codec: G.711A/u, G.722,…
-
Page 55
Call Service Field name explanation Hotline Specify Hotline number. If you set the number, you cannot dial any other numbers. No Answer Specify No Answer Time Time Set Prefix in peer to peer IP call. For example: what you want P2P IP Prefix to dial is 192.168.1.119, If you define P2P IP Prefix as 192.168.1., you dial only #119 to reach 192.168.1.119. -
Page 56
Accept Any If select it, the phone will accept the call even if the called Call number is not belong to the phone. Auto Enable the phone to auto hang up a call after the call is finished handdown Auto Set the auto handdown time. -
Page 57: Digital Map Configuration
forbidden to be responded。 If user wants to allow a number or a series of number incoming, he may add the number(s) to the list as the white list rule. the configuration rule is -number, for example, -123456, or -1234xx Means any incoming number is forbidden except for 4119 Note: End with DOT (.) when set up the white list Set Add/Delete Limit List.
-
Page 58
sent out is 9-digit with 9. Digital Map Configuration Field name explanation End with «#» Set Enable/Disable the phone ended with “#” dial. Fixed Length Specify the Fixed Length of phone ending with. Time out Set the timeout of the last dial digit. The call will be sent after timeout. -
Page 59: Phone Book
Cause any number started with 9911 to be dialed 4 seconds after dialing ceases. Notice: End with “#”, Fixed Length, Time out and Digital Map Table can be used simultaneously, System will stop dialing and send number according to your set rules. Phone Book 7.3.4.4 You can input the name, phone number and select ring type for each name here.
-
Page 60
You need to match a XML Phonebook address and you can directly access the corresponding remote phonebook. You can make a call through the WEB DIAL, enter the Dial Num then press Dial, if you want to finish the talk, press Hang-up. -
Page 61: Function Key
Function Key 7.3.4.5 Function Key Field name explanation Contrast Set contrast of screen Luminance Set luminance of screen…
-
Page 62
Line: select Auto, SIP1, SIP2, SIP3, SIP4, or IAX2 in function key type. After you set it, you pick up handset or hands-free, press this function key, and then you can use the corresponding IP line. Memory key Set the memory key’s serial number Type Memory Key: settings can be stored in key storage for each number, the standby or off-hook, select… -
Page 63
User can be configured in accordance with push to talk function the way: 4116 was the other number; Then press the standby button and make it automatically answer the call 4116; key can be configured through the following events: For example: External Console External Console has the same usage with the Function key. -
Page 64: Maintenance
Maintenance 7.3.5 Auto Provision 7.3.5.1 Auto Provision Field name explanation Current Config Show the current config file’s version.
-
Page 65: Syslog Config
Version Server Address Set FTP/TFTP/HTTP server IP address for auto update. The address can be IP address or Domain name with subdirectory. Username Set FTP server Username. System will use anonymous if username keep blank. Password Set FTP server Password. Config File Name Set configuration file’s name which need to update.
-
Page 66: Config Setting
person. At present, the lowest level of debug information send to Syslog is info; debug level only can be displayed on telnet. Syslog Configuration Field name explanation Server IP Set Syslog server IP address. Server Port Set Syslog server port. MGR Log Level Set the level of MGR log.
-
Page 67: Update
Field name explanation You can save all changes of configurations. Click the Save Config Save button, all changes of configuration will be saved, and be effective immediately. . Backup Config Right clicks on “Right click here…” and select “Save Target As….” then you will save the config file in .txt format User can restore factory default configuration and Clear Config…
-
Page 68: Account Config
Domain name with subdirectory. Username Set the FTP server Username for download/upload. Password Set the FTP server password for download/upload. File name Set the name of update file or config file. The default name is the MAC of the phone, such as 000102030405.
-
Page 69
Account Configuration Field name explanation Menu Password Set the password for entering the setting menu of the phone by the phone‘s key board. The password is digit. Set fast keylock Keylock setting Set up the key lock password. It must be digit and no longer than 6. -
Page 70: Reboot
This table shows the current user existed. User Name Set account user name. User Level Set user level, Root user has the right to modify configuration, General can only read. Password Set the password. Confirm Confirm the password. Select the account and click the Modify to modify the selected account, and click the Delete to delete the selected account.
-
Page 71: Security
Security 7.3.6 MMI Filter 7.3.6.1 MMI Filter User could make some device own IP, which is pre-specified, access to the MMI of the phone to config and manage the phone. Field name explanation MMI Filter IP Table list: Add or delete the IP address segments that access to the phone. Set initial IP address in the Start IP column, Set end IP address in the End IP column, and click Add to add this IP segment.
-
Page 72: Firewall
Firewall 7.3.6.2 Firewall Configuration In this web interface, you can set up firewall to prevent unauthorized Internet users from accessing private networks connected to the Internet (input rule), or prevent unauthorized private network devices from accessing the Internet (output rule). Firewall supports two types of rules: input access rule and output access rule.
-
Page 73
Field name explanation In access enable Select it to Enable in_ access rule out access enable Select it to Enable out_ access rule Input / Output Specify current adding rule by selecting input rule or output rule. Deny/Permit Specify current adding rule by selecting Deny rule or Permit rule. -
Page 74: Nat Config
NAT Config 7.3.6.3 NAT is abbreviated from Net Address Translation; it’s a protocol responsible for IP address translation. In other word, it is responsible for transforming IP and port of private network to public, also is the IP address mapping which we usually say.
-
Page 75
NAT Configuration Field name explanation IPSec ALG It is an encryption technology. Select it to enable IPSec ALG, the default is enable FTP is a service of connection layer which can FTP ALG transform intranet IP into extranet IP when intranet IP is sending out packet. -
Page 76: Vpn Config
Shows the NAT UDP mapping table Transfer Type Select the NAT mapping protocol style, TCP or UDP Inside IP Set the IP address of device which is connected to LAN interface to do NAT mapping. Inside Port Set the LAN port of the NAT mapping Outside Port Set the WAN port of the NAT mapping Notice: After finish setting, click the Add button to add new mapping table;…
-
Page 77: Vpn Configuration
VPN Configuration Field name explanation VPN IP Shows the current VPN IP address Select L2TP. You can choose only one for current state. After you select it, you’d better save configuration and reboot your phone. Enable VPN Select it or not to enable or disable VPN;…
-
Page 78: Logout
VPN Server Addr Set VPN L2TP Server IP address VPN User Name Set User Name access to VPN L2TP Server VPN Password Set Password access to VPN L2TP Server Logout 7.3.7 Click Logout, and you will exit web page. If you want to enter it next time, you need input user name and password again.
-
Page 79: Appendix
8 Appendix 8.1 Specification Hardware 8.1.1 Item C62(P) Adapter Input: 100-240V (Input / Output) Output: 5V 1A port 10/100Base- T RJ-45 1 PORT 10/100Base- T RJ-45 1 PORT Power Idle: 2.5W/Active: 2.8W Consumption LCD Size 128×64 53.5 x 70mm Operation 0~40℃…
-
Page 80: Network Features
Automatically select calling line, if one line can’t be connected, the phone can automatically switch to other line to call. 9 kinds of ring types and 5 user-defined music rings DTMF Relay: support SIP info, DTMF Relay, RFC2833 …
-
Page 81: Maintenance And Management
Support DMZ Support VPN (L2TP) function Wan Port supports main DNS and secondary DNS server, can select dynamically to get DNS in DHCP mode or statically set DNS address. Support DHCP client on WAN Support DHCP server on LAN …
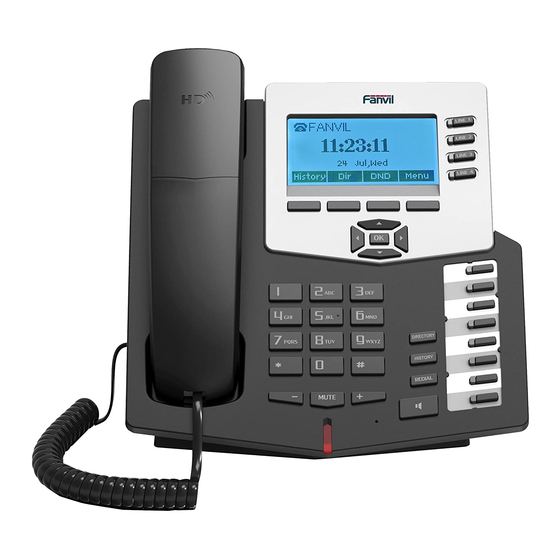
Fanvil C62 – современный IP-телефон, поддерживающий 4 SIP линии, имеющий 8 клавиш быстрого набора. Телефон поможет решить повседневные задачи, вести дела более эффективно. C62 имеет BLF клавиши для контроля статуса абонента, поддерживает SMS, отличается звуком высокой четкости для всех 4-х SIP линий. Fanvil C62 имеет большой монохромный LCD дисплей с программными клавишами, а также возможность подключения до 5 консолей расширения.
В Fanvil C62 предусмотрены все необходимые функции: возможность совершать звонки точка-точка, переадресация вызова, перевод вызова (с уведомлением или без), удержание вызова, конференция, перехват вызова, повтор вызова, селекторная связь, черный список, список разрешенных номеров и другие. В телефоне есть разъем RJ9 для подключения гарнитуры, что поможет освободить руки во время разговора.
Fanvil C62 – отличное решение для больших и оживленных офисов, которое поможет решить все вопросы с максимальным удобством.
Функции телефона:
Поддержка SIP 2.0 (RFC3261)
Возможность регистрировать 4 раздельных SIP аккаунтов
Возможность одновременного подключения ко всем 4 SIP серверам
Поддержка звука высокой чёткости на всех 4-х линиях
Поддержка одной линии по протоколу IAX2
Речевые кодеки: G.711 A/u, G.723.1, G.729a/b, G.722, G.726
Эхоподавление G.168
VGS, VAD, CNG
Полнодуплексный спикерфон
Возможность совершать звонки «точка-точка»
Режимы передачи DTMF: inband, SIP info, RFC2833
9 различных мелодий вызова и возможность загружать 5 дополнительных
Большой LCD дисплей с программными клавишами
Разъём для гарнитуры RJ9
4 клавиши SIP линий с возможностью привязки каждой клавиши к различным аккаунтам
8 дополнительных программируемых клавиш
Подержка телефонных функций: переадресация вызова, перевод вызова (с уведомлением и без), удержание вызова, конференция, перехват вызова, селекторная связь, повтор вызова
Чёрный список, список разрешённых номеров, режим «Не беспокоить!», план набора
История вызовов: входящие, исходящие, пропущенные. В каждой по 100 записей.
Телефонная книга на 500 записей
Поддержка внешней телефонной книги в формате XML
Поддержка BLF
Поддержка SMS
Возможность подключения до 5 консолей расширения
Возможность установки собственного логотипа
Сетевые функции:
WAN / LAN: 10/100 Мбит. Возможность работы в режиме Bridge или Router
PPPoE
PoE (опционально)
VLAN (voice / data)
Поддержка STUN
DHCP клиент на стороне WAN
DHCP сервер на стороне LAN
DNS Relay, SNTP, Firewall, DMZ
VPN (L2TP)
QoS
Сетевые утилиты: telnet, ping, trace route.
Управление:
Управление через WEB, telnet или через меню телефона
Разделение прав доступа для пользователей
Обновление попротоколам HTTP, FTP или TFTP
Автообновление (Auto provisioning)
Поддержка DHCP опции 66
4 SIP линии, 4 клавиши быстрого набора
Функции телефона:
- Поддержка SIP 2.0 (RFC3261)
- Возможность регистрировать 4 раздельных SIP аккаунта
- Возможность одновременного подключения к 4 SIP серверам
- Поддержка звука высокой чёткости на обоих линиях
- Поддержка одной линии по протоколу IAX2
- Речевые кодеки: G.711 A/u, G.723.1, G.729a/b, G.722, G.726
- Эхоподавление G.168
- VGS, VAD, CNG
- Полнодуплексный спикерфон
- Возможность совершать звонки «точка-точка»
- Режимы передачи DTMF: inband, SIP info, RFC2833
- 9 различных мелодий вызова и возможность загружать 5 дополнительных
- Большой LCD дисплей с программными клавишами
- Разъём для гарнитуры RJ9
- 2 клавиши SIP линий с возможностью привязки каждой клавиши к различным аккаунтам
- 4 дополнительных програмируемых клавиш
- Подержка телефонных функций: переадресация вызова, перевод вызова (с уведомлением и без), удержание вызова, конференция, перехват вызова, селекторная связь, повтор вызова
- Чёрный список, список разрешённых номеров, режим «Не беспокоить!», план набора
- История вызовов: входящие, исходящие, пропущенные. В каждой по 100 записей.
- Телефонная книга на 500 записей
- Подержка внешней телефонной книги в формате XML
- Поддержка BLF
- Поддержка SMS
Сетевые функции:
- WAN / LAN: 10/100 Мбит. Возможность работы в режиме Bridge или Router
- PPPoE
- PoE (опционально)
- VLAN (voice / data)
- Поддержка STUN
- DHCP клиент на стороне WAN
- DHCP сервер на стороне LAN
- DNS Relay, SNTP, Firewall, DMZ
- VPN (L2TP)
- QoS
- Сетевые утилиты: telnet, ping, trace route.
Управление:
- Управление через WEB, telnet или через меню телефона
- Разделение прав доступа для пользователей
- Обновление по протоколам HTTP, FTP или TFTP
- Автообновление (Auto provisioning)
- Поддержка DHCP опции 66
Описание
Fanvil C62 — это IP-телефон, который поддерживает 4 SIP-линии и предоставляет отличную возможность для голосовой передачи. Fanvil C62 успешно справляется с предоставлением высококачественных технологических сервисов, оборудован 8-ю программируемыми клавишами. Аппарат поддерживает возможность подключения пяти панелей расширения.
Эта модель снята с производства! Обращайтесь к менеджерам нашего интерент-магазина для подбора аналогов.
Телефон обладает внушительным списком функций:
- Поддержка SIP 2.0 (RFC3261)
- Возможность регистрировать 4 раздельных SIP аккаунтов
- Возможность одновременного подключения ко всем 4 SIP серврерам
- Поддержка звука высокой чёткости на всех 4-х линиях
- Поддержка одной лнии по протоколу IAX2
- Речевые кодеки: G.711 A/u, G.723.1, G.729a/b, G.722, G.726
- Эхоподавление G.168
- VGS, VAD, CNG
- Полнодуплексный спикерфон
- Возможность совершать звонки «точка-точка»
- Режимы передачи DTMF: inband, SIP info, RFC2833
- 9 различных мелодий вызова и возможность загружать 5 дополнительных
- Большой LCD дисплей с программными клавишами
- Разъём для гарнитуры RJ9
- 4 клавиши SIP линий с возможностью привязки каждой клавиши к различным аккаунтам
- 8 дополнительных программируемых клавиш
- Подержка телефонных функций: переадресация вызова, перевод вызова (с уведомлением и без), удержание вызова, конференция, перехват вызова, селекторная связь, повтор вызова
- Чёрный список, список разрешённых номеров, режим «Не беспокоить!», план набора
- История вызовов: входящие, исходящие, пропущенные. В каждой по 100 записей.
- Телефонная книга на 500 записей
- Подержка внешней телефонной книги в формате XML
- Поддержка BLF
- Поддержка SMS
- Возможность подключения до 5 консолей расширения
- Возможность установки собственного логотипа
- IP телефоны Fanvil technologies inc. являются полноценными IP телефонами, обладающими необходимым функционалом и характеристиками для работы со всеми известными провайдерами IP телефонии. Сетевые функции:
- WAN / LAN: 10/100 Мбит. Возможность работы в режиме Bridge или Router
- PPPoE
- PoE (опционально)
- VLAN (voice / data)
- Поддержка STUN
- DHCP клиент на стороне WAN
- DHCP сервер на стороне LAN
- DNS Relay, SNTP, Firewall, DMZ
- VPN (L2TP)
- QoS
- Сетевые утилиты: telnet, ping, trace route
- Управление через WEB, telnet или через меню телефона
- Разделение прав доступа для пользователей
- Обновление попротоколам HTTP, FTP или TFTP
- Автообновление (Auto provisioning)
- Поддержка DHCP опции 66
Skip to content
Конференц-звонок с помощью Fanvil C62/C58

В это примере демонстрируется конференц-звонок с помощью телефона Fanvil C62 и C58. Телефоны Fanvil поддерживают режим CTI.
Конференц-звонок
- Позвоните или ответьте на вызов.

- Нажмите программную клавишу “Conf” (Конференция). Первый абонент будет поставлен на удержание.
- Наберите номер абонента, которого требуется добавить в конференцию, и нажмите “Dial” (Набрать). Когда абонент ответит, нажмите “Conf” (Конференция), чтобы добавить его в конференцию.

- Нажмите программную клавишу “Hold” (Удержание), чтобы поставить конференцию на удержание.
- Нажмите программную клавишу “Split” (Разделить), чтобы разделить конференцию на два отдельных звонка.
- Нажмите программную клавишу “End” (Завершить), чтобы завершить конференц-звонок.
С помощью этой процедуры можно провести конференцию с тремя участниками (вы и два других абонента).
Похожие записи
Page load link