Мануал к машинке
Добрый день, Господа!
Представляю Вашему вниманию мануал к VW Jetta V и всем подходящим под этот мануал автомобилей!
Инструкция по ремонту и эксплуатации автомобилей Volkswagen Jetta v 5, Golf v 5, Golf Plus, Touran автомобили с 2003 и с 2005
Мелочь конечно же, но лишней не будет)
яндексдиск.мануал
Войдите или зарегистрируйтесь, чтобы писать комментарии, задавать вопросы и участвовать в обсуждении.
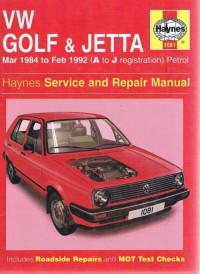
Руководство на английском языке по техническому обслуживанию и ремонту автомобилей Volkswagen Golf и Volkswagen Jetta 1984-1992 годов выпуска с бензиновыми двигателями.
- Автор: —
- Издательство: Haynes Publishing
- Год издания: 1997
- Страниц: 310
- Формат: PDF
- Размер: 7,2 Mb
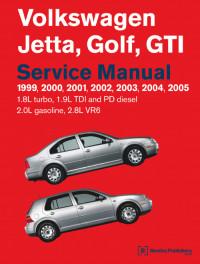
Руководство на английском языке по техническому обслуживанию и ремонту автомобилей Volkswagen Golf/Golf GTI/Jetta 1999-2005 годов выпуска с бензиновыми и дизельными двигателями.
- Автор: —
- Издательство: Bentley Publishers
- Год издания: 2005
- Страниц: 4954
- Формат: PDF
- Размер: 60,9 Mb
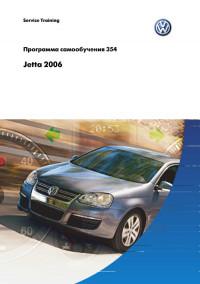
Программа самообучения по устройству автомобиля Volkswagen Jetta 2006 года выпуска.
- Автор: —
- Издательство: Volkswagen AG
- Год издания: —
- Страниц: 39
- Формат: PDF
- Размер: 4,2 Mb
Схемы на английском языке по электрооборудования автомобиля Volkswagen Jetta с 2010 года выпуска.
- Автор: —
- Издательство: Volkswagen AG
- Год издания: —
- Страниц: 1099
- Формат: PDF
- Размер: 21,3 Mb

Сборник руководств на английском языке по техническому обслуживанию и ремонту автомобиля Volkswagen Jetta с 2005 года выпуска.
- Автор: —
- Издательство: Volkswagen AG
- Год издания: 2005-2015
- Страниц: —
- Формат: PDF
- Размер: 179,8 Mb
Сборник руководств на английском языке по техническому обслуживанию и ремонту автомобиля Volkswagen Jetta с 2011 года выпуска.
- Автор: —
- Издательство: Volkswagen AG
- Год издания: 2010-2016
- Страниц: —
- Формат: PDF
- Размер: 206,4 Mb
Руководство по техническому обслуживанию и ремонту автомобилей Volkswagen Golf и Volkswagen Jetta 1984-1992 годов выпуска с бензиновыми двигателями.
- Автор: —
- Издательство: Алфамер
- Год издания: —
- Страниц: 278
- Формат: PDF
- Размер: 17,0 Mb

Руководство по эксплуатации, техническому обслуживанию и ремонту автомобилей Volkswagen Golf и Volkswagen Jetta с 2004 года выпуска с бензиновыми и дизельными двигателями.
- Автор: —
- Издательство: Алфамер
- Год издания: —
- Страниц: 408
- Формат: —
- Размер: —
Мультимедийное руководство по эксплуатации и ремонту автомобилей Volkswagen Golf II и Volkswagen Jetta 1983-1992 годов выпуска.
- Автор: —
- Издательство: —
- Год издания: —
- Страниц: —
- Формат: —
- Размер: 102,4 Mb
Руководство на немецком языке по техническому обслуживанию и ремонту автомобилей Volkswagen Golf V/Golf Plus/Jetta/Touran с 2003 года выпуска.
- Автор: —
- Издательство: Delis Klasing
- Год издания: —
- Страниц: 332
- Формат: PDF
- Размер: 133,2 Mb
Руководство по техническому обслуживанию и ремонту автомобилей Volkswagen Golf до 1983 и Volkswagen Jetta до 1984 года выпуска с дизельными двигателями.
- Автор: —
- Издательство: Автостиль
- Год издания: 1996
- Страниц: 271
- Формат: PDF
- Размер: 46,0 Mb
Руководство на английском языке по ремонту АКПП автомобиля Volkswagen Jetta 1986 года выпуска.
- Автор: —
- Издательство: —
- Год издания: —
- Страниц: 47
- Формат: PDF
- Размер: 2,1 Mb
Руководство по техническому обслуживанию и ремонту автомобилей Volkswagen Golf/Jetta/Scirocco 1974-1984 годов выпуска.
- Автор: —
- Издательство: ПетерГранд
- Год издания: 1998
- Страниц: 217
- Формат: DjVu
- Размер: 12,9 Mb
Руководство по техническому обслуживанию и ремонту автомобилей Volkswagen Golf и Volkswagen Jetta 1984-1992 годов выпуска с бензиновыми двигателями объемом 1,1/1,3/1,6/1,8 л.
- Автор: —
- Издательство: Легион-Автодата
- Год издания: —
- Страниц: 336
- Формат: —
- Размер: —
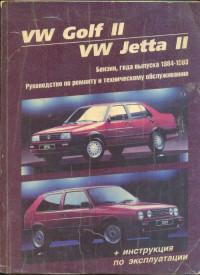
Руководство по эксплуатации, техническому обслуживанию и ремонту автомобилей Volkswagen Golf II и Volkswagen Jetta II 1984-1993 годов выпуска с бензиновыми двигателями.
- Автор: —
- Издательство: Экоинвест
- Год издания: 1997
- Страниц: 331
- Формат: DjVu
- Размер: 31,9 Mb
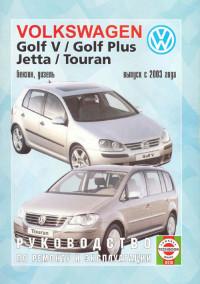
Руководство по эксплуатации и ремонту автомобилей Volkswagen Golf V/Golf Plus/Jetta/Touran с 2003 года выпуска с бензиновыми и дизельными двигателями.
- Автор: —
- Издательство: Гуси-лебеди
- Год издания: 2007
- Страниц: 265
- Формат: PDF
- Размер: 55,7 Mb

Руководство по эксплуатации и ремонту автомобилей Volkswagen Golf V и Volkswagen Jetta с 2003 года выпуска с бензиновыми и дизельными двигателями.
- Автор: —
- Издательство: Монолит
- Год издания: —
- Страниц: 494
- Формат: —
- Размер: —
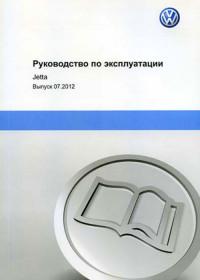
Руководство по эксплуатации и техническому обслуживанию автомобиля Volkswagen Jetta с 2012 года выпуска.
- Автор: —
- Издательство: Volkswagen AG
- Год издания: 2012
- Страниц: 383
- Формат: —
- Размер: 107,4 Mb

Руководство по эксплуатации, техническому обслуживанию и ремонту автомобилей Volkswagen Golf II и Volkswagen Jetta II 1983-1992 годов выпуска с бензиновыми и дизельными двигателями.
- Автор: —
- Издательство: Атласы автомобилей
- Год издания: 2002
- Страниц: 248
- Формат: —
- Размер: —

Руководство по эксплуатации, техническому обслуживанию и ремонту автомобиля Volkswagen Jetta с 2010 года выпуска с бензиновыми двигателями объемом 1,4/1,6 л.
- Автор: —
- Издательство: АНТА-ЭКО
- Год издания: 2014
- Страниц: 404
- Формат: —
- Размер: —

Руководство по эксплуатации, техническому обслуживанию и ремонту автомобилей Volkswagen Bora, Volkswagen Jetta и Volkswagen Golf 1997-2005 годов выпуска.
- Автор: —
- Издательство: Мир Автокниг
- Год издания: 2008
- Страниц: 513
- Формат: PDF
- Размер: 464,8 Mb

- Manuals
- Brands
- Volkswagen Manuals
- Automobile
- Jetta 2005
Manuals and User Guides for Volkswagen Jetta 2005. We have 15 Volkswagen Jetta 2005 manuals available for free PDF download: Service Manual, Workshop Manual, Body Repair Manual, Repair Manual, Maintenance Manual
Volkswagen Jetta 2005 Service Manual (4954 pages)
1.8 L turbo, 1.9 L TDI and PDI diesel. 2.0L Gasoline, 2.8L VR6
Brand: Volkswagen
|
Category: Automobile
|
Size: 108.52 MB
Table of Contents
-
Página 18 de
24
-
Página 7 de
35
-
Table of Contents
83
-
Cylinder Head
96
-
Disassembling and Assembling
115
-
Offset Gaps by
155
-
Fig
158
-
Checking
158
-
Fig
161
-
Position to
164
-
Installation Tool (Funnel)
200
-
Fig
203
-
Functional Check
392
-
Test Conditions
392
-
Coolant Temperature Must be at Least 85
392
-
C, Display Group 1, Display Zone 2
392
-
Test Sequence
393
-
Engine Control Module
394
-
Repair Manual, 2.8 Liter VR6 4V Fuel Injection
394
-
Indicated on Display
394
-
Readiness Code
636
-
Work Step
636
-
Display Display Zone
636
-
Converter (TWC)
642
-
Greater than
643
-
Rpm
733
-
Página 36 de 58
758
-
Display Zone 2
796
-
Checking Voltage Supply Terminal
910
-
Página 26 de
930
-
General Repair Instructions
1032
-
Gear Selector
1079
-
Adjust Selector Mechanism
1109
-
Clutch Housing
1177
-
Input Shaft
1213
-
Página 25 de
1244
-
Adjustment Overview
1320
-
Rapid Data Transfer HELP
1363
-
Select Function XX
1363
-
Página 5 de 10
1452
-
Press Key
1487
-
Indicated on Display
1487
-
By Pressing the HELP Key, a List of
1487
-
If «Control Module Does Not Answer!» Again Appears
1488
-
Indicated on Display
1488
-
Perform Test Steps 1, 2 and
1488
-
Front Brakes
1735
-
Rear Wheel
1788
-
Parking Brake
1831
-
Rear Brake
1868
Advertisement

Volkswagen Jetta 2005 Workshop Manual (515 pages)
Electrical system
Brand: Volkswagen
|
Category: Automobile
|
Size: 13.1 MB
Table of Contents
-
Table of Contents
3
-
Starter, Current Supply, CCS
9
-
Battery a
9
-
Types of Battery
9
-
Warning Notices and Safety Regulations
9
-
Battery Terminal Connection
9
-
Checking Battery a
10
-
Charging Battery a
11
-
Disconnecting and Connecting Battery a
12
-
Disconnecting and Connecting Battery a ( Battery a in Engine Compartment)
12
-
Removing and Installing Battery a
15
-
Removing and Installing Battery a ( Battery a in Engine Compartment)
15
-
Starter B
21
-
Checking Starter B
21
-
Removing and Installing Starter B (Automatic Gearbox)
22
-
Removing and Installing Starter B (DSG)
43
-
Removing and Installing Starter B (Manual Gearbox)
68
-
Alternator C
96
-
Securing Battery Positive Wire on Alternator C
96
-
Checking Poly V-Belt
96
-
Checking Alternator C
97
-
Alternator C 1.4L Petrol Engine
98
-
Alternator C 1.4L FSI Engine
103
-
Alternator C 1.4L, TSI Engine
108
-
Alternator C 1.6L Petrol Engine
114
-
Alternator C 1.6L FSI Engine
118
-
Alternator C 2.0L FSI Engine
122
-
Alternator C 2.0L TFSI Engine
129
-
Alternator C 2.5L Petrol Engine
136
-
Alternator C 1.9L Diesel Engine
139
-
Alternator C 1.9L Diesel Engine with Diesel Particle Filter
146
-
Alternator C 2.0L SDI Engine
152
-
Alternator C 2.0L Diesel Engine
156
-
Alternator C 2.0L CR Diesel Engine
161
-
Alternator C 2.0L TSI Engine
166
-
Removing and Installing Poly-V Belt Pulley on Alternator C
171
-
Voltage Regulator C1 for Alternator C
176
-
Cruise Control System (CCS)
180
-
Gauges, Instruments
181
-
Dash Panel Insert
181
-
Renewing Dash Panel Insert
181
-
Removing and Installing Dash Panel Insert (up to MY2009)
182
-
Removing and Installing Dash Panel Insert (from MY2010)
183
-
Back of Dash Panel Insert (up to MY2009)
184
-
Back of Dash Panel Insert (from MY2010)
184
-
Pin Assignment of Connectors at Dash Panel Insert
184
-
Warning Lamp Symbols on Dash Panel Insert (up to MY2009)
184
-
Warning Lamp Symbols on Dash Panel Insert (from MY2010)
186
-
Service Interval Display
188
-
Resetting Service Interval Display
188
-
Windscreen Wash/Wipe System
189
-
Windscreen Wiper System
189
-
Deactivating Wiper Motor Control Unit J400 APP Function
189
-
Assembly Overview — Windscreen Wiper System
191
-
Removing and Installing Windscreen Wiper System
191
-
Removing and Installing Wiper Arms
196
-
Adjusting Wiper Blade Park Position
196
-
Removing and Installing Joint-Free Wiper Blades
198
-
Removing and Installing Rain and Light Sensor G397
198
-
Coding Rain and Light Sensor G397
200
-
Windscreen Washer System
202
-
Assembly Overview — Windscreen Washer System
202
-
Removing and Installing Washer Fluid Reservoir
203
-
Removing and Installing Windscreen and Rear Window Washer Pump V59
205
-
Removing and Installing Windscreen Washer Fluid Level Sender G33
206
-
Removing and Installing Windscreen Washer System Spray Jets
207
-
Adjusting Windscreen Washer System Spray Jets
207
-
Rear Window Wiper System
208
-
Assembly Overview — Rear Window Wiper System
208
-
Removing Rear Window Wiper
208
-
Adjusting Rear Window Wiper Park Position
210
-
Removing and Installing Joint-Free Wiper Blades
211
-
Rear Window Washer System
213
-
Assembly Overview — Rear Window Washer System
213
-
Removing and Installing Washer Jet
214
-
Adjusting Spray Jet
214
-
Headlight Washer System
215
-
Assembly Overview — Headlight Washer System
215
-
Removing and Installing Headlight Washer System Pump V11
216
-
Removing and Installing Spray Jet Pop-Up Cylinders
217
-
Removing and Installing Spray Jet Assembly
217
-
Adjusting Headlight Washer System Spray Jets
218
-
Bleeding Headlight Washer System
218
-
Washer Fluid Line Hose Couplings
220
-
Hose Repair
221
-
Lights, Bulbs, Switches — Exterior
222
-
Headlights with Halogen Bulbs (up to MY2009)
222
-
Assembly Overview
222
-
Removing and Installing Headlight
223
-
Adjusting Headlight Installation Position
225
-
Renewing Bulbs
226
-
Removing and Installing Headlight Range Control Motor
232
-
Repairing Headlight Retaining Tabs
239
-
Converting Headlights for Use When Driving on the Left or Right
241
-
Adjusting Headlights
243
-
Headlights with Halogen Bulbs (from MY2009)
244
-
General Description
244
-
Assembly Overview
244
-
Removing and Installing Headlight
246
-
Adjusting Headlight Installation Position
248
-
Renewing Bulbs
249
-
Removing and Installing Headlight Range Control Motor
255
-
Repairing Headlight Securing Tabs
259
-
Converting Headlights for Use When Driving on the Left or Right
262
-
Adjusting Headlights
265
-
Headlights with Gas Discharge Bulbs (up to MY2009)
266
-
Operation and Safety Notes for Gas Discharge Bulbs
266
-
Assembly Overview
269
-
Removing and Installing Headlight
270
-
Adjusting Headlight Installation Position
270
-
Renewing Bulbs
270
-
Removing and Installing Headlight Range Control Motor
276
-
Removing and Installing Gas Discharge Light Control Unit
279
-
Control Unit for Headlight Range Control J431
280
-
Vehicle Level Sender
283
-
Repairing Headlight Securing Tabs
284
-
Converting Headlights for Use When Driving on the Left or Right
285
-
Adjusting Headlights
285
-
Headlights with Gas Discharge Bulbs and Cornering Lights (from MY2010)
286
-
General Description
286
-
Assembly Overview
287
-
Removing and Installing Headlight
288
-
Adjusting Headlight Installation Position
290
-
Renewing Bulbs
290
-
Headlight Starter for Gas Discharge Bulb
295
-
Power Output Module for Headlight
296
-
Headlight Range Control Unit J431
298
-
Headlight Range Control Motor
300
-
Swivel Module Position Sensor
300
-
Headlight Screen Adjustment Solenoid
301
-
Vehicle Level Sender
302
-
LED Module for Daytime Running Light and Side Light
302

Volkswagen Jetta 2005 Workshop Manual (372 pages)
Brand: Volkswagen
|
Category: Automobile
|
Size: 12.72 MB
Table of Contents
-
Table of Contents
3
-
Golf Variant 2007 ➤ , Jetta
10
-
Body — Front
11
-
Lock Carrier
11
-
Tools
11
-
Assembly Overview — Lock Carrier, Service Position
12
-
Service Position
12
-
Removing and Installing Lock Carrier with Add-On Parts
14
-
Wing
16
-
Tools
16
-
Assembly Overview — Front Wing
17
-
Removing and Installing Wing
17
-
Removing and Installing Wing Bracket
18
-
Noise Insulation
20
-
Tools
20
-
Assembly Overview — Noise Insulation
21
-
Underbody Cladding
22
-
Tools
22
-
Assembly Overview — Underbody Cladding
23
-
Assembly Overview — Rear Underbody Cladding
24
-
Plenum Chamber Bulkhead
25
-
Tools
25
-
Assembly Overview — Plenum Chamber Bulkhead
25
-
-
Bonnet, Rear Lid
26
-
Bonnet
26
-
Tools
26
-
Assembly Overview — Bonnet
27
-
Removing and Installing Bonnet
27
-
Removing Gas Strut
29
-
Releasing Gas from Gas Strut
29
-
Removing and Installing Lid Hinge
29
-
Removing and Installing Insulation
30
-
Assembly Overview — Bonnet Latch and Release Components
33
-
Removing and Installing Bonnet Lock
33
-
Disconnecting Bowden Cable
34
-
Adjusting Bonnet
35
-
Removing and Installing Release Lever
37
-
Rear Lid (Saloon)
39
-
Tools
39
-
Assembly Overview — Rear Lid
39
-
Removing and Installing Rear Lid
40
-
Removing Gas Strut
40
-
Releasing Gas from Gas Strut
41
-
Removing and Installing Lid Hinge
41
-
Removing and Installing Striker Pin
42
-
Adjusting Rear Lid
43
-
Assembly Overview — Lid Lock and Lock Cylinder Carrier
45
-
Removing and Installing Lock Cylinder
45
-
Removing and Installing Handle Trim
46
-
Removing and Installing Lid Lock
46
-
Rear Lid Seal
47
-
Removing and Installing Rear Lid Seal
48
-
Rear Lid (Variant)
49
-
Tools
49
-
Assembly Overview — Rear Lid
49
-
Removing and Installing Rear Lid
50
-
Removing and Installing Gas Strut
51
-
Releasing Gas from Gas Strut
52
-
Removing and Installing Rear Lid Hinge
52
-
Adjusting Rear Lid
54
-
Removing and Installing Release Button
57
-
Removing and Installing Lid Lock
58
-
Rear Lid Seal
60
-
Removing and Installing Rear Lid Seal
61
-
Registration Plate Carrier
63
-
Fuel Tank Flap Unit (Saloon)
64
-
Assembly Overview — Tank Flap Unit
64
-
Removing and Installing Tank Flap Unit
64
-
Removing and Installing Tank Filler Flap Locking Motor V155
66
-
Fuel Tank Flap Unit (Variant)
68
-
Assembly Overview — Tank Flap Unit
68
-
Removing and Installing Tank Flap Unit
68
-
Removing and Installing Tank Filler Flap Locking Motor V155
70
-
-
Front Doors, Door Components, Central Locking
73
-
Front Door
73
-
Tools
73
-
Materials
74
-
Assembly Overview — Door Assembly
74
-
Assembly Overview — Door Hinges
76
-
Removing and Installing Door
78
-
Adjusting Door
80
-
Removing and Installing Outer Panel on Door
83
-
Installing New Outer Panel on Door
86
-
Removing and Installing Retaining Rail on Door Outer Panel
90
-
Installation Notes for Bonding a New Outer Panel on Door
92
-
Minimum Curing Period
92
-
Cleaning off Excess Adhesive Sealing Material
93
-
Assembly Overview — Door Inner Part
94
-
Assembly Overview — Door Handle and Door Lock
95
-
Removing and Installing Housing
96
-
Removing and Installing Door Handle
96
-
Removing and Installing Bearing Bracket
99
-
Removing and Installing Door Lock
100
-
Assembly Overview — Side Impact Protection
102
-
Door Inner Seal
102
-
Removing and Installing Door Inner Seal
103
-
Removing and Installing Door Outer Seal
104
-
Central Locking
108
-
Fitting Location Overview — Central Locking Components
108
-
Adapting Keys with Remote Control
110
-
Assembly Overview — Battery for Folding Key with Remote Control
110
-
Removing and Installing Battery for Folding Key with Remote Control
111
-
-
Rear Doors, Door Components
112
-
Rear Door (Saloon)
112
-
Tools
112
-
Materials
113
-
Assembly Overview — Door Assembly
113
-
Assembly Overview — Door Hinges
115
-
Removing and Installing Door
117
-
Adjusting Door
119
-
Removing and Installing Outer Panel on Door
122
-
Installing New Outer Panel on Door
125
-
Removing and Installing Retaining Rail on Door Outer Panel
129
-
Installation Notes for Bonding a New Outer Panel on Door
131
-
Minimum Curing Period
131
-
Cleaning off Excess Adhesive Sealing Material
132
-
Assembly Overview — Door Inner Part
133
-
Assembly Overview — Door Handle and Door Lock
134
-
Removing and Installing Housing
134
-
Removing and Installing Door Handle
135
-
Removing Bearing Bracket
137
-
Removing and Installing Door Lock
139
-
Assembly Overview — Side Impact Protection
141
-
Door Inner Seals
141
-
Removing and Installing Door Inner Seal
142
-
Removing and Installing Door Outer Seal
143
-
Rear Door (Variant)
147
-
Tools
147
-
Assembly Overview — Rear Door
148
-
Assembly Overview — Door Hinges
148
-
Removing and Installing Door
150
-
Adjusting Door
152
-
Assembly Overview — Assembly Carrier
154
-
Removing and Installing Assembly Carrier
155
-
Assembly Overview — Door Handle and Door Lock
160
-
Removing and Installing Housing
161
-
Removing and Installing Door Handle
161
-
Removing and Installing Bearing Bracket
164
-
Removing and Installing Door Lock
165
-
Door Inner Seals
165
-
Removing and Installing Door Inner Seal
166
-
Removing and Installing Door Outer Seal
167
-
-
Advertisement
Volkswagen Jetta 2005 Workshop Manual (315 pages)
Electrical System
Brand: Volkswagen
|
Category: Automobile
|
Size: 9.07 MB
Table of Contents
-
Table of Contents
3
-
Jetta 2005 ➤ , Bora
8
-
Starter, Current Supply, CC
9
-
Battery
9
-
Fundamentals for Batteries
9
-
Types of Battery
9
-
Warning Notices and Safety Regulations
10
-
Battery Terminal Connection
12
-
Checking Battery
13
-
Procedure When Checking the Battery
13
-
-
-
Visual Check
13
-
Checking Battery with Magic Eye
14
-
Checking Low Maintenance Battery
15
-
Check no Load Voltage of Battery
18
-
Battery Tester with Printer VAS 5097 a
19
-
Evaluating Test Result
22
-
Charging Battery
23
-
Battery Charger VAS 5095 a
23
-
Battery Charger VAS 5900
27
-
Totally Discharged Batteries
35
-
Disconnecting and Reconnecting Batteries
37
-
Disconnecting Battery
37
-
Connecting Battery
37
-
Removing and Installing Battery
39
-
Models with a Petrol Engine
39
-
Models with a Diesel Engine
40
-
Torque Settings: Battery
44
-
Starter
45
-
Checking Starter B
45
-
Removing and Installing Starter, Automatic Gearbox
46
-
Removing and Installing Starter, Automated Shift Gearboxes
66
-
Removing and Installing Starter, Manual Gearbox
84
-
Torque Settings: Starter
105
-
Alternator
106
-
Fastening B+ Wire to Alternator
106
-
Checking Ribbed Belt (Poly V-Belt)
106
-
Check Alternator C
107
-
Alternator, 1.6 L Injection Engine
107
-
Alternator, 1.6 L FSI Engine
112
-
Alternator, 2.0 L FSI Engine
116
-
Alternator, 2.0 L FSI Turbo Engine
123
-
Alternator 2.5 L Injection Engine
130
-
Alternator, 1.9 L TDI Engine
134
-
Alternator, 2,0 L TDI Engine
141
-
Removing and Installing Ribbed Belt (Poly V-Belt) Pulley on Alternator
145
-
Voltage Regulator for Alternator
150
-
Torque Settings: Alternator
153
-
General Torque Settings for All Vehicles
153
-
L Injection Engine and 2.0 L FSI Engine
153
-
2.0 L FSI Turbo Engine
154
-
1.9 L and 2.0 L TDI Engine
155
-
2.5 L Injection Engine
156
-
Cruise Control System (CCS)
157
-
-
Activating and Deactivating Cruise Control System
157
-
Dash Panel Insert
158
-
Jetta 2005 ➤ , Bora
158
-
Renewing Dash Panel Insert
158
-
Removing and Installing Dash Panel Insert
159
-
Description of Reverse Side of Dash Panel Insert
160
-
Warning Lamp Symbols in Dash Panel Insert
160
-
Resetting Service Interval Display
162
-
Service Interval Display
162
-
-
Instruments, GCI
158
-
Windscreen Wash/Wipe System
163
-
Windscreen Wiper System
163
-
Deactivating APP Function of Wiper Motors
163
-
Removing and Installing the Windscreen Wiper System
164
-
Removing and Installing Wiper Arms
168
-
Adjusting Wiper Blade Park Position
169
-
Removing and Installing Aerodynamic Wipers
170
-
Removing and Installing Rain and Light Detector Sensor G397
171
-
Windscreen Washer System
173
-
Assembly Overview of Windscreen Washer System
173
-
Removing and Installing Reservoir for Windscreen and Headlight Washer Systems
174
-
Removing and Installing Washer Pump V5
176
-
Removing and Installing Windscreen Washer Spray Jets
177
-
Adjusting Front Windscreen Washer System Spray Jets
177
-
Headlight Washer System
178
-
Assembly Overview — Headlight Washer System
179
-
Removing and Installing Headlight Washer System Pump V11
179
-
Removing and Installing Pop-Up Spray Jet Cylinder
180
-
Removing and Installing Spray Jet Assembly
181
-
Adjusting Headlight Washer System Jets
181
-
Bleeding the Headlight Washer System
181
-
Wash Water Line Hose Couplings
182
-
Windscreen and Rear Window Washer System
182
-
Headlight Washer System
183
-
Hose Repair
184
-
General Description
184
-
Repairing Smooth Pipe
184
-
Repairing Corrugated Pipe
184
-
Torque Settings: Windscreen Wash/Wipe System
186
-
Volkswagen Jetta 2005 Workshop Manual (374 pages)
Running gear, axles, steering
Brand: Volkswagen
|
Category: Automobile
|
Size: 12.43 MB
Table of Contents
-
Golf Variant 2007 ➤ , Jetta
8
-
Technical Data
9
-
General Information
11
-
Front Suspension
12
-
Repairing Front Suspension
13
-
Raising Wheel Suspension to Unladen Position
14
-
Subframe, Anti-Roll Bar, Suspension Links
17
-
Assembly Overview: Front Left Vehicle Level Sender G78
22
-
Repairing Thread in Longitudinal Member
23
-
Fixing Position of Subframe and Brackets
24
-
Lowering Subframe
25
-
Removing and Installing Subframe Without Steering Box
29
-
Removing and Installing Subframe with Steering Box
31
-
Repairing Subframe (Front-Wheel Drive)
36
-
Repairing Subframe (Four-Wheel Drive)
39
-
Checking Swivel Joint
43
-
Removing and Installing Swivel Joint
44
-
Removing and Installing Suspension Link with Mounting Bracket
46
-
Renewing Bonded Rubber Bush for Suspension Link
54
-
Renewing Mounting Bracket with Suspension Link Bush
56
-
Removing and Installing Anti-Roll Bar
58
-
Assembly Overview: Wheel Bearing
63
-
Removing and Installing Wheel Bearing Unit
64
-
Removing and Installing Wheel Bearing Housing
66
-
Assembly Overview: Suspension Strut
70
-
Removing and Installing Suspension Strut
71
-
Repairing Suspension Strut
76
-
Removing and Installing Drive Shafts
78
-
Loosening and Tightening 12-Point Flange Bolt Securing Drive Shaft
79
-
Removing and Installing Drive Shaft with Constant Velocity Joint
80
-
Removing and Installing Left Drive Shaft with (Push-On) Constant Velocity Slip Joint
82
-
Removing and Installing Right Drive Shaft with (Push-On) Constant Velocity Slip Joint
86
-
Removing and Installing Drive Shafts with Triple Roller Joint Aar2600I
89
-
Removing and Installing Drive Shafts with Triple Roller Joint Aar3300I
91
-
Removing and Installing Intermediate Shaft
93
-
Repairing Drive Shaft — Overview of Drive Shafts
95
-
Heat Shields for Drive Shafts
97
-
Assembly Overview: Drive Shaft with VL90 or VL100 Constant Velocity Joint
98
-
Dismantling and Assembling Drive Shaft with VL90 or VL100 Constant Velocity Joint
100
-
Checking Outer Constant Velocity Joint
104
-
Checking Inner Constant Velocity Joint
105
-
Assembly Overview: Drive Shaft with VL107 Constant Velocity Joint (Bolt-On)
108
-
Dismantling and Assembling Drive Shaft with VL107 Constant Velocity Joint
110
-
Golf Variant 2007 ➤ , Jetta
111
-
Repairing Intermediate Shaft
115
-
Assembly Overview: Drive Shaft with VL107 Constant Velocity Slip Joint (Push-On)
117
-
10.1 Dismantling and Assembling Drive Shaft with VL107 (Push-On) Constant Velocity Slip Joint
118
-
Checking Outer Constant Velocity Joint
120
-
Assembly Overview: Drive Shaft with Triple Roller Joint Aar2600I
122
-
Dismantling and Assembling Drive Shaft with Triple Roller Joint Aar2600I
123
-
Assembly Overview: Drive Shaft with Triple Roller Joint Aar3300I
128
-
Dismantling and Assembling Drive Shaft with Triple Roller Joint Aar3300I
130
-
Appraisal of Accident Vehicles
135
-
Repairing Rear Suspension (Front-Wheel Drive)
136
-
Rear Axle in Unladen Position
137
-
Assembly Overview: Subframe, Transverse Link, Track Rod (Front-Wheel Drive)
140
-
Removing and Installing Rear Axle
142
-
Vehicle Level Sender for Vehicles with Automatic Headlight Range Control
147
-
Removing and Installing Upper Transverse Link
148
-
Removing and Installing Lower Transverse Link
150
-
Removing and Installing Track Rod
151
-
Assembly Overview: Wheel Bearing Housing, Trailing Arm (Front-Wheel Drive)
155
-
Removing and Installing Wheel Bearing Housing
156
Volkswagen Jetta 2005 Workshop Manual (319 pages)
Brand: Volkswagen
|
Category: Automobile
|
Size: 12.2 MB
Table of Contents
-
Table of Contents
3
-
Golf Variant 2007 ➤ , Golf Variant 2010 ➤ , Jetta
8
-
Interior Equipment
9
-
Interior Mirror
9
-
Tools
9
-
Automatic Anti-Dazzle Interior Mirror
9
-
Removing and Installing Interior Mirror with Rain Sensor
9
-
Bonding on Retaining Plate for Interior Mirror with Rain Sensor
10
-
Removing and Installing Interior Mirror in Vehicles with Adaptive Cruise Control
11
-
Removing and Installing Interior Mirror
13
-
Bonding on Retaining Plate for Interior Mirror Without Rain Sensor
13
-
Compartments, Covers and Trims
15
-
Tools
15
-
Removing and Installing Basic Version Centre Console (Jetta 2010 ▸, Golf Variant 2010 ▸)
19
-
Removing and Installing Highline Centre Console (Jetta 2005 ▸, Golf Variant 2007 ▸)
24
-
Removing and Installing Highline Centre Console (Jetta 2010 ▸, Golf Variant 2010 ▸)
33
-
Removing and Installing Mounting Bracket for Centre Console (Jetta 2005 ▸, Golf Variant 2007 ▸)
43
-
Removing and Installing Mounting Bracket for Centre Console and Mounting Bracket for Footwell Trim (Jetta 2010 ▸, Golf Variant 2010 ▸)
44
-
Removing and Installing Cup Holder in Highline Centre Console
45
-
Repairing Cup Holder in Centre Console, Highline
46
-
Removing and Installing Dash Panel Centre Vents (Vehicles with no Climatronic) (Jetta 2005 ▸, Golf Variant 2007 ▸)
51
-
Removing and Installing Dash Panel Centre Vents (Vehicles with Climatronic) (Jetta 2005 ▸, Golf Variant 2007 ▸)
53
-
Removing and Installing Centre Storage Compartment in Dash Panel (Jetta 2010 ▸, Golf Variant 2010 ▸)
56
-
Removing and Installing Dash Panel Centre Vents (Jetta 2010 ▸, Golf Variant 2010 ▸)
57
-
Removing and Installing Dash Panel Middle Trim (Jetta 2005 ▸, Golf Variant 2007 ▸)
59
-
Removing and Installing Dash Panel Middle Trim (Jetta 2010 ▸, Golf Variant 2010 ▸)
60
-
Removing and Installing Air Conditioner Controls Unit / Heater Controls Unit Trim (Jetta 2010 ▸, Golf Variant 2010 ▸)
61
-
Removing and Installing Dash Panel End Trims
62
-
Removing and Installing Steering Column Trim
63
-
Removing and Installing Left Trim Panel on Driver Side with no Storage Compartment
64
-
Removing and Installing Left Trim Panel on Driver Side with Storage Compartment
66
-
Removing and Installing Right Trim Panel on Driver Side
68
-
Removing and Installing Glove Compartment
70
-
Removing and Installing Glove Compartment Lock Cylinder
74
-
Removing and Installing Footwell Cover on Driver Side
75
-
Removing and Installing Centre Cover (Jetta 2005 ▸, Golf Variant 2007 ▸)
80
-
Removing and Installing Centre Cover (Jetta 2010 ▸, Golf Variant 2010 ▸)
80
-
Removing and Installing Sun Visor
81
-
Sill Panel Mouldings
85
-
Removing and Installing Sill Panel Mouldings
85
-
Removing and Installing Wheel Housing Liner (Saloon)
86
-
Removing and Installing Wheel Housing Liner (Variant)
87
-
Grab Handles
89
-
Removing and Installing Roof Grab Handles
89
-
Removing and Installing Roof Grab Handle Bracket
90
-
Net Partition
92
-
Removing and Installing Net Partition
92
-
Removing and Installing Net Partition Mountings
93
-
Removing and Installing Net Partition Bracket on Vehicles with no Panorama Sliding Roof
94
-
Removing and Installing Net Partition Bracket on Vehicles with Panorama Sliding Roof
95
-
-
Passenger Protection
96
-
Seat Belts
96
-
General Safety Regulations When Working on Airbag, Belt Tensioner and Battery Isolator Units (Pyrotechnic Components)
97
-
Special Instructions for Belt Tensioners
98
-
Storage, Transportation and Disposal of Airbag, Belt Tensioner and Battery Isolator Units (Pyrotechnic Components)
98
-
Assembly Overview — Front Seat Belts
99
-
Removing and Installing Front Seat Belts
99
-
Removing and Installing Front Belt Height Adjuster
101
-
Removing and Installing Front Belt Buckle
102
-
Assembly Overview — Rear Outer Seat Belts (Saloon)
104
-
Removing and Installing Rear Outer Seat Belts (Saloon)
104
-
Assembly Overview — Rear Outer Seat Belts (Variant)
106
-
Removing and Installing Rear Outer Seat Belts (Variant)
106
-
Assembly Overview — Rear Centre 3-Point Seat Belt
108
-
Removing and Installing Rear Centre 3-Point Seat Belt
108
-
Removing and Installing Middle Rear Seat Lap Belt
109
-
Removing and Installing Rear Double Belt Buckle
110
-
Inspecting Seat Belts
112
-
Points to Check
112
-
Checking Child Seat Anchors (ISOFIX) after an Accident
116
-
Points to Check
116
-
Removing and Installing Child Seat Anchorages in Rear Shelf
116
-
Airbag
117
-
Overview of Locations — Airbag Systems
117
-
General Safety Regulations When Working on Airbag, Belt Tensioner and Battery Isolator Units (Pyrotechnic Components)
119
-
Special Instructions for Driver and Front Passenger Airbag
120
-
Special Instructions for Curtain Airbag Modules
120
-
Storage, Transportation and Disposal of Airbag, Belt Tensioner and Battery Isolator Units (Pyrotechnic Components)
120
-
Deactivating the Airbag
120
-
Renewing Airbag Units Following an Accident
121
-
Removing and Installing Airbag Control Unit J234
122
-
Removing and Installing Airbag Unit on Driver Side (Jetta 2005 ▸, Golf Variant 2007 ▸)
124
-
Removing and Installing Airbag Unit on Driver Side (Jetta 2010 ▸, Golf Variant 2010 ▸)
128
-
Removing and Installing Airbag Coil Connector and Return Spring with Slip Ring F138
131
-
Removing and Installing Key Operated Switch to Deactivate Front Passenger Airbag E224
131
-
Removing and Installing Knee Airbag (Jetta 2010 ▸, Golf Variant 2010 ▸)
132
-
Drive Vehicles
134
-
Drive Vehicles
136
-
-
Removing and Installing Return Spring with Slip Ring
138
-
Removing and Installing Front Passenger Airbag Unit
138
-
Removing and Installing Side Airbags on Driver and Front Passenger Sides
143
-
Removing and Installing Rear Side-Airbag
144
-
Removing and Installing Curtain Airbag on Driver and Passenger Side (Saloon)
146
-
Removing and Installing Curtain Airbag on Driver and Passenger Side (Variant)
148
-
Removing and Installing Seat Occupied Sensor, Front Passenger Side G128
150
-
Adapting Components
155
-
Seat Occupied Recognition (USA)
156
-
Safety Precautions for When Working on Seat Occupied Recognition
156
-
Procedure for Seat Belt Tensioner after an Accident and /Or Triggering of Airbag
156
-
Assembly Overview — Seat Occupied Recognition (USA)
157
-
Parts Repair Kit for Seat Occupied Recognition
157
-
Removing and Installing Repair Kit for Seat Occupied Recognition on Vehicles with Manually Adjusted Seats
158
-
Removing and Installing Repair Kit for Seat Occupied Recognition on Vehicles with Electrically Adjusted Seats
167
-
Importers Reporting Obligation
176
-
Crash Sensors
178
-
Tools
178
-
Removing and Installing Side Airbag Crash Sensor on Driver Side G179
181
-
Variant 2010 ▸)
181
-
Removing and Installing Side Airbag Crash Sensor on Front Passenger Side G180 (Jetta 2010 ▸, Golf Variant 2010 ▸)
183
-
Removing and Installing Crash Sensors in Rear Wheel Housing (Saloon)
183
-
Removing and Installing Crash Sensors in Rear Wheel Housing (Variant)
185
-

Volkswagen Jetta 2005 Workshop Manual (246 pages)
Brand: Volkswagen
|
Category: Automobile
|
Size: 9.73 MB
Table of Contents
-
Table of Contents
3
-
Technical Data
5
-
Gearbox Identification
5
-
Location on Gearbox
5
-
Identification Code, Assembly Allocation and Capacities
5
-
Golf Variant 2007 ➤ , Golf Variant 2010 ➤ , Jetta 2005 ➤ , Jetta
5
-
Overview — Power Transmission
9
-
Calculating Overall Gear Ratio „I
11
-
General Repair Notes
12
-
Contact Corrosion
12
-
Special Tools
12
-
Components
12
-
-
Clutch
16
-
Fault Finding, Power Transmission
16
-
Repairing Clutch Mechanism
17
-
Overview
17
-
Assembly Overview — Pedal Cluster
18
-
Removing and Installing Over-Centre Spring
19
-
Removing and Installing Clutch Pedal
23
-
Removing and Installing Mounting Bracket
27
-
Removing and Installing Master Cylinder
33
-
Removing and Installing Clutch Position Sender G476
34
-
Assembly Overview — Hydraulics (LHD)
38
-
Assembly Overview — Hydraulics (RHD)
40
-
Bleeding Clutch System
41
-
Repairing Clutch Release Mechanism
43
-
Removing Pipe/Hose Line and Bleeder from and Installing on Slave Cylinder
44
-
Removing and Installing Slave Cylinder with Release Bearing
44
-
Removing and Installing Pipe/Hose Line or Plastic Line
45
-
Renewing Input Shaft Seal
47
-
Repairing Clutch — Vehicles with Turbo Diesel Engine
49
-
Determining Clutch Manufacturer
49
-
Removing and Installing „Sachs» Clutch
51
-
Repairing „Sachs» Clutch
54
-
Removing and Installing „Luk» Clutch
54
-
Repairing „Luk» Clutch
57
-
Repairing Clutch — Vehicles with Petrol Engine
58
-
Repairing Clutch
59
-
Removing and Installing Clutch
59
-
-
Controls, Housing
63
-
Repairing Selector Mechanism
63
-
Installation Position of Selector Mechanism
63
-
Overview of Selector Mechanism
64
-
Removing and Installing Gear Knob and Frame
66
-
Removing and Installing Gaiter with Gear Knob and Noise Insulation
66
-
Repairing Gear Lever and Selector Housing (through 10.06)
68
-
Repairing Gear Lever and Selector Housing (from 11.06)
70
-
Assembly Overview — Removing and Installing Selector Cables
75
-
Plastic Relay Lever
79
-
Removing and Installing Selector Mechanism
82
-
Removing and Installing Gear Selector Cable and Gate Selector Cable
84
-
Adjusting Selector Mechanism
86
-
Functional Check
88
-
Removing and Installing Gearbox in Vehicles with Turbo Diesel Engine
89
-
Removing Gearbox
89
-
Transporting Gearbox
100
-
Installing Gearbox
101
-
Specified Torques
108
-
Removing and Installing Gearbox, Vehicles with Petrol Engine
110
-
Removing Gearbox
110
-
Transporting Gearbox
120
-
Installing Gearbox
121
-
Specified Torques
128
-
Checking Gearbox Oil
130
-
Dismantling and Assembling Gearbox
132
-
Overview — Rear Final Drive
132
-
Assembly Overview
133
-
Removing and Installing Gearbox Housing and Selector Mechanism
134
-
Removing and Installing Input Shaft, Output Shafts, Differential and Selector Rods
136
-
Assembly Order, Gearbox »Without« Retaining Ring a for Input Shaft Sealing Cover
138
-
Assembly Order, Gearbox »With« Retaining Ring a for Input Shaft Sealing Cover
149
-
Repairing Gearbox Housing
161
-
Repairing Clutch Housing
171
-
Repairing Selector Unit
176
-
Renewing Oil Seal for Selector Shaft
177
-
Repairing Selector Forks
179
-
Volkswagen Jetta 2005 Body Repair Manual (230 pages)
Brand: Volkswagen
|
Category: Automobile
|
Size: 7.29 MB
Table of Contents
-
Body Repairs
1
-
Technical Data
7
-
Identification Plate
8
-
Safety Instructions
10
-
Moulded Foam Elements
11
-
Laser Welding
12
-
Galvanized Body Parts
13
-
Floor Group
14
-
High Strength Body Parts
15
-
Floor Group
16
-
Body Panel Gaps/Shut Lines
18
-
Body — Centre
20
-
Body — Rear
21
-
Body Dimensions
24
-
Body — Centre
29
-
Body — Rear
34
-
Floor Group — Front
37
-
Floor Group — Centre
40
-
Floor Group — Rear
42
-
Alignment Jig
45
-
Overview
46
-
Front Alignment Bracket
47
-
Centre Alignment Bracket
52
-
Rear Alignment Bracket
54
-
Portal Gauge
56
-
Renewing Right-Hand Bracket
58
-
Installing
59
-
Renewing Left Console
61
-
Removing
62
-
Installing
63
-
Renewing Retaining Bracket
64
-
Installing
65
-
Renewing Front Bumper Bracket
67
-
Installing
68
-
Renewing Upper Wheel Housing Longitudinal Member
70
-
Removing
71
-
Renewing Upper Longitudinal Member for Wheel Housing — Partial Renewal
73
-
Installing
74
-
Renewing Front Wheel Housing
76
-
Installing
77
-
Repairing Threads for Securing Subframe (Suspension Subframe)
78
-
Contents of Thread Repair Kit
79
-
Repairing Thread
80
-
Renewing Front Longitudinal Member
83
-
Removing
84
-
Installing
86
-
Renewing Front Longitudinal Member — Partial Replacement
91
-
Removing
92
-
Installing
93
-
Renewing Roof
95
-
Removing
96
-
Installing
97

Volkswagen Jetta 2005 Maintenance Manual (214 pages)
Brand: Volkswagen
|
Category: Automobile
|
Size: 5.89 MB
Table of Contents
-
Table of Contents
3
-
1 Engine List
5
-
In Litres Number of Cylinders 4
8
-
Engine List
9
-
-
2 Service Work
10
-
Service Tables for «Rest of World» Markets
10
-
Spark Plugs
13
-
Service Scope for North American and Canadian Markets
15
-
Service Scope for «Rest of World» Markets up to Model Year 2007
21
-
Page
21
-
Service Scope for «Rest of World» Markets from Model Year 2008
29
-
Oil Change Service
29
-
Interval Service
31
-
Inspection Service
32
-
-
Service Intervals for «Rest of World» Markets
39
-
Service Intervals for North American and Canadian Markets
39
-
Information on Longlife Service or Time or Distance Dependent Service
40
-
-
3 General
41
-
Tow Starting/Towing for North American and Canadian Markets
41
-
Raising Vehicle with Lifting Platform and Trolley Jack
45
-
Sticker
45
-
Delivery Inspection
46
-
Connecting Vehicle Diagnostic Tester
47
-
Vehicle Identification Number
50
-
Vehicle Data Sticker
50
-
Countries with Elevated Sulphur Content in Diesel Fuel
51
-
Severe Operating Conditions
51
-
Engine Code and Engine Number
52
-
Engine Oils for North American and Canadian Markets
52
-
Engine Oils for «Rest of World» Markets
52
-
RME Fuel -Biodiesel- for Vehicles up to 05.2006
53
-
Type Plate
53
-
-
4 Descriptions of Work
55
-
Removable Towing Bracket: Check
57
-
Swivel Joints: Visual Check
59
-
Driving Light Assist and Cornering Light: Check Function
59
-
Automatic Gearbox: Check ATF Level, 09G Gearbox
60
-
Battery: Check Battery Terminal Clamps for Secure Seating
60
-
Battery: Check Using Battery Tester with Printer VAS 5097A
62
-
Front Passenger Front Airbag: Check Activation / Deactivation for Vehicles Without Seat
62
-
Occupied Recognition
62
-
Checking Tyres: Condition, Wear Pattern, Inflation Pressure, Tread Depth
63
-
General Notes
65
-
Brake and Clutch System: Change Brake Fluid
71
-
Brake Fluid Level: Check
75
-
Brake System: Perform Visual Check for Leaks and Damage
76
-
Front and Rear Brake Pads/Linings: Check Thickness
76
-
Front Brake Pads
77
-
Checking Diesel Particulate Filter
78
-
6-Speed Dual Clutch Gearbox (DSG) 02E: Change Oil and Filter
78
-
Electric Windows: Check Positioning (Open and Close Functions)
79
-
Vehicle System Test: Perform Test
79
-
Protective Bellows: Visual Check
80
-
Renewing Rubber Buffers for Engine Cover
81
-
Haldex Coupling (Jetta 4Motion): Change Oil
82
-
Poly V-Belt: Adjust Tension on Engines Without Automatic Tensioning Roller
85
-
Poly V-Belt: Check Condition
86
-
Dash Panel Insert: Adapt Menu Language Versions
87
-
Compass: Set Compass Zone and Calibrate Compass (for North American, Canadian and Mexican Markets)
88
-
Multifunction Steering Wheel
88
-
Cooling System: Check Frost Protection and Coolant Level
92
-
Fuel Filter: Renew
95
-
Air Filter: Clean Housing and Renew Filter Element
99
-
Memory Seat: Perform Initialisation
108
-
Engine and Components in Engine Compartment (from above and Below): Perform Visual Check for Leaks and Damage
109
-
Engine Cover -Top-: Removing and Installing
109
-
Removing and Installing Engine Compartment Cover -Bottom- (Noise Insulation)
120
-
Engine Oil Level: Check
121
-
Engine Oil: Drain or Extract; Renew Oil Filter and Replenish Engine Oil
121
-
Checking Breakdown Set
137
-
Panorama Sliding Roof: Check Function, Clean Guide Rails if Necessary and Grease with Special Grease, Clean Wind Deflector
138
-
Performing Road Test (Driving Behaviour, Noises, Air Conditioner Etc.)
139
-
Wheel Securing Bolts: Tighten to Prescribed Torque Setting
140
-
Reading Radio Code with Fault Reader
143
-
Radio/Navigation System: Activate Anti-Theft Coding
144
-
Tyre Pressure Monitoring: Perform Basic Setting
148
-
Renewing Tyre Pressure Sensors
150
-
Dust and Pollen Filter: Clean Housing and Renew Filter Element
150
-
Headlight Adjustment: Check
151
-
Adjusting Headlights
155
-
Service Interval Display: Reset
157
-
Service Interval Display: Recode (for «Rest of World» Markets)
158
-
Service Interval Display: Recode at Delivery Inspection
160
-
Markets)
160
-
Service Interval Display: Recode at First Oil Change Service (for North American and Canadian Markets)
162
-
Sunroof: Check Function, Clean and Grease Guide Rails
164
-
Window Wash/Wipe System and Headlight Washer System: Check Function
164
-
Wiper Blades: Check Park Position
169
-
Wiper Blade Protection: Remove
170
-
Track Rod Ends: Check Play, Security and Boots
173
-
Auxiliary Heater: Set Weekday in Menu of Combi-Instrument
173
-
Door Arrester: Grease
174
-
Transportation Mode: Switch off
174
-
Transportation Devices: Remove Blocking Pieces from Front Axle Springs
176
-
Underbody Sealant: Perform Visual Check for Damage to Underbody Sealant, Underbody Panels, Routing of Lines and Plugs
176
-
Clock and Date: Set to Correct Time
177
-
Camshaft Drive Toothed Belt: Check (TDI Unit Injector Engines)
178
-
Toothed Belt and Toothed Belt Tensioning Roller: Renew (TDI Engines)
178
-
Camshaft Drive Toothed Belt: Renew (2.0 L FSI and TFSI)
179
-
Camshaft Drive Toothed Belt: Check (4-Cylinder Petrol Engines 1.4 L and 1.6 L)
179
-
Spark Plugs: Renew
179
-

Volkswagen Jetta 2005 Repair Manual (224 pages)
Brand: Volkswagen
|
Category: Automobile
|
Size: 15.42 MB
Table of Contents
-
Table of Contents
3
-
General, Technical Data
5
-
Transmission Identification
5
-
Overview — Transmission
6
-
Engine Codes, Engine Allocation
7
-
Capacities
8
-
Safety Precautions
9
-
General Safety Precautions
9
-
Safety Precautions When Working on Vehicles with Start/Stop System
9
-
Safety Precautions During Road Test with Testing Equipment
10
-
Tow Starting and Towing Notes
11
-
General Repair Information
12
-
Tools
12
-
Transmission
12
-
Working with Vehicle Diagnostic Testers
17
-
-
Clutch
19
-
Dual Clutch, Removing and Installing, through Transmission Production Date 05/2011
19
-
Overview — Dual Clutch, through Transmission Production Date 05/2011
19
-
Dual Clutch, Removing, through Transmission Production Date 05/2011
21
-
K 1″ and «K 2» Clutch Engaging Bearing Position, Adjusting, Transmission Production Date through 05/2011
24
-
Dual Clutch, Installing, Transmission Production Date through 05/2011
37
-
Dual Clutch, Removing and Installing, from Transmission Production Date 06/2011
44
-
Overview — Dual Clutch, Transmission Production Date from 06/2011
44
-
Dual Clutch, Removing, Transmission Production Date from 06/2011
46
-
K 1″ and «K 2» Clutch Engaging Bearing Position, Adjusting, Transmission Production Date from 06/2011
49
-
Dual Clutch, Installing, Transmission Production Date from 06/2011
62
-
Clutch-Side Seals, Removing and Installing
67
-
Special Tools
70
-
-
Controls, Housing
74
-
Transmission Fluid, Replacing
74
-
Selector Mechanism
78
-
Selector Mechanism Overview, through 02/2009
78
-
Selector Lever Cable, Removing and Installing, through 02/2009
80
-
Selector Mechanism Overview, from 03/2009
88
-
Selector Mechanism, Removing and Installing, Vehicles from 03/2009
89
-
Selector Lever Cable, Checking
97
-
Selector Lever Cable, Adjusting
98
-
Selector Lever, Emergency Release
100
-
Selector Lever Handle, Removing and Installing
100
-
Button in Handle, Moving into Installation Position
103
-
Selector Mechanism, Checking
105
-
DSG Transmission Mechatronic J743
107
-
DSG Transmission Mechatronic J743 Safety Precautions
107
-
Overview — Mechatronic
108
-
DSG Transmission Mechatronic J743 , Removing with Transmission Installed
109
-
DSG Transmission Mechatronic J743 , Moving into «Removal Position» by Hand
119
-
DSG Transmission Mechatronic J743 , Moving into Re- Moval Position by Hand
119
-
DSG Transmission Mechatronic J743 , Installing
123
-
Overview — Shift Forks with Mechatronic Removed
129
-
Transmission, Removing and Installing, Jetta from MY 2005, Golf Wagon from MY 2007 and Golf Wagon from MY 2010
131
-
Transmissions with Different Output Shafts
131
-
Transmission, Removing, Vehicles with 1.4L/90 Kw TFSI Engine and 1.4L/118 Kw TSI Engine
131
-
Transmission, Removing, Vehicles with 1.6L/75 Kw MPI Engine
139
-
Transmission, Removing, Vehicles with 1.9L 77 Kw TDI PD Engine
147
-
Transmission, Removing, Vehicles with 1.6L/77 Kw TDI CR Engine
154
-
Transmission, Installing, Jetta from MY 2005, Golf Wagon from MY 2007, Golf Wagon from
161
-
Transmission to Engine» Tightening Specifications and Subframe Mount Information
165
-
Transmission, Removing and Installing, Jetta from MY 2011
170
-
Transmission, Removing, Jetta 2011 with 1.4L/90 Kw TFSI Engine and 1.4L/118 Kw TSI Engine
170
-
Transmission, Removing, Jetta 2011 with 1.6L/77 Kw TDI CR Engine
179
-
Transmission, Installing, Jetta MY 2011
187
-
Tightening Specifications
192
-
Transmission, Transporting and Securing to Assembly Stand
195
-
Special Tools
198
-

Volkswagen Jetta 2005 Service Manual (206 pages)
6-speed manual gearbox 02S
Brand: Volkswagen
|
Category: Automobile
|
Size: 11.23 MB
Table of Contents
-
Table of Contents
3
-
Technical Data
5
-
Gearbox Identification
5
-
Location on Gearbox
5
-
Identification Code, Assembly Allocation and Capacities
5
-
Overview — Power Transmission
9
-
Calculating Overall Gear Ratio «I
11
-
General Repair Notes
12
-
Components
12
-
-
Clutch
16
-
Fault Finding, Power Transmission
16
-
Repairing Clutch Mechanism
17
-
Overview
17
-
Assembly Overview — Pedal Cluster
18
-
Removing and Installing Over-Centre Spring
19
-
Removing and Installing Clutch Pedal
24
-
Removing and Installing Mounting Bracket
29
-
Removing and Installing Master Cylinder
35
-
Removing and Installing Clutch Position Sender G476
37
-
Assembly Overview — Hydraulics (LHD Vehicles)
41
-
Assembly Overview — Hydraulics (RHD Vehicles)
43
-
Removing and Installing Slave Cylinder
44
-
Bleeding Clutch System
46
-
Repairing Clutch Release Mechanism
48
-
Repairing Clutch, in Conjunction with Dual-Mass Flywheel
50
-
Determining Clutch Manufacturer
50
-
Removing and Installing Sachs Clutch
52
-
Repairing Sachs Clutch
54
-
Removing and Installing Luk Clutch
54
-
Repairing Luk Clutch
57
-
Repairing Clutch, in Conjunction with One-Piece Flywheel
58
-
-
Controls, Housing
61
-
Fault Finding, Power Transmission
61
-
Repairing Selector Mechanism
62
-
Installation Position of Selector Mechanism
62
-
Overview of Selector Mechanism
63
-
Removing and Installing Gear Knob and Frame
65
-
Removing and Installing Gaiter with Gear Knob and Noise Insulation
65
-
Repairing Gear Lever and Selector Housing (through 10.06)
67
-
Repairing Gear Lever and Selector Housing (from 11.06)
69
-
Assembly Overview — Removing and Installing Selector Cables
74
-
Plastic Relay Lever
77
-
Removing and Installing Selector Mechanism
79
-
Removing and Installing Gear Selector Cable and Gate Selector Cable
82
-
Adjusting Selector Mechanism
84
-
Functional Check
86
-
Removing and Installing Gearbox
88
-
Removing Gearbox
89
-
Transporting Gearbox
95
-
Installing Gearbox
96
-
Specified Torques
100
-
Checking and Topping up Gear Oil
103
-
Preparation
103
-
Draining Gear Oil
104
-
Filling with Gear Oil
105
-
Dismantling and Assembling Gearbox
106
-
Overview — Gearbox
106
-
Assembly Overview
107
-
Removing and Installing Cover for Gearbox Housing and 5Th and 6Th Gear
108
-
Removing and Installing Gearbox Housing and Shift Mechanism
111
-
Removing and Installing Input Shaft, Output Shaft, Differential and Selector Forks
112
-
Gear
113
-
Assembly Sequence — Dismantling and Assembling Gearbox Completely
119
-
Repairing Gearbox Housing and Clutch Housing
136
-
Repairing Gearbox Housing Cover
142
-
Repairing Selector Unit
146
-
Dismantling and Assembling Selector Forks
149
-
Volkswagen Jetta 2005 Workshop Manual (180 pages)
Brand: Volkswagen
|
Category: Automobile
|
Size: 1.72 MB
Table of Contents
-
Table of Contents
5
-
Technical Data
7
-
1 General Notes on Air Conditioning Systems
7
-
Introduction
7
-
Additional Information
7
-
Basics of Air Conditioning
8
-
Vapour Pressure Table for Refrigerant R134A
9
-
Refrigerant R134A
10
-
Characteristics of Refrigerant R134A
11
-
Refrigerant Machine Oil
13
-
Comfort
15
-
How Air Conditioning Works
15
-
General Safety
16
-
Safety Precautions for When Working on Vehicles with Air Conditioning and When Handling
19
-
Refrigerant R134A
19
-
-
Basics for Working on Refrigerant Circuit
20
-
-
2 General Information on Refrigerant Circuit
23
-
Refrigerant Circuit Components
23
-
Design of Refrigerant Circuit
31
-
Evacuation and Charging Valves for Quick-Release Couplings of Air Conditioner Service Station
31
-
On Refrigerant Circuit
31
-
-
Switch and Sender in Refrigerant Circuit and Related Connections
33
-
Electrical Components Not Installed in Refrigerant Circuit
36
-
Pressures and Temperatures in the Refrigerant Circuit
38
-
Refrigerant Circuit with Expansion Valve
38
-
Refrigerant Circuit with Restrictor and Reservoir
40
-
Test and Measurement Work that Can be Performed Using a Pressure Gauge
42
-
Air Conditioner Service and Recycling Equipment
43
-
Notes to Repairs on Refrigerant Circuit
44
-
-
3 Statutory Texts and Instructions
45
-
Statutes and Regulations
45
-
Recycling and Refuse Law
50
-
Converting R12 Refrigerant Circuits to R134A Refrigerant Circuits and Repairing Them (Retrofitting)
51
-
Maintaining Records on Refrigerant
51
-
-
4 Refrigerant Circuit
52
-
Important Repair Notes on Air Conditioning
52
-
Retrofitting Refrigerant Circuit from R12 Refrigerant to R134A Refrigerant
52
-
-
5 Working with the Air Conditioner Service Station
53
-
Important Notes for Working with the Air Conditioner Service Station
54
-
Connecting Air Conditioner Service Station for Measuring and Checking
54
-
Draining Refrigerant Circuit Using Air Conditioner Service Station
55
-
Evacuating Refrigerant Circuit Using Air Conditioner Service Station
56
-
Charging Refrigerant Circuit Using Air Conditioner Service Station
57
-
Bringing Air Conditioning System into Service after Charging
58
-
Charging Container in Air Conditioner Service Station with Refrigerant
59
-
Draining Air Conditioner Service Station
59
-
-
6 Detecting Leaks in Refrigerant Circuit
61
-
Leak Detection in Refrigerant Circuit Using Compressed Air or Nitrogen
62
-
Searching for Leaks in Refrigerant Circuits Using Leak Detector V.A.G 1796
64
-
Detecting Leaks in Refrigerant Circuit Using Leak Detecting System VAS 6196 or Leak Detecting
65
-
System VAS 6201 or a Later Model
65
-
-

Volkswagen Jetta 2005 Workshop Manual (116 pages)
Brand: Volkswagen
|
Category: Automobile
|
Size: 4.24 MB
Table of Contents
-
Table of Contents
3
-
Technical Data
5
-
Suggestions and Criticism, General Repair Notes
5
-
Suggestions and Criticism of this Workshop Manual
5
-
Golf Variant 2007 ➤ , Golf Variant 2010 ➤ , Jetta 2005 ➤ , Jetta
5
-
General Repair Notes
6
-
Gearbox
6
-
Torque Converter
6
-
Atf
6
-
Automatic Gearbox Control Unit J217 with Fuzzy Logic
6
-
Control Units in Vehicle
6
-
Information on «09G Gearbox
6
-
Tools
6
-
Gearbox
7
-
Gaskets, Seals and Oil
8
-
Nuts and Bolts
8
-
Electrical Components
8
-
Guided Fault Finding, Vehicle Self-Diagnosis and Testing
9
-
Gearbox Identification
10
-
Gearbox Codes
10
-
Capacities
11
-
Planetary Gearbox and Final Drive
11
-
Codes, Gearbox Allocation, Ratios
12
-
-
Torque Converter
13
-
Identification of Torque Converter
13
-
Draining Torque Converter
13
-
Removing and Installing Torque Converter Oil Seal
13
-
Installing Torque Converter
14
-
-
Controls, Housing
15
-
Connecting «Tester
15
-
Connecting Vehicle Diagnosis, Testing and Information System VAS 5051
15
-
Electrical and Electronic Components and Their Locations
17
-
Multifunction Switch F125
22
-
Removing Multifunction Switch F125
22
-
Installing Multifunction Switch F125
23
-
Adjusting Multifunction Switch F125
24
-
Selector Mechanism up to 02.2009
26
-
Overview of Selector Mechanism up to 02.2009
26
-
Removing and Installing Selector Mechanism with Selector Lever up to 02.2009
27
-
Removing and Installing Selector Lever Cable up to 02.2009
27
-
Checking Selector Lever Cable
34
-
Adjusting Selector Lever Cable
34
-
Emergency Release of Selector Lever
35
-
Removing and Installing Knob
36
-
Checking Selector Mechanism
37
-
Selector Mechanism from 03.2009 Onwards
39
-
Overview of Selector Mechanism in Vehicles from 03.2009 Onwards
39
-
Onwards
39
-
Emergency Release of Selector Lever
41
-
Removing and Installing Gearbox, Jetta 2005 ▸, Bora 2006 ▸, Golf Variant 2007 ▸, Jetta Wagon 2008
42
-
Removing Gearbox, Vehicles with 1.6 L — 75 Kw and 2.0 L — 110 Kw (FSI) Engines
42
-
Installing Gearbox, Vehicles with 1.6 L — 75 Kw and 2.0 L — 110 Kw (FSI) Engines
49
-
Removing Gearbox, Vehicles with 2.5 L, 110 Kw Engine
49
-
Installing Gearbox, Vehicles with 2.5 L, 110 Kw Engine
57
-
Torque Settings, Gearbox to Engine
58
-
Removing and Installing Gearbox, Jetta 2011
61
-
Removing Gearbox, Jetta 2011 with 2.0 L — 85 Kw Engine
61
-
Installing Gearbox, Jetta 2011 with 2.0 L — 85 Kw Engine
67
-
Removing Gearbox, Jetta 2011 with 2.5 L — 125 Kw Engine
67
-
Installing Gearbox, Jetta 2011 with 2.5 L — 125 Kw Engine
76
-
Torque Settings, Gearbox to Engine
76
-
Transporting Gearbox
79
-
ATF Cooler
80
-
Assembly Overview — ATF Cooler
80
-
Checking ATF Level and Topping up
81
-
Checking ATF Level
82
-
Topping up ATF
83
-
Draining and Filling ATF
84
-
Volkswagen Jetta 2005 Workshop Manual (123 pages)
Electrical System, General Information
Brand: Volkswagen
|
Category: Automobile
|
Size: 1.6 MB
Table of Contents
-
Table of Contents
3
-
Starter, Current Supply, CCS
5
-
Battery a
5
-
Fundamentals for Batteries a
5
-
Types of Battery
5
-
Warning Notices and Safety Regulations
6
-
Battery Terminal Connection
8
-
Checking Battery a
9
-
Testing Different Battery Types
9
-
Visual Check
10
-
Test of Colour Display of Magic Eye
11
-
Battery Tester with Printer VAS 5097 a
12
-
Battery Tester with Printer VAS 6161
17
-
Midtronics MCR340V Battery Tester (Only for Usa/Canada)
23
-
Current Draw Test
27
-
Checking No-Load Voltage of Battery a (Stock and Stored Vehicles)
28
-
Charging Battery a
30
-
Battery Charger VAS 5095 a
30
-
Battery Charger VAS 5900
35
-
Trickle Charging
46
-
Battery Charger VAS 5903
47
-
Battery Charger VAS 5906
59
-
Midtronics INC 940 Battery Charger (Only for Usa/Canada)
61
-
Solar Panel VAS 6102 a
66
-
Totally Discharged Batteries a
67
-
Cruise Control System (CCS)
69
-
Activating and Deactivating Cruise Control System (CCS)
69
-
-
Gauges, Instruments
70
-
Windscreen Wash/Wipe System
71
-
Washer Fluid Line Hose Couplings
71
-
Windscreen and Rear Window Washer System
71
-
Headlight Washer System
72
-
Hose Repair
73
-
General Description
73
-
Repairing Smooth Pipe
73
-
Repairing Corrugated Pipe
73
-
Distinguishing Features of Jointless Wiper Blades
75
-
-
Lights, Bulbs, Switches — Exterior
76
-
Operation and Safety Notes for Gas Discharge Bulbs
76
-
-
Lights, Bulbs, Switches — Interior
79
-
Socket U5
79
-
Removing and Installing 12 V Socket U5
79
-
Removing and Installing Socket Illumination Bulb L42
79
-
Cigarette Lighter U1
80
-
General Description
80
-
Assembly Overview
81
-
Removing and Installing Cigarette Lighter Socket
82
-
Removing and Installing Cigarette Lighter Illumination Bulb L28
84
-
-
Wiring
86
-
Vehicle Diagnosis, Testing and Information System VAS 5051B
86
-
Connecting Vehicle Diagnosis, Testing and Information System VAS 5051B
86
-
Connecting Vehicle Diagnostic Tester Bora Model Year 1998 to 2003
87
-
Repairs to Wiring Harnesses and Connectors
89
-
Wiring Harness Repair Set
89
-
Tool Descriptions
90
-
General Notes Concerning Repairs to Vehicle Electrical System
94
-
Repairs to Wiring Harnesses
95
-
Repairs to Contact Housings and Connectors
105
-
Releasing and Dismantling Contact Housings
109
-
Contact Surface Cleaning Set VAS 6410
115
-
Using the Contact Surface Cleaning Set VAS 6410
115
-
Cleaning Battery Terminals
118
-
Renewing Lambda Probe
121
-
Renewing LSF Lambda Probe (4-Pin)
121
-
Renewing LSU Lambda Probe (6-Pin)
122
-
Types of Protective Tube on Uniform Lambda Probes
123
-

Volkswagen Jetta 2005 Workshop Manual (127 pages)
7-speed dual clutch gearbox 0AM
Brand: Volkswagen
|
Category: Automobile
|
Size: 10.89 MB
Table of Contents
-
Table of Contents
3
-
Technical Data
5
-
Gearbox Identification
5
-
Code, Engine Allocation
6
-
Capacities
7
-
General Repair Notes
8
-
Tools
8
-
Gearbox
8
-
Oil
10
-
Working with Vehicle Diagnostic Testers
10
-
-
Clutch
12
-
Removing and Installing the Dual Clutch
12
-
Removing Dual Clutch
12
-
Adjusting Position of Engagement Bearings «K 1 and K 2
16
-
Installing Dual Clutch
26
-
-
Controls, Housing
34
-
Renewing Gear Oil
34
-
Selector Mechanism
37
-
Overview — Selector Mechanism in Vehicles up to 02.2009
37
-
Removing and Installing Selector Lever Cable — Vehicles up to 02.2009
38
-
Overview of Selector Mechanism — Vehicles from 03.2009 Onwards
45
-
Removing and Installing Selector Mechanism with Selector Lever and Selector Lever Cable
46
-
Vehicles from 03.2009 Onwards
46
-
Checking Selector Lever Cable
47
-
Adjusting Selector Lever Cable
47
-
Emergency Release of Selector Lever
50
-
Removing and Installing Selector Lever Handle
50
-
Checking Selector Mechanism
52
-
Mechatronic Unit for Dual Clutch Gearbox J743
54
-
Safety Note on Mechatronic Unit for Dual Clutch Gearbox J743
54
-
Overview — Mechatronic Unit
55
-
Removing Mechatronic Unit for Dual Clutch Gearbox J743 with Gearbox Installed
56
-
Moving Mechatronic Unit for Dual Clutch Gearbox J743 into «Removal Position» by Hand
66
-
Installing Mechatronic Unit for Dual Clutch Gearbox J743
69
-
View of Selector Forks with Mechatronic Unit Removed
76
-
Removing and Installing Gearbox
77
-
Information about Gearboxes with Different Output Shafts
77
-
Removing Gearbox, Vehicles with 1.4 L/90 Kw TFSI Engine and 1.4 L/118 Kw TSI Engine
78
-
Removing Gearbox, Vehicles with 1.6 L/75 Kw MPI Engine
85
-
Removing Gearbox — Vehicles with 1.9 L/77 Kw TDI PD Engine
94
-
Removing Gearbox — Vehicles with 1.6 L/77 Kw TDI CR Engine
101
-
Installing Gearbox
108
-
Torque Settings «Gearbox to Engine» and Notes on Assembly Mounting
111
-
Transporting Gearbox and Securing to Assembly Stand
115
-
-
Gears, Shafts
117
-
Currently, no Repairs Can be Made to Gears and Shafts
117
-
-
Renewing Oil Seal for Right Stub Shaft
118
-
Final Drive — Front Differential
118
-
Oil Seals
118
-
-
Renewing Oil Seal for Left Stub Shaft
120
-
Renewing Seal for Right Flange Shaft
122
-
Renewing Oil Seal for Left Flange Shaft
124
Advertisement
Related Products
-
Volkswagen Jetta 2011
-
Volkswagen Jetta 2000
-
Volkswagen Jetta 2001
-
Volkswagen Jetta 2002
-
Volkswagen Jetta 2003
-
Volkswagen Jetta 2021
-
Volkswagen Jetta Hybrid 2013
-
Volkswagen Jetta S
-
Volkswagen Jetta SportWagen 2013
-
Volkswagen Jetta 1999
Volkswagen Categories
Automobile
Automobile Accessories
Adapter
Cables and connectors
Car Receiver
More Volkswagen Manuals
Volkswagen Jetta Mark V (A5, Typ 1K) с бензиновыми двигателями: CAXA 1.4 л T-FSI (1390 см³) 122 л.с./90 кВт, BGU/BSE/BSF 1.6 л (1595 см³) 102 л.с./75 кВт, AXW/BLR/BLX/BLY 2.0 л FSI (1984 см³) 150 л.с./110 кВт и дизельными BJB/BKC/BLS 1.9 л TDI (1896 см³) 105 л.с./77 кВт; Руководство по эксплуатации, техническому обслуживанию и ремонту. Советы по выбору запасных частей, полные технические характеристики, особенности эксплуатации и ремонта, устранения неисправностей в пути, более 2800 оригинальных фотографий, цветные электросхемы, диагностика, особенности конструкции. Пошаговый ремонт в фотографиях малого среднего класса Фольксваген Джетта 5 с цельнометаллическими несущими кузовами четырёхдверный седан переднеприводные модели пятого поколения выпуска с 2005 по 2011 год
ЕСЛИ ВЫ ВИДИТЕ ОШИБКУ 406 Not Acceptable и не видите документ, то скорей всего у Вас IP РФ и его надо сменить, на любой другой страны, с помощью VPN ( Scribd и SlideShare блокируют посетителей с Российским IP).
Видео VW Jetta V замена передних тормозных дисков, колодок/ how to replace disc brakes и магнитолы/ radio removal (Фольксваген Джетта 05-11)
Volkswagen Jetta Mark V общая информация (Фольксваген Джетта 5 2005-2011)
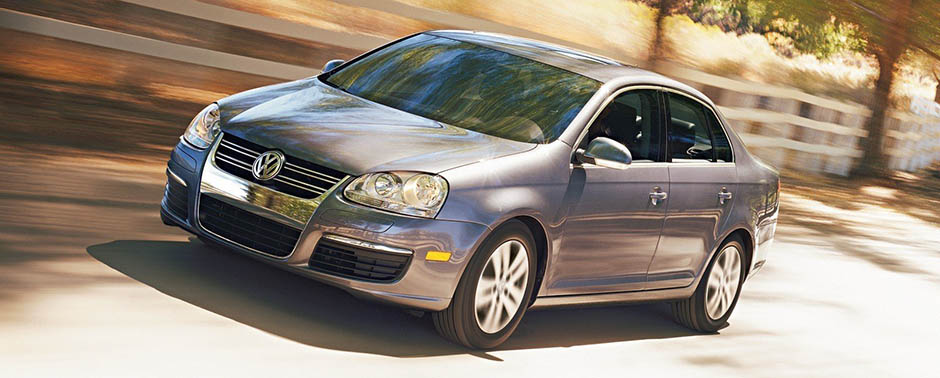
ЗАМЕНА ТОРМОЗНЫХ КОЛОДОК ТОРМОЗНОГО МЕХАНИЗМА ПЕРЕДНЕГО КОЛЕСА
В зависимости от комплектации автомобиля на передние колеса устанавливают тормозные механизмы мод. FS III или FN3. Механизмы обеих моделей сходны по конструкции и отличаются только формой направляющей колодок. Работы по замене тормозных колодок в механизмах выполняются практически одинаково.
Проверяйте состояние тормозных колодок при каждом техническом обслуживании «Проверка степени износа тормозных колодок и дисков». с. 174).
Тормозные колодки необходимо заменять при износе накладок, непрочном соединении накладок с основанием, замасливании рабочих поверхностей, наличии глубоких борозд или сколов.
ПРЕДУПРЕЖДЕНИЕ
Заменяйте тормозные колодки передних тормозных механизмов только комплектом из 4 шт. (по две на каждую сторону).
Перед заменой тормозных колодок проверьте уровень тормозной жидкости в бачке главного тормозного цилиндра. Если уровень близок к верхней метке, необходимо откачать часть жидкости: после замены изношенных колодок новыми уровень жидкости поднимется.
Вам потребуются: ключ-шестигранник «на 7», отвертка с плоским лезвием.
1. Снимите правое переднее колесо.
ПРИМЕЧАНИЕ
Работа показана на примере тормозного механизма FS III.
2. Снимите защитный колпачок болта крепления нижнего пальца суппорта…
3. …и выверните болт.
4. Снимите защитный колпачок болта крепления верхнего пальца суппорта…
5. …и выверните болт.
На тормозном механизме мод. FN3 отверткой извлеките отогнутые концы пружинного фиксатора наружной колодки из отверстий суппорта и снимите фиксатор.
6. Снимите суппорт в сборе с тормозными колодками.
ПРИМЕЧАНИЕ
На тормозном механизме мод. FN3 перед снятием суппорта отсоедините колодку А разъема провода сигнализатора износа тормозных колодок от провода контакта на колодке.
7. Отожмите наружную тормозную колодку…
8 …и снимите ее, преодолевая сопротивление металлических фиксаторов.
9. Аналогично снимите внутреннюю тормозную колодку, вынув ее фиксатор из внутренней полости поршня.
10 Установите на суппорт специальное приспособление А и, вращая винт, утопите поршень в рабочий цилиндр.
11. При отсутствии приспособления можно вдавить поршень с помощью раздвижных пассатижей Соблюдайте осторожность, чтобы не повредить пыльник поршня.
12. Установите в суппорт наружную А и внутреннюю Б тормозные колодки.
13. Установите суппорт в порядке, обратном снятию. Для исключения само отворачивания болтов крепления направляющих пальцев суппорта смажьте перед установкой их резьбу анаэробным фиксатором резьбы. Болты затяните моментом 30 Нм (3,0 кГс-м).
14. Несколько раз нажмите до упора на педаль тормоза. Это необходимо для того, чтобы выбрать зазоры в тормозном механизме, появившиеся после вдавливания поршней в цилиндры.
15. Установите колесо.
16. Аналогично замените тормозные колодки тормозного механизма левого колеса.
17. Проверьте и при необходимости восстановите уровень тормозной жидкости в бачке главного тормозного цилиндра.
ПОЛЕЗНЫЕ СОВЕТЫ
Заменив изношенные тормозные колодки новыми, не спешите сразу выезжать на оживленные магистрали. Не исключено, что при первом же интенсивном торможении вы будете неприятно поражены низкой эффективностью тормозов, несмотря на то что установлены фирменные колодки. Тормозные диски тоже изнашиваются, и новые колодки касаются их только краями, практически не тормозя. Выберите тихую улочку или проезд без автомобилей и несколько раз плавно затормозите, чтобы колодки притерлись и стали прилегать всей поверхностью. Заодно оцените и эффективность тормозов. Старайтесь не тормозить резко хотя бы первые 100 км. При сильном нагреве не приработавшихся колодок верхний слой их накладок подгорает и тормоза еще долго не будут максимально эффективны.
ЗАМЕНА СУППОРТА ТОРМОЗНОГО МЕХАНИЗМА ПЕРЕДНЕГО КОЛЕСА
В зависимости от комплектации автомобиля на передние колеса устанавливают тормозные механизмы мод. FS III или FN3 Механизмы обеих моделей сходны по конструкции и отличаются только формой направляющей колодок. Работы по замене суппортов тормозных механизмов этих моделей тормозных механизмов выполняются одинаково Работа показана на примере тормозного механизма FS III.
Вам потребуются: ключ-шестигранник «на 7», отвертка с плоским лезвием.
1. Снимите колесо со стороны заменяемого суппорта.
2. Снимите защитный колпачок болта крепления нижнего пальца суппорта…
3. …и выверните болт
4 Снимите защитный колпачок болта крепления верхнего пальца суппорта…
5. …и выверните болт
ПРИМЕЧАНИЕ
Для снятия тормозного механизма мод. FN3 вместо болтов крепления направляющих пальцев необходимо вывернуть болты крепления направляющей колодок к кулаку.
6. Выверните болт крепления наконечника тормозного шланга к суппорту…
7. …отсоедините тормозной шланг и заглушите его отверстие.
ПРИМЕЧАНИЕ
Обратите внимание на две металлические уплотнительные шайбы, расположенные по обеим сторонам наконечника шланга. При сборке замените эти шайбы новыми.
8 Снимите суппорт в сборе с тормозными колодками
9 Выньте из суппорта тормозные колодки
10 Установите суппорт в порядке, обратном снятию. Перед установкой болтов крепления суппорта к поворотному кулаку нанесите на резьбу анаэробный фиксатор резьбы. При установке тормозного шланга проследите, чтобы шланг не был перекручен.
11 После установки удалите воздух из гидропривода тормозов (см. «Прокачка гидропривода тормозной-системы», с. 175) и восстановите уровень жидкости в бачке главного тормозного цилиндра.
ЗАМЕНА ТОРМОЗНОГО ДИСКА ТОРМОЗНОГО МЕХАНИЗМА ПЕРЕДНЕГО КОЛЕСА
При наличии на рабочей поверхности диска задиров, глубоких рисок и других дефектов, увеличивающих износ колодок и снижающих эффективность торможения, а также в случае повышенного бокового биения диска, вызывающего вибрации при торможении, замените диск. В специализированных мастерских такой диск можно проточить и прошлифовать с обеих сторон на одинаковую глубину, но после обработки толщина диска должна быть не меньше минимально допустимой.
Если толщина одного из дисков меньше минимально допустимой, замените оба диска. При замене тормозных дисков обязательно замените тормозные колодки новым комплектом.
Вам потребуются: ключ-шестигранник «на 7», отвертка с плоским лезвием, ключ TORX T30.
1. Снимите колесо со стороны заменяемого диска.
2. Снимите суппорт в сборе с колодками (см,
«Замена суппорта тормозного механизма переднего колеса», с. 183), не отсоединяя тормозной шланг, и закрепите проволокой, не допуская скручивания или натяжения шланга.
3. Выверите винт крепления тормозного диска к ступице…
4. …и снимите тормозной диск со ступицы переднего колеса.
ПРИМЕЧАНИЕ
При затрудненном снятии строньте диск резиновым или полимерным молотком.
5. Тщательно очистите ступицу.
6. Установите детали в порядке, обратном снятию.
ПРИМЕЧАНИЕ
Перед установкой диска тщательно очистите привалочные поверхности ступицы и диска от ржавчины и окалины, так как даже мельчайшая частица, зажатая между привалочными поверхностями, вызовет биение диска и вибрации при торможении.
7. Несколько раз нажмите до упора на педаль тормоза. Это необходимо для того, чтобы выбрать зазоры в тормозном механизме, появившиеся после вдавливания поршней в цилиндры.
8. Установите колесо.
9. Аналогично снимите тормозной диск другого колеса.
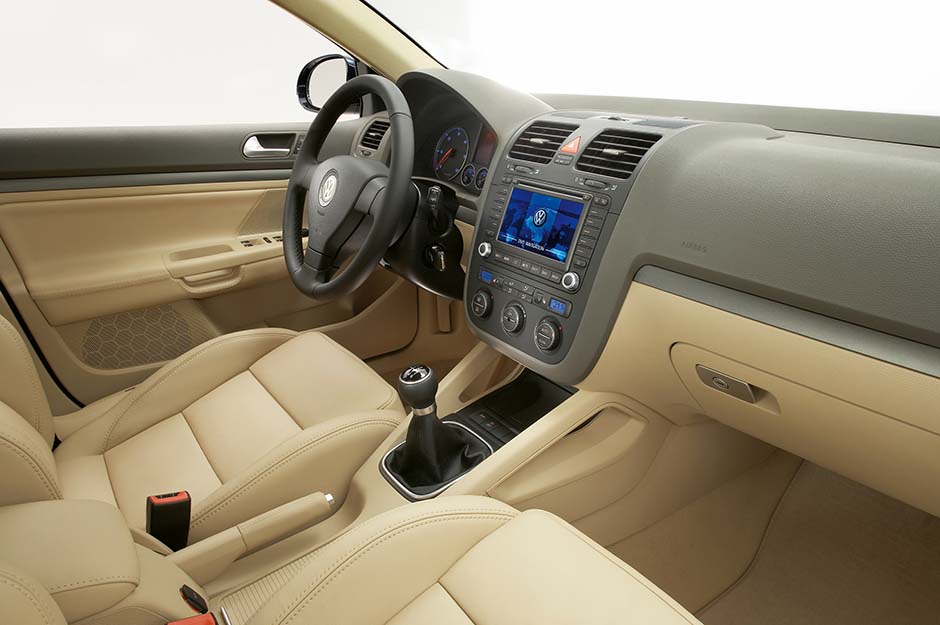
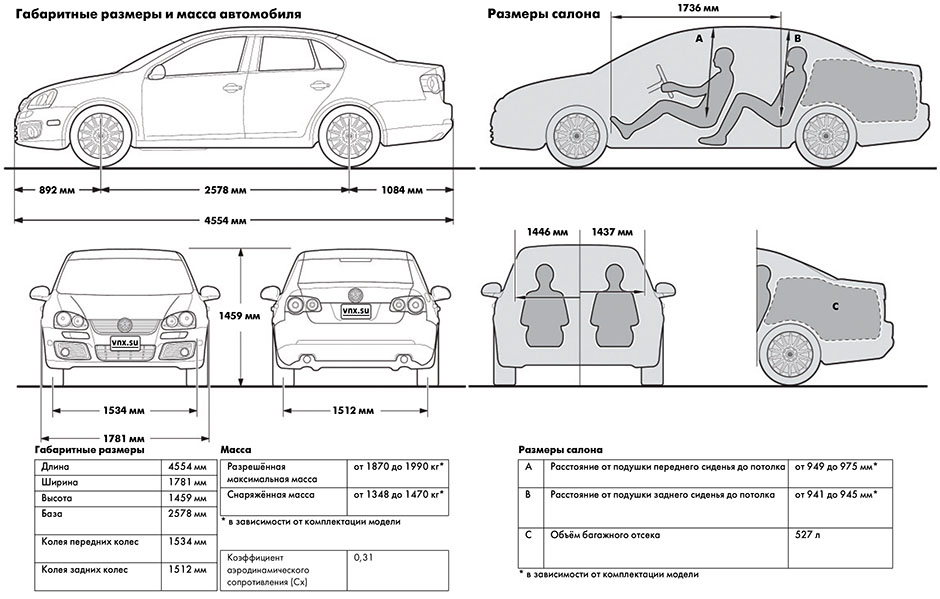
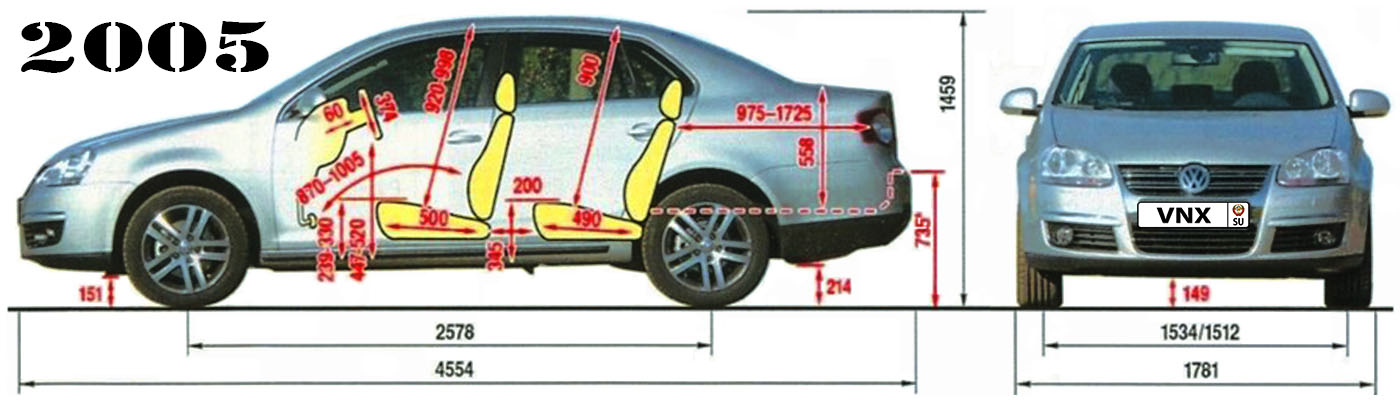
| № | Спецификация / Specs | Данные |
| Габариты (мм/mm) и масса (кг/kg) / Dimensions and Weight | ||
| 1 | Длина / Length | 4554 |
| 2 | Ширина (без/с зеркалами) / Width | 1781 |
| 3 | Высота (загружен/пустой) / Height | 1459 |
| 4 | Колёсная база / Wheelbase | 2578 |
| 5 | Дорожный просвет (клиренс) / Ground clearance | 115 |
| 6 | Снаряжённая масса / Total (curb) weight | 1382 |
| Полная масса / Gross (max.) weight | 1950 | |
|
Двигатель / Engine |
||
| 7 | Тип / Engine Type, Code | Бензиновый, жидкостного охлаждения, четырехтактный, CAXA |
| 8 | Количество цилиндров / Cylinder arrangement: Total number of cylinders, of valves | 4-цилиндровый, рядный, 16V, DOHC с верхним расположением двух распределительных валов |
| 9 | Диаметр цилиндра / Bore | 76.5 мм |
| 10 | Ход поршня / Stroke | 75.6 мм |
| 11 | Объём / Engine displacement | 1390 см³ |
| 12 | Система питания / Fuel supply, Aspiration | Непосредственный впрыск топлива Motronic MED 17 TSI turbocharger |
| Турбонаддув и промежуточное охлаждение наддувочного воздуха | ||
| 13 | Степень сжатия / Compression ratio | 9.7:1 |
| 14 | Максимальная мощность / Max. output power kW (HP) at rpm | 90 кВт (122 л.с.) при 5000 об/мин |
| 15 | Максимальный крутящий момент / Max. torque N·m at rpm | 220 Нм при 1500-4000 об/мин |
|
Трансмиссия / Transmission |
||
| 16 | Сцепление / Clutch type | Два соосных мокрых многодисковых сцепления с электрогидравлическим приводом |
| 17 | КПП / Transmission type | 02E МКПП 7 Роботизированная механическая, семиступенчатая DSG7 Direct Shift Gearbox Mechatronic J743 |
О Книге
- Название: VW Jetta V Руководство по эксплуатации, техническому обслуживанию и ремонту
- Бензиновые двигатели: CAXA 1.4 л T-FSI (1390 см³) 122 л.с./90 кВт, BGU/BSE/BSF 1.6 л (1595 см³) 102 л.с./75 кВт, AXW/BLR/BLX/BLY 2.0 л FSI (1984 см³) 150 л.с./110 кВт и дизельными BJB/BKC/BLS 1.9 л TDI (1896 см³) 105 л.с./77 кВт
- Выпуск с 2005 года
- Серия: «Ремонт без проблем»
- Год издания: 2010
- Автор: Коллектив авторов
- Издательство: «Ассоциация независимых издателей»
- Формат: PDF
- Страниц в книге: 346
- Размер: 220.32 МБ
- Язык: Русский
- Количество электросхем: 16

FAQ
VW
Audi
Skoda
Seat
| Скидки по клубной карте на запчасти | для ЛЮБЫХ автомобилей! |
|---|---|
| http://autodoc.ru (скидка опт 3) http://exist.ru (скидка VIP) |
http://apex.ru (скидка по опт-6) http://auto-z.ru (скидка 5%) |
Скидки действуют сразу — в день заказа карты!
Заказать дисконтную карту можно тут… Отзывы о карте.