- Manuals
- Brands
- Acon Manuals
- Blood Glucose Meter
- On Call Plus
- User manual
-
Contents
-
Table of Contents
-
Troubleshooting
-
Bookmarks
Quick Links
Related Manuals for Acon On Call Plus
Summary of Contents for Acon On Call Plus
-
Page 3
Self monitoring of blood glucose (SMBG) is an integral part of diabetes care, but the high cost of testing can make this impossible. At ACON, our goal is to provide high quality glucose monitoring at a price that allows you to test as often as necessary. -
Page 5: Table Of Contents
Table of Contents Getting Started………………………………………………………………………… 1 Component Descriptions………………………………………………………. 2 ® On Call Plus Blood Glucose Meter…………………………………………. Meter Display…………………………………………………………………… 4 ® On Call Plus Blood Glucose Test Strips………………………….………… 5 ® On Call Plus Glucose Control Solution…………………………….………. Installing the Battery…………………………………………………………………. 10 Meter Setup Before Testing…………………………………………………………. 11 Step 1 –…
-
Page 7: Getting Started
Getting Started Before testing, read the instructions carefully and learn about all the components of ® ® your On Call Plus Blood Glucose Monitoring System. Depending on the On Call Plus product you purchase, some of the components may need to be purchased separately.
-
Page 8: Component Descriptions
Component Descriptions 1. Blood Glucose Meter: Reads the test strips and displays the blood glucose concentration. 2. Test Strips: Strips with a chemical reagent system used with the meter to measure glucose concentration in blood. 3. Code Chip: Automatically calibrates the meter with the code number when inserted into the meter.
-
Page 9: On Call ® Plus Blood Glucose Meter
® On Call Plus Blood Glucose Meter The meter reads the test strips and displays the blood glucose concentration. Use this diagram to become familiar with all the parts of your meter. Strip Port Battery Carrier Liquid Crystal Display (LCD) Code Chip Code Chip Slot M Button…
-
Page 10: Meter Display
Meter Display Pound Sign (#) Control Solution Symbol Appears with the control solution test Indicates a control test result. A result or when you mark an invalid pound sign (#) will also be result to prevent it from being displayed when control solution included in the averages.
-
Page 11: On Call ® Plus Blood Glucose Test Strips
Meter Use and Precautions • The meter is pre-set to display blood glucose concentration in either millimoles per liter (mmol/L) or milligrams per deciliter (mg/dL) depending on which unit of measure is standard in your country. This unit of measure cannot be adjusted. The meter will be set to mg/dL by default when sold in the United States.
-
Page 12
IMPORTANT: Apply sample only to the sample tip of the test strip. Do not apply blood or control solution to the top of the test strip as this may result in an inaccurate reading. Incorrect Correct Hold the blood drop to the sample tip of the test strip until the check window is completely full and until the meter begins to count down. -
Page 13
Storage and Handling Please review the following storage and handling instructions: • Store test strips in a cool, dry place at room temperature, 56-86°F (15-30°C). Store them away from heat and direct sunlight. • Do not freeze or refrigerate. • Do not store or use test strips in a humid place such as a bathroom. -
Page 14: On Call ® Plus Glucose Control Solution
Test Strip Precautions • For in vitro diagnostic use. Test strips are to be used only outside the body for testing purposes. • Do not use test strips that are torn, bent, or damaged in any way. Do not reuse test strips.
-
Page 15
Storage and Handling • Store the control solution at room temperature, 59-86°F (15-30°C). • Do not refrigerate or freeze. • If the control solution is cold, do not use until it has warmed to room temperature. • Use before the unopened expiration date that is shown on the bottle. Note: The expiration date is printed in Year-Month format. -
Page 16: Installing The Battery
Installing the Battery Battery may not be preinstalled in the meter. One CR 2032 3.0 V coin cell battery is required. Please find the battery in your carrying case and install it according to the following steps: 1. Pull the battery carrier on the left side of the meter. The battery carrier should be easily opened with your finger.
-
Page 17: Meter Setup Before Testing
Meter Setup Before Testing Before testing, the following steps should be followed: Step 1 – Coding the Meter Simply insert the code chip to code the meter. Every time you change to a new box of test strips, you need to insert the code chip packed with the new box of test strips.
-
Page 18: Step 2 — Adjusting The Meter Settings
Step 2 – Adjusting the Meter Settings Adjust the meter settings to set the clock, ensuring that results stored in the memory are shown with the correct date and time. You can also turn the meter audio feature on or off. You need to adjust the meter settings before you first use your meter.
-
Page 19
Hour Hour Minutes Minutes 5. Audio Feature: The meter comes with the meter audio feature enabled. The meter will give one short beep when it is turned on, after sample detection and when the result is ready. The meter will sound three short beeps to sound a warning when an error has occurred. -
Page 20: Performing A Quality Control Test
Performing a Quality Control Test The quality control test confirms that the test strips and meter are working together properly, and that you are performing the test correctly. It is important to perform this test. • Before you first use your meter, to familiarize yourself with its operation. •…
-
Page 21
4. Press the M button to mark the test as a control solution test. Once the M button is pressed, the control solution symbol will appear on the display. 5. Shake the control solution bottle well, then squeeze it gently and discard the first drop. -
Page 22
7. Remove and discard the test strip. The display should also show a pound sign (#) indicating the test is a control solution test. This shows that the number will not be counted in the 7, 14 and 30 day averages. The pound sign (#) will also be displayed when reviewing the results stored in memory. -
Page 23: Testing Your Blood
Testing Your Blood The following steps will show how to use the meter, test strips, lancing device and sterile lancets together to measure your blood glucose concentration. Step 1 – Getting a Drop of Blood ® The On Call Plus Blood Glucose Monitoring System requires a very small sample of blood which may be obtained from the fingertip, palm (at base of the thumb) or forearm.
-
Page 24
Fingertip Testing For fingertip sampling, adjust the depth penetration to reduce the discomfort. You do not need the clear cap for fingertip sampling. 1. Unscrew the lancing device cover from the body of the lancing device. Insert a sterile lancet into the lancet holder and push it until the lancet comes to a complete stop in the lancet holder. -
Page 25
Adjustment: 1 and 2 for delicate skin for normal skin 4 and 5 for calloused or thick skin Note: Greater pressure of the lancing device against the finger will also increase the puncture depth. 5. Pull the cocking barrel back to set the lancing device. You may hear a click. -
Page 26
Forearm and Palm (at the base of the thumb) Testing The forearm and palm areas have fewer nerve endings than the fingertip so you may find that obtaining blood from these sites is less painful than from the fingertip. The technique for forearm and palm sampling is different. You need the clear cap to draw blood from these sites. -
Page 27
3. Place the lancing device against the puncture site. Press and hold the clear cap against the puncture site for a few seconds. Press the release button of the lancing device, but do not immediately lift the lancing device from the puncture site. Continue to hold the lancing device against the puncture site until you can confirm a sufficient blood sample has formed. -
Page 28: Step 2 — Testing Blood Glucose
Step 2 – Testing Blood Glucose Note: Insertion of a new test strip at any time, except while in the data transfer mode (detailed on page 28), will cause the meter to automatically enter the test mode. 1. Insert a test strip into the strip port, contact bars end first and facing up, to turn on the meter and display all the display segments.
-
Page 29
4. The meter will count down from 9 to 1 and then display the measurement results. The meter will also beep to indicate that measurement is complete. To mark invalid results and to prevent them from being included in the 7, 14 and 30 day averages, press the M and S buttons together. -
Page 30: Hi» And «Lo» Messages
«HI» and «LO» Messages The meter can accurately measure blood glucose concentrations between 20 to 600 mg/dL. «HI» and «LO» messages indicate results outside of this range. «HI» appears display, measured concentration value is above 600 mg/dL. The test should be retaken to ensure that no mistake was made in the procedure.
-
Page 31
• Abnormally high levels of Vitamin C (ascorbic acid), Acetaminophen, Uric Acid, L-Dopa, Tolazamide or other reducing substances will produce falsely high blood glucose measurements. • Fatty substances such (Triglycerides up to 3,000 mg/dL or Cholesterol up to 500 mg/dL) have no major effect on blood glucose test results. ®… -
Page 32: Using The Meter Memory
Using the Meter Memory The meter automatically stores up to 300 test records. Each record includes the test result, time and date. If there are already 300 records in memory, the oldest record will be erased to make room for a new one The meter will also calculate the average values of records from the last 7, 14 and 30 days.
-
Page 33: Clearing The Memory
5. While in memory mode, press the M button to switch between the 7, 14 and 30 day averages. The meter will calculate the average that you selected. The number of records used in the DAY AVG will also appear in the display. 6.
-
Page 34: Transferring Records
Transferring Records The meter can transfer stored information to a Windows-based personal computer (PC) using an optional data transfer cable and software package. To use this feature, first install the software packaged with the data transfer cable. Then follow these steps: 1.
-
Page 35: Maintenance
Maintenance Proper maintenance is recommended for best results. Replacing the Battery When the battery icon ( ) appears, it means the battery is running low and you should replace the battery as soon as possible. An «E-6» error message will appear if the battery is too low to perform any more blood glucose tests.
-
Page 36: Suggested Testing Times And Target Goals
Suggested Testing Times and Target Goals Tracking your blood glucose concentration through frequent testing is an important part of proper diabetes care. Your diabetes health care professional will help you to decide the normal target range for your glucose levels. They will also help you determine when and how often to test your blood glucose.
-
Page 37: Comparing Meter And Laboratory Results
Comparing Meter and Laboratory Results ® Your On Call Plus Blood Glucose Monitoring System and laboratory results both report the glucose concentration in the serum or plasma component of your blood. However, the results may differ somewhat due to normal variation. This is expected, but the difference under normal operating conditions should be no greater than 20%.
-
Page 38: Troubleshooting Guide
Troubleshooting Guide The meter has built-in messages to alert you of problems. When error messages appear, note the error number, turn off the meter and then follow these instructions. Display Causes Solution Battery may be damaged or not be Replace battery. charged Meter If meter has been exposed to or…
-
Page 39
Display Causes Solution Temperature is below the operating Move to a warmer environment and temperature of the system repeat the test. Test results will still be accurate, but Battery is discharged but has enough replace the battery as soon as power to run 10 more tests possible. -
Page 40: Specifications
Specifications Feature Specification Measurement Range 20 to 600 mg/dL Result Calibration Plasma-equivalent Sample Fresh capillary whole blood Minimum Sample Size 1 µL Test Time 10 seconds Power Source One (1) CR 2032 3.0 V coin cell battery Battery Life 12 months or approximately 1,000 tests The meter is pre-set to either millimoles per liter (mmol/L) or milligrams per deciliter (mg/dL) Glucose Units of Measure…
-
Page 41: Warranty
Warranty Please complete the warranty card that came with this product and mail it to the following address: ® On Call Plus Warranty Center 10125 Mesa Rim Road San Diego, CA 92121-2915, USA If the meter fails to work for any reason other than obvious abuse within the first five (5) years from purchase, we will replace it with a new meter free of charge.
-
Page 42: Index
Index Averaging Results…………….….. Procedure Battery, Replacing the…………… Precautions and Limitations…. Carrying Case……………………… Testing Your Blood……………… Clearing the Memory……………… Quality Control Test……………… Data Port……..Control Solution…………..…… Date Format……..How to Run………………..…… Guidelines……..Results Hematocrit……..24,34 Blood Glucose………………..… Install the Battery……Control Solution………………… Lancing Device……1,17,29 Meter vs.
Self monitoring of blood glucose (SMBG) is an integral part of diabetes care, but
the high cost of testing can make this impossible. At ACON, our goal is to provide
high quality glucose monitoring at a price that allows you to test as often as
necessary. Together, we can better manage your diabetes and help you live a
longer and healthier life.
Welcome, and thank you for choosing the On Call
Monitoring System. The On Call
you accurate blood glucose results in just a few simple steps.
To ensure accurate results from your On Call
System, please follow these guidelines:
Read instructions before use.
Use the code chip that accompanies each box of test strips.
Use only On Call
Glucose Meter.
For in vitro diagnostic use only. Your blood glucose monitoring system is to be
used only outside the body for testing purposes.
For self testing and professional use.
Test only whole blood samples with the On Call
Strips and Meter.
For self-testers, consult your physician or diabetes healthcare professional
before making any adjustments to your medication, diet or activity routines.
Keep out of reach of children.
For help with any additional questions or issues, please contact Customer
Support at 1-800-838-9502.
By following the instructions outlined in this User’s Manual, you will be able to use
®
your On Call
glucose and better manage your diabetes.
®
Plus Blood Glucose Test Strips with the On Call
Plus Blood Glucose Monitoring System to monitor your blood
®
Plus Blood Glucose Monitoring System will give
®
i
®
Plus Blood Glucose
Plus Blood Glucose Monitoring
®
Plus Blood Glucose Test
®
Plus Blood
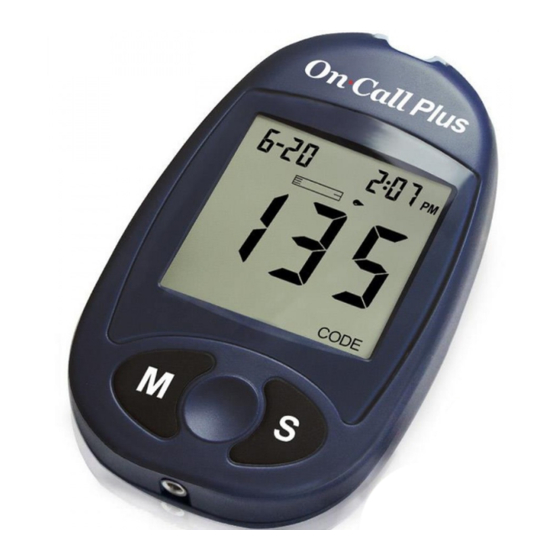
Глюкометр On-Call Plus – інноваційний прилад, що визначає рівень глюкози у крові людини. Портативний пристрій підходить для застосування в домашніх умовах, бере зразок крові лише 1 мкл, через 10 секунд обчислює результат.
On-Call Plus – глюкометр від виробника лабораторного обладнання ACON Laboratories, Inc.
Точний та надійний.
Простий у використанні.
Для кодування використовується спеціальний чіп із комплекту тест-смужок.
Час аналізу – 10 секунд.
Мінімальна крапля крові – 1мкл.
Можливість забору крові з долоні та передпліччя, що суттєво полегшує життя подушечкам пальців.
Пам’ять на 300 результатів, середній показник за 7, 14 та 30 днів.
Для живлення використовується стандартна батарея CR2032 із ресурсом до 1000 вимірювань та системою попередження про втрату потужності. Це дозволяє не турбуватися про те, що батарея сяде в невідповідний момент.
Гарантія 5 років.
Комплект постачання включає:
- Система On Call® Plus
- Ручка для проколу пальця (ланцетний пристрій)
- Ланцети стерильні – 10 шт.
- Тест-смужки — 10+150 шт.
- Кодуючий чип
- Чохол для зберігання та транспортування
- Змінний ковпачок ланцетного пристрою для взяття проби з альтернативних місць
- Контрольний розчин
- Інструкція користувача
- Щоденник самоконтролю
- Елемент живлення
- Гарантійний талон
1.Перед першим використанням приладу введіть кодову платину, яка є в базовому наборі. Таким чином, Ви закодуєте пристрій, зможете уникнути неточних показників.
2.Після вставте тест смужку, переконайтеся, що номер кодової пластини та номер партії тест смужок, вказаний на коробці, збігаються. Категорично заборонено використовувати смужки, пластини різних виробників, номери партій.
3.Встановіть голку, виберіть глибину проколу.
4.Натисніть пуск, проведіть маніпуляцію.
5. Через 10 секунд на екрані з’явиться Ваш результат.
Важливо: перед проколом та після продезінфікуйте шкіру спиртом або іншим антисептиком, з метою гігієни не використовуйте одну голку двічі.

On Call Plus — простой в использовании глюкометр американского производства. Глюкометр и тест-полоски к нему стоят недорого, но качество измерений при этом не страдает. Глюкометр точный, быстрый и удобный. Они имеет компактные размеры и небольшой вес, его удобно носить с собой в сумке или рюкзаке.
Глюкометр оснащен крупным дисплеем, на котором четко видны все цифры и значки, поэтому он отлично подойдет и для людей с ослабленным зрением.
Для проведения анализа требуется очень маленькая капля крови, поэтому глюкометр можно использовать для замеров сахара у детей.
Широкий диапазон измерений – от 1,1ммоль/л до 33,3ммоль/л
Глюкометр требует кодирования, кодирование осуществляется при помощи чипа, который поставляется вместе с тест-полосками.
Подробнее
ACON On Call Plus цены в аптеках Стоимось ACON On Call Plus может зависеть от населенного пункта
Населенный пункт
Покупайте ACON On Call Plus недорого в аптеках вашего города
Ищите в какой аптеке купить недорого ACON On Call Plus? Просмотрите наш список аптек в которых ACON On Call Plus в наличии. Вы также можете найти лекарства по таким критериям, как бесплатная доставка лекарств или быстрая доставка лекарств, перейдя на сайт аптеки и выбрав наиболее подходящие для вас условия покупки.
Вам нужно больше результатов поиска? Просто перейдите по ссылке Показать все предложения, где вы сможете найти ACON On Call Plus в аптеке поблизости или указать свой город. Найти то, что вы ищете, очень просто и не займёт много времени. Чтобы получить больше информации, читайте реальные отзывы о ACON On Call Plus, оставленные пользователями, — это поможет принять решение о покупке, но прежде всего необходимо проконсультироваться с врачом и крайне важно ознакомиться с инструкцией по применению ACON On Call Plus. На нашем сайте Поиска Лекарств есть множество отзывов на лекарства различной ценовой категории, которые помогут найти вам аналоги ACON On Call Plus вне зависимости от вашего бюджета.
Скидки на ACON On Call Plus в аптеках могут предоставляться по дисконтным картам или согласно проводимых акций в различных аптеках, поэтому о деталях покупки уточняйте непосредственно в аптеках или следите за обновлением цен на ACON On Call Plus на сайте Поиска Лекарств. Мы регулярно обновляем цены на лекарства и у нас всегда актуальная информация.
Инструкция по применению ACON On Call Plus
- Состав
- Показания
- Способ применения
- Особенности
- Условия отпуска из аптеки
Состав
Глюкометр Он Колл Плюс (On Call Plus).
Тест-полоски Он Колл Плюс — 10 штук.
Кодовая полоска.
Контрольный раствор для проверки прибора и тест-полосок.
Ручка для прокола и прозрачный колпачок для взятия крови из предплечья и ладони.
Стерильные ланцеты к ручке — 10 штук.
Футляр.
Батарейка CR2032 — 1 шт.
Руководство по работе с глюкометром и краткий справочник, гарантийная карточка.
Коробка для упаковки.
Показания
Сахарный диабет.
Способ применения
Достаньте полоску из бокса и вставьте в анализатор;
после включения глюкометра нанесите на специальное окошко каплю крови;
подождите несколько секунд, расчет начнется автоматически, результат появится на экране;
выбросите использованную полоску и ланцет, глюкометр отключится автоматически.
Обратите внимание! Для более точных показаний первую каплю крови вытрите ватным диском, а на полоску нанесите вторую каплю. Сразу после извлечения тест-полоски из тубуса, плотно закройте крышку.
В дальнейшем сохраненные результаты измерений можно загрузить на компьютер. Кабель для синхронизации приобретается отдельно.
Особенности
Простой в использовании — с процедурой справится и ребенок, и пожилой;
точность превосходит требования ISO 15197;
анализ за 10 секунд, при этом с подготовкой и забором крови уйдет не больше минуты;
для анализа подходит капиллярная кровь из пальца и альтернативных мест: предплечья, ладони;
для анализа нужна крохотная капля крови — 0,5 мкл;
защитная оболочка у полосок позволяет брать их за любую часть.
Условия отпуска из аптеки
Без рецепта.
Формы выпуска
- ACON On Call Plus тесты 1 шт
Смотрите также
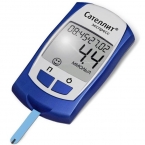
Сателлит Экспресс
Экспресс-измеритель концентрации глюкозы в крови портативный Глюкометр Сателлит — Экспресс предназначен для определения концентрации глюкозы в цельной капиллярной крови человека.
Прибор может применяться в клинической практике при недоступности лабораторных методов измерения, при скрининговых исследованиях, в полевых условиях и чрезвычайных ситуациях, а также в индивидуальном пользовании с целью оперативного контроля. При этом самостоятельный контроль не является основанием для изменения дозировки лекарственных препаратов без консультации с врачом.
5.0 1 отзыв
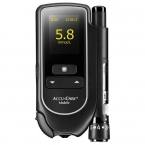
Accu-Chek Mobile
Глюкометр Accu-Chek Mobile является уникальной и единственной системой, в которой в едином эргономичном корпусе совмещены: глюкометр, кассета с тест-полосками и ручка с ланцетами, находящимися в барабане. Это очень удобно для частых измерений уровня сахара и эффективного контроля и управления диабетом.
5.0 1 отзыв

Diacont Classic
Высокоточный глюкометр с большим экраном, функцией предупреждения о гипогликемии и гипергликемии, портом передачи данных на ПК и системой измерения без кодирования тест-полосок. Измерение происходит всего за 6 секунд, при этом для анализа требуется только 0,7 мкл крови. Глюкометр Diacont хранит в памяти 250 измерений, рассчитывает среднее значение за 7, 14, 21 и 28 дней, включается и выключается автоматически. Поставляется в комплекте с тест-полосками, ланцетами, устройством для получения капли крови, автоматическим скарификатором с приспособлением для взятия крови из альтернативных мест, контрольным раствором и футляром для хранения.
5.0 1 отзыв
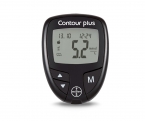
Bayer Contour Plus
Глюкометр Контур Плюс (Contour Plus) — это верный помощник диабетика. Благодаря инновационным технологиям аппарата регулярный замер содержания глюкозы в крови становится простым и комфортным. Прибор, разработанный известной швейцарской компанией, выдает точные результаты даже при низкой концентрации глюкозы.
5.0 1 отзыв

Accu-Chek Active
Глюкометр Акку Чек Актив — это компактный глюкометр для измерения в домашних условиях количества глюкозы в крови.
5.0 1 отзыв
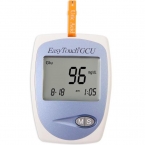
EasyTouch GCU
Система мониторинга Easy Touch GCU уникальна и не имеет аналогов на Российском рынке. В отличие от других известных приборов для самоконтроля, эта система позволяет провести три вида анализа при помощи только одного прибора, что отличает EasyTouch невероятным удобством. Пациенты, использующие систему EasyTouch GCU, ежедневно могут контролировать свои результаты.Прибор создан для количественного измерения содержания глюкозы, холестерина и мочевой ксилоты в свежей капиллярной цельной крови из кончика пальца
5.0 1 отзыв
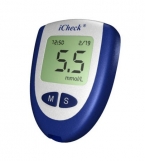
iCheck
Система контроля уровня глюкозы в крови АйЧек позволяет проводить анализ всего за 9 секунд с минимальным образцом крови, всего 0,9 мкл свежей цельной капиллярной крови, взятой из пальца.
Принцип метода основан на применении биосенсорной технологии. Использование в качестве сенсора фермента глюкозооксидазы позволяет провести специфичный анализ на содержание бета-D-глюкозы.
5.0 1 отзыв