Тепловые насосы Versati IIIКаталог продукции

Gree 2022Каталог продукции

Gree 2021Каталог продукции

Gree 2018Каталог продукции

Gree 2020Каталог продукции

Инверторные кондиционерыБуклет

Тепловые насосы Versati IIБуклет

Неинверторные кондиционерыБуклет

Gree 2017Каталог продукции

Gree 2019Каталог продукции

Сертификат дистрибьютора

Пульт управления XK117Инструкция по эксплуатации

Серия PULAR R-32Инструкция по монтажу и эксплуатации

Серия U-CROWN R-32Инструкция по монтажу и эксплуатации

Серия Soyal Inverter R-32Инструкция пользователя

Серия Soyal Inverter R-32Инструкция пользователя

Серия G-Tech Inverter R-32Инструкция пользователя

Серия Bora Inverter R-32Инструкция пользователя

Серия AmberИнструкция пользователя

Серия StageИнструкция пользователя

Краткая инструкция подключения по Wi FiИнструкция пользователя

Инструкция подключения по Wi FiИнструкция пользователя

Серия Bora Inverter R-32Инструкция пользователя

Серия Lomo InverterИнструкция пользователя

Универсальная инструкцияИнструкция по эксплуатации

U-Match с инвертором R-410AУстановка и эксплуатация

Реализованные проектыКаталог реализованных объектов

VERSATI IIИнструкция пользователя

VRF GMV 5Каталог продукции

Сплит-системыИнструкция пользователя

Серия LyraИнструкция пользователя

Серия Muse On/OffИнструкция пользователя

Серия Free MatchИнструкция пользователя

Серия Muse InverterИнструкция пользователя

Пульт управленияИнструкция пользователя

Руководство по установкеУстановка

Серия Bora InverterИнструкция пользователя

Серия AmberИнструкция пользователя

Серия U-MATCH неинверторУстановка и эксплуатация

Серия U-MATCH инверторУстановка и эксплуатация

еще
Кондиционеры GREE серии Bora превратят ваш дом в климатический «райский остров».
Сплит-системы GREE Bora уже при первом знакомстве порадуют Вас своей низкой стоимостью, дополнит приятное впечатление простая и удобная установка, а быстрота, с которой кондиционер создаст в помещении комфортный микроклимат, влюбит вас в него навсегда.
Свое название надежные и мощные кондиционеры GREE Bora получили в честь тихоокеанского «острова вечной весны» Бора-Бора, известного своим великолепным климатом, привлекающим туристов со всего мира.
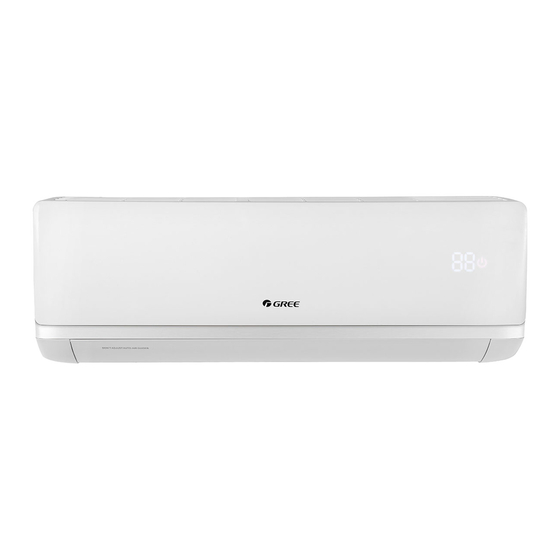
BORA имеет современный дизайн: белый корпус украшен сдержанной золотой полоской, а цифры информационной панели проступают как бы «сквозь» пластиковую панель. Кондиционер очень удобный, компактный и бесшумный. Внутренний блок снабжен надежной крепежной пластиной, а качественные силиконовые жалюзи работают бесшумно, не издавая раздражающего дребезжания.
В комплектацию сплит-системы GREE Bora входят два фильтра тонкой очистки:
— многофункциональный фильтр 3-в-1;
— угольный фильтр, который активно поглощает неприятные запахи в квартире.
Система оптимального распределения воздуха обеспечивается многоступенчатым вентилятором и автоматической работой жалюзи, что гарантирует комфортную прохладу без сквозняков. Низкий уровень шума внутреннего блока, аналогичный тихому шепоту, и режим «Комфортный сон» создадут идеальные условия для ночного отдыха.
Комфортен GREE Bora и для специалистов по монтажу, их Bora приятно удивит. Во-первых, на наружном блоке имеется дополнительная защитная крышка из прочного пластика, защищающая штутцера от влаги. С внутренней стороны крышки находится электросхема подключения, то есть искать ее специально не придется. Во-вторых, решетка
панели наружного блока съемная! Теперь ее можно снимать для чистки или менять, не меняя при этом всю панель.
Кондиционеры GREE серии Bora – климатический «райский остров» у Вас дома.
Лифлет Gree 2023 — Кондиционеры Gree
Каталог продукции Gree 2023 — Бытовые и полупромышленные кондиционеры
Каталог продукции Gree 2023 — Мультизональные системы кондиционирования GMV
Каталог продукции Gree 2022 — Мультизональные системы кондиционирования GMV6
Лифлет Gree 2022 — Кондиционеры Gree
Каталог продукции Gree 2021 — Бытовые и полупромышленные кондиционеры
Каталог продукции Gree 2019 — Бытовые и полупромышленные кондиционеры
Кондиционеры воздуха Gree серии Bora
Кондиционеры воздуха Gree серии Fairy
Кондиционеры воздуха Gree серии Lyra
Кондиционеры воздуха Gree серии Muse
Кондиционеры воздуха Gree серии Amber Inverter
Кондиционеры воздуха Gree серии Bora Inverter R-32
Кондиционеры воздуха Gree серии Bora Inverter R-410a
Кондиционеры воздуха Gree серии Change PRO Inverter
Кондиционеры воздуха Gree серии G-Tech Inverter
Кондиционеры воздуха Gree серии Lomo Inverter
Кондиционеры воздуха Gree серии Muse Inverter
Кондиционеры воздуха Gree серии Praktik Pro Inverter
Кондиционеры воздуха Gree серии Smart Inverter
Каталог продукции Gree 2020 — Бытовые и полупромышленные кондиционеры
Кондиционеры воздуха Gree серии U-CROWN Inverter
Кондиционеры воздуха Gree серии Soyal Inverter
Кондиционеры воздуха Gree серии Stage Inverter
Колонные кондиционеры Gree серии Fresh Wind GVA…
Мульти сплит-системы Gree серии FREE MATCH IV
Каталог продукции Gree 2022 — Бытовые и полупромышленные кондиционеры
Настенные сплит-системы Gree серии U-cool GWH…U…
Настенные сплит-системы Gree серии U-POEM GWH…UB / K3DNA3A
Настенные сплит-системы Gree серии CHANGE GWH…KF / K3DN…, GWH…KG / K3DN…
Настенные сплит-системы Gree серии BEAUTY GWHN…
Настенные сплит-системы Gree серии ARTFUL GWHN…A…
Настенные сплит-системы Gree серии VIOLA GWH…R… / K3NNA6A
Настенные сплит-системы Gree серии COZY NEW GWH… / K3NN…
Кондиционеры сплит-системы Gree серии COZY NEW: GWH07MA / K3NNC5A, GWH09MA / K3NNC5A, GWH09MA / K3NNB8A, GWH09MA / K3NNB8B, GWH12MB / K3NNC5A,
GWH12MB / K3NNB8A, GWH12MB / K3NNB8B, GWH18MC / K3NNC5A, GWH24MD / K3NNC5A, GWHN24FANK3A1B,
GWHN28FANK3A1A. Руководство пользователя.
Настенные сплит-системы Gree серии COZY GWH… / K3NN…
Кондиционеры сплит-системы Gree серии COZY R410a: GWH07MA / K3NNA4A, GWH09MA / K3NNA4A, GWH09MA / K3NNC5F, GWH09MA / K3NNB8A, GWH12MB / K3NNA4A,
GWH12MB / K3NNB8A, GWH18MC / K3NNA4A, GWH18MC / K3NNA4F, GWH24MD / K3NNA4A, GWHN24FANK3A1B, GWHN28FANK3A1A. Руководство пользователя.
Настенные сплит-системы Gree серии BEE, BEE PLASMA GWH… / K3NN…
Кондиционеры сплит-системы Gree серии BEE, BEE PLASMA R410a: GWH07NA/ K3NNB3A, GWH07NA / K3NNB3B, GWH09NA / K3NNB3A, GWH09NA / K3NNB3B, GWH12NB / K3NNB3A, GWH12NB / K3NNB3B, GWH18ND / K3NNB3A, GWH18ND / K3NNB3B, GWH24ND / K3NNB3A, GWH24ND / K3NNB3B. Руководство пользователя.
Мульти сплит-системы Gree серии FREE MATCH
Мульти сплит-системы Gree серии FREE MATCH II
Напольно-потолочные сплит-системы Gree серии U-MATCH
Канальные сплит-системы Gree серии FGR… / BNa-M
- Manuals
- Brands
- Gree Manuals
- Air Conditioner
- BORA GWH12AAB
- Owner’s manual
-
Contents
-
Table of Contents
-
Bookmarks
Quick Links
Split Air Conditioner
Thank you for choosing our product.
For proper operation, please read and keep this manual carefully.
If you have lost the Owner’s Manual, please contact the local agent or visit
www.gree.com or sent email to global@gree.com.cn for electronic version.
Related Manuals for Gree BORA GWH12AAB
Summary of Contents for Gree BORA GWH12AAB
-
Page 1
Split Air Conditioner Thank you for choosing our product. For proper operation, please read and keep this manual carefully. If you have lost the Owner’s Manual, please contact the local agent or visit www.gree.com or sent email to global@gree.com.cn for electronic version. -
Page 3
GWH09AAB-K6DNA3A/O GWH12AAB-K6DNA3A/O GWH18AAD-K6DNA1A/O GWH18AAD-K6DNA1B/O GWH24AAD-K6DNA1A/O… -
Page 4: Table Of Contents
Content Operation Notices The Refrigerant………………….1 Precautions………………….2 Parts Name………………….7 Installation Notice Safety operation of flammable refrigerant………….8 Installation dimension diagram …………….10 Safety precautions for installing and relocating the unit ……..11 Tools for installation …………………12 Selection of installation location …………….12 Requirements for electric connection …………..13 Installation Installation of outdoor unit ……………….14 Vacuum pumping ………………..17…
-
Page 5
Explanation of Symbols Indicates a hazardous situation that, if not avoided, will DANGER result in death or serious injury. Indicates a hazardous situation that, if not avoided, could WARNING result in death or serious injury. Indicates a hazardous situation that, if not avoided, may CAUTION result in minor or moderate injury. -
Page 6: The Refrigerant
Appliance filled with flammable gas R32. Before use the appliance, read the owner’s manual first. Before install the appliance, read the installation manual first. Before repair the appliance, read the service manual first. The Refrigerant To realize the function of the air conditioner unit, a special refrigerant circulates in the system.
-
Page 7: Precautions
Precautions WARNING Operation and Maintenance This appliance can be used by children aged from 8 years and above and persons with reduced physical, sensory or mental capabilities or lack of experience and knowledge if they have been given supervision or instruction concerning use of the appliance in a safe way and understand the hazards involved.
-
Page 8
Precautions WARNING Maintenance must be performed by qualified professionals. Otherwise, it may cause personal injury or damage. Do not repair air conditioner by yourself. It may cause electric shock or damage. Please contact dealer when you need to repair air conditioner. Do not extend fingers or objects into air inlet or air outlet. -
Page 9
Precautions WARNING Attachment Installation must be performed by qualified professionals. Otherwise, it may cause personal injury or damage. Must follow the electric safety regulations when installing the unit. According to the local safety regulations, use qualified power supply circuit and circuit break. Do install the circuit break. -
Page 10
Precautions WARNING Do not put through the power before finishing installation. If the supply cord is damaged, it must be replaced by the manufacturer, its service agent or similarly qualified persons in order to avoid a hazard. The temperature of refrigerant circuit will be high, please keep the interconnection cable away from the copper tube. -
Page 11
Precautions WARNING For the air conditioner with plug, the plug should be reachable after finishing installation. For the air conditioner without plug, an circuit break must be installed in the line. If you need to relocate the air conditioner to another place, only the qualified person can perform the work. -
Page 12: Parts Name
Parts Name Outdoor Unit air inlet Connection wire air outlet NOTICE: Actual product may be different from above graphics, please refer to actual products.
-
Page 13: Safety Operation Of Flammable Refrigerant
Safety operation of flammable refrigerant Qualification requirement for installation and maintenance man All the work men who are engaging in the refrigeration system should bear the valid certification awarded by the authoritative organization and the qualification for dealing with the refrigeration system recognized by this industry. If it needs other technician to maintain and repair the appliance, they should be supervised by the person who bears the qualification for using the flammable refrigerant.
-
Page 14
Safety operation of flammable refrigerant a. Shut down the unit and cut power supply b. Eliminate the refrigerant c. Vacuuming d. Clean it with N2 gas e. Cutting or welding f. Carry back to the service spot for welding The refrigerant should be recycled into the specialized storage tank. Make sure that there isn’t any naked flame near the outlet of the vacuum pump and it’s well-ventilated. -
Page 15: Installation Dimension Diagram
Installation dimension diagram Drainage pipe…
-
Page 16: Safety Precautions For Installing And Relocating The Unit
Safety precautions for installing and relocating the unit To ensure safety, please be mindful of the following precautions. Warning When installing or relocating the unit, be sure to keep the refrigerant circuit free from air or substances other than the specified refrigerant. Any presence of air or other foreign substance in the refrigerant circuit will cause system pressure rise or compressor rupture, resulting in injury.
-
Page 17: Tools For Installation
Tools for installation 1 Level meter 2 Screw driver 3 Impact drill 4 Drill head 5 Pipe expander 6 Torque wrench 7 Open-end wrench 8 Pipe cutter 9 Leakage detector 10 Vacuum pump 11 Pressure meter 12 Universal meter 13 Inner hexagon spanner 14 Measuring tape Note: ●…
-
Page 18: Requirements For Electric Connection
Requirements for electric connection Safety precaution 1. Must follow the electric safety regulations when installing the unit. air switch. 3. Make sure the power supply matches with the requirement of air conditioner. Unstable power supply or incorrect wiring or malfunction. Please install proper power supply cables before using the air conditioner.
-
Page 19: Installation Of Outdoor Unit
Installation of outdoor unit (select it according to the actual installation situation) 1. Select installation location according to the house structure. 2. Fix the support of outdoor unit on the selected location with expansion screws. Note: installing the outdoor unit. ●…
-
Page 20
Installation of outdoor unit Step four: connect indoor and outdoor pipes 1. Remove the screw on the right han- 3. Pretightening the union nut with dle of outdoor unit and then remove hand. the handle. pipe joint screw union nut handle 2. -
Page 21
Installation of outdoor unit 2. Fix the power connection wire and signal control wire with wire clip (only for cooling and heating unit). Note: ● Never cut the power connection wire to prolong or shorten the distance. Step six: neaten the pipes 1. -
Page 22: Vacuum Pumping
Vacuum pumping Use vacuum pump 1. Remove the valve caps on the liquid valve and gas liquid valve piezometer valve and the nut of refri- gas valve gerant charging vent. refrigerant charging 2. Connect the charging ho- valve cap vent se of piezometer to the refrigerant charging vent nut of refrigerant…
-
Page 23: Check After Installation
Check after installation Items to be checked Possible malfunction The unit may drop, shake or emit noise. Have you done the refrigerant leakage test? (heating) capacity. It may cause condensation and water dripping. It may cause condensation and water Is water drained well? dripping.
-
Page 24: Configuration Of Connection Pipe
Configuration of connection pipe 1. Standard length of connection pipe ● 5m、7.5m、8m 2. Min length of connection pipe For the unit with standard connection pipe of 5m, there is no limitation for the min length of connection pipe. For the unit with standard connection pipe of 7.5m and 8m, the min length of connection pipe is 3m.
-
Page 25
Configuration of connection pipe Sheet 2. Additional refrigerant charging amount for R32 Diameter of connection pipe mm Indoor unit throttle Outdoor unit throttle Cooling only, cooling and Cooling only Liquid pipe Gas pipe cooling and heating heating (g / m) (g / m) (g / m) Ф6… -
Page 26: Pipe Expanding Method
Pipe expanding method Note: Improper pipe expanding is the main cause of refrigerant leakage. Please expand the pipe according to the following steps: A: Cut the pipe E: Expand the port ● Expand the port with expander. the distance of indoor unit and hard outdoor unit.
-
Page 28
GREE ELECTRIC APPLIANCES, INC. OF ZHUHAI Add: West Jinji Rd, Qianshan, Zhuhai, Guangdong, China, 519070 Tel: (+86-756) 8522218 Fax: (+86-756) 8669426 E-mail: gree@gree.com.cn www.gree.com 66129927757…