Manuals Directory
Manualsdir.ru — Онлайн поиск инструкций и руководств
H4next, Портативный рекордер
- Текст
- Оригинал
Advertising

Воспроизведение этой документации полностью или частично в любых целях, запрещено.
© ZOOM Corporation
Руководство пользователя
Ру
сский
H4next
Портативный Рекордер
Advertising
Популярные бренды
- Apple
- Bissell
- Brother
- Canon
- Casio
- Dell
- Garmin
- Honeywell
- HP
- LG
- Motorola
- Nikon
- Panasonic
- Pioneer
- Samsung
- Sharp
- SINGER
- Sony
- Whirlpool
- Yamaha
Популярные инструкции
- Nikon — D5000
- Nikon — D40
- Nikon — D3100
- Nikon — D90
- Nikon — D7000
- Nikon — D80
- Nikon — D3000
- HP — Officejet Pro 8600
- Canon — EOS 60D
- Manuals
- Brands
- Zoom Manuals
- Recording Equipment
- H4N
- Operation manual
-
Contents
-
Table of Contents
-
Bookmarks
Quick Links
OPERATION MANUAL
© ZOOM Corporation
Reproduction of this manual, in whole or in part,by any means, is prohibited.
Related Manuals for Zoom H4n
Summary of Contents for Zoom H4n
-
Page 1: Zoom Corporation
OPERATION MANUAL © ZOOM Corporation Reproduction of this manual, in whole or in part,by any means, is prohibited.
-
Page 2: Special Features Of H4N
<MTR mode> which allows you to record You can also use the H4n as an SD card reader for your computer. You can even multiple tracks in multiple passes, overdubbing one or two tracks at a time. In take the recorded files from your computer and create an audio CD using those <STAMINA mode>…
-
Page 3: The H4N Is Ideal For The Following Scenarios
The H4n is ideal for the following scenarios Vocal recording Recording acoustic guitar sound Piano recitals Live performance recording The band practices Transfer analogue sound sources to digital sources Recording the meetings Any field sound recording Drum practice recording…
-
Page 4: Table Of Contents
6-5 Setting up: USB connection, H4n used as an Audio Interface ���� 033 Safety precautions for users ��������������������� 006 6-6 Setting up: USB connection, H4n used as a SD card reader ����� 035 Copyright warnings ������������������������� 007 6-7 Setting up: Built-in speaker ������������������� 036 7-1 About H4n modes �����������������������…
-
Page 5
1-06-3 Setting / Recording: Recording <ALWAYS NEW> in MTR mode �� 058 3-03-5 Effect <EDIT (EFX) >, editing EFX modules ����������� 086 1-07 Setting / Recording: TRACK MENU in MTR mode �������� 059 3-03-6 Effect <EDIT (LEVEL/RENAME) > ��������������� 087 1-08-1 Setting / Recording: Re-recording, <PUNCH IN/OUT> automatic �… -
Page 6
Edit / Output : <DIVIDE> ������������������� 116 Effect types on MTR mode and the parameter ������������� 139 5-13 Edit / Output : <MOVE> ������������������� 117 H4n patch list ��������������������������� 145 5-14 Edit / Output : <NEW PROJECT> ��������������� 118 H4n products spec ������������������������� 147 5-15 Edit / Output : <PROJECT (SELECT) > �������������… -
Page 7: Safety Precautions For Users
If the users ignore this symbol and handle the cover should be closed. device the wrong way, serious injury or death Do not use the H4n at a loud volume for a long could result. Environment time since this can cause hearing impairment.
-
Page 8: Copyright Warnings
Copyright warnings Recording of live performances Many artists and most live venues do not allow recording and photography and will check for cameras and recorders at the entrance. Even if recording is allowed, it is prohibited to sell, distribute, or upload to the Internet without the organizer’s authorization.
-
Page 9: Getting Started
Getting started…
-
Page 10: Recording Flow Using The H4N
1-1 Recording flow using the H4n The following is the basic flow of recording operation for the H4n. Depending on the application of the recording, you can select which recording mode and audio quality setting is right for the situation.
-
Page 11
Playback RECORD Edit·Output (Recording again and confirm from scratch) 5) The H4n has very convenient 6) In MTR mode the punch-in/ 7) The recordings are saved as Recording on STEREO mode/ ways to swiftly review/playback punch-out function enables you FILES and PROJECTS, and you STAMINA mode………P.049… -
Page 12: Easy Recording Guide [Stereo Mode]
1-2 Easy recording guide [STEREO MODE] The following is basic recording instructions using the built-in stereo microphones and built-in speaker in STEREO MODE. Confirm RECORD READY Power switch STEREO OR STANDBY MODE CONDITION Input from the built-in microphones [POWER] STEREO switch on.
-
Page 13
ADJUST START STOP PLAYBACK INPUT LEVEL RECORDING RECORDING DECREASE INCREASE [PLAYBACK] [STOP] − Press. Press. Press. Press. light on light off Counter turns Now recording Counter returns 0:00:00:00:000 [BACK PANEL] mark Remaining time on SD CARD Adjust the input sound rec level [RIGHT PANEL] Pause Recording… -
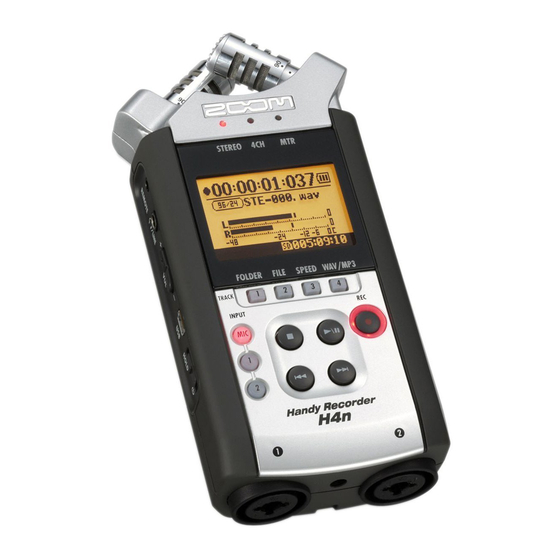
Page 14: Name And Function Of Each Part
2-1 Name and function of each part [FRONT PANEL] [BACK PANEL] 90 / 120° Variable XY Stereo microphones (Built-in) Input jacks for external stereo microphone STEREO/4CH/MTR mode indicator A built-in mono speaker Backlight Equipped Display Threaded Tripod mount • Short cut buttons on STEREO/4CH mode [1] <FOLDER> Battery cover…
-
Page 15
[RIGHT PANEL] [LEFT PANEL] [BOTTOM PANEL] DC5V AC ADAPTER jack Optional remote-control jack [DIAL] [LINE/PHONE] output jack [MENU] button Installed hole for a strap VOLUME [ + / − ] REC LEVEL [ + / − ] XLR/STANDARD PHONE XLR/STANDARD PHONE INPUT [1] jack INPUT [2] jack USB port… -
Page 16: Included Accessories
2-2 Included Accessories The following accessories are included in the H4n package. Inspect the package contents to be sure all accessories are included. MAIN BODY CASE Instruction manual 2 AA batteries (for testing the unit)
-
Page 17: Remote Control
Remote control (Option, sold separately) Operation of 〉 〉 〉 〉 P.045 remote control [FRONT PANEL] [SIDE PANEL]…
-
Page 18: Battery/Power Setting
3 Battery/Power setting Power for H4n recorder is supplied by 2 AA batteries or the AD-14 Power Adapter (sold separately). • AC power operation • Battery installation Open the battery An AC adapter is specified. Install two size AA batteries (IEC R6) compartment cover.
-
Page 19
* Approximate lifetime when it is used for continuous recording on WAV 44.1 kHz/16bit format. turned on via USB bus power supply. This function is only available when the H4n is used as an SD card reader or an audio interface. • Remaining lifetime of the battery HINT: When “Low Battery!”… -
Page 20: Power On And Off, How To Use Power And Hold Switch
Make sure all equipment is turned off. • Before switching the power on, lower the volume of instruments and monitors connected to the H4n. Insert SD card. • If the display reads «No Card» when boot- ing up, make sure…
-
Page 21
POWER OFF / SHUT DOWN HOLD Function [Preparation] The H4n features a HOLD function to make Turn off monitors first then instruments any button operation inactive, preventing errors during recording. To engage the hold function, [Power Off _ Shut down] Slide the power switch. -
Page 22: How To Use The [Rec] And Transport Control Buttons
4-2 How to use the [REC] and transport control buttons Buttons like [REC], [STOP], [PLAY/PAUSE], [FF], [REW] each have different functions depending on the H4n’s operation MODE. [FRONT PANEL] STEREO/4CH/STAMINA MODE MTR MODE [REC] button [REC] button Enter recording standby mode and…
-
Page 23: How To Use The Track [1], [2], [3] And [4] Buttons
4-3 How to use the track [1], [2], [3] and [4] buttons The buttons of TRACK [1] – [4] have different functions depending on the MODE. [Front Panel] MTR MODE STEREO/4CH/STAMINA MODE Move to the Switch from ‘RECORDING’ to ‘PLAYBACK’ of the <FOLDER SELECT>…
-
Page 24: How To Use The Input [Mic], [1] And [2] Buttons
Use all input sources like [MIC], [1] and [2] = All [MIC], [1] and [2] light on. When you switch to 4CH, H4n will receive 2- system stereo inputs from [MIC] and [1] [2] altogether. When you press the lighted button, each shows its input level and you can make adjustment to recording level operating [REC LEVEL].
-
Page 25: How To Use Rec Level And Volume
4-5 How to use REC LEVEL and VOLUME These keys allow you to adjust the levels of recording input and output volume. (All the modes are the same) [LEFT PANEL] [RIGHT PANEL] ‘REC LEVEL’ IN ANY MODE The recording levels coming from the INPUT [1] & [2] can REC LEVEL be adjusted from 1 to 100 with the (+/−) key.
-
Page 26: How To Use [Dial] And [Menu] Buttons
4-6 How to use [DIAL] and [MENU] buttons [DIAL] and [MENU] buttons are used for various settings while recording and during playback. Here are some basic explanations about each operation. [RIGHT PANEL] The basic operation for [DIAL] Rotate the [DIAL] = select an item [ DIAL ] Rotate the [DIAL], and the cursor on the display will move along the [DIAL] Select…
-
Page 27
The operation when [ ] cursor is on display (Date·Time Setting, Changing File Name Directory, etc) Pressing [DIAL] in, change [DIAL] operation on the top screen When you rotate the [DIAL], the numbers and letters. [ ] moves accordingly. Moving [DIAL] on the top screen, [ ] move accordingly. -
Page 28: Insert A Sd Card
SD card has This “War ning” will show MP3 44.1 kHz/128 kbps approx. 68 hours not been formatted in the H4n. To format, when an SD card is not in (measured in terms of stereo track) a recognized format. Select press [DIAL] down and select OK button.
-
Page 29: Set Date And Time
5-2 Set date and time <DATE/TIME> Each file will automatically record the date/time. To facilitate searching for files by date, be sure to set the date/time after every battery change. Set YEAR➝MONTH➝DAY➝TIME Press. (Time: Minute: Second) Select the item on <DATE/TIME>: Select <SYSTEM>…
-
Page 30: Setting Up: How To Connect External Audio Devices
6-1 Setting up: How to connect external audio devices The H4n offers versatile connectivity with options for any recording application. Remote control (option) Stereo microphones Headphones Monitor SD card INPUT: instrument Mixer (keyboard) INPUT: instrument (microphone) INPUT: instrument Personal computer (PC) (guitar) H4n’s very own AC adapter…
-
Page 31: Setting Up: Built-In Microphones
The H4n utilizes an X Y stereo mic configuration. By placing two microphones in a crossed pattern (opposing angles), the H4n can cover a wide area and capture sound sources in the center with clarity and definition. Sounds reach both mics simultaneously, and therefore no phase cancellation occurs between right and left channels.
-
Page 32: Setting Up: Built-In Microphones /Outside Microphone With Plug-In Power
External microphone recording Press the [MENU] button for more than 2 seconds, and start Please put H4n 30 — 50 cm away from the When you use the external microphone, be sure to operation from the top screen. sound source.
-
Page 33: Setting Up: Input [1], [2] Connections And Phantom Power Source
6-4 Setting up: INPUT [1], [2] connections and phantom power source Using INPUT [1] and INPUT [2] you can connect to a guitar, a bass, a keyboard, etc. [How to make setting of <PHANTOM> power] Connecting to instruments Press the [MENU] button for more than 2 seconds, and start For a guitar or a bass, you can operation from the top screen.
-
Page 34: Setting Up: Usb Connection, H4N Used As An Audio Interface
6-5 Setting up: USB connection, H4n used as an Audio Interface The H4n can be used as a two-in/two-out USB interface at 44.1kHz or 48kHz. From Connect H4n to Select <FREQUENCY> power ON computer with USB cable. and press. Connect H4n…
-
Page 35
44.1kHz. [Selection of input source] • You do not need a specific driver to use the H4n as an USB audio When you select an input the corresponding To monitor input signals, you must turn the interface. -
Page 36: Setting Up: Usb Connection, H4N Used As A Sd Card Reader
6-6 Setting up: USB connection, H4n used as a SD card reader When you use the H4n as a SD card reader, make the following settings. NOTE: After it’s powered ‘ON’, From connect the H4n to the computer • Before physically unplugging USB power ON with the USB cable.
-
Page 37: Setting Up: Built-In Speaker
6-7 Setting up: Built-in speaker The H4n is equipped with a built-in mono speaker. H4n built-in speaker This is a mono speaker for playback. Without connecting headphones to [LINE/PHONE] jack, you can easily playback the recorded data and listen. NOTE:…
-
Page 38: About H4N Modes
7-1 About H4n modes There are four operational modes in H4n: STEREO/STAMINA, 4 CH (CHANNEL), MTR (MULTI TRACK) mode. You can choose the mode according to your need. • STEREO mode • STAMINA mode • 4CH mode • MTR mode…
-
Page 39: Selecting A
• The current mode is indicated on the FRONT PANEL by Mode Indicator LEDs. • The H4n will power up in the same mode it was in Press. when turned off. • When booting up for the first time, the default mode is ‘STEREO’.
-
Page 40: Details About Modes
MTR mode STAMINA MODE In STEREO mode, you can select 2 different inputs In 4CH MODE the H4n records two stereo You can record tracks in MONO or STEREO from either INPUT[MIC] or INPUT[1] and INPUT[2], WAV files: one stereo WAV file for the built-in INPUT [1], INPUT [2] or the internal microphones.
-
Page 41: Mode> Screens: Stereo And Stamina Modes
8-1 <MODE> screens: STEREO and STAMINA modes • Explanation of the top screen Display of recorder’s condition Counter REMAINING BATTERY LIFETIME during battery running Recording lapse and playback lapse: STOP Display: 00(time):00(minute):00(second):000(1/1000second) Recording Standby When the display of “Low Battery” is shown, blink it is time to change battery.
-
Page 42: Mode> Screen: 4Ch Mode
8-2 <MODE> screen: 4CH mode • Explanation of the top screen Display of recorder’s condition Counter REMAINING BATTERY LIFETIME during battery running Recording lapse and playback lapse: STOP Display: 00(time):00(minute):00(second):000(1/1000second) Recording Standby When the display of “Low Battery” is shown, blink it is time to change battery.
-
Page 43: Mode> Screen: Mtr Mode
8-3 <MODE> screen: MTR mode • Explanation of the top screen [DIAL] operations ➀ ➁ ➂ ➃ on the top screen Display of recorder’s condition Counter ➀ Recording lapse and playback lapse: Counter Function: STOP ☞ Ref. P.102 Appoint time Display: 00(time):00(minute):00(second):000(1/1000second) Recording Standby [REC] button…
-
Page 44: Mode> Screen: Main Menu
8-4 <MODE> screen: MAIN MENU The Menu icon list is displayed by [MENU] button. <FOLDER> <FILE> <INPUT> <REC> <TOOL> Press. STEREO mode Select items and press. STAMINA mode <FOLDER> <FILE> <INPUT> <REC> <TOOL> CANCEL: To return back to the top, p re s s [ M E N U ] b u t t o n 4CH mode more than 2 seconds.
-
Page 45
Display at the bottom of Menu screen In the recording and playback menu, the current re- cording condition is displayed at the bottom left of the screen. <PLAY MODE> <SYSTEM> <SD CARD> <USB> <MODE> On the right bottom of the screen the current folder number i s d i s p l a y e d ( O n S t e r e o , 4 c h a n d… -
Page 46: Option: Remote Control Operation
9 Option: Remote control operation When you use the optional remote controller, you can operate the H4n from a distance. Recording and placing marks. Engages recording standby condition and Remote control button operation Stop counter resets to 0. Start recording and the counter begins to…
-
Page 47: Operations
Operations…
-
Page 48: Setting / Recording: Set Input Source And Recording Level
1-01 Setting / Recording: Set input source and recording level Control settings for the targets, built-in microphones or external input jacks. STEREO MODE 4CH MODE Use both [MIC] and INPUT [1] [2] stereo input. Use the stereo input source of either [MIC] or INPUT [1] [2]. Built-in microphones Built-in Microphones INPUT [1] jack…
-
Page 49
MTR MODE Any of tracks 1-4 can be set for mono or stereo input. SELECT the input per track one by one and adjust. Use the REC LEVEL Press the selected track and input button. SELECT the input to 2 tracks and adjust. Press REC LEVEL and adjust the level. -
Page 50: Setting / Recording: Recording In Stereo And Stamina Mode
1-02 Setting / Recording: Recording in STEREO and STAMINA mode These are the steps to begin recording in STEREO or STAMINA mode. [RECORDING DIRECTION] Adjust the recording Press the [MENU] button for more than 2 seconds, and start level of the input source. operation from the top screen.
-
Page 51
HINT: [TEMPORARY STOP] <REC FORMAT> <FILE NAME> change MARK In STEREO mode you can Recorded files are named When the recording format light blinks record in 19 different file for- a u t o m a t i c a l l y. Yo u c a n is WAV, you can mark your Press mats using WAV and MP3. -
Page 52: Setting / Recording: Recording Format
1-03 Setting / Recording: Recording format <REC FORMAT> Choose recording file settings <REC FORMAT> before recording. NOTE: Press the [MENU] button for more than 2 seconds, and start How to use WAV and MP3 format operation from the top screen. REC FORMAT •…
-
Page 53: Setting / Recording: File Name
1-04 Setting / Recording: File name <FILE NAME> When recording, a file name is automatically assigned. To change that, take the following steps. Press the [MENU] button for more than 2 seconds, and start operation from the top screen. File Name STEREO mode: STE-×××.wav (mp3) : ‘STE-‘3 figures, extension Press.
-
Page 54: Setting / Recording: Recording On 4Ch Mode
1-05 Setting / Recording: Recording on 4CH mode This is the method to record 4 channel stereo sounds coming from the built-in mic and the external input jack. [RECORDING DIRECTION] Adjust the recording level Press the [MENU] button for more than 2 seconds, and start of the input sources.
-
Page 55
HINT: [TEMPORARY STOP] FILE NAME <REC FORMAT> CHANGE Mark On 4CH mode the input from If you want change, operate before While the recording format is WAV, light blinks t h e b u i l t — i n a n d t h e e x t e r n a l recording. -
Page 56: Setting / Recording: Recording In Mtr Mode
1-06-1 Setting / Recording: Recording in MTR mode Using multiple tracks, you can combine mono and stereo recordings. Change to <REC MODE>, <OVERWRITE/ ALWAYS NEW> [RECORDING DIRECTION] Press the [MENU] button for Change to MTR mode more than 2 seconds, and start operation from the top screen.
-
Page 57
About INPUT SOURCE and TRACK Only one recording track Two recording tracks 1. Input source comes from either INPUT [1] or INPUT [2]. 1. Input source comes from either INPUT [1] or INPUT [2]. INPUT [1] or [2] TRACK Track 1 or 3 INPUT [1] or [2] Track 2 or 4 The same signals are sent to both tracks. -
Page 58: Setting / Recording: Recording In Mtr Mode
1-06-2 Setting / Recording: Recording <OVER WRITE> in MTR mode You can select from two recording modes. Using the <OVERWRITE> mode, you can overwrite new sounds on the existing file. Press the [MENU] button for more than 2 seconds, and start operation from the top screen.
-
Page 59: Setting / Recording: Recording In Mtr Mode
1-06-3 Setting / Recording: Recording <ALWAYS NEW> in MTR mode In ALWAYS NEW, a new file is made whenever it records. Press the [MENU] button for more than 2 seconds, and start operation from the top screen. Choose the appropriate Input setting �…
-
Page 60: Setting / Recording: Track Menu In Mtr Mode
1-07 Setting / Recording: TRACK MENU in MTR mode This is an exclusive menu available only in MTR mode to set a track. Link tracks together, create a stereo track, or you can create a special setting for output effects. Press the [MENU] button for more than 2 seconds, and start operation from the top screen.
-
Page 61
Only on MTR MODE NOTE: NOTE: NOTE: • You cannot record on the <KARAOKE> track. Setting for <STEREO LINK>, • You can only playback a mono file on ‘MONO TRACK’ and • When the <STEREO LINK> turns on automatically with a <FILE>… -
Page 62: Setting / Recording: Re-Recording, Automatic
1-08-1 Setting / Recording: Re-recording, <PUNCH IN/OUT> automatic This function, <PUNCH IN/OUT>, allows you to partially re-record a recorded file. Here we explain how to start <PUNCH IN> and end <PUNCH OUT> automatically. Press the [MENU] button for Change from <REC MODE> more than 2 seconds, and start to <OVERWRITE>…
-
Page 63
Only on MTR MODE NOTE Setting available on MTR mode and <OVERWRITE> recording. Set the recording end position, <PUNCH OUT> Re-recording Rewind the file to the head Press the desirable position for ‘PUNCH OUT’. (Counter: 0) or to the position to start re-recording ‘PUNCH IN’. -
Page 64: Setting / Recording: Re-Recording, Manual
1-08-2 Setting / Recording: Re-recording, <PUNCH IN/OUT> manual Using [OVERWRITE] recording operation in MTR mode, you can manually punch in and out. Press [REC] button during playback, from that pressed position you can start re-recording. Press the [MENU] button for Change from <REC MODE>…
-
Page 65
Only on MTR MODE Re-recording (Manual <PUNCH IN/OUT>) Press [FINISH RECORDING]. Performance (Not recording). light off Press [START RECORDING]. light on Press [PLAYBACK FINISH]. light on light on Performance (Recording). → RECORDING START FINISH RECORDING PLAY PLAY Start Stop Re-recording… -
Page 66: Recording Function
2-01-1 Recording function <AUTO REC> The H4n can detect when the input level surpasses your predetermined level, and can automatically start recording from the recording standby position. Pressing the [MENU] button long for two seconds, start to operate from the top screen of the MODE.
-
Page 67: Recording Function
2-01-2 Recording function <AUTO REC STOP> When <AUTO REC> is on and recording, the H4n will automatically stop recording when the input level goes below a predetermined level. Press the [MENU] button for more than 2 seconds, and start operation from the top screen.
-
Page 68: Recording Function
Select <ON> and press. Press. Select <REC> and press. HINT In PRE REC mode the H4n will pre-record audio two sec- onds before the record button is pressed. Select <PRE REC> and press. NOTE • You cannot use this setting during recording and playback.
-
Page 69: Recording Function
2-03 Recording function <LO CUT> The <LO CUT> filter setting allows you to eliminate wind or blowing noises. Press the [MENU] button for more than 2 seconds, and start operation from the top screen. Select the setting input source. Press. Select <INPUT>…
-
Page 70: Recording Function
2-04 Recording function <COMP/LIMIT> The <COMP / LIMIT> setting can compensate for volume differences. For each input source, low level input signals are lifted up and high level input signals are controlled down when recording. Press the [MENU] button for Select the setting input source.
-
Page 71: Recording Function
2-05 Recording function <REC LEVEL AUTO> This function automatically sets the level for recording. Press the [MENU] button for more than 2 seconds, and start operation from the top screen. HINT: When <REC LEVEL AUTO> is used, the unit automatically Press.
-
Page 72: Recording Function
2-06 Recording function <MONITOR> Turning on the MONITOR function allows you to monitor input signals at all times. Press the [MENU] button for more than 2 seconds, and start operation from the top screen. Select <ON> and press. Press. Select <INPUT> and press. HINT: You can always monitor the input source through [LINE/ Select <MONITOR>…
-
Page 73: Recording Function
2-07 Recording function <MONO MIX> Engaging <MONO MIX> blends the left and right signals down to mono then records dual-mono to each left and right channel. Press the [MENU] button for more than 2 seconds, and start operation from the top screen. Select <MONO MIX>…
-
Page 74: Recording Function
2-08 Recording function <MS STEREO MATRIX> This function enables you to convert the stereo microphone signals when using a MID/SIDE recording configuration. Press the [MENU] button for more than 2 seconds, and start operation from the top screen. Press. <ON / OFF> <MID LEVEL>…
-
Page 75
NOTE: <SIDE LEVEL> <SOURCE> <CH SETTING> You cannot use this function A bi-directional microphone <SIDE> and Enable to select what input is effective. Allocate <MID> inputs and <SIDE> together with <MONO MIX>. <MID> are perpendicular each other. (Only on 4CH mode) inputs between Setting value: MUTE, −48.0 _ +12.0dB L-ch (INPUT [1]) and R-ch (INPUT [2]). -
Page 76: Tuner
3-01-1 Tuner <TUNER (CHROMATIC) > The H4n features a tuner with multiple tuning modes. Press the [MENU] button for more than 2 seconds, and start operation from the top screen. Tuning. Press. The indicator shows the input signals are higher or lower than the ‘NOTE’…
-
Page 77: Tuner, All Other
3-01-2 Tuner, all other <TUNER> Aside from CHROMATIC, there are other tuning modes such as GUITAR, BASS, OPEN A, OPEN D, OPEN E, OPEN G and DADGAD. Press the [MENU] button for more than 2 seconds, and start operation from the top screen. Tuning.
-
Page 78: Tuner
3-01-3 Tuner <TUNER (CALIB) > This function allows you to calibrate the tuner. Press the [MENU] button for more than 2 seconds, and start operation from the top screen. Select <CALIB> press. Press. Select <TOOL> and press. Select frequency numbers. Select <TUNER>…
-
Page 79: Tuner
3-01-4 Tuner <TUNER (INPUT) > Only on 4CH MODE In 4CH mode you can select the input source for the tuner. HINT: Press the [MENU] button for more than 2 seconds, and start Tuning display Tuner type and code operation from the top screen. String number/ note name 〈…
-
Page 80: Metronome
3-02 Metronome <METRONOME> The metronome has other convenient functions such as click, pre-count, tempo, sound, etc. Press the [MENU] button for more than 2 seconds, and start operation from the top screen. Press. <CLICK> <PRE COUNT> This setting turns the metronome on or off dur- Set the count number just before the ing recording, playback or both.
-
Page 81
NOTE: The metronome starts at the beginning of recording and playback. If you start in the middle of a song or track, the metronome beats may not be in sync with the song. <TEMPO> <SOUND> <PATTERN> <LEVEL> Set the metronome speed. Set the metronome tone. -
Page 82: All About Effect
3-03-1 All about EFFECT Brief outline about how to use <EFFECT>, its flow, input and output [Flow of the EFFECT] P.038 Change of the mode (MTR mode) #3 Import the patch <IMPORT> #1 Use <EFFECT> #2 Edit the patch <EDIT> Select the mode P.083 Use the pre-set patch as it is…
-
Page 83
Only on MTR MODE About input and output of [EFFECT] You can use EFFECT in MTR mode for mono or stereo signals. The flow of signals will change corresponding to the input sources and recording tracks. 1. Input source comes from either INPUT [1] or [2] EFFECT INPUT [1] or [2] TRACK… -
Page 84: Effect
3-03-2 Effect <EFFECT> Only on MTR MODE Using the EFFECT made up of 2 modules in MTR mode, you can add various effects to the input signals. Press the [MENU] button for more than 2 seconds, and start operation from the top screen. Select No.
-
Page 85: Effect , Patch Edit
3-03-3 Effect <EDIT>, patch edit Only on MTR MODE You can create your own patch by combining effects and adjusting the parameter settings. EDIT MENU Select the desired sound No. :PATCH NAME and press. <PRE AMP> <LEVEL> PRE AMP module contains Adjust PATCH level.
-
Page 86: Effect , Editing Pre Amp Modules
3-03-4 Effect <EDIT (PRE AMP) >, editing PRE AMP modules Only on MTR MODE You can edit the PATCH using PRE SET EFFECT. Select the desired PATCH and edit it..P084 ADJUST PRE AMP module ADJUST PARAMETER Select <PRE AMP>and press. ICON PRE AMP MODULE CONDITION ON / OFF…
-
Page 87: Effect , Editing Efx Modules
3-03-5 Effect <EDIT (EFX) >, editing EFX modules Only on MTR MODE Edit the patch by selecting from various parameters that correspond closest to your desired effect. Select the nearest image PATCH and edit it..P084 ADJUST EFX module Select <EFX> and press. ICON HINT: PRE AMP MODULE CONDITION…
-
Page 88: Effect
3-03-6 Effect <EDIT (LEVEL/RENAME) > Only on MTR MODE Adjust the levels of the patch and change the name. EFFECT 〈EDIT〉 …P.084 LEVEL RENAME Select <RENAME> and Select <LEVEL> and press. press. Change the number and Change the PATCH name press.
-
Page 89: Effect
3-03-7 Effect <EDIT (STORE) > Only on MTR MODE EFFECT 〈EDIT〉 …P.084 STORE Select <STORE> and press. NOTE: The items you edited have ‘ED’ display and confirmed by <STORE>operation. Select not <STORE>. Confirmed <STORE>. Select the ‘PATCH No.’ (not stored) where to save and press.
-
Page 90: Effect , Taking In A Patch From Another Project
3-03-8 Effect <IMPORT>, taking in a patch from another PROJECT You can apply the edited and saved EFFECT PATCH, used in other project to the current PROJECT. SELECTED EFFECT…P.083<EFFECT> <ALL> read in all patches Press <IMPORT> from Select PROJECT Select <NEXT> and press. the <EFFECT>…
-
Page 91
Only on MTR MODE <EACH> import one patch Select <NEXT> and press. Select <YES> and press. The patch selected at step6 is now imported to the present project. Select an import patch and press. NOTE: When pressing the <IMPORT>, “No Other Project!”… -
Page 92: A Sing-Along Machine Preparation
3-04-1 A sing-along machine <KARAOKE> preparation Create spontaneous music files and convert them into KARAOKE form, then record vocals or additional guitar sounds over those files. [Flow of the KARAOKE] Press the [MENU] button for more than 2 seconds, and start operation from the top screen.
-
Page 93
Only on MTR MODE Continue to the next page Make CENTER CANCELATION of the KARAOKE track Change the KEY of KARAOKE track Select TRACK MENU icon Select TRACK MENU icon and press. and press. HINT: The contents of KARAOKE Select <CNT CANCEL> and press. Select <KEY>… -
Page 94: A Sing-Along Machine Recording
3-04-2 A sing-along machine <KARAOKE> recording Only on MTR MODE A slight adjustment of KARAOKE TRACK KEY. Recording on KARAOKE Select TRACK MENU icon Connect the microphone. and press. Press the INPUT button corresponding to the connected input jack. Select the track menu icon and press. Select <FINE>…
-
Page 95: Playback : Playback Files (Stereo, 4Ch And Stamina Modes)
4-01 Playback : Playback files (stereo, 4ch and stamina modes) Immediately after recording, you can playback the file by pressing the [PLAY/PAUSE] button. If you prefer to call up the files for later playback, take the following steps. Press the [MENU] button for more than 2 seconds, and start operation from the top screen.
-
Page 96: Playback :
4-02 Playback : <PLAY MODE> Aside from general playback, you can also select 1) one file only playback, 2) repeat playback of one file, and 3) all files repeat playback. Press the [MENU] button for more than 2 seconds, and start operation from the top screen.
-
Page 97: Playback : Setting Marks
4-03 Playback : Setting marks While operating file playback you can create marks at desired spots. You can move easily to the spot during playback. During playback operation, How to create marks press the [REC] button. Mark A Mark B How to playback the marked file FILE You can move to the marked position…
-
Page 98: Playback :
4-04 Playback : <AB REPEAT> The <AB REPEAT> repeat setting allows you to playback two points on the file repeatedly. Press the [MENU] button for more than 2 seconds, and start operation from the top screen. [START PLAYBACK] Press. Press. Select <TOOL>…
-
Page 99
HINT: NOTE: Caution: After setting up A and B During recording and playback, When you move around in the file using [FF] points press the [REC] button, you cannot make any settings and [REW] buttons and whenever you press you can cancel all settings. after Step 3 of <AB REPEAT>. -
Page 100: Playback :
4-05 Playback : <SPEED> Only on STEREO MODE You can adjust playback speed of the file. «Short cut» Press the [MENU] button for Pressing TRACK more than 2 seconds, and start on the top screen. operation from the top screen. Adjust playback speed.
-
Page 101: Playback :
4-06 Playback : <MIXER> Only on 4CH MODE In 4CH mode you can use the mixer to adjust the playback LEVEL and PAN settings of two stereo files. Press the [MENU] button for more than 2 seconds, and start operation <LEVEL>…
-
Page 102: Playback : Playback Files (Mtr Mode)
4-07 Playback : Playback files (MTR mode) Only on MTR MODE There are various ways to playback in MTR mode: Create and record files separately, assign them to tracks and play them back simultaneously. TRACK [ 1] [2 ] [3] [4]…
-
Page 103: Playback : Appointing Time With A Counter
4-08 Playback : Appointing time with a counter Only on MTR MODE Using the counter, you can scroll to any desired point in a recording. Press the [MENU] button for more than 2 seconds, and start operation from the top screen. Set the time: Select the figures according Select the counter…
-
Page 104: Edit / Output :
5-01 Edit / Output : <FOLDER SELECT> Select the folder that contains your targeted file. Press the [MENU] button for more than 2 seconds, and start operation from the top screen. Press. Select <FOLDER> and press. «Short cut» Pressing TRACK on the top screen.
-
Page 105: Edit / Output :
5-02 Edit / Output : <FILE SELECT> Selecting playback files from the file list. Press the [MENU] button for 長押し more than 2 seconds, and start トッ プ画面より operation from the top screen. Select <SELECT> and press. Press. Select <FILE> and press. «Short cut»…
-
Page 106: Edit / Output :
5-03 Edit / Output : <FILE INFORMATION> This function displays the selected file information. SELECTING THE FILES…P.104 <FILE SELECT> Select <INFORMATION> and press. NAME Name of the file The recorded date of the file, or the renewal date when DATE it created by PC or other device.
-
Page 107: Edit / Output :
5-04 Edit / Output : <FILE DELETE> Delete a selected file. SELECTING THE FILES…P.104 <FILE SELECT> Select <DELETE> and press. Select <YES> and press. a deleting file NOTE: Caution; Once deleted, you cannot retrieve the file.
-
Page 108: Edit / Output :
5-05 Edit / Output : <FILE DELETE ALL> Delete all the files in the folders and projects. SELECTING THE FILES…P.104 <FILE SELECT> Select <DELETE ALL> and press. Select <YES> and press. The name of the folder or the project to delete files. NOTE: Once deleted, you cannot retrieve the file.
-
Page 109: Edit / Output :
5-06 Edit / Output : <FILE (COPY)> Only on MTR MODE In MTR mode you can copy files. The copies are saved in the same project as the original files. This function is useful when you want to preserve the original master copy. Press the [MENU] button for more than 2 seconds, and start operation from the top screen.
-
Page 110: Edit / Output :
5-07 Edit / Output : <FILE RENAME> In STEREO, MTR and STAMINA MODE, you can change the name of the file. When recorded in 4CH MODE, the file names cannot be changed. SELECTING THE FILES…P.104 <FILE SELECT> [Input a letter or number.] Select <RENAME>…
-
Page 111
HINT: NOTE: When converting letters, In case of two files with the Display when the file same name. The display name is over follow the next order: shows «This file name already 12 characters. When the name of the file exists!», the screen returns (space)!#$%&'()+,-01234 has more than 12 letters, a… -
Page 112: Edit / Output :
5-08 Edit / Output : <FILE MP3 ENCODE> Only on STEREO MODE In STEREO MODE you can encode a WAV FILE into MP3 format at various bit rates. SELECTING THE FILES…P.104 <FILE SELECT> Select <MP3 ENCODE> and press. Select <EXECUTE> and press. Select <BIT RATE>…
-
Page 113: Edit / Output :
5-09 Edit / Output : <FILE NORMALIZE> This function automatically adjusts the volume level of a recorded file for enhanced sound quality and audio consistency. SELECTING THE FILES…P.104<FILE SELECT> Select <NORMALIZE> and press. Select <YES> and press. NOTE: <NORMALIZE> function is only available for files recorded in WAV format…
-
Page 114: Edit / Output :
5-10 Edit / Output : <FILE STEREO ENCODE> This function will mix down a 4CH file to a stereo file. The resulting files are stored in the folder in STEREO mode. SELECTING THE FILES…P.104 <FILE SELECT> You should select to make MIXER Select <STEREO ENCODE>…
-
Page 115
Only on 4CH MODE HINT: Select the folder on STEREO mode Select <SAVE IN> EXECUTION You cannot have two files to save the encoded files. with the same name. If the Select <EXECUTE> screen says “File name exists!”, Select <SAVE IN> and press. and press. -
Page 116: Edit / Output :
The mark the user created. lighter. WAV96kHz/16bit WAV48kHz/16bit WAV44.1kHz/16bit WAV48kHz/24bit NOTE: WAV44.1kHz/24bit ☞ WAV48kHz/16bit Ref. The H4n will place the mark on the WAV44.1kHz/16bit P.051 <REC FORMAT> point automatically when sound Light P.096 Setting the mark dropout happens during recording.
-
Page 117: Edit / Output
5-12 Edit / Output : <DIVIDE> Only on STEREO MODE On STEREO MODE, you can divide files at any desired position. SELECTING THE FILES…P.104 <FILE SELECT> [DIVIDE POSITION] Select <DIVIDE> and press. You should press at the desirable dividing spot. Operation of button on <DIVIDE>…
-
Page 118: Edit / Output :
5-13 Edit / Output : <MOVE> NOTE: This function is used to move files to a different folder or mode. MOVABLE FILE FORMAT • Only stereo files can move to SELECTING THE FILES…P.104 <FILE SELECT> stereo folder. Monaural files Select <NEXT> and press. cannot move to the stereo fold- ers.
-
Page 119: Edit / Output :
To change the name of the new project. Numbering of the projects Press. Select <NAME> and • The H4n numbers new press. projects automatically. • You cannot change the Select <PROJECT> and press. number. • You can use the same name in multiple projects Select the letter to change and press.
-
Page 120: Edit / Output :
5-15 Edit / Output : <PROJECT (SELECT) > Only on MTR MODE Select a project stored on the SD card. P re s s t h e [ M E N U ] b u t t o n f o r more than 2 seconds, and start operation from the top screen.
-
Page 121: Edit / Output :
5-16 Edit / Output : <PROJECT (DELETE) > Only on MTR MODE This function will delete a project. Press the [MENU] button for more than 2 seconds, and start operation from the top screen. Select a project to be Press. deleted and press.
-
Page 122: Edit / Output :
Select <OK> and press. HINT: Select the project to change Project number; the name and press. • The H4n numbers new proj- When you change letters, you can change in ects automatically. the following order: • You cannot change the number.
-
Page 123: Edit / Output :
5-18 Edit / Output : <PROJECT (COPY) > Only on MTR MODE Copy the project and create a new project with a new number. Select a target project and start operation.…P.119 Press the [MENU] button for more than 2 seconds, and start operation from the top screen.
-
Page 124: Edit / Output :
5-19 Edit / Output : <PROJECT (BOUNCE) > You can combine tracks created in MTR mode and mix them down to one mono or stereo track. Select a target project and start operation.…P.119 Press the [MENU] button for more than 2 seconds, and start operation from the top screen.
-
Page 125
Only on MTR MODE Select output file format: mono or stereo Execution HINT: Select <FORMAT> and press. Select <EXECUTE> and press. B O U N C E m e a n s t o p u t together the various music data divided in different tracks and files into the stereo or monaural files. -
Page 126: Edit / Output :
5-20 Edit / Output : <PROJECT (PROTECT) > Only on MTR MODE Using the PROTECT function on your project prohibits dividing of tracks and the change of files in that project. Select a target project and start operation.…P.119 Press the [MENU] button for more than 2 seconds, and start operation from the top screen.
-
Page 127: Utility :
6-01 Utility : <DISPLAY BACK LIGHT> You can set the lighting time of the LCD BACK LIGHT on the display. Press the [MENU] button for more than 2 seconds, and start operation from the top screen. Select the time you desire and press. Press.
-
Page 128: Utility :
6-02 Utility : <DISPLAY CONTRAST> Adjust the display contrast. Press the [MENU] button for more than 2 seconds, and start operation from the top screen. Change the number Press. and press. Select <SYSTEM> and press. * You can adjust from #1 to #8. A higher the number corresponds to more contrast.
-
Page 129: Utility :
6-03 Utility : <BATTERY TYPE> By setting your battery type, H4n can correctly display the remaining lifetime of the battery. Press the [MENU] button for more than 2 seconds, and start operation from the top screen. Select the battery type and Press.
-
Page 130: Utility :
6-04 Utility : <VERSION> After it starts, the version of H4n can be confirmed. Press the [MENU] button for more than 2 seconds, and start operation from the top screen. Press. Select <SYSTEM> and press. Select <VERSION> and press. NOTE:…
-
Page 131: Utility :
6-05 Utility : <FACTORY RESET> Returns all the settings back to the original default condition. Press the [MENU] button for more than 2 seconds, and start operation from the top screen. Select <YES> and press. Press. Select <SYSTEM> and press. Select <FACTORY RESET>…
-
Page 132: Utility :
6-06 Utility : <REMAIN> You can confirm the remaining capacity of the SD CARD. Press the [MENU] button for more than 2 seconds, and start operation from the top screen. Press. Select <SD CARD> and press. Select <REMAIN> and press. NOTE: approximate remaining capacity…
-
Page 133: Utility :
Select <SD CARD> and press. HINT: “Format Card” If you insert an SD card not format- ted for the H4n, during boot up the unit says “Format Card?” NOTE: Select <FORMAT> and press. • You cannot use this setting during recording and playback.
-
Page 134: Utility :
6-08 Utility : <VERSION UP> If H4n (and SD card) is connected to the computer (PC) that has access to the internet, you can download H4n software upgrades. You can verify H4n version The version of at <SYSTEM (VERSION)>. the main body…
-
Page 135: Utility: How To Use H2 And H4 Sd Cards
6-09 Utility: How to use H2 and H4 SD cards When you use the SD cards for H2 and H4 in the H4n, you can move their files and projects to the H4n. Insert SD card for H2/H4 unit into H4n and boot up the unit.
-
Page 137: Reference
Reference…
-
Page 138: Main Spec List By Mode
Main spec list by mode STEREO MODE STAMINA STEREO WAV: 44.1/48/96kHz 16/24bit 44.1kHz 16it STEREO WAV, STEREO MP3: STEREO WAV × 2: MONAURAL WAV, 44.1 kHz/16bit WAV type only Recording Format 48, 56, 64,80,96,112,128,160,192, 44.1/48kHz 16/24bit those total 4 tracks can be (fixed) 224,256, combined…
-
Page 139: Available Setting Menu List By Each Mode
Available setting menu list by each mode SYSTEM INPUT SETTING PROJECT STEREO STAMINA STEREO STAMINA STEREO STAMINA DATE/TIME LO CUT NEW PROJECT − − − − BACK LIGHT COMP/LIMIT − − SELECT − − − LCD CONTRAST MONITOR RENAME − −…
-
Page 140: Effect Types On Mtr Mode And The Parameter
Combination of Fender Combo amp and Ibanez TS-9 registered trademarks of their respective owners. The names are used only to illustrate sonic characteristics and do not indicate any affiliation with ZOOM CORPORATION. SD+MSstk Combination of Marshall stack amp and Boss SD-1…
-
Page 141
ZOOM. • Manufacturer names and product names mentioned in this table are trademarks or registered trademarks of their respective owners. The names are used only to illustrate sonic characteristics and do not indicate any affiliation with ZOOM CORPORATION. -
Page 142: Efx Module
Effect types on MTR mode and the parameter ■ EFX module ● Compressor/limiter effect types ● Modulation effect types This is a compressor which attenuates high-level signals This is an auto wah effect that tracks the input signal RackComp AUTO WAH and boosts lowlevel signals.
-
Page 143
This effect produces a metallic ringing sound. Adjusting the This effect produces a resonating and strongly undulating RING MOD FLANGER FREQUENCY drastic change of sound character. sound. Selects the insertion position of the EFX module: (1) DEPTH 0 − 100 Adjusts the modulation depth. -
Page 144
Effect types on MTR mode and the parameter ● Delay/reverb effect types This effect lends spatial depth to the sound by reproduc- This effect varies the sound like a talking modulator. ing the ambient atmosphere of a room. Adjusts the frequency range in which the effect (1) SIZE 1 −… -
Page 145
This is a reverse delay with a long delay time of up to [Table] RvsDelay 2500 milliseconds. Parameters with a < > symbol can be selected in note units, using 10−2500 (1) TIME Adjusts the delay time. ( Ref. P144) the metronome tempo as reference. -
Page 146: H4N Patch List
H4n patch list Effect patches in this page» Patch List» can be used in 4track mode and audio interface func- tion. (with sampling rate in 44.1kHz ) PREAMP Category Patch Name Description module module Fender Clean Basic clean sound optimized for recording.
-
Page 147
* Manufacturer names and product names mentioned in this patch list are trademarks or registered trademarks of their respective owners and do not indicate any affiliation with ZOOM CORPORATION. All product and artist names are intended only to illustrate sonic characteristics that were used as reference in the development of this product. -
Page 148: H4N Products Spec
USB functions can be operated by USB bus power A/D conversion 24 bit 24 bit × 128 oversampling DC 5 V 1A AC from AC adapter ( ZOOM AD-14 ) , Power D/A conversion 24 bit 24 bit × 128 oversampling…
-
Page 149: When You Think Something May Be Wrong With Your Machine
• Verify that there is sufficient free space on the SD card. • When playback is carried out with a track in recording standby condition, a temporary file is created in the H4n. If the remaining capacity of the SD card is Other problems low, the temporary file may use up all the remaining space, causing playback to stop.
-
Page 150: Index
Index EDIT (STORE) [4CH MODE] P139 Effect types and parameters P37·39 Details Copyright warnings Effects Mode and top screen CANCEL operation IMPORT P37·38 P145 Mode selection CARIB/TUNER Patch List Playback operation CHROMATIC/TUNER EFX module/EFFECT Recording operation COMP/LIMIT Connections P130 FACTORY RESET [FILE] AB repeat FILE (COPY)
-
Page 151
[MENU] button operations On-mic recording METRONOME Over write recording mode P100 IMPORT/EFFECT MIXER INPUT [MIC][1][2] buttons operations Mixing P37−44 INPUT/TUNER MODE MONITOR PATCH EDIT/EFFECT MONO MIX Patch List P145 MOVE P117 PAN/TRACK MENU [KARAOKE] P111 MP3 ENCODE Phantom power Preparation MP3 file format PLAY MODE Recording… -
Page 152
REC FORMAT Mode and top screen [USB connection] P17·38 REC LEVEL AUTO Mode setting H4n used as a SD card reader REC LEVEL operations Playback operation H4n used as an Audio Interface [REC] button operations Recording operation USB bus power… -
Page 153
The FCC regulation warning (for U.S.A.) This equipment has been tested and found to comply with the limits harmful interference to radio communications. However, there is no for a Class B digital device, pursuant to Part 15 of the FCC Rules. guarantee that interference will not occur in a particular installation. -
Page 156
4-4-3 Kanda-Surugadai, Chiyoda-ku, Tokyo 101-0062 Japan Web Site: www.zoom.co.jp © 2014 ZOOM CORPORATION Z2I-2089-01…
Русский H4next Портативный Рекордер Руководство пользователя © ZOOM Corporation Воспроизведение этой документации полностью или частично в любых целях, запрещено.
Специальные возможности H4n Специальные возможности H4n Спасибо, что вы выбрали рекордер ZOOM H4n (здесь и далее “H4n”). Этот прибор обладает огромным количеством возможностей, среди которых: • Технология “все в одном приборе” Устройство позволит вам создавать и записывать вашу музыку везде, где бы
Запись вокала Запись акустической гитары Фортепьянное выступление Запись живых выступлений Запись звучания группы на репетициях Оцифровка звука с аналоговых носителей Запись звука на собраниях Запись любых звуков в открытой местности Запись барабанов на репетиции H4n отлично подхлдит для следующих
Оглавление Оглавление Специальные возможности H4n …………………………………………………… 001 6-3 Настройка: Встроенные микрофоны/внешние <PLUG-IN> микрофоны ………… 031 H4n отлично подходит для следующих задач …………………………………… 002 6-4 Настройка: Входы INPUT [1], [2] и фантомное питание ……………………… 032 Оглавление
Оглавление 1-06-3 Настройка/запись: запись методом <ALWAYS NEW> в режиме MTR … 058 3-03-5 Редактирование блока модуляционных эффектов <EFX> …………… 086 1-07 Настройка/запись: Настройки дорожки [TRACK MENU] в режиме [MTR] ……… 059 3-03-6 Уровень/имя патча ………………………………………………………… 087 1-08-1
Оглавление 5-09 Редактирование Нормализация уровня записанного сигнала ……… 112 5-10 Редактирование: Конвертирование в стерео-формат ………………… 113 5-11 Редактирование: Список маркеров ……………………………………… 115 5-12 Редактирование: Разделение файлов …………………………………… 116 5-13 Редактирование: Перемещение файлов
Меры предосторожности Обратите внимание на символы, используемые в данной инструкции для предупреж дения об опасности и предотвращения несчастных случаев. Значения их символов приведены ниже: Игнорирование этого знака и, как следствие, невнимательное или неправильное обращение с прибором могут
Предупреждение по авторскому праву Предупреждение по авторскому праву Запись живых выступлений Многие музыканты, а также организаторы не разрешают фотосъемку, а также запись видео и аудио во время своих концертов. При входе будет проходить проверка на наличие звукозаписывающего оборудования. Даже
Знакомство с устройством Знакомство с устройством 008
Запись на H4n: последовательность действий 1-1 Запись на H4n: последовательность действий В этой главе описаны основные операции по записи звука с помощью Н4n. Вы можете выбирать тип записи и качество звука, наилучшим образом подходящие для конкретной ситуации. Подготовка Подключение к другим
Запись в режимах STEREO и STAMINA …………..………Стр.049 Запись в режиме 4CH ……………Стр.053 Запись в режиме MTR ……………Стр.055 Перезапись Воспроизведение и подтверждение Редактирование сброс (Исправление ошибок) 5) С помощью удобного интерфейса H4n вы сможете легко включать
Запись: Краткая инструкция (режим [STEREO]) 1-2 Запись: Краткая инструкция (режим [STEREO]) Ниже следуют пошаговые инструкции по записи, при использовании встроенного микрофона и динамика в режиме STEREO. 1 Переключатель питания в положение ON Переключатель [POWER] в положение ON. 2 3
Уменьшить “−” 5 6 7 Начало записи Остановка записи Воспроизведение [Воспроизведение] Увеличить “+” или Нажмите. Нажмите Загорится Счетчик показывает: Значок: идет запись Отображает уровень входных сигналов Запись: Краткая инструкция (режим [STEREO]) 4 Регулировка входной громкости [Остановка]
Название и функции элементов интерфейса 2-1 Название и функции элементов интерфейса [Лицевая панель] [Задняя панель] 90 / 120° Стерео-микрофон типа XY (встроенный) Индикатор [STEREO/4CH/MTR] Черно-белый дисплей • Обозначения кнопок для режима [STEREO/4CH] [1] [<FOLDER>] Папка [2] [<FILE>] Файл [3]
[Боковая панель] Название и функции элементов интерфейса [Боковая панель] [Нижняя панель] Гнездо для подключения адаптера постоянного питания DC5V Колесо прокрутки [DIAL] Гнездо для подключения пульта дистанционного управления Кнопка меню [MENU] Гнездо линейного выхода для наушников [LINE/PHONE]
Аксессуары в комплекте 2-2 Аксессуары в комплекте Следующие аксессуары включены в комплект устройства. Осмотрите упаковку, чтобы убедиться, что все детали на месте. Карта SD Ветрозащитный экран Крепежный адаптер (позволяет закрепить H4n на микрофонной стойке) Адаптер постоянного питания Кабель USB
Установка дополнительных деталей •Использование ветрозащитного экрана При записи на открытом воздухе вы можете использовать ветрозащитный экран, чтобы уменьшить уровень посторонних шумов. П у л ьт д и с т а н ц и о н н о го управления (дополнительно, продается отдельно) •Закрепление устройства на
Питание устройства 3 Питание устройства Питание устройства осуществляется при помощи включенного в коплект адаптера постоянного питания (входит в комплект) или батарей (не входят в комплект). • Операции с адаптером • Установка батарей Вставьте две батареи AA (IEC R6) 1 Откройте крышку отсека
Используемые батаереи Во всех режимах Около 6-ти часов * Вы можете использовать как традиционные алкалайновые батареи, так и их никельметаллгидридные аналоги. В режиме STAMINA Около 11-ти часов * Питание от USB Алкалайновая батарея * Приблизительное время работы от батарей при постоянной записи в
Включение и выключение питания, переключатель [HOLD] 4-1 Включение и выключение питания, переключатель [Hold/Power] Включение / Загрузка [Боковая панель] 1 [Подготовка] Убедитесь, что все оборудование находится в выключенном состоянии. 2 Вставьте карту SD. 3 [Включение _ Загрузка] Передвиньте
1 [Подготовка] Выключите сперва акустическую систему, потом инструменты. 2 [Выключение] Переместите переключатель POWER в положение OFF. Включение и выключение питания, переключатель [Hold/Power] Выключение питания Функция HOLD Интерфейс H4n поддерживает функцию HOLD, делающую все кнопки
Использование кнопки [REC] и кнопок управления курсором 4-2 Использование кнопки [REC] и кнопок управления курсором Кнопки [REC], [STOP], [PLAY/PAUSE], [FF], [REW] могут иметь различные функции, в зависимости от выбранного режима работы H4n. [Лицевая панель] Режим [STEREO/4CH/STAMINA] Кнопка
Использование кнопок дорожек [1], [2], [3] и [4] 4-3 Использование кнопок дорожек [1], [2], [3] и [4] Кнопки дорожек [1] – [4] могут иметь различные функции, в зависимоcти от выбранного режима. [Лицевая панель] Режим [MTR] Переключите режимы с [RECORDING] на [PLAYBACK] для любой из дорожек и
Использование кнопок входов [MIC], [1] и [2] 4-4 Использование кнопок входов [MIC], [1] и [2] Эти кнопки могут иметь различные назначения, в зависимости от выбранного режима записи. [Лицевая панель] Режим STEREO/STAMINA Нажмите кнопку INPUT [MIC] или INPUT [1][2]. Загорится соответствующий
Использование кнопок уровня записи [REC LEVEL] и громкости [VOLUME] 4-5 Использование кнопок уровня записи [REC LEVEL] и громкости [VOLUME] Эти кнопки позволят вам установить уровень входного и выходного сигналов при записи. [Боковая панель] [Боковая панель] Настройка уровня записи в любом режиме
Использование колеса прокрутки [DIAL] и кнопки [MENU] 4-6 Использование колеса прокрутки [DIAL] и кнопки [MENU] Кнопки [DIAL] и [MENU] используются для выполнения различных операций во время записи и воспроизведения. Ниже находится описание всех возможных операций. Основные операции для колеса
How to use [DIAL] and [MENU] buttons Операции с курсором [ ] (смена времени/даты, изменение имени файла/директории) Курсор [ ] будет перемещаться в соответствие направлением поворота колеса [DIAL]. Нажатие колеса прокрутки [DIAL] подтвердит смену значения. Курсор [ ] переместится Цвета выделенных
Установка карты SD 5-1 Установка карты SD Для записи необходима карта SD. Перед тем как вставить или вынуть карту, убедитесь, что питание выключено. [Установка карты SD] [Извлечение карты SD] ПРИМЕЧАНИЕ: 1 2 1 2 Выключите питание! Убедитесь, что питание выключено. Вставьте карту SD в слот.
Установка даты и времени <DATE/TIME> 5-2 Установка даты и времени <DATE/TIME> Каждому файлу автоматически присваиваются дата и время. Чтобы облегчить поиск файлов по дате, не забывайте устанавливать правильную дату/время после скаждой смены батарей. 1 Нажмите кнопку [MENU]. 2 Выберите <SYSTEM> и
Настройка: Подключение дополниельных устройств 6-1 Настройка: Подключение дополнительных устройств H4n предлагает широкие возможности по коммутации под любую задачу. Пульт дистанционного управления (дополнительно) Стереомикрофон Наушники А к ус тич е с к а я система карта SD Микшер Линейный вход:
Настройка: Встроенные микрофоны 6-2 Настройка: Встроенные микрофоны Ниже описаны специальные возможности встроенных микрофонов H4n. Расположение микрофонов системы XY Направленность: 90°, 120° Захват звука при помощи стереомикрофонов Центральная 90° Обычные стерео-микрофоны Высококачественный
Настройка: Встроенные микрофоны/внешние <PLUG-IN> микрофоны 6-3 Настройка: Встроенные микрофоны/внешние <PLUG-IN> микрофоны Входное гнездо для внешнего микрофона подходит как для обычных, так и для микрофонов, требующих фантомное питание. [Настройка питания типа <PLUG-IN>] Запись с близкого
Используя входы INPUT [1] и INPUT [2], вы можете подключить гитару, бас-гитару или клавиши и т.п. [ Н а с тр о й к а п и та н и я ти п а < P H A N TO M > ] Подключение инструментов Ги т а р у и л и б а с — г и т а р у м о ж н о подключить непосредственно в один из входов INPUT [1] или INPUT [2].
Настройка: Подключение по USB, использование H4n в качестве аудио-интерфейса. 6-5 Настройка: Подключение по USB, использование H4n в качестве аудио-интерфейса H4n можно использовать в виде 2-х канального аудио USB интерфейса, работающего в частоте 44.1кГц или 48 кГц. После включения питания
[Операции во время настройки в меню <AUDIO I/F>] [Эти кнопки используются во время настройки] Нажмите. <AUDIO I/F> MENU EFFECT Эффекты (толтко при 44.1 кГц) TUNER Тюнер MONITOR Просмотр PHANTOM Фантомное питание PLUG-IN DISCONNECT * Вызов [MENU] и насторйки ПОДСКАЗКА: Питание через вход PLUG-IN
Настройка: Подключение через USB, использование H4n в качестве SD карт-ридера 6-6 Настройка: Подключение через USB, использование H4n в качестве SD карт-ридера При использовании H4n в качестве SD карт-ридера, выполните следующие настройки После включения питания После выключения питания 1 После
Настройка: Встроенный динамик 6-7 Настройка: Встроенный динамик H4n оснащен встроенным моно-динамиком. Встроенный динамик H4n Встроенный моно динамик служит для воспроизведения файлов. Вы можете легко прослушать записанную дорожку, не подключая наушников к гнезду [LINE/PHONE]. ПРИМЕЧАНИЕ:
Описание режимов H4n 7-1 Описание режимов H4n Устройство поддерживает 4 режима записи: стерео [STEREO/STAMINA], четырехканальный [4CH], мультитрек [MTR]. Вы можете выбрать режим, наиболее подходящий для ваших задач. • Режим STEREO • Режим STAMINA • Режим 4CH • Режим MTR Вы можете легко с делать с
Выбор режима 7-2 Выбор режима Убедитесь в том, что вы выбрали правильный режим записи для ваших целей. Уд е р ж и в а й т е к н о п к у [ M E N U ] нажатой более 2-х секунд и начинайте действия с основной индикации. ПОДСКАЗКА: Подтверждение выбора режима • Текущий режим отображается индикатором
Описание режимов 7-3 Описание режимов Значения уровней выходных сигналов, а также функции сохранения и форматирования данных различаются у разных режимов. Режим [STEREO] Режим [4CH] Режим [MTR] В режиме 4CH устройство записывает 2 стерео дорожки в формате WAV: одна пишется встроенным
Информация на дисплее: режимы [STEREO] и [STAMINA] 8-1 Информация на дисплее: режимы [STEREO] и [STAMINA] • Описание основной индикации Состояние рекордера Пауза мигает Счетчик Индикатор состояния батареи во время работы Пройденное время при записи и воспроизведении. Стоп Запись Воcпроизведение
Информация на дисплее: режим [4CH] 8-2 Информация на дисплее: режим [4CH] • Описание основной индикации Состояние рекордера Счетчик Ожидание записи мигает Индикатор состояния батареи во время работы Пройденное время при записи и воспроизведении. Стоп Экран:
• Функции на начальном экране Операции с [DIAL] на начальном экране (1) Счетчик Состояние рекордера Стоп Запись Ожидание записи мигает Только при записи в режиме[ALWAYS NEW] Кнопка [REC] мигает Информация на дисплее: режим [MTR] 8-3 Информация на дисплее: режим [MTR] Пройденное время при записи и
Информация на дисплее: Основное меню 8-4 Информация на дисплее: Основное меню Попасть в основное меню можно, нажав кнопку [MENU]. 1 Папка <FOLDER> Файл <FILE> Вход <INPUT> Запись <REC> Доп. функции <TOOL> Папка <FOLDER> Файл <FILE> Вход <INPUT> Запись <REC> Доп. функции <TOOL> Проект <PROJECT> Файл
Режим воспроизведения Системные настройки <PLAY MODE> <SYSTEM> SD-карта <SD CARD> <USB> Режим <MODE> В правом нижнем углу экрана отображается номер текущей папки (в режимах Stereo, 4ch и Stamina). Перед использованием прибора на батареях, установите режим [STAMINA] с помощью переключателя STAMINA .
Дололнительные аксессуары: Пульт дистанционного управления 9 Дололнительные аксессуары: Пульт дистанционного управления При использовании пульта дистанционного управления (в комплект не входит, продается отдельно), вы имеете возможность управлять устройством на расстоянии. Запись и установка
Операции Операции 046
1-01 Настройка/запись: Установка типа входного источника и уровня громкости Основные настройки для встроенных микрофонов и входов. Настройка/запись: Установка типа входного источника и уровня громкости Режим [STEREO] Режим [4CH] Используются встроенный или внешний микрофон [MIC] и оба входа INPUT
Настройка/запись: Установка типа входного источника и уровня громкости Режим [MTR] Любая из дорожек 1-4 может быть использована как для источников стерео, так и моно сигналов. По очереди выберите входы для дорожек и произведите настройки Используйте функцию REC LEVEL 1 Нажмите кнопку,
1-02 Настройка/Запись: Запись в режимах [STEREO] и [STAMINA] Ниже представлены шаги для записи в режимах [STEREO] или [STAMINA]. Настройка/Запись: Запись в режимах [STEREO] и [STAMINA] [Порядок действий] Уд е р ж и в а й т е к н о п к у [ M E N U ] нажатой более 2-х секунд и начинайте действия с о
Индикатор мигает Нажмите мигает Счетчик не обнулится. Формат записи<REC FORMAT> Смена именни файла Маркер Записанным файлам автоматически присваиваются имена. Вы можете выбрать из двух форматов записи: <DEFAULT> и <DATE>. <DEFAULT>: STE-××× <DATE>: 090531-××× * Дата записи отмечена Исходным
1-03 Настройка/запись: Формат записи <REC FORMAT> Выполните настройки <REC FORMAT> перед началом записи. Настройка/запись: Формат записи <REC FORMAT> Уд е р ж и в а й т е к н о п к у [ M E N U ] нажатой более 2-х секунд и начинайте действия с о сновной индикации. 1 2 Нажмите. Выберите <REC> и
1-04 Настройка/запись: Имя файла <FILE NAME> Во время записи файлу автоматически присваивается имя. Чтобы изменить его, сделайте следующее: Настройка/запись: Имя файла <FILE NAME> Уд е р ж и в а й т е к н о п к у [ M E N U ] нажатой более 2-х секунд и начинайте действия с о сновной индикации. Имя
1-05 Настройка/запись: Запись в режиме 4CH Настройка/запись: Запись в режиме 4CH В этом режиме 4-канальная запись создается при помощи встроенного стереомикрофона и обоих входов INPUT [1] и [2]. Уд е р ж и в а й т е к н о п к у [ M E N U ] нажатой более 2-х секунд и начинайте действия с о сновной
Имя файла мигает Нажмите мигает Счетчик не обнулится. [Повтор записи] горит В режиме 4CH входные сигналы о т в с т р о е н н о го и в н е ш н е го микрофонов (или других ус тройс тв, подк люченных ко входам INPUT [1] и [2] сохраняются раздельно в формате STEREO WAV. Эти 2 стерео-файла всегда будут
1-06-1 Настройка/запись: Запись в режиме MTR Используя несколько дорожек, вы можете комбинировать запись в моно и стерео. Настройка/запись: Запись в режиме [MTR] [Порядок действий] Смена режима на <REC MODE>, <OVERWRITE/ ALWAYS NEW> Удерживайте кнопку [MENU] нажатой б о л е е 2 — х с е к у н д и н
Настройка/запись: Запись в режиме [MTR] Подробнее про входные сигналы [INPUT SOURCE] и дорожки [TRACK] Пишется одна дорожка Пишутся две дорожки 1. Записываемый сигнал поступает со входов INPUT [1] или INPUT [2]. INPUT [1] или [2] 1. Записываемый сигнал поступает со входов INPUT [1] или INPUT [2].
1-06-2 Настройка/запись: Перезапись <OVER WRITE> в режиме [MTR] Настройка/запись: Перезапись <OVER WRITE> в режиме [MTR] Вы можете выбрать из двух режимов записи. Используя метод перезаписи <OVERWRITE>, вы можете перезаписывать дорожки в уже существующем файле. Уд е р ж и в а й т е к н о п к у [ M
1-06-3 Настройка/запись: Запись методом <ALWAYS NEW> в режиме MTR В режиме [ALWAYS NEW], новый файл создается каждый раз при начале записи. Настройка/запись: запись методом <ALWAYS NEW> в режиме MTR Уд е р ж и в а й т е к н о п к у [ M E N U ] нажатой более 2-х секунд и начинайте действия с о
1-07 Настройка/запись: Настройки дорожки [TRACK MENU] в режиме [MTR] Настройка/запись: Настройки дорожки [TRACK MENU] в режиме [MTR] Данное меню для настройки дорожки доступно только в режиме MTR. Смешивайте записанные дорожки, создавайте стерео дорожки, или обрабатывайте выходной сигнал
Только в режиме [MTR] ПРИМЕЧАНИЕ: ПРИМЕЧАНИЕ: Настройки параметров <STEREO LINK>, <FILE> и <KARAOKE> недоступны во время записи и воспроизведения. • Моно файл можно проигрывать только через монодорожку ‘MONO TRACK’, стерео файл – только через стерео-дорожку ‘STEREO TRACK’. • Если функция <STEREO
1-08-1 Настройка/запись: Перезапись, функция врезки (программируемая заранее) Настройка/запись: Перезапись, функция врезки (программируемая заранее) Функция врезки <PUNCH IN/OUT> позволит вам при необходимости частично перезаписать уже созданный файл. Ниже идут пояснения, как начать [PUNCH IN] и
Только в режиме MTR Настройки доступны в режиме [MTR] и при перезаписи [<OVERWRITE>]. Установите точку конца врезки 7 Найдите нужный момент для окончания врезки и нажмите колесо[DIAL]. Перезапись 8 Перемотайте дорожку к началу (счетчик: 0) или установите отметку на точке началеа врезки. 9 Нажмите
1-08-2 Настройка/запись: Перезапись, функция врезки <PUNCH IN/OUT> (вручную) Настройка/запись: Перезапись, функция врезки <PUNCH IN/OUT> (в ручную) При перезаписи [OVERWRITE] в режиме [MTR], вы можете осуществлять врезку вручную. Нажмите кнопку записи [REC] во время воспроизведения. С этой позиции
Только в режиме MTR Настройка/запись: Перезапись, функция врезки <PUNCH IN/OUT> (в ручную) Перезапись (ручная врезка) 9 6 Сыграйте партию (без записи). 7 При достижении начала перезаписываемого фрагмента нажмите кнопку [REC]. При достижении конца перезаписываемого фрагмента нажмите кнопку [REC] не
2-01-1 Функции записи: Автозапись <AUTO REC> Функции записи: Автозапись <AUTO REC> С включенной функцией автозаписи <AUTO REC>, H4n автоматически запускает запись с паузы когда уровень входного сигнала превышает заранее установленный пороговый уровень. Уд е р ж и в а й т е к н о п к у [ M E N U ]
2-01-2 Функция автоматической остановки записи <AUTO REC STOP> Если функция <AUTO REC> включена, H4n автоматически остановит запись, если уровень сигнала опустится ниже установленного порогового уровня. 1 2 3 4 Нажмите. 5 Настройте уровень громкости Ус та н о в и те п о р о го в ы й уровень, при
2-02 Функции записи: Обратный отсчет<PRE REC> Функции записи: Обратный отсчет<PRE REC> Функция обратного отсчета <PRE REC> включается нажатием кнопки записи [REC], автоматически добавляя 2 секунды до начала записи. Уд е р ж и в а й т е к н о п к у [ M E N U ] нажатой более 2-х секунд и начинайте
2-03 Функции записи: Обрезной фильтр низких частот <LO CUT> Низкочастотный фильтр <LO CUT> позволит вам устранить шумы от ветра. Функции записи: Обрезной фильтр низких частот <LO CUT> Уд е р ж и в а й т е к н о п к у [ M E N U ] нажатой более 2-х секунд и начинайте действия с основной индикации. 1
2-04 Функции записи: Компрессор, лимитер <COMP/LIMIT> Функции записи: Компрессор, Лимитер <COMP/LIMIT> Функция компрессора/лимитера <COMP/LIMIT> позволит вам сгладить динамический диапазон сигнала. Для каждой из дорожек: низкий уровень громкости поднимается, а высокий опускается во время записи. Уд
2-05 Функции записи: <REC LEVEL AUTO> Эта функция автоматически устанавливает уровень громкости записи. 1 Нажмите. 2 Выберите <INPUT> и нажмите. 3 ПОДСКАЗКА: При использовании функции <REC LEVEL AUTO>, устройство автоматически определяет уровень сигнала во время паузы записи. Если при записи
2-06 Функции записи: Мониторинг сигнала <MONITOR> Функция мониторинга [MONITOR] позволит вам направлять входной сигнал на устройства вывода. Функции записи: Мониторинг сигнала <MONITOR> Уд е р ж и в а й т е к н о п к у [ M E N U ] нажатой более 2-х секунд и начинайте действия с о сновной индикации.
2-07 Функции записи: Моно микшер <MONO MIX> Функция <MONO MIX> смешивает левый и правый каналы в моно дорожку, которая затем записывается на оба канала. Функции записи: Моно микшер <MONO MIX> Уд е р ж и в а й т е к н о п к у [ M E N U ] нажатой более 2-х секунд и начинайте действия с основной
2-08 Функции записи: Запись с двух разнонаправленных микрофонов Эта функция позволит вам микшировать микрофонный стерео сигнал, при использовании комбинации двух микрофонов. один из которых направлен по центру, а другой — в сторону для съема акустики помещения. Функции записи: Запись с двух
<SOURCE> <CH SETTING> Разноправленные микрофоны <SIDE> и <MID> перпендикулярны друг другу. Значения: MUTE, −48.0 _ 12.0дБ По умолчанию: +0.0дБ Позволяет выбрать источник сигнала. (Только в режиме 4CH ) Распределяет сигналы <MID> и <SIDE> между левым (INPUT [1]) и правым (INPUT [2]) каналами.
3-01-1 Тюнер: Хроматический тюнер <TUNER (CHROMATIC)> H4n поддерживает функцию тюнера, способного работать в различных режимах. Тюнер: Хроматический тюнер <TUNER (CHROMATIC)> Уд е р ж и в а й т е к н о п к у [ M E N U ] нажатой более 2-х секунд и начинайте действия с основной индикации. 1 Нажмите.
3-01-2 Тюнер: Остальные режимы <TUNER> Помимо хроматического режима [CHROMATIC], тюнер поддерживает большой набор дополнительных строев, таких как [GUITAR], [BASS], [OPEN A], [OPEN D], [OPEN E], [OPEN G] и [DADGAD]. 1 2 Нажмите. 5 Настройка. Эта индикация показывает отношение высоты входного
3-01-3 Тюнер: Калибровка тюнера <TUNER (CALIB)> Эта функция позволит вам выполнить калибровку тюнера. Тюнер: Калибровка тюнера <TUNER (CALIB) > Уд е р ж и в а й т е к н о п к у [ M E N U ] нажатой более 2-х секунд и начинайте действия с основной индикации. 1 Нажмите. 2 Выберите <TOOL> и нажмите. 3
3-01-4 Тюнер: Источник сигнала для тюнера <TUNER (INPUT)> Только в режиме [4CH] В режиме [4CH] необходимо выбрать источник входного сигнала для тюнера. ПОДСКАЗКА: Экран настройки Режимы тюнера и расшифровка Номер струны/нота TUNER …Стр. 075 4 Тюнер: Источник сигнала для тюнера <TUNER (INPUT) >
3-02 Метроном <METRONOME> Метроном <METRONOME> Встроенный метроном поддерживает набор полезных функций, таких как ритм, затактовый отсчет, темп, звук, и т.д. Уд е р ж и в а й т е к н о п к у [ M E N U ] нажатой более 2-х секунд и начинайте действия с основной индикации. 1 2 3 Нажмите. Выберите
Метроном включается в начале записи или воспроизведения. Если вы включите метроном с середины дорожки, его ритм может оказаться несинхронизированым с ритмом песни. <TEMPO> <SOUND> <PATTERN> <LEVEL> Задает темп метронома. Настраивает звучание матронома. Ус т а н а в л и в а е т р и т м и ч е с к и й
3-03-1 Эффекты Краткий обзор возможностей и способов использования встроенных эффектов H4n. Эффекты [Работа с функцией <EFFECT>] Смена режима (режим [MTR]) Стр.038 #1 Нажмите <EFFECT> Используйте один из заводских патчей Стр.083 #3 Импортируйте патч <IMPORT> Выберите режим Импортировать один <EACH>
Только в режиме многодорожечной записи Эффекты <EFFECT> Входные и выходные сигналы при использовани функции [EFFECT] Вы можете использовать функцию <EFFECT> в режиме [MTR] с моно или стерео сигналами. Поток сигнала будет зависить от типа входного источника и выбранных дорожек. 1. Входной сигнал
3-03-2 Эффекты Только в режиме многодорожечной записи В режиме [MTR] можно использовать два различных эффектовых модуля. Эффекты Уд е р ж и в а й т е к н о п к у [ M E N U ] нажатой более 2-х секунд и начинайте действия с о сновной индикации. 1 Нажмите. 4 Выберите номер, имя пвтча и нажмите. Номер
3-03-3 Редактирование патчей <EDIT> Только в режиме многодорожечной записи 5 6 Выберите подходящий по звучанию патч и нажмите. Редактирование патчей <EDIT> Вы можете создавать свои собственные патчи путем комбинирования различных эффектов и настройки их параметров. Меню EDIT <PRE AMP> <LEVEL>
3-03-4 Редактирование модуля преампа <PRE AMP> Только в режиме многодорожечной записи Вы можете редактировать патчи, используя функцию <PRE SET EFFECT>. 3-03-4 Выберите подходящий патч и отредактируйте его ….Стр.084 Настройки преампа 7 Выберите <PRE AMP> и нажмите. Настройте параметр Иконки
3-03-5 Редактирование блока модуляционных эффектов <EFX> Только в режиме многодорожечной записи Вы можете редактировать патч, настраивая различные параметры. Редактирование блока модуляционных эффектов <EFX> Выберите наиболее подходящий патч и отредактируйте его….Стр.084 Настройка блока модуляции
3-03-6 Уровень/имя патча Только в режиме многодорожечной записи Вы можете регулировать уровень сигнала после обработки эффектом (уровень громкости патча) и изменять его имя. Уровень/имя патча Редактирование патчей…Стр.084 Уровень 087 Смена имени 1 Выберите <LEVEL> и нажмите. 1 Выберите <RENAME> и
3-03-7 Сохранение патча Только в режиме многодорожечной записи Сохранение патча Редактирование патча…Стр.084 Сохранение отредактированного патча 10 Выберите <STORE> и нажмите. ПРИМЕЧАНИЕ: Все настройки, которые вы делаете имеют индикацию ‘ED’ и подтвержаются при помощи операции сохранения <STORE>.
3-03-8 Импортирование патча из другого проекта Вы можете использовать в текущем проекте патч, который был создан в другом проекте. Импортирование патча из другого проекта Выбранный эффект …Стр.083 Эффект 4 <ALL> загружаются все патчи 1 Нажмите <IMPORT>, находясь на индикации <EFFECT>. 2 Выберите
Только в режиме многодорожечной записи Импортирование патча из другого проекта <EACH> импортируется один патч 5 6 Выберите <NEXT> и нажмите. Выберите патч для импорта и нажмите. 8 Выберите <YES> и нажмите. Патч, выбранный в процессе выполнения шага 6 будет импортирован в текущий проект. ПРИМЕЧАНИЕ:
3-04-1 Караоке Создавайте музыкальные файлы и конвертируйте их в формат KARAOKE, затем накладывайте партии вокала или гитары поверх записанной дорожки. Караоке [Порядок действий] Уд е р ж и в а й т е к н о п к у [ M E N U ] нажатой более 2-х секунд и начинайте действия с основной индикации.
Только в режиме многодорожечной записи Караоке Продолжение на следующей странице Удалите центральный сигнал из дорожки караоке 7 Выберите значок TRACK MENU и нажмите 8 Выберите <CNT CANCEL> и нажмите Измените тональность дорожки караоке 10 Выберите значок <TRACK MENU> и нажмите ПОДСКАЗКА: 11
3-04-2 Режим караоке для записи сольных партий Режим караоке Быстрая настройка дорожек караоке 13 14 Запись караоке Выберите иконку TRACK MENU и нажмите. 1 Подключите микрофон. 2 Выберите меню дорожки и нажмите. 093 Нажмите кнопку INPUT, соответствующую выбранному входу. Выберите <FINE> и нажмите.
4-01 Воспроизведение файлов в режимах и [STAMINA]) [STEREO], [4CH] Удерживайте кнопку [ M E N U ] нажатой более 2-х секунд и начинайте действия с основной индикации. 1 Нажмите. 2 Выберите <FILE> и нажмите. 4 Выберите <SELECT> и нажмите. 5 Для начала воспроизведения, нажмите кнопку [PLAY/PAUSE]
4-02 Выбор режима воспроизведения Режим воспроизведения <PLAY MODE> Помимо основного режима воспроизведения существуют и другие: 1) воспроизведение одного файла, 2) повторное воспроизведение одного файла 3) повторное воспроизведение всех файлов. Удерживайте кнопку [ M E N U ] нажатой более 2-х
4-03 Расстановка маркеров Воспроизведение: Расстановка маркеров Во время воспроизведения файла вы можете сделать пометки (маркеры) в нужных местах. Вы можете легко перемещаться по интересующим вас местам файла в процессе его воспроизведения. Во время воспроизведения, нажмите кнопку [REC]. Создание
4-04 Повтор выбранного отрезка “A-B” <AB REPEAT> — функция повтора, позволяющая многократно проигрывать выбранный кусок композиции. Повтор выбранного отрезка “А-В” Удерживайте кнопку [ M E N U ] нажатой более 2-х секунд и начинайте действия с основной индикации. 1 Нажмите. 2 Выберите <TOOL> и
Предупреждение: Когда вы передвигаетесь по файлу с помощью кнопок перемотки [FF] и [REW] , быстрое нажатие на кнопку (меньше 2 секунд) переместит вас к следующему файлу. При наличии маркеров, перемещение будет произведено до Долгое нажатие помеченной точки. кнопок перемотки Долгое нажатие (более
4-05 Изменение скорости воспроизведения Только в режиме [STEREO] Изменение скорости воспроизведения Вы можете регулировать скорость воспроизведения файла.. Удерживайте кнопку [ M E N U ] нажатой более 2-х секунд и начинайте действия с основной индикации. 1 Быстрый доступ Нажмите TRACK в основной
4-06 Функция микшера Только в режиме [4CH]. В четырехканальном режиме баланс уровней и панорамирования двух стерео-файлов можно регулировать с помощью функции микшера 1 Нажмите. 2 Выберите <MIXER> и нажмите. Настройки уровня сигнала <LEVEL> Функция микшера Удерживайте кнопку [ M E N U ] нажатой
4-07 Воспроизведение файлов в режиме многодорожечной записи Только в режиме многодорожечной записи Воспроизведение файлов в режиме многодорожечной записи Существует несколько вариантов действий в режиме [MTR]: запись отдельных файлов, назначение их на дорожки в конкретный проект и одновременное
4-08 Воспроизведение: Перемещение по дорожке при помощи счетчика Только в режиме многодорожечной записи Используя счетчик, вы сможете точно находить желаемые точки на записи. Воспроизведение: Перемещение по дорожке при помощи счетчика Удерживайте кнопку [ M E N U ] нажатой более 2-х секунд и
5-01 Редактирование: Выбор папки: Выбор папки, содержащей нужный файл. Редактирование: Выбор папки Удерживайте кнопку [MENU] нажатой более 2-х секунд и начинайте действия с основной индикации. 1 Нажмите. 2 Выберите <FOLDER> и нажмите. Быстрый доступ Нажмите TRACK в основной индикации. ПРИМЕЧАНИЕ: 3
5-02 Редактирование: Выбор файла: Редактирование: Выбор файла Выбор воспроизводимого файла из списка файлов. Удерживайте кнопку [MENU] нажатой более 2-х секунд и начинайте действия с основной индикации. 1 Нажмите. 2 Выберите <FILE> и нажмите. 3 Выберите необходимый файл и нажмите. 4
5-03 Редактирование: Свойства файла: Отображение информации о файле. Редактирование: Свойства файла Выберите файл…Стр.104 Выбор файла 4 105 Выберите <INFORMATION> и нажмите. Имя Имя файла. Дата Дата записи файла или дата его обновления, совершенного на компьютере или на другом устройстве. Формат
5-04 Редактирование: Удаление файла Редактирование: Удаление файла Удаление выбранного файла. Выберите файл…Стр.104 Выбор файла 4 Для удаления файла выберите <DELETE> и нажмите. 5 Для удаления выберите <YES> и нажмите. Если выбрать <No>, процедура удаления прервется. Удаление файла “STE-000.wav“
5-05 Редактирование: Удаление всех файлов из папки Редактирование : Удаление всех файлов из папки Удаление всех файлов из папок и проектов. Выберите файл…Стр.104 Выбор файла 4 Выберите <DELETE ALL> (“удалить все”) и нажмите. 5 Выберите <YES> и нажмите. Имя папки или ячейки памяти, откуда удаляются
5-06 Редактирование: Копирование файлов Только в режиме многодорожечной записи Редактирование : Копирование файлов В режиме [MTR] вы можете копировать файлы. Копии сохраняются в тот же проект, что и оригинальные файлы. Эта функция может пригодится для сохранения важной мастер-записи. Удерживайте
5-07 Редактирование: Переименование файла Редактирование: Переименование файла В режимах [STEREO], [MTR] и [STAMINA], вы можете изменять имя файла. Во время записи в режиме [4CH] , имя файла не может быть изменено. Выберите файл…Стр.104 Выбор файла 4 Выберите <RENAME> и нажмите. 6 [Ввод букв или
Редактирование: Переименование файла ПОДСКАЗКА: ПРИМЕЧАНИЕ: Экран может отображать названия длиной в 12 букв. Символы изменяются в следующем порядке: Когда имя длиннее, появятся стрелки указывающие на то, что за пределами экрана есть символы. (пробел)!#$%&'()+,-0123456789;=@
5-08 Редактирование: Конвертирование в MP3 Только в режиме [STEREO В режиме [STEREO] вы можете перевести WAV файлы в MP3 формат с различным битрейтом. Редактирование: Конвертирование в MP3 Выберите файл…Стр.104 Выбор файла 4 Выберите <MP3 ENCODE> и нажмите. 7 5 Выберите <BIT RATE> и нажмите.
5-09 Редактирование: Нормализация уровня записанного сигнала Редактирование: Нормализация Функция автоматической настройки уровня громкости записаного файла для улучшения качества звука и делает звучание более плотным и насыщенным. Выберите файл…Стр.104 Выбор файла 4 Выберите <NORMALIZE> и нажмите.
5-10 Редактирование: Конвертирование в стерео-формат Это функция позволяет смикшировать четырехканальную запись в стерео файл. В результате файл будет сохранен в папке в режиме [STEREO]. Редактирование: Конвертирование в стерео-формат Выберите файл…Стр.104 Выбор файла Выберите <STEREO ENCODE> 4
Только в режиме [4CH] Выберите папку в режиме [STEREO], чтобы сохранить перекодированый файл. 7 Выберите <SAVE IN> и нажмите. 8 Выберите папку для сохранения и нажмите. Выполнение 9 Для начала операции выберите <EXECUTE> и нажмите. У вас не может быть двух файлов с одинаковыми именами.Если на
5-11 Редактирование: Список маркеров Вы можете видеть список маркеров, который содержится в WAV файле. Редактирование: Список маркеров Выберите файл…Стр.104 Выбор файла 4 Выберите <MARK LIST> и нажмите. ПОДСКАЗКА: К о гд а в ф а й л е н е т м а р к е р о в , н а э к р а н е появляется сообщение:
5-12 Редактирование: Разделение файлов Только в режиме [STEREO] В режиме [STEREO] вы можете разделить любой файл в нужном месте. 4 Выберите <DIVIDE> и нажмите. 6 Чтобы разделить запись, нажмите кнопку [REC] в желаемом месте на треке. Функции кнопок в режиме <DIVIDE> Разделение Воспроизведение или
5-13 Редактирование: Перемещение файлов ПРИМЕЧАНИЕ: Эта функция используется для перемещения файлов в другие папки и режимы. Редактирование: Перемещение файлов Изменяемый формат файла Выберите файл…Стр.104 Выбор файла 4 5 7 Выберите <NEXT> и нажмите. 8 Выберите папку для перемещения (проект).
5-14 Редактирование: Новый проект Только в режиме многодорожечной записи Здесь вы можете создать новый проект и настроить параметры дорожки или эффектов в режиме [MTR]. 1 2 ПОДСКАЗКА: Изменение имени нового проекта. Нажмите. Выберите <NAME> и нажмите. Выберите <PROJECT> и нажмите. Выберите букву
5-15 Редактирование: Выбор проекта Только в режиме многодорожечной записи Выбор проекта, находящегося на SD карте. Редактирование: Выбор проекта Удерживайте кнопку [ M E N U ] нажатой более 2-х секунд и начинайте действия с основной индикации. 119 1 Нажмите. 2 Выберите <PROJECT> и нажмите. 3
5-16 Редактирование: Удаление проекта Только в режиме многодорожечной записи Функция удаления проекта. Редактирование: Удаление проекта Удерживайте кнопку [ M E N U ] нажатой более 2-х секунд и начинайте действия с основной индикации. 1 Нажмите. 2 Выберите <PROJECT> и нажмите. 4 Выберите проект для
5-17 Редактирование: Переименование проекта Только в режиме многодорожечной записи Вы можете изменить имя проекта. Редактирование: Переименование проекта Удерживайте кнопку [ M E N U ] нажатой более 2-х секунд и начинайте действия с основной индикации. 1 Нажмите. 2 Выберите <PROJECT> и нажмите. 3 5
5-18 Редактирование: Копирование проекта Только в режиме многодорожечной записи Копирование проекта и создание нового с другим номером. Редактирование: Копирование проекта Выберите нужный проект и начинайте работу… Стр.119 Удерживайте кнопку [ M E N U ] нажатой более 2-х секунд и начинайте действия
5-19 Редактирование: Сброс нескольких дорожек в одну Вы можете комбинировать треки, созданные в режиме [MTR] и соединять их в один моно или стерео-трек. Редактирование: Сброс нескольких дорожек в одну Выберите нужный проект и начинайте работу… Стр.119 Удерживайте кнопку [ M E N U ] нажатой более
Только в режиме многодорожечной записи 4 Выберите <FORMAT> и нажмите. 5 Выберите формат файла и нажмите. 6 Выберите <EXECUTE> и нажмите. ПОДСКАЗКА: “Сброс” означает объединение вместе разных музыкальных отрывков и файлов в один стерео или моно файл. 5мин Дорожка 1 Дорожка 2 СБРОС Дорожка 3 5мин
5-20 Редактирование: Защита проекта Только в режиме многодорожечной записи Редактирование: Защита проекта Фукции защиты, использованая на вашем проекте, предотвращает разделение трэков и изменение файлов в этом проекте. Выберите нужный проект и начинайте работу…Стр.119 Удерживайте кнопку [ M E N U
6-01 Дополнительные функции: Подсветка дисплея Вы можете установить время, в течение которого дисплей будет подсвечен. Дополнительные функции: Подсветка дисплея Удерживайте кнопку [ M E N U ] нажатой более 2-х секунд и начинайте действия с основной индикации. 1 Нажмите. 2 Выберите <SYSTEM> и
6-02 Дополнительные функции: Контрастность дисплея Настройка контрастности дисплея. Дополнительные функции: Контрастность дисплея Удерживайте кнопку [ M E N U ] нажатой более 2-х секунд и начинайте действия с основной индикации. 1 Нажмите. 2 Выберите <SYSTEM> и нажмите. 4 Измените значение и
6-03 Дополнительные функции: Тип батарей Установка типа батарей позволит H4n точно определять оставшийся заряд батареи. Дополнительные функции: Тип батарей Удерживайте кнопку [ M E N U ] нажатой более 2-х секунд и начинайте действия с основной индикации. 1 Нажмите. 2 Выберите <SYSTEM> и нажмите. 4
6-04 Дополнительные функции: Версия устройства С помощью этой функции вы можете проверить версию H4n. Дополнительные функции: Версия устройства Удерживайте кнопку [ M E N U ] нажатой более 2-х секунд и начинайте действия со сновной индикации. 1 Нажмите. 2 Выберите <SYSTEM> и нажмите. 3 Выберите
6-05 Дополнительные функции: Заводские настройки Возвращение всех настроек к заводским. Дополнительные функции: Заводские настройки Удерживайте кнопку [ M E N U ] нажатой более 2-х секунд и начинайте действия с основной индикации. 1 Нажмите. 2 Выберите <SYSTEM> и нажмите. 3 Выберите <FACTORY RESET>
6-06 Дополнительные функции: Свободное место на карте SD Вы можете проверить объем свободного места на SD карте. Дополнительные функции: Оставшееся время записи Удерживайте кнопку [ M E N U ] нажатой более 2-х секунд и начинайте действия с основной индикации. 1 Нажмите. 2 Выберите <SD CARD> и
6-07 Дополнительные функции: Форматирование карты SD Форматирование карты SD для H4n. Дополнительные функции: Форматирование карты SD Удерживайте кнопку [ M E N U ] нажатой более 2-х секунд и начинайте действия с основной индикации. 1 Нажмите. 2 Выберите <SD CARD> и нажмите. 4 Выберите <YES> и
6-08 Дополнительные функции: Обновление ПО Дополнительные функции: Обновление ПО Если H4n (и SD карта) подключены к компьютеру (PC), на котором имеется доступ в интернет, вы можете скачать обновления программного обеспечения для H4n. 1 PC Вы можете проверить версию H4n в пункте <SYSTEM (VERSION)>.
6-09 Дополнительные функции: Использование карт SD для H2 и H4 1 2 Вставьте SD карту для H2/H4 устройств в H4n и запустите его. Выберите MOVE FILES и <YES>, и нажмите. it is displayed for H4 as H4. ПРИМЕЧАНИЕ: • Стерео файлы H2/H4 и проекты H4 будут перемещены H4n в папку со стерео файлами и MTR
135
Приложение Приложение 136
Особенности разных режимов записи Особенности разных режимов записи Режим стерео <STEREO> 4-канальный режим <4CH> стерео WAV: 44.1/48/96 кГц 16/24 бит Формат записи стерео MP3: 48, 56, 64,80,96,112,128,160,192, 224,256 кБ/сек Многодорожечный режим <MTR> Режим STAMINA стерео WAV × 2: 44.1/48 кГц
Меню настроек режимов STEREO 4CH MTR STAMINA Дата/время Подсветка дисплея Контрастность дисплея Тип питания Сброс всех настроек Карта памяти SD STEREO 4CH MTR STAMINA Форматировать Оставить USB STEREO 4CH MTR Аудио-интерфейс Хранение данных Выбор режима − − STEREO 4CH MTR STAMINA STEREO 4CH MTR
Типы и параметры эффектов, доступные в многодорожечном режиме [MTR] Модуль предусилителей PREAMP Эффекты, имитирующие звучания гитарных предусилителей Типы и параметры эффектов, доступные в многодорожечном режиме [MTR] FD CLEAN Чистый звук усилителя Fender TwinReverb (’65) VX CLEAN Чистый звук
Басовые предусилители BASSMAN Микрофонные предусилители Имитация звучания усилителя Ampeg SVT. VO MPRE Имитация звучания усилителя Fender Bassman 100. HARTKE Имитация звучания усилителя Hartke HA3500. SUP-Bass Имитация звучания усилителя Marshall Super Bass. SANSAMP Имитация звучания усилителя
Типы и параметры эффектов, доступные в многодорожечном режиме [MTR] Блок модуляционных эффектов EFX Эффекты компрессора/лимитера Типы и параметры эффектов, доступные в многодорожечном режиме [MTR] RackComp Компрессор “поджимает” пики сигнала и “вытягивает” провалы. Модуляционные эффекты AUTO WAH
(1) POSITION (2) FREQ (3) BALANCE (4) LEVEL SLOW ATK Ринг-модулятор. “Кольцевая” модуляция добавляет к звуку “металлические” обертона. Параметр 2 “Frequency“ в корне изменяет характер звучания. Before, After 1 − 50 0 − 100 2 − 100 Выбор места модуля в цепи эффектов: “Before”(перед секцией преампа)
Типы и параметры эффектов, доступные в многодорожечном режиме [MTR] Эффекты Дилея/Реверберации (Delay/reverb) Типы и параметры эффектов, доступные в многодорожечном режиме [MTR] CRY Этот эффект изменяет звучание также, как модулятор голоса. (1) RANGE 1 − 10 (2) RESONANC 0 − 10 (3) SENSE (4) BALANCE
(1) TIME Эффект обратного дилея с временем задержки до 2500 миллисекунд. 10−2500 мс,* (2) FEEDBACK 0 − 100 (3) HIDAMP 0 − 10 (4) BALANCE 0 −100 Время задержки. (См. стр.144) Количество повторов. [Таблица] Параметры, отмеченные символом < > можно синхронизировать с длительностями, представленными
Список патчей H4n Патчи, указанные ниже, могут быть использованы в режиме 4-х дорожечной записи [4CH], а также при работе утройства в качестве аудио-интерфейса (частота дискретизации — 44.1kHz ). Категория Список патчей H4n Гитара 145 №. 00 Fender Clean Название патча Чистый звук, подходящий для
№ Название патча Бас 25 Hartke Имитация характерного звучания HARTKE HA3500. HARTKE OFF 26 27 28 29 Bassman SVT SuperBass Имитация звучания усилителя FENDER BASSMAN 100. Имитация звучания одного из самых популярных басовых аппаратов AMPEG SVT. Имитация звучания легендарного усилителя MARSHALL 1992
Спецификации H4n Режим [STEREO] Режим [4CH] Режим [MTR] 2 4 2 Число одновременно записываемых дорожек Спецификации H4n Число одновременно воспроизводимых дорожек Рекордер Время записи 2 4 4 4 Гб (Карта SDHC повышенной емкости) Непрерывно 380 минут (Конвертируется в формат WAV 44.1 кГц/16 бит
Возможные проблемы и пути их решения В случае возникновения проблем попробуйте воспользоваться приведенными ниже инструкциями. Проблемы при записи/воспроизвении • Убедитесь, что устройство подключено к акустической системе, и проверьте настройки громкости. • Проверьте, не включена ли функция защиты
Алфавитный указатель Алфавитный указатель [ENG] [Д] H4n как аудио-интерфейс XСтр. 33 Дата/время XСтр. 28 Дисплей Дисплей — контрастность XСтр. 127 Дисплей — подсветка XСтр. 126 [A] Авто-уровень громкости записи XСтр. 70 Автозапись XСтр. 65 Автоматическая остановка записи XСтр. 66 [Б] Битрейт XСтр.
[М] Маркер XСтр. 96 [Меню] Использование кнопок в основной индикации XСтр. 25 Основная индикация XСтр. 43 Меню дорожки XСтр. 59 Меры предосторожности для пользователя XСтр. 6 Метроном XСтр. 79 Микшер XСтр. 100 Микширование XСтр. 59 Мониторинг сигнала XСтр. 71 Моно микшер XСтр. 72 [Н] Настройка
Алфавитный указатель Алфавитный указатель Настройки дорожки XСтр. 59 Режим перезаписи XСтр. 57 Функции на начальном экране XСтр. 42 [Режим STAMINA] Воспроизведение XСтр. 94 Запись XСтр. 49 Настройка режима XСтр. 17·38 Основная индикация XСтр. 40 Описание режимов XСтр. 37,39 [Режим STEREO]
Соблюдение регламента ФКК (для США) Согласно результатам тестирования данное устройство относится к классу B цифровых устройств, и, следовательно, подчиняется части 15 правил Федеральной Комиссии по Коммуникациям. Эти правила предназначены для предотвращения возникновения радиопомех, вызванных
Портативный рекордер ITOHPIA Iwamotocho 2chome Bldg. 2F, 2-11-2, Iwamoto-cho, Chiyoda-ku, Tokyo 101-0032, Japan Web Site: http://www.zoom.co.jp H4n-5000-2
Меры предосторожности
Если устройство долго не используется,
Модификации
Для предотвращения несчастных случаев озна-
выньте из него батареи.
Никогда не разбирайте H4n Pro и не
комьтесь
с
данной инструкцией.
Для
обозначения
При протечке батареи аккуратно протрите
пытайтесь
модифицировать устройство,
потенциально
опасных
ситуаций в
ней
используются
отсек
для
батарей,
удалив
все остатки
Опасно!
так как это может привести к его поломке.
символы «Осторожно!» и «Внимание!»
электролита.
Громкость
При использовании устройства отсек для
Не используйте H4n Pro на максимальной
Игнорирование этого знака и, как
батарей должен быть закрыт.
следствие, неправильное обращение с
При
установке батарей
соблюдайте
громкости в течение долгого времени, так
Опасно!
устройством могут привести к опасным
полярность. Не используйте вместе старые
Внимание!
как это может привести к нарушениям слуха.
последствиям или смертельному исходу.
и новые батареи, а также батареи разных
Игнорирование этого знака может привести
Внимание!
марок и типов.
БЕЗОПАСНОСТЬ ИСПОЛЬЗОВАНИЯ
Защита от электромагнитного излучения
к
возникновению риска
для
здоровья
Условия эксплуатации
человека, а также поломке устройства или
Прибор разработан с учетом обеспечения
Для предотвращения неисправностей и
Внимание!
его составляющих.
максимальной защиты
от
электромагнитного
поломок не используйте H4n Pro в
излучения как самого
устройства, так и от внешних
следующих условиях:
источников. Однако, не стоит помещать в
Обязательное для выполнения действие
Опасно! • При высоких и низких температурах
непосредственной близости от устройства другое
•
Вблизи источников тепла (радиаторы, печи)
оборудование, чувствительное к воздействию
электромагнитных волн,
или
излучающее
их.
•
При высокой влажности и сырости
Как и в любых других цифровых устройствыах, в
Запрещенное действие
•
В местах, где много пыли или песка
приборе воздействие
сильного
электромагнитного
•
В условиях высокого уровня вибраций
поля может явиться причиной неисправной работы,
Уход
а также потери данных. Соблюдайте меры
Пожалуйста, внимательно прочитайте следующие
предосторожности
для
уменьшения
риска
инструкции для безопасного использования H4n Pro.
H4n Pro — хрупкий прибор. Не давите слишком
возникновения неисправностей.
Питание
сильно
на
кнопки
и
другие элементы
Очистка
Внимание!
управления. Не роняйте прибор и не
Для очисткиH4n Pro используйте мягкую сухую тканьПри.
Использование адаптера
подвергайте его большим нагрузкам.
необходимости немного намочите ткань. Не используйте
Используйте
только
фирменный адаптер
Не допускайте проникновения внутрь прибора
абразивные средства, воск или растворители (жидкость
Опасно!
DC5
«плюс»
на центральном
контакте 1A
посторонних предметов (монет, булавок и т.д.)
для снятия краски или спирт), так как это может привести к
повреждению поверхности устройства.
(ZOOM AD
14). Использование адаптера
или жидкостей (воды, алкоголя или сока).
Неисправности и поломки
другого типа может привести к поломке
Не подносите H4n Pro близко к другим точным
устройства.
приборам (часы, компьютер), электронным
При возникновении неисправностей или поломок
При
подключении адаптера
к
сети
медицинским
приборам
или
магнитным
немедленно отсоедините адаптер от сети, выключите
убедитесь,
что
она
обеспечивает
картам.
питание и отсоедините кабели. Свяжитесь с
номинальное
напряжение,
требующееся
Коммутация с другими устройствами
магазином, где вы приобрели устройство или с
для адаптера.
Всегда выключайте питание H4n Pro перед
сервисным центром ZOOM и сообщите следующую
При отсоединении адаптера от сети всегда
информацию: модель устройства, серийный номер,
держите его за корпус, не тяните за провод.
тем, как подключать
или
отключать любые
характер повреждений, а также свой адрес и номер
кабели. При переноске устройства убедитесь,
телефона.
Во
время
грозы
и
в
случае,
если
Внимание!
что все кабели отключены.
Пожалуйста, храните данную
устройство долго не используется,
отсоединяйте адаптер от сети.
инструкцию в доступном месте.
Использование батарей
Используйте 2 стандартные батареи АА
006
1,5В (щелочные или никель-метал-
гидридные).
-
Страница 1
Reproduction of this manual, in whole or in part,by any means, is prohibited. © ZOOM Corporation OPERA TION MANU AL English PDF compression, OCR, web optimization using a watermarked evaluation copy of CVISION PDFCompressor[…]
-
Страница 2
Special features of H4n 0 01 Special featur es of H4n * Please read this manual carefully to ensur e comprehensive knowledge and proper use of the H4n. After reading through it, please keep the manual for futur e reference • An all-in-one handy recor der . Y ou can enjoy recording and creating your own music any time, anywhere with the H4n. The H[…]
-
Страница 3
The H4n is ideal for the following scenarios 002 The H4n is ideal for the following scenarios Piano recitals Any field sound recor ding Recording the meetings Live performance recor ding V ocal recording The band practices Recording acoustic guitar sound T ransfer analogue sound sources to digital sources Drum practice recor ding PDF compression, O[…]
-
Страница 4
A table of contents A table of contents 003 Special features of H4n ����������������������� 001 The H4n is ideal for the following scenarios �������������� 002 A table of contents ������������������������� 003 Safety precautio[…]
-
Страница 5
A table of contents 004 1-06-3 Setting / Recor ding: Recording <AL WA YS NEW> in MTR mode �� 058 1-07 Setting / Recording: TRACK MENU in MTR mode �������� 059 1-08-1 Setting / Recor ding: Re-recording, <PUNCH IN/OUT> automatic � 061 1-08-2 Setting / Recor ding: Re-recording, <PUNCH IN/OUT> manual �� 063 2[…]
-
Страница 6
A table of contents 005 5-09 Edit / Output : <FILE NORMALIZE> �������������� 112 5-10 Edit / Output : <FILE STEREO ENCODE> ������������ 113 5-11 Edit / Output : <MARK LIST> ����������������� 115 5-12 Edit / Output : <DIVIDE> �����[…]
-
Страница 7
Safety precautions for users 006 Safety pr ecautions for users SAFETY PRECAUTIONS In this manual, the warning and caution symbols are used to highlight dangerous accidents and troubles for users to read so that accidents can be prevented. The meanings of these symbols are as follows: If the users ignore this symbol and handle the device the wrong w[…]
-
Страница 8
Copyright warnings 0 07 Copyright war nings Recording of live performances Many artists and most live venues do not allow recording and photography and will check for cameras and recorders at the entrance. Even if recording is allowed, it is prohibited to sell, distribute, or upload to the Internet without the organizer’ s authorization. Copyrigh[…]
-
Страница 9
Getting started 008 Getting started PDF compression, OCR, web optimization using a watermarked evaluation copy of CVISION PDFCompressor[…]
-
Страница 10
Recording ow using the H4n 009 1-1 Recor ding flow using the H4n The following is the basic ow of recor ding operation for the H4n. Depending on the application of the recording, you can select which recor ding mode and audio quality setting is right for the situation. Switch on Connecting to other audio devices Set-up Select the Mode Set-up […]
-
Страница 11
Recording ow using the H4n 010 Edit·Output RECORD Playback and conrm RE-RECORDING (Recording again from scratch) Recording on STEREO mode/ ST AMINA mode…… …P .049 Recording on 4CH mode ……………P .053 Recording on MTR mode ……………P .055 5) The H4n has very convenient ways to swif tly r eview/playback a recording as well a[…]
-
Страница 12
Monitor the input sound rec level Easy recor ding guide [STEREO MODE] 0 11 1-2 Easy r ecording guide [STEREO MODE] The following is basic recor ding instructions using the built-in stereo microphones and built-in speaker in STEREO MODE. [LEFT P ANEL] Power switch ON 1 [POWER] switch on. Conrm STEREO M O D E 2 P .038 〉〉〉〉 In case of a wro[…]
-
Страница 13
Easy recor ding guide [STEREO MODE] 012 ADJUST INPUT LEVEL ST ART RECORDING STOP RECORDING Adjust the input sound rec level P .09 4 〉〉〉〉 In detail 4 5 6 PLA YBACK 7 DECREASE − light on Counter turns Remaining time on SD CARD Counter returns 0:00:00:00:000 light off Pause Recording Counter doesn’t return 0 [STOP] [RIGHT P ANEL] Now recor[…]
-
Страница 14
Name and function of each part 013 2-1 Name and function of each part 90 / 120° V ariable XY Stereo micr ophones (Built-in) Backlight Equipped Display [REC] Button STEREO/4CH/MTR mode indicator INPUT : Buttons for [MIC] [1], [2] T ransport Control Buttons [FRONT P ANEL] [BACK P ANEL] Threaded T ripod mount Battery cover A built-in mono speaker •[…]
-
Страница 15
Name and function of each part 014 [BOTTOM P ANEL] DC5V AC ADAPTER jack Optional remote-contr ol jack [LINE/PHONE] output jack USB port POWER switch HOLD switch [LEFT P ANEL] [DIAL] [MENU] button REC LEVEL [ + / − ] SD card slot [RIGHT P ANEL] VOLUME [ + / − ] Installed hole for a strap XLR/ST ANDARD PHONE INPUT [1] jack XLR/ST ANDARD PHONE INP[…]
-
Страница 16
Included Accessories 015 2-2 Included Accessories The following accessories are included in the H4n package. Inspect the package contents to be sure all accessories ar e included. SD CARD MAIN BODY CASE MICROPHONE ST AND ADAPTER AC ADAPTER (ZOOM AD-14) USB CABLE WINDSHIELD Cubase LE4 Instruction manual DAW start-up guide PDF compression, OCR, web o[…]
-
Страница 17
Installation of the attachments and options 016 •How to use the windshield Remote control (Option, sold separately) P .045 〉〉〉〉 Operation of remote contr ol Microphone stand adapter(Accessory) Microphone stand •How to mount to a microphone stand [FRONT P ANEL] [SIDE P ANEL] When recording outside in the field, covering the built- in mic[…]
-
Страница 18
Battery/Power setting 017 3 Battery/Power setting Power for H4n recor der is supplied by the included AC adapter or batteries. • AC power operation An AC adapter is included. • Battery installation Install two size AA batteries (IEC R6) An attached AC adapter Zoom AD-14 Use of an AC adapter other than the one included may cause trouble. 2 Inser[…]
-
Страница 19
Battery/Power outlet setting 018 T o measure the lifetime of the battery The remaining lifetime of the battery is measured more precisely by using the battery type setting on the H4n. Saving period for the setting <DA TE/TIME> Whenever power supply is off by dead battery , the H4n can save the date/time setting for three minutes. When the sav[…]
-
Страница 20
Power On and Off, How to use power and hold switch 019 4-1 Power On and Of f, How to use power and hold switch [ LEFT P ANEL ] POWER switch HOLD switch POWER ON / BOOTING UP 2 Insert SD card. 1 [Preparation] Make sure all equipment is turned off. 4 Switch on connected instruments and monitors. • Before switching the power on, lower the volume of […]
-
Страница 21
4-1 Power On and Of f, How to use power and hold switch Power On and Off, How to use power and hold switch 020 POWER OFF / SHUT DOWN 1 [Preparation] T urn off monitors first then instruments 2 [Power Off _ Shut down] Slide the power switch. HOLD Function The H4n features a HOLD function to make any button operation inactive, preventing errors durin[…]
-
Страница 22
How to use the [REC] and transport control buttons 0 21 4-2 How to use the [REC] and transport contr ol buttons Buttons like [REC], [STOP], [PLA Y/P AUSE], [FF], [REW] each have different functions depending on the H4n’ s operation MODE. STEREO/4CH/ST AMINA MODE MTR MODE [FRONT P ANEL] transport control buttons [REC] button [REC] button Set to ov[…]
-
Страница 23
How to use the track [1], [2], [3] and [4] buttons 022 4-3 How to use the track [1], [2], [3] and [4] buttons The buttons of TRACK [1] – [4] have differ ent functions depending on the MODE. STEREO/4CH/ST AMINA MODE Move to the <FOLDER SELECT> menu Move to the <FILE> menu Move to the <SPEED> menu (only STEREO MODE) Move to the &l[…]
-
Страница 24
How to use the input [MIC], [1] and [2] buttons 023 4-4 How to use the input [MIC], [1] and [2] buttons These buttons have differ ent functions depending on the various modes. [FRONT P ANEL] INPUT [1] & [2] buttons STEREO/ST AMINA MODE Select INPUT [MIC] or INPUT [1] [2] and the corr esponding button lights up. Whether you select the INPUT [1] […]
-
Страница 25
How to use REC LEVEL and VOLUME 024 4-5 How to use REC LEVEL and VOLUME These keys allow you to adjust the levels of recor ding input and output volume. (All the modes are the same) ‘REC LEVEL ’ IN ANY MODE The recording levels coming from the INPUT [1] & [2] can be adjusted from 1 to 100 with the (+/−) key . Press the ‘REC LEVEL ’ = […]
-
Страница 26
4-6 How to use [DIAL] and [MENU] buttons How to use [DIAL] and [MENU] buttons 025 The basic operation for [DIAL] Rotate the [DIAL], and the cursor on the display will move along the [DIAL] Rotate the [DIAL] = select an item Press down [DIAL], your selection is confirmed. ➞ for additional selections, move on to the next screen. ➞ When you comple[…]
-
Страница 27
How to use [DIAL] and [MENU] buttons 026 The operation when [ ] cursor is on display (Date·Time Setting, Changing File Name Directory , etc) The operation when the selections are listed on scr een About the ‘ ⁄ ’ on the se lection lists When you see this display , there are more selections on the next screen. Highlight arrow and press [DIAL][…]
-
Страница 28
2 Push the SD card in to remove it fr om the slot. Insert a SD card 027 5-1 Insert a SD car d The SD card is r equired to recor d. Make sure to turn off power before inserting or r emoving the SD card. 1 Make sure power is of f. 2 Insert the SD card into the slot. [How to install the SD card] SD card capacity time to recor d (approx.) 4GB SDHC card[…]
-
Страница 29
Set date and time <DA TE/TIME> 028 5-2 Set date and time <DA TE/TIME> Each file will automatically recor d the date/time. T o facilitate searching for files by date, be sur e to set the date/time after every battery change. 1 Press. 2 Select <SYSTEM> and press. 3 Select <DA TE/TIME> and press. 5 Select <OK> and press. […]
-
Страница 30
Setting up: How to connect external audio devices 029 6-1 Setting up: How to connect exter nal audio devices The H4n offers versatile connectivity with options for any r ecording application. Remote control (option) Headphones Mixer USB Personal computer (PC) Stereo microphones SD card INPUT : instrument (microphone) INPUT : instrument (keyboard) H[…]
-
Страница 31
Setting up: Built-in microphones 030 6-2 Setting up: Built-in micr ophones These are special featur es of the H4n’ s built-in microphones. LOCA TION OF THE MICROPHONES UNDER XY SYSTEM Capturing sound in a stereo image. DIRECTIVITY OF 90°, 120° movable General stereo micr ophones H4n stereo micr ophones Stereo images with no phase cancellation. […]
-
Страница 32
Built-in microphones Setting up: Built-in microphones /outside micr ophones with plug-in power The input jack for the external microphone is suitable for microphones that r equire <PLUG-IN> power . 6-3 Setting up: Built-in microphones /outside microphone with plug-in power 0 31 Sound source 30_50cm Close microphone r ecording Please put H4n 3[…]
-
Страница 33
Setting up: INPUT [1], [2] connections and phantom power source 032 Using INPUT [1] and INPUT [2] you can connect to a guitar , a bass, a keyboard, etc. 6 -4 Setting up: INPUT [1], [2] connections and phantom power source For a guitar or a bass, you can directly plug into either INPUT [1] or INPUT [2]. For a keyboard with stereo output, you can plu[…]
-
Страница 34
The H4n can be used as a two-in/two-out USB interface at 44.1kHz or 48kHz. 6-5 Setting up: USB connection, H4n used as an Audio Interface 2 Press on the top scr een. 4 Select <AUDIO I/F> and press. 5 Select <FREQUENCY> and press. 7 Select <CONNECT> and press. 1 Connect H4n to computer with USB cable. USB 3 Select <USB> and p[…]
-
Страница 35
Setting up: USB connection, H4n used as an Audio Interface 034 Usage of AUDIO INTERF ACE • Y ou can record and playback signals directly to and from your DAW software using the H4n. • In this mode, you can use the H4n’ s built-in effects on input sig — nals. • Effects can only be used when the sampling rate is set to 44.1kHz. • Y ou do no[…]
-
Страница 36
Setting up: USB connection, H4n used as a SD card r eader 035 When you use the H4n as a SD card r eader , make the following settings. 6-6 Setting up: USB connection, H4n used as a SD card reader USB 2 Press on the top scr een. • Before physically unplugging USB cable (and H4n) from computer , be sure to perform the “safely remove hardware” f[…]
-
Страница 37
036 H4n built-in speaker This is a mono speaker for playback. W ithout connecting headphones to [LINE/PHONE] jack, you can easily playback the recorded data and listen. 6-7 Setting up: Built-in speaker The H4n is equipped with a built-in mono speaker . There is no output when [LINE/ PHONE] jack is plugged in. When setting is the <MONITOR>, th[…]
-
Страница 38
About H4n modes 0 37 • STEREO mode 7-1 About H4n modes There are four operational modes in H4n: STEREO/ST AMINA, 4 CH (CHANNEL), MTR (MUL TI TRACK) mode. Y ou can choose the mode according to your need. • ST AMINA mode • 4CH mode • MTR mode • One-pass stereo recording of live performance or rehearsal. • Direct r ecording of a single ins[…]
-
Страница 39
Selecting a <MODE> 038 7-2 Selecting a <MODE> Be sure to select the appr opriate mode for your application. MODE indicator ST AMINA mode display here. Confirmation of the mode • The current mode is indicated on the FRONT P ANEL by Mode Indicator LEDs. • The H4n will power up in the same mode it was in when turned off. • When booti[…]
-
Страница 40
Details about modes 0 39 7-3 Details about modes Input and output levels as well as saving and formatting data are dif ferent in each mode. MTR mode ST AMINA MODE STEREO mode 4CH mode In 4CH MODE the H4n records two stereo W A V files: one stereo W A V file for the built-in microphones and one stereo W A V file for the inputs. These FILES are saved[…]
-
Страница 41
<MODE> screens: STEREO and ST AMINA modes 040 8-1 <MODE> scr eens: STEREO and ST AMINA modes • Explanation of the top scr een Recording lapse and playback lapse: Display: 00(time):00(minute):00(second):000(1/1000second) Counter File format during selecting, recor ding and playback. • WA V FILE: Hz/bit • MP3 FILE: bit rate FILE FOR[…]
-
Страница 42
0 4 1 8-2 <MODE> scr een: 4CH mode • Explanation of the top scr een Displays the recording and playback level corresponding to each input source. [MIC] �����Input from either the built- in microphones or an external stereo microphone [IN] �������� Input from INPUT [1] and INPUT [2] INPUT SOURCE and LEVEL METER <[…]
-
Страница 43
<MODE> screen: <MTR> mode 042 8-3 <MODE> scr een: MTR mode • Explanation of the top scr een Recording lapse and playback lapse: Display: 00(time):00(minute):00(second):000(1/1000second) ➀ Counter During recording standby operation the track or its icon is highlighted. TRACK NUMBER Displays the master left and right output leve[…]
-
Страница 44
<MODE> screen: MAIN MENU 043 8-4 <MODE> scr een: MAIN MENU The Menu icon list is displayed by [MENU] button. 1 Press. 2 Select items and press. 4CH mode MTR mode ST AMI NA mode CANCEL: T o return back to the top, press [MENU] button more than 2 seconds. <FOLDER> <FOLDER> <PROJECT> <FILE> <FILE> <FILE>[…]
-
Страница 45
<MODE> screen: MAIN MENU 044 <PLA Y MODE> <MIXER> <TOOL> <SYSTEM> <PLA Y MODE> <SYSTEM> <SD CARD> <SYSTEM> <SD CARD> <USB> <SD CARD> <USB> <MODE> <USB> <MODE> <MODE> Display at the bottom of Menu screen In the recor ding and playback menu, the curr[…]
-
Страница 46
Option: Remote control operation 045 When you use the optional remote contr oller , you can operate the H4n from a distance. 9 Option: Remote contr ol operation [STOP] button Stop recording and r eturn to 0 Record, Recording Standby , T emporary stop Stop playback and the counter stops Playback temporary stop Stop recording and the counter stops Re[…]
-
Страница 47
Operations Operations 046 PDF compression, OCR, web optimization using a watermarked evaluation copy of CVISION PDFCompressor[…]
-
Страница 48
1 Select INPUT and press. 047 Control settings for the targets, built-in micr ophones or exter nal input jacks. 1-01 Setting / Recording: Set input source and recording level STEREO MODE 4CH MODE Use the stereo input source of either [MIC] or INPUT [1] [2]. Use both [MIC] and INPUT [1] [2] stereo input. or Light on Connecting the external microphon[…]
-
Страница 49
Setting / Recording: Set input sour ce and recording level 048 TRACK 1 TRACK 2 TRACK 3 TRACK 4 MONAURAL STEREO MONAURAL MONAURAL STEREO MONAURAL MONAURAL MONAURAL MONAURAL STEREO STEREO STEREO MTR MODE Any of tracks 1-4 can be set for mono or stereo input. SELECT the input per track one by one an d adjust. Use the REC LEVEL 1 Press the selected tra[…]
-
Страница 50
1 [RECORDING ST ANDBY] press. Setting / Recording: Recor ding in STEREO and ST AMINA mode 049 These are the steps to begin r ecording in STEREO or ST AMINA mode. 1-02 Setting / Recording: Recording in STEREO and ST AMINA mode 3 Adjust the recor ding level of the input source. 4 [REC ST ART] press. 5 [REC FINISH] press. STEREO MODE TOP 2 Select an i[…]
-
Страница 51
Setting / Recording: Recor ding on STEREO and ST AMINA mode 050 In STEREO mode you can recor d in 19 different file for- mats using WA V and MP3. Recording format must be selected before recording of a file begins. HINT: <REC FORMA T> Recorded files are named automatically . Y ou can choose from two formats: <DEF AUL T> and <DA TE>[…]
-
Страница 52
Setting / Recording: Recor ding format <REC FORMA T> 0 51 Choose recor ding file settings <REC FORMA T> before r ecording. V ARIETY OF WA V FILES Formats are: 44.1/48/96 kHz indicates the sampling rate of the analog-to-digital conversion. 16/24-bit indicates the bit depth of the analog-to-digital con- version. The larger the number , th[…]
-
Страница 53
When recor ding, a file name is automatically assigned. T o change that, take the following steps. Setting / Recording: File name <FILE NAME> 052 1-04 Setting / Recording: F ile name <FILE NAME> • Y ou can set the DA TE type only on STEREO mode. • Y ou can use other file names on STEREO and MTR mode. Those setting is operated on <[…]
-
Страница 54
1 [RECORDING ST ANDBY] press. Setting / Recording: Recor ding on 4CH mode 053 This is the method to record 4 channel stereo sounds coming from the built-in mic and the external input jack. 1-05 Setting / Recording: Recor ding on 4CH mode 3 Adjust the recor ding level of the input sources. 4 [ST ART RECORDING] press. 5 [COMPLETE RECORDING] press. ST[…]
-
Страница 55
Setting / Recording: Recor ding on 4CH mode 054 HINT: Mark While the recor ding format is WA V , if you press [REC] button during recording operation, the mark is put on the file and you can move swiftly to the marked position during playback. When you pause, that becomes the mark position. While recor ding and playback, no <REC FORMA T> is p[…]
-
Страница 56
Setting / Recording: Recor ding in MTR mode 055 Using multiple tracks, you can combine mono and stereo r ecordings. 1-06-1 Setting / Recor ding: Recording in MTR mode [RECORDING DIRECTION] * This means you can rec ord without this s etting. Change to MTR mode Create a new PROJECT . Record the second track Complete recording Recording Standby Record[…]
-
Страница 57
Setting / Recording: Recor ding in MTR mode 056 Only one recor ding track T wo recor ding tracks 1. Input source comes from either INPUT [1] or INPUT [2]. INPUT [1] or [2] TRACK T rack 1 or 3 T rack 2 or 4 INPUT [1] or [2] The same signals are sent to both tracks. 1. Input source comes from either INPUT [1] or INPUT [2]. 2. The input source comes f[…]
-
Страница 58
Setting / Recording: Recor ding <OVER WRITE> in MTR mode 0 57 Y ou can select from two recor ding modes. Using the <OVERWRITE> mode, you can overwrite new sounds on the existing file. 1-06-2 Setting / Recording: Recording <OVER WRITE> in MTR mode 1 Select the TRACK. The selected ‘TRACK’ light on. Counter won’ t be reset to 0[…]
-
Страница 59
In AL WA YS NEW , a new file is made whenever it r ecords. 1-06-3 Setting / Recording: Recording <AL WA YS NEW> in MTR mode 1 Select the TRACK. The selected TRACK light on. Counter won’t be reset to 0 when using. 2 Press. Setting / Recording: Recor ding <AL WA YS NEW> in MTR mode 058 3 [ST ART RECORDING] press. The PLA Y/PAUSE button […]
-
Страница 60
Setting / Recording: TRACK MENU in MTR mode 059 This is an exclusive menu available only in MTR mode to set a track. Link tracks together , create a stereo track, or you can cr eate a special setting for output effects. 1-07 Setting / Recording: TRACK MENU in MTR mode Select TRACK MENU 1 On the top screen select ‘TRACK MENU ICON’ and pres[…]
-
Страница 61
Setting / Recording: TRACK MENU in MTR mode 060 Select <KARAOKE> and press. Setting <KARAOKE> Set the value and press. HINT: Setting stereo link on creates a stereo track from tracks 1 and 2 or 3 and 4. Setting stereo link off creates a mono track. Setting value: ON/OFF Default: OFF STEREO LINK Select <FILE> and press. Allocate ?[…]
-
Страница 62
2 Select <FILE> and press. Setting / Recording: Re-r ecording, <PUNCH IN/OUT> automatic 0 61 This function, <PUNCH IN/OUT>, allows you to partially re-r ecord a recor ded file. Here we explain how to start <PUNCH IN> and end <PUNCH OUT> automatically . 1-08-1 Setting / Recording: Re-recording, <PUNCH IN/OUT> auto[…]
-
Страница 63
Setting / Recording: Re-r ecording, <PUNCH IN/OUT> automatic 062 • Y ou can set the position for <PUNCH IN / OUT> while stopped by using the counter . First set each time and move the cursor to <PUNCH IN / OUT>, and then press [DIAL]. • During <PUNCH OUT> _ Step 7-, if you press [DIAL] again, all the setting will be canc[…]
-
Страница 64
2 Select <FILE> and press. Setting / Recording: Re-r ecording, <PUNCH IN/OUT> manual 063 Using [OVERWRITE] recor ding operation in MTR mode, you can manually punch in and out. Press [REC] button during playback, from that pr essed position you can start re-recor ding. 1-08-2 Setting / Recording: Re-recording, <PUNCH IN/OUT> manual[…]
-
Страница 65
Setting / Recording: Re-r ecording, <PUNCH IN/OUT> manual 6 Performance (Not recor ding). 8 Performance (Recording). 9 Press [FINISH RECORDING]. PLA Y PLA Y REC → ▲ RECORDING ST AR T ▲ FINISH RECORDING Start Stop Re-recording Re-recor ding (Manual <PUNCH IN/OUT>) 064 light on light on 7 Press [ST ART RECORDING]. 10 Press [PLA YBAC[…]
-
Страница 66
Recording function <AUTO REC> 065 The H4n can detect when the input level surpasses your predetermined level, and can automatically start r ecording from the r ecording standby position. 2-01-1 Recording function <AUTO REC> • Y ou cannot use this setting during recor ding and playback. • Y ou cannot use this function together with &[…]
-
Страница 67
Recording function <AUTO REC STOP> 066 When <AUTO REC> is on and recor ding, the H4n will automatically stop recording when the input level goes below a pr edetermined level. 2-01-2 Recor ding function <AUTO REC STOP> • Y ou cannot use this function during recording and playback. • When <AUTO REC STOP> is on, you can fin[…]
-
Страница 68
Recording function <PRE REC> 0 67 The <PRE REC> setting can be initialized by pressing the [REC] button, automatically adding the previous 2 seconds to your r ecording. 2-02 Recording function <PRE REC> • Y ou cannot us e this setting during recor ding and playback. • When recor ding on 96 kHz, 4CH mode, the maximum PRE REC ti[…]
-
Страница 69
Recording function <LO CUT> 068 The <LO CUT> filter setting allows you to eliminate wind or blowing noises. 2-03 Recording function <LO CUT> • Y ou can Select the <LO CUT> filter among eleven frequencies, such as OFF , 80, 98, 115, 133, 150, 168, 185, 203, 220, and 237 Hz. When selecting higher numbers, you should verify t[…]
-
Страница 70
Recording function <COMP/LIMIT> 069 The <COMP / LIMIT> setting can compensate for volume differ ences. For each input source, low level input signals are lifted up and high level input signals ar e controlled down when recor ding. 2-04 Recording function <COMP/LIMIT> 1 Press. 3 Select <COMP/LIMIT> and press. 4 Select the set[…]
-
Страница 71
Recording function <REC LEVEL AUTO> 07 0 This function automatically sets the level for recor ding. 2-05 Recording function <REC LEVEL AUTO> When <REC LEVEL AUTO> is used, the unit automatically determines the r ecording levels using the signal present dur- ing recor ding standby . If the volume surpasses 6dB during recor ding, th[…]
-
Страница 72
Recording function <MONITOR> 071 T ur ning on the MONITOR function allows you to monitor input signals at all times. 2-06 Recording function <MONITOR> Y ou cannot monitor the input sound through the built-in speaker . NOTE: 1 Press. 2 Select <INPUT> and press. 3 Select <MONITOR> and press. 4 Select <ON> and press. Y ou[…]
-
Страница 73
Recording function <MONO MIX> 07 2 Engaging <MONO MIX> blends the left and right signals down to mono then recor ds dual-mono to each left and right channel. 2-07 Recording function <MONO MIX> • The name of the recorded file making <MONO MIX> valid is “MONO-xxx” • Y ou cannot use this function together with <MS ST[…]
-
Страница 74
Recording function <MS STEREO MA TRIX> 07 3 This function enables you to convert the stereo micr ophone signals when using a MID/SIDE recording configuration. 2-08 Recording function <MS STEREO MA TRIX> <ON / OFF> Make the setting <ON/OFF> of <MS STEREO MA TRIX>. <MID LEVEL> <MID>is a directional microphone[…]
-
Страница 75
Recording function <MS STEREO MA TRIX> 0 74 Y ou cannot use this function together with <MONO MIX>. NOTE: <SIDE LEVEL> A bi-directional microphone <SIDE> and <MID> are perpendicular each other . Setting value: MUTE, −48.0 _ + 12.0dB Default: +0.0dB <SOURCE> Enable to select what input is effective. (Only on 4CH[…]
-
Страница 76
T uner <TUNER (CHROMA TIC) > 07 5 The H4n features a tuner with multiple tuning modes. 3-01-1 T uner <TUNER (CHROMA TIC) > Not available during recor ding and playback. NOTE: • The input source signals selected at the present become the tuning target. • Operating under 4CH mode, at Step 4 select <INPUT> and select the input so[…]
-
Страница 77
T uner , all other <TUNER> 0 76 Aside from CHROMA TIC, there are other tuning modes such as GUIT AR, BASS, OPEN A, OPEN D, OPEN E, OPEN G and DADGAD. 3-01-2 T uner , all other <TUNER> 1 Press. 2 Select <TOOL> and press. 3 Select <TUNER> and press. 4 Select the tuning mode and press. 5 T uning. Press the [MENU] button for mor[…]
-
Страница 78
This function allows you to calibrate the tuner . 3-01-3 T uner <TUNER (CALIB) > • The initial setting is 440Hz. • Y ou can make any setting per 1Hz from 435Hz to 445Hz. HINT: Not available during recor ding and playback. NOTE: 1 Press. 2 Select <TOOL> and press. 3 Select <TUNER> and press. 4 Select <CALIB> press. 5 Sele[…]
-
Страница 79
T uner <TUNER (INPUT) > 07 8 In 4CH mode you can select the input source for the tuner . 3-01-4 T uner <TUNER (INPUT) > 4 Select <INPUT> and press. 5 Select input source and pr ess. T uning display HINT: Not available during recor ding and playback. NOTE: When tuning is low When tuning is high No input sound (chromatic) T uner typ[…]
-
Страница 80
Metronome <METRONOME> 07 9 The metronome has other convenient functions such as click, pr e-count, tempo, sound, etc. 3-02 Metronome <METRONOME> <CLICK> This setting turns the metronome on or off dur — ing recording, playback or both. This setting must be made before recor ding or playback. <PRE COUNT> Set the count number j[…]
-
Страница 81
Metronome <METRONOME> 080 <TEMPO> Set the metronome speed. Adjust Select default: 120.0. <SOUND> Set the metronome tone. Select Select default: bell sound. <P A TTE RN> Set the pattern of the metronome. Select Select default: 4/4. <LEVEL> Set for the volume of the metronome. Select Select Y ou can set between 40.0 and […]
-
Страница 82
All about EFFECT 0 81 Brief outline about how to use <EFFECT>, its flow , input and output 3-03-1 All about EFFECT [Flow of the EFFECT] Change of the mode (MTR mode) P .038 Recording P .055 #1 Use <EFFECT> Use the pre-set patch as it is P .083 #2 Edit the patch <EDIT> Select the pre-set that’ s closest to your desir ed sound. Ed[…]
-
Страница 83
All about EFFECT 082 About input and output of [EFFECT] Y ou can use EFFECT in MTR mode for mono or stereo signals. The flow of signals will change corresponding to the input sour ces and recording tracks. 2. Input source comes from either [MIC] or INPUT [1] [2] TRACK Built-in MIC L or INPUT [1] Built-in MIC R or INPUT [2] + + EFFECT PRE AMP EFX 1.[…]
-
Страница 84
4 Select No. : P A TCH NAME and press. 1 Press. 2 Press <EFFECT> and pr ess. 3 Press <ON> and pr ess. Effect <EFFECT> 083 3-03-2 Ef fect <EFFECT> P A TCH Effects module settings are saved as a ‘patch’. 60 patches are available and 50 of them have been programmed. NOTE: Using the EFFECT made up of 2 modules in MTR mode, y[…]
-
Страница 85
Effect <EDIT>, patch edit 084 Y ou can create your own patch by combining effects and adjusting the parameter settings. 3-03-3 Ef fect <EDIT>, patch edit 5 Select the desired sound No.
 A TCH NAME and press. 6 Select <EDIT> and press. 7 Select the P ARAMETER which you want to change and press. EDIT MENU <PRE AMP> PRE AMP m[…]
 -
Страница 86
Effect <EDIT (PRE AMP) >, editing PRE AMP modules 085 Y ou can edit the P A TCH using PRE SET EFFECT . 3-03-4 Effect <EDIT (PRE AMP) >, editing PRE AMP modules ZNR ICON EFFECT TYPE: SET THE AMP TYPE CABINET .EQ.LEVEL. ETC. PRE AMP MODULE CONDITION ON / OFF ICON 7 Select <PRE AMP>and press. 8 Press <ON/OFF> and PRE AM[…]
-
Страница 87
Effect <EDIT (EFX) >, editing EFX modules Edit the patch by selecting from various parameters that corr espond closest to your desired effect. 3-03-5 Ef fect <EDIT (EFX) >, editing EFX modules Select the nearest image P A TCH and edit it….P084 ADJUST EFX module 9 Select editing P ARAMETER and press. 8 Press <ON/OFF> and EFX modu[…]
-
Страница 88
Effect <EDIT (LEVEL/RENAME) > Adjust the levels of the patch and change the name. 3-03-6 Ef fect <EDIT (LEVEL/RENAME) > Select <LEVEL> and press. Change the number and press. Select <STORE> to save the patch. T o return to the top without saving the edit/ change, hit MENU. NOTE: EFFECT 〈 EDIT 〉 …P .084 LEVEL RENAME 0 8[…]
-
Страница 89
Effect <EDIT (STORE) > 088 Select not <STORE>. (not stored) Selecting “YES” will overwrite the current patch. T o save without overwriting an exist — ing patch, select an empty patch during STORE opera — tion. Patch changes are only stored for the curr ent project. 10 Select <STORE> and press. 11 Select the ‘P A TCH No.’ w[…]
-
Страница 90
Effect <IMPOR T>, taking in a patch from another PROJECT 089 Y ou can apply the edited and saved EFFECT P A TCH, used in other project to the current PROJECT . 3-03-8 Ef fect <IMPORT>, taking in a patch fr om another PROJECT 1 Press <IMPOR T> from the <EFFECT> screen. 3 Select your desired mode and press. 2 Select <MODE&g[…]
-
Страница 91
3-03-8 Ef fect <IMPORT>, taking in a patch fr om another PROJECT Effect <IMPOR T>, taking in a patch from another PROJECT 090 <EACH> import one patch When pressing the <IMPORT>, “No Other Project!” display will appear when there is no PROJECT . NOTE: HINT: Read in MODE Read in PROJECT Start importing current PROJECT Sele[…]
-
Страница 92
A sing-along machine <KARAOKE> preparation 0 91 Create spontaneous music files and convert them into KARAOKE form, then r ecord vocals or additional guitar sounds over those files. 3-04-1 A sing-along machine <KARAOKE> pr eparation KARAOKE track preparation Allocate an optional le on to KARAOKE track 1 Select TRA CK MEN U icon and pr[…]
-
Страница 93
A sing-along machine <KARAOKE> preparation 092 Change the KEY of KARAOKE track Continue to the next page The contents of KARAOKE TRACK are different from a general TRACK MENU. HINT: (LEVEL) (CNT CANCEL) (KEY) (FINE) (FILE) (KARAOKE) Make CENTER CANCELA TION of the KARAOKE track 10 Select T RA CK M EN U icon and press. 7 Select T RA CK M EN U […]
-
Страница 94
A sing-along machine <KARAOKE> recor ding 093 3-04-2 A sing-along machine <KARAOKE> recording Y ou cannot use this function together with <EFFECT>. NOTE: + A slight adjustment of KARAOKE TRACK KEY . 1 Connect the microphone. 2 Select the track menu icon and press. 3 Press ‘PRACTICE’ (no recording). [ST ART RECORDING] Press [RE[…]
-
Страница 95
Playback : Playback files (stereo, 4ch and stamina modes) 0 94 Immediately after recor ding, you can playback the file by pressing the [PLA Y/P AUSE] button. If you prefer to call up the files for later playback, take the following steps. 4-01 Playback : Playback files (stereo, 4ch and stamina modes) 1 Press. 2 Select <FILE> and press. 3 Sele[…]
-
Страница 96
Playback : <PLA Y MODE> 095 Aside from general playback, you can also select 1) one file only playback, 2) repeat playback of one file, and 3) all files r epeat playback. 4-02 Playback : <PLA Y MODE> Y ou cannot use this setting during recording and playback. NOTE: 1 Press. 2 Select <PLA Y MODE> and press. 3 Select a play mode and[…]
-
Страница 97
Playback : Setting marks 096 While operating file playback you can create marks at desir ed spots. Y ou can move easily to the spot during playback. 4-03 Playback : Setting marks • Mark function is available only in case of WA V format. • The maximum marks you can place in one file are 99. • Once a mark has been created it cannot be deleted. […]
-
Страница 98
Playback : <AB REPEA T> 0 97 4-04 Playback : <AB REPEA T> The <AB REPEA T> r epeat setting allows you to playback two points on the file repeatedly . 1 Press. 2 Select <TOOL> and press. 3 Select <AB REPEA T > and press. 4 [ST ART PLA YBACK] Press. point A moves. 5 [Set up point A] Press. A mark is placed at point A, th[…]
-
Страница 99
Playback : <AB REPEA T> 098 Caution: When you move around in the file using [FF] a n d [REW] buttons and whenever you press t h e button for less than 2 seconds (quick press), it will move to the next file. If there is a mark, it will move to the marked point. By pressing the [FF] and [REW] buttons for more than 2 seconds you can move to a de[…]
-
Страница 100
1 Press. 2 Select <TOOL> and press. 3 Select <SPEED> and press. Playback : <SPEED> 099 Y ou can adjust playback speed of the file. 4-05 Playback : <SPEED> • Y ou can move swiftly to this menu pressing TRACK [3] button on the top screen of each mode. • Y ou can set up playback speed between 50% and 150% with incr ements o[…]
-
Страница 101
10 0 In 4CH mode you can use the mixer to adjust the playback LEVEL and P AN settings of two ster eo files. 4-06 Playback : <MIXER> Playback : <MIXER> 2 Select <MIXER> and press. 1 Press. <LEVEL> setting <P AN> setting fader Icon L 100 _ C _ R 100 Default; Center MUTE 48.0dB_+12.0dB Default; -0.0dB after setting, confi[…]
-
Страница 102
Playback : Playback files (MTR mode) 101 There are various ways to playback in MTR mode: Create and record files separately , assign them to tracks and play them back simultaneously . 4-07 Playback : Playback files (MTR mode) Ref. ☞ <TRACK MENU> P .059 TRACK [ 1 ] [ 2 ] [ 3 ] [ 4 ] Second time recor ding to a track Initial r[…]
-
Страница 103
Playback : Appointing time with a counter 10 2 4-08 Playback : Appointing time with a counter Using the counter , you can scroll to any desired point in a r ecording. 1 Select the counter figures on the top screen and pr ess. counter HINT time : minute : second : 1/1000 second 2 Set the time: Select the figures accor ding to the appointing hour / m[…]
-
Страница 104
Edit / Output : <FOLDER SELECT> 10 3 Select the folder that contains your targeted file. Y ou can call the <FOLDER SELECT> pressing TRACK [1]button on the top screen. HINT: 5-01 Edit / Output : <FOLDER SELECT> 1 Press. • Y ou cannot us e this setting during recor ding and playback. • Y ou can select any one separately among 10[…]
-
Страница 105
1 Press. 3 Select an optional file and press. 2 Select <FILE> and press. Edit / Output : <FILE SELECT> 10 4 Selecting playback files from the file list. 5-02 Edit / Output : <FILE SELECT> <FILE> operation to here is the same • Y ou can select files in the folder directly using [DIAL] from the top screen. • Y ou can move […]
-
Страница 106
Edit / Output : <FILE INFORMA TION> 10 5 This function displays the selected file information. 5-03 Edit / Output : <FILE INFORMA TION> SELECTING THE FILES…P .104 <FILE SELECT> 4 Select <INFORMA TION> and press. NAME Name of the file DA TE The recorded date of the file, or the renewal date when it created by PC or other de[…]
-
Страница 107
Edit / Output : <FILE DELETE> 10 6 Delete a selected file. 5-04 Edit / Output : <FILE DELETE> Caution; Once deleted, you cannot retrieve the file. NOTE: 4 Select <DELETE> and press. 5 Select <YES> and press. SELECTING THE FILES…P .104 <FILE SELECT> a deleting file PDF compression, OCR, web optimization using a waterm[…]
-
Страница 108
Delete all the files in the folders and projects. SELECTING THE FILES…P .104 <FILE SELECT> Once deleted, you cannot retrieve the file. NOTE: Edit / Output : <FILE DELETE ALL> 10 7 5-05 Edit / Output : <FILE DELETE ALL> 5 Select <YES> and press. 4 Select <DELETE ALL> and press. The name of the folder or the project to[…]
-
Страница 109
HINT: Change the file name: In MTR mode you can copy files. The copies are saved in the same pr oject as the original files. This function is useful when you want to preserve the original master copy . Edit / Output : <FILE (COPY)> 10 8 5-06 Edit / Output : <FILE (COPY)> 1 Press. 3 Select your desired file and press. 2 Select <FILE&g[…]
-
Страница 110
Edit / Output : <FILE RENAME> 10 9 In STEREO, MTR and ST AMINA MODE, you can change the name of the file. When recor ded in 4CH MODE, the file names cannot be changed. 5-07 Edit / Output : <FILE RENAME> 4 Select <RENAME> and press. SELECTING THE FILES…P .104 <FILE SELECT> 5 [Make change of each letter or number .] Select a[…]
-
Страница 111
Edit / Output : <FILE RENAME> 11 0 HINT: Display when the file name is over 12 characters. When the name of the file has more than 12 letters, a triangle mark appears telling letters available outside the screen. When converting letters, follow the next order: (space)!#$%&'()+,-01234 56789;=@ABCDEFGHIJ KLMNOPQRSTUV WXYZ [ ]^_`ab cdef[…]
-
Страница 112
Edit / Output : <FILE MP3 ENCODE> 111 In STEREO MODE you can encode a WA V FILE into MP3 format at various bit rates. 5-08 Edit / Output : <FILE MP3 ENCODE> SELECTING THE FILES…P .104 <FILE SELECT> • The name of the encode-completed file becomes automatically the “Original file name.mp3” • Y ou cannot have two files with[…]
-
Страница 113
Edit / Output : <FILE NORMALIZE> 11 2 This function automatically adjusts the volume level of a recorded file for enhanced sound quality and audio consistency . 5-09 Edit / Output : <FILE NORMALIZE> SELECTING THE FILES…P .104<FILE SELECT> 5 Select <YES> and press. 4 Select <NORMALIZE> and press. <NORMALIZE> fun[…]
-
Страница 114
Edit / Output : <FILE STEREO ENCODE> 11 3 This function will mix down a 4CH file to a stereo file. The r esulting files are stored in the folder in STEREO mode. 5-10 Edit / Output : <FILE STEREO ENCODE> SELECTING THE FILES…P .104 <FILE SELECT> ENABLE means to make setting effective. DISABLE means to inactivate setting, in other […]
-
Страница 115
7 Select <SA VE IN> and press. 8 Select the <SAVE IN> folder and press. Edit / Output : <FILE STEREO ENCODE> 11 4 Select <SA VE IN> 9 Select <EXECUTE> and press. EXECUTION HINT: Y ou cannot have two files with the same name. If the screen says “File name exists!”, select <RENAME> and set up a differ ent name.[…]
-
Страница 116
Edit / Output : <MARK LIST> 11 5 Y ou can view the list of marks put in the WA V FILE. 5-11 Edit / Output : <MARK LIST> SELECTING THE FILES…P .104 <FILE SELECT> 4 Select <MARK LIST> and press. This mark shows sounds dropout happening. The mark the user created. When there ar e no marks on the required files, the display wi[…]
-
Страница 117
Edit / Output : <DIVIDE> 11 6 On STEREO MODE, you can divide files at any desired position. 5-12 Edit / Output : <DIVIDE> SELECTING THE FILES…P .104 <FILE SELECT> • After the <DIVIDE> operation, there will be 2 files: the first portion will get [A] and the second one will get [B] at the end of the file name. HINT: 4 Sele[…]
-
Страница 118
Edit / Output : <MOVE> 11 7 This function is used to move files to a differ ent folder or mode. 5-13 Edit / Output : <MOVE> Ref. ☞ <FI LE RENAME> <NE W PRO JEC T> SELECTING THE FILES…P .104 <FILE SELECT> NOTE: • Only stereo files can move to stereo folder . Monaural files cannot move to the stereo fold- ers. • […]
-
Страница 119
Edit / Output : <NEW PROJECT> Here you can make a new pr oject and adjust settings for AUDIO TRACK or EFFECT in MTR mode. 5-14 Edit / Output : <NEW PROJECT> The maximum number of the projects Y ou can create a maximum of 1000 projects. Each project name can be up to 8 letters long. When you change letters, you can change in the above-me[…]
-
Страница 120
Edit / Output : <PROJECT (SELECT) > 11 9 Select a project stor ed on the SD card. 5-15 Edit / Output : <PROJECT (SELECT) > 1 Press. Press the [MENU] button for more than 2 seconds, and start operation from the top screen. 2 Select <PROJECT> and press. 3 Select <SELECT> and press. 4 Select your desired pr oject and press. Onl[…]
-
Страница 121
Edit / Output : <PROJECT (DELETE) > 12 0 This function will delete a project. 5-16 Edit / Output : <PROJECT (DELETE) > 1 Press. Once deleted, you cannot retrieve the pr oject. NOTE: Y ou cannot delete a project under protection. Y ou need to release it from protection before delete operation. HINT: Ref. ☞ < PR OTE CT> P.12 5 2 4[…]
-
Страница 122
Edit / Output : <PROJECT (RENAME) > 121 Y ou can change the name of the project. 5-17 Edit / Output : <PROJECT (RENAME) > 1 Press. 3 Select <RENAME> and press. 2 Select <PROJECT> and press. When you change letters, you can change in the following order: (Space)!»#$%&'()*+,-./0123456789:;<=> ?@ABCDEFGHIJKL[…]
-
Страница 123
Automatically displays the lowest unused number Edit / Output : <PROJECT (COPY) > 12 2 Copy the project and cr eate a new project with a new number . 5-18 Edit / Output : <PROJECT (COPY) > 1 Press. 3 Select <COPY> and press. 4 Select <EXECUTE> and press. 2 Select <PROJECT> and press. Ref. ☞ <PR OJE CT (REN AME )&g[…]
-
Страница 124
Edit / Output : <PROJECT (BOUNCE) > 12 3 Y ou can combine tracks created in MTR mode and mix them down to one mono or stereo track. 5-19 Edit / Output : <PROJECT (BOUNCE) > Select <BOUNCE> Select the name to bounce to. * If you have no change, proceed to next. → 3 Change the name of the file. Select a target project and start op[…]
-
Страница 125
Edit / Output : <PROJECT (BOUNCE) > 12 4 Select output le format: mono or stereo 6 Sele ct < E XECUTE> and pr ess. Execution Y ou cannot use this setting during recor ding and playback. NOTE: 4 Se lec t <FORM A T> and p res s. STEREO STEREO file MONO MONAURAL file 5 Selec t the file ty pe and pr ess. BOUNCE means to put togethe[…]
-
Страница 126
Edit / Output : <PROJECT (PROTECT) > 12 5 Using the PROTECT function on your project prohibits dividing of tracks and the change of files in that project. 5-20 Edit / Output : <PROJECT (PROTECT) > 1 Press. If you try to change a file allocated in a track, the screen will say «Project Pr otected». NOTE: 3 Select <PROTECT>[…]
-
Страница 127
Utility : <DISPLA Y BACK LIGHT> 12 6 Y ou can set the lighting time of the LCD BACK LIGHT on the display . 6-01 Utility : <DISPLA Y BACK LIGHT> 1 Press. OFF Switch off the light all the time. ON Switch on the light all the time. 15sec Light on for 15 seconds after the last key operation. 30sec Light on for 30 seconds after the last key […]
-
Страница 128
Utility : <DISPLA Y CONTRAST> 12 7 Adjust the display contrast. 6-02 Utility : <DISPLA Y CONTRAST> 1 Press. 4 Change the number and press. * Y ou can adjust fr om #1 to #8. A higher the number corresponds to more contrast. 3 Select <CONTRAST> and press. 1 − 8 weak get lighter ↑ ↓ strong get darker * default; #5 2 Select […]
-
Страница 129
Utility : <BA TTERY TYPE> 12 8 By setting your battery type, H4n can correctly display the r emaining lifetime of the battery . 6-03 Utility : <BA TTER Y TYPE> 1 Press. 4 Select the battery type and press. 3 Select <BA TTER Y> and press. ALKALINE Alkaline battery Ni-MH Nickel hydrogen storage battery * Default; ALKALINE 2 Select &[…]
-
Страница 130
1 Press. Y ou cannot use this setting during recor ding and playback. NOTE: 2 Select <SYSTEM> and press. 12 9 After it starts, the version of H4n can be confirmed. 6-04 Utility : <VERSION> Utility : <VERSION> 3 Select <VERSION> and press. system version boot program version Press the [MENU] button for more than 2 seconds, an[…]
-
Страница 131
Utility : <F ACTOR Y RESET> 13 0 Returns all the settings back to the original default condition. 6-05 Utility : <F ACTOR Y RESET> • Y ou cannot us e this setting during recor ding and playback. • Caution: if you operate the <F ACTORY RESET>, all the settings stored in this unit will be deleted and the settings will return to […]
-
Страница 132
Utility : <REMAIN> 131 Y ou can confirm the remaining capacity of the SD CARD. 6-06 Utility : <REMAIN> 1 Press. 3 Select <REMAIN> and press. approximate remaining capacity remain volume (MB) Remaining recording time on the current recording format. 2 Select <SD CARD> and press. Press the [MENU] button for more than 2 seconds[…]
-
Страница 133
Utility : <FORMA T> 13 2 Formatting the SD card for the H4n. 6-07 Utility : <FORMA T> 1 Press. • Y ou cannot us e this setting during recor ding and playback. • Caution: When you format the SD card, all data will be deleted. • The SD cards used in a computer or a digital camera, should be formatted by the H4n before using. NOTE: 3[…]
-
Страница 134
3 The downloaded system software is copied onto the root dir ectory of the SD card of H4n. 1 Open W eb site of ZOOM on PC and download the most recent system softwar e. [http://www .zoom.co.jp] 2 Connect H4n to PC with USB cable. 5 Switch on while holding down PLA Y/P AUSE button. 4 Cancel the connection of PC and H4n. Please disconnect through PC.[…]
-
Страница 135
Utility: How to use H2 and H4 SD cards 13 4 When you use the SD cards for H2 and H4 in the H4n, you can move their files and projects to the H4n. 6-09 Utility: How to use H2 and H4 SD cards 1 Insert SD card for H2/H4 unit into H4n and boot up the unit. 2 Select MOVE FILES and <YES>, and press. • The stereo files of H2/H4 and the projects of[…]
-
Страница 136
13 5 PDF compression, OCR, web optimization using a watermarked evaluation copy of CVISION PDFCompressor[…]
-
Страница 137
Reference 13 6 Refer ence PDF compression, OCR, web optimization using a watermarked evaluation copy of CVISION PDFCompressor[…]
-
Страница 138
Main spec list by mode 13 7 STEREO MODE 4CH MTR ST AMINA Recording Format STEREO WAV: 44.1/48/96kHz 16/24bit STEREO MP3: 48, 56, 64,80,96,112,128,160,192, 224,256, 320kbps, VBR44.1kHz STEREO WAV × 2 : 44.1/48kHz 16/24bit 44.1kHz 16it STEREO WAV, MONAURAL WAV, those total 4 tracks can be combined 44.1 kHz/16bit WAV type only (fixed) Maximum T rac[…]
-
Страница 139
Available setting menu list by each mode 13 8 � Y ou can use this setting during r ecording and playback. «*» has the exception. � Y ou cannot use this setting during r ecording and playback. A vailable setting menu list by each mode SYSTEM STEREO 4CH MTR STAMINA DA TE/TIME BACK LIGHT LCD CONTRAST BA TTERY TYPE F ACTORY RESET SD CARD […]
-
Страница 140
Effect types on MTR mode and the parameter 13 9 Ef fect types on MTR mode and the parameter FD CLEAN Clean sound of Fender T winReverb (’65) VX CLEAN Clean sound of V ox AC30 HW CLEAN Clean sound of Hiwatt Custom 100 UK BLUES Crunch sound of Marshall 1962 Bluesbreaker BGcrunch Crunch sound of Mesa Boogie MK MS #1959 Crunch sound of Marshall 19[…]
-
Страница 141
Effect types on MTR mode and the parameter 14 0 SVT Simulation of Ampeg SVT sound. BASSMAN Simulation of Fender Bassman 100 sound. HARTKE Simulation of Hartke HA3500 sound. SUP-Bass Simulation of Marshall Super Bass sound. SANSAMP Simulation of Sansamp Bass Driver DI sound. TUBE PRE ZOOM original tube preamplifier sound. ● Bass pr eamp effect typ[…]
-
Страница 142
Effect types on MTR mode and the parameter 14 1 Effect types on MTR mode and the parameter (1) POSITION Before, After Selects the insertion position of the EFX module: «Before» the PREAMP module or «After» the PREAMP module. (2) RA TE 0 − 50, Ref. P144 Adjusts the modulation rate. (3) COLOR 4ST AGE, 8ST AGE, INVERT 4, INVERT 8[…]
-
Страница 143
Effect types on MTR mode and the parameter 14 2 (1) POSITION Before, After Selects the insertion position of the EFX module: «Before» the PREAMP module or «After» the PREAMP module. (2) FREQ 1 − 50 Adjusts the modulation frequency . (3) BALANCE 0 − 100 Adjusts the balance between original sound and effect sound. (4) LEVEL 2 […]
-
Страница 144
Effect types on MTR mode and the parameter 14 3 Effect types on MTR mode and the parameter C RY This ef fect varies the sound like a talking modulator . (1) RANGE 1 − 10 Adjusts the frequency range in which the effect operates. (2) RESONANC 0 − 10 Adjusts the resonance characteristic of the ef — fect. (3) SENSE -10 − -1, 1 − 10 Adjusts the […]
-
Страница 145
Effect types on MTR mode and the parameter 14 4 [T able] Parameters with a < > symbol can be selected in note units, using the metronome tempo as r eference. Note durations • The actual note range that can be selected depends on the parameter . • Some tempo and note symbol combinations may result in values that exceed the parameter range.[…]
-
Страница 146
H4n patch list 14 5 H4n patch list Category No. Patch Name Description PREAMP module EFX module Guitar 00 Fender Clean Basic clean sound optimized for recor ding. FD CLEAN OFF 01 Natural Cho V ersatile clean chorus sound for applications ranging fr om arpeggio to melody playing. OFF ENSEMBLE 02 FunkyCutting Great sound for seventies style funky cut[…]
-
Страница 147
H4n patch list 14 6 Category No. Patch Name Description PREAMP module EFX module Bass 25 Hartke Tight sound modeled on the HARTKE HA3500. HARTKE OFF 26 Bassman Standard bass sound inspired by the FENDER BASSMAN 100. BASSMAN OFF 27 SVT Rock bass sound modeled on the AMPEG SVT . SVT OFF 28 SuperBass Drive sound modeled on the MARSHALL 1992 SuperBass.[…]
-
Страница 148
Data type MP3 Format <Recording> Bit rate 48, 56, 64, 80, 96, 112, 128, 160, 192, 224, 256, 320 kbps, VBR Sampling frequency 44.1 kHz <Playback> Bit rate 32, 40, 48, 56, 64, 80, 96, 112, 128, 160, 192, 224, 256, 320 kbps, VBR Sampling frequency 44.1/48 kHz Display 128 x 64 dots Full-dot LCD (with backlight) Inputs INPUT [1] [2] XLR (bal[…]
-
Страница 149
When you think something may be wrong with your machine 14 8 When you think something may be wr ong with your machine If there ar e problems during operation of the H4n, check the following points first. Problems during r ecording/playback ◆ No sound, or sound is very weak • Check the connections to your monitor system, and the volume setting o[…]
-
Страница 150
Index 14 9 [4CH MODE] Details u P3 7·39 Mode and top screen u P41 Mode selection u P3 7·38 Playback operation u P 94 Recording operation u P53 [A] AB repeat u P97 Always New recor ding mode u P58 AUDIO I/F (Audio interface), use as u P33 AUTO PUNCH IN/OUT u P 61 AUTO REC u P65 AUTO REC STOP u P66 [B] Battery/Power outlet setting u P 17 BA TTERY T[…]
-
Страница 151
Index 15 0 [I] IMPORT/EFFECT u P89 INPUT [MIC][1][2] buttons operations u P23 INPUT/TUNER u P78 [K] [KARAOKE] Preparation u P 91 Recording u P93 Setting/TRACK MENU u P59 [L] LEVEL/EFFECT u P 87 LEVEL/TRACK MENU u P59 Locator buttons operations u P 21 LO CUT u P68 [M] Manual PUNCH IN/OUT u P63 MARK u P96 MARK LIST u P 11 5 [MENU] MAIN ME[…]
-
Страница 152
[R] REC FORMA T u P 51 REC LEVEL AUTO u P70 REC LEVEL operations u P24 [REC] button operations u P 21 Recording (ster eo/stamina mode) u P49 Recording (4CH mode) u P53 Recording (MTR mode) u P55 Recording track selection u P47 REMAIN u P 1 31 Remote control (option) u P1 6·45 RENAME/EFFECT u P 87 RENAME/FILE u P1 09 RENAME/PROJECT u P 121 [S] Safe[…]
-
Страница 153
15 2 This equipment has been tested and found to comply with the limits for a Class B digital device, pursuant to Part 15 of the FCC Rules. These limits are designed to provide reasonable protection against harmful interference in a residential installation. This equipment generates, uses, and can radiate radio frequency energy and, if not installe[…]
-
Страница 154
H4n-5000-2 ITOHPIA Iwamotocho 2chome Bldg. 2F , 2-11-2, Iwamoto-cho, Chiyoda-ku, T okyo 101-0032, Japan W e b S i t e : http://www.zoom.co.jp PDF compression, OCR, web optimization using a watermarked evaluation copy of CVISION PDFCompressor[…]
-
Страница 155
Cubase LE 4 installation Connections and preparation Use Cubase LE 4 to r ecord Cubase LE 4 installation Windows V ista / XP Connections and preparation Use Cubase LE 4 to recor d Cubase LE 4 installation MacOS X Connections and preparation Use Cubase LE 4 to r ecord Continued overleaf To connect the H4n to a computer running Windows Vista (or Wind[…]
-
Страница 156
MacOS X Cubase LE 4 installation Windows V ista / XP Connections and preparation Use Cubase LE 4 to r ecor d From the «Devices» menu of Cubase LE 4, select «VST Connections» and select the device containing the string «Zm In (Out)» ( «H4 Audio» for MacOS X) as input port and output port. Use the tabs at top ([…]