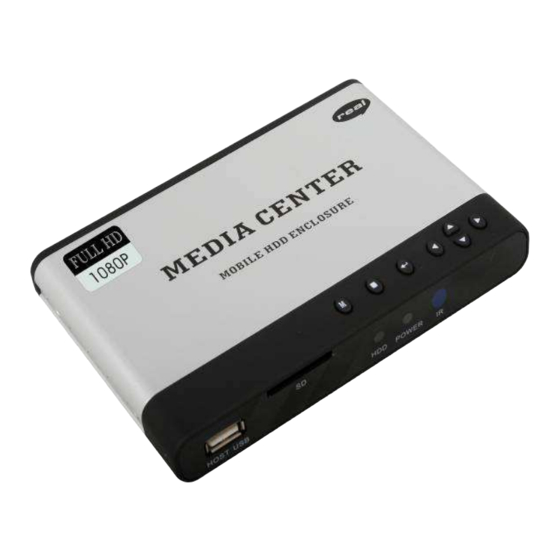
Сегодня вашему вниманию представляется всежрущий медиаплеер. Батя мечтал о таком два года, потому что его достал дивидиплеер китайский, который не видел диски. Я купил эту штуку пару месяцев назад ради интереса, были лишние деньги. Посылка затерялась где то на два месяца, я уже и диспут открывал, и закрыть успел, так как китаец умолял меня это сделать, и вот штука у меня.
Начнем обзирать:
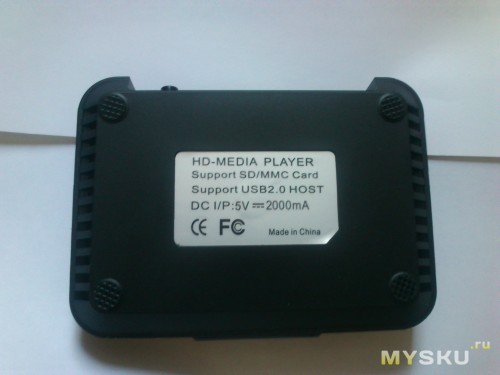
что эта штука может:
Поддержка: AVI, MPG, MPEG, XVID, VOB, DAT, MP4, TS, M2TS, MKV, H.264, RM, RMVB и т. д.
Поддержка MP3, WMA, AAC т.д…
Поддержка графических форматов JPG, BMP, PNG, GIF, TIFF
Поддержка USB 2.0 Host, SD, MMC, SDHC карт памяти
Поддержка внешних hdd
Поддержка выхода CVBS (NTSC, PAL)
720p HD разрешение
Стереозвук
Цвет: Черный
Размеры:
плеер: 108 * 78 * 23мм
пульт: 124 * 51 * 10мм
Вес нетто: 221г
содержимое пакета
1 х плеер
1 х пульт
1 х блок питания
1 х AV-кабель
1 х инструкция
Фоточки!
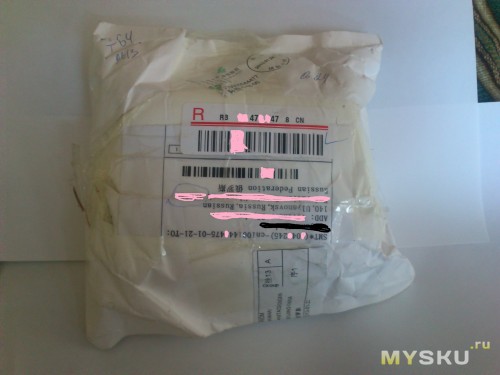
пришло все в белом пакете
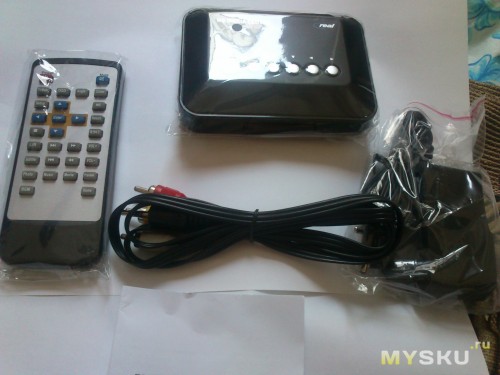
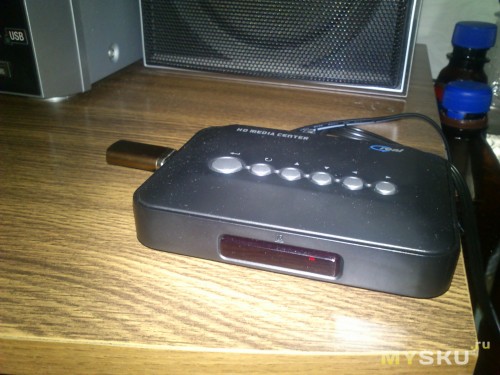
общий вид посылки: плеер, пульт, адаптер питания, кабель для соединения с телеком, есть еще простенькая инструкция на английском
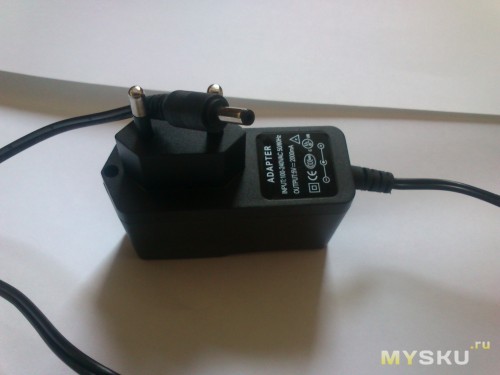
адаптер с разъемом
кабель для соединения с телеком. джеком в плеер, тюльпанами в телевизор
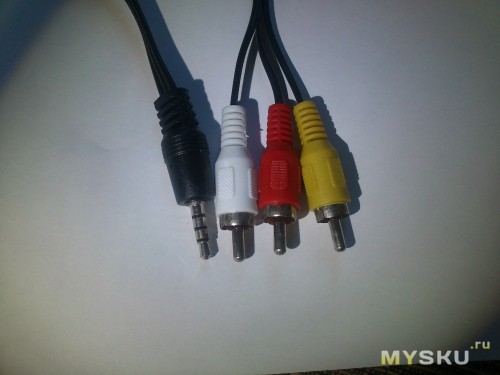
Фото плеера с разных сторон:
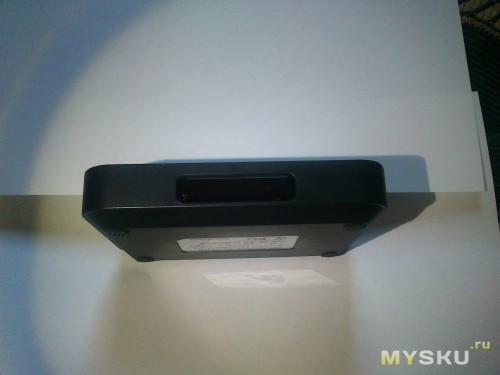
снизу
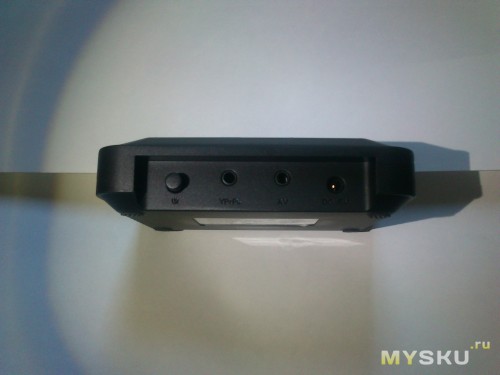
сзади. слева на право:
-кнопка влючения,
-гнездо выдающее компонентный сигнал.
кабеля такого нет, туда суется комплектный кабель, а в гнездо AV вставляется кабель джек-тюльпаны обычный, для звука
-гнездо для кабеля, который в комплекте,
-гнездо для адаптера
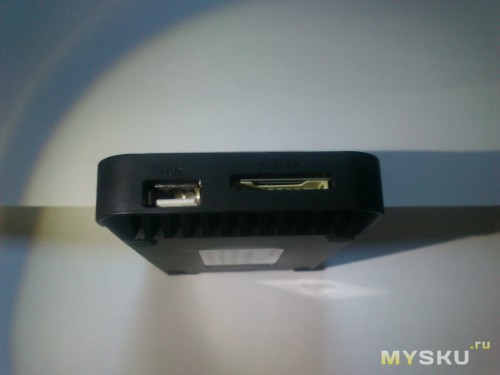
боковая сорона. юсб порт, и гнездо для sdmmc карт
другая боковая сторона
мыльная пустая
передняя сторона. при включении загорается красный огонек за накладкой из гладкой пласмассы
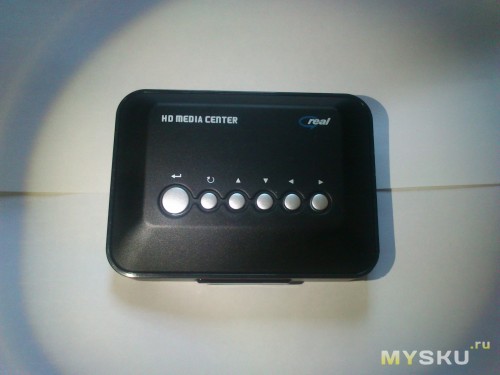
вид сверху. тут расположены кнопки навигации по меню
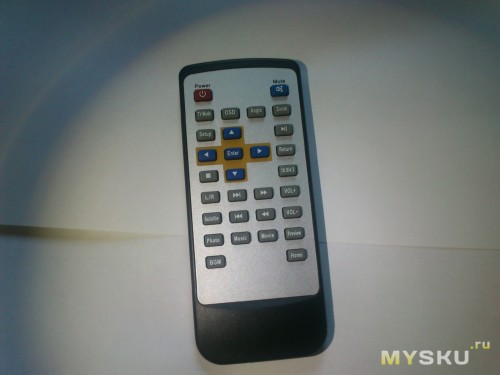
простенький пультик
медиацентр подключен. флешка втавлена.
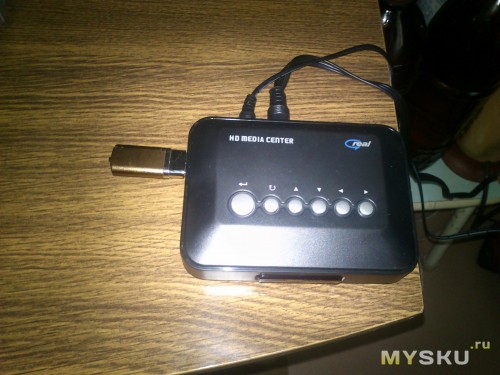
огонек горит, значит работает)))
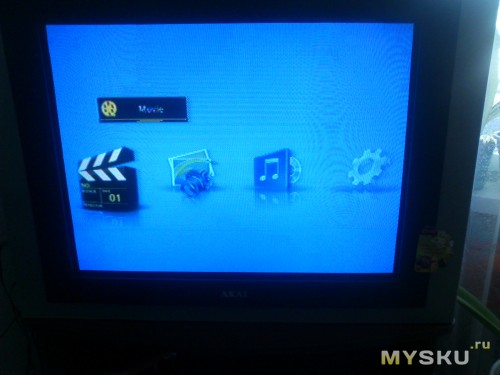
главное меню
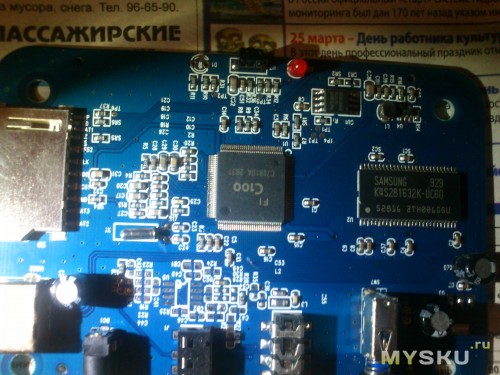
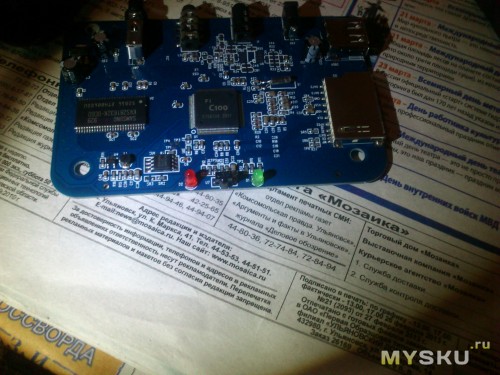
разбираем!!!
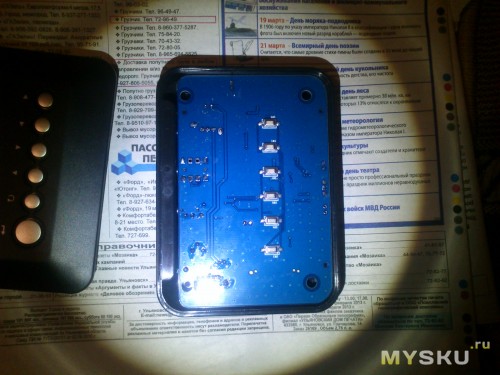
плата вынулась легко. сразу в глаза бросился нераспаянный диод d1
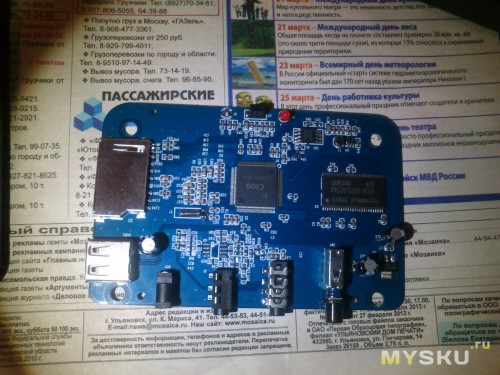
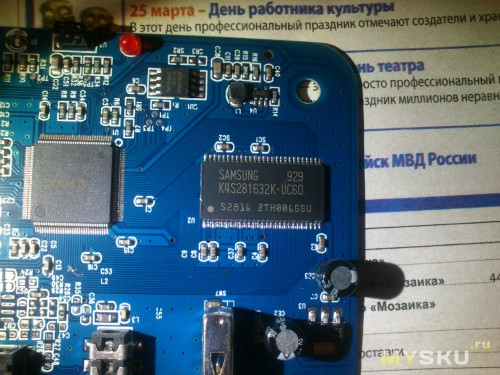
чипы крупным планом для интересующихся
я нашел светодиод как на плате, и резво впаял его в свободное место
но ничего не изменилось, нигде ничего не замигало… выпаял его от греха подальше, мало ли что.
плеер пережил все мои издевательства.
-я пихал в него флешку с сотонинской музыкой.
-подключал жесткий диск с непотребным содержанием. потребовалось доппитание, ток его юсб порта маловат.
-совал ему 720р видео (это вообще ржака, с желтым тюльпанчиком то). читает, но… я не вижу смысла смотреть это на элт телеке, от которого у меня закровоточили глаза через 15 минут испытаний
-я тыкал в него паяльником
Итак.
плюсы:
-дешево. для меня дешево.
-просто. простая навигация, понятное меню, удобный пультик
-всеядность. самое то для всяких мутных рипов
-можно подключить жесткий диск и будет вообще хорошо.
минусы:
-не читает Losless, хотя он и не нужен в этом случае
-не тянет внешний жесткий диск без доппитания
-качество изображения оставляет желать лучшего, приделали б ему hdmi…
в общем позырить кинцо на кухне пойдет, можно стасмихайлова включать на пьянке, не жалею ни о чем.
- Manuals
- Brands
- Real Manuals
- Portable Multimedia Player
- Media Center
- User manual
-
Contents
-
Table of Contents
-
Bookmarks
Quick Links
HD 1080P Media Center
User Manual
( ( ( ( Please read this operation manual carefully and keep it for daily use ) ) ) )
Summary of Contents for Real Media Center
-
Page 1
HD 1080P Media Center User Manual ( ( ( ( Please read this operation manual carefully and keep it for daily use ) ) ) )… -
Page 2: Table Of Contents
HD 1080P MEDIA PLAYER Index Function and features………………………………………………………2 List of accessories ………………………………………………………..2 Install of HDD…………………………………………………………………3 Indications of the player……………………………………………………4 Description of remote controller………………………………………….5 Connect to other devices…………………………………………………..7 6.1 Connect to PC ………………………………………………………..7 6.2 Connect to display devices……………………………………………8 Display mode……………………………………………………………….10 Operation reference……………………………………………………….11 9.1 Operation setup menu………………………………………………11 9.2 Play mode select interface………………………………………..12 9.2.1 Video interface……………………………………………………..12…
-
Page 3: Function And Features
HD 1080P MEDIA PLAYER 9. Troubleshooting guides……………………………………………………18 10. Specifications………………………………………………………………..19 Function and Features AS a multifunctional HDD media player, compact and easy, it will become a…
-
Page 4
HD 1080P MEDIA PLAYER good companion for both your office work and home entertainment. Mobile HDD: USB2.0 interface enables it as a USB mobile HDD with SATA HDD installed. Special design makes it easy to connect to any PC USB port, no external power supply needed. Compatible with both Windows and MAC OS. -
Page 5: List Of Accessories
HD 1080P MEDIA PLAYER Support Repeat, Zoom , FF , BF , Rotate functions. Support HDMI, CVBS ,YPbPr video output. Stereo L/R, S/PDIF optical audio output. Dimension (net): 142*95*23 mm. List of accessories Remote controller 1 USB cable 1 AC/DC Power adapter 1 AV /YPbPr cable 2 User manual 1 Screws and screw driver 1 set…
-
Page 6
HD 1080P MEDIA PLAYER then you will see the SATA port in the PCBA. 3. Install the HDD, lock HDD with attached screws. 4. Put back and restore. (Note: please format HDD before installation )… -
Page 7: Indications Of The Player
HD 1080P MEDIA PLAYER Indications of the player…
-
Page 8: Description Of Remote Controller
HD 1080P MEDIA PLAYER Description of remote controller…
-
Page 9
HD 1080P MEDIA PLAYER… -
Page 10
HD 1080P MEDIA PLAYER Function of remote key table POWER Power Standby MENU Menu MUTE Audio mute FUNCTION Special Function MOVIE Movie mode hot key HOME Return root menu MUSIC Music mode hot key EXIT Return PHOTO Photo mode hot key SUB-T Subtitle Reserved… -
Page 11: Connect To Other Devices
HD 1080P MEDIA PLAYER Connect to other devices *Connect to PC Ⅰ Connect the player with PC with 5pin USB cable. Ⅱ Open “My computer”, you can see storage of built-in hard disk in the player.
-
Page 12
HD 1080P MEDIA PLAYER… -
Page 13: Connect To Display Devices
HD 1080P MEDIA PLAYER *Connect to display devices 1. AV interface to TV Use the AV cable to connect player with TV through AV interface. Refer to picture below:…
-
Page 14
HD 1080P MEDIA PLAYER 2. YPbPr interface to TV Use the YPbPr cable to connect player with TV through the YPbPr interface, and use the AV audio cable(red, white) to connect the AV interface of the player with the TV audio interface(red, white).(Refer to picture below) -
Page 15
HD 1080P MEDIA PLAYER… -
Page 16
HD 1080P MEDIA PLAYER 3. HDMI interface to TV Use the HDMI cable to connect the player with a HDTV. (Refer to picture below) -
Page 17: Display Mode
HD 1080P MEDIA PLAYER Display mode 1. Set up TV display mode. 2. Set up the player output mode as same as TV by remoter (CVBS, YPbPr, HMDI). Operation reference After power on, it will enter into the main menu. (Refer to picture1)
-
Page 18: Operation Setup Menu
HD 1080P MEDIA PLAYER Picture1 Operation setup menu Select the setting option by pressing the LEFT/RIGHT key in root menu, then press the ENTER key to confirm. (Refer to picture2, picture3) Picture2…
-
Page 19: Play Mode Select Interface
HD 1080P MEDIA PLAYER Picture3 Output : Set up the output mode: NTSC 、 PAL, HDMI mode. SPDIF: ON or OFF selection for optical output. Language : Set up different languages. Such as : S-Chinese, English, T- Chinese. Keytone: ON or OFF selection for keytone. Restore default: restore the factory setting.
-
Page 20
HD 1080P MEDIA PLAYER key to confirm, please refer to picture5. Picture4 Picture5… -
Page 21
HD 1080P MEDIA PLAYER 3. Press UP or DOWN key to choose the movie, and press the ENTER key to confirm. ( Refer to picture6) Picture6 Remark : operation while playing the movie : [Refer to remote controller] “ ”: In full screen playing status, press this key will fast forward play the current file. -
Page 22
HD 1080P MEDIA PLAYER “ ”: Press this key will stop playing. 4. In the condition of playing movie, press FUNCTION key will enter into the submenu of playing. (Refer to picture7) Picture7 “ ”: Return to the root. “ ”: Choose the audio track. -
Page 23: Music Interface
HD 1080P MEDIA PLAYER “ ”: Choose the text color of subtitle “default (white), red, blue”. Note : 1. In the menu, if has“ ”record, means has been selected already. Press ENTER key to confirm, the EXIT key to return back to the previous menu.
-
Page 24
HD 1080P MEDIA PLAYER Picture8 Picture9 3. Press UP/ DOWN key to choose the music, and press the ENTER key to confirm. ( Refer to picture10) -
Page 25
HD 1080P MEDIA PLAYER Picture10 Remark : some operation when playing the music : [Refer to remote] “ ”: In full screen playing status, press this key will fast forward play the current file. Press the ENTER key will return to normal playing speed. “… -
Page 26: Photo Interface
HD 1080P MEDIA PLAYER *Photo interface 1. Select the picture option by pressing the LEFT/ RIGHT key in root menu interface, then press ENTER key to enter into the picture list. (Refer to picture 2. In the list of “picture”, select the device from which you prefer to enjoy the photo, press ENTER key to confirm.
-
Page 27
HD 1080P MEDIA PLAYER 3. Press UP or DOWN key to choose the photo to play, and press ENTER to confirm. (Refer to picture13) Picture13 Remark : operation for showing the photo : [Refer to remote] “ ”press this key to play the previous photo “… -
Page 28
HD 1080P MEDIA PLAYER Picture 14 Press LEFT/RIGHT key to choose functions, and press ENTER to confirm: “ ”: Return to the root. “ ”: Pause the slide show. “ ”: Press the ENTER key, you can find the function list for Zoom in, Zoom out, Rotate, UP, DOWN etc. -
Page 29
HD 1080P MEDIA PLAYER 1. Select the explore option by pressing the LEFT/ RIGHT key in root menu interface, then press the ENTER key to select a folder or a file, press will show the instruction of sort, copy, delete and paste options. Please refer to picture15&picture16, use the LEFT/ RIGHT key to select the appointed function. -
Page 30
HD 1080P MEDIA PLAYER Picture17 Troubleshooting guide Symptom Possible cause Possible solution Power Power cable problem Check whether the DC power cable is connected properly when DC5V The player needs to be restarted Check whether the DC power plug in cable is connected properly video player… -
Page 31
HD 1080P MEDIA PLAYER Remote Battery failure of the remote Install a new battery. Make sure control does controller to use a battery of the model not work Cr2025,3V Improper battery installation Reinstall the battery according to the instructions remote control Point remote… -
Page 32
HD 1080P MEDIA PLAYER Dimensions 142*95*23mm Weight(net/packaged) 185g/720g Video format RM,RMVB,AVI,DIVX,MKV,MOV,H DMOV,MP4,M4V,PMP,AVC,FLV,V OB,MPG,DAT,MPEG,TS,TP,M2TS , (H.264,H. 263,WMV9/VC-1,MPEG1/2/4) Audio format MP3,WMA,OGG,AAC,FLAC,APE , AC3,DTS,ATRA Photo format BMP, JPG, PNG, GIF E-book Video Output 1Vp-p+/-(75 Ohm) Audio Output 2.0Vrms+/-0.3V Audio Signal Output Frequency 20Hz-22kHz Characteristics Response >…
Operation & User’s Manual for Real Media Center Portable Multimedia Player (32 pages)
Specifications:1177/1177506-media_center.pdf file (28 May 2023) |
Accompanying Data:
Real Media Center Portable Multimedia Player PDF Operation & User’s Manual (Updated: Sunday 28th of May 2023 10:27:44 AM)
Rating: 4.7 (rated by 36 users)
Compatible devices: ANI-2PIP-LOGO, NM-145, QA-360, SA1MUS16K — GoGear Muse 16 GB, DSX-A55BT, ZIN-5005HD, DVP-7401 X2, iSense Classic.
Recommended Documentation:
Text Version of Operation & User’s Manual
(Ocr-Read Summary of Contents of some pages of the Real Media Center Document (Main Content), UPD: 28 May 2023)
-
1, HD 1080P Media Center User Manual ( (( ( Please read this operation manual carefully and keep it for daily use ) )) )
… -
17, HD 1080P MEDIA PLAYER Display mode 1. Set up TV display mode. 2. Set up the player output mode as same as TV by remoter (CVBS, YPbPr, HMDI). Operation reference After power on, it will enter into the main menu. (Refer to picture1) 17
… -
14, HD 1080P MEDIA PLAYER 2. YPbPr interface to TV Use the YPbPr cable to connect player with TV through the YPbPr interface, and use the AV audio cable(red, white) to connect the AV interface of the player with the TV audio interface(red, white).(Refer to picture below) 14
… -
28, Real Media Center HD 1080P MEDIA PLAYER Picture 14 Press LEFT/RIGHT key to choose functions, and press ENTER to confirm: “ ”: Return to the root. “ ”: Pause the slide show. “ ”: Press the ENTER key, you can find the function list for Zoom in, Zoom out, Rotate, UP, DOWN etc. “ ”: Show picture list. “ ”:…
-
3, HD 1080P MEDIA PLAYER 17 9. Troubleshooting guides……………………………………………………18 10. Specifications………………………………………………………………..19 Function and Features AS a multifunct…
-
11, Real Media Center HD 1080P MEDIA PLAYER Connect to other devices *Connect to PC Ⅰ Connect the player with PC with 5pin USB cable. Ⅱ Open “My computer”, you can see storage of built-in hard disk in the player. 11 11
…
-
Real Media Center User Manual
-
Real Media Center User Guide
-
Real Media Center PDF Manual
-
Real Media Center Owner’s Manuals
Recommended: HD84000, Quantumdata 780E, PT560AU


-
Philips HMP3000
HMP3000EN User manualES Manual del usuario PT-BR Manual do Usuário Register your product and get support atCadastre seu produto e obtenha suporte emRegistre su producto y obtenga asistencia enwww.philips.com/welcome …
HMP3000 28
-
Philips SA2VBE08RA/02
Philips GoGear MP4 playerSA2VBE04SA2VBE08SA2VBE16Quick start guidePrzewodni szybkiego startuGuía de inicio rápidoSnabbstartsinstruktionerSchnellstartanleitungQuick start guideStručný návod k rychlému použitíคู่มือเริ่มต้นใช้งานอย่างย่อ 快� …
SA2VBE08RA/02 11
-
Archos Gmini 400
1• MPEG-4 Video Player • MP3 & WMA Music Player • Photo Viewer • USB 2.0 Hard Disk• Game player User Manual for ARCHOS Gmini™ 400 Version 1.1English Language User ManualPlease visit our website to download the most recent manual and software for this product.2Table of Conten …
Gmini 400 34
-
Philips SA3ARA16K/02
Quick start guideGuide de mise en routeKurzanleitungGuía de conguración rápidaGuida rapidaPhilips GoGear MP4 playerSA3ARA04SA3ARA08SA3AR A16Quick start guideRegister your product and get support atwww.philips.com/welcome …
SA3ARA16K/02 7
Additional Information:
Popular Right Now:
Operating Impressions, Questions and Answers:
Table of Contents for Real Media Center:
-
HD 1080P MEDIA PLAYER Picture 14 Press LEFT/RIGHT key to choose functions, and press ENTER to confirm: “ ”: Return to the root. “ ”: Pause the slide show. “ ”: Press the ENTER key, you can find the function list for Zoom in, Zoom out, Rotate, UP, DOWN etc. “ ”: Show picture list. “ ”: Choose the play mode for pictures. “ ”: Choose the slide show time”1s, 3s, 10s”. “ ”: Choose the sequence for picture play. Copy/Delete functions 28
-
HD 1080P MEDIA PLAYER Picture8 Picture9 3. Press UP/ DOWN key to choose the music, and press the ENTER key to confirm. ( Refer to picture10) 24
-
HD 1080P MEDIA PLAYER Picture17 Troubleshooting guide Symptom Possible cause Possible solution Power LED not ON when DC5V plug in Power cable problem Check whether the DC power cable is connected properly The player needs to be restarted Check whether the DC power cable is connected properly No video signal or wrong on display The player is connected improperly Connect the player’s power again according to the instructions The video output of the play
-
HD 1080P MEDIA PLAYER key to confirm, please refer to picture5. Picture4 Picture5 20
-
HD 1080P MEDIA PLAYER *Connect to display devices 1. AV interface to TV Use the AV cable to connect player with TV through AV interface. Refer to picture below: 13 11
-
HD 1080P MEDIA PLAYER *Photo interface 1. Select the picture option by pressing the LEFT/ RIGHT key in root menu interface, then press ENTER key to enter into the picture list. (Refer to picture 11) 2. In the list of “picture”, select the device from which you prefer to enjoy the photo, press ENTER key to confirm. (Refer to picture12) Picture12 26 Picture11
-
HD 1080P MEDIA PLAYER then you will see the SATA port in the PCBA. 3. Install the HDD, lock HDD with attached screws. 4. Put back and restore. (Note: please format HDD before installation ) 6
-
HD 1080P MEDIA PLAYER Picture3 Output : Set up the output mode: NTSC 、 PAL, HDMI mode. SPDIF: ON or OFF selection for optical output. Language : Set up different languages. Such as : S-Chinese, English, T- Chinese. Keytone: ON or OFF selection for keytone. Restore default: restore the factory setting. Play mode select interface *Video interface 1. Select the movie option by pressing the LEFT/RIGHT key in root menu, then press the
-
HD 1080P MEDIA PLAYER Display mode 1. Set up TV display mode. 2. Set up the player output mode as same as TV by remoter (CVBS, YPbPr, HMDI). Operation reference After power on, it will enter into the main menu. (Refer to picture1) 17
Questions, Opinions and Exploitation Impressions:
You can ask a question, express your opinion or share our experience of Real Media Center device using right now.
| Document’s Content and Additional Information | Share Manual |
|---|---|
|
Real Media Center Operation & user’s manual
Pages Preview: Document Transcription:
See Details |


| Document’s Content and Additional Information | Share Manual |
|---|---|
|
Real Media Center Operation & user’s manual
Pages Preview: Document Transcription:
See Details |
При покупке своего нового автомобиля, многие сталкиваются с проблемой функционала и возможностей установленной в ней авто-магнитолы (головы, кому как удобно  ), а иногда и вообще в отсутствии таковой. И тут вариантов не много. Либо в магазин за новой, либо мириться и ездить с тем что есть…
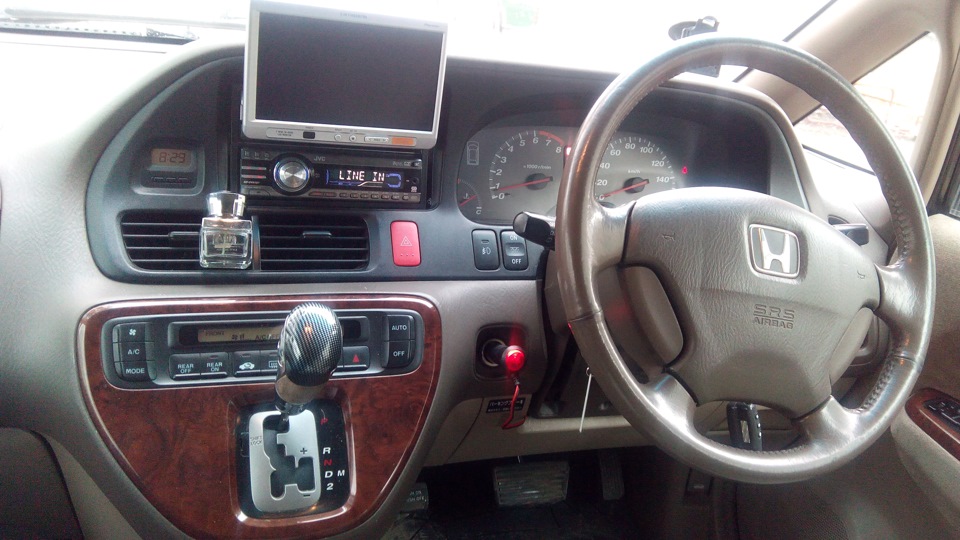
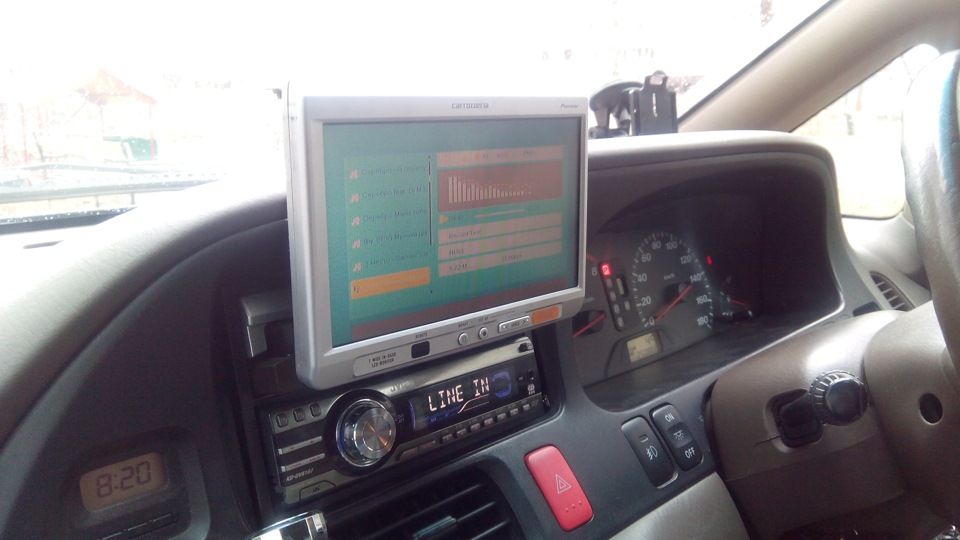
Так вот, при покупке в 2014 году Honda Odyssey, я обнаружил установленную в ней магнитолу JVC KD-DV6107 (когда-то очень даже ни чего была вещица ), с возможностью чтения MP3 дисков и проигрывания радио. Была у неё ещё возможность чтения video DVD, правда только в стандарте PAL. Вроде бы не плохо для начала? Так я и ездил какое то время. Но отсутствие USB меня серьезно угнетало. Постоянно покупать, записывать и возить с собой гору CD «болванок» мне начинало надоедать . Но это было не всё, что стояло на борту моего авто. Услужливый продавец оставил мне систему PIONER CARROZZERIA AVIC-DR2500, в которой отсутствовал gps-приёмник, усилитель и CD — чейнджер . Остался только монитор, привод для загрузки системы и пульт ду . Естественно она находилась в не рабочем состоянии, не был установлен загрузочный диск, который нужен для запуска системы. Да и если бы она была в рабочем состоянии, толку от неё было бы не много. Вы спросите почему ? Во первых : приёмник gps отсутствовал, а значит навигация не работает, да и толку от неё ноль в России т.к. понимает она только японские карты. Во вторых : видео стандарт NTSC и это означает, что подключить её к JVC, с стандартом PAL для последующего просмотра фильмов на мониторе, не представлялось возможным. Ну а диски и радио я мог прослушивать на работающей JVC .
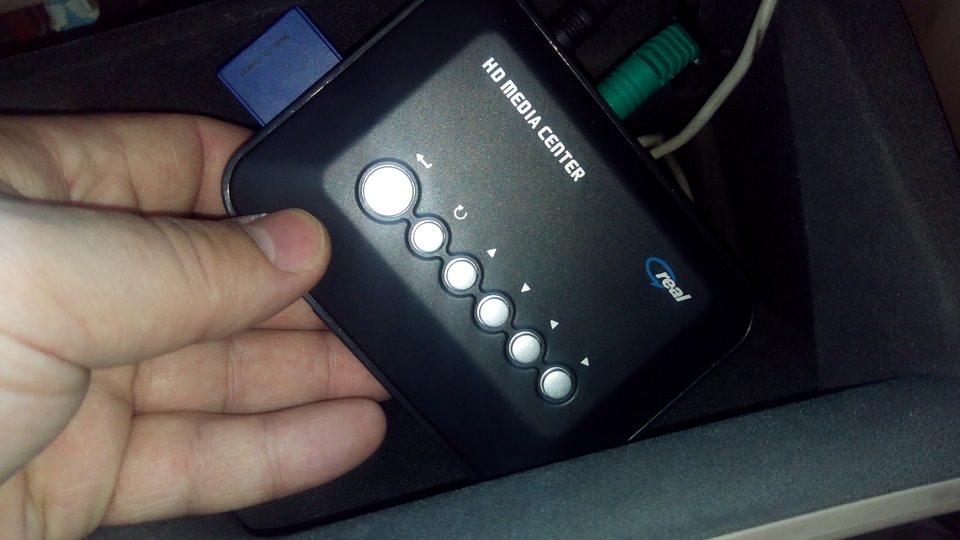
Необходимость в этой системе отпадала, пока я не пообщался на эту тему с одним своим хорошим товарищем, который довольно не плохо разбирается в электронике. К слову, даже очень так не плохо… Он и предложил мне установить в качестве «головы» обычный китайский TV медиа плеер, который используется для подключения к телевизору в качестве приставки для просмотра видео с usb носителя. Выкинуть привод, а к монитору приделать обычный аналоговый TV -вход . JVC, тем временем, должна была исполнять роль усилителя. Дело за малым. После изучения предложений наших китайских братьев на просторах интернета я сделал выбор. Хотел было уже заказывать, но случаем судьбы наткнулся на такой же девайс в одном из магазинов моего города. Долго не думал, взял его.
К слову оговорюсь, пока раздумывал и искал медиа плеер, с товарищем выкинули все лишнее, переделали монитор и временно установили DVD привод “мистери”, который расположился в ногах у пассажира . Пользоваться данным девайсом мне не доставляло особого удовольствия. Диски он понимал не все, тормозил от резких перепадов температур в зимний период, да и пультом ду пользоваться было крайне не удобно когда рядом сидел пассажир . Успокаивало одно — это всё временно.
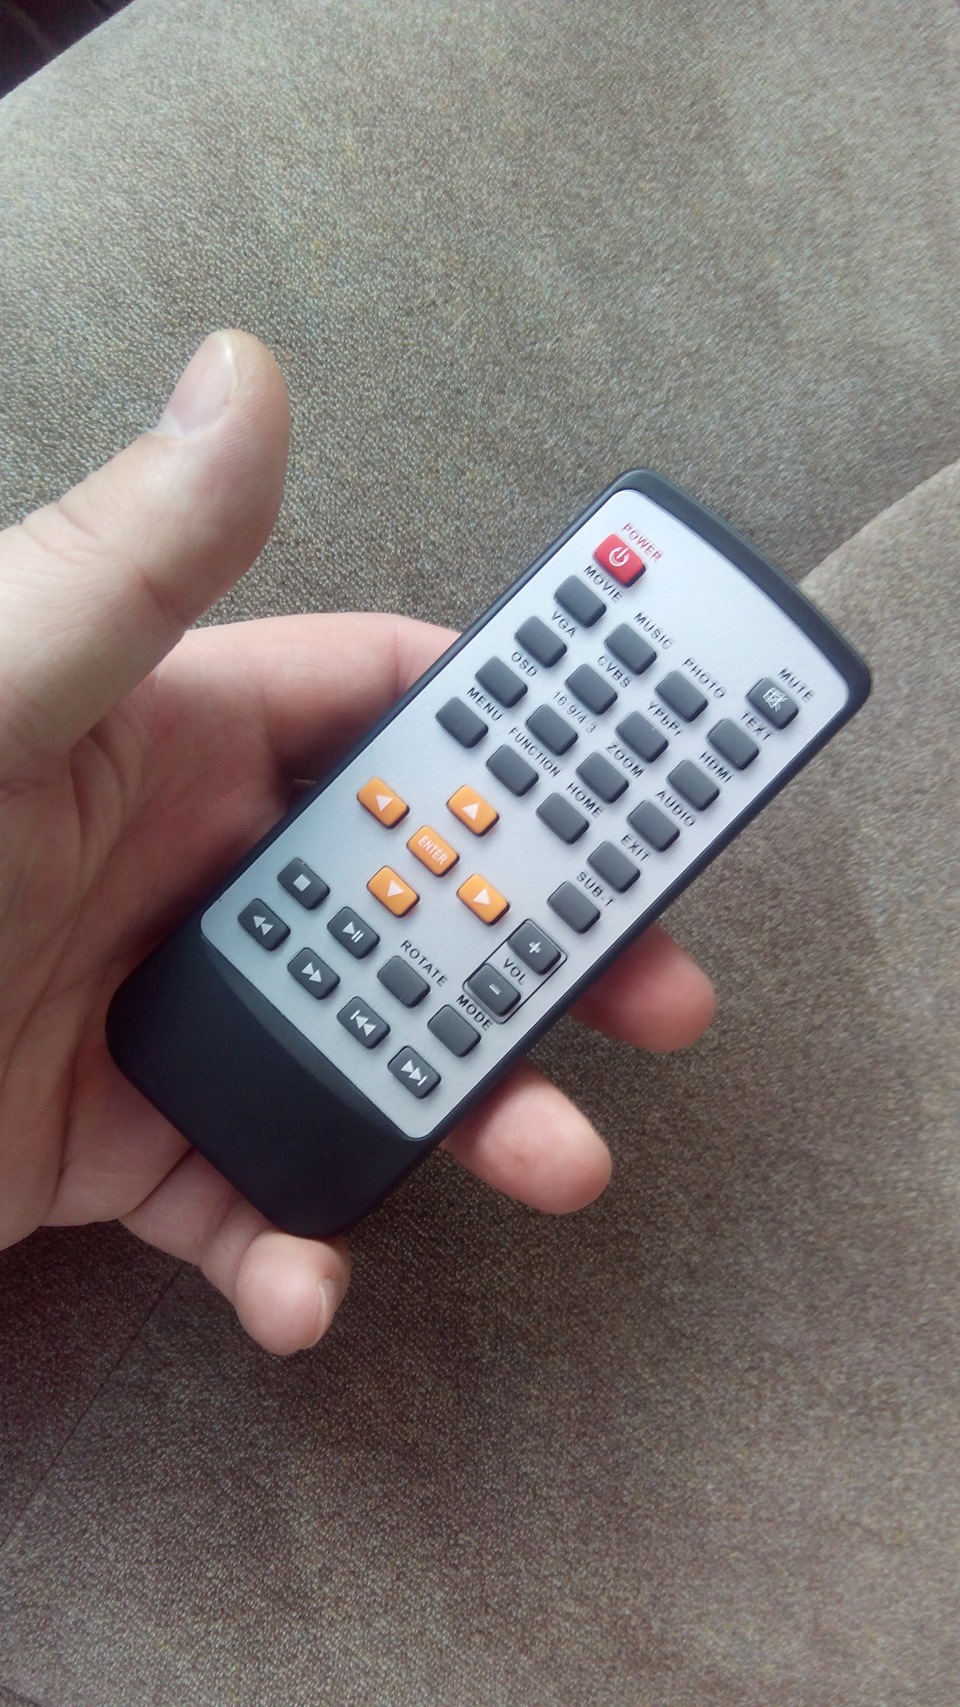
Так вот, купив медиа плеер встал вопрос о удобстве управления им. Решил проблему следующим образом — отпаял датчик приема сигнала с пду, и вынес его за пределы корпуса, соединив его с девайсом посредством провода. Сам датчик разместил в зазоре между приборной панелью и магнитолой, приклеив его на двухсторонний скотч.
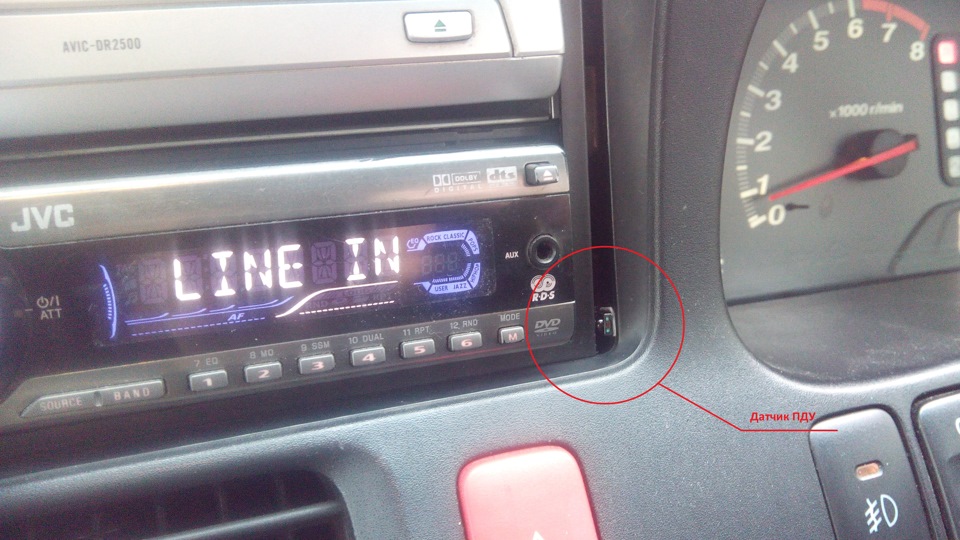
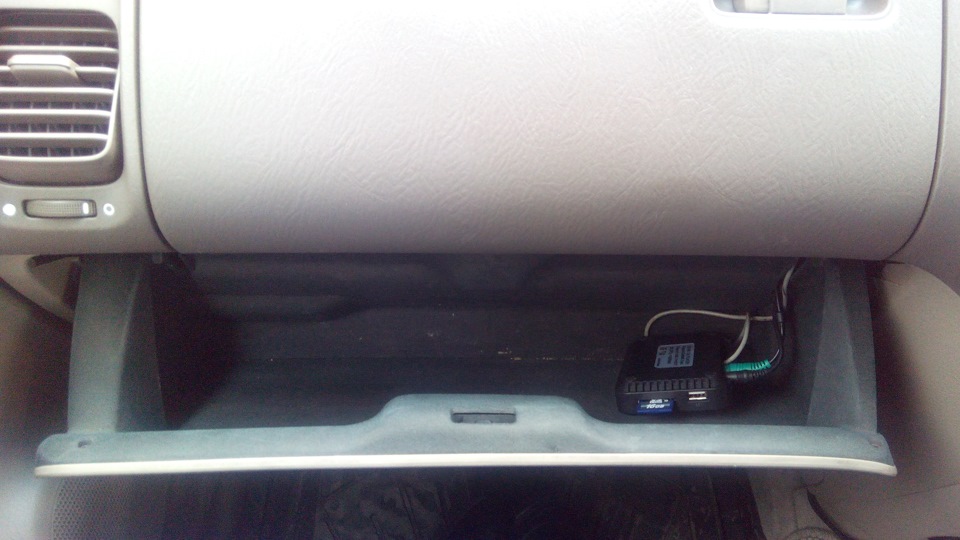
Так он сильно в глаза не бросается и пользоваться пду теперь стало удобнее, направляя его на сам монитор. Сам девайс разместил в «бардачке», много места он там не занимает.
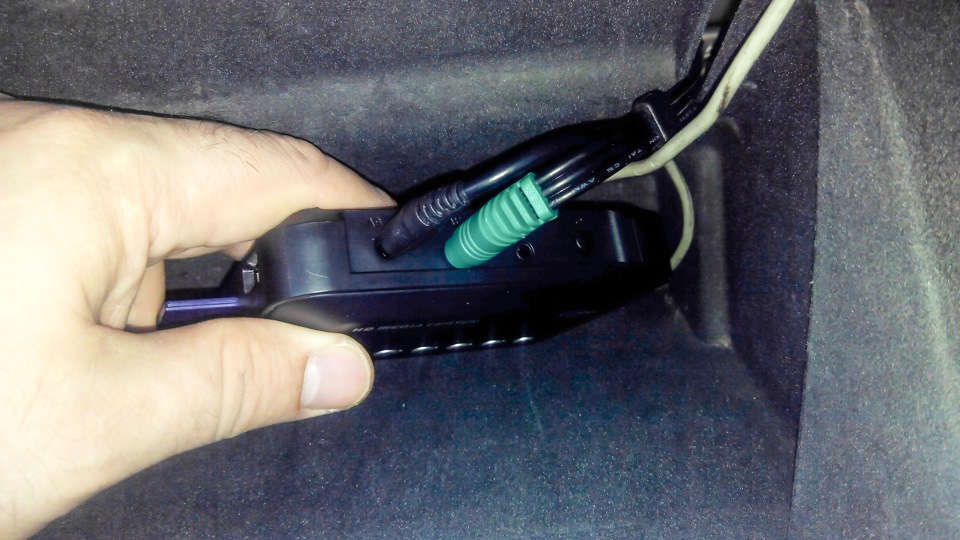
С питанием пришлось немного повозиться. Девайс питается постоянным током в 5V. В комплекте с ним шел блок питания 220V – 5V. Решено было, отрезать провод от родного блока питания и припаять к этому проводу USB разъем (питание USB, если кто не в курсе, 5V ) .
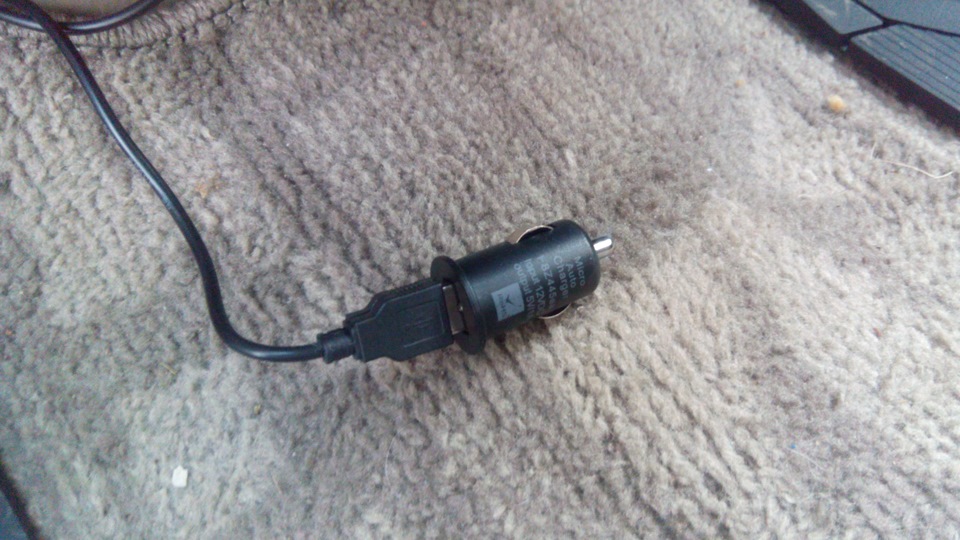
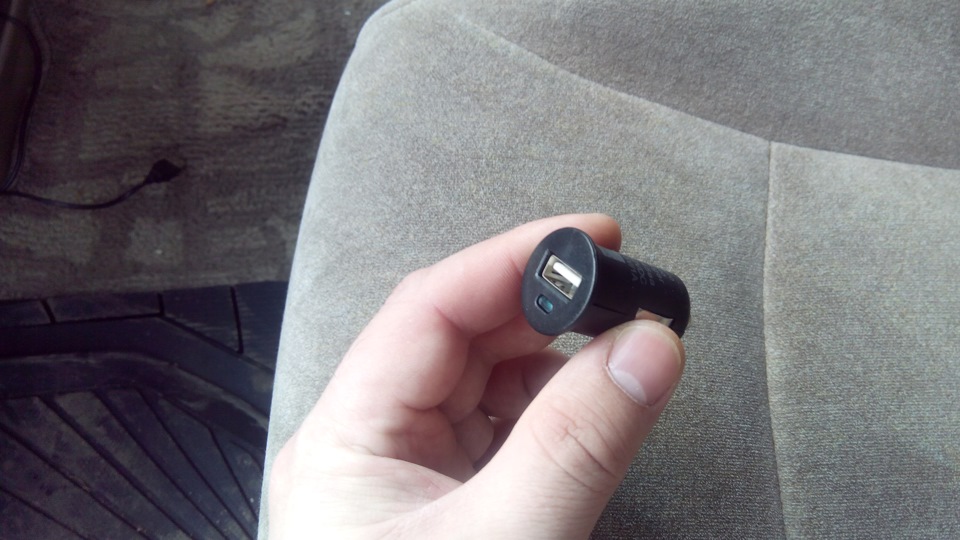
Запитаться было решено от USB разъема находящегося на разветвителе прикуривателя, установленного мною за ранее в нижнюю полку центральной турели. И тут я столкнулся со следующей проблемой. Мощности USB входа разветвителя не хватало для запуска плеера. Он выдавал всего 500 ma. Решено было приобрести отдельный переходник USB на 1 ампер и все заработало.

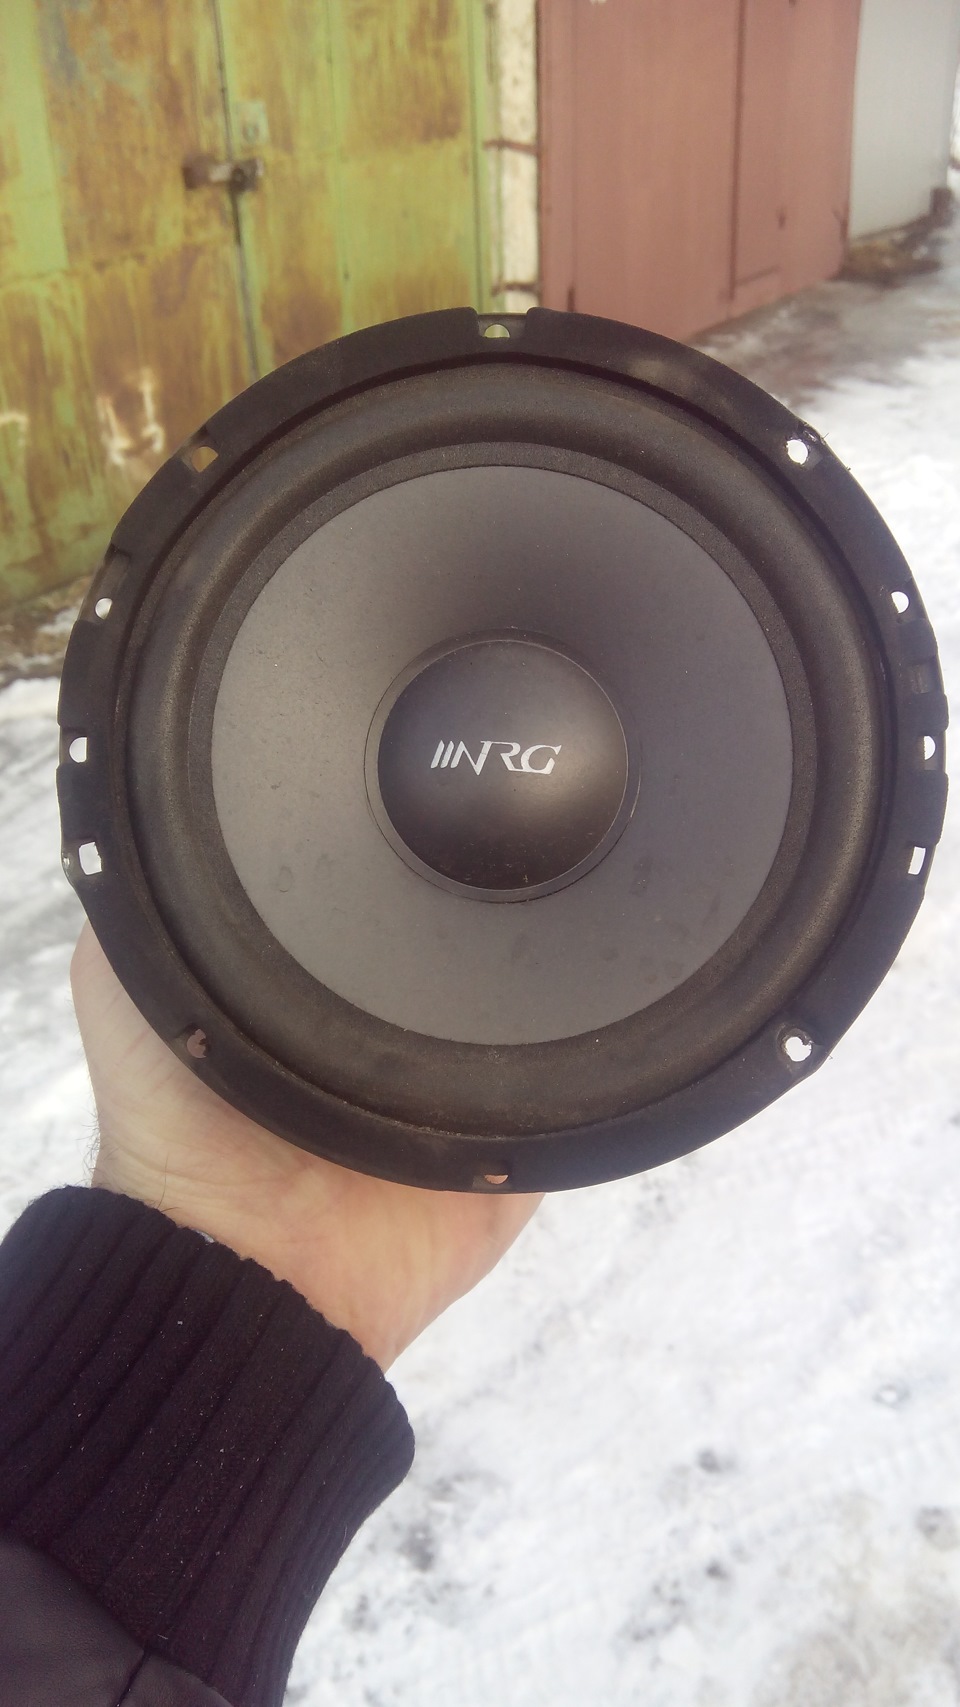
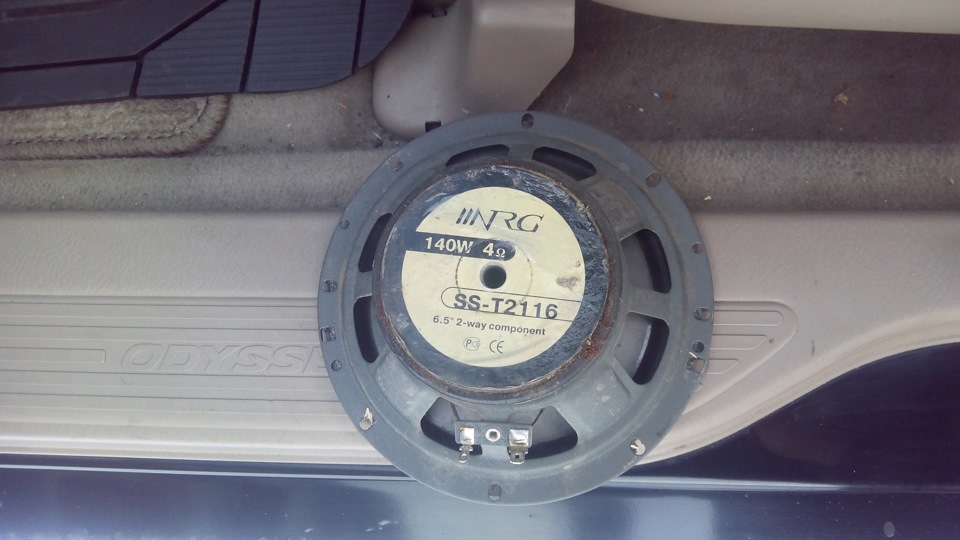
В меню настроек плеера заранее был выставлен стандарт видео NTSC, соотношение сторон 16:9, язык русский (тут китайцы порадовали). Настройка звука ограничилась установкой на JVC режима “линейный вход ” и настройкой эквалайзера на выходе. К слову о звуке хотелось бы упомянуть о динамиках в дверях. Не так давно, устраняя люфт в боковых зеркалах, пришлось снять обшивку двери. Был приятно удивлен . Вместо штатных «блинов» у меня стояли NRG SS-T2116 140W/4om. Не самый дорогой вариант, но уж точно лучше, чем штатная акустика.
Далее на SD карту была записана музыка и видео (выбор SD карты был обусловлен её малыми габаритами, хотя и стандартный USB разъем в девайсе тоже присутствует). И тут меня ожидал очередной сюрприз. Девайс понимает видео только формата avi и ни какой больше. Музыка не сортируется по папкам, а идёт сплошным списком (правда в названии отображается исходная папка). Меню особо не радует графикой и настройками, а графический эквалайзер, при воспроизведении музыки, слегка подтормаживает. Но с этим я готов мирится за возможность смотреть видео и слушать музыку с “флэшки”. При том, что на качество звука и воспроизведение видео это ни как не влияет. Звук чистый, видео не тормозит, идёт чётко. Переключение между треками быстрое.
Порадовала возможность включения музыки без задействования монитора. Достаточно нажать на пду кнопку “music” и “ok”, как девайс начинает воспроизведение трека с последней прослушиваемой вами композиции.
В целом девайсом очень доволен. За не большие деньги и минимум доработок я получил что хотел – возможность прослушивания музыки и просмотра видео с флэш-карты. А управление с ПДУ добавляет всему этому определённый комфорт и удобство.
Table of Contents for Real Media Center:
-
HD 1080P MEDIA PLAYER Picture 14 Press LEFT/RIGHT key to choose functions, and press ENTER to confirm: “ ”: Return to the root. “ ”: Pause the slide show. “ ”: Press the ENTER key, you can find the function list for Zoom in, Zoom out, Rotate, UP, DOWN etc. “ ”: Show picture list. “ ”: Choose the play mode for pictures. “ ”: Choose the slide show time”1s, 3s, 10s”. “ ”: Choose the sequence for picture play. Copy/Delete functions 28
-
HD 1080P MEDIA PLAYER 1. Select the explore option by pressing the LEFT/ RIGHT key in root menu interface, then press the ENTER key to select a folder or a file, press key will show the instruction of sort, copy, delete and paste options. Please refer to picture15&picture16, use the LEFT/ RIGHT key to select the appointed function. Picture15 Picture16 “ ”: Return to the root. “ ”: Sort the file. “ ”: Copy
-
HD 1080P MEDIA PLAYER 2. YPbPr interface to TV Use the YPbPr cable to connect player with TV through the YPbPr interface, and use the AV audio cable(red, white) to connect the AV interface of the player with the TV audio interface(red, white).(Refer to picture below) 14
-
HD 1080P MEDIA PLAYER 17 9. Troubleshooting guides……………………………………………………18 10. Specifications………………………………………………………………..19 Function and Features AS a multifunctional HDD media player, compact and easy, it will become a 3
-
HD 1080P MEDIA PLAYER Index 1. Function and features………………………………………………………2 2. List of accessories ………………………………………………………….2 3. Install of HDD…………………………………………………………………3 4. Indications of the player……………………………………………………4 5. Description of remote
-
HD 1080P MEDIA PLAYER 3. HDMI interface to TV Use the HDMI cable to connect the player with a HDTV. (Refer to picture below) 16
-
HD 1080P MEDIA PLAYER then you will see the SATA port in the PCBA. 3. Install the HDD, lock HDD with attached screws. 4. Put back and restore. (Note: please format HDD before installation ) 6
-
HD 1080P MEDIA PLAYER 3. Press UP or DOWN key to choose the photo to play, and press ENTER to confirm. (Refer to picture13) Picture13 Remark : operation for showing the photo : [Refer to remote] “ ”press this key to play the previous photo “ ”press this key to play the next photo In the condition of playing music, press FUNCTION key to enter into the submenu. (Refer to picture 14) 27
-
HD 1080P MEDIA PLAYER key to confirm, please refer to picture5. Picture4 Picture5 20
-
HD 1080P MEDIA PLAYER *Photo interface 1. Select the picture option by pressing the LEFT/ RIGHT key in root menu interface, then press ENTER key to enter into the picture list. (Refer to picture 11) 2. In the list of “picture”, select the device from which you prefer to enjoy the photo, press ENTER key to confirm. (Refer to picture12) Picture12 26 Picture11
-
HD 1080P MEDIA PLAYER “ ”: Choose the text color of subtitle “default (white), red, blue”. Note : 1. In the menu, if has“ ”record, means has been selected already. Press ENTER key to confirm, the EXIT key to return back to the previous menu. 2. Exit from a video, and again enter into the same video, the system will ask you if to continue from last break point. *Music interface 1. Select the music option by pressing the LEFT/ RIGHT key i
Questions, Opinions and Exploitation Impressions:
You can ask a question, express your opinion or share our experience of Real Media Center device using right now.
Download or browse on-line these Operation & User’s Manual for Real Media Center Portable Multimedia Player.
Summary of Contents:
 |
[Page 1] Real Media Center HD 1080P Media Center User Manual ( (( ( Please read this operation manual carefully and keep it for daily use ) )) ) |
 |
[Page 2] Real Media Center HD 1080P MEDIA PLAYER Index 1. Function and features………………………………………………………2 2. List of accessories ………………………………………………………….2 3. Install of HDD……………………… |
 |
[Page 3] Real Media Center HD 1080P MEDIA PLAYER 17 9. Troubleshooting guides……………………………………………………18 10. Specifications………………………………………………………………..19 Function and Features … |
 |
[Page 4] Real Media Center HD 1080P MEDIA PLAYER good companion for both your office work and home entertainment. 1. Mobile HDD: USB2.0 interface enables it as a USB mobile HDD with SATA HDD installed. Special design makes it easy to connect to any PC USB port, no external p… |
 |
[Page 5] Real Media Center HD 1080P MEDIA PLAYER 9. Support Repeat, Zoom , FF , BF , Rotate functions. 10. Support HDMI, CVBS ,YPbPr video output. 11. Stereo L/R, S/PDIF optical audio output. 12. Dimension (net): 142*95*23 mm. List of accessories … |
 |
[Page 6] Real Media Center HD 1080P MEDIA PLAYER then you will see the SATA port in the PCBA. 3. Install the HDD, lock HDD with attached screws. 4. Put back and restore. (Note: please format HDD before installation ) 6 |
 |
[Page 7] Real Media Center HD 1080P MEDIA PLAYER Indications of the player 7 |
 |
[Page 8] Real Media Center HD 1080P MEDIA PLAYER Description of remote controller 8 |
 |
[Page 9] Real Media Center HD 1080P MEDIA PLAYER 9 |
 |
[Page 10] Real Media Center HD 1080P MEDIA PLAYER Function of remote key table POWER Power Standby MENU Menu MUTE Audio mute FUNCTION Special Function MOVIE Movie mode hot key HOME Return to root menu MUSIC Music mode hot key EXIT Return PHOTO Photo mode hot key SUB-… |
 |
[Page 11] Real Media Center HD 1080P MEDIA PLAYER Connect to other devices *Connect to PC Ⅰ Connect the player with PC with 5pin USB cable. Ⅱ Open “My computer”, you can see storage of built-in hard… |
 |
[Page 12] Real Media Center HD 1080P MEDIA PLAYER 12 |
 |
[Page 13] Real Media Center HD 1080P MEDIA PLAYER *Connect to display devices 1. AV interface to TV Use the AV cable to connect player with TV through AV interface. Refer to picture below: 13 11 |
 |
[Page 14] Real Media Center HD 1080P MEDIA PLAYER 2. YPbPr interface to TV Use the YPbPr cable to connect player with TV through the YPbPr interface, and use the AV audio cable(red, white) to connect the AV interface of the player with the TV audio interface(red, white).(Refer … |
 |
[Page 15] Real Media Center HD 1080P MEDIA PLAYER 15 |
 |
[Page 16] Real Media Center HD 1080P MEDIA PLAYER 3. HDMI interface to TV Use the HDMI cable to connect the player with a HDTV. (Refer to picture below) 16 |
 |
[Page 17] Real Media Center HD 1080P MEDIA PLAYER Display mode 1. Set up TV display mode. 2. Set up the player output mode as same as TV by remoter (CVBS, YPbPr, HMDI). Operation reference After power on, it w… |
 |
[Page 18] Real Media Center HD 1080P MEDIA PLAYER Picture1 Operation setup menu 1. Select the setting option by pressing the LEFT/RIGHT key in root menu, then press the ENTER key to confirm. (Refer to picture2, picture3) Picture2 18 |
 |
[Page 19] Real Media Center HD 1080P MEDIA PLAYER Picture3 Output : Set up the output mode: NTSC 、 PAL, HDMI mode. SPDIF: ON or OFF selection for optical output. Language : Set up different languages. Such as : S-Chinese, English, T- Chinese. Key… |
 |
[Page 20] Real Media Center HD 1080P MEDIA PLAYER key to confirm, please refer to picture5. Picture4 Picture5 20 |
 |
[Page 21] Real Media Center HD 1080P MEDIA PLAYER 3. Press UP or DOWN key to choose the movie, and press the ENTER key to confirm. ( Refer to picture6) Picture6 Remark : operation while playing the movie : [Refer to remote controller] “ ”: In full screen playing status,… |
 |
[Page 22] Real Media Center HD 1080P MEDIA PLAYER “ ”: Press this key will stop playing. 4. In the condition of playing movie, press FUNCTION key will enter into the submenu of playing. (Refer to picture7) Picture7 “ ”: Return to the root. “ ”: Ch… |
 |
[Page 23] Real Media Center HD 1080P MEDIA PLAYER “ ”: Choose the text color of subtitle “default (white), red, blue”. Note : 1. In the menu, if has“ ”record, means has been selected already. Press ENTER key to confirm, the EXIT key to return back … |
 |
[Page 24] Real Media Center HD 1080P MEDIA PLAYER Picture8 Picture9 3. Press UP/ DOWN key to choose the music, and press the ENTER key to confirm. ( Refer to picture10) 24 |
 |
[Page 25] Real Media Center HD 1080P MEDIA PLAYER Picture10 Remark : some operation when playing the music : [Refer to remote] “ ”: In full screen playing status, press this key will fast forward play the current file. Press the ENTER key will return to normal playing s… |
 |
[Page 26] Real Media Center HD 1080P MEDIA PLAYER *Photo interface 1. Select the picture option by pressing the LEFT/ RIGHT key in root menu interface, then press ENTER key to enter into the picture list. (Refer to picture 11) 2. In the list of “picture”, select the devic… |
 |
[Page 27] Real Media Center HD 1080P MEDIA PLAYER 3. Press UP or DOWN key to choose the photo to play, and press ENTER to confirm. (Refer to picture13) Picture13 Remark : operation for showing the photo : [Refer to remote] “ ”press this key to play the previous photo �… |
 |
[Page 28] Real Media Center HD 1080P MEDIA PLAYER Picture 14 Press LEFT/RIGHT key to choose functions, and press ENTER to confirm: “ ”: Return to the root. “ ”: Pause the slide show. “ ”: Press the ENTER key, you can find the function list for Zoom in, Zoom out, Rot… |
 |
[Page 29] Real Media Center HD 1080P MEDIA PLAYER 1. Select the explore option by pressing the LEFT/ RIGHT key in root menu interface, then press the ENTER key to select a folder or a file, press key will show the instruction of sort, copy, delete and paste options. Please re… |
 |
[Page 30] Real Media Center HD 1080P MEDIA PLAYER Picture17 Troubleshooting guide Symptom Possible cause Possible solution Power LED not ON when DC5V plug in Power cable problem Check whether the DC po… |
 |
[Page 31] Real Media Center HD 1080P MEDIA PLAYER Remote control does not work Battery failure of the remote controller Install a new battery. Make sure to use a battery of the model Cr2025,3V Improper battery installation Reinstall the battery according to the… |
 |
[Page 32] Real Media Center HD 1080P MEDIA PLAYER Dimensions 142*95*23mm Weight(net/packaged) 185g/720g Video format RM,RMVB,AVI,DIVX,MKV,MOV,H DMOV,MP4,M4V,PMP,AVC,FLV,V OB,MPG,DAT,MPEG,TS,TP,M2TS , WMV (H.264,H. 263,WMV9/VC-1,MPEG1/2/4… |