
Инструкция по эксплуатации
и рецепты приготовления блюд
АВТОМАТИЧЕСКАЯ
ХЛЕБОПЕКАРНЯ
S D — 2 5 3
Перед началом эксплуатации данной микроволновой печи, пожалуйста, ознакомьтесь с
инструкцией и сохраните ее для использования в дальнейшем.
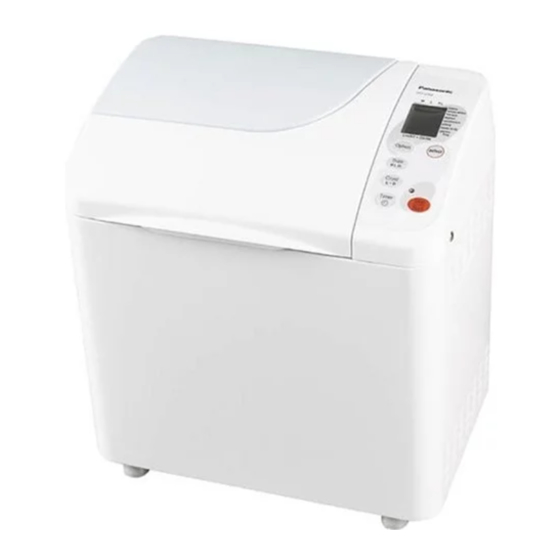
Требуется руководство для вашей Panasonic SD-253 Хлебопечка? Ниже вы можете просмотреть и загрузить бесплатно руководство в формате PDF. Кроме того, приведены часто задаваемые вопросы, рейтинг изделия и отзывы пользователей, что позволит оптимально использовать ваше изделие. Если это не то руководство, которое вы искали, – свяжитесь с нами.
Ваше устройство неисправно, и в руководстве отсутствует решение? Перейдите в Repair Café для получения бесплатных ремонтных услуг.
Руководство

Рейтинг
Сообщите нам, что вы думаете о Panasonic SD-253 Хлебопечка, оставив оценку продукта. Хотите поделиться вашими впечатлениями от данного изделия или задать вопрос? Вы можете оставить комментарий в нижней части страницы.
Довольны ли вы данным изделием Panasonic?
Да Нет
2 голоса
Часто задаваемые вопросы
Наша служба поддержки выполняет поиск полезной информации по изделиям и отвечает на часто задаваемые вопросы. Если вы заметили неточность в наших часто задаваемых вопросах, сообщите нам об этом с помощью нашей контактной формы.
Могу ли я очистить форму для выпечки хлебопечки мочалкой? Проверенный
Нет. У большинства хлебопеков есть формы для выпечки с антипригарным слоем, которые можно повредить мочалкой или абразивным очистителем. Используйте только мягкую сторону мочалки или влажную салфетку.
Это было полезно (613)
Почему мне нужно снимать лоток перед добавлением ингредиентов? Проверенный
Это необходимо для предотвращения падения ингредиентов на нагревательный элемент. Они могут загореться и вызвать дым.
Это было полезно (499)


Инструкция по эксплуатации
и рецепты приготовления блюд
АВТОМАТИЧЕСКАЯ
ХЛЕБОПЕКАРНЯ
SD-253
Перед началом эксплуатации данной микроволновой печи, пожалуйста, ознакомьтесь с
инструкцией и сохраните ее для использования в дальнейшем.

Поздравляем с покупкой!
Благодарим Вас за покупку хлебопекарни Panasonic SD-253.
Выпечка хорошего хлеба – это настоящее искусство, требующее ис-
пользования высококачественных ингредиентов, а также больших затрат
времени и сил из-за необходимости тщательного замешивания теста.
Поэтому автоматическая хлебопекарня Panasonic SD-253 идеально по-
дойдет тем, кто не имеет достаточного опыта в выпечке собственного
хлеба.
Тот, кто обладает таким опытом, также оценит удобство автоматическо-
го режима выпечки любимых сортов домашнего хлеба.
Одним из важнейших преимуществ данного устройства является то, что
самый трудоемкий процесс, т. е. замешивание теста, полностью автома-
тизирован. Это экономит Ваше время и устраняет необходимость мыть
лишнюю посуду, т. к. весь предусмотренный программой процесс подго-
товки теста и выпечки хлеба происходит в одной емкости.
Кроме того, автоматический диспенсер изюма и орехов по Вашему
желанию добавит в тесто дополнительные ингредиенты – сухофрукты
и/или орехи — точно в нужный момент. Поэтому все, что от Вас потребу-
ется – это просто нажать стартовую кнопку.
Перед тем, как пользоваться хлебопекарней, прочтите, пожалуйста, до
конца данную инструкцию.
–2–

Содержание
Основные принципы использования 5 – 9
Техника безопасности ……………………………………………………….5
Описание деталей устройства …………………………………………….6
Предосторожности при использовании
диспенсера изюма и орехов ………………………………………………7
Окошко дисплея ………………………………………………………………7
Панель управления функции каждой кнопки……………………..8
Основные особенности функции и операционные режимы ..8
Доступность функций и время, необходимое
для выполнения каждой операции ………………………………….9
Как выпекать хлеб в хлебопекарне 10 – 18
Основные процедуры ………………………………………………..10 – 12
Использование таймера ………………………………………………….13
Использование режима ТЕСТО …………………………………………14
Использование программы ТОЛЬКО ВЫПЕЧКА ……………………15
Использование программы БЕЗ ГЛЮТЕНА ……………………16 – 17
Использование программы ВАРЕНЬЕ ………………………………..18
Чистка и уход …………………………….19
Советы
по приготовлению и рецепты……..20 – 33
Основные ингредиенты ……………………………………………………20
Дополнительные ингредиенты, …………………………………………21
Советы по выпечке хлеба
из пшеничного и смешанного зерна ………………………………….22
Советы по использованию готовых хлебопекарных смесей ……22
Нарезка и хранение хлеба ………………………………………………..22
Причины неодинаковых результатов выпечки ……………………..23
Ингредиенты, которые можно помещать в диспенсер …………..24
Рецепты ………………………………………………………………….25 – 33
Устранение неисправностей ……….34-37
Устранение неисправностей…………………………………………34-35
Информация на дисплее о ненормальном
функционировании устройства …………………………………………36
Утечка ингредиентов из формы для хлеба …………………………..37
Когда требуется замена деталей ……………………………………….37
Технические характеристики …………………………………………….37
–3–
-
Contents
-
Table of Contents
-
Troubleshooting
-
Bookmarks
Quick Links
CONTENTS
SD-253
ENG
GER
BEL
RSA
AUST
NZL
Page
2
8
11
22
23
25
27
© 2002 Matsushita Electric Industrial Co., Ltd. All
rights
distribution is a violation of law.
ORDER No. KAD0207508C2
Automatic Bread Maker
reserved.
Unauthorized
Page
29
31
33
35
36
37
copying
and
Related Manuals for Panasonic SD-253
Summary of Contents for Panasonic SD-253
-
Page 1: Table Of Contents
ORDER No. KAD0207508C2 Automatic Bread Maker SD-253 AUST CONTENTS Page Page 1 Operating Instructions 8 REPLACEMENT PARTS (RSA) 2 TROUBLESHOOTING CHART 9 REPLACEMENT PARTS (AUST) 3 DISASSEMBLY PROCEDURE 10 REPLACEMENT PARTS (NZL) 4 WIRING CONNECTION DIAGRAM 11 PACKAGING (ENG) 5 REPLACEMENT PARTS (ENG)
-
Page 2: Operating Instructions
SD-253 1 Operating Instructions…
-
Page 3
SD-253… -
Page 4
SD-253… -
Page 5
SD-253… -
Page 6
SD-253… -
Page 7
SD-253… -
Page 8: Troubleshooting Chart
SD-253 2 TROUBLESHOOTING CHART Note : The causes of unsuccessful baking vary and can be divided roughly into user-side problems and bread maker problems. Most problems are caused by the user. Therefore, it is very important to obtain detailed information from customers regarding their conditions of using the bread maker and to specify whether the problem lies with the user or the bread maker.
-
Page 9
SD-253 Check point Diagnosis Remedy Connection of the heater terminals Check the connection of the heater terminals. Make a proper connection. <Reference value> (If no problem is found with the connection) Replace the heater. Resistance of the heater (in normal status) 230V: 96Ω… -
Page 10
SD-253 Symptom Cause Remedy The bread rises too much. The amount of sugar is excessive. Reduce the amount of sugar. The amount of yeast is excessive. Reduce the yeast to a proper level. A business-use flour with too much protein has Reduce the amount of yeast. -
Page 11: Disassembly Procedure
SD-253 3 DISASSEMBLY PROCEDURE 3.1. Top lid 1. Remove the dispenser cover assembly and the dispenser assembly from the top lid. 2. Remove the hinge screw from the back of the body. 3. Lift the top lid and slide it to the left to remove it.
-
Page 12
SD-253 3.2. Control panel assembly 1. Remove the two screws labeled F. Parts Name Screw F 2. Remove the control panel assembly by pressing the side of Control panel Ass’y Fig.5 Fig.4 3.3. P.C. board A assembly 1. Remove the connectors from the solenoid and the lead wire A unit. -
Page 13
SD-253 3.4. Solenoid 1. Remove a screw from the solenoid. 2. Remove the solenoid holder plate and spring A. Fig.8 Parts Name Screw Solenoid holder plate Spring A Control panel Ass’y Solenoid Ass’y 3.5. Bottom plate Before turning the body upside down, remove the kneading blade, bread pan assembly, measuring spoon, and measuring cup. -
Page 14
SD-253 3.6. Power cord 1. As shown in the figure, turn the body upside down with the power cord stored inside the angel unit to prevent damage to the cord. Fig.10 Parts Name Power cord Body Ass’y 3.7. Body 1. Remove the six screws labeled F. -
Page 15
SD-253 3.8. Power cord 1. Disconnect the power cord connectors. 2. Push the cord bushing A and push out the power cord B. Fig.14 Parts Name Power cord Fig.13 Cord bushing Parts Name Angle Angle Cord bushing Power cord 3.9. -
Page 16
SD-253 3.10. Ground wire A assembly 1. Remove the screw and the spring washer that secures the ground wire A assembly. 2. Raise the two claws of the ground plate up with the flat- blade screwdriver. 3. Remove the ground plate from the heater terminal. -
Page 17
SD-253 3.12. Heater 1. Remove the «Faston» terminal from the heater. 2. Raise the two claws of the ground plate up with the flat- blade screwdriver. 3. On the outside of the heater case, detach the three claws that secure heater bobbin B. -
Page 18
SD-253 3.13. lnner lid 1. Remove the three screws that secure the inner lid. 2. Insert a thin flat-blade driver into the space between the top lid and the inner lid (six locations) to move it up and take out the inner lid. -
Page 19
SD-253 3.15. Belt, Pulley B, and Connector lower unit 1. Remove the belt by rotating pulley B. 2. Remove the lock nut and then pulley B and the lock washer. 3. Remove the U-cripe and pull out the connector lower unit. -
Page 20
SD-253 3.17. Bread pan 1. Remove the three screws from the mounting shaft Ass’y to remove it. 2. Remove the packing. Caution: · Attach the bread pan to the mounting shaft Ass’y while aligning them with the mark. · When replacing the mounting shaft Ass’y, replace the packing and the three screws with new ones. -
Page 21
SD-253 3.19. Location of production code The production code is marked on the bottom plate (bottom side) of the main body. Fig.26 Parts Name Production code Bottom plate… -
Page 22: Wiring Connection Diagram
SD-253 4 WIRING CONNECTION DIAGRAM Parts Name Parts Name For Angle 16 Flat cable Heater 17 Connector Kneading motor 18 Sensor (W/Fuse) Ground wire A 19 Wire (Orange) Wire (Yellow/Green) 20 Solenoid Ass’y Lead wire B (white) 21 Yellow line…
-
Page 23: Replacement Parts (Eng)
SD-253 5 REPLACEMENT PARTS (ENG) 5.1. Parts Location (ENG)
-
Page 24
SD-253 5.2. Replacement Parts List (ENG) Ref. Part No. Part Name & Description Remarks Ref. Part No. Part Name & Description Remarks ADA39E142-0S Dispenser cover Ass´y Caution ADE01R117-0S Angle Unit Water label & protect Seal rubber tape ADY02E142-W Caution label ADA24E142 Power cord Ass´y… -
Page 25: Replacement Parts (Ger)
SD-253 6 REPLACEMENT PARTS (GER) 6.1. Parts Location (GER)
-
Page 26
SD-253 6.2. Replacement Parts List (GER) Ref. Part No. Part Name & Description Remarks Ref. Part No. Part Name & Description Remarks ADA39G142-0S Dispenser cover Ass´y Caution ADB10E142 P.C.B.holder label & ADE01R117-0S Angle Unit Water Seal protect rubber tape ADY02G107-W… -
Page 27: Replacement Parts (Bel)
SD-253 7 REPLACEMENT PARTS (BEL) 7.1. Parts Location (BEL)
-
Page 28
SD-253 7.2. Replacement Parts List (BEL) Ref. Part No. Part Name & Description Remarks Ref. Part No. Part Name & Description Remarks ADA39R142-0S Dispenser cover Ass´y Caution ADB10E142 P.C.B.holder label & ADE01R117-0S Angle Unit Water Seal protect rubber tape ADY02E142-W… -
Page 29: Replacement Parts (Rsa)
SD-253 8 REPLACEMENT PARTS (RSA) 8.1. Parts Location (RSA)
-
Page 30
SD-253 8.2. Replacement Parts List (RSA) Ref. Part No. Part Name & Description Remarks Ref. Part No. Part Name & Description Remarks ADA39K142-0S Dispenser cover Ass´y Caution ADB10E142 P.C.B.holder label & ADE01R117-0S Angle Unit Water Seal protect rubber tape ADY02K107-W… -
Page 31: Replacement Parts (Aust)
SD-253 9 REPLACEMENT PARTS (AUST) 9.1. Parts Location (AUST)
-
Page 32
SD-253 9.2. Replacement Parts List (AUST) Ref. Part No. Part Name & Description Remarks Ref. Part No. Part Name & Description Remarks ADA39R142-0S Dispenser cover Ass´y Caution ADE01R117-0S Angle Unit Water label & protect Seal rubber tape ADY02E142-W Caution label ADA24R132 Power cord Ass´y… -
Page 33: Replacement Parts (Nzl)
SD-253 10 REPLACEMENT PARTS (NZL) 10.1. Parts Location (NZL)
-
Page 34
SD-253 10.2. Replacement Parts List (NZL) Ref. Part No. Part Name & Description Ref. Part No. Part Name & Description Remarks Remarks ADA39R142-0S Dispenser cover Ass´y Caution ADB10E142 P.C.B.holder label & ADE01R117-0S Angle Unit Water Seal protect rubber tape ADY02E142-W… -
Page 35: Packaging (Eng)
SD-253 11 PACKAGING (ENG) Parts Name Protection board Cushion Ass’y (Upper) Measuring spoon Measuring cup Lid protection sheet Kneading blade B Unit Bread pan Ass’y Body Ass’y Plug 10 Power cord Ass’y 11 Operating Instructions set 12 Carton 13 Cushion Ass’y (Lower)
-
Page 36: Packaging (Aust, Nzl)
SD-253 12 PACKAGING (AUST, NZL) Parts Name Protection board Cushion Ass’y (Upper) Measuring spoon *Only for NZL Measuring cup Lid protection sheet Kneading blade B Unit Bread pan Ass’y Body Ass’y Plug 10 Power cord Ass’y 11 Operating Instructions set 12 Carton 13 Cushion Ass’y (Lower)
-
Page 37: Packaging (Ger, Bel, Rsa)
SD-253 13 PACKAGING (GER, BEL, RSA) Parts Name Protection board Cushion Ass’y (Upper) Measuring spoon Measuring cup Lid protection sheet Kneading blade B Unit Bread pan Ass’y Body Ass’y Plug 10 Power cord Ass’y 11 Operating Instructions set 12 Carton 13 Cushion Ass’y (Lower)
Посмотреть инструкция для Panasonic SD-253 бесплатно. Руководство относится к категории хлебопечки, 7 человек(а) дали ему среднюю оценку 8. Руководство доступно на следующих языках: русский. У вас есть вопрос о Panasonic SD-253 или вам нужна помощь? Задайте свой вопрос здесь
Не можете найти ответ на свой вопрос в руководстве? Вы можете найти ответ на свой вопрос ниже, в разделе часто задаваемых вопросов о Panasonic SD-253.
Почему хлеб не поднимается?
Вероятно, это связано с дрожжами. Вы добавили слишком мало дрожжей или использовали старые дрожжи.
Почему хлеб каждый раз имеет разную форму и высоту?
Форма хлеба зависит от многих факторов, в том числе количества и качества используемых ингредиентов, а также от температуры окружающей среды.
Почему в некоторых случаях хлебная корка получается слишком толстой или твердой?
Если корка толстая или твердая, это означает, что использовалось чрезмерное количество муки или она слишком старая.
При приготовлении теста не получается сформировать шар, что мне делать?
Добавьте воды.
Инструкция Panasonic SD-253 доступно в русский?
Да, руководствоPanasonic SD-253 доступно врусский .
Не нашли свой вопрос? Задайте свой вопрос здесь