Посмотреть инструкция для Honor 8A бесплатно. Руководство относится к категории смартфоны, 12 человек(а) дали ему среднюю оценку 8.5. Руководство доступно на следующих языках: русский. У вас есть вопрос о Honor 8A или вам нужна помощь? Задайте свой вопрос здесь
Не можете найти ответ на свой вопрос в руководстве? Вы можете найти ответ на свой вопрос ниже, в разделе часто задаваемых вопросов о Honor 8A.
Как перезагрузить Honor 8A?
Большинство моделей телефонов Honor можно перезагрузить воспользовавшись комбинацией кнопок регулировки громкости звука, включения/выключения и возврата.
Моя SIM-карта слишком мала и не подходит к моему телефону Honor. Что мне теперь делать?
В таком случае можно воспользоваться специальным адаптером для SIM-карт. Вставьте SIM-карту в адаптер и установите его в телефон.
Что такое номер IMEI?
IMEI расшифровывается как «International Mobile Equipment Identity» (Международный идентификатор мобильного оборудования). Это уникальный номер из пятнадцати цифр, идентифицирующий ваш телефон Honor.
Каковы размеры экрана смартфон?
Размер смартфон обычно выражается в дюймах, 1 дюйм — 2,54 сантиметра. Под размером понимается размер диагонали смартфон, поэтому экран необходимо измерять от нижнего левого угла к верхнему правому.
Может ли аккумулятор моего смартфон взорваться?
Убедитесь, что аккумулятор вашего смартфон не сильно нагревается, в этом случае вероятность взрыва аккумулятора очень мала.
Какая операционная система в Honor 8A используется?
В Honor 8A используется Android как операционная система.
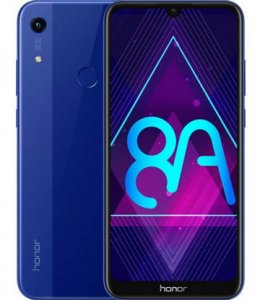
Какой вес Honor 8A?
Honor 8A имеет вес 150 g.
Какой размер экрана Honor 8A?
Размер экрана Honor 8A составляет 6.09 «.
Какая высота Honor 8A?
Honor 8A имеет высоту 156.28 mm.
Какое разрешение экрана дисплея Honor 8A?
Разрешение экрана Honor 8A следующее 1560 x 720 пикселей.
Какая ширина Honor 8A?
Honor 8A имеет ширину 73.5 mm.
Какая толщина Honor 8A?
Honor 8A имеет толщину 8 mm.
Какой объем памяти Honor 8A имеет?
Honor 8A имеет 32 GB объем памяти.
Инструкция Honor 8A доступно в русский?
Да, руководствоHonor 8A доступно врусский .
Не нашли свой вопрос? Задайте свой вопрос здесь
Перейти к контенту
![]()
Русские электронные инструкции по эксплуатации
Постоянно обновляемый большой каталог документации по эксплуатации и использованию современных устройств и оборудования на русском языке. Бесплатное скачивание файлов.
Поиск:
Главная
♥ В закладки
Просмотр инструкции в pdf


.jpg)
Инструкция по эксплуатации смартфона Honor 8A Black (JAT-LX1).
Скачать инструкцию к смартфону Honor 8A Black (JAT-LX1) (1,59 МБ)

Инструкции по эксплуатации смартфонов Honor
« Инструкция к смартфону Honor 20e 4+64GB Midnight Black (HRY-LX1T)
» Инструкция к смартфону Sony Xperia XZ3 Black (H9436)
Вам также может быть интересно
.jpg)
Инструкция к смартфону Honor 30S 128GB Titanium Silver (CDY-NX9A)
.jpg)
Инструкция к смартфону Honor 30 128GB Emerald Green (BMH-AN10)
.jpg)
Инструкция к смартфону Honor 8S Prime 64GB Navy Blue (KSA-LX9)
.jpg)
Инструкция к смартфону Honor 8X 64Gb Phantom Blue (JSN-L21)

Инструкция к фитнес-браслетам Honor Band 6 Sandstone Grey
.jpg)
Инструкция к умным часам Honor MagicWatch 2 Charcoal Black (MNS-B19)

Инструкция к смартфону Honor 7X Blue
.jpg)
Инструкция к смартфону Honor 30 Pro+ 256GB Titanium Silver (EBG-AN10)
Добавить комментарий
Имя *
Email *
Сайт
Комментарий


![]()


Сохранить моё имя, email и адрес сайта в этом браузере для последующих моих комментариев.
- Добавить инструкцию
- Заказать инструкцию
- Политика конфиденциальности

- Manuals
- Brands
- honor Manuals
- Cell Phone
- 8A
- User manual
-
Contents
-
Table of Contents
-
Bookmarks
Quick Links
Related Manuals for honor 8A
Summary of Contents for honor 8A
-
Page 1
User Guide… -
Page 2: Table Of Contents
Contents Exciting Features Featured Usage Tips Camera Tips Manage Your Phone New Device New Device Configuration Gestures and Operations Record Exciting Moments on Your Screen Home Screen Navigation Bar Use Shortcut Switches to Quickly Enable Frequently Used Features Notification Panel and Status Bar Screen Lock and Unlock Home Screen Management Contacts…
-
Page 3
Contents Email Add Email Accounts Manage Email Accounts Manage VIP Email Contacts Import Important Events to Calendar Set Auto Response for Exchange Email Calendar Navigate the Calendar Import To-Dos to Keep Your Work Organised Clock Use the Clock Notepad Manage Your Notes to Keep Your Records in Order Utilities Check Your Screen Time Device Connection… -
Page 4
Contents System Change the Input Method Accessibility General Settings Legal Notice Legal Notice Personal Information and Data Security Obtaining help… -
Page 5: Exciting Features
Exciting Features Featured Usage Tips Enrol Your Facial Information to Enable Face Unlock Face unlock allows you to quickly unlock your Phone by holding it up to your face. Only the owner can enable Face unlock. This feature is not available for users or guests, and not supported in PrivateSpace either.
-
Page 6: Camera Tips
Exciting Features If you haven’t selected Enable pick up to wake when enroling the face data, you can set up this feature later: Open Settings, go to Security & privacy > Face recognition, set the Face unlock method to Direct unlock. Then open Settings, go to Smart assistance >…
-
Page 7
Exciting Features Go to Camera > More > Panorama. Touch at the bottom of the screen to configure the shooting direction. Hold your Phone steady, and then touch to start shooting. Slowly move the Phone in the direction indicated, holding the device steady and ensuring that the arrow stays level with the centre line. -
Page 8
Exciting Features When shooting under sunlight, you can select . In a weak light environment, you can select Touch to adjust the colour temperature. If you want to give your photo a cosy, nostalgic tone, increase the K value. For a cold, calm or futuristic tone, select a lower K value. Adjust AF based on the shooting subject: On the Pro mode screen, touch , slide on the AF slider and drag your desired mode to the centre. -
Page 9: Manage Your Phone
Exciting Features Adjust EV compensation: You may increase the EV compensation if the light on the subjects or background is low, and decrease the EV compensation if there is too much light. Adjust AWB: Select AWB depending on the lighting conditions. When shooting under sunlight, you can select .
-
Page 10
Exciting Features Set a photo as your wallpaper from Gallery: Have a great photo you want to set as your wallpaper? In Gallery, open the photo that you like, go to > Set as > Wallpaper, and follow the onscreen instructions to set the photo as your home screen wallpaper. Manage Your Home Screen Widgets Want to quickly manage widgets on your home screen? You can add, move or delete home screen widgets to tidy up your home screen and make it easier to use. -
Page 11
Exciting Features Use App Drawer to Store Apps Want to store your apps in one location on your home screen to make your home screen look cleaner? You can enable app drawer on your home screen to store all your apps and free up space on your home screen. -
Page 12: New Device
New Device New Device Configuration Connecting to the Internet Connect to Wi-Fi networks effortlessly with your device. Connecting to a Wi-Fi network Swipe down from the status bar to open the notification panel. Touch and hold to open the Wi-Fi settings screen. Switch on Wi-Fi.
-
Page 13
New Device If you have selected Enable pick up to wake, your Phone will turn the screen on and recognise your face to unlock the screen automatically after you pick up your Phone and hold it to your face. If you do not wish to use this feature, deselect this option. Touch Enrol face and follow the onscreen instructions to enrol your facial information. -
Page 14
New Device To unlock the screen, simply place your fingertip on the fingerprint sensor. Connect to Wi-Fi By connecting your device to a Wi-Fi network, you can effectively save mobile data. To avoid potential security risks (such as unauthorised access to your personal data and financial information), please exercise caution when connecting to a public Wi-Fi network. -
Page 15: Gestures And Operations
Gestures and Operations Record Exciting Moments on Your Screen The screen recording feature comes in handy when you are making tutorial videos or if you want to record your gaming exploits to share with your friends using your Phone. Screen recording will end if you make or answer a call. If you are using the sound recording function of your Phone before screen recording, Enable microphone is disabled by default.
-
Page 16
Gestures and Operations Use key combination to start recording: Simultaneously press and hold the Power button and the Volume up button to begin recording. You can enable or disable Enable microphone based on your needs. To end the recording, simultaneously press and hold the Power button and the Volume up button again. -
Page 17: Home Screen
Home Screen Navigation Bar Configure Your Navigation Bar Layout Using the navigation bar, you can conveniently access the home screen, return to the previous page, exit an app, or view recent apps used. To configure your navigation bar layout, go to Settings, then go to System >…
-
Page 18: Use Shortcut Switches To Quickly Enable Frequently Used Features
Home Screen Switch to a recently used app: Swipe left or right on the screen to find the app you want to use, and touch the app tab. Close an app: Swipe up on an app tab to close the corresponding app. Close all apps: Touch to close all apps.
-
Page 19
Home Screen HSPA+ network connected Airplane mode enabled VoLTE available Wi-Fi network connected Roaming Receiving location data from GPS Bluetooth enabled Silent mode enabled Wi-Fi network detected Charging Vibration mode enabled Battery level low Alarm enabled No SIM card detected Battery fully charged Headset plugged in Power saving mode enabled… -
Page 20
Home Screen Open the Notification Panel to Get Important Information Want to ensure that you do not miss out on any important notifications? From your Phone’s status bar, you can view real time notification information and your device’s operating status. When there is a notification reminder, you can turn on the screen and swipe down from the status bar to view the notification. -
Page 21: Screen Lock And Unlock
Home Screen Set notification method: Touch Notification method. Depending on your preferences, you can select Icons, Numbers, or None. Screen Lock and Unlock Set a Lock Screen Password to Protect Your Privacy Your Phone stores a lot of sensitive information, such as personal photos, contact information, banking apps (for example, Alipay).
-
Page 22: Home Screen Management
Home Screen Home Screen Management Manage Home Screen Icons Is your home screen cluttered with app icons? You can move or delete icons from the home screen or sort and move them to folders for more convenient use. Move a home screen icon: From the home screen, touch and hold an app icon until your Phone vibrates, then drag it to any position on the home screen.
-
Page 23
Home Screen Add or remove app icons from a folder: Open the folder, touch , select or deselect apps and then touch OK. The selected app icons will be automatically added to the folder while the deselected apps will be removed from the folder. Another way to remove an app icon from a folder is to touch and hold the icon in the folder until your Phone vibrates, and then drag it to the home screen. -
Page 24
Home Screen Add widgets: Touch and hold an empty area on the home screen to enter home screen editing mode. Touch Widgets, touch and hold a widget and drag it to an empty area on the home screen, or touch the widget you want. Check that there are enough empty spaces on the home screen for the widget. -
Page 25
Home Screen Add an app icon from app drawer to the home screen: After you enable app drawer, touch on the home screen to enter the app list. From the app list, touch and hold the app icon that you want to add until your Phone vibrates, and then drag it to the desired position on the home screen. -
Page 26: Contacts
Contacts Search Contacts Open Contacts, in the contacts list, you can use the following search methods: For most accurate search results, ensure your device is displaying all contacts. On the contacts list screen, go to > Settings > Display preferences, and touch All contacts. Drag the index on the side to quickly scroll through the list.
-
Page 27
Contacts Share your business card: Open Contacts and touch My card to set your profile picture and enter your name, work address, telephone number, and other information. Then touch and your device will automatically generate your QR code business card. You can share your business card directly using the QR code. -
Page 28
Contacts Display contacts for different accounts: Want to only view contacts on your Phone or SIM card? Go to > Settings > Display preferences, and select the accounts that you want to display. You can also: Enable Simple layout: Want to hide the profile pictures, companies, and titles in the contacts list? From the contacts list screen, go to >… -
Page 29
Contacts Erase Call and Message Records Use Erase traces to erase call and message records for a contact to protect your privacy. Open Contacts, select a contact, and go to > Erase traces > Erase. All of your call and message records for that contact will be erased. -
Page 30: Dialling
Dialling Basic Calling Functions Make Calls On the dialler screen, enter part of the telephone number or the first letter or pinyin initials of the contact’s name. Your Phone will automatically search for the relevant contacts. Open Dialler. From the dialler screen, enter the phone number or the first letter or pinyin initials of the contact’s name (for example, enter hwkf for Huawei customer service).
-
Page 31: Volte
Dialling Open Dialler, go to > Settings > More, and enable Call waiting. When receiving another call, touch to answer the call and place your first call on hold. Touch or the call on hold in the call list to switch between calls. Enable Call Forwarding and Never Miss a Call If you are unavailable to answer calls, you can set your device to forward calls to another number.
-
Page 32: Use Vowi-Fi For A New Calling Experience
Dialling Dual VoWiFi: Both of your Phone’s SIM card slots support VoWiFi, which allows calls to be made using Wi-Fi. You can use VoWiFi to make calls even in Airplane mode. Some carriers may not support this feature. Enable VoLTE to Enjoy HD Calls Some carriers may not support this feature.
-
Page 33: Message
Message Basic Messaging Functions Send Messages Text messages give you a quick and easy way to communicate with friends, family and colleagues. In addition to text, you can also add emojis or insert pictures and audio files to enrich your messages. Send a message: Open Messages.
-
Page 34
Message Unblock messages: Touch and touch Blocked contacts. Touch at the end of the phone number to unblock the number. Set MMS Message Automatic Download Rules Set MMS message automatic download rules to prevent costly mobile data usage. Open Messages and touch . -
Page 35: Camera
Camera Basic Camera Functions Use Basic Camera Features Understand your camera’s basic functions to help you take better pictures. Select a camera mode: Open Camera. In the viewfinder, choose a camera mode from the preinstalled ones. Zoom your camera in or out: From the viewfinder, touch the screen with two fingers and pinch them together to zoom out or move them apart to zoom in.
-
Page 36
Camera Turn on flashlight: When recording a video in low light conditions, you can touch and select to turn on the flashlight. Use Assistive Grid to Compose Your Photos Ever get annoyed that your photos turn out looking skewed or the subject always seems to be off- center? You can use your camera’s assistive grid feature to help you line up the perfect shot. -
Page 37: Use Panorama Mode To Take Panoramic Photos
Camera Use Panorama Mode to Take Panoramic Photos Panoramas provide a wider viewing angle than ordinary photos, letting you take sweeping landscape shots. To capture a panorama shot, the camera takes multiple photos of objects within our visual field and stitches them together into a single photo.
-
Page 38: Pro Mode
Camera Touch at the bottom of the screen to configure the shooting direction. Hold your Phone steady, and then touch to start shooting. Slowly move the Phone in the direction indicated, holding the device steady and ensuring that the arrow stays level with the centre line.
-
Page 39
Camera When shooting under sunlight, you can select . In a weak light environment, you can select Touch to adjust the colour temperature. If you want to give your photo a cosy, nostalgic tone, increase the K value. For a cold, calm or futuristic tone, select a lower K value. Adjust AF based on the shooting subject: On the Pro mode screen, touch , slide on the AF slider and drag your desired mode to the centre. -
Page 40
Camera Adjust EV compensation: You may increase the EV compensation if the light on the subjects or background is low, and decrease the EV compensation if there is too much light. Adjust AWB: Select AWB depending on the lighting conditions. When shooting under sunlight, you can select . -
Page 41: Gallery
Gallery Photo Management Edit Photos Want to edit a picture you just took to make it even better? You can use the Gallery’s editing features to crop, rotate, and apply a variety of effects (such as graffiti, personalised watermarks, and filters) to your photos to make them more striking.
-
Page 42
Gallery Touch , and select the album to move the items into. Once the items are moved, they will no longer be retained in their original locations. Favourite photos and videos: Want to store your favourite photos and videos separately? You can Favourite your special photos and videos for easy viewing. -
Page 43: Phone Manager
Phone Manager Use One-touch Optimisation Have you noticed that your Phone has slowed down recently? Do you worry that it might be vulnerable to malware and other security threats? Use one-touch optimisation to make your Phone run smoother and protect it from security threats. Open Phone Manager, and touch OPTIMISE.
-
Page 44
Phone Manager View power consumption details: Touch Power consumption details to view power consumption details. In the Battery usage details section, the coloured bars beneath Charging indicate the various points when you charge your device. Gaps between the coloured bars indicate the various points when you were not charging your device. -
Page 45: Add Email Accounts
Email Add Email Accounts Add your email account to your Phone for convenient email access at any time. If you have questions about specific settings while configuring your email, please consult your email account provider. Add a personal email account: Open , select an email service provider or touch Others, enter your email address and password, then touch Sign in and follow the onscreen instructions to configure your account.
-
Page 46: Manage Vip Email Contacts
Email Manage VIP Email Contacts Worried about missing an important contact’s email among a sea of emails? You can add important contacts to the VIP list. Your device will automatically move emails from VIP contacts to the VIP mailbox. Open Email, and go to >…
-
Page 47: Calendar
Calendar Navigate the Calendar Want to bring order to your busy life? Try using the app Calendar on your Huawei Phone to manage your daily schedule. Search event View today Switch view Event available View event(s) on the day selected Today Week no.
-
Page 48: Import To-Dos To Keep Your Work Organised
Calendar Import To-Dos to Keep Your Work Organised Many to-dos cannot be handled in time. What can I do if I forget to handle them? Import each to-do item to Calendar for easy reference and you will not miss any important events. Import meeting reminders: Open Calendar, go to >…
-
Page 49: Clock
Clock Use the Clock With many powerful features and lots of information, the humble Clock has a lot to offer. The Clock can be used as an alarm, a world clock, stopwatch, or a timer. View the time all over the world: Go to Clock, touch on the World clock tab and enter the name of a city or select a city from the list of cities.
-
Page 50
Clock Time and datein Network-provided your selected city date and time If the time in your current region is the same as that of your home city, the lock screen will only display one time. -
Page 51: Notepad
Notepad Manage Your Notes to Keep Your Records in Order Want to share important notes or add something to favourites? Manage your notes to keep your records in order. Share a note: Want to send your meeting notes to your colleague? On the list page of All notes or All to-dos, open the note you want to share, then touch to select a sharing method and follow the onscreen prompts.
-
Page 52
Notepad Add a handwritten note: Want to quickly record your drawing or handwriting? Go to Notes > touch , write your notes, and touch to save it. You can write and draw in Notepad. Add tags to notes: Want to easily view the categories of your notes? On the editing page of All notes, touch , and use different coloured tags to categorise different content for a clearer view of your notes. -
Page 53: Utilities
Utilities Check Your Screen Time Digital balance allows you to check the app usage, and helps you manage your screen time and guides you towards healthier Phone usage habits. To check your Phone usage, open Settings, and go to Digital balance > More. Check today’s screen time: Touch Today, and you can check your Screen time, App usage, Unlocks, and EXTENSIONS.
-
Page 54: Device Connection
Device Connection Bluetooth Connect Your Phone to Bluetooth Devices Use Bluetooth to connect your Phone to Bluetooth headsets and in-car Bluetooth to navigate or listen to music while you drive. You can also connect your Phone to Bluetooth wearables to record and manage fitness data.
-
Page 55
Device Connection Operate Bluetooth keyboards and mouses Tethering Connect to Bluetooth Low Energy (BLE) devices Enable or disable Bluetooth: From the home screen, swipe down from the status bar, open the shortcuts panel, and then touch to enable or disable Bluetooth. Touch and hold to open the Bluetooth settings screen. -
Page 56: Connecting Usb Device
Device Connection Export contacts: Touch Share contacts, select the contacts that you want to share, touch and select Bluetooth. Follow the onscreen instructions to establish a Bluetooth connection with the other device. Those contacts selected will be exported from your Phone to the other device automatically.
-
Page 57
Device Connection Swipe down from the status bar to open the notification panel, and then set your USB connection method to Input MIDI. You can then use Phone to receive and process MIDI messages transmitted by other devices. Transfer Data Between Your Phone and a USB Device USB OTG (USB On-The-Go) allows you to transfer data directly between your Phone and other devices (such as phones, tablets, cameras, and printers) without requiring a computer. -
Page 58: Security And Privacy
Security and Privacy Face Unlock Enrol Your Facial Information to Enable Face Unlock Face unlock allows you to quickly unlock your Phone by holding it up to your face. Only the owner can enable Face unlock. This feature is not available for users or guests, and not supported in PrivateSpace either.
-
Page 59: Fingerprint
Security and Privacy Open Settings, go to Security & privacy > Face recognition, follow the onscreen instructions and enter the lock screen password, then touch Delete facial data and follow the onscreen instructions to delete your current face data. Pick Up to Unlock Open Settings, go to Security &…
-
Page 60
Security and Privacy Use Fingerprint Shortcuts for Faster Device Operation Can’t reach the shutter button to take a photo, or want a faster way to answer a call or turn off an alarm? You can use any of your fingertips to quickly take photos and answer calls with the fingerprint sensor. -
Page 61
Security and Privacy Fingerprint unlocking is only available when your unlock method is set to Pattern, PIN or Password. You will be required to unlock your Phone using the screen unlock password after the device is restarted or if your fingerprint is not recognised. Before enrolling a fingerprint, make sure your finger is clean and dry. -
Page 62: Enable Or Disable Location Services
Security and Privacy Use a fingerprint to access the Safe: Open Files and touch Safe, you can then access the Safe using your fingerprint. Use a fingerprint to access apps locked by App lock: You can now open locked apps on your home screen using your fingerprint.
-
Page 63
Security and Privacy Modify your App lock password and password protection: Touch on the App lock screen, and then touch Change password or Change password protection to modify your App lock password or password protection. -
Page 64: Backup And Restoration
Backup and Restoration Data Backup Using HiSuite You can use the backup function of HiSuite to back up all your device’s most important information, including your contacts, SMS messages, images, or other major files on your Phone and store them externally on your computer.
-
Page 65: Reset Your Phone
Backup and Restoration Open Settings, go to System > Backup & restore > Data backup > External storage > Memory card, then touch BACK UP. On the Select data screen, select the data you want to back up and touch Back up. You can go to >…
-
Page 66: Wi-Fi And Network
Wi-Fi and Network Wi-Fi Introduction to Wi-Fi+ Wi-Fi+ intelligently connects to Wi-Fi networks to save mobile data consumption. When your device detects a known or free Wi-Fi network, it will automatically turn on Wi-Fi and connect to the network. Your device will also automatically select the optimal network in the area for the best Internet connection.
-
Page 67
Wi-Fi and Network Automatically turn Wi-Fi on: Depending on the Wi-Fi networks you have connected to previously, Wi-Fi will be automatically enabled in specific locations. This will prevent your device from constantly searching for new networks. Assess the quality of available networks: Evaluate currently available network hotspots and prevent your device from automatically connecting to networks with no Internet connection. -
Page 68
Wi-Fi and Network Send files with Wi-Fi Direct: Open Files, touch and hold a file you want to send, and go to More > Share > Wi-Fi Direct. When another device is detected, touch its name to establish the connection and begin file transfer. Receive files with Wi-Fi Direct: Enable Wi-Fi. -
Page 69: Connecting To The Internet
Wi-Fi and Network Connecting to the Internet Connect to Wi-Fi networks effortlessly with your device. Connecting to a Wi-Fi network Swipe down from the status bar to open the notification panel. Touch and hold to open the Wi-Fi settings screen. Switch on Wi-Fi.
-
Page 70
Wi-Fi and Network Have extra mobile data at the end of the month? You can share it with your friends. You can use Wi-Fi hotspot or Bluetooth to share your mobile data with other devices. Use Wi-Fi hotspot to share mobile data: Open Settings and go to Wireless &… -
Page 71
Wi-Fi and Network Depending on the operating system, you may need to install drivers or establish the relevant network connection on your computer before using this function. Refer to your computer’s operating system guide for more information. -
Page 72: Sound And Display
Sound and Display Configure Do Not Disturb Mode Do not disturb mode blocks calls from strangers and only notifies you when you receive calls and messages from chosen contacts. Open Settings and go to Sounds > Do not disturb. Toggle on the Do not disturb switch, then touch Do not disturb mode and select one of the following options: Allow calls and messages from important contacts: Select Allow priority interruptions only, and then touch Define priority interruptions to configure which contacts can call or message…
-
Page 73: Enable Eye Comfort Mode To Prevent Eye Strain
Sound and Display Set your Phone to Silent mode: From the Sounds screen, enable Silent mode. After you enable Silent mode, enable Vibrate in silent mode. Now when you receive an incoming call, your screen will light up and your device will vibrate. Customise your ringtone and notification tone: From the Sounds screen, select a custom ringtone or use the Notification.
-
Page 74
Sound and Display Quickly access frequently used app features: Touch and hold an app icon on your home screen, and then touch a frequently used feature to access it. Each app supports up to four frequently used features. These are preset by the app and cannot be changed. For example, to take a selfie, touch and hold the camera icon, and then touch Selfie in the pop-up menu. -
Page 75: Change The Input Method
System Change the Input Method You can change the input method on your Phone as desired. Switch the input method: Open Settings, go to System > Language & input > Default keyboard, and select an input method. Accessibility Enable TalkBack to Have Onscreen Content Read Aloud TalkBack reads aloud content on the screen that you touch, select, or activate.
-
Page 76: General Settings
System Select an item: Touch an item with one finger to select it (it will not open). Your device will read out the content of the selected item. Open an item: Double-touch any part of the screen using one finger to confirm your selection from the previous step.
-
Page 77
System Open Settings, go to System > Language & input > Language and select your system language. If you cannot find your language from the language list, touch Add language to add your language. Set Your System Time and Date If you travel abroad or change your SIM card, your Phone will automatically display the time and date provided by the local mobile network. -
Page 78
System View Memory and Storage Status Unsure of how much memory and storage you have left after using your Phone for a long time? You can view your Phone’s memory and storage information to help you monitor your memory and storage use and decide whether to perform a cleanup. -
Page 79: Legal Notice
Legal Notice Legal Notice Copyright © Huawei Technologies Co., Ltd. 2019. All rights reserved. This document, whether in part or whole, shall not be reproduced or transmitted in any way, shape, or form without the prior written consent of Huawei Technologies Co., Ltd. and its affiliates («Huawei»).
-
Page 80: Personal Information And Data Security
Legal Notice Third-party software and applications services may be interrupted or terminated at any time, and Huawei does not guarantee the availability of any content or service. Third-party service providers provide content and services through network or transmission tools outside of the control of Huawei. To the greatest extent permitted by applicable law, it is explicitly stated that Huawei shall not compensate or be liable for services provided by third-party service providers, or the interruption or termination of third-party contents or services.
-
Page 81: Obtaining Help
Legal Notice Put your device in a safe place to prevent unauthorised use. Set your device screen to lock and set a password or unlock pattern. Periodically back up personal information stored on your SIM card, memory card or your device memory.
-
Page 82
This guide is for reference only. The actual product, including but not limited to the color, size, and screen layout, may vary. All statements, information, and recommendations in this guide do not constitute a warranty of any kind, express or implied.
 Инструкция с описанием работы со смартфоном Honor 8A. Данное русскоязычное руководство по эксплуатации можно сохранить на компьютере в PDF формате, так вы сможете ознакомиться с этой моделью в деталях.
Huawei Honor 8A является топовым представителем серии Хонор, который получил первоклассный внешний вид и великолепную техническую часть. Девайс официально анонсировали в июле 2016. Телефон представляет средний ценовой уровень.
Что хорошо:
• Изумительное внешнее исполнение.
• Очень высокое быстродействие.
• Качественный основной фотомодуль.
• Дисплей с высокой яркостью.
• Новая версия Android со множеством полезностей.
Что не очень:
• На стеклянном корпусе быстро появляются царапины.
• Наушники выдают посредственный звук.
Данное русскоязычное руководство по эксплуатации, предназначенное для смартфона Honor 8A, содержит принципы работы и ключевые особенности пользования устройством.
|
тип файла: |
размер файла: |
формат файла: |
скачать: |
|
руководство пользователя |
1.70 мегабайт |
|