-
Инструкции по эксплуатации
1

SINBO SCO 5034 инструкция по эксплуатации
(59 страниц)
- Языки:Русский
-
Тип:
PDF -
Размер:
13.32 MB -
Описание:
Мультиварка
Просмотр
На NoDevice можно скачать инструкцию по эксплуатации для SINBO SCO 5034. Руководство пользователя необходимо для ознакомления с правилами установки и эксплуатации SINBO SCO 5034. Инструкции по использованию помогут правильно настроить SINBO SCO 5034, исправить ошибки и выявить неполадки.
Мультиварка Sinbo SCO-5034, 700Вт, белый/рисунок [sco 5034]
Нет в наличии
Последний раз товар был 5 марта
- Объем чаши: 4 л;
- Управление: электронное,
- Функции: таймер, разогрев, поддержание температуры,
- В комплекте: книга рецептов,
- Особенности: дисплей, антипригарное покрытие;
Появились вопросы о товаре?

- Объем чаши: 4 л;
- Управление: электронное,
- Функции: таймер, разогрев, поддержание температуры,
- В комплекте: книга рецептов,
- Особенности: дисплей, антипригарное покрытие;
Появились вопросы о товаре?
Нет в наличии
Последний раз товар был 5 марта
Нет в наличии
Последний раз товар был 5 марта
Хочу быть в курсе акций и новинок
Контакты
- Журнал
- Акции
- Покупателям
- Информация
- Доставка
- Гарантия
- Кредит и рассрочка
- Сервисные центры
- Услуги
- Корпоративным клиентам
- Аренда помещений
- Партнёрская программа
- Обзоры
- Форум
- Клуб Ситилинк
- Конфигуратор
- Подбор расходных материалов
- Ситилинк
- Новости
- Вакансии
- Документы
Мы используем файлы cookie. Подробнее
Мы используем файлы cookie для вашего удобства пользования сайтом и повышения качества рекомендаций. Подробнее
![]()
SCO 5034, SCO 5035 BUHARLI P‹fi‹R‹C‹
KULLANMA KILAVUZU
TR
EN
FR
NL
DE
ES
RU
UA
AR
SCO 5034
SCO 5035

De¤erli Müflterimiz,
SINBO markal› ürünümüzü seçti¤iniz için çok teflekkür ederiz. Teknolojisi, tasar›m› ve kullan›m kolayl›¤›yla enerji ve zaman tasarrufu sa¤layan cihaz›n›zla mutfakta geçirdi¤iniz zaman›n keyfini ç›kart›n.
Sayg›lar›m›zla,
Sinbo Küçük Ev Aletleri
SINBO SCO 5034, SCO 5035 ÇOK FONKS‹YONLU P‹LAV P‹fi‹R‹C‹S‹
KULLANIM KILAVUZU
ÖNEML‹! Cihaz›n›z› kullanmadan önce lütfen bu talimatlar› dikkatle okuyunuz.
Cihazla oynamamalarını güvenceye almak için çocuklar gözetim altında tutulmalıdır.
Bu ürün (çocuklar dahil ) fiziksel hassasiyeti az, zihinsel olarak yetersiz, deneyimsiz ve yeterli bilgiye sahip olmadan yada kendilerinin güvenli¤inden sorumlu olan kifliler tarafından bu ürünü kullanmak için gerekli talimatlar verilmemifl kiflilerin kullanımına uygun de¤ildir.
•Bu cihazın, afla¤ıda belirtilen yerler gibi, ev ve benzeri uygulamalarda kullanılması amaçlanır. (IEC 60335-2-15/A2):
•Dükkânlarda, bürolarda ve di¤er çalıflma ortamlarındaki personele ait mutfak alanları,
•Çiftlik evleri
•Müflteriler tarafından, motellerde, otellerde kullanılan yerler ve di¤er mesken tipi çevreler,
•Yatma yerleri ve kahvaltı yapılan ortamlar.
Children being supervised not to play with the appliance.
This appliance is not intended for use by persons (including children) with reduced physical, sensory or mental capabilities, or lack of experience and knowledge, unless they have been given supervision or instruction concerning use of the appliances by a person responsible for their safety. Children should be supervised to ensure that they do not play with the appliance.
This appliance is intended to be used in household and similar applications such as: (IEC 60335-2-15/A2)
—staff kitchen areas in shops, offices and other working environments;
—farm houses;
—by clients in hotels, motels and other residential type environments;
—bed and breakfast type environments.
— 1 —

ÖNEML‹ GÜVENL‹K UYARILARI
• Bakım, Onarım ve Kullanımda Uyulması Gereken Kurallar
1.Önemli: ‹lk kullan›mdan önce talimatlar›n tamam›n› dikkatle okuyunuz. Lütfen bu kullan›m k›lavuzunu saklay›n›z.
2.Teknik Bilgiler’ bölümünde belirtilen voltaj de¤erinin yerel voltaj de¤erine uygun oldu¤undan emin olunuz. Cihaz›n›z evsel kullan›m için tasarlanm›flt›r. Cihaz›n›z› d›fl ortamlarda kullanmay›n›z.
3.Cihaz›n›z› düz, kuru ve ›s›ya dayanakl› yüzeylerin üzerinde kullan›n›z. Cihaz›n›z› yan›c› veya nemli ortamlarda bulundurmay›n›z, s›cak ocak üzerine veya ›s›t›lm›fl f›r›n içine koymay›n›z.
4.Cihaz›n›z› kullan›m amac› d›fl›ndaki amaçlarla kullanmay›n›z.
5.Cihaz›n›z›n s›cak yüzeylerine dokunmay›n›z. Cihaz›n›z› tafl›mak için tutma saplar›n› kullan›n›z. Buhar ç›k›fl penceresi çok s›cakt›r ve hafllanma tehlikesi oluflturmaktad›r. Buhar ç›k›fl penceresine dokunmay›n›z, üstünü örtmeyiniz veya t›kamay›n›z.
6.Cihaz›n›z› tafl›rken yan tutma saplar›n› kullan›n›z, kapak sap›n› kullanmay›n›z. ‹çersinde pirinç, s›cak ya¤ veya di¤er s›v›lar bulunurken özellikle dikkat ediniz.
7.Piflirme esnas›nda veya piflirdikten sonra cihaz›n›z›n kapa¤›n› açarken çok dikkat ediniz. Kapak aç›ld›¤›nda a盤a ç›kacak olan buhar nedeniyle hafllanma tehlikesi vard›r.
8.Pirinç pifliricinizi çal›flmakta olan di¤er elektrikli cihazlar›n›z›n beslenmedi¤i bir prize tak›n›z. Di¤er cihazlar nedeniyle elektrik devresine afl›r› yük binmesi halinde cihaz›n›z düzgün çal›flmayabilir.
9.Yang›n, elektrik floku ve yaralanmalara sebebiyet vermemek için cihaz›n›z›, cihaz›n güç kablosunu ya da fiflini suya veya di¤er s›v›lara sokmay›n›z. Temizleme talimatlar›n› inceleyiniz.
10.Çocuklar›n cihaza yaklaflmamalar› gerekir. Cihaz çocuklar›n yak›n›nda veya çocuklar taraf›ndan kullan›l›rken yak›n gözetim gereklidir.
11.Bu ürün (çocuklar dahil) fiziksel hassasiyeti az, zihinsel olarak yetersiz, deneyimsiz ve yeterli bilgiye sahip olmadan ya da kendilerinin güvenli¤inden sorumlu olan kifliler taraf›ndan bu ürünü kullanmak için gerekli talimatlar verilmemifl kifllerin kullan›m›na uygun de¤ildir.
12.Kordonunda ya da fiflinde hasar bulunan; ar›zal› ya da herhangi bir flekilde zarar görmüfl olan hiçbir cihaz› çal›flt›rmay›n›z. Böyle durumlarda kontrol edilmesi, onar›m› veya elektrik ya da mekanik ayarlar›n›n yap›lmas› için cihaz›n›z› en yak›n yetkili servise götürünüz. Cihaz› kendi kendinize onarmaya çal›flmay›n›z.
13.Fiflini prizden çekmeden önce cihaz›n kumandalar›n› kapal› konuma getiriniz daha sonra fifli prizden çekiniz.
14.Kullan›lmad›¤› zamanlarda ve temizlemeden önce cihaz›n›z›n fiflini prizden çekiniz. Parçalar›n› tak›p ç›karmadan veya temizleme ifllemine bafllamadan önce cihaz›n›z›n iyice so¤umas›n› bekleyiniz..
15.Elektrik floku riskini azaltmak için piflirme iflleminin sadece ç›kar›labilir iç hazne içinde gerçekleflmesi sa¤lanm›flt›r.
16.Üreticinin önermedi¤i ilave parçalar›n kullan›lmas› yang›n, elektrik floku ve yaralanmalara neden olabilir. Sadece üreticiden tedarik etti¤iniz parçalar› kullan›n›z.
17.Uzun kabloya dolaflma veya tak›l›p düflme riskini engellemek için cihaz›n›zda k›sa kablo kullan›lm›flt›r.
18.Cihaz›n›z›n kablosunu çekifltirmeyiniz veya kabloya as›lmay›n›z. Güç kablosunun çekifltirilmeden ve gerdirilmeden prize ulaflmas› sa¤lanmal›d›r. Cihaz› çocuklardan uzak tutunuz.
19.Kablonun s›cak yüzeylere temas etmesine, masa veya tezgah›n kenarlar›na tak›lmas›na izin vermeyiniz.
20.Güç kablosunun ar›zalanmas› durumunda tehlikelerin önlenmesi için kablo üretici, servis yetkilisi ya da benzer bir ehliyetli kifli taraf›ndan de¤ifltirilmelidir.
21.Kullanmaya bafllamadan önce daima iç piflirme haznesinin d›fl›n›n kuru oldu¤undan emin olunuz. E¤er iç piflirme haznesi ›slakken pifliriciye yerlefltirilirse cihazda ar›za veya hasar meydana gelebilir.
22.Hasar veya deformasyon oluflmas›n› önlemek için cihaz›n iç piflirme haznesini di¤er ›s›t›c›larla kullanmay›n›z veya pifliricinin içine baflka piflirme kaplar› yerlefltirmeyiniz.
23.‹ç haznenin yüzeylerinin zarar görmesini önlemek için tahta veya plastik kepçe kullan›n›z.
24.Elektrik floku riskini azaltmak için bu cihazda polarize fifl kullan›lm›flt›r. Bu fifl sadece polarize
—2 —

prizlere tek yönlü olarak tak›labilir. E¤er fifli prize takamazsan›z fiflin yönünü de¤ifltirip tekrar takmay› deneyiniz. E¤er fifl bu yönde de prize girmiyorsa konusunda ehliyetli bir elektrikçi ça¤›rarak prizi de¤ifltiriniz. Kesinlikle cihaz›n fiflinde bir de¤ifliklik yapmaya kalk›flmay›n›z.
‹LK KULLANIMDAN ÖNCE
1.Bütün talimatlar› ve güvenlik önlemlerini okuyunuz.
2.ÖNEML‹: C‹HAZIN ANA P‹fi‹RME ÜN‹TES‹N‹ SUYA VEYA BAfiKA HERHANG‹ B‹R SIVI ‹Ç‹NE SOKMAYINIZ!
3.Cihaz›n›z›n ambalaj›n› açt›ktan sonra paket içeri¤ini kontrol ediniz ve bütün parçalar›n› hasars›z olarak teslim ald›¤›n›zdan emin olunuz.
4.Çocuklar›n zarar görmesini önlemek için ambalaj malzemelerini ortadan kald›r›n›z.
5.Nemli bir bezle cihaz›n›z›n gövdesini siliniz. Buhar penceresi ve di¤er aksesuarlar› ›l›k ve sabunlu suyla y›kay›p durulad›ktan sonra hepsini iyice kurulay›nz.
6.‹ç piflirme kab›n› pirinç pifliricisinin içinden ç›kar›p ›l›k ve sabunlu suyla y›kay›n›z. Kapta hasar meydana gelebilece¤inden afl›nd›r›c› bulafl›k süngerleri ve temizlik malzemeleri kullanmay›n›z. Kab› suyla durulay›n›z ve pifliriciye yerlefltirmeden önce iyice kurulay›n›z.
7.‹lk kullan›m esnas›nda üretim kal›nt›lar›n›n yanmas›ndan kaynaklanan garip bir koku duyabilirsiniz. Bu tamamen normaldir. Yemek piflirmeye bafllamadan önce pifliricide yaklafl›k 10 dakika boyunca su kaynatman›z tavsiye edilir.
PARÇALARIN TANITIMI
1.Kapak,
2.Buhar penceresi,
3.Su kollektörü,
4.Piflirici gövdesi,
5.Kumanda paneli,
6.‹ç hazne
7.Buhar kab›,
8.Pirinç kepçesi,
9.Ölçme kab›,
10.Güç kablosu
KONTROL PANEL‹
TEKN‹K B‹LG‹ Voltaj: AC230V/50HZ
Watt: 700W
Kapasite: 4L/1.5L/8 fincan
— 3 —

C‹HAZIN KULLANIMI
• Ba¤lantı veya Montajın Nasıl Yapılaca¤ını Gösterir fiema ile Ba¤lantı veya Montajın Kimin Tarafından Yapılaca¤ına (tüketici, yetkili servis) iliflkin bilgiler
ÇALIfiTIRMA TAL‹MATLARI 1. Modlar ve Gösterge
Delay
Notlar: a) Tah›l veya Pilav Piflirme modundayken göstergede takip ›fl›klar› yanar, geri say›ma piflirme süresinin bitimine 9 dakika kala bafllan›r.
b) Tufllara bas›ld›¤›nda cihazdan bir “bip” sesi duyulacakt›r.
2. Kumanda panelinin çal›flma fonksiyonlar›
Mikro bilgisayar kumandas› olan bu model pirinç pifliricisinin tah›l, pilav, süt, kek piflirme; hafllama, buharda piflirme; erteleme, piflirme süresi ayar›, ›s›tma/kapatma ve otomatik hata saptama gibi çoklu fonksiyonlar› vard›r.
Tek tuflla kontrol fonksiyonu:
– Bekleme modundayken herhangi bir fonksiyon tufluna bas›n›z, fonksiyonun gösterge ›fl›¤› dijital ekranda yan›p sönmeye bafllayacakt›r. 5 saniye içinde baflka bir fonksiyon tufluna basarak ilgili fonksiyona geçifl yapabilirsiniz. 5 saniye geçtikten sonra seçilen fonksiyon onaylan›r veya varsa erteleme süresinin geri say›m› bafllat›l›r; bu s›rada ilgili gösterge ›fl›¤› yanar ve piflirici çal›flma moduna girer. Bu durumdayken ‘Warm/Off’ (›s›tma/kapatma) tuflundan baflka hiçbir tufl çal›flmaz.
— 4 —

Erteleme:
– Herhangi bir fonksiyon tufluna basmadan önce:
*Bekleme modundayken ‘delay’ (erteleme) tufluna bas›n›z ard›ndan istedi¤iniz erteleme süresini ayarlamak için “Timer” (zamanlay›c›) tufluna sürekli olarak bas›n›z.
*‹stenen erteleme süresi ayarland›ktan sonra lütfen kullanmak istedi¤iniz fonksiyonun tufluna bas›n›z (ilgili fonksiyonun gösterge ›fl›¤› yanar) aksi takdirde piflirici saniyeler içinde bekleme moduna geçifl yapacakt›r.
– Herhangi bir fonksiyon tufluna bas›ld›ktan sonra:
*Bekleme modundayken herhangi bir fonksiyon tufluna bas›n›z; fonksiyonun gösterge ›fl›¤› dijital ekranda yan›p sönmeye bafllayacakt›r.
*5 saniye içinde ‘delay’ (erteleme) tufluna bas›n›z ard›ndan “Timer” (zamanlay›c›) tufluna sürekli olarak basarak istedi¤iniz erteleme süresini ayarlay›n›z.
– Piflirme süresindeki erteleme ve kullan›lmak istenen fonksiyon ayarland›ktan sonra cihaz geri say›m› bafllatacak ve erteleme süresi doldu¤unda piflirme ifllemine bafllayacakt›r. – “Timer” (zamanlay›c›) tufluna her bas›flta 30 dakikal›k bir süre art›fl› yap›lacakt›r. Erteleme süresinde 0.5 saatten 24 saate kadar ayar yap›labilir.
Warm/Off (Is›t/Kapat):
–Bekleme modundayken ‘Warm/off’ (Is›t/Kapat) tufluna bas›n›z, ›s›tma gösterge ›fl›¤› yanacak ve dijital göstergede ‘bb’ iflareti gösterilir ve s›cakl›k 65-85°C’de korunur.
–Piflirme iflleminin tamamlan›p dijital ekran›nda ‘bb’ iflaretinin gösterilmeye bafllamas›yla cihaz 5 kez ‘buzz’ alarm› vererek otomatik olarak ›s›tma moduna geçifl yapacakt›r.
–Is›tma modundayken ‘Warm/off’’(Is›t/Kapat) tufluna tekrar bast›¤›n›zda piflirici kapat›l›r.
Tah›l/Pilav:
–Yiyecek türüne uygun olan fonksiyon tufluna bas›n›z, dijital ekran çal›flmaya bafllayacak ve fonksiyona ba¤l› gösterge ›fl›¤› yanacakt›r. Not: ‹zleyen 5 saniye içinde ilgili tufla basarak farkl› bir fonksiyon seçebilirsiniz.
–Piflirici 5 sonra çal›flmaya veya (varsa) erteleme süresinin geri say›m›na bafllar. Göstergede önce takip ›fl›klar› yanar, geri say›ma piflirme süresinin bitimine 9 dakika kala bafllan›r. Piflirme ifllemi tamamland›ktan sonra cihaz 5 kez ‘buzz’ alarm› vererek otomatik olarak ›s›tma moduna geçifl yapar.
Süt/Kek/Hafllama/Buharda piflirme:
–Yiyecek türüne uygun olan piflirme fonksiyonunun tufluna bas›n›z. Fonksiyonun gösterge ›fl›¤› yanacak ve dijital göstergede fonksiyon için varsay›lan olarak atanan piflirme süresi gösterilecektir (Bkz. Tablo 1). Not: ‹zleyen 5 saniye içinde ilgili tufla basarak farkl› bir fonksiyon seçebilirsiniz.
–‹stenen fonksiyon seçildikten sonraki 5 saniye içinde “Timer” (zamanlay›c›) tufluna basarak piflirme süresini de¤ifltirebilirsiniz. “Timer” (zamanlay›c›) tufluna her bas›fltaki süre art›fl miktar› seçilen fonksiyona göre de¤ifliklik gösterir (Bkz. Tablo 1).
–‹stenen fonksiyon ve piflirme süresi seçildikten veya (önceden ayarland›ysa) erteleme süresi dolduktan 5 saniye sonra cihaz piflirme moduna geçer ve ayarlanan piflirme süresinin geri say›m› bafllar; piflirme ifllemi tamamlan›p befl kez ‘buzz’ alarm› verildikten sonra cihaz otomatik olarak ›s›tma moduna geçifl yapar.
|
Tablo 1: Süt, Hafllama, Buharda piflirme ve Kek için piflirme süreleri |
||||||||
|
Fonksiyon |
Süt |
Hafllama |
Buharda Piflirme |
Kek |
||||
|
Varsay›lan piflirme süresi (dak) |
50 |
60 |
10 |
40 |
||||
|
Ayarlanabilir piflirme süresi (dak) |
30-120 |
30-330 |
1-60 |
30-120 |
||||
|
Zamanlay›c›daki süre art›fl miktar› (dak) |
5 |
30 |
1 |
5 |
— 5 —

KULLANIM HATALARINA ‹L‹fiK‹N B‹LG‹LER
Cihazınızı, beyan edilen voltaj ile çal›flt›r›n›z.Bulundu¤unuz yerin voltaj›n›n uygun olup olmad›¤›n› kontrol ediniz.
Güç kablosunun ar›zalanmas› durumunda tehlikelerin önlenmesi için kablo üretici, servis merkezi ya da benzer bir ehliyetli kifli taraf›ndan de¤ifltirilmelidir. Ar›za durumunda cihaz› kendiniz onarmaya kalk›flmay›n›z. Meydana gelebilecek ar›zalardan firmam›z kesinlikle sorumlu de¤ildir, ve cihaz›n›z garanti kapsam› d›fl›nda ifllem görecektir.
TAfiIMA VE NAKL‹YE ESNASINDA
•Ürünü düflürmeyiniz,
•Darbelere maruz kalmamas›n› sa¤lay›n›z,
•S›k›flmamas›n›, ezilmemesini sa¤lay›n›z,
•Ambalaj üzerindeki iflaretlemelere uyunuz.
•Orjinal ambalajıyla taflımaya özen gösteriniz.
ÇEVRE VE ‹NSAN SA⁄LI⁄I
Çevre korumas›na siz de katk›da bulunabilirsiniz!
Lütfen yerel düzenlemelere uymay› unutmay›n: Çal›flmayan elektrikli cihazlar›, uygun elden ç›karma merkezlerine götürün.
Kullanım sırasında insan ve çevre sa¤lı¤ına tehlikeli veya zararlı olabilecek bir durum söz konusu de¤ildir.
TEM‹ZL‹K VE BAKIM
• Tüketicinin Kendi Yapabilece¤i Bakım, Onarım veya Ürünün Temizli¤ine ‹liflkin Bilgiler
1.Temizlik ifllemine bafllamadan önce cihaz›n›z›n fiflini prizden çekiniz ve tamamen so¤umas›n› bekleyiniz.
2.Cihaz›n gövdesini yumuflak bir deterjan ve nemli bir bez kullanarak temizleyiniz ard›ndan yumuflak ve kuru bir bez kullanarak iyice kurulay›n›z. Önemli: Cihaz›n›z›n taban›n› hiçbir koflulda suya veya di¤er s›v›lara sokmay›n›z.
3.Su kollektörünü cihazdan ç›kar›p ›l›k suyun alt›nda yumuflak bir deterjanla y›kay›n›z daha sonra durulay›p iyice kurulad›ktan sonra cihaza geri tak›n›z
4.Kapak, buhar penceresi ve iç piflirme haznesini ›l›k su ve yumuflak bir deterjan ile y›kay›n›z. Parçalar›n çizilmesine veya zarar görmesine neden olabileceklerinden afl›nd›r›c› temizlik malzemeleri kullanmaktan kaç›n›n›z. Tekrar kullanmadan önce iç piflirme haznesinin iyice kuruland›¤›ndan emin olunuz.
5.Is›t›c› yüzeyin ve iç piflirme haznesinin d›fl k›sm›n›n temiz oldu¤undan ve tam temas sa¤lad›klar›ndan emin olunuz.
Not: Is›t›c› yüzey ile iç piflirme haznesinin birbirlerine daha iyi temas etmelerini sa¤lamak için iç piflirme kab›n› cihaz›n içine yerlefltirip afla¤›daki resimde gösterildi¤i flekilde hafifçe döndürünüz.
• Periyodik Bakım Gerektirmesi Durumunda, Periyodik Bakımın Yapılaca¤ı Zaman Aralıkları ile Kimin Tarafından Yapılması Gerekti¤ine ‹liflkin Bilgiler
Cihaz periyodik bak›m gerektirmez.
Her kullan›mdan sonra temizli¤inin yap›lmas›nda fayda vard›r.
— 6 —

SORUN G‹DERME
— 7 —

ENGLISH
SINBO SCO 5034, SCO 5035 MULTI-FUNCTION RICE COOKER
INSTRUCTION MANUAL
Important! Please read this manual carefully before using.
Dear customer,
Many thanks for choosing our SINBO brand product. With its technology, design and operation, you will enjoy your modern kitchen life while saving more energy and time.
IMPORTANT SAFEGUARDS
1.Important: Read all instructions carefully before first use. Please keep these instructions.
2.Make sure the voltage indicated in “Technical Data” is in line with local voltage. Do not use outdoors. It is for household use only.
3.Use only on a level, dry and heat-resistant surface. Do not put the unit into a inflammable and damp surroundings. Do not place on or near a hot burner or in a heated oven.
4.Do not use the appliance for other than its intended use.
5.Do not touch hot surfaces. Use the handles or knobs. Do not touch, cover or obstruct the steam vent on the top of the rice cooker as it is extremely hot and may cause scalding.
6.Move the product with side handles, not the lid handle. Extreme caution must be used when moving the appliance containing rice, hot oil or other liquids.
7.Use extreme caution when opening the lid during or after cooking. Hot steam will escape and may cause scalding.
8.The rice cooker should be operated on a separate electrical circuit from other operating appliances. If the electrical circuit is overloaded with other appliances, the appliance may not operate properly.
9.To protect against fire, electric shock and injury to persons, do not immerse cord, plug or the appliance in water or any other liquid. See instructions for cleaning.
10.Children should be kept away from the appliance. Close supervision is necessary when the appliance is used by or near children.
11.The appliance is not intended for use by persons (including children) with reduced physical, sensory or mental capabilities, or lack of experience and knowledge, unless they have been given supervision or instruction concerning use of the appliance by a person responsible for their safety.
12.Do not operate any appliance with a damaged cord or plug or after the appliance malfunctions or has been damaged in any manner. Contact the service agent for examination, repair or adjustment. Do not carry on repairs on your own.
13.To disconnect, turn any control to OFF, then remove the plug from the wall outlet.
14.Unplug from outlet when not in use and before cleaning. Allow unit to cool before removing or replacing parts and before cleaning the appliance.
15.To reduce the risk of electrical shock, cook only in the removable inner cooking pot provided.
16.The use of accessory attachments not recommended by manufacturer may result in fire, electrical shock or injury. Parts from the manufacturer used only.
17.A short power cord is provided to reduce the risks resulting form becoming entangled in or tripping over a longer cord.
18.Do not pull/drape cord. The power cord should be able to reach the unit from socket without straining/stretching the cord. Keep away from children.
19.Do not let cord touch hot surfaces or hang over the edge of a counter or table.
20.If the cord is damaged, it must be replaced by the manufacturer, its service agent or a similar qualified person in order to avoid a hazard.
21.Always make sure the outside of the inner cooking pot is dry prior to use. If the inner pot is returned to the cooker when wet, if may damage or cause the product to malfunction.
22.To prevent damage or deformation, do not use the inner pot on other heating device or replace it
—8 —

with other container.
23.Use wood or plastic rice ladle to prevent any damage to the surface of inner pot.
24.This appliance has a polarized plug. To reduce the risk of electric shock, this plug is intended to fit into a polarized outlet only one way. If the plug does not fit fully into the outlet, reverse the plug. If it still does not fit, contact a qualified electrician. Do not attempt to modify the plug in any way.
BEFORE FIRST USE
1.Read all instructions and important safeguards.
2.IMPORTANT: DO NOT IMMERSE THE MAIN COOKING UNIT IN WATER OR ANY OTHER LIQUID!
3.Remove all packaging materials and check that all items have been received in good condition.
4.Tear up all plastic bags as they can pose a risk to children.
5.Wipe body clean with a damp cloth. Wash steam vent and all other accessories in warm, soapy water. Rinse and dry thoroughly.
6.Remove the inner cooking pot from rice cooker and clean with warm, soapy water. Do not use a scouring pad or other abrasive materials as this could damage the product. Rinse and dry thoroughly before returning to cooker.
7.During the initial using, you may notice a slight odour due to the burning off of manufacturing residue. This is completely normal. It is suggested to cook some water to boil for about 10 minutes before food cooking.
PARTS IDENTIFICATION
1.Lid,
2.Steam vent,
3.Water Collector,
4.Cooker Body,
5.Control Panel,
6.Inner pot,
7.Steamer,
8.Rice ladle,
9.Measuring Cup,
10.Power Cord
CONTROL PANEL
TECHNICAL DATA
Voltage: AC230V
Frequency: 50HZ
Power: 700W
Capacity: 4L/1.5L/8 cup
— 9 —
![]()
OPERATING INSTRUCTIONS 1. Modes and display
Delay
Notes: a) Under working mode of Buckwheat or Pilaf, the unit shows chasing pattern at first, and then starts to countdown when only 9 minutes working time left.
b) For each effective button pressing, the unit will make a small “b” sound.
2. Operation of control panel
With the micro-computer controller, this model rice cooker has the multiple functions of Buckwheat, Pilaf, Milk Porridge, Cake, Stew, Steam, Delay, Timer, Warm/Off and auto error detecting.
One button control function:
–Press any function button in standby mode, the relevant indicator lights and the digital display flashes. It can be switched to other functions by pressing other function button within 5 seconds. After 5 seconds the function is confirmed or the Delay time is up (if any), the relevant indicator keeps on, and cooker enters into working mode. In such condition, no button can be activated except the ‘Warm/Off’ button.
–Before any function button pressed:
*Press the ‘delay’ button in standby mode, and followed by continuously pressing “Timer” button to select the desired Delay time.
*Once the desired Delay time is confirmed, please press relative function button (the relative function indicator lights). Otherwise, the cooker will enter in Standby mode in seconds.
– After any function button pressed:
*Press any function button in standby mode, the relevant indicator lights and the digital display flashes.
—10 —

* Within 5 seconds press the ‘delay’ button and followed by continuously pressing “Timer” button to select the desired Delay time.
–After the delay cooking time and relative function are confirmed, the unit will enter into countdown mode, and starts working when the Delay time is up.
–Each pressing “Timer” increases in 30 minutes increments. You can set 0.5-24 hour Delay time.
Warm/Off:
–Under Standby mode, press ‘Warm/off’ button, the ‘Warm’ indicator lights, the digital display indicates ‘bb’, and temperature stays at 65-85°C.
–The unit will automatically switch to ‘Warm’ with five ‘buzz’ alarm when the cooking is finished, and digital displays ‘bb’.
–If on ‘Warm’’ mode, press ‘Warm/off’’ button again, cooker will be turned off.
Buckwheat/Pilaf:
–Press the appropriate relative button depending the food type, the relevant indicator lights, and the digital display turns on. Notes: You can switch to other functions by pressing other function button within 5 seconds.
–Cooker enters into working mode after 5 seconds, or the preset Delay time is up (if any). At first, the digit shows chasing pattern, and then start to countdown when only 9 minutes working time left. At last, unit automatically switches to ‘Warm’ mode with five ‘buzz’ alarm when cooking is finished.
Milk porridge/Cake/Stew/Steam:
–Press the appropriate relative button according to the food, the relative indicator lights and the digit display shows the corresponding default cooking time (See in table 1).
Notes: You can switch to other functions by pressing other function button within 5 seconds.
–Different cooking time can be adjusted by pressing “Timer” button within 5 seconds after the desired function button pressed. For different function, the increments of each “Timer” pressing is different. (See table 1)
–5 seconds after the desired function and cooking time are set, or the preset Delay time is up (if any), the cooker enters into working mode, counting down from the cooking time set, and automatically switch to ‘Warm’ mode with five ‘buzz’ alarm when cooking is finished.
|
Table 1: Table for cooking time of Milk Porridge, Stew, Steam and Cake |
||||||||
|
Function |
Milk Porridge |
Stew |
Steam |
Cake |
||||
|
Default cooking time (min) |
50 |
60 |
10 |
40 |
||||
|
Adjustable cooking time (min) |
30-120 |
30-330 |
1-60 |
30-120 |
||||
|
Increments of Timer (min) |
5 |
30 |
1 |
5 |
CARE & CLEANING
1.Before clearing, unplug the power cord and wait until the cooker cools.
2.Clean the body with a mild detergent and a damp cloth, then use a soft and dry cloth to wipe it dry thoroughly. Important: Do not under any circumstances submerge the base into water or any other liquid. Do not put the base under running water.
3.Remove the water collector from the unit and wash under warm water with a mild detergent, then rinse and dry completely before attaching it to the unit.
4.Clean the lid, steam vent and inner pot with warm water and a mild detergent. Do not use any abrasive materials to clean as it will damage them and result in scratching. Ensure the pot is completely dry before storing or re-use.
5.Make sure the heating plate and the outside of inner pot are clean, free from any dirty and contact
—11 —

evenly.
Notes: For better contact of heating plate and inner pot, place the inner pot in unit, then rotate it slightly as below picture.
TROUBLE SHOOTING
— 12 —

FRANÇAIS
SINBO SCO 5034, SCO 5035 MULTI — CUISEUR A RIZ
MODE D’EMPLOI
IMPORTANT! Lire attentivement ces instructions avant d’utiliser votre appareil. Cher, Chère Client,
Merci d’avoir acheté un produit de la marque SINBO.Ce dernier vous permet de gagner de précieuses minutes dans votre emploi du temps avec sa technologie, son design et sa facilité d’utilisation , nous souhaitons que cet appareil vous apporte entière satisfaction.
CONSIGNES DE SECURITE IMPORTANTES
1.Important: Lire attentivement ces instructions avant la première utilisation. Conservez –les pour pouvoir les consulter lorsque vous en aurez besoin.
2.Avant de brancher votre appareil, assurez-vous que la tension électrique de votre domicile correspond à celle indiquée à “Caractèristiques Techniques “.Cet appareil est destiné à un usage domestique uniquement.N’Utilisez pas cet appareil à l’extérieur.
3.Placez votre appareil sur une surface plane,stable et résistante à la chaleur.Gardez l’appareil loin des zones inflammables ou humides. Ne placez pas et n’utilisez pas cet appareil à proximité d’une quelconque source de chaleur (table de cuisson, chauffage, etc.).
4.N’Utilisez pas votre appareil hors de son but.
5.Ne pas toucher aux surfaces chaudes; utiliser les poignées.La soupape de vapeur est très chaude et il y a un risque de brûlure. Ne pas toucher la soupape de vapeur,ni la couvrir ou l’obstruer.
6.Déplacez l’appareil avec les poignées latérales et non la poignée du couvercle. Faites très attention lorsque vous déplacez le récipient de cuisson interne contenant du riz, de l’huile chaude ou des autres liquides.
7.Une fois la cuisson terminée ou pendant la cuisson, faites très attention en retirant le couvercle. Le reste de vapeur chaude s’échappant du multi cuiseur peut aussi causer des brûlures.
8.Branchez votre appareil à une prise différente. Votre appareil ne pourrait pas fonctionner correctement en cas d’une surcharge du circuit électrique à cause des autres appareils.
9.Pour réduire les risques d’électrocution, ne mettez jamais la prise, le câble d’alimentation ou le boîtier principal dans l’eau ou dans tout autre liquide. Voir les instructions de nettoyage.
10.Gardez le multi cuiseur hors de portée des enfants. Les enfants doivent être surveillés en tout temps lorsqu’ils se trouvent dans la cuisine ou à proximité.
11.Cet appareil n’est pas prévu pour être utilisé par des personnes (y compris les enfants) dont les capacités physiques, sensorielles ou mentales sont réduites, ou des personnes dénuées d’expérience ou de connaissance, sauf si elles ont pu bénéficier, par l’intermédiaire d’une personne responsable de leur sécurité, d’une surveillance ou d’instructions préalables concernant l’utilisation de l’appareil.
12.Ne mettez pas l’appareil en marche si le cordon électrique ou la fiche est endommagé( e). Si l’appareil ne fonctionne pas convenablement, cessez immédiatement de l’utiliser et appelez le service agrée pour toute la réparation ou le réglage méchanique ou électrique. Il ne faut jamais tenter de réparer l’appareil vous-même.
13.Arrêtez l’appareil avant de débrancher la fiche de la prise électrique.
14.Arrêtez et débranchez toujours l’appareil de la prise de courant lorsque vous ne l’utilisez pas et avant de le nettoyer. Laissez l’appareil refroidir avant d’installer ou de retirer des accessoires ou avant de le nettoyer.
15.La cuisson peut être réalisée uniquement dans le récipient interne amovible afin de réduire le risque d’un choc électrique
16.N’utilisez que les accessoires fournis et recommandés par le fabricant. L’utilisation d’accessoires non recommandés pourrait présenter un danger pour l’utilisateur et risquerait d’endommager l’appareil.
17.Le cordon d’alimentation de l’appareil est court afin de minimiser les risques d’enchevêtrement ou de trébuchement.
—13 —

18.Lorsque vous débranchez le câble d’alimentation, tirez-le toujours au niveau de la fiche, ne tirez pas sur le câble lui-même. Gardez le multi cuiseur hors de portée des enfants.
19.Ne laissez pas pendre le câble d’alimentation sur le rebord d’une table ou d’un plan de travail et veillez à ce qu’il n’entre pas en contact avec des surfaces chaudes.
20.Si le cordon d’alimentation est endommagé, il doit être remplacé par votre revendeur, son service après-vente ou une personne de qualification similaire afin d’éviter tout danger.
21.Assurez vous que la surface extérieure du récipient de cuisson interne soit sec avant d’utiliser l’appareil. Si le récipient est placé dans le cuiseur lorsqu’il est mouillé, l’appareil peut endommager.
22.N’Utilisez pas le récipient de cuisson interne avec les autres cuiseurs ou ne placez pas d’autres récipients dans le cuiseur afin d’éviter d’endommager ou de le déformer
23.Utilisez une cuillère en bois ou en plastique afin d’éviter d’endommager la surface du récipient interne.
24.L’appareil est muni d’une fiche polarisée afin de minimiser les risques de secousses électriques. Ce genre de fiche n’entre que d’une façon dans une prise polarisée. Lorsqu’on ne peut insérer la fiche à fond dans la prise, il faut tenter de le faire après avoir inversé les lames de côté. Si la fiche n’entre toujours pas dans la prise, il faut communiquer avec un électricien certifié. Il ne faut jamais tenter de modifier la fiche.
AVANT LA PREMIERE UTILISATION
1.Lire attentivement toutes les instructions et les consignes de sécurité.
2.IMPORTANT: NE JAMAIS PLONGER LE BOITIER PRINCIPAL DANS L’EAU OU TOUT AUTRE LIQUIDE!
3.Retirez tous les matériaux d’emballage et vérifiez le contenu du paquet et assurez vous que vous obtenez toute la livraison des pièces en bon état.
4.Collecter tous les matériaux d’emballage pour éviter d’endommager les enfants.
5.Essuyez la surface de l’appareil avec un chiffon humide. Lavez et rinçez la soupape de vapeur et les autres accessoires avec de l’eau tiède et savonneuse et puis séchez –les.
6.Retirez le récipient de cuisson interne de cuiseur à riz et lavezle avec de l’eau tiède et savonneuse. Ne pas utiliser de nettoyants abrasifs ni d’éponge métallique puisque ceux-ci risquent d’égratigner le récipient.Rincer et sécher complètement le récipient avant de placer dans le cuiseur.
7.Une fumée peut être se produire pendant la première utilisation,ceci est tout à fait normal. Il est recommandé de faire bouillir de l’eau dans le cuiseur pendant environ 10 minutes avant de commencer la cuisson.
DESCRIPTION DES PIECES
1.Couvercle
2.Soupape de vapeur
3.Réservoir d’eau de condensation
4.Boitier principal
5.Panneau de réglage
6.Récipient de cuisson interne
7.Bol à vapeur
8.Cuillère de riz
9.Tasse à mesurer
10.Cordon d’alimentation
— 14 —

Panneau de réglage
CARACTERISTIQUES TECHNIQUES Puissance: AC230V/50Hz
Watts: 700W
Capacité: 4L/1.5L/8 tasses
TABLEAU POUR LA CUISSON 1. Modes et Indicateur
Delay
— 15 —

Remarques: a) Les voyants lumineux de suivi s’allument sur l’écran lors du mode de cuisson de pilaf ou de céréales, il est commencé de décompter 9 minutes avant la fin du temps de cuisson.
b) Un “bip” sonore de l’appareil lorsque vous appuyez sur les touches.
2. Fonctions de commande du panneau de réglage
Cet appareil avec le commande de micro-ordinateur est doté de multi-fonctions tel que la cuisson de céléales, du pilaf, du lait , du gâteau, la cuisson à la vapeur, le bouilli, la répétition, le réglage du temps de cuisson , chauffage / arrêt et la détection automatique des erreurs.
Fonction de contrôle d’une seule touche
Appuyez sur une touche quelconque lors du mode en attend, le voyant lumineux de la fonctionne va clignoter sur l’affichage numérique. Vous pouvez passer une fonction correspondante en appuyant sur une autre touche de fonction dans 5 secondes. Après 5 secondes, la fonction sélectionnée est approuvée ou s’il existe, le compte à rebours d’intervalle de répétition est commencé;pendant ce temps, le voyant lumineux correspondant s’allume et le cuiseur se met fonctionner. Dans ce cas ,aucune touche ne fonctionne à l’exception “Warm/Off” (Chaud /Arrêt)
Répétition :
– Avant d’appuyer sur une touche de fonction quelconque
*Appuyez sur la touche “delay(répétition) lors du mode en attend puis appuyez sur la touche de “Timer” ( minuterie )à plusieurs reprises pour régler le temps de répétition souhaité.
*Après avoir réglé le temps de répétition souhaité, appuyez sur la touche de la fonction souhaitée ( le voyant lumineux de la fonction correspondante s’allume ) sinon le cuiseur se met en attend dans quelques secondes.
– Après avoir appuyé sur une touche de fonction quelconque
*Appuyez sur une touche de fonction quelconque lors de mode en attend, le voyant lumineux de la fonction clignote sur l’affichage numérique.
*Appuyez sur la touche “delay” (répétition) dans 5 minutes puis appuyez sur la touche de “Timer “ (minuterie) à plusieurs reprises et réglez le temps de répétition.
– Après avoir réglé la fonction souhaitée et la répétition au temps de cuisson, l’appareil fait commencer le compte à rebours et va commencer la cuisson lors du délai de répétition
– Chaque fois que vous appuyez sur la touche “Timer” ( minuterie ) , l’augmentation d’une période de 30 minutes se fait. Le délai de répétition peut être réglé de 0.5 heures jusqu’à 24 heures.
Warm/Off (Chaud / Arrêt) :
–Appuyez sur la touche “Warm/Off” ( Chaud /Arrêt ) lors du mode en attend. Le voyant lumineux de chauffage va s’allumer et l’affichage numérique affiche “bb” et la température est conservée à 6585°C.
–Lorsque le processus de cuisson est terminé et l’affichage numérique marque “bb” , l’appareil donne 5 fois l’alarme “buzz” et se met automatiquement en mode de chauffage.
–Si vous appuyez sur la touche “Warm/Off” ( Chaud /Arrêt ) en mode de chauffage, le cuiseur s’arrête.
–Céréales/ Pilaf
–Appuyez sur la touche appropriée au type d’aliment, l’affichage numérique commence à fonctionner et le voyant lumineux correspondant à la fonction va s’allumer.Remarque : Vous pouvez choisir une fonction différente en appuyant sur la touche correspondante dans les 5 secondes suivantes.
–Le cuiseur commence à fonctionner ou (s’il existe ) le compte à rebours d’intervalle de répétition après 5 secondes. Le voyant lumineux de suivi s’allume , et le compte à rebours est commencé 9minutes avant la fin du temps de cuisson. Après le fin de cuisson , l’appareil donne 5 fois l’alarme “buzz” et se met automatiquement en mode de chauffage.
—16 —

Cuisson pour le lait, le gâteau, la cuisson à la vapeur et le bouilli:
–Appuyez sur la touche de la fonction de cuisson appropriée au type d’aliment. Le voyant lumineux de la fonction va s’allumer et le temps de cuisson attribué par défaut pour la fonction à l’affichage numérique.(Voir tableau 1 ) Remarque :Vous pouvez choisir une fonction différente en appuyant sur la touche correspondante dans les 5 secondes suivantes.
–Vous pouvez changer le temps de cuisson en appuyant sur la touche de “Timer “ (minuterie ) dans les 5 secondes après avoir choisi la fonction désirée. La quantité d’augmentation du temps de chaque appui sur la touche de “Timer “ (minuterie ) varie selon la fonction sélectionnée.(voir tableau 1 )
–Après avoir séléctionné la fonction et le temps de cuisson souhaité ou ( si préréglé ) , l’appareil passe en cuisine 5 secondes après le délai de répétition et le compte à rebours du temps de cuisson réglé commence; après le fin de cuisson , l’appareil donne 5 fois l’alarme “buzz” et se met automatiquement en mode de chauffage.
|
Tableau 1:Temps de cuisson pour le lait, le gâteau, la cuisson à la vapeur et le bouilli |
|||||||||
|
Fonction |
Lait |
Bouilli |
Cuisson à la Vapeur |
Gâteau |
|||||
|
Temps de cuisson par défaut |
|||||||||
|
(min) |
50 |
60 |
10 |
40 |
|||||
|
Temps de cuisson réglé (min) |
30-120 |
30-330 |
1-60 |
30-120 |
|||||
|
Quantité d’augmentation de |
|||||||||
|
temps à la minuterie ( min) |
5 |
30 |
1 |
5 |
ENTRETIEN & NETTOYAGE
1.Débranchez la fiche de l’appareil de la prise électrique et laissez l’appareil complètement refroidir avant le nettoyage
2.Nettoyez le corps à l’aide d’un chiffon humide et un détergent doux et puis séchez le complètement avec un chiffon doux et sec. Important : N’Immergez jamais la base de l’appareil dans l’eau ou tout autre liquide.
3.Retirez le réservoir d’eau de condensation de l’appareil et lavez –le sous l’eau tiède avec un détergent doux , puis rincez et séchez –le et enfin réinsérez-le à l’appareil.
4.Lavez le couvercle , la soupape de vapeur et le récipient de cuisson interne avec un détergent doux et l’eau tiède. Ne pas utiliser de nettoyants abrasifs puisque ceux-ci risquent d’égratigner ou d’endommager les pièces Assurez vous que le récipient de cuisson interne soit complètement sec avant de le réutiliser. Assurez vous que la surface chauffante et le récipient de cuisson interne soient propres et contactent bien l’un à l’autre.
Remarque: Insérez le récipient de cuisson interne dans l’appareil et tournez –le légèrement comme
indiquée au figure ci-dessous afin de fournir un meilleur contact entre la surface chauffante et le récipient de cuisson interne.
DÉPANNAGE
— 17 —
 Loading…
-
Инструкции по эксплуатации
1
SINBO SCO 5034 инструкция по эксплуатации
(59 страниц)
- Языки:Русский
-
Тип:
PDF -
Размер:
13.32 MB -
Описание:
Мультиварка
Просмотр
На NoDevice можно скачать инструкцию по эксплуатации для SINBO SCO 5034. Руководство пользователя необходимо для ознакомления с правилами установки и эксплуатации SINBO SCO 5034. Инструкции по использованию помогут правильно настроить SINBO SCO 5034, исправить ошибки и выявить неполадки.

![]() 8 положительных
8 положительных
![]() 2 негативных
2 негативных
- Отзывы 10
- Характеристики
- Инструкция
- Вопросы
-
Рецепты
Подборка отзывов
- Покрытие чаши
- Программы
- Функции
- показать все
Основные характеристики
Тип: мультиварка
Отложенный старт: есть
Поддержание тепла: есть
Мощность: 700 Вт
Объем: 4 л
Материал корпуса: пластик
Съемная верхняя крышка: нет
Часы: есть
Управление: электронное
Максимальное время установки таймера: 24 ч
Обсуждения
Обсуждение функционала, характеристик и особенностей. Ваши вопросы и ответы помогут дополнить обзор.
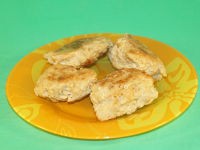
- Выпечка
- Мясо
- Птица
- Рыба
- Овощи
- Каши
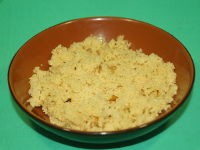
- Супы
- Молочное


SCO 5034, SCO 5035 BUHARLI P‹fi‹R‹C‹ KULLANMA KILAVUZU TR EN FR NL DE ES RU UA AR SCO 5034 SCO 5035
De¤erli Müflterimiz, SINBO markal› ürünümüzü seçti¤iniz için çok teflekkür ederiz. Teknolojisi, tasar›m› ve kullan›m kolayl›¤›yla enerji ve zaman tasarrufu sa¤layan cihaz›n›zla mutfakta geçirdi¤iniz zaman›n keyfini ç›kart›n. Sayg›lar›m›zla, Sinbo Küçük Ev Aletleri SINBO SCO 5034, SCO 5035 ÇOK
ÖNEML‹ GÜVENL‹K UYARILARI • Bakım, Onarım ve Kullanımda Uyulması Gereken Kurallar 1. Önemli: ‹lk kullan›mdan önce talimatlar›n tamam›n› dikkatle okuyunuz. Lütfen bu kullan›m k›lavuzunu saklay›n›z. 2. Teknik Bilgiler’ bölümünde belirtilen voltaj de¤erinin yerel voltaj de¤erine uygun oldu¤undan emin
prizlere tek yönlü olarak tak›labilir. E¤er fifli prize takamazsan›z fiflin yönünü de¤ifltirip tekrar takmay› deneyiniz. E¤er fifl bu yönde de prize girmiyorsa konusunda ehliyetli bir elektrikçi ça¤›rarak prizi de¤ifltiriniz. Kesinlikle cihaz›n fiflinde bir de¤ifliklik yapmaya kalk›flmay›n›z. ‹LK
C‹HAZIN KULLANIMI • Ba¤lantı veya Montajın Nasıl Yapılaca¤ını Gösterir fiema ile Ba¤lantı veya Montajın Kimin Tarafından Yapılaca¤ına (tüketici, yetkili servis) iliflkin bilgiler ÇALIfiTIRMA TAL‹MATLARI 1. Modlar ve Gösterge Delay Notlar: a) Tah›l veya Pilav Piflirme modundayken göstergede takip
Erteleme: – Herhangi bir fonksiyon tufluna basmadan önce: * Bekleme modundayken ‘delay’ (erteleme) tufluna bas›n›z ard›ndan istedi¤iniz erteleme süresini ayarlamak için “Timer” (zamanlay›c›) tufluna sürekli olarak bas›n›z. * ‹stenen erteleme süresi ayarland›ktan sonra lütfen kullanmak istedi¤iniz
KULLANIM HATALARINA ‹L‹fiK‹N B‹LG‹LER Cihazınızı, beyan edilen voltaj ile çal›flt›r›n›z.Bulundu¤unuz yerin voltaj›n›n uygun olup olmad›¤›n› kontrol ediniz. Güç kablosunun ar›zalanmas› durumunda tehlikelerin önlenmesi için kablo üretici, servis merkezi ya da benzer bir ehliyetli kifli taraf›ndan
SORUN G‹DERME -7-
ENGLISH SINBO SCO 5034, SCO 5035 MULTI-FUNCTION RICE COOKER INSTRUCTION MANUAL Important! Please read this manual carefully before using. Dear customer, Many thanks for choosing our SINBO brand product. With its technology, design and operation, you will enjoy your modern kitchen life while saving
with other container. 23. Use wood or plastic rice ladle to prevent any damage to the surface of inner pot. 24. This appliance has a polarized plug. To reduce the risk of electric shock, this plug is intended to fit into a polarized outlet only one way. If the plug does not fit fully into the
OPERATING INSTRUCTIONS 1. Modes and display Delay Notes: a) Under working mode of Buckwheat or Pilaf, the unit shows chasing pattern at first, and then starts to countdown when only 9 minutes working time left. b) For each effective button pressing, the unit will make a small “b” sound. 2.
* Within 5 seconds press the ‘delay’ button and followed by continuously pressing “Timer” button to select the desired Delay time. – After the delay cooking time and relative function are confirmed, the unit will enter into countdown mode, and starts working when the Delay time is up. – Each
evenly. Notes: For better contact of heating plate and inner pot, place the inner pot in unit, then rotate it slightly as below picture. TROUBLE SHOOTING — 12 —
FRANÇAIS SINBO SCO 5034, SCO 5035 MULTI — CUISEUR A RIZ MODE D’EMPLOI IMPORTANT! Lire attentivement ces instructions avant d’utiliser votre appareil. Cher, Chère Client, Merci d’avoir acheté un produit de la marque SINBO.Ce dernier vous permet de gagner de précieuses minutes dans votre emploi du
18. Lorsque vous débranchez le câble d’alimentation, tirez-le toujours au niveau de la fiche, ne tirez pas sur le câble lui-même. Gardez le multi cuiseur hors de portée des enfants. 19. Ne laissez pas pendre le câble d’alimentation sur le rebord d’une table ou d’un plan de travail et veillez à ce
Panneau de réglage CARACTERISTIQUES TECHNIQUES Puissance: AC230V/50Hz Watts: 700W Capacité: 4L/1.5L/8 tasses TABLEAU POUR LA CUISSON 1. Modes et Indicateur Delay — 15 —
Remarques: a) Les voyants lumineux de suivi s’allument sur l’écran lors du mode de cuisson de pilaf ou de céréales, il est commencé de décompter 9 minutes avant la fin du temps de cuisson. b) Un “bip” sonore de l’appareil lorsque vous appuyez sur les touches. 2. Fonctions de commande du panneau de
Cuisson pour le lait, le gâteau, la cuisson à la vapeur et le bouilli: – Appuyez sur la touche de la fonction de cuisson appropriée au type d’aliment. Le voyant lumineux de la fonction va s’allumer et le temps de cuisson attribué par défaut pour la fonction à l’affichage numérique.(Voir tableau 1 )
NEDERLANDS SINBO SCO 5034, SCO 5035 MULT‹FUNCT‹ONELE RIJSTKOKER GEBRU‹KERSHANDLE‹D‹NG BELANGRIJK! Lees voor gebruik van uw apparaat alle voorschriften aandachtig. Geachte klant, Hartelijk dank voor het kiezen voor onze SINBO merkproduct. Geniet van de tijd die je in de keuken met uw apparaat
18. Trek of ruk niet aan het snoer van uw apparaat. Zorg ervoor dat het netsnoer zonder te trekken en rekken, het stopcontact bereikt. Houd het apparaat buiten bereik van kinderen. 19. Laat het snoer niet in aanraking komen met hete oppervlakken, niet hangen over de randen van de tafel of het
BEDIENINGSPANEEL TECHN‹SCHE GEGEVENS Kracht: AC230V/50Hz Watt: 700W Capaciteit: 4L/1.5L/8 kopjes GEBRUIKSAANWIJZINGEN 1. Modus en Display Delay — 20 —
Opmerkingen: a) ‹n de Graan- of Rijstmodus branden de opvolglampjes op het display, het aftellen begint 9 minuten voor het einde van de kooktijd. b) Bij het drukken op de toetsen, hoor je een “bip” geluid. 2. Bedieningsfuncties van het bedieningspaneel Dit model rijstkoker, die middels een
— De koker begint na 5 seconden te werken of (indien aanwezig) begint met het aftellen vande uitsteltijd. Op het display gaan eerst de opvolglampjes branden, het aftellen begint 9 minuten voor het einde van de kooktijd. — Na voltooiing van het kookproces zal de ‘buzz’-alarm van het apparaat 5 maal
HET OPLOSSEN VAN PROBLEMEN — 23 —
DEUTSCH SINBO SCO 5034, SCO 5035 MULT‹FUNKT‹ONELLER RE‹SKOCHER GEBRAUCHSANLE‹TUNG ß W‹CHT‹G! Bevor Sie Ihr Gerät benutzen, lesen Sie die Anweisungen sorgfältig durch. Verehrter Kunde, Vielen Dank, dass Sie Sich für ein Produkt der Marke SINBO entschieden haben. Genießen Sie die Zeit in der Küche,
16. Um das Risiko für Einwicklungen mit dem Kabel oder das Hängenbleiben und Stürzen am Kabel zu verhindern, ist am Gerät ein verkürztes Kabel angebracht worden. 17. Rütteln oder ziehen Sie nicht an dem Stromkabel. Das Stromkabel sollte ungerüttelt und ungespannt den Stecker erreichen können.
SCHALTTAFEL TECHN‹SCHE DATEN Leistung: AC230V/50Hz Watt: 700W Kapazitat: 4L/1.5L/8 Tassen BETR‹EBSANWE‹SUNGEN 1. Einstellungen und Anzeige Delay Vermerke: a) Während der Garphase für Getreide oder Reis, leuchten die Anzeigelichter, 9 Minuten vor der Garzeit startet die Zeitkontrolluhr. b) Bei
2. Betriebsfunktionen der Schalttafel Dieses Reisgarer-Modell hat eine Mikro-Computer-Steuerung und verfügt über Multi-Funktionen, wie Getreide- und Reisgaren, sowie Milch, Kuchen, Kochen, Dampfgaren, Verzögerung, Kochzeiteinstellung, Warm/Aus und eine automatische Fehlererkennung. Kontrollfunktion
Milch/Kuchen/Kochen/Dampfgaren: – Betätigen Sie die Taste, nach entsprechender Sorte der Zutat, die digitale Anzeige schaltet sich ein und das entsprechende Kontrolllicht für die jeweilige Funktion leuchtet auf (S. Tabelle1). Anmerkung: In den nächsten 5 Sekunden könne Sie eine andere Funktion
ESPANOL SINBO SCO 5034, SCO 5035 HORNEADOR MULTIFUNCIONAL DE ARROZ MANUAL DE USO IMPORTANTE! Por favor leer estas instrucciones antes de usar su aparato. Estimado/a cliente, Le damos nuestras muchas gracias por seleccionar nuestro producto con marca SINBO. Ponerles de buen umor pasando su tiempo en
19- No permitir que el cable de la energía se tocará los superficies calientes, unirá a los bordes de la mesa o del mostrador. 20- En caso de ser averíado el cable de la energía, debe ser recambiado por el/la fabricante, el/la autorizado/a del servicio ú por otra persona similar calificada. 21-
PANEL DE MANDO INFORMACIÓN TÉCNICA Energía: AC230V/50Hz Watt: 700W Capacidad: 4L/1.5Lts/8 taza INSTRUCCIONES PARA FUNCUONAR 1- Modos e indicador Delay — 31 —
Notas: a-) Mientrás está en el modo cocinar cereal o arroz, las luces del seguimiento encienden sobre la indicadora, se empieza a contar atrás 9 (nueve) minutos menos de la completación de cocinar. b-) Al pulsar los botones, se oirá una voz de “bip” del aparato. 2- Funciones del panel de mando para
Primero las luces del seguimiento se encenderán sobre la indicadora, se empieza al contar atrás menos 9 (nueve) minutos a la completación del proceso de cocinar. Después de ser completado el proceso de cocinar el aparato, el aparato pasa al modo del calentamiento, dando alarma de “buzz” 5 (cinco)
ELIMINAR PROBLEMA — 34 —
— 35 —
— 36 —
Delay — 37 —
— 38 —
— 39 —
No: 1-5034, 5035-23112012 — 40 —
— 41 —
— 42 —
— 43 —
Delay — 44 —
— 45 —
— 46 —
— 47 —
1-5034, 5035-23112012 — 48 —
— 49 —
— 50 —
— 51 —
Delay — 52 —
— 53 —
— 54 —
— G A R A N T ‹ fi A R T L A R I 1) Garanti süresi,mal›n teslim tarihinden itibaren bafllar ve 2 y›ld›r. 2) Mal›n bütün parçalar› dahil olmak üzere tamam› Firmam›z›n garanti kapsam›ndad›r. 3) Mal›n garanti süresi içerisinde ar›zalanmas› durumunda, tamirde geçen süre garanti süresine eklenir. Mal›n
— SCO 5034, SCO 5035 BUHARLI P‹fi‹R‹C‹ -GARANT‹ BELGES‹ Garanti Belge No : 79336 SSHY Belge No : 35274 ‹THALATÇI F‹RMA Ünvanı Garanti Belge Onay Tarihi : 22/02/2010 Garanti Belge Vize Tarihi : 31/01/2012 SSHY Belge Onay Tarihi : 04/04/2012 Tel. : DE‹MA ELEKTROMEKAN‹K ÜRÜNLER‹ ‹Nfi. SPOR MALZ.
MÜfiTER‹ H‹ZMETLER‹ De¤erli Müflterimiz, En uygun fiyata en iyi ürünü vermenin yan› s›ra; en iyi hizmeti vermenin de önemli oldu¤una inan›yoruz. Bu nedenle siz bilinçli tüketicilere daha yak›n olabilmek için, internet adresimizdeki eriflim formlar›n›n yan› s›ra, tüketici dan›flma hattımızı da
— TEDAR‹KÇ‹ F‹RMA / EXPORTER United Favour Development Limited Unit B, 10/F Lee May Building 788-790 Nathan Road, Mongkok, Kowloon, HK. — UYGUNLUK BEYANI / CE CONFORMITY Accurate Technology Co., Ltd. Science & Industry Park of ATC, No.345 Baima Block, Guantai Road, Nancheng, Dongguan, 523080,
Мультиварка Sinbo SCO 5034 белый
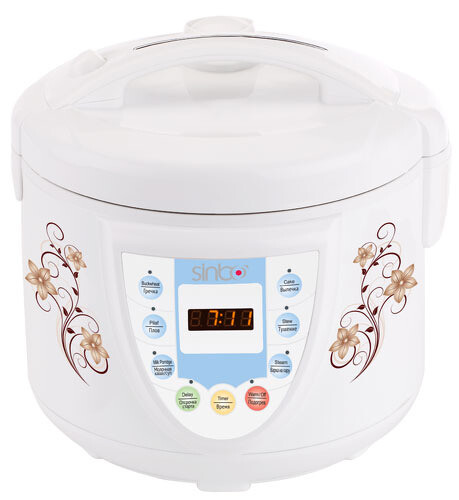
4 л, 700 Вт, управление — кнопки, программ — 7, поддержание температуры, отложенный старт
подробнее

нет отзывов
Код товара: 1007080
В представленном списке руководства для конкретной модели Мультиварки — Sinbo SCO-5034. Вы можете скачать инструкции к себе на компьютер или просмотреть онлайн на страницах сайта бесплатно или распечатать.
В случае если инструкция на русском не полная или нужна дополнительная информация по этому устройству, если вам нужны
дополнительные файлы: драйвера, дополнительное руководство пользователя (производители зачастую для каждого
продукта делают несколько различных документов технической помощи и руководств), свежая версия прошивки, то
вы можете задать вопрос администраторам или всем пользователям сайта, все постараются оперативно отреагировать
на ваш запрос и как можно быстрее помочь. Ваше устройство имеет характеристики:Тип: мультиварка, Мощность: 700 Вт, Объем: 4 л, Материал корпуса: пластик, Часы: есть, Управление: электронное, полные характеристики смотрите в следующей вкладке.
Для многих товаров, для работы с Sinbo SCO-5034 могут понадобиться различные дополнительные файлы: драйвера, патчи, обновления, программы установки. Вы можете скачать онлайн эти файлы для конкретнй модели Sinbo SCO-5034 или добавить свои для бесплатного скачивания другим посетителями.
Если вы не нашли файлов и документов для этой модели то можете посмотреть интсрукции для похожих товаров и моделей, так как они зачастую отличаются небольшим изменениями и взаимодополняемы.
Обязательно напишите несколько слов о преобретенном вами товаре, чтобы каждый мог ознакомиться с вашим отзывом или вопросом. Проявляйте активность что как можно бльше людей смогли узнать мнение настоящих людей которые уже пользовались Sinbo SCO-5034.
Основные и самые важные характеристики модели собраны из надежных источников и по характеристикам можно найти похожие модели.
| Общие характеристики | |
| Тип | мультиварка |
| Мощность | 700 Вт |
| Объем | 4 л |
| Материал корпуса | пластик |
| Часы | есть |
| Управление и программы | |
| Управление | электронное |
| 3D нагрев | нет |
| Максимальное время установки таймера | 24 ч |
| Поддержание тепла | есть |
| Отложенный старт | есть |
Здесь представлен список самых частых и распространенных поломок и неисправностей у Мультиварок. Если у вас такая поломка то вам повезло, это типовая неисправность для Sinbo SCO-5034 и вы можете задать вопрос о том как ее устранить и вам быстро ответят или же прочитайте в вопросах и ответах ниже.
| Название поломки | Описание поломки | Действие |
|---|---|---|
| Не Включается | ||
| Не Горит Дисплей | ||
| Таймер Не Работает | ||
| Не Готовит Пищу | ||
| Образование Нагара | ||
| Пригорание Еды К Емкости | ||
| Перестали Включаться Некоторые Программы | ||
| На Дисплее Горит Е3 | И Пикает | |
| Отключается Во Время Готовки | Таймер Отключается Раньше Времяни | |
| На Дисплее Горит Е4 | ||
| На Дисплее Горит Е2 | ||
| Таймер | Не Можем Установить Минуты На Приготовление Пищи | |
| Вылетел Клапан На Ручке И Потерялся,Что Делать ? | ||
| Не Плотно Закрывается Крышка | Пар Выходит Через Отверстия, Где Крышка Прилегает К Самой Мультиварке. | |
| Перегрев | ||
| Провод В Крышке Переломился. | Вскрывается Ли Корпус Крышки,Чтобы Починить Провод? | |
| E1 | Когда Включается Программа, Срабатывает E1 | |
| Конденсат Над Дисплеем. | Во Время Приготовления Пищи Появляется Конденсат Над Дисплеем. Запитываются Все Сегменты. | |
| Режим Преготовления | Не Включается Режим Преготовления | |
| Скидывает Все Программы | При Установки Программы Скидывает На Нули | |
| Не Включается | Под Дисплей Залезли Тараканы | |
| Ошибка При Эксплуатации | Загрузили Картофельную Массу В Мультиварку Без Установки Внутренней Чаши И Включили В Сеть. В Течении Минуты Мультиварка Была В Сети. При Этом Ничего Не Произошло. Прибор Был Тут Же Отключен. Внутренняя Часть Была Очищена По Мере Возможности. Но Как Ее Оч | |
| Сбой Программы? | При Больше Ни Одну Программу Не Включить. Включении Кнопки Меню Сразу Включается Программа Рис/ Крупа И | |
| Не Поднимается Ограничительный Клапан | Во Время Приготовления Ограничительный Клапан (Желтенький) Не Поднимается | |
| Защёлка Крышки. | Поломалась Защёлка Крышки. | |
| Загорелась Ошибка Е25С | Перезагружается Программа Самостоятельно И Высвечивается Ошибка Е25С | |
| Ves Sk-80 | Табло Мигает,Пищит,Выдаёт Ошибку 10H | |
| Вибило Е 6 | Таймер Піщить Всі Кнопки Мігают | |
| Нечайно Засыпала Мимо Чаши Крупу (Геркулес) | Что Делать? Не Можем Открыть С Другой Стороны Чтоб Вытрясти Это | |
| Ошибка Lb Мультиварки Скороварки Ротекс Repc58-G | Не Работают Кнопки,Тен Греет | |
| E5 | Отключается | |
| Не Горит Дисплей | ||
| Отвалилась Скоба Крышки | Нижняя Скоба Отвалилась | |
| Е-81 | Пищит | |
| Приготовление | Неработают Кнопки Старт И Выкл/Подогрев.програмы Переключаются,Дисплей Работает.на Шлейфе Нет 12В.на Остальных Ножках Чуть Больше 6В И Ниже |
В нашей базе сейчас зарегестрированно 18 353 сервиса в 513 города России, Беларусии, Казахстана и Украины.

НИМАЛ
⭐
⭐
⭐
⭐
⭐
Адресс:
ул. Иркутская, д.17, стр.8
Телефон:
74957307777
Сайт:
n/a
Время работы
Время работы не указано
НИКОМ
⭐
⭐
⭐
⭐
⭐
Адресс:
ул.Менжинского, д.32, стр.2
Телефон:
74959267226
Сайт:
n/a
Время работы
Будни: с 1000 до 2000
Суббота: с 1100 до 1700
Воскресенье: с 1100 до 1700
СЕРВИС КОРСО ТРЕЙД
⭐
⭐
⭐
⭐
⭐
Адресс:
Банный проезд, д. 3 стр.1
Телефон:
74959250003
Сайт:
n/a
Время работы
Будни: с 1000 до 1900
Суббота: выходной
Воскресенье: выходной
PANASONIC
⭐
⭐
⭐
⭐
⭐
Адресс:
м. Коломенская, ул. Нагатинская, дом 33
Телефон:
74999630243
Сайт:
n/a
Время работы
Время работы не указано
ТЕХПРОФИКС
⭐
⭐
⭐
⭐
⭐
Адресс:
ул. Рязанский проспект 40/2
Телефон:
74955325750
Сайт:
n/a
Время работы
Ежедневно: с 1000 до 2000
Всем привет! Решила поделиться моими впечатлениями от мультиварки модели 5035 ( черного цвета). Это моя вторая мультиварка, первый опыт был с Redmond 45025.я ее случайно включила вез внутренней крышки, видимо пар попал внутрь и она перестала правильно регулировать температуру, стала нагревать по максимуму.
Но я уже знала, что нужные мне режимы — это суп, тушение, плов, изредка выпечка. Молочные каши у нас никто не ест. 4 литра нам вполне хватает. Я полную 5 литровую кастрюлю и не готовила почти никогда, даже с супом.отсроченный таймер тоже для меня обязательная вещь.
Купила Sinbo в Израиле.цены у нас на эти товары завышены в 2-3 раза по сравнению с Россией, выбора практически нет, потрогать руками практически негде, в крупных сетях электро товаров я их вообще не видела . Через интернет можно заказать Редмонд(900-1500шек), ну вот и Синбо появились в некоторых маленьких магазинах 350 -500шек , там же и Полярис был был за 800.
Кстати в инструкции на русском языке ошибка перевода о режимах Гречка и Плов. Написано, что режим работает до бесконечности, останавливать надо в ручную и что режим подогрева не включается. Неправда. Во всех остальных языках говорится о том, что время выставлять не надо, просто нажимаешь на режим и он начинает работать. За 9 минут до окончания программы появляется таймер с обратным отсчетом(9мин). По окончанию переходит в режим подогрева. Режим гречка я попробовала. Все сработало, таймер появился минут через 15 от начала работы.
Готовила куриный бульон на режиме каша/суп. В первый раз часто заглядывала под крышку и он очень долго закипал. Около 40 минут. Я что то занервничала и перевела на режим тушения на час. Там он закипел , но кипел слишком бурно.
Сегодня я просто решила набраться терпения, не заглядывать. Поставила на полтора часа на режим каша/суп. Заглянула под крышку уже ближе к концу. Интересно же! Кипел очень деликатно. Получился очень прозрачный. В Редмонде варила час, но он мощнее.
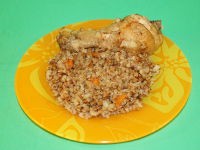
Так же варила наше израильское блюдо Птитим. Такие маленькие макароны горошком.
Сначала включила режим Плов. На нем время не задается. Как котелок нагрелся налила немного растит. Масла , всыпала стакан птитим, слегка поджарила, как начали менять цвет , добавила 2 ст. Ложки том соуса(
Барилла) , 1.5 стакана воды, немного соли и сахара. Отключила режим плов, включила режим гречка. И ждала рока появится таймер на 9 минут. Появился! Потом по окончанию включился режим подогрева. Блюдо получилось очень хорошо. Горошины мягкие, не слипшиеся, вода вся выкипела. Я довольна
Варила так же кабачковую икру. Лук и морковь жарила на режиме плов, потом добавила тертые кабачки, перцы, помидоры, чеснок. Соль сахар. Перевела на режим каша/ суп. На 40 мин.
Я довольна покупкой. В следующий раз буду ставить на отсроченный таймер проверенные программы. В основном суп я так привыкла варить