Быстрые ссылки
-
Руководства и документация
Дополнительная информация
-
Инструкция по эксплуатации PDF
файл,
2.6 MB
14 августа 2009 г. -
Инструкция по эксплуатации PDF
файл,
2.6 MB
14 августа 2009 г. -
Инструкция по эксплуатации PDF
файл,
2.6 MB
14 августа 2009 г. -
Инструкция по эксплуатации PDF
файл,
2.6 MB
14 августа 2009 г. -
Инструкция по эксплуатации PDF
файл,
2.6 MB
14 августа 2009 г. -
Инструкция по эксплуатации PDF
файл,
2.6 MB
14 августа 2009 г. -
Инструкция по эксплуатации PDF
файл,
638.6 kB
11 января 2010 г. -
Инструкция по эксплуатации PDF
файл,
2.6 MB
14 августа 2009 г. -
Инструкция по эксплуатации PDF
файл,
2.6 MB
14 августа 2009 г. -
Инструкция по эксплуатации PDF
файл,
2.6 MB
14 августа 2009 г. -
Инструкция по эксплуатации PDF
файл,
2.6 MB
14 августа 2009 г. -
Инструкция по эксплуатации PDF
файл,
717.6 kB
11 января 2010 г. -
Инструкция по эксплуатации PDF
файл,
716.0 kB
11 января 2010 г. -
Инструкция по эксплуатации PDF
файл,
2.6 MB
14 августа 2009 г. -
Инструкция по эксплуатации PDF
файл,
2.6 MB
14 августа 2009 г. -
Инструкция по эксплуатации PDF
файл,
2.6 MB
14 августа 2009 г. -
Инструкция по эксплуатации PDF
файл,
2.6 MB
14 августа 2009 г. -
Инструкция по эксплуатации PDF
файл,
2.6 MB
14 августа 2009 г. -
Инструкция по эксплуатации PDF
файл,
2.6 MB
14 августа 2009 г. -
Инструкция по эксплуатации PDF
файл,
2.6 MB
14 августа 2009 г. -
Инструкция по эксплуатации PDF
файл,
2.6 MB
14 августа 2009 г. -
Инструкция по эксплуатации PDF
файл,
2.6 MB
14 августа 2009 г. -
Обновление встроенного программного обеспечения — файл Readme TXT
файл,
1.3 kB
25 мая 2012 г. -
Обновление встроенного программного обеспечения — программное обеспечение Version: 1.08
BIN
файл,
3.8 MB
25 мая 2012 г. -
Обновление встроенного программного обеспечения — программное обеспечение Version: 1.08
BIN
файл,
3.8 MB
25 мая 2012 г. -
Обновление встроенного программного обеспечения — файл Readme TXT
файл,
1.3 kB
25 мая 2012 г. -
Обновление встроенного программного обеспечения — программное обеспечение Version: 1.08
BIN
файл,
3.8 MB
25 мая 2012 г. -
Обновление встроенного программного обеспечения — файл Readme TXT
файл,
1.3 kB
25 мая 2012 г. -
Обновление встроенного программного обеспечения — программное обеспечение Version: 1.08
BIN
файл,
3.8 MB
25 мая 2012 г. -
Обновление встроенного программного обеспечения — файл Readme TXT
файл,
1.3 kB
25 мая 2012 г. -
Обновление встроенного программного обеспечения — программное обеспечение Version: 1.08
BIN
файл,
3.8 MB
25 мая 2012 г. -
Обновление встроенного программного обеспечения — файл Readme TXT
файл,
1.3 kB
25 мая 2012 г. -
Обновление встроенного программного обеспечения — программное обеспечение Version: 1.08
BIN
файл,
3.8 MB
25 мая 2012 г. -
Обновление встроенного программного обеспечения — файл Readme TXT
файл,
1.3 kB
25 мая 2012 г. -
Обновление встроенного программного обеспечения — файл Readme TXT
файл,
1.3 kB
25 мая 2012 г. -
Обновление встроенного программного обеспечения — программное обеспечение Version: 1.08
BIN
файл,
3.8 MB
25 мая 2012 г. -
Обновление встроенного программного обеспечения — файл Readme TXT
файл,
1.3 kB
25 мая 2012 г. -
Обновление встроенного программного обеспечения — программное обеспечение Version: 1.08
BIN
файл,
3.8 MB
25 мая 2012 г. -
Обновление встроенного программного обеспечения — программное обеспечение Version: 1.08
BIN
файл,
3.8 MB
25 мая 2012 г. -
Обновление встроенного программного обеспечения — файл Readme TXT
файл,
1.3 kB
25 мая 2012 г. -
Обновление встроенного программного обеспечения — файл Readme TXT
файл,
1.3 kB
25 мая 2012 г. -
Обновление встроенного программного обеспечения — программное обеспечение Version: 1.08
BIN
файл,
3.8 MB
25 мая 2012 г. -
Обновление встроенного программного обеспечения — файл Readme TXT
файл,
1.3 kB
25 мая 2012 г. -
Обновление встроенного программного обеспечения — программное обеспечение Version: 1.08
BIN
файл,
3.8 MB
25 мая 2012 г. -
Обновление встроенного программного обеспечения — файл Readme TXT
файл,
1.3 kB
25 мая 2012 г. -
Обновление встроенного программного обеспечения — программное обеспечение Version: 1.08
BIN
файл,
3.8 MB
25 мая 2012 г. -
Обновление встроенного программного обеспечения — файл Readme TXT
файл,
1.3 kB
25 мая 2012 г. -
Обновление встроенного программного обеспечения — программное обеспечение Version: 1.08
BIN
файл,
3.8 MB
25 мая 2012 г. -
Обновление встроенного программного обеспечения — файл Readme TXT
файл,
1.3 kB
25 мая 2012 г. -
Обновление встроенного программного обеспечения — программное обеспечение Version: 1.08
BIN
файл,
3.8 MB
25 мая 2012 г. -
Обновление встроенного программного обеспечения — программное обеспечение Version: 1.08
BIN
файл,
3.8 MB
25 мая 2012 г. -
Обновление встроенного программного обеспечения — файл Readme TXT
файл,
1.3 kB
25 мая 2012 г. -
Обновление встроенного программного обеспечения — файл Readme TXT
файл,
1.3 kB
25 мая 2012 г. -
Обновление встроенного программного обеспечения — программное обеспечение Version: 1.08
BIN
файл,
3.8 MB
25 мая 2012 г. -
Обновление встроенного программного обеспечения — файл Readme TXT
файл,
1.3 kB
25 мая 2012 г. -
Обновление встроенного программного обеспечения — программное обеспечение Version: 1.08
BIN
файл,
3.8 MB
25 мая 2012 г. -
Обновление встроенного программного обеспечения — файл Readme TXT
файл,
1.3 kB
25 мая 2012 г. -
Обновление встроенного программного обеспечения — программное обеспечение Version: 1.08
BIN
файл,
3.8 MB
25 мая 2012 г. -
Обновление встроенного программного обеспечения — файл Readme TXT
файл,
1.3 kB
25 мая 2012 г. -
Обновление встроенного программного обеспечения — программное обеспечение Version: 1.08
BIN
файл,
3.8 MB
25 мая 2012 г. -
Обновление встроенного программного обеспечения — программное обеспечение Version: 1.08
BIN
файл,
3.8 MB
25 мая 2012 г. -
Обновление встроенного программного обеспечения — файл Readme TXT
файл,
1.3 kB
25 мая 2012 г. -
Обновление встроенного программного обеспечения — программное обеспечение Version: 1.08
BIN
файл,
3.8 MB
25 мая 2012 г. -
Обновление встроенного программного обеспечения — файл Readme TXT
файл,
1.3 kB
25 мая 2012 г. -
Обновление встроенного программного обеспечения — программное обеспечение Version: 1.08
BIN
файл,
3.8 MB
25 мая 2012 г. -
Обновление встроенного программного обеспечения — файл Readme TXT
файл,
1.3 kB
25 мая 2012 г. -
Обновление встроенного программного обеспечения — программное обеспечение Version: 1.08
BIN
файл,
3.8 MB
25 мая 2012 г. -
Обновление встроенного программного обеспечения — файл Readme TXT
файл,
1.3 kB
25 мая 2012 г. -
Обновление встроенного программного обеспечения — программное обеспечение Version: 1.08
BIN
файл,
3.8 MB
25 мая 2012 г. -
Обновление встроенного программного обеспечения — файл Readme TXT
файл,
1.3 kB
25 мая 2012 г. -
Обновление встроенного программного обеспечения — программное обеспечение Version: 1.08
BIN
файл,
3.8 MB
25 мая 2012 г. -
Обновление встроенного программного обеспечения — файл Readme TXT
файл,
1.3 kB
25 мая 2012 г. -
Обновление встроенного программного обеспечения — программное обеспечение Version: 1.08
BIN
файл,
3.8 MB
25 мая 2012 г. -
Обновление встроенного программного обеспечения — файл Readme TXT
файл,
1.3 kB
25 мая 2012 г. -
Обновление встроенного программного обеспечения — файл Readme TXT
файл,
1.3 kB
25 мая 2012 г. -
Обновление встроенного программного обеспечения — программное обеспечение Version: 1.08
BIN
файл,
3.8 MB
25 мая 2012 г. -
Обновление встроенного программного обеспечения — программное обеспечение Version: 1.08
BIN
файл,
3.8 MB
25 мая 2012 г. -
Обновление встроенного программного обеспечения — файл Readme TXT
файл,
1.3 kB
25 мая 2012 г. -
Обновление встроенного программного обеспечения — файл Readme TXT
файл,
1.3 kB
25 мая 2012 г. -
Обновление встроенного программного обеспечения — программное обеспечение Version: 1.08
BIN
файл,
3.8 MB
25 мая 2012 г. -
Обновление встроенного программного обеспечения — файл Readme TXT
файл,
1.3 kB
25 мая 2012 г. -
Обновление встроенного программного обеспечения — программное обеспечение Version: 1.08
BIN
файл,
3.8 MB
25 мая 2012 г. -
Обновление встроенного программного обеспечения — файл Readme TXT
файл,
1.3 kB
25 мая 2012 г. -
Обновление встроенного программного обеспечения — программное обеспечение Version: 1.08
BIN
файл,
3.8 MB
25 мая 2012 г. -
Обновление встроенного программного обеспечения — файл Readme TXT
файл,
1.3 kB
25 мая 2012 г. -
Обновление встроенного программного обеспечения — программное обеспечение Version: 1.08
BIN
файл,
3.8 MB
25 мая 2012 г. -
Обновление встроенного программного обеспечения — программное обеспечение Version: 1.08
BIN
файл,
3.8 MB
25 мая 2012 г. -
Обновление встроенного программного обеспечения — файл Readme TXT
файл,
1.3 kB
25 мая 2012 г. -
Обновление встроенного программного обеспечения — файл Readme TXT
файл,
1.3 kB
25 мая 2012 г. -
Обновление встроенного программного обеспечения — программное обеспечение Version: 1.08
BIN
файл,
3.8 MB
25 мая 2012 г. -
Обновление встроенного программного обеспечения — файл Readme TXT
файл,
1.3 kB
25 мая 2012 г. -
Обновление встроенного программного обеспечения — программное обеспечение Version: 1.08
BIN
файл,
3.8 MB
25 мая 2012 г. -
Обновление встроенного программного обеспечения — файл Readme TXT
файл,
1.3 kB
25 мая 2012 г. -
Обновление встроенного программного обеспечения — программное обеспечение Version: 1.08
BIN
файл,
3.8 MB
25 мая 2012 г. -
Обновление встроенного программного обеспечения — программное обеспечение Version: 1.08
BIN
файл,
3.8 MB
25 мая 2012 г. -
Обновление встроенного программного обеспечения — файл Readme TXT
файл,
1.3 kB
25 мая 2012 г. -
Обновление встроенного программного обеспечения — программное обеспечение Version: 1.08
BIN
файл,
3.8 MB
25 мая 2012 г. -
Обновление встроенного программного обеспечения — файл Readme TXT
файл,
1.3 kB
25 мая 2012 г. -
Обновление встроенного программного обеспечения — программное обеспечение Version: 1.08
BIN
файл,
3.8 MB
25 мая 2012 г. -
Обновление встроенного программного обеспечения — файл Readme TXT
файл,
1.3 kB
25 мая 2012 г. -
Обновление встроенного программного обеспечения — программное обеспечение Version: 1.08
BIN
файл,
3.8 MB
25 мая 2012 г. -
Обновление встроенного программного обеспечения — файл Readme TXT
файл,
1.3 kB
25 мая 2012 г. -
Обновление встроенного программного обеспечения — программное обеспечение Version: 1.08
BIN
файл,
3.8 MB
25 мая 2012 г. -
Обновление встроенного программного обеспечения — файл Readme TXT
файл,
1.3 kB
25 мая 2012 г. -
Обновление встроенного программного обеспечения — программное обеспечение Version: 1.08
BIN
файл,
3.8 MB
25 мая 2012 г. -
Обновление встроенного программного обеспечения — файл Readme TXT
файл,
1.3 kB
25 мая 2012 г. -
Обновление встроенного программного обеспечения — программное обеспечение Version: 1.08
BIN
файл,
3.8 MB
25 мая 2012 г. -
Обновление встроенного программного обеспечения — файл Readme TXT
файл,
1.3 kB
25 мая 2012 г. -
Обновление встроенного программного обеспечения — файл Readme TXT
файл,
1.3 kB
25 мая 2012 г. -
Обновление встроенного программного обеспечения — программное обеспечение Version: 1.08
BIN
файл,
3.8 MB
25 мая 2012 г. -
Обновление встроенного программного обеспечения — файл Readme TXT
файл,
1.3 kB
25 мая 2012 г. -
Обновление встроенного программного обеспечения — программное обеспечение Version: 1.08
BIN
файл,
3.8 MB
25 мая 2012 г. -
Обновление встроенного программного обеспечения — файл Readme TXT
файл,
1.3 kB
25 мая 2012 г. -
Обновление встроенного программного обеспечения — программное обеспечение Version: 1.08
BIN
файл,
3.8 MB
25 мая 2012 г. -
Обновление встроенного программного обеспечения — программное обеспечение Version: 1.08
BIN
файл,
3.8 MB
25 мая 2012 г. -
Обновление встроенного программного обеспечения — файл Readme TXT
файл,
1.3 kB
25 мая 2012 г. -
Брошюра Version: 3.4.4
PDF
файл,
1.3 kB
1 апреля 2018 г. -
Гарантийный талон PDF
файл,
1.3 kB
2 сентября 2009 г.
ПО и драйверы
-
Обновление встроенного программного обеспечения — программное обеспечение version: 1.08
BIN
файл,
3.8 MB
25 мая 2012 г. -
Обновление встроенного программного обеспечения — программное обеспечение version: 1.08
BIN
файл,
3.8 MB
25 мая 2012 г. -
Обновление встроенного программного обеспечения — программное обеспечение version: 1.08
BIN
файл,
3.8 MB
25 мая 2012 г. -
Обновление встроенного программного обеспечения — программное обеспечение version: 1.08
BIN
файл,
3.8 MB
25 мая 2012 г. -
Обновление встроенного программного обеспечения — программное обеспечение version: 1.08
BIN
файл,
3.8 MB
25 мая 2012 г. -
Обновление встроенного программного обеспечения — программное обеспечение version: 1.08
BIN
файл,
3.8 MB
25 мая 2012 г. -
Обновление встроенного программного обеспечения — программное обеспечение version: 1.08
BIN
файл,
3.8 MB
25 мая 2012 г. -
Обновление встроенного программного обеспечения — программное обеспечение version: 1.08
BIN
файл,
3.8 MB
25 мая 2012 г. -
Обновление встроенного программного обеспечения — программное обеспечение version: 1.08
BIN
файл,
3.8 MB
25 мая 2012 г. -
Обновление встроенного программного обеспечения — программное обеспечение version: 1.08
BIN
файл,
3.8 MB
25 мая 2012 г. -
Обновление встроенного программного обеспечения — программное обеспечение version: 1.08
BIN
файл,
3.8 MB
25 мая 2012 г. -
Обновление встроенного программного обеспечения — программное обеспечение version: 1.08
BIN
файл,
3.8 MB
25 мая 2012 г. -
Обновление встроенного программного обеспечения — программное обеспечение version: 1.08
BIN
файл,
3.8 MB
25 мая 2012 г. -
Обновление встроенного программного обеспечения — программное обеспечение version: 1.08
BIN
файл,
3.8 MB
25 мая 2012 г. -
Обновление встроенного программного обеспечения — программное обеспечение version: 1.08
BIN
файл,
3.8 MB
25 мая 2012 г. -
Обновление встроенного программного обеспечения — программное обеспечение version: 1.08
BIN
файл,
3.8 MB
25 мая 2012 г. -
Обновление встроенного программного обеспечения — программное обеспечение version: 1.08
BIN
файл,
3.8 MB
25 мая 2012 г. -
Обновление встроенного программного обеспечения — программное обеспечение version: 1.08
BIN
файл,
3.8 MB
25 мая 2012 г. -
Обновление встроенного программного обеспечения — программное обеспечение version: 1.08
BIN
файл,
3.8 MB
25 мая 2012 г. -
Обновление встроенного программного обеспечения — программное обеспечение version: 1.08
BIN
файл,
3.8 MB
25 мая 2012 г. -
Обновление встроенного программного обеспечения — программное обеспечение version: 1.08
BIN
файл,
3.8 MB
25 мая 2012 г. -
Обновление встроенного программного обеспечения — программное обеспечение version: 1.08
BIN
файл,
3.8 MB
25 мая 2012 г. -
Обновление встроенного программного обеспечения — программное обеспечение version: 1.08
BIN
файл,
3.8 MB
25 мая 2012 г. -
Обновление встроенного программного обеспечения — программное обеспечение version: 1.08
BIN
файл,
3.8 MB
25 мая 2012 г. -
Обновление встроенного программного обеспечения — программное обеспечение version: 1.08
BIN
файл,
3.8 MB
25 мая 2012 г. -
Обновление встроенного программного обеспечения — программное обеспечение version: 1.08
BIN
файл,
3.8 MB
25 мая 2012 г. -
Обновление встроенного программного обеспечения — программное обеспечение version: 1.08
BIN
файл,
3.8 MB
25 мая 2012 г. -
Обновление встроенного программного обеспечения — программное обеспечение version: 1.08
BIN
файл,
3.8 MB
25 мая 2012 г. -
Обновление встроенного программного обеспечения — программное обеспечение version: 1.08
BIN
файл,
3.8 MB
25 мая 2012 г. -
Обновление встроенного программного обеспечения — программное обеспечение version: 1.08
BIN
файл,
3.8 MB
25 мая 2012 г. -
Обновление встроенного программного обеспечения — программное обеспечение version: 1.08
BIN
файл,
3.8 MB
25 мая 2012 г. -
Обновление встроенного программного обеспечения — программное обеспечение version: 1.08
BIN
файл,
3.8 MB
25 мая 2012 г. -
Обновление встроенного программного обеспечения — программное обеспечение version: 1.08
BIN
файл,
3.8 MB
25 мая 2012 г. -
Обновление встроенного программного обеспечения — программное обеспечение version: 1.08
BIN
файл,
3.8 MB
25 мая 2012 г. -
Обновление встроенного программного обеспечения — программное обеспечение version: 1.08
BIN
файл,
3.8 MB
25 мая 2012 г. -
Обновление встроенного программного обеспечения — программное обеспечение version: 1.08
BIN
файл,
3.8 MB
25 мая 2012 г. -
End Users License Agreement файл
10 апреля 2012 г. -
Обновление встроенного программного обеспечения — программное обеспечение version: 1.08
BIN
файл,
3.8 MB
25 мая 2012 г. -
Обновление встроенного программного обеспечения — программное обеспечение version: 1.08
BIN
файл,
3.8 MB
25 мая 2012 г. -
Обновление встроенного программного обеспечения — программное обеспечение version: 1.08
BIN
файл,
3.8 MB
25 мая 2012 г. -
Обновление встроенного программного обеспечения — программное обеспечение version: 1.08
BIN
файл,
3.8 MB
25 мая 2012 г. -
Обновление встроенного программного обеспечения — программное обеспечение version: 1.08
BIN
файл,
3.8 MB
25 мая 2012 г. -
Обновление встроенного программного обеспечения — программное обеспечение version: 1.08
BIN
файл,
3.8 MB
25 мая 2012 г. -
Обновление встроенного программного обеспечения — программное обеспечение version: 1.08
BIN
файл,
3.8 MB
25 мая 2012 г. -
Обновление встроенного программного обеспечения — программное обеспечение version: 1.08
BIN
файл,
3.8 MB
25 мая 2012 г. -
Обновление встроенного программного обеспечения — программное обеспечение version: 1.08
BIN
файл,
3.8 MB
25 мая 2012 г. -
Обновление встроенного программного обеспечения — программное обеспечение version: 1.08
BIN
файл,
3.8 MB
25 мая 2012 г. -
Обновление встроенного программного обеспечения — программное обеспечение version: 1.08
BIN
файл,
3.8 MB
25 мая 2012 г.
Зарегистрируйте продукт и получите
- Электронную гарантию
- Информацию о скидках и акциях
- Простой доступ к поддержке продуктов
Найти сервисный центр
Контакты поддержки, Адреса авторизованных сервисных центров, Аксессуары и расходные материалы.
Популярные компоненты и аксессуары для этого продукта
-
-{discount-value}

Обращение в компанию Philips
Мы всегда рады помочь вам
Предлагаемые продукты

www.philips.com/welcome
Зарегистрируйте свое изделие и получите поддержку
RU Руководство пользователя
LFH0652
- Manuals
- Brands
- Philips Manuals
- Voice Recorder
- Voice Tracer
- User manual
-
Contents
-
Table of Contents
-
Troubleshooting
-
Bookmarks
Quick Links
Register your product and get support at
www.philips.com/dictation
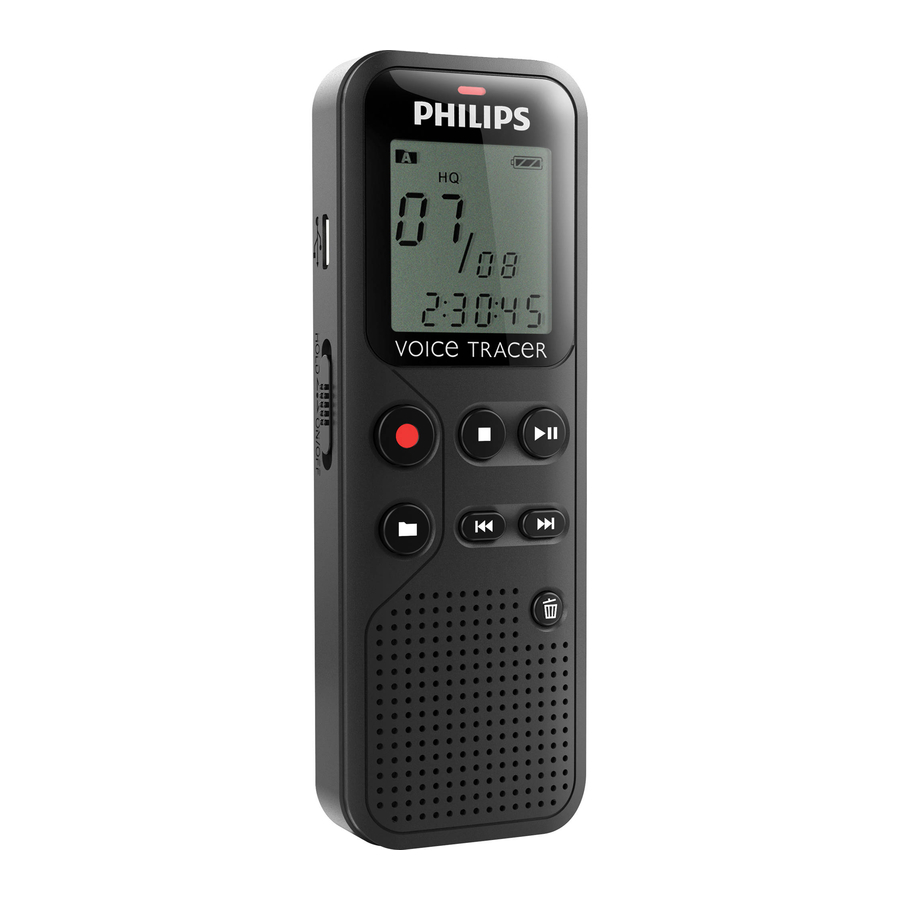
DVT1100
EN User manual
Related Manuals for Philips Voice Tracer
Summary of Contents for Philips Voice Tracer
-
Page 1
Register your product and get support at www.philips.com/dictation DVT1100 EN User manual… -
Page 2
Table of contents… -
Page 3: Table Of Contents
2 About this user manual 6 Playback 2.1 Symbols used 6.1 Selecting a recording 6.2 Playing a recording back 3 Digital Voice Tracer 6.3 Adjusting playback speed 3.1 Product highlights 6.4 Quick search 3.2 What’s in the box 6.5 Repeating playback 3.3 Product overview…
-
Page 4
8.2.2 AUTO-OFF 8.2.3 Setting date & time 9 Service 9.1 Service functions 9.1.1 Memory formatting 9.1.2 Device reset 9.1.3 Displaying the remaining memory space 9.2 Replacing batteries or rechargeable batteries 9.3 Updating the firmware 9.3.1 Displaying the firmware version 9.4 Troubleshooting 10 Appendix 10.1 Technical data Table of contents… -
Page 5: Important Safety Information
1 Important safety information 1.1.1 Batteries and rechargeable batteries • Only use AAA batteries with the device. • Never try to recharge alkaline or non-rechargeable batteries. Do not make any adjustments and modifications that are not described • Remove batteries or rechargeable batteries from the device if it in this manual.
-
Page 6
If you need to replace these headphones, we recommend contacting your dealer to order the respective original Philips model. Table of contents… -
Page 7: About This User Manual
Warning 2 About this user manual • This symbol warns of danger to persons. Bodily injury or damage could be caused by improper handling. You can find a quick overview of your device in the following pages. For detailed description, see the following chapters of this user manual.
-
Page 8: Digital Voice Tracer
3 Digital Voice Tracer We are delighted that you have chosen a Philips device. Visit our website for comprehensive support such as user manuals, software downloads, warranty information and much more: www.philips.com/dictation. 3.1 Product highlights • Voice-activated recording for hands-free dictating • Highlight important parts of your recording using index marks…
-
Page 9: What’s In The Box
3.2 What’s in the box Device Two AAA batteries Quick-start guide USB cable to connect to a computer Note • If any item is missing or damaged, please contact your distributor. Digital Voice Tracer Table of contents…
-
Page 10: Product Overview
Green – device is playing back Yellow – data is being transferred to/from the computer Display Operating panel with keys Speaker Operating panel with keys External microphone socket, (stereo jack, 3.5 mm) Microphone Headphone socket (stereo jack, 3.5 mm) Battery compartment Digital Voice Tracer Table of contents…
-
Page 11: Keys
Delete recording (delete key) Short press: set index mark, long press: Call up index marks (INDEX key) Call up menu functions (MENU key) Increase volume / Increase playback speed – Reduce volume / Reduce playback speed Digital Voice Tracer Table of contents…
-
Page 12: Start-Up Screen
Set repeat mode: n – no repeat, Í – repeat folder playback, Ì – repeat file playback Total number of recordings in the folder / menu option Note • The symbol display may vary, depending on the model, the mode and the selected functions. Digital Voice Tracer Table of contents…
-
Page 13: Menu Overview
Enabling/disabling the record indicator Setting microphone sensitivity Enabling/disabling voice-activated recording Monitoring during recording Enabling/disabling key and signal tones AUTO-OFF Setting date & time Memory formatting Device reset Setting auto divide Displaying the remaining memory space Digital Voice Tracer Table of contents…
-
Page 14: First Steps
Fold the cover out. 4 First steps Use the installation guide on the following pages to start using your device quickly and easily. Caution • Follow the instructions on handling the device, especially the batteries and rechargeable batteries (see also chapter 1.1.1 Insert the batteries or rechargeable batteries into the device as Batteries and rechargeable batteries, page shown.
-
Page 15: Power On/Off
4.2 Power on/off 4.3 Initial installation process Slide the on/off switch on the side of the device downwards for When using for the first time, you must set the date and time of the approximately two seconds. device. The device turns on and the start-up screen is displayed. 4.3.1 Setting date &…
-
Page 16: Enabling/Disabling The Keypad Lock
4.4 Enabling/disabling the keypad lock 4.5 Accessories The keypad lock deactivates all keys on the device. The timer function 4.5.1 Connecting the headphones of the device continues to function. Slide the HOLD switch up into the HOLD position to lock the Warning keypad of the device.
-
Page 17: Connecting An External Microphone
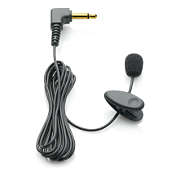
Turn up the volume until you reach a comfortable listening level. 4.6 Connecting to a computer The speaker is switched off when headphones are connected. You can select one of the following options once you have connected 4.5.2 Connecting an external microphone the device to a computer Note • A USB mass storage device: You can use the File Explorer to…
-
Page 18: Transferring Files From Or To The Device
Caution Caution • Do not disconnect the device from the computer while files are • Do not disconnect the device from the computer while files are transferred from or to the device (the status LED indicator flashes transferred from or to the device (the status LED indicator flashes yellow when data is being transferred).
-
Page 19: Record
Press g to pause recording. 5 Record The record/play indicator will blink red. Press the g key to resume recording. The device offers many features that you can use during recording or to improve the quality of a recording. Use the timer and the voice Press the j key to stop recording.
-
Page 20: Displaying The Remaining Recording Time
5.1.1 Displaying the remaining recording time 5.2 Starting recording automatically In stop mode press the stop key j. The remaining recording time in the memory is shown in The following methods are available for automatic starting of hours and minutes. recording: Voice activation.
-
Page 21: Playback
Press e to continue playback from the previous position. 6 Playback Press the j key to stop playback. 6.1 Selecting a recording 6.3 Adjusting playback speed In stop mode (start-up screen), press a to select the desired folder for the recording. Press and hold the playback key e for at least 3 seconds during The following symbols will be displayed, depending on the playback.
-
Page 22: Repeating Playback
6.5.1 Endless loop / sequence repeating 6.5 Repeating playback Select the required file as described. You can automatically repeat playback of a certain file, folder or sequence (=loop). Press e to playback the selected file. Select the required file as described. Press a, to specify the sequence start point.
-
Page 23: Protecting A Recording / Lock File
6.6 Protecting a recording / lock file You can protect recordings against unintentional deletion. Select the required file as described. Press MENU briefly. Using h / b select LOCK. Press the record key, g, to confirm. 6.7 Unprotect / unlock file Select the required file as described.
-
Page 24: Delete
7 Delete 7.2 Deleting all recordings in the folder You can delete all recordings in the selected folder. Connect the device You can delete an individual recording on the device or all the to a computer if you want to rename an entire folder. recordings in the folder In stop mode (start screen), select the folder in which you wish to delete all recordings by pressing a.
-
Page 25: Settings
Press h / b to select the required recording quality. 8 Settings The selected quality setting symbol is shown on the display. – High Quality, Format: WAV, 384 kbit/s Press and hold the MENU key for at least two seconds while the – (Short play) above-average recording time, device is stopped (start-up screen) to enter the Settings menu.
-
Page 26: Setting Microphone Sensitivity
Press the j key to exit the menu. Press the j key to exit the menu. • Press the j key to cancel the operation without saving and return • Press the j key to cancel the operation without saving and return to the stop mode.
-
Page 27: Monitoring During Recording
In stop mode (start-up screen), press MENU for at least two 8.1.5 Monitoring during recording seconds. Using this feature you can listen to the current recording using the headphones (see also chapter 4.5.1 Connecting the headphones, page Press e to select the DIVIDE function. 16).
-
Page 28: Auto-Off
Press the record key, g, to confirm. 8.2.3 Setting date & time Press the j key to exit the menu. The date and time entered are saved with each recording as the recording time. In stop mode (start-up screen), press MENU for at least two • Press the j key to cancel the operation without saving and return seconds.
-
Page 29
Press + / – to set the seconds. Press the record key, g, to confirm. Press the j key to exit the menu. • Press the j key to cancel the operation without saving and return to the stop mode. Settings Table of contents… -
Page 30: Service
Press the j key to exit the menu. 9 Service Do not perform any maintenance operations that are not described in • Press the j key to cancel the operation without saving and return this user manual. Do not disassemble the device into its component to the stop mode.
-
Page 31: Displaying The Remaining Memory Space
If you do this, data may be damaged or lost. easily update your device to the latest version. Device malfunctions may also occur. You can find more information under www.philips.com/dictation. When the batteries are nearly empty, the battery indicator blinks; you should replace them.
-
Page 32: Troubleshooting
Problem Possible cause/solution 9.4 Troubleshooting The recording session does • Voice activation may be switched on. not start • Keypad lock (HOLD) is switched on. Problem Possible cause/solution Slide the HOLD switch to the The device does not turn on • The batteries or rechargeable batteries «Off»…
-
Page 33: Appendix
Technical data 10 Appendix Internal memory NAND-Flash, 4 GB Recording format HQ – WAV, 384 kbit/s The information in this user manual has been produced to the best of our knowledge. It (particularly the technical data) may be modified or SP –…
-
Page 34
We accept no liability for changes, mistakes or printing errors. Packaging: Please observe the recycling and packaging provisions Philips and the Philips Shield Emblem are registered trademarks of applicable in your country. Koninklijke Philips Electronics NV and are used by Speech Processing Batteries: Used batteries should be disposed of at an official Solutions under license from Koninklijke Philips Electronics NV. -
Page 35
Table of contents… -
Page 36
© 2013 Speech Processing Solutions GmbH. All rights reserved. Documents Version 1.0, 2013/06/10…
![]()
Digital Voice Tracer
LFH 7655 / LFH 7675
www.philips.com/dictation

|
EN |
User manual |
3 |
|
DE |
Benutzerhandbuch |
13 |
|
FR |
Manuel de l‘utilisateur |
23 |
|
ES |
Manual del usuario |
33 |
|
IT |
Manuale di istruzioni |
43 |
|
NL |
Gebruikershandleiding |
53 |
|
CZ |
Uživatelská příručka |
63 |
|
HU |
Felhasználói kézikönyv |
73 |
|
PL |
Instrukcja obsługi |
83 |
|
PT |
Manual do utilizador |
93 |
|
RU |
Руководство пользователя |
103 |
|
TR |
Kullanıcı El Kitabı |
113 |

|
User manual |
1 |
Your Digital Voice Tracer |
||||||
|
1 |
Your Digital Voice Tracer |
3 |
5 |
Menu Entry |
8 |
1.1 |
What’s in the Box |
|
|
1.1 |
What’s in the box |
3 |
5.1 |
Mic Recording Sensitivity |
8 |
|||
|
1.2 |
Overview |
4 |
5.2 |
VA Function |
9 |
|||
|
1.3 |
LCD indicators and symbols |
4 |
5.3 |
Beep Setting |
9 |
|||
|
2 |
Getting Started |
5 |
5.4 |
Recording Mode Setting |
9 |
|||
|
2.1 |
Replacing the Batteries |
5 |
5.5 |
File Introduction |
9 |
|||
|
2.2 |
Switching the Voice Tracer On |
5 |
6 |
Delete Function |
10 |
User manual |
||
|
2.3 |
Switching the Voice Tracer Off |
5 |
6.1 |
To Delete a Specific File |
10 |
|||
|
2.4 |
Hold Function |
5 |
6.2 |
To delete a specific folder |
10 |
|||
|
3 |
Recording |
6 |
6.3 |
To delete all folders (format mode) |
10 |
|||
|
3.1 |
Recording With the Built-in |
7 |
Warnings |
10 |
||||
|
Microphone |
6 |
8 |
Specifications |
11 |
USB cable |
|||
|
3.2 |
Recording With an External |
9 |
Troubleshooting |
12 |
||||
|
Microphone |
6 |
|||||||
|
4 |
Playback |
7 |
DVT 7655 DVT 7675 |
|||||
|
4.1 |
Normal Playback |
7 |
Voice Tracer |
|||||
|
4.2 |
Low-speed Playback |
7 |
Batteries |
|||||
|
4.3 |
Search |
7 |
||||||
|
4.4 |
Playback of other files |
7 |
||||||
|
4.5 |
Repeat Playback |
8 |
||||||
|
Ear-Mic combo |
||||||||
|
(DVT 7675 only) |
CD |
|||||||
|
User manual |
E N G L I S H
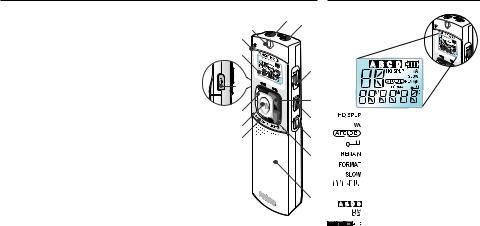
1.2Overview
|
A |
Earphone socket |
A |
B |
|
|
I |
||||
|
B |
Microphone socket |
J |
||
|
C |
Volume control |
|||
|
K |
||||
|
D NEXT |
||||
|
Fast forward, file selection, menu change |
C |
|||
|
E |
REC/PAUSE Record/Pause |
|||
|
F |
STOP/DEL |
O |
||
|
Stop recording, delete file, delete selected folder, delete all folders |
D |
|||
|
G |
FOLDER/REPEAT |
|||
|
L |
||||
|
Folder selection and repeat playback |
E |
|||
|
H |
Speaker |
M |
||
|
I |
Built-in microphone |
N |
F |
|
|
J |
Record/playback indicator LED |
|||
|
Red = recording, green = playback |
G |
|||
|
K |
LC display |
|||
|
L |
BACK |
|||
|
Fast rewind, file selection, menu change |
||||
|
M |
PLAY/PAUSE/REMAIN |
H |
||
|
Low speed and normal playback, pause, remaining recording time, |
||||
|
FILE (recording number), time, menu selection, file introduction functions |
NMENU/HOLD
Recording sensitivity, voice activation function, beep, recording time, file introduction (scan), hold set/release
OUSB socket
1.3LCD Indicators and Symbols
Record mode indicator Voice-activated recording Repeat mode indicator Hold indicator
Record, Play remain time indicator Format indicator
Slow play indicator Play/recording time indicator, menu selection
Folder selection File dispaly (0-99)
Battery indicator (Replace the batteries if the display alternates between status 3 and 4.)
User manual
2 Get Started
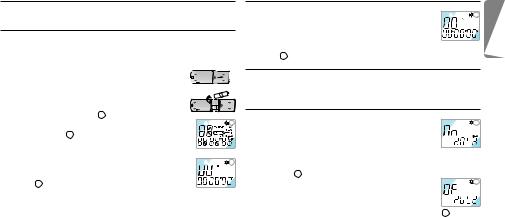
2.1Replace the Batteries
1 Be sure that the power is OFF. Do not replace the batteries while the power is on, as this may cause the device to malfunction.
2 Open the battery cover. 3 Insert the batteries. Make sure that the batteries
are inserted properly (size “AAA”) and close the cover. When the batteries are inserted, the LCD will display all indicators 1 and the device will go
|
into standby mode (waiting for recording or playback |
1 |
|||||||
|
to be activated 2 ). |
||||||||
|
4 The power will shut off automatically if no function |
||||||||
|
is activated for 1 minute. |
||||||||
|
5 Press the PLAY/PAUSE/REMAIN button to switch |
2 |
|||||||
|
the power on. Your Voice Tracer will be in standby |
||||||||
|
mode 2 . |
DRemove the batteries if the Voice Tracer will not be used for an extended period. Leaking batteries may damage the Voice Tracer.
EIf the Voice Tracer malfunctions, remove the batteries and re insert them.
User manual
2.2Switch the Voice Tracer On
|
1 Press the PLAY/PAUSE/REMAIN button to activate |
1 |
||
|
the Voice Tracer. The device will switch to standby |
|||
|
mode. When the batteries are inserted, the LCD |
|||
|
displays all indicators and the Voice Tracer goes into standby |
|||
|
mode 1 . |
2.3Switch the Voice Tracer Off
The power will shut off automatically if functions are not activated for 1 minute.
2.4Hold Function
|
1 Press and hold the MENU/HOLD button for |
1 |
||
|
approximately 2 seconds when the Voice Tracer is in |
|||
|
playback, recording, or standby mode to activate the |
|||
|
lock function. All buttons are deactivated when the device is in |
|||
|
HOLD mode, and the LCD displays “ON HOLD” when a button |
|||
|
is pressed 1 . |
|||
|
2 Press and hold the MENU/HOLD button again |
2 |
||
|
for approximately 2 seconds to release the lock |
|||
|
function. The LCD will display “OF HOLD” |
|||
|
indicating that the lock function has been deactivated 2 . |
DHOLD mode will be deactivated if the device switches off and is turned on again.
E N G L I S H

3 Record
CNote: For good results, when working with Dragon speech recognition software, record in HQ mode (factory default) and convert the .zvr file into .wav format after PC download! Please also read the Download Manager software user manual.
Note the following before recording is begun (Be sure the device is in standby mode):
•Press the FOLDER/REPEAT button to select the desired folder. The Voice Tracer will move to the next folder (A, B, C, or D) each time the button is pressed. If a folder is not selected, the Voice Tracer will record in the current folder.
•When the number of files in the current folder reaches 99, the recording will continue after the last file of the next folder.
•Press the PLAY/PAUSE/REMAIN button to display the remaining recording capacity.
•Press the NEXT button to separate a FILE while recording (file separation function).
•The maximum number of files in each folder is 99 or up to 396 files.
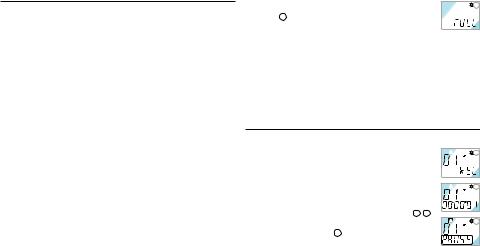
•If the recording time exceeds the available capacity or
|
the file number reaches 396, “FULL” is displayed and |
1 |
|
recording cannot continue 1 . If this happens, delete |
|
|
some recordings or move them to an external device |
|
|
(audio or PC) to continue recording. |
•Do not remove the batteries during recording. This may cause the Voice Tracer to malfunction. If recording for a prolonged period of time, replace the batteries before beginning recording.
•Recording will stop automatically when no sound is detected when the Voice Tracer is in VA mode. Deactivate the VA function when recording important conversations.
3.1 Record With the Built-in Microphone
1 Set the desired recording folder, VA function and
|
1 |
|||||
|
quality (HQ, SP or LP) before recording (see chapter |
|||||
|
“Menu”). |
|||||
|
2 Point the device’s built-in microphone toward the |
|||||
|
sound source. |
|||||
|
2 |
|||||
|
3 Press the REC/PAUSE button to start recording. The |
|||||
|
red LED will light 1 2 . |
|||||
|
4 Press the REC/PAUSE button to pause the recording |
|||||
|
3 . |
|||||
|
3 |
|||||
|
5 Press the REC/PAUSE button again to continue the |
|||||
|
recording. The red LED will light again. |
|||||
|
6 Press the STOP/DEL button to stop recording. |
3.2Record With an External Microphone
To record with an external microphone, connect the microphone to the microphone socket and follow the same procedure as for the built-in microphone.
User manual

4 Playback
DPress and hold the PLAY/PAUSE/REMAIN button during normal playback to display the remaining duration time of the current file.
4.1Normal Playback
|
1 |
||||
|
1 Press the FOLDER/REPEAT button to select the |
||||
|
desired folder (A, B, C, or D). If a folder is not |
||||
|
selected, the last folder into which you recorded |
||||
|
will be played. |
||||
|
2 |
||||
|
2 Press the PLAY/PAUSE/REMAIN button to start |
||||
|
playback. The green LED will light and the duration |
||||
|
time of the playback will be displayed ( 1 and 2 ). |
3 Press the PLAY/PAUSE/REMAIN button again to pause playback. 4 Press the PLAY/PAUSE/REMAIN button again to resume
playback.
5 Press the STOP/DEL button during Playback or Pause to stop playback.
4.2Low-speed Playback
1 Press the REPEAT/FOLDER button to select the desired folder (A, B, C, or D). If you do not select a folder, the folder that you recorded into or played last will be played.
User manual
2 Press and hold the PLAY/PAUSE/REMAIN button for approximately 2 seconds to start low-speed playback. The green LED will light and the duration time of the recording will be displayed.
3 Press the PLAY/PAUSE/REMAIN button briefly again during lowspeed playback to pause.
4 In Pause, press and hold the PLAY/PAUSE/REMAIN button for approximately 2 seconds to resume low-speed playback or press the button briefly to start normal playback.
5 Press the STOP/DEL button during Playback or Pause to stop playback.
4.3Search
1 Press and hold the NEXT button or BACK button for at least a half a second during Playback. Playback stops and the time on the LCD increases or decreases rapidly.
2 Release the button when you wish to start playback.
3 The search will stop when the end of the current file is reached when the NEXT button is pressed and held or when the beginning of the current file is reached when the BACK button is pressed and held.
4.4Playback of Other Files
1 To switch to the next or previous file, press the NEXT button or BACK button briefly during Playback or Pause.
2 To navigate through all files, press and hold the NEXT button
E N G L I S H
or BACK button during Stop until the desired file is reached. 3 Release the button to play the displayed file.
4.5Repeat Playback
4.5.1 Repeat a Section
|
1 |
||||||
|
1 Press the FOLDER/REPEAT button at the point the |
||||||
|
section is to be reapeated. The starting point is set |
||||||
|
and the |
indicator flashes 1 . |
|||||
|
2 While |
is flashing, press the FOLDER/REPEAT |
|||||
|
button again where repetition is to end. The |
2 |
|||||
|
indicator lights continuously and the selected section |
||||||
|
will be repeated every time during normal playback |
2 . |
|||||
|
3 Press STOP/DEL to stop playback. |
||||||
|
4.5.2 Repeat a File |
||||||
|
1 Press and hold the FOLDER/REPEAT button during Playback. |
||||||
|
2 The |
indicator will appear and the current file |
|||||
|
1 |
||||||
|
will be repeated every time during normal playback |
1 . |
|||||
|
3 Press STOP/DEL to stop playback. |
||||||
|
4.5.3 Repeat a Folder |
||||||
|
1 Press and hold the FOLDER/REPEAT button during Playback. |
||||||
|
2 When |
appears on the LCD, press and hold the FOLDER/ |
|||||
|
REPEAT button again. |
|
3 |
appears on the LCD and all files in the |
1 |
current folder will be repeated every time during normal playback 1 .
5 Menu
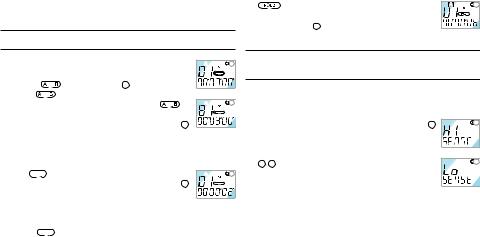
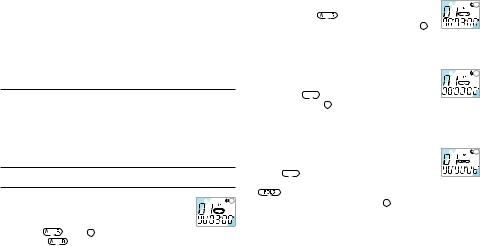
5.1Microphone Recording Sensitivity
D The factory default is high sensitivity mode.
|
1 Press the MENU/HOLD button once during Stop |
1 . |
1 |
2 Press the NEXT button or the BACK button . 3 The mode will toggle between low sensitivity mode
(LO SENSE) and high sensitivity mode (HI SENSE)
|
1 2 . |
2 |
|
4 Press the PLAY/PAUSE/REMAIN or the STOP/DEL |
|
|
button to select the displayed mode. |
5 The previous operation will be resumed with the selected mode.
DHigh sensitivity mode: Recommended for recording in a quiet environment and for conference recording.
Low sensitivity mode: Recommended for recording in a noisy environment. Locate the microphone close to the sound source.
User manual
|
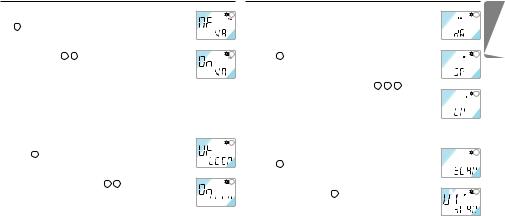
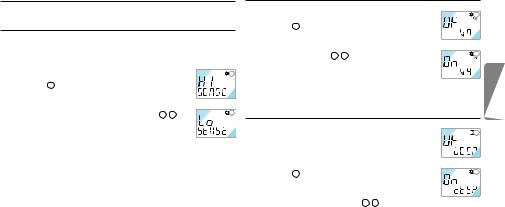
5.2 |
Voice Activation Function |
5.4 |
Recording Mode Setting |
|||||||||||||||||
|
1 Press the MENU/HOLD button twice during Stop |
1 |
1 |
||||||||||||||||||
|
D The factory default is high quality recording mode. |
||||||||||||||||||||
|
1 . |
||||||||||||||||||||
|
2 Press the NEXT button or the BACK button . |
1 Press the MENU/HOLD button four times during |
|||||||||||||||||||
|
The mode toggles between VA ON (ON VA) and VA |
||||||||||||||||||||
|
OFF (OF VA) 1 2 . |
2 |
Stop 1 . |
2 |
|||||||||||||||||
|
3 Press the PLAY/PAUSE/REMAIN or STOP/DEL |
2 Press the NEXT button or BACK button . The |
|||||||||||||||||||
|
button to select the displayed mode. |
mode toggles among long play (LP), standard play |
|||||||||||||||||||
|
4 The previous operation will continue in the selected mode. |
(SP) and high quality (HQ) modes 1 2 3 . |
|||||||||||||||||||
|
3 Press the PLAY/PAUSE/REMAIN or STOP/DEL |
3 |
|||||||||||||||||||
|
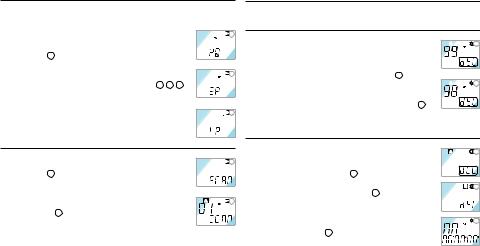
5.3 |
Beep Setting |
button to select the displayed mode. |
||||||||||||||||||
|
4 The previous operation will continue in the selected |
||||||||||||||||||||
|
D The factory default is BEEP ON. |
mode. |
|||||||||||||||||||
|
1 Press the MENU/HOLD button three times during |
1 |
5.5 |
File Introduction |
|||||||||||||||||
|
Stop 1 . |
1 Press the MENU/HOLD button five times during |
1 |
||||||||||||||||||
|
2 Press the NEXT button or the BACK button . |
Stop 1 . |
|||||||||||||||||||
|
3 The mode toggles between BEEP OFF (OF BEEP) |
2 Press the PLAY/PAUSE/REMAIN button to play the |
|||||||||||||||||||
|
and BEEP ON (ON BEEP) |
1 2 . |
2 |
first 3 seconds of each file starting from the first file |
|||||||||||||||||
|
4 Press the PLAY/PAUSE/REMAIN or the STOP/DEL |
of the current folder |
2 . |
2 |
|||||||||||||||||
button to select the displayed mode. 


 5 The previous operation will continue in the selected mode.
E N G L I S H
6 Delete Function
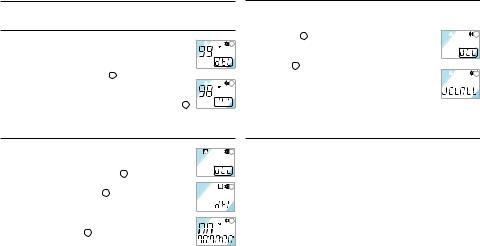
6.1Delete a Specific File
|
1 |
|||||
|
1 Press the STOP/DEL button briefly during Stop. The |
|||||
|
file number appears and DEL flashes. |
|||||
|
2 Press the NEXT button or BACK button to |
|||||
|
select the file to be deleted 1 . |
|||||
|
2 |
|||||
|
3 Press and hold the STOP/DEL button for |
|||||
|
approximately 3 seconds to delete the current file. |
The number of files is reduced by 1 automatically 2 . 


 4 If you do not want to delete the file, press the STOP/DEL button
briefly.
6.2Delete a Specific Folder
|
1 Press and hold the STOP/DEL button for |
1 |
|
approximately 3 seconds during Stop. The current |
|
|
folder appears and DEL flashes 1 . |
|
|
2 Press the FOLDER/REPEAT button to select the |
2 |
folder you want to delete 2 .
3 Press and hold the STOP/DEL button for approximately 3 seconds again to delete all the files
|
in the selected folder. The Voice Tracer will stop |
3 |
||
|
playing at this folder 3 . |
|||
|
4 If you do not want to delete the folder, press the |
|||
|
10 STOP/DEL button briefly. |
6.3Delete All Folders (format mode)
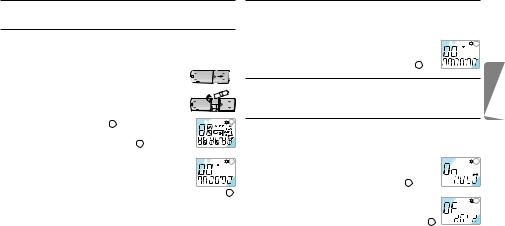
1 Press and hold the STOP/DEL button for approximately 3 seconds during Stop. The current folder appears and
|
1 |
||||
|
DEL flashes 1 . |
||||
|
2 Press the FOLDER/REPEAT button repeatedly until |
||||
|
all four folders are displayed. “DELALL” will be |
||||
|
displayed 2 . |
||||
|
2 |
||||
|
3 Press and hold the STOP/DEL button again to delete |
||||
|
all files in all folders. After deletion, the position will |
||||
|
be in folder A. |
||||
|
4 If you do not want to delete the folders, press the STOP/DEL |
||||
|
button briefly. |
7 Warnings
•Do not attempt to open, repair, or modify the Voice Tracer.
•Do not use the Voice Tracer where the use of electronic devices is prohibited (such as in aircraft, etc.).
•Do not put the Voice Tracer or its accessories in your mouth.
•Do not immerse the Voice Tracer or spill liquids on it.
•Do not expose the Voice Tracer or its accessories to shocks, as this may cause malfunctions.
•Do not apply excessive force to the LCD display, as this may
User manual
![]()
damage the display or cause malfunctions.
•Do not expose the Voice Tracer to direct sunlight or any source of heat for a prolonged period.
•Remove the batteries if the Voice Tracer will not be used for a long period of time.
•Do not pull attached earphone, microphone, or USB cables with excessive force.
|
8 |
Specifications |
|||
|
Device |
LFH 7655 |
LFH 7675 |
||
|
Recording time / |
HQ |
6 h / 48 kbps / 16 kHz |
12 h / 48 kbps / 16 kHz |
|
|
bit rate / |
SP |
36 h / 6.4 kbps / 8 kHz |
90 h / 6.4 kbps / 8 kHz |
|
|
sample rate |
LP |
66 h / 4 kbps / 8 kHz |
144 h / 4 kbps / 8 kHz |
|
|
Dimensions |
33 mm / 110 mm / 19 mm |
|||
|
Power supply |
LR03 (AAA, UM-4) 2 batteries |
|||
|
Battery life |
Recording: 11 hours, playback: 13 hours |
|||
|
Maximum number of recordings |
Total 396 (99 per folder x 4) |
|||
|
USB mass storage |
E N G L I S H

9 Troubleshooting
LCD is blank
•Replace the batteries with new ones
•Delete some recordings or move recordings to an external device
I cannot play recordings
I cannot hear anything from the speaker
Possible cause:
•The earphones are plugged in
•The volume is at the lowest setting
|
Possible cause: |
Possible cause: |
|||
|
• The batteries are exhausted |
• The Voice Tracer is locked (HOLD mode) |
Correction: |
||
|
• The batteries are not inserted correctly |
• The batteries are exhausted |
• Remove the earphones |
||
|
• Nothing has been recorded yet |
• Adjust the volume |
|||
|
Correction: |
• The volume is at the lowest setting |
|||
|
• Replace the batteries with new ones |
I cannot hear anything from the |
|||
|
• Insert the batteries correctly |
Correction: |
earphones |
||
|
• Release the lock function |
||||
|
I cannot record anything |
• Replace the batteries with new ones |
Possible cause: |
||
|
• Check the number of recordings. |
• The earphones are not plugged in properly |
|||
|
Possible cause: |
• Adjust the volume |
• The volume is at the lowest setting |
||
|
• The Voice Tracer is locked (HOLD mode) |
||||
|
• The batteries are exhausted |
I cannot stop, pause, play or record |
Correction: |
||
|
• The maximum number of recordings has |
• Plug in the earphones properly |
|||
|
been reached or the recording capacity |
Possible cause: |
• Adjust the volume |
||
|
is full |
• The Voice Tracer is locked (HOLD mode) |
|||
|
Correction: |
Correction: |
|||
|
• Release the lock function |
• Release the lock function |

|
Benutzerhandbuch |
1 |
Ihr Digital Voice Tracer |
||||||
|
1 |
Ihr Digital Voice Tracer |
13 |
5 |
Menü |
19 |
1.1 |
Verpackungsinhalt |
|
|
1.1 |
Verpackungsinhalt |
13 |
5.1 |
Aufnahmeempfindlickeit des |
||||
|
1.2 |
Übersicht über Bedienungselemente |
Mikrofons |
19 |
|||||
|
und Anschlüsse |
14 |
5.2 |
VA Function |
19 |
||||
|
1.3 |
LCD Anzeige und Symbole |
14 |
5.3 |
Einstellen des Pieptons |
19 |
|||
|
2 |
Erste Schritte |
15 |
5.4 |
Einstellen des Aufnahmemodus |
20 |
|||
|
2.1 |
Einsetzen der Batterien |
15 |
5.5 |
Dateien scannen |
20 |
Benutzerhandbuch |
||
|
2.2 |
Einschalten des Voice Tracers |
15 |
6 |
Löschfunktion |
20 |
|||
|
2.3 |
Ausschalten des Voice Tracers |
15 |
6.1 |
Löschen einer einzelnen Datei |
20 |
|||
|
2.4 |
Verriegelungsfunktion (Hold) |
15 |
6.2 |
Löschen eines einzelnen Ordners |
20 |
|||
|
3 |
Aufnahme |
16 |
6.3 |
Löschen aller Ordner |
||||
|
3.1 |
Aufnehmen mit dem eingebauten |
(Formatiermodus) |
21 |
USB-Kabel |
||||
|
Mikrofon |
16 |
7 |
Warnhinweise |
21 |
||||
|
3.2 |
Aufnehmen mit einem externen |
8 |
Technische Daten |
21 |
||||
|
Mikrofon |
17 |
9 |
Fehlerbehebung |
22 |
DVT 7655 DVT 7675 |
|||
|
4 |
Wiedergabe |
17 |
Voice Tracer |
|||||
|
4.1 |
Normale Wiedergabe |
17 |
Batterien |
|||||
|
4.2 |
Einstellen der |
|||||||
|
Wiedergabegeschwindigkeit |
17 |
|||||||
|
4.3 |
Suchlauf |
17 |
||||||
|
4.4 |
Navigieren zwischen Dateien |
18 |
Ohrhörer- |
|||||
|
4.5 |
Wiedergabe wiederholen |
18 |
Mikrophoneinheit |
CD |
D E U T S C H
|
Benutzerhandbuch |
(nur DVT 7675) |
13 |

1.2Übersicht über Bedienungselemente und Anschlüsse
AKopfhöreranschluss
BMikrofonanschluss
CLautstärkeregelung
DWEITER
Schnell vor, Dateiwechsel, Menüwechsel
EREC/PAUSE Aufnahme und Pause
F STOP/DEL
Aufnahme stoppen, Datei löschen, ausgewählten Ordner löschen, alle Ordner löschen
GFOLDER/REPEAT
Ordnerwechsel und Wiedergabe wiederholen
HLautsprecher
IEingebautes Mikrofon
JLED-Anzeigeleuchte für Aufnahme (Rot) / Wiedergabe (Grün)
KLCD-Anzeige
LZURÜCK
Schnell vor, Dateiwechsel, Menüwechsel
MWIEDERGABE/PAUSE/RESTZEIT
Langsame und schnelle Wiedergabe, Pause, restliche Aufnahmezeit, DATEI (Aufzeichnungs-Nr.), Zeit, Menüauswahl, Dateieingabefunktionen
NMENU/HOLD
1.3LCD Anzeige und Symbole
|
A |
B |
|
|
I |
||
|
J |
||
|
K |
||
|
C |
||
|
O |
||
|
D |
||
|
L |
E |
|
|
M |
||
|
N |
F |
|
|
G |
||
|
H |
Anzeige des Aufnahmemodus Sprachaktivierung der Aufnahme Anzeige Wiederholmodus Anzeige Tastensperre
Restliche Aufnahme-/Wiedergabezeit Formatanzeige
Anzeige langsame Wiedergabe Anzeige Wiedergabezeit, Aufnahmezeit, Menüwechsel Ordner
Dateianzeige (0-99) Anzeige des Ladezustands
|
Aufnahmempfindlichkeit, VA, Piepton, Aufnahmezeit, Anspielen (Scannen) und Halten einstellen/freigeben |
(Batterien ersetzen, wenn die Anzeige |
|
|
O USBAnschluss |
zwischen den Zuständen 3 und 4 hin und |
|
|
14 |
her springt.) |
Benutzerhandbuch |
2 Erste Schritte
2.1Einsetzen der Batterien
1 Stellen Sie sicher, dass das Gerät abgeschaltet ist. Wenn Sie die Batterien entfernen, während das Gerät eingeschaltet ist, kann dies Funktionsstörungen verursachen.
2 Öffnen Sie das Batteriefach. 3 Legen Sie die Batterien ein. Stellen Sie sicher, dass
die Batterien richtig eingelegt sind (Typ „AAA“) und schließen Sie das Bateriefach wieder. Beim Einlegen der Batterien werden auf dem Bildschirm
|
kurz alle Symbole angezeigt 1 . Anschließend geht |
1 |
||||||||
|
das Gerät in den Bereitschaftsmodus und ist bereit |
|||||||||
|
für die Aufnahme oder Wiedergabe 2 . |
|||||||||
|
4 Der Voice Tracer schaltet sich automatisch ab, wenn |
|||||||||
|
eine Minute lang keine Funktion aktiviert wird. |
2 |
||||||||
|
5 Drücken Sie zum Einschalten für einige Sekunden die |
|||||||||
|
Taste WIEDERGABE/PAUSE/RESTZEIT. Der Voice |
|||||||||
|
Tracer befindet sich nach dem Einschalten im Bereitschaftsmodus 2 . |
D Entfernen Sie die Batterien aus dem Gerät, falls es während einer längeren Zeitspanne nicht verwendet wird. Ausfließende Batterien können den Voice Tracer beschädigen.
E Nehmen Sie bei Funktionsstörungen des Geräts, die Batterien
kurz heraus und setzen Sie sie wieder ein.
Benutzerhandbuch
2.2Einschalten des Voice Tracers
1 Zum Einschalten des Voice Tracers die Taste WIEDERGABE/ PAUSE/RESTZEIT oder REC/PAUSE betätigen. Das Gerät schaltet sich im Bereitschaftsmodus-Modus ein.
|
2 Beim Einlegen der Batterien erscheinen auf dem |
1 |
||
|
LCD alle Anzeigeleuchten und der Voice Tracer |
|||
|
stellt sich auf den Bereitschaftsmodus-Modus 1 . |
2.3Ausschalten des Voice Tracers
Der Voice Tracer schaltet sich automatisch aus, wenn eine Minute lang keine Funktion aktiviert wird.
2.4Verriegelungsfunktion (Hold)
1 Um die Verriegelungsfunktion zu aktivieren halten Sie die Taste MENU/HOLD etwa 2 Sekunden lang gedrückt, während sich der Voice Tracer im Wiedergabe-, Aufnahmeoder Bereit-
|
schafts-Modus befindet. Während des HOLD-Modus |
1 |
||
|
sind alle Tasten deaktiviert, auf dem Display erscheint |
|||
|
„ON HOLD“, wenn eine Taste betätigt wird 1 . |
|||
|
2 Zum Deaktivieren der Verriegelungsfunktion die |
|||
|
MENU/HOLD-Taste noch einmal etwa 2 Sekunden ge- |
2 |
||
|
drückt halten. Auf dem LCD erscheint „OF HOLD“, d. |
|||
|
h., dass die Verriegelungsfunktion deaktiviert wurde 2 . |
|||
|
D Der HOLD-Modus wird auch deaktiviert, wenn sich das Gerät |
|||
|
abschaltet und wieder eingeschaltet wird. |
15 |
||
D E U T S C H
3 Aufnahme
CAchtung: Um mit der Dragon-Spracherkennungssoftware beste Resultate zu erzielen, sollte die Aufnahme im HQ-Modus erfolgen (werksseitig eingestellt). Nach dem Download auf den PC muss die
.zvr-Datei in das .wav-Format umgewandelt werden! Lesen Sie dazu bitte auch das Download-Manager-Bedienungshandbuch.
Bitte beachten Sie vor der Aufnahme folgende Hinweise (Stellen Sie sicher, dass das Gerät im Bereitschaftsmodus-Modus ist):
•Betätigen Sie die Taste FOLDER/REPEAT, um den gewünschten Ordner auszuwählen. Der Voice Tracer geht bei jedem nächsten Druck auf diese Taste auf den nächsten Ordner über (A, B, C und D). Wird kein Ordner ausgewählt, wird im aktuellen Ordner aufgenommen.
•Sobald die Anzahl der Dateien im laufenden Ordner 99 erreicht, wird die Aufnahme nach der letzten Datei des nächsten Ordners fortgesetzt.
•Zum Anzeigen der restlichen Aufnahmekapazität betätigen Sie die Taste WIEDERGABE/PAUSE/RESTZEIT.
•Betätigen Sie die WEITER-Taste während der Aufnahme um diese auf mehrere Dateien zu verteilen.
•In jedem Ordner können maximal 99 Dateien gespeichert werden (in den 4 Ordnern daher 396 Dateien).
•Übersteigt die Aufnahmezeit die verfügbare Kapazität oder wenn die Dateinummer 396 erreicht wird, wird „FULL“ auf dem Display
|
eingeblendet, ein Fortsetzen der Aufnahme ist nicht |
1 |
|
möglich 1 . |
|
|
• In diesem Fall sollte man einige Aufzeichnungen |
|
|
löschen oder sie auf ein externes Gerät übertragen (Audio oder |
|
|
PC), um weiter aufnehmen zu können. |
•Während des Aufnehmens dürfen die Batterien nicht herausgenommen werden. Das kann zu Funktionsstörungen des Voice Tracer führen. Ist eine längere Aufnahme geplant, sollten die Batterien vor dem Aufnehmen durch neue ersetzt werden.
•Die Aufnahme stoppt automatisch, wenn sich der Voice Tracer im VA-Modus befindet und kein Geräusch erfasst wird. Die VA-Funktion sollte für das Aufnehmen wichtiger Gespräche deaktiviert werden.
3.1 Aufnehmen mit dem eingebauten Mikrofon
1 Wählen Sie den gewünschten Aufnahmeordner, die
|
1 |
|||||
|
VA-Funktion und den Aufnahmemodus (HQ, SP oder |
|||||
|
LP) bevor Sie beginnen aufzunehmen. (siehe Kapitel |
|||||
|
„Menü“). |
|||||
|
2 Richten Sie das eingebaute Mikrofon des Geräts auf |
|||||
|
2 |
die Tonquelle aus.
3 Drücken Sie die REC/PAUSE-Taste, um mit der Aufnahme zu beginnen. Die rote LED schaltet sich ein 1 2 .
|
4 Drücken Sie die REC/PAUSE-Taste, um die |
3 |
|
Aufnahme anzuhalten 3 . |
|
|
5 Drücken Sie die REC/PAUSE-Taste erneut, um die |

Aufnahme fortzusetzen. Die rote LED schaltet sich wieder ein. 6 Drücken Sie zum Stoppen der Aufnahme die STOP/DEL-Taste.
3.2Aufnehmen mit einem externen Mikrofon
Schließen Sie ein Mikrofon an den Mikrofonanschluss an und gehen gleich vor wie beim Aufnehmen mit dem eingebauten Mikrofon.
4 Wiedergabe
DHalten Sie während der Wiedergabe die WIEDERGABE/PAUSE/ RESTZEIT-Taste, um die restliche Wiedergabezeit anzuzeigen.
4.1Normale Wiedergabe
|
1 |
|||
|
1 Drücken Sie die FOLDER/REPEAT-Taste, um den |
|||
|
gewünschten Ordner auszuwählen (A, B, C oder |
|||
|
D). Wird kein Ordner ausgewählt, wird der zuletzt |
|||
|
benutzte Ordner abgespielt. |
|||
|
2 |
|||
|
2 Zum Starten der Wiedergabe die WIEDERGABE/ |
|||
|
PAUSE/RESTZEIT-Taste betätigen. Die grüne LED |
|||
|
schaltet sich ein, die Dauer der Wiedergabe wird |
|||
|
angezeigt ( 1 und 2 ). |
3 Drücken Sie die WIEDERGABE/PAUSE/RESTZEIT-Taste, um die Wiedergabe zu unterbrechen.
4 Zum Fortsetzen der Wiedergabe die WIEDERGABE/PAUSE/ RESTZEIT-Taste noch einmal betätigen.
5 Drücken Sie die die STOP/DELETE-Taste, um die Wiedergabe zu stoppen.
4.2Einstellen der Wiedergabegeschwindigkeit
1 Drücken Sie die FOLDER/REPEAT-Taste, um den gewünschten Ordner auszuwählen (A, B, C oder D). Wird kein Ordner ausgewählt, wird der zuletzt benutze Ordner wiedergegeben.
2 Halten Sie die WIEDERGABE/PAUSE/RESTZEIT-Taste etwa 2 Sekunden gedrückt, um die Wiedergabe mit langsamer Geschwindigkeit zu beginnen. Die grüne LED schaltet sich ein, die Dauer der Aufnahme wird angezeigt.
3 Drücken Sie die WIEDERGABE/PAUSE/RESTZEIT-Taste, um die Wiedergabe zu unterbrechen.
4 Um die Wiedergabe mit langsamer Geschwindigkeit fortzusetzen, halten Sie die WIEDERGABE/PAUSE/RESTZEITTaste etwa 2 Sekunden gedrückt. Oder drücken Sie die Taste kurz, um die normale Wiedergabe zu beginnen.
5 Drücken Sie die die STOP/DELETE-Taste, um die Wiedergabe zu stoppen.
4.3Suchlauf
1 Drücken Sie währen der Wiedergaben die WEITER-Taste oder ZURÜCK-Taste mindestens eine halbe Sekunde. Die
D E U T S C H
Wiedergabe stoppt, die Anzeige der Aufnahmezeit auf dem LCD läuft rasch vorwärts oder rückwärts.
2 Lassen Sie die Taste los, wenn die Wiedergabe beginnen soll. 3 Der Suchlauf stoppt, sobald das Ende der laufenden Datei
erreicht ist, wenn die WEITER-Taste gedrückt und niedergehalten wird, oder wenn der Beginn der laufenden Datei erreicht wird und die ZURÜCK-Taste betätigt und niedergehalten wird.
4.4Navigieren zwischen Dateien
1 Um zur nächsten oder vorhergehenden Datei zu springen, betätigen Sie im Stopp-Modus die WEITER-Taste oder ZURÜCK-Taste .
2 Zur Ansicht aller Dateien in einem Ordner die WEITER-Taste oder ZURÜCK-Taste im Stopp-Modus gedrückt halten.
3 Die Taste freigeben, um die angezeigte Datei wiederzugeben.
4.5Wiedergabe wiederholen
4.5.1 Einen Abschnitt wiederholen
|
1 |
||||
|
1 Drücken Sie die FOLDER/REPEAT-Taste an jener |
||||
|
Stelle, wo die Wiederholung eines Abschnitts |
||||
|
beginnen soll. Der Startpunkt ist eingestellt und die |
||||
|
Anzeige |
blinkt 1 . |
|||
|
2 Während |
blinkt, die FOLDER/REPEAT-Taste nochmals an |
|
2 |
||||||
|
der Stellen drücken, an der die Wiederholung enden |
||||||
|
soll. Die Anzeige |
hört auf zu blinken und der |
|||||
|
ausgewählte Abschnitt wird ständig wiederholt 2 . |
||||||
|
3 Drücken Sie die die STOP/DELETE-Taste, um die Wiedergabe |
||||||
|
zu stoppen. |
||||||
|
4.5.2 Eine ganze Datei wiederholen |
||||||
|
1 |
||||||
|
1 Während der Wiedergabe die FOLDER/REPEAT- |
||||||
|
Taste betätigen und gedrückt halten. |
||||||
|
2 Die Anzeige |
erscheint, die laufende Datei wird |
|||||
|
ständig wiederholt |
1 . |
|||||
|
3 Drücken Sie die die STOP/DELETE-Taste, um die Wiedergabe |
||||||
|
zu stoppen. |
||||||
|
4.5.3 Einen Ordner wiederholen |
||||||
|
1 |
||||||
|
1 Während der Wiedergabe die FOLDER/REPEAT- |
||||||
|
Taste betätigen und gedrückt halten. |
||||||
|
2 Wenn |
auf dem LCD erscheint, die FOLDER/ |
|||||
|
REPEAT-Taste wieder betätigen und halten. |
||||||
|
3 |
erscheint auf dem LCD und alle Dateien des laufenden |
|||||
|
Ordners werden ständig wiederholt 1 . |
5 Menü
5.1Aufnahmeempfindlickeit des Mikrofons
D Werkseitig wird der Modus mit hoher Empfindlichkeit eingestellt.
|
1 Während Stopp die MENU/HOLD-Taste einmal |
1 |
|
|
betätigen 1 . |
||
|
2 Die Taste WEITER oder die ZURÜCK drücken. |
||
|
3 Der Modus schaltet zwischen geringer (LO SENSE) |
||
|
und hoher Empfindlichkeit (HI SENSE) um 1 2 . |
2 |
|
|
4 Die WIEDERGABE/PAUSE/RESTZEIT-Taste oder |
||
|
die STOP/DEL-Taste betätigen, um den angezeigten |
||
|
Modus auszuwählen. |
||
|
5 Der vorhergehende Vorgang wird mit dem ausgewählten Modus |
||
|
fortgesetzt. |
DHinweis: HI SENSE: Empfohlen für Aufnahmen in ruhiger Umgebung und für das Aufnehmen von Konferenzen.
LO SENSE: Empfohlen für Aufnahmen in lauter Umgebung. Das Mikrofon nahe an die Tonquelle halten.
5.2VA Function
|
1 Während Stopp die MENU-HOLD-Taste zweimal |
1 |
|
|
betätigen 1 . |
||
|
2 Die Taste WEITER oder die ZURÜCK drücken. |
||
|
3 Der Modus schaltet zwischen VA EIN (ON VA) und |
||
|
VA AUS (OF VA) um 1 2 . |
2 |
|
|
4 Die WIEDERGABE/PAUSE/RESTZEIT-Taste oder |
||
|
die STOP/DEL-Taste betätigen, um den angezeigten |
||
|
Modus auszuwählen. |
||
|
5 Der vorhergehende Vorgang wird mit dem ausgewählten Modus |
||
|
fortgesetzt. |
5.3Einstellen des Pieptons


 1
1

D Werkseitig ist der Piepton aktiviert (BEEP ON).
1 Während Stopp die MENU/ HOLD-Taste dreimal
|
betätigen 1 . |
2 |
|
|
2 Die Taste WEITER oder die ZURÜCK drücken. |
||
|
Der Modus schaltet zwischen BEEP AUS (OF BEEP) |
||
|
und BEEP ON (ON BEEP) um 1 2 . |
||
|
3 Die WIEDERGABE/PAUSE/RESTZEIT-Taste oder die STOP/ |
||
|
DEL-Taste betätigen, um den angezeigten Modus auszuwählen. |
||
|
4 Der vorhergehende Vorgang wird mit dem ausgewählten Modus |
||
|
fortgesetzt. |
D E U T S C H
5.4Einstellen des Aufnahmemodus
D Werkseitig ist der High-Quality-Modus eingestellt.
1 Während Stopp die MENU-HOLD-Taste viermal betätigen 1 .
2 Die Taste WEITER oder die ZURÜCK drücken. Der Modus schaltet zwischen long play (LP) und standard play (SP) sowie High Quality (HQ) um 1 2 3 .
3 Die WIEDERGABE/PAUSE/RESTZEIT-Taste oder die STOP/DEL-Taste betätigen, um den angezeigten Modus auszuwählen.
4 Der vorhergehende Vorgang wird mit dem ausgewählten Modus fortgesetzt.
5.5Dateien scannen
1 Während Stopp die MENU-HOLD-Taste fünfmal betätigen 1 .
2 Die WIEDERGABE/PAUSE/RESTZEIT-Taste betätigen, um die ersten 3 Sekunden jeder Datei (beginnend mit der ersten) des laufenden Ordners anzuspielen 2 .
20
6 Löschfunktion
6.1Löschen einer einzelnen Datei
|
1 |
|||||
|
1 Die STOP/DEL-Taste während Stopp kurz betätigen. |
|||||
|
Die Dateinummer erscheint, und DEL blinkt. |
|||||
|
2 Die Taste WEITER oder die ZURÜCK drücken, |
|||||
|
um die zu löschende Datei auszuwählen 1 . |
|||||
|
2 |
|||||
|
3 Die STOP/DEL-Taste etwa 3 Sekunden gedrückt |
|||||
|
halten, um die gewählte Datei zu löschen. Die Anzahl |
|||||
|
der Dateien wird automatisch um 1 verringert 2 . |
|||||
|
4 Drücken Sie kurz die STOP/DEL-Taste, um den Löschvorgang |
|||||
|
abzubrechen. |
6.2Löschen eines einzelnen Ordners
|
1 Während Stopp die STOP/DEL-Taste etwa 3 |
1 |
|
Sekunden gedrückt halten. Der laufende Ordner |
|
|
wird angezeigt, DEL blinkt 1 . |
|
|
2 Die FOLDER/REPEAT-Taste betätigen, um den zu |
2 |
löschenden Ordner auszuwählen 2 .
3 Die STOP/DEL-Taste etwa 3 Sekunden gedrückt halten, um alle Dateien des ausgewählten Ordners
|
zu löschen. Der Voice Tracer stoppt die Wiedergabe |
3 |
||||
|
bei diesem Ordner 3 . |
|||||
|
4 Drücken Sie kurz die STOP/DEL-Taste, um den |
|||||
|
Löschvorgang abzubrechen. |
Benutzerhandbuch |
||||
![]()
6.3Löschen aller Ordner (Formatiermodus)
|
1 |
||||
|
1 Während Stopp die STOP/DEL-Taste etwa 3 |
||||
|
Sekunden gedrückt halten. Der laufende Ordner |
||||
|
wird angezeigt, DEL blinkt 1 . |
||||
|
2 Die FOLDER/REPEAT-Taste wiederholt betätigen, |
||||
|
2 |
||||
|
bis alle vier Ordner angezeigt werden. „DELALL“ |
||||
|
wird angezeigt 2 . |
3 Die STOP/DEL-Taste etwa 3 Sekunden gedrückt halten, 


 um die Dateien aller Ordner zu löschen. Der Voice Tracer befindet sich nach Abschluss des Löschvorgangs in Ordner A.
4 Drücken Sie kurz die STOP/DEL-Taste, um den Löschvorgang abzubrechen.
7 Warnhinweise
•Versuchen Sie nicht, den Voice Tracer zu öffnen oder zu reparieren.
•Den Voice Tracer nicht verwenden, wenn der Gebrauch elektronischer Geräte verboten ist (wie zum Beispiel in Flugzeugen usw.).
•Den Voice Tracer oder sein Zubehör nicht in den Mund stecken.
•Den Voice Tracer nicht in Flüssigkeiten tauchen oder mit Flüssigkeiten überschütten.
•Den Voice Tracer oder sein Zubehör nicht Stößen aussetzen, das kann
|
Funktionsstörungen verursachen. |
|||||
|
• Nicht stark auf das LCD drücken: das kann das Display beschädigen |
|||||
|
oder Funktionsstörungen verursachen. |
|||||
|
• Den Voice Tracer nicht über längere Zeit direkter Sonnenbestrahlung |
|||||
|
oder Wärmequellen aussetzen. |
|||||
|
• Die Batterien entfernen, falls der Voice Tracer für längere Zeit nicht |
|||||
|
benutzt wird. |
H |
||||
|
• Nicht zu fest an angeschlossenen Kopfhörern, Mikrofon oder USB- |
|||||
|
S C |
|||||
|
Kabeln ziehen. |
|||||
|
D E U T |
|||||
|
8 |
Technische Daten |
||||
|
Gerät |
LFH 7655 |
LFH 7675 |
|||
|
Max. Aufnahmezeit / |
HQ |
6 h / 48 kbps / 16 kHz |
12 h / 48 kbps / 16 kHz |
||
|
Bitrate / |
SP |
36 h / 6.4 kbps / 8 kHz |
90 h / 6.4 kbps / 8 kHz |
||
|
Abtastrate |
LP |
66 h / 4 kbps / 8 kHz |
144 h / 4 kbps / 8 kHz |
||
|
Geräteabmessungen |
33 mm / 110 mm / 19 mm |
||||
|
Stromversorgung |
LR03 (AAA, UM-4) 2 Batterien |
||||
|
Batterielebensdauer |
Aufnahme: 11 h, Wiedergabe: 13 h |
||||
|
Max. Anzahl Aufnahmen |
Insgesamt 396 (99 pro Ordner x 4) |
||||
|
USB-Massenspeicher |

9 Fehlerbehebung |
• Einige Aufnahmen löschen oder auf ein |
|
|
externes Gerät übertragen. |
||
|
Am Bildschirm wird nichts angezeigt |
Die Wiedergabe funktioniert nicht |
Mögliche Ursache:
•Die Batterien sind leer
•Die Batterien wurden falsch eingelegt
Abhilfe:
•Neue Batterien einlegen
•Die Batterien richtig einlegen
Das Aufnehmen funktioniert nicht
Mögliche Ursache:
•Der Voice Tracer ist verriegelt (HOLD ON-Modus)
•Die Batterien sind leer
•Die maximale Anzahl der Aufnahmen wurde erreicht oder keine Speicherkapazität mehr
Abhilfe:
•Die Verriegelungsfunktion deaktivieren
•Neue Batterien einlegen
Mögliche Ursache:
•Der Voice Tracer ist verriegelt (HOLD ON-Modus)
•Die Batterien sind leer
•Es wurde noch nichts aufgenommen
•Die Lautstärkeregelung steht auf ganz leise
Abhilfe:
•Die Verriegelungsfunktion deaktivieren
•Neue Batterien einlegen
•Die Aufnahme-Nr. prüfen
•Die Lautstärkeregelung einstellen
Aufnahme oder Wiedergabe lassen sich nicht stoppen oder auf Pause stellen
Mögliche Ursache:
•Der Voice Tracer ist verriegelt (HOLD ON-Modus)
Abhilfe:
• Die Verriegelungsfunktion deaktivieren
Kein Ton aus dem Lautsprecher
Mögliche Ursache:
•Der Kopfhörer ist angesteckt
•Die Lautstärkeregelung steht auf ganz leise
Abhilfe:
•Den Kopfhörer entfernen
•Die Lautstärkeregelung einstellen
Kein Ton aus dem Kopfhörer
Mögliche Ursache:
•Der Kopfhörer ist nicht komplett angesteckt
•Die Lautstärkeregelung steht auf ganz leise
Abhilfe:
•Den Kopfhörer korrekt anstecken
•Die Lautstärkeregelung einstellen

|
Manuel de l‘utilisateur |
1 |
Votre Digital Voice Tracer |
||||||
|
1 |
Votre Digital Voice Tracer |
23 |
5 |
Menu |
28 |
1.1 |
Contenu de l’emballage |
|
|
1.1 |
Contenu de l’emballage |
23 |
5.1 |
Sensibilité d’enregistrement |
||||
|
1.2 |
Présentation des touches et de la |
du micro |
28 |
|||||
|
connectique |
24 |
5.2 |
Fonction VA |
29 |
||||
|
1.3 |
Indicateur à cristaux liquides et |
5.3 |
Marche/arrêt du bip sonore |
29 |
||||
|
symboles |
24 |
5.4 |
Définition du mode |
|||||
|
2 |
Pour commencer |
25 |
d’enregistrement |
29 |
Manuel de l‘utilisateur |
|||
|
2.1 |
Changer les piles |
25 |
5.5 |
Début de fichier |
30 |
|||
|
2.2 |
Mise sous tension du Voice Tracer |
25 |
6 |
Fonction de suppression |
30 |
|||
|
2.3 |
Mise hors tension du Voice Tracer |
25 |
6.1 |
Pour supprimer un fichier spécifique 30 |
||||
|
2.4 |
Fonction de verrouillage (Hold) |
25 |
6.2 |
Pour supprimer un dossier |
||||
|
3 |
Enregistrement |
26 |
spécifique |
30 |
Câble USB |
|||
|
3.1 |
Enregistrement avec le microphone |
6.3 |
Pour supprimer tous les dossiers |
|||||
|
incorporé |
26 |
(Mode Format) |
30 |
|||||
|
3.2 |
Enregistrement avec un microphone |
7 |
Avertissements |
31 |
DVT 7655 DVT 7675 |
|||
|
externe |
27 |
8 |
Fiche technique |
31 |
Voice Tracer |
|||
|
4 |
Écoute |
27 |
9 |
Dépannage |
32 |
Piles |
||
|
4.1 |
Écoute normale |
27 |
||||||
|
4.2 |
Écoute au ralenti |
27 |
||||||
|
4.3 |
Recherche |
27 |
||||||
|
4.4 |
Écoute d’autres fichiers |
28 |
Kit écouteurs/micro |
|||||
|
4.5 |
Répétition |
28 |
(DVT 7675) |
CD |
F R A N Ç A I S
|
Manuel de l‘utilisateur |
23 |

|
1.2 |
Présentation des touches et de la connectique |
1.3 Indicateur à cristaux liquides et |
||
|
A |
Prise écouteurs |
A |
B |
symboles |
|
I |
||||
|
B |
Prise microphone |
|||
|
J |
||||
|
C |
Contrôle du volume |
|||
|
K |
||||
|
D |
SUIVANT |
|||
|
Avance rapide, changement de fichier, changement de menu |
C |
|||
|
E |
REC/PAUSE Enregistrement et pause |
|||
|
F |
STOP/DEL |
O |
|
Arrêt enregistrement, effacement du fichier, effacement du |
D |
||||
|
dossier sélectionné, effacement de tous les dossiers |
|||||
|
L |
|||||
|
G |
FOLDER/REPEAT Changement de dossier et répétition de l’écoute |
E |
Mode d’enregistrement |
||
|
H |
Haut-parleur |
M |
Activation vocale de l’enregistrement |
||
|
I |
Microphone incorporé |
N |
F |
Indicateur de mode de répétition |
|
|
J |
Indicateur d’état d’enregistrement (rouge) / d’écoute (vert) |
Verrouillage des boutons |
|||
|
K |
Écran à cristaux liquides |
G |
Temps d’enregistrement/de lecture |
||
|
L |
PRÉCÉDENT |
restant |
|||
|
Retour rapide, changement de fichier, changement de menu |
Indicateur de format |
||||
|
M |
ÉCOUTE/PAUSE/TEMPS RESTANT |
Indicateur de lecture au ralenti |
|||
|
Lecture au ralenti et normale, pause, temps d’enregistrement restant, FICHIER |
H |
Durée de lecture, d’enregistrement, |
|||
|
(nombre d’enregistrements), heure, sélection du menu, fonctions de début de fichier |
de changement de menu |
||||
|
N |
MENU/HOLD |
Dossiers |
|||
|
Sensibilité d’enregistrement, VA, avertisseur sonore, temps d’enregistrement, |
Affichage des fichiers (0-99) |
||||
|
début de fichier (scan) et dispositif de verrouillage/déverrouillage |
Indicateur d’état des piles (Changer |
|
O Prise USB |
les piles si l’affichage alterne entre les |
|
|
24 |
niveaux 3 et 4.) |
Manuel de l‘utilisateur |
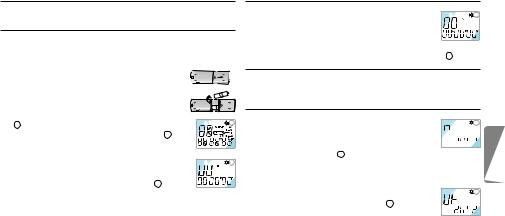
2 Pour commencer
2.1Changer les piles
1 S’assurer que l’alimentation est bien coupée. Ne jamais changer les piles si le périphérique est encore sous tension. Cela pourrait provoquer des dysfonctionnements.
2 Ouvrir le compartiment des piles. 3 Mettre les piles. S’assurer que les piles sont
correctement installées (taille « AAA ») et refermer le compartiment. Lors de l’installation des piles, l’écran à cristaux liquides affiche tous les indicateurs
|
1 et le périphérique passe en mode d’attente (jusqu’au |
1 |
|||||||
|
démarrage de l’enregistrement ou de l’écoute 2 ). |
||||||||
|
4 Le périphérique se met automatiquement hors tension |
||||||||
|
si aucune fonction n’est activée durant 1 minute. |
||||||||
|
5 Appuyer sur le bouton ÉCOUTE/ PAUSE/TEMPS |
2 |
|||||||
|
RESTANT pour mettre le périphérique en marche. |
||||||||
|
Le Voice Tracer passe en mode d’attente 2 . |
DRetirer les piles s’il n’est pas prévu d’utiliser le Voicer Tracer avant longtemps. Toute fuite au niveau des piles peut endommager l’appareil.
ESi le Voice Tracer ne fonctionne pas correctement, retirer les piles et les réinstaller.
Manuel de l‘utilisateur
2.2Mise sous tension du Voice Tracer
|
1 Appuyer sur le bouton ÉCOUTE/PAUSE/TEMPS |
1 |
|||
|
RESTANT pour activer le Voice Tracer. Le |
||||
|
périphérique passe en mode d’attente. Lors de |
||||
|
l’installation des piles, l’écran à cristaux liquides affiche tous les |
||||
|
indicateurs et le Voice Tracer passe en mode d’attente 1 . |
2.3Mise hors tension du Voice Tracer
Le périphérique se met automatiquement hors tension si aucune fonction n’est activée durant 1 minute.
2.4Fonction de verrouillage (Hold)
|
1 Appuyer sur le bouton MENU/HOLD et le maintenir 2 |
1 |
secondes environ lorsque le Voice Tracer est en mode 


 d’écoute, d’enregistrement ou d’attente pour activer la


 fonction de verrouillage 1 . Tous les boutons sont désactivés lorsque le périphérique est en mode de VERROUILLAGE et l’écran à cristaux liquides affiche «ON HOLD» à chaque pression de bouton.
2 Appuyer une nouvelle fois sur le bouton MENU/
|
HOLD et le maintenir 2 secondes environ pour |
2 |
|
débloquer la fonction de verrouillage 2 . L’écran à |
|
|
cristaux liquides affiche «OF HOLD» pour indiquer |
|
|
que la fonction de verrouillage a été désactivée. |
D Le mode de VERROUILLAGE est désactivé si le périphérique est
|
mis hors tension et à nouveau sous tension. |
25 |
F R A N Ç A I S

3 Enregistrement
CRemarque : Pour de bons résultats lorsque vous travaillez avec le logiciel de reconnaissance vocale Dragon, enregistrez en mode HQ (valeur d’usine par défaut) et convertissez le fichier .zvr en format wavaprès téléchargement sur le PC ! Veuillez également lire le manuel d’utilisation du Gestionnaire de téléchargement.
Points à considérer avant de commencer l’enregistrement (S’assurer que le périphérique est en mode d’attente) :
•Appuyer sur le bouton FOLDER/REPEAT pour sélectionner le dossier souhaité. Le Voice Tracer passe au dossier suivant (A, B, C, et D) à chaque pression du bouton. Si aucun dossier n’est sélectionné, l’enregistrement s’effectue sur le dossier affiché.
•Lorsque le nombre de fichiers du dossier affiché atteint 99, l’enregistrement se poursuit à la suite du dernier fichier du dossier suivant.
•Appuyer sur le bouton ÉCOUTE/PAUSE/TEMPS RESTANT pour afficher la capacité d’enregistrement restante.
•Appuyer sur le bouton SUIVANT pour séparer un FICHIER pendant l’enregistrement (fonction de séparation des fichiers).
•Le nombre maximal de fichiers dans chaque dossier est de 99.
•Si la durée d’enregistrement excède la capacité disponible ou si le nombre de fichiers est de 396, l’écran indique «FULL» et il est impossible de poursuivre l’enregistrement 1 . Le cas échéant, supprimer certains
|
enregistrements ou les transférer sur un périphérique ex- |
1 |
|
terne (audio ou PC) afin de poursuivre l’enregistrement. |
|
|
• Ne pas retirer les piles durant l’enregistrement. Cela |
|
|
pourrait provoquer des dysfonctionnements au niveau du Voice |
|
|
Tracer. S’il est prévu d’effectuer un enregistrement de longue |
|
|
durée, changer les piles avant de commencer l’enregistrement. |
•Lorsque le Voice Tracer est en mode VA, l’enregistrement s’arrête automatiquement si aucun son n’est détecté. Désactiver la fonction VA durant l’enregistrement de conversations importantes.
3.1 Enregistrement avec le microphone incorporé
1 Définir la sensibilité d’enregistrement souhaitée, le
|
1 |
|||||
|
dossier, la fonction VA et la qualité (HQ, standard ou |
|||||
|
longue durée) avant de commencer l’enregistrement |
|||||
|
(voir chapitre « Menu »). |
|||||
|
2 Diriger le microphone incorporé du périphérique |
|||||
|
2 |
|||||
|
vers la source sonore. |
|||||
|
3 Appuyer sur le bouton REC/PAUSE pour |
|||||
|
commencer l’enregistrement 1 2 . |
|||||
|
4 Appuyer sur le bouton REC/PAUSE pour suspendre |
|||||
|
3 |
|||||
|
l’enregistrement 3 . |
|||||
|
5 Appuyer sur le bouton REC/PAUSE pour poursuivre |
|||||
|
l’enregistrement. L’indicateur rouge s’allume à |
|||||
|
nouveau. |
6 Appuyer sur le bouton STOP/DEL pour arrêter l’enregistrement.
|
26 |
Manuel de l‘utilisateur |

3.2 Enregistrement avec un microphone externe
Raccorder le microphone à la prise microphone et procéder de la même façon qu’avec le microphone incorporé.
4 Écoute
DAppuyer sur le bouton ÉCOUTE/PAUSE/TEMPS RESTANT et le maintenir durant l’écoute normale pour afficher la durée restante du fichier affiché.
4.1Écoute normale
|
1 |
|||
|
1 Appuyer sur le bouton FOLDER/ REPEAT pour |
|||
|
sélectionner le dossier souhaité (A, B, C ou D). Si |
|||
|
aucun dossier n’est sélectionné, le dernier dossier, |
|||
|
sur lequel un enregistrement a été effectué, sera |
|||
|
2 |
|||
|
écouté. |
|||
|
2 Appuyer sur le bouton ÉCOUTE/PAUSE/TEMPS |
RESTANT pour commencer l’écoute. L’indicateur vert s’allume et la durée de l’enregistrement s’affiche 1 2 .
3 Appuyer à nouveau sur le bouton ÉCOUTE/PAUSE/ TEMPS RESTANT pour suspendre l’écoute.
4 Appuyer sur le bouton ÉCOUTE/PAUSE/TEMPS RESTANT pour reprendre l’écoute.
5 Appuyer sur le bouton STOP/DEL durant l’écoute ou la pause pour arrêter l’écoute.
4.2Écoute au ralenti
1 Appuyer sur le bouton REPEAT/FOLDER pour sélectionner le dossier souhaité (A, B, C ou D). Si aucun dossier n’est
sélectionné, le dernier dossier écouté ou enregistré, sera écouté. 2 Appuyer sur le bouton ÉCOUTE/PAUSE/TEMPS RESTANT et
le maintenir 2 secondes environ pour commencer l’écoute au ralenti. L’indicateur vert s’allume et la durée de lecture s’affiche.
3 Appuyer une nouvelle fois brièvement sur le bouton ÉCOUTE/ PAUSE/ TEMPS RESTANT durant l’écoute au ralenti pour suspendre l’écoute.
4 Sur Pause, appuyer sur le bouton ÉCOUTE/PAUSE/TEMPS RESTANT et le maintenir 2 secondes environ pour reprendre l’écoute au ralenti ou appuyer brièvement sur le bouton pour commencer l’écoute normale.
5 Appuyer sur le bouton STOP/DEL durant l’écoute ou la pause pour arrêter l’écoute.
4.3Recherche
1 Appuyer sur le bouton SUIVANT ou PRÉCÉDENT et le maintenir au moins une demi-seconde durant l’écoute.
2 L’écoute s’arrête et la durée affichée par l’écran à cristaux liquides augmente ou diminue rapidement.
F R A N Ç A I S
|
Manuel de l‘utilisateur |
27 |

3 Relâcher le bouton à l’endroit souhaité pour commencer l’écoute. 4 La recherche s’arrête à la fin du fichier affiché en appuyant sur le
bouton SUIVANT et en le maintenant ou au début du fichier affiché en appuyant sur le bouton PRÉCÉDENT et en le maintenant.
4.4Écoute d’autres fichiers
1 Pour passer au fichier suivant ou précédent, appuyer brièvement sur le bouton SUIVANT ou PRÉCÉDENT durant l’écoute ou la pause.
2 Pour naviguer dans tous les fichiers, appuyer sur le bouton SUIVANT ou PRÉCÉDENT et le maintenir durant l’arrêt pour passer au fichier souhaité.
3 Relâcher le bouton pour écouter le fichier affiché.
4.5Répétition
4.5.1 Répétition d’un passage
|
1 |
||||
|
1 Appuyer sur le bouton FOLDER/REPEAT à l’endroit |
||||
|
souhaité pour commencer la répétition du passage. |
||||
|
Le point de départ est défini et l’indicateur |
||||
|
clignote 1 . |
||||
|
2 |
||||
|
2 Pendant le clignotement |
, appuyer à sur le bou- |
|||
|
ton FOLDER/REPEAT à l’endroit souhaité pour arrêter |
||||
|
la répétition. L’indicateur |
s’allume de façon |
|||
|
continue et le passage sélectionné est répété constamment 2 . |
||||
|
3 Appuyer sur le bouton STOP/DEL pour arrêter l’écoute. |
4.5.2 Répéter un fichier
|
1 |
|||||||
|
1 Appuyer sur le bouton FOLDER/REPEAT et le |
|||||||
|
maintenir durant l’écoute. |
|||||||
|
2 L’indicateur |
se manifeste et le fichier affiché |
||||||
|
est constamment répété 1 . |
|||||||
|
3 Appuyer sur le bouton STOP/DEL pour arrêter l’écoute. |
|||||||
|
4.5.3 Répéter un dossier |
|||||||
|
1 |
|||||||
|
1 Appuyer sur le bouton FOLDER/REPEAT et le |
|||||||
|
maintenir durant l’écoute. |
|||||||
|
2 Lorsque |
apparaît sur l’écran à cristaux liquides, |
||||||
|
appuyer à nouveau sur le bouton FOLDER/REPEAT et le maintenir. |
|||||||
|
3 |
apparaît sur l’écran à cristaux liquides et tous les fichiers |
||||||
|
du dossier affiché sont constamment répétés 1 . |
5 Menu
5.1Sensibilité d’enregistrement du micro
D Les paramètres d’usine par défaut sont en mode haute sensibilité.
1 Appuyer une fois sur le bouton MENU/HOLD en mode arrêt 1 . 2 Appuyer sur le bouton SUIVANT ou PRÉCÉDENT . Le
|
28 |
Manuel de l‘utilisateur |
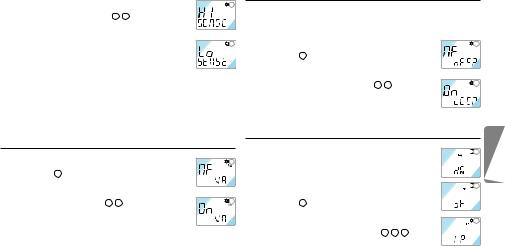
|
mode alterne entre basse sensibilité (LO SENSE) et |
1 |
|
haute sensibilité (HI SENSE) 1 2 . |
|
|
3 Appuyer sur le bouton ÉCOUTE/PAUSE/TEMPS |
|
|
RESTANT ou STOP/DEL pour sélectionner le mode |
|
|
affiché. |
2 |
|
4 L’opération précédente est reprise avec le mode |
|
|
sélectionné. |
DRemarque : HI SENSE : recommandé pour les enregistrements dans un environnement calme et pour l’enregistrement de conférences.
LO SENSE : recommandé pour un enregistrement dans un environnement bruyant. Installer le microphone près de la source sonore.
5.2Fonction VA
|
1 Appuyer deux fois sur le bouton MENU/HOLD en |
1 |
|
mode arrêt 1 . |
|
|
2 Appuyer sur le bouton SUIVANT ou PRÉCÉDENT |
|
|
. Le mode alterne entre VA ACTIVÉE (ON VA) et |
|
|
VA DÉSACTIVÉE (OF VA) 1 2 . |
2 |
|
3 Appuyer sur le bouton ÉCOUTE/PAUSE/TEMPS |
|
|
RESTANT ou STOP/DEL pour sélectionner le mode |
|
|
affiché. |
|
|
4 L’opération précédente est reprise avec le mode sélectionné. |
5.3Marche/arrêt du bip sonore
D Les paramètres d’usine par défaut sont sur BIP ACTIVÉ.
|
1 Appuyer trois fois sur le bouton MENU/HOLD en |
1 |
|
mode arrêt 1 . |
|
|
2 Appuyer sur le bouton SUIVANT ou PRÉCÉDENT |
|
|
. Le mode alterne entre BIP DÉSACTIVÉ (OF |
|
|
BEEP) et BIP ACTIVÉ (ON BEEP) 1 2 . |
2 |
|
3 Appuyer sur le bouton ÉCOUTE/PAUSE/TEMPS |
|
|
RESTANT ou STOP/DEL pour sélectionner le mode |
|
|
affiché. |
|
|
4 L’opération précédente est reprise avec le mode sélectionné. |
5.4Définition du mode d’enregistrement


 1
1

D Les paramètres d’usine par défaut sont en mode d’enregistrement haute qualité.


 2
2

1 Appuyer quatre fois sur le bouton MENU/HOLD en mode arrêt 1 .
2 Appuyer sur le bouton SUIVANT ou PRÉCÉDENT
|
. Le mode alterne entre longue durée (LP), |
3 |
|
standard (SP) et haute qualité (HQ) 1 2 3 . |
|
|
3 Appuyer sur le bouton ÉCOUTE/PAUSE/TEMPS |
F R A N Ç A I S
|
Manuel de l‘utilisateur |
29 |
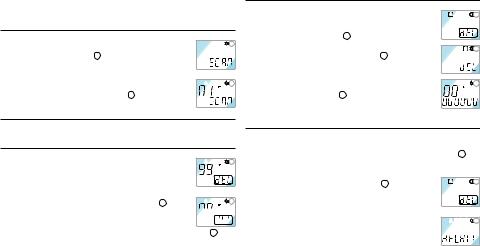
RESTANT ou STOP/DEL pour sélectionner le mode affiché. 4 L’opération précédente est reprise avec le mode sélectionné.
5.5Début de fichier
|
1 Appuyer cinq fois sur le bouton MENU/HOLD |
1 |
|||
|
durant l’Écoute/l’Arrêt 1 . |
||||
|
2 Appuyer sur le bouton ÉCOUTE/PAUSE/TEMPS |
||||
|
RESTANT pour écouter les trois premières |
||||
|
2 |
||||
|
secondes de chaque fichier en commençant par le |
||||
|
premier fichier du dossier affiché 2 . |
6 Fonction de suppression
6.1Pour supprimer un fichier spécifique
|
1 |
|||||
|
1 Appuyer brièvement sur le bouton STOP/DEL |
|||||
|
durant l’arrêt. Le numéro du fichier apparaît et la |
|||||
|
DEL clignote. |
|||||
|
2 Appuyer sur le bouton SUIVANT ou PRÉCÉDENT |
|||||
|
2 |
|||||
|
pour sélectionner le fichier à supprimer 1 . |
3 Appuyer sur le bouton STOP/DEL et le maintenir 3 


 secondes environ pour supprimer le fichier affiché.Le


 nombre de fichiers se réduit automatiquement d’1 fichier 2 .
4 Si le fichier n’est pas à effacer, appuyer brièvement sur le bouton 30 STOP/DEL.
6.2Pour supprimer un dossier spécifique
|
1 Appuyer sur le bouton STOP/DEL et le maintenir 3 |
1 |
|
secondes environ durant l’arrêt. Le dossier affiché |
|
|
apparaît et DEL clignote 1 . |
|
|
2 Appuyer sur le bouton FOLDER/ REPEAT pour |
2 |
sélectionner le dossier à supprimer 2 .
3 Appuyer sur le bouton STOP/DEL et le maintenir 3 secondes environ pour supprimer tous les fichiers du
|
dossier sélectionné. Le Voice Tracer arrête l’écoute |
3 |
||
|
au niveau de ce dossier 3 . |
|||
|
4 Si le dossier n’est pas à effacer, appuyer brièvement |
|||
|
sur le bouton STOP/DEL. |
6.3Pour supprimer tous les dossiers (Mode Format)
1 Appuyer sur le bouton STOP/DEL et le maintenir 3 secondes environ durant l’arrêt. Le dossier affiché apparaît et DEL clignote 1 .
2 Appuyer de façon répétée sur le bouton FOLDER/REPEAT jusqu’à ce que les quatre dossiers s’affichent. «
|
DELALL » apparaît alors sur l’écran |
2 . |
1 |
3 Appuyer sur le bouton STOP/DEL et le maintenir 3 secondes environ pour supprimer les fichiers de tous les dossiers. Après effacement, le Voice Tracer se
|
positionne au niveau du dossier A. |
2 |
||||
|
4 Si les dossiers ne sont pas à effacer, appuyer |
|||||
|
brièvement sur le bouton STOP/DEL. |
|||||
|
Manuel de l‘utilisateur |
![]()
7 Avertissements
•Ne jamais tenter d’ouvrir, de réparer ou de modifier le Voice Tracer.
•Ne pas utiliser le Voice Tracer dans les endroits où l’usage de périphériques électroniques est interdit (par exemple dans les avions etc.).
•Ne pas mettre le Voice Tracer ou ses accessoires dans la bouche.
•Ne pas plonger le Voice Tracer dans l’eau ou l’imprégner d’un quelconque liquide.
•Ne pas exposer le Voice Tracer ou ses accessoires à des chocs qui pourraient provoquer des dysfonctionnements.
•Ne pas exercer de pression sur l’écran à cristaux liquides, ce qui pourrait endommager l’écran ou provoquer des dysfonctionnements.
•Ne pas laisser le Voice Tracer en plein soleil ou exposé à toute autre source de chaleur pendant une période prolongée.
•Retirer les piles du Voice Tracer en cas de non-utilisation prolongée.
•Ne pas retirer violemment les écouteurs, le microphone ou les câbles USB.
|
8 |
Fiche technique |
|||
|
Périphérique |
LFH 7655 |
LFH 7675 |
||
|
Durée d’enregistrement / |
HQ |
6 h / 48 kbps / 16 kHz |
12 h / 48 kbps / 16 kHz |
|
|
débit / fréquence |
SP |
36 h / 6.4 kbps / 8 kHz |
90 h / 6.4 kbps / 8 kHz |
|
|
d’échantillonnage |
LP |
66 h / 4 kbps / 8 kHz |
144 h / 4 kbps / 8 kHz |
|
|
Dimensions |
33 mm / 110 mm / 19 mm |
|||
|
Puissance |
2 piles LR03 (AAA, UM-4) |
|||
|
Durée des piles |
Enregistrement : 11 h, lecture : 13 h |
|||
|
Nombre max. d’enregistrements |
396 au total (99 par dossier x 4) |
|||
|
Mémoire de masse USB |
F R A N Ç A I S
|
Manuel de l‘utilisateur |
31 |

9 Dépannage
L’écran d’affichage est noir
Origine possible :
•Les piles sont épuisées
•Les piles ne sont pas installées correctement
Correction :
•Mettre des piles neuves
•Remettre les piles en place correctement
Aucun enregistrement possible
Origine possible :
•Le Voice Tracer est verrouillé
•Les piles sont épuisées
•Le nombre maximal d’enregistrements est atteint ou la capacité d’enregistrement est épuisée
Correction :
•Débloquer la fonction de verrouillage
•Mettre des piles neuves
•Supprimer certains enregistrements ou les transférer sur un périphérique externe
Aucun enregistrement ne peut être écouté
Origine possible :
•Le Voice Tracer est verrouillé
•Les piles sont épuisées
•Il n’y a encore aucun enregistrement
•Le volume est à son niveau le plus bas
Correction :
•Débloquer la fonction de verrouillage
•Mettre des piles neuves
•Vérifier le nombre d’enregistrements
•Ajuster le contrôle du volume
Impossibilité d’arrêter ou de suspendre l’écoute ou l’enregistrement
Origine possible :
• Le Voice Tracer est verrouillé
Correction :
• Débloquer la fonction de verrouillage
Impossibilité d’écouter avec le hautparleur
Origine possible :
•Les écouteurs sont branchés
•Le contrôle du volume est à son niveau le plus bas
Correction :
•Retirer les écouteurs
•Ajuster le contrôle du volume
Impossibilité d’écouter avec les écouteurs
Origine possible :
•Les écouteurs ne sont pas parfaitement branchés
•Le volume est à son niveau le plus bas
Correction :
•Brancher correctement les écouteurs
•Ajuster le contrôle du volume
|
32 |
Manuel de l‘utilisateur |

|
Manual del usuario |
1 |
Su Digital Voice Tracer |
||||||
|
1 |
Su Digital Voice Tracer |
33 |
5 |
Menú |
38 |
1.1 Contenido de la caja |
||
|
1.1 |
Contenido de la caja |
33 |
5.1 |
Sensibilidad de grabación con |
||||
|
1.2 |
Información general de los controles |
micrófono |
38 |
|||||
|
y las conexiones |
34 |
5.2 |
Función VA |
39 |
||||
|
1.3 |
Indicador LCD y símbolos |
34 |
5.3 |
Establecimiento de aviso |
39 |
|||
|
2 |
Primeros pasos |
35 |
5.4 |
Establecimiento del modo de |
||||
|
2.1 |
Sustitución de pilas |
35 |
grabación |
39 |
Manual del usuario |
|||
|
2.2 |
Encendido del Voice Tracer |
35 |
5.5 |
Introducción de archivos |
40 |
|||
|
2.3 |
Apagado del Voice Tracer |
35 |
6 |
Función de borrado |
40 |
|||
|
2.4 |
Función de bloqueo (Hold) |
35 |
6.1 |
Para borrar un archivo específico |
40 |
|||
|
3 |
Grabación |
36 |
6.2 |
Para borrar una carpeta específica |
40 |
|||
|
3.1 |
Grabación con el micrófono |
6.3 |
Para borrar todas las carpetas |
Cable USB |
||||
|
incorporado |
36 |
(modo formato) |
40 |
|||||
|
3.2 |
Grabación con un micrófono |
7 |
Advertencias |
41 |
||||
|
externo |
37 |
8 |
Características |
41 |
DVT 7655 DVT 7675 |
|||
|
4 |
Reproducción |
37 |
9 |
Solución de problemas |
42 |
Voice Tracer |
||
|
4.1 |
Reproducción normal |
37 |
Pilas |
|||||
|
4.2 |
Reproducción a baja velocidad |
37 |
||||||
|
4.3 |
Búsqueda |
37 |
||||||
|
4.4 |
Reproducción de otros archivos |
38 |
||||||
|
4.5 |
Repetición |
38 |
Ear-Mic combo |
|||||
|
(solo para DVT 7675) |
CD |
|||||||
|
Manual del usuario |
33 |
E S PA Ñ O L

1.2 Información general de los controles y las conexiones |
1.3 Indicador LCD y símbolos |
|
A |
Toma de auriculares |
A |
B |
|
|
I |
||||
|
B |
Toma de micrófono |
|||
|
J |
||||
|
C |
Control de volumen |
|||
|
K |
||||
|
D |
SIGUIENTE |
|||
|
Búsqueda hacia adelante, cambio de archivo, cambio de menú |
C |
|||
|
E |
REC/PAUSE Grabación y pausa |
|||
|
F |
STOP/DEL |
O |
|
Detención de la grabación, borrado de archivo, borrado de |
D |
|||
|
carpeta seleccionada, eliminación de todas las carpetas |
||||
|
L |
||||
|
G |
FOLDER/REPEAT Cambio de carpeta y repetición de reproducción |
E |
||
|
H |
Altavoz |
M |
||
|
I |
Micrófono incorporado |
N |
F |
|
|
J |
Indicador LED de grabación (Rojo) / reproducción (Verde) |
|||
|
K |
Pantalla LCD |
G |
L ANTERIOR
Búsqueda hacia atrás, cambio de archivo, cambio de menú
M REPRODUCCIÓN/PAUSA/TIEMPO RESTANTE
|
Reproducción normal y a baja velocidad, pausa, tiempo de grabación restante, ARCHIVO |
H |
|
(número de grabación), hora, selección de menús, funciones de introducción de archivos |
NMENU/HOLD
Sensibilidad de grabación, VA, aviso, tiempo de grabación, introducción de archivos (examinar) y activación o desactivación del bloqueo
OToma USB
34
Modo de grabación
Activación vocal de la grabación Modo de repetición
Bloqueo de los botones Duración restante de grabación/ de reproducción
Indicador de formato Reproducción a baja velocidad Tiempo de reproducción/ grabación, de cambio de menú Carpetas
Pantalla de archivos (0-99) Estado de las pilas (Sustituya las pilas si
la pantalla alterna entre el stado 3 y el 4.)
Manual del usuario

2 Primeros pasos
2.1Sustitución de pilas
1 Asegúrese de que el dispositivo se encuentra apagado. No sustituya las pilas si el dispositivo se encuentra encendido, ya que esto podría dañarlo.
2 Abra la tapa de las pilas. 3 Introduzca las pilas. Asegúrese de que ha introducido
las pilas de forma correcta (tamaño “AAA”) y cierre la tapa. Una vez colocadas, la pantalla LCD mostrará todos los indicadores 1 y el dispositivo se
|
establecerá en modo en espera (a la espera de que se |
1 |
|||||||
|
active la grabación o la reproducción 2 ). |
||||||||
|
4 El dispositivo se apagará automáticamente si no se |
||||||||
|
activa ninguna función en el espacio de 1 minuto. |
||||||||
|
5 Pulse el botón REPRODUCCIÓN/ PAUSA/TIEMPO |
2 |
|||||||
|
RESTANTE para encender el dispositivo. El Voice |
||||||||
|
Tracer pasará a modo en espera 2 . |
DExtraiga las pilas si no va a utilizar el Voice Tracer durante un periodo prolongado de tiempo. Las pilas que presenten filtraciones puedes dañar el dispositivo.
EEn caso de que no foncione correctamente el voice Tracer, retire las pilas e introdúzcalas de nuevo.
Manual del usuario
2.2Encendido del Voice Tracer
|
1 Pulse el botón REPRODUCCIÓN/PAUSA/ |
1 |
||
|
TIEMPO RESTANTE para activar el Voice Tracer. |
|||
|
El dispositivo pasará al modo en espera. Cuando |
|||
|
introduzca las pilas, la pantalla LCD mostrará todos los |
|||
|
indicadores y el Voice Tracer pasará al modo en espera 1 . |
2.3Apagado del Voice Tracer
El dispositivo se apagará automáticamente si no se activa ninguna función en el espacio de 1 minuto.
2.4Función de bloqueo (Hold)
|
1 Mantenga pulsado el botón MENU/HOLD durante |
1 |
aproximadamente 2 segundos cuando el Voice Tracer 


 se encuentre en modo de reproducción, grabación o en


 espera para activar la función de bloqueo. Todos los botones se desactivan cuando el dispositivo se encuentra en modo de bloqueo y en la pantalla LCD aparece “ON HOLD” cuando se pulsa algún botón 1 .
2 Mantenga pulsado de nuevo el botón MENU/
|
HOLD durante aproximadamente 2 segundos para |
2 |
|
desactivar la función de bloqueo. En la pantalla LCD |
|
|
aparecerá “OF HOLD” para indicar que la función de |
|
|
bloqueo se ha desactivado 2 . |
D El modo de BLOQUEO se desactivará si se apaga el dispositivo y
|
se vuelve a encenderlo. |
35 |
E S PA Ñ O L

3 Grabación
CObservación: Para lograr buenos resultados, cuando trabaje con el software de reconocimiento de voz Dragon grabe en el modo HQ (configurado de fábrica) y convierta el archivo de sonido .zvr en formato .wav después de la descarga del PC. Lea también el manual del usuario del software Download Manager.
Tenga en cuenta las indicaciones siguientes antes de comenzar con el proceso de grabación (Compruebe que el dispositivo se encuentra en modo en espera):
•Pulse el botón FOLDER/REPEAT para seleccionar la carpeta deseada. El Voice Tracer pasará a la carpeta siguiente (A, B, C y D) cada vez que pulse el botón. Si no selecciona una carpeta, la grabación se efectuará en la carpeta actual.
•Cuando el número de archivos de la carpeta actual llegue a 99, la grabación continuará después del último archivo de la carpeta siguiente.
•Pulse el botón REPRODUCCIÓN/PAUSA/TIEMPO RESTANTE para comprobar la capacidad restante de grabación.
•Pulse el botón SIGUIENTE para separar un ARCHIVO mientras se encuentra grabando (función de separación de archivos).
•El número máximo de archivos que pueden guardarse en una carpeta es 99 (hasta 396 archivos: 99 x 4).
•Si el tiempo de grabación supera la capacidad disponible o el número
|
de archivos llega a 396, en la pantalla aparecerá “FULL” |
1 |
|
y no será posible continuar con la grabación 1 . En este |
|
|
caso, borre alguna grabación o páselas a un dispositivo |
|
|
externo (audio o PC) para disponer de espacio de grabación. |
•No extraiga las pilas durante la grabación. De lo contrario, es posible que el Voice Tracer no funcione correctamente. Si tiene la intención de grabar durante un periodo de tiempo prolongado, sustituya las pilas antes de iniciar la grabación.
•El proceso de grabación se detendrá automáticamente si no se detecta ningún sonido cuando el Voice Tracer se encuentra en modo VA. Desactive la función VA si se dispone a grabar conversaciones importantes.
3.1Grabación con el micrófono incorporado
|
1 |
|||||
|
1 Establezca la sensibilidad de grabación, la carpeta, la fun- |
|||||
|
ción VA y la velocidad (HQ, SP o LP) que desea antes |
|||||
|
de comenzar la grabación (consulte el capítulo “Menú”). |
|||||
|
2 Dirija el micrófono incorporado en el dispositivo |
|||||
|
2 |
hacia la fuente de sonido.
3 Pulse el botón REC/PAUSE para iniciar la grabación
1 2 .
|
3 |
|||
|
4 Pulse el botón REC/PAUSE para introducir una |
|||
|
pausa. El indicador LED rojo parpadeará 3 . |
|||
|
5 Pulse de nuevo el botón REC/PAUSE para continuar |
|||
|
con la grabación. El indicador LED rojo se volverá a iluminar. |
|||
|
6 Pulse el botón STOP/DEL para detener la grabación. |

3.2Grabación con un micrófono externo
Conéctelo a la toma de micrófono y siga el procedimiento indicado para el micrófono incorporado.
4 Reproducción
DMantenga pulsado el botón REPRODUCCIÓN/PAUSA/TIEMPO RESTANTE durante la reproducción normal para visualizar la duración restante del archivo.
4.1Reproducción normal
|
1 |
|||
|
1 Pulse el botón FOLDER/ REPEAT para seleccionar |
|||
|
la carpeta deseada (A, B, C o D). Si no selecciona |
|||
|
una carpeta, se llevará a cabo la reproducción de la |
|||
|
última carpeta que haya grabado. |
|||
|
2 |
|||
|
2 Pulse el botón REPRODUCCIÓN/PAUSA/ |
|||
|
TIEMPO RESTANTE para iniciar la reproducción. El |
|||
|
indicador LED verde se iluminará y la duración de |
|||
|
reproducción aparecerá en la pantalla 1 2 . |
|||
|
3 Pulse de nuevo el botón REPRODUCCIÓN/PAUSA/ TIEMPO |
|||
|
RESTANTE para efectuar una pausa en la reproducción. |
|||
|
4 Pulse de nuevo el botón REPRODUCCIÓN/ PAUSA/TIEMPO |
|||
|
RESTANTE para reanudar la reproducción. |
5 Pulse el botón STOP/DEL durante la reproducción o en la pausa para detener la reproducción.
4.2Reproducción a baja velocidad
1 Pulse el botón REPEAT/FOLDER para seleccionar la carpeta deseada (A, B, C o D). Si no selecciona una carpeta, se llevará a cabo la reproducción de la carpeta que ha grabado o reproducido por última vez.
2 Mantenga pulsado el botón REPRODUCCIÓN/PAUSA/TIEMPO RESTANTE durante aproximadamente 2 segundos para comenzar la reproducción a baja velocidad. El indicador LED verde se iluminará y aparecerá en la pantalla la duración de la grabación.
3 Pulse de nuevo el botón REPRODUCCIÓN/PAUSA/TIEMPO RESTANTE durante la grabación a baja velocidad para efectuar una pausa.
4 En pausa, mantenga pulsado el botón REPRODUCCIÓN/ PAUSA/ TIEMPO RESTANTE durante aproximadamente 2 segundos para reanudar la reproducción a baja velocidad o pulse brevemente el botón para iniciar la reproducción normal.
5 Pulse el botón STOP/DEL durante la reproducción o en la pausa para detener la reproducción.
4.3Búsqueda
1 Mantenga pulsado el botón SIGUIENTE o el botón ANTERIORdurante al menos medio segundo durante la reproducción.
2 La reproducción se detendrá y el tiempo aumentará o disminuirá rápidamente en la pantalla LCD.
E S PA Ñ O L

3 Suelte el botón cuando desee iniciar la reproducción.
4 La búsqueda se detendrá al llegar al final del archivo actual si mantiene pulsado el botón SIGUIENTE o al llegar al inicio del archivo actual si mantiene pulsado el botón ANTERIOR .
4.4Reproducción de otros archivos
1 Para pasar al archivo anterior o posterior, pulse brevemente el botón SIGUIENTE o el botón ANTERIOR durante la reproducción y en la pausa.
2 Para navegar por todos los archivos, mantenga pulsado el botón SIGUIENTE o el botón ANTERIOR cuando el dispositivo esté parado para pasar al archivo deseado.
3 Suelte el botón para reproducir el archivo que aparece en la pantalla.
4.5Repetición
4.5.1 Repetición de sección
|
1 |
|||||
|
1 Pulse el botón FOLDER/REPEAT donde desee iniciar |
|||||
|
la repetición de la sección. Una vez establecido el |
|||||
|
punto de inicio, el indicador |
se iluminará por |
||||
|
un breve espacio de tiempo |
1 . |
||||
|
2 |
|||||
|
2 Mientras |
esté iluminado, pulse de nuevo el botón |
||||
|
FOLDER/REPEAT donde desee detener la repetición. |
|||||
|
3 El indicador |
se iluminará continuamente y la |
||||
|
sección seleccionada se repetirá constantemente 2 . |
4 Pulse STOP/DEL para detener la reproducción.
38
4.5.2 Repetición de archivo
|
1 |
||||||
|
1 Mantenga pulsado el botón FOLDER/REPEAT |
||||||
|
durante la reproducción. |
||||||
|
2 El indicador |
aparecerá y el archivo actual se |
|||||
|
repetirá constantemente 1 . |
||||||
|
3 Pulse STOP/DEL para detener la reproducción. |
||||||
|
4.5.3 Repetición de carpeta |
||||||
|
1 |
||||||
|
1 Mantenga pulsado el botón FOLDER/REPEAT |
||||||
|
durante la reproducción. |
||||||
|
2 Cuando aparezca |
en la pantalla LCD, mantenga |
|||||
|
de nuevo pulsado el botón FOLDER/REPEAT. |
||||||
|
3 |
aparece en la pantalla LCD y todos los archivos de la |
|||||
|
carpeta actual se repetirán constantemente 1 . |
5 Menú
5.1Sensibilidad de grabación con micrófono
D El modo de alta sensibilidad viene determinado de fábrica.
1 Pulse el botón MENU/HOLD una vez durante la Parada 1 . 2 Pulse el botón SIGUIENTE o el botón ANTERIOR . El
Manual del usuario
 Loading…
Посмотреть инструкция для Philips Voice Tracer LFH0884 бесплатно. Руководство относится к категории диктофоны, 3 человек(а) дали ему среднюю оценку 8.1. Руководство доступно на следующих языках: русский. У вас есть вопрос о Philips Voice Tracer LFH0884 или вам нужна помощь? Задайте свой вопрос здесь
Не можете найти ответ на свой вопрос в руководстве? Вы можете найти ответ на свой вопрос ниже, в разделе часто задаваемых вопросов о Philips Voice Tracer LFH0884.
Какой вес Philips Voice Tracer LFH0884?
Philips Voice Tracer LFH0884 имеет вес 58 g.
Какой размер экрана Philips Voice Tracer LFH0884?
Размер экрана Philips Voice Tracer LFH0884 составляет 1.5 «.
Какая высота Philips Voice Tracer LFH0884?
Philips Voice Tracer LFH0884 имеет высоту 107 mm.
Какая ширина Philips Voice Tracer LFH0884?
Philips Voice Tracer LFH0884 имеет ширину 39 mm.
Какая толщина Philips Voice Tracer LFH0884?
Philips Voice Tracer LFH0884 имеет толщину 18 mm.
Инструкция Philips Voice Tracer LFH0884 доступно в русский?
Да, руководствоPhilips Voice Tracer LFH0884 доступно врусский .
Не нашли свой вопрос? Задайте свой вопрос здесь