-
Contents
-
Table of Contents
-
Bookmarks
Available languages
-
EN
-
FR
Quick Links
User ManUal + Warranty Info
Related Manuals for GoPro HD HERO2
Summary of Contents for GoPro HD HERO2
-
Page 1
User ManUal + Warranty Info… -
Page 2: Table Of Contents
Join the GoPro party at facebook.com/goprocamera to see what other GoPro owners are capturing with their GoPros. Share some of your own footage and contribute to the GoPro movement table of contents Accessories Mounts HD HERO2 Features Firmware Update Basics…
-
Page 3: Accessories
Floaty Backdoor Rechargeable Li-Ion Battery Anti-Fog Inserts Lens Replacement Kit Replacement HD Housing HD Skeleton Housing 16GB SD Memory Card 32GB SD Memory Card More at gopRo.com mounts Helmet Front Chest Mount Handlebar Seatpost Mount Harness Mount HD Wrist Housing…
-
Page 4: Product View And Features
HD Hero2 featUres 1. LED Recording Lights 4. HDMI Port 2. SHUTTER/SELECT Button 5. SD Card Slot 3. LCD Status Screen 6. POWER/MODE Button (cable not included) HD Hero2 featUres 7. 2.5mm Composite Port 11. Battery Door (cable not included) 12.
-
Page 5: Firmware Update
Before using the HD HERO2 for first time: 1. insert a sD memory card into the sD card slot. Your HD HERO2 is compatible with SD + SDHC memory cards (Class 4 or higher rated cards are recommended). ‣ See stoRAgE/sD cARDs for more information.
-
Page 6: Camera Modes
The LED Recording Light times and the Buzzer will emit seven quick beeps. You can change the HD HERO2 default settings to start in One Button Mode, which sets the camera to immediately begin recording once it is powered on.
-
Page 7: Recording Video
HD HERO2 will automatically stop recording when either the SD card is full or the battery runs out of power. Your video will be saved before the camera powers off.
-
Page 8: Photo Burst Mode
UsInG yoUr HD Hero2: caMera MoDes pHoto BuRst moDE In Photo Burst Mode, the camera will take 10 photos in 1 second. • Verify the camera is in Burst Mode, indicated by If not, press repeatedly until the camera displays the Burst Mode icon.
-
Page 9: Self-Timer Mode
UsInG yoUr HD Hero2: caMera MoDes sElF-timER moDE In Self-Timer Mode, the HD HERO2 will take a single photo at the end of a 10-second countdown. • Verify that the camera is in Self-Timer Mode, indicated by not, press repeatedly until the camera displays the Self-Timer Mode icon.
-
Page 10: Default Mode At Power Up
Select which camera mode is active (or default) when you power on your camera. viDEo pHoto BuRst (Default) VIDEO RESOLUTION MODES Your HD HERO2 camera shoots the following video resolutions: Resolution/ Field of View Screen Best Use Resolution 1080-30 / 127 1920×1080 Highest resolution.
-
Page 11
WIDE 170º (Default) MEDIUM 127º PHOTO RESOLUTION MODES The HD HERO2 can take photos in either 11MP, 8MP or 5MP resolutions. Changing this setting effects photos taken in Photo, Burst, Self Timer and Time Lapse Modes. 11MP (Default) When you are using the camera in one of the photo modes, the currently selected photo resolution appears on the LCD beneath the Photo Mode icon. -
Page 12
aDVanceD MenU settInGs ONE BUTTON MODE One Button Mode forces the camera to automatically begin recording in its default power up mode once the camera is ON. When One Button Mode is ON, is disabled. To stop recording, you must turn your camera OFF. (Default) to turn one Button mode on: (‣… -
Page 13: Additional Menu Settings
aDDItIonal MenU settInGs moRE mEnu sEttings To access additional settings, enter MORE settings are found in this subsection: DELETE Delete last file or delete all files and reformat SD card. CANCEL (Default) LAST ALL/ REFORMAT to delete the last file saved: 1.
-
Page 14
aDDItIonal MenU settInGs NTSC / PAL This setting controls both the video recording frame rate and playback of video from the camera when viewing on a TV. Select NTSC if viewing on a TV in North America. Choose PAL if viewing on a PAL TV (most televisions outside of North America) or if viewing on a PAL TV in any region. -
Page 15
aDDItIonal MenU settInGs DATE / TIME / MONTH You can set the camera’s internal clock to ensure that your video and photo files are saved with the correct date/time information. You will need to adjust the date/time information if the battery is removed from the camera for an extended period of time. -
Page 16: Storage/Sd Cards
The HD HERO2 camera is compatible with Microsoft® Vista, 7 or later and Mac OS X 10.5 or later. System Requirements for full High Definition 1080p and 720p 60fps playback: WinDoWs Microsoft Windows®…
-
Page 17: Transferring Files
AnD viDEo on A tv oR HDtv Using an HDMI cable (not included), plug your HD HERO2 camera into your TV. You can also use the composite port and a composite cable (not included). once connected:…
-
Page 18: Battery Life
REmoving tHE BAttERY FRom tHE cAmERA The HD HERO2 battery is designed to have a very tight fit to maximize reliability in high vibration activities. In most cases it is not necessary to remove the battery.
-
Page 19: Important Warning Messages
—so do not worry, as no damage has occurred. caMera asseMbly AssEmBling tHE cAmERA The HD HERO2 camera housing is waterproof to 197 feet / 60 meters and constructed of polycarbonate and stainless steel for ultimate durability. to assemble the camera into the housing: 1.
-
Page 20
Your HD HERO2 housing comes with two types of backdoors—waterproof and skeleton. To swap out a backdoor, click the door off its hinge. To attach the other backdoor, click it back on the hinge. skeleton Backdoor Waterproof Backdoor… -
Page 21
Re-install it into the grooves in the backdoor of the housing. WARning: Failure to follow these steps each time you use your HD HERO2 can result in leaks that damage or destroy your camera. Your warranty does not cover water damage resulting from user error. -
Page 22: Fcc Statement
caMera asseMbly pRo tips: AttAcHing ADHEsivE mounts clean the surface first. Be sure to carefully clean the surface where you will be attaching your adhesive mount. Wax, oil, dirt and other debris will reduce adhesion, which can result in a weak bond and the risk of losing your camera if the bond fails.
-
Page 23: Warranty
Warranty This product is guaranteed against manufacturing defects for one (1) year from the original date of purchase. GoPro’s sole obligation in the event of such defects during this period is to repair or replace the defective part or product with a comparable part or product at GoPro’s sole discretion.
-
Page 24
ManUel De l’UtIlIsateUr et InforMatIons relatIVes à la GarantIe… -
Page 25
Venez faire la fête avec GoPro sur facebook.com/ goprocamera pour voir les images prises sur des GoPro par leurs propriétaires. Nous vous encourageons à nous faire parvenir vos propres images et à contribuer au mouvement GoPro. table Des MatIères Accessoires Supports Fonctionnalités du HD HERO2… -
Page 26: Accessoires
Kit de remplacement d’objectif Boîtier HD de rechange Boîtier squelette HD Carte de mémoire SD 16 GB Carte de mémoire SD 32 GB poUr en saVoIr plUs, consUltez gopRo.com suppoRts Support de montage Harnais de montage Support pour avant pour casque…
-
Page 27: Fonctionnalités Du Hd Hero2
DU HD Hero2 1. Voyants d’enregistrement DEL 4. Port HDMI 2. Bouton d’obturateur / de sélection (SHUTTER/SELECT) 5. Fente de carte SD 3. Écran d’état LCD 6. Bouton d’allumage / de mode (câble non compris) (POWER/MODE) fonctIonnalItés DU HD Hero2 7.
-
Page 28: Mise À Jour Du Micrologiciel
‣ Voir BAttERiE pour toute information complémentaire. UtIlIser Votre HD Hero2 : les bases vuE D’EnsEmBlE DEs conFiguRAtions pAR DÉFAut Lorsque vous la sortez de sa boîte, votre caméra HD HERO2 est configurée de la manière suivante par défaut : mode caméra Video Résolution vidéo…
-
Page 29: Modes De La Caméra
‣ Voir le moDE un Bouton pour plus d’informations. UtIlIser Votre HD Hero2 : MoDes De la caMéra vuE D’EnsEmBlE Lorsque la caméra HD HERO2 est allumée, chaque pression sur de passer au mode d’enregistrement de la caméra suivant et aux menus de configurations dans l’ordre suivant : viDÉo…
-
Page 30
émet trois bips sonores pour indiquer que l’enregistrement est interrompu. HD HERO2 s’arrête automatiquement d’enregistrer lorsque la carte SD est pleine ou la batterie épuisée. Votre vidéo sera sauvegardée avant que la caméra ne s’éteigne. Lorsque l’on enregistre une vidéo, l’écran LCD affiche la résolution vidéo sélectionnée, le champ de vision de l’objectif (FOV), le temps… -
Page 31
UtIlIser Votre HD Hero2 : MoDes De la caMéra moDE pHotos En RAFAlEs (BuRst) En mode Burst, la caméra prend 10 photos en 1 seconde. • Vérifiez que la caméra est en mode Burst, indiqué sur l’écran LCD. Dans le cas contraire, appuyez sur à… -
Page 32: Configurations De Menu Avancées
UtIlIser Votre HD Hero2 : MoDes De la caMéra moDE REtARDAtEuR En mode retardateur, le HD HERO2 prend une seule photo à la fin d’un compte à rebours de 10 secondes. • Vérifiez que la caméra est un mode retardateur, indiqué sur le LCD. Dans le cas contraire, appuyez sur à…
-
Page 33
Choisissez le mode de caméra actif (ou par défaut) lorsque vous allumez votre caméra. viDÉo pHoto RAFAlE (Default) MODES DE RÉSOLUTION VIDÉO Votre caméra HD HERO2 enregistre dans les résolutions vidéo suivantes : Resolution/ Champ de Résolution Meilleure utilisa vision de l’écran… -
Page 34
170º (Défaut) ANGLE MOYEN 127º MODES DE RÉSOLUTIONS PHOTO Le HD HERO2 peut prendre des photos aux résolutions 11MP, 8MP ou 5MP. La modification de ces réglages affecte les photos prises en mode Photo, Rafale, Retardateur et Accéléré. 11MP (Défaut) Lorsque vous utilisez la caméra dans l’un des modes photo, la… -
Page 35
confIGUratIons De MenU aVancées MODE UN BOUTON Le mode Un Bouton contraint la caméra à commencer à enregistrer automatiquement dans son mode par défaut à l’allumage lorsque la caméra est allumée. Lorsque le mode Un Bouton est allumé, interrompre l’enregistrement, vous devez éteindre votre caméra.. (Défaut) to turn one-Button mode on: 1. -
Page 36: Configurations Supplémentaires
confIGUratIons sUppléMentaIres conFiguRAtions supplÉmEntAiREs Pour accéder aux configurations supplémentaires, accédez au menu MORE. Les réglages suivants sont offerts dans cette sous-section : EFFACER Effacer le dernier fichier ou effacer tous les fichiers et reformater la carte SD. CANCEL (Default) LAST ALL/ REFORMAT pour effacer le dernier fichier enregistré…
-
Page 37
confIGUratIons sUppléMentaIres NTSC / PAL Ce réglage contrôle à la fois le nombre d’images par seconde lors de l’enregistrement et la lecture de la vidéo de la caméra sur un poste de télévision. Choisissez NTSC si le visionnage s’effectue sur une télévision en Amérique du Nord, PAL s’il s’agit d’une télévision PAL (la plupart des télévisions à… -
Page 38
confIGUratIons sUppléMentaIres DATE / HEURE / MOIS Vous pouvez régler l’horloge interne de la caméra pour veiller à ce que vos fichiers vidéo et photo soient enregistrés avec les informations de date et d’heure correctes. Mois / Jour / Année 1. -
Page 39: Archivage / Cartes Sd
/ cartes sD La caméra HD HERO2 est compatible avec des cartes mémoires de 2 GB, 4 GB, 8 GB, 16 GB et 32 GB, ainsi qu’avec les cartes mémoires SD et SDHC. Toutes les cartes quelle qu’en soit la vitesse fonctionnent avec la caméra, mais GoPro recommande des cartes de la plus grande vitesse (dont l’étiquette porte la…
-
Page 40: Transfert De Fichiers
TV. You must also have an SD card with recorded information loaded into your HD HERO2 camera. If there are no video or photo files stored on your SD card you will see a no video, no photo, or no Files message.
-
Page 41: Durée De Charge De La Batterie
REtRAit DE lA BAttERiE DE lA cAmÉRA La batterie HD HERO2 est conçue pour se loger de manière très ajustée dans son compartiment pour une fiabilité optimale lors d’activités produisant de fortes vibrations.
-
Page 42: Messages D’avertissement Importants
MontaGe De la caMéra montAgE DE lA cAmÉRA Le boîtier de la caméra HD HERO2 est étanche à 197 pieds / 60 mètres et est fabriqué en polycarbonate et en acier inoxydable pour une durabilité pour monter la caméra dans le boîtier : 1.
-
Page 43
MontaGe De la caMéra Votre boîtier HD HERO2 est pourvu de deux types de couvercle — étanche et squelette. Pour changer le couvercle, faites-le sortir de ses charnières. Pour attacher l’autre couvercle arrière, remettez-le sur les charnières. couvercle arrière étanche couvercle arrière squelette… -
Page 44
MontaGe De la caMéra ÉcHAngE DEs couvERclEs Du BoîtiER Le boîtier de votre HD HERO2 a deux types de couvercles, un étanche et un squelette. pour changer le couvercle arrière : 1. Ouvrez le couvercle arrière du boîtier de sorte qu’il pende vers le bas. -
Page 45: Déclaration Relative À La Fcc
MontaGe De la caMéra consEil DEs pRos : FiXAtion DEs suppoRts ADHÉsiFs nettoyez d’abord la surface. Veillez à bien nettoyer la surface sur laquelle vous attacherez votre support de montage adhésif. La cire, l’huile, la saleté et les autres débris limitent et affaiblissent l’adhésion, et vous risquez de perdre votre caméra en cas de perte de l’adhésion.
-
Page 46: Garantie
Ce produit est garanti contre tout défaut de fabrication pendant un (1) an à compter de la date originale d’achat. La seule obligation de GoPro en cas de défaut de ce type pendant ce délai est de réparer ou remplacer la pièce ou le produit présentant le défaut par une pièce ou un produit comparable à…
-
Page 47
Learn about more GoPro products at: please recycle. 130-00037 reVb…
Видеокамеры GoPro
- Текст
- Оригинал
Advertising

ИНСТРУКЦИЯ ПОЛЬЗОВАТЕЛЯ + ИНФОРМАЦИЯ О ГАРАНТИИ
www.gopro-club.ru
www.vkontakte.ru/goproclub
www.facebook.com/goproclub
Advertising
Эта инструкция подходит к следующим моделям:
HD HERO 2 Surf Edition, HD HERO 2 Outdoor Edition, HD HERO2
![]()
User Manual + Warranty Info

Join the GoPro party at facebook.com/goprocamera to see what other GoPro owners are capturing with their GoPros. Share some of your own footage and contribute to the GoPro movement!
|
table of contents |
|
|
Accessories |
4 |
|
Mounts |
5 |
|
HD HERO2 Features |
6 |
|
Firmware Update |
8 |
|
Basics |
8 |
|
Camera Modes |
11 |
|
Advanced Menu Settings |
17 |
|
Additional Menu Settings |
24 |
|
Storage/SD Cards |
30 |
|
System Requirements |
31 |
|
Transferring Files |
32 |
|
Battery Life |
34 |
|
Important Warning Messages |
36 |
|
Camera Assembly |
37 |
|
FCC Statement |
43 |
|
Warranty |
44 |
|
Customer Support |
45 |

WEAR it. mount it. love it.
Premium Core
ACcessories ACcessories
3D HERO® System
LCD BacPac™
Battery BacPac™
Floaty Backdoor
Rechargeable Li-Ion Battery
Anti-Fog Inserts
Lens Replacement Kit
Replacement HD Housing
HD Skeleton Housing
16GB SD Memory Card
32GB SD Memory Card
4
More at gopro.com
Mounts
|
Helmet Front |
Chest Mount |
Handlebar Seatpost |
Surf HERO |
|
Mount |
Harness |
Mount |
Mounting Kit |
|
HD Wrist Housing |
Head Strap |
Suction Cup Mount |
Vented Helmet |
|
Strap |
|
Roll Bar Mount |
Tripod Mount |
Military Helmet |
Grab Bag of |
|
Mount |
Mounts |
|
Curved Adhesive |
Flat Adhesive |
|
Mounts |
Mounts |
5

|
HD HERO2 Features |
HD HERO2 Features |
|||||
|
1. LED Recording Lights |
4. HDMI Port |
7. 2.5mm Composite Port |
11. Battery Door |
|
|
2. SHUTTER/SELECT Button |
(cable not included) |
(cable not included) |
12. Buzzer |
|
|
5. SD Card Slot |
8. Microphone |
|||
|
3. LCD Status Screen |
(located on camera bottom) |
|||
|
9. HERO Port |
||||
|
6. POWER/MODE Button |
13. 3.5mm External Mic Input |
|||
|
10. USB Port (file transfer/charging) |
||||
|
6 |
7 |

Firmware Update
GoPro releases new camera features through firmware updates. Visit gopro.com/firmware to download the latest updates.
USING YOUR HD HERO2: Basics
Getting started
Before using the HD HERO2 for first time:
1.Insert a SD memory card into the SD card slot.
Your HD HERO2 is compatible with SD + SDHC memory cards (Class 4 or higher rated cards are recommended).
See STORAGE/SD CARDS for more information.
2.Install the battery into your HD HERO2 camera.
3.Charge the battery.
The lithium-ion battery included with your HD HERO2 ships only partially charged. For a full charge, use the USB cable to plug the camera into a power source such as a computer or USB charging device. No damage will occur to your battery if you are not able to charge it before using your camera.
See BATTERY LIFE for more information.
USING YOUR HD HERO2: BASICS
DEFAULT SETTINGs SNAPSHOT
Out of the box, your HD HERO2 camera is configured with the following featured default settings:
|
Camera Mode: |
Video |
|
|
Video Resolution: |
960p-30fps |
|
|
Field of View: |
170º Wide |
|
|
Still Photo Resolution: |
11 Megapixels |
|
|
Time Lapse Interval: |
1 second |
|
|
Power Up Mode: |
Video |
|
See SETTINGS MENU for more information on the camera’s default settings and instructions on how to change them.

USING YOUR HD HERO2: Basics
Powering ON and OFF
To power ON the HD HERO2:
Press and release . The LED Recording Light
 on the front of the camera will flash three times and the Buzzer
 will emit three short beeps.
To power OFF the HD HERO2:
Press and hold for two seconds. The LED Recording Light
 will flash seven times and the Buzzer
 will emit seven quick beeps.
|
You can change the HD HERO2 default settings to start in |
||
|
PRO |
One Button Mode, which sets the camera to immediately |
|
|
begin recording once it is powered on. |
||
|
TIP: |
||
|
See ONE BUTTON MODE for more information. |
||
USING YOUR HD HERO2: camera modes
overview
Once the HD HERO2 is powered on, each press of  will cycle through the camera’s recording modes and settings menu in the following order:
|
video |
Record video |
|
photo |
Take single photos |
|
burst |
Take 10 photos in 1 second |
|
time lapse |
Take a photo every 0.5, 1, 2, 5, 10, 30, and 60 seconds |
|
self timer |
Take a single photo after a 10-second countdown |
|
Settings |
Change the camera’s configuration |
Each camera mode can be changed in the Settings menu.
See ENTERING THE SETTINGS MENU for more information.

USING YOUR HD HERO2: camera modes
Recording Video
Verify that the camera is in Video Mode, indicated by on the LCD. If not, press
 repeatedly until the camera displays the Video Mode icon.
•To begin recording video:
Press and release . The camera will emit one beep and the LED Recording Light will flash while recording continues.
•To stop recording:
Press and release . The LED Recording Light will flash three times and the camera will emit three beeps to indicate recording has stopped.
HD HERO2 will automatically stop recording when either the SD card is full or the battery runs out of power. Your video will be saved before the camera powers off.
While recording video, the LCD will display the currently selected video resolution, lens field of view (FOV), the elapsed time of the current recording, and the remaining recording time determined by the free space on your SD card.
When recording is stopped, the LCD shows the number of video files stored on the SD card in place of the elapsed recording time.
|
When the camera is set to One Button Mode, hold for |
|
|
PRO |
two seconds to enter the Settings screen, where you can |
|
TIP: |
quickly turn OFF One Button Mode. |
See One Button Mode for more information.
12
USING YOUR HD HERO2: camera modes
Taking Single Photos
Verify that the camera is in Photo Mode, indicated by on the LCD. If not, press
  repeatedly until the camera displays the Photo Mode icon.
|
To take a photo: |
|||
|
Press and release . The camera will beep once and the LED |
|||
|
Recording Light will flash once to indicate a photo has been taken. |
|||
|
In Photo mode: |
|||
|
The LCD screen will display your currently selected photo |
|||
|
resolution (11MP, 8MP or 5MP), the number of photos stored on |
|||
|
your SD card, and the number of photos that can be taken before |
|||
|
the card is full. |
|||
|
If you think your SD card will fill up before you are able to |
|||
|
PRO |
transfer your files, select the 5MP option under the Photo |
||
|
settings menu. 5MP files are smaller than 11MP files, |
|||
|
TIP: |
allowing your SD card to store more photos. |
||
|
See PHOTO RESOLUTION MODES for more information. |
13

USING YOUR HD HERO2: camera modes
Photo Burst Mode
In Photo Burst Mode, the camera will take 10 photos in 1 second.
•Verify the camera is in Burst Mode, indicated by on the LCD screen. If not, press
  repeatedly until the camera displays the Burst Mode icon.
•Pressandrelease once to take a photo burst of ten photos over one second. The LED Recording Light will flash and the camera will beep 10 times to indicate the photos have been taken.
As in Photo Mode, the LCD screen will display your currently selected photo resolution (11MP, 8MP or 5MP), the number of photos stored on your SD card, and the number of photos that can be taken before the card is full.
PRO Compared to single Photo Mode, Burst Mode gives you 10 TIP: times as many chances to capture that “can’t miss” moment.
USING YOUR HD HERO2: camera modes
Time Lapse Photo Mode
Time Lapse Photo Mode is used to take a series of photos at 0.5, 1, 2, 5, 10, 30 or 60 second intervals (when using 0.5 seconds, it is recommended to use a class 10 or higher SD card).
See TIME LAPSE PHOTO MODE in advanced settings for instructions on how to change the interval setting.
•Verify the camera is in Time Lapse Mode, indicated by on the LCD
screen. If not, press repeatedly until the camera displays the Time Lapse Mode icon.
•Press the button once to begin taking Time Lapse photos. The LED Recording Light will flash each time a photo is taken.
•Press once to stop taking Time Lapse photos. The LED Recording Light will flash three times and the camera will emit three beeps to indicate Time Lapse has stopped.
As in Photo Mode, the LCD screen will display your currently selected photo resolution (11MP, 8MP or 5MP), the number of photos stored on your SD card, and the number of photos that can be taken before the card is full.

USING YOUR HD HERO2: camera modes
Self-Timer MODE
In Self-Timer Mode, the HD HERO2 will take a single photo at the end of a 10-second countdown.
•VerifythatthecameraisinSelf-TimerMode,indicatedby on the LCD. If not, press
 repeatedly until the camera displays the Self-Timer Mode icon.
•Totakeaphoto,pressandrelease . The camera will beep and the LED Recording Light will flash during the countdown, ending with a series of rapid beeps and flashes just before the photo is taken.
•Tostopthecountdowntimer,press .
.
As in Photo Mode, the LCD screen will display your currently selected photo resolution (11MP, 8MP or 5MP), the number of photos stored on your SD card, and the number of photos that can be taken before the card is full.
ADVANCED Menu SETTINGS
enterING the settings menu
Using the Settings Menu, many of the functions of the HD HERO2 can be customized based on your shooting needs.
To access your HD HERO2 settings:
1.Make sure your camera is powered ON.
2.Cycle through camera modes using  until the LCD Status Screen shows the SETTINGS
  icon.
icon.
3.To enter into the Settings Menu, press  .
.
4.Use  to toggle through each camera setting mode.
5.Every settings mode has a list of options. Press  to enter into a specific mode. The option which is currently active will be highlighted. Press
  to toggle through the list. Press
  to select highlighted option and exit list.
6.Press  to cycle to the next camera setting mode or press
  to display current option list again.

ADVANCED Menu SETTINGS
Default Mode at Power Up
Select which camera mode is active (or default) when you power on your camera.
|
video (Default) |
photo |
burst |
time Lapse |
Video Resolution Modes
Your HD HERO2 camera shoots the following video resolutions:
|
Resolution/ |
Field of View |
Screen |
Best Use |
|
FPS |
Resolution |
||
|
1080-30 |
170º / 127º |
1920×1080 |
Highest resolution. |
|
960-48 |
170º |
1280×960 |
This resolution provides the widest |
|
(Slow motion) |
wide angle |
top-to-bottom and side-to-side viewing |
|
|
area. Great for slow motion. |
|||
|
960-30 |
170º |
1280×960 |
This resolution provides the widest |
|
(Default) |
wide angle |
top-to-bottom and side-to-side |
|
|
viewing area. |
ADVANCED Menu SETTINGS
Video Resolution Modes : Cont’d
|
Resolution/ |
Field of View |
Screen |
Best Use |
|
FPS |
Resolution |
||
|
720-60 |
170º |
1280×720 |
For mounting on vehicles or gear |
|
(Slow motion) |
wide angle |
when a max side-to-side wide angle is |
|
|
desired but vertical viewing area is not |
|||
|
as important. Great for slow motion. |
|||
|
720-30 |
170º |
1280×720 |
For mounting on vehicles or gear |
|
wide angle |
when a max side-to-side wide angle is |
||
|
desired but vertical viewing area is not |
|||
|
as important. |
|||
|
WVGA-120 |
170º |
848×480 |
For smaller data files. This is standard |
|
(Super slow |
wide angle |
definition resolution. Great for super |
|
|
motion) |
slow motion. |
||
|
WVGA-60 |
170º |
848×480 |
For smaller data files. This is |
|
(Super slow |
wide angle |
standard definition resolution. |
|
|
motion) |
Great for slow motion. |
||
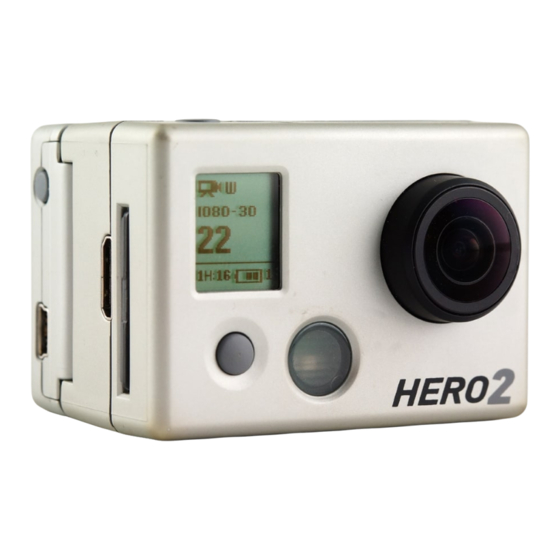
When you are using the camera in Video Mode, the currently selected video resolution appears on the LCD Status Screen beneath the Video mode icon.
|
PRO |
Consider using 960-48 when wearing camera on a helmet or |
|
|
a chest harness to see your handlebars when biking, or knees |
||
|
TIP: |
||
|
and skis when skiing. |
||
![]()
ADVANCED Menu SETTINGS
Field of View Modes
When recording video in 1080p, you can set the camera to shoot in the default wide-angle (170º) or a medium-wide angle (127º) field of view.
See VIDEO RESOLUTION MODES for more information.
|
WIDE |
170º (Default) |
|
MEDIUM |
127º |
Photo Resolution Modes
The HD HERO2 can take photos in either 11MP, 8MP or 5MP resolutions. Changing this setting effects photos taken in Photo, Burst, Self Timer and Time Lapse Modes.
11MP (Default)
8MP
5MP
When you are using the camera in one of the photo modes, the currently selected photo resolution appears on the LCD beneath the Photo Mode icon.
ADVANCED Menu SETTINGS
Time Lapse Modes
You can select a wide range of time intervals for your Time Lapse Mode photos.
Choose between 0.5, 1 (Default), 2, 5, 10, 30 and 60 seconds.
Upside Down Video/Image Mode
If you need to mount your camera upside down, you can set the camera to save the photo or video upside down so that it appears right side up when you review it on your computer or TV. This eliminates the need to “fllip” the photo or video later on your computer.
(Default) Camera right side up
Camera upside down
Spot Meter Settings
Turn on the Spot Meter when you are filming from a dark space into a brighter setting, like when filming outdside a windshield from inside a car.
OFF (Default)
ON
Note: The Spot Meter icon  is displayed in the upper-right corner of the LCD when Spot Metering is on.

ADVANCED Menu SETTINGS
One Button Mode
One Button Mode forces the camera to automatically begin recording in its default power up mode once the camera is ON. When One Button Mode is ON,  is disabled. To stop recording, you must turn your camera OFF.
OFF (Default)
ON
To turn One Button Mode ON:
1.Access the Settings Menu ( See ENTERING THE SETTINGS MENU for more information.)
2.Use  to cycle through the settings menus until the One Button Mode


 menu appears.
3.Press  to access the One Button Mode menu.
4.Press  once to select ON and press
  once to confirm selection.
5.Press  to cycle through settings menu. Select and press EXIT.
In One Button Mode, the camera is either “on and recording” or PRO powered OFF. This simplifiies camera operation when loaning TIP: the camera to a friend or when you know you only want to shoot
in one mode.
ADVANCED Menu SETTINGS
One Button Mode (Cont’d):
To turn One Button Mode OFF:
1.While the camera is ON and recording, press and hold  for two seconds until the settings icon
  appears.
2.Enter the settings menu by pressing  .
.
3.Use  to cycle through the settings menu until


 appears. Press
  to enter One Button Mode menu.
4.Press  once to select OFF and press
  to confirm selection.
5.Press  to cycle through the settings menu. Select and press EXIT.

ADditional Menu SETTINGS
More Menu Settings
To access additional settings, enter MORE
 menu. The following settings are found in this subsection:
delete
Delete last file or delete all files and reformat SD card.
cancel (Default)
last
all/Reformat
To delete the last file saved:
1.With the Delete  settings menu screen displayed, press
  to enter into the delete list.
2.Within the delete menu you can toggle through the list by using  to choose one of the following options:
•CANCEL: To cancel out of delete, Press  and return to the main settings menu.
ADditional Menu SETTINGS
delete (Cont’d):
•LAST: To delete the last file saved, Press  to select menu option. The LCD will display a confirmation menu. Within this menu you can toggle through the menu options using
  .
.
|
The menu options are: |
||||
|
NO: Press |
to cancel and return to the main settings menu. |
|||
|
YES: Press |
to select yes. The last file saved will be deleted. |
|||
•ALL/Format SD Card: To delete all files on the SD Card, press  to select menu. The LCD will display a confirmation menu. Within this menu you can toggle through the menu options using
  .
.
The menu options are:
No: Press  to cancel and return to the main settings menu
YES: Press  to select yes. All files will be deleted. During the delete all process, the LED lights will continue to blink until formatting is complete.

ADditional Menu SETTINGS
ntsc / pal
This setting controls both the video recording frame rate and playback of video from the camera when viewing on a TV. Select NTSC if viewing on a TV in North America. Choose PAL if viewing on a PAL TV (most televisions outside of North America) or if viewing on a PAL TV in any region.
NTSC (Default)
PAL
On Screen Display (OSD)
Select if you would like to display or hide the recording icons and information on your video screen (when displaying live video on a TV screen or using the LCD BacPac™). OFF will hide icons and ON will display icons.
OFF (Default)
ON
LED Lights
You can choose between having all 4 LED lights active, only 2 LED lights active (front and back) or turn OFF all the LED lights.
4 (Default)
2
OFF
ADditional Menu SETTINGS
Camera Sound
You can change volume level of the camera’s beep to be softer than the default or silent for stealth mode.
100% (Default)
70%
OFF
Auto Power Off
Program the camera to automatically turn OFF after a specific period of inactivity (when no videos or photos are being taken and no buttons have been pressed). If you set the camera to MANUAL, you will need to manually turn your camera OFF.
MANUAL (Default)
60sec
120sec
300sec

ADditional Menu SETTINGS
Date / Time / Month
You can set the camera’s internal clock to ensure that your video and photo files are saved with the correct date/time information. You will need to adjust the date/time information if the battery is removed from the camera for an extended period of time.
|
Month / Day / Year |
Hour / Minute |
|||||||
1.Press  repeatedly until Date/Time/Month


 appears on the LCD.
2.Press  to begin setting the date and time.
3.The LCD will show the Date/Time/Month setting menu with the Month field highlighted. Press  to access the list of months (1 to 12).
4.Use  to cycle through the list until the correct month is highlighted.
5.Press  to select the highlighted month.
6.The Date/Time/Month setting menu will appear on the LCD. Press  once to highlight the Day field and press
  to access the list of days (1 to 31).
7.Again use  to highlight the correct day and
  to select it.
8.Repeat this process for the Year, Hour and Minute.
PRO The Date/Time/Month fields are abbreviated. For example, the TIP: month is MM, day is DD, Year is YY, hour is HH, minute is MM.
28
ADditional Menu SETTINGS
Exit Settings Menu
From the EXIT screen, press  to return to the camera’s default camera mode.
29
 Loading…