- Manuals
- Brands
- Janome Manuals
- Sewing Machine
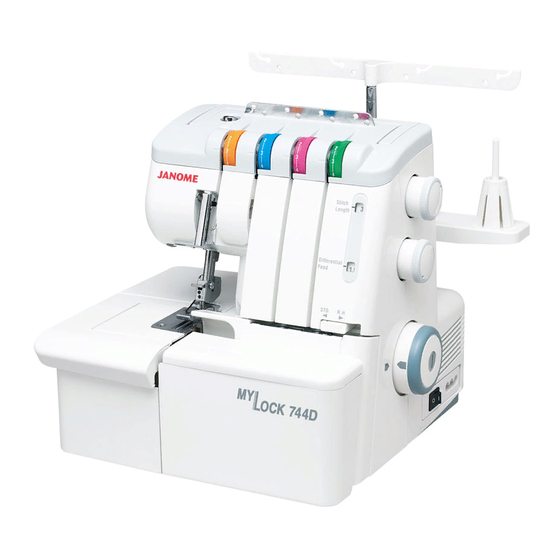
- MyLock 744D
- Instruction book
-
Contents
-
Table of Contents
-
Troubleshooting
-
Bookmarks
Quick Links
INSTRUCTION BOOK
MANUEL D’INSTRUCTIONS
INSTRUKCJA OBSŁUGI
MODEL
MODÉLE
744D
MODEL
Related Manuals for Janome MyLock 744D
Summary of Contents for Janome MyLock 744D
-
Page 1
INSTRUCTION BOOK MANUEL D’INSTRUCTIONS INSTRUKCJA OBSŁUGI MODEL MODÉLE 744D MODEL… -
Page 2
If it still does not fit, contact a qualified electrician to install the proper outlet. Do not modify the plug in any way. Foot Controller YC-482J or TJC-150 for use with Sewing Machine MyLock 744D (for U. S. A. market only) NOTICE TECHNIQUE : Pour les appareils avec fiche polarisée (une lame plus large que l’autre) : pour réduire le risque… -
Page 3
IMPORTANT SAFETY INSTRUCTIONS Your sewing machine is designed and constructed only for HOUSEHOLD use. Read all Instructions before using this appliance. DANGER – To reduce the risk of electric shock: 1. An appliance should never be left unattended when plugged in. Always unplug this appliance from the electrical outlet immediately after using and before cleaning. -
Page 4
DIRECTIVES IMPORTANTES SUR LA SÉCURITÉ Cette machine à coudre est conçue et fabriquée uniquement pour l’usage DOMESTIQUE. Lire toutes les instructions avant d’utiliser la machine à coudre. DANGER : Pour réduire le risque de secousse électrique : 1. Cette machine à coudre ne devrait jamais être laissée sans surveillance lorsqu’elle est branchée. Débrancher toujours cette machine à… -
Page 5
WAŻNE WSKAZÓWKI BEZPIECZEŃSTWA Korzystając z niniejszego urządzenie, należy zachować podstawowe środki ostrożności. Przed użyciem maszyny, przeczytaj wszystkie zalecenia. NIEBEZPIECZEŃSTWO Aby wyeliminować ryzyko porażenia prądem 1. Nie wolno pozostawiać bez nadzoru urządzenia podłączonego do źródła zasilania. Maszynę do szycia należy wyłączyć niezwłocznie po zakończeniu pracy oraz przed oczyszczeniem. -
Page 6
Do’s and Don’ts 1. Always be aware of the up-and-down movement of the needle and do not turn your attention away from the machine while it is running. 2. When leaving the sewing machine unattended, the main switch of the machine must be switched off or the plug must be removed from the socket-outlet. -
Page 7: Table Of Contents
TABLE OF CONTENTS ROLLED HEMMING, PICOT EDGING AND PREPARATION NARROW HEMMING Names of Parts …………8 Machine Setting and Thread, Fabric and Attaching the Waste Chip Box ……10 Range of the Tension Dial ……..77 Storing the Accessory Box ……..10 Thread Tension ………….
-
Page 8
TABLE DES MATIÈRES P R É PAR AT I ON Noms des pièces …………. 9 Pose de la boîte de rebut ……….11 Rangement de la boîte d’accessoires ……11 Accessoires standard ………… 11 Rangement de l’enfile-aiguille ……..11 Raccordement de la machine à la source d’alimentation ………. -
Page 9
ROULEAUTÉ, REVERS Á PICOTS ET OURLET ÉTROIT Réglage de la machine et fil, tissu et portée du cadran de tension …………..78 Tension du fil …………..81 Pour de meilleurs résultats ………. 83 SURJET DÉCOR ATIF Fil et tissu …………..85 Réglage de la machine ………. -
Page 10
SPIS TREŚCI PRZYGOTOWANIE OBRĘBIANIE ZAWIJANE, ZAKAŃCZANIE PIKOTKĄ I WĄSKIE OBRĘBIANIE Nazwy części ………………… 9 Przymocowywanie pojemnika na strzępki ….11 Ustawienia maszyny i nici, materiału oraz zasięgu Przechowywanie pojemnika na akcesoria….11 naprężenia nici………….. 79 Akcesoria standardowe ……….11 Naprężenie nici …………81 Przechowywanie nawlekacza igły ………11 Dla lepszych rezultatów……………….. -
Page 11: Preparation
PREPARATION e r i Names of Parts Left needle thread tension dial Right needle thread tension dial Upper looper thread tension dial Lower looper thread tension dial Pressure adjusting screw Thread guide bar Thread guide Carrying handle Spool stand Spool pin Spool holder Stitch length dial Differential feed dial…
-
Page 12: Noms Des Pièces
P R Z Y G O T O W A N I E P R É PA R AT I O N Nazwy części Noms des pièces Regulator naprężenia lewej nici od igły Cadran de tension du fil d’aiguille gauche Regulator naprężenia lewej nici od igły Cadran de tension du fil d’aiguille droite Regulator naprężenia nici pętlującej górnej…
-
Page 13: Attaching The Waste Chip Box
Attaching the Waste Chip Box Insert the hook into groove on looper cover. Groove Looper cover Waste chip box Hook Storing the Accessory Box Insert the accessory box into the waste chip box. Waste chip box Accessory box Standard Accessories Screwdriver (Large) Screwdriver (Small) Tweezers…
-
Page 14: Pose De La Boîte De Rebut
Pose de la boîte de rebut Przymocowywanie pojemnika na strzępki. Insérer le crochet dans l’encoche du couvercle du Wstaw haczyk w rowek na pokrywie mechanizmu pętlującego boucleur. Rowek Encoche Pokrywa mechanizmu pętlującego Couvercle du boucleur Pojemnik na strzępki Boîte de rebut Haczyk Crochet Przechowywanie pojemnika na akcesoria…
-
Page 15: Connecting The Machine To The Power Supply
Connecting the Machine to the Power Supply 1. Turn off the power switch, and connect the machine plug to the machine socket. 2. Connect the power supply plug to your power supply. 3. Turn on the power switch. Power switch Machine plug Machine socket Power supply plug…
-
Page 16: Raccordement De La Machine À La Source D’alimentation
Podłączenie maszyny do źródła zasilania Raccordement de la machine à la source d’alimentation 1. Wyłącz przycisk zasilania, po czym podłącz 1. Éteindre l’interrupteur et brancher la prise de la wtyczkę od maszyny do gniazdka przy maszynie machine à la douille de la machine. 2.
-
Page 17: How To Turn The Handwheel
How to Turn the Handwheel Always turn the handwheel toward you (Counterclockwise). Handwheel Extension Table The extension table provides added sewing surface and can be easily removed for free arm sewing. Detaching the table: Pull the table away from the machine. Attaching the table: Push the extension table until it snaps into the machine.
-
Page 18: Comment Tourner Le Volant
Comment tourner le volant Aby obrócić koło napędowe Toujours tourner le volant vers soi (mouvement anti- Zawsze obracaj kołem do siebie (zgodnie z ruchem wskazówek zegara) horaire). Koło napędowe Volant Wysuwany stolik Table d’extension La table d’extension ajoute de la surface pour coudre et Wysuwany stolik powoduje zwiększenie powierzchni szycia i może być…
-
Page 19: The Position Of Thread Guide Bar
The Position of Thread Guide Bar 1. Pull the thread guide bar up as far as it will go. 2. Turn the thread guide bar so that the thread guides are right above the spool pins. Thread guide bar Thread guide Stoppers Spool pin * Make sure the two stoppers on the thread guide…
-
Page 20: Position De La Barre Du Guide-Fil
Position de la barre du guide-fil Pozycja prętu prowadnicy nici 1. Tirer la barre du guide-fil aussi loin que possible. 1. Podnieś pręt prowadnicy tak wysoko, jak to możliwe. 2. Tourner la barre du guide-fil pour que les guide-fils 2. Obróć prowadnicę tak, by prowadnice przechodziły se trouvent juste au-dessus des broches à…
-
Page 21: Changing Needle
Changing Needle Turn off the power switch and unplug the machine. Raise the needle to its highest position. Then loosen the left or right needle clamp screw for the needle you are going to remove. Needle clamp screw on the left Needle clamp screw on the right * Use HA-1SP No.14 Needle or No.11.
-
Page 22: Changement De L’aiguille
Wymiana igły Changement de l’aiguille Éteindre l’interrupteur et débrancher la machine. Wyłącz przycisk zasilania i odłącz maszynę od prądu. Soulever l’aiguille à sa position la plus haute. Podnieś igłę do jej najwyższej pozycji. Desserrer ensuite la vis de pince-aiguille gauche ou Zwolnij lewą…
-
Page 23: Raising Or Lowering The Presser Foot
Raising or Lowering the Presser Foot By raising or lowering the presser foot lifter, the presser foot goes up or down. * While in operation, keep the presser foot lowered except when threading the machine or test running without threads. Thread tension will be released when the presser foot lifter is raised.
-
Page 24: Soulever Ou Baisser Le Pied Presseur
Podnoszenie i opuszczanie stopki dociskowej Soulever ou baisser le pied presseur En soulevant ou en baissant le releveur de pied Operując wskazaną dźwignią, podnosisz i opuszczasz stopkę dociskową. presseur, le pied presseur monte et descend. * Podczas pracy, utrzymuj stopkę w pozycji * Lors du fonctionnement, garder le pied presseur opuszczonej, chyba że nawlekasz maszynę…
-
Page 25: Adjustment Of Stitch Length
Adjustment of Stitch Length To select stitch length, turn the dial. The larger the number, the longer the stitch. The stitch length can be adjusted from 1 to 5 mm. Position “R” is for rolled and narrow hemmings. Stitch length dial Setting mark Stitch length indicating window Adjustment of Differential Feed Ratio…
-
Page 26: Réglage De La Longueur Des Points
Regulacja długości ściegu Réglage de la longueur des points Pour sélectionner la longueur des points, tourner le Aby wybrać długość ściegu, przekręć regulator. cadran. Im numer na wskaźniku, tym dłuższy ścieg. Plus le chiffre est élevé, plus la longueur des points est Długość…
-
Page 27: To Deactivate The Upper Knife
CAUTION Turn the power switch off and unplug the machine when deactivating or activating the upper knife. To Deactivate the Upper Knife Turn the handwheel counterclockwise to align the setting marks on the handwheel and machine. Push the upper knife release lever all the way back to the setting mark on the back (down position).
-
Page 28: Désactiver Le Couteau Supérieur
UWAGA ATTENTION Wyłącz przycisk zasilania i wyłącz wtyczkę z kontaktu, Arrêter et débrancher la machine en enlevant la prise de gdy wyłączasz lub włączasz pracę górnego nożyka courant si vous désirez activer ou désactiver le couteau supérieur. Aby wyłączyć górny nożyk Désactiver le couteau supérieur Przekręć…
-
Page 29: Adjustment Of Cutting Width
Adjustment of Cutting Width When cutting width is too narrow or too wide against seam width, adjust it as follows. 1. Turn off the power switch and unplug the machine. 2. Remove the extension table and open the looper cover. 3.
-
Page 30: Réglage De La Largeur De Coupe
Réglage de la largeur de coupe Regulacja szerokości przycinania Lorsque la largeur de coupe est trop étroite ou trop Kiedy szerokość przycinania jest zbyt wąska lub zbyt large par rapport à la largeur de couture, la régler szeroka wobec szerokości ściegu, wyreguluj ją w następujący sposób: comme suit : 1.
-
Page 31: Adjustment Of Needle Plate Setting Knob
Adjustment of Needle Plate Setting Knob (Changing to Standard Serging or Rolled Hemming) The needle plate setting knob adjusts the position of the chaining finger. The chaining finger will move back under the needle plate when shifting the needle plate setting knob to the “R”…
-
Page 32: Réglage Du Bouton De Réglage De La Plaque À Aiguille
Regulacja ustawienia gałki przy płytce ściegowej Réglage du bouton de réglage de la plaque à (zmiana na standardowe szycie materiałów wełnianych aiguille (changement au surfilage standard ou [płaszczów, garniturów itp.] lub obrębianie zawijane) rouleauté) Gałka przy płytce ściegowej pozwana na regulację Le bouton de réglage de la plaque à…
-
Page 33: Setting The Lower Looper Pre-Tension Setting Slider And Changeable Thread Guide
Setting the Lower Looper Pre-Tension Setting Slider and Changeable Thread Guide Standard serging(STD.) STD. R.H. Standard serging with 2, 3 or 4 threads q Lower looper pre-tension setting slider Rolled hemming(R.H.) Rolled hemming with 2 or 3 threads STD. R.H. 3/4 thread serging Serging with 3 or 4 threads w Changeable thread guide…
-
Page 34: Réglage Du Dispositif De Glissement De Réglage De Pre-Tension Du Pied-De-Biche Inférieur Et Du Guide-Fil Changeant
Ustawienia naprężenia dolnego mechanizmu Réglage du dispositif de glissement de réglage pętlującego de pre-tension du pied-de-biche inférieur et du Suwak oraz Prowadnica nici (zmienna) guide-fil changeant Surjet normal(STD.) Standardowe szycie materiałów wełnianych (STD) Surjet normal à 2, 3 ou 4 fils Szycie standardowe przy użyciu 2, 3 lub 4 nici q Dispositif de glissement de pretension du boucleur q Suwak naprężenia dolnego mechanizmu pętlującego…
-
Page 35: Changing Totwo-Thread Serging
Changing to Two-Thread Serging * In case of two-thread serging, use one needle thread and the lower looper thread. Remove other threads. To attach the spreader Put the tip of the spreader into the hole on the upper looper, and slide the spreader down into the holder. q Spreader w Upper looper e Holder…
-
Page 36: Changement Au Surjet À Deux Fils
Changement au surjet à deux fils Zmiana na szycie dwiema nićmi Pour installer l’épandeuse W przypadku szycia za pomocą dwóch nici, użyj jednej nici od igły oraz nici dolnego mechanizmu pętlującego. Placez le bout de l’épandeuse dans le trou du pied-de- Zdejmij inne nici.
-
Page 37: Threading The Machine
Threading the Machine The left illustration shows the completed threading conditions of the four threads. Lower looper thread Upper looper thread Right needle thread Left needle thread Thread guide Thread guide plate Threading chart The machine is pre-threaded to make threading easier.
-
Page 38: Enfilage De La Machine
Enfilage de la machine Nawlekanie maszyny L’illustration de gauche montre les conditions lustracja pokazuje kompletne warunki nawlekania dla czterech nici d’enfilage terminé des quatre fils. Nić od dolnego mechanizmu pytlującego Fil du boucleur inférieur Nić od górnego mechanizmu pytlującego Fil du boucleur supérieur Nić…
-
Page 39
• If one of the threads is broken, follow the re-threading procedure as follows: * Turn off the power switch and unplug the machine. 1. Raise the presser foot and pull the thread chain out to the back of the presser foot, and cut the chain to separate each of the threads. -
Page 40
— Jeżeli jedna z nici pęknie, postępuj w następujący • Si l’un des fils est cassé, suivre la procédure de sposób, aby nawlec ją ponownie réenfilage comme suit : * Wyłącz przycisk zasilania i wyjmij wtyczkę z * Éteindre l’interrupteur et débrancher la machine. kontaktu. -
Page 41: Threading The Lower Looper
• Threading the Lower Looper Open the looper cover. Place the spool of thread on the right side spool pin. * The points to thread for lower looper are marked in green. * A convenient threading chart is placed on the machine body inside the looper cover.
-
Page 42: Enfiler Le Boucleur Inférieur
• Nawlekanie dolnego mechanizmu pętlującego • Enfiler le boucleur inférieur Ouvrir le couvercle du boucleur. Otwórz pokrywę mechanizmu pętlującego Połóż szpulkę z nicią na prawym trzpieniu. Placer la bobine de fil sur la broche à bobine droite. * Punkty dla nawlekania dolnego mechanizmu * Les points à…
-
Page 43
4. Hook the thread on the corner , and then pass the thread through the looper thread guide. 5. Pass the thread through the changeable thread guide. 6. Pass the thread through the looper thread take-up lever (lower). 7. Pass the thread through the lower looper thread guide (1). -
Page 44
4. Zahacz nić o narożnik A, po czym przeprowadź nici 4. Accrocher le fil sur le coin (A), puis faire passer le poprzez prowadnicę nici dolnego mechanizmu fil dans le guide-fil du boucleur. pętlującego 5. Faire passer le fil dans le guide-fil changeant. 5. -
Page 45
10. Move the lower looper to its rightmost position by turning the handwheel, and draw the thread with a pair of tweezers through the hole on the lower looper 10 cm (4˝) or more. * Make sure the needle threads are not tangled on the lower looper. -
Page 46
10. Przesuń dolny mechanizm pętlujący do jego 10. Déplacer le boucleur inférieur à sa position najbardziej prawej pozycji, obracając kołem d’extrême droite en tournant le volant et faire napędowym. Następnie przeciągnij 10cm lub więcej passer le fil à l’aide de pinces dans le trou du nici (ze pomocą… -
Page 47: Threading The Upper Looper
• Threading the Upper Looper Place a spool of thread on the spool pin second from the right. * The points to thread for upper looper are marked in red. * A convenient threading chart is placed on the machine body inside the looper cover. 1.
-
Page 48: Enfiler Le Boucleur Supérieur
Nawlekanie górnego mechanizmu pętlującego • Enfiler le boucleur supérieur Placer une bobine de fil sur la deuxième broche à Połóż szpulkę z nicią na bolcu (drugim od prawej) bobine à partir de la droite. * Punkty dla nici od górnego mechanizmu pętlującego są…
-
Page 49: How To Thread Only The Upper Looper
4. Hook the thread on the corner , and then pass the thread through the looper thread guide. Looper thread guide 5. Pass the thread through the looper thread take-up lever (upper). Looper thread take-up lever (upper) 6. Pass the thread through upper looper thread guide.
-
Page 50: Boucleur Supérieur
4. Zahacz nić o narożnik B, po czym przeprowadź nici 4. Accrocher le fil sur le coin (B) et faire passer le fil poprzez prowadnicę nici dolnego mechanizmu dans le guide-fil du boucleur. pętlującego Guide-fil du boucleur Prowadnica nici mechanizmu pętlującego 5.
-
Page 51: Threading The Needle On The Right
• Threading the Needle on the Right Place the spool of thread on the spool pin second from the left. * The points to thread for needle on the right are marked in blue. * A convenient threading chart is placed on the machine body inside the looper cover.
-
Page 52: Enfiler L’aiguille De Droite
• Enfiler l’aiguille droite Nawlekanie igły po prawej stronie Placer la bobine de fil sur la deuxième broche à Połóż szpulkę z nicią na bolcu (drugim od lewej) bobine à partir de la gauche. * Punkty dla nici od górnego mechanizmu pętlującego są…
-
Page 53: How To Use The Needle Threader
4, 5, 6. After passing through the front cover thread guide (1), pass the thread from the bottom of the front cover thread guide (2) and the take-up lever cover from right to left. 7. Guide the thread over the front cover thread guide (3).
-
Page 54: • Emploi De L’enfile Aiguille
4, 5, 6. Po przeprowadzeniu nici przez prowadnicę na 4, 5, 6. Après avoir franchi le guide-fil du couvercle froncie pokrywy (1), przeprowadź nić przez avant (1), faire passer le fil à partir du bas du prowadnicę z tyłu pokrywy (2) oraz przez guide-fil du couvercle avant (2) et du couvercle pokrywę…
-
Page 55: Threading The Needle On The Left
• Threading the Needle on the Left Place the spool of thread on the left side spool pin. * The points to thread for needle on the left are marked in orange. * A convenient threading chart is placed on the machine body inside the looper cover.
-
Page 56: Enfiler L’aiguille De Gauche
Nawlekanie igły po lewej stronie • Enfiler l’aiguille gauche Placer la bobine de fil sur la broche à bobine gauche. Połóż szpulkę z nicią na bolcu (pierwszy od lewej) * Les points à enfiler pour l’aiguille gauche sont * Punkty dla nici od górnego mechanizmu indiqués en orange.
-
Page 57
4, 5. Slide the thread from the bottom of front cover thread guide (2) and the take-up lever cover right to left. 6. Guide the thread over the front cover thread guide (3). 7. Insert the thread into the left slot of the needle thread guide plate. -
Page 58
4, 5. Przeprowadź nić z prawej strony do lewej z tyłu do 4, 5. Glisser le fil du bas du guide-fil du couvercle przodu prowadnicy na pokrywie frontowej (2) oraz avant (2) et du couvercle du levier tendeur, de la prowadnicy na pokrywie szarpaka droite vers la gauche. -
Page 59: Test Stitching Starting Sewing
TEST STITCHING Starting Sewing 1. Insert the fabric under the toe of the foot. (It is not necessary to raise the foot.) 2. Turn the handwheel gently toward you a couple of turns and check the thread chain. Then start sewing slowly.
-
Page 60: Points D’essai Commencer À Coudre
SZYCIE TESTOWE POINTS D’ESSAI Commencer à coudre Rozpoczynanie szycia 1. Insérer le tissu sous l’orteil du pied. (Il n’est pas 1. Wstaw materiał pod stopkę (nie jest konieczne, by nécessaire de soulever le pied). podnosić stopkę). 2. Tourner le volant délicatement vers soi sur environ 2.
-
Page 61: Securing Ends
Securing Ends To avoid unravelling, it is necessary to leave a thread chain about 5 cm (2˝) long at the beginning and at the end of a seam. To secure the beginning and end of a seam, choose one of the following methods.
-
Page 62: Retenir Les Extrémités
Zabezpieczanie szwu Retenir les extrémités Pour éviter l’effilochage, il est nécessaire de laisser une Aby uniknąć rozpruwania, jest konieczne, by zostawić łańcuszek długości około 5cm na początku i na końcu chaîne de fils d’environ 5 cm (2˝) de long au début et à szwu.
-
Page 63: Thread Tension (4 Threads)
Thread Tension (4 threads) Correct tension The illustration at left shows sewing results with correct tension settings. However, adjusting the thread tension may be required depending upon the type of fabric and thread being used. Wrong side of fabric Right side of fabric Right needle thread Left needle thread Upper looper thread…
-
Page 64: Tension Des Fils (4 Fils)
Naprężenie nici (dla czterech nici) Tension des fils (4 fils) Bonne tension Właściwe naprężenie L’illustration de gauche montre les résultats de couture Rysunek po lewej stronie wskazuje rezultat szycia przy avec les bons réglages de tension. Toutefois, le réglage pracy z właściwym ustawieniem naprężenia nici. Jednakże, korekta naprężenia może być…
-
Page 65
Looper thread tension is out of balance (1) The illustration shows sewing results when the lower looper thread tension is too tight and/or upper looper thread tension is too loose. Remedy: Loosen lower looper thread tension and/or tighten upper looper thread tension. Wrong side of fabric Right side of fabric Right needle thread… -
Page 66
Tension du fil de boucleur non équilibrée (1) Naprężenie nici mechanizmu pętlującego jest rozregulowane (1) L’illustration montre les résultats de couture lorsque la tension du fil du boucleur inférieur est trop serrée et/ Rysunek pokazuje rezultaty szycia, gdy naprężenie nici ou la tension du fil du boucleur supérieur est trop dolnego mechanizmu pętlującego jest zbyt mocne i/lub lâche. -
Page 67: Threading The Machine (3 Threads)
Threading the Machine (3 threads) Using the needle on the right only (for regular three-thread serging) When you use the right needle, the standard sewing width is 3.5 mm. The illustration on the left shows you how to thread the needle. Note: Tighten the needle clamp screw on the side that is not being used to prevent losing the screw.
-
Page 68: Enfiler La Machine (3 Fils)
Nawlekanie maszyny (dla trzech nici) Enfiler la machine (3 fils) Emploi de l’aiguille droite seulement Używając tylko prawej igły (pour surfilage à trois fils régulier) (dla regularnego szycia trzema nićmi) Lorsque l’aiguille droite est utilisée, la largeur de Kiedy używasz prawej igły, standardowa szerokość couture standard est de 3,5 mm.
-
Page 69: Thread Tension (3 Threads)
Thread Tension (3 threads) Correct tension The illustration at left shows sewing results with correct tension settings. However, adjusting the thread tension may be required depending on the type of fabric and thread being used. Wrong side of fabric Right side of fabric Right or left needle thread Upper looper thread Lower looper thread…
-
Page 70: Tension Des Fils (3 Fils)
Naprężenie nici (dla trzech nici) Tension des fils (3 fils) Bonne tension Właściwe naprężenie L’illustration à gauche montre les résultats de couture avec les réglages de tension appropriés. Rysunek po lewej stronie wskazuje rezultat szycia przy Toutefois, le réglage de tension du fil peut être requis pracy z właściwym ustawieniem naprężenia nici.
-
Page 71: Threading The Machine (2 Threads)
Threading the Machine (2 threads) Using the needle on the right only (for regular two-thread serging) When you use the right needle, the standard sewing width is 3.5 mm. The illustration on the left shows you how to thread the needle. Note: Tighten the needle clamp screw on the side that is not being used to prevent losing the screw.
-
Page 72: Enfilage De Machine(2 Fils)
Nawlekanie maszyny (dla dwóch nici) Enfilage de la machine(2fils) Utilisation de l’aiguille(côté droit) Używając tylko prawej igły (dla regularnego szycia trzema nićmi) (pour le surjet á trois fois large ou pour le surjet á deux fils réglier): 3,5 mm de large Kiedy używasz prawej igły, standardowa szerokość…
-
Page 73: Thread Tension (2 Threads)
Thread Tension (2 threads) Correct tension The illustration at left shows sewing results with correct tension settings. However, adjusting the thread tension may be required depending on the type of fabric and thread being used. Wrong side of fabric Right side of fabric Right or left needle thread Lower looper thread Thread tension adjustment…
-
Page 74: Tension Du Fils(2 Fils)
Tension du fil (2 fils) Naprężenie nici (dla dwóch nici) Bonne tension Właściwe naprężenie L’illustration à gauche montre une couture avec les Rysunek po lewej stronie wskazuje rezultat szycia przy pracy z właściwym ustawieniem naprężenia nici. bons réglages de tension. Jednakże, korekta naprężenia może być…
-
Page 75
Needle/Lower looper thread tension is out of balance (2) The illustration shows sewing results when the needle thread tension is too tight and/or lower looper thread tension is too loose. Remedy: Loosen needle thread tension and/or tighten lower looper thread tension. Left needle thread tension dial Right needle thread tension dial Lower looper thread tension dial… -
Page 76
Naprężenie nici od igły lub nici od dolnego Tension du fil d’aiguille/boucleur inférieur non mechanizmu jest rozregulowane (2) équilibrée (2) Rysunek pokazuje rezultat szycia, gdy naprężenie nici L’illustration montre les résultats de couture lorsque la dolnego mechanizmu pętlującego jest za słabe i/lub tension du fil d’aiguille est trop serrée et/ou lorsque la naprężenie nici od igły jest zbyt mocne małe. -
Page 77: Thread And Needle Chart
Thread and Needle Chart Differential Type of thread Needle Stitch length feed ratio Type of fabric Lightweight Organdy, Cotton: No. 80 – 100 HA-1 SP 2.0 – 3.0 0.5 – 1.0 Georgette, Silk: No. 80 – 100 No. 11 Lawn, Crepe Synthetic: No.
-
Page 78: Tableau Des Fils Et Aiguilles
Tableau des fils et aiguilles Rapport Longueur des Aiguille Type de fil d’entraînement points différentiel Type de tissu Léger : organdi, Coton : n°80 – 100 HA-1 SP 2.0 – 3.0 0.5 – 1.0 Soie : n° 80 – 100 crêpe georgette, soie N°…
-
Page 79: Tabela Doboru Nici I Igieł
Tabela doboru nici i igieł Proporcja Długość Nić podawania Igła ściegu Rodzaj materiału Organdyna, żorżeta, Bawełna: N r 80 — 100 HA-1 SP 2.0 — 3.0 0.5 — 1.0 cienkie płótna Lekkie Jedwab: N r 80 — 100 Nr 11 lniane/bawełniane, krepa N r 80 -100 Syntetyk:…
-
Page 80: Rolled Hemming, Picot Edging And Narrow Hemming
ROLLED HEMMING, PICOT EDGING AND NARROW HEMMING Machine Setting and Thread, Fabric and Range of the Tension Dial The setting of tension dials may vary depending on the type and thickness of fabric and thread being sewn. Picot Edging Narrow Hemming Rolled Hemming Stitch Length…
-
Page 81: Rouleauté, Revers Á Picots Et Ourlet Étroit
ROULEAUTÉ, REVERS À PICOTS ET OURLET ÉTROIT Réglage de la machine et fil, tissu et portée du cadran de tension Le réglage des cadrans de tension peut varier selon le type et l’épaisseur du tissu et du fil utilisés. Rouleauté Revers à…
-
Page 82: Obrębianie Zawijane, Zakańczanie Pikotką I Wąskie Obrębianie Ustawienia Maszyny I Nici, Materiału Oraz Zasięgu Naprężenia Nici
Obrębianie zawijane, zakańczanie pikotką i wąskie obrębianie Ustawienia maszyny i nici, materiału oraz zasięgu naprężenia nici Ustawienia regulatorów naprężenia mogą się zmieniać, w zależności od typu czy grubości materiału oraz rodzaju nici Wąskie obrębianie Obrębianie zawijane Zakańczanie pikotką Długość ściegu (3 ~ 4) Proporcja podawania…
-
Page 83: Thread Tension
Thread Tension For rolled hemming and picot edging Correct tension The illustration at left shows sewing results with correct tension settings. Adjusting the thread tension may be required depending on the type of fabric and thread being used. Wrong side of fabric Right side of fabric Right needle thread Upper looper thread…
-
Page 84: Tension Du Fil
Naprężenie nici Tension du fil Pour rouleauté et revers à picots Dla obrębiania zawijanego i zakańczania pikotką Bonne tension Właściwe naprężenie Rysunek pokazuje rezultaty szycia dla właściwego L’illustration de gauche montre les résultats de couture naprężenia. avec les bons reeglages de tension. Korekta naprężenia może być…
-
Page 85: For Better Results
For Better Results Rolled hemming Pull the end of thread chain to the back lightly in the beginning and end of sewing. Fabric Thread chain Picot edging Pull the fabric lightly to the back while sewing. Fabric For narrow hemming Correct tension The illustration at left shows sewing results with correct tension settings.
-
Page 86: Pour De Meilleurs Résultats
Dla lepszych rezultatów Pour de meilleurs résultats Rouleauté Obrębianie zawijane Tirer légèrement l’extrémité de la chaîne de fils vers Przeciągnij delikatni koniec łańcuszka do tyłu — przy początku i końcu szycia l’arrière au début et à la fin de la couture. Materiał…
-
Page 87: Decorative Overedging
DECORATIVE OVEREDGING * Refer to pages 60, 62, 66 for thread tension balance adjustment. * For the best results, pull the thread chain to the back lightly at the beginning and end of sewing. Overedging Thread and Fabric Thread Fabric Synthetic : No.
-
Page 88: Surjet Décor Atif
SURJET DÉCOR ATIF OBRĘBIANIE DEKORACYJNE * Se référer aux pages 61, 63, 67 pour le réglage * Informacje o regulowaniu naprężenia nici znajdziesz na stronach 61, 63 i 67 d’équilibre de tension du fil. * Dla osiągnięcia lepszego rezultatu, pociągnij * Pour obtenir de meilleurs résultats, tirer légèrement delikatnie łańcuszek do tyłu przy początku i końcu la chaîne de fils vers l’arrière au début et à…
-
Page 89: Pin Tucking Thread And Fabric
PIN TUCKING * Refer to page 77 (Narrow Hemming) for thread tension balance adjustment. q Pin tucking Thread and Fabric Thread Fabric Synthetic : No. 60~80 Needle thread on the Light to right Silk : No. 50~80 Medium Upper looper thread Synthetic : No.
-
Page 90: Nervur E Fil Et Tissu
N E RV U R E ZA S ZE W KA * Se référer à la page 78 (ourlet étroit) pour le réglage * Aby uzyskać informację o ustawieniu naprężenia nici — patrz strona 79 (wąskie obrębianie) d’équilibre de la tension du fil. Zaszewka Nervure Materiał…
-
Page 91: Care Of Your Machine Replacing The Upper Knife
CARE OF YOUR MACHINE Replacing the Upper Knife To remove: 1. Turn off the power switch and unplug the machine. 2. Open the looper cover and side cover. 3. Turn the handwheel toward you until the upper knife reaches its highest position. 4.
-
Page 92: Entretien De La Machine
KONSERWACJA MASZYNY ENTRETIEN DE LA MACHINE Remplacement du couteau supérieur Wymiana nożyka górnego Retrait : Aby zdjąć: 1. Éteindre l’interrupteur et débrancher la machine. 1. Wyłącz przycisk zasilania i wyjmij wtyczkę z kontaktu 2. Ouvrir le couvercle du boucleur et le couvercle 2.
-
Page 93: Replacing The Light Bulb
Replacing the Light Bulb 1. Turn off the power switch and unplug the machine. 2. Loosen the face plate set screw, and remove the face plate. Face plate Set screw To remove: Push and twist to the left. To attach: Push and twist to the right.
-
Page 94: Remplacement De L’ampoule
Wymiana żarówki Remplacement de l’ampoule 1. Éteindre l’interrupteur et débrancher la machine. 1. Wyłącz przycisk zasilania i wyjmij wtyczkę z kontaktu 2. Desserrer la vis de réglage de la plaque frontale et 2. Zluzuj śrubę przy pokrywie czołowej i zdejmij retirer la plaque frontale.
-
Page 95: Oiling The Machine
Oiling the Machine Apply a few drops of fine quality sewing machine oil to the parts indicated with arrows. It is recommended to apply oil once a week in normal use, once in ten hours in continuous use. * Open the looper cover and apply oil. Carrying the Machine Raise the handle to carry the machine Handle…
-
Page 96: Huilage De La Machine
Oliwienie maszyny Huilage de la machine Appliquer quelques gouttes d’huile de machine à Nanieś kilka kropki dobrej jakości oleju do maszyn na części wskazane strzałkami (patrz rysunek). coudre de bonne qualité aux pièces indiquées par des flèches. Przy normalnym użytkowaniu, zaleca się by oliwić maszynę…
-
Page 97: Attachment Mounting Plate
Attachment Mounting Plate You need the attachment mounting plate when using the following optional attachments: Beading attachment Gathering attachment Elastic gathering attachment Cloth guide Setting the attachment mounting plate 1. Remove the extension table. 2. Insert the back tab all the way into the slot on the side plate along the upper edge.
-
Page 98: Plat De Support D’attachement
Dodatkowa płytki do montażu Plaque de support pour l’accessoire Potrzebujesz dodatkowej płytki do montażu, jeżeli Vous avez besoin du plaque de support d’ accessoire à chcesz skorzystać z następujących opcjonalnych l’aide des accessoires facultatifs suivants: części: Accessoires à perler Przyrząd do robienia paciorków Accessoires à…
-
Page 99: Troubleshooting
Troubleshooting Condition Cause Reference 1. The feed dog is packed with lint. See page 90. The fabric is not being fed 2. The presser foot has been raised. Lower the presser foot. smoothly. The needle 1. The needle is incorrectly inserted. See page 18.
-
Page 100: Recherché Des Pannes
Recherche des pannes Condition Cause Référence Le tissu n’avance pas 1. La griffe d’entraînement est remplie de charpie. Voir la page 91. régulièrement. 2. Le pied presseur est soulevé. Baisser le pied presseur. L’aiguille casse. 1. L’aiguille est mal insérée. Voir la page 19.
-
Page 101: Rozwiązywanie Problemów
ROZWIĄZYWANIE PROBLEMÓW Zastrzeżenie Przyczyna Patrz strona Materiał nie jest 1. Przy ząbkach nagromadziły się strzępki. Patrz strona 91. 2. Podniesiono stopkę dociskową Opuść stopkę dociskową. podawany równomiernie Patrz strona 19. Igła pęka 1. Igła jest nieprawidłowo wstawiona. 2. Igła jest tępa lub zakrzywiona. Patrz strona 19.
-
Page 103: Optional Parts
OPTIONAL PARTS Blind stitch foot Use to blind stitch a cuff or a skirt. Taping foot with Use for sewing tape on a tape reel shoulder or armpit line to protect from stretching or to decorate. Works well with the taping foot or the cording foot.
-
Page 104: Pièces Facultatives
CZĘŚCI OPCJONALNE PIÉCES FACU LTATIVES Służy m.in. do szycia Pied d’ourlet Utiliser pour faire des points Stopka do ściegu mankietów invisibles sur une manchette ou krytego invisible czy sukienek une jupe. Używana do przyszywania taśmy Stopka do na ramiona, by chronić materiał Utiliser pour coudre un ruban Pied à…
-
Page 105
Printed in Taiwan 794-800-505 (E/F/S)
|
Код: 28126 Извините, товара сейчас нет в наличии
Бесплатная доставка
Извините, товара сейчас нет в наличии Сравнить Новости интернет-магазина «Лаукар»:28.03.2023 22.02.2023 13.02.2023 Дополнительная информация в категории Оверлок:Оверлоки — разбираемся в терминах Таблица Авторизованных сервисных центров по брендам. Описание Отзывы (0) В интернет-магазине бытовой техники «Лаукар» Вы можете скачать инструкцию к товару Оверлок Janome MyLock 744D совершенно бесплатно. Все инструкции, представленные на сайте интернет-магазина бытовой техники «Лаукар», предоставляются производителем товара. Для того чтобы скачать инструкцию, Вам необходимо нажать на ссылку «скачать инструкцию», расположенную ниже, а в случае, если ссылки нет,
Фирма-производитель оставляет за собой право на внесение изменений в конструкцию, дизайн и комплектацию товара: Оверлок Janome MyLock 744D. Пожалуйста, сверяйте информацию о товаре с информацией на |


- Каталог
- Бытовая техника
- Техника для дома
- Шитье, вышивание и уход за одеждой
- Оверлоки
- Janome
- Оверлок Janome 744 D
Оверлок Janome 744 D
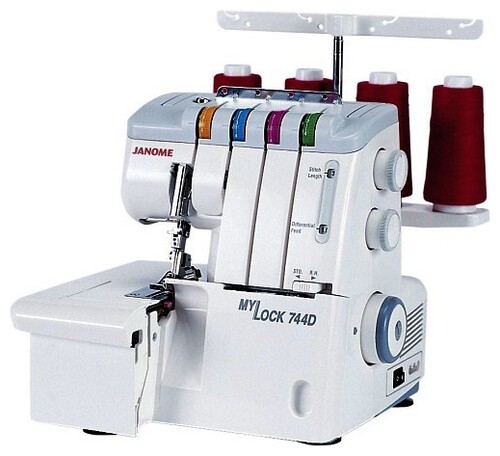
число нитей:2,3,4, швейных операций: 7
подробнее

нет отзывов
Код товара: 0159806
Оверлок Janome 744 D

Характеристики
ОтзывыОбзорыИнструкции и файлы
Как выбрать?
Советуют эксперты DNS
Инструкции и файлы
Что-то пошло не так
Данный раздел сейчас недоступен, но вы можете перейти в любой другой интересующий Вас раздел
Нашли ошибку?
Выделите текст с ошибкой и нажмите Ctrl+Enter или
напишите нам
.
Указанное предложение действительно на 24.04.2023
|
Код: 28126 Извините, товара сейчас нет в наличии
Бесплатная доставка Извините, товара сейчас нет в наличии Сравнить Новости интернет-магазина «Лаукар»:28.03.2023 22.02.2023 13.02.2023 Дополнительная информация в категории Оверлок:Оверлоки — разбираемся в терминах Таблица Авторизованных сервисных центров по брендам. Описание Отзывы (0) В интернет-магазине бытовой техники «Лаукар» Вы можете скачать инструкцию к товару Оверлок Janome MyLock 744D совершенно бесплатно. Все инструкции, представленные на сайте интернет-магазина бытовой техники «Лаукар», предоставляются производителем товара. Для того чтобы скачать инструкцию, Вам необходимо нажать на ссылку «скачать инструкцию», расположенную ниже, а в случае, если ссылки нет,
Фирма-производитель оставляет за собой право на внесение изменений в конструкцию, дизайн и комплектацию товара: Оверлок Janome MyLock 744D. Пожалуйста, сверяйте информацию о товаре с информацией на |


Швейная машина Janome MyLock 744D — инструкция пользователя по применению, эксплуатации и установке на русском языке. Мы надеемся, она поможет вам решить возникшие у вас вопросы при эксплуатации техники.
Вы можете скачать инструкцию к Janome MyLock 744D по ссылке ниже, если не хотите ждать загрузки. Если остались вопросы, задайте их в комментариях после инструкции.
«Загружаем инструкцию», означает, что нужно подождать пока файл загрузится и можно будет его читать онлайн. Некоторые инструкции очень большие и время их появления зависит от вашей скорости интернета.
Остались вопросы?
Не нашли свой ответ в руководстве или возникли другие проблемы? Задайте свой вопрос в форме ниже с подробным описанием вашей ситуации, чтобы другие люди и специалисты смогли дать на него ответ. Если вы знаете как решить проблему другого человека, пожалуйста, подскажите ему
![:)]()
Часто задаваемые вопросы

Как посмотреть инструкцию к Janome MyLock 744D?
Необходимо подождать полной загрузки инструкции в сером окне на данной странице или скачать кликнув по специальной кнопке.
Руководство на русском языке?
Все наши руководства представлены на русском языке или схематично, поэтому вы без труда сможете разобраться с вашей моделью
Как можно распечатать инструкцию?
Скачайте ее по специальной кнопке над формой чтения на ваше устройства и отправьте на печать.
![]()


Бесплатная доставка
по Красноярску
Извините, товара сейчас нет в наличии
Сравнить
Новости интернет-магазина «Лаукар»:
28.03.2023
Скидка на продукцию бренда «TOR»
22.02.2023
Ищете подарки на 8 марта? У нас большой выбор!
13.02.2023
Каким подарком порадовать защитника Отечества на 23 февраля ?
Дополнительная информация в категории Оверлок:
Оверлоки — разбираемся в терминах
Таблица Авторизованных сервисных центров по брендам.
Описание
Характеристики
Отзывы (0)
В интернет-магазине бытовой техники «Лаукар» Вы можете скачать инструкцию к товару Оверлок Janome MyLock 744D совершенно бесплатно.
Все инструкции, представленные на сайте интернет-магазина бытовой техники «Лаукар», предоставляются производителем товара.
Перед началом использования товара рекомендуем Вам ознакомиться с инструкцией по применению.
Для того чтобы скачать инструкцию, Вам необходимо нажать на ссылку «скачать инструкцию», расположенную ниже, а в случае, если ссылки нет,
Вы можете попробовать обратиться к данной странице позднее,
возможно специалисты интернет-магазина бытовой техники «Лаукар» еще не успели загрузить для скачивания инструкцию к товару:
Оверлок Janome MyLock 744D.

Фирма-производитель оставляет за собой право на внесение изменений в конструкцию, дизайн и комплектацию товара: Оверлок Janome MyLock 744D. Пожалуйста, сверяйте информацию о товаре с информацией на
официальном сайте компании производителя.
