Требуется руководство для вашей Sony CDX-GT560UE Автомагнитола? Ниже вы можете просмотреть и загрузить бесплатно руководство в формате PDF. Кроме того, приведены часто задаваемые вопросы, рейтинг изделия и отзывы пользователей, что позволит оптимально использовать ваше изделие. Если это не то руководство, которое вы искали, – свяжитесь с нами.
Ваше устройство неисправно, и в руководстве отсутствует решение? Перейдите в Repair Café для получения бесплатных ремонтных услуг.
Руководство

Рейтинг
Сообщите нам, что вы думаете о Sony CDX-GT560UE Автомагнитола, оставив оценку продукта. Хотите поделиться вашими впечатлениями от данного изделия или задать вопрос? Вы можете оставить комментарий в нижней части страницы.
Довольны ли вы данным изделием Sony?
Да Нет
Будьте первым, кто оценит это изделие
0 голоса
Часто задаваемые вопросы
Наша служба поддержки выполняет поиск полезной информации по изделиям и отвечает на часто задаваемые вопросы. Если вы заметили неточность в наших часто задаваемых вопросах, сообщите нам об этом с помощью нашей контактной формы.
Что такое DAB +? Проверенный
DAB + является преемником сигнала FM и расшифровывается как Digital Audio Broadcasting. Это цифровой сигнал, который позволяет использовать больше каналов в пределах одной полосы пропускания и упрощает переключение между каналами.
Это было полезно (411)
В автомагнитолу застрял компакт-диск, что мне делать? Проверенный
В некоторых автомобильных радиоприемниках есть функция извлечения застрявших компакт-дисков. Выключите автомобиль и одновременно нажмите кнопки включения и извлечения и удерживайте их в течение 10 секунд. Если это не помогло, заведите машину и попробуйте еще раз.
Это было полезно (215)
В чем разница между FM и AM? Проверенный
FM и AM — это формы модуляции, используемые для передачи сигнала. FM — это частотная модуляция, а AM — амплитудная модуляция. AM — самая старая форма модуляции. Самая большая разница в том, что сигнал FM намного сильнее сигнала AM.
Это было полезно (214)
Какого размера автомобильный радиоприемник подходит для моей машины? Проверенный
Существует два стандартных размера автомобильных радиоприемников: 1-DIN и 2-DIN. 1-DIN — это стандартная тонкая версия, а 2-DIN — вдвое больше. Автомобильные радиоприемники 2-DIN часто имеют место для экрана для отображения навигационной информации или воспроизведения фильмов.
Это было полезно (174)
На моем автомобильном радиоприемнике Sony отображается сообщение «ERROR 99» или «E99». Что это означает? Проверенный
Эти ошибки вызваны колебаниями мощности. Если на автомобильном радиоприемнике есть кнопка «СБРОС», нажмите ее, чтобы устранить ошибку. Если проблема не исчезнет, обратитесь к производителю.
Это было полезно (52)
инструкцияSony CDX-GT560UE

4-284-027-22(1)
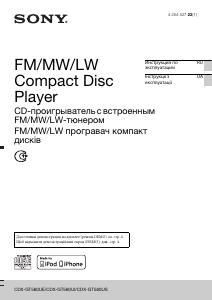
CDX-GT560UE/CDX-GT560UI/CDX-GT560US
FM/MW/LW
Compact Disc
Player
CD-проигрыватель с встроенным
FM/MW/LW-тюнером
FM/MW/LW програвач компакт
дисків
Для отмены демонстрации на дисплее (режим DEMO) см. стр. 4.
Щоб відмінити демонстраційний екран (DEMO), див. стр. 4.
Инструкция по
эксплуатации
RU
Інcтpyкції з
eкcплyaтaції
UA
Посмотреть инструкция для Sony CDX-GT560UE бесплатно. Руководство относится к категории автомагнитолы, 1 человек(а) дали ему среднюю оценку 7.1. Руководство доступно на следующих языках: русский. У вас есть вопрос о Sony CDX-GT560UE или вам нужна помощь? Задайте свой вопрос здесь
- RU
- UA
Главная
Не можете найти ответ на свой вопрос в руководстве? Вы можете найти ответ на свой вопрос ниже, в разделе часто задаваемых вопросов о Sony CDX-GT560UE.
В чем разница между FM и AM?
FM означает «частотная модуляция», AM — «амплитудная модуляция». Основная разница между FM- и AM-радиостанциями состоит в качестве звука.
Когда звук считается слишком громким?
Уровень звука выше 80 децибел может нанести вред слуху. Уровень звука выше 120 децибел может нанести прямое повреждение слуху. Вероятность повреждения слуха зависит от частоты и продолжительности прослушивания.
Автомобильный радиоприемник не включается, что делать?
Если автомобильный радиоприемник не включен, на него не будет подаваться питание. Убедитесь, что красный провод подключен к контактному источнику питания, а желтый провод — к источнику питания постоянной мощности.
Как лучше всего выполнять чистку автомагнитола?
Для удаления отпечатков пальцев лучше всего использовать слегка влажную салфетку для уборки или мягкую чистую ткань. Пыль в труднодоступных местах лучше всего удаляется потоком сжатого воздуха.
Что такое Bluetooth?
Bluetooth — это способ обмена данными по беспроводной сети между электронными устройствами с помощью радиоволн. Расстояние между двумя устройствами обменивающимися данными в большинстве случаев составляет не более десяти метров.
Инструкция Sony CDX-GT560UE доступно в русский?
Да, руководствоSony CDX-GT560UE доступно врусский .
Не нашли свой вопрос? Задайте свой вопрос здесь
SERVICE MANUAL
Sony Corporation
Published by Sony Techno Create Corporation
CDX-GT61UMS/GT560UE/GT560UI/GT560US/
GT564UI/GT610UG/GT610US/GT616UG
SPECIFICATIONS
9-893-265-04
2012H33-1
©
2012.08
AEP Model
UK Model
CDX-GT560UI/GT564UI
E Model
CDX-GT610UG/GT610US
Russian Model
CDX-GT560UE/GT560UI/GT560US
Mexican Model
Argentina Model
CDX-GT610UG
Thai Model
CDX-GT610US
Indian Model
CDX-GT61UMS/GT616UG
Ver. 1.3 2012.08
Model Name Using Similar Mechanism
CDX-GT45U/GT660UE/
GT660UV/GT710UV/GT717UV
Mechanism Type
MG-101CA-188
Optical Pick-up Name
DAX-25A
Photo: CDX-GT610UG
• The tuner and CD sections have no adjustments.
Tuner section
(CDX-GT560UE/GT560UI/
GT560US/GT564UI)
FM
Tuning range:
87.5 – 108.0 MHz
FM1/FM2: 87.5 – 108.0 MHz (at 50 kHz step)
FM3: 65 – 74 MHz (at 30 kHz step)
CDX-GT560UE:
CDX-GT560UI/GT560US/GT564UI:
Antenna (aerial) terminal:
External antenna (aerial) connector
Intermediate frequency: 25 kHz
Usable sensitivity: 8 dBf
Selectivity: 75 dB at 400 kHz
Signal-to-noise ratio: 80 dB (stereo)
Separation: 50 dB at 1 kHz
Frequency response: 20 – 15,000 Hz
MW/LW
Tuning range:
MW: 531 – 1,602 kHz
LW: 153 – 279 kHz
Antenna (aerial) terminal:
External antenna (aerial) connector
Intermediate frequency:
9,124.5 kHz or 9,115.5 kHz/4.5 kHz
Sensitivity: MW: 26 μV, LW: 45 μV
CD Player section
Signal-to-noise ratio: 120 dB
Frequency response: 10 – 20,000 Hz
Wow and flutter: Below measurable limit
USB Player section
Interface: USB (Full-speed)
Maximum current: 1 A
Power amplifier section
Output: Speaker outputs
Speaker impedance: 4 – 8 ohms
Maximum power output: 52 W u 4 (at 4 ohms)
General
Outputs:
Audio outputs terminal
t3FBSTVCTXJUDIBCMF
CDX-GT560UE/GT560UI/GT560US/GT564UI
t’SPOU3FBSTVCTXJUDIBCMF
CDX-GT61UMS/GT610UG/GT610US/GT616UG
Power antenna (aerial) relay control terminal
Power amplifier control terminal
Power antenna (aerial)/
1PXFSBNQMJĕFSDPOUSPMUFSNJOBM 3&.065
CDX-GT61UMS/GT610UG/GT610US/GT616UG
Inputs:
3emote controller input terminal
Antenna (aerial) input terminal
AUX input jack (stereo mini jack)
USB signal input connector
Power requirements: 12 V DC car battery
(negative ground (earth))
Dimensions: Approx. 178 u 50 u 179 mm
(7
1
/
8
u 2 u 7
1
/
8
in) (w/h/d)
Mounting dimensions: Approx. 182 u 53 u 162 mm
(7
1
/
4
u 2
1
/
8
u 6
1
/
2
in) (w/h/d)
Mass: Approx. 1.2 kg (2 lb 11 oz)
Supplied accessory:
Parts for installation and connections (1 set)
Design and specifications are subject to change
without notice.
Tuner section
(CDX-GT61UMS/
GT610UG: E, Mexican, Argentina/
GT610US: E, Thai/GT616UG)
3emote commander: 3M-X211
(CDX-61UMS/GT610UG/GT610US/GT616UG only)
Tuner section
(CDX-GT610UG: Saudi Arabia/
GT610US: Saudi Arabia model)
FM
Tuning range: 87.5 – 108.0 MHz
Antenna (aerial) terminal:
External antenna (aerial) connector
Intermediate frequency: 25 kHz
Usable sensitivity: 8 dBf
Selectivity: 75 dB at 400 kHz
Signal-to-noise ratio: 80 dB (stereo)
Separation: 50 dB at 1 kHz
Frequency response: 20 – 15,000 Hz
MW
Tuning range: 531 – 1,602 kHz
Antenna (aerial) terminal:
External antenna (aerial) connector
Intermediate frequency:
9,124.5 kHz or 9,115.5 kHz/4.5 kHz
Sensitivity: 26 μV
SW
Tuning range:
SW1: 2,940 – 7,735 kHz
SW2: 9,500 – 18,135 kHz
(except for 10,140 – 11,575 kHz)
Antenna (aerial) terminal:
External antenna (aerial) connector
Intermediate frequency:
9,124.5 kHz or 9,115.5 kHz/4.5 kHz
Sensitivity: 26 μV
FM
Tuning range:
For non-Argentine models:
87.5 – 108.0 MHz (at 50 kHz step)
87.5 – 108.0 MHz (at 100 kHz step)
87.5 – 107.9 MHz (at 200 kHz step)
For Argentine models:
87.5 – 107.9 MHz
FM tuning step (for non-Argentine models):
50 kHz/100 kHz/200 kHz switchable
Antenna (aerial) terminal:
External antenna (aerial) connector
Intermediate frequency: 25 kHz
Usable sensitivity: 8 dBf
Selectivity: 75 dB at 400 kHz
Signal-to-noise ratio: 80 dB (stereo)
Separation: 50 dB at 1 kHz
Frequency response: 20 – 15,000 Hz
AM
Tuning range:
For non-Argentine models:
531 – 1,602 kHz (at 9 kHz step)
530 – 1,710 kHz (at 10 kHz step)
For Argentine models:
530 – 1,710 kHz
AM tuning step (for non-Argentine models):
9 kHz/10 kHz switchable
Antenna (aerial) terminal:
External antenna (aerial) connector
Intermediate frequency:
For non-Argentine models:
9,124.5 kHz or 9,115.5 kHz/4.5 kHz
(at 9 kHz step)
9,115 kHz or 9,125 kHz/5 kHz
(at 10 kHz step)
For Argentine models:
9,115 kHz or 9,125 kHz/5 kHz
Sensitivity: 26 μV
E, Mexican, Argentina, Thai, Indian models
FM/AM COMPACT DISC PLAYER
AEP, Russian, UK models
FM/MW/LW COMPACT DISC PLAYER
Saudi Arabia model
FM/MW/SW COMPACT DISC PLAYER
CDX-GT61UMS/GT560UE/GT560UI/GT560US/GT564UI/GT610UG/GT610US/GT616UG
2
NOTES ON CHIP COMPONENT REPLACEMENT
•
Never reuse a disconnected chip component.
•
Notice that the minus side of a tantalum capacitor may be dam-
aged by heat.
FLEXIBLE CIRCUIT BOARD REPAIRING
•
Keep the temperature of soldering iron around 270 °C during
repairing.
•
Do not touch the soldering iron on the same conductor of the
circuit board (within 3 times).
•
Be careful not to apply force on the conductor when soldering
or unsoldering.
SAFETY-RELATED COMPONENT WARNING!
COMPONENTS IDENTIFIED BY MARK
0 OR DOTTED LINE
WITH MARK
0 ON THE SCHEMATIC DIAGRAMS AND IN
THE PARTS LIST ARE CRITICAL TO SAFE OPERATION.
REPLACE THESE COMPONENTS WITH SONY PARTS
WHOSE PART NUMBERS APPEAR AS SHOWN IN THIS
MANUAL OR IN SUPPLEMENTS PUBLISHED BY SONY.
CAUTION
Use of controls or adjustments or performance of procedures
other than those specifi ed herein may result in hazardous radia-
tion exposure.
ZAPPIN and Quick-BrowZer are
trademarks of Sony Corporation.
Windows Media is either a registered
trademark or trademark of Microsoft
Corporation in the United States and/or
other countries.
This product contains technology subject
to certain intellectual property rights of
Microsoft. Use or distribution of this
technology outside of this product is
prohibited without the appropriate
license(s) from Microsoft.
iPhone, iPod, iPod classic, iPod nano, and
iPod touch are trademarks of Apple Inc.,
registered in the U.S. and other countries.
MPEG Layer-3 audio coding technology
and patents licensed from Fraunhofer IIS
and Thomson.
This label is located on the bottom of the
chassis.
CDX-GT61UMS/GT560UE/GT560UI/GT560US/GT564UI/GT610UG/GT610US/GT616UG
3
1.
SERVICING NOTES
……………………………………… 3
2. GENERAL
………………………………………………………… 8
3. DISASSEMBLY
3-1. Disassembly
Flow
………………………………………………….. 14
3-2. Cover ……………………………………………………………………. 15
3-3. Sub Panel Block …………………………………………………….. 15
3-4. CD Mechanism Deck (MG-101CA-188) ………………….. 16
3-5. MAIN
Board
…………………………………………………………. 16
3-6. SERVO
Board
……………………………………………………….. 17
3-7. Chassis (T) Sub Assy ……………………………………………… 18
3-8. Roller
Arm
Assy
…………………………………………………….. 18
3-9. Chassis
(OP)
Assy
………………………………………………….. 19
3-10. Chucking Arm Sub Assy …………………………………………. 19
3-11. Sled Motor Assy …………………………………………………….. 20
3-12. Optical Pick-up Section ………………………………………….. 21
3-13. Optical Pick-up ……………………………………………………… 21
4. DIAGRAMS
4-1. Block Diagram — AUDIO INPUT Section — ……………….. 22
4-2. Block Diagram — AUDIO OUTPUT Section — ……………. 23
4-3. Block
Diagram
— PANEL, POWER SUPPLY Section — ……………………… 24
4-4. Printed Wiring Board — MAIN Section (1/2)
(GT61UMS/GT560UE/GT560UI/GT560US/
GT564UI/GT610UG: E, Mexican, Argentina/
GT610US: E, Thai/GT616UG) — ……………………………… 26
4-5. Printed Wiring Boards — MAIN Section (2/2)
(GT61UMS/GT560UE/GT560UI/GT560US/
GT564UI/GT610UG: E, Mexican, Argentina/
GT610US: E, Thai/GT616UG) — ……………………………… 27
4-6. Printed Wiring Board — MAIN Section (1/2)
(GT610UG: Saudi Arabia/
GT610US: Saudi Arabia models) — …………………………… 28
4-7. Printed Wiring Boards — MAIN Section (2/2)
(GT610UG: Saudi Arabia/
GT610US: Saudi Arabia models) — …………………………… 29
4-8. Schematic Diagram — MAIN Section (1/4) — ………………. 30
4-9. Schematic Diagram — MAIN Section (2/4) — ………………. 31
4-10. Schematic Diagram — MAIN Section (3/4) — ………………. 32
4-11. Schematic Diagram — MAIN Section (4/4) — ………………. 33
4-12. Printed Wiring Board — KEY Board -………………………… 34
4-13. Schematic Diagram — KEY Board — ………………………….. 35
5.
EXPLODED VIEWS
5-1. Main
Section
…………………………………………………………. 44
5-2. Front Panel Section ………………………………………………… 45
5-3. CD Mechanism Section (MG-101CA-188) ……………….. 46
6.
ELECTRICAL PARTS LIST
………………………… 47
Accessories are given in the last of the electrical parts list.
TABLE OF CONTENTS
SECTION 1
SERVICING NOTES
NOTES ON HANDLING THE OPTICAL PICK-UP
BLOCK OR BASE UNIT
The laser diode in the optical pick-up block may suffer electro-
static break-down because of the potential difference generated by
the charged electrostatic load, etc. on clothing and the human body.
During repair, pay attention to electrostatic break-down and also
use the procedure in the printed matter which is included in the
repair parts.
The fl exible board is easily damaged and should be handled with
care.
NOTES ON LASER DIODE EMISSION CHECK
Never look into the laser diode emission from right above when
checking it for adjustment. It is feared that you will lose your sight.
If the optical pick-up block is defective, please replace the whole
optical pick-up block.
Never turn the semi-fi xed resistor located at the side of optical
pick-up block.
optical pick-up
semi-fixed resistor
UNLEADED SOLDER
Boards requiring use of unleaded solder are printed with the lead-
free mark (LF) indicating the solder contains no lead.
(Caution: Some printed circuit boards may not come printed with
the lead free mark due to their particular size)
: LEAD FREE MARK
Unleaded solder has the following characteristics.
• Unleaded solder melts at a temperature about 40 °C higher
than ordinary solder.
Ordinary soldering irons can be used but the iron tip has to be
applied to the solder joint for a slightly longer time.
Soldering irons using a temperature regulator should be set to
about 350 °C.
Caution: The printed pattern (copper foil) may peel away if
the heated tip is applied for too long, so be careful!
• Strong
viscosity
Unleaded solder is more viscous (sticky, less prone to fl ow)
than ordinary solder so use caution not to let solder bridges
occur such as on IC pins, etc.
• Usable with ordinary solder
It is best to use only unleaded solder but unleaded solder may
also be added to ordinary solder.
Ver. 1.3
Note: Refer to SUPPLEMENT-1 for printed wiring board, schemat-
ic diagram and electrical parts list of the KEY board (CDX-
GT610US: Thai model).
CDX-GT61UMS/GT560UE/GT560UI/GT560US/GT564UI/GT610UG/GT610US/GT616UG
4
NOTE THE MAIN BOARD OR SYSTEM CONTROLLER
(IC501) REPLACING
When the MAIN board or system controller (IC501) is replaced,
the destination setting is necessary.
1. Destination
Setting
Set destination according to the procedure below.
1-1. Setting the Destination Code
1. In the state of source off (the clock is displayed), enter the test
mode by pressing the buttons in order of the [4]
t [5] t [6]
(press only the [6] button for two seconds).
2. In the state in which the system controller version is displayed
on the liquid crystal display, enter the destination setting mode
by pressing the buttons in order of the [SEEK +]
t [SEEK –]
t [PUSH ENTER/SELECT].
3. Input the alphanumeric character of 6 digits of “F XXXXXX”
displayed on the liquid crystal display, and execute the destina-
tion setting.
Note: Refer to following “1-3. Entering the Destination Code” for opera-
tion method.
4. The resetting operation is executed by pressing the [SOURCE/
OFF] button for 1 second after the setting ends, and the unit
returns to the normal condition.
1-2. Display in Destination Setting Mode
12 digits
OP0
OP2 OP1
OP3
OP4
OP5
X
X
X
X
X
X
F
1-3. Entering the Destination Code
•
Method of operation by main unit
1. Rotate the control dial, and select the alphanumeric character
of “0 to F”.
2. The digit advances by pressing the [PUSH ENTER/SELECT]
or [SEEK +] button.
The digit returns by pressing the [ ] or [SEEK –] button.
3. The setting is completed by pressing the [PUSH ENTER/
SELECT] button, and the initialization operation is done.
•
Method of operation by remote commander
(CDX-GT61UMS/GT610UG/GT610US/GT616UG
only)
Note: The model to which the remote commander is not attached can
also be operated by using the remote commander.
OFF
PTY
DSPL/
SCRL
SOUND
SOURCE
MODE
2
5
AT T
VO L
+
–
+
–
MENU
ENTER
PA US E
1. Press
the
[ ] or [ ] button, and select the alphanumeric char-
acter of “0 to F”.
2. The digit advances by pressing the [
] button.
The digit returns by pressing the [
] button.
3. The setting is completed by pressing the [ENTER] button, and
the initialization operation is done.
1-4. Destination Code
Model
Destination
OP5 OP4 OP3 OP2 OP1 OP0
CDX-GT61UMS Indian
0
1
C
9
7
0
CDX-GT560UE Russian
0
1
E
1
3
7
CDX-GT560UI
AEP, Russian,
UK
0
1
C
1
0
1
CDX-GT560US Russian
0
1
C
1
2
1
CDX-GT564UI
AEP, UK
0
1
C
1
1
1
CDX-GT610UG
E, Mexican
0
1
C
9
6
0
Argentina
0
0
8
9
6
3
Saudi Arabia
0
1
C
9
6
4
CDX-GT610US
E, Thai
0
1
C
9
5
0
Saudi Arabia
0
1
C
9
5
4
CDX-GT616UG Indian
0
1
C
9
9
0
2. Confi rmation After Destination Setting
Execute the following operation after completing the destination
setting, and confi rm a correct destination was set.
Destination setting checking method:
1. In the state of source off (the clock is displayed on the liquid
crystal display), enter the test mode by pressing the buttons in
order of the [4]
t [5] t [6] (press only the [6] button for two
seconds).
2. In the state in which the system controller version is displayed
on the liquid crystal display, enter the destination setting value
display mode by pressing the [DSPL] button.
3. Confi
rm the alphanumeric character of 6 digits of “F
XXXXXX” displayed in liquid crystal display is an value cor-
rectly input.
4. The resetting operation is executed by pressing the [SOURCE/
OFF] button for 1 second after the confi rming ends, and the
unit returns to the normal condition.
Ver. 1.3
- Manuals
- Brands
- Sony Manuals
- Car Receiver
- CDX-GT560UI
Manuals and User Guides for Sony CDX-GT560UI. We have 3 Sony CDX-GT560UI manuals available for free PDF download: Operating Instructions Manual, Service Manual, Installation/Connections
Sony CDX-GT560UI Operating Instructions Manual (144 pages)
FM/MW/LW Compact Disc Player
Brand: Sony
|
Category: Car Receiver
|
Size: 2.01 MB
Table of Contents
-
English
3
-
Table of Contents
3
-
Getting Started
4
-
Canceling the DEMO Mode
4
-
Setting the Clock
4
-
Detaching the Front Panel
4
-
-
Location of Controls
5
-
Radio
6
-
Storing and Receiving Stations
6
-
Rds
7
-
Tuning Automatically
7
-
-
Playing a Disc
9
-
-
USB Devices
9
-
Playing Back a USB Device
9
-
-
Ipod
10
-
Playing Back Ipod
10
-
Operating an Ipod Directly — Passenger Control
11
-
-
Searching and Playing Tracks
12
-
Playing Tracks in Various Modes
12
-
Searching a Track by Name — Quick-Browzer
12
-
Searching a Track by Listening to Track Passages — ZAPPIN
13
-
-
Sound Settings and Setup Menu
14
-
Changing the Sound Settings
14
-
Enjoying Sophisticated Sound Functions — Advanced Sound Engine
14
-
Adjusting Setup Items
17
-
-
Using Optional Equipment
18
-
Auxiliary Audio Equipment
18
-
RM-X114 Remote Commander
19
-
-
Additional Information
20
-
Precautions
20
-
Maintenance
21
-
Specifications
22
-
Troubleshooting
23
-
Error Displays/Messages
25
-
-
-
-
Deutsch
28
-
Vorbereitungen
29
-
Beenden des DEMO-Modus
29
-
Einstellen der Uhr
29
-
Abnehmen der Frontplatte
30
-
Anbringen der Frontplatte
30
-
-
-
Lage und Funktion der Bedienelemente
31
-
Radio
32
-
Speichern und Empfangen von Sendern
32
-
Rds
33
-
Wiedergeben einer CD
35
-
-
USB-Geräte
36
-
Wiedergabe mit einem USB-Gerät
36
-
-
Ipod
37
-
Wiedergabe mit einem Ipod
37
-
Direktes Bedienen eines Ipod — Direkte Steuerung
38
-
-
Suchen und Wiedergeben von Titeln
38
-
Wiedergeben von Titeln in Verschiedenen Modi
38
-
Suchen nach einem Titel Anhand seines Namens — Quick-Browzer
39
-
Suchen nach einem Titel durch Anspielen der Titel — ZAPPIN
41
-
-
Klangeinstellungen und Setup-Menü
41
-
Ändern der Klangeinstellungen
41
-
Verwenden der Erweiterten Klangfunktionen — Erweiterte Sound-Engine
42
-
Einstellen von Konfigurationsoptionen
45
-
-
Verwenden Gesondert Erhältlicher Geräte
46
-
Zusätzliche Audiogeräte
46
-
Fernbedienung RM-X114
47
-
-
Weitere Informationen
48
-
Sicherheitsmaßnahmen
48
-
Hinweise zu Cds
48
-
-
Wartung
49
-
Der Ipod
49
-
-
Technische Daten
50
-
Störungsbehebung
51
-
-
-
Français
58
-
Préparation
59
-
Désactivation du Mode DEMO
59
-
Réglage de L’horloge
59
-
Retrait de la Façade
60
-
-
Emplacement des Commandes
61
-
Appareil Principal
61
-
-
Radio
63
-
Mémorisation Et Réception des Stations
63
-
Rds
63
-
Lecture D’un Disque
66
-
-
Périphériques USB
66
-
Lecture D’un Périphérique USB
66
-
-
Ipod
67
-
Lecture Sur un Ipod
67
-
Utilisation Directe D’un Ipod — Commande Passager
68
-
-
Recherche Et Lecture de Plages
69
-
Lecture de Plages Dans Différents Modes
69
-
Recherche D’une Plage Par Son Nom — Quick-Browzer
69
-
Recherche D’une Plage en Écoutant des Passages de Plages — ZAPPIN
71
-
-
Réglages du Son Et Menu de Configuration
71
-
Modification des Caractéristiques du Son
71
-
Utilisation de Fonctions Audio Évoluées — Moteur de Son Avancé
72
-
Réglage des Paramètres de Configuration
75
-
-
Utilisation D ‘Un Appareil en Option
76
-
Appareil Audio Auxiliaire
76
-
Télécommande RM-X114
77
-
-
Informations Complémentaires
78
-
Précautions
78
-
Remarques Sur Les Disques
78
-
-
Entretien
79
-
Spécifications
80
-
Dépannage
81
-
Lecture de CD
83
-
-
-
-
Italiano
88
-
Operazioni Preliminari
89
-
Disattivazione del Modo DEMO
89
-
Impostazione Dell’orologio
89
-
Rimozione del Pannello Anteriore
90
-
-
Individuazione Dei Comandi
91
-
Radio
92
-
Memorizzazione E Ricezione Delle Stazioni
92
-
Memorizzazione Manuale
92
-
-
Rds
93
-
Sintonizzazione Automatica
93
-
-
Riproduzione DI un Disco
95
-
-
Dispositivi USB
96
-
Riproduzione del Contenuto DI un Dispositivo USB
96
-
-
Ipod
97
-
Riproduzione Tramite un Ipod
97
-
Uso Diretto Dell’ipod — Controllo Passeggero
98
-
-
Ricerca E Riproduzione Dei Brani
98
-
Riproduzione DI Brani con Diverse Modalità
98
-
Ricerca DI un Brano in Base al Nome — Quick-Browzer
99
-
Ricerca DI un Brano in Base All’ascolto DI Porzioni DI Brani — ZAPPIN
100
-
-
Impostazioni Audio E Menu Setup
101
-
Modifica Delle Impostazioni Audio
101
-
Uso DI Funzioni Audio DI Livello Avanzato — Motore Sonoro Avanzato
101
-
Personalizzazione Della Curva
102
-
-
Regolazione Delle Voci DI Impostazione
104
-
-
Uso DI Apparecchi Opzionali
106
-
Apparecchio Audio Ausiliario
106
-
Telecomando RM-X114
106
-
-
Informazioni Aggiuntive
107
-
Precauzioni
107
-
Note Sui Dischi
107
-
-
Manutenzione
109
-
Caratteristiche Tecniche
110
-
Guida Alla Soluzione Dei Problemi
111
-
-
-
Dutch
118
-
Aan de Slag
119
-
De DEMO-Stand Annuleren
119
-
De Klok Instellen
119
-
Het Voorpaneel Verwijderen
120
-
Het Voorpaneel Bevestigen
120
-
-
-
Bedieningselementen
121
-
Radio
121
-
Zenders Opslaan en Ontvangen
122
-
Handmatig Opslaan
122
-
-
Rds
123
-
Automatisch Afstemmen
123
-
-
Een CD Afspelen
125
-
-
USB-Apparaten
126
-
Een USB-Apparaat Afspelen
126
-
-
Ipod
127
-
Een Ipod Afspelen
127
-
Een Ipod Rechtstreeks Bedienen — Passagiersbediening
128
-
-
Tracks Zoeken en Afspelen
128
-
Tracks Afspelen in Verschillende Standen
128
-
Zoeken Naar Een Track Op Naam — Quick-Browzer
129
-
Zappin
130
-
-
Geluidsinstellingen en Het Installatiemenu
131
-
De Geluidsinstellingen Wijzigen
131
-
Genieten Van Geavanceerde Geluidsfuncties — Advanced Sound Engine
131
-
Versterking Lage Tonen Achter
133
-
De Luisterpositie Aanpassen
133
-
-
Instelitems Aanpassen
134
-
-
Optionele Apparaten Gebruiken
135
-
Randapparatuur Voor Audio
135
-
-
Aanvullende Informatie
137
-
Voorzorgsmaatregelen
137
-
Opmerkingen over Disks
137
-
-
Onderhoud
138
-
Informatie over Ipod
138
-
-
Technische Gegevens
139
-
Problemen Oplossen
140
-
-
Advertisement

Sony CDX-GT560UI Service Manual (54 pages)
Brand: Sony
|
Category: CD Player
|
Size: 4.15 MB
Table of Contents
-
1 Servicing Notes
3
-
Table of Contents
3
-
-
2 General
6
-
Cover
12
-
-
3 Disassembly
12
-
Disassembly Flow
12
-
CD Mechanism Deck (MG-101CA-188)
13
-
Sub Panel Block
13
-
MAIN Board
14
-
SERVO Board
14
-
Chassis (T) Sub Assy
15
-
Roller Arm Assy
15
-
Chassis (OP) Assy
16
-
Chucking Arm Sub Assy
16
-
Optical Pick-Up
17
-
Optical Pick-Up Section
17
-
Sled Motor Assy
17
-
Block Diagram — AUDIO INPUT Section
18
-
-
4 Diagrams
18
-
Block Diagram — AUDIO OUTPUT Section
19
-
Block Diagram — PANEL, POWER SUPPLY Section
20
-
PRINTED WIRING BOARD — MAIN Section (1/2) (GT61UMS/GT560UE/GT560UI/GT560US/GT564UI/GT610UG: E, Mexican, Argentina/Gt610Us: E/GT616UG)
22
-
PRINTED WIRING BOARDS — MAIN Section (2/2) (GT61UMS/GT560UE/GT560UI/GT560US/GT564UI/GT610UG: E, Mexican, Argentina/Gt610Us: E/GT616UG)
23
-
Printed Wiring Board — MAIN Section (1/2) (GT610UG: Saudi Arabia/Gt610Us: Saudi Arabia Models)
24
-
Printed Wiring Boards — MAIN Section (2/2) (GT610UG: Saudi Arabia/Gt610Us: Saudi Arabia Models)
25
-
Schematic Diagram — MAIN Section (1/4)
26
-
Schematic Diagram — MAIN Section (2/4)
27
-
Schematic Diagram — MAIN Section (3/4)
28
-
Schematic Diagram — MAIN Section (4/4)
29
-
Printed Wiring Board — KEY Board
30
-
Schematic Diagram — KEY Board
31
-
-
5 Exploded Views
40
-
Main Section
40
-
Front Panel Section
41
-
CD Mechanism Section (MG-101CA-188)
42
-
-
6 Electrical Parts List
43
Sony CDX-GT560UI Installation/Connections (2 pages)
FM/MW/LW Compact Disc Player
Brand: Sony
|
Category: Car Receiver
|
Size: 0.3 MB
Advertisement
Advertisement
Related Products
-
Sony CDX-GT56UI
-
Sony CDX-GT560S
-
Sony CDX-GT565UV
-
Sony CDX-GT564UI
-
Sony CDX-GT560
-
Sony CDX-GT550UI — Fm/am Compact Disc Player
-
Sony CDX-GT52W
-
Sony CDX-GT500U
-
Sony CDX-GT50UMS
-
Sony CDX-GT570
Sony Categories
![]()
Laptop
![]()
Camcorder
![]()
TV
![]()
CD Player
![]()
Digital Camera
More Sony Manuals