-
Contents
-
Table of Contents
-
Bookmarks
Quick Links
LINK:
CONTENT & A-Z
OWNER’S MANUAL.
MINI COUNTRYMAN PLUG-IN HYBRID.
Online Edition for Part no. 01402628632 — VI/19
Related Manuals for Mini COUNTRYMAN PLUG-IN HYBRID
Summary of Contents for Mini COUNTRYMAN PLUG-IN HYBRID
-
Page 1
LINK: CONTENT & A-Z OWNER’S MANUAL. MINI COUNTRYMAN PLUG-IN HYBRID. Online Edition for Part no. 01402628632 — VI/19… -
Page 2
Online Edition for Part no. 01402628632 — VI/19… -
Page 3
The more familiar you are with your vehicle, the better control you will have on the road. We therefore strongly suggest: Read this Owner’s Manual before starting off in your new MINI. Also use the Integrated Owner’s Manual in your vehicle. It contains important information on vehicle operation that will help you make full use of the technical features available in your MINI. -
Page 4: Table Of Contents
On the road……………………..AT A GLANCE Cockpit………………………. Central Information Display (CID)………………44 Voice activation system………………..General settings……………………Owner’s Manual media…………………..67 MINI eDRIVE……………………69 Safety of the hybrid system………………..72 CONTROLS Opening and closing………………….Seats, mirrors, and steering wheel…………….100 Transporting children safely………………112 Driving……………………..118 Displays……………………..
-
Page 5
Climate control……………………213 Interior equipment………………….222 Storage compartments…………………230 Cargo area……………………..233 DRIVING TIPS Things to remember when driving…………….Saving fuel………………………247 MOBILITY Charging the vehicle………………….Refueling……………………..263 Fuel……………………….Wheels and tires……………………268 Engine compartment………………….285 Engine oil……………………..288 Coolant……………………..292 Maintenance……………………Replacing components………………..Breakdown assistance………………… Care……………………….313 REFERENCE Technical data……………………Appendix……………………..322 Everything from A to Z………………..324… -
Page 6
Online Edition for Part no. 01402628632 — VI/19… -
Page 7
NOTES Information ………………..Online Edition for Part no. 01402628632 — VI/19… -
Page 8: Integrated Owner’s Manual In The Vehicle
Information Information Using this Owner’s Manual Internet Vehicle information and general informa- tion on MINI, e.g., on technology, are availa- Orientation ble on the Internet: www.mini.jp. The fastest way to find information on a Vehicle information and general informa- particular topic is by using the index.
-
Page 9
Information NOTES Symbols and displays Symbols in the Owner’s Manual Symbol Meaning Precautions that must be followed in order to avoid the possibility of injury to yourself and to others as well as serious The symbols on parts of the vehicle indicate damage to the vehicle. -
Page 10
The manufacturer of your vehicle recom- mends that you entrust corresponding pro- For Your Own Safety cedures to a MINI dealer’s service center. If you choose to use another service facility, the manufacturer of your vehicle recom- Manufacturer… -
Page 11
MINI dealer’s service center. MINI parts and accessories were tested by the manufacturer of the MINI for their Warning safety and suitability in MINI vehicles. Operating, servicing and maintaining a… -
Page 12
– Ambient conditions, e.g., temperature, damaging the vehicle. Such damage is not rain sensor signals. covered by the MINI New Vehicle Limited The processed data is only processed in the Warranty. vehicle itself and generally volatile. The data is not stored beyond the operating pe- riod. -
Page 13
Information NOTES This information generally records the state uct liability law. To fulfill these duties, the of a component, a module, a system, or the vehicle manufacturer needs technical data environment, for instance: from the vehicle. The data from the vehicle can also be used to check customer claims –… -
Page 14
NOTES Information This data is only transmitted to third parties Services from the vehicle upon personal request as part of the use of manufacturer online services. The transmission depends Where online services from the vehicle on the selected settings for the use of the manufacturer are concerned, the corre- services. -
Page 15
National Highway Traffic Safety Administration NHTSA, in addition to noti- fying MINI of North America, LLC, P.O. Box Online Edition for Part no. 01402628632 — VI/19… -
Page 16
However, NHTSA cannot become involved in individual problems between you, your dealer, or MINI of North America, LLC. To contact NHTSA, you may call the Vehicle Safety Hotline toll-free at 1-888-327-4236 (TTY: 1-800-424-9153); go to http:// www.safercar.gov;… -
Page 17
Information NOTES Online Edition for Part no. 01402628632 — VI/19… -
Page 18
Online Edition for Part no. 01402628632 — VI/19… -
Page 19: Quick Reference
QUICK REFERENCE Entering …………………. Set-up and use ………………. On the road ………………..Online Edition for Part no. 01402628632 — VI/19…
-
Page 20: Entering
QUICK REFERENCE Entering Entering Opening and closing Locking the vehicle Press the button on the vehicle key. Buttons on the vehicle key All vehicle access points are locked. Buttons for the central locking system Overview 1 Unlocking 2 Locking 3 Unlocking the tailgate With automatic tailgate operation: open the tailgate 4 Panic mode…
-
Page 21
Entering QUICK REFERENCE Comfort Access Opening and closing the tailgate with no-touch activation Concept Concept The vehicle can be accessed without operat- The tailgate can be opened and closed with ing the vehicle key. no-touch activation using the vehicle key Carrying the vehicle key with you, e.g., in you are carrying. -
Page 22
QUICK REFERENCE Entering Displays and control elements Depending on the setting, the doors may also be unlocked. In the vicinity of the steering With automatic tailgate: Opening wheel – Unlock the vehicle and press the button 1 Low beams, fog lights on the tailgate. -
Page 23
Entering QUICK REFERENCE Driver’s door Controller General information The buttons can be used to open the menus directly. The Controller can be used to se- lect menu items and enter the settings. Buttons on the Controller Button Function Press once: calls up the main 1 Safety switch menu. -
Page 24
QUICK REFERENCE Entering If no other commands are available, operate the function via the Central Information Display (CID). Terminating the voice activation system Press the button on the steering wheel or ›Cancel‹. Help on the voice activation system – To have information on the operating principle of the voice activation system read out loud: ›General information on voice control‹. -
Page 25: Set-Up And Use
Set-up and use QUICK REFERENCE Set-up and use Seats, mirrors, and steering Adjusting the head restraint wheel Height Manually adjustable seats – To raise: push the head restraint up. – To lower: press the button, arrow 1, and 1 Forward/backward push the head restraint down.
-
Page 26
QUICK REFERENCE Set-up and use Adjusting the steering wheel Press the desired button 1 or 2. The procedure stops when a seat adjust- In four directions ment switch or one of the memory buttons is pressed. Once underway, adjustment of the seat po- sition on the driver’s side is disabled after a short while. -
Page 27
Central Information Display on the steering wheel. (CID), the steering wheel buttons and spo- ken instructions. Via the Central Information Display (CID) «Accept» «My MINI» «System settings» Via the button on the steering wheel «Mobile devices» Press the button. «Connect new device»… -
Page 28
Corresponding mobile contract. – Bluetooth, WiFi, and Siri voice opera- tion are switched on on the iPhone. Switching on Bluetooth and CarPlay Via the Central Information Display (CID): «My MINI» «System settings» «Mobile devices» «Settings» Select the following settings: –… -
Page 29: On The Road
On the road QUICK REFERENCE On the road Driving Auto Start/Stop function The Auto Start/Stop function helps save fuel. The system switches off the combus- Activate/deactivate drive-ready tion engine when conditions for electric state driving have been met. The ignition re- mains switched on.
-
Page 30
QUICK REFERENCE On the road Selector lever lock High beams, headlight flasher, turn signal, roadside parking light A lock prevents an inadvertent change from selector lever position P to another selector High beams, headlight flasher lever position and, depending on the trans- mission version, inadvertent switching to selector lever position P or R. -
Page 31
On the road QUICK REFERENCE Canada: roadside parking light Wiper system Switching the wipers on/off and brief wipe Switching on To illuminate the vehicle on one side. – On: with the ignition switched off, press the lever either up or down past the re- sistance point for approx. -
Page 32
QUICK REFERENCE On the road Rain sensor Canada: wiper system Activating/deactivating Switching the wipers on/off and brief wipe Switching on To activate: press the lever up once from its standard position, arrow 1. To deactivate: press the lever back into the standard position. -
Page 33
On the road QUICK REFERENCE Climate control Rain sensor Activating/deactivating Air conditioner Button Function Temperature. Air conditioning. Press the button on the wiper lever. Recirculated-air mode. Set interval or sensitivity of the rain sensor Controls the air flow, manual. Controls the air distribution manually. -
Page 34
QUICK REFERENCE On the road Keep the charging socket flap closed when Button Function the charging socket is not used. Recirculated-air mode. Connecting the charging cable Automatic recirculated-air To connect, engage selector lever posi- control AUC/recirculated- tion P, deactivate drive-ready state, and un- air mode. -
Page 35
On the road QUICK REFERENCE Charging process is interrupted. The tank venting status is displayed in the instrument cluster. In rare cases, tank venting can last several minutes. When tank venting has finished, a mes- sage is displayed in the instrument clus- ter. -
Page 36
Displaying the engine oil level Via the Central Information Display (CID): «My MINI» The button is located above the Control Dis- «Vehicle status» play. «Engine oil level»… -
Page 37
This service can be reached around the clock in many countries. «MINI Connected» «MINI Assist» «MINI Roadside Assistance» The contact to the MINI Roadside Assis- tance is established. A telephone number is displayed, if needed. Select to dial the telephone number on a connected mobile phone. -
Page 38
Online Edition for Part no. 01402628632 — VI/19… -
Page 39: At A Glance
AT A GLANCE Cockpit ………………….Central Information Display (CID) …………Voice activation system …………….. General settings ………………Owner’s Manual media …………….MINI eDRIVE ……………….. Safety of the hybrid system …………..Online Edition for Part no. 01402628632 — VI/19…
-
Page 40: Cockpit
AT A GLANCE Cockpit Cockpit Vehicle features and options instance, due to the selected options or country versions. This also applies to safety- related functions and systems. When using This chapter describes all standard, country- these functions and systems, the applicable specific and optional features offered with laws and regulations must be observed.
-
Page 41
Cockpit AT A GLANCE Automatic headlight con- Canada: roadside parking trol light Cornering light Onboard Computer High-beam Assistant Instrument lighting 7 Instrument cluster 8 Steering column stalk, right 5 Steering wheel buttons, left Wipers Camera-based cruise control Wiper on Canadian mod- on/off Cruise control on/off Rain sensor… -
Page 42
AT A GLANCE Cockpit Increase volume 11 Adjusting the steering wheel 12 Unlocking the hood 13 Operate the tailgate Reduce volume Tank vent Horn, entire surface In the vicinity of the center console Hazard warning system PDC Park Distance Con- trol Rearview camera Intelligent Safety… -
Page 43
Cockpit AT A GLANCE DSC Dynamic Stability Control 7 Steptronic transmission selector lever 8 Controller with buttons MINI Driving Modes 9 Parking brake switch In the vicinity of the roofliner Emergency Request, Ambient light Indicator light, front-seat pas- Panoramic glass sunroof… -
Page 44: Central Information Display (Cid)
AT A GLANCE Central Information Display (CID) Central Information Display (CID) Vehicle features and options Input and display Letters and numbers This chapter describes all standard, country- specific and optional features offered with Depending on the menu, you can switch be- the series.
-
Page 45
Central Information Display (CID) AT A GLANCE Function is activated. Entertainment Function is deactivated. Symbol Meaning Status information Bluetooth audio. USB audio interface. General information Mobile phone audio interface. The status field can be found in the upper area of the Control Display. Status informa- tion is displayed in the form of symbols. -
Page 46
AT A GLANCE Central Information Display (CID) Selecting the display In the case of very high temperatures on the Control Display, for instance due to in- The display can be selected in menus which tense solar radiation, the brightness may be support the split screen function. -
Page 47
Central Information Display (CID) AT A GLANCE Operation Button Function – Turn to switch between menu items, for Opens the Communication menu. example. Opens the Media/Radio menu. Opens destination input menu for navigation. Opens navigation map. Opens the previous display. –… -
Page 48
If applicable, further operating options for the selected menu, for instance «Save station». Changing settings Settings, such as brightness, can be entered. Via the Central Information Display (CID): «My MINI» «System settings» Press the Controller. «Displays» «Control display» Changing between displays «Brightness at night»… -
Page 49
Opening the main menu Changing settings Tap on the symbol. Settings such as brightness can be changed via the touchscreen. Via the Central Information Display (CID): «My MINI» «System settings» «Displays» «Control display» «Brightness at night» The main menu is displayed. -
Page 50
AT A GLANCE Central Information Display (CID) Entering letters and numbers Storing a function Select the function via the Central Infor- Input mation Display (CID). Tap the symbol on the touchscreen. Press and hold the desired but- A keyboard appears in the Control Dis- ton, until a signal sounds. -
Page 51: Voice Activation System
Voice activation system AT A GLANCE Voice activation system Vehicle features and options activation system. To set the language, refer to page 55. – Always say commands in the language This chapter describes all standard, country- of the voice activation system. specific and optional features offered with the series.
-
Page 52
Displaying possible commands and system announcements can be set. Via the Central Information Display (CID): The following is displayed in the top area of the Control Display: «My MINI» – Some possible commands for the current «System settings» menu. If necessary, «Language»… -
Page 53
Via the Central Information Display (CID): – Major language dialects can cause prob- lems with the voice recognition feature. «My MINI» Speak loud and clear. «System settings» «Language» Using the voice activation sys- «Server speech recognition»… -
Page 54
– Amazon Alexa Car Integration pur- chased via MINI Connected Store. – The ConnectedDrive account in the ve- hicle is the same as in the MINI Con- nected app. – The vehicle is connected in the MINI Connected app. –… -
Page 55: General Settings
Setting the time country versions. This also applies to safety- Via the Central Information Display (CID): related functions and systems. When using these functions and systems, the applicable «My MINI» laws and regulations must be observed. «System settings» «Date and time» Language «Time:»…
-
Page 56
Press the Controller. If vehicle tracking has been activated, the current vehicle position can be displayed in Make the settings for the month and the MINI Connected app. year. Activating/deactivating Setting the date format Via the Central Information Display (CID): Via the Central Information Display (CID): «My MINI»… -
Page 57
Control Display Messages Brightness Concept Via the Central Information Display (CID): The menu centrally displays all messages ar- riving in the vehicle in list form. «My MINI» «System settings» General information «Displays» The following messages can be displayed: «Control display» –… -
Page 58
Navigation, for instance stored destina- Concept tions. The vehicle offers various functions which – Phone book. require data to be transferred to MINI or a – Office data, for instance voice notes. service provider. The data transfer can be – Login accounts. -
Page 59
General settings AT A GLANCE «System settings» Function Connec- tion type «Data privacy» Making calls via the hands- Bluetooth. «Delete personal data» free system. «Delete personal data» Using phone functions via «OK» the Central Information Dis- Exit and lock the vehicle. play (CID). -
Page 60
Switching on Bluetooth devices when the traffic situation allows. As warranted, stop and use the systems Via the Central Information Display (CID): and devices while the vehicle is stationary. «My MINI» «System settings» Compatible devices «Mobile devices» «Settings» General information «Bluetooth®»… -
Page 61
All requirements are met and all required steps were completed in the specified order. Via the Central Information Display (CID): Despite that, the mobile device does not «My MINI» function as expected. «System settings» In this case, the following explanations can help: «Mobile devices»… -
Page 62
AT A GLANCE General settings – Transmission of the phone book entries – Audio devices with USB port, for in- is not yet complete. stance MP3 players. – It is possible that only the phone book – USB storage devices. entries of the mobile phone or the SIM Common file systems are supported. -
Page 63
Bluetooth, WiFi, and Siri voice opera- established, CarPlay can no longer be se- tion are switched on on the iPhone. lected. – Booking the MINI Connected service: – Delete the iPhone concerned from the Apple CarPlay preparation. device list. Online Edition for Part no. 01402628632 — VI/19… -
Page 64
Pair the iPhone as a new device. Via the Central Information Display (CID): If the steps listed have been carried out and «My MINI» the required function is still not available: contact the hotline, a dealer’s service center «System settings»… -
Page 65
The software version installed in the vehicle Deleting the device is displayed. Via the Central Information Display (CID): Via the Central Information Display (CID): «My MINI» «My MINI» «System settings» «System settings» «Mobile devices» «Software update» Select device. -
Page 66
AT A GLANCE General settings Via the Central Information Display (CID): «My MINI» «System settings» «Software update» «Restore software» 5. – «Previous version» The previous software version is re- stored. – «Default software settings» The first software version is re- stored. -
Page 67: Owner’s Manual Media
Owner’s Manual: – Printed Owner’s Manual, refer to Press the button. page 67. «My MINI» – Integrated Owner’s Manual in the vehi- «Owner’s Manual» cle, refer to page 67. Select the desired method of accessing the contents.
-
Page 68
AT A GLANCE Owner’s Manual media Opening via Central Information Programmable memory buttons Display (CID) General information Change directly to the Options menu from the function on the Control Display: The Owner’s Manual can be stored on the programmable memory buttons and called up directly. -
Page 69: Mini Edrive
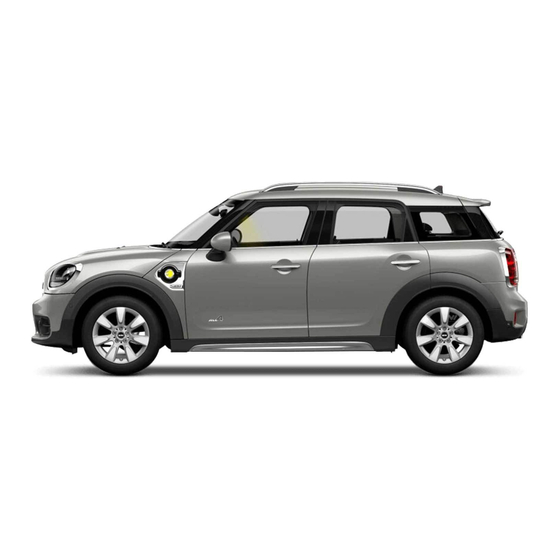
Hybrid system 1 Combustion engine Concept 2 Control-system electronics, electric mo- This MINI is a hybrid vehicle. In addition to the combustion engine, the vehicle features 3 Electric motor a high-voltage system that consists of an 4 High-voltage cables: orange…
-
Page 70
AT A GLANCE MINI eDRIVE Follow the information about electric driv- Charging the vehicle ing ePOWER, driving with the combustion The high-voltage battery of the vehicle can engine POWER, and the driving stability be charged, refer to page 254, via the control systems. -
Page 71
MINI eDRIVE AT A GLANCE Long-term vehicle storage Observe the information on vehicle storage and for longer idle periods, refer to page 317. Online Edition for Part no. 01402628632 — VI/19… -
Page 72: Safety Of The Hybrid System
AT A GLANCE Safety of the hybrid system Safety of the hybrid system Vehicle features and options Contact with water This chapter describes all standard, country- The hybrid system is typically safe even in specific and optional features offered with the following example situations: the series.
-
Page 73
Safety of the hybrid system AT A GLANCE Online Edition for Part no. 01402628632 — VI/19… -
Page 74
Online Edition for Part no. 01402628632 — VI/19… -
Page 75: Controls
CONTROLS Opening and closing …………….Seats, mirrors, and steering wheel ……….. Transporting children safely ………….. Driving …………………. Displays ………………..Lights ………………….Safety ………………….Driving stability control systems …………. Driving comfort ………………Climate control ………………Interior equipment …………….Storage compartments …………….. Cargo area ………………..
-
Page 76: Opening And Closing
CONTROLS Opening and closing Opening and closing Vehicle features and options of injury. Take the vehicle key with you so that the vehicle can be opened from the outside. This chapter describes all standard, country- specific and optional features offered with the series.
-
Page 77
Opening and closing CONTROLS Overview – The interior lights, refer to page 167, and the MINI logo projection are switched on, provided that the interior lights were not switched off manually. – Depending on the settings, the welcome light and headlight courtesy delay fea- ture, refer to page 164, are switched on. -
Page 78
There is a risk of damage to property. The MINI logo projection is also switched Cover the edges and ensure that pointed objects do not hit the windows. These functions are not available if the inte- rior lights were switched off manually. -
Page 79
Opening and closing CONTROLS Panic mode Push battery in the direction of the ar- row using a pointed object and lift it You can trigger the alarm system if you find out. yourself in a dangerous situation. – Press the button on the vehicle key and hold for at least 3 sec- onds. -
Page 80
The options provided by the Remote – The vehicle key is in direct proximity of Services of the MINI Connected app in- the wireless charging tray. clude the ability to lock and unlock a ve- Place the vehicle key in a different loca- hicle. -
Page 81
Opening and closing CONTROLS Safety information To do this, slide the integrated key into the opening from below and remove the lid. Warning Unlocking from the inside is only possible with special knowledge. Persons who spend a lengthy time in the vehicle while being exposed to extreme temperatures are at risk of injury or death. -
Page 82
CONTROLS Opening and closing Overview Carrying the vehicle key with you, e.g., in your pants pocket, is sufficient. The vehicle automatically detects the vehi- cle key when it is in close proximity or in the car’s interior. General information Comfort Access supports the following functions: –… -
Page 83
Opening and closing CONTROLS vehicle access points. Rather, the vehicle is Closing locked again. If the vehicle was locked automatically after driving off or with the button of the central locking system from the inside, note the fol- lowing: if a door on a locked vehicle is opened from the inside with the door opener, pressing the button on the outer door handle will first lock the vehicle again. -
Page 84
Adjusting General information «My MINI» To avoid locking the vehicle key in the vehi- «Vehicle settings» cle, do not place the vehicle key in the cargo area. «Doors/Key»… -
Page 85
Opening and closing CONTROLS Before closing, the hazard warning system «Tailgate» flashes and an acoustic signal sounds. Select the desired setting: Moving a foot again will stop the closing – «Open by foot movement» process. Contactless opening of the tailgate is When the touchless opening is switched on: switched on or off. -
Page 86
CONTROLS Opening and closing Tailgate Without automatic tailgate operation General information Opening from the outside To avoid locking the vehicle key in the vehi- cle, do not place the remote control in the cargo area. Depending on the equipment and country version, it is possible to specify whether the tailgate can be activated with the vehicle key and how the vehicle doors will respond… -
Page 87
4 in/10 cm above the tailgate. From the inside Via the Central Information Display (CID): With Steptronic transmission: «My MINI» Pull button in the storage compart- ment of the driver’s door upward. «Vehicle settings» If the vehicle is locked, selector lever posi- «Doors/Key»… -
Page 88
CONTROLS Opening and closing Interruption of the opening procedure The opening procedure is interrupted in the following situations: – When the vehicle starts moving. – By pressing the button on the outside of the tailgate. Pressing again closes the tailgate. –… -
Page 89
Opening and closing CONTROLS – By releasing the button in the storage If several drivers use their own vehicle compartment of the driver’s door. Press- keys, the vehicle will apply the personal set- ing again and holding continues the tings as it is being unlocked. These settings closing motion. -
Page 90
PDC Park Distance Control. «My MINI» – Rearview camera. «Driver profiles» – Head-up Display. – MINI Driving Modes. «Drive off (guest)» – Intelligent Safety. «OK» – Driver’s seat position, exterior mirror The guest profile cannot be renamed. It is position. -
Page 91
Opening and closing CONTROLS Via the Central Information Display (CID): «Reset driver profile» «OK» «My MINI» «Driver profiles» Exporting driver profiles «Show driver profiles at startup» Most settings of the active driver profile can be exported. System limits Exporting is helpful when storing and re-… -
Page 92
Adjusting the last seat and mirror position Only the driver’s door is unlocked. Pressing again unlocks the entire ve- Via the Central Information Display (CID): hicle. «My MINI» – «All doors» «Driver profiles» The entire vehicle is unlocked. Select driver profile. -
Page 93
Depending on local regulations, the vehicle acoustic alarm may be suppressed. Via the Central Information Display (CID): – Visual alarm: By flashing the exterior lighting. «My MINI» «Vehicle settings» Overview «Doors/Key» Deactivate or activate the desired con- firmation signals. –… -
Page 94
CONTROLS Opening and closing Switching off the alarm, refer to page 95. on, but no longer than approx. 5 mi- nutes: Opening the tailgate with the alarm An alarm has been triggered. system switched on Tilt alarm sensor The tailgate can be opened even when the alarm system is switched on. -
Page 95
Opening and closing CONTROLS The tilt alarm sensor and interior motion Overview sensor are switched off until the vehicle is locked again. Switching off the alarm – Unlock the vehicle with the vehicle key. – Unlock the vehicle with the integrated remote control or switch on the ignition using the emergency detection of re- mote control, refer to page 79. -
Page 96
CONTROLS Opening and closing Convenient closing with the vehicle key, re- Pull the switch past the resistance fer to page 78. point again within approx. 4 seconds Closing via Comfort Access, refer to and hold it there. page 83. The window closes without jam protec- tion. -
Page 97
Opening and closing CONTROLS Initializing the system Safety information The system can be initialized when the ve- hicle is stationary and the engine is run- Warning ning. Body parts can be jammed when operating During initialization, the affected window the glass sunroof. There is a risk of injury. closes without jam protection. -
Page 98
CONTROLS Opening and closing With the glass sunroof completely Pressing the switch again stops the mo- tion. raised – Slide switch back to the re- With the glass sunroof completely sistance point and hold. raised The glass sunroof is Press the switch forward be- opened as long as the yond the resistance point and switch is pressed. -
Page 99
After a power failure during the opening or closing process, the glass sunroof can only be operated to a limited extent. The system must be initialized in this case. MINI rec- ommends having this work performed only by a dealer’s service center or another quali- fied service center or repair shop. -
Page 100: Seats, Mirrors, And Steering Wheel
CONTROLS Seats, mirrors, and steering wheel Seats, mirrors, and steering wheel Vehicle features and options Warning With a backrest inclined too far to the This chapter describes all standard, country- rear, the efficacy of the safety belt can no specific and optional features offered with longer be ensured.
-
Page 101
Seats, mirrors, and steering wheel CONTROLS Forward/backward Lumbar support The curvature of the seat backrest can be adjusted in a way that it supports the lum- bar region of the spine. The lower back and the spine are supported for upright posture. Pull the lever and slide the seat in the de- sired direction. -
Page 102
CONTROLS Seats, mirrors, and steering wheel Backrest tilt 3 Backrest tilt 4 Forward/backward, height, seat tilt Forward/backward Move switch forward or backward. Lumbar support Push switch forward or backward. Concept The curvature of the seat backrest can be Height adjusted in a way that it supports the lum- bar region of the spine. -
Page 103
Seats, mirrors, and steering wheel CONTROLS Thigh support Switching off Press and hold the button until the LEDs go out. Rear seats Safety information Pull the lever at the front of the seat and ad- Warning just the thigh support. There is a risk of jamming when folding down the center armrest in the rear. -
Page 104
CONTROLS Seats, mirrors, and steering wheel Safety belts Warning The efficacy of safety gear, including Number of safety belts and safety safety belts, can be limited or lost when belt buckles safety belts are fastened incorrectly. An The vehicle is fitted with five safety belts to incorrectly fastened safety belt can cause ensure occupant safety. -
Page 105
Seats, mirrors, and steering wheel CONTROLS – Do not rub the safety belt against sharp Middle safety belt in the rear edges, or guide it or jam it in across hard or fragile objects. Buckling the safety belt – Avoid thick clothing. –… -
Page 106
CONTROLS Seats, mirrors, and steering wheel Safety belt reminder for driver’s Warning seat and front passenger seat Objects on the head restraint reduce the Display in the instrument cluster protective effect in the head and neck area. There is a risk of injury. The indicator light lights up and a –… -
Page 107
Seats, mirrors, and steering wheel CONTROLS Removing Warning Only remove the head restraint if no one Body parts can be jammed when moving will be sitting in the seat in question. the head restraint. There is a risk of injury. Make sure that the area of movement is clear when moving the head restraint. -
Page 108
CONTROLS Seats, mirrors, and steering wheel Fold down Safety information Warning There is a risk of jamming when moving the seats. There is a risk of injury or risk of damage to property. Make sure that the area of movement of the seat is clear prior to any adjustment. -
Page 109
Seats, mirrors, and steering wheel CONTROLS Press the desired button 1 or 2. the traffic behind by looking over your shoulder. The procedure stops when a seat adjust- ment switch or one of the memory buttons is pressed. Overview Once underway, adjustment of the seat po- sition on the driver’s side is disabled after a short while. -
Page 110
CONTROLS Seats, mirrors, and steering wheel Folding in and out Activating slide the switch to the driver’s NOTICE side mirror position. Depending on the vehicle width, the vehi- Engage selector lever position R. cle can be damaged in vehicle washes. There is a risk of damage to property. -
Page 111
Seats, mirrors, and steering wheel CONTROLS Interior mirror, automatic dimming Adjusting feature Overview Fold the lever down. Move the steering wheel to the prefer- red height and angle to suit your seating Photocells are used for control: position. – In the mirror glass. Fold the lever back up. -
Page 112: Transporting Children Safely
CONTROLS Transporting children safely Transporting children safely Vehicle features and options instance, due to the selected options or country versions. This also applies to safety- related functions and systems. When using This chapter describes all standard, country- these functions and systems, the applicable specific and optional features offered with laws and regulations must be observed.
-
Page 113
Transporting children safely CONTROLS activation of front-seat passenger airbags, Safety information refer to page 171. Warning Safety information The protective effect of child restraint sys- tems and their fastening systems which Warning have been damaged or exposed to an acci- Active front-seat passenger airbags can in- dent can be limited or lost. -
Page 114
CONTROLS Transporting children safely On the front passenger seat Child seat security Deactivating airbags Warning Active front-seat passenger airbags can in- jure a child in a child restraint system when the airbags are activated. There is a risk of injury. Make sure that the front- seat passenger airbags are deactivated and that the PASSENGER AIRBAG OFF indica- The rear safety belts and the front passen-… -
Page 115
Transporting children safely CONTROLS manufacturer when installing and using Position LATCH child restraint fixing systems. Symbol Meaning Mounts for the lower LATCH The corresponding symbol anchors shows the mounts for the The lower anchors may be used to attach lower LATCH anchors. the CRS to the vehicle seat up to a com- Seats equipped with lower bined child and CRS weight of 65 lbs/30 kg… -
Page 116
CONTROLS Transporting children safely Child restraint systems with tether Routing the retaining strap strap Safety information Warning If the upper retaining strap is incorrectly used for the child restraint system, the protective effect can be reduced. There is a risk of injury. Make sure that the upper 1 Direction of travel retaining strap does not run over sharp edges and is not twisted as it passes the… -
Page 117
Transporting children safely CONTROLS Locking the doors and win- dows Doors Push the locking lever on the rear doors up. The door can now be opened from the out- side only. Safety switch for the rear Press the button on the driver’s door if children are being trans- ported in the rear. -
Page 118: Driving
CONTROLS Driving Driving Vehicle features and options – When the engine is switched off auto- matically using the Auto Start/Stop function. This chapter describes all standard, country- Some electronic systems/power consumers specific and optional features offered with remain ready for operation. the series.
-
Page 119
Driving CONTROLS Drive-ready state in detail All indicator lights in the instrument cluster go out. To save battery power when the engine is Concept off, switch off the ignition and any unneces- The following are the different drive-ready sary electronic systems/power consumers. state variants: Safety measures –… -
Page 120
CONTROLS Driving Depending on the prerequisite, the electric drive-ready state is possible or the engine Warning can be started. An unsecured vehicle can begin to move and possibly roll away. There is a risk of Electric drive-ready state accident. Before exiting, secure the vehi- cle against rolling. -
Page 121
Driving CONTROLS Deactivating drive-ready state power and energy recovery is not active, is referred to as coasting, refer to page 124. After stopping the vehicle: The combustion engine is not switched off Set the parking brake. automatically in the following situations: Engage selector lever position P. -
Page 122
CONTROLS Driving – The Auto Start/Stop function is de- – Selector lever position D or R engaged. activated. – The accelerator pedal is not depressed – Engage selector lever position P. too far. – The possible maximum speed for elec- Set the parking brake. -
Page 123
AUTO eDRIVE. When pressing the button, the current Via the Central Information Display (CID): eDRIVE setting is graphically displayed on «My MINI» the Control Display. «Vehicle settings» «Configure MAX eDRIVE» «MAX eDRIVE by default» Online Edition for Part no. 01402628632 — VI/19… -
Page 124
CONTROLS Driving Driving with the combustion Auto Start/Stop function, coasting engine: POWER Concept The combustion engine is automatically Concept stopped and disengaged from the drivetrain. The combustion engine provides the main This driving condition of rolling is referred drive power to move the vehicle. If re- to as coasting. -
Page 125
On uphill grades or on a downhill slope, also secure the vehicle, for in- General information stance with a wheel chock. Depending on the setting of the MINI Driv- ing Modes switch, the high-voltage battery is charged at different speeds and the vehi- Warning cle is decelerated differently while coasting. -
Page 126
CONTROLS Driving – Releasing the parking brake. While driving – Opening and closing the doors or To use as emergency brake while driving: windows. Pull the switch and hold it. The vehicle – Engaging selector lever position N. brakes hard while the switch is being pulled. -
Page 127
The triple turn signal duration can be ad- justed. After a power failure Via the Central Information Display (CID): Re-activating the parking brake «My MINI» Switch on the ignition. «Vehicle settings» «Lighting» Press the switch while stepping on the brake pedal or selector lever posi- «Exterior lighting»… -
Page 128
CONTROLS Driving – High beams off/headlight flasher, ar- Switching on row 2. Wiper system General information Do not use the wipers if the windshield is dry, as this may damage the wiper blades or cause them to become worn more quickly. Press the lever up until the desired position is reached. -
Page 129
Driving CONTROLS Interval mode or rain sensor Deactivating Press the lever back into the standard posi- Concept tion. The rain sensor automatically controls the Setting the frequency or sensitivity of time between wipes depending on the in- the rain sensor tensity of the rainfall. -
Page 130
CONTROLS Driving – Resting position of the wiper, posi- tion 0. NOTICE – Intermittent mode, arrow 1. When re- When the washer fluid reservoir is empty, verse gear is engaged, the system the wash pump cannot work as intended. switches to continuous operation. There is a risk of damage to property. -
Page 131
Driving CONTROLS Push wiper lever down. Wipers return to their resting position and are ready NOTICE again for operation. If the wipers are frozen to the windshield, the wiper blades can be torn off and the wiper motor can overheat when switching Canada: wiper system on. -
Page 132
CONTROLS Driving Switching on Interval mode or rain sensor Concept The rain sensor automatically controls the time between wipes depending on the in- tensity of the rainfall. General information The sensor is located on the windshield, di- rectly in front of the interior mirror. With- out the rain sensor, the frequency of the Tap up the lever or press it past the resist- wiper operation is preset. -
Page 133
Driving CONTROLS Setting the frequency or sensitivity of Cleaning the windshield the rain sensor Pull the lever. Turn the thumbwheel. The system sprays washer fluid on the windshield and activates the wipers briefly. With deactivated rain sensor: set the inter- val. -
Page 134
CONTROLS Driving – In resting position: turn the switch Folding away the wipers downward, arrow 3. The switch auto- Switch the ignition on and off again. matically returns to its idle position Press the wiper lever up past the point when released. -
Page 135
Driving CONTROLS Washer fluid NOTICE Silicon-containing additives in the washer General information fluid for the water-repelling effect on the All washer nozzles are supplied from one windows can lead to damage to the wash- reservoir. ing system. There is a risk of damage to Use a mixture of tap water and windshield property. -
Page 136
CONTROLS Driving Steptronic transmission Transmission with a latching selector lever Concept The Steptronic transmission combines the functions of an automatic transmission with the possibility of manual shifting, if needed. Safety information Warning An unsecured vehicle can begin to move The selector lever positions P, R, N, and D and possibly roll away. -
Page 137
Driving CONTROLS Engage selector lever position P only when – Unintentional shifting from selector the vehicle is stationary. lever position P into another selector lever position. Before exiting the vehicle, make sure that selector lever position P is set. Otherwise, To release the selector lever lock: with the vehicle may begin to move. -
Page 138
CONTROLS Driving The vehicle can roll. charged at different speeds. Fuel consump- tion can increase. If there is a malfunction, you may not be able to change the selector lever position. Ending the Sport program Manually unlock the transmission lock, if needed, refer to page 139. -
Page 139
Driving CONTROLS Ending the manual mode the yellow release lever downward, see arrow. Push the selector lever to the right. D is displayed in the instrument cluster. Displays in the instrument cluster The selector lever position is displayed, for example P. Releasing the transmission lock Press the button on the front of the se- manually: with a latching selector… -
Page 140: Displays
CONTROLS Displays Displays Vehicle features and options instance, due to the selected options or country versions. This also applies to safety- related functions and systems. When using This chapter describes all standard, country- these functions and systems, the applicable specific and optional features offered with laws and regulations must be observed.
-
Page 141
Onboard Computer Messages, for instance Check Control Charging screen Time 2 Selector lever position External temperature 3 MINI Driving Modes switch sta- Selection lists eDRIVE mode status Total miles/trip odometer Charging screen Departure time with timer 4 Stationary climate control… -
Page 142
CONTROLS Displays – Drive-ready state: READY, refer to A pointer indicates the power outputted by page 142. the hybrid drive in a scale, arrow 2. – Electric driving: ePOWER, refer to If the pointer is outside the range high- page 142. lighted in yellow, the combustion engine is switched on, arrow 3. -
Page 143
Displaying the energy flow The display becomes active af- Via the Central Information Display (CID): ter MAX eDRIVE, refer to page 123, is activated via the «My MINI» eDRIVE button. «Technology in action» «eDRIVE» SAVE BATTERY Adapting to the course of the road… -
Page 144
CONTROLS Displays Display Indicator/warning lights General information The indicator/warning lights can light up in a variety of combinations and colors. Several of the lights are checked for proper functioning and light up temporarily when the engine is started or the ignition is switched on. -
Page 145
Displays CONTROLS Approach control warning Yellow lights Indicator light illuminates: advance Anti-lock Braking System ABS warning is issued, for example when there is the impending danger of a The Brake Assistant function may collision or the distance to the vehicle not activate. -
Page 146
CONTROLS Displays Tire Pressure Monitor TPM Reduce the vehicle speed and have the system checked immediately; otherwise, The indicator light lights up: the Tire serious engine misfiring within a brief Pressure Monitor reports a low tire period can seriously damage emission inflation pressure or a flat tire. -
Page 147
Displaying stored Check Control messages Cruise control Via the Central Information Display (CID): The system is switched on. It main- «My MINI» tains the speed that was set using «Vehicle status» the control elements on the steering wheel. «Check Control»… -
Page 148
CONTROLS Displays External temperature Messages after trip completion Certain messages displayed while driving are displayed again after the ignition is General information switched off. If the indicator drops to +37 ℉/+3 ℃, a sig- nal sounds. Fuel gauge A Check Control message is displayed. There is an increased risk of ice on roads. -
Page 149
Driving style. – Traffic conditions. In MAX eDRIVE mode, the electric range can be dis- – Program changes via the MINI Driving played via the Onboard Com- Modes switch. puter in the instrument clus- – Climate and terrain conditions. ter. -
Page 150
Via the Central Information Display (CID): drive is currently not availa- ble. «My MINI» «System settings» Display total range «Displays» The current total range is dis- «Instrument panel» played in the instrument clus- «Current consumption»… -
Page 151
Displays CONTROLS Required maintenance procedures and Via the Central Information Display (CID): legally mandated inspections are dis- «My MINI» played. «Vehicle status» Select an entry to call up detailed infor- mation. Move the Controller to the left. «Teleservice Call» Symbols… -
Page 152
CONTROLS Displays Overview With navigation system: Speed Limit Info is not availa- ble. Camera Speed Limit Info can also be displayed in the Head-up Display. System limits The system may not be fully functional and may provide incorrect information in the following situations: –… -
Page 153
Displays CONTROLS Selection lists Onboard Computer General information Concept Depending on the vehicle equipment, the The Onboard Computer displays different buttons on the steering wheel and the dis- vehicle data in the instrument cluster, such play in the instrument cluster can be used as average values. -
Page 154
On- board Computer can be displayed on the Info Display of the instrument cluster. Via the Central Information Display (CID): «My MINI» «System settings» «Displays» A marking is displayed when SAVE BAT- «Instrument panel»… -
Page 155
Displays CONTROLS Average speed Display Periods in which the vehicle is parked with the engine manually stopped are not in- cluded in the calculation of the average speed. Resetting average values With equipment version with Head-up Display and navigation: distance to destination The distance remaining to the destination is displayed if a destination is entered in the… -
Page 156
«My MINI» Resetting the Onboard Computer «Technology in action» Via the Central Information Display (CID): «Sport displays» «Sports instruments» «My MINI» Via MINI Driving Modes switch: «Driving information» «Onboard info» Activate SPORT. «Consumption» or «Speed» «Sport displays» «OK» «Sports instruments»… -
Page 157
«Technology in action» «Vehicle settings» «Sport displays» «Speed warning» «Vehicle and surroundings» «Speed warning» Via the MINI Driving Modes switch: Setting your current speed as the Activate SPORT. speed warning «Sport displays» Via the Central Information Display (CID): «Vehicle and surroundings»… -
Page 158
RPMs and Via the Central Information Display (CID): the respective RPM warning thresholds. «My MINI» Display «System settings» «Displays» «Center Instrument»… -
Page 159
Do not move the moving parts manually. Selecting displays in the Head-up Display Overview Via the Central Information Display (CID): «My MINI» «System settings» «Displays» «Head-Up Display» «Displayed information» Select the desired displays in the Head- up Display. -
Page 160
«Displays» Via the Central Information Display (CID): «Head-Up Display» «Rotation» «My MINI» Turn the Controller until the desired set- «MINI Country Timer» ting is selected. Select the desired setting. Press the Controller. – : display of the Country Timer. The setting is stored for the driver profile –… -
Page 161
Display of the Country Timer Resetting the Country Timer Info Via the Central Information Display (CID): Overview «My MINI» «MINI Country Timer» «MINI Country Timer Info» Select the desired setting: – «Reset record time and display»: re- setting the best time. –… -
Page 162
CONTROLS Displays Symbols Description «Check Control»: Check Con- trol messages are stored in the background and can be displayed on the Control Display. Displaying stored Check Control messages, re- fer to page 147. «Service required»: display- ing service requirements, refer to page 150. «Teleservice Call»: Serv- ice Request. -
Page 163: Lights
Lights CONTROLS Lights Vehicle features and options Symbol Function Parking lights. This chapter describes all standard, country- specific and optional features offered with the series. It also describes features that are Low beams. not necessarily available in your vehicle, for instance, due to the selected options or country versions.
-
Page 164
2 seconds. Setting the duration Via the Central Information Display (CID): Switching off «My MINI» Briefly press the lever to the resistance «Vehicle settings» point in the opposite direction. «Lighting»… -
Page 165
In some countries, daytime running lights are mandatory, so it may not be possible to deactivate the daytime running lights. High-beam Assistant Via the Central Information Display (CID): «My MINI» Concept «Vehicle settings» The high-beam Assistant detects other traf- «Lighting»… -
Page 166
CONTROLS Lights The system responds to light from oncom- The system is not fully functional in the fol- ing traffic and traffic driving ahead of you, lowing situations, and driver intervention and to ambient lighting, for instance in may be necessary: towns and cities. -
Page 167
Ambient light General information Depending on the equipment version, light- ing can be adjusted for some lights in the car’s interior. Activating/deactivating Via the Central Information Display (CID): «My MINI» «Vehicle settings» «Lighting» Online Edition for Part no. 01402628632 — VI/19… -
Page 168
Depending on the equipment, the bright- ness of the ambient light can be adjusted via the thumbwheel for the instrument lighting or on the Control Display. Via the Central Information Display (CID): «My MINI» «Vehicle settings» «Lighting» «Interior lighting» «Brightness»… -
Page 169: Safety
Safety CONTROLS Safety Vehicle features and options instance, due to the selected options or country versions. This also applies to safety- related functions and systems. When using This chapter describes all standard, country- these functions and systems, the applicable specific and optional features offered with laws and regulations must be observed.
-
Page 170
CONTROLS Safety Head airbag feet and legs in the floor area and does not support them on the dashboard. In the event of a side impact, the head air- – Make sure that occupants keep their bag protects the head. heads away from the side airbag. -
Page 171
Safety CONTROLS tact MINI Customer Relations for further in- Automatic deactivation of the formation. front-seat passenger airbags Warnings and information on the airbags are also found on the sun visors. Concept The system reads if the front passenger seat Functional readiness of the airbag… -
Page 172
CONTROLS Safety To enable correct recognition of the occu- Detected child restraint systems pied seat cushion. The system generally detects children – Do not attach covers, cushions, ball mats seated in a child restraint system, particu- or other items to the front passenger larly in child restraint systems required by seat unless they are specifically deter- NHTSA at the point in time when the vehi-… -
Page 173
If the message does not disappear after a re- tem is active. peat calibration, have the system checked Via the Central Information Display (CID): as soon as possible. «My MINI» «Vehicle status» Tire Pressure Monitor TPM «Tire Pressure Monitor» The current status is displayed. -
Page 174
CONTROLS Safety Resetting the system on run-flat tires and continued driving with these tires. Via the Central Information Display (CID): «My MINI» If a tire inflation pressure check is «Vehicle status» required «Tire Pressure Monitor» Message Start the engine but do not drive off. -
Page 175
Safety CONTROLS Measure Symbol Possible cause Reduce your speed and stop cautiously. There is a tire inflation pressure Avoid sudden braking and steering ma- loss. neuvers. No reset was performed for the Check whether the vehicle is fitted with system. The system issues a normal tires or run-flat tires. -
Page 176
CONTROLS Safety Run-flat tires the distance for which it may be safe to drive may be up to 50 miles/80 km. Safety information Vehicle handling with damaged tires Vehicles driven with a damaged tire will Warning handle differently, potentially leading to Your vehicle handles differently with a conditions such as the following: run-flat tire with no or low inflation pres-… -
Page 177
Safety CONTROLS Failure performing a reset with a tire pressure monitoring system (TPMS) that illuminates a low tire pressure The system does not function properly if a telltale when one or more of your tires is reset has not been carried out, for instance significantly under-inflated. -
Page 178
The difference will be detected and reported Via the Central Information Display (CID): as a flat tire. The system does not measure the actual in- «My MINI» flation pressure in the tires. «Vehicle status» Functional requirements «Flat Tire Monitor»… -
Page 179
Safety CONTROLS on run-flat tires and continued driving If identification of flat tire damage is with these tires. not possible, please contact a dealer’s service center or another qualified serv- ice center or repair shop. Indication of a flat tire Repair the flat tire, e.g., with a flat tire kit or by changing the wheel. -
Page 180
CONTROLS Safety Possible driving range with a – Sudden serious tire damage caused by depressurized tire external circumstances cannot be recog- nized in advance. The distance for which it may be possible to drive safely varies depending on how the –… -
Page 181
Safety CONTROLS Adjust the settings as needed. The individ- ual settings are stored for the driver profile Warning currently in use. Indicators and warnings cannot serve as a substitute for the driver’s personal judg- Press button again: ment. Due to its limits, the system may not –… -
Page 182
CONTROLS Safety prox. 3 mph/5 km/h. The timing of warn- Overview ings may vary with the current driving situation. Button in the vehicle Braking is performed at speeds up to ap- proximately 35 mph/60 km/h. Detection range Intelligent Safety button Camera Objects that the system can detect are taken into account. -
Page 183
The warning time can be set via the Central An acute warning is displayed when there Information Display (CID). is an imminent danger of collision due to «My MINI» the vehicle approaching another object at a high speed. «Vehicle settings»… -
Page 184
CONTROLS Safety The braking intervention occurs only if ve- Functional limitations hicle stability has not been restricted, The system may not be fully functional in for instance by deactivating the DSC Dy- the following situations: namic Stability Control. – In heavy fog, wet conditions, or snow- The driver may interrupt the braking inter- fall. -
Page 185
Safety CONTROLS General information Warning In sufficiently bright conditions, the system Indicators and warnings cannot serve as a issues a warning of a possible risk of colli- substitute for the driver’s personal judg- sion with pedestrians in the speed range ment. -
Page 186
CONTROLS Safety Switching on/off Braking intervention The warning prompts the driver to inter- Switching on automatically vene. During a warning, the maximum brak- ing force is used. In order to activate the The system is automatically active after ev- Brake Assistant function, you must apply ery driving off. -
Page 187
Safety CONTROLS Thus, a warning might not be issued or be General information issued late. The following situations may not be de- tected, for example: – Partially covered pedestrians. – Pedestrians that are not detected as such because of the viewing angle or contour. -
Page 188
CONTROLS Safety After travel has begun, the system monitors case of a break during longer trips on high- certain aspects of the driver’s behavior, so ways. that decreasing alertness or fatigue can be detected. PostCrash – iBrake This procedure takes the following criteria into account: –… -
Page 189: Driving Stability Control Systems
Driving stability control systems CONTROLS Driving stability control systems Vehicle features and options DSC Dynamic Stability Control Concept This chapter describes all standard, country- specific and optional features offered with Within the physical limits, the system helps the series. It also describes features that are to keep the vehicle on a steady course by not necessarily available in your vehicle, for reducing engine speed and by applying…
-
Page 190
CONTROLS Driving stability control systems Activating DSC Warning Press the button. When driving with a roof load, for in- DSC OFF and the DSC OFF indicator stance with roof-mounted luggage rack, light go out. the vehicle’s center of gravity is higher, which increases the risk of the vehicle tip- Indicator/warning lights ping in critical driving situations. -
Page 191
MINI Driving Modes switch GREEN is activated. Via the Central Information Display (CID) Concept «My MINI» The MINI Driving Modes switch helps to fine-tune the vehicle’s settings and features. «Vehicle settings» Choose between three different programs. If necessary, «Driving mode»… -
Page 192
Release the foot brake and drive off Activating SPORT without delay. Press the MINI Driving Modes switch up- After the foot brake is released, the vehicle ward until SPORT is displayed in the instru- is held in place for approx. 2 seconds. -
Page 193: Driving Comfort
Driving comfort CONTROLS Driving comfort Vehicle features and options General information A camera on the interior mirror is used to detect vehicles driving ahead. This chapter describes all standard, country- specific and optional features offered with Depending on the settings, the characteris- the series.
-
Page 194
CONTROLS Driving comfort – When fast approaching standing ve- Button Function hicles. Increase speed, refer to There is a risk of injuries or danger to life. page 195. Watch traffic closely and actively inter- vene where appropriate. Reduce speed, refer to page 195. Buttons are arranged according to vehicle’s Warning series, optional features and country speci-… -
Page 195
Driving comfort CONTROLS Switching on/off and interrupting – When the driver applies the brakes. cruise control – If selector lever position N is set. – Dynamic Traction Control DTC is acti- Switching on vated or DSC Dynamic Stability Control is deactivated. Press the button on the steering –… -
Page 196
CONTROLS Driving comfort speed increases or decreases by approx. Continuing cruise control 1 mph/1 km/h. General information – button: each time it is pressed past the resistance point, the desired An interrupted cruise control can be contin- speed changes by a maximum of 5 mph/ ued by calling up the stored speed. -
Page 197
Driving comfort CONTROLS Distance display Press and hold this button. Distance 3 The indicator light in the instrument Distance 4 cluster lights up. This value is set automatically af- To switch distance control back on, press ter the system is switched on. one of the two buttons again briefly. -
Page 198
CONTROLS Driving comfort pedal is being pressed; a vehicle was not de- Swerving vehicles tected. Distance control is temporarily sup- pressed because the accelerator pedal is being pressed; a vehicle was detected. Displays in the Head-up Display The information from Active Cruise Control can also be displayed in the Head-up Dis- A vehicle driving in front of you is not de- play. -
Page 199
Driving comfort CONTROLS Cornering Examples of unfavorable weather or light conditions: – Wet conditions. – Snowfall. – Slush. – Fog. – Glare. Drive attentively, and react to the current traffic situation. If necessary, intervene ac- tively, for instance by braking, steering or If the desired speed is too high for a curve, evading. -
Page 200
CONTROLS Driving comfort Cruise control There may be a risk of accident or risk of damage to property. Only use the system if driving at constant speed is possible. Concept Using this system, a desired speed can be Overview adjusted using the buttons on the steering wheel. -
Page 201
Driving comfort CONTROLS Switching off If active, the displayed speed is stored and the vehicle reaches the stored speed when Press the button on the steering the road is clear. wheel. – button: each time it is pressed The displays go out. The stored desired to the point of resistance, the desired speed is deleted. -
Page 202
CONTROLS Driving comfort Displays in the instrument cluster General information The ultrasound sensors for measuring the Indicator light distances are located in the bumpers. Depending on how the vehicle is The delete range, depending on obstacles equipped, the indicator light in the and environmental conditions, is approx. -
Page 203
Overview With front PDC: automatic activation on ob- stacle detection can be switched off. Via the Central Information Display (CID): With front PDC: button in vehicle «My MINI» «Vehicle settings» «Parking» «Automatic PDC activation»: depending on the vehicle equipment. «Automatic PDC activation»… -
Page 204
Ac- the entertainment volume can be adjusted. tively intervene as warranted. Refer to the information in this Owner’s Manual re- «My MINI» garding the scope of the system’s opera- «System settings» tion and limitations. -
Page 205
Driving comfort CONTROLS – With objects with a fine surface struc- Red symbol is displayed, and the ture such as fences. range of the sensors is dimmed on the Control Display. – For objects with porous surfaces. – Low objects already displayed, for in- PDC has failed. -
Page 206
CONTROLS Driving comfort Park assistance button Switching the view via the Central Information Display (CID) If the rearview camera view is not dis- Camera played, change the view via the Central In- formation Display (CID): «Rear view camera» The rearview camera image is displayed. Display on the Control Display Functional requirement –… -
Page 207
Driving comfort CONTROLS Pathway lines Obstacle marking Pathway lines can be superimposed on the Depending on the vehicle equipment, obsta- image of the rearview camera. cle markings can be faded into the image of the rearview camera. Pathway lines help you to estimate the space required when parking and maneu- The colored thresholds of the obstacle mark- vering on level roads. -
Page 208
CONTROLS Driving comfort fore, do not estimate the distance from the Turn the steering wheel to the point objects on the display. where the pathway line covers the cor- responding turning radius line. Parking assistant Concept Display settings Brightness With the rearview camera switched on: This system assists the driver in parking parallel to the road. -
Page 209
– Gaps behind an object that has a min. length of 5 ft/1.5 m. – Gap between two objects with a mini- mum length of approx. 5 ft/1.5 m. Park assistance button – Min. length of gap between two objects: your vehicle’s length plus approx. -
Page 210
CONTROLS Driving comfort – The parking brake is released. Parking space search and system status – When parking in parking spaces on the driver’s side, the corresponding turn sig- nal must be switched on. Switching on and activating Switching on with the button Press the park assistance button. -
Page 211
Driving comfort CONTROLS and at a distance of maximum Resuming 5 ft/1.5 m. An interrupted parking procedure can be The status of the parking space search continued, if needed. and possible parking spaces are dis- Reactivate the parking assistant, refer to played on the display, refer to page 210. -
Page 212
CONTROLS Driving comfort – With accumulations of leaves/snow in Tire size the parking space. The parking position may vary depending – With a mounted emergency wheel. on the tire size. – With ditches or edges, for instance an Malfunction edge of a port. A Check Control message is displayed. -
Page 213: Climate Control
Climate control CONTROLS Climate control Vehicle features and options – Emission tested passenger compart- ment. – Microfilter. This chapter describes all standard, country- – Air conditioning system to control the specific and optional features offered with temperature, air flow and recirculated- the series.
-
Page 214
CONTROLS Climate control 3 Temperature 7 Rear window defroster 4 Seat heating, right 8 Windshield defroster 5 Air conditioning 9 Seat heating, left 6 Recirculated-air mode Climate control functions in detail Switching on/off Press the button. Switching the system on/off The LED is illuminated with air con- ditioning switched on. -
Page 215
Climate control CONTROLS If the windows fog over, switch off recircu- To defrost windows and remove lated-air mode and increase the air flow, if condensation needed. Make the following settings to defrost the windows and remove condensation: Controlling the air flow manually –… -
Page 216
CONTROLS Climate control Automatic climate control 1 Temperature, left 9 Maximum cooling 2 Display 10 Air conditioning 3 Air flow, AUTO intensity 11 Recirculated-air mode 4 AUTO program 12 Rear window defroster 5 Air distribution, manual 13 Windshield defroster 6 Display 14 To defrost windows and remove conden- sation 7 Temperature, right… -
Page 217
Climate control CONTROLS necessary by using the maximum cooling or Maximum cooling heating power, and then keeps it constant. Concept Adjusting The system is set to the lowest temperature, maximum air flow and recirculated-air Turn the wheel to set the de- mode. -
Page 218
CONTROLS Climate control air is directed to the windshield, side win- porarily suspending the supply of outside dows, upper body, and into the floor area. air. The system then recirculates the air flow within the vehicle. Point the side vents toward the side win- dows. -
Page 219
Climate control CONTROLS The manually adjusted air flow is displayed The air flow can be adjusted with the pro- via illuminated LED segments. gram active. The air flow of the automatic climate con- If there is window condensation, switch on trol may be reduced automatically to save the air conditioning too. -
Page 220
CONTROLS Climate control Stationary climate control The air flow is directly pointed onto the person. The air flow heats or cools no- ticeably, depending on the adjusted tem- Concept perature. Stationary climate control cools or heats the – Indirect ventilation: car’s interior prior to departure to a com- If the vents are fully or partly closed, the fortable temperature. -
Page 221
Setting the departure time may be automatically switched off, for Via the Central Information Display (CID): instance after repeated switching on: «My MINI» switch the drive-ready state on and off and the system is available again. «Vehicle settings» –… -
Page 222: Interior Equipment
CONTROLS Interior equipment Interior equipment Vehicle features and options Safety information This chapter describes all standard, country- Warning specific and optional features offered with The operation of remote-controlled sys- the series. It also describes features that are tems with the integrated universal remote not necessarily available in your vehicle, for control, such as the garage door, may re- instance, due to the selected options or…
-
Page 223
Interior equipment CONTROLS Overview down the interior mirror button and re- peatedly press and release the hand-held transmitter button for 2 seconds. 6. – The LED lights up green: program- ming completed. Release the button. – The LED flashes fast: programming is not complete. -
Page 224
CONTROLS Interior equipment Synchronizing the universal remote control – The LED flashes fast: the hand-held with the system: transmitter was detected but pro- gramming is not complete. Park the vehicle within range of the re- Press the button on the interior mir- mote-controlled system. -
Page 225
Interior equipment CONTROLS Deleting stored functions Mirror display All stored functions will be deleted. The The point of the compass is displayed in the functions cannot be deleted individually. mirror when driving straight. Press and hold the two outer buttons on the Operating concept interior mirror simultaneously for approxi- mately 10 seconds until the LED on the in-… -
Page 226
CONTROLS Interior equipment World map with magnetic zones Procedure Procedure Press and hold the control button for ap- Make sure that there are no large metal- prox. 3 to 4 seconds. The number of the lic objects or overhead power lines near set compass zone appears in the mirror. -
Page 227
Interior equipment CONTROLS control button again to switch between Cigarette lighter English «E» and German «O». Safety information Settings are stored automatically after ap- proximately 10 seconds. Warning Contact with the hot heating element or Sun visor the hot socket of the cigarette lighter can cause burns. -
Page 228
CONTROLS Interior equipment Do not damage the socket by using non- In the center console compatible connectors. Safety information Warning Devices and cables in the unfolding area of the airbags, such as portable navigation devices, can hinder the unfolding of the airbag or be thrown around in the car’s in- terior during unfolding. -
Page 229
Interior equipment CONTROLS In the front center console Under the center armrest The USB interface is located in the front of The USB interface is located under the cen- the center console. ter armrest. Properties: Properties: – USB port Type A. –… -
Page 230: Storage Compartments
CONTROLS Storage compartments Storage compartments Vehicle features and options – Glove compartment on the front passen- ger side. – Compartments in the doors. This chapter describes all standard, country- – Storage compartment in the center arm- specific and optional features offered with rest.
-
Page 231
Storage compartments CONTROLS Center armrest Opening General information The center armrest contains a storage com- partment. Opening Pull the handle. The light in the glove compartment switches on. Closing Fold up the cover. Press button, arrow 1, and open center arm- rest upward, arrow 2. -
Page 232
CONTROLS Storage compartments containers. Do not transport hot bever- Safety information ages. NOTICE Front With an open cup holder, the center arm- rest cannot be folded back up. There is a risk of damage to property. Press back the covers before the center armrest is folded Clothes hooks General information In the center console. -
Page 233: Cargo Area
Cargo area CONTROLS Cargo area Vehicle features and options a cable connection to the vehicle in the car’s interior. This chapter describes all standard, country- specific and optional features offered with Warning the series. It also describes features that are not necessarily available in your vehicle, for Improperly stowed objects can shift and be thrown into the car’s interior, for in-…
-
Page 234
CONTROLS Cargo area luggage load capacity is 650 lbs (1,400 — – Do not stack cargo above the top edge of 750 (5 x 150) = 650 lbs) the backrests. Determine the combined weight of lug- gage and cargo being loaded on the ve- Lashing eyes in the cargo area hicle. -
Page 235
Cargo area CONTROLS jury. Secure loose objects or devices with Multi-function hook a cable connection to the vehicle in the car’s interior. Warning Improper use of the multi-function hooks Removing can lead to a risk of objects flying about during braking and evasive maneuvers, For storing bulky objects the cargo cover for example. -
Page 236
CONTROLS Cargo area Enlarging the cargo area injury. Do not fasten any objects to the straps for unlocking the rear backrests. Concept The cargo area can be enlarged by folding Warning down the rear seat backrests or by moving The stability of the child restraint system the rear seat backrest into the cargo posi- is limited or compromised with incorrect tion. -
Page 237
Cargo area CONTROLS Variable cargo area floor Cargo position Concept Concept The rear seat backrests can be moved into With the variable cargo area floor, the cargo an upright loading position individually. An area can be configured corresponding to adjustment in several tilt stages is possible transport requirements. -
Page 238
When the MINI Picnic Bench is not in use, tach it to the rear part of the cargo floor fold it together to prevent soiling and dam- panel using the four snaps. -
Page 239
Lift the rear part of the cargo area floor. tened there with magnets. Grasp the MINI Picnic Bench in the mid- dle and pull it back and up against the force of the magnets. -
Page 240
Online Edition for Part no. 01402628632 — VI/19… -
Page 241: Driving Tips
DRIVING TIPS Things to remember when driving ……….Saving fuel ………………..Online Edition for Part no. 01402628632 — VI/19…
-
Page 242: Things To Remember When Driving
DRIVING TIPS Things to remember when driving Things to remember when driving Vehicle features and options Engine, transmission, and axle drive This chapter describes all standard, country- Up to 1,200 miles/2,000 km specific and optional features offered with the series. It also describes features that are Do not exceed the maximum engine and not necessarily available in your vehicle, for road speed:…
-
Page 243
Things to remember when driving DRIVING TIPS General driving notes driving operation, idle or during parking. Do not touch the hot exhaust gas system. Closing the tailgate Mobile communication devices in Safety information the vehicle Warning Warning An open tailgate protrudes from the vehi- Vehicle electronics and mobile phones can cle and can endanger occupants and other influence one another. -
Page 244
DRIVING TIPS Things to remember when driving Safety information securely fastened again after they were re- moved, for instance for cleaning. NOTICE Driving in wet conditions When driving too quickly through too deep water, water can enter into the en- When roads are wet, salted, or in heavy gine compartment, the electrical system or rain, gently press the brake pedal every few… -
Page 245
Things to remember when driving DRIVING TIPS Roof-mounted luggage rack available at all. There is a risk of accident. Do not drive in idle state, in GREEN Mode or with drive-ready state switched off. General information Installation only possible with roof rack. Brake disc corrosion Roof racks are available as special accesso- Corrosion on the brake discs and contami-… -
Page 246
DRIVING TIPS Things to remember when driving Driving on poor roads After a trip on poor roads Note the following to maintain driving safety: Concept – Clear heavy soiling from the body. Because of its greater ground clearance, the – Keep the wheels and tires free of mud, vehicle can be driven on a variety of road snow, ice, etc., and check them for dam-… -
Page 247: Saving Fuel
Saving fuel DRIVING TIPS Saving fuel Vehicle features and options Attached parts on the vehicle impair the aerodynamics and increase the fuel con- sumption. This chapter describes all standard, country- specific and optional features offered with the series. It also describes features that are Close the windows and glass not necessarily available in your vehicle, for sunroof…
-
Page 248
MINI recommends that mainte- harder if required by the situation. nance work be performed by a MINI service center. Online Edition for Part no. 01402628632 — VI/19… -
Page 249
Activating GREEN Mode Avoiding the use of the combustion Press the MINI Driving Modes engine switch downward until GREEN is displayed in the in- Follow the following information to avoid strument cluster. -
Page 250
Saving fuel Via the Central Information Display Indications on the Control Display (CID) GREEN tip, driving instruction «My MINI» The GREEN tip indicates that your driving «Vehicle settings» style can be modified to be more efficient, «Configure GREEN» for example by backing off the accelerator. -
Page 251
Saving fuel DRIVING TIPS Online Edition for Part no. 01402628632 — VI/19… -
Page 252
Online Edition for Part no. 01402628632 — VI/19… -
Page 253: Mobility
MOBILITY Charging the vehicle …………….Refueling ………………..Fuel ………………….Wheels and tires ………………Engine compartment …………….Engine oil ………………..Coolant …………………. Maintenance ………………. Replacing components …………….. Breakdown assistance …………….Care ………………….Online Edition for Part no. 01402628632 — VI/19…
-
Page 254: Charging The Vehicle
MOBILITY Charging the vehicle Charging the vehicle Vehicle features and options Level 1 charging is possible via a household socket with a voltage of 120 volts. For optimal use of the energy from the This chapter describes all standard, country- power mains, charging at a charging sta- specific and optional features offered with tion, for instance BMW Wallbox, is recom-…
-
Page 255
Charging the vehicle MOBILITY Overview Imprint on the charging cable Charge current setting «Max.» «Reduced» «Low» 10 A 10 A 7.5 A 12 A 12 A 15 A 15 A 11.25 A 7.5 A Depending on the charge current setting, The manufacturer of your vehicle recom- the charging duration changes. -
Page 256
MOBILITY Charging the vehicle the vehicle, and do not extend it using ca- bles or adapters. Warning Contact with live components can lead to an electric shock. High voltage is present Warning at the charging connection. There is a risk of injury or danger to life. -
Page 257
Charging the vehicle MOBILITY Storage lock the vehicle. Set the parking brake, if needed. To open the charging socket flap, press on the rear edge, arrow. The charging socket flap opens. The Level 1 charging cable is located in a bag in the cargo area. -
Page 258
MOBILITY Charging the vehicle Charging process is interrupted. The charging cable is manually un- locked. Remove the charging cable from the charging socket, arrow 2. For removing the charging cable, refer to page 257. Put the charging socket lid back on. Have the locking system of the charging Press on the charging socket flap until it socket checked at the dealer’s service cen-… -
Page 259
Charging the vehicle MOBILITY Safety information Charging status display Indicator light at the charging socket Warning Improper use of the power mains connec- tion can lead to damage, for instance cable fire. There is a risk of injury or risk of damage to property. -
Page 260
Additional messages about the charging sta- Via the Central Information Display (CID): tus, for instance the probable end of charg- «My MINI» ing or the planned departure time, can be «Plan charging/climate control» shown in the instrument cluster or on the Control Display. -
Page 261
Charging the vehicle MOBILITY Continuing the charging process Display Meaning If the charging process is interrupted, for Ring flashes orange: the charg- instance through a temporary power failure, ing process is being prepared. the charging process is automatically con- Ring yellow: the charging proc- tinued after the interruption. -
Page 262
Planned climate control at the set depar- ture time, refer to page 221. Via the Central Information Display (CID): If a Mode 2 charging cable is used, the «My MINI» high-voltage battery may not be fully «Plan charging/climate control» charged at departure time. -
Page 263: Refueling
Refueling MOBILITY Refueling Vehicle features and options of damage to property. Do not fill the vehi- cle with fuel and charge it simultaneously. This chapter describes all standard, country- specific and optional features offered with the series. It also describes features that are Tank vent not necessarily available in your vehicle, for instance, due to the selected options or…
-
Page 264
MOBILITY Refueling The tank venting status is displayed in Turn the fuel cap counterclockwise. the instrument cluster. In rare cases, tank venting can last several minutes. When tank venting has finished, a mes- sage is displayed in the instrument clus- ter. -
Page 265
Refueling MOBILITY The release is located in the cargo area. Safety informationSafety information Remove the cover. Pull the green knob with the fuel pump Warning symbol. This releases the fuel filler flap. Simultaneous charging and refueling poses a risk of fire if a sufficient safety distance from easily flammable materials is not maintained. -
Page 266: Fuel
Fuels that are marked on the gas pump as NOTICE containing metal must not be used. Fuel that does not comply with the mini- Fuels with a maximum ethanol content of mum quality can compromise engine func- 25 %, i. e. E10 or E25, may be used for refu- tion or cause engine damage.
-
Page 267
Failure to comply with these recommenda- tions may result in the need for unsched- uled maintenance. Recommended fuel grade MINI recommends AKI 91. Refuel with this gasoline to achieve the rated performance and consumption values. Minimum fuel grade MINI recommends AKI 89. -
Page 268: Wheels And Tires
MOBILITY Wheels and tires Wheels and tires Vehicle features and options Tire inflation pressure specifications This chapter describes all standard, country- In the tire inflation pressure table specific and optional features offered with the series. It also describes features that are The tire inflation pressure table, refer to not necessarily available in your vehicle, for page 269, contains all tire inflation pres-…
-
Page 269
Wheels and tires MOBILITY – If the vehicle has not moved again for at Tire pressure values up to least 2 hours after a trip. 100 mph/160 km/h Determine the intended tire inflation pressure levels for the mounted tires. COOPER SE Check the tire inflation pressure in all Tire size Pressure specifications… -
Page 270
MOBILITY Wheels and tires Tire inflation pressure values over – GAWR – on the certification label on the driver’s door pillar. Divide the tire load by 100 mph/160 km/h 1.1. It must be greater than one-half of the vehicle’s Gross Axle Weight Rating – COOPER SE GAWR. -
Page 271
Wheels and tires MOBILITY Uniform Tire Quality Grading cornering, hydroplaning, or peak traction characteristics. Quality grades can be found where applica- ble on the tire sidewall between tread Temperature shoulder and maximum section width. The temperature grades are A, the highest, E.g.: Treadwear 200;… -
Page 272
MOBILITY Wheels and tires Tire tread likely to occur with low-profile tires, which provide less cushioning between the wheel and the road. Be careful to avoid road haz- Summer tires ards and reduce your speed, especially if your vehicle is equipped with low-profile Do not drive with a tire tread of less than tires. -
Page 273
Wheels and tires MOBILITY damage. There is a danger of accidents and System or Dynamic Stability Control. property damage. If possible, avoid driving There is a risk of accident. To maintain over objects or road conditions that may good handling and vehicle response, use damage tires, or drive over them slowly only tires with a single tread configuration and carefully. -
Page 274
MOBILITY Wheels and tires Retreaded tires in pairs between the axles to achieve even wear. Further information is available from a dealer’s service center or another qualified Warning service center or repair shop. After rotating, Retreaded tires can have different tire cas- check the tire pressure and correct, if ing structures. -
Page 275
Wheels and tires MOBILITY Safety information side the immediate area in a safe place, such as behind a guardrail. – If necessary, set up a warning triangle Warning at an appropriate distance. Your vehicle handles differently with a run-flat tire with no or low inflation pres- sure;… -
Page 276
MOBILITY Wheels and tires Overview Safety measures – Park the vehicle as far away as possible Storage from passing traffic and on solid ground. The Mobility System is located in a bag on – Switch on the hazard warning system. the right side trim in the cargo area. -
Page 277
Wheels and tires MOBILITY Filling Screw the filling hose of the sealant con- tainer onto the tire valve of the non- Shake the sealant container. working wheel. Pull filling hose completely out of the With the compressor switched off, in- cover of the sealant container. -
Page 278
MOBILITY Wheels and tires Checking and adjusting the tire Insert the connector into the power socket inside the vehicle. inflation pressure Checking Switch off the compressor. Read the tire inflation pressure on the tire pressure gage. To continue the trip, a tire inflation pres- sure of at least 2 bar must be reached. -
Page 279
Wheels and tires MOBILITY Adjustment Reinitialize the Flat Tire Monitor, refer to page 178. Stop at a suitable location. Reset the Tire Pressure Monitor, refer to Screw the connection hose of the com- page 173. pressor directly onto the tire valve stem. Replace the nonworking tire and the sealant container of the Mobility System promptly. -
Page 280
MOBILITY Wheels and tires Changing wheels/tires Use only in pairs on the front wheels, equip- ped with the tires of the following size: General information – 205/60 R 17. When using run-flat tires or a flat tire kit, a Follow the snow chain manufacturer’s in- wheel does not always need to be changed structions. -
Page 281
Wheels and tires MOBILITY cause it to become jammed or damaged. er’s service center or another qualified There is a risk of injury and risk of damage service center or repair shop. to property. Only use the jack to attach an emergency or spare wheel in the event of Securing the vehicle against rolling a breakdown. -
Page 282
MOBILITY Wheels and tires Lug bolt lock – Switch on the hazard warning system. – Set the parking brake. Concept – Engage a gear or move the selector lever The wheel lug bolts have a special coding. to position P. The lug bolts can only be released with the –… -
Page 283
Wheels and tires MOBILITY Jacking up the vehicle Extend the vehicle jack by turning the vehicle jack crank or lever clockwise. Warning Hands and fingers can be jammed when using the vehicle jack. There is a risk of injury. Comply with the described hand position and do not change this position while using the vehicle jack. -
Page 284
MOBILITY Wheels and tires ground and the relevant wheel is maxi- other qualified service center or repair mum 1.2 inches/3 cm above ground. shop. Mounting a wheel Mount one emergency wheel only, as re- quired. Unscrew the lug bolts. Remove the wheel. Put the new wheel or emergency wheel on and screw in at least two lug bolts in a crosswise pattern until hand-tight. -
Page 285: Engine Compartment
Engine compartment MOBILITY Engine compartment Vehicle features and options instance, due to the selected options or country versions. This also applies to safety- related functions and systems. When using This chapter describes all standard, country- these functions and systems, the applicable specific and optional features offered with laws and regulations must be observed.
-
Page 286
MOBILITY Engine compartment Hood Warning Body parts can be jammed when opening Safety information and closing the hood. There is a risk of in- jury. Make sure that the area of movement Warning of the hood is clear during opening and closing. -
Page 287
Engine compartment MOBILITY Indicator/warning lights When the hood is opened, a Check Control message is displayed. Closing the hood Energetically close the hood from approx. 20 in/50 cm. The hood must engage on both sides. Online Edition for Part no. 01402628632 — VI/19… -
Page 288: Engine Oil
MOBILITY Engine oil Engine oil Vehicle features and options NOTICE Too much engine oil can damage the en- This chapter describes all standard, country- gine or the catalytic converter. There is a specific and optional features offered with risk of damage to property. Do not add too the series.
-
Page 289
Performing a detailed measurement A current measured value is available after Via the Central Information Display (CID): approx. 30 minutes of normal driving with «My MINI» the combustion engine running. «Vehicle status» Displaying the engine oil level «Engine oil level»… -
Page 290
MOBILITY Engine oil Engine oil types to add NOTICE An engine oil level that is too low causes General information engine damage. There is a risk of damage The engine oil quality is critical for the life to property. Immediately add engine oil. of the engine. -
Page 291
Engine oil MOBILITY Oil rating API SL. API SM. API SN. Viscosity grades When selecting an engine oil, make sure that the engine oil belongs to one of the fol- lowing viscosity grades: Viscosity grades SAE 0W-20. SAE 0W-30. More information about suitable oil ratings and viscosity grades of engine oils can be requested from a dealer’s service center or another qualified service center or repair… -
Page 292: Coolant
MOBILITY Coolant Coolant Vehicle features and options contact with skin, eyes or articles of cloth- ing. Use suitable additives only. This chapter describes all standard, country- specific and optional features offered with the series. It also describes features that are Coolant level not necessarily available in your vehicle, for instance, due to the selected options or…
-
Page 293
Coolant MOBILITY Disposal The coolant level is correct if it lies be- tween the minimum and maximum marks in the filler neck. Comply with the relevant environ- mental protection regulations when disposing of coolant and coolant ad- ditives. Close the lid. Adding Let the engine cool. -
Page 294: Maintenance
Therefore, hand the service advisor the ve- hicle key with which the vehicle was driven MINI maintenance system most recently. The maintenance system indicates required Storage periods maintenance measures, and thereby pro-…
-
Page 295
Maintenance MOBILITY The manufacturer of your vehicle recom- Position mends that maintenance and repair be per- formed by a service center or another quali- fied service center or repair shop. Records of regular maintenance and repair work should be retained. Socket for OBD Onboard Diag- nosis There is an OBD socket on the driver’s side… -
Page 296: Replacing Components
MOBILITY Replacing components Replacing components Vehicle features and options changing the wiper blade. Do not fold or switch on the wiper without a wiper blade installed. This chapter describes all standard, country- specific and optional features offered with the series. It also describes features that are NOTICE not necessarily available in your vehicle, for Folded-away wipers can be jammed when…
-
Page 297
Replacing components MOBILITY Rear wiper blade cially designated as Class 1 light-emitting diodes. Fold up and hold the wiper arm firmly. Follow the safety information, refer to Pull the wiper blade out of the wiper page 297. arm. Safety information Lights and bulbs Warning Bulbs can get hot during operation. -
Page 298
MOBILITY Replacing components Headlight glass 55-watt bulb, H7. Condensation can form on the inside of the Open the hood, refer to page 286. headlight glass in cool or humid weather. Turn the lid counterclockwise and re- When driving with the lights switched on, move. -
Page 299
Replacing components MOBILITY 55-watt bulb, H7. Install the new bulb with the bulb holder in reverse order of removal. In Turn the steering wheel. doing so, ensure that the bulb tab is cor- 2. – On the left facing the driving direc- rectly positioned in the headlight hous- tion: turn the cover clockwise and ing and the bulb holder perceptibly en-… -
Page 300
MOBILITY Replacing components Overview Turn the bulb holder counterclockwise, arrow 1, and remove, arrow 2. Position of the headlights Press the bulb gently into the bulb holder, turn counterclockwise and re- 1 Turn signal move. 2 Daytime running lights Insert the new bulb and install the cov- 3 Low beams/high beams ers in the reverse order. -
Page 301
Replacing components MOBILITY 24-watt bulb, PWY24W. Tail lights, bulb replacement Open the hood, refer to page 286. Overview Turn the lid counterclockwise and re- move. 1 Side tail lights 2 Center brake light Turn the bulb holder counterclockwise, 3 License plate light arrow 1, and remove, arrow 2. -
Page 302
MOBILITY Replacing components Side LED tail lights Press the latches together, arrows 1, and remove the bulb holder. 1 Brake light Remove the bulb holder from the open- 2 Tail lights ing. 3 Turn signal Press the nonworking bulb gently into 4 Reversing lights the socket, turn counterclockwise and remove. -
Page 303
Replacing components MOBILITY Side turn signal, bulb replacement More information about the battery can be requested from a dealer’s service center or Follow the general instructions on lights another qualified service center or repair and bulbs, refer to page 297. shop. -
Page 304
MOBILITY Replacing components – When the inspection glass on the top of Disposing of old batteries the battery is black. Have old batteries disposed of by a – When the take-off performance is insuf- dealer’s service center or another ficient. qualified service center or repair The following circumstances can have a shop or take them to a collection point. -
Page 305
Replacing components MOBILITY boxes, is available on the Internet: www.mini.com/fusecard. Where applicable, information on the fuse types and locations is also found on a sepa- rate sheet in the fuse box. Replacing fuses The vehicle manufacturer recommends that you have a dealer’s service center or an- other qualified service center or repair shop replace the fuses. -
Page 306: Breakdown Assistance
The red light in the button flashes when the hazard warning flashers are activated. MINI Roadside Assistance Concept MINI Roadside Assistance can be contacted if assistance is needed in the event of a breakdown. Online Edition for Part no. 01402628632 — VI/19…
-
Page 307
Only press the SOS button in an emergency. «MINI Roadside Assistance» The Intelligent Assist system establishes a The contact to the Roadside Assistance connection with the MINI Response Center. of the manufacture is established. For technical reasons, the Emergency Re- A telephone number is displayed, if quest cannot be guaranteed under unfavora- needed. -
Page 308
For instance, the current position of the SOS button in the roofliner vehicle, if it can be established. If you can no longer hear the MINI Re- Functional requirements sponse Center through the loudspeakers, the hands-free system, for instance, may –… -
Page 309
Breakdown assistance MOBILITY Warning If the jumper cables are connected in the incorrect order, sparking may occur. There is a risk of injury. Pay attention to the cor- rect order during connection. NOTICE A special connection on the body acts as the In the case of body contact between the battery negative terminal. -
Page 310
MOBILITY Breakdown assistance Tow truck Establish the drive-ready state for the vehicle to be started as usual. If the first starting attempt is not suc- cessful, wait a few minutes before mak- ing another attempt in order to allow the discharged battery to recharge. -
Page 311
Breakdown assistance MOBILITY the towing vehicle is heavier than the ve- The tow fitting can be screwed in at the hicle to be towed. front or rear of the vehicle. The tow fitting and the onboard vehicle tool kit, refer to page 296, are together in the cargo area. -
Page 312
MOBILITY Breakdown assistance Tow-starting – Engage selector lever position P, set the parking brake, and switch off the igni- tion and drive-ready state. Steptronic transmission – Lock the vehicle after exiting. Do not tow-start the vehicle. – Do not inhale any gases escaping from Tow-starting the engine is not possible due the high-voltage battery;… -
Page 313: Care
Care MOBILITY Care Vehicle features and options NOTICE When washing, water can get into the This chapter describes all standard, country- open charging socket. There is a risk of specific and optional features offered with damage to property. Close the charging the series.
-
Page 314
Driving into a vehicle wash with a Steptronic transmission General information In vehicle washes, the vehicle must be able MINI recommends using vehicle care and to roll freely. cleaning products from MINI. Suitable care products are available from a dealer’s serv-… -
Page 315
Care MOBILITY Only use products intended for cleaning Upholstery material care vehicles. Follow the instructions on the container. General information Vacuum the upholstery regularly with a vacuum cleaner. Vehicle paint If upholstery is very dirty, for instance with beverage stains, use a soft sponge or micro- General information fiber cloth with a suitable interior cleaner. -
Page 316
MOBILITY Care ularly when they have been exposed to road Safety belts salt. Warning Rubber components Chemical cleansers can destroy the safety Environmental influences can cause surface belt webbing. Missing protective effect of soiling of rubber parts and a loss of gloss. the safety belts. -
Page 317
Care MOBILITY Sensor/camera lenses General information To clean sensors and camera lenses, use a Your dealer’s service center or another cloth moistened with a small amount of qualified service center or repair shop can glass detergent. advise you on what to consider when stor- ing the vehicle for longer than three Displays/Screens/Projection lenses months. -
Page 318
Online Edition for Part no. 01402628632 — VI/19… -
Page 319: Reference
REFERENCE Technical data ………………Appendix ………………..Everything from A to Z ……………. Online Edition for Part no. 01402628632 — VI/19…
-
Page 320: Technical Data
The specified heights do not take into ac- count attached parts, for instance a roof an- MINI Countryman Width with mirrors in/mm 78.9/2,005 Width without mirrors in/mm 71.7/1,822…
-
Page 321
Technical data REFERENCE Weights MINI Cooper SE Countryman Approved gross vehicle weight lbs/kg 5,016/2,275 Load lbs/kg 988/448 Approved front axle load lbs/kg 2,458/1,115 Approved rear axle load lbs/kg 2,679/1,215 Capacities MINI Countryman Fuel tank, approx. US gal/liters 9.5/36.0 Observe further information on fuel quality, refer to page 266. -
Page 322: Appendix
REFERENCE Appendix Appendix Any updates to the Owner’s Manual of the vehicle are listed here. Updates made after the edito- rial deadline The following chapters were updated in the printed version of the Owner’s Manual after the editorial deadline for the Integrated Owner’s Manual in the vehicle had closed: –…
-
Page 323
Appendix REFERENCE Online Edition for Part no. 01402628632 — VI/19… -
Page 324: Everything From A To Z
REFERENCE Everything from A to Z Everything from A to Z Index Antifreeze, washer fluid Antilock Brake System, ABS Anti-slip control, see DSC A/C button, see Air conditioning Anti-theft protection, lug bolts ABS, Antilock Brake System Approach control warning with city light Accessories and parts braking function Accident, what to do…
-
Page 325
Everything from A to Z REFERENCE Backrest, seats Care, washing the vehicle Band-aids, see First-aid kit Cargo area Battery, disposing of Cargo area, adapting size Battery, vehicle Cargo area, enlarging Being towed, see Tow-starting and tow- Cargo area lid Cargo area, loading Belts, safety belts Cargo area, seating surface Beverage holder, cup holder… -
Page 326
REFERENCE Everything from A to Z Children, transporting safely Coolant Child restraint system Cooling, maximum Child restraint system LATCH Cooling system Child restraint systems, mounting Cornering light Child safety locks Corrosion on brake discs Child seat, mounting Cosmetic mirror Child seats Country timer Chrome parts, care Coupling, see Pairing… -
Page 327
Driver profiles Emergency release, fuel filler flap Driver profiles, exporting profiles Emergency Request Driver profiles, importing profiles Emergency service, see Breakdown assis- Driving Dynamics Control, see MINI Driv- tance ing Modes switch Emergency unlocking, charging cable Driving Excitement, SPORT Energy control… -
Page 328
REFERENCE Everything from A to Z Engine temperature, display Flat tire, repairing Entering a destination, see Owner’s Hand- Flat tire, Tire Pressure Monitor TPM book for Navigation, Entertainment, Com- Flat tire, warning light 174, munication Flooding Entering an address, navigation, see Own- Floor carpet, care er’s Manual for Navigation, Entertainment Floor mats, care… -
Page 329
Everything from A to Z REFERENCE GPS, navigation, see Owner’s Handbook for Hot exhaust gas system Navigation, Entertainment, Communica- Hotline, see Owner’s Handbook for Naviga- tion tion, Entertainment, Communication GREEN Mode HUD Head-up Display GREEN — program, driving dynamics Hybrid system, adapting to the course of GREEN tip, driving tip the road Gross vehicle weight, approved… -
Page 330
REFERENCE Everything from A to Z Integrated Owner’s Manual in the vehi- Language, on the Control Display Lashing eyes Integrated Universal Remote Control LATCH child restraint fixing system Intelligent emergency call Leather, care Intelligent Safety LED ring, central instrument cluster Intended use LEDs, light-emitting diodes Intensity, AUTO program… -
Page 331
No-touch closing of the tailgate Messages No-touch opening of the tailgate Messages, see Check Control Microfilter 215, MID — program, driving dynamics MINI Connected, see Owner’s Handbook for OBD Onboard Diagnostics Navigation, Entertainment, Communica- Obstacle marking, rearview camera tion Octane rating, see Recommended fuel… -
Page 332
REFERENCE Everything from A to Z Office, see Owner’s Manual for Navigation, Pathway lines, rearview camera Entertainment and Communication PDC Park Distance Control Officially use hybrid system Pedestrian protection, acoustic Performance Control Oil, adding Personal profile, see Driver profiles Oil change Picnic Bench Oil change interval, service require- Plastic, care… -
Page 333
Everything from A to Z REFERENCE Recommended tire brands Seating position for children Refueling Seat, see Memory function Remaining range Seats, front Remote control, universal Seats, rear Replacing parts Securing cargo Replacing the battery, vehicle key Selection list in instrument cluster Replacing wheels/tires Sensors, care Reporting safety malfunctions… -
Page 334
REFERENCE Everything from A to Z Stability control systems Tank vent Standard charging cable, see Level 1 charg- Technical changes, see For Your Own ing cable Safety Standard charging, see Level 1 charg- Technical data Telephone, see Owner’s Manual for Naviga- Standard equipment tion, Entertainment and Communication Standard view, Head-up Display… -
Page 335
Everything from A to Z REFERENCE Traffic bulletins, see Owner’s Handbook for Vehicle identification number Navigation, Entertainment, Communica- Vehicle jack tion Vehicle key, additional Transmission lock, releasing manually Vehicle key, loss Transmission, see Steptronic transmis- Vehicle key, malfunction sion Vehicle key, opening/closing Transporting children safely Vehicle key, replacing the battery Tread, tires… -
Page 336
REFERENCE Everything from A to Z Windshield defroster 215, Windshield washer fluid Windshield washer nozzles 130, Windshield wipers, fold-away posi- tion 130, Windshield wipers, see Wiper sys- tem 128, Winter storage, care Winter tires, suitable tires Winter tires, tread Wiper blades, replacing Wiper fluid Wiper system 128, Wireless charging of a smartphone, see… -
Page 337
01402628632 ue *BL262863200Z*… -
Page 339
California Proposition 65 Warning For vehicles sold in California: Online Edition for Part no. 01402628632 — VI/19… -
Page 340
MINI MOTORER’S GUIDE APP. Your customized information about the vehicle in an app. Optimized for smartphones & tablets. Can be used offline. 01402628632 ue *BL262863200Z* Online Edition for Part no. 01402628632 — VI/19…
Цены носят информационный характер и ни при каких условиях не являются публичной офертой, определяемой положениями Статьи 435 ГК РФ.
Все содержащиеся на Сайте сведения носят исключительно справочный характер и не являются исчерпывающими. Информация о продаже автомобилей, о наличии и или отсутствии автомобилей у официальных дилеров может не соответствовать действительности и/или утратить актуальность на момент обращения к официальному дилеру.
Все условия приобретения автомобилей, цены, спецпредложения и комплектации автомобилей указаны с целью ознакомления и ни при каких обстоятельствах не являются публичной офертой, как она определена положениями статьи 435 ГК РФ.
ООО «БМВ Русланд Трейдинг» не участвует во взаимоотношениях между официальными дилерами и покупателями автомобилей, не является поверенным/агентом/комиссионером в отношении автомобилей, не несет никакой ответственности по обязательствам, вытекающим из сделок, заключенных с официальными дилерами на основании информации на Сайте, а также не несет ответственности за любые убытки, возникшие в связи с использованием информации на Сайте.
Посмотреть инструкция для Mini Countryman (2021) бесплатно. Руководство относится к категории автомобили, 10 человек(а) дали ему среднюю оценку 8.5. Руководство доступно на следующих языках: английский. У вас есть вопрос о Mini Countryman (2021) или вам нужна помощь? Задайте свой вопрос здесь
Не можете найти ответ на свой вопрос в руководстве? Вы можете найти ответ на свой вопрос ниже, в разделе часто задаваемых вопросов о Mini Countryman (2021).
Как перевести мили в километры?
1 миля равна 1,609344 километрам, а 1 километр — 0,62137119 милям.
Где я могу узнать идентификационный номер транспортного средства Mini?
Место размещения идентификационного номера транспортного средства зависит от марки и типа транспортного средства. Номер может быть выбит на раме транспортного средства или указан на номерном знаке. Чтобы узнать место расположения идентификационного номера транспортного средства лучше всего ознакомиться с руководством по эксплуатации Mini Countryman (2021).
Что такое идентификационный номер транспортного средства (VIN)?
Идентификационный номер транспортного средства — уникальный для каждого транспортного средства идентификационный номер. Аббревиатура VIN расшифровывается как «Vehicle Identification Number» (Идентификационный номер транспортного средства).
Когда транспортному средству Mini требуется техническое обслуживание?
Регулярное техническое обслуживание необходимо всем транспортным средствам. С информацией о том, как часто необходимо проходить техническое обслуживание и чему именно стоит уделять особое внимание можно ознакомиться в инструкции по техническому обслуживанию. Как правило, транспортное средство требует технического обслуживания каждые 2 года или 30 000 километров пробега.
Когда следует заменять тормозную жидкость на Mini?
Тормозную жидкость рекомендуется менять каждые два года.
В чем разница между топливом E10 и E5?
В топливе E10 содержится до десяти процентов этанола, в то время как в E5 содержится менее пяти процентов. Соответственно, топливо E10 менее вредит окружающей среде.
Одна или несколько дверей не открываются изнутри. Что мне делать?
Скорее всего, замок оснащен защитой от детей и поэтому не может быть открыт изнутри. Процедура открытия замка с защитой от детей зависит от марки и типа замка.
Автомобильный радиоприемник не включается, что делать?
Если автомобильный радиоприемник не включен, на него не будет подаваться питание. Убедитесь, что красный провод подключен к контактному источнику питания, а желтый провод — к источнику питания постоянной мощности.
Инструкция Mini Countryman (2021) доступно в русский?
К сожалению, у нас нет руководства для Mini Countryman (2021), доступного в русский. Это руководство доступно в английский.
Не нашли свой вопрос? Задайте свой вопрос здесь
Цены носят информационный характер и ни при каких условиях не являются публичной офертой, определяемой положениями Статьи 435 ГК РФ.
Все содержащиеся на Сайте сведения носят исключительно справочный характер и не являются исчерпывающими. Информация о продаже автомобилей, о наличии и или отсутствии автомобилей у официальных дилеров может не соответствовать действительности и/или утратить актуальность на момент обращения к официальному дилеру.
Все условия приобретения автомобилей, цены, спецпредложения и комплектации автомобилей указаны с целью ознакомления и ни при каких обстоятельствах не являются публичной офертой, как она определена положениями статьи 435 ГК РФ.
ООО «БМВ Русланд Трейдинг» не участвует во взаимоотношениях между официальными дилерами и покупателями автомобилей, не является поверенным/агентом/комиссионером в отношении автомобилей, не несет никакой ответственности по обязательствам, вытекающим из сделок, заключенных с официальными дилерами на основании информации на Сайте, а также не несет ответственности за любые убытки, возникшие в связи с использованием информации на Сайте.