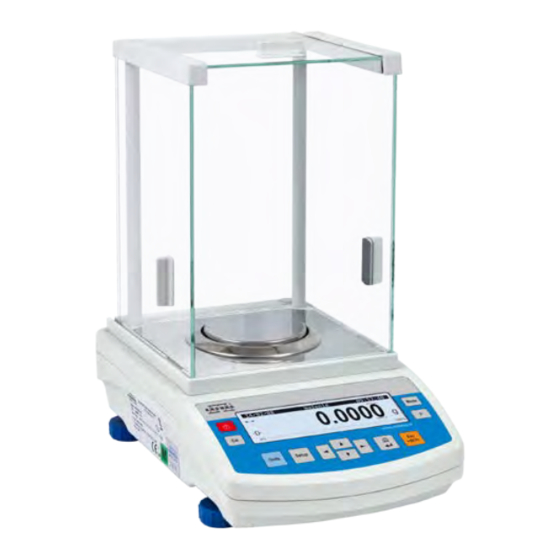
 Аналитические весы – это весы с точностью взвешивания до 0,001 мг, предназначенные для работы в научных лабораториях или лабораториях любых отраслей промышленности, где требуется высокая точность результата.
При работе с аналитическими весами важно соблюдать определенные правила, так как на результат анализа влияет несколько факторов:
— окружающая среда (температура, влажность, пыль, сквозняки, вибрации);
— географическая широта и высота над уровнем моря;
— этажность здания (результат может меняться в зависимости от этажа, на котором находятся весы);
— работа оператора (при некорректной работе точность снижается);
— скачки напряжения в электросети и работа электроприборов.
Требования к помещению
Необходимо соблюдать ряд требований к помещению для достижения точного результата.
Аналитические весы рекомендуется устанавливать в отдельной весовой комнате, предназначенной только для взвешивания. Количество дверей и окон должно быть ограничено во избежание влияния солнечных лучей и воздушных потоков. Желательна установка раздвижной двери.
Весы устанавливаются на специальный весовой стол, отличающийся особой устойчивостью. Для более ровной установки необходимо регулировать высоту ножек стола. Материал столешницы должен обладать антистатическими и антимагнитными свойствами, а также должен поглощать вибрации.
Весы должны быть установлены на расстоянии от нагревательных приборов, компьютеров, кондиционеров, электроосветительных приборов. Необходимо помнить, что лампы накаливания выделяют наибольшее количество тепла, а флуоресцентные – наименьшее.
Идеальная температура помещения – 20 ±2 оC. Не должно быть колебаний более 0,5 оС. Влажность воздуха должна составлять 45-60%, минимально допустимая влажность составляет 20%, максимально допустимая – 80%. Необходимо исключить влияние сквозняков, пыли, вибраций, вредных паров от химреактивов.
Правила работы с аналитическими весами
Для того чтобы полученный результат всегда был точным, а весы прослужили долгое время и не вышли из строя необходимо соблюдать определенные правила работы.
- Подготовка к работе
— Если перед началом работы осуществлялось любое перемещение весов, перед подключением к электросети их необходимо выдержать в течение 2 часов в нормальных условиях, а затем дать выстояться на 12 часов, так как в процессе перемещения может образовываться влага, способная вывести прибор из строя.
— Если весы были отключены от электросети в течение долго времени, их необходимо прогреть 2 часа.
— Перед началом взвешивания убедиться, что показания находятся на нуле. Для исключения ошибки необходимо произвести тарирование.
— Необходимо уравнять температурный режим. Для этого нужно открыть дверку защитного кожуха за 20-30 минут до начала взвешивания.
- Требования к контейнеру и образцам
— Контейнеры должны иметь наименьшие габариты.
— Чтобы избежать образования электростатического разряда, желательно не использовать контейнеры из пластмассы и стекла, особенно в случаях, если влажность воздуха менее 30-40%.
— Температура образца и контейнера должна совпадать с температурой помещения во избежание образования конденсата. Нельзя взвешивать образцы, которые находились в холодильнике, тигле или эксикаторе.
— Контейнеры, содержащие материал, должны быть накрыты крышкой. В противном случае будет происходить испарение влаги, которое приведет к уменьшению веса образца.
— Необходимо размещать образец в центре чаши для взвешивания, чтобы избежать угловых нагрузок.
— Убирать контейнер с образцами с чаши весов после взвешивания, так как их нахождение там может привести к изменению влажности и температурного режима внутри кожуха.
— Размещать порошковые образцы на блюдце или бумагу.
- Требования к работе оператора
— К работе должны быть допущены только обученные операторы, так как аналитические весы являются прибором высокой точности.
— Чтобы избежать попадания пыли и жира, необходимо использовать пинцет, салфетки и щипцы. Запрещается брать образец голыми руками.
— Необходимо пользоваться перчатками.
- Общие требования к эксплуатации
— Устанавливать весы так, чтобы открывание кожуха было наименьшим.
— Содержать весы в чистоте.
— Избегать ударов и ограничить перемещение весов.
— Проверять точность каждый год.
— Не превышать предельно установленные нормы взвешивания.
— Не отключать весы от электропитания, а использовать режим ожидания, если необходимо производить взвешивание часто.
Юстировка аналитических весов
Калибровка – установление разницы между результатом измерения и истинным значением массы образца. При калибровке не происходит изменения параметров весов. Юстировка – операция, направленная на корректировку расхождений между результатами измерения и истинным значением веса. Юстировка необходима в следующих случаях:
1) при первоначальной установке;
2) после перемещения весов;
3) после регулировки уровня или после изменений в помещении температуры, влажности или атмосферного давления.
Некоторые модели весов имеют встроенную программируемую самокалибровку, поэтому необходимость в юстировке может отпадать.
-
Contents
-
Table of Contents
-
Bookmarks
Quick Links
User manual no.:
LMI-31-08/04/13/ENG
Analytical balances
AS/X
series
B A L A N C E S A N D S C A L E S
RADWAG 26 – 600 Radom, Bracka 28, POLAND
Phone: +48 (0-48) 38 48 800, fax. +48 (0-48) 385 00 10
export@radwag.com
www.radwag.com
Related Manuals for RADWAG AS series
Summary of Contents for RADWAG AS series
-
Page 1
AS/X series B A L A N C E S A N D S C A L E S RADWAG 26 – 600 Radom, Bracka 28, POLAND Phone: +48 (0-48) 38 48 800, fax. +48 (0-48) 385 00 10 export@radwag.com… -
Page 2
APRILE 2013 — 2 -… -
Page 3: Table Of Contents
Table of contents 1. UNPACKING AND ASSEMBLING…………….. 5 1.1. Balance AS/X series ………………… 5 2. STARTUP ……………………6 2.1. Intended use ………………….6 2.2. Leveling……………………. 6 2.3. Balance temperature stabilization period …………6 3. APPLICATION ………………….. 7 4. BALANCE DESCRIPTION ………………… 8 4.1.
-
Page 4
16. WORKING MODES …………………. 46 16.1. Parts counting of the same mass …………..46 16.2. Checkweighing ………………..50 16.3. Filling (dosing) ………………..54 16.4. Percent setup ………………… 55 16.5. Animal weighing ………………..58 16.6. Density determination of solids and liquids ………… 59 16.7. -
Page 5: Unpacking And Assembling
UNPACKING AND ASSEMBLING 1.1. Balance AS/X series Cut the protective tape of balance’s factory packaging. Carefully remove the balance from its packaging. Take out from the box all the accessories needed for correct operation of a balance. Place the balance in its inteded place of use and assembly its components as specified in below scheme.
-
Page 6: Startup
STARTUP 2.1. Intended use • The balance should be located on a stable wall console desk or a stable working table which is not affected by vibrations and distant from heat sources. • Balance should be used in locations free of gusts of air and drafts. •…
-
Page 7: Application
APPLICATION Balance featuring a graphic display is intended to precise determining mass in laboratory conditions. The balance enables zeroing the indication in whole measuring range. Balance AS/X series enables determining mass in the following measuring units: Fig. 2. Measuring units Apart from determining mass of weighed object using different measuring units, the software balance AS/X series comprises the following working modes: −…
-
Page 8: Balance Description
BALANCE DESCRIPTION 4.1. Graphic display Fig. 3. Balance display Mass indication of weighed load or counted parts, Measuring unit, Pictogram denoting whether measurement result is stable, „BARGRAPH” presenting which part of accessible measuring range is in use, Text informing on enabled working mode, Current date, Current time, Pictogram denoting, that the indication is in precise ZERO.
-
Page 9: Sockets And Interfaces
ON/OFF key enables switching on and off balance’s display. If switched off balance components other than the display are powered, and balance is in stand-by mode. F key. Function key, which enables quick entering the settings of an active working mode MODE key for selecting balance’s working mode.
-
Page 10: User Menu
USER MENU User menu of a balance AS/X series consists of 9 main menu groups named using letter P and a corresponding number. The name and content of the menu is presented below. P1 Adjustment Internal adjust. | * * * * * * * * | function External adjust.
-
Page 11
P5 RS — 232 Interface * * * * * *0.0 | RS 232 Baud rate * * * * * *0.1 | 4800 Parity * * * * * *0.0 | none Data bits * * * * * *0.2 | 8 bits Stop bits * * * * *… -
Page 12
P8 Working modes Parts counting * * * * * *0.1 | yes Checkweighing * * * * * *0.1 | yes Filling (Dosing) * * * * * *0.1 | yes Percent setup * * * * * *0.1 | yes Animal weighing * * * * * *0.1 | yes… -
Page 13
Preview of balance menu – graphic presentation While in the weighing mode press SETUP key. The display opens balance’s main menu (display I). Press UP or DOWN navigating arrows on the balance’s overlay to move the cursor upwards or downwards in the menu content. Place the cursor next to a menu option to be previewed. -
Page 14: Moving Through The Menu
5.1. Moving through the menu Moving in the user menu can be carried out using: Balance keyboard, External PC keyboard PS/2 type connected to balance’s socket, Commands sent from a connected computer to a balance Moving in the user menu using balance keyboard 5.1.1.
-
Page 15
Return to weighing mode 5.1.2. Changes introduced in balance memory will be saved on returning to weighing with procedure of saving changes. Press ESC key for a few times until the display shows a question: Save? As displayed, select one of available options: ENTER –… -
Page 16: User Menu — Content
— equivalents of navigating arrows Moving the cursor up in the menu list Exit to higher level in menu structure , e.g. to main menu Entering settings of a selected submenu. Moving the cursor down in the menu list — equivalents of ENTER / PRINT key and ESC key Accepting entered value of a parameter Abandon parameter changes and exit to to main menu…
-
Page 17
Fig. 7. Balance main menu – submenu selection In order to edit a submenu, press RIGHT ARROW key, which opens the content of selected submenu. When inside the submenu structure, the user can select an option to be edited (modified) by placing the cursor next to submenu name (use up and down navigating arrows). -
Page 18: Weighing
WEIGHING Basic working conditions for obtaining reliable measurement results: Stable and constant temperature in a weighing room, Stable foundation of a balance, Selecting adequate balance settings adjusted to ambient conditions at a workstation. Before start of weighing process or in case of essential change of ambient conditions at a workstation (e.g.
-
Page 19: User Log In
6.1. User log in The users of a balance AS/X series can have their specific access code to the balance’s menu. The password system is determined by balance’s administrator, i.e. a user of the higher order in relation to the other balance users. The access password can comprise up to 6 digits.
-
Page 20
Fig. 9-1. Password protection – menu content — Administrator the field for inserting administrator’s password. Balance administrator has access to all balance functions and settings. — User the field for inserting user’s password. Balance user has access to the functions and settings which attribute is set to NO (i.e. -
Page 21
Fig. 10. Keys on balance overlay – entering values in editing fields of balance menu — 21 -… -
Page 22: Adjustment
ADJUSTMENT In order to ensure the highest measuring accuracy, it is recommended to periodically introduce to balance memory a corrective factor of indications in relation to a mass standard – i.e. balance adjustment. Adjustment should be carried out: Before the beginning of a weighing procedure, If long breaks between following measuring series occur If temperature inside the balance changes more than: 0,8°C Types of adjustment…
-
Page 23
The time delay enables the user to take the weighed load of the weighing pan, if a weighing process is in progress. Pressing T/O key causes temporary delay of the adjustment process initiation. Automatic adjustment settings Fig. 12. Settings of automatic balance adjustment 1 –… -
Page 24: Adjustment Test
04 Adjustment test mass comparison of internal adjustment weight with its value saved in balance memory. 05 Internal weight correction The function enables correcting the value of internal adjustment weight. The function is disabled in verified balances. 06 Automatic adjustment Determination of factors triggering start of automatic internal adjustment: –…
-
Page 25: Manual Adjustment
Return to weighing mode Changes introduced in balance memory will be saved on returning to weighing with procedure of saving changes. Press ESC key for a few times until the display shows a question: Save? As displayed, select one of available options: ENTER –…
-
Page 26
On completing adjustment process the balance returns to displaying submenu P1 — Adjustment Return to weighing mode – in accordance with point 5.1.2. If the DRH function is enabled in balance settings, then external adjustment process is disabled. The DRH function is enabled in verified balances (which are subject to conformity assessment). -
Page 27: Adjustment Report Printout
7.4. Adjustment report printout On completion of any type of adjustment process, the balance enables preparing a report from adjustment process. The report can be printed on a connected printer and sent to a computer and saved in a form of file for records. P1 08 Report printout : 1: yes –…
-
Page 28: Determining Content Of A Printout For Glp Procedures
Apart from information set in menu group the report contains: Mass of adjustment weight stored in balance’s memory from last carried out adjustment (description: Old:) Mass of adjustment weight determined in current adjustment process (description: Adjustment:) Adjustment deviation, i.e. difference between the two mass records (description: Deviation:).
-
Page 29: Date And Time Settings
DATE AND TIME SETTINGS The balance AS/X series features an internal real-time clock, and its parameters are editable. Go to submenu P3 Date/Time following prompts given on below figure. Fig. 18. Submenu Date / Time 01 Date format Enables two types of setting date format: date format Month/Day/Year date format…
-
Page 30
03 Time Press RIGHT ARROW KEY to enter parameter 03 Time, as presented on below figure. Fig. 19. Submenu Date / Time – setting time Place the marker next to a value to be edited (Hour, Minute, Second). Activate a field for editing by pressing RIGHT ARROW KEY. -
Page 31
04 Date Press RIGHT ARROW KEY to enter parameter 04 Data. As specified in the previous point (03 Time) set current date. On setting required date return to weighing mode as specified in point 5.1.2 of this user manual. Fig. 21. Submenu Date / Time – date setting 05 Display time Available settings 1 –… -
Page 32: Setting Balance Operating Parameters
10. SETTING BALANCE OPERATING PARAMETERS Balance AS/X series, in the menu group <P4 Readout> enables adjusting balance operation to current ambient conditions at a workstation (filter) and required user needs (display refreshment, autozero, previewing last digit). Fig. 22. Submenu Readout – internal settings 10.1.
-
Page 33: Autozero Function
10.4. Autozero function In order to ensure balance’s precise mass indication, “AUTOZERO” software parameter has been introduced. The application of this function is automatic control and correction of zero indication. If AUTOZERO function is enabled, then each weighing process starts from precise zero point.
-
Page 34
Fig. 23. Error value in relation to the density of weighed sample 2. The test monitors changes in mass of a sample within the time of a few hours, if: mass sample is possibly constant (minor changes). In such case it is assumed, that considerable effect on the final mass measurement result is caused by changes of air density, which in turn is strongly affected by pressure, temperature and humidity. -
Page 35: Means Of Operation
10.7.1. Means of operation The software enables two means of using the air buoyancy correction. By inserting to balance memory known value of air density and known density value of weighed sample. After inserting these values the application automatically calculates correction factor for measured mass and after re-calculation of sample mass displays correct mass value.
-
Page 36: Determining The Coefficient Value For Known Density Of Air And Weighed
Set value of parameter P4 07 Air buoyancy correction to 1: yes After returning to weighing mode with procedure of saving changes the display indicates pictogram (!). From now on the displayed mass is corrected in relation to buoyed air and density of weighed sample.
-
Page 37: Coefficient Determining Process Using A Set Of Mass Standards
10.7.4. Coefficient determining process using a set of mass standards CAUTION: Before carrying out the process it is necessary to disable AIR BUOYANCY CORRECTION MODE if it was in use. Determining air buoyancy correction is also carried out using a dedicated set of 2 pieces of mass standards.
-
Page 38
On entering mode settings, set required data (mass and density) in the corresponding fields Fig. 23-6. Air density – declaring values of mass and density After inserting all required data start the determining procedure – move the marker to the START field and press F key Load the weighing with the stainless steel mass standard and on stabilization of measurement result press ENTER key Fig. -
Page 39
The density of air is calculated automatically. Fig. 23-9. Air buoyancy correction – the air density correcting coefficient At this stage the user can: − Restart the procedure from the beginning (by pressing Units key) − Return to weighing without saving changes on air density determination (press MODE key and select mode WEIGHING) −… -
Page 40: Operating Conditions
Fig. 23-11. Air buoyancy correction – mode activation 10.8. Operating conditions This parameter enables two settings: stable or unstable. Setting the parameter to stable causes much faster operation of the balance, i.e. the weighing time is shorter than compared to setting: unstable. This parameter refers to operating and ambient conditions at a workstation.
-
Page 41: Rs 232 Functions
11. RS 232 FUNCTIONS Balance AS/X series enables defining parameters of balance communication with a computer or a printer. Fig. 24. Submenu RS 232 — settings 01 Interface / 0 : RS232 1 : USB* 2 : RS232+USB* 02 Baud rate / 0 : 2400 1 : 4800 2 : 9600 3 : 19200…
-
Page 42: Printouts
12. PRINTOUTS Printouts menu is dedicated for creating non-standard printout templates and selecting type of a printout which is printed. Detailed description of non-standard printouts is provided in point 17 of this user manual. 13. SETTING ACCESSIBILITY OF MEASURING UNITS All measuring units which attribute is set to 1: yes are accessible from the main menu level under a key for toggling between the measuring units.
-
Page 43: Setting Accessibility Of Working Modes
14. SETTING ACCESSIBILITY OF WORKING MODES This group of parameters enables setting accessibility of working modes, which are available for an operator after pressing the Mode key on balance’s overlay. Fig. 26. Working modes – settings All working modes which attribute is set to 1: yes are accessible from the main menu level under a key for toggling between the working modes.
-
Page 44
Language Selecting language version of software menu, available settings Polish or English Backlight Determines whether the backlight of the balance’s graphic display should be enabled or disabled (enabling the backlight option improves data visibility on the display) Screen brightness Enables changing the brightness of the balance’s graphic display – entering the function opens a window for setting brightness level using buttons on the balance’s overlay Screen contrast… -
Page 45
Acquire (upload) parameters Enabling this function causes uploading all parameters sent via RS 232 interface from a connected computer. On completing uploading process the balance informs a user on number of accepted and changed parameters, and number of incorrectly declared parameters which are rejected by the balance. -
Page 46: Working Modes
16. WORKING MODES 16.1. Parts counting of the same mass The parts counting mode can be carried out suing three means: inserting mass of a single part determining mass of a single part from a standard quantity selecting a part for counting from balance’s database Counting by inserting mass of a single part 16.1.1.
-
Page 47
Return to weighing mode Press MODE key, the display indicates list of available working modes Move the cursor next to a field: MO Weighing Press RIGHT ARROW KEY, the software returns to weighing mode and displays current measurement result Counting by determining mass of a single part from a 16.1.2. -
Page 48
mass of a single part 2 — mass of all counted parts 3 — the pictogram of enabled Automatic Accuracy Correction function The display indicates mass of counted parts, that are loaded on balance’s weighing pan (i.e. 10 parts). If the added amount of parts is below the currently counted one, then the software automatically corrects mass of a single part. -
Page 49
is mass of a single part. Now the record in the database is ready for recalling by using field 02 Recall standard Selecting a part for counting from balance’s database 16.1.3. Enable parts counting mode in accordance with below figure. Fig. -
Page 50: Checkweighing
16.2. Checkweighing Checkweighing is a process intended for precise determining mass of a weighed sample with set and enabled checkweighing thresholds (limits). The thresholds are to visualize (by means of a bargraph located on the left side of the display) and monitor checkweighing process.
-
Page 51
Remember to set the 02 Hi Threshold first, as the software automatically checks whether inserted values are correct and hold within the measuring range of a balance. If set values are recognized by the software as incorrect, the balance displays an error message and returns to parameter settings without saving changes. -
Page 52
− Move the cursor to a field “Database of thresholds (limits)” and press RIGHT ARROW KEY Fig. 38. Checkweighing – programming database of thresholds – inserting thresholds values − Enter a name for a selected record (name of a product to be weighed) −… -
Page 53
Fig. 40. Checkweighing – display content 1 – measurement result 2 – pictogram of stable measurement result 3 – working mode name 4 – the value of HI threshold (limit) 5 – the value of LO threshold (limit) 6 – a pictogram indicating the weighing range of currently weighed sample (LO –… -
Page 54: Filling (Dosing)
16.3. Filling (dosing) Filling (dosing) mode is intended for precise measuring or adding a product until reaching a pre-defined target value. Before the beginning of a measuring cycle the user should set a target mass, which is simultaneous the HI dosing threshold. Mode activating Fig.
-
Page 55: Percent Setup
16.4. Percent setup The purpose of this working mode is comparing mass of a weighed load with reference mass which is specified in mode settings. The result of the comparison process is displayed in percent. Working mode Percent Setup can cooperate with additional working modes: checkweighing, dosing and statistics.
-
Page 56
Percent setup in cooperation with other working modes While activating the working mode go to its settings and set parameters: M4 03, 04, 05 to YES. Then move the cursor next to START field and start working mode operation. Caution: On enabling the Checkweighing mode in working mode settings remember to set the HI and LO checkweighing thresholds (limits) as values expressed in %. -
Page 57
7 – statistics mode enabled (N=0 – equals to no measurement records in current statistics) 8 – dosing mode enabled (load mass between 90 – 110%) On completing a measurement series, e.g. 10 measurements (no, of measurement N=10) the user can preview the result of carried out statistics from the measurement series. -
Page 58: Animal Weighing
16.5. Animal weighing Mode activating Fig. 47. Animal weighing – display content Internal mode settings FILTER (determines the speed (weighing time) required for stabilization of the final measurement result, the faster the filter setting, the shorter the measurement time. THRESHOLD (its value is expressed in balance reading units, it is the value below which the weighing results must come down to automatically enable the following measurement of weighed object) AUTO START (the function used for automatic startup of the following…
-
Page 59: Density Determination Of Solids And Liquids
16.6. Density determination of solids and liquids Additional equipment of a balance AS/X series includes a kit dedicated for determining density of solids and liquids. Fig. 48. Components of a density kit Components of a density kit: 1. Beaker basis. 8.
-
Page 60
Density determining of liquids 16.6.1. The basic component needed for determining density of liquids is a glass sinker with precisely determined volume, which value is indicated on sinker’s hook. Before carrying out density determining process enter the sinker’s volume value to balance’s memory. -
Page 61: Formulation
16.7. Formulation Formulation mode is intended for preparing mixtures in accordance with pre-defined formulas. It is highly recommended for pharmacies. The software of balance XA/2X series features calculation memory, therefore it stores mass of each ingredient of a mixture and sums of weighed ingredients.
-
Page 62
parameter 03 No. of ingredients here the user can set number of ingredients in a prepared mixture (maximum no. of ingredients: 20) parameter 04 Formulation entering this parameter settings opens another submenu for specifying names (max 10 characters) and settings (target mass) for each ingredient in a prepared mixture. parameter 05 Formulation printout enabling this function causes printing parameters of an active formulation on a connected printer. -
Page 63
Fig. 51. Bargraphs – automatic scaling Means of preparing mixtures – in accordance with data set in working mode settings on ingredients and their mass Go to parameter 04 Formulation and enter names and mass of the ingredients in a formulation. -
Page 64
− Total mass of a prepared formulation and mass of the vessel in which the formulation is prepared must not exceed maximum measuring range (max. capacity) of a balance − A formulation can contain maximum 20 ingredients − Parameter 03 No. of ingredients enables specifying number of the ingredients in a prepared formulation −… -
Page 65
Means of preparing mixtures without entering data to balance memory on formation ingredients and their mass If a user needs a documentation from a formula making process, e.g. in a form of a printout, then set parameter 02 Automatic printout to 1 : YES. In such case each accepted mass of an ingredient (by pressing F key) is automatically printed on a connected printer or computer. -
Page 66: Statistics
16.8. Statistics Mode activating Fig. 53. Statistics – mode activation The very first process after entering the Statistics mode should be erasing the results of previous statistical calculations. It is carried out by using option M8 01 Erase. All statistical data are updated on an ongoing basis after saving a measurement result in balance memory.
-
Page 67
Fig. 54. Statistics – display content including a series of measurements Mass currently placed on the weighing pan Number of measurement in a measuring series Sum of all completed measurements in a series Average mass of all completed measurements in a series Minimum saved mass in a carried out measuring series Maximum saved mass in a carried out measuring series The difference between the minimum and maximum saved mass in a measuring… -
Page 68: Calibration Of Pipettes
For the purpose of increasing the speed of statistical calculations it is possible to enable the option of automatic erasing statistics. The option is set in parameter: P5 (RS 232) 12 <Erase statistics>. 0 — no (the statistics are not erased. Erasing is carried out by entering mode settings and selecting option <ERASE>…
-
Page 69
Mode activating Fig. 55. Pipette calibration – mode activating Before startup of pipette calibration process set: Pipette type [volume: fixed / adjustable] Pipette volume Vmax [ml] Pipette volume V1/2max [ml] Pipette volume Vmin [ml] Volume error at Vmax Volume error at V1/2max [%] Volume error at Vmin Liquid temperature [oC]… -
Page 70
Display content Fig. 56. Pipette calibration – display content 1 – measurement result 2 – working mode name 3 – tested volume 4 – average volume 5 – accuracy error 6 – number of samples (measurements) The procedure is completed by determining the accuracy error [ES], standard deviation [sr] and repeatability error [CV]. -
Page 71
Press PRINT key to print a report from pipette calibration process. Fig. 58. Report from a completed pipette calibration procedure — 71 -… -
Page 72: Printouts
17. PRINTOUTS 17.1. Standard printout A balance AS/X series features 2 basic types of printouts. The first one is a standard printout which comprises of a measurement result and all variables set in the GLP submenu which attribute is set to YES. In case of fields User and Project the user can enter alphanumeric data.
-
Page 73: Non-Standard Printouts
17.2. Non-standard printouts Principles of creating non-standard printout templates: − balance enables creating up to 4 custom printout templates, − each template must have the string of text start and end specified, e.g. Printout no. 1 Start – 1 and Printout no. 1 Stop – 40. In this case the Printout no. 1 contains text strings from 1 to 40.
-
Page 74
Inserting text into strings 17.2.1. Variables available in all working modes and having the same value Printout of a single character “%” Current net mass in basic measuring unit Current date Current time Balance factory no. Software no. Project no. User no. -
Page 75
Static variables available in all working modes except for weighing (basic mode) Measurement no. Average value Minimum value Maximum value Difference between max and min value Standard deviation Variance factor Variable available in all working modes and accepting a value related to an enabled working mode %V –… -
Page 76
19 Text 10 20 Text 11 21 Text 12 22 Text 13 23 Text 14 Example no. 2: “RADWAG” Balances & Scales Date: Hour: Load mass *****Signature:..***<active working mode >*** Enter text strings settings and input 8 characters from the above text into each of the text strings until completing the printout. -
Page 77
Principles of inserting texts − Using keys on balance’s overlay Toggling upwards through all available characters: digits, letters, and signs by one value. Toggling downwards through all available characters: digits, letters, and signs by one value. Selecting a character for modification by moving the cursor to the RIGHT (the following pressing of the the right arrow key causes activating a character for modification (character is flickering;… -
Page 78
On enabling the printout editing mode select a number of a non-standard printout (1-4) and the place for the beginning of text in a printout (text strings from 1 to 80). Then, go to option Edit to design a printout template or Erase all to erase all designed printout templates. Fig. -
Page 79: Cooperation With A Printer Or A Computer
18. COOPERATION WITH A PRINTER OR A COMPUTER Each pressing of < PRINT > key causes sending to a connected printer or computer a signal corresponding to current mass indication (display status) with enabled measuring unit. The default baud rate setting of a balance is 9600 bit/sec. If a peripheral device (a printer or a computer) requires other baud rate settings then it needs to be changed in balance parameter settings.
-
Page 80: Cooperation With A Citizen Label Printer
a balance: slot DB 9/F – a computer slot DB 9/F (with control of data transmission) Balance Computer 2 (RxD) 3 (TxD) 3 (TxD) 2 (RxD) 4 (DTR) 6 DSR 5 (GND) 5 (GND) 6 (DSR) 6 (DTR) 7 (RTS) 8 (CTS) 8 (CTS) 7 (RTS)
-
Page 81
Design a non-standard printout in a balance which enables printing a label (i.e. following the data included in the designed label template). Set required printout parameters, e.g.: − Printout no. − Text string for start and stop of a selected printout −… -
Page 82
− On adding data on a non-standard printout set other printout parameters, such Printout no. – 1 Printout no. 1 start – 1 Printout no. 1 stop – 10 Fig. 68. Declaring printout content − On setting printout parameters go back to the weighing mode with procedure of saving carried out changes. -
Page 83
TABLE 2 Variables independent on an enabled working mode Number of characters Variable Variable description needed for a variable Printout of a single character “%” 16 or 18 * Current net mass in basic measuring unit Current date 8 (for 24-hour version) Current time Balance factory no. -
Page 84
TABLE 3 Variables dependent on a currently enabled working mode Number of Working mode in which the Variable Description characters variable is active 16 or 18 * Mass of a single part PARTS COUNTING 16 or 18 * HI high threshold CHECKWEIGHING 16 or 18 * LO Low threshold… -
Page 85: Cooperation With Epson Receipt Printer
20. COOPERATION WITH EPSON RECEIPT PRINTER For the purpose of using Polish letters in the printouts it is necessary to: − On the beginning of a printout that is programmed in a balance add a formula on coding page change to CP 852 Recording scheme: 1B7412c −…
-
Page 86: Under Hook Weighing
21. UNDER HOOK WEIGHING A balance AS/X series comes standard with a possibility for weighing loads under the weighing pan. Follow below description for enabling under hook weighing process: Fig. 71. Hole plug for under hook weighing option in an analytical balances Remove plastic hole plug located in the bottom of balance’s base, There is suspension place for hook visible in the hole –…
-
Page 87: Connecing Scheme Of External Buttons
22. CONNECING SCHEME OF EXTERNAL BUTTONS A balance AS/X series enables connecting external buttons for tarring or printing measurement results without the need to touch balance’s keyboard with operator’s hands. The buttons are connected using a dedicated splitter connected to balance’s RS 232 interface.
-
Page 88
Function SWITCH OFF CONTINUOUS TRANSMISSION IN BASIC MEASURING UNIT Command C0 CR LF Function SWITCH ON CONTINUOUS TRANSMISSION IN BASIC MEASURING UNIT Command C1 CR LF Function SWITCH OFF CONTINUOUS TRANSMISSION IN CURRENT MEASURING UNIT Command CU0 CR LF Function SWITCH ON CONTINUOUS TRANSMISSION IN CURRENT MEASURING UNIT Command… -
Page 89
Function SHOW HEADER Command DH CR LF (causes previewing a sequence of characters in the upper bar of the display) Function ERASE HEADER Command CH CR LF (causes erasing a text string from the upper bar of the display) Function SHOW FOOTER Command DF CR LF (causes previewing a sequence of characters in the bottom bar… -
Page 90: Technical Data
24. TECHNICAL DATA 24.1. Balance AS/X series AS 110/X AS 160/X AS 220/X AS 310/X Max. capacity 110 g 160 g 220 g 310 g Min. load 10 mg 10 mg 10 mg 10 mg Readability 0,1 mg 0,1 mg 0,1 mg 0,1 mg Tare range…
-
Page 91: Error Messages
25. ERROR MESSAGES Message Error Error description code «Control sum error.» Error related to data transmission » A/D converter error» Converter error «Measuring range Maximum capacity (measuring range) of the exceeded» balance exceeded (over load) «Measuring range Maximum capacity (measuring range) of the exceeded»…
-
Page 92
MANUFACTURER OF ELECTRONIC WEIGHING INSTRUMENTS RADWAG WAGI ELEKTRONICZNE 26-600 Radom 28 Bracka POLAND phone +48 48 38 48 800 fax. + 48 48 385 00 10 e-mail: export@radwag.com www.radwag.com — 92 -…
This manual is also suitable for:
X series
Правила работы с аналитическими весами
Так что же собой представляют аналитические весы? Это довольно таки сложное устройство, позволяющее с наибольшей точностью определять вес, массу. Покупка такого аппарата не дает гарантию получения самого точного результата при взвешивании, несмотря на надписи на весах: точность взвешивания 0,01 мг (или 0,001 мг).
На итоговый результат при взвешивании влияет довольно много факторов. Этими факторами могут быть и высота над уровнем моря, и окружающая температура, и скачки напряжения в электрической сети, и некомпетентная работа оператора весов. На особо восприимчивых весах можно заметить даже изменение веса одного и того же предмета при использовании на разных этажах здания.
Каковы же основные условия правильного и точного взвешивания?
Перед использованием необходимо внимательно ознакомиться с руководством по эксплуатации весов.
Расположение весов
Расположение весов существенно влияет на правильность и верность итогов взвешивания. Поэтому перед началом эксплуатации весов необходимо определить и выбрать помещение, в котором будет находиться этот прибор. Существуют определенные требования к помещению:
Комната
- Помещение или комната не должны подвергаться воздействию различных вибраций.
- Во избежание появления сквозняков и попадания прямого солнечного света, комната, в которой будут находиться весы, должна иметь как можно меньше окон и всего один выход.
Температура
- Идеальной температурой является температура 20±2 °C.
- Колебания температуры в комнате не должно быть больше 0,5 єC (для некоторых допускается до 2 °C).
- Разнообразные нагревательные приборы должны находиться на существенном расстоянии от весов.
Атмосферная влажность
- Оптимальной влажностью воздуха составляет 30–80%.
Освещение
- Необходимо обеспечить, чтобы на весы не падал прямой солнечный свет.
- Используемые электроосветительные приборы необходимо размещать на почтительном расстоянии от стола, на котором находятся весы. Это необходимо сделать, так как от светильников происходит выделение тепла. При этом наибольшее количество тепла выделяют лампы накаливания, а наименьшее – флюорисцентные.
Воздух
- В помещении не должно быть воздушных потоков и сквозняков. Стол, на котором стоят весы необходимо располагать как можно дальше от кондиционеров, приборов отопления и устройств с вентиляторами и нагнетателями (компьютеры, электрообогреватели, кондиционеры).
- Вблизи весов не должны находиться химические препараты, выделяющие вредные пары.
Подставка для весов
- Для установки весов разрешается использовать устойчивые лабораторные столы, специальные кронштейны, прикрепляемые к стене или отдельные фундаменты.
- В качестве подставки для весов нужно использовать достаточно толстый ровный материал, который должен поглощать вибрации, обладать антимагнитными и антистатическими свойствами.
Работа с весами
Так как аналитические весы являются измерительным прибором высокой точности, то к эксплуатации таких весов допускаются только обученные работники.
После освобождения весов из упаковки необходимо убедиться в отсутствии механических повреждений, которые могли возникнуть во время пересылки или перевозки. Оригинальную упаковку и ее дополнительные элементы. Это необходимо сделать на случай изменения места нахождения весов, для безопасной транспортировки. Горизонтальная установка Для правильной установки весов лучше всего воспользоваться прибором для измерения уровня. Отклонения в ту или иную сторону корректируются регулировкой соответствующих ножек.
Защитный кожух
Весы, имеющие сложную конструкцию защитного кожуха, нужно устанавливать таким образом, чтобы открывание кожуха было наименьшим.
У весов с обычным кожухом дверку надо открывать на ширину, которая позволяет правильно расположить предмет для взвешивания. Такая рекомендация позволяет предупредить изменение температуры и перемешивание воздуха.
Включение весов
- При резкой смене температуры окружающего воздуха, связанной с перемещением или перевозкой весов, их необходимо, не подключая к электросети, выдержать в нормальных условиях не менее 2 часов. Это связано с тем, что в таком случае на внутренних деталях весов образуется конденсат, который может привести к короткому замыканию и выходу весов из строя. В дальнейшем, во время эксплуатации, такого эффекта не наблюдается.
- После изменения местоположения весов, нужно дать им выстояться не менее 12 часов.
- Чтобы весы показывали наиболее точный результат, после долгого отключения от электросети, а так же при первом включении, нужно прогреть весы не менее 2 часов. При регулярной эксплуатации весы желательно не выключать. При этом их необходимо переводить в режим ожидания. В последующем, предварительный прогрев перед взвешиванием не потребуется.
- Для того, чтобы уровнять температурный режим внутри весов с окружающим, требуется за 20–30 минут до начала измерений приоткрыть дверку защитного кожуха.
Сосуд/контейнер для взвешивания
- Необходимо выбирать контейнеры для взвешивания, имеющие самые малые габариты.
- Во избежание появления электростатического разряда, рекомендуется воздержаться от использования пластмассовых и стеклянных контейнеров, особенно, если влажность воздуха менее 30–40%.
- Температура образца и сосуда для взвешивания должны иметь температуру, которая равна внутренней температуре помещения. При разной температуре появляются воздушные потоки, и на образце и сосуде изменяется пленка влаги.
Образцы
Перед взвешиванием, для выравнивания температур, необходимо, чтобы образцы находились в помещении, температура которого равна температуре внутри весов.
Калибровка
После соблюдения всех вышеперечисленных условий и рекомендаций весы нуждаются в калибровке, а точнее – юстировке. Давайте немного уясним разницу:
- Калибровка – это определение разницы между результатом взвешивания образца и его истинным значением веса (массы), при калибровке не происходит изменение параметров весов.
- Юстировка – это операция, производимая для коррекции расхождения между показываемым результатом измерения и истинным значением веса. Она же служит для снижения расхождения между этими показателями.
- Весы калибровать необходимо систематически, особенно если вы: выполнили первоначальную установку, переносили или перемещали весы в другое место и производили регулировку уровня, после колебаний или изменений температуры, атмосферного давления и влажности. Точность взвешивания напрямую зависит от частоты калибровки.
- Необходимость в юстировке отпадает, если весы снабжены функцией самокалибровки или имеют встроенную автоматическую самокалибровку, которую можно программировать.
- При наличии только внешней юстировки, калибровать весы и наблюдать за режимами работы весов придется визуально. Внешняя юстировка позволяет произвести наиболее качественную настройку весов.
Работа оператора с весами
- Заблаговременно до начала измерений рекомендуется произвести несколько взвешиваний для пробы. При этом перемешается воздух внутри весовой камеры и произойдет «раскачка» ячейки для взвешивания. При этом на точность взвешивания влияет постоянство и периодичность взвешивания.
- Обязательным условием является использование при работе хлопчатобумажных перчаток.
- Запрещается брать образцы голыми руками. Это связано с влиянием температуры рук и отпечатков пальцев на итоговые результаты взвешивания.
- Старайтесь пользоваться пинцетом и остальными принадлежностями. Нужно находиться в спокойном расположении духа для того, чтобы точно и аккуратно размещать образцы на чашках весов.
- Для наиболее точного измерения избегайте вносить руку вовнутрь защитного кожуха во избежание изменения температуры и влажности внутри, которые повлияют на результат взвешивания.
- Перед взвешиванием необходимо убедиться в том, что показания весов находятся на нулевой отметке. Для исключения ошибки нуля нужно оттарировать весы.
- Во избежание угловых нагрузок, нужно образец для взвешивания размещать в центре чашки весов.
- После взвешивания чашку весов нужно освобождать от контейнеров с образцами. Вызвано это тем, что если оставить образцы внутри, то в кожухе весов (шкафу) может измениться влажность воздуха и температурный режим.
Уход за весами
Необходимо содержать весы, чашку для взвешивания и шкаф в идеальной чистоте. Для взвешивания нужно использовать только чистые контейнеры.
Физические воздействия
Иногда, когда, казалось бы, соблюдены все правила и условия, все же точность измерений оставляет желать лучшего. При этом показания на дисплее становятся нестабильными, они колеблются в ту или иную сторону. В большинстве случаев, в этом виноваты нежелательные физические помехи.
Самые распространенные причины:
- неверное расположение весов,
- намагниченные образцы или контейнеры,
- сорбция или потеря влаги образцом,
- электростатический заряд образцов или контейнеров,
- неверное обращение с образцом.
Ниже описываются причины, их возникновение, влияние и методы корректировки.
Температура
Эффект:
Непостоянство итогов взвешивания, показываемых на дисплее, показания отклоняются в одну сторону.
Причины:
Связано это с разными температурами окружающей среды, контейнера или образца. Это вызывает возникновение потоков воздуха вдоль образца или контейнера. В итоге результат взвешивания оказывается неверным. Появляется так называемый эффект динамической плавучести. Он проявляет себя до тех пор, пока не выровняется температура образца и весов.
В пленке влаги, которая покрывает сосуд, происходят изменения, которые скрываются эффектом динамической плавучести. С изменением температурного режима изменяется и пленка влаги. Поэтому получается, что теплый предмет легче, а холодный – тяжелее. В связи с этим, этому эффекту необходимо уделить особое внимание при дифференциальном взвешивании на микровесах, необходимо строго следить за температурой.
Корректирующие меры:
- для переноса образцов необходимо использовать только предназначенный для этого пинцет,
- старайтесь не погружать внутрь шкафа кисть руки,
- при взвешивании используйте контейнеры для образцов с наименьшими размерами,
- не взвешивайте образцы, которые только что вынуты из холодильника или сушильного шкафа,
- перед взвешиванием дождитесь выравнивания температур шкафа весов и окружающей среды.
Поглощение или испарение влаги
Эффект:
Постепенное медленное повышение или уменьшение веса взвешиваемого образца.
Причины:
Происходит измерение потери массы воды или летучих веществ. Повышение веса проявляется тогда, когда образец для взвешивания является гигроскопичным (влага аккумулируется из воздуха). Такой эффект просто воспроизвести, делается это при помощи силикагеля или спирта.
Корректирующие меры:
- необходимо накрывать сосуды с образцами крышками или использовать для этих целей пробки,
- желательно использовать сосуды, имеющие узкую горловину,
- при взвешивании нужно следить за чистотой чаши весов и контейнеров для образцов.
Электростатика
Эффект:
При взвешивании масса одного и того же сосуда оказывается разной. Нестабильными остаются показания на дисплее во время этой процедуры. Повторение результатов измерения проблематичны.
Причины:
Этот эффект связан с электростатическим зарядом используемого сосуда или контейнера. Связано это с тем, что во время транспортировки или перемешивания веществ происходит процесс трения, из-за чего и появляется этот заряд. Для изготовления большинства контейнеров используется стекло или пластик, которые могут накапливать электростатический заряд. При относительной влажности менее 40% проявляется плохая поверхностная проводимость. В связи с этим потеря накопленного электростатического заряда будет происходить очень медленно.
В процессе взвешивания этих образцов происходит взаимодействие между окружающей средой и образцом. Происходит это согласно законам физики: одинаково заряженные предметы отталкиваются, в случае разных потенциалов они взаимно притягиваются. Для измерения электростатического заряда применяют микро- , полумикро- и аналитические весы, при этом возникают вышеописанные явления. Подобного эффекта можно достичь, натерев шелком или шерстью пластиковый сосуд.
Корректирующие меры:
- Необходимо снять электростатический заряд,
- Закрыть специальным защитным экраном взвешиваемый образец,
- Нужно повысить влажность в комнате. Используя увлажнитель или настроив кондиционер. Пристальное внимание следует уделить этому в холодное время года в отапливаемых помещениях. Идеальной является относительная влажность воздуха 45–60%,
- Использовать сосуд или контейнер из другого материала, учитывая что: пластик плохо проводит электричество, стекло – лучше, а металл – лучше всего,
- При наличии возможности, воспользуйтесь антистатическими пистолетами, не забывая о том, что они малоэффективны для кое-каких материалов,
- Произведите правильное заземление весов и стола.
Магнетизм
Эффект: При взвешивании происходит изменение массы образца, которое зависит от его расположения на чаше весов. Практически тяжело повторить одинаковое измерение.
Причина:
Происходит взвешивание магнитного материала, который реагирует на наличие рядом металлических деталей. Силы магнетизма, которые возникают, влияют на показания весов.
Корректирующие меры:
- При наличии возможности, произведите размагничивание образца, который имеет в своем составе частицы железа, никеля, стали и т.д.,
- Старайтесь удалить образец от чаши весов как можно дальше, используя подставки из диэлектрических, немагнитных материалов (алюминиевый штатив, стеклянный стакан),
- Такого эффекта легко достичь, воспользовавшись крючком-подвеской, производя взвешивания на большом расстоянии под весами,
- Произвести магнитную экранировку образца, используя биметаллический чехол.
Статическая плавучесть
Эффект:
Различие результатов взвешивания образца в вакууме и в воздухе.
Причины:
Здесь уместно вспомнить закон Архимеда: «Тело теряет в весе массу вытесненной им среды».
Согласно этому закону становится ясно, почему возносятся вверх воздушные шары, плывут корабли и т.д. Отсюда же видна зависимость массы образца от атмосферного давления.
В данном случае, наш образец окружает воздух. При этом плотность воздуха примерно равна 1,2 кг/м3 (она зависит от атмосферного давления и температуры). Соответственно, и »статическая плавучесть» равна примерно столько же.