
1
СОДЕРЖАНИЕ
ОСНОВНЫЕ ЧАСТИ
Названия частей ………………………………………..2
Стандартные аксессуары и их размещение .. 3
Дополнительный столик и свободный рукав ..4
ПОДГОТОВКА К ШИТЬЮ
Подключение питания ………………………………..5
Контроль скорости шитья …………………………..5
Функциональные кнопки и клавиши …………….6
z
Кнопка реверса …………………………………… 6
z
Кнопка автоматической закрепки …………..6
z
Кнопка подъема/опускания иглы ………….. 6
Отключение транспортера ткани ………………..7
Регулировка давления лапки на ткань ……….. 7
Замена прижимной лапки …………………………..8
Установка держателя лапки ………………………. 8
Подъем и опускание прижимной лапки ……….9
Регулировка натяжения нити ………………………9
z
Автоматическое натяжение …………………..9
z
Регулировка натяжения вручную ………….. 9
Смена игл ………………………………………………. 10
Таблица соотношений игл и нитей …………… 10
Намотка шпульки ……………………………………..11
z
Удаление шпульки ………………………………11
z
Намотка шпульки ………………………………..11
z
Установка шпульки ……………………………..12
Заправка нитей в машину ……………………….. 13
z
Заправка верхней нити ……………………….13
Автоматический нитевдеватель ………………..14
Вытягивание нижней нити ……………………….. 15
Ручка выбора стежков …………………………….. 16
Регулятор ширины стежка ……………………….. 16
Регулятор длины стежка …………………………..16
ОСНОВНЫЕ ШВЕЙНЫЕ ТЕХНИКИ
Прямой стежок ……………………………………….. 17
z
Начало шитья …………………………………….17
z
Смена направления шитья ………………… 17
z
Закрепление шва/обрезка нити ………….. 17
z
Подбор длины стежка …………………………18
z
Смена положения иглы ……………………… 18
z
Направительные линии ……………………… 19
z
Шитье от края толстой ткани ……………… 19
Разнообразие прямых стежков ………………… 20
Основной стежок зигзаг …………………………… 21
z
Изменение ширины стежка …………………21
z
Изменение длины стежка ……………………21
Оверлочивание ………………………………………. 22
z
Стежок зигзаг ……………………………………. 22
z
Мультизигзаг (Стежок трико) ……………….22
z
Трикотажный стежок ………………………….. 22
z
Обработка края ………………………………….23
z
Оверлочный стежок …………………………… 23
Пришивание пуговиц ………………………………..24
Автоматическая петля …………………………25-31
Зажгутованная петля ………………………………. 32
Пришивание молнии ……………………………33-35
Роликовый шов ………………………………………..36
Глазок ……………………………………………………..36
Потайная строчка …………………………………….37
Штопка …………………………………………………… 38
АППЛИКАЦИИ
И ДЕКОРАТИВНЫЕ СТЕЖКИ
Аппликация ……………………………………………..39
Квилтинг ………………………………………………….39
Узкие складки …………………………………………. 40
Пэчворк ………………………………………………….. 40
Мережка ………………………………………………….41
Шов-ракушка ……………………………………………41
Сборки …………………………………………………….42
Декоративные атласные стежки ………………. 42
Комбинации стежков ………………………………. 43
Шитье крестом …………………………………………43
Пришивание шнура ………………………………….44
Эластичный стежок стреч …………………………44
Декоративные стежки стреч …………………….. 45
Регулировка баланса стежков стреч ………….45
УХОД ЗА МАШИНОЙ
Замена лампочки ……………………………………. 46
Чистка челночного
отсека и тканенаправителей ……………………. 47
ПРОБЛЕМЫ И
ПРЕДУПРЕЖДАЮЩИЕ СИГНАЛЫ ………….48
УСТРАНЕНИЕ НЕИСПРАВНОСТЕЙ ………… 49
- Manuals
- Brands
- Janome Manuals
- Sewing Machine
- OC 6260
- Instruction book
-
Contents
-
Table of Contents
-
Troubleshooting
-
Bookmarks
Quick Links
Related Manuals for Janome OC 6260
Summary of Contents for Janome OC 6260
-
Page 1
INSTRUCTION BOOK… -
Page 2: Important Safety Instructions
IMPORTANT SAFETY INSTRUCTIONS When using an electrical appliance, basic safety precautions should always be followed, including the followings: Read all instructions before using this appliance. DANGER— To reduce the risk of electric shock: 1. An appliance should never be left unattended when plugged in. Always unplug this sewing machine from the electric outlet immediately after using and before cleaning.
-
Page 3: Table Of Contents
TABLE OF CONTENTS Name of Parts …………2 Overcasting ………….. 22 • Zigzag stitch ………… 22 Standard Accessories and Storage ……3 • Extension Table and Free Arm Sewing ….. 4 Multiple zigzag stitch (Tricot stitch) ….22 • Knit stitch …………22 GETTING READY TO SEW •…
-
Page 4: Product View And Parts
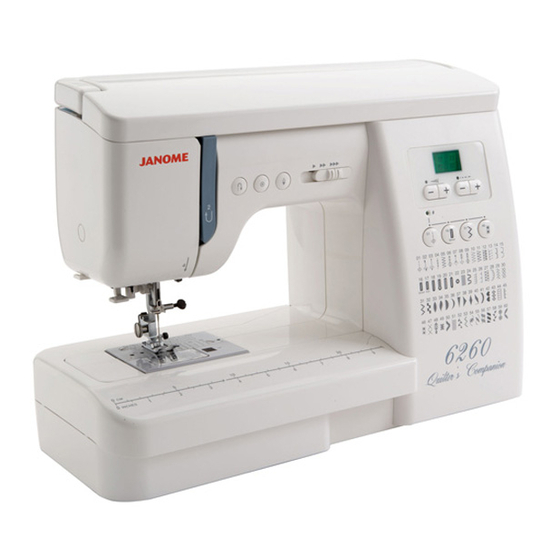
Name of Parts Speed control lever Direct pattern selection keys Stitch width control keys Stitch length control keys LED display Bobbin winder stopper Bobbin winder spindle Accessory storage compartment Spool pin Spool holder Stitch reference chart Top cover Hole for additional spool pin Bobbin winder thread guide Thread guide A Thread guide B…
-
Page 5: Standard Accessories And Storage
Standard Accessories and Storage A: Zigzag foot (set in the machine) F: Satin stitch foot C: Overedge foot D: Rolled hem foot G: Blind hem foot R: Automatic buttonhole foot Accessory storage box Accessories are conveniently stored in the storage box. Draw out the storage box by pulling the dent on the box to the left.
-
Page 6: Extension Table And Free Arm Sewing
Extension Table and Free Arm Sewing To detach: Pull the extension table to the left. Free arm sewing: The free arm is useful for stitching sleeves, waistbands, pant legs or any tubular garment, also for darning socks or mending knees, elbows and children’s wear. To attach: Slide the extension table along the free arm, inserting the pin into the hole to attach.
-
Page 7: Getting Ready To Sew Connecting To The Power Supply
GETTING READY TO SEW Connecting to the Power Supply 1. Turn the power switch OFF. 2. Insert the foot control jack into the machine socket. 3. Insert the machine plug into the machine socket. 4. Insert the power supply plug into the outlet. 5.
-
Page 8: Function Keys And Buttons
Function Keys and Buttons • Reverse stitch button While the reverse stitch button is pressed, the machine sews backwards when the pattern 01, 02, 05 or 10 has been selected. The machine will immediately lock the stitches and stop automatically when other stitch has been selected. * In case of 02, the machine will sew in reverse and stop automatically.
-
Page 9: Dropping The Feed Dog
Dropping the Feed Dog The feed dog can be lowered by the drop feed lever for sewing on buttons, manual embroidery etc. Push the drop feed lever to the right to lower the feed dog. Push the lever to the left to raise the feed dog, it will return to the up position when starting the machine.
-
Page 10: Changing The Presser Foot
Changing the Presser Foot WARNING: Turn OFF the power switch before changing the foot. Always use the proper foot for the selected pattern. Wrong foot can cause needle to break. To snap off: Raise the needle and presser foot. Press the black lever on the back of the foot holder and the foot will drop off.
-
Page 11: Raising And Lowering The Presser Foot
Raising and Lowering the Presser Foot The presser foot lifter raises and lowers the presser foot. You can raise it about 0.6 cm (1/4˝) higher than the normal up position for easy removal of the presser foot, or to help you to place thick fabric under the foot. Lowered position Normal up position Highest position…
-
Page 12: Changing The Needle
Changing the Needles WARNING: Turn OFF the power switch before changing the needle. Loosen the needle cramp screw and pull out the needle. Insert a new needle into the needle cramp with the flat side facing back. Push the needle up against the stopper pin and tighten the needle cramp screw firmly.
-
Page 13: Winding The Bobbin
Winding the Bobbin • Removing the bobbin Slide the hook cover release button to the right, and remove the hook cover. Take the bobbin out. Hook cover release button Hook cover Bobbin Setting the spool of thread Place the spool of thread on the spool pin with the thread coming off the spool as shown.
-
Page 14: Inserting The Bobbin
• Inserting the bobbin Place the bobbin in the bobbin holder with the thread running counter-clockwise. End of the thread Bobbin holder Guide the thread into the notch A on the front side of the bobbin holder. Draw the thread to the left sliding it between the tension spring blades.
-
Page 15: Threading The Machine
Threading the Machine • Threading the needle thread Raise the presser foot. Press the needle Up/Down button twice to bring the take- up lever to its highest position then turn off the power switch. Spool of thread Spool holder Presser foot lifter Draw the end of the thread with your left hand and pass it under the thread guide (A) then hook around the thread guide (B) while holding the spool with your…
-
Page 16: Automatic Needle Threader
Automatic Needle Threader Raise the needle to its highest position by pressing the needle Up/Down button twice. Raise the presser foot. Depress the needle threader knob as far as it will go. The hook comes out through the needle eye from behind.
-
Page 17: Drawing Up Bobbin Thread
Drawing Up Bobbin Thread Raise the presser foot and hold the needle thread with your fingers. Needle thread Press the needle Up/Down button twice to raise the needle to its highest position. Pull the needle thread to pick up a loop of the bobbin thread. Needle thread Bobbin thread Needle Up/Down button…
-
Page 18: Selecting The Stitch Pattern
Selecting the Stitch Pattern Press the pattern selection key until pattern number of the desired stitch is shown in the LED display. The key (1) on the left selects patterns #01 to #15. The key (2) second from the left selects patterns #16 to #30.
-
Page 19: Utility Stitches Straight Stitch
UTILITY STITCHES Straight Stitch Machine setting Pattern Foot A: Zigzag foot Thread tension Auto • Starting to sew Raise the presser foot and place the fabric on the machine. Lower the needle into the fabric where you want to start. Lower the presser foot and start sewing.
-
Page 20: Adjusting The Stitch Length
• Adjusting the Stitch Length The LED display shows “ 2.2 ” (default setting) when the plus or minus key is pressed once. Press the plus (+) key to increase stitch length. Press the minus (–) key to decrease stitch length. The stitch length can be varied from 0.0 to 5.0.
-
Page 21: Using The Seam Guide Lines
• Using the seam guide lines The seam guides on the needle plate and hook cover help you to measure seam allowance. NOTE: The number indicates the distance from the center needle position. Number 1 1/2 Distance (cm) 4.0 1.3 Center needle position Edge of the fabric Guide lines…
-
Page 22: Variety Of Straight Stitches
Variety of Straight Stitching Pattern #01 Straight stitch Foot A: Zigzag foot For seaming garments, zipper application and more. Pattern #02 Lock-a-Matic stitch Foot A: Zigzag foot Seaming with auto reverse stitches at the beginning and end Press the reverse stitch button once, the machine will sew the reverse stitches and stop automatically.
-
Page 23: Basic Zigzag Stitch
Basic Zigzag Stitch Machine setting Pattern Foot A: Zigzag foot Thread tension Auto Zigzag stitch is one of the most useful and versatile stitches. It is used for overcasting, mending, appliqué also used as a decorative stitch. NOTE: Use an interface when sewing on the stretch fabric such as knit, jersey or tricot.
-
Page 24: Overcasting
Overcasting • Zigzag stitch Machine setting Pattern Foot C: Overcasting foot Thread tension Auto CAUTION: Do not set the stitch width less than 5 when using the overcasting foot to prevent the needle from hitting the wires on the foot. Place the raw edge of the fabric next to the guide of the foot and start sewing.
-
Page 25: Overedge Stitch
• Overedge stitch Machine setting Pattern Foot C: Overcasting foot Thread tension Auto CAUTION: Do not set the stitch width less than 5 when using the overedge foot to prevent the needle from hitting the wires on the foot. This stitch overcasts and seams the raw edge at the same time, it prevents fraying.
-
Page 26: Sewing On Buttons
Sewing on Buttons Machine setting Pattern Foot F: Satin stitch foot Thread tension Auto Feed dog Dropped Unthread the needle. Adjust the stitch width to match the needle swing with the span of the holes on the button, by pressing the plus (+) or minus (–) key. Rethread the needle and lower the presser foot to hold the button in place.
-
Page 27: Automatic Buttonhole
Automatic Buttonhole Variety of buttonholes #16 Square buttonhole (Sensor buttonhole): Sensor Widely used for medium to heavy weight fabrics. The buttonhole size is automatically determined by placing a button on the back of the automatic buttonhole foot. #17 Square buttonhole (Auto buttonhole): Similar to the sensor buttonhole, but you can set the buttonhole length as desired and memorize it to repeat the same size buttonholes.
-
Page 28: Square Buttonhole
Square buttonhole Machine setting Pattern Foot R: Automatic buttonhole foot Sensor Thread tension Auto NOTES: The size of buttonhole is automatically set by placing the button in the rear of the automatic buttonhole foot R. The button holder of the foot takes a button size up to 2.5 cm (1˝) in diameter.
-
Page 29
Raise the buttonhole foot and draw the needle thread to the left through the hole on the foot. Place the fabric under the foot and lower the needle at the starting point by turning the handwheel. Then lower the foot. Needle thread Bobbin thread Buttonhole mark… -
Page 30
Remove the fabric and place a pin just before the bartack at each end to prevent cutting bartacks. Cut the opening with the seam ripper. Use an awl to open the keyhole buttonhole. Seam ripper After the buttonhole sewing is finished, push the buttonhole lever upward as far as it will go. -
Page 31
Adjusting the buttonhole width and density Adjusting the buttonhole width. Press the plus (+) key to increase buttonhole width. Press the minus (–) key to decrease buttonhole width. The LED display shows “ 5.0 ” (default setting) when the plus or minus key is pressed. The buttonhole width can be varied from 2.5 to 7.0. -
Page 32
Round end/Keyhole buttonhole Machine setting Pattern #18, #19 or #21 LED display Foot R: Automatic buttonhole foot The sewing sequence is the same as sensor buttonhole. Refer to pages 26, 27, 28 for sewing instruction. Starting point End point Adjusting the buttonhole width Press the plus (+) key to increase buttonhole width. -
Page 33
#17 Square buttonhole (Auto buttonhole) Machine setting Pattern Foot R: Automatic buttonhole foot Auto Thread tension Auto Mark the buttonhole position on the fabric. Pull the 1 2 3 button holder all the way out. Draw the needle thread to the left through the hole on the foot. -
Page 34: Corded Buttonhole
Corded Buttonholes Machine setting Pattern Foot R: Automatic buttonhole foot Sensor Thread tension Auto With the buttonhole foot raised, hook the filler cord on the cord spur on the back of the buttonhole foot. Bring the ends toward you under the foot, and hook the filler cord into the forks on the front of the foot to hold them tight.
-
Page 35: Zipper Application
Zipper Application Machine setting Pattern Foot E: Zipper foot Thread tension Auto To attach the zipper foot: (1) Attach the zipper foot with the pin on the right, when sewing on the left side of the zipper. (2) Attach the zipper foot with the pin on the left, when sewing on the right side of the zipper.
-
Page 36
To sew: Fold up the upper seam allowance. Fold back the bottom seam allowance to form a 0.3 cm (1/8˝) fold. Place the zipper teeth next to the fold and pin it in place. Bottom fabric End of the zipper opening Zipper teeth 0.3 cm (1/8˝) Wrong side of the upper fabric… -
Page 37
Detach the foot and attach it with the pin on the left. Backstitch across the end of opening to 1 cm (3/8˝). Turn the fabric 90 degrees and stitch through the garment and zipper tape. Stop the machine 5 cm (2˝) before the foot reaches the slider on the zipper tape. -
Page 38: Rolled Hem
Rolled Hem Machine setting Pattern Foot D: Rolled hem foot Thread tension Auto Trim off the corner of the fabric 0.5 cm (3/16˝) by 0.8 cm (5/16˝) to avoid a bulkiness of the hem at the corner. Fold the fabric edge twice 0.3 cm (1/8˝) wide and 6 cm (2 3/8˝) long.
-
Page 39: Blind Hem Stitch
Blind Hem Stitch Machine setting Pattern #14, #15 Foot G: Blind hem foot Thread tension Auto Fold a hem with the wrong side up forming a 0.4-0.7 cm (3/16-5/16˝) allowance. Wrong side of the fabric 0.4-0.7 cm (3/16-5/16˝) Overcasting (1) On heavy weight fabrics that ravel, the raw edge should be overcast first.
-
Page 40: Darning
Darning Machine setting Pattern Foot R: Automatic buttonhole foot Thread tension Auto 1. Pull the button holder all the way out. 2. Draw the needle thread to the left through the hole on the foot. 3. Lower the needle into the fabric where start to sew. Lower the foot and depress the foot control.
-
Page 41: Sewing Application And Decorative Stitches
SEWING APPLICATION AND DECORATIVE STITCHES Appliqué Machine setting Pattern Foot F: Satin stitch foot Thread tension Auto Foot pressure The patterns #05 and #26 can also be used. Baste or glue appliqué pieces on the fabric. Stitch around the appliqué making sure the needle falls along the outer edge of the appliqué.
-
Page 42: Pin Tucking
Pin Tucking Machine setting Pattern Foot G: Blind hem foot Thread tension Auto Needle drop position Left (0.0) Fold the fabric with wrong side together. Position the fabric so that the folded edge is next to the guide on the presser foot. Lower the foot and Sew guiding the folded edge along the guide.
-
Page 43: Fagoting
Fagoting Machine setting Pattern Foot F: Satin stitch foot Thread tension Auto Fold under 1.5 cm (1/2˝) on each fabric edge and press. Pin the two edges to a piece of paper 0.3 cm (1/8˝) apart. Sew guiding the fabric so the needle catches the folded edge on each side.
-
Page 44: Smocking
Smocking Machine setting Pattern Foot F: Satin stitch foot Thread tension Auto The patterns #51 to #55 can also be used. 1. Set the thread tension dial at 1-3, and stitch length at 3-4, sew straight lines 1 cm (3/8˝) apart across the area to be smocked.
-
Page 45: Pattern Combination
Pattern Combination Machine setting Pattern #42 and #54 Foot F: Satin stitch foot Thread tension Auto You can sew a combination of decorative pattern with the aid of the auto lock button. Auto lock button Example: To sew a combination of two units of the pattern #42 and one unit of #54.
-
Page 46: Cording
Cording 3-strand cording Machine setting Pattern Foot H: Cording foot Thread tension Auto Insert 3 strands of cord under the spring blade on the foot and draw them under the foot to the back. Hold the 3 strands parallel and stitch over the cords evenly.
-
Page 47: Decorative Stretch Stitch
Decorative Stretch Stitches Machine setting Pattern #06-09, #11-13, #24-30 and #43-60 Foot A: Zigzag foot Thread tension Auto As the fabric moves back and forth in the stretch stitch sewing, guide the fabric carefully to keep the seams straight, NOTE: If the patterns are uneven when sewing with a particular fabric, adjust them with the stretch stitch balancing dial.
-
Page 48: Care Of Your Machine
CARE OF YOUR MACHINE Replacing the Light Bulb WARNINGS: Turn OFF the power before replacing the light bulb. The bulb could be HOT, wait until it has cooled down before touching it. To remove: Remove the cap and setscrew on the faceplate. Remove the faceplate.
-
Page 49: Cleaning Hook Race And Feed Dog
Cleaning Hook Race and Feed Dog WARNING: Raise the presser foot and needle, and then unplug the machine. DO NOT dismantle the machine other than as explained in this section. Remove the needle and presser foot. Remove the two setscrews and unhook the hook to remove the needle plate.
-
Page 50: Problems And Warning Signals
PROBLEMS AND WARNING SIGNALS When beep sounds and the LED display shows warning signal, follow the guidance below to deal with. Visual signal Cause and Action The foot control has been disconnected while sewing. Turn OFF the power and connect the foot control. A button is pressed when the machine halts due to the overload.
-
Page 51: Troubleshooting
TROUBLESHOOTING Cause Reference Condition The needle thread The needle thread is not threaded properly. Page 13 breaks. The needle thread tension is too tight. Page 9 The needle is bent or blunt. Page 10 The needle is incorrectly inserted. Page 10 The needle thread and the bobbin thread are not set under the presser foot when start sewing.
-
Page 52
Printed in Taiwan 845-800-001(E)
-
Инструкции по эксплуатации
1

Janome QC 2325 (6260QC) инструкция по эксплуатации
(52 страницы)
- Языки:Русский
-
Тип:
PDF -
Размер:
4.72 MB -
Описание:
Швейная машина
Просмотр
На NoDevice можно скачать инструкцию по эксплуатации для Janome QC 2325 (6260QC). Руководство пользователя необходимо для ознакомления с правилами установки и эксплуатации Janome QC 2325 (6260QC). Инструкции по использованию помогут правильно настроить Janome QC 2325 (6260QC), исправить ошибки и выявить неполадки.
Страницы и текст этой инструкции
 Инструкция — 6260 QC
 Информация отображена на картинке
 Информация отображена на картинке
 Информация отображена на картинке
 Информация отображена на картинке
Как использовать наш сайт инструкций OnlineManuals.ru
Наша цель состоит в том, чтобы предоставить вам быстрый доступ к содержанию инструкции для — 6260 QC.
С помощью онлайн просмотра, Вы можете быстро просмотреть содержимое инструкции и найти решение проблемы с — 6260 QC.
Для Вашего удобства
Если листать руководство пользователя — 6260 QC прямо на сайте, не очень удобно для Вас, есть два возможных решения:
• Просмотр в полноэкранном режиме — легко просмотреть руководство пользователя (без загрузки его на свой компьютер), Вы можете использовать режим полноэкранного просмотра.
Для просмотра инструкции пользователя — 6260 QC на полном экране, используйте кнопку «Открыть в Pdf-viewer».
• Загрузка на компьютер — Вы можете также скачать Инструкция — 6260 QC на свой компьютер и сохранить его в файлах.
Многие люди предпочитают читать документы не на экране, а в печатной версии.
Возможность печати руководства пользователя также была предусмотрена на нашем сайте,
и вы можете использовать ее, нажав на иконку «печать» в Pdf-viewer.
Нет необходимости печатать все руководство — 6260 QC, можно выбрать только нужные страницы инструкции.
 Инструкция — 6260 QC
Информация отображена на картинке
Информация отображена на картинке
Информация отображена на картинке
Информация отображена на картинке
Как использовать наш сайт инструкций OnlineManuals.ru
Наша цель состоит в том, чтобы предоставить вам быстрый доступ к содержанию инструкции для — 6260 QC.
С помощью онлайн просмотра, Вы можете быстро просмотреть содержимое инструкции и найти решение проблемы с — 6260 QC.
Для Вашего удобства
Если листать руководство пользователя — 6260 QC прямо на сайте, не очень удобно для Вас, есть два возможных решения:
• Просмотр в полноэкранном режиме — легко просмотреть руководство пользователя (без загрузки его на свой компьютер), Вы можете использовать режим полноэкранного просмотра.
Для просмотра инструкции пользователя — 6260 QC на полном экране, используйте кнопку «Открыть в Pdf-viewer».
• Загрузка на компьютер — Вы можете также скачать Инструкция — 6260 QC на свой компьютер и сохранить его в файлах.
Многие люди предпочитают читать документы не на экране, а в печатной версии.
Возможность печати руководства пользователя также была предусмотрена на нашем сайте,
и вы можете использовать ее, нажав на иконку «печать» в Pdf-viewer.
Нет необходимости печатать все руководство — 6260 QC, можно выбрать только нужные страницы инструкции.