In this tutorial, you’ll learn how to create a pouch mockup using the Mesh Tool in Adobe Illustrator. We’ll create a set of three different stand-up pouch mockups!
If you’d like to skip the tutorial and just use this vector in your work, you can go ahead and purchase the Big Set of Plastic and Paper Packaging, and also browse Envato Elements’ library of pouch packaging mockups.


Ready to learn how to create a packaging design mockup in Illustrator? Let’s get started!
What You’ll Learn in This Pouch Mockup Tutorial
- How to create three pouch bag design templates
- How to use the Mesh Tool to create packaging bag mockups
- How to edit and add color to a mesh grid
1. How to Create the First Pouch Bag Design Template
Step 1
To begin drawing the first part of the first plastic pouch packaging mockup, create a rectangle, coloring it with #EEEEEE. Then, take the Mesh Tool (U) and, following the picture below, create a mesh grid.
Next, using the Mesh Tool (U), bend the rectangle to resemble the shape in the third section of this step. You can achieve it by moving the edge Mesh nodes.
To get rounded corners just like those in the bottom part of the shape, I recommend first converting the corner nodes with the Convert Anchor Point Tool (Shift-C).


Step 2
Now let’s start coloring the mesh grid! Using either the Mesh Tool (U) or the Direct Selection Tool (A), select the mesh nodes selected in section 1 of the screenshot below. Color these nodes with #DBDBDB via the Color Picker panel.
Next, add some more mesh nodes and bend them accordingly to achieve the shape shown in the second section below.
When you’re happy with your shape, color some more nodes (selected in the third section) with #D1D1D1.


Step 3
Finish this part of the plastic pouch packaging mockup by coloring the remaining nodes according to the screenshot below. You will need these colors:
#C6C6C6#F2F2F2#D0D0D0


Step 4
To make the second part of the flat bottom pouch mockup, create a grey (#DADADA) rectangle with a mesh grid, and then bend it and color it according to the screenshot below.
You will need these colors:
#DADADA#C6C6C6#E4E4E4#F2F2F2


Step 5
Attach both parts of the packaging bag mockup we’ve made so far. Bend and color the edge nodes so that they overlap and create a seamless illusion!
For easier manipulation, you can Group (Control-G) both elements.


Step 6
Create the third part of the plastic pouch packaging mockup with Gradient Mesh, following similar steps as in Steps 1 to 5. Use these colors:
#D3D3D3#7B7B7B#929292#9D9D9D#9F9F9F#BDBDBD


Step 7
Add the third part of the pouch packaging mockup to the others, just like in Step 5, completing the pouch mockup!


Step 8
Use the Rotate Tool (R) to rotate the finished flat bottom pouch mockup by -4°.


Step 9
Draw a shadow with a Radial Gradient from #979797 to white. Change its Transparency mode to Multiply. Then, place the shadow under the stand-up pouch template.


Step 10
The first packaging bag mockup should come out looking like this!


2. How to Create the Second Pouch Bag Design Template
Step 1
Let’s start the creation of the second packaging bag mockup by drawing a rectangle! For this element, we will need to use a rectangle with rounded edges.
You can use my measurements below with the Rounded Rectangle Tool. Once you’re happy with your shape, color it with #D9D9D9.
- Width: 122 px
- Height: 253 px
- Corner Radius: 4 px


Step 2
Continue by bending and coloring the shape with Gradient Mesh, creating the first piece of the stand-up pouch template.
#F0F0F0#C3C3C3#CCCCCC#E4E4E4#E3E3E3#D7D7D7#C7C7C7#D3D3D3


Step 3
Next, create the side of the pouch mockup. You will need these colors:
#B6B6B6#9A9A9A#ABABAB#AAAAAA#969696#C7C7C7


Step 4
For the third element of the packaging bag mockup, use these measurements:
- Width: 220 px
- Height: 150 px
- Corner Radius: 10 px


Step 5
Bend the rectangle and then color it with Gradient Mesh.
#CCCCCC#FFFFFF#9D9D9D#AFAFAF#ECECEC#969696


Step 6
In the Transparency panel, change the resulting element’s Transparency Mode to Multiply and its Opacity to 40%.


Step 7
To create the pouch mockup, put all the elements together, as shown below. Make sure that element 3 stays on top of the other pieces!


Step 8
To finish the pouch packaging mockup, place a shadow under it, just as we learned in the previous section.


3. How to Create the Third Pouch Bag Design Template
Step 1
Begin creating the mesh grid for the last plastic pouch packaging mockup.
Use these colors:
#E1E1E1#A5A5A5#C3C3C3


Step 2
Color the top part of the element.
#D6D6D6#ECECEC


Step 3
Add more nodes and colors to finish this piece of the plastic pouch packaging mockup.
#E8E8E8#BABABA#D0D0D0


Step 4
Create the second piece of the flat bottom pouch mockup with Gradient Mesh.
#B1B1B1#7C7C7C#8C8C8C#CCCCCC


Step 5
Create the third element of the pouch mockup.
#8C8C8C#636363#6E6E6E#545454


Step 6
Continue by creating a smaller piece for the stand-up pouch template.
#ABABAB#8C8C8C#9B9B9B


Step 7
Finish with another small piece for the pouch packaging mockup.
#969696#B7B7B7#636363#7A7A7A


Step 8
Put all of the elements together to create the flat bottom pouch mockup, as shown below!


Step 9
Add a shadow, and you’re done with this pouch packaging mockup!


Awesome Work, You Know How to Create a Pouch Mockup!
Now you know how to create a packaging design mockup in Illustrator. What now? You can try any of my other tutorials from my profile, or check out my portfolio on GraphicRiver, as well as the original set of elements, some of which we created today.


Discover More Amazing Product Mockups From Envato Elements!
If you don’t have the time to learn how to create a packaging design mockup in Illustrator, you can always visit Envato Elements’ library of pouch bag design templates! These ready-to-use templates will save you lots of time. Let’s review a few of the top pouch mockups.
1. Plastic Pouch Product Mock-Up (PSD, PDF)


Check out this high-quality plastic pouch mockup for your packaging design! It’s easy to customize via the smart object feature, and it comes with grouped and named layers, isolated shadows, and an editable background texture and color.
2. Product Bag Mock Up (PSD, PDF)


By purchasing this product bag mockup, you will receive four gorgeous, well-organized PSD files that are simple to customize. Using the smart object feature, you can modify everything about this mockup. Place your own design or replace the logo with the color you want!
3. Paper Bag Coffee Product Mockups (PSD, PDF)


This product mockup allows you to showcase your coffee packaging design professionally! It is available in PSD format with smart-object features to help you replace the current designs with your own within seconds.
4. Product Box Mockup (PSD)


This product box mockup uses smart object features to help you adjust your design. It’s incredibly simple to use and easy to recolor by using solid color layers.
The high resolution of this mockup allows it to be used for commercial purposes.
5. Doy Pack With Side Spout Mockups (PSD)


Present any of your pouch packaging designs using these doy pack with side spout mockups! They come complete with the smart object feature and well-named layers for your personalization needs.
Check Out More Mockup Tutorials!
In this tutorial, you’ll learn how to create a pouch mockup using the Mesh Tool in Adobe Illustrator. We’ll create a set of three different stand-up pouch mockups!
If you’d like to skip the tutorial and just use this vector in your work, you can go ahead and purchase the Big Set of Plastic and Paper Packaging, and also browse Envato Elements’ library of pouch packaging mockups.
Ready to learn how to create a packaging design mockup in Illustrator? Let’s get started!
What You’ll Learn in This Pouch Mockup Tutorial
- How to create three pouch bag design templates
- How to use the Mesh Tool to create packaging bag mockups
- How to edit and add color to a mesh grid
1. How to Create the First Pouch Bag Design Template
Step 1
To begin drawing the first part of the first plastic pouch packaging mockup, create a rectangle, coloring it with #EEEEEE. Then, take the Mesh Tool (U) and, following the picture below, create a mesh grid.
Next, using the Mesh Tool (U), bend the rectangle to resemble the shape in the third section of this step. You can achieve it by moving the edge Mesh nodes.
To get rounded corners just like those in the bottom part of the shape, I recommend first converting the corner nodes with the Convert Anchor Point Tool (Shift-C).
Step 2
Now let’s start coloring the mesh grid! Using either the Mesh Tool (U) or the Direct Selection Tool (A), select the mesh nodes selected in section 1 of the screenshot below. Color these nodes with #DBDBDB via the Color Picker panel.
Next, add some more mesh nodes and bend them accordingly to achieve the shape shown in the second section below.
When you’re happy with your shape, color some more nodes (selected in the third section) with #D1D1D1.
Step 3
Finish this part of the plastic pouch packaging mockup by coloring the remaining nodes according to the screenshot below. You will need these colors:
#C6C6C6#F2F2F2#D0D0D0
Step 4
To make the second part of the flat bottom pouch mockup, create a grey (#DADADA) rectangle with a mesh grid, and then bend it and color it according to the screenshot below.
You will need these colors:
#DADADA#C6C6C6#E4E4E4#F2F2F2
Step 5
Attach both parts of the packaging bag mockup we’ve made so far. Bend and color the edge nodes so that they overlap and create a seamless illusion!
For easier manipulation, you can Group (Control-G) both elements.
Step 6
Create the third part of the plastic pouch packaging mockup with Gradient Mesh, following similar steps as in Steps 1 to 5. Use these colors:
#D3D3D3#7B7B7B#929292#9D9D9D#9F9F9F#BDBDBD
Step 7
Add the third part of the pouch packaging mockup to the others, just like in Step 5, completing the pouch mockup!
Step 8
Use the Rotate Tool (R) to rotate the finished flat bottom pouch mockup by -4°.
Step 9
Draw a shadow with a Radial Gradient from #979797 to white. Change its Transparency mode to Multiply. Then, place the shadow under the stand-up pouch template.
Step 10
The first packaging bag mockup should come out looking like this!
2. How to Create the Second Pouch Bag Design Template
Step 1
Let’s start the creation of the second packaging bag mockup by drawing a rectangle! For this element, we will need to use a rectangle with rounded edges.
You can use my measurements below with the Rounded Rectangle Tool. Once you’re happy with your shape, color it with #D9D9D9.
- Width: 122 px
- Height: 253 px
- Corner Radius: 4 px
Step 2
Continue by bending and coloring the shape with Gradient Mesh, creating the first piece of the stand-up pouch template.
#F0F0F0#C3C3C3#CCCCCC#E4E4E4#E3E3E3#D7D7D7#C7C7C7#D3D3D3
Step 3
Next, create the side of the pouch mockup. You will need these colors:
#B6B6B6#9A9A9A#ABABAB#AAAAAA#969696#C7C7C7
Step 4
For the third element of the packaging bag mockup, use these measurements:
- Width: 220 px
- Height: 150 px
- Corner Radius: 10 px
Step 5
Bend the rectangle and then color it with Gradient Mesh.
#CCCCCC#FFFFFF#9D9D9D#AFAFAF#ECECEC#969696
Step 6
In the Transparency panel, change the resulting element’s Transparency Mode to Multiply and its Opacity to 40%.
Step 7
To create the pouch mockup, put all the elements together, as shown below. Make sure that element 3 stays on top of the other pieces!
Step 8
To finish the pouch packaging mockup, place a shadow under it, just as we learned in the previous section.
3. How to Create the Third Pouch Bag Design Template
Step 1
Begin creating the mesh grid for the last plastic pouch packaging mockup.
Use these colors:
#E1E1E1#A5A5A5#C3C3C3
Step 2
Color the top part of the element.
#D6D6D6#ECECEC
Step 3
Add more nodes and colors to finish this piece of the plastic pouch packaging mockup.
#E8E8E8#BABABA#D0D0D0
Step 4
Create the second piece of the flat bottom pouch mockup with Gradient Mesh.
#B1B1B1#7C7C7C#8C8C8C#CCCCCC
Step 5
Create the third element of the pouch mockup.
#8C8C8C#636363#6E6E6E#545454
Step 6
Continue by creating a smaller piece for the stand-up pouch template.
#ABABAB#8C8C8C#9B9B9B
Step 7
Finish with another small piece for the pouch packaging mockup.
#969696#B7B7B7#636363#7A7A7A
Step 8
Put all of the elements together to create the flat bottom pouch mockup, as shown below!
Step 9
Add a shadow, and you’re done with this pouch packaging mockup!
Awesome Work, You Know How to Create a Pouch Mockup!
Now you know how to create a packaging design mockup in Illustrator. What now? You can try any of my other tutorials from my profile, or check out my portfolio on GraphicRiver, as well as the original set of elements, some of which we created today.
Discover More Amazing Product Mockups From Envato Elements!
If you don’t have the time to learn how to create a packaging design mockup in Illustrator, you can always visit Envato Elements’ library of pouch bag design templates! These ready-to-use templates will save you lots of time. Let’s review a few of the top pouch mockups.
1. Plastic Pouch Product Mock-Up (PSD, PDF)
Check out this high-quality plastic pouch mockup for your packaging design! It’s easy to customize via the smart object feature, and it comes with grouped and named layers, isolated shadows, and an editable background texture and color.
2. Product Bag Mock Up (PSD, PDF)
By purchasing this product bag mockup, you will receive four gorgeous, well-organized PSD files that are simple to customize. Using the smart object feature, you can modify everything about this mockup. Place your own design or replace the logo with the color you want!
3. Paper Bag Coffee Product Mockups (PSD, PDF)
This product mockup allows you to showcase your coffee packaging design professionally! It is available in PSD format with smart-object features to help you replace the current designs with your own within seconds.
4. Product Box Mockup (PSD)
This product box mockup uses smart object features to help you adjust your design. It’s incredibly simple to use and easy to recolor by using solid color layers.
The high resolution of this mockup allows it to be used for commercial purposes.
5. Doy Pack With Side Spout Mockups (PSD)
Present any of your pouch packaging designs using these doy pack with side spout mockups! They come complete with the smart object feature and well-named layers for your personalization needs.
Check Out More Mockup Tutorials!
-
-
June 21 2016, 14:31
- Дети
- Cancel
Ребята, привет.
Сейчас такая жара, что мозг просто не хочет ничего делать, и заставить сдвинуться с места себя очень не просто.
Но не смотря на это, все же каст будет проведен:)
Сразу ссылка:
ИЗ приятного: болванку мокапа я подготовлю заранее, потому посвятим время, непосредственно, «разукрашиванию» и распределением свето теней.
Когда: Четверг, 18:07(Мск/Киев), 23 июня.
По плану: Временные рамки в этот раз также будут в районе 2-2,5 часов.
До встречи в четверг!:)
Что общего между красивым сайтом, фанатский мерчем, обложкой книги и визиткой? В производстве каждой из этих вещей принимают участие дизайнеры. Это борцы творческого фронта, без которых уже трудно представить современный мир. Но мало придумать красивый дизайн, нужно его правильно презентовать заказчику, чтобы ему понравилось и хотелось внести меньше правок. Сделать убедительную презентацию поможет mock-up. В этой статье мы расскажем, что такое мокап.
Mock-up ― что это и для чего он нужен?
Мокап ― это макет продукта с помещённым на нём дизайнерским решением. С помощью mock-up заказчик может увидеть свой продукт «в деле». Mock-up может быть как электронный, так и физический. Электронный вариант макетов используют для демонстрации рекламной и PR-продукции. Физически реализованные макеты распространены в сфере самолётостроения и строительства. В этой статье мы будем говорить об электронных мокапах.
При создании демонстрационного материала создаётся не просто картинка, а трёхмерное изображение, что ещё больше приближает электронный макет к реалистичности. Мокапы могут понадобиться в разных ситуациях, но чаще всего их используют для демонстрации:
- фирменного стиля,
- обложки книги,
- буклетов,
- визиток,
- мерча,
- POS-материалов.
Электронные макеты популярнее материальных из-за своей дешевизны. Печать — это дорого, особенно если распечатать нужно не просто буклет, а, например, этикетку для нестандартной упаковки или даже билборд. Также стоит помнить о правках, без которых редко обходятся заказчики. Таким образом, вам придётся снова и снова распечатывать новые варианты. Такой подход не экономичен и не экологичен.
Мокап помогает не только при демонстрации дизайна, но и при создании самого изображения. Дизайнер помещает макет на предмет и смотрит, как улучшить свою работу.
Чем отличается mock-up, wireframe, sketch и prototype
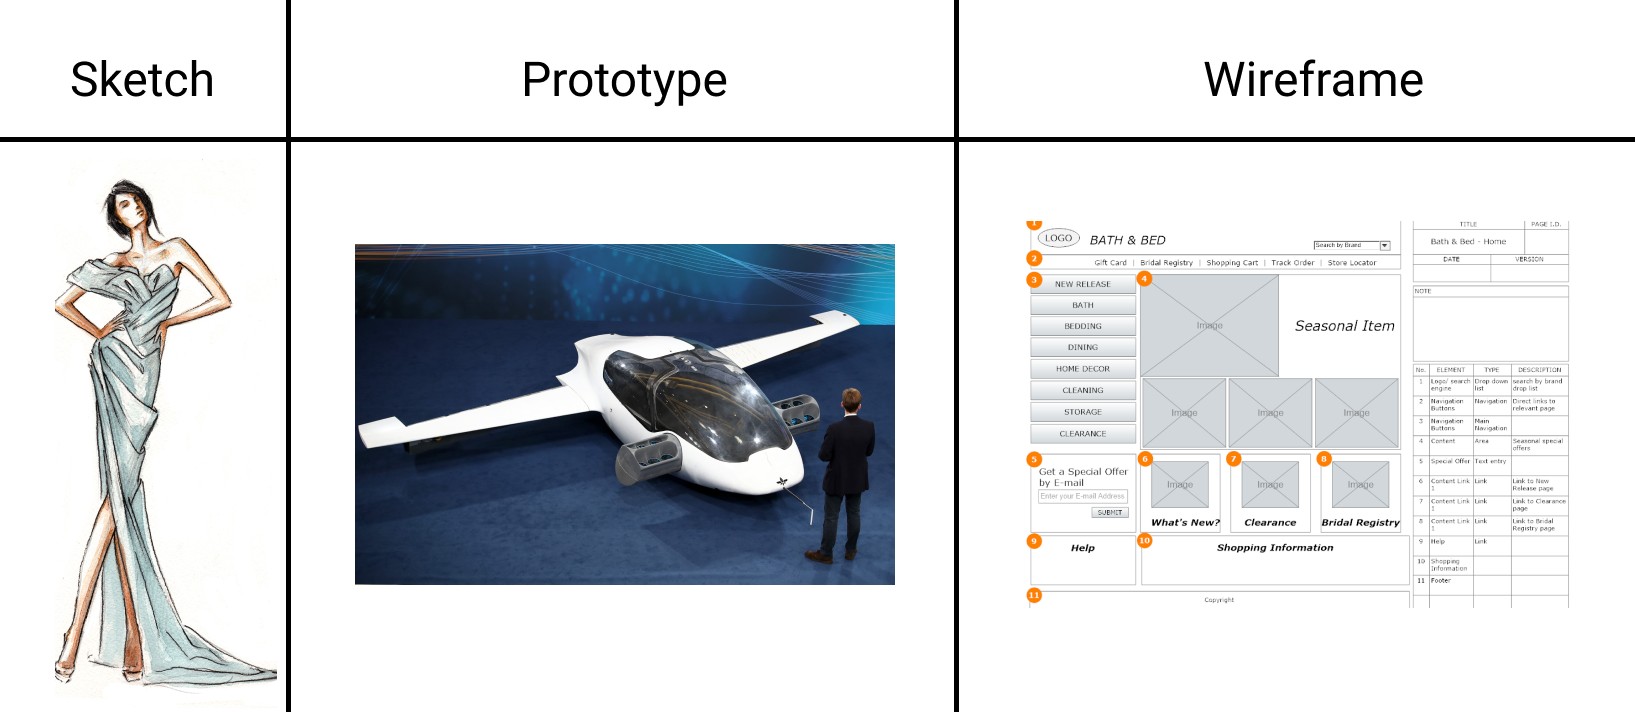
Кроме mock-up, есть понятия wireframe, sketch и prototype. Их часто путают между собой.
Sketch (скетч) ― это набросок, зарисовка, идея. В нём нет конкретики. Результат может в корне отличается от первого наброска. Задача скетча ― зафиксировать идею. Ими часто пользуются модные дизайнеры, когда придумывают одежду.
Wireframe ― это схема проекта. Часто wireframe называют мокапом для сайта. Но у них есть большие отличия. Wireframe отражает визуальный «скелет» без иллюстраций и декоративных элементов. Яркий пример wireframe ― каркас сайта. Он создаётся, чтобы познакомиться с основными блоками и функциями будущего сайта. Веб-макет показывает, где будет меню, основные кнопки, блоки с текстом и другие элементы, каких приблизительно размеров они будут.
Prototype ― это близкий к готовности продукт. Его можно попробовать в действии. Например, в прототипе сайта должны работать все страницы, кнопки и ссылки.
Как создать mock-up
Мы говорили, что электронный мокап дешевле, чем физический макет, но всё-таки сделать его не так-то просто. Дело в том, что к разработанному дизайну нужно подготовить и макеты предметов, на которых будет располагаться созданная картинка.
Шаблоны демонстрационных материалов можно создать самостоятельно или скачать уже готовые. Для самостоятельного создания шаблона продукта можно использовать любую программу для рисования. Определёнными фаворитами сейчас являются:
-
Adobe Illustrator,
-
Adobe Photoshop,
-
Figma.
Выбор программы зависит от продукта. Чтобы создать мокапы сайтов, лучше работать в Figma. Эта программа разработана в первую очередь для создания веб-дизайна. Однако здесь получаются скорее прототипы, нежели мокапы.
Если речь идёт о материальных продуктах, понадобятся более сложные программы. Так как шаблон должен быть объёмным, рисовать его проще всего в программе Adobe Illustrator. В ней есть функция 3D-моделирования, что значительно упрощает задачу.
Рисование шаблонов продуктов ― процесс долгий и трудоёмкий. Дабы сэкономить время дизайнеры пользуются уже готовыми шаблонами, которые размещаются на интернет-ресурсах. Для работы с готовыми шаблонами больше подходит Adobe Photoshop. В программу нужно поместить скачанный шаблон и объединить его с созданным дизайном.
Откуда взять шаблон mock-up и как с ним работать
Стоков с шаблонами для мокапов немало. Мы разберём только 5 из них, которые, по нашему мнению, имеют хорошую базу иллюстраций.
-
Mockupworld ― англоязычный ресурс с большой базой мокапов. Здесь есть не только шаблоны книг, вывесок и iPhone, но и макеты косметической продукции, медицинских масок и даже грузовиков. При регистрации обещают подарок ― 10 бесплатных эксклюзивных макетов. Сервис сотрудничает с сервисом Placeit, о котором ниже мы поговорим подробнее. Обратите внимание! Так как это англоязычный сайт, вводить запрос в поиске по сайту придётся на английском языке. Кириллицу он не воспринимает.
-
Freepik ― это сток, в котором есть не только макеты для мокапов, но и иконки, изображения, векторные иллюстрации, фотографии. Поэтому при покупке подписки вы получаете доступ не только к шаблонам, но и к библиотеке других творческих материалов. В отличие от Mockupworld он понимает русский язык, поэтому в поиск можно вводить запросы как на английском, так и на русском языке.
-
Freemockup ― это русскоязычный сервис, что значительно облегчит поиск нужного макета. По сравнению с предыдущими сервисами у Freemockup не такая обширная библиотека, однако все стандартные макеты есть.
-
Mockups-design ― ещё один англоязычный сервис. Библиотека небольшая. В основном специализируются на традиционной рекламной и сувенирной продукции. Их главное достоинство ― минимализм макетов. Всё просто, но со вкусом.
-
PSD Freebies ― интересная онлайн-библиотека макетов с необычными шаблонами. Тут вам и шоперы в кухонном интерьере и бумажный кофейный стаканчик на бордюре и даже макеты ароматических свечек. Если вы ищете что-то необычное, загляните на этот сайт.
Как использовать мокап, скачанный из библиотеки? Макеты предназначены для работы с программой Adobe Photoshop. С каждого из этих сайтов скачивается zip-документ, в котором есть инструкция по использованию макета, и PSD документ с самим макетом. Откройте макет в Photoshop. Традиционный файл PSD будет состоять из слоёв. Один из слоёв будет предназначен для того, чтобы в него вставили другой дизайн. Обычно он называется «Your design here» или подобным образом. Вам остаётся только вставить свою картинку в этот слой. При желании можно поиграться с цветами. Например, чтобы показать, как будет выглядеть логотип на продуктах разного цвета. Готово, вы можете презентовать свою работу.
Как работать с мокапами? Онлайн-сервис для создания мокапа
Те, у кого нет Illustrator, Photoshop или Figma, могут воспользоваться онлайн-сервисом. Одним из таких сервисов является Placeit. Он прост в использовании, у него есть большая база макетов и отличный онлайн-генератор, который самостоятельно поместит ваше изображение на шаблон. На каждом шаблоне указаны размеры. Таким образом, вы будете уверены в параметрах своего мокапа. Для примера давайте вместе попробуем воспользоваться этим сервисом.
-
Выберите подходящий шаблон.
-
Чтобы загрузить свой дизайн, нажмите на кнопку Insert Image.
Онлайн-генератор сам поместит ваш дизайн на макет. Вот, что получилось у нас:

К сожалению, сервис платный. Скачать созданный мокап без оплаты не получится. Выгоднее всего брать годовую подписку. Она стоит 90$. Учитывая количество готовых шаблонов, это отличное вложение для дизайнера.
Проблемы с использованием готовых мокапов
Как пользоваться мокапами, скачанными из интернета мы рассказали, но неужели с ними всё так просто? К сожалению, нет. Вы можете столкнуться с такими проблемами, как:
-
Нестандартные заказы. Иногда заказчики хотят дизайн для необычных по форме предметов или размеров. В этом случае библиотеки шаблонов не помогут и придётся делать макет самому.
-
Размеры макетов на англоязычных сайтах могут не подходить под российские стандарты. Здесь в большей степени идёт речь о полиграфии. В России есть определённые стандарты типографий, на которые ориентируются дизайнеры. Они могут отличаться от европейских и американских стандартов. Это может вызывать сложность при поиске подходящего макета. Будьте внимательны, ведь ошибка в размерах может испортить всю выпущенную партию напечатанного продукта.
-
Перегруженность макета. Создатели макетов создают всё новые и новые шаблоны. Некоторые из шаблонов иногда выглядят перегруженными. Такие материалы лучше не выбирать. Цель мокапа ― презентовать созданный дизайн. Макет продукта может быть атмосферным, но он не должен затмевать работу дизайнера. Отдавайте предпочтение минималистичным шаблонам. С ними сложнее промахнуться.
Примеры mock-up
И напоследок покажем мокапы для фотошопа для разных продуктов.
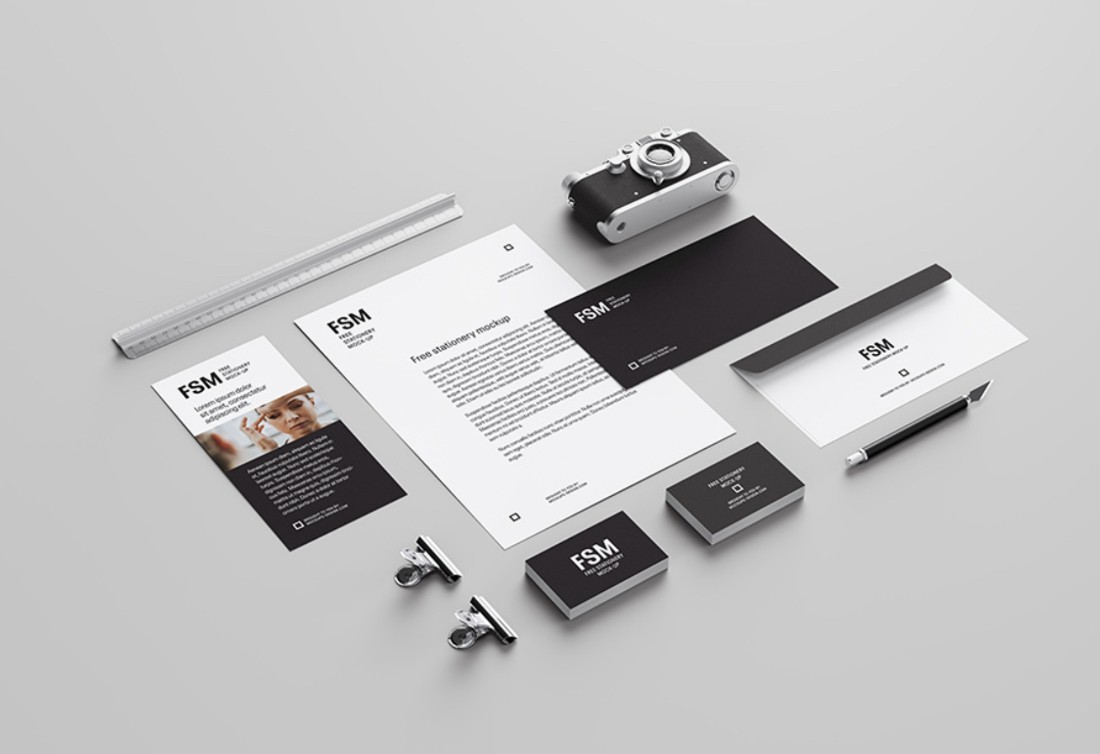
Канцелярия и полиграфия
На канцелярии и полиграфии часто помещают элементы фирменного стиля (мокап логотипа, шрифт, фирменные цвета). Именно такие мелочи позволяют компании произвести приятное первое впечатление.
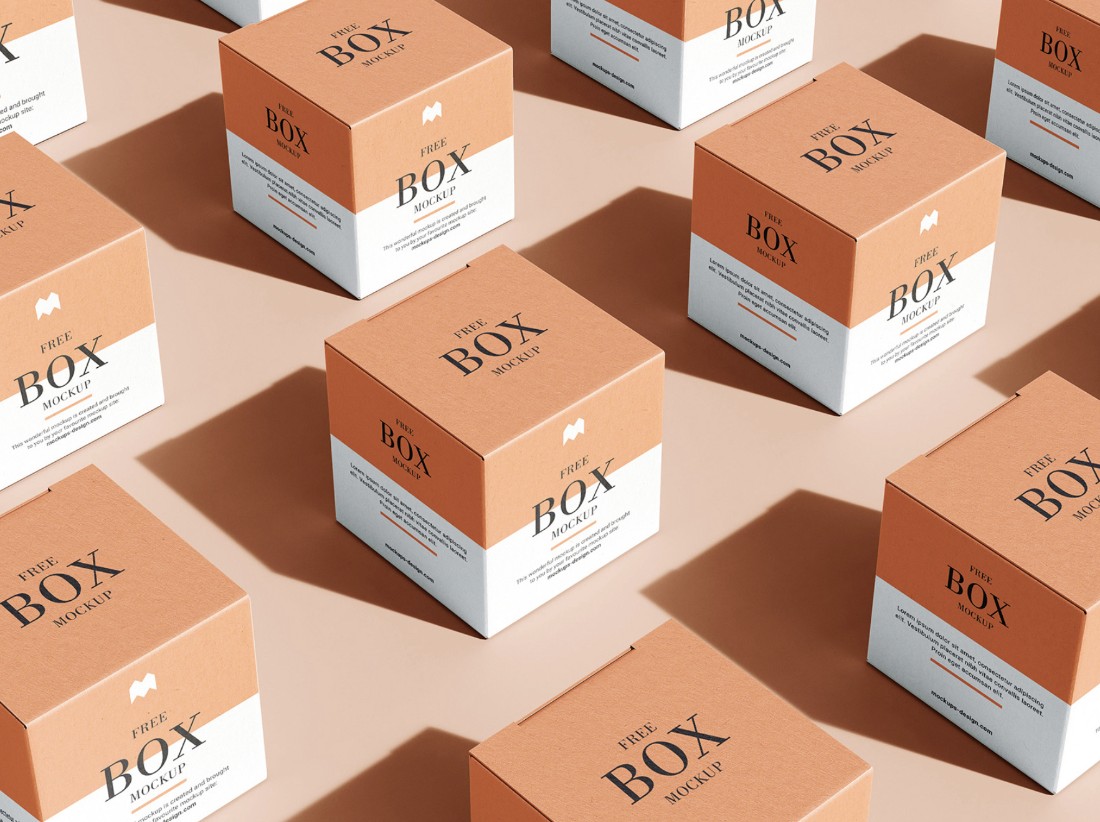
Упаковка
Найти подходящий готовый шаблон для мокапа упаковки ― высший пилотаж. Здесь нет никаких стандартов, как это принято в полиграфии. Однако библиотеки шаблонов уже настолько обширные, что поискать нужный объект стоит. Вот, например, шаблон упаковки для крема:
Вывеска
Если вы готовите дизайн для наружной рекламы или мокап вывески, лучше показывать на макете, который сымитирует элементы городского пространства. Хотя бы немного.

Если вы смогли создать дизайн для продукта, сделать его презентацию для вас не будет сложной задачей. Особенно с таким количеством сервисов-помощников. Не торопитесь делать мокап. Выделите на него время.
Чем убедительнее вы представите свою работу, тем меньше правок понадобится вносить в проект. Старайтесь делать макеты объёмными. Если вы рисуете их с нуля, не забывайте про тени. Удачи в творческом пути!

Похожие видео
PART 1. Mock-Up in illustrator./ Работа с мокапом в иллюстратореСкачать

Похожие видео
PART 1. Mock-Up in illustrator./ Работа с мокапом в иллюстратореСкачать
МОКАПЫ: Где скачать и как пользоваться? ПРИМЕР. ШАГ ЗА ШАГОМ.Скачать
Похожие видео
PART 1. Mock-Up in illustrator./ Работа с мокапом в иллюстратореСкачать
Похожие видео
PART 1. Mock-Up in illustrator./ Работа с мокапом в иллюстратореСкачать
МОКАПЫ: Где скачать и как пользоваться? ПРИМЕР. ШАГ ЗА ШАГОМ.Скачать
Как пользоваться мокапами в фотошопе | Как вставить картинку в мокап | adobe illustratorСкачать

Как пользоваться мокапами в фотошопе | Как вставить картинку в мокап | adobe illustratorСкачать
Adobe Illustrator Полный курс №40 Презентация своих проектов Используем мокапыСкачать

Как пользоваться мокапами в фотошопе | Как вставить картинку в мокап | adobe illustratorСкачать
Adobe Illustrator Полный курс №40 Презентация своих проектов Используем мокапыСкачать
МОКАПЫ БЕЗ СКАЧИВАНИЯ ФОТОШОПА | КАК РАБОТАТЬ С МОКАПАМИ | MOCKUPS | КАК ДЕЛАТЬ И ЧТО ТАКОЕ МОКАПЫСкачать

МОКАПЫ БЕЗ СКАЧИВАНИЯ ФОТОШОПА | КАК РАБОТАТЬ С МОКАПАМИ | MOCKUPS | КАК ДЕЛАТЬ И ЧТО ТАКОЕ МОКАПЫСкачать
Дополнительные материалы
МОКАПЫ — Хватит использовать их НЕПРАВИЛЬНО!Скачать

МОКАПЫ БЕЗ СКАЧИВАНИЯ ФОТОШОПА | КАК РАБОТАТЬ С МОКАПАМИ | MOCKUPS | КАК ДЕЛАТЬ И ЧТО ТАКОЕ МОКАПЫСкачать
Дополнительные материалы
МОКАПЫ — Хватит использовать их НЕПРАВИЛЬНО!Скачать
ЧТО ТАКОЕ МОКАПЫ? КАК ПОЛЬЗОВАТЬСЯ МОКАПАМИ? И ГДЕ ВЗЯТЬ БЕСПЛАТНЫЕ МОКАПЫ?Скачать

ЧТО ТАКОЕ МОКАПЫ? КАК ПОЛЬЗОВАТЬСЯ МОКАПАМИ? И ГДЕ ВЗЯТЬ БЕСПЛАТНЫЕ МОКАПЫ?Скачать
КАК СОЗДАТЬ СВОЙ МОКАП С ФУТБОЛКОЙ. УРОК В ADOBE PHOTOSHOPСкачать

ЧТО ТАКОЕ МОКАПЫ? КАК ПОЛЬЗОВАТЬСЯ МОКАПАМИ? И ГДЕ ВЗЯТЬ БЕСПЛАТНЫЕ МОКАПЫ?Скачать
КАК СОЗДАТЬ СВОЙ МОКАП С ФУТБОЛКОЙ. УРОК В ADOBE PHOTOSHOPСкачать
Ликбез: мокап для иллюстратораСкачать

Ликбез: мокап для иллюстратораСкачать
Как сделать отличный Mockup за 30 секунд!Скачать

Ликбез: мокап для иллюстратораСкачать
Как сделать отличный Mockup за 30 секунд!Скачать
КАК СОЗДАТЬ ВИЗИТНУЮ КАРТОЧКУ и ПОДГОТОВИТЬ ЕЁ ДЛЯ ПЕЧАТИ В ADOBE ILLUSTRATOR. ОСНОВНЫЕ ОШИБКИ.Скачать
КАК СОЗДАТЬ ВИЗИТНУЮ КАРТОЧКУ и ПОДГОТОВИТЬ ЕЁ ДЛЯ ПЕЧАТИ В ADOBE ILLUSTRATOR. ОСНОВНЫЕ ОШИБКИ.Скачать
Мокап брошюры в 3д Макс и Фотошоп. Не урок. Часть 2/Creating a mock-up in 3d and Photoshop. Part 2.Скачать

КАК СОЗДАТЬ ВИЗИТНУЮ КАРТОЧКУ и ПОДГОТОВИТЬ ЕЁ ДЛЯ ПЕЧАТИ В ADOBE ILLUSTRATOR. ОСНОВНЫЕ ОШИБКИ.Скачать
Мокап брошюры в 3д Макс и Фотошоп. Не урок. Часть 2/Creating a mock-up in 3d and Photoshop. Part 2.Скачать
Мокап или mockup — это заранее созданное изображение, макет, куда помещают свой дизайн. Видели на сайтах абсолютно одинаковые футболки с разными принтами или губы с разными цветами помад? Это и есть мокапы, когда на одном объекте (это может быть что угодно: футболка, кружка, визитка, губы, обложка книги, кофейный стаканчик) размещают разные шрифты, логотипы, фоны.
Рассказываем, как сделать мокап самому, какие они бывают, зачем нужны и как работать с готовыми мокапами для Фотошопа.
Какие бывают мокапы
Как сделать мокап
Мокапы для Фотошопа — как с ними работать
 Это шаблон со стокового фотохостинга, который легко превратить в мокап / Фото: unsplash.com
Какие бывают мокапы
Мокап помогает увидеть, как дизайн или изображение будут выглядеть на предмете: билборде на улице, экране телефона, блокноте, носках, кружках. Благодаря нему вы показываете заказчику наглядно и реалистично вид будущего продукта. Сами представьте, что лучше: сделать логотип и отправить файлом, либо поместить его на «готовую» бутылку или визитку и показать, каким он будет в жизни?
Это экономит бюджет и даёт свободу. Вместо того, чтобы нанимать фотографа и ретушёра, платить модели за съёмку целой коллекции футболок и всё начинать сначала, если вдруг захочется что-то изменить, достаточно получить одну универсальную модель абстрактной футболки, на которую можно ставить разные принты и публиковать сразу на сайт.
Чтобы понять, как сделать мокап, нужно разобраться в их видах. Одни подходят для новичков, а для других нужно уметь работать сразу в нескольких графических редакторах.
- 3d-модель. Это созданный с нуля «чистый» объект. Чтобы сделать такой мокап, нужно уметь работать в 3d-редакторах: Blender, 3ds Max, Cinema4D и т.д. Если нет времени осваивать новую профессию, модель можно купить у специалиста или попытаться скачать бесплатно.
 Пример мокапа в формате 3d-модели / Фото: unsplash.com
- Фото-мокап. Если фотография вам ближе, можно подобрать «стерильный» объект, сфотографировать, отретушировать или найти готовый снимок на стоке, а после накладывать принты, логотипы и надписи в Фотошопе. Например, чтобы примерять дизайны на кружки, футболки, визитки, достаточно сделать по одной фотографии каждого объекта без принта.
- Скачанные мокапы. В интернете можно найти бесплатные мокапы. Это готовые psd-файлы, на которые с помощью Фотошопа можно накладывать свои изображения. Удобно, если готовый мокап подходит по форме. Если же у вашего продукта уникальный дизайн, то без 3d-моделирования или фотосъёмки не обойтись.
 Скриншот с сайта с бесплатными мокапами для Фотошопа / Иллюстрация: Елизавета Чечевица, Фотосклад.Эксперт
- Мокапы, созданные на сайтах. Есть множество платных и бесплатных сервисов, где новичок, который никогда не открывал даже Paint, может сделать свой мокап. Достаточно выбрать шаблон и перенести на него свою картинку.
3d-моделирование — это огромная индустрия и сложная профессия, которой не обучиться за пару абзацев. Если нужен индивидуальный мокап и поджимает время, проще всего обратиться к специалисту.
Ниже мы расскажем, как сделать мокап из фотографии и как работать в Фотошопе с готовым мокапом, скачанным бесплатно из интернета.
Как сделать мокап
Если вам важно сделать мокап с нуля и не беспокоиться о том, что готовый скачанный шаблон не подходит и не уникален, воспользуйтесь Фотошопом и нашей пошаговой инструкцией.
1. Сфотографируйте объект сами или найдите на фотостоках. Например, для этой инструкции автор нашёл подходящую фотографию на бесплатном стоке.
2. Откройте изображение в Фотошопе.
3. Возьмите инструмент Прямоугольник / Rectangle Tool. Найти его можно на панели инструментов слева или с помощью горячей клавиши U.
4. Создайте поверх объекта прямоугольник. Для этого растяните его из одного угла в другой левой кнопкой мыши.
 Точно размер и форму подгонять не нужно — это чуть позже / Иллюстрация: Елизавета Чечевица, Фотосклад.Эксперт / Фото: piqsels.com
5. В меню Окно / Windows откройте палитру Слои / Layers. Вы увидите слой с прямоугольником, который так и будет называться. Кликните по нему правой кнопкой мыши и выберите Преобразовать в смарт-объект / Convert to Smart Object.
 Это обязательный шаг, который нельзя пропускать / Иллюстрация: Елизавета Чечевица, Фотосклад.Эксперт
6. Теперь пришло время подогнать форму! Нажмите по прямоугольнику правой кнопкой мыши и выберите Свободное трансформирование / Free Transform. Это позволит передвинуть прямоугольник, изменить его размер.
Чтобы подогнать будущий мокап под форму идеально, нажмите ещё раз правой кнопкой мыши и выберите Искажение / Distort.
 Теперь, передвигая квадратики вокруг прямоугольника, можно сделать форму ещё точнее / Иллюстрация: Елизавета Чечевица, Фотосклад.Эксперт
Если и этого мало, как в нашем случае, потому что стакан округлой формы, нажмите правой кнопкой ещё раз и выберите Деформация / Warp.
 Из-за деформации прямоугольник идеально «лёг» на стакан / Иллюстрация: Елизавета Чечевица, Фотосклад.Эксперт
7. Добавляем на макет дизайн! Кликните два раза по слою с прямоугольником — смарт-объект откроется в отдельном документе. Добавьте на этот новый документ с прямоугольником логотип, текст, изображение с дизайном. Если у вас изображение, перетащите его из папки мышью или откройте через команду Ctrl + O. Если вам нужен текст, добавьте его через инструмент фотошопа Текст / Text.
 Автор добавил фон, скачанный со стока, а сверху — текст. Всё это происходит в файле смарт-объекта с прямоугольником / Иллюстрация: Елизавета Чечевица, Фотосклад.Эксперт
Важно: когда вы закончите все манипуляции с будущим мокапом, сохраните смарт-объект с прямоугольником. Для этого нажмите Ctrl + S или Файл / File — Save / Сохранить.
8. Изменения применились на файле с кофейным стаканчиком. Если после применения дизайна вы видите огрехи в форме мокапа, повторите пункт шесть. В один файл со смарт-объектом можно добавить множество вариантов дизайнов.
 Добавить реалистичности мокапу можно, меняя у слоя с Прямоугольником режимы наложения и непрозрачность. Автор поставил режим Линейный затемнитель / Linear Burn и Непрозрачность / Opacity 79% / Иллюстрация: Елизавета Чечевица, Фотосклад.Эксперт
Чтобы сделать надпись более реалистичной, трансформируйте и её тоже! Для этого откройте смарт объект, выберите слой с текстом и нажмите Ctrl + T. Так вы окажетесь в режиме трансформирования текста. Чтобы придать ему изгиб, кликните по нему правой кнопкой мыши, выберите Деформация / Warp. Деформировать можно как вручную, сдвигая сетку, так и с помощью пресетов — они находятся наверху в строке Деформация / Warp.
 Стакан с другим фоном и ручной деформацией текста / Иллюстрация: Елизавета Чечевица, Фотосклад.Эксперт
Важно: чтобы всегда иметь доступ к файлу со смарт-объектом, сохраняйте документ в формате .PSD.
Мокапы для Фотошопа — как с ними работать
А как быть, если создавать свой проект не хочется или слишком тяжело? Естественно, скачать готовый мокап в интернете! Рассказываем, как работать со скачанными мокапами для Фотошопа.
1. Скачайте мокап бесплатно или купите на специальном сайте. В любом поисковике по соответствующему запросу найдется много ресурсов.
2. В результате вы получите архив с файлом в формате PSD. Разархивируйте его и откройте документ в Фотошопе.
 Вы увидите мокап в формате .PSD со множеством групп и слоями в них. Они все подписаны, а те, которые поддаются изменению — выделены красным / Иллюстрация: Елизавета Чечевица, Фотосклад.Эксперт / Мокап: Tatiana Teplukhina, psdmockup.ru
3. Меняем цвета и изображение.
Чтобы изменить цвет крышки, нажмите дважды на красный квадратик на слое, который называется Change Cap Color, а для изменения фона — на нижний серый квадратик, названный Change Background Color.
Чтобы изменить главное — логотип — дважды нажмите на слой смарт-объект, который называется YOUR IMAGE HERE. Вы окажетесь в отдельном документе смарт-объекта, где находится только базовый логотип. Вставьте поверх него любую картинку, логотип, надпись и нажмите Ctrl + S или Файл / File — Save / Сохранить.
 После сохранения результат тут же отобразится в файле с мокапом / Иллюстрация: Елизавета Чечевица, Фотосклад.Эксперт
4. Готово. Чтобы в любой момент у вас был доступ к мокапу со всеми слоями, сохраняйте его в формате .PSD. Так его можно передавать другим людям, которые смогут его открыть в таком же виде и с такими же настройками.

Show your vision!
A great way to show the world the product that you visualize with your pattern, is by using mockups.
There are different ways that you can create mockups. But you may have notice that some of them looks realistic, and others, simply don’t.
There are many places to buy high quality mockups, such as Creative Market. They are usually an Adobe Photoshop document with specific layers to place your designs and, just like magic, they adjust in perspective and transparency to look as if the product is already produced.
Adobe offers their programs as a subscription. Which means as long as you pay for the subscription, monthly or yearly, you have access to their programs. You can pay a subscription to all their programs or just pay for one.
In this blog I will be showing you how to create realistic mockups for your surface design patterns only with Adobe Illustrator. Yes, it is possible!
The first thing that you will need to find is a picture of the product that you want to place your art in, with a white surface.
I suggest you avoid search engines such as Google or Bing, to look for your photos. Try websites that offer free images with the photographers’ permission. My favorite is Unsplash because it consistently delivers what I am looking for.
You could also buy a stock photo from Adobe Stock or iStock.
Just make sure that wherever you are getting your photo, you read the license information to know what you are allowed or not allowed to do with that photo.
And of course, you could always take your own photos! You just need a well light place and the product of your preference.
Let’s go step by step to create our mockup in Adobe Illustrator.
1. Search for your image and download it
One of my favorite products to place my surface pattern designs are throw pillows. So, I did a search by “white throw pillow” and found this image by Mediamodifier. Just below the photo you can confirm the license agreement for it.

I always download the image in the “Original Size”. Because once you have something in high quality, you can always export it in a lower quality. But if your image is low quality, you won’t be able to make it better no matter how many tricks you pull out of your pocket.
Also, it is always nice to say thanks to the creator of the image. In my case I do it through Twitter.

2. Place your image in a new document in Adobe Illustrator and lock it.

3. Use the Pen Tool to trace the border of the object that you want your design to be placed in.
You will need to set both your fill and stroke to none and zoom in to be able to see better the border that you are tracing.

4. Select the pattern that you will like to use in your pillow, or any other product, from the swatches.
With your trace selected, and the fill on front, open your swatches panel and select your pattern.

You may need to make some adjustments to your tracing at this point.

5. Adjust the transparency mode of your object.
Select your patten shape and go to the transparency panel. From the dropdown select the mode “multiply”. If you need to, you can also adjust the transparency of the pattern.
You will instantly see how the textures of the white surface shows through the pattern and it looks realistic.


6. Export your image!
That’s it! Just export your image to use in your portfolio, social media, or website!

Must haves…
Creating realistic mockups in Adobe Illustrator is possible. You just need a white surface and some patience.
If you don’t understand how to use the Pen Tool, I have a Skillshare class called «Create Vector Art from Photos: All the Tools to Vectorize in Adobe Illustrator» that teaches you how to use all of the drawing/tracing tools inside Illustrator. If you don’t have a Skillshare account, through that link you can get a 1 month free trial to watch it.
I hope you find this blog helpful. See you around!
This blog is a space to learn about design. I invite you to join my mailing list. This way you will receive a monthly email with my blog post. I respect your privacy and will never share your personal information.
On this tutorial, you will discover ways to create a pouch mockup utilizing the Mesh Device in Adobe Illustrator. We’ll create a set of three totally different stand-up pouch mockups!
If you would like to skip the tutorial and simply use this vector in your work, you possibly can go forward and buy the Large Set of Plastic and Paper Packaging, and likewise browse Envato Components‘ library of pouch packaging mockups.
Able to discover ways to create a packaging design mockup in Illustrator? Let’s get began!
What You may Be taught in This Pouch Mockup Tutorial
- create three pouch bag design templates
- use the Mesh Device to create packaging bag mockups
- edit and add coloration to a mesh grid
1. Create the First Pouch Bag Design Template
Step 1
To start drawing the primary a part of the primary plastic pouch packaging mockup, create a rectangle, coloring it with #EEEEEE. Then, take the Mesh Device (U) and, following the image under, create a mesh grid.
Subsequent, utilizing the Mesh Device (U), bend the rectangle to resemble the form within the third part of this step. You possibly can obtain it by shifting the sting Mesh nodes.
To get rounded corners similar to these within the backside a part of the form, I like to recommend first changing the nook nodes with the Convert Anchor Level Device (Shift-C).
Step 2
Now let’s begin coloring the mesh grid! Utilizing both the Mesh Device (U) or the Direct Choice Device (A), choose the mesh nodes chosen in part 1 of the screenshot under. Shade these nodes with #DBDBDB through the Shade Picker panel.
Subsequent, add some extra mesh nodes and bend them accordingly to attain the form proven within the second part under.
Once you’re pleased together with your form, coloration some extra nodes (chosen within the third part) with #D1D1D1.
Step 3
End this a part of the plastic pouch packaging mockup by coloring the remaining nodes in keeping with the screenshot under. You will want these colours:
#C6C6C6#F2F2F2#D0D0D0
Step 4
To make the second a part of the flat backside pouch mockup, create a gray (#DADADA) rectangle with a mesh grid, after which bend it and coloration it in keeping with the screenshot under.
You will want these colours:
#DADADA#C6C6C6#E4E4E4#F2F2F2
Step 5
Connect each components of the packaging bag mockup we have made up to now. Bend and coloration the sting nodes in order that they overlap and create a seamless phantasm!
For simpler manipulation, you possibly can Group (Management-G) each components.
Step 6
Create the third a part of the plastic pouch packaging mockup with Gradient Mesh, following related steps as in Steps 1 to five. Use these colours:
#D3D3D3#7B7B7B#929292#9D9D9D#9F9F9F#BDBDBD
Step 7
Add the third a part of the pouch packaging mockup to the others, similar to in Step 5, finishing the pouch mockup!
Step 8
Use the Rotate Device (R) to rotate the completed flat backside pouch mockup by -4°.
Step 9
Draw a shadow with a Radial Gradient from #979797 to white. Change its Transparency mode to Multiply. Then, place the shadow underneath the stand-up pouch template.
Step 10
The primary packaging bag mockup ought to come out wanting like this!
2. Create the Second Pouch Bag Design Template
Step 1
Let’s begin the creation of the second packaging bag mockup by drawing a rectangle! For this aspect, we might want to use a rectangle with rounded edges.
You should utilize my measurements under with the Rounded Rectangle Device. When you’re pleased together with your form, coloration it with #D9D9D9.
- Width: 122 px
- Peak: 253 px
- Nook Radius: 4 px
Step 2
Proceed by bending and coloring the form with Gradient Mesh, creating the primary piece of the stand-up pouch template.
#F0F0F0#C3C3C3#CCCCCC#E4E4E4#E3E3E3#D7D7D7#C7C7C7#D3D3D3
Step 3
Subsequent, create the aspect of the pouch mockup. You will want these colours:
#B6B6B6#9A9A9A#ABABAB#AAAAAA#969696#C7C7C7
Step 4
For the third aspect of the packaging bag mockup, use these measurements:
- Width: 220 px
- Peak: 150 px
- Nook Radius: 10 px
Step 5
Bend the rectangle after which coloration it with Gradient Mesh.
#CCCCCC#FFFFFF#9D9D9D#AFAFAF#ECECEC#969696
Step 6
Within the Transparency panel, change the ensuing aspect’s Transparency Mode to Multiply and its Opacity to 40%.
Step 7
To create the pouch mockup, put all the weather collectively, as proven under. Guarantee that aspect 3 stays on prime of the opposite items!
Step 8
To complete the pouch packaging mockup, place a shadow underneath it, simply as we realized within the earlier part.
3. Create the Third Pouch Bag Design Template
Step 1
Start creating the mesh grid for the final plastic pouch packaging mockup.
Use these colours:
#E1E1E1#A5A5A5#C3C3C3
Step 2
Shade the highest a part of the aspect.
#D6D6D6#ECECEC
Step 3
Add extra nodes and colours to complete this piece of the plastic pouch packaging mockup.
#E8E8E8#BABABA#D0D0D0
Step 4
Create the second piece of the flat backside pouch mockup with Gradient Mesh.
#B1B1B1#7C7C7C#8C8C8C#CCCCCC
Step 5
Create the third aspect of the pouch mockup.
#8C8C8C#636363#6E6E6E#545454
Step 6
Proceed by making a smaller piece for the stand-up pouch template.
#ABABAB#8C8C8C#9B9B9B
Step 7
End with one other small piece for the pouch packaging mockup.
#969696#B7B7B7#636363#7A7A7A
Step 8
Put all the components collectively to create the flat backside pouch mockup, as proven under!
Step 9
Add a shadow, and also you’re achieved with this pouch packaging mockup!
Superior Work, You Know Create a Pouch Mockup!
Now you know the way to create a packaging design mockup in Illustrator. What now? You possibly can strive any of my different tutorials from my profile, or try my portfolio on GraphicRiver, in addition to the unique set of components, a few of which we created right now.
Uncover Extra Superb Product Mockups From Envato Components!
If you do not have the time to discover ways to create a packaging design mockup in Illustrator, you possibly can at all times go to Envato Components’ library of pouch bag design templates! These ready-to-use templates will prevent a number of time. Let’s overview a number of of the prime pouch mockups.
1. Plastic Pouch Product Mock-Up (PSD, PDF)
Take a look at this high-quality plastic pouch mockup on your packaging design! It is easy to customise through the good object function, and it comes with grouped and named layers, remoted shadows, and an editable background texture and coloration.
2. Product Bag Mock Up (PSD, PDF)
By buying this product bag mockup, you’ll obtain 4 beautiful, well-organized PSD recordsdata which can be easy to customise. Utilizing the good object function, you possibly can modify all the pieces about this mockup. Place your personal design or substitute the brand with the colour you need!
3. Paper Bag Espresso Product Mockups (PSD, PDF)
This product mockup means that you can showcase your espresso packaging design professionally! It’s out there in PSD format with smart-object options that will help you substitute the present designs with your personal inside seconds.
4. Product Field Mockup (PSD)
This product field mockup makes use of good object options that will help you modify your design. It’s extremely easy to make use of and straightforward to recolor by utilizing strong coloration layers.
The excessive decision of this mockup permits it for use for business functions.
5. Doy Pack With Facet Spout Mockups (PSD)
Current any of your pouch packaging designs utilizing these doy pack with aspect spout mockups! They arrive full with the good object function and well-named layers on your personalization wants.
Verify Out Extra Mockup Tutorials!

Contents
- 1 How To Create A Mock Up In Adobe Illustrator
- 2 Create Mock Ups With Ease In Adobe Illustrator
- 2.1 Conclusion
- 2.1.1 Related image with how to create a mock up in adobe illustrator
- 2.1.2 Related image with how to create a mock up in adobe illustrator
- 2.1 Conclusion
Personal Growth and Self-Improvement Made Easy: Embark on a transformative journey of self-discovery with our How To Create A Mock Up In Adobe Illustrator resources. Unlock your true potential and cultivate personal growth with actionable strategies, empowering stories, and motivational insights. Mesh this time illustrator create create creating you39ll a min stand updated tool how Packaging mockup pouch illustrator- up what the set to of a mockup three different to galantsev a be how adobe 18 vladimir mockups- you39ll using in in create we39ll read 7 jun pouch tutorial last 2022 learn in
Part 1 Mock Up In Illustrator работа с мокапом в иллюстраторе Youtube
Part 1 Mock Up In Illustrator работа с мокапом в иллюстраторе Youtube
Packaging how to create a mockup in illustrator vladimir galantsev last updated jun 18, 2022 read time: 7 min what you’ll be creating in this tutorial, you’ll learn how to create a pouch mockup using the mesh tool in adobe illustrator. we’ll create a set of three different stand up pouch mockups!. Intro how to create a mock up in adobe illustrator erin gipford 24.9k subscribers subscribe 63k views 6 years ago sign up for a 30 min (skype or zoom) video coaching session:.

How I Make A Mockup On Adobe Illustrator With Adobe Dimension Youtube
How I Make A Mockup On Adobe Illustrator With Adobe Dimension Youtube
A mockup in illustrator is a visual representation of a design concept or product created using adobe illustrator software. it allows designers to showcase t. In this video i’m going to show you, how to create mock ups in adobe illustrator. this is a very simple method to follow. do watch the video. more more. How to design vector mockups from scratch in adobe illustrator 0:00 12:35 • intro how to design vector mockups from scratch in adobe illustrator vector slate | graphic design. How to make mockup in adobe illustrator. here’s a basic process to create a mockup in adobe illustrator: step 1: choose a template. start by selecting a mockup template from adobe’s stock library or creating your own custom template. step 2: place your design. open the template and place your design on a separate layer in the file.

How Do You Make A Mockup In Illustrator Websitebuilderinsider
How Do You Make A Mockup In Illustrator Websitebuilderinsider
How to design vector mockups from scratch in adobe illustrator 0:00 12:35 • intro how to design vector mockups from scratch in adobe illustrator vector slate | graphic design. How to make mockup in adobe illustrator. here’s a basic process to create a mockup in adobe illustrator: step 1: choose a template. start by selecting a mockup template from adobe’s stock library or creating your own custom template. step 2: place your design. open the template and place your design on a separate layer in the file. 1. how to draw a t shirt mockup template step 1 to begin your t shirt mockup in illustrator, let’s learn how to use the mesh tool while creating a photo realistic t shirt! begin by drawing the shape of half of a shirt with the pen tool (p). fill it in with #f3f3f3. create a copy of the shape! put it aside—we will need it later. Beginner · 6 min mock up a text based layout in this tutorial, you’ll explore how to quickly and easily mock up a text based layout and learn the different ways to add text, apply formatting to that text, and add type on a path. what you learned: how to mock up a text based layout, add text, apply formatting to text, and add type on a path.

How To Create A Mesh Repeating Pattern Mock Up In Adobe Illustrator
How To Create A Mesh Repeating Pattern Mock Up In Adobe Illustrator
1. how to draw a t shirt mockup template step 1 to begin your t shirt mockup in illustrator, let’s learn how to use the mesh tool while creating a photo realistic t shirt! begin by drawing the shape of half of a shirt with the pen tool (p). fill it in with #f3f3f3. create a copy of the shape! put it aside—we will need it later. Beginner · 6 min mock up a text based layout in this tutorial, you’ll explore how to quickly and easily mock up a text based layout and learn the different ways to add text, apply formatting to that text, and add type on a path. what you learned: how to mock up a text based layout, add text, apply formatting to text, and add type on a path.
Create Mock Ups With Ease In Adobe Illustrator
Create Mock Ups With Ease In Adobe Illustrator
in this video i’m going to show you, how to create mock ups in adobe illustrator. this is a very simple method to follow. do watch get access to all psds & ai files used in tutorials: patreon wejustclickme in this tutorial, i will show you how to today we will learn how to use mockups. a mockup is an effective way to showcase your designs in the best possible way for a mockup in illustrator is a visual representation of a design concept or product created using adobe illustrator software. it allows sign up for a 30 min (skype or zoom) video coaching session: create a mockup in seconds in adobe illustrator. #graphicdesign #illustrator #mockups — how to freelance: in this short tutorial, i will show you how to place your design perfectly on any surface or object in photoshop. hashtags create mockup in photoshop create mockup in photoshop create mockup in photoshop free website to add voice over your in this video i will show you how to mockup chips packet in realistic way in photoshop 2022 #bennyproductions #graphicdesign logo #design #graphicdesign #designer #creative #branding #logodesigner #logodesigner #photoshop #brandidentity #vector adobe illustrator beta is doing bits!! it can definitely be a bit hit and miss, but with time i can definitely see this becoming the new
Conclusion
All things considered, it is clear that post offers helpful knowledge concerning How To Create A Mock Up In Adobe Illustrator. Throughout the article, the writer illustrates a wealth of knowledge about the subject matter. Notably, the section on Z stands out as particularly informative. Thanks for taking the time to this post. If you have any questions, feel free to reach out via email. I am excited about your feedback. Additionally, below are a few related content that might be interesting: