
- Manuals
- Brands
- Sony Manuals
- Camcorder
- NXCAM HXR-NX100
- Operating manual
-
Contents
-
Table of Contents
-
Troubleshooting
-
Bookmarks
Quick Links
Solid-State Memory
Camcorder
Operating Guide
HXR-NX100
4-580-997-11(1)
Table of Contents
Getting Started
Recording
Playback
Editing
Using the Menu
Troubleshooting
Additional Information
Related Manuals for Sony NXCAM HXR-NX100
Summary of Contents for Sony NXCAM HXR-NX100
-
Page 1
4-580-997-11(1) Solid-State Memory Table of Contents Camcorder Getting Started Recording Operating Guide Playback Editing Using the Menu Troubleshooting Additional Information HXR-NX100… -
Page 2: Read This First
Read this first Before operating this unit, please read this manual thoroughly, and retain it for future reference. Precautions when using the the LCD screen. This is not a malfunction. These points are normal results of the camcorder manufacturing process and do not affect the •…
-
Page 3: Your Computer
About the operation of the camcorder • Before starting to record, test the recording function to make sure the picture and sound are You can operate the camcorder using the V/v/B/ recorded without any problems. b/SET buttons (p. 72). • Compensation for the loss of the content of recordings or the loss of recording opportunities About NTSC (60i)/PAL (50i) models cannot be provided, even if recording or…
-
Page 4: Identifying Parts And Controls
Identifying Parts and Controls Body The numbers in ( ) are reference pages. A Hook for shoulder strap B ASSIGN4/LAST SCENE button (p. 57) C Microphone holder D Multi-interface shoe (p. 44, 79) E Power zoom lever (p. 32) F Grip belt attachment G ASSIGN5/FOCUS MAG button (p.
-
Page 5
Attaching the microphone (sold separately) This section explains how to connect an external microphone (sold separately). Put the cable in the outer cable holder. 1 Place the microphone A into the microphone holder B. 2 Connect the plug of the microphone to the INPUT1 jack or INPUT2 jack C. -
Page 6
Identifying Parts and Controls (Continued) A Lens (G lens) R CH-2 (INT MIC/EXT/MI SHOE) switch (p. 42) B Lens hood S INPUT2 (LINE/MIC/MIC+48V) switch C Internal microphone (p. 42) D Remote control sensor (p. 91) T IRIS AUTO/MAN button (p. 38) E Recording lamp (p. -
Page 7
Attaching the lens hood Align the marks on the lens hood to those on the camcorder, and turn the lens hood in the direction of the arrow until it is locked. z Tip • If you attach or remove a 62 mm (2 1/2 in.) PL filter or MC protector, remove the lens hood. -
Page 8
Identifying Parts and Controls (Continued) A VIDEO OUT jack/AUDIO OUT jack Some tripods may not be designed to (p. 65, 81) attach in the proper direction. B HDMI OUT jack (p. 65) L START/STOP button (p. 28) C Multi/Micro USB jack (p. 91) M POWER/CHG lamp D DC IN jack (p. -
Page 9
Cable clamper Loop clamper b Note Do not use the cable clamper/loop clamper for any purpose other than securing cables (for example, attaching a strap for carrying the camcorder). Continued ,… -
Page 10
Identifying Parts and Controls (Continued) A Focus ring (p. 33) B Zoom ring (p. 32) C Iris ring (p. 38) D Hook for shoulder strap E Viewfinder (p. 24) F Large eyecup (p. 24) G BATT RELEASE button (p. 20) H Battery pack (p. -
Page 11
A LCD screen (p. 24) B MENU button (p. 72) C V/v/B/b/SET buttons (p. 72) D THUMBNAIL button (p. 60) E Memory card slot A/Memory card access lamp (p. 26) F Memory card slot B/Memory card access lamp (p. 26) G i (headphones) jack H REMOTE jack (p. -
Page 12: Wireless Remote Commander
Commander may shorten, or the Wireless Remote Commander may not function properly. I START/STOP button (p. 28) In this case, replace the battery with a Sony J Power zoom lever CR2025 lithium battery. Use of another battery may present a risk of fire or explosion.
-
Page 13: Screen Indicators
Screen Indicators Upper right Center Upper left Upper right Indicator Meaning Estimated remaining 0min recording time Recording/playback media Time code 00:00:00:00 (hour:minute:second:frame) Bottom Bottom Upper left Indicator Meaning Indicator Meaning Face detection [ON] 100% Remaining battery PEAKING (p. 85) INTELLIGENT AUTO ZEBRA (p.
-
Page 14
Screen Indicators (Continued) Indicator Meaning Multi Interface Shoe video light (p. 79) Manual volume adjustment (p. 44) z Tip • Indicators may look different or appear at different positions. Data during recording The recording date, time and condition are recorded automatically on the recording media. -
Page 15: Table Of Contents
Table of Contents Read this first ……………….2 Identifying Parts and Controls …………..4 Body ………………… 4 Wireless Remote Commander …………12 Screen Indicators ……………….13 Getting Started Step 1: Checking supplied accessories ……….18 Step 2: Charging the battery pack …………19 Step 3: Turning on the camcorder and setting the date and time ..22 Turning on the camcorder …………..
-
Page 16
Table of Contents (Continued) Recording sound from an external audio device ……. 43 Recording sound from a Multi Interface Shoe compatible microphone (sold separately) …………….. 44 Adjusting the recording level …………. 44 Useful functions ………………45 Selecting suitable settings automatically (auto mode setting) … 45 Shooting in dimly lit locations (LOW LUX) ………. -
Page 17
Using the Menu Operating the menu …………….72 Menu items …………………74 (CAMERA SET) menu …………..77 Settings to adjust your camcorder to the recording conditions STEADYSHOT, etc.) (REC/OUT SET) menu …………..80 Recording settings, input and output settings (REC SET/VIDEO OUT, etc.) (AUDIO SET) menu …………….82 Settings for the audio recording (AVCHD AUDIO FORMAT, etc.) (DISPLAY SET) menu …………..84 Display settings (MARKER/DISPLAY OUTPUT, etc.) -
Page 18: Getting Started
Make sure that you have following items Lens hood (p. 7) supplied with your camcorder. If, for any reason, there is something missing, contact your Sony dealer. The number in the parentheses indicates the number of that item supplied. • Recording media are sold separately.
-
Page 19: Step 2: Charging The Battery Pack
Step 2: Charging the battery pack Sony Professional products website: You can charge the “InfoLITHIUM” U.S.A. http://pro.sony.com battery pack (L series) with the Canada http://www.sonybiz.ca supplied AC Adaptor. Latin America http://sonypro-latin.com Europe, Middle East, and Africa b Note http://www.pro.sony.eu • You can use a large capacity battery pack, NP- Japan http://www.sonybsc.com…
-
Page 20
Step 2: Charging the battery pack (Continued) When charging ends Connect the DC plug to the DC IN The CHG lamp turns off when the battery is jack of the camcorder. fully charged. b Note Even if the CHG lamp is not lit, the battery charger is not disconnected from the AC power source (mains) as long as it is connected to the wall outlet (wall socket). -
Page 21
Battery pack Full charge time Connect the DC plug to the DC IN NP-F970 (sold 520 minutes jack of the battery charger. separately) On the battery pack Connect the power cord (mains • Always turn the ON/STANDBY switch to lead) to the AC Adaptor and the STANDBY (1) before changing the battery pack. -
Page 22: Step 3: Turning On The Camcorder And Setting The Date And Time
Step 3: Turning on the camcorder and setting the date and Setting the date and time time Set the date and time when you use your camcorder for the first time. Turning on the camcorder z Tip • If you do not use your camcorder for about 3 months, the built-in rechargeable battery gets Turn the ON/STANDBY switch to ON discharged and the date and time settings may…
-
Page 23
Set [SUMMERTIME], [Y] (year), [M] (month), [D] (day), hour and minute, using the V/v/B/b/SET button, then press the button. The clock starts. •Set [SUMMERTIME] to [ON] to move the time forward 1 hour. •You can set any year up to the year 2037. •Midnight is indicated as 12:00 AM, and noon as 12:00 PM. -
Page 24: Step 4: Adjusting The Lcd Screen And Viewfinder
Step 4: Adjusting the LCD screen and viewfinder Using the LCD screen Adjusting the viewfinder The LCD screen can be rotated in the range Diopter adjustment dial as illustrated below, allowing a person other Move it until the picture becomes clear. than the camera operator to see the image.
-
Page 25
Large eyecup (supplied) b Note • Do not remove the eyecup attached to the camcorder. -
Page 26: Step 5: Preparing The Recording Media
Step 5: Preparing the recording media Supported memory cards Open the cover, and insert the File format Recording media memory card with the notched edge SD, SDHC, SDXC in the direction as illustrated until it memory card (Class 4 or clicks into place.
-
Page 27
Selecting the memory card slot to be used for recording Press the SLOT SEL button to change which slot is selected for recording. You can confirm the selected slot on the screen. SLOT SEL button b Notes • You can only select a slot that already has a memory card inserted. -
Page 28: Recording
Recording Recording Handle record button START/STOP button Recording movies Your camcorder records movies on a memory card. The factory setting for recording movies is AVCHD. Do the following steps to record movies. Press the latches on both sides of the lens cap and remove it.
-
Page 29
Turn the ON/STANDBY switch to ON (❙). Press the START/STOP button (or the handle record button) to start recording. [STBY] t [REC] The recording lamps light up during recording. To stop the movie recording, press the START/STOP button or the handle record button again. -
Page 30: Continuous Recording On The Memory Cards (Relay Recording)
Recording (Continued) z Tips • When recording with a setting other than DV, the aspect ratio is fixed to 16:9. When recording in DV mode, you can switch the aspect ratio to 4:3 ([ WIDE REC], p. 80). • For details about changing the screen display during recording, see page 63. •…
-
Page 31: Recording Movies Using Both The Memory Card A And B (Simultaneous Recording)
Recording movies using both the memory card A and B (Simultaneous recording) You can record movies on both of these recording media simultaneously. Press MENU t select (REC/OUT SET) t [REC SET] t [SIMUL/RELAY REC] t [SIMULTANEOUS REC] with the V/v/B/b/SET button. Changing the setting of the START/STOP button and handle record button When using SIMULTANEOUS REC, you can start and stop recording on different memory…
-
Page 32: Adjusting The Zoom
Recording (Continued) z Tips Adjusting the zoom • When focusing, the minimum distance required between the camcorder and the subject is about 1 cm (about 13/32 in.) for wide angle and about 1 meter (about 39 3/8 in.) for telephoto. •…
-
Page 33: Adjusting The Focus
Adjusting the focus You can adjust the focus manually for different recording conditions. During recording or standby, Use this function in the following cases. press the FOCUS AUTO/MAN – To record a subject behind a window covered button B to set the focus to with raindrops.
-
Page 34: Focusing On A Detected Face (Face Detection)
Adjusting the focus (Continued) Press the ASSIGN5/FOCUS MAG Select (CAMERA SET) t button. [FACE DETECTION] t [ON] with the V/v/B/b/SET button D. The center of the screen is magnified. The setting changes with each press of the When the faces are detected, frames button.
-
Page 35
z Tips • You can assign this function to an ASSIGN button (p. 58). • To make it easy to detect faces, record under the following conditions: – Record in a moderately bright place – Do not obscure the face with a hat, mask, sunglasses, etc. -
Page 36: Changing The Recording Setting
Changing the recording setting Selecting the file format and 1080/60i HQ 1080/50i HQ recording format 1080/60i LP 1080/50i LP You can select the file format in [FILE 1080/30p FX 1080/25p FX FORMAT] and the recording format (bit- 1080/30p FH 1080/25p FH rate, image size, frame rate, and scanning 1080/24p FX –…
-
Page 37: Setting Dv Mode (Dv Mode)
Frame rate for 60i models b Note • When you switch from DV mode to another, The frame rate displayed on the LCD screen settings made in DV mode are initialized. differs from the actual frame rate. If a movie file exceeds 2 GB during recording, Frame rate on the LCD the camcorder divides the recording into Actual frame rate…
-
Page 38: Adjusting The Brightness
Adjusting the brightness You can adjust the image brightness by adjusting the iris, gain or shutter speed, or Press the IRIS AUTO/MAN button by adjusting the light volume with the ND C to set the iris to manual. filter switch B. next to the iris value disappears.
-
Page 39: Adjusting The Gain
Adjusting the gain Adjusting the shutter speed You can use this if you do not want to You can adjust and fix the shutter speed increase the value by AGC (automatic gain manually. You can make a moving subject control). look still or emphasize the movement of a subject by adjusting the shutter speed.
-
Page 40: Adjusting The Volume Of Light (Nd Filter)
Adjusting the brightness (Continued) the LCD screen is, the faster the shutter Adjusting the volume of light speed is. (ND filter) You can record a subject clearly by using z Tips the ND filter switch B when the recording environment is too bright. •…
-
Page 41: Adjusting The Color Tone
Adjusting the color tone Adjusting the white balance Select PRESET, A, or B using the manual lever A. x Setting the A/B value Select A or B for recording with the white balance setting stored in memory A or B. x To use the PRESET value of white balance (CAMERA SET) t [WB…
-
Page 42: Audio Setup
Audio setup Adjusting the color tone (Continued) 2 Press the WHT BAL button B to The jacks, switches and dials shown below highlight the white balance value. allow you to set the sound that is recorded. See page 5 for details about connecting a 3 Select A ( A) or B ( B) using the…
-
Page 43: Recording Sound From The Internal Microphone
Audio level controls Recording sound from an E: AUTO/MAN (CH-1) switch external audio device I: AUTO/MAN (CH-2) switch F: AUDIO LEVEL (CH-1) dial Use the following procedure if using a J: AUDIO LEVEL (CH-2) dial microphone or external audio device. Recording sound from the Select the audio input source.
-
Page 44: Recording Sound From A Multi Interface Shoe Compatible Microphone (Sold Separately)
Audio setup (Continued) • If [INPUT CH SELECT] is set to [INPUT1/INPUT1] in the [XLR SET] Connect the Multi Interface Shoe menu, the audio input on the INPUT1 compatible microphone (sold jack is recorded to both CH-1 and CH- separately) to the Multi Interface Shoe.
-
Page 45: Useful Functions
Useful functions Selecting suitable settings Press the V/v/B/b/SET button B, automatically (auto mode select [AUTO], [INTELLIGENT AUTO], or [SCENE SELECTION], setting) and press the button again. You can make optimal recordings in various situations. b Note • When you select [INTELLIGENT AUTO], [STEADYSHOT] is set to [ACTIVE], and the angle of view shifts 1.08 times toward the telephoto side.
-
Page 46: Shooting In Dimly Lit Locations (Low Lux)
Useful functions (Continued) Setting values Recording conditions Press the FULL AUTO button to Shoots distant subjects set auto mode on. clearly. This setting also prevents your camcorder The FULL AUTO button lamp turns on. Landscape* from focusing on any ([LANDSCAPE]) glass or mesh in windows between the Press the ASSIGN3/LOW LUX…
-
Page 47: Customizing The Picture Quality (Picture Profile)
Customizing the picture quality Select (CAMERA SET) t (Picture profile) [PICTURE PROFILE] t the desired picture profile number You can customize the picture quality by using the V/v/B/b/SET button, adjusting picture profile items such as then press the button again. [GAMMA] and [DETAIL].
-
Page 48
Useful functions (Continued) 6 Press the V/v/B/b/SET button, select [OK], then press the button again. The picture profile indicator is displayed. -
Page 49: To Set Black Level
BLACK LEVEL To set the black level. Item Description and settings Sets the black level. –15 to +15 GAMMA To select a gamma curve. Item Description and settings [STANDARD] Standard gamma curve [STILL] Gamma curve to create the tone of a still image. [CINEMATONE1] Gamma curve 1 for producing tone of film camera images [CINEMATONE2]…
-
Page 50
Useful functions (Continued) KNEE To set knee point and slope for video signal compression to prevent over-exposure by limiting signals in high intensity areas of the subject to the dynamic range of your camcorder. When selecting [STANDARD] or [STILL] in [GAMMA], [KNEE] is set to off if [MODE] is set to [AUTO]. -
Page 51
SATURATION To set the color level. Item Description and settings –32 (light) to +32 (dark) COLOR PHASE To set the color phase. Item Description and settings –7 (greenish) to +7 (reddish) COLOR DEPTH To set the color depth for each color phase. This function is more effective for chromatic colors and less effective for achromatic colors. -
Page 52
Useful functions (Continued) Item Description and settings MEMORY1 COLOR Sets colors stored in Memory 1. [PHASE]: Sets color phase. 0 (purple) to 8 (red) to 16 (yellow) to 24 (green) to 31 (blue) [PHASE RANGE]: Sets color phase range. 0 (no color selection), 1 (narrow: to select only a single color) to 31 (wide: to select multiple colors in similar color phase) [SATURATION]: Sets saturation. -
Page 53
WB SHIFT To set items for the white balance shift. Items you can adjust differ depending on the filter type. Item Description and settings [FILTER TYPE] Selects a color filter type for the white balance shift. [LB-CC] : Film type (color conversion and correction) [R-B] : Video type (correction of R and B levels) [LB[COLOR TEMP]]… -
Page 54: Setting Time Data
Useful functions (Continued) COPY Setting the time code To copy the settings of the picture profile to 1 Press the MENU button, press the V/v/ another picture profile number. B/b/SET button and select (TC/ RESET UB SET) t [TC PRESET], then press the button again.
-
Page 55: Recording With The Slow & Quick Motion Function
4 Set other digits by repeating step 3. 50i models 5 Press the V/v/B/b/SET button, select REC FORMAT FRAME [OK], then press the button again. RATE 1080/25p 1080/50p 50% slow 100% To reset the user bits (standard) Select [RESET] in step 2 of “Setting the 100% 200% quick user bits”…
-
Page 56
Useful functions (Continued) press the button to stop recording. Do not Recording in Slow & Quick Motion operate your camcorder while the [REC] indicator is flashing on the screen, and wait till it mode turns to [STBY]. 1 Press the V/v/B/b/SET button B to •… -
Page 57: Reviewing The Most Recently Recorded Scene (Last Scene Review)
• You cannot use the Slow & Quick Motion function with XAVC S HD or DV. • You cannot use the Slow & Quick Motion function when FULL AUTO is turned on. Reviewing the most recently recorded scene (Last Scene Review) You can review the most recently recorded scene on the LCD screen.
-
Page 58: Assigning Functions To The Assign Buttons
Assigning functions to the ASSIGN buttons Some functions can be assigned to the • DATA CODE (p. 87) ASSIGN buttons. • TC/UB DISPLAY (p. 88) You can assign a single function to each of • STATUS CHECK (p. 64) the ASSIGN1 to 5 buttons. •…
-
Page 59
Press the MENU button A. Select (OTHERS) t [ASSIGN BUTTON] with the V/v/B/b/SET button B. Press the V/v/B/b/SET button B, select the ASSIGN button that you want to set, then press the ASSIGN1 to 3 button again. buttons Press the V/v/B/b/SET button B, select the function that you want to assign, then press the button again. -
Page 60: Playback
Playback Playback THUMBNAIL button Playing back movies Open the LCD panel.
-
Page 61
Press the THUMBNAIL button. The thumbnail screen appears after a few seconds. Recording media Playback mode Previous Thumbnail (movie) Next Current movie data (p. 61) •You can turn on or off the date and time display on the thumbnails by pressing the DISPLAY button. Play back movies. -
Page 62
Playback (Continued) F Time code of recording started Time code will not be displayed correctly when you play back recording media with no time code, or recording media with time code that your camcorder does not support. G DOLBY DIGITAL recording Displayed when audio is recorded in Dolby Digital format. -
Page 63: Changing/Checking The Settings In Your Camcorder
Changing/checking the settings in your camcorder Displaying recording data (Data code) You can display information, including date, time and camera data automatically stored during recording on the screen during playback. Select (DISPLAY SET) t DATA CODE and choose the data that you want to display, or press the ASSIGN button to which the DATA CODE function is assigned, during…
-
Page 64: Checking The Settings In Your Camcorder (Status Check)
Changing/checking the settings in your camcorder (Continued) F Camera shake correction (Steady Shot) • Battery Info You can check the remaining capacity of the attached battery. b Note • When you play back the memory card on other devices, the camera data may be displayed incorrectly.
-
Page 65: Connecting To A Monitor Or A Tv
Connecting to a monitor or a TV Playback image quality depends on the type of monitor or TV, or the jacks used to make the connection. Monitor/TV To video input jack Video cable (sold separately) To audio input jack Audio cable (sold separately) To HDMI input jack…
-
Page 66
[24p OUTPUT] setting in [VIDEO OUT], as shown below. Output resolution 24p OUTPUT HDMI OUT 1080/24p 1080/60p b Notes • It is recommended that you use an authorized cable with HDMI logo or a Sony HDMI cable. -
Page 67
• Images are not output from the HDMI OUT jack of your camcorder, if copyright protection signals are recorded in the movies. • Images and sounds may not be reproduced correctly on some monitors or TVs. • Do not connect the output jacks of the camcorder with the output jacks of the monitor or TV. A malfunction may be caused. -
Page 68: Editing
Editing Protecting movies Dividing a movie (Protect) You can divide a movie at a designated Protect movies to avoid deleting them by point. mistake. Press the MENU button while Press the MENU button when the playing back movies. thumbnail screen is displayed. Press the V/v/B/b/SET button, Press the V/v/B/b/SET button, then select…
-
Page 69: Deleting Movies
Deleting movies You can free media space by deleting movies from recording media. Select b Notes • You cannot restore images once they are deleted. • Do not remove the battery pack, the AC Adaptor or the recording media from your camcorder during the operation.
-
Page 70: Formatting Recording Media
Formatting recording Deleting all data from media the memory card completely Formatting deletes data from the recording media to recover recordable free space. If a memory card is used repeatedly, b Notes garbage data accumulate which may prevent the image data from being written •…
-
Page 71: Repairing The Image Database File
Repairing the image database file This function checks the database Select [Empty] t information and the consistency of movies on the recording media, and repairs any inconsistencies found. b Note b Notes • Connect your camcorder to the wall outlet (wall •…
-
Page 72: Using The Menu
Using the Menu Operating the menu You can change various settings or make detailed adjustments using the menu items Press the V/v/B/b/SET button, displayed on the LCD screen. select the desired menu icon, then press the button again. MENU button CAMERA SET (p.
-
Page 73
Press the MENU button to hide the menu screen. To return to the previous screen, select RETURN]. b Notes • The available menu items vary depending on the context of your camcorder during recording or playback. • Items and setting values not available due to other settings, are grayed out. -
Page 74: Menu Items
Menu items The function and setting value of each menu item are as follows. The default settings are marked with B. AUTO MODE SET BAUTO, INTELLIGENT AUTO, (CAMERA SET) (p. 77) SCENE SELECTION AGC LIMIT BOFF, 24dB to 0dB SCENE SELECTION NIGHT SCENE, SUNRISE &…
-
Page 75
REC BUTTON SETTING (REC/OUT SET) (p. 80) BREC BUTTON: REC SET FILE FORMAT , HANDLE XAVC S HD, REC BUTTON: BAVCHD /REC REC FORMAT BUTTON: XAVC S HD HANDLE REC 60i models: BUTTON: /REC 1080/60p 50Mbps, BUTTON: 1080/30p 50Mbps, HANDLE REC 1080/24p 50Mbps, BUTTON: 50i models:… -
Page 76
Menu items (Continued) INT MIC SET INT MIC SENS MARKER ON/OFF BNORMAL, HIGH BOFF, ON INT MIC WIND CENTER BOFF, ON BON, OFF XLR SET INPUT CH SELECT ASPECT INPUT1/INPUT1, BOFF, 4:3, 13:9, BINPUT1/INPUT2 14:9, 15:9, 1.66:1, XLR AGC LINK 1.85:1, 2.35:1 BSEPARATE, SAFETY ZONE… -
Page 77: (Camera Set) Menu
(CAMERA SET) menu Settings to adjust your camcorder to the recording conditions ( STEADYSHOT, (OTHERS) (p. 90) etc.) STATUS CHECK CAMERA PROFILE MEMORY CARD A, MEMORY CARD B The default settings are marked with B. See page 72 for details on selecting ASSIGN BUTTON ASSIGN1, ASSIGN2, ASSIGN3, ASSIGN4,…
-
Page 78
(CAMERA SET) menu (Continued) WB SET ZOOM SET ZOOM TYPE See page 41. B OPTICAL ZOOM ONLY AE SHIFT Uses only optical zoom. You can zoom up to 12×. ON/OFF ON[CLEAR IMAGE ZOOM] B OFF You can use the clear image zoom in Does not use the AE SHIFT function. -
Page 79
ACTIVE ( Uses Steady Shot with more powerful Automatically corrects for backlighting. effect. FACE DETECTION OFF ( Does not use SteadyShot. See page 34. This setting is recommended when you use a tripod. VIDEO LIGHT b Note This sets the lighting method for a video •… -
Page 80: (Rec/Out Set) Menu
(REC/OUT SET) (CAMERA SET) menu (Continued) menu Recording settings, input and output COLOR BAR settings (REC SET/VIDEO OUT, etc.) ON/OFF B OFF The default settings are marked with B. See page 72 for details on selecting Does not display color bars. menu items.
-
Page 81
DOWN CONVERT TYPE VIDEO OUT You can select a down convert type when you down-covert video signal. HDMI Use this function for outputting movies You can select the resolution of the output recorded in 16:9. signal from the HDMI jacks. B SQUEEZE 60i models: Outputs a horizontally compressed image… -
Page 82: (Audio Set) Menu
(AUDIO SET) menu (REC/OUT SET) menu (Continued) Settings for the audio recording (AVCHD AUDIO FORMAT, etc.) HDMI TC OUTPUT You can set whether to output time code to other professional-use devices, using The default settings are marked with B. HDMI. See page 72 for details on selecting menu items.
-
Page 83
XLR AGC LINK INT MIC SET Links/unlinks the AGC (Auto Gain Control) of CH-1 and CH-2 when using an external INT MIC SENS microphone. You can set the audio recording sensitivity of the internal microphone. B SEPARATE Unlinks AGC (CH-1 and CH-2 are B NORMAL recorded with separate AGC). -
Page 84: (Display Set) Menu
(DISPLAY SET) (AUDIO SET) menu (Continued) menu INPUT2 TRIM Display settings (MARKER/DISPLAY OUTPUT, etc.) INPUT2 WIND See the description for the corresponding functions for INPUT1. The default settings are marked with B. See page 72 for details on selecting z Tips menu items.
-
Page 85
z Tips ZEBRA • You can focus more easily using this function in combination with the expanded focus function You can display a zebra pattern as a guide (p. 33). for adjusting brightness. • You can assign [ON/OFF] to an ASSIGN button ON/OFF (p. -
Page 86
(DISPLAY SET) menu (Continued) SAFETY ZONE FOCUS MAG RATIO B OFF You can set the magnification of expanded Does not display the safety zone. focus. 80%, 90% ×4.0 If you select either one, you can display markers at boundaries of display area that ×8.0 regular home TVs can display. -
Page 87: Zoom Display
AUDIO LEVEL DISPLAY SHUTTER DISPLAY B ON B SECOND Displays the audio level meters on the Displays the shutter display in seconds. LCD screen. DEGREE Displays the shutter display in degrees. The shutter speed equal to the period that your camcorder reads image data from the image sensor is defined as 360 degrees.
-
Page 88: (Tc/Ub Set) Menu
(TC/UB SET) menu (DISPLAY SET) menu (Continued) Time code settings (TC PRESET/UB PRESET/TC FORMAT, etc.) DATE/TIME The date and time are displayed. The default settings are marked with B. CAMERA DATA See page 72 for details on selecting Camera data is displayed. menu items.
-
Page 89
z Tip UB TIME REC Drop frame B OFF Time code is based on 30 frames per second; however, gaps in the actual time occur during Does not save the actual time in the user extended periods of recording as the actual frame bit code. -
Page 90: (Others) Menu
(OTHERS) menu Settings while recording or other basic settings (AREA SET/BEEP, etc.) b Note • A camera profile saved on a camcorder with The default settings are marked with B. different model name, or edited on a computer See page 72 for details on selecting cannot be loaded.
-
Page 91
SUMMERTIME REC LAMP B ON You can change this setting without stopping the clock. Set to [ON] to move the Turns on the recording lamp. time forward 1 hour. B OFF Turns off the recording lamp. Does not set summer time. z Tip •… -
Page 92
(OTHERS) menu (Continued) SINGLE Set to [SINGLE] if you are unable to connect using the [MULTI] setting. OPERATION TIME Displays the total hours of operation in 10- hour increments. VERSION DISPLAY Displays the current version of your camcorder. Be sure to check for firmware updates. -
Page 93: Troubleshooting
(OTHERS) t INITIALIZE. 3 Select This operation will reset the date, time and area settings. 4 Consult your Sony dealer or local authorized Sony service facility. • Power sources/LCD screen/Wireless Remote Commander (p. 93) • Memory cards (p. 94) • Recording (p. 95) •…
-
Page 94
Troubleshooting (Continued) The battery pack discharges too quickly. • Ambient temperature is too high or too low, or the battery pack has not been charged enough. This is not a malfunction. • Fully charge the battery again. If the problem persists, the battery may be worn-out. Replace with a new battery (p. -
Page 95
Images on the recording media cannot be deleted. • You can select no more than 100 images to be deleted on the edit screen. • The images are protected. Unprotect the images (p. 68). Recording The recording does not start when you press the START/STOP button. •… -
Page 96
Troubleshooting (Continued) There is a time difference between the point when the START/STOP button is pressed and the point that the recording movie actually starts or stops. • On your camcorder, there may be a slight time difference between the point where you press the START/STOP button and the actual point that recording movie starts/stops. -
Page 97
Black bands appear when you record a TV screen or computer screen. • Adjust the shutter speed (p. 39). Fine patterns flicker, diagonal lines look jagged. • Adjust [DETAIL] to the negative side (p. 53). The time code is not recorded in sequence. •… -
Page 98
Troubleshooting (Continued) “—” is displayed on the LCD screen. • Bars will be displayed for the camera data of the movies recorded with [COLOR BAR] set to [ON]. appears on the LCD screen. • appears when you play back movies recorded with 5.1ch surround sound. 5.1ch surround sound is down-mixed to 2ch stereo and played back on your camcorder. -
Page 99
Connecting to a computer The computer does not recognize the camcorder. • Disconnect the cable from the computer, then connect it again securely. • Disconnect the cable from your computer and camcorder. Reboot your computer, and connect your computer and camcorder following the steps in the correct order. Movies cannot be viewed or copied to the computer. -
Page 100: Warning Indicators And Messages
If the problem (Warning indicator pertaining to persists even after you have tried a couple the video light) of times, contact your Sony dealer or local authorized Sony service facility. • The battery level is too low. C:04:ss…
-
Page 101
However, the loading of all moves is — (Warning indicators not guaranteed. pertaining to the write-protect of the memory card)* Buffer overflow. Writing to the media • The write-protect switch is set to lock was not completed in time. position on the memory card. •… -
Page 102
• Use a memory card recommended for your camcorder (p. 26). • Contact your Sony dealer. Do not eject the memory card during writing. Data may be damaged. • Reinsert the memory card, and follow the instructions on the LCD screen. -
Page 103: Additional Information
Additional Information Recording time of movies Estimated time of recording and Estimated recording time of playback with each battery pack movies Approximate time available when you use a XAVC S HD fully charged battery pack. (Unit: minute) Recording time 1080 (Unit: minute) 64GB (155)
-
Page 104
70 (70) 32GB 140 (140) 64GB 280 (280) • When using Sony memory cards. b Notes • The recording time may vary depending on the recording conditions, subjects, and [REC SET] (p. 80). • The number in ( ) is the minimum recordable time. -
Page 105: Using Your Camcorder Abroad
Using your camcorder abroad Power supply You can use your camcorder in any country/region using the AC Adaptor supplied with your camcorder within the AC 100V to 240V, 50Hz/60Hz range. Viewing on TV The following shows which countries and regions use 60i and 50i models. Countries and regions using 60i models Bahama Islands, Barbados, Bermuda, Bolivia, Canada, Central America, Chile,…
-
Page 106: File/Folder Structure On The Recording Media
• Sony accepts no responsibility for the results of This folder contains recording data of operation using data copied from a PC to a AVCHD movies. Do not try to open this memory card.
-
Page 107: Maintenance And Precautions
Maintenance and precautions scenes where the image, angle, or brightness About the XAVC S format changes drastically. This is not a malfunction. Recording and playback on the About memory cards camcorder • A memory card formatted on a computer does Based on the XAVC S format, your not have guaranteed compatibility with your camcorder records with HD (high…
-
Page 108: About The «Infolithium» Battery Pack
Maintenance and precautions (Continued) On image data compatibility About the “InfoLITHIUM” • Image data files recorded on a memory card by battery pack your camcorder conform to the “Design rule for Camera File system” universal standard Your camcorder operates only with an established by the JEITA (Japan Electronics and “InfoLITHIUM”…
-
Page 109
• Remove the charged battery from the AC Battery remaining Adaptor. indicator • The CHG lamp of the supplied AC Adaptor 81% to 100% flashes in 2 patterns as follows: Fast-flashing…Turns on and off rapidly at about 51% to 80% 0.15-second intervals. -
Page 110: About Handling Of Your Camcorder
(or casing, unplug your camcorder and have it vice versa) or when you use your camcorder in a checked by a Sony dealer before operating it humid place as shown below. any further.
-
Page 111: Rechargeable Battery
How to avoid moisture condensation Care and storage of the lens When you bring your camcorder from a cold place • Wipe the surface of the lens clean with a soft into a warm place, put your camcorder in a plastic cloth in the following instances: when there are bag and seal it tightly.
-
Page 112
Maintenance and precautions (Continued) deletion software on a computer. Also, when you dispose of the memory card, it is recommended that you destroy the actual body of the memory card. Operation is not guaranteed when using a card adaptor. -
Page 113: Specifications
Specifications General SD image quality: DV standard compatible Power requirements Audio recording system 8.4 V DC (using AC Adaptor) XAVC S HD: Linear PCM 2ch, 16-bit, 7.2 V DC (using battery pack) 48 kHz Power consumption AVCHD: Linear PCM 2ch, 16-bit, 48 While recording AVCHD using kHz/Dolby Digital 2ch, 16-bit, 48 kHz viewfinder:…
-
Page 114
Specifications (Continued) Gamma curve INPUT1/INPUT2 jacks Selectable XLR-type 3-pin (female) (2), line/mic/ Built-in ND filter mic +48 V selectable CLEAR: Off DC input DC IN jack Remote jack Stereo mini jack (φ2.5 mm) (1) Multi Interface Shoe (1) Lens Screen Lens mount Fixed LCD screen… -
Page 115
Rechargeable battery pack (NP-F770) Maximum output voltage 8.4 V DC Output voltage 7.2 V DC Maximum charging voltage 8.4 V DC Maximum charging current 3.0 A Capacity Typical: 31.7 Wh (4,400 mAh) Minimum: 30.0 Wh (4,200 mAh) Type Li-ion DC battery charger (BC-L1) Input rating 8.4 V DC Output rating… -
Page 116: Index
Index DATE REC ……91 Date and time … 14, 22, 23 AC Adaptor ….18, 19 Image database file….71 DELETE ……69 AE SHIFT…….78, 96 INDOOR ……41 DETAIL ……. 53 AGC LIMIT ……77 “InfoLITHIUM” battery D. EXTENDER ….78 pack ……..108 AREA SET ……90 DF ……..
-
Page 117
Moisture condensation..110 REPAIR IMAGE DB Using your camcorder FILE ……..71 abroad ………105 Movie……..28 SAFETY ZONE ….86 VERSION DISPLAY …92 ND filter……..40 SATURATION ….51 VF BRIGHT ……88 NDF ……..88 SCENE SELECTION VIDEO LIGHT…..79 NIGHTSHOT LIGHT ..79 SET……..45 VIDEO OUT ……81 Number of movies ….103 Screen indicators …. -
Page 118
Trademarks Notes on the License • “NXCAM” logo is a trademark of Sony THIS PRODUCT IS LICENSED UNDER THE Corporation. AVC PATENT PORTFOLIO LICENSE FOR THE PERSONAL USE OF A CONSUMER OR • “XAVC S HD” and are registered OTHER USES IN WHICH IT DOES NOT trademarks of Sony Corporation. -
Page 119
GPL/LGPL. Source code is provided on the web. Use the following URL to download it. http://oss.sony.net/Products/Linux/ We would prefer you do not contact us about the contents of source code. Licenses (in English) are recorded in the internal memory of your product. -
Page 120
© 2015 Sony Corporation Printed in Japan…
31.Jul.2012 AVCCAM (AVCHD) AG-AC90
 AG-AC90")
31.Jul.2012 AVCCAM (AVCHD) AG-AC90 Scene For Videographer Professional Design 3 manual rings Dual SD card slots simultaneous REC SD(Standard definition ) support http://commons.wikimedia.org For Production
More information
SD Card for Professional

SD Card for Professional 128GB, 64GB and 32GB ultra high durability Memory Cards Overview Ultra high durability with free file recovery software Sony SD Card for Professional is specially designed for
More information
HXRNX type NXCAM Camcorder

SONY SONY HXRNX100 1.0-type NXCAM Camcorder $1,949.00 U.S.List Price UPC: 027242895218 Overview The HXR-NX100 comes with Sony s unique 20 mega pixel 1.0-type Exmor R back-illuminated CMOS sensor that delivers
More information
Professional Camcorder Family

Professional Camcorder Family XDCAM Handy camcorders NXCAM Accessory Full Line-up PMW-300K1/K2 PXW-X200 PXW-X180/X160 Camera Section Imaging Device (Type) 3-chip 1/2 type Exmor CMOS 3-chip 1/3 type Exmor
More information
Professional Camcorder Family

Professional Camcorder Family XDCAM Handy Camcorders NXCAM Camcorders Accessories *4K: 3840 2160pix Connect this product to HDR (HLG) compatible TV via HDMI cable and turn to HDR (HLG) mode by TV when
More information
Full HD solid-state camcorder.

Full HD solid-state camcorder. PMW-EX1R XDCAM EX Camcorder www.sonybiz.net/xdcam Full HD solid-state camcorder for superior HD Picture performance and more creative freedom. Unique Lens Operation PMW-EX1R
More information
Press Release mm: 35 mm conversion.

Press Release Sony Launches Its First 3 ClearVid CMOS Sensor High Definition Camcorder For the ultimate high-definition shooting experience, Sony s high-end HDV camcorder HDR-FX7/E offers 3 ClearVid CMOS
More information
XDCAM EX NAB Presentation 1

XDCAM EX NAB Presentation 1 PMW-320L XDCAM EX ½-inch Shoulder Camcorder PMW-320K XDCAM EX ½-inch Shoulder Camcorder with Supplied Lens EXpanding XDCAM EX Line Up 2010 New! PMW-350 PMW-320 PMW-EX1R PMW-EX3
More information
EOS C300 Key Features

EOS C300 EOS C300 Key Features 1 Versatile Lens Range 2 New Super 35 mm-equivalent Canon CMOS sensor EF mount body PL mount body Canon entry into the digital cine lens market 8.3MP for 3-chip performance
More information
GY-LS300 4K Super 35 camcorder

GY-LS300 4K Super 35 camcorder A handheld 4K Super 35 professional camcorder that offers filmmakers the flexibility to use high-end cinema lenses or affordable glass to capture 2K/4K footage GY-LS300 4K
More information
USA Security Systems

Product Technical Specifications Blackmagic URSA Mini Pro URSA Mini Pro is a professional digital film camera that combines incredible 4.6K image quality with the features and controls of a traditional
More information
Blackmagic URSA Mini Pro

Product Technical Specifications Blackmagic URSA Mini Pro URSA Mini Pro is a professional digital film camera that combines incredible 4.6K image quality with the features and controls of a traditional
More information
CAMERAS & ACCESSORIES

CAMERAS & ACCESSORIES All our camera kits come with tripods, batteries and memory cards so you are ready to start shooting straight away! Sony PMW-F3 Camera & Lens Kit The PMW-F3 is equipped with an Exmor
More information
XDCAM, XDCAM EX, XAVC, XAVC S, NXCAM, SxS and Professional Disc are trademarks of Sony Corporation.

Revised Monday, April 9, 2018 XDCAM, XDCAM EX, XAVC, XAVC S, NXCAM, SxS and Professional Disc are trademarks of Sony Corporation. Avid and DNxHD are trademarks or registered trademarks of Avid Technology,
More information
NEXTO DI 4K package User guide

NEXTO DI 4K package User guide July 2015 Contents 4K package… 3 Finding the serial number on NSB-25… 5 Upgrade firmware of NSB-25… 6 Check the installation of 4K pack… 8 Transcoding… 9 July 2015
More information
XDCAM, XDCAM EX, XAVC, XAVC S, NXCAM, SxS and Professional Disc are trademarks of Sony Corporation.

Revised Tuesday, March 12, 2019 XDCAM, XDCAM EX, XAVC, XAVC S, NXCAM, SxS and Professional Disc are trademarks of Sony Corporation. Avid and DNxHD are trademarks or registered trademarks of Avid Technology,
More information
AVCHD Converter Utility

How To Guide AVCHD Converter Utility Converting AVCHD files to the Canopus HQ codec for use with Grass Valley EDIUS NLE Software desktop. grassvalley. com professional. grassvalley. com 2008 Thomson. All
More information
TS5 FASTEC. Cine DATA SHEET

FASTEC FASTER THAN VISION Cine DATA SHEET May, 2018 TS5 In the Studio, on the shoot, in the field…high-speed imaging in the palm of your hand! Its superior image quality and dynamic range make it a great
More information
FS-P250 Quick Start Guide

FS-P250 Quick Start Guide This document is a quick look into using the Vitec FS-P250 with Panasonic AG-HPX250/255. The following will be covered in this document: Getting Started and Recording Proxy Footage
More information
Professional Camcorder Family

Professional Camcorder Family XDCAM Handy Camcorders NXCAM Camcorders Accessories *4K: 3840 2160pix Connect this product to HDR (HLG) compatible TV via HDMI cable and turn to HDR (HLG) mode by TV when
More information
HIGH DEFINITION CAMCORDERS

4K PRO XC SERIES XC10-XC15 UHD THE COMPLETE PACKAGE The XC10 4K Camcorder features a compact, lightweight and versatile design for convenient 4K UHD/Full HD video shooting and 12 Megapixel digital still
More information
Краткое содержание страницы № 1
4-157-878-12(1)
Digital HD Video
Camera Recorder
HXR-NX5E/NX5P/NX5M
Operating Guide
Before operating the unit, please read this manual thoroughly,
and retain it for future reference.
© 2009 Sony Corporation
Краткое содержание страницы № 2
Read this first * The exFAT is a file system that is used for Before operating this unit, please read this SDXC memory cards. manual thoroughly, and retain it for future reference. Size of memory card you can use with To handle the recorded images on your camcorder your computer Refer to “Help” on the supplied CD-ROM “Content Management Utility.” Notes on use � “Memory Stick PRO Duo” media, half the Types of memory cards you can use in size of “Memory Stick,” or standard size your camcor
Краткое содержание страницы № 3
b Notes Do not expose your camcorder’s � The camcorder is not dustproof, dripproof or viewfinder, lens, or LCD screen to the waterproof. sun or strong light source for extended See “About handling of your camcorder” periods. (p. 109). � Connect cables to your camcorder with their � Intense light sources, especially the sun terminals placed the correct way. Squeezing the will converge on the viewfinder or lens terminals into your camcorder’s jacks may and damage the internal parts of yo
Краткое содержание страницы № 4
Read this first (Continued) recordings on a TV, you need a PAL containing AVCHD footage should not be system-based TV. used with DVD based players or recorders, as the DVD player/recorder may fail to � Television programs, films, video tapes, eject the media and may erase its contents and other materials may be copyrighted. without warning. Unauthorized recording of such materials may be contrary to the copyright laws. Save all your recorded image data � Because of the way that the image
Краткое содержание страницы № 5
About this manual � Memory cards and a flash memory unit are both referred to as recording media in this manual. � The images of the LCD screen and the viewfinder used in this manual for illustration purposes are captured using a digital still camera, and therefore may appear different. � The on-screen displays in each local language are used for illustrating the operating procedures. Change the screen language before using your camcorder if necessary (p. 18). � Design and specificatio
Краткое содержание страницы № 6
Table of Contents Read this first ………………………………………………………………………………. 2 Getting Started Step 1: Checking supplied items …………………………………………………….. 9 Step 2: Attaching the supplied microphone and the lens hood with lens cover ………………………………………………………………………………10 Step 3: Charging the battery pack ……………………………………………….
Краткое содержание страницы № 7
Editing Operating the MODE menu …………………………………………………………..57 Protecting recorded images (Protect) ……………………………………………..58 Using the Playlist of movies ………………………………………………………….59 Creating the Playlist …………………………………………………………………. 59 Playing the Playlist …………………………………………………………………… 59
Краткое содержание страницы № 8
Table of Contents (Continued) Troubleshooting Troubleshooting ………………………………………………………………………….90 Warning indicators and messages ………………………………………………… 99 Additional Information Recording time of movies ………………………………………………………….. 101 Using your camcorder abroad …………………………………………………….. 103 File/folder structure on the memory card
Краткое содержание страницы № 9
Getting Started Getting Started Step 1: Checking supplied items Make sure that you have following items Large eyecup (1) (p. 16) supplied with your camcorder. The number in the parentheses indicates the number of that item supplied. � Memory cards are not included. See pages 2 and 106 for types of memory cards that you can use on your camcorder. AC Adaptor/Charger (AC-VL1) (1) (p. 12) Rechargeable battery pack (NP-F570) (1) (p. 12, 107) Lens hood with lens cover (1) (p. 10) This lens hood i
Краткое содержание страницы № 10
Step 2: Attaching the supplied microphone and the lens hood with lens cover Attaching the supplied 4 Put the microphone cable into the microphone cable holder E. When you use the supplied microphone (ECM-XM1) for recording sound, do the following steps. Hook the cable in the outer cable holder. Attaching the lens hood with lens cover 1 Attach the wind screen B to the supplied microphone A. 2 Place the microphone A in the PUSH (lens hood release) button microphone holder C with the model
Краткое содержание страницы № 11
Getting Started To remove the lens hood with lens cover Turn the lens hood in the opposite direction to the arrow 2 in the illustration while pressing the PUSH (lens hood release) button. z Tips � If you attach or remove a 72mm (2 7/8 in.) PL filter or MC protector, remove the lens hood with lens cover. To open or close the shutter of the lens hood with lens cover Move the lens cover lever to OPEN to open the lens cover, and move the lever to CLOSE to close the lens cover. 11
Краткое содержание страницы № 12
Step 3: Charging the battery pack After charging the battery You can charge the “InfoLITHIUM” battery pack (L series) with the The charge lamp turns off (normal charge). If you continue charging more 1 hour after supplied AC Adaptor/Charger. the charge lamp turns off, you can use the b Notes battery a little longer (full charge). Remove the battery pack from the AC � You cannot use batteries other than the “InfoLITHIUM” battery pack (L series) Adaptor/Charger when the charge is (p. 107).
Краткое содержание страницы № 13
Getting Started To store the battery pack Using an outside power source If the battery pack is not in use for a while, You can use the AC Adaptor/Charger to run down the battery and store it. See page obtain AC power. 108 for details on storage of the battery pack. To the wall outlet (wall socket) Charging time Power cord Approximate time (min.) required when AC Adaptor/ you charge a fully discharged battery pack. Charger Charge Normal charge Fully charge lamp Battery pack time time NP-F5
Краткое содержание страницы № 14
Step 3: Charging the battery pack Step 4: Turning the (Continued) power on and holding � Even if your camcorder is turned off, AC power your camcorder (house current) is still supplied to it while connected to the wall outlet (wall socket) via the properly AC Adaptor/Charger. To record or play back, set the POWER switch to ON. When you use your camcorder for the first time, the [CLOCK SET] screen appears (p. 17). POWER switch 1 Slide the POWER switch to ON while you press the green bu
Краткое содержание страницы № 15
Getting Started Step 5: Adjusting the LCD panel and viewfinder 2 Hold the camcorder properly. LCD panel Open the LCD panel 180 degrees (1), then rotate it to the best angle to record or play back (2). 1Open 180 degrees. 290 degrees (max.) 2180 degrees (max.) 3 Ensure a good grip, then fasten the grip belt. DISPLAY button z Tips � Images are displayed as mirror images on the LCD screen, but are recorded as normal images. To turn off the LCD backlight to make the battery last longer To tu
Краткое содержание страницы № 16
Step 5: Adjusting the LCD panel and viewfinder (Continued) Viewfinder Large eyecup (supplied) Viewfinder lens Attach with the adjustment lever protruding part Move it until the picture at the top. becomes clear. b Notes � You may see primary colors shimmering in the viewfinder when you move your line of sight. This is not a malfunction. The shimmering colors will not be recorded on the recording media. z Tips � You can adjust the brightness of the viewfinder backlight from [VF BACKLIGH
Краткое содержание страницы № 17
Getting Started Step 6: Setting the date and time Set the date and time when using your camcorder for the first time. If you do not 2 Select (OTHERS) by turning set the date and time, [CLOCK SET] screen the SEL/PUSH EXEC dial, then appears every time you turn on your press the dial. camcorder. z Tips � If you do not use your camcorder for about 3 months, the built-in rechargeable battery gets discharged and the date and time settings may be cleared from the memory. In that case, charg
Краткое содержание страницы № 18
Step 6: Setting the date and time (Continued) The clock starts. � Set [SUMMERTIME] to [ON] to move the time forward 1 hour. � You can set any year up to the year 2037. z Tips � The date and time are automatically recorded on the selected recording media, and can be displayed during playback (DATA CODE button, p. 51). Changing the language setting You can change the on-screen displays to show messages in a specified language. Press the MENU button and select (OTHERS) with the SEL/PUSH EXEC
Краткое содержание страницы № 19
Getting Started Step 7: Inserting a memory card/Attaching a flash memory unit � When you insert a new memory card in Memory card standby mode, the [Create a new Image Database File.] screen appears. Follow the screen indication, and touch [YES]. 1 Open the cover in the direction of the arrow. To eject the memory card Lightly push the memory card once. b Notes � When the access lamp is lit or flashing in red, your camcorder is reading/writing data. Do not shake or knock your camcorder, tur
Краткое содержание страницы № 20
Step 7: Inserting a memory card/Attaching a flash memory unit (Continued) b Notes � You can only select a slot that already has a memory card inserted. � While movies are being recorded on the memory card, you cannot switch the slot even if you press the memory card slot A/B buttons. z Tips � When only one slot has a memory card inserted, the slot that has the memory card is selected automatically. � If the memory card is fully recorded during recording, the camcorder continues recording
Посмотреть инструкция для Sony NXCAM HXR-NX3 бесплатно. Руководство относится к категории видеокамеры, 1 человек(а) дали ему среднюю оценку 7.5. Руководство доступно на следующих языках: английский. У вас есть вопрос о Sony NXCAM HXR-NX3 или вам нужна помощь? Задайте свой вопрос здесь
Не можете найти ответ на свой вопрос в руководстве? Вы можете найти ответ на свой вопрос ниже, в разделе часто задаваемых вопросов о Sony NXCAM HXR-NX3.
Что означает аббревиатура MП?
Инструкция Sony NXCAM HXR-NX3 доступно в русский?
Не нашли свой вопрос? Задайте свой вопрос здесь
Specifications:1092/1092320-nxcam_hxrnx100.pdf file (10 Jan 2023) |
Accompanying Data:
Sony NXCAM HXR-NX100 Camcorder PDF Operating Manual (Updated: Tuesday 10th of January 2023 06:00:06 AM)
Rating: 4.4 (rated by 78 users)
Compatible devices: DCR-IP7BT, DSC-H50 Marketing Specifications (Black Model), Betacam SX DNV-5, DCR200, DCR-DVD7E, DSC-W290, DCR-DVD100, IPELA SRG-300SE.
Recommended Documentation:
Text Version of Operating Manual
(Ocr-Read Summary of Contents of some pages of the Sony NXCAM HXR-NX100 Document (Main Content), UPD: 10 January 2023)
-
11, Sony NXCAM HXR-NX100 11 A LCD screen (p. 24) B MENU button (p. 72) C V/v/B/b/SET buttons (p. 72) D THUMBNAIL button (p. 60) E Memory card slot A/Memory card access lamp (p. 26) F Memory card slot B/Memory card access lamp (p. 26) G i (headphones) jack H REMOTE jack (p. 91) The REMOTE jack connects to a video deck or other devic…
-
36, Sony NXCAM HXR-NX100 36 Changing the recording setting You can select the file format in [FILE FORMAT] and the recording format (bit- rate, image size, frame rate, and scanning system) in [REC FORMAT]. You can select either XAVC S HD or AVCHD in [FILE FORMAT]. Select the desired file format that best suits the shooting si…
-
116, 116 Index A AC Adaptor ………………..18, 19 AE SHIFT…………………..78, 96 AGC LIMIT …………………….77 AREA SET………………………90 ASPECT ………………………….85 ASSIGN BUTTON …………..58 AUDIO LEVEL DISPLAY ………………………..87 AUDIO LIMIT ………….…
-
47, 47 Recording You can customize the picture quality by adjusting picture profile items such as [GAMMA] and [DETAIL]. You can make adjustments for the time of day, weather conditions, or just personal preference. Connect your camcorder to a TV or monitor, and adjust the picture quality while observing …
-
77, 77 Using the Menu *1 Available on 60i models only. z Tip • You can display the [EDIT] menu by pressing the MENU button when the THUMBNAIL or playback screen is displayed. (OTHERS) (p. 90) STATUS CHECK CAMERA PROFILE MEMORY CARD A, MEMORY CARD B ASSIGN BUTTON ASSIGN1, ASSIGN2, ASSIGN3, ASSIGN4, ASSIGN5 CLOCK S…
-
31, Sony NXCAM HXR-NX100 31 Recording You can record movies on both of these recording media simultaneously. Press MENU t select (REC/OUT SET) t [REC SET] t [SIMUL/RELAY REC] t [SIMULTANEOUS REC] with the V/v/B/b/SET button. When using SIMULTANEOUS REC, you can start and stop recording on different memory cards by using the ST…
-
98, 98 “—” is displayed on the LCD screen. • Bars will be displayed for the camera data of the movies recorded with [COLOR BAR] set to [ON]. appears on the LCD screen. • appears when you play back movies recorded with 5.1ch surround sound. 5.1ch surround sound is down-mixed to 2ch stereo and played back…
-
100, 100 Warning indicators and messages When an error occurs, a warning indicator appears on the LCD screen or in the viewfinder. You can fix some problems associated with the symptoms yourself. If the problem persists even after you have tried a couple of times, contact your Sony dealer or local authorized …
-
Sony NXCAM HXR-NX100 User Manual
-
Sony NXCAM HXR-NX100 User Guide
-
Sony NXCAM HXR-NX100 PDF Manual
-
Sony NXCAM HXR-NX100 Owner’s Manuals
Recommended: ksrg25fkss05, 13AT605G755, RHINO 7214 MSL


-
Sanyo VCC-HD4600P
FILE NO.REFERENCE No.SM5310801L5DH2/XE, XE-C1F, XE-C8F, US-Z, US-C1F, US-C8F, C-Z, C-C1F (R)NOTE: 1. Parts order must contain model number, part number, and description.2. Substitute parts may be supplied as the service parts.3. N.S.P. : Not available as service parts.Design and specifications are subject to …
VCC-HD4600P 55
-
JVC GZMG40US — Everio Camcorder — 1.33 MP
SCHEMATIC DIAGRAMSCOPYRIGHT © 2005 Victor Company of Japan, LimitedNo.YF109SCH2005/9YF05320048CD-ROM No.SML200509HARD DISK CAMCORDERGZ-MG40US, GZ-MG50USLead free solder used in the board (material : Sn-Ag-Cu, melting point : 219 Centigrade)GZ-MG40US[M5E327],GZ-MG50US[M5E329] …
GZMG40US — Everio Camcorder — 1.33 MP 52
-
Sony DVW-A506
DIGITAL VIDEOCASSETTE RECORDERDVW-A500P/1DVW-500P/1CONTROL PANELBKDW-515ANALOG COMPOSITE DECODER BOARDBKDW-506AUDIO PROGRAM PLAY BOARDBKDW-507PARALLEL (50P) INTERFACE KITBKDW-509CONTROL PANELBKDW-514OPERATION MANUAL [French]1st Edition (Revised 3)Serial No. 50001 and Higher (DVW-A500P/1)Serial …
DVW-A506 164
-
Besteker Z18
Table of ContentsIntroduction………………………………………………………………………………………………………………………………………..2Main Features……………………………………………………………………………………………………… …
Z18 32
Popular Right Now:
Operating Impressions, Questions and Answers:
: Sony Sony-Nxcamtm-Hxr-Nx5U-Users-Manual-286840 sony-nxcamtm-hxr-nx5u-users-manual-286840 sony pdf
1
HXR-NX5U
Digital HD Video Camera Recorder
(simulated image)
SONY56901_20pgBro_SONY_56020_20pgBro.pdf 1SONY56901_20pgBro_SONY_56020_20pgBro.pdf 1 11/3/10 11:54:01 AM11/3/10 11:54:01 AM
2
NXCAM™ is the name for Sony’s newest line of affordable HD camcorders based
on the AVCHD technology produced exclusively for demanding professionals.
Picture yourself in the next stage.
Definition for Professionals
Mobility for Professionals
Confidence for Professionals …visualize your creativity.
SONY56901_20pgBro_SONY_56020_20pgBro.pdf 2SONY56901_20pgBro_SONY_56020_20pgBro.pdf 2 11/3/10 11:54:02 AM11/3/10 11:54:02 AM
3
Introduction
Debut of the First Sony NXCAM Camcorder-HXR-NX5U
– Heralding New Standards in Contents Creation
The new HXR-NX5U camcorder is the first product of the NXCAM generation from Sony, and
a new category of tapeless memory camcorder, providing an ideal balance of power and
performance in the digital age.
Utilizing the revolutionary AVCHD format, this camcorder offers long duration recording – with
dual memory slots – on affordable consumer memory cards. As it facilitates a totally IT-based
workflow, the HXR-NX5U has the potential to profoundly change the way content is created.
Simultaneous hybrid recording is available in HD (high definition) and SD (standard definition)
formats using an optional HXR-FMU128 flash memory unit.
In any format, breathtaking picture quality is assured with proven features from Sony such as a
state-of-the-art «G Lens» and three Exmor™ CMOS sensors with a ClearVid™ array. Professionals
around the world expect this standard of picture quality from Sony…and accept nothing less.
SONY56901_20pgBro_SONY_56020_20pgBro.pdf 3SONY56901_20pgBro_SONY_56020_20pgBro.pdf 3 11/3/10 11:54:02 AM11/3/10 11:54:02 AM
4
Main Features
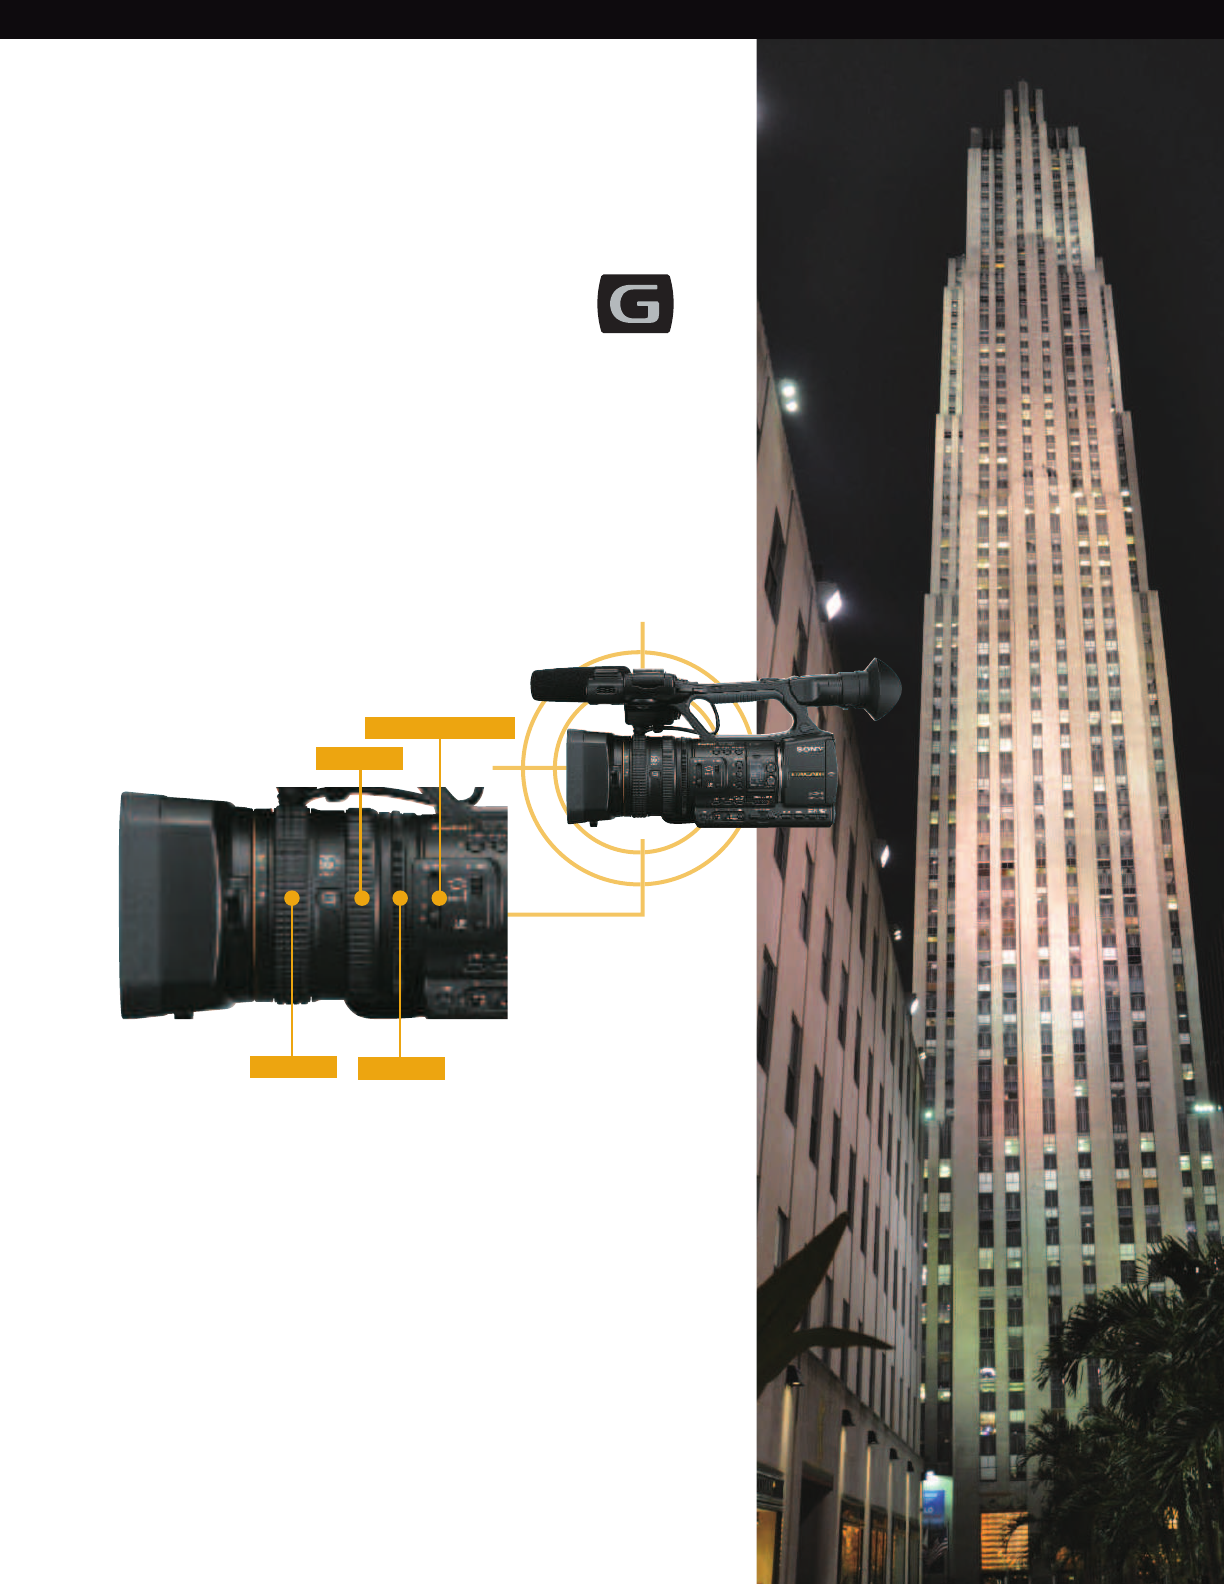
G Lens
Memory Recording and HYBRID
«G Lens», the lens featured in other successful Sony camcorders,
already enjoys an excellent industry reputation. In the HXR-NX5U,
this sophisticated lens is optimized to complement the camcorder’s
advanced image sensor and image-processing technology.
Three Exmor CMOS sensors with a ClearVid array comprise a
state-of-the-art sensor system from Sony which realizes high
resolution, high sensitivity, a wide dynamic range, and excellent
color reproduction, regardless of the codec.
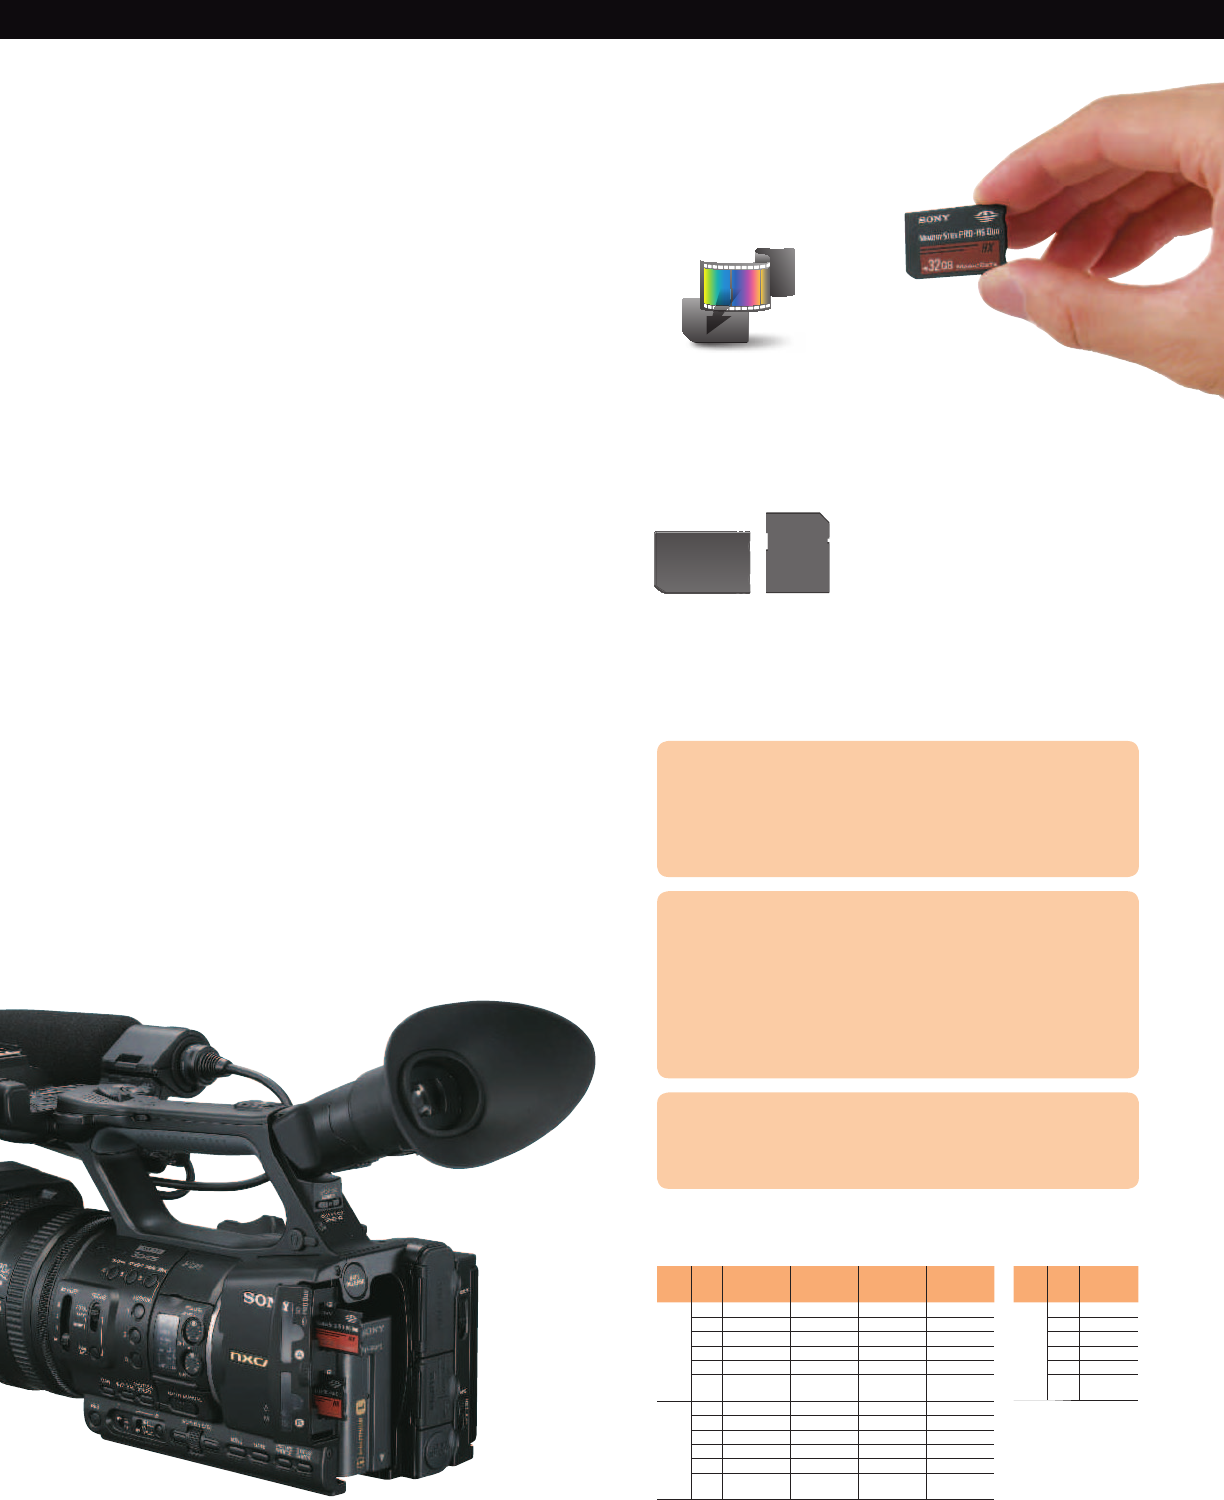
Memory recording on affordable consumer memory cards offers
workflow efficiency at both the shooting and editing stages.
Combined with hybrid recording, using an optional HXR-FMU128,
the user achieves a totally IT-based workflow, with the added
bonus of instant data backup.
SONY56901_20pgBro_SONY_56020_20pgBro.pdf 4SONY56901_20pgBro_SONY_56020_20pgBro.pdf 4 11/3/10 11:54:03 AM11/3/10 11:54:03 AM
5
GPS
Active SteadyShot Feature
A built-in global positioning system (GPS) locator allows satellite
navigation data to be recorded directly onto footage for
reference or posting on popular internet mapping systems.
GPS data can be invaluable when searching for footage or to
provide evidence of where and when footage was recorded.
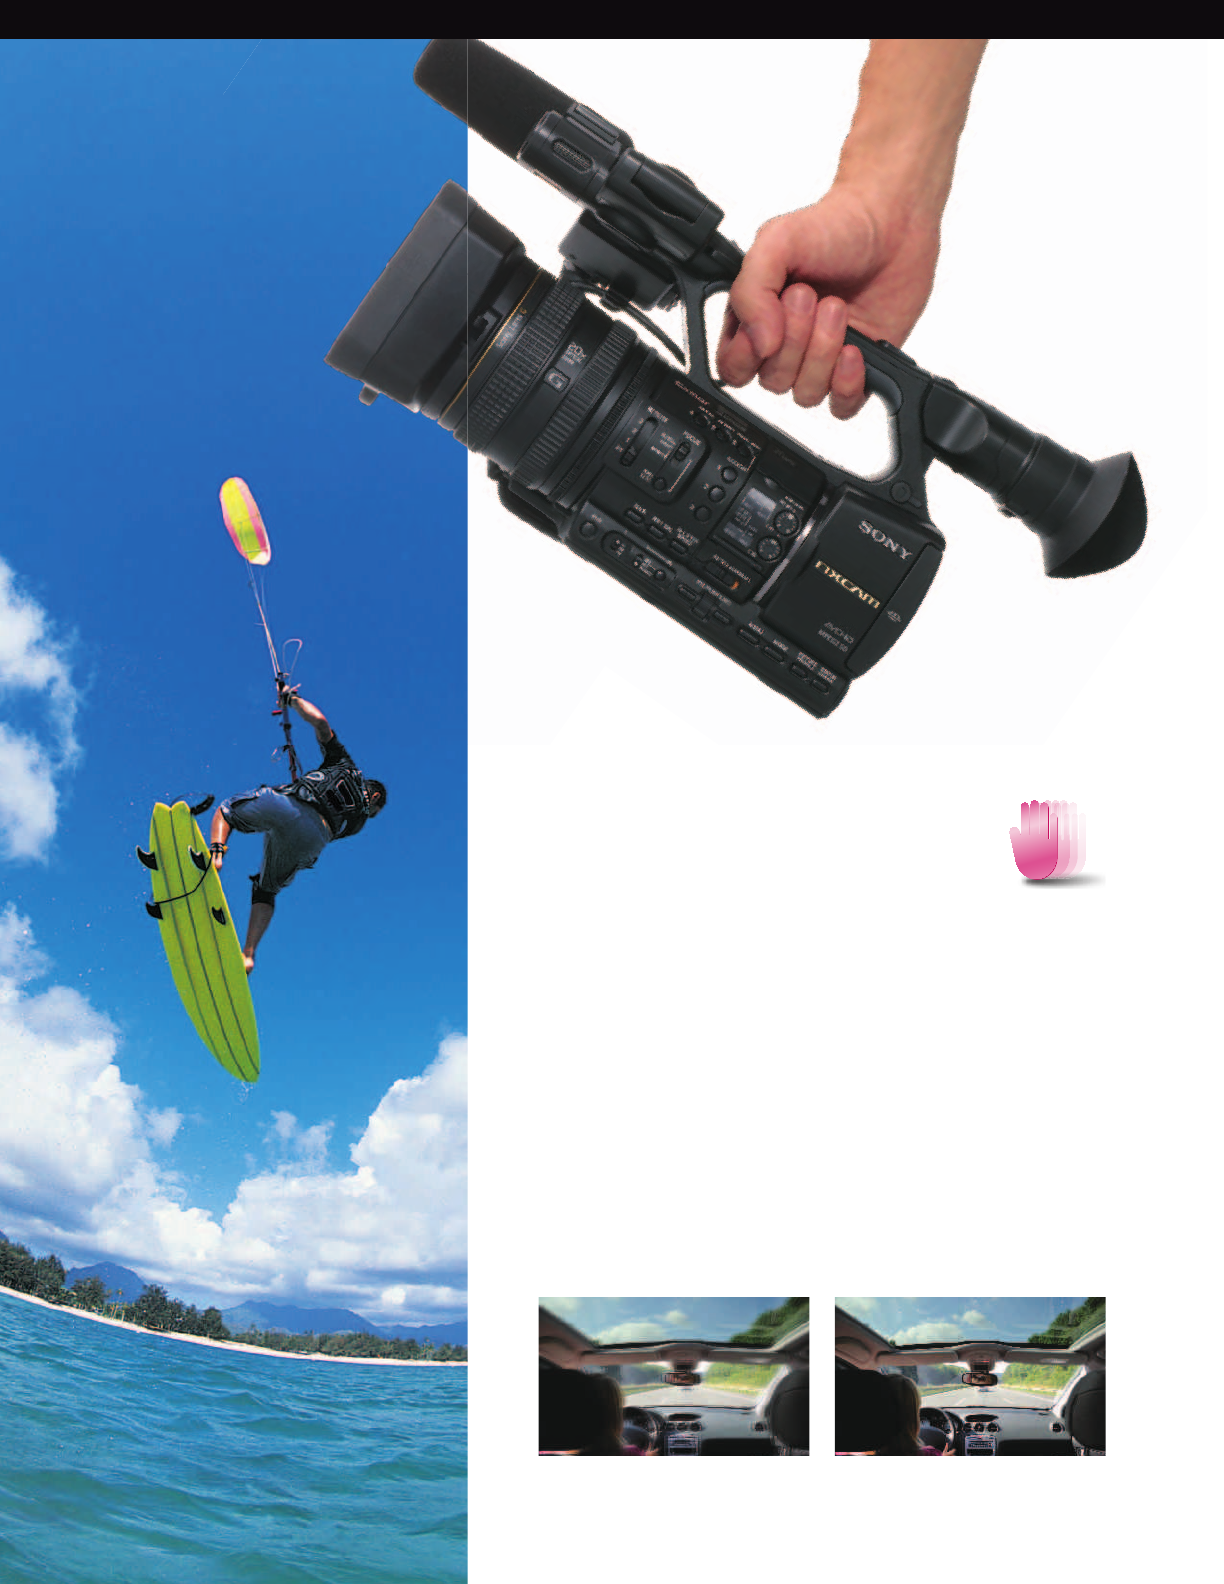
Active SteadyShot® feature is a new, enhanced image
stabilization system that provides a powerful shake-reduction
capability, vital for handheld usage. Additional stabilization is
provided by the increased optical lens coverage area and
by improved detection with state-of-the-art compensation
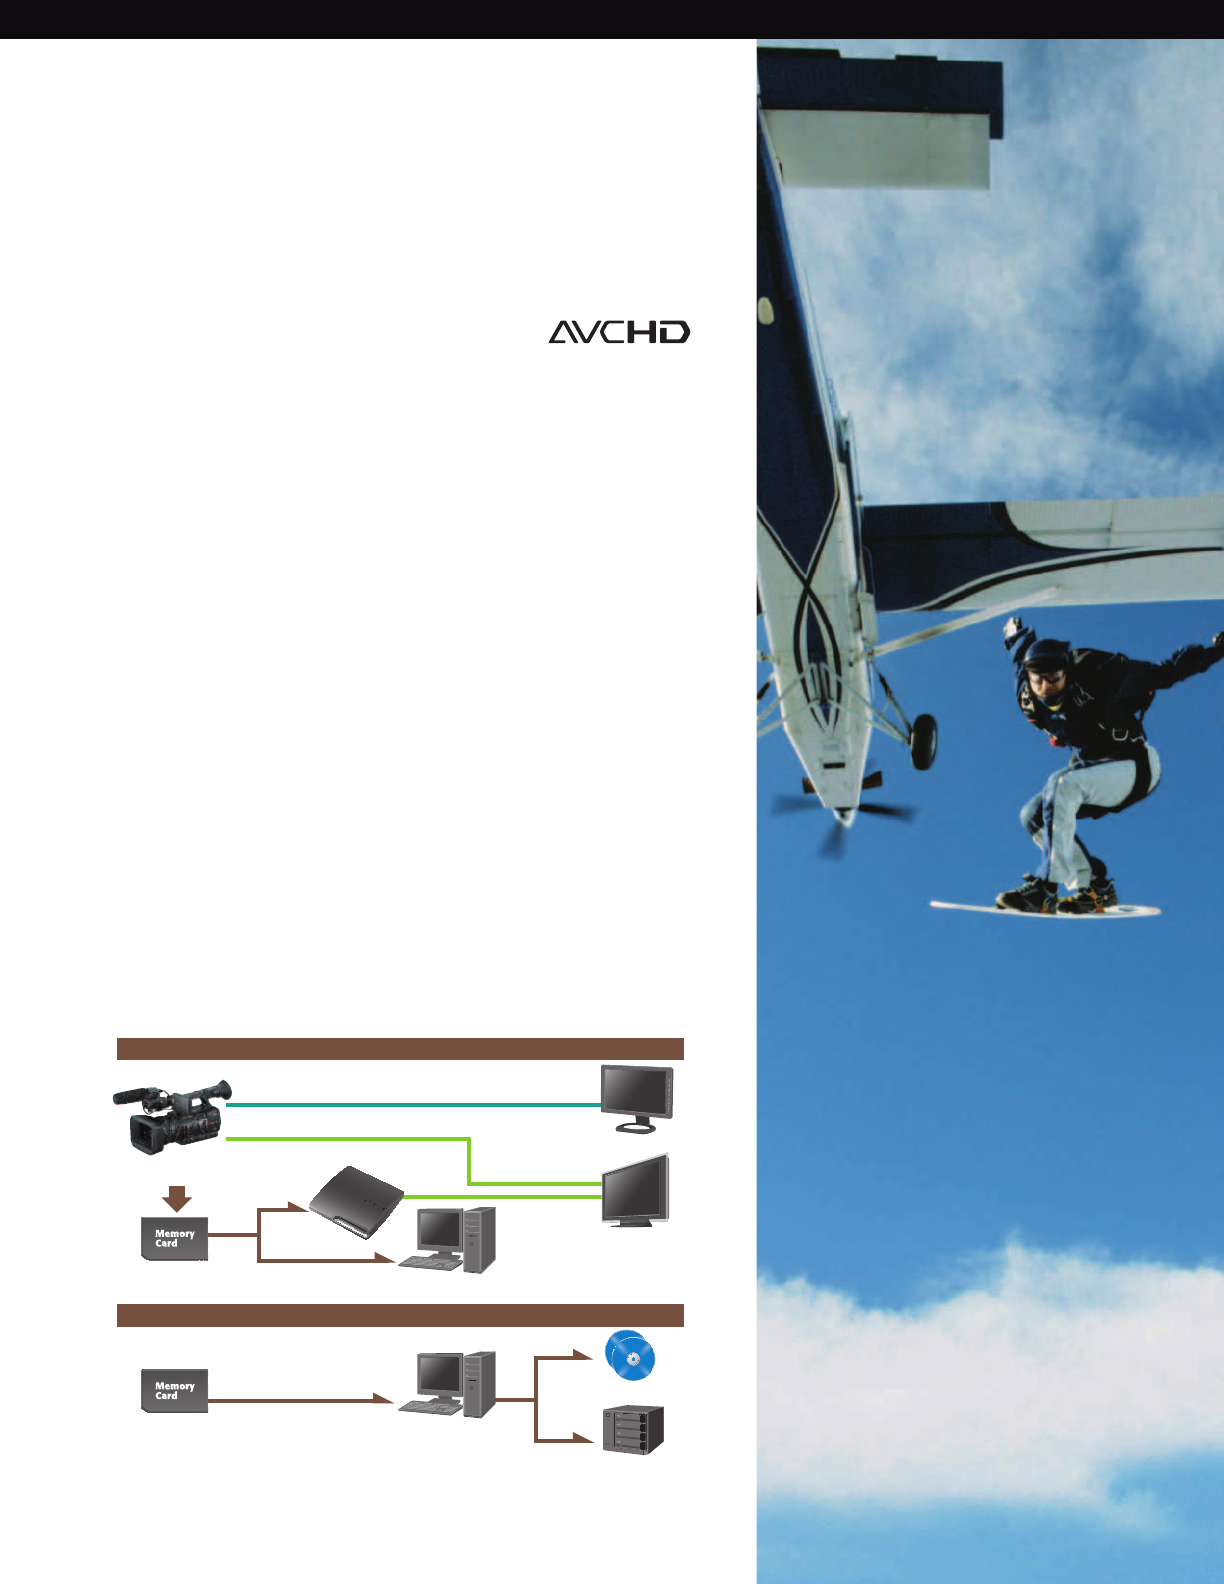
The revolutionary AVCHD™ recording format, which utilizes
the MPEG-4, AVC/H.264 video codec, allows users to record
HD video footage onto random access media. Its intelligent
and sophisticated algorithm makes AVCHD a highly efficient
compression format ideal for memory recording and IT-based
editing.
Format
SONY56901_20pgBro_SONY_56020_20pgBro.pdf 5SONY56901_20pgBro_SONY_56020_20pgBro.pdf 5 11/3/10 11:54:03 AM11/3/10 11:54:03 AM
6
The «G Lens» provides great picture quality and versatility with a wide angle
of 29.5 mm (equivalent to 35 mm film) and a 20x high quality zoom. Two ED
(extra-low dispersion) glass elements reduce chromatic aberrations caused
by differences in light refraction to minimize color fringing. The advanced
10-group, 15-element lens structure also includes a compound aspheric lens
for images that are crisp and clear, even when shooting videos at a high
zooming ratio.
Advanced Camera Features
Sony-exclusive
High-performance “G Lens”
Other Superb Features of
the Optical System
FOCUS IRIS
ZOOM
Three ND filters
Natural-touch Lens Operation
The focus, zoom and iris ring are positioned on the lens barrel, and this design
offers the same operability as general interchangeable lenses. Focus, zoom
and iris control can all be managed easily.
Six-blade Iris
SThe six-blade iris diaphragm is nearly circular, enabling the creation of an
extremely beautiful background blur.
Built-in ND filters
SThe HXR-NX5U is equipped with three built-in ND (Neutral Density) filters – 1/4,
1/16, 1/64 – which help to vary the depth of field with iris control.
SONY56901_20pgBro_SONY_56020_20pgBro.pdf 6SONY56901_20pgBro_SONY_56020_20pgBro.pdf 6 11/3/10 11:54:03 AM11/3/10 11:54:03 AM
7
Innovative Technologies
The three state-of-the-art 1/3” Exmor CMOS sensors with a ClearVid array
ensure high resolution, high sensitivity, a wide dynamic range, and excellent
color reproduction. The quality of this imaging system has earned an excellent
reputation in the industry, and is of course fully realized in the new HXR-NX5U.
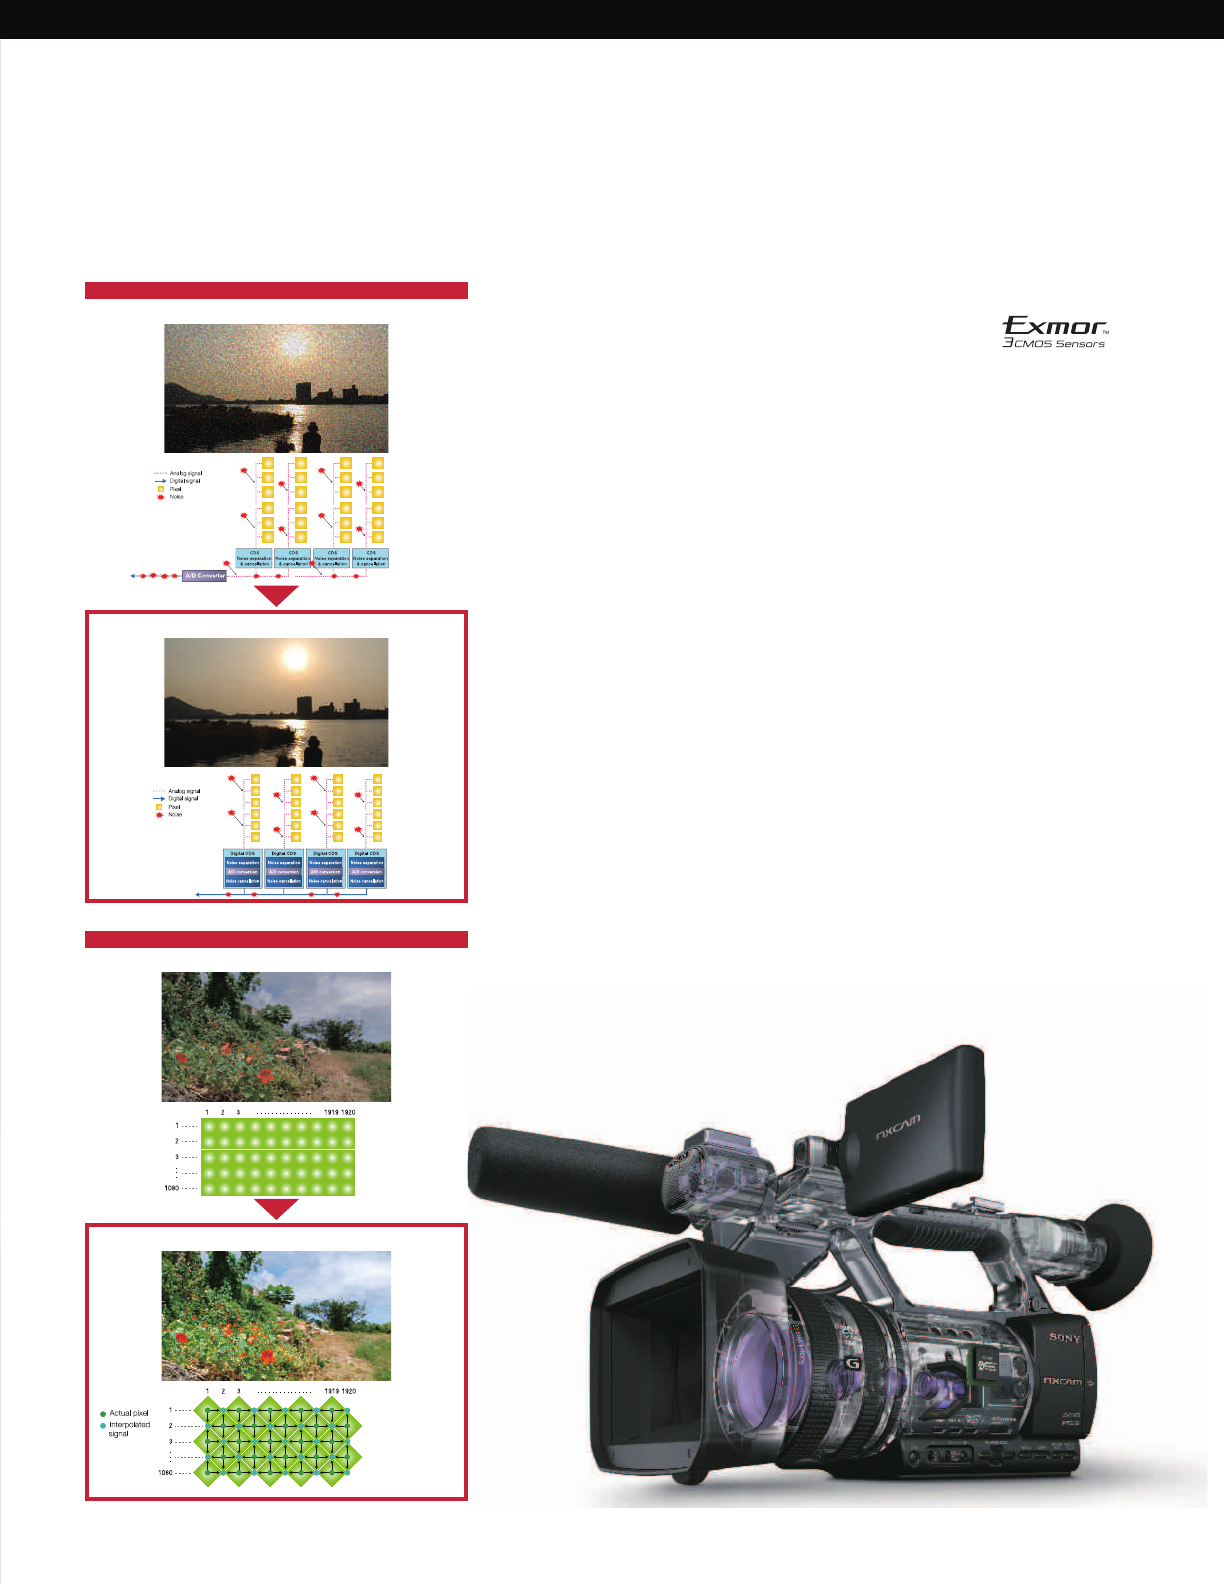
S Exmor Technology Noise Reduction System
Multiple A/D (analog-to-digital) converters on each pixel row convert analog
signals to digital as soon as they are generated, unlike traditional technology
that only provides one A/D converter on each chip. Exmor technology
can eliminate the influence of external noise that enters the signal chain
during transfer to the A/D converter, resulting in high-quality digital signals
with extremely low noise. This significantly enhances shooting in low-light
environments with a sensitivity of just 1.5 lux.*
* At 1/30 shutter, auto iris, and auto gain.
S High Sensitivity and Resolution with Sophisticated Techniques
CMOS sensors equipped with a ClearVid array achieve a bigger sensor pixel
size than ordinary image sensors, and this leads to high sensitivity. Furthermore,
a unique interpolation technique from Sony utilizes the 45-degree rotated
pixels on each chip, increasing resolution. The powerful combination of these
two sophisticated techniques explains why Sony picture quality has such an
excellent industry reputation.
Three 1/3” Exmor CMOS
Sensors – Before the Codec
+ Ordinary CMOS Sensor
Exmor Technology
ClearVid Array Technology
+ Sensor with Exmor Technology
+ Sensor with ClearVid Array
+ Small size sensor
(simulated image)
SONY56901_20pgBro_SONY_56020_20pgBro.pdf 7SONY56901_20pgBro_SONY_56020_20pgBro.pdf 7 11/3/10 11:54:04 AM11/3/10 11:54:04 AM
8
Cutting-edge Technologies
The HXR-NX5U is the world’s first AVCHD professional camcorder with an
internal GPS. This important new feature enables users to find the same shooting
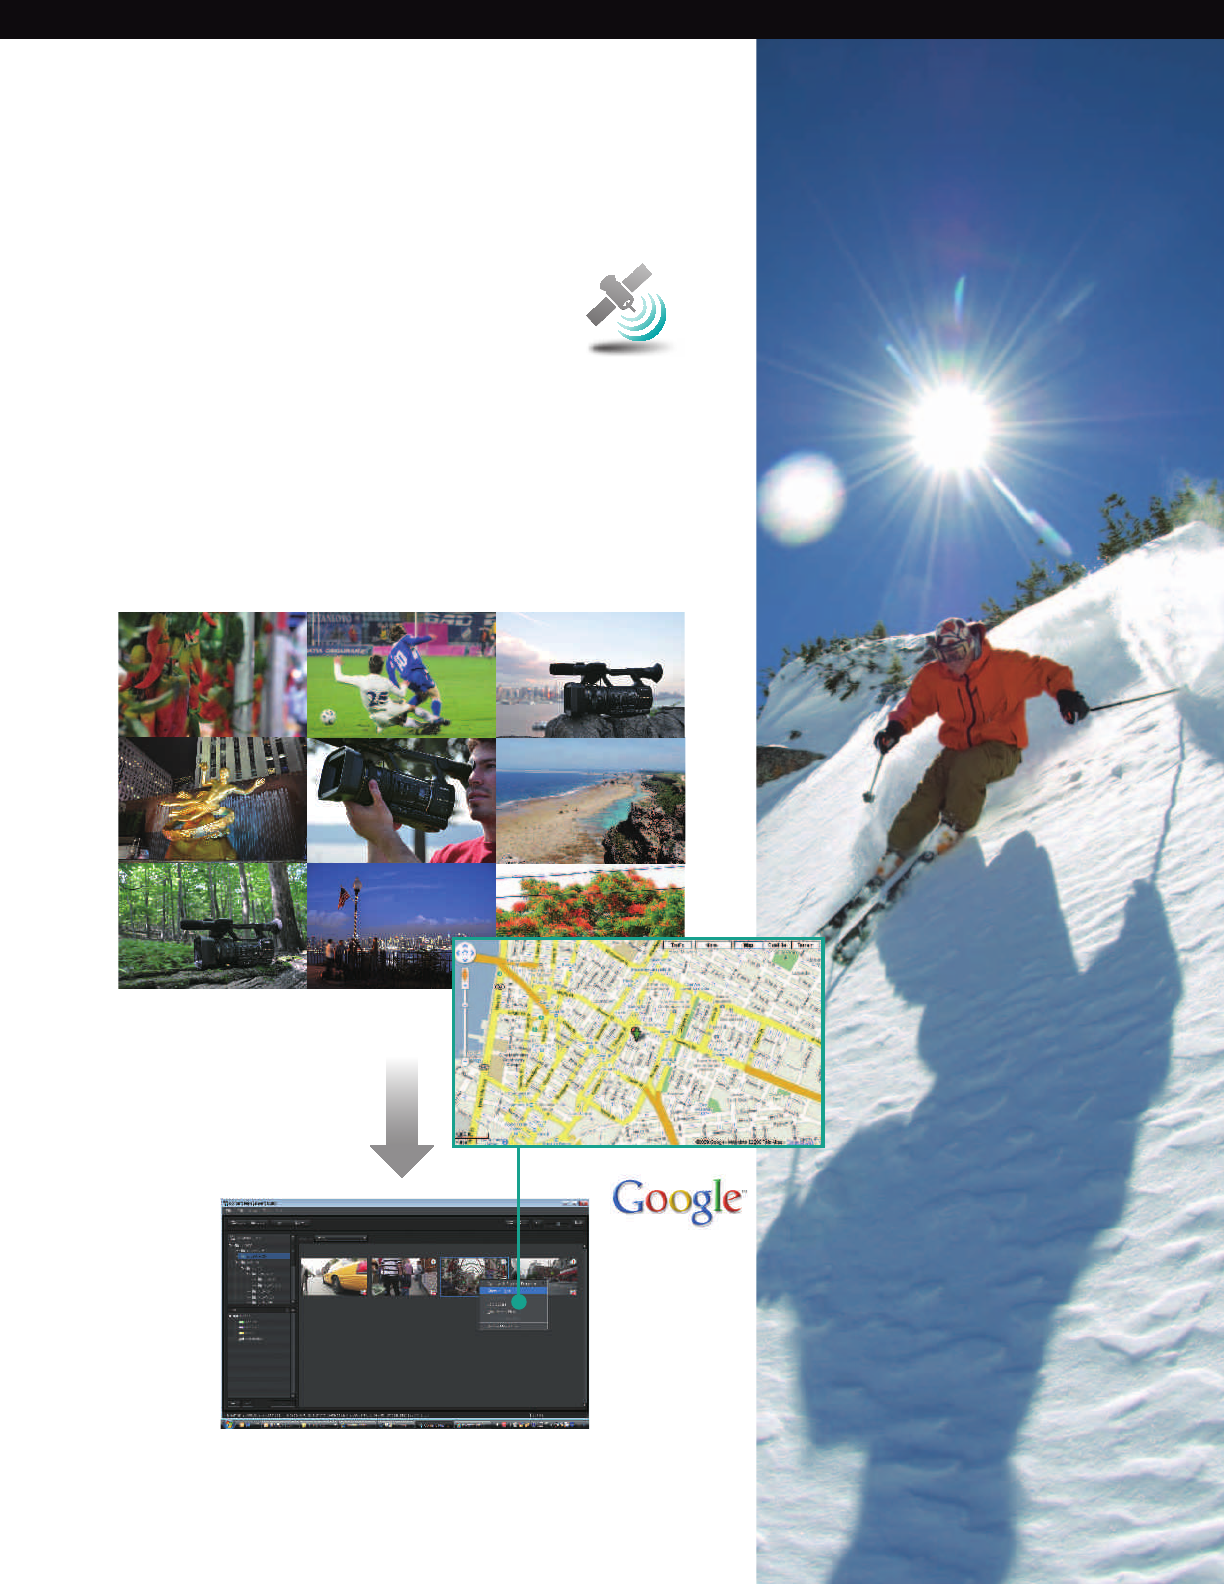
location when, for example, they need to revisit a location for extra shots that
must match existing footage. GPS data is embedded in AVCHD video data
files. Mapping data can be created using bundled Content Management
Utility software. Also GPS data can be extracted from video files, using
Content Management Utility software, in a commonly used latitude/longitude
NMEA data format. This GPS information can be used in several applications.
Location Simplification with
Cutting-edge GPS Technology
Content Management Utility Software
Display GPS data on the map
“ Google and Google Earth are trademarks of Google inc.”
“ Maps and satellite images powered by Google Maps™ mapping service. ”
SONY56901_20pgBro_SONY_56020_20pgBro.pdf 8SONY56901_20pgBro_SONY_56020_20pgBro.pdf 8 11/3/10 11:54:05 AM11/3/10 11:54:05 AM
9
A new feature of the HXR-NX5U is Active SteadyShot. This useful feature
effectively reduces hand-held camera shake. The improvement is particularly
noticeable when using wide-angle framing. It is an essential feature when
holding the camcorder by hand, and especially for projects that are recorded
mainly in the field. It is also ideal when the subject is moving and must be
followed, for example in news gathering or at weddings. Shooting from inside
a moving vehicle is another useful application for the Active SteadyShot
feature. It significantly reduces the need for external stabilization systems.
Improved stabilization allows the user to concentrate more on composition
and shot transition, rather than worry about how to stabilize the camera.
Depending on the shooting environment, users can select normal SteadyShot
feature or Active SteadyShot feature for hand-held applications. When not in
use, the stabilization feature can be easily switched off.
Shoot and Walk with the New
Active SteadyShot Feature
Without Active SteadyShot Feature With Active SteadyShot Feature
(simulated images)
SONY56901_20pgBro_SONY_56020_20pgBro.pdf 9SONY56901_20pgBro_SONY_56020_20pgBro.pdf 9 11/3/10 11:54:05 AM11/3/10 11:54:05 AM
10
The HXR-NX5U is also the first Sony professional camcorder
designed to record directly onto consumer memory cards.
These cards are affordable and easy to find. This general
versatility is especially handy when a user suddenly needs extra
memory – something that happens quite often when shooting a
documentary or news report on the move. Also, memory cards
are very compact and easy to handle. Many devices can accept
these memory cards allowing easy playback. Files can be copied
Three Major Advantages of Memory Recording
Recording Time on a single memory media
HD MOVIE SD MOVIE
1. Easy Viewing of Recorded Footage
The major benefit of this memory recording system is its instant search
capability for recorded clips using thumbnail images. This speeds up
logging and editing work, which is ideal in fast-paced environments.
Having the ability to access clips randomly will make production staff
much happier and far more efficient.
2. Fast Ingestion to a Computer
Users can simply pop out a memory card and plug it into most
computer’s memory card reader slot (or use a USB2.0-type memory
card reader) to upload files. This is likely to take less time than the
actual length of recorded footage, so more time can be spent
shooting. Users are secure in the knowledge that editing deadlines
will be met, thanks to this efficient new approach to digital video
production.
*The uploading time will depend on the computer’s specification.
3. Easy Playback
Affordable consumer memory media are already used in many
consumer electronic devices, and more are to come. Recorded
footage can be instantly played back using these devices.
Another new feature is continuous recording between two memory
card slots. The new HXR-NX5U camcorder automatically cycles
between the dual memory slots. When using two, 32-GB memory
cards, six hours of continuous HD footage can be recorded. If
a longer continuous recording time is required, the user simply
waits until the first card is full and recording has relayed to the
second card, before ejecting the first card and inserting a new
blank memory card. This procedure can be repeated as required,
extending continuous recording for a sufficiently long time.
from a memory card to any available computer, instantly backing
up valuable data. Another benefit is that memory cards can be
easily and cost-effectively reused.
Memory Recording for Professionals
Efficiency and Operability on Readily
Available Memory Cards
Relay Record with Dual Memory Slots
AVCHD
24Mbps
(max) FX mode
AVCHD
17Mbps
(avg) FH mode
AVCHD
9Mbps
(avg) HQ mode
AVCHD
5Mbps
(avg) LP mode
Linear
PCM
2ch
1GB 4 min 6 min 10 min 15 min
2GB 10 min 10 min 20 min 35 min
4GB 20 min 25 min 45 min 70 min
8GB 40 min 55 min 95 min 150 min
16GB 85 min 110 min 190 min 300 min
32GB 170 min
(2h 50m)
225 min
(3h 45m)
385 min
(6h 25m)
605 min
(10h 5m)
Dolby
Digital
2ch
1GB 5 min 6 min 10 min 20 min
2GB 10 min 10 min 25 min 40 min
4GB 20 min 25 min 50 min 90 min
8GB 45 min 55 min 105 min 185 min
16GB 90 min 115 min 215 min 375 min
32GB 180 min
(3h 0m)
235 min
(3h 55m)
435 min
(7h 15m)
750 min
(12h 30m)
SD 9Mbps
(avg) HQ
mode
Dolby
Digital
2ch
1GB 10 min
2GB 25 min
4GB 55 min
8GB 115 min
16GB 235 min
32GB 475 min
(7h 55m)
Available Memory Cards Type
* For detailed information please refer to the
specification sheet on the back of this brochure.
Memory Stick
PRO DuoTM media
SD/SDHC
Memory
Card
SONY56901_20pgBro_SONY_56020_20pgBro.pdf 10SONY56901_20pgBro_SONY_56020_20pgBro.pdf 10 11/3/10 11:54:10 AM11/3/10 11:54:10 AM
11
HD + HD HYBRID Recording
HD + SD HYBRID Recording
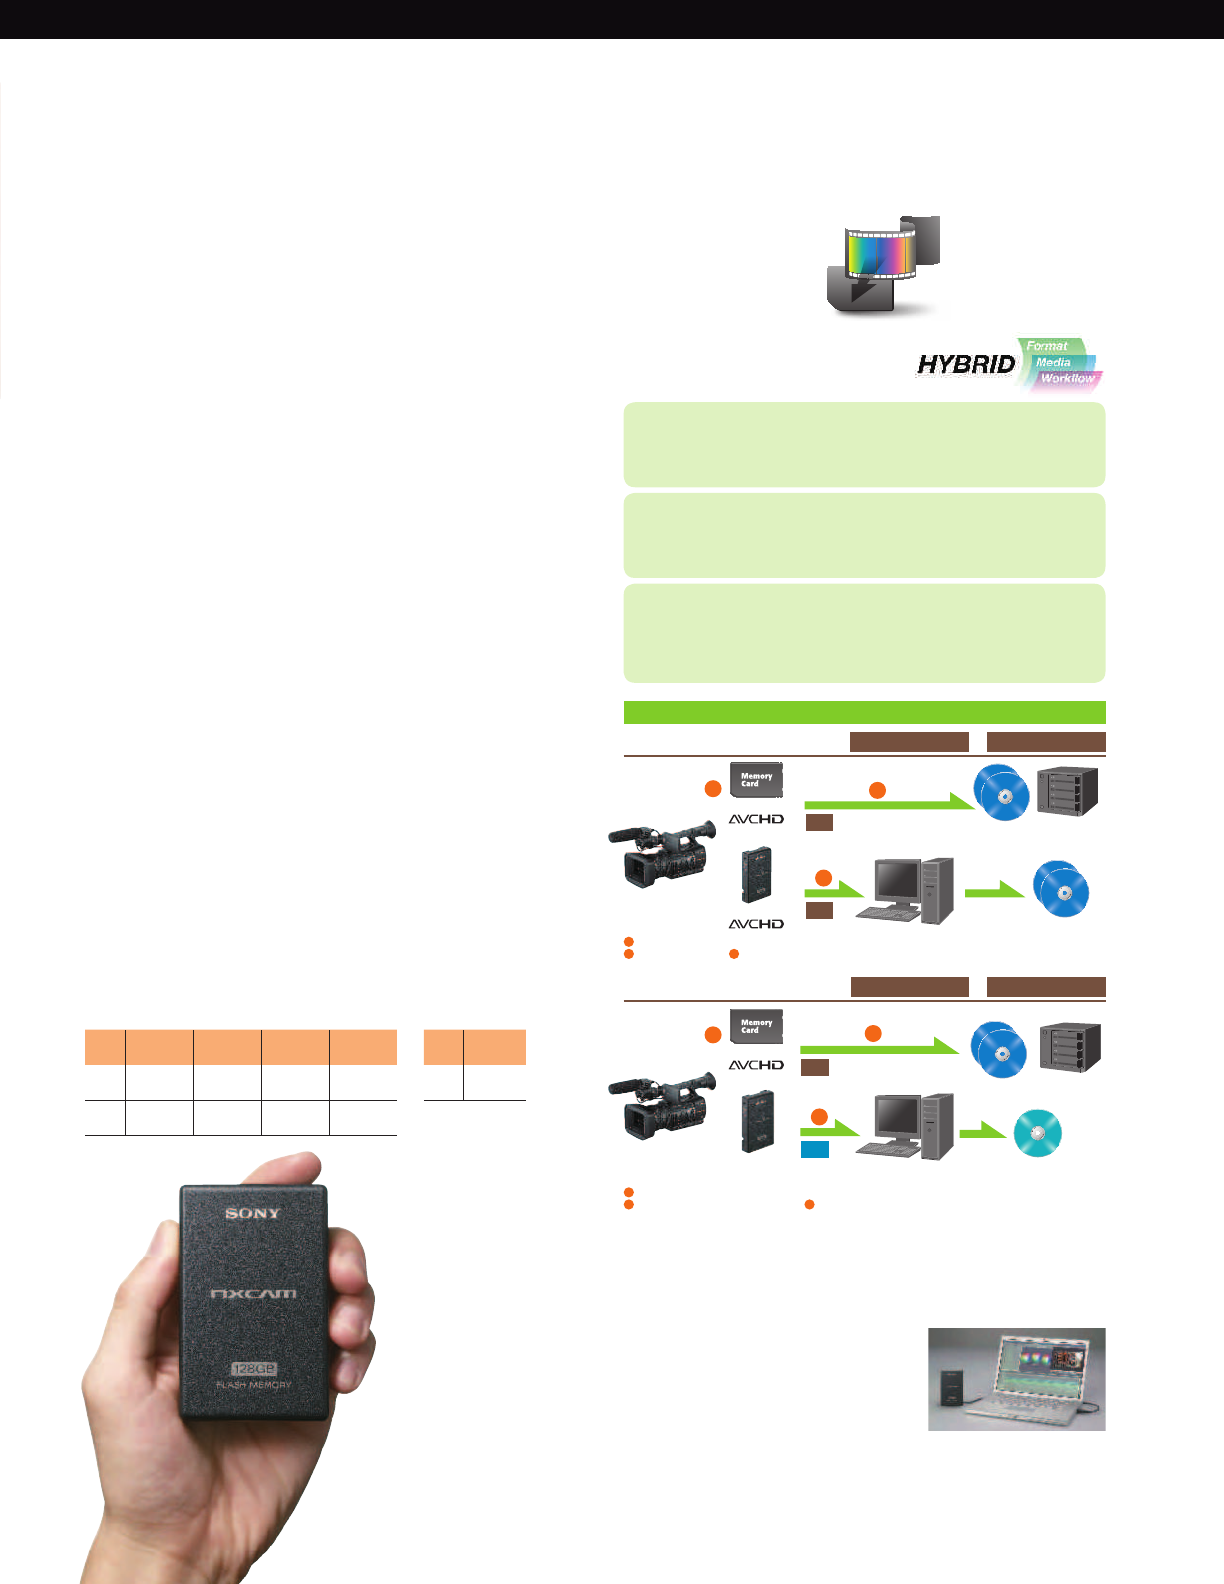
Sony proudly introduces the HXR-FMU128, an optional 128-GB flash
memory unit exclusively designed for the HXR-NX5U camcorder.
This enables hybrid recording of video footage – another world
first for an AVCHD professional camcorder. Other capabilities
include simultaneous recording of HD and HD video footage, and
even the combination of HD and SD, realizing an instant backup
in the desired format. The 128-GB storage capacity provides
continuous recording for almost half a day at the highest bit-rate –
incredible in a unit of such compact size. This is an ideal option for
recording music festivals, seminars, and weddings, and for making
documentaries, all of which require extended recording times.
Simple Direct Attachment
The HXR-FMU128 is designed exclusively for this camcorder, so it
attaches directly to the back of the HXR-NX5U.
Long, High-quality Recording
The memory unit enables approximately 11 hours of continuous
recording in the highest FX 24-Mbps* mode.
* FX 24-Mbps mode comprises 21-Mbps of video data and 3-Mbps of audio and
other data.
*Notes on HXR-FMU128
— HXR-FMU128 formatted by a 60i (50i) camcorder cannot be used by a 50i (60i) camcorder.
— Rebooting of the camcorder is needed when HXR-FMU128 is attached while the
camcorder power is ON.
HD recording time (HD MOVIE)
When connected to the HXR-NX5U
SD recording time (SD MOVIE)
When connected to the
HXR-NX5U
Recording Time on HXR-FMU128
1. HYBRID Format
HD+HD/HD+SD
SD for today, HD for tomorrow, both acquired by one shot
5. HYBRID Media
Memory Card + Flash Memory Unit
Identical clips on different media provides instant backup
9. HYBRID Workflow
Media for Editing + Media for Archiving
Simultaneous ingesting to two computers will allow editing and
archiving at the same time
Hybrid Recording with the
HXR-NX5U and HXR-FMU128
Hybrid Video Footage Recording Capability
Optional 128-GB Flash Memory Unit, HXR-FMU128
Simple Data Transfer and Input
Simple connection to a computer via a USB slot means there’s no
need for an external power supply. Once the HXR-NX5U is linked
to a PC via a USB2.0 cable, files can be
uploaded directly. This allows fast file
transfer to popular NLE systems, and
saves valuable time.
HYBRID Recording
HXR-NX5U
HXR-NX5U
Archiving during editing
HD archive for future usage
*Media of HD +SD can be vice versa
HD Delivery
Ex. Blu-ray
SD Delivery
Ex. DVD-VIDEO, Web contents
and
and
HXR-FMU128
Memory Card
Memory Card
HXR-FMU128
MPEG-2 SD
Memory Card: HD HXR-FMU128: HD
+
HXR-FMU128: SDMemory Card: HD +
HD
SD
HD
HD
1
1
Simultaneous recording on different media for instant backup
Ingest to edit A Copy for archiving at the same time
1
2 3
Simultaneous recording in different format for different purposes
Ingest SD data to edit today A Archive HD data for tomorrow at the same time
1
2 3
2
2
3
3
AVCHD
24Mbps
(max) FX mode
AVCHD
17Mbps
(avg) FH mode
AVCHD
9Mbps
(avg) HQ mode
AVCHD
5Mbps
(avg) LP mode
Linear
PCM
2ch
700 min
(11h 40m)
930 min
(15h 30m)
1570 min
(26h 10m)
2490 min
(41h 30m)
Dolby
Digital
2ch
740 min
(12h 20m)
980 min
(16h 20m)
1790 min
(29h 50m)
3080 min
(51h 20m)
SD 9Mbps
(avg) HQ
mode
Dolby
Digital
2ch
1960 min
(32h 40m)
HDD mass storage
HDD mass storage
SONY56901_20pgBro_SONY_56020_20pgBro.pdf 11SONY56901_20pgBro_SONY_56020_20pgBro.pdf 11 11/3/10 11:54:10 AM11/3/10 11:54:10 AM
12
Recording Format
and Editing Workflow
AVCHD is an efficient data compression method which greatly reduces
memory requirements. The new format allows tapeless recording with high
image quality in a small file size. This is made possible by the revolutionary
MPEG4 AVC/H.264 codec. In addition, the AVCHD file format is spreading
rapidly into the market. Many consumer electronic devices already support
AVCHD playback, and more are likely to come. Major NLE software
manufacturers already support AVCHD ingestion and editing.
The audio recording format on HXR-NX5U can be selected from either
Dolby Digital stereo or Linear PCM stereo. LPCM audio recording provides
uncompressed audio quality. Customers who needs high quality audio, such
as in music videos will be able to acquire CD quality audio data.
SD format recording is available in addition to HD format recording. The SD
recording format uses MPEG-2 which is the same compression codec as
standard DVD-VIDEO Discs. Customers who make delivery in DVD-VIDEOs will
be able to obtain video data in sufficient SD quality using this format.
The Revolutionary
AVCHD Format
MPEG-2 for SD (standard definition)
Recording Format
Loss-less Audio Recording Capability
Playback and Archiving
How to Playback
How to Archive
HXR-NX5U
Memory Card
Memory Card
PlayStation3® System
Computer
Computer
Blu-ray Disc™
HDD mass storage
*Windows® 7 offers AVCHD playback
as a standard feature
Television with HDMI etc input
Professional Monitor with SDI input
SDI
HDMI etc
HDMI etc
Caution: When backing up AVCHD data on the Memory Stick media to
Blu-ray Disc or HDD mass storage, copy all the files below the root folder.
SONY56901_20pgBro_SONY_56020_20pgBro.pdf 12SONY56901_20pgBro_SONY_56020_20pgBro.pdf 12 11/3/10 11:54:11 AM11/3/10 11:54:11 AM
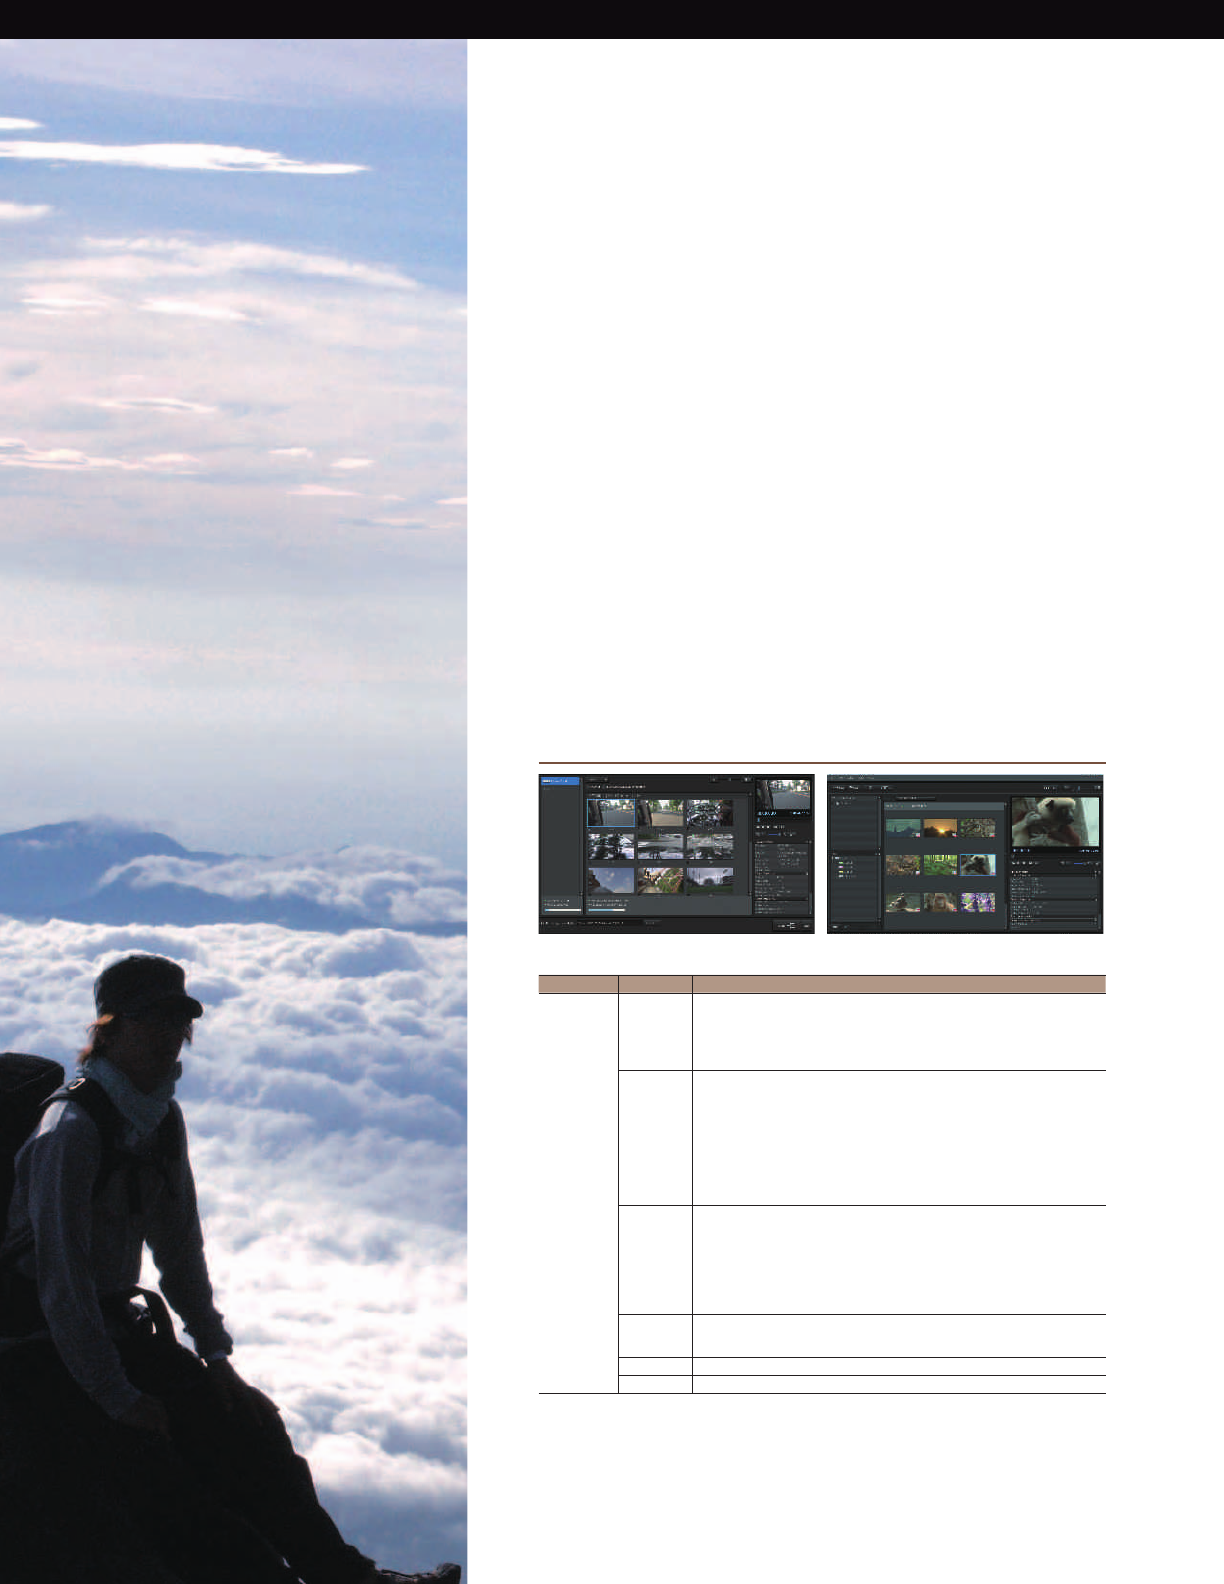
13
Content Management Utility
Software for HXR-NX5U
Content Management Utility
Content Management Utility is an easy to use Microsoft Windows® software
application for clip management and file uploading.
1. It allows users to connect divided files due to FAT32 restrictions, which
automatically divide files into 2-GB data files during recording.
2. The new Sony dual memory card relay recording system record clips onto
separate cards, if the clip exceeds the capacity of a single memory card.
Content Management Utility software also connects clips divided onto
several cards made by relay recording.
3. Content Management Utility software maps any GPS data embedded in
video data.
PC Software Content Management Utility 1.0.00
System
Requirements
OS Microsoft Windows® XP SP3*,
Windows Vista® SP2**, Windows® 7
*64-bit editions and Starter (Edition) are not supported.
** Starter (Edition) is not supported.
Standard installation is required.
Operation is not assured if the above OS has been upgraded or in a multi-boot environment.
CPU Use an Intel Core 2 Duo™ 2.20 GHz CPU or faster to play back videos with high
definition image quality (HD) if recorded using the highest quality mode.
Videos with high definition image quality (HD) recorded in other quality modes may
be played back with a slower CPU.
Depending on the performance of your video card, videos with high definition image
quality (HD) recorded using the highest quality mode may be played back with a
slower CPU than that recommended above.
For the following operations, an Intel Pentium® III 1GHz or faster is necessary.
— Importing videos to a computer
— Processing videos with standard definition image quality (SD) only
Memory Windows® XP
512 MB or more (1 GB or more is recommended.)
For processing content with standard definition image quality (SD) only, 256 MB of
memory or more is necessary.
Windows Vista®
1 GB or more
Windows® 7
1 GB or more
Hard disk Disk volume required for installation: Approximately 100 MB
Only the NTFS or exFAT filesystem can be used for importing videos or registering them
for viewing.
Display Minimum 1,024 X 768 dots
Others USB port (this must be provided as standard, Hi-Speed USB (USB 2.0 compatible))
Notes: Your computer must meet hardware requirements other than those described above for each OS.
Even in a computer environment where the operations are guaranteed, frames may be dropped from movies, resulting in uneven
playback. However, imported images will not be affected.
Operations are not guaranteed on all the recommended environments. For example, other open or background applications running on
currently may limit product performance.
Content Management Utility does not support 5.1ch surround sound reproduction. The sound is reproduced in 2ch sound.
If you use a Notebook PC, connect it to the AC Adaptor as the power source. Otherwise, the software will not work properly due to the
power saving function of the PC.
SONY56901_20pgBro_SONY_56020_20pgBro.pdf 13SONY56901_20pgBro_SONY_56020_20pgBro.pdf 13 11/3/10 11:54:11 AM11/3/10 11:54:11 AM
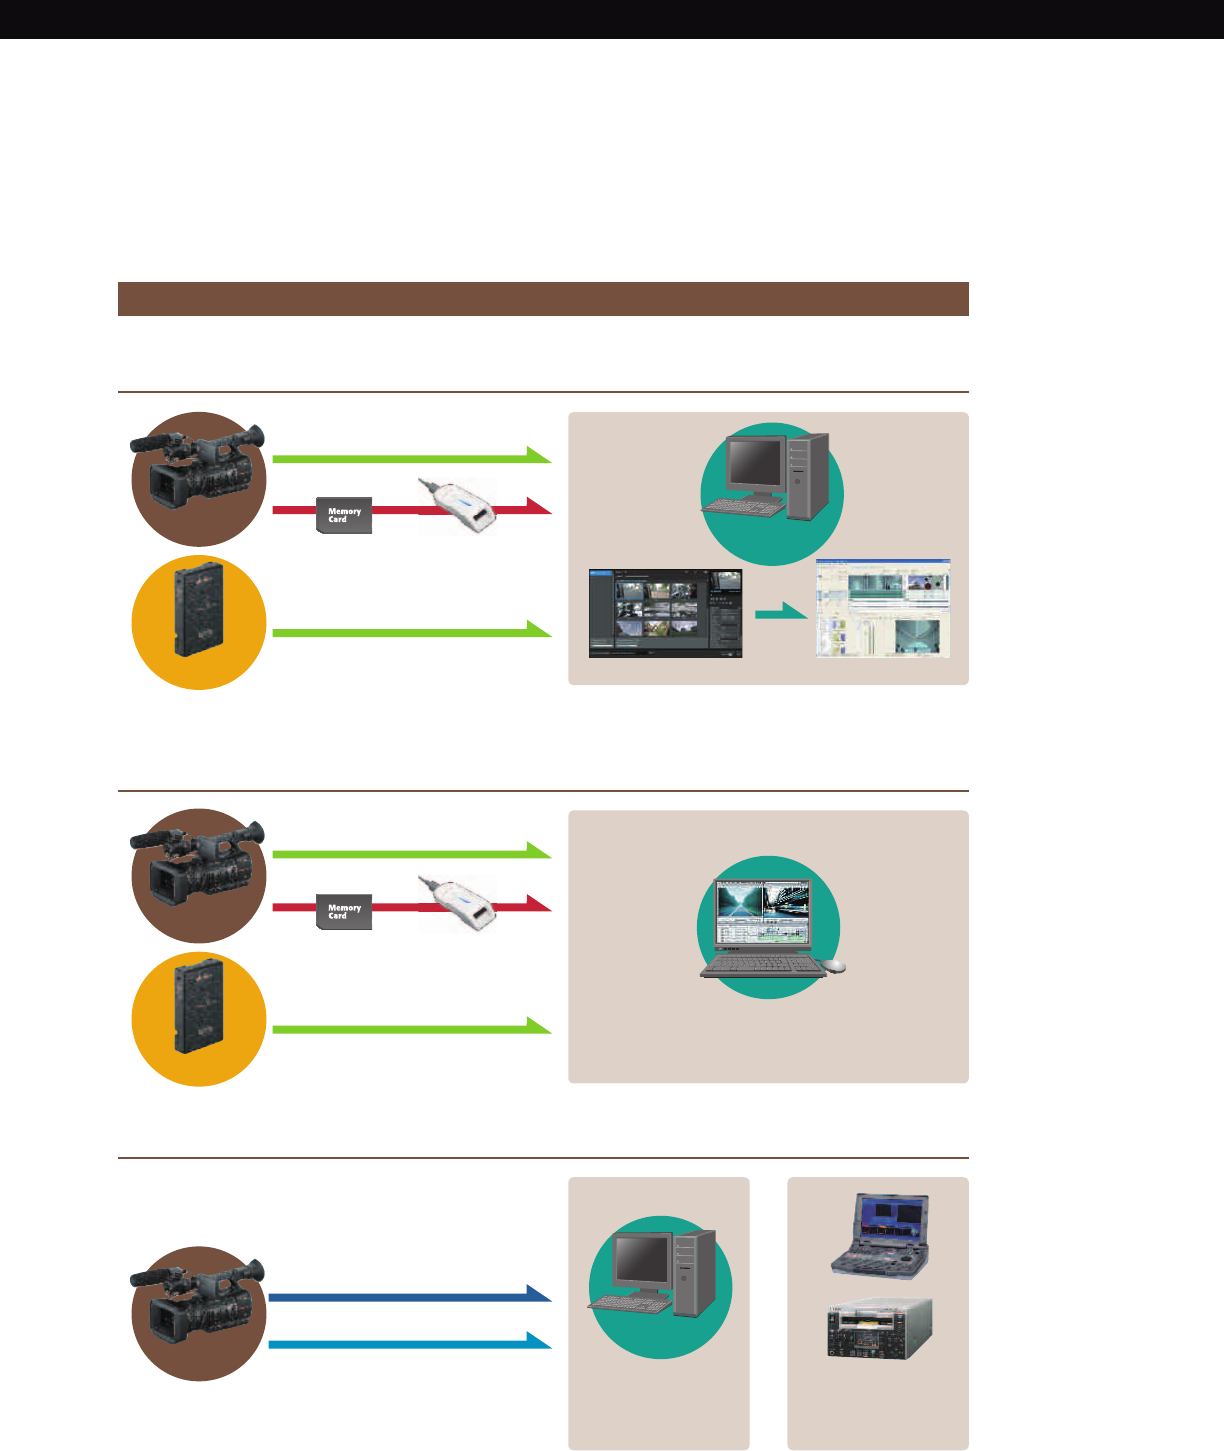
14
Recording Format
and Editing Workflow
USB2.0
USB2.0
USB2.0
USB2.0
Content Management Utility
Log & Transfer
Edit on Final Cut Pro Software
SDI input*
HDMI input*
(Using an interface board)
Video Switcher
or recorder with
SDI input or HDMI input
NLE software
Import
HDMI
SDI
*Please contact the manufacturer for further detailed information
Memory Card
Memory Card
Memory Card Reader
Memory Card Reader
Editing Workflow
For Windows users
For Final Cut Pro® Users
Use Content Management Utility Software to ingest
Use “Log & Transfer” and convert to ProRes422 to edit
Utilize the SDI or HDMI etc outputs
HXR-NX5U
HXR-NX5U
HXR-NX5U
HXR-FMU128
HXR-FMU128
Windows® PC
Computer
OR
SONY56901_20pgBro_SONY_56020_20pgBro.pdf 14SONY56901_20pgBro_SONY_56020_20pgBro.pdf 14 11/3/10 11:54:11 AM11/3/10 11:54:11 AM
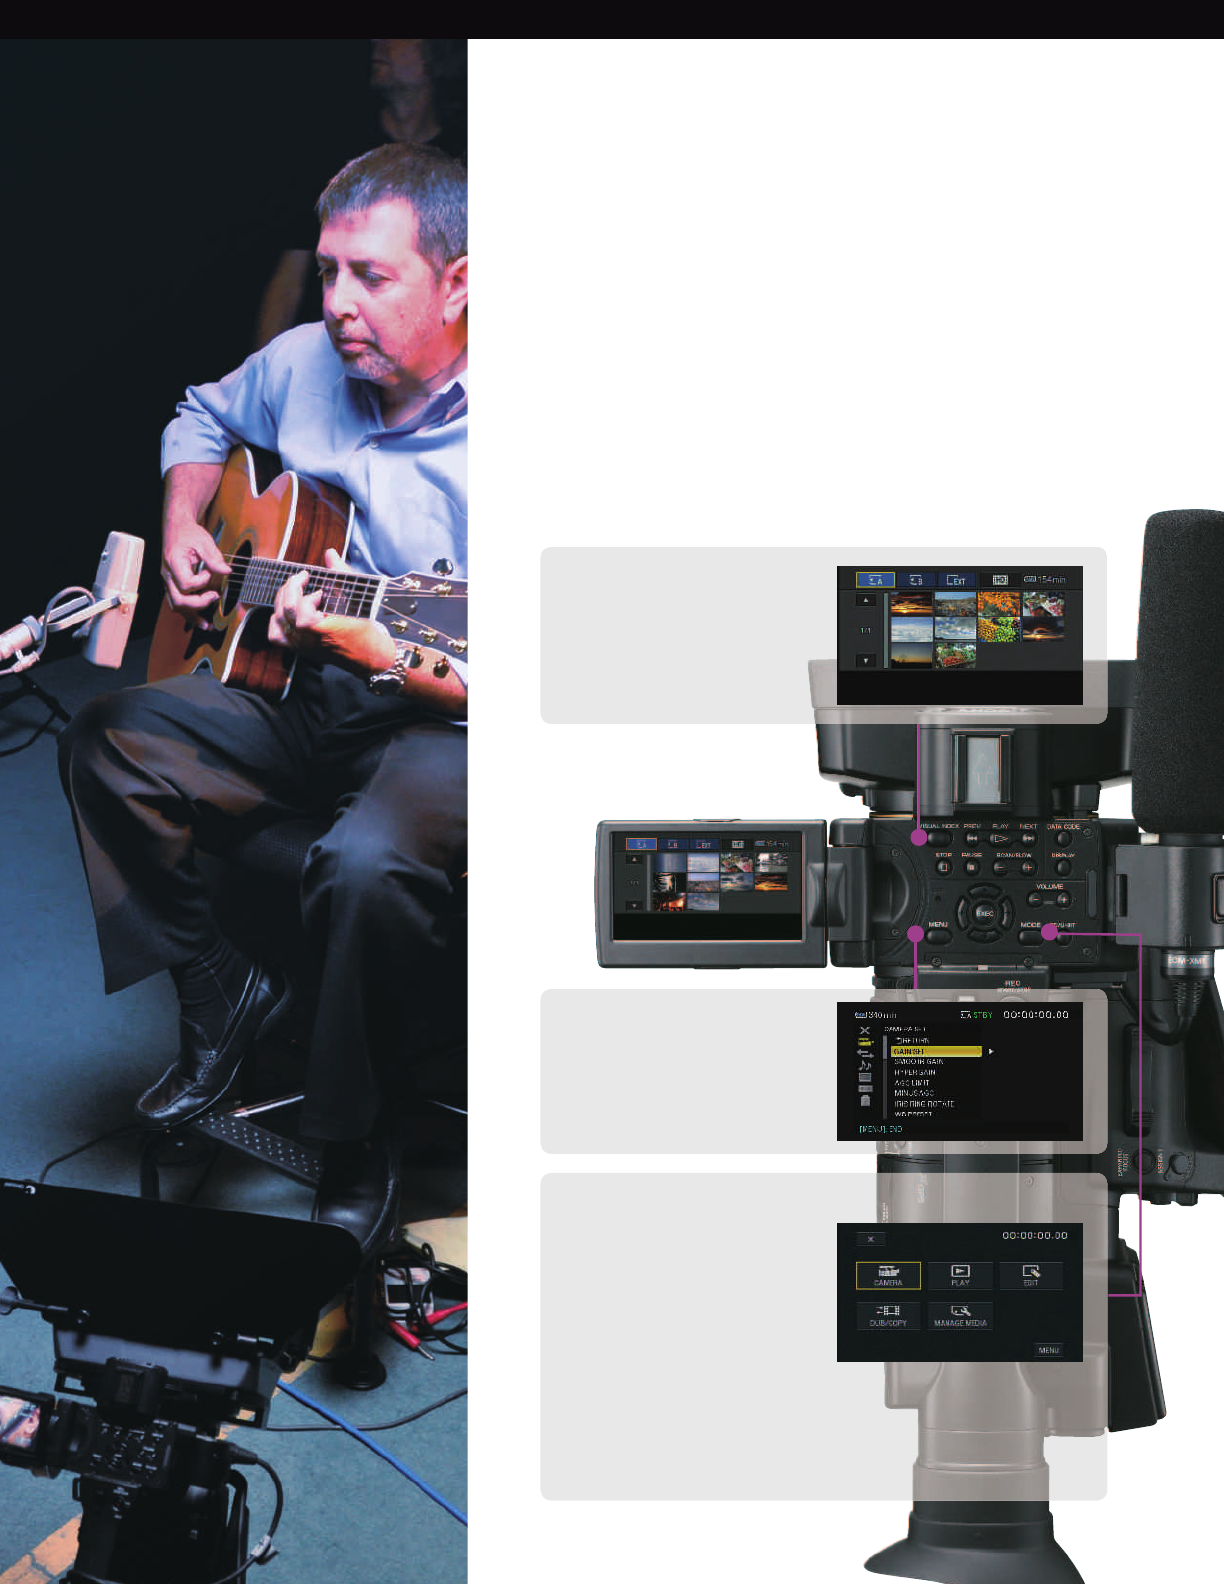
15
The completely new menu interface allows users to adjust camcorder
functions via a touch panel or buttons and switches. This interface is newly
designed specifically for this model. Easier and more straightforward
operations are achieved by the combination of a high-resolution XtraFine™
LCD panel, XtraFine electronic viewfinder (EVF), and well-defined layout.
Operation Functionality
Easy Operation with Newly Designed
Menu Interface
VISUAL INDEX Button
The VISUAL INDEX button is a one touch button
to view the recorded footage. It will instantly
change the camera mode from shooting to
previewing. Just touch a thumbnail picture of
the recorded clip on the LCD panel to select a
clip to preview.
MENU Button
The MENU button will instantly lead you to the
camera setting menu. Changing the output
settings, display settings, timecode settings
can be done through this menu.
MODE Button
Functions to manage the media and recorded
data can be reached from this MODE button.
Formatting the media and dubbing and
copying the data can be done through this
menu. Smooth Slow Rec can be triggered from
this MODE button.
CAMERA Button
SMOOTH SLOW REC
PLAY Button
VISUAL INDEX
PLAYLIST
Structure of MODE
EDIT Button
PROTECT
PLAYLIST EDIT
PHOTO CAPTURE
DIVIDE
DELETE
DUB/COPY
MOVIE DUB
PHOTO DUB
MANAGE MEDIA
MEDIA FORMAT
REPAIR IMAGE DB FILE
USB CONNECT
SONY56901_20pgBro_SONY_56020_20pgBro.pdf 15SONY56901_20pgBro_SONY_56020_20pgBro.pdf 15 11/3/10 11:54:12 AM11/3/10 11:54:12 AM

16
Supporting Features
One-touch Viewing with
the Visual Index Button
Thanks to file-based operation, recorded clips
can be quickly reviewed by scanning through
thumbnail images. This makes it easier and less
stressful to search for important clips.
Well-designed Layout
The ergonomic layout of buttons and
switches provides convenient access.
Professional user feedback has guided
the design processing, making the new
HXR-NX5U easy to use.
XtraFine LCD Panel
The HXR-NX5U features a 3.2-inch*-type XtraFine
LCD panel. It has approximately 921,000 pixels
(1920 x 480), and this higher resolution allows
easier focus. The XtraFine LCD displays virtually
100% of the recorded picture area at a color
temperature of approximately 6500K. The LCD
Panel on non-Sony camcorders often have poor
contrast and non-standard color temperature.
*(viewable area, measured diagonally)
Hybrid Operation with Touch
Panel and Buttons
The HXR-NX5U is equipped with a touch panel
LCD with a complete new interface specifically
designed for this new camcorder. Most of
settings can be adjusted by touch screen
operation, which is easy, straightforward, and
instinctive for operators. However, standard
operation using buttons and switches is also
available, to provide users with choices to suit
any shooting situation.
One-touch Clip-type Microphone Holder
A one-touch clip-type microphone holder makes it easy to
attach and remove the microphone for quick storage.
Two Screw Holes for Secure Connection
To provide a more secure connection between
the camcorder and a tripod plate and other
accessories, there are two screw holes in the
camcorder’s base plate.
(simulated image)
SONY56901_20pgBro_SONY_56020_20pgBro.pdf 16SONY56901_20pgBro_SONY_56020_20pgBro.pdf 16 11/3/10 11:54:12 AM11/3/10 11:54:12 AM
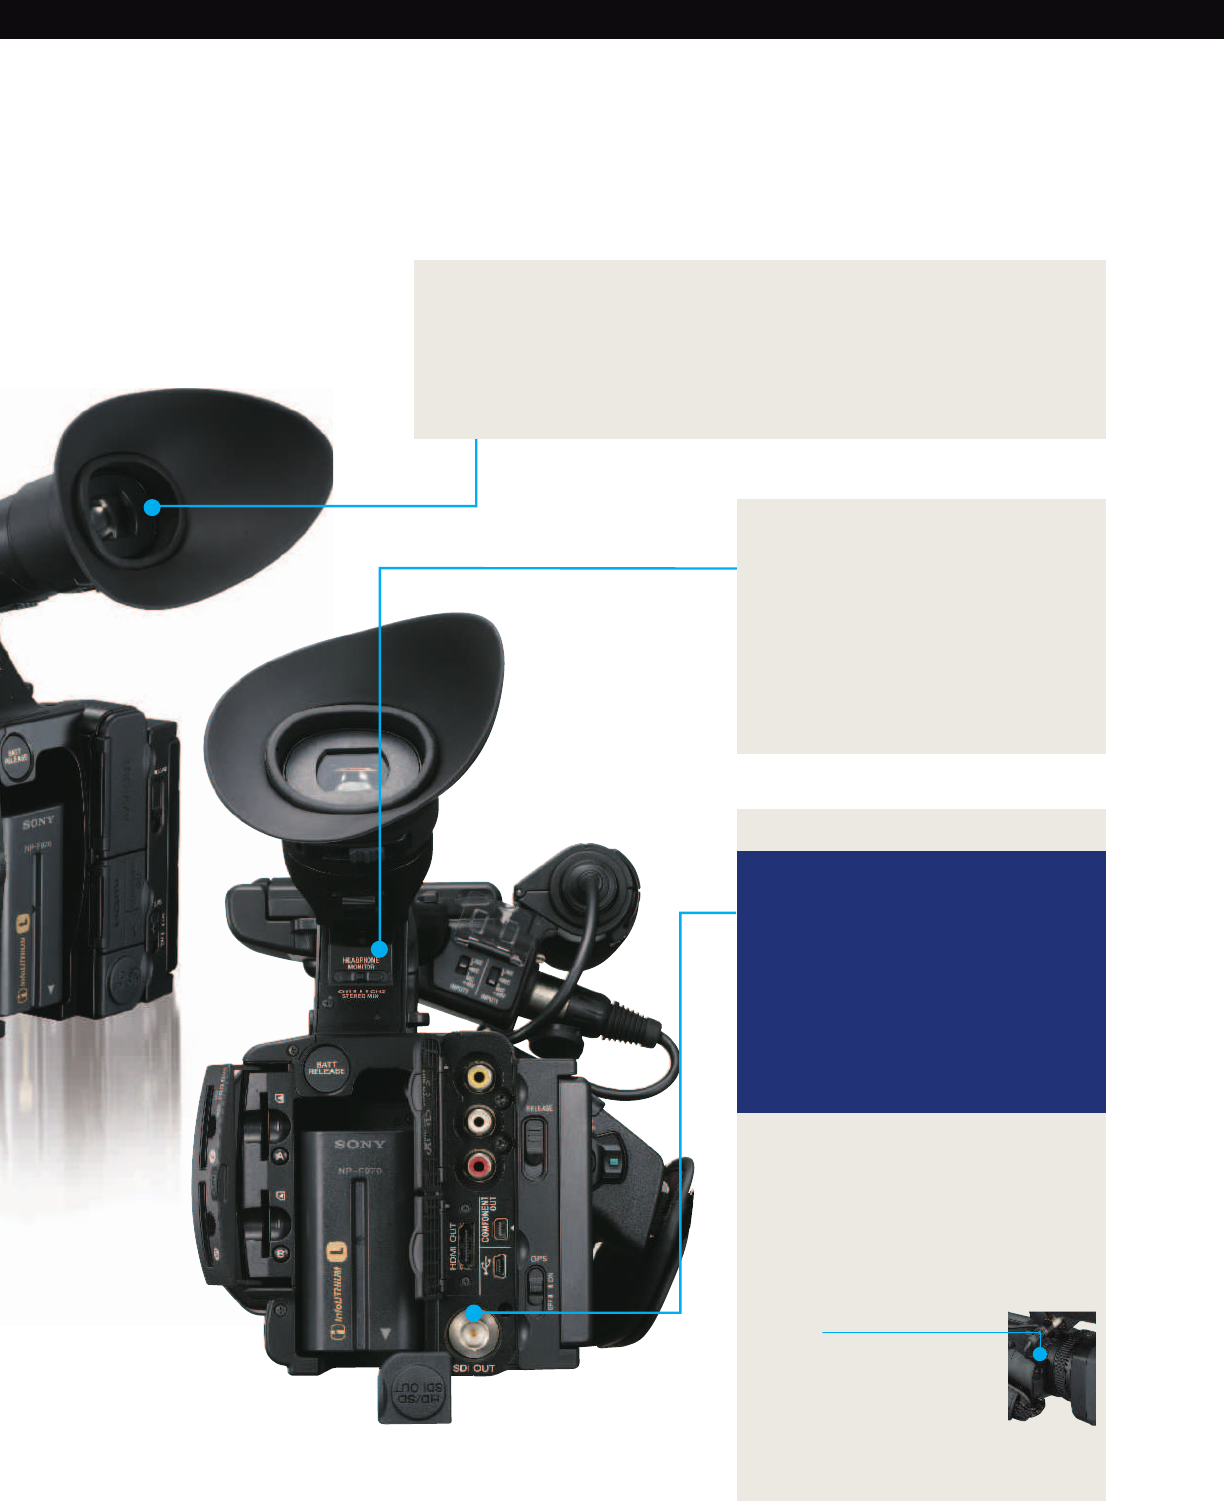
17
Hardware Switch for
Headphone Monitor
A high-quality headphone monitor jack allows
the user to instantly check the quality of
recorded audio. The HXR-NX5U is equipped with
a hardware switch so the user can change the
output to Channel 1 or Channel 2, or mix both
channels together. There is no need to go into
the menu to change the headphone output.
XtraFine EVF
The 0.45-inch-type XtraFine electronic viewfinder (EVF) has approximately 1,227,000 pixels
(852 x 3 (RGB) x 480). This device has three independent LEDs for Red, Green, and Blue colors.
The EVF has a selectable display mode (Color or Black and White mode). It also displays
virtually 100% of the recorded picture area at a color temperature of approximately 6500K,
and has an improved interface for easier viewing of the on-screen menu.
Versatile Terminal Interfaces
1. HD-SDI
The HXR-NX5U is equipped with an HD-
SDI*
terminal, making it easier and more
convenient to install the camcorder into high-
end video editing systems. If the system
has an HD-SDI input, the camcorder can be
connected to the system with a BNC cable.
No conversion boxes are needed. The
camera’s E to E output from the HDSDI terminal
will be a 10 bit uncompressed 4:2:2 signal.
*
Timecode and audio signals are embedded in the HD-SDI signal.
*
SD-SDI is also available.
2. HDMI terminals
The HDMI interface allows easy connection
to consumer electronic devices.
3. RCA-pin-type composite and
audio outputs terminals
4. Component output with AV/R-out
5. USB
6. Remote Terminal
7. TC Link
By connecting two camcorders
with a standard mini-plug
cable, using the TC Link
function, timecodes of the
two camcorders can be
synchronized.
SONY56901_20pgBro_SONY_56020_20pgBro.pdf 17SONY56901_20pgBro_SONY_56020_20pgBro.pdf 17 11/3/10 11:54:13 AM11/3/10 11:54:13 AM
18
Accessories
To expand the variety and possibilities of shooting, using
accessories is a simple, efficient choice. How about shooting
in darkness or longtime shooting? Shooting under these
kinds of situations can be realized much easier with the help
of accessories.
Sony makes a variety of compatible accessories available
starting from basic necessities, such as batteries, to
advanced necessities, such as camcorder supports, which
are ergonomically designed to ease the workflow and
enhance the creativeness of the users.
The new HXR-NX5U, also is compatible with many of our
professional accessories lineup.
For instance, batteries, chargers and LCD hoods will be
essential to ensure comfortable shooting. Moreover, shooting
supports will ease the stress made by longtime shooting. Take
a look at our professional accessories lineup and choose the
best combination to meet your shooting style needs.
s-ONAURALTYPE
s3UPERCARDIOID
s-ONAURALTYPE
s3UPERCARDIOID
HXR-FMU128
Flash Memory Unit
An external Flash Memory Recording Unit with a 128GB capacity, capa-
ble of recording AVCHD and MPEG2 SD formats, designed exclusively
for the NXCAM camcorder. Simple direct attachment to the camcorder
and a simple data transfer to the computer via USB 2.0 is available.
VCT-SP1BP
Camcorder Support
s7EIGHTSUPPORTFORSTABLE
comfortable shooting
s3UPPORTFORSEVERAL
shooting styles (e.g., high-
angle shooting)
s1UICKRELEASEFUNCTION
from harness for excellent
mobility
s0ERFECTDESIGNFOR
camcorder Monopod
s#ARBONSHAFTFORLIGHT
weight and rigid design
s2-»02EMOTE#ONTROLLER
supplied as standard
VCT-PG11RMB
Tripod with RM-1BP
Remote Controller
s3TEREOAND-ONAURAL
Switchable Stereo: Uni-
Directional
Manoural: Super-cardioid
ECM-680S
Shotgun-type Electret
Condenser Microphone
ECM-678/9X
Shotgun-type Electret
Condenser Microphone
ECM-673/9X
Shotgun-type Electret
Condenser Microphone
s#ONSISTSOF«ODYPACK
Transmitter and Portable
Receiver
s0ORTABLE2ECEIVERCAN
be attached to shoe
connector by supplied
shoe mount adaptor
UWP-V1
UHF Wireless
Microphone Package
RM-1000BP
Remote Commander® Unit
s-ULTIFUNCTION2EMOTE
Commander unit
s#ONTROLSMAINCAMCORDER
functions
s
Better User Interface for
professional applications
SONY56901_20pgBro_SONY_56020_20pgBro.pdf 18SONY56901_20pgBro_SONY_56020_20pgBro.pdf 18 11/3/10 11:54:14 AM11/3/10 11:54:14 AM
19
sSLOTSBATTERYCHARGER
(A pair of parallel
charge)
sCHARGEMODE
selectable (Normal/Full)
s#HARGINGINFORMATION
Remaining time to
charge complete Current
available time for
shooting
s»ATTERY,OGINFORMATION
Total charge time Total
charge cycle last
operation date
AC-VQL1BP
AC Adaptor / Charger
HVL-LBPA
LED Battery Video Light
s
LED reliability and low
power consumption of 16W
s»ATTERYPOWERFROM
NP-F770/F970
s7IDECOMPATIBILITYFOR
flexible installation (Cold
shoe/Screw bolt/Screw
hole)
s)DEALFOR7IDEANGLE
shooting and interviews
Spot (600lx@1m) or
flood-lighting (300lx@1m)
with attached condens-
ing lens ON or Off
s,IGHTDIFFUSERATTACHED
to soften shadows and
reduce contrast
s,ONG/PERATINGTIME
approximately 3 hours
with the NP-F970
(at maximum brightness)
s3UPPLIEDINDOOROUTDOOR
filter kit (5,500K to 3,200K)
SH-L32WBP
LCD Hood
s,#$(OODFORv,#$MONITOR
s!DJUSTABLESHADEªSHADE
s
Folding structure realize transfer
with camcorder
*(viewable area measured diagonally)
VCL-HG0872K
Wide Conversion Lens
s%QUIVALENTTO
magnification
s(IGHRESOLUTIONWIDE
conversion lens for the
HXR-NX5U
s»AYONETMOUNTFORQUICK
and easy attachment
s3UPPORTSLARGE&RENCH
Flag and 4×5.65 inch filter
holder
s1UICKANDCONVENIENT
integrated lens shutter
VCT-SP2BP
Camcorder Support
s
Three point support (shoulder, chest, operator’s hands)
s
Simple but efficient stabilization capable of a variety of shooting styles
s
1UICKRELEASEFROMTRIPODINCLUDINGTRIPODSWHICHREQUIRE6#45
s
Fast and easy transformation from tripod mode to support mode
LMD-940W
Professional LCD
Monitor
sX76′!0ANEL
Resolution
s!SPECT2ATIO
Selection
sMODEPOWERSYSTEM
AC100V, DC12V, Battery
Adaptor
s’3$)INPUTOUTPUT
standard
MS-HX32G
(16GB, 8GB, 4GB)
s
Memory Stick PRO-HG Duo HX
media
s(IGHSPEEDDATATRANSFER
*Use the USB adaptor for high
*speed transfer (20Mbps)
MS-MT32G
(16GB, 8GB, 4GB, 2GB,
1GB)
s-EMORY3TICK02/$UO©-EDIA
2NP-F970/B
InfoLITHIUM
Rechargeable Battery
Pack (2 pack)
NP-F970/F770/F570
InfoLITHIUM
Rechargeable
Battery Pack
RM-1BP
Remote controller
SONY56901_20pgBro_SONY_56020_20pgBro.pdf 19SONY56901_20pgBro_SONY_56020_20pgBro.pdf 19 11/3/10 11:54:14 AM11/3/10 11:54:14 AM
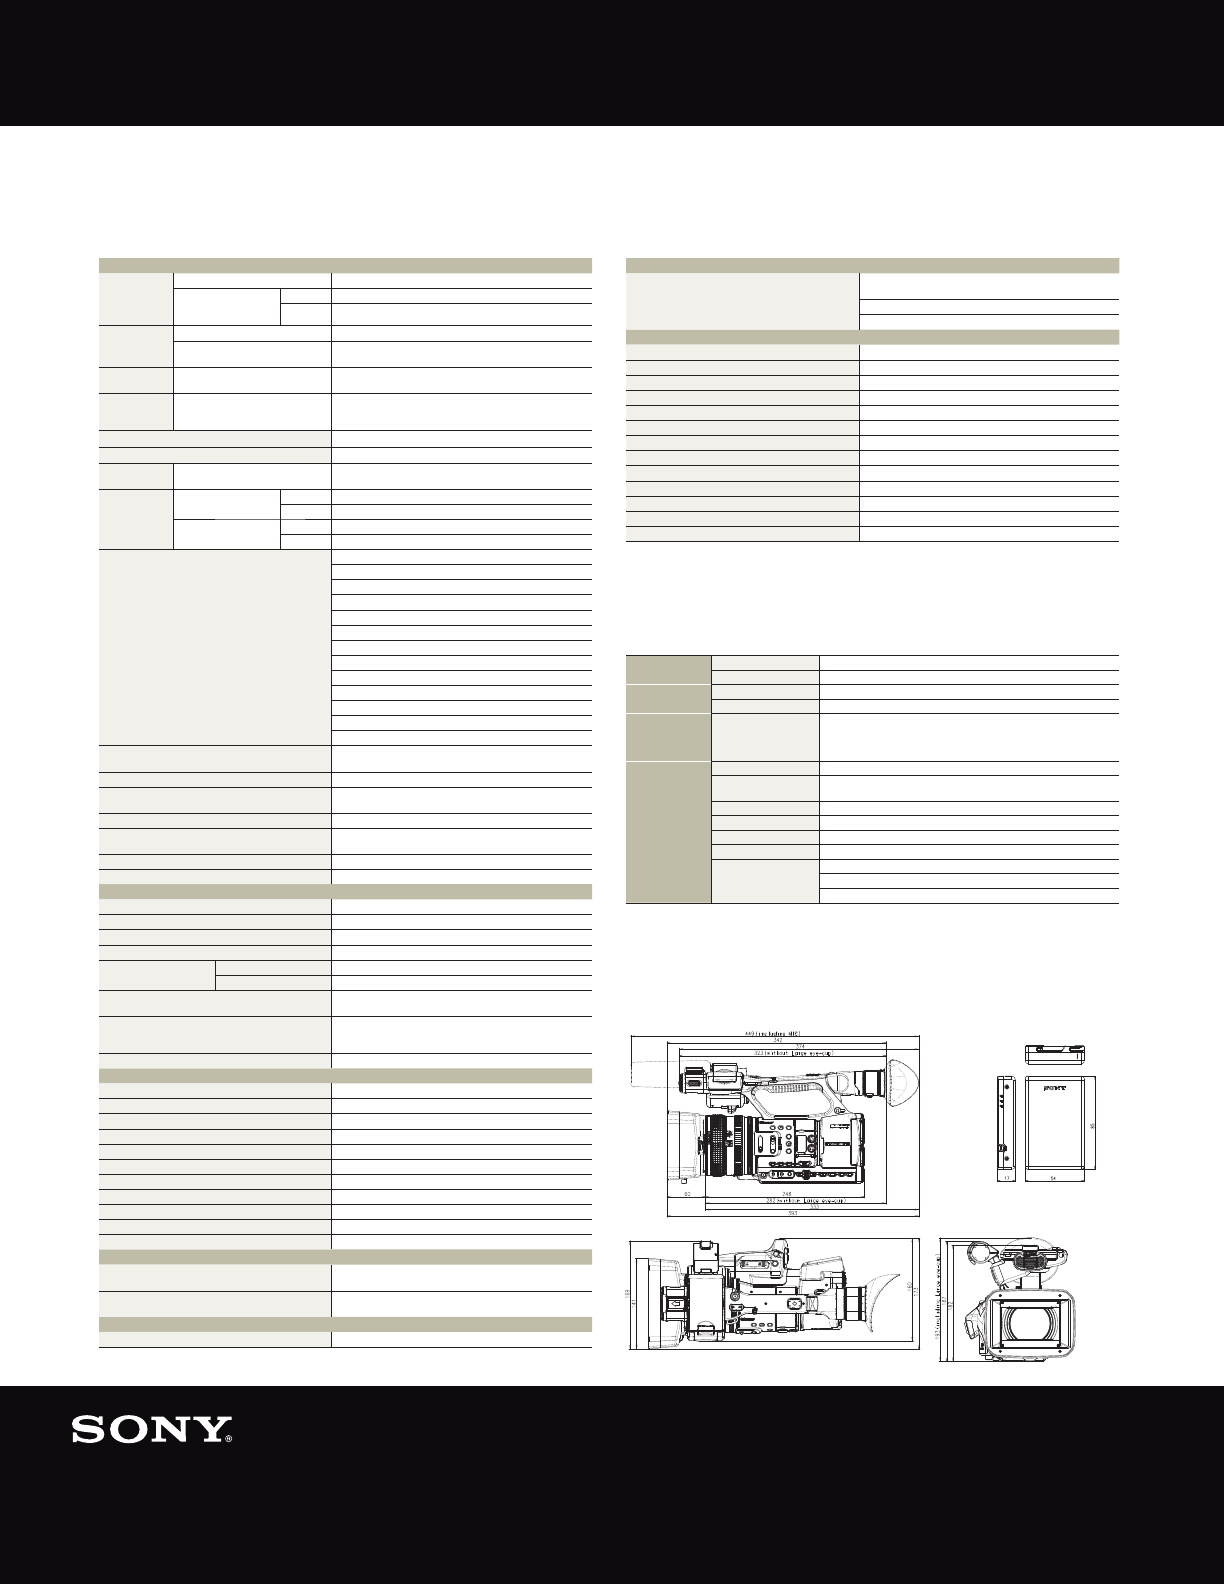
Specifications
HXR-NX5U
HXR-NX5U
HXR-FMU128
HXR-FMU128
General
Weight (w/ Lens hood with Lens cover) Approx. 4 lb 15 oz (2.2 kg)
(w/ Battery, Lens hood with
Lens cover, large eyecup,
ECM-XM1, Memory card)
NP-F770 Approx. 5 lb 11oz (2.6 kg)
NP-F970 Approx. 5 lb 14oz (2.7 kg)
Dimension
(W x H x D)
(Lens hood with Lens cover) Approx. 6 7/8 x 7 3/8 x 13 1/2 inch (173 x 187 x 342 mm)
(Lens hood with Lens cover, large
eyecup, ECM-XM1, NP-F970)
Approx. 6 7/8 x 7 5/8 x 17 3/4 inch (173 x 193 x 449 mm)
Power
requirements
(AC adaptor / Battery) 8.4V / 7.2V
Power
consumption
(w/ ECM-XM1 and LCD with normal
brightness)
Approx. 7.9 W
*When Flash Memory Unit HXR-FMU128 is used, the average
power consumption increases about 1.1 W.
Operating temperature 0 to +40 deg C (+32 to +104 deg F)
Storage temperature -20 to +60 deg C (-4 to +140 deg F)
Battery operating
time
Continuous recording time Approx. 365 min (NP-F970:fully charged batt.)
Recording format Video Format HD MPEG-4 AVC/H.264 (AVCHD)
SD MPEG-2 PS
Audio Format HD
Linear PCM 2ch, 16bit, 48kHz / Dolby Digital 2ch, 16bit, 48kHz
SD Dolby Digital 2ch, 16bit, 48kHz
Recording frame rate*1AVCHD FX (24Mbps) 1920 x 1080/60i
AVCHD FH (17Mbps) 1920 x 1080/60i
AVCHD HQ (9Mbps) 1440 x 1080/60i
AVCHD LP (5Mbps) 1440 x 1080/60i
AVCHD FX (24Mbps) 1920 x 1080/24p
AVCHD FH (17Mbps) 1920 x 1080/24p
AVCHD FX (24Mbps) 1920 x 1080/30p
AVCHD FH (17Mbps) 1920 x 1080/30p
AVCHD FX (24Mbps) 1280 x 720/60p
AVCHD FH (17Mbps) 1280 x 720/60p
MPEG2 SD HQ (9Mbps) 720 x 480/60i
MPEG2 SD HQ (9Mbps) 720 x 480/60i (24p Scan)
MPEG2 SD HQ (9Mbps) 720 x 480/60i (30p Scan)
Recording/Playback time 170 min (2h 50m) with 32GB Memory Stick PRO-HX Duo FX
(24Mbps) Linear PCM 2ch recording
Zoom ratio Sony G Lens, 20x (optical), 1.5x Digital Extender
Focal length f = 4.1 to 82.0 mm (equivalent to f = 29.5 to 590 mm at 16:9
mode, f = 36.1 to 722 mm at 4:3 mode on 35 mm lens)*2
Iris Auto/Manual (F1.6-F11, close)
Focus AF/MF selectable, 800 mm to ∞ (MACRO OFF), 10 mm to ∞
(MACRO ON, Wide), 800 mm to ∞ (MACRO ON, Tele)
Image stabilizer ON/OFF selectable
Filter diameter 72 mm
Camera Section
Imaging device
3-chip 1/3-inch type Exmor CMOS with ClearVid pixel array
Effective picture elements Approx. 1,037,000 pixels with ClearVid array
Built-in optical filters Clear, 1/4, 1/16, 1/64
Minimum illumination 1.5 lx (auto gain, auto iris, 1/30 shutter)
Shutter speed Auto
60i/60p: 1/60-1/2000, 30p: 1/30-1/2000, 24p: 1/48-1/2400
Manual
60i/30p/60p: 1/4 — 1/10000, 24p: 1/3 — 1/10000
Slow & Quick Motion function 120 fps (fixed) as improved Smooth Slow Rec
*The picture quality is degraded.
White balance
Auto, one-push auto (A/B positions), indoor (3200 K), outdoor
(selectable level -7 to +7, approx. 500K/step), manual WB Temp
(selectable 2300K to 15000K, 100K/step)
Gain Auto/Manual (-6dB — 21dB, 3dB step)
Inputs/Outputs
Audio input XLR 3-pin (female) (x 2), LINE/MIC/MIC +48 V selectable
Composite output RCA Type (x 1)
Audio output RCA type(CH-1,CH-2)
Comonent output RCA Type (x 3) via Mini-D jack
SDI output BNC (x 1), HD-SDI/SD-SDI selectable
USB USB device, Mini-B/Hi-Speed (x 1)
Headphone output Stereo mini jack (x 1) ø3.5mm
Speaker output Monaural
DC input Power code
Remote Remote: Stereo mini-mini jack (x 1)ø2.5mm
HDMI output HDMI connector (x 1)
Monitoring
Viewfinder 0.45 inch-type approx. 1,226,880 dots (852 x 3[RGB] x 480),
16:9 aspect ratio
Built-in LCD monitor 3.2 inch-type, XtraFine LCD, approx. 921,600 dots(1920 x
480), hybrid type, 16:9 aspect ratio
Built-in Microphone
stereo microphone
Media
Type Memory Stick PRO Duo(Mark2)™, Memory Stick PRO-HG Duo™,
Memory Stick PRO-HG Duo HX™ *3
SD/SDHC Memory Card*4
Flash Memory Unit
Supplied Accessories
AC Adaptor/Charger AC-VL1
Rechargeable Battery Pack NP-F770
Connecting cord DK-415
Microphone ECM-XM1
Remote Commander RMT-845
Component video cable
A/V connecting cable
USB cable
Large eyecup
Lens hood with lens cover
Accessory shoe kit
Lithium Battery CR2025
Application Software (CD-ROM)
Flash Memory Recording Capacity 128GB*
File System FAT32
Interface Camcorder Connection Connection Jack
PC Connection USB mini-B jack Hi-Speed USB (USB 2.0)
OS Compatibility OS
Windows® XP SP3 (64bit editions and Starter (Edition) are not supported)
Windows Vista
®
SP2 (Starter (Edition) is not supported)
Windows
®
7
Mac OS X(v10.4 or later)
General Weight 2oz (80g)
Dimension (WxHxD) Approx. 2 1/4 x 3 3/8 x 21/32 inch (54 x 85 x 17mm)
(including the projecting parts)
Power Requirements 5V (Power supplied from connecting device)
Power Consumption Approx. 0.9W (Power supplied from connecting device)
Operating Temprature +32 to +104 deg F (0 to +40 deg C)
Storage Temprature -4 to +140 deg F (-20 to +60 deg C)
Supplied Accessories USB cable (Mini-jack — A-jack)
Case
Label
*In this specification, 1GB indicates 1 billion bytes. A portion of the recording capacity is used for data management.
*1 Due to variable bitrate, 24Mbps is the maximum bitrate for AVCHD FX mode and the average bitrate is being stated for FH, HQ and LP modes.
*2 The focal length is when SteadyShot mode is in SteadyShot or Off.
*3 Compatible «Memory Stick» type : For AVCHD recording / Capacity: more than 1GB, For standard definition recording / Capacity: more than 512MB
*4 Recommended Speed Class For AVCHD recording / Class 4 or higher, For standard definition recording / Class 2 or higher
Dimensions
Sony Electronics Inc.
1 Sony Drive
Park Ridge, NJ 07656
sony.com/nxcam
V-2454 (MK10622V1)
© 2009 Sony Electronics Inc. All rights reserved.
Reproduction in whole or in part without written permissions is prohibited.
Features and specifications are subject to change without notice. Weights and measurements are approximate.
Sony, “make.believe”, NXCAM, G Lens, Exmor, InfoLITHIUM, Memory Stick, Memory Stick PRO Duo, Memory Stick PRO-HG Duo
and their respective logos are trademarks of Sony. Blu-ray Disc is a trademark of the Blu-ray Disc Association.
AVCHD and AVCHD logo are trademarks of Panasonic Corporation and Sony Corporation.
Windows, Windows Vista, Windows XP and Windows 7 are trademarks of Microsoft Corporation.
Mac and Final Cut Pro are trademarks of Apple.Inc. Dolby is a trademark of Dolby Laboratories.
Pentium and Core 2 Duo are trademarks of Intel Corporation.
Printed in USA (11/10)
SONY56901_20pgBro_SONY_56020_20pgBro.pdf 20SONY56901_20pgBro_SONY_56020_20pgBro.pdf 20 11/3/10 11:54:14 AM11/3/10 11:54:14 AM
Краткое содержание страницы № 1
4-157-878-12(1)
Digital HD Video
Camera Recorder
HXR-NX5E/NX5P/NX5M
Operating Guide
Before operating the unit, please read this manual thoroughly,
and retain it for future reference.
© 2009 Sony Corporation
Краткое содержание страницы № 2
Read this first * The exFAT is a file system that is used for Before operating this unit, please read this SDXC memory cards. manual thoroughly, and retain it for future reference. Size of memory card you can use with To handle the recorded images on your camcorder your computer Refer to “Help” on the supplied CD-ROM “Content Management Utility.” Notes on use � “Memory Stick PRO Duo” media, half the Types of memory cards you can use in size of “Memory Stick,” or standard size your camcor
Краткое содержание страницы № 3
b Notes Do not expose your camcorder’s � The camcorder is not dustproof, dripproof or viewfinder, lens, or LCD screen to the waterproof. sun or strong light source for extended See “About handling of your camcorder” periods. (p. 109). � Connect cables to your camcorder with their � Intense light sources, especially the sun terminals placed the correct way. Squeezing the will converge on the viewfinder or lens terminals into your camcorder’s jacks may and damage the internal parts of yo
Краткое содержание страницы № 4
Read this first (Continued) recordings on a TV, you need a PAL containing AVCHD footage should not be system-based TV. used with DVD based players or recorders, as the DVD player/recorder may fail to � Television programs, films, video tapes, eject the media and may erase its contents and other materials may be copyrighted. without warning. Unauthorized recording of such materials may be contrary to the copyright laws. Save all your recorded image data � Because of the way that the image
Краткое содержание страницы № 5
About this manual � Memory cards and a flash memory unit are both referred to as recording media in this manual. � The images of the LCD screen and the viewfinder used in this manual for illustration purposes are captured using a digital still camera, and therefore may appear different. � The on-screen displays in each local language are used for illustrating the operating procedures. Change the screen language before using your camcorder if necessary (p. 18). � Design and specificatio
Краткое содержание страницы № 6
Table of Contents Read this first ………………………………………………………………………………. 2 Getting Started Step 1: Checking supplied items …………………………………………………….. 9 Step 2: Attaching the supplied microphone and the lens hood with lens cover ………………………………………………………………………………10 Step 3: Charging the battery pack ……………………………………………….
Краткое содержание страницы № 7
Editing Operating the MODE menu …………………………………………………………..57 Protecting recorded images (Protect) ……………………………………………..58 Using the Playlist of movies ………………………………………………………….59 Creating the Playlist …………………………………………………………………. 59 Playing the Playlist …………………………………………………………………… 59
Краткое содержание страницы № 8
Table of Contents (Continued) Troubleshooting Troubleshooting ………………………………………………………………………….90 Warning indicators and messages ………………………………………………… 99 Additional Information Recording time of movies ………………………………………………………….. 101 Using your camcorder abroad …………………………………………………….. 103 File/folder structure on the memory card
Краткое содержание страницы № 9
Getting Started Getting Started Step 1: Checking supplied items Make sure that you have following items Large eyecup (1) (p. 16) supplied with your camcorder. The number in the parentheses indicates the number of that item supplied. � Memory cards are not included. See pages 2 and 106 for types of memory cards that you can use on your camcorder. AC Adaptor/Charger (AC-VL1) (1) (p. 12) Rechargeable battery pack (NP-F570) (1) (p. 12, 107) Lens hood with lens cover (1) (p. 10) This lens hood i
Краткое содержание страницы № 10
Step 2: Attaching the supplied microphone and the lens hood with lens cover Attaching the supplied 4 Put the microphone cable into the microphone cable holder E. When you use the supplied microphone (ECM-XM1) for recording sound, do the following steps. Hook the cable in the outer cable holder. Attaching the lens hood with lens cover 1 Attach the wind screen B to the supplied microphone A. 2 Place the microphone A in the PUSH (lens hood release) button microphone holder C with the model
Краткое содержание страницы № 11
Getting Started To remove the lens hood with lens cover Turn the lens hood in the opposite direction to the arrow 2 in the illustration while pressing the PUSH (lens hood release) button. z Tips � If you attach or remove a 72mm (2 7/8 in.) PL filter or MC protector, remove the lens hood with lens cover. To open or close the shutter of the lens hood with lens cover Move the lens cover lever to OPEN to open the lens cover, and move the lever to CLOSE to close the lens cover. 11
Краткое содержание страницы № 12
Step 3: Charging the battery pack After charging the battery You can charge the “InfoLITHIUM” battery pack (L series) with the The charge lamp turns off (normal charge). If you continue charging more 1 hour after supplied AC Adaptor/Charger. the charge lamp turns off, you can use the b Notes battery a little longer (full charge). Remove the battery pack from the AC � You cannot use batteries other than the “InfoLITHIUM” battery pack (L series) Adaptor/Charger when the charge is (p. 107).
Краткое содержание страницы № 13
Getting Started To store the battery pack Using an outside power source If the battery pack is not in use for a while, You can use the AC Adaptor/Charger to run down the battery and store it. See page obtain AC power. 108 for details on storage of the battery pack. To the wall outlet (wall socket) Charging time Power cord Approximate time (min.) required when AC Adaptor/ you charge a fully discharged battery pack. Charger Charge Normal charge Fully charge lamp Battery pack time time NP-F5
Краткое содержание страницы № 14
Step 3: Charging the battery pack Step 4: Turning the (Continued) power on and holding � Even if your camcorder is turned off, AC power your camcorder (house current) is still supplied to it while connected to the wall outlet (wall socket) via the properly AC Adaptor/Charger. To record or play back, set the POWER switch to ON. When you use your camcorder for the first time, the [CLOCK SET] screen appears (p. 17). POWER switch 1 Slide the POWER switch to ON while you press the green bu
Краткое содержание страницы № 15
Getting Started Step 5: Adjusting the LCD panel and viewfinder 2 Hold the camcorder properly. LCD panel Open the LCD panel 180 degrees (1), then rotate it to the best angle to record or play back (2). 1Open 180 degrees. 290 degrees (max.) 2180 degrees (max.) 3 Ensure a good grip, then fasten the grip belt. DISPLAY button z Tips � Images are displayed as mirror images on the LCD screen, but are recorded as normal images. To turn off the LCD backlight to make the battery last longer To tu
Краткое содержание страницы № 16
Step 5: Adjusting the LCD panel and viewfinder (Continued) Viewfinder Large eyecup (supplied) Viewfinder lens Attach with the adjustment lever protruding part Move it until the picture at the top. becomes clear. b Notes � You may see primary colors shimmering in the viewfinder when you move your line of sight. This is not a malfunction. The shimmering colors will not be recorded on the recording media. z Tips � You can adjust the brightness of the viewfinder backlight from [VF BACKLIGH
Краткое содержание страницы № 17
Getting Started Step 6: Setting the date and time Set the date and time when using your camcorder for the first time. If you do not 2 Select (OTHERS) by turning set the date and time, [CLOCK SET] screen the SEL/PUSH EXEC dial, then appears every time you turn on your press the dial. camcorder. z Tips � If you do not use your camcorder for about 3 months, the built-in rechargeable battery gets discharged and the date and time settings may be cleared from the memory. In that case, charg
Краткое содержание страницы № 18
Step 6: Setting the date and time (Continued) The clock starts. � Set [SUMMERTIME] to [ON] to move the time forward 1 hour. � You can set any year up to the year 2037. z Tips � The date and time are automatically recorded on the selected recording media, and can be displayed during playback (DATA CODE button, p. 51). Changing the language setting You can change the on-screen displays to show messages in a specified language. Press the MENU button and select (OTHERS) with the SEL/PUSH EXEC
Краткое содержание страницы № 19
Getting Started Step 7: Inserting a memory card/Attaching a flash memory unit � When you insert a new memory card in Memory card standby mode, the [Create a new Image Database File.] screen appears. Follow the screen indication, and touch [YES]. 1 Open the cover in the direction of the arrow. To eject the memory card Lightly push the memory card once. b Notes � When the access lamp is lit or flashing in red, your camcorder is reading/writing data. Do not shake or knock your camcorder, tur
Краткое содержание страницы № 20
Step 7: Inserting a memory card/Attaching a flash memory unit (Continued) b Notes � You can only select a slot that already has a memory card inserted. � While movies are being recorded on the memory card, you cannot switch the slot even if you press the memory card slot A/B buttons. z Tips � When only one slot has a memory card inserted, the slot that has the memory card is selected automatically. � If the memory card is fully recorded during recording, the camcorder continues recording
31.Jul.2012 AVCCAM (AVCHD) AG-AC90
31.Jul.2012 AVCCAM (AVCHD) AG-AC90 Scene For Videographer Professional Design 3 manual rings Dual SD card slots simultaneous REC SD(Standard definition ) support http://commons.wikimedia.org For Production
More information
SD Card for Professional
SD Card for Professional 128GB, 64GB and 32GB ultra high durability Memory Cards Overview Ultra high durability with free file recovery software Sony SD Card for Professional is specially designed for
More information
HXRNX type NXCAM Camcorder
SONY SONY HXRNX100 1.0-type NXCAM Camcorder $1,949.00 U.S.List Price UPC: 027242895218 Overview The HXR-NX100 comes with Sony s unique 20 mega pixel 1.0-type Exmor R back-illuminated CMOS sensor that delivers
More information
Professional Camcorder Family
Professional Camcorder Family XDCAM Handy camcorders NXCAM Accessory Full Line-up PMW-300K1/K2 PXW-X200 PXW-X180/X160 Camera Section Imaging Device (Type) 3-chip 1/2 type Exmor CMOS 3-chip 1/3 type Exmor
More information
Professional Camcorder Family
Professional Camcorder Family XDCAM Handy Camcorders NXCAM Camcorders Accessories *4K: 3840 2160pix Connect this product to HDR (HLG) compatible TV via HDMI cable and turn to HDR (HLG) mode by TV when
More information
Full HD solid-state camcorder.
Full HD solid-state camcorder. PMW-EX1R XDCAM EX Camcorder www.sonybiz.net/xdcam Full HD solid-state camcorder for superior HD Picture performance and more creative freedom. Unique Lens Operation PMW-EX1R
More information
Press Release mm: 35 mm conversion.
Press Release Sony Launches Its First 3 ClearVid CMOS Sensor High Definition Camcorder For the ultimate high-definition shooting experience, Sony s high-end HDV camcorder HDR-FX7/E offers 3 ClearVid CMOS
More information
XDCAM EX NAB Presentation 1
XDCAM EX NAB Presentation 1 PMW-320L XDCAM EX ½-inch Shoulder Camcorder PMW-320K XDCAM EX ½-inch Shoulder Camcorder with Supplied Lens EXpanding XDCAM EX Line Up 2010 New! PMW-350 PMW-320 PMW-EX1R PMW-EX3
More information
EOS C300 Key Features
EOS C300 EOS C300 Key Features 1 Versatile Lens Range 2 New Super 35 mm-equivalent Canon CMOS sensor EF mount body PL mount body Canon entry into the digital cine lens market 8.3MP for 3-chip performance
More information
GY-LS300 4K Super 35 camcorder
GY-LS300 4K Super 35 camcorder A handheld 4K Super 35 professional camcorder that offers filmmakers the flexibility to use high-end cinema lenses or affordable glass to capture 2K/4K footage GY-LS300 4K
More information
USA Security Systems
Product Technical Specifications Blackmagic URSA Mini Pro URSA Mini Pro is a professional digital film camera that combines incredible 4.6K image quality with the features and controls of a traditional
More information
Blackmagic URSA Mini Pro
Product Technical Specifications Blackmagic URSA Mini Pro URSA Mini Pro is a professional digital film camera that combines incredible 4.6K image quality with the features and controls of a traditional
More information
CAMERAS & ACCESSORIES
CAMERAS & ACCESSORIES All our camera kits come with tripods, batteries and memory cards so you are ready to start shooting straight away! Sony PMW-F3 Camera & Lens Kit The PMW-F3 is equipped with an Exmor
More information
XDCAM, XDCAM EX, XAVC, XAVC S, NXCAM, SxS and Professional Disc are trademarks of Sony Corporation.
Revised Monday, April 9, 2018 XDCAM, XDCAM EX, XAVC, XAVC S, NXCAM, SxS and Professional Disc are trademarks of Sony Corporation. Avid and DNxHD are trademarks or registered trademarks of Avid Technology,
More information
NEXTO DI 4K package User guide
NEXTO DI 4K package User guide July 2015 Contents 4K package… 3 Finding the serial number on NSB-25… 5 Upgrade firmware of NSB-25… 6 Check the installation of 4K pack… 8 Transcoding… 9 July 2015
More information
XDCAM, XDCAM EX, XAVC, XAVC S, NXCAM, SxS and Professional Disc are trademarks of Sony Corporation.
Revised Tuesday, March 12, 2019 XDCAM, XDCAM EX, XAVC, XAVC S, NXCAM, SxS and Professional Disc are trademarks of Sony Corporation. Avid and DNxHD are trademarks or registered trademarks of Avid Technology,
More information
AVCHD Converter Utility
How To Guide AVCHD Converter Utility Converting AVCHD files to the Canopus HQ codec for use with Grass Valley EDIUS NLE Software desktop. grassvalley. com professional. grassvalley. com 2008 Thomson. All
More information
TS5 FASTEC. Cine DATA SHEET
FASTEC FASTER THAN VISION Cine DATA SHEET May, 2018 TS5 In the Studio, on the shoot, in the field…high-speed imaging in the palm of your hand! Its superior image quality and dynamic range make it a great
More information
FS-P250 Quick Start Guide
FS-P250 Quick Start Guide This document is a quick look into using the Vitec FS-P250 with Panasonic AG-HPX250/255. The following will be covered in this document: Getting Started and Recording Proxy Footage
More information
Professional Camcorder Family
Professional Camcorder Family XDCAM Handy Camcorders NXCAM Camcorders Accessories *4K: 3840 2160pix Connect this product to HDR (HLG) compatible TV via HDMI cable and turn to HDR (HLG) mode by TV when
More information
HIGH DEFINITION CAMCORDERS
4K PRO XC SERIES XC10-XC15 UHD THE COMPLETE PACKAGE The XC10 4K Camcorder features a compact, lightweight and versatile design for convenient 4K UHD/Full HD video shooting and 12 Megapixel digital still
More information

Contents
- 1 Sony Nxcam Avchd Mpeg2 Sd Manual
- 2 Sony Nxcam Hxr Nx5u Basics W Audio Explanation
- 2.1 Conclusion
- 2.1.1 Related image with sony nxcam avchd mpeg2 sd manual
- 2.1.2 Related image with sony nxcam avchd mpeg2 sd manual
- 2.1 Conclusion
Immerse yourself in the captivating realm of arts and culture, where creativity knows no boundaries. Celebrate the transformative power of artistic expression as we explore diverse art forms, spotlight talented artists, and ignite your passion for the cultural tapestry that shapes our world in our Sony Nxcam Avchd Mpeg2 Sd Manual section. The card the hd up up of s xavc video- sd memory sd media via codec your 59-94p recorded at slots- recording full Recording to avchd to supports codecs 2-0 x 59-94p rates variety formats camcorder to video to footage and for and dv a 2 is frame
Sony Nxcam Avchd Mpeg2 Sd Manual
Sony Nxcam Avchd Mpeg2 Sd Manual
Sony nxcam hxr nx5n operating manual digital hd video camera recorder also see for nxcam hxr nx5n: service manual (19 pages) , service manual (121 pages) 1 2 3 4 5 table of contents 6 7 8 9 10 11 12 13 14 15 16 17 18 19 20 21 22 23 24 25 26. Manual button (40) manual dial (40) lcd screen touch panel (19, 21) if you rotate the lcd panel 180 degrees, you can close the lcd panel with the lcd screen facing out. this is convenient during playback operations. speakers projector lens (47) projector focus lever (47) gps antenna (44) a gps antenna is located in the lcd panel.

Sony Nxcam Avchd Mpeg2 Sd Professional Camcorder W Accessories Property Room
Sony Nxcam Avchd Mpeg2 Sd Professional Camcorder W Accessories Property Room
Overview fast forward your creativity with nxcam sony’s first professional avchd camcorder redefines the performance and features expected of this product class. it records stunning quality 1920 x 1080 images at 24mbps (60i, 30p or 24p), as well as supporting 720 60p and standard definition recording. Recording to a variety of formats, frame rates and codecs, the camcorder supports the xavc s codec recording full hd video at up to 59.94p, avchd 2.0 up to 59.94p, and dv for sd video. your footage is recorded to media via 2 x sd memory card slots. As for recording sd mpeg2 to cards, i briefly tested sd video with my nx5 and did not like it. in 16:9 widescreen sd, the video from the nx5 looked a lot like the widescreen sd from my vx2000, which is to say that it did not look very good. switching the vx2000 back to 4:3 improved the look but that was not true for 4:3 mpeg2 from my nx5. Support by sony (mobile app) get support content on the go! contact support. parts & repair. find instruction manuals and brochures for digital cameras.

Sony Nxcam Avchd Mpeg2 Sd Manual
Sony Nxcam Avchd Mpeg2 Sd Manual
As for recording sd mpeg2 to cards, i briefly tested sd video with my nx5 and did not like it. in 16:9 widescreen sd, the video from the nx5 looked a lot like the widescreen sd from my vx2000, which is to say that it did not look very good. switching the vx2000 back to 4:3 improved the look but that was not true for 4:3 mpeg2 from my nx5. Support by sony (mobile app) get support content on the go! contact support. parts & repair. find instruction manuals and brochures for digital cameras. Learn how to operate the sony pxw fs5, a versatile and compact 4k hdr camcorder with a super 35 mm sensor. this operation manual covers the basic functions, menu settings, recording modes, and troubleshooting tips for the pxw fs5. In this manual, the dvd disc recorded with high definition image quality (hd) is called avchd recording disc. design and specifications of your camcorder and accessories are subject to change without notice. notes on use do not do any of the following. otherwise, the recording media may be damaged, recorded images may be impossible to play back.
Sony Nxcam Hxr Nx5u Basics W Audio Explanation
Sony Nxcam Hxr Nx5u Basics W Audio Explanation
this video provides a brief survey of the sony nxcam’s functions. by far, the most challenging part of the camera is using its basic and advanced operation of dmc sony hxr nx3 1 nxcam professional handheld camcorder. thank you for watching this video, i hope it will help you to solve your problem. my goal with this channel is to explain how to do diginfo diginfo.tv sony nxcam related links : sony.jp products professional nxcam index here we delve into the nx5’s manual settings. learn to adjust shutter speed gain aperture white balance nd filters quick, basic walk through of the sony hxr nx100 camcorder. we use this camcorder in our youth divisions for video streaming. this tutorial explains the basics of using a sony nxcam. in this video we’ll go through everything you need to know about the manual settings of the sony hxr nx80. 0:26 manual mode basic setup amazon.in shop banaodikhao full settings for sony nx200 nxcam camcorder for professional sony professional solutions. this video introduces sony broadcast & professional’s latest nxcam avchd camcorder. thank you for watching this video, i hope it will help you to solve your problem. my goal with this channel is to explain how to do
Conclusion
Having examined the subject matter thoroughly, it is clear that the article provides informative information about Sony Nxcam Avchd Mpeg2 Sd Manual. Throughout the article, the author presents an impressive level of expertise on the topic. In particular, the discussion of X stands out as a highlight. Thanks for taking the time to this post. If you would like to know more, feel free to contact me through the comments. I look forward to hearing from you. Moreover, here are some similar posts that you may find helpful: