- Manuals
- Brands
- Kärcher Manuals
- Pressure Washer
- HD 6/16-4 M
Manuals and User Guides for Kärcher HD 6/16-4 M. We have 3 Kärcher HD 6/16-4 M manuals available for free PDF download: Operating Instructions Manual, Original Instructions Manual, Manual
Kärcher HD 6/16-4 M Original Instructions Manual (372 pages)
Brand: Kärcher
|
Category: Pressure Washer
|
Size: 3.93 MB
Table of Contents
-
Deutsch
6
-
Table of Contents
6
-
Geräteelemente
6
-
Zu Ihrer Sicherheit
6
-
Bestimmungsgemäße Verwen- Dung
7
-
Sicherheitseinrichtungen
7
-
Umweltschutz
8
-
Vor Inbetriebnahme
8
-
Inbetriebnahme
8
-
Bedienung
9
-
Transport
11
-
Lagerung
12
-
Pflege und Wartung
12
-
Hilfe bei Störungen
12
-
Ersatzteile
13
-
Garantie
13
-
EG-Konformitätserklärung . de
14
-
Technische Daten
15
-
-
English
19
-
For Your Safety
19
-
Environmental Protection
20
-
Safety Valve
20
-
-
Proper Use
20
-
Safety Devices
20
-
Before Startup
21
-
Start up
21
-
Electrical Connection
21
-
Check Oil Level
21
-
-
Operation
22
-
Water Connection
22
-
-
Storage
24
-
Transport
24
-
Maintenance and Care
25
-
Troubleshooting
25
-
Spare Parts
26
-
Warranty
26
-
EC Declaration of Conformity en
27
-
Technical Specifications
28
-
-
Français
32
-
Dispositifs de Sécurité
33
-
Protection de L’environnement FR
33
-
Utilisation Conforme
33
-
Avant la Mise en Service
34
-
Mise en Service
34
-
Utilisation
35
-
Entreposage
38
-
Entretien Et Maintenance
38
-
Transport
38
-
Assistance en Cas de Panne FR
39
-
Déclaration de Conformité CE FR
40
-
Elektrische Aansluiting
60
-
-
Garantie
40
-
Pièces de Rechange
40
-
-
Español
71
-
Dispositivos de Seguridad . es
72
-
Protección del Medio Ambiente es
72
-
Uso Previsto
72
-
Antes de la Puesta en Marcha es
73
-
Puesta en Marcha
73
-
Manejo
74
-
Almacenamiento
77
-
Cuidados y Mantenimiento. es
77
-
Transporte
77
-
Ayuda en Caso de Avería
78
-
Declaración de Conformidad CE es
79
-
Garantía
79
-
Piezas de Repuesto
79
-
Datos Técnicos
80
-
-
Русский
174
-
Защитные Устройства
175
-
Использование По Назначению
175
-
Начало Работы
176
-
Перед Началом Работы
176
-
Управление
177
-
Вание
180
-
Транспортировка
180
-
Уход И Техническое Обслужи
180
-
Хранение
180
-
Гарантия
182
-
Запасные Части
182
-
Технические Данные
184
-
Advertisement
Kärcher HD 6/16-4 M Manual (360 pages)
Brand: Kärcher
|
Category: Pressure Washer
|
Size: 3.85 MB
Table of Contents
-
Deutsch
6
-
Table of Contents
6
-
Geräteelemente
6
-
Zu Ihrer Sicherheit
6
-
Bestimmungsgemäße Verwen- Dung
7
-
Sicherheitseinrichtungen
7
-
Umweltschutz
8
-
Vor Inbetriebnahme
8
-
Inbetriebnahme
8
-
Bedienung
9
-
Transport
11
-
Lagerung
12
-
Pflege und Wartung
12
-
Hilfe bei Störungen
12
-
Ersatzteile
13
-
Garantie
13
-
EG-Konformitätserklärung . de
14
-
Technische Daten
15
-
-
English
19
-
For Your Safety
19
-
Environmental Protection
20
-
Safety Valve
20
-
-
Proper Use
20
-
Safety Devices
20
-
Before Startup
21
-
Start up
21
-
Electrical Connection
21
-
Check Oil Level
21
-
-
Operation
22
-
Water Connection
22
-
High Pressure Operation
23
-
Operation with Detergent
23
-
-
Storage
24
-
Interrupting Operation
24
-
Frost Protection
24
-
Storing the Appliance
24
-
-
Transport
24
-
Maintenance and Care
25
-
Troubleshooting
25
-
Spare Parts
26
-
Warranty
26
-
EC Declaration of Conformity en
27
-
Technical Specifications
28
-
-
Français
32
-
Dispositifs de Sécurité
33
-
Protection de L’environnement FR
33
-
Utilisation Conforme
33
-
Avant la Mise en Service
34
-
Mise en Service
34
-
Utilisation
35
-
Entreposage
38
-
Entretien Et Maintenance
38
-
Transport
38
-
Assistance en Cas de Panne FR
39
-
Déclaration de Conformité CE FR
40
-
Elektrische Aansluiting
60
-
-
Garantie
40
-
Pièces de Rechange
40
-
-
Español
71
-
Dispositivos de Seguridad . es
72
-
Protección del Medio Ambiente es
72
-
Uso Previsto
72
-
Antes de la Puesta en Marcha es
73
-
Puesta en Marcha
73
-
Manejo
74
-
Almacenamiento
77
-
Cuidados y Mantenimiento. es
77
-
Transporte
77
-
Ayuda en Caso de Avería
78
-
Declaración de Conformidad CE es
79
-
Garantía
79
-
Piezas de Repuesto
79
-
Datos Técnicos
80
-
-
Русский
238
-
Защитные Устройства
239
-
Использование По Назначению
239
-
Начало Работы
240
-
Перед Началом Работы
240
-
Управление
241
-
Вание
244
-
Транспортировка
244
-
Уход И Техническое Обслужи
244
-
Хранение
244
-
Гарантия
246
-
Запасные Части
246
-
Технические Данные
248
-

Kärcher HD 6/16-4 M Operating Instructions Manual (372 pages)
Karcher Pressure Washers Operating instructions
Brand: Kärcher
|
Category: Pressure Washer
|
Size: 7 MB
Table of Contents
-
Deutsch
6
-
English
18
-
Water Connection
20
-
Electrical Connection
20
-
High Pressure Operation
21
-
Operation with Detergent
22
-
Interrupting Operation
22
-
Storing the Appliance
23
-
Frost Protection
23
-
Français
42
-
Italiano
55
-
Nederlands
68
-
Elektrische Aansluiting
70
-
Table of Contents
80
-
Español
80
-
Uso Previsto
81
-
Dispositivos de Seguridad
81
-
Protección del Medio Ambiente es
81
-
Antes de la Puesta en Marcha es
81
-
Puesta en Marcha
82
-
Manejo es
83
-
Transporte es
85
-
Almacenamiento es
85
-
Cuidados y Mantenimiento
85
-
Ayuda en Caso de Avería es
86
-
Piezas de Repuesto
87
-
Garantía es
87
-
Declaración de Conformidad es
88
-
Datos Técnicos
89
-
Português
93
-
Dansk
106
-
Norsk
118
-
Svenska
130
-
Suomi
142
-
Türkçe
167
-
Magyar
193
-
Polski
229
-
Hrvatski
268
-
Srpski
280
-
Eesti
305
-
Latviešu
317
-
Lietuviškai
329
-
Advertisement
Advertisement
Related Products
-
Kärcher HD 6/16-4 M Plus
-
Kärcher HD 6/16 ST
-
Kärcher HD 6/16-4 M / MX
-
Kärcher HD 6/16-4 MX
-
Kärcher HD 6/16-4 MX Plus
-
Kärcher HD 6/13-4 M
-
Kärcher HD 6/15 ST
-
Kärcher HD 6/15 G
-
Kärcher HD 6/13 C
-
Kärcher HD 6/13 C Plus
Kärcher Categories
Pressure Washer
![]()
Vacuum Cleaner
Floor Machine
Steam Cleaner
Scrubber
More Kärcher Manuals
![]()
|
HD 6/11-4 M Plus |
HD 7/12-4 M |
HD 9/18 M |
HD 9/20-4 M |
|
HD 6/15-4 M |
HD 7/16-4 M |
HD 9/19 M |
HD 9/20-4 M Plus |
|
HD 6/15-4 MX Plus |
HD 7/18-4 M |
HD 9/19 M Plus |
HD 9/20-4 MX |
|
HD 6/16-4 M |
HD 7/18-4 M Plus |
HD 9/19 MX |
HD 9/20-4 MX Plus |
|
HD 6/16-4 M Plus |
HD 7/18-4 MX |
HD 9/19 MX Plus |
|
|
HD 6/16-4 MX |
HD 7/18-4 MX Plus |
||
|
HD 6/16-4 MX Plus |
Registerwww . kaercherand . win! com!
|
Deutsch |
6 |
|
English |
18 |
|
Français |
42 |
|
Italiano |
55 |
|
Nederlands |
68 |
|
Español |
80 |
|
Português |
93 |
|
Dansk |
106 |
|
Norsk |
118 |
|
Svenska |
130 |
|
Suomi |
142 |
|
Ελληνικά |
154 |
|
Türkçe |
167 |
|
Русский |
179 |
|
Magyar |
193 |
|
Čeština |
205 |
|
Slovenščina |
217 |
|
Polski |
229 |
|
Româneşte |
242 |
|
Slovenčina |
255 |
|
Hrvatski |
268 |
|
Srpski |
280 |
|
Български |
292 |
|
Eesti |
305 |
|
Latviešu |
317 |
|
Lietuviškai |
329 |
|
Українська |
341 |
|
Indonesia |
355 |
59617120 01/12
2
3

|
HD 6/11-4 M Plus |
HD 6/15-4 M |
HD 6/16-4 M |
|
HD 6/16-4 M Plus |
HD 7/12-4M |
HD 7/16-4 M |
|
HD 7/18-4 M |
HD 7/18-4 M Plus |
HD 9/18 M |
|
HD 9/19 M |
HD 9/19 M Plus |
HD 9/20-4 M |
|
HD 9/20-4 M Plus |
4

|
HD 6/15-4 MX Plus |
HD 6/16-4 MX |
|
HD 6/16-4 MX Plus |
HD 7/18-4 MX |
|
HD 7/18-4 MX Plus |
HD 9/19 MX |
|
HD 9/19 MX Plus |
HD 9/20-4 MX |
|
HD 9/20-4 MX Plus |
5

|
Lesen Sie vor der ersten Benut- |
17 Handspritzpistole |
|||||||||||
|
zung Ihres Gerätes diese Origi- |
18 Sicherungshebel |
|||||||||||
|
nalbetriebsanleitung, handeln Sie danach |
19 Hebel der Handspritzpistole |
|||||||||||
|
und bewahren Sie diese für späteren Ge- |
20 Hochdruckschlauch |
|||||||||||
|
brauch oder für Nachbesitzer auf. |
21 Schubbügel |
|||||||||||
|
22 Kabelhalter |
||||||||||||
|
Inhaltsverzeichnis |
||||||||||||
|
23 Reinigungsmittel-Dosierventil |
||||||||||||
|
Geräteelemente |
DE — |
1 |
24 Reinigungsmittel-Saugschlauch mit Fil- |
|||||||||
|
ter und Schraubdeckel |
||||||||||||
|
Zu Ihrer Sicherheit |
DE — |
1 |
25 Flaschenhalter für Reinigungsmittel |
|||||||||
|
Bestimmungsgemäße Ver- |
DE — |
2 |
26 Kurbel |
|||||||||
|
wendung |
27 Schlauchtrommel |
|||||||||||
|
Sicherheitseinrichtungen |
DE — |
2 |
||||||||||
|
Zu Ihrer Sicherheit |
||||||||||||
|
Umweltschutz |
DE — |
2 |
||||||||||
|
Vor erster Inbetriebnahme Sicherheitshin- |
||||||||||||
|
Vor Inbetriebnahme |
DE — |
2 |
||||||||||
|
weise Nr. 5.951-949 unbedingt lesen! |
||||||||||||
|
Inbetriebnahme |
DE — |
3 |
||||||||||
|
Symbole in der Betriebsanleitung |
||||||||||||
|
Bedienung |
DE — |
4 |
||||||||||
|
Gefahr |
||||||||||||
|
Transport |
DE — |
6 |
||||||||||
|
Lagerung |
DE — |
6 |
Für eine unmittelbar drohende Gefahr, die |
|||||||||
|
Pflege und Wartung |
DE — |
6 |
zu schweren Körperverletzungen oder zum |
|||||||||
|
Tod führt. |
||||||||||||
|
Hilfe bei Störungen |
DE — |
7 |
||||||||||
|
Warnung |
||||||||||||
|
Ersatzteile |
DE — |
8 |
||||||||||
|
Für eine möglicherweise gefährliche Situa- |
||||||||||||
|
Garantie |
DE — |
8 |
||||||||||
|
tion, die zu schweren Körperverletzungen |
||||||||||||
|
EG-Konformitätserklärung |
DE — |
8 |
||||||||||
|
oder zum Tod führen könnte. |
||||||||||||
|
Technische Daten |
DE — |
9 |
||||||||||
|
Vorsicht |
||||||||||||
|
Geräteelemente |
Für eine möglicherweise gefährliche Situa- |
|||||||||||
|
tion, die zu leichten Verletzungen oder zu |
||||||||||||
|
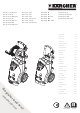
Bitte Bildseite vorne ausklappen |
||||||||||||
|
Sachschäden führen kann. |
||||||||||||
|
1 |
Düsenablage |
|||||||||||
|
Symbole auf dem Gerät |
||||||||||||
|
2 |
Griff |
|||||||||||
|
3 |
Hochdruckanschluss |
Hochdruckstrahlen können bei |
||||||||||
|
4 |
Wasseranschluss |
unsachgemäßem Gebrauch ge- |
||||||||||
|
5 |
Manometer |
fährlich sein. Der Strahl darf |
||||||||||
|
6 |
Ölstandsanzeige |
nicht auf Personen, Tiere, aktive elektri- |
||||||||||
|
7 |
Ölbehälter |
sche Ausrüstung oder auf das Gerät selbst |
||||||||||
|
8 |
Gerätehaube |
gerichtet werden. |
||||||||||
|
9 |
Geräteschalter |
Gemäß gültiger Vorschriften darf |
||||||||||
|
10 Befestigungsschraube Gerätehaube |
das Gerät nie ohne Systemtrenner |
|||||||||||
|
am Trinkwassernetz betrieben |
||||||||||||
|
11 Schlauchablage |
||||||||||||
|
werden. Es ist ein geeigneter Sys- |
||||||||||||
|
12 Halter für Handspritzpistole |
||||||||||||
|
temtrenner der Fa. KÄRCHER oder alter- |
||||||||||||
|
13 Düse |
||||||||||||
|
nativ ein Systemtrenner gemäß EN 12729 |
||||||||||||
|
14 Markierung der Düse |
||||||||||||
|
Typ BA zu verwenden. Wasser, das durch |
||||||||||||
|
15 Strahlrohr |
||||||||||||
|
einen Systemtrenner geflossen ist, wird als |
||||||||||||
|
16 Druck-/Mengenregulierung |
||||||||||||
|
nicht trinkbar eingestuft. |
||||||||||||
|
(nicht bei HD 9/18 M) |
||||||||||||
|
6 |
DE – 1 |
Vorsicht
Systemtrenner immer an der Wasserversorgung, niemals direkt am Gerät anschließen!
Bestimmungsgemäße
Verwendung
Diesen Hochdruckreiniger ausschließlich verwenden
–zum Reinigen mit dem Niederdruckstrahl und Reinigungsmittel (z.B. Reinigen von Maschinen, Fahrzeugen, Bauwerken, Werkzeugen),
–zum Reinigen mit Hochdruckstrahl ohne Reinigungsmittel (z.B. Reinigen von Fassaden, Terrassen, Gartengeräten).
Für hartnäckige Verschmutzungen empfehlen wir den Dreckfräser als Sonderzubehör. Bei HD…Plus ist der Dreckfräser im Lieferumfang enthalten.
Sicherheitseinrichtungen
Sicherheitseinrichtungen dienen dem Schutz des Benutzers und dürfen nicht außer Kraft gesetzt oder in ihrer Funktion umgangen werden.
Überströmventil mit Druckschalter
Beim Reduzieren der Wassermenge mit der Druck-/Mengenregulierung öffnet das Überströmventil und ein Teil des Wassers fließt zur Pumpensaugseite zurück.
Wird der Hebel an der Handspritzpistole losgelassen, schaltet der Druckschalter die Pumpe ab, der Hochdruckstrahl stoppt. Wird der Hebel gezogen, schaltet die Pumpe wieder ein.
Sicherheitsventil
Das Sicherheitsventil öffnet bei Überschreitung des zulässigen Betriebsüberdrucks; das Wasser fließt zur Pumpensaugseite zurück.
Überströmventil, Druckschalter und Sicherheitsventil sind werkseitig eingestellt und plombiert.
Einstellungen nur durch den Kundendienst.
Umweltschutz
Die Verpackungsmaterialien sind recyclebar. Bitte werfen Sie die Verpackungen nicht in den Hausmüll, sondern führen Sie diese einer Wiederverwertung zu.
Altgeräte enthalten wertvolle recyclingfähige Materialien, die einer Verwertung zugeführt werden sollten. Batterien, Öl und ähnliche Stoffe dürfen nicht in die Umwelt gelangen. Bitte entsorgen Sie Altgeräte deshalb über geeignete Sammelsysteme.
Hinweise zu Inhaltsstoffen (REACH)
Aktuelle Informationen zu Inhaltsstoffen finden Sie unter:
www.kaercher.de/REACH
Vor Inbetriebnahme
Auspacken
–Packungsinhalt beim Auspacken prüfen.
–Bei Transportschaden sofort Händler informieren.
Ölstand kontrollieren
Ölstandsanzeige bei stehendem Gerät ablesen. Der Ölstand muss oberhalb der beiden Zeiger liegen.
Entlüftung Ölbehälter aktivieren
Befestigungsschraube der Gerätehaube herausdrehen, Gerätehaube abnehmen.
Spitze des Ölbehälterdeckels abschneiden.
Gerätehaube befestigen.

Zubehör montieren
Düse auf das Strahlrohr montieren (Markierungen auf dem Stellring oben).
Strahlrohr auf die Handspritzpistole mit Druckund Mengenregulierung montieren.
Hinweis (nur bei 1.524-207)
Bei beengten Platzverhältnissen kann der beigelegte Adapter mit Düse direkt an der Handspritzpistole montiert werden.
Bei Geräten ohne Schlauchtrommel:
Hochdruckschlauch am Hochdruckanschluss festschrauben.
Bei Geräten mit Schlauchtrommel:
Kurbel in die Schlauchtrommelwelle einstecken und einrasten.
Hochdruckschlauch vor dem Aufwickeln gestreckt auslegen.
Hochdruckschlauch durch Drehen der Kurbel in gleichmäßigen Lagen auf die Schlauchtrommel aufwickeln. Drehrichtung so wählen, dass der Hochdruckschlauch nicht geknickt wird.
Das Gerät muss zwingend mit einem Stecker an das elektrische Netz angeschlossen werden. Eine nicht trennbare Verbindung mit dem Stromnetz ist verboten. Der Stecker dient zur Netztrennung. Anschlussleitung mit Netzstecker vor jedem Betrieb auf Schäden prüfen. Beschädigte Anschlussleitung unverzüglich durch autorisierten Kundendienst/Elektro-Fachkraft austauschen lassen.
Stecker und Kupplung einer verwendeten Verlängerungsleitung müssen wasserdicht sein. Verlängerungskabel mit ausreichendem Querschnitt verwenden (siehe „Technische Daten“) und ganz von der Kabeltrommel abwickeln.
Ungeeignete Verlängerungsleitungen können gefährlich sein. Verwenden Sie im Freien nur dafür zugelassene und entsprechend gekennzeichnete Verlängerungsleitungen mit ausreichendem Leitungsquerschnitt:
Anschlusswerte siehe Typenschild/Technische Daten.
Wasseranschluss
Inbetriebnahme
Elektrischer Anschluss
Gefahr
Verletzungsgefahr durch elektrischen Schlag.
Gerät nur an Wechselstrom anschließen.
Das Gerät darf nur an einen elektrischen Anschluss angeschlossen werden, der von einem Elektroinstallateur gemäß IEC 60364 ausgeführt wurde.
Die angegebene Spannung auf dem Typenschild muss mit der Spannung der Stromquelle übereinstimmen. Mindestabsicherung der Steckdose (siehe Technische Daten).
Die maximal zulässige Netzimpedanz am elektrischen Anschlusspunkt (siehe Technische Daten) darf nicht überschritten werden. Bei Unklarheiten bezüglich der an Ihrem Anschlusspunkt vorliegenden Netzimpedanz setzen Sie sich bitte mit Ihrem Energieversorgungsunternehmen in Verbindung.
Anschluss an die Wasserleitung
Warnung
Vorschriften des Wasserversorgungsunternehmens beachten.
Gemäß gültiger Vorschriften darf das Gerät nie ohne Systemtrenner
am Trinkwassernetz betrieben 


 werden. Es ist ein geeigneter Systemtrenner der Fa. KÄRCHER oder alternativ ein Systemtrenner gemäß EN 12729 Typ BA zu verwenden. Wasser, das durch einen Systemtrenner geflossen ist, wird als nicht trinkbar eingestuft.
Vorsicht
Systemtrenner immer an der Wasserversorgung, niemals direkt am Gerät anschließen!
Anschlusswerte siehe Technische Daten.
Zulaufschlauch (Mindestlänge 7,5 m, Mindestdurchmesser 1“) am Wasseranschluss des Gerätes und am Wasserzulauf (zum Beispiel Wasserhahn) anschließen.

Hinweis
Der Zulaufschlauch ist nicht im Lieferumfang enthalten.
Wasserzulauf öffnen.
Wasser aus offenen Behältern ansaugen
Saugschlauch (Bestell-Nr. 4.440-270.0) am Wasseranschluss anschrauben.
Filter (Bestell-Nr. 4.730-012.0) am Saugschlauch anbringen.
Gerät entlüften: Düse abschrauben.
Gerät so lange laufen lassen bis das Wasser blasenfrei austritt. Eventuell Gerät 10 Sekunden laufen
lassen – ausschalten. Vorgang mehrmals wiederholen.
Gerät ausschalten und Düse wieder aufschrauben.
Bedienung
Gefahr
Explosionsgefahr!
Keine brennbaren Flüssigkeiten versprühen. Beim Einsatz des Gerätes in Gefahrbereichen (z.B. Tankstellen) sind die entsprechenden Sicherheitsvorschriften zu beachten.
Warnung
Motoren nur an Stellen mit entsprechendem Ölabscheider reinigen (Umweltschutz).
Den Strahl nicht auf andere oder sich selbst richten, um Kleidung oder Schuhwerk zu reinigen.
Verstopfungsgefahr. Düsen nur mit der Mündung nach oben in das Zubehörfach legen.
Nur bei HD 9/19…:
Gefahr
Längere Benutzungsdauer des Gerätes kann zu vibrationsbedingten Durchblutungsstörungen in den Händen führen.
Eine allgemein gültige Dauer für die Benutzung kann nicht festgelegt werden, weil diese von mehreren Einflussfaktoren abhängt:
–Persönliche Veranlagung zu schlechter Durchblutung (häufig kalte Finger, Fingerkribbeln).
–Niedrige Umgebungstemperatur. Warme Handschuhe zum Schutz der Hände tragen.
–Festes Zugreifen behindert die Durchblutung.
–Ununterbrochener Betrieb ist schlechter als durch Pausen unterbrochener Betrieb.
Beiregelmäßiger,langandauernderBenutzung des Gerätes und bei wiederholtem Auftreten entsprechender Anzeichen (zum Beispiel Fingerkribbeln, kalte Finger) empfehlen wir eine ärztliche Untersuchung.
Betrieb mit Hochdruck
Hinweis
Das Gerät ist mit einem Druckschalter ausgestattet. Der Motor läuft nur an, wenn der Hebel der Pistole gezogen ist.
Hochdruckschlauch ganz von der Schlauchtrommel abrollen.
Geräteschalter auf „I“ stellen.
Handspritzpistole entriegeln und Hebel der Pistole ziehen.
Arbeitsdruck und Wassermenge durch Drehen (stufenlos) an der Druckund Mengenregulierung einstellen(+/-)
(nicht bei HD 9/18 M).
Nur bei HD 9/20-4…:
Bei kleinster Fördermenge sorgt die Abwärme des Motors für eine Wassererwärmung von ca. 15 °C.
Strahlart wählen
Handspritzpistole schließen.
Gehäuse der Düse drehen, bis das gewünschte Symbol mit der Markierung übereinstimmt:
Hochdruck-Rundstrahl (0°) für besonders hartnäckige Verschmutzungen
Niederdruck-Flachstrahl (CHEM) für den Betrieb mit Reinigungsmittel oder Reinigen mit geringem Druck
Hochdruck-Flachstrahl (25°) für großflächige Verschmutzungen

Gefahr
Verletzungsgefahr. Bei Verwendung des kurzen Strahlrohrs/Adapters ist die Verwendung von Punktstrahldüsen/Rundstrahldüsen nicht zulässig.
Betrieb mit Reinigungsmittel
Warnung
Ungeeignete Reinigungsmittel können das Gerät und das zu reinigende Objekt beschädigen. Nur Reinigungsmittel verwenden, die von Kärcher freigegeben sind. Dosierempfehlung und Hinweise, die den Reinigungsmitteln beigegeben sind, beachten. Zum Schonen der Umwelt sparsam mit Reinigungsmitteln umgehen. Sicherheitshinweise auf den Reingungsmitteln beachten.
Kärcher-Reinigungsmittel garantieren ein störungsfreies Arbeiten. Bitte lassen Sie sich beraten oder fordern Sie unseren Katalog oder unsere Reinigungsmittel-Infor- mationsblätter an.
Reinigungsmittel-Flasche in Flaschenhalter am Gerät stellen oder Reini- gungsmittel-Kanister neben das Gerät stellen. Zwei verschiedene Reinigungsmittel können gleichzeitig im Gerät abgestellt werden.
Reinigungsmittel-Saugschlauch herausziehen und in Reinigungsmittel-Fla- sche oder -Kanister tauchen.
Schraubdeckel auf Flasche oder Kanister aufschrauben.
Düse auf „CHEM“ stellen.
ReinigungsmittelDosierventil auf gewünschtes Reinigungsmittel und gewünschte Konzentration einstellen.
Empfohlene Reinigungsmethode
Reinigungsmittel sparsam auf die trockene Oberfläche sprühen und einwirken (nicht trocknen) lassen.
Gelösten Schmutz mit dem Hochdruckstrahl abspülen.
Nach dem Betrieb Filter in klares Wasser tauchen. Dosierventil auf höchste Reinigungsmittel-Konzentration drehen. Gerät starten und eine Minute lang klarspülen.
Betrieb unterbrechen
Hebel der Handspritzpistole loslassen, das Gerät schaltet ab.
Hebel der Handspritzpistole erneut ziehen, das Gerät schaltet wieder ein.
Gerät ausschalten
Geräteschalter auf „0“ stellen.
Netzstecker aus der Steckdose ziehen.
Wasserzulauf schließen.
Handspritzpistole betätigen, bis das Gerät drucklos ist.
Sicherungshebel der Handspritzpistole betätigen, um Hebel der Pistole gegen unabsichtliches Auslösen zu sichern.
Nur bei HD 9/20-4…:Gefahr
Verbrühungsgefahr durch heißes Wasser. Im ausgeschalteten Gerät enthaltenes Restwasser kann sich erhitzen. Beim Entfernen des Schlauchs vom Wasserzulauf kann das erhitzte Wasser herausspritzen und Verbrühungen verursachen. Schlauch erst abnehmen, wenn das Gerät abgekühlt ist.
![]()
Gerät aufbewahren
Handspritzpistole in den Halter stecken.
Hochdruckschlauch aufwickeln und über die Schlauchablage hängen.
oder
Hochdruckschlauch auf die Schlauchtrommel aufwickeln. Griff der Kurbel einschieben, um die Schlauchtrommel zu blockieren.
Anschlusskabel um den Kabelhalter wickeln.
Stecker mit montiertem Clip befestigen.
Frostschutz
Vorsicht
Frost zerstört das nicht vollständig von Wasser entleerte Gerät.
Gerät an einem frostfreien Ort aufbewahren.
Ist eine frostfreie Lagerung nicht möglich:
Wasser ablassen.
Handelsübliches Frostschutzmittel durch das Gerät pumpen.
Hinweis
Handelsübliches Frostschutzmittel für Automobile auf Glykolbasis verwenden. Handhabungsvorschriften des Frostschutzmittelherstellers beachten.
Gerät max. 1 Minute laufen lassen bis Pumpe und Leitungen leer sind.
Transport
Vorsicht
Verletzungsund Beschädigungsgefahr! Gewicht des Gerätes beim Transport beachten.
Zum Transport über längere Strecken Gerät am Griff hinter sich herziehen.
Bei Geräten ohne Schlauchtrommel Schubbügel zum Tragen nach unten stellen. Gerät zum Tragen an den Griffen fassen, nicht am Schubbügel.
Vor dem Transport in liegender Position, Reinigungsmittel-Flaschen aus dem Flaschenhalter nehmen und verschließen.
Beim Transport in Fahrzeugen Gerät nach den jeweils gültigen Richtlinien gegen Rutschen und Kippen sichern.
Lagerung
Vorsicht
Verletzungsund Beschädigungsgefahr! Gewicht des Gerätes bei Lagerung beachten.
Dieses Gerät darf nur in Innenräumen gelagert werden.
Pflege und Wartung
Gefahr
Verletzungsgefahr durch unabsichtlich anlaufendes Gerät und elektrischen Schlag. Vor allen Arbeiten am Gerät, Gerät ausschalten und Netzstecker ziehen.
Hinweis
Altöl darf nur von den dafür vorgesehenen Sammelstellen entsorgt werden. Bitte geben Sie anfallendes Altöl dort ab. Verschmutzen der Umwelt mit Altöl ist strafbar.
Sicherheitsinspektion/
Wartungsvertrag
Mit Ihrem Händler können Sie eine regelmäßige Sicherheitsinspektion vereinbaren oder einen Wartungsvertrag abschließen. Bitte lassen Sie sich beraten.
Vor jedem Betrieb
Anschlusskabel auf Schaden prüfen (Gefahr durch elektrischen Schlag), beschädigtes Anschlusskabel unverzüglich durch autorisierten Kundendienst/ Elektrofachkraft austauschen lassen.
Hochdruckschlauch auf Beschädigung überprüfen (Berstgefahr). Beschädigten Hochdruckschlauch unverzüglich austauschen.
Gerät (Pumpe) auf Dichtheit prüfen. 3 Tropfen Wasser pro Minute sind zu-
lässig und können an der Geräteunterseite austreten. Bei stärkerer Undichtigkeit Kundendienst aufsuchen.

Wöchentlich
Ölstand prüfen. Bei milchigem Öl (Wasser im Öl) sofort Kundendienst aufsuchen.
Sieb im Wasseranschluss reinigen.
Filter am Reinigungsmittel-Saug- schlauch reinigen.
Nur HD 9/20-4:
Feinfilter reinigen.
Gerät drucklos machen.
Befestigungsschraube der Gerätehaube herausdrehen, Gerätehaube abnehmen.
Deckel mit Filter abschrauben.
Filter mit sauberem Wasser oder Druckluft reinigen.
In umgekehrter Reihenfolge zusammenbauen.
Jährlich oder nach 500
Betriebsstunden
Öl wechseln.
Ölwechsel
Hinweis
Ölmenge und -sorte siehe „Technische Daten“.
Befestigungsschraube der Gerätehaube herausdrehen, Gerätehaube abnehmen.
Deckel des Ölbehälters abnehmen.
Gerät nach vorne kippen.
Öl in Auffangbehälter ablassen.
Neues Öl langsam einfüllen; Luftblasen müssen entweichen.
Deckel des Ölbehälters anbringen.
Gerätehaube befestigen.
Hilfe bei Störungen
Gefahr
Verletzungsgefahr durch unabsichtlich anlaufendes Gerät und elektrischen Schlag. Vor allen Arbeiten am Gerät, Gerät ausschalten und Netzstecker ziehen. Elektrische Bauteile nur vom autorisierten Kundendienst prüfen und reparieren lassen.
Bei Störungen, die in diesem Kapitel nicht genannt sind, im Zweifelsfall und bei ausdrücklichem Hinweis einen autorisierten Kundendienst aufsuchen.
Gerät läuft nicht
Anschlusskabel auf Schaden prüfen.
Netzspannung prüfen.
Geräteschalter auf „0“ stellen und Motor min. 5 Minuten abkühlen lassen.
Tritt die Störung danach wieder auf, Gerät durch Kundendienst prüfen lassen.
Bei elektrischem Defekt Kundendienst aufsuchen.
Gerät kommt nicht auf Druck
Düse auf „Hochdruck“ stellen.
Düse reinigen.
Düse ersetzen.
Gerät entlüften (siehe „Inbetriebnahme“).
Wasserzulaufmenge prüfen (siehe Technische Daten).
Sieb im Wasseranschluss reinigen.
Sämtliche Zulaufleitungen zur Pumpe prüfen.
Bei Bedarf Kundendienst aufsuchen.
Pumpe undicht
3 Tropfen Wasser pro Minute sind zulässig und können an der Geräteunterseite austreten. Bei stärkerer Undichtigkeit Kundendienst aufsuchen.
Bei stärkerer Undichtigkeit Gerät durch Kundendienst prüfen lassen.
Pumpe klopft
Saugleitungen für Wasser und Reinigungsmittel auf Undichtheit prüfen.
Dosierventil für Reinigungsmittel bei Betrieb ohne Reinigungsmittel schließen.
Gerät entlüften (siehe „Inbetriebnahme“).
Bei Bedarf Kundendienst aufsuchen.
Reinigungsmittel wird nicht angesaugt
Düse auf „CHEM“ stellen.
Reinigungsmittel-Saugschlauch mit Filter prüfen/reinigen.
Reinigungsmittel-Dosierventil öffnen oder prüfen/reinigen.
Bei Bedarf Kundendienst aufsuchen.

Ersatzteile
–Es dürfen nur Zubehör und Ersatzteile verwendet werden, die vom Hersteller freigegeben sind. Original-Zubehör und Original-Ersatzteile bieten die Gewähr dafür, dass das Gerät sicher und störungsfrei betrieben werden kann.
–Eine Auswahl der am häufigsten benötigten Ersatzteile finden Sie am Ende der Betriebsanleitung.
–Weitere Informationen über Ersatzteile erhalten Sie unter www.kaercher.com im Bereich Service.
Garantie
In jedem Land gelten die von unserer zuständigen Vertriebsgesellschaft herausgegebenen Garantiebedingungen. Etwaige Störungen an Ihrem Gerät beseitigen wir innerhalb der Garantiefrist kostenlos, sofern ein Materialoder Herstellungsfehler die Ursache sein sollte. Im Garantiefall wenden Sie sich bitte mit Kaufbeleg an Ihren Händler oder die nächste autorisierte Kundendienststelle.
EN 62233: 2008
HD 6/11, HD 6/15, HD 7/12, HD 7/18,
HD 9/19
EN 61000–3–3: 2006
HD 6/16, HD 9/20:
EN 61000–3–11: 2000
Angewandtes Konformitätsbewer-
tungsverfahren
2000/14/EG: Anhang V
Schallleistungspegel dB(A)
|
Gemessen: |
Garantiert: |
|
|
HD 6/11 |
83 |
84 |
|
HD 6/15 |
83 |
84 |
|
HD 6/16 |
83 |
84 |
|
HD 9/19 |
89 |
91 |
|
HD 9/20 |
87 |
88 |
Die Unterzeichnenden handeln im Auftrag und mit Vollmacht der Geschäftsführung.
Dokumentationsbevollmächtigter:
S. Reiser
|
EG-Konformitätserklärung |
Alfred Kärcher GmbH & Co. KG |
||
|
Hiermit erklären wir, dass die nachfolgend |
|||
|
Alfred-Kärcher-Str. 28 — 40 |
|||
|
bezeichnete Maschine aufgrund ihrer Kon- |
71364 Winnenden (Germany) |
||
|
zipierung und Bauart sowie in der von uns |
Tel.: +49 7195 14-0 |
||
|
in Verkehr gebrachten Ausführung den ein- |
Fax: +49 7195 14-2212 |
||
|
schlägigen grundlegenden Sicherheits- |
|||
|
und Gesundheitsanforderungen der EG- |
Winnenden, 2010/12/01 |
||
|
Richtlinien entspricht. Bei einer nicht mit |
|||
|
uns abgestimmten Änderung der Maschine |
|||
|
verliert diese Erklärung ihre Gültigkeit. |
|||
|
Produkt: |
Hochdruckreiniger |
||
|
Typ: |
1.524-xxx |
||
|
Einschlägige EG-Richtlinien |
|||
|
2006/42/EG (+2009/127/EG) |
|||
|
2004/108/EG |
|||
|
2000/14/EG |
|||
|
Angewandte harmonisierte Normen |
|||
|
EN 60335–1 |
|||
|
EN 60335–2–79 |
|||
|
EN 55014–1: 2006 + A1: 2009 |
|||
|
EN 55014–2: 1997 + A2: 2008 |
|||
|
EN 61000–3–2: 2006 + A2: 2009 |
|||
|
DE – 8 |
13 |

Technische Daten
|
Typ |
HD 6/11-4 M |
HD 6/15-4 M |
HD 6/16-4 M |
|
|
1.524-104.0 |
1.524-113.0 |
1.524-100.0 |
||
|
1.524-107.0 |
||||
|
HD 6/15-4 MX |
HD 6/16-4 MX |
|||
|
1.524-109.0 |
1.524-101.0 |
|||
|
1.524-108.0 |
||||
|
GB |
AUS |
EU |
||
|
Netzanschluss |
||||
|
Spannung |
V |
100 |
240 |
230 |
|
Stromart |
Hz |
1~ 50 |
||
|
Motordrehzahl |
1/min |
1400 |
||
|
Anschlussleistung |
kW |
2,9 |
3,3 |
3,4 |
|
Absicherung (träge, Char. C) |
A |
30 |
16 |
|
|
Schutzart |
IPX5 |
|||
|
Maximal zulässige Netzimpedanz |
Ohm |
— |
0,294+j0,184 |
|
|
Verlängerungskabel 30 m |
mm2 |
2,5 |
||
|
Wasseranschluss |
||||
|
Zulauftemperatur (max.) |
°C |
60 |
||
|
Zulaufmenge (min.) |
l/h (l/min) |
600 (10) |
||
|
Saughöhe aus offenem Behälter (20 °C) |
m |
0,5 |
||
|
Zulaufdruck (max.) |
MPa |
1 |
||
|
Leistungsdaten |
||||
|
Arbeitsdruck |
MPa |
3…11 |
3…15 |
3…16 |
|
Düsengröße |
045 |
040 |
038 |
|
|
Max. Betriebsüberdruck |
MPa |
14 |
18 |
19 |
|
Fördermenge |
l/h (l/min) |
250…600 |
300…600 |
(5…10) |
|
(4,2…10) |
||||
|
Reinigungsmittelansaugung |
l/h (l/min) |
0…40 (0…0,7) |
||
|
Rückstoßkraft der Handspritzpistole (max.) |
N |
30 |
||
|
Ermittelte Werte gemäß EN 60335-2-79 |
||||
|
Hand-Arm Vibrationswert |
m/s2 |
|||
|
Handspritzpistole |
<2,5 |
|||
|
Strahlrohr |
m/s2 |
<2,5 |
||
|
Unsicherheit K |
m/s2 |
1 |
||
|
Schalldruckpegel LpA |
dB(A) |
69 |
||
|
Unsicherheit KpA |
dB(A) |
1 |
||
|
Schallleistungspegel LWA + Unsicherheit KWA |
dB(A) |
84 |
||
|
Betriebsstoffe |
||||
|
Ölmenge |
l |
0,5 |
||
|
Ölsorte |
SAE 15W40 |
|||
|
Maße und Gewichte |
||||
|
Länge |
mm |
554 |
||
|
Breite |
mm |
509 |
||
|
Höhe |
mm |
1000 |
||
|
Gewicht ohne Zubehör (MX) |
kg |
44,5 |
54 |
48 (50) |

|
Typ |
HD 7/12-4 M |
HD 7/12-4 M |
HD 7/16-4 M |
HD 7/16-4 M |
||
|
1.524-105.0 |
1.524-106.0 |
1.524-204.0 |
1.524-203.0 |
|||
|
KAP |
KAP |
KAP |
KAP |
|||
|
Netzanschluss |
||||||
|
Spannung |
V |
220 |
380 |
220 |
||
|
Stromart |
Hz |
1~ 50 |
1~ 60 |
3~ 50 |
3~ 60 |
|
|
Motordrehzahl |
1/min |
1400 |
1680 |
|||
|
Anschlussleistung |
kW |
2,4 |
4,4 |
4,1 |
||
|
Absicherung (träge, Char. C) |
A |
16 |
20 |
16 |
||
|
Schutzart |
IPX5 |
|||||
|
Maximal zulässige Netzimpedanz |
Ohm |
— |
||||
|
Verlängerungskabel 30 m |
mm2 |
2,5 |
4,0 |
2,5 |
||
|
Wasseranschluss |
||||||
|
Zulauftemperatur (max.) |
°C |
60 |
||||
|
Zulaufmenge (min.) |
l/h (l/min) |
700 (11,7) |
||||
|
Saughöhe aus offenem Behälter |
m |
0,5 |
||||
|
(20 °C) |
||||||
|
Zulaufdruck (max.) |
MPa |
1 |
||||
|
Leistungsdaten |
||||||
|
Arbeitsdruck |
MPa |
3…12 |
3…16 |
|||
|
Düsengröße |
055 |
054 |
045 |
|||
|
Max. Betriebsüberdruck |
MPa |
14 |
19 |
|||
|
Fördermenge |
l/h (l/min) |
300…700 |
(5…11,7) |
|||
|
Reinigungsmittelansaugung |
l/h (l/min) |
0…40 (0…0,7) |
||||
|
Rückstoßkraft der Handspritzpisto- |
N |
30 |
35 |
|||
|
le (max.) |
||||||
|
Ermittelte Werte gemäß EN 60335 |
-2-79 |
|||||
|
Hand-Arm Vibrationswert |
||||||
|
Handspritzpistole |
m/s2 |
<2,5 |
||||
|
Strahlrohr |
m/s2 |
<2,5 |
||||
|
Unsicherheit K |
m/s2 |
1 |
||||
|
Schalldruckpegel LpA |
dB(A) |
69 |
75 |
|||
|
Unsicherheit KpA |
dB(A) |
1 |
||||
|
Schallleistungspegel LWA + Unsi- |
dB(A) |
84 |
90 |
|||
|
cherheit KWA |
||||||
|
Betriebsstoffe |
||||||
|
Ölmenge |
l |
0,5 |
||||
|
Ölsorte |
SAE 15W40 |
SAE 90 Hypoid |
||||
|
Maße und Gewichte |
||||||
|
Länge |
mm |
554 |
||||
|
Breite |
mm |
509 |
||||
|
Höhe |
mm |
1000 |
||||
|
Gewicht ohne Zubehör (MX) |
kg |
46 |
47,5 |
44,5 |

|
Typ |
HD 7/18-4 M |
HD 7/18-4 M |
HD 9/18 M |
HD9/19 M |
||||||
|
1.524-200.0 |
1.524-209.0 |
1.524-303.0 |
1.524-300.0 |
|||||||
|
1.524-208.0 |
1.524-308.0 |
|||||||||
|
HD 7/18-4 |
HD 7/18-4 |
HD 9/19 MX |
||||||||
|
MX |
MX |
1.524-301.0 |
||||||||
|
1.524 1.0 |
1.524-210.0 |
1.524-311.0 |
||||||||
|
1.524-211.0 |
||||||||||
|
EU |
EU II |
KAP |
EU |
|||||||
|
Netzanschluss |
||||||||||
|
Spannung |
V |
400 |
230 |
220 |
400 |
|||||
|
Stromart |
Hz |
3~ |
50 |
3~ 60 |
3~ 50 |
|||||
|
Motordrehzahl |
1/min |
1400 |
3370 |
2800 |
||||||
|
Anschlussleistung |
kW |
4,7 |
6,7 |
6,8 |
||||||
|
Absicherung (träge, Char. C) |
A |
16 |
20 |
16 |
||||||
|
Schutzart |
IPX5 |
|||||||||
|
Maximal zulässige Netzimpedanz |
Ohm |
— |
||||||||
|
Verlängerungskabel 30 m |
mm2 |
2,5 |
4,0 |
2,5 |
||||||
|
Wasseranschluss |
||||||||||
|
Zulauftemperatur (max.) |
°C |
60 |
||||||||
|
Zulaufmenge (min.) |
l/h (l/ |
700 (11,7) |
900 (15) |
|||||||
|
min) |
||||||||||
|
Saughöhe aus offenem Behälter |
m |
0,5 |
||||||||
|
(20 °C) |
||||||||||
|
Zulaufdruck (max.) |
MPa |
1 |
||||||||
|
Leistungsdaten |
||||||||||
|
Arbeitsdruck |
MPa |
3…18 |
18,5 |
4…18,5 |
||||||
|
Düsengröße |
042 |
053 |
||||||||
|
Max. Betriebsüberdruck |
MPa |
21 |
23 |
22,5 |
||||||
|
Fördermenge |
l/h (l/ |
300…700 (5…11,7) |
900 (15) |
450…890 |
||||||
|
min) |
(7,5…14,8) |
|||||||||
|
Reinigungsmittelansaugung |
l/h (l/ |
0…40 |
(0…0,7) |
|||||||
|
min) |
||||||||||
|
Rückstoßkraft der Handspritzpistole (max.) |
N |
37 |
49 |
|||||||
|
Ermittelte Werte gemäß EN 60335-2- |
79 |
|||||||||
|
Hand-Arm Vibrationswert |
m/s2 |
|||||||||
|
Handspritzpistole |
<2,5 |
|||||||||
|
Strahlrohr |
m/s2 |
<2,5 |
3,0 |
|||||||
|
Unsicherheit K |
m/s2 |
1 |
||||||||
|
Schalldruckpegel LpA |
dB(A) |
75 |
76 |
|||||||
|
Unsicherheit KpA |
dB(A) |
1 |
2 |
|||||||
|
Schallleistungspegel LWA + Unsicher- |
dB(A) |
90 |
91 |
|||||||
|
heit KWA |
||||||||||
|
Betriebsstoffe |
||||||||||
|
Ölmenge |
l |
0,5 |
||||||||
|
Ölsorte |
SAE 90 Hypoid |
|||||||||
|
Maße und Gewichte |
||||||||||
|
Länge |
mm |
554 |
||||||||
|
Breite |
mm |
509 |
||||||||
|
Höhe |
mm |
1000 |
||||||||
|
Gewicht ohne Zubehör (MX) |
kg |
49 (52) |
44 (47) |
48,6 |
43 (45) |

|
Typ |
HD 9/19 M |
HD 9/20-4 M |
HD 9/20-4 M |
||||
|
1.524-315.0 |
1.524-401.0 |
1.524-402.0 |
|||||
|
1.524-403.0 |
|||||||
|
HD 9/20-4 MX |
|||||||
|
1.524-404.0 |
|||||||
|
EU II |
EU |
EU II |
|||||
|
Netzanschluss |
|||||||
|
Spannung |
V |
230 |
400 |
230 |
|||
|
Stromart |
Hz |
3~ 50 |
|||||
|
Motordrehzahl |
1/min |
2800 |
1400 |
||||
|
Anschlussleistung |
kW |
6,8 |
6,9 |
||||
|
Absicherung (träge, Char. C) |
A |
25 |
16 |
25 |
|||
|
Schutzart |
IPX5 |
||||||
|
Maximal zulässige Netzimpedanz |
Ohm |
— |
0,222+j0,139 |
||||
|
Verlängerungskabel 30 m |
mm2 |
4,0 |
2,5 |
4,0 |
|||
|
Wasseranschluss |
|||||||
|
Zulauftemperatur (max.) |
°C |
60 |
|||||
|
Zulaufmenge (min.) |
l/h (l/min) |
900 (15) |
|||||
|
Saughöhe aus offenem Behälter |
m |
0,5 |
|||||
|
(20 °C) |
|||||||
|
Zulaufdruck (max.) |
MPa |
1 |
|||||
|
Leistungsdaten |
|||||||
|
Arbeitsdruck |
MPa |
4…18,5 |
4…20 |
||||
|
Düsengröße |
053 |
050 |
|||||
|
Max. Betriebsüberdruck |
MPa |
22,5 |
22 |
||||
|
Fördermenge |
l/h (l/min) |
450…890 |
460…900 (7,7…15) |
||||
|
(7,5…14,8) |
|||||||
|
Reinigungsmittelansaugung |
l/h (l/min) |
0…40 (0…0,7) |
|||||
|
Rückstoßkraft der Handspritzpisto- |
N |
49 |
|||||
|
le (max.) |
|||||||
|
Ermittelte Werte gemäß EN 60335-2-79 |
|||||||
|
Hand-Arm Vibrationswert |
m/s2 |
||||||
|
Handspritzpistole |
<2,5 |
||||||
|
Strahlrohr |
m/s2 |
3,0 |
1,5 |
||||
|
Unsicherheit K |
m/s2 |
1 |
|||||
|
Schalldruckpegel LpA |
dB(A) |
76 |
75 |
||||
|
Unsicherheit KpA |
dB(A) |
2 |
1 |
||||
|
Schallleistungspegel LWA + Unsi- |
dB(A) |
91 |
88 |
||||
|
cherheit KWA |
|||||||
|
Betriebsstoffe |
|||||||
|
Ölmenge |
l |
0,5 |
0,75 |
||||
|
Ölsorte |
SAE 90 Hypoid |
||||||
|
Maße und Gewichte |
|||||||
|
Länge |
mm |
554 |
|||||
|
Breite |
mm |
509 |
|||||
|
Höhe |
mm |
1000 |
|||||
|
Gewicht ohne Zubehör (MX) |
kg |
45 |
48 (50) |
55 |


 Please read and comply with


 these original instructions prior to the initial operation of your appliance
and store them for later use or subsequent owners.
Contents
|
Device elements |
EN — |
1 |
|
For Your Safety |
EN — |
1 |
|
Proper use |
EN — |
2 |
|
Safety Devices |
EN — |
2 |
|
Environmental protection |
EN — |
2 |
|
Before Startup |
EN — |
2 |
|
Start up |
EN — |
3 |
|
Operation |
EN — |
4 |
|
Transport |
EN — |
6 |
|
Storage |
EN — |
6 |
|
Maintenance and care |
EN — |
6 |
|
Troubleshooting |
EN — |
7 |
|
Spare parts |
EN — |
8 |
|
Warranty |
EN — |
8 |
|
EC Declaration of Conformity |
EN — |
8 |
|
Technical specifications |
EN — |
9 |
Device elements
18Safety lever
19Lever for hand spray gun
20High pressure hose
21Push handle
22Cable clamp
23Dosage valve for detergent
24Detergent suction hose with filter and screw-on lid
25Bottle holder for detergent
26Crank
27Hose drum
For Your Safety
Before first start-up it is definitely necessary to read the operating instructions and safety indications Nr. 5.951-949!
Symbols in the operating instructions
Danger
Immediate danger that can cause severe injury or even death.
Warning
Possible hazardous situation that could lead to severe injury or even death.
Caution
Possible hazardous situation that could lead to mild injury to persons or damage to
Please unfold the front picture side
1Storage compartment for nozzles
2Handle
3High pressure connection
4Water connection
5Manometer
6Oil level indicator
7Oil tank
8Cover
9Power switch
10Fastening screw for device hood
11Storage compartment for hoses
12Trigger gun storage clip
13Nozzle
14Marking of the nozzle
15Spray lance
16Pressure/ quantity regulation (not with HD 9/18 M)
17Hand blowing gun
18
property.
Symbols on the machine
High-pressure jets can be dan-
gerous if improperly used. The
 jet may not be directed at persons, animals, live electrical equipment or at the appliance itself.
According to the applicable regulations, the appliance must never be
used on the drinking water supply 


 without a system separator. Use a suitable system separator manufactured by KÄRCHER; or, as an alternative, a system separator as per EN 12729 Type BA. Water flowing through a system separator is considered non-drinkable.
Caution
Always connect the system separator to the water supply, never directly to the appliance!
EN – 1

Proper use
Use this high pressure cleaner exclusively for
–Cleaning using low pressure jet and detergent (for e.g. for cleaning machines, cars, buildings, tools),
–For cleaning using high pressure jet without detergent (for e.g. for cleaning facades, terraces, garden appliances).
For stubborn dirt, we recommend the use of the dirt blaster as a special accessory. HD…Plus includes a dirt remover as part of standard delivery.
Safety Devices
Safety devices serve for the protection of the user and must not be put out of operation or bypassed with respect to their function.
Overflow valve with pressure switch
While reducing the water supply/quantity regulation at the pump head, the overflow valve opens and part of the water flows back to the pump suck side.
If the lever on the trigger gun is released the pressure switch turns off the pump, the high-pressure jet is stopped. If the lever is pulled the pump is turned on again.
Safety valve
The safety valve opens when the permissible operating pressure is exceeded; water flows back to the suction side of the pump. The overflow valve, pressure switch and safety valve are set and sealed at the factory. Setting only by customer service.
Environmental protection
The packaging material can be recycled. Please do not place the packaging into the ordinary refuse for disposal, but arrange for the proper recycling.
Old appliances contain valuable materials that can be recycled. Please arrange for the proper recycling of old appliances. Batteries, oil, and similar substances must not enter the environment. Please dispose of your old appliances using appropriate collection systems.
Notes about the ingredients (REACH)
You will find current information about the ingredients at: www.kaercher.com/REACH
Before Startup
Unpacking
–Check the contents of the pack before unpacking.
–In case of transport damage inform vendor immediately
Check oil level
Read the oil level display when the device is not running. The oil level must be above the two pointers.
Activate deaeration of oil container
Unscrew the fastening screws of the device hood; remove the device hood.
Cut off tip of oil container cover
Fasten the device hood.

Attaching the Accessories
Mount the nozzle on the spray pipe (markings on the adjustment ring at the top).
Install spray pipe on the hand-spray gun with pressure and volume regulation.
Note (for 1.524-207 only)
When space is limited, the enclosed adapter with nozzle can be mounted directly to the hand spray gun.
In devices without hose drum:
Fasten the high pressure hose to the high pressure connection.
In devices without hose drum:
Insert the crank in the hose drum shaft and lock it in.
Before rolling up, stretch out the high pressure hose.
Wind the high pressure hose in uniform layers on the hose drum by rotating the crank. Select the rotation direction in such a way that the high pressure hose does not get bent.
Start up
Electrical connection
Danger
Danger of injury by electric shock.
The appliance may only be connected to alternating current.
The appliance may only be connected to an electrical supply which has been installed in accordance with IEC 60364.
The voltage indicated on the type plate must correspond to the voltage of the electrical source.
The minimum fuse rating required at the socket outlet is (see technical specifications). The highest allowed net impedance at the electrical connection point (refer to technical data) is not to be exceeded. In case of confusion regarding the power impedance present on your connection, please contact your utilities provider.
The appliance should always be connected to the electrical mains using a plug. It is forbidden to permanently connect the appli-
ance to the power supply. The plug is only for mains separation.
Check the power cord with mains plug for damage before every use. If the power cord is damaged, please arrange immediately for the exchange by an authorized customer service or a skilled electrician.
The plug and coupling of the extension cable used must be watertight.
Use the extension cord that has an adequate cross-section (see «Technical Data») and unwind it fully from the cable drum. Unsuitable extension cables can be hazardous. Only use extension cables outdoors which have been approved for this purpose and labelled with a sufficient cable cross section:
For connection values, see type plate/technical data.
Water connection
Connection to the water supply
Warning
Observe regulations of water supplier. According to the applicable regulations, the appliance must never be
used on the drinking water supply 


 without a system separator. Use a suitable system separator manufactured by KÄRCHER; or, as an alternative, a system separator as per EN 12729 Type BA. Water flowing through a system separator is considered non-drinkable.
Caution
Always connect the system separator to the water supply, never directly to the appliance!
For connection values refer to technical specifications
Connect the supply hose (minimum length 7.5 m, minimum diameter 1“) to the water connection point of the appliance (such as the tap).
Note
The supply hose is not included.
Open the water supply.
![]()
Drawing in water from open reservoirs
Screw the suction hose (order no. 4.440270.0) onto the water connection.
Filter (Bestell-Nr. 4.730-012.0) am Saugschlauch anbringen.
Deaerate the appliance: Unscrew the nozzle.
Switch on the appliance and let it run until the water exiting is bubble-free.
At the end let the appliance run for approx. 10 seconds — then switch off. Repeat the procedure for a couple of times.
Switch off the appliance and fit the nozzle again.
Operation
Danger
Risk of explosion!
Do not spray flammable liquids.
If the appliance is used in hazardous areas (e.g. filling stations) the corresponding safety provisions must be observed.
Warning
Clean engines only at places with corresponding oil separators (environmental safety).
The jet must not be directed at other persons or directed by the user at him/herself to clean clothing or footwear.
Risk of blocking. Place the nozzles in the accessory compartment with their joint pointing upward.
Only HD 9/19….
Danger
Long hours of using the appliance can cause circulation problems in the hands on account of vibrations.
It is not possible to specify a generally valid operation time, since this depends on several factors:
–Proneness to blood circulation deficiencies (cold, numb fingers).
–Low ambient temperature. Wear warm gloves to protect hands.
–A firm grip impedes blood circulation.
–Continuous operation is worse than an operation interrupted by pauses.
In case of regular, long-term operation of the device and in case of repeated occurrence of the symptoms (e.g. cold, numb fingers) please consult a physician.
High pressure operation
Note
The appliance is equipped with a pressure switch. The motor starts up only when the lever of the pistol is pulled.
Roll off the high pressure hose totally from the hose drum.
Set the appliance switch to «I».
Unlock the hand-spray gun and pull the lever of the gun.
Set working pressure and water quantity by turning (rungless) at the pressureand volume regulator (+/-) (not on HD 9/18 M).
Only on HD 9/20-4…:
For transporting small quantities, the engine heat ensures that water is heated up to approx. 15 °C.
Select spray type
Close the hand spray gun.
Turn the casing of the nozzle till the desired symbol matches the marking.
High pressure circular spray (0°) for specially stubborn dirt
Flat low pressure spray (CHEM) for operating using detergents or cleaning at low pressure.
High pressure flat spray (25°) for large dirt areas

Danger
Risk of injury. If you use the short spray lance/adapter, the use of point spray nozzles is not permitted.
Operation with detergent
Warning
Unsuitable detergents can cause damage to the appliance and to the object to be cleaned. Use only those detergents that have been approved by Kärcher. Observe the dosage and other instructions provided with these detergents. For considerate treatment of the environment use detergent economically.
Follow the safety instructions for using detergents.
Kärcher detergents ensure smooth functioning. Please consult us or ask for our catalogue or our detergent information sheets.
Place the detergent bottle into the bottle holder on the appliance or place a detergent container next to the appliance.. Two different detergents can be simultaneously placed into the appliance.
Pull the detergent suction hose out and immerse it into the detergent bottle or container.
Screw the lid onto the bottle or the container.
Set nozzle to «CHEM».
Set the detergent dosing valve to the desired detergent and concentration.
Recommended cleaning method
Spray the detergent sparingly on the dry surface and allow it to react, but not to dry.
Spray off loosened dirt with the highpressure ray.
After operations, dip the filter in clear water. Turn the dosing valve to the highest detergent concentration. Start the appliance and rinse for one minute.
Interrupting operation
Release the lever of the hand-spray gun; the device will switch off.
Release again the lever of the handspray gun; the device will switch on again.
Turn off the appliance
Set the appliance switch to «0».
Disconnect the mains plug from the socket.
Shut off water supply.
Activate hand spray gun until device is pressure-less.
Press the safety lever of the hand-spray gun to secure the lever of the pistol against being released accidentally.
Only on HD 9/20-4…:
Danger
Danger of scalding by means of hot water. The water remaining in the switched off device can get heated up. When you remove the hose from the water inlet, the heated water can spray out and cause scalding. Remove the hose only when the device has cooled down.

Storing the Appliance
Insert the hand-spary gun in the holder.
Wind up the high-pressure hose and hang it over the hose storage.
or
Wind up the high-pressure hose on the hose drum. Push in the handle of the crank to block the hose drum.
Wind the connection cable around the cable holder.
Fasten the plug with the mounted clip.
Frost protection
Caution
Frost will destroy the not completely water drained device.
Store the appliance in a frost free area.
If you cannot store it in a frost-free place:
Drain water.
Pump in conventional frost protection agents through the appliance.
Note
Use normal glycol-based anti-freezing agents for automobiles.
Observe handling instructions of the antifreeze agent manufacturer.
Operate device for max. 1 minute until the pump and conduits are empty.
Transport
Caution
Risk of injury and damage! Observe the weight of the appliance when you transport it.
Pull the device behind you at the handle for transporting it over longer distances.
For devices without hose drum, push the handle downward to carry the appliance. To carry, hold the appliance at the handles and not at the pushing handle.
Prior to transporting the appliance in horizontal position, remove the detergent bottles from the bottle holder and close them.
When transporting in vehicles, secure the appliance according to the guidelines from slipping and tipping over.
Storage
Caution
Risk of injury and damage! Note the weight of the appliance in case of storage.
This appliance must only be stored in interior rooms.
Maintenance and care
Danger
Risk of injury by inadvertent startup of appliance and electrical shock.
First pull out the plug from the mains before carrying out any tasks on the machine.
Note
Please dispose off used oil only in the collection points provided for them. Please hand over old oil, if any, only at such places. Polluting the environment with used oil is a punishable offence.
Safety inspection/ maintenance contract
You can sign with your dealer a contract for regular safety inspection or even sign a maintenance contract. Please take advice on this matter.
Before each use
Check connection cable for damages (risk of electrical shock); get the damaged connection cable replaced immediately by an authorised customer service person/ electrician.
Check the high pressure hose for damages (risk of bursting).
Please arrange for the immediate exchange of a damaged high-pressure hose.
Check appliance (pump) for leaks.
3 drops per minute are permitted and can come out from the lower side of the appliance. Call Customer Service if there is heavy leakage.

Weekly
Check oil level Please contact Customer Service immediately if the oil is milky (water in oil).
Clean the sieve in the water connection.
Clean filter at the detergent suck hose.
HD 9/20-4 only:
Clean the fine filter.
Unpressurize the appliance.
Unscrew the fastening screws of the device hood; remove the device hood.
Unscrew lid with filter.
Clean the filter with clean water or compressed air.
Reinstall in reverse sequence.
monthly or after 500 operating hours
Oil change.
Oil change
Note
See «Technical Details» for details of oil quantity and type.
Unscrew the fastening screws of the device hood; remove the device hood.
Remove the lid of the oil container.
Tilt the appliance forward.
Drain the oil in a collection basin.
Fill in new oil slowly; air bubbles should go out.
Attach the lid of the oil container.
Fasten the device hood.
Troubleshooting
Danger
Risk of injury by inadvertent startup of appliance and electrical shock.
First pull out the plug from the mains before carrying out any tasks on the machine. Get the electrical components checked and repaired only by authorised customer service persons.
Contact an authorised customer service person in case of problems not mentioned in this chapter or if you are in doubt or when you have been explicitly asked to do so.
Appliance is not running
Check connection cable for damages.
Check the supply voltage.
Turn device switch on «0» and let engine cool off for min. 5 minutes.
If malfunction still occurs, have device checked by customer service.
Call Customer Service in case of electrical defects.
Pressure does not build up in the appliance
Set nozzle to «High pressure».
Clean the nozzle.
Replace the nozzle.
Deaerate the appliance (see «Start-up»)
Check water supply level (refer to technical data).
Clean the sieve in the water connection.
Check all inlet pipes to the pump.
Contact Customer Service if needed.
Pump leaky
3 drops per minute are permitted and can come out from the lower side of the appliance. Call Customer Service if there is heavy leakage.
With stronger leak, have device checked by customer service.
Pump is vibrating
Check suction pipes for water and detergent and ensure that they are leakproof.
Close dosing valve for detergent to operate the machine without detergent.
Deaerate the appliance (see «Start-up»)
Contact Customer Service if needed.
Detergent is not getting sucked in
Set nozzle to «CHEM».
Check/ clean detergent suction hose with filter.
Open or check/clean detergent dosing valve.
Contact Customer Service if needed.

Spare parts
–Only use accessories and spare parts which have been approved by the manufacturer. The exclusive use of original accessories and original spare parts ensures that the appliance can be operated safely and trouble free.
–At the end of the operating instructions you will find a selected list of spare parts that are often required.
–For additional information about spare parts, please go to the Service section at www.kaercher.com.
Warranty
The warranty terms published by the relevant sales company are applicable in each country. We will repair potential failures of your appliance within the warranty period free of charge, provided that such failure is caused by faulty material or defects in manufacturing. In the event of a warranty claim please contact your dealer or the nearest authorized Customer Service centre. Please submit the proof of purchase.
HD 6/11, HD 6/15, HD 7/12, HD 7/18,
HD 9/19
EN 61000–3–3: 2006
HD 6/16, HD 9/20:
EN 61000–3–11: 2000
Applied conformity evaluation method
2000/14/EC: Appendix V
Sound power level dB(A)
|
Measured: |
Guaran- |
|
|
teed: |
||
|
HD 6/11 |
83 |
84 |
|
HD 6/15 |
83 |
84 |
|
HD 6/16 |
83 |
84 |
|
HD 9/19 |
89 |
91 |
|
HD 9/20 |
87 |
88 |
The undersigned act on behalf and under the power of attorney of the company management.
Authorised Documentation Representative
S. Reiser
|
EC Declaration of Conformity |
Alfred Kärcher GmbH Co. KG |
||
|
We hereby declare that the machine de- |
|||
|
Alfred-Kärcher-Str. 28 — 40 |
|||
|
scribed below complies with the relevant |
71364 Winnenden (Germany) |
||
|
basic safety and health requirements of the |
Phone: +49 7195 14-0 |
||
|
EU Directives, both in its basic design and |
Fax: +49 7195 14-2212 |
||
|
construction as well as in the version put |
|||
|
into circulation by us. This declaration shall |
Winnenden, 2010/12/01 |
||
|
cease to be valid if the machine is modified |
|||
|
without our prior approval. |
|||
|
Product: |
High-pressure cleaner |
||
|
Type: |
1.524-xxx |
||
|
Relevant EU Directives |
|||
|
2006/42/EC (+2009/127/EC) |
|||
|
2004/108/EC |
|||
|
2000/14/EC |
|||
|
Applied harmonized standards |
|||
|
EN 60335–1 |
|||
|
EN 60335–2–79 |
|||
|
EN 55014–1: 2006 + A1: 2009 |
|||
|
EN 55014–2: 1997 + A2: 2008 |
|||
|
EN 61000–3–2: 2006 + A2: 2009 |
|||
|
EN 62233: 2008 |
|||
|
EN – 8 |
25 |

Technical specifications
|
Type |
HD 6/11-4 M |
HD 6/15-4 M |
HD 6/16-4 M |
||
|
1.524-104.0 |
1.524-113.0 |
1.524-100.0 |
|||
|
1.524-107.0 |
|||||
|
HD 6/15-4 MX |
HD 6/16-4 MX |
||||
|
1.524-109.0 |
1.524-101.0 |
||||
|
1.524-108.0 |
|||||
|
GB |
AUS |
EU |
|||
|
Main Supply |
|||||
|
Voltage |
V |
100 |
240 |
230 |
|
|
Current type |
Hz |
1~ 50 |
|||
|
Motor rpm |
1/min |
1400 |
|||
|
Connected load |
kW |
2,9 |
3,3 |
3,4 |
|
|
Protection (slow, char. C) |
A |
30 |
16 |
||
|
Type of protection |
IPX5 |
||||
|
Maximum allowed net impedance |
Ohm |
— |
0,294+j0,184 |
||
|
Extension cord 30 m |
mm2 |
2,5 |
|||
|
Water connection |
|||||
|
Max. feed temperature |
°C |
60 |
|||
|
Min. feed volume |
l/h (l/min) |
600 (10) |
|||
|
Suck height from open container (20 °C) |
m |
0,5 |
|||
|
Max. feed pressure |
MPa |
1 |
|||
|
Performance data |
|||||
|
Working pressure |
MPa |
3…11 |
3…15 |
3…16 |
|
|
Nozzle size |
045 |
040 |
038 |
||
|
Max. operating over-pressure |
MPa |
14 |
18 |
19 |
|
|
Flow rate |
l/h (l/min) |
250…600 |
300…600 (5…10) |
||
|
(4,2…10) |
|||||
|
Detergent suck in |
l/h (l/min) |
0…40 (0…0,7) |
|||
|
Max. recoil force of hand spray gun |
N |
30 |
|||
|
Values determined as per EN 60355-2-79 |
|||||
|
Hand-arm vibration value |
|||||
|
Hand spraygun |
m/s2 |
<2,5 |
|||
|
Spray lance |
m/s2 |
<2,5 |
|||
|
Uncertainty K |
m/s2 |
1 |
|||
|
Sound pressure level LpA |
dB(A) |
69 |
|||
|
Uncertainty KpA |
dB(A) |
1 |
|||
|
Sound power level LWA + Uncertainty KWA |
dB(A) |
84 |
|||
|
Fuel |
|||||
|
Amount of oil |
l |
0,5 |
|||
|
Oil grade |
SAE 15W40 |
||||
|
Dimensions and weights |
|||||
|
Length |
mm |
554 |
|||
|
Width |
mm |
509 |
|||
|
Height |
mm |
1000 |
|||
|
Weight without accessories (MX) |
kg |
44,5 |
54 |
48 (50) |

|
Type |
HD 7/12-4 M |
HD 7/12-4 M |
HD 7/16-4 M |
HD 7/16-4 M |
||||
|
1.524-105.0 |
1.524-106.0 |
1.524-204.0 |
1.524-203.0 |
|||||
|
KAP |
KAP |
KAP |
KAP |
|||||
|
Main Supply |
||||||||
|
Voltage |
V |
220 |
380 |
220 |
||||
|
Current type |
Hz |
1~ 50 |
1~ 60 |
3~ 50 |
3~ 60 |
|||
|
Motor rpm |
1/min |
1400 |
1680 |
|||||
|
Connected load |
kW |
2,4 |
4,4 |
4,1 |
||||
|
Protection (slow, char. C) |
A |
16 |
20 |
16 |
||||
|
Type of protection |
IPX5 |
|||||||
|
Maximum allowed net impedance |
Ohm |
— |
||||||
|
Extension cord 30 m |
mm2 |
2,5 |
4,0 |
2,5 |
||||
|
Water connection |
||||||||
|
Max. feed temperature |
°C |
60 |
||||||
|
Min. feed volume |
l/h (l/min) |
700 (11,7) |
||||||
|
Suck height from open container |
m |
0,5 |
||||||
|
(20 °C) |
||||||||
|
Max. feed pressure |
MPa |
1 |
||||||
|
Performance data |
||||||||
|
Working pressure |
MPa |
3…12 |
3…16 |
|||||
|
Nozzle size |
055 |
054 |
045 |
|||||
|
Max. operating over-pressure |
MPa |
14 |
19 |
|||||
|
Flow rate |
l/h (l/min) |
300…700 |
(5…11,7) |
|||||
|
Detergent suck in |
l/h (l/min) |
0…40 (0…0,7) |
||||||
|
Max. recoil force of hand spray gun |
N |
30 |
35 |
|||||
|
Values determined as per EN 60355-2-79 |
||||||||
|
Hand-arm vibration value |
||||||||
|
Hand spraygun |
m/s2 |
<2,5 |
||||||
|
Spray lance |
m/s2 |
<2,5 |
||||||
|
Uncertainty K |
m/s2 |
1 |
||||||
|
Sound pressure level LpA |
dB(A) |
69 |
75 |
|||||
|
Uncertainty KpA |
dB(A) |
1 |
||||||
|
Sound power level LWA + Uncertainty |
dB(A) |
84 |
90 |
|||||
|
KWA |
||||||||
|
Fuel |
||||||||
|
Amount of oil |
l |
0,5 |
||||||
|
Oil grade |
SAE 15W40 |
SAE 90 Hypoid |
||||||
|
Dimensions and weights |
||||||||
|
Length |
mm |
554 |
||||||
|
Width |
mm |
509 |
||||||
|
Height |
mm |
1000 |
||||||
|
Weight without accessories (MX) |
kg |
46 |
47,5 |
44,5 |

|
Type |
HD 7/18-4 |
HD 7/18-4 |
HD 9/18 M |
HD9/19 M |
|||||
|
M |
M |
1.524-303.0 |
1.524-300.0 |
||||||
|
1.524-200.0 |
1.524- |
1.524-308.0 |
|||||||
|
1.524-208.0 |
209.0 |
||||||||
|
HD 7/18-4 |
HD 7/18-4 |
HD 9/19 MX |
|||||||
|
MX |
MX |
1.524-301.0 |
|||||||
|
1.524 1.0 |
1.524- |
1.524-311.0 |
|||||||
|
1.524-211.0 |
210.0 |
||||||||
|
EU |
EU II |
KAP |
EU |
||||||
|
Main Supply |
|||||||||
|
Voltage |
V |
400 |
230 |
220 |
400 |
||||
|
Current type |
Hz |
3~ |
50 |
3~ 60 |
3~ 50 |
||||
|
Motor rpm |
1/min |
1400 |
3370 |
2800 |
|||||
|
Connected load |
kW |
4,7 |
6,7 |
6,8 |
|||||
|
Protection (slow, char. C) |
A |
16 |
20 |
16 |
|||||
|
Type of protection |
IPX5 |
||||||||
|
Maximum allowed net impedance |
Ohm |
— |
|||||||
|
Extension cord 30 m |
mm2 |
2,5 |
4,0 |
2,5 |
|||||
|
Water connection |
|||||||||
|
Max. feed temperature |
°C |
60 |
|||||||
|
Min. feed volume |
l/h (l/min) |
700 (11,7) |
900 (15) |
||||||
|
Suck height from open container (20 °C) |
m |
0,5 |
|||||||
|
Max. feed pressure |
MPa |
1 |
|||||||
|
Performance data |
|||||||||
|
Working pressure |
MPa |
3…18 |
18,5 |
4…18,5 |
|||||
|
Nozzle size |
042 |
053 |
|||||||
|
Max. operating over-pressure |
MPa |
21 |
23 |
22,5 |
|||||
|
Flow rate |
l/h (l/min) |
300…700 (5…11,7) |
900 (15) |
450…890 |
|||||
|
(7,5…14,8) |
|||||||||
|
Detergent suck in |
l/h (l/min) |
0…40 |
(0…0,7) |
||||||
|
Max. recoil force of hand spray gun |
N |
37 |
49 |
||||||
|
Values determined as per EN 60355-2-79 |
|||||||||
|
Hand-arm vibration value |
|||||||||
|
Hand spraygun |
m/s2 |
<2,5 |
|||||||
|
Spray lance |
m/s2 |
<2,5 |
3,0 |
||||||
|
Uncertainty K |
m/s2 |
1 |
|||||||
|
Sound pressure level LpA |
dB(A) |
75 |
76 |
||||||
|
Uncertainty KpA |
dB(A) |
1 |
2 |
||||||
|
Sound power level LWA + Uncertainty KWA |
dB(A) |
90 |
91 |
||||||
|
Fuel |
|||||||||
|
Amount of oil |
l |
0,5 |
|||||||
|
Oil grade |
SAE 90 Hypoid |
||||||||
|
Dimensions and weights |
|||||||||
|
Length |
mm |
554 |
|||||||
|
Width |
mm |
509 |
|||||||
|
Height |
mm |
1000 |
|||||||
|
Weight without accessories (MX) |
kg |
49 (52) |
44 (47) |
48,6 |
43 (45) |

|
Type |
HD 9/19 M |
HD 9/20-4 M |
HD 9/20-4 M |
||
|
1.524-315.0 |
1.524-401.0 |
1.524-402.0 |
|||
|
1.524-403.0 |
|||||
|
HD 9/20-4 MX |
|||||
|
1.524-404.0 |
|||||
|
EU II |
EU |
EU II |
|||
|
Main Supply |
|||||
|
Voltage |
V |
230 |
400 |
230 |
|
|
Current type |
Hz |
3~ 50 |
|||
|
Motor rpm |
1/min |
2800 |
1400 |
||
|
Connected load |
kW |
6,8 |
6,9 |
||
|
Protection (slow, char. C) |
A |
25 |
16 |
25 |
|
|
Type of protection |
IPX5 |
||||
|
Maximum allowed net impedance |
Ohm |
— |
0,222+j0,139 |
||
|
Extension cord 30 m |
mm2 |
4,0 |
2,5 |
4,0 |
|
|
Water connection |
|||||
|
Max. feed temperature |
°C |
60 |
|||
|
Min. feed volume |
l/h (l/min) |
900 (15) |
|||
|
Suck height from open container (20 °C) |
m |
0,5 |
|||
|
Max. feed pressure |
MPa |
1 |
|||
|
Performance data |
|||||
|
Working pressure |
MPa |
4…18,5 |
4…20 |
||
|
Nozzle size |
053 |
050 |
|||
|
Max. operating over-pressure |
MPa |
22,5 |
22 |
||
|
Flow rate |
l/h (l/min) |
450…890 |
460…900 (7,7…15) |
||
|
(7,5…14,8) |
|||||
|
Detergent suck in |
l/h (l/min) |
0…40 (0…0,7) |
|||
|
Max. recoil force of hand spray gun |
N |
49 |
|||
|
Values determined as per EN 60355-2 |
-79 |
||||
|
Hand-arm vibration value |
|||||
|
Hand spraygun |
m/s2 |
<2,5 |
|||
|
Spray lance |
m/s2 |
3,0 |
1,5 |
||
|
Uncertainty K |
m/s2 |
1 |
|||
|
Sound pressure level LpA |
dB(A) |
76 |
75 |
||
|
Uncertainty KpA |
dB(A) |
2 |
1 |
||
|
Sound power level LWA + Uncertainty |
dB(A) |
91 |
88 |
||
|
KWA |
|||||
|
Fuel |
|||||
|
Amount of oil |
l |
0,5 |
0,75 |
||
|
Oil grade |
SAE 90 Hypoid |
||||
|
Dimensions and weights |
|||||
|
Length |
mm |
554 |
|||
|
Width |
mm |
509 |
|||
|
Height |
mm |
1000 |
|||
|
Weight without accessories (MX) |
kg |
45 |
48 (50) |
55 |


 Please read and comply with


 these original instructions prior to the initial operation of your appliance
and store them for later use or subsequent owners.
Contents
|
Device elements |
EN — |
1 |
|
For Your Safety |
EN — |
1 |
|
Proper use |
EN — |
2 |
|
Safety Devices |
EN — |
2 |
|
Environmental protection |
EN — |
2 |
|
Before Startup |
EN — |
2 |
|
Start up |
EN — |
3 |
|
Operation |
EN — |
4 |
|
Transport |
EN — |
6 |
|
Storage |
EN — |
6 |
|
Maintenance and care |
EN — |
6 |
|
Troubleshooting |
EN — |
7 |
|
Spare parts |
EN — |
8 |
|
Warranty |
EN — |
8 |
|
EC Declaration of Conformity |
EN — |
8 |
|
Technical specifications |
EN — |
9 |
Device elements
18Safety lever
19Lever for hand spray gun
20High pressure hose
21Push handle
22Cable clamp
23Dosage valve for detergent
24Detergent suction hose with filter and screw-on lid
25Bottle holder for detergent
26Crank
27Hose drum
For Your Safety
Before first start-up it is definitely necessary to read the operating instructions and safety indications Nr. 5.951-949!
Symbols in the operating instructions
Danger
Immediate danger that can cause severe injury or even death.
Warning
Possible hazardous situation that could lead to severe injury or even death.
Caution
Possible hazardous situation that could lead to mild injury to persons or damage to
Please unfold the front picture side
1Storage compartment for nozzles
2Handle
3High pressure connection
4Water connection
5Manometer
6Oil level indicator
7Oil tank
8Cover
9Power switch
10Fastening screw for device hood
11Storage compartment for hoses
12Trigger gun storage clip
13Nozzle
14Marking of the nozzle
15Spray lance
16Pressure/ quantity regulation (not with HD 9/18 M)
17Hand blowing gun
30
property.
Symbols on the machine
High-pressure jets can be dan-
gerous if improperly used. The
 jet may not be directed at persons, animals, live electrical equipment or at the appliance itself.
According to the applicable regulations, the appliance must never be
used on the drinking water supply 


 without a system separator. Use a suitable system separator manufactured by KÄRCHER; or, as an alternative, a system separator as per EN 12729 Type BA. Water flowing through a system separator is considered non-drinkable.
Caution
Always connect the system separator to the water supply, never directly to the appliance!
EN – 1
![]()
Proper use
Use this high pressure cleaner exclusively for
–Cleaning using low pressure jet and detergent (for e.g. for cleaning machines, cars, buildings, tools),
–For cleaning using high pressure jet without detergent (for e.g. for cleaning facades, terraces, garden appliances).
For stubborn dirt, we recommend the use of the dirt blaster as a special accessory. HD…Plus includes a dirt remover as part of standard delivery.
Safety Devices
Safety devices serve for the protection of the user and must not be put out of operation or bypassed with respect to their function.
Overflow valve with pressure switch
While reducing the water supply/quantity regulation at the pump head, the overflow valve opens and part of the water flows back to the pump suck side.
If the lever on the trigger gun is released the pressure switch turns off the pump, the high-pressure jet is stopped. If the lever is pulled the pump is turned on again.
Safety valve
The safety valve opens when the permissible operating pressure is exceeded; water flows back to the suction side of the pump. The overflow valve, pressure switch and safety valve are set and sealed at the factory. Setting only by customer service.
Environmental protection
The packaging material can be recycled. Please do not place the packaging into the ordinary refuse for disposal, but arrange for the proper recycling.
Old appliances contain valuable materials that can be recycled. Please arrange for the proper recycling of old appliances. Batteries, oil, and similar substances must not enter the environment. Please dispose of your old appliances using appropriate collection systems.
Notes about the ingredients (REACH)
You will find current information about the ingredients at: www.kaercher.com/REACH
Before Startup
Unpacking
–Check the contents of the pack before unpacking.
–In case of transport damage inform vendor immediately
Check oil level
Read the oil level display when the device is not running. The oil level must be above the two pointers.
Activate deaeration of oil container
Unscrew the fastening screws of the device hood; remove the device hood.
Cut off tip of oil container cover
Fasten the device hood.

Attaching the Accessories
Mount the nozzle on the spray pipe (markings on the adjustment ring at the top).
Install spray pipe on the hand-spray gun with pressure and volume regulation.
Note (for 1.524-207 only)
When space is limited, the enclosed adapter with nozzle can be mounted directly to the hand spray gun.
In devices without hose drum:
Fasten the high pressure hose to the high pressure connection.
In devices without hose drum:
Insert the crank in the hose drum shaft and lock it in.
Before rolling up, stretch out the high pressure hose.
Wind the high pressure hose in uniform layers on the hose drum by rotating the crank. Select the rotation direction in such a way that the high pressure hose does not get bent.
Start up
Electrical connection
Danger
Danger of injury by electric shock.
The appliance may only be connected to alternating current.
The appliance may only be connected to an electrical supply which has been installed in accordance with IEC 60364.
The voltage indicated on the type plate must correspond to the voltage of the electrical source.
The minimum fuse rating required at the socket outlet is (see technical specifications). The highest allowed net impedance at the electrical connection point (refer to technical data) is not to be exceeded. In case of confusion regarding the power impedance present on your connection, please contact your utilities provider.
The appliance should always be connected to the electrical mains using a plug. It is forbidden to permanently connect the appli-
ance to the power supply. The plug is only for mains separation.
Check the power cord with mains plug for damage before every use. If the power cord is damaged, please arrange immediately for the exchange by an authorized customer service or a skilled electrician.
The plug and coupling of the extension cable used must be watertight.
Use the extension cord that has an adequate cross-section (see «Technical Data») and unwind it fully from the cable drum. Unsuitable extension cables can be hazardous. Only use extension cables outdoors which have been approved for this purpose and labelled with a sufficient cable cross section:
For connection values, see type plate/technical data.
Water connection
Connection to the water supply
Warning
Observe regulations of water supplier. According to the applicable regulations, the appliance must never be
used on the drinking water supply 


 without a system separator. Use a suitable system separator manufactured by KÄRCHER; or, as an alternative, a system separator as per EN 12729 Type BA. Water flowing through a system separator is considered non-drinkable.
Caution
Always connect the system separator to the water supply, never directly to the appliance!
For connection values refer to technical specifications
Connect the supply hose (minimum length 7.5 m, minimum diameter 1“) to the water connection point of the appliance (such as the tap).
Note
The supply hose is not included.
Open the water supply.

Drawing in water from open reservoirs
Screw the suction hose (order no. 4.440270.0) onto the water connection.
Filter (Bestell-Nr. 4.730-012.0) am Saugschlauch anbringen.
Deaerate the appliance: Unscrew the nozzle.
Switch on the appliance and let it run until the water exiting is bubble-free.
At the end let the appliance run for approx. 10 seconds — then switch off. Repeat the procedure for a couple of times.
Switch off the appliance and fit the nozzle again.
Operation
Danger
Risk of explosion!
Do not spray flammable liquids.
If the appliance is used in hazardous areas (e.g. filling stations) the corresponding safety provisions must be observed.
Warning
Clean engines only at places with corresponding oil separators (environmental safety).
The jet must not be directed at other persons or directed by the user at him/herself to clean clothing or footwear.
Risk of blocking. Place the nozzles in the accessory compartment with their joint pointing upward.
Only HD 9/19….
Danger
Long hours of using the appliance can cause circulation problems in the hands on account of vibrations.
It is not possible to specify a generally valid operation time, since this depends on several factors:
–Proneness to blood circulation deficiencies (cold, numb fingers).
–Low ambient temperature. Wear warm gloves to protect hands.
–A firm grip impedes blood circulation.
–Continuous operation is worse than an operation interrupted by pauses.
In case of regular, long-term operation of the device and in case of repeated occurrence of the symptoms (e.g. cold, numb fingers) please consult a physician.
High pressure operation
Note
The appliance is equipped with a pressure switch. The motor starts up only when the lever of the pistol is pulled.
Roll off the high pressure hose totally from the hose drum.
Set the appliance switch to «I».
Unlock the hand-spray gun and pull the lever of the gun.
Set working pressure and water quantity by turning (rungless) at the pressureand volume regulator (+/-) (not on HD 9/18 M).
Only on HD 9/20-4…:
For transporting small quantities, the engine heat ensures that water is heated up to approx. 15 °C.
Select spray type
Close the hand spray gun.
Turn the casing of the nozzle till the desired symbol matches the marking.
High pressure circular spray (0°) for specially stubborn dirt
Flat low pressure spray (CHEM) for operating using detergents or cleaning at low pressure.
High pressure flat spray (25°) for large dirt areas

Danger
Risk of injury. If you use the short spray lance/adapter, the use of point spray nozzles is not permitted.
Operation with detergent
Warning
Unsuitable detergents can cause damage to the appliance and to the object to be cleaned. Use only those detergents that have been approved by Kärcher. Observe the dosage and other instructions provided with these detergents. For considerate treatment of the environment use detergent economically.
Follow the safety instructions for using detergents.
Kärcher detergents ensure smooth functioning. Please consult us or ask for our catalogue or our detergent information sheets.
Place the detergent bottle into the bottle holder on the appliance or place a detergent container next to the appliance.. Two different detergents can be simultaneously placed into the appliance.
Pull the detergent suction hose out and immerse it into the detergent bottle or container.
Screw the lid onto the bottle or the container.
Set nozzle to «CHEM».
Set the detergent dosing valve to the desired detergent and concentration.
Recommended cleaning method
Spray the detergent sparingly on the dry surface and allow it to react, but not to dry.
Spray off loosened dirt with the highpressure ray.
After operations, dip the filter in clear water. Turn the dosing valve to the highest detergent concentration. Start the appliance and rinse for one minute.
Interrupting operation
Release the lever of the hand-spray gun; the device will switch off.
Release again the lever of the handspray gun; the device will switch on again.
Turn off the appliance
Set the appliance switch to «0».
Disconnect the mains plug from the socket.
Shut off water supply.
Activate hand spray gun until device is pressure-less.
Press the safety lever of the hand-spray gun to secure the lever of the pistol against being released accidentally.
Only on HD 9/20-4…:
Danger
Danger of scalding by means of hot water. The water remaining in the switched off device can get heated up. When you remove the hose from the water inlet, the heated water can spray out and cause scalding. Remove the hose only when the device has cooled down.

Storing the Appliance
Insert the hand-spary gun in the holder.
Wind up the high-pressure hose and hang it over the hose storage.
or
Wind up the high-pressure hose on the hose drum. Push in the handle of the crank to block the hose drum.
Wind the connection cable around the cable holder.
Fasten the plug with the mounted clip.
Frost protection
Caution
Frost will destroy the not completely water drained device.
Store the appliance in a frost free area.
If you cannot store it in a frost-free place:
Drain water.
Pump in conventional frost protection agents through the appliance.
Note
Use normal glycol-based anti-freezing agents for automobiles.
Observe handling instructions of the antifreeze agent manufacturer.
Operate device for max. 1 minute until the pump and conduits are empty.
Transport
Caution
Risk of injury and damage! Observe the weight of the appliance when you transport it.
Pull the device behind you at the handle for transporting it over longer distances.
For devices without hose drum, push the handle downward to carry the appliance. To carry, hold the appliance at the handles and not at the pushing handle.
Prior to transporting the appliance in horizontal position, remove the detergent bottles from the bottle holder and close them.
When transporting in vehicles, secure the appliance according to the guidelines from slipping and tipping over.
Storage
Caution
Risk of injury and damage! Note the weight of the appliance in case of storage.
This appliance must only be stored in interior rooms.
Maintenance and care
Danger
Risk of injury by inadvertent startup of appliance and electrical shock.
First pull out the plug from the mains before carrying out any tasks on the machine.
Note
Please dispose off used oil only in the collection points provided for them. Please hand over old oil, if any, only at such places. Polluting the environment with used oil is a punishable offence.
Safety inspection/ maintenance contract
You can sign with your dealer a contract for regular safety inspection or even sign a maintenance contract. Please take advice on this matter.
Before each use
Check connection cable for damages (risk of electrical shock); get the damaged connection cable replaced immediately by an authorised customer service person/ electrician.
Check the high pressure hose for damages (risk of bursting).
Please arrange for the immediate exchange of a damaged high-pressure hose.
Check appliance (pump) for leaks.
3 drops per minute are permitted and can come out from the lower side of the appliance. Call Customer Service if there is heavy leakage.

Weekly
Check oil level Please contact Customer Service immediately if the oil is milky (water in oil).
Clean the sieve in the water connection.
Clean filter at the detergent suck hose.
HD 9/20-4 only:
Clean the fine filter.
Unpressurize the appliance.
Unscrew the fastening screws of the device hood; remove the device hood.
Unscrew lid with filter.
Clean the filter with clean water or compressed air.
Reinstall in reverse sequence.
monthly or after 500 operating hours
Oil change.
Oil change
Note
See «Technical Details» for details of oil quantity and type.
Unscrew the fastening screws of the device hood; remove the device hood.
Remove the lid of the oil container.
Tilt the appliance forward.
Drain the oil in a collection basin.
Fill in new oil slowly; air bubbles should go out.
Attach the lid of the oil container.
Fasten the device hood.
Troubleshooting
Danger
Risk of injury by inadvertent startup of appliance and electrical shock.
First pull out the plug from the mains before carrying out any tasks on the machine. Get the electrical components checked and repaired only by authorised customer service persons.
Contact an authorised customer service person in case of problems not mentioned in this chapter or if you are in doubt or when you have been explicitly asked to do so.
Appliance is not running
Check connection cable for damages.
Check the supply voltage.
Turn device switch on «0» and let engine cool off for min. 5 minutes.
If malfunction still occurs, have device checked by customer service.
Call Customer Service in case of electrical defects.
Pressure does not build up in the appliance
Set nozzle to «High pressure».
Clean the nozzle.
Replace the nozzle.
Deaerate the appliance (see «Start-up»)
Check water supply level (refer to technical data).
Clean the sieve in the water connection.
Check all inlet pipes to the pump.
Contact Customer Service if needed.
Pump leaky
3 drops per minute are permitted and can come out from the lower side of the appliance. Call Customer Service if there is heavy leakage.
With stronger leak, have device checked by customer service.
Pump is vibrating
Check suction pipes for water and detergent and ensure that they are leakproof.
Close dosing valve for detergent to operate the machine without detergent.
Deaerate the appliance (see «Start-up»)
Contact Customer Service if needed.
Detergent is not getting sucked in
Set nozzle to «CHEM».
Check/ clean detergent suction hose with filter.
Open or check/clean detergent dosing valve.
Contact Customer Service if needed.

Spare parts
–Only use accessories and spare parts which have been approved by the manufacturer. The exclusive use of original accessories and original spare parts ensures that the appliance can be operated safely and trouble free.
–At the end of the operating instructions you will find a selected list of spare parts that are often required.
–For additional information about spare parts, please go to the Service section at www.kaercher.com.
Warranty
The warranty terms published by the relevant sales company are applicable in each country. We will repair potential failures of your appliance within the warranty period free of charge, provided that such failure is caused by faulty material or defects in manufacturing. In the event of a warranty claim please contact your dealer or the nearest authorized Customer Service centre. Please submit the proof of purchase.
HD 6/11, HD 6/15, HD 7/12, HD 7/18,
HD 9/19
EN 61000–3–3: 2006
HD 6/16, HD 9/20:
EN 61000–3–11: 2000
Applied conformity evaluation method
2000/14/EC: Appendix V
Sound power level dB(A)
|
Measured: |
Guaran- |
|
|
teed: |
||
|
HD 6/11 |
83 |
84 |
|
HD 6/15 |
83 |
84 |
|
HD 6/16 |
83 |
84 |
|
HD 9/19 |
89 |
91 |
|
HD 9/20 |
87 |
88 |
The undersigned act on behalf and under the power of attorney of the company management.
Authorised Documentation Representative
S. Reiser
|
EC Declaration of Conformity |
Alfred Kärcher GmbH Co. KG |
||
|
We hereby declare that the machine de- |
|||
|
Alfred-Kärcher-Str. 28 — 40 |
|||
|
scribed below complies with the relevant |
71364 Winnenden (Germany) |
||
|
basic safety and health requirements of the |
Phone: +49 7195 14-0 |
||
|
EU Directives, both in its basic design and |
Fax: +49 7195 14-2212 |
||
|
construction as well as in the version put |
|||
|
into circulation by us. This declaration shall |
Winnenden, 2010/12/01 |
||
|
cease to be valid if the machine is modified |
|||
|
without our prior approval. |
|||
|
Product: |
High-pressure cleaner |
||
|
Type: |
1.524-xxx |
||
|
Relevant EU Directives |
|||
|
2006/42/EC (+2009/127/EC) |
|||
|
2004/108/EC |
|||
|
2000/14/EC |
|||
|
Applied harmonized standards |
|||
|
EN 60335–1 |
|||
|
EN 60335–2–79 |
|||
|
EN 55014–1: 2006 + A1: 2009 |
|||
|
EN 55014–2: 1997 + A2: 2008 |
|||
|
EN 61000–3–2: 2006 + A2: 2009 |
|||
|
EN 62233: 2008 |
|||
|
EN – 8 |
37 |

Technical specifications
|
Type |
HD 6/11-4 M |
HD 6/15-4 M |
HD 6/16-4 M |
||
|
1.524-104.0 |
1.524-113.0 |
1.524-100.0 |
|||
|
1.524-107.0 |
|||||
|
HD 6/15-4 MX |
HD 6/16-4 MX |
||||
|
1.524-109.0 |
1.524-101.0 |
||||
|
1.524-108.0 |
|||||
|
GB |
AUS |
EU |
|||
|
Main Supply |
|||||
|
Voltage |
V |
100 |
240 |
230 |
|
|
Current type |
Hz |
1~ 50 |
|||
|
Motor rpm |
1/min |
1400 |
|||
|
Connected load |
kW |
2,9 |
3,3 |
3,4 |
|
|
Protection (slow, char. C) |
A |
30 |
16 |
||
|
Type of protection |
IPX5 |
||||
|
Maximum allowed net impedance |
Ohm |
— |
0,294+j0,184 |
||
|
Extension cord 30 m |
mm2 |
2,5 |
|||
|
Water connection |
|||||
|
Max. feed temperature |
°C |
60 |
|||
|
Min. feed volume |
l/h (l/min) |
600 (10) |
|||
|
Suck height from open container (20 °C) |
m |
0,5 |
|||
|
Max. feed pressure |
MPa |
1 |
|||
|
Performance data |
|||||
|
Working pressure |
MPa |
3…11 |
3…15 |
3…16 |
|
|
Nozzle size |
045 |
040 |
038 |
||
|
Max. operating over-pressure |
MPa |
14 |
18 |
19 |
|
|
Flow rate |
l/h (l/min) |
250…600 |
300…600 (5…10) |
||
|
(4,2…10) |
|||||
|
Detergent suck in |
l/h (l/min) |
0…40 (0…0,7) |
|||
|
Max. recoil force of hand spray gun |
N |
30 |
|||
|
Values determined as per EN 60355-2-79 |
|||||
|
Hand-arm vibration value |
|||||
|
Hand spraygun |
m/s2 |
<2,5 |
|||
|
Spray lance |
m/s2 |
<2,5 |
|||
|
Uncertainty K |
m/s2 |
1 |
|||
|
Sound pressure level LpA |
dB(A) |
69 |
|||
|
Uncertainty KpA |
dB(A) |
1 |
|||
|
Sound power level LWA + Uncertainty KWA |
dB(A) |
84 |
|||
|
Fuel |
|||||
|
Amount of oil |
l |
0,5 |
|||
|
Oil grade |
SAE 15W40 |
||||
|
Dimensions and weights |
|||||
|
Length |
mm |
554 |
|||
|
Width |
mm |
509 |
|||
|
Height |
mm |
1000 |
|||
|
Weight without accessories (MX) |
kg |
44,5 |
54 |
48 (50) |

|
Type |
HD 7/12-4 M |
HD 7/12-4 M |
HD 7/16-4 M |
HD 7/16-4 M |
||||
|
1.524-105.0 |
1.524-106.0 |
1.524-204.0 |
1.524-203.0 |
|||||
|
KAP |
KAP |
KAP |
KAP |
|||||
|
Main Supply |
||||||||
|
Voltage |
V |
220 |
380 |
220 |
||||
|
Current type |
Hz |
1~ 50 |
1~ 60 |
3~ 50 |
3~ 60 |
|||
|
Motor rpm |
1/min |
1400 |
1680 |
|||||
|
Connected load |
kW |
2,4 |
4,4 |
4,1 |
||||
|
Protection (slow, char. C) |
A |
16 |
20 |
16 |
||||
|
Type of protection |
IPX5 |
|||||||
|
Maximum allowed net impedance |
Ohm |
— |
||||||
|
Extension cord 30 m |
mm2 |
2,5 |
4,0 |
2,5 |
||||
|
Water connection |
||||||||
|
Max. feed temperature |
°C |
60 |
||||||
|
Min. feed volume |
l/h (l/min) |
700 (11,7) |
||||||
|
Suck height from open container |
m |
0,5 |
||||||
|
(20 °C) |
||||||||
|
Max. feed pressure |
MPa |
1 |
||||||
|
Performance data |
||||||||
|
Working pressure |
MPa |
3…12 |
3…16 |
|||||
|
Nozzle size |
055 |
054 |
045 |
|||||
|
Max. operating over-pressure |
MPa |
14 |
19 |
|||||
|
Flow rate |
l/h (l/min) |
300…700 |
(5…11,7) |
|||||
|
Detergent suck in |
l/h (l/min) |
0…40 (0…0,7) |
||||||
|
Max. recoil force of hand spray gun |
N |
30 |
35 |
|||||
|
Values determined as per EN 60355-2-79 |
||||||||
|
Hand-arm vibration value |
||||||||
|
Hand spraygun |
m/s2 |
<2,5 |
||||||
|
Spray lance |
m/s2 |
<2,5 |
||||||
|
Uncertainty K |
m/s2 |
1 |
||||||
|
Sound pressure level LpA |
dB(A) |
69 |
75 |
|||||
|
Uncertainty KpA |
dB(A) |
1 |
||||||
|
Sound power level LWA + Uncertainty |
dB(A) |
84 |
90 |
|||||
|
KWA |
||||||||
|
Fuel |
||||||||
|
Amount of oil |
l |
0,5 |
||||||
|
Oil grade |
SAE 15W40 |
SAE 90 Hypoid |
||||||
|
Dimensions and weights |
||||||||
|
Length |
mm |
554 |
||||||
|
Width |
mm |
509 |
||||||
|
Height |
mm |
1000 |
||||||
|
Weight without accessories (MX) |
kg |
46 |
47,5 |
44,5 |

|
Type |
HD 7/18-4 |
HD 7/18-4 |
HD 9/18 M |
HD9/19 M |
|||||
|
M |
M |
1.524-303.0 |
1.524-300.0 |
||||||
|
1.524-200.0 |
1.524- |
1.524-308.0 |
|||||||
|
1.524-208.0 |
209.0 |
||||||||
|
HD 7/18-4 |
HD 7/18-4 |
HD 9/19 MX |
|||||||
|
MX |
MX |
1.524-301.0 |
|||||||
|
1.524 1.0 |
1.524- |
1.524-311.0 |
|||||||
|
1.524-211.0 |
210.0 |
||||||||
|
EU |
EU II |
KAP |
EU |
||||||
|
Main Supply |
|||||||||
|
Voltage |
V |
400 |
230 |
220 |
400 |
||||
|
Current type |
Hz |
3~ |
50 |
3~ 60 |
3~ 50 |
||||
|
Motor rpm |
1/min |
1400 |
3370 |
2800 |
|||||
|
Connected load |
kW |
4,7 |
6,7 |
6,8 |
|||||
|
Protection (slow, char. C) |
A |
16 |
20 |
16 |
|||||
|
Type of protection |
IPX5 |
||||||||
|
Maximum allowed net impedance |
Ohm |
— |
|||||||
|
Extension cord 30 m |
mm2 |
2,5 |
4,0 |
2,5 |
|||||
|
Water connection |
|||||||||
|
Max. feed temperature |
°C |
60 |
|||||||
|
Min. feed volume |
l/h (l/min) |
700 (11,7) |
900 (15) |
||||||
|
Suck height from open container (20 °C) |
m |
0,5 |
|||||||
|
Max. feed pressure |
MPa |
1 |
|||||||
|
Performance data |
|||||||||
|
Working pressure |
MPa |
3…18 |
18,5 |
4…18,5 |
|||||
|
Nozzle size |
042 |
053 |
|||||||
|
Max. operating over-pressure |
MPa |
21 |
23 |
22,5 |
|||||
|
Flow rate |
l/h (l/min) |
300…700 (5…11,7) |
900 (15) |
450…890 |
|||||
|
(7,5…14,8) |
|||||||||
|
Detergent suck in |
l/h (l/min) |
0…40 |
(0…0,7) |
||||||
|
Max. recoil force of hand spray gun |
N |
37 |
49 |
||||||
|
Values determined as per EN 60355-2-79 |
|||||||||
|
Hand-arm vibration value |
|||||||||
|
Hand spraygun |
m/s2 |
<2,5 |
|||||||
|
Spray lance |
m/s2 |
<2,5 |
3,0 |
||||||
|
Uncertainty K |
m/s2 |
1 |
|||||||
|
Sound pressure level LpA |
dB(A) |
75 |
76 |
||||||
|
Uncertainty KpA |
dB(A) |
1 |
2 |
||||||
|
Sound power level LWA + Uncertainty KWA |
dB(A) |
90 |
91 |
||||||
|
Fuel |
|||||||||
|
Amount of oil |
l |
0,5 |
|||||||
|
Oil grade |
SAE 90 Hypoid |
||||||||
|
Dimensions and weights |
|||||||||
|
Length |
mm |
554 |
|||||||
|
Width |
mm |
509 |
|||||||
|
Height |
mm |
1000 |
|||||||
|
Weight without accessories (MX) |
kg |
49 (52) |
44 (47) |
48,6 |
43 (45) |
![]()
|
Type |
HD 9/19 M |
HD 9/20-4 M |
HD 9/20-4 M |
||
|
1.524-315.0 |
1.524-401.0 |
1.524-402.0 |
|||
|
1.524-403.0 |
|||||
|
HD 9/20-4 MX |
|||||
|
1.524-404.0 |
|||||
|
EU II |
EU |
EU II |
|||
|
Main Supply |
|||||
|
Voltage |
V |
230 |
400 |
230 |
|
|
Current type |
Hz |
3~ 50 |
|||
|
Motor rpm |
1/min |
2800 |
1400 |
||
|
Connected load |
kW |
6,8 |
6,9 |
||
|
Protection (slow, char. C) |
A |
25 |
16 |
25 |
|
|
Type of protection |
IPX5 |
||||
|
Maximum allowed net impedance |
Ohm |
— |
0,222+j0,139 |
||
|
Extension cord 30 m |
mm2 |
4,0 |
2,5 |
4,0 |
|
|
Water connection |
|||||
|
Max. feed temperature |
°C |
60 |
|||
|
Min. feed volume |
l/h (l/min) |
900 (15) |
|||
|
Suck height from open container (20 °C) |
m |
0,5 |
|||
|
Max. feed pressure |
MPa |
1 |
|||
|
Performance data |
|||||
|
Working pressure |
MPa |
4…18,5 |
4…20 |
||
|
Nozzle size |
053 |
050 |
|||
|
Max. operating over-pressure |
MPa |
22,5 |
22 |
||
|
Flow rate |
l/h (l/min) |
450…890 |
460…900 (7,7…15) |
||
|
(7,5…14,8) |
|||||
|
Detergent suck in |
l/h (l/min) |
0…40 (0…0,7) |
|||
|
Max. recoil force of hand spray gun |
N |
49 |
|||
|
Values determined as per EN 60355-2 |
-79 |
||||
|
Hand-arm vibration value |
|||||
|
Hand spraygun |
m/s2 |
<2,5 |
|||
|
Spray lance |
m/s2 |
3,0 |
1,5 |
||
|
Uncertainty K |
m/s2 |
1 |
|||
|
Sound pressure level LpA |
dB(A) |
76 |
75 |
||
|
Uncertainty KpA |
dB(A) |
2 |
1 |
||
|
Sound power level LWA + Uncertainty |
dB(A) |
91 |
88 |
||
|
KWA |
|||||
|
Fuel |
|||||
|
Amount of oil |
l |
0,5 |
0,75 |
||
|
Oil grade |
SAE 90 Hypoid |
||||
|
Dimensions and weights |
|||||
|
Length |
mm |
554 |
|||
|
Width |
mm |
509 |
|||
|
Height |
mm |
1000 |
|||
|
Weight without accessories (MX) |
kg |
45 |
48 (50) |
55 |

Lire ces notice originale avant la première utilisation de votre ap-
pareil, se comporter selon ce qu’elles requièrent et les conserver pour une utilisation ultérieure ou pour le propriétaire futur.
Table des matières
|
Éléments de l’appareil |
FR — |
1 |
|
Pour votre sécurité |
FR — |
1 |
|
Utilisation conforme |
FR — |
2 |
|
Dispositifs de sécurité |
FR — |
2 |
|
Protection de l’environnement |
FR — |
2 |
|
Avant la mise en service |
FR — |
2 |
|
Mise en service |
FR — |
3 |
|
Utilisation |
FR — |
4 |
|
Transport |
FR — |
6 |
|
Entreposage |
FR — |
6 |
|
Entretien et maintenance |
FR — |
6 |
|
Assistance en cas de panne |
FR — |
7 |
|
Pièces de rechange |
FR — |
8 |
|
Garantie |
FR — |
8 |
|
Déclaration de conformité CE |
FR — |
9 |
|
Caractéristiques techniques |
FR — |
10 |
Éléments de l’appareil
18Manette de sécurité
19Manette de la poignée-pistolet
20Flexible haute pression
21Guidon de poussée
22Attache-câble
23Vanne de dosage du détergent
24Flexible d’aspiration de détergent avec filtre et couvercle fileté
25Support de bouteille pour détergent
26Manivelle
27Dévidoir
Pour votre sécurité
Avant la première mise en service, vous devez impérativement avoir lu les consignes de sécurité N° 5.951-949 !
Symboles utilisés dans le mode d’emploi
Danger
Pour un danger immédiat qui peut avoir pour conséquence la mort ou des blessures corporelles graves.
Avertissement
Pour une situation potentiellement dangereuse qui peut avoir pour conséquence des blessures corporelles graves ou la mort.
Attention
Veuillez ouvrir la page d’image devant
1Récepteur de buse
2Poignée
3Raccord haute pression
4Arrivée d’eau
5Manomètre
6Indicateur de niveau d’huile
7Réservoir d’huile
8Capot
9Interrupteur principal
10Vis de fixation du capot
11Dépose du flexible
12Support de poignée-pistolet
13Buse
14Marquage de la buse
15Lance
16Régulateur de pression et de quantité (pas avec HD 9/18 M)
17Poignée-pistolet
42
Pour une situation potentiellement dangereuse qui peut avoir pour conséquence des blessures légères ou des dommages matériels.
Des symboles sur l’appareil
Une utilisation incorrecte des jets
haute pression peut présenter des
dangers. Le jet ne doit pas être dirigé sur des personnes, animaux,
installations électriques actives ni sur l’appareil lui-même.
Selon les directives en vigueur, l’appareil ne doit jamais être exploité sans
séparateur système sur le réseau d’eau potable. Utiliser un séparateur
système approprié de la Sté. Kärcher® ou en alternative un séparateur système selon EN 12729 type BA. L’eau qui s’est écoulée à travers un séparateur systeme est classifiée comme non potable.
FR – 1

Attention
Toujours raccorder le séparateur du système au niveau de l’alimentation en eau et jamais directement sur l’appareil!
Utilisation conforme
Utiliser exclusivement ce nettoyeur haute pression
–pour nettoyer au jet basse pression et avec du détergent (par exemple pour le nettoyage de machines, véhicules, bâtiments, outils),
–pour nettoyer au jet haute pression sans détergent (par ex. nettoyage de façades, de terrasses, d’appareils de jardinage).
Pour des salissures tenaces nos recommandons le fraiseur de saleté comme accessoire en option.
La rotabuse est incluse dans la fourniture du HD…Plus.
Dispositifs de sécurité
Les dispositifs de sécurité ont pour but de protéger l’utilisateur. Par conséquent, ils ne doivent en aucun cas être désactivés ou transformés.
Clapet de décharge avec pressostat
En cas de réduction de la quantité d’eau avec le réglage de pression/quantité, la clapet de décharge s’ouvre et une partie de l’eau est évacuée vers le côté aspiration de la pompe.
Si vous relâchez la gâchette, la pompe est éteinte par un manocontacteur, le jet haute pression est interrompu. Si vous appuyez à nouveau sur le levier, la pompe est remise en marche.
Protection de l’environnement
Les matériaux constitutifs de l’emballage sont recyclables. Ne pas jeterlesemballagesdanslesordures ménagères, mais les remettre à un système de recyclage.
Lesappareilsuséscontiennentdes matériaux précieux recyclables lesquels doivent être apportés à un système de recyclage. Il est interdit de jeter les batteries, l’huile et les substances similaires dans l’environnement. Pour cette raison, utiliser des systèmes de collecte adéquats afin d’éliminer les appareils usés.
Instructions relatives aux ingrédients (REACH)
Les informations actuelles relatives aux ingrédients se trouvent sous : www.kaercher.com/REACH
Avant la mise en service
Déballage
–Vérifier le contenu du paquet lors de l’ouverture de l’emballage.
–Contactez immédiatement le revendeur en cas d’avarie de transport.
Contrôle du niveau d’huile
Affichage du niveau d’huile avec l’appareil à l’arrêt. Le niveau d’huile doit reposer au-dessus des deux indicateurs.
Activer la purge du carter d’huile
Soupape de sûreté
Le soupape de sûreté ouvre si la valeur de la pression de service admissible est dépassée et l’eau recoule alors vers le côté aspiration de la pompe.
Le clapet de décharge, le pressostat et la soupape de sûreté sont ajustés par défaut dans nos usines et plombés
Seul le service après-vente est autorisé à procéder aux réglages.
Dévisser la vis de fixation du capot et retirer celui-ci.
Couper la pointe du couvercle du réservoir d’huile.
Fixer le capot.

Montage des accessoires
Monter la buse sur la lance (marquage sur la bague de butée en haut).
Monter le tube de pulvérisation sur la poignée-pistolet avec la régulation de quantité et de pression.
Remarque (seulement pour 1.524-207)
Au cas où la place disponible est réduite, l’adaptateur joint avec buse peut être directement monté sur la poignée-pistolet.
Pour les appareils sans dévidoir :
Visser fermement le flexible haute pression sur le raccord haute pression.
Pour les appareils avec dévidoir :
Enficher en enclencher la manivelle dans l’arbre de dévidoir.
Avant d’enrouler le flexible haute pression, veiller à le placer de manière tendue.
Enrouler uniformément le flexible haute pression sur le dévidoir en tournant la manivelle. Choisir le sens de rotation de telle sorte que le flexible haute pression ne soit pas plié.
Mise en service
Branchement électrique
Danger
Risque d’électrocution.
Branchement de l’appareil uniquement à du courant alternatif.
L’appareil doit uniquement être raccordé à un branchement électrique mis en service par un électricien conformément à la norme IEC 60364.
La tension indiquée sur la plaque signalétique de l’appareil doit correspondre à celle de la prise.
Protection minimale par fusible de la prise de courant (cf. Données techniques). L’impédance de réseau maximale admissible au niveau du point de raccordement ne doit en aucun cas être dépassée (voir Caractéristiques techniques). En cas de doute concernant l’impédance de réseau présente sur votre point de raccordement, veuillez vous adresser à l’entre-
prise responsable de votre alimentation énergétique.
L’appareil doit impérativement être raccordé au secteur avec une fiche électrique. Une connexion au secteur ne pouvant pas être coupée est interdite. La fiche électrique sert à la séparation du secteur.
Vérifier avant chaque utilisation que le câble et la fiche secteur ne sont pas endommagés. Un câble d’alimentation endommagé doit immédiatement être remplacé par le service aprèsvente ou un électricien agréé.
Les fiches mâles et les raccords des câbles de rallonge utilisés doivent être étanches à l’eau. Utiliser un câble de prolongation avec une section suffisante (voir «Caractéristiques techniques») et le dérouler complètement de l’enrouleur.
Des rallonges non adaptées peuvent présenter des risques. N’utiliser en plein air que des rallonges homologuées avec une section suffisante:
Données de raccordement, voir plaque signalétique / caractéristiques techniques
Arrivée d’eau
Raccordement à la conduite d’eau
Avertissement
Respecter les prescriptions de votre société distributrice en eau.
Selon les directives en vigueur, l’appareil ne doit jamais être exploité sans
séparateur système sur le réseau d’eau potable. Utiliser un séparateur
système approprié de la Sté. Kärcher® ou en alternative un séparateur système selon EN 12729 type BA. L’eau qui s’est écoulée à travers un séparateur systeme est classifiée comme non potable.
Attention
Toujours raccorder le séparateur du système au niveau de l’alimentation en eau et jamais directement sur l’appareil!
Pour les valeurs de raccordement, se reporter à la section Caractéristiques techniques.

Raccorder la conduite d’alimentation (longueur minimale 7,5 m, diamètre minimum 1″) au raccord d’arrivée d’eau de l’appareil et à l’alimentation en eau (ex. un robinet).
Remarque
La conduite d’alimentation n’est pas comprise dans la livraison.
Ouvrir l’alimentation d’eau.
Aspiration d’eau depuis des réservoirs ouverts
Visser le flexible d’aspiration (réf. 4.440-270.0) sur la prise d’eau.
Filter (Bestell-Nr. 4.730-012.0) am Saugschlauch anbringen.
Purge d’air de l’appareil : Dévisser l’injecteur.
Laisser l’appareil en route jusqu’à l’eau sorte sans faire de bulles.
Faire tourner l’appareil éventuellement pendant 10 secondes — le mettre hors service. Répéter le processus à plusieurs reprises.
Arrêter l’appareil et dévisser de nouveau l’injecteur.
Utilisation
Danger
Risque d’explosion !
Ne pas pulvériser de liquides inflammables.
Si l’appareil est utilisé dans des zones de danger (par exemple des stations essence), il faut tenir compte des consignes de sécurité correspondantes.
Avertissement
Nettoyer les moteurs uniquement à des endroits équipés des séparateurs d’huile nécessaires (protection de l’environnement). Ne jamais diriger le jet sur soi-même ni sur d’autres personnes dans le but de nettoyer les vêtements ou les chaussures.
Risque d’obturation. Poser les gicleurs uniquement avec l’embouchure vers le haut dans le compartiment des accessoires.
Uniquement pour HD 9/19…
Danger
Á cause des vibrations, une durée d’utilisation plus long de l’appareil peut amenée aux troubles de l’irrigation sanguine dans les mains.
Il est impossible de définir une durée d’utilisation universelle. Celle-ci dépend en effet de plusieurs facteurs d’influence :
–Mauvaise circulation sanguine de l’utilisateur (doigts souvent froids, sensation de picotement dans les doigts).
–Température ambiante faible. Porter des gants chauds pour protéger les mains.
–Une préhension ferme peut entraver la circulation sanguine.
–Il est conseiller de ponctuer le travail de pauses plutôt que d’assurer un service ininterrompu.
En cas d’utilisation régulière et de longue durée de l’appareil et en cas d’apparition répétée des symptômes caractéristiques (par exemple, une sensation de picotement dans les doigts, les doigts froids), nous recommandons de consulter un médecin.
Fonctionnement à haute pression
Remarque
L’appareil est équipé d’un manocontacteur. Le moteur ne démarre que lorsque le levier du pistolet est tiré.
Dérouler complètement le flexible haute pression de l’enrouleur.
Régler l’interrupteur principal sur «I».
Décrochez le pistolet de giclage à main et tirer le levier du pistolet.
Régler (+/-) la pression de service et le débit en tournant (en continu) le dispositif régulateur de pression et de quantité (pas avec HD 9/18).
Uniquement pour HD 9/20-4…
Avec les débits réduits, la chaleur émise par le moteur assure un réchauffement de l’eau d’env. 15° C.

Choisir le type de jet
Fermer la poignée-pistolet.
Tourner le logement de la buse jusqu’à ce que le symbole désiré corresponde avec le marquage :
Jet bâton à haute pression (0°) pour des salissures très tenaces
Jet plat à basse pression (CHEM) pour le service avec détergent ou nettoyer avec une pression basse
Jet plat à haute pression (25°) pour des salissures sur des grandes surfaces
Danger
Risque de blessure. Lors de l’utilisation de la lance/adaptateur court(e), l’utilisation des buses à jet crayon/rond n’est pas autorisée.
Fonctionnement avec détergent
Avertissement
Des détergents peu appropriés peuvent endommagés l’appareil et l’objet pour nettoyer. Utiliser uniquement des détergents qui sont validés par Kärcher. Respecter les consignes et recommandations de dosage jointes aux détergents. Protéger l’environnement en utilisant le détergent avec parcimonie.
Respecter les consignes de sécurité figurant sur les détergents.
Des détergents de Kärcher garantissent un travail sans défauts. Veuillez-vous conseiller ou demander notre catalogue ou notre bulletins d’information sur des produits de nettoyage.
Placer la bouteille détergent dans le support de bouteille figurant sur l’appareil ou bien poser le bidon de détergent à côté de l’appareil. Il est possible de déposer simultanément deux différents détergents dans l’appareil.
Sortir le flexible d’aspiration de détergent et le plonger dans la bouteillle ou le bidon de détergent.
Visser le couvercle fileté sur la bouteille ou sur le bidon.
Placer l’injecteur sur la position «CHEM».
Régler le doseur
de détergent pour ajuster le détergent souhaité et la concentration souhaitée.
Méthode de nettoyage conseillée
Pulvériser le détergent sur la surface sèche et laisser agir sans toutefois le laisser sécher complètement.
Ôter les salissures décollées à l’aide du jet haute pression.
Après utilisation, plonger le filtre dans de l’eau claire. Tourner la valve de dosage sur la concentration en détergent la plus élevée. Démarrer l’appareil et rincer à l’eau claire pendant une minute.
Interrompre le fonctionnement
Relâcher le levier de la poignée-pisto- let, l’appareil se met hors service.
Tirer de nouveau sur le levier de la poi- gnée-pistolet, l’appareil se remet en service.

Mise hors service de l’appareil
Mettre l’interrupteur principal sur «0».
Retirer la fiche secteur de la prise de courant.
Couper l’alimentation en eau.
Actionner la poignée-pistolet jusqu’à ce que l’appareil soit hors pression.
Actionner le cran de sûreté de la poi- gnée-pistolet pour sécuriser le pistolet contre un déclenchement intempestif.
Uniquement pour HD 9/20-4…
Danger
Risque de brûlure provoquée par l’eau chaude . lorsque l’appareil est hors service, l’eau résiduelle contenue peut se réchauffer. Lors de l’enlèvement du tuyau de l’arrivée d’eau, l’eau réchauffée peut être projetée et provoquer des ébouillantements. Retirer tout d’abord le tuyau lorsque l’appareil a refroidi.
Ranger l’appareil
Enficher la poignée-pistolet dans le support.
Enrouler le flexible haute pression et l’accrocher sur la dépose du flexible.
ou
Enrouler le flexible haute pression sur le dévidoir. Enfoncer la poignée de la manivelle pour bloquer le dévidoir.
Enrouler le câble d’alimentation autour de l’attache-câbles.
Fixer la fiche électrique avec le clip monté.
Protection antigel
Attention
Le gel peut endommager l’appareil si l’eau n’a pas été intégralement vidée.
Conserver l’appareil dans un lieu à l’abri du gel.
Si un entreposage à l’abri du gel n’est pas possible :
Purger l’eau.
Pomper produit antigel d’usage par l’appareil.
Remarque
utiliser un produit antigel courant pour automobile à base de glycol.
Respecter les consignes d’utilisation du fabricant du produit antigel.
Faire tourner l’appareil au max. 1 minute jusqu’à ce que la pompe et les conduites soient entièrement vides.
Transport
Attention
Risque de blessure et d’endommagement ! Respecter le poids de l’appareil lors du transport.
Pour transporter l’appareil sur de plus longues distances, le tirer derrière soi au moyen du manche de poussée.
Pour les appareil sans dévidoir, disposer le guidon de poussée vers le bas pour les porter. Pour porter l’appareil, toujours utiliser les poignées, jamais le guidon de poussée.
Avant de transporter l’appareil en position horizontale, sortir la bouteille de détergent du support de bouteille et la fermer.
Sécuriser l’appareil contre les glissements ou les basculements selon les directives en vigueur lors du transport dans des véhicules.
Entreposage
Attention
Risque de blessure et d’endommagement ! Prendre en compte le poids de l’appareil à l’entreposage.
Cet appareil doit uniquement être entreposé en intérieur.
Entretien et maintenance
Danger
Risque de blessure et de choc électrique par un démarrage inopiné de l’appareil. Avant d’effectuer tout type de travaux sur l’appareil, le mettre hors service et débrancher la fiche électrique.
Remarque
L’huile usagée doit impérativement être éliminée auprès d’un point de collecte compétent. Y apporter l’huile usagée. L’huile usagée est polluante. Toute élimination incorrecte est passible d’une amende.

Inspection de sécurité/Contrat d’entretien
Vous pouvez accorder avec votre commerçant une inspection de sécurité régulière ou passer un contrat d’entretien. Conseillez-vous.
Avant chaque mise en service
Contrôler que le câble d’alimentation n’est pas endommagé (risque de choc électrique), faire remplacer immédiatement tout câble d’alimentation endommagé par un service après-vente autorisé/un électricien spécialisé.
Vérifier le tuyau à haute pression s’il est endommagé (danger d’éclatement). Un flexible haute pression endommagé doit immédiatement être remplacé.
Vérifier l’étanchéité de l’appareil (pompe).
3 gouttes d’eau par minute sont admissibles et peuvent s’écoulent au côté inférieure de l’appareil. En cas de non étanchéité plus forte, adressez-vous au Centre de Service Après-vente.
Hebdomadairement
Vérifier le niveau d’huile Si l’huile est laiteux (eau dans l’huile), adressez-vous immédiatement au Centre de Service Après-vente.
Nettoyer le tamis de l’arrivée d’eau.
Nettoyer le filtre situé sur le tuyau d’aspiration de détergent.
Uniquement HD 9/20-4 :
Nettoyer le filtre fin.
Mettre l’appareil hors pression.
Dévisser la vis de fixation du capot et retirer celui-ci.
Dévisser le couvercle et le filtre.
Nettoyer le filtre à l’eau propre ou à l’air comprimé.
Remonter en suivant les étapes dans l’ordre inverse.
Annuellement ou après 500 heures de service
Remplacer l’huile.
Vidange d’huile
Remarque
Quantités et sortes d’huiles, voir les «Caractéristiques techniques».
Dévisser la vis de fixation du capot et retirer celui-ci.
Retirer le couvercle du réservoir d’huile.
Verser l’appareil en avant.
Vider l’huile dans la cuvette de récupération.
Remplir lentement la nouvelle huile ; les bulles d’air doivent s’échapper.
Apporter le couvercle du réservoir d’huile.
Fixer le capot.
Assistance en cas de panne
Danger
Risque de blessure et de choc électrique par un démarrage inopiné de l’appareil. Avant d’effectuer tout type de travaux sur l’appareil, le mettre hors service et débrancher la fiche électrique.
Seul le service après-vente autorisé est habilité à contrôler et réparer les composants électriques.
S’il se produit des défauts qui ne sont pas répertoriés dans ce chapitre, en cas de doute ou si cela est explicitement indiqué, s’adresser à un service après-vente autorisé.
L’appareil ne fonctionne pas
Contrôler que le câble de raccordement n’est pas endommagé.
Contrôler la tension du secteur.
Positionner l’interrupteur de l’appareil sur «0» et laisser refroidir le moteur pendant environ 5 minutes.
Si la panne réapparaît, faire vérifier l’appareil par le service après-vente.
En cas de défaut électrique, consulter le service après-vente.

L’appareil ne monte pas en pression
Placer l’injecteur sur la position «Haute pression».
Nettoyer la buse.
Susbstituer la busette.
Purger l’air de l’appareil (voir «Mise en service»).
Contrôler le débit de l’alimentation en eau ( voir la section Caractéristiques techniques).
Nettoyer le tamis de l’arrivée d’eau.
Vérifier toutes les conduites d’alimentation vers la pompe.
Si nécessaire, visiter le service aprèsvente.
La pompe fuit
3 gouttes d’eau par minute sont admissibles et peuvent s’écoulent au côté inférieure de l’appareil. En cas de non étanchéité plus forte, adressez-vous au Centre de Service Après-vente.
En cas de fuite plus importante, faire vérifier l’appareil par le service aprèsvente.
La pompe frappe
Vérifier les conduites d’aspiration de l’eau et de détergent par rapport à une perte d’étanchéité.
Fermer la valve de dosage pour le détergent lors du fonctionnement sans détergent.
Purger l’air de l’appareil (voir «Mise en service»).
Si nécessaire, visiter le service aprèsvente.
Le détergent n’est pas aspirée
Pièces de rechange
–Utiliser uniquement des accessoires et des pièces de rechange autorisés par le fabricant. Des accessoires et des pièces de rechange d’origine garantissent un fonctionnement sûr et parfait de l’appareil.
–Une sélection des pièces de rechange utilisées le plus se trouve à la fin du mode d’emploi.
–Plus information sur les pièces de rechange vous les trouverez sous www.kaercher.com sous le menu Service.
Garantie
Dans chaque pays, les conditions de garantie en vigueur sont celles publiées par notre société de distribution responsable. Les éventuelles pannes sur l’appareil sont réparées gratuitement dans le délai de validité de la garantie, dans la mesure où celles-ci relèvent d’un défaut matériel ou d’un vice de fabrication. En cas de recours en garantie, adressez-vous à votre revendeur ou au service après-vente agréé le plus proche munis de votre preuve d’achat.
Placer l’injecteur sur la position «CHEM».
Vérifier/ettoyer le flexible d’aspiration du détergent avec filtre.
Ouvrir ou vérifier/nettoyer le doseur du détergent.
Si nécessaire, visiter le service après-

Déclaration de conformité CE
Nous certifions par la présente que la machine spécifiée ci-après répond de par sa conception et son type de construction ainsi que de par la version que nous avons mise sur le marché aux prescriptions fondamentales stipulées en matière de sécurité et d’hygiène par les directives européennes en vigueur. Toute modification apportée à la machine sans notre accord rend cette déclaration invalide.
Produit: Nettoyeur haute pression Type: 1.524-xxx
Directives européennes en vigueur :
2006/42/CE (+2009/127/CE) 2004/108/CE
2000/14/CE
Normes harmonisées appliquées :
EN 60335–1 EN 60335–2–79
EN 55014–1: 2006 + A1: 2009
EN 55014–2: 1997 + A2: 2008 EN 61000–3–2: 2006 + A2: 2009 EN 62233: 2008
HD 6/11, HD 6/15, HD 7/12, HD 7/18,
HD 9/19
EN 61000–3–3: 2006
HD 6/16, HD 9/20:
EN 61000–3–11: 2000
Procédures d’évaluation de la conformi-
té
2000/14/CE: Annexe V
Niveau de puissance acoustique dB(A)
|
Mesuré: |
Garanti: |
|
|
HD 6/11 |
83 |
84 |
|
HD 6/15 |
83 |
84 |
|
HD 6/16 |
83 |
84 |
|
HD 9/19 |
89 |
91 |
|
HD 9/20 |
87 |
88 |
Les soussignés agissent sur ordre et sur procuration de la Direction commerciale.
Responsable de la documentation: S. Reiser
Alfred Kärcher GmbH Co. KG
Alfred-Kärcher-Str. 28 — 40
71364 Winnenden (Germany)
Téléphone : +49 7195 14-0
Télécopieur : +49 7195 14-2212
Winnenden, 2010/12/01
 Loading…
-
Storch 140 HOT
Power-Hochdruckreiniger 140 HOT Power-hogedrukreiniger 140 HOTNettoyeur haute pression performant 140 HOTPerformante idropulitrice ad alta pressione 140 HOTPower high pressure cleaner 140 HOT Vysokotlaké čistící zařízení Power 140 HOTDENLFRITGBCZ …
140 HOT Pressure Washer, 124
-
Craftsman HIGH PRESSURE WASHER 580.76225
SmARSOwner’s ManualCRAFTSMAN°6.0 HORSEPOWER2250 PSI 2.2 GPMHIGH PRESSURE WASHERModel No.580.762250CAUTION: Before using thisproduct, read this manual andfollow all Safety Rules andOperating Instructions.PRESSURE WASHER /CUSTOMERHEUPUNEHOURS: Mon,- Fri. 8 a.m. to 5 p.m. (CST)SEARS, ROEBUCK and CO., Hoffman Estates …
HIGH PRESSURE WASHER 580.76225 Pressure Washer, 16
-
Gerni Poseidon 3
G4G4Betjeningsvejledning DK Bruksanvisning N Bruksanvisning S Operating guide UK Betribsanleitung D Mode d’emploi F Gebruiksaanwijzingen NL Instrucciones de manejo E Instruções para uso P Käyttöopas FI Instrukcja obsługi PL Ελληνικά — οδηγίες λειτουργίάς GR06951019.01301002984 BO …
Poseidon 3 Pressure Washer, 12
-
Husky HU80709A
SAVE THIS MANUAL FOR FUTURE REFERENCEYour pressure washer has been engineered and manufactured to Husky’s high standard for dependability, ease of operation, and operator safety. When properly cared for, it will give you years of rugged, trouble-free performance.WARNING: To reduce the risk of injury, the user must re …
HU80709A Pressure Washer, 36
-
Cocraft HHA90
ENGLISHSVENSKANORSKSUOMIDEUTSCHImportant!Read the entire instruction manual carefully and make sure that you fully understand it before you use the equipment. Keep the manual for future reference.Viktig information:Läs hela bruksanvisningen noggrant och försäkra dig om att du har förstått den innan du använder ut …
HHA90 Pressure Washer, 64
-
Graco Series A
308–559Rev. BSupersedes Rev Aand PCN B First choice whenquality counts.INSTRUCTIONS-PARTS LISTINSTRUCTIONSThis manual contains importantwarnings and information.READ AND KEEP FOR REFERENCE.ELECTRIC, 100 VAC, 50 or 60 Hz590st Airless Paint Sprayer195 bar Maximum Working PressureModel 231–347, Serie …
Series A Paint Sprayer, 36
-
Karcher HD 10/25-4 S
HD 10/25-4 SRegister and win!www.kaercher.comHD 10/25-4 SHD 10/25-4 S PlusHD 10/25-4 SX PlusHD 13/18-4 S PlusHD 13/18-4 SX Plus59596750 10/11Deutsch 5English 15Français 25Italiano 35Nederlands 46Español 56Português 67Dansk 78Norsk 88Svenska 97Suomi 106Ελληνικά 116Türkçe 127Русск� …
HD 10/25-4 S Paint Sprayer, 298