- Manuals
- Brands
- Tornado Karcher Manuals
- Floor Machine
- EB 30/1
- Manual
-
Bookmarks
Quick Links
EB 30/1
English
Français
Español
!
5.961-771 2011582 11/05
3
9
15
Related Manuals for Tornado Karcher EB 30/1
Summary of Contents for Tornado Karcher EB 30/1
-
Page 1
EB 30/1 English Français Español 5.961-771 2011582 11/05… -
Page 3
IMPORTANT SAFETY INSTRUCTIONS 8 USE ONLY AS RECOMMENDED READ ALL INSTRUC- BY THIS MANUAL. Use only with re- TIONS BEFORE USING commended attachments. THIS MACHINE. 9 KEEP HAIR, CLOTHING, LOOSE Inform your dealer immediately if JEWELRY, FINGERS and all parts there is any transport damage. -
Page 4
19 USE EXTRA CAUTION when opera- ting on stairs. 20 STAY ALERT! Do not use sweeper when you are tired or under the influ- ence of drugs, alcohol or medication. SAVE THESE INSTRUC- TIONS English… -
Page 5
Dear Customer, Risk of injury Please read and comply with – The appliance contains rotary brush rol- these instructions prior to the ler; please never touch them with the fin- initial operation of your ap- gers or any other tool when the pliance. -
Page 6
Insert the entire strut with the locking but- Symbols on the machine ton into the joint on the appliance. Loosen the handle and pull out the strut to the desired working height; turn the handle to the correct position and tighten –… -
Page 7
Interrupting the work Change/ clean the brush roller see Figure 6 see Figure 8 Switch off the appliance; press the on/off Press the unlocking button and remove foot switch to do so. the brush roller. To ensure that the telescopic strut Remove wound up hair using a knife or stands safely during breaks in operation, scissors by moving the knife along the… -
Page 8
Special accessories Quick charger BC 1/1,8 Order No. 6.654-197 Spare battery Order No. 4.654-259 Brush rollers, soft, red Order No. 4.762-401 Customer Service Our Kärcher branch will be pleased to help you further in the case of questions or faults. See address on the reverse. -
Page 9
RÈGLES IMPORTANTES 4 METTEZ L’INTERRUPTEUR EN OBSERVEZ LES POSITION D’ARRÊT avant de bran- POINTS SUIVANTS cher le chargeur électrique. AVANT LA MISE EN SERVICE DE L’ASPIRA- 5 NE PASTIRER SUR LE CORDON TEUR. POUR DÈBRANCHER l’appareil. Ti- rer sur la prise. En cas de dommages dus au trans- 6 NE PAS SAISIR LA PRISE AVEC port, veuillez en informer immédia-… -
Page 10
diluant pour peinture, du mazout do- mestique, des acides non dilués, des solvants, des pesticides ou de l’amiante. 14 UTILISER LES FILTRES RECOM- MANDÉS pour aspirer les solides. 15 CETTE BALAYEUSE N’EST PAS UN JOUET. Ne la laissez pas à por- tée des enfants. -
Page 11
Cher client, Consignes de sécurité Lisez attentivement ce mode d’emploi avant la première Outre les instructions figurant dans le mode utilisation de l’appareil et re- d’emploi, il est important de prendre en spectez les conseils y figurant. Conservez considération les consignes générales de ce mode d’emploi pour une utilisation ul- sécurité… -
Page 12
– Ne pas charger des groupes d’accumu- 11 Poignée rotative pour déplacement en lateurs endommagés. Remplacer des hauteur groupes d’accumulateurs endommagés. 12 Poignée – Ne pas garder des groupes d’accumula- 13 L’appareil de charge avec affichage de teurs avec des objets de métal, risque de service de chargement et cable de char- court-circuit. -
Page 13
Remarque Vider le récipient collecteur – Le temps de chargement d’un accumula- cf. Illustration 7 teur vide est d’environ 12 heures. Deverrouiller la poubelle et retirer. – Si le temps de charge est dépassé, l’ap- Vider le réservoir collecteur. pareil de charge se met en chargement Remettre la poubelle et encliqueter. -
Page 14
Service Service après-vente Notre succursale Kärcher se tient à votre Garantie entière disposition pour d’éventuelles que- stions ou problèmes. L’adresse figure au Dans chaque pays, les conditions de garan- dos. tie en vigueur sont celles publiées par notre société de distribution responsable. Nous Caractéristiques techniques éliminons gratuitement d’éventuelles pan- nes sur l’appareil au cours de la durée de la… -
Page 15
ADVERTENCIAS IMPORTANTES prevenir cualquier riesgo de incendio, ANTES DE LA PRIMERA descargas eléctricas o daños o lesiones PUESTA EN MARCHA del personal encargado de manipular DEL APARATO DE- los mismos:Esta aspiradora está BERÁN OBSERVARSE diseñada para uso comercial. LOS SIGUIENTES PUN- 1 DESCONECTAR LA BATERÍA DEL TOS. -
Page 16
turas libres de pelusa, pelo, polvo y cia de drogas, alcohol o cualquier cosa que limite la circula- medicamentos. ción del aire. GUARDE ESTAS IN- 11 NO ASPIRE NINGUNA COSA QUE STRUCCIONES SE ESTE QUEMANDO, ardiendo sin llama o echando humo, tal como cigarrillos (cigarros), fósforos (ceril- los) o cenizas calientes. -
Page 17
Estimado cliente: Instrucciones de seguridad Antes de poner en marcha por primera vez el aparato, Además de las indicaciones contenidas en lea el presente manual de in- este manual de instrucciones, deben respe- strucciones y siga las instrucciones que figu- tarse las normas generales vigentes de se- ran en el mismo. -
Page 18
– Evitar entrar en contacto con el líquido Insertar el mango para mano sobre el que sale de baterías defectuosas. Si mango largo con la empuñadura girato- entra en contacto con el líquido, enjua- ria. gar con agua. Si entra en contacto con Unir el mango largo y el corto, presionar los ojos consultar también a un médico. -
Page 19
Para limpiar mueva el aparato hacia Limpieza del aparato delante y hacia atrás. Limpie el exterior del aparato con un Para limpiar las zonas cercanas a las es- paño húmedo. No utilice agentes abra- quinas, utilice el lateral derecho (lateral sivos (como, p. -
Page 20
El aparato lanza suciedad hacia afuera. Vaciar el recipiente cuando esté lleno (véase el capítulo «Vaciar el recipiente acumulador de suciedad»). Accesorios especiales Cargador rápido BC 1/1,8 Nº referencia 6.654-197 Batería de repuesto Nº referencia 4.654-259 Cepillo rotativo, blando, rojo Nº…
- Manuals
- Brands
- Tornado Karcher Manuals
- Floor Machine
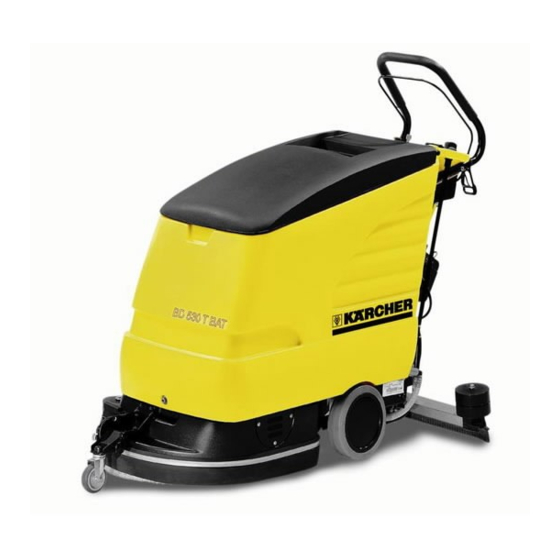
- BR 530 BAT
- Operating instructions manual
-
Contents
-
Table of Contents
-
Troubleshooting
-
Bookmarks
Quick Links
BR 530 BAT
BR 53/40 W
!
www.karcher.com
BD 530 BAT
BD 53/40 W
5.959-398 A2005839 06/03
Related Manuals for Tornado Karcher BR 530 BAT
Summary of Contents for Tornado Karcher BR 530 BAT
-
Page 1
BR 530 BAT BD 530 BAT BR 53/40 W BD 53/40 W www.karcher.com 5.959-398 A2005839 06/03… -
Page 2
Operating Instructions Page 3 English Spare Parts List Page 35 Notice d’instructions Page 12 Français Liste des pièces de rechange Page 35 Instrucciones de servicio Página 23 Español Liste des pièces de rechange Página 35… -
Page 3: Table Of Contents
The floor cleaners have been designed so that the user can easily recognize and operate all functions. The operating console contains all the switches and indicators, the functions of which are represented by symbols. BD 530 BAT BD 53/40 W BR 530 BAT BR 53/40 W…
-
Page 4: Unit Diagram
Suction turbine Rating plate Suction hose Connection for suction hose Suction bar Star knobs “Fixing of suction bar” Brush rollers (BR 530 BAT/BR 53/40 W) Disc brushes * (BD 530 BAT/BD 53/40 W) Cleaning head Running gear Handle Locking device…
-
Page 5: Operation
The side planks of the packing are used to construct a ramp. BR 530 BAT / BR 53/40 W b) Open the reservoir catch – turn the socket-head screw On delivery the brush rollers are already fitted.
-
Page 6: Shut-Down Procedure
English 5.959-398 Switching on the brush head Starting the work – Close reservoir cover. – Push the unit forwards with the push handle and activate the hand lever – the brushes switch themselves on, and – Turn on the switches for brush operation and suction the work can be started.
-
Page 7: Batteries
English 5.959-398 BATTERIES Please dispose of battery or rechargeable battery in an environmentally friendly manner The unit contains circuitry that provides protection Batteries and rechargeable batteries contain against over-discharging the batteries; i.e., when the substances which must not pollute the minimum permissible battery capacity has been environment.
-
Page 8: Care And Maintenance
Check that the Replacing the brush rollers connecting cable is firmly attached. BR 530 BAT, BR 53/40 W – Check tank cover seals for leakage, and replace if required. – Undo the star knob screws. Remove the side bearing cover.
-
Page 9: Accessories
6.369-023 6.369-016 Cleaning pad, red for slightly dirty floors 6.369-024 6.369-017 Part No. Part No. BR 530 BAT / BR 53/40 W BR 530 Quant Quantity required by unit BR 53/40 W Brush drum, white for routine cleaning, also for 5.762-169 5.762-208…
-
Page 10: Technical Specifications
English 5.959-398 TECHNICAL SPECIFICATIONS BR 530 BAT (BR 53/40 W*) Power Nominal voltage ………… 24 V Battery capacity ……….. 75 AH(5h) Power consumption ……1200 (1560*) W Suction motor ………… 500 W Brush motor …………600 W Suction Air flow …………..30 l/s Negative pressure ……….
-
Page 11: Troubleshooting
Brushes do not rotate Fuse defective Clear cause of damage, replace fuse Toothed belt torn Call Customer Service (BR 530 BAT, BR 53/40 W) Brush motor defective Call Customer Service Worm drive defective Call Customer Service (BD 530 BAT, BD 53/40 W)
-
Page 12
7.644-018.0 BR 53/40 W B TO*USA 7.644-040.0 1.127-881.0 6.644-277.0 7.644-006.0 5.380-209.0 6.682-395.0 6.435-356.0 6.630-005.0 5.115-608.0 6.368-076.0 4.034-107.0 5.442-930.0 6.435-301.0 7.303-065.0 5.321-509.0 5.382-594.0 7.343-004.0 6.321-154.0 5.059-011.0 7.343-300.0 6.390-610.0 6.390-733.0 6.343-132.0 4.172-016.0 7.343-300.0 7.306-119.0 6.388-549.0 7.311-224.0 6.390-166.0 7.303-139.0 6.390-730.0 6.362-089.0 7.312-003.0 6.310-129.0 6.310-128.0 5.128-339.0 6.273-185.0…
Table of Contents for Tornado Karcher KM 100:
-
KM 100/100 R 47
-
Operating Instructions KM 100/100 R English 11 Maintenance by the customer service department Maintenance after 8 operating hours First inspection Maintenance after 20 operating hours Maintenance every 100 operating hours Maintenance every 300 operating hours Maintenance every 500 operating hours Maintenance every 1000 operating hours Maintenance every 1500 operating hours Note: To safeguard warranty rights, during the warranty period all service and maintenance work must be performed by an authorised Kärcher after sales service. Maintenance tasks Notes on saf
-
Operating Instructions KM 100/100 R English 8 Drive backwards ! Slowly press the driving pedal Note: Driving behaviour — The driving speed can be varied continuously with the driving pedals. — Slightly release drive pedal if power decrease is registered uphill. Braking ! Ease pressure on drive pedal, the sweeper brakes automatically and stops. Warning! If while the drive pedal is actuated the seat contact switch or the key switch are turned on the drive system will be turned off and the side brush,
-
www.karcher.com 5.961-037 A2006373 07/03 KM 100 / 100 R 1.280-102
-
Operating Instructions KM 100/100 R English 12 Check and top up the battery’s fluid level Warning! ! Regularly check the fluid level of acid-filled batteries. ! Open all cell plugs ! If the fluid level is too low fill up cells with distilled water up to mark ! Close cell plugs ! Charge the battery Check the tyre air pressure ! The air pressure in the rear tyres must be set to 6 bar. Changing wheels Danger! Preparations ! Stand sweeper on a flat surface ! Turn off key switch and remove the key ! Wear warning clot
-
Operating Instructions KM 100/100 R English 3 Contents For your own safety! 4 General notes 4 Safety features 5 Risk of overturning on too high gradients! 5 Risk of overturning when taking bends rapidly! 5 Danger of tipping over given an unstable travelling surface! 5 Danger of tipping over given a sideways incline that is too large! 5 For our environment 5 Caution, danger to the environment from used batteries! 5 Endangerung of environment by packaging mate
-
Operating Instructions KM 100/100 R English 9 Empty the swept material container ! Wait until automatic filter dedusting is completed and the dust has settled before opening the debris container and emptying it. ! Pull out debris container ! Empty the swept material container ! Slide in and lock the debris container ! Then perform the same operations on the opposite debris container Usage instructions Safety instructions when sweeping Warning! — Never sweep up packing straps, wires or the like as this coul
-
Operating Instructions KM 100/100 R English 13 Checking the sealing cup ! The sealing cup must be regularly checked for a proper fit. Sealing cup at the suction turbine Replacing side brush ! Unscrew fastening screws (3 pieces) at the underside ! Slip side brush on carrier and screw it tight Check the sweep roller ! Stand sweeper on a flat surface ! Raise the sweep roller ! Turn key switch to «0» and remove key ! Secure the mac
-
Operating Instructions KM 100/100 R English 10 Battery discharging warning Green Battery is charged Yellow Battery is almost dead ! Stop sweeping and charge battery Red Battery flat — Sweeping system switched off by control ! Charge the battery see chapter on «Maintenance» Flashing red — Discharge limit reached — 3 more min. driving possible, then the sweeper turns itself off ! Then the sweeper cannot be restarted any more,
-
Operating Instructions KM 100/100 R English 4 For your own safety! General notes It is mandatory to read and observe this prior to using the appliance! — Notify your sales outlet if during unpacking you detect damage that has occurred in transit. ! Read the operating instructions of your appliance prior to putting it into operation, especially the safety information. — The warning signs and information labels attached to the unit provide
-
Operating Instructions KM 100/100 R English 5 ! Take care when handling accumulator acid. Heed the relevant safety regulations! ! Used batteries are to be disposed of in an environmentally friendly way, according to EC-guideline 91/157 EWG. Safety features Safety features are provided for the protection of the operator, and it is forbidden to disconnent them or circumvent their operation. EMERGENCY STOP pushbutton — For an instant stop of all operations. — To
-
Operating Instructions KM 100/100 R English 6 Machine components 1. Unit cover 2. Debris container (bilateral) 3. Coarse-dirt flap 4. Roller 5. Side brush Before first operating The sweeper has an electric drive. The machine can be pushed only if the trigger is pulled away from the wheel. (See chapter: Moving the sweeper without its own drive) Open/close unit cover Open unit cover ! Swivel unit cover upwards at the provided handle grip When opened th
-
KM 100/100 R 2 Operating Instructions 3 Spare Parts List 47 Notice d’utilisation 17 Liste des pièces de rechange 47 Instrucciones de servicio 32 Lista de piezas de requesto 47
Questions, Opinions and Exploitation Impressions:
You can ask a question, express your opinion or share our experience of Tornado Karcher KM 100 device using right now.
 |
[Page 1] Tornado Karcher KM 100 www.karcher.com 5.961-037 A2006373 07/03 KM 100 / 100 R 1.280-102 |
 |
[Page 2] Tornado Karcher KM 100 KM 100/100 R 2 Operating Instructions 3 Spare Parts List 47 Notice d’utilisation 17 Liste des … |
 |
[Page 3] Tornado Karcher KM 100 Operating Instructions KM 100/100 R English 3 Contents For your own safety! 4 General notes 4 Safety features 5 Risk of overturning on too high gradients! 5 Risk of overturning when taking bends rapidly! 5 Danger of tipping over given an unstable tr… |
 |
[Page 4] Tornado Karcher KM 100 Operating Instructions KM 100/100 R English 4 For your own safety! General notes It is mandatory to read and observe this prior to using the appliance! — Notify your sales outlet if during unpacking you detect damage that has occurred in transit. … |
 |
[Page 5] Tornado Karcher KM 100 Operating Instructions KM 100/100 R English 5 ! Take care when handling accumulator acid. Heed the relevant safety regulations! ! Used batteries are to be disposed of in an environmentally friendly way, according to EC-guideline 91/157 EWG. Safety… |
 |
[Page 6] Tornado Karcher KM 100 Operating Instructions KM 100/100 R English 6 Machine components 1. Unit cover 2. Debris container (bilateral) 3. Coarse-dirt flap 4. Roller 5. Side brush Before first operating The sweeper has an electric drive. The machine can be pushed only if th… |
 |
[Page 7] Tornado Karcher KM 100 Operating Instructions KM 100/100 R English 7 Before every operation General notes ! Stand sweeper on a flat surface ! Turn off key switch (position «0») Testing and maintenance work ! Check charge condition of battery * ! Check side b… |
 |
[Page 8] Tornado Karcher KM 100 Operating Instructions KM 100/100 R English 8 Drive backwards ! Slowly press the driving pedal Note: Driving behaviour — The driving speed can be varied continuously with the driving pedals. — Slightly release drive pedal if power decrease is r… |
 |
[Page 9] Tornado Karcher KM 100 Operating Instructions KM 100/100 R English 9 Empty the swept material container ! Wait until automatic filter dedusting is completed and the dust has settled before opening the debris container and emptying it. ! Pull out debris container ! Empt… |
 |
[Page 10] Tornado Karcher KM 100 Operating Instructions KM 100/100 R English 10 Battery discharging warning Green Battery is charged Yellow Battery is almost dead ! Stop sweeping and charge battery Red Battery flat — Sweeping system switched off by control ! Charge the battery … |
 |
[Page 11] Tornado Karcher KM 100 Operating Instructions KM 100/100 R English 11 Maintenance by the customer service department Maintenance after 8 operating hours First inspection Maintenance after 20 operating hours Maintenance every 100 operating hours Maintenance every 300 opera… |
 |
[Page 12] Tornado Karcher KM 100 Operating Instructions KM 100/100 R English 12 Check and top up the battery’s fluid level Warning! ! Regularly check the fluid level of acid-filled batteries. ! Open all cell plugs ! If the fluid level is too low fill up cells with distilled w… |
 |
[Page 13] Tornado Karcher KM 100 Operating Instructions KM 100/100 R English 13 Checking the sealing cup ! The sealing cup must be regularly checked for a proper fit. Sealing cup at the suction turbine Replacing side brush ! Unscrew fastening screws (3 pieces) at the underside ! … |
 |
[Page 14] Tornado Karcher KM 100 Operating Instructions KM 100/100 R English 14 ! Slide the new main brush into the main brush box and slip it onto the drive peg Notes: — Pay attention to the position of the bristle set when installing the new main brush! — The bowden cable is… |
 |
[Page 15] Tornado Karcher KM 100 Operating Instructions KM 100/100 R English 15 Replace the dust filter Danger! ! Empty the debris container prior to beginning work on replacing the dust filter ! Wear a dust protection mask when working on the filter system ! Observe the safety… |
 |
[Page 16] Tornado Karcher KM 100 Operating Instructions KM 100/100 R English 16 Accessories Side brush 6.905-986 Provided with standard bristles for indoor and outdoor surfaces. Soft side broom 6.906-133 For fine dust on indoor surfaces, resistant to moisture. Hard side broom 6.906… |
 |
[Page 17] Tornado Karcher KM 100 KM 100/100 R 47 |
-
Floor Machine
# Device Model Document Pages File Size 1 Tornado Karcher BR 530 BAT
12 2 Tornado Karcher KM 100
17