
149
СОДЕРЖАНИЕ
1. ОСНОВНЫЕ ПРАВИЛА БЕЗОПАСНОСТИ … 150
2. ПРЕДУПРЕЖДЕНИЯ ПО БЕЗОПАСНОСТИ 151
2.1 Символы, используемые в инструкции .151
2.2 Применение по назначению ………………151
2.3 Инструкции по применению ……………….151
3. ВВЕДЕНИЕ …………………………………….. 151
3.1 Буквы в скобках…………………………………151
3.2 Неисправности и их устранение ………….152
4. ОПИСАНИЕ …………………………………….. 152
4.1 Описание прибора …………………………….152
4.2 Описание панели управления …………….152
5. ПОДГОТОВИТЕЛЬНЫЕ ДЕЙСТВИЯ ………. 152
5.1 Проверка прибора …………………………….. 152
5.2 Установка прибора …………………………….152
5.3 Подключение прибора ………………………. 153
5.4 Первое включение прибора ……………….153
6. ВКЛЮЧЕНИЕ ПРИБОРА ……………………. 153
7. ВЫКЛЮЧЕНИЕ ПРИБОРА …………………. 154
8. НАСТРОЙКА ЖЕСТКОСТИ ВОДЫ …………. 154
9. НАСТРОЙКА ТЕМПЕРАТУРЫ ………………. 154
10. АВТОВЫКЛЮЧЕНИЕ ………………………… 154
11. ЭКОНОМИЯ ЭНЕРГИИ ………………………. 155
12. ЗВУКОВОЙ СИГНАЛ …………………………. 155
13. ЗАВОДСКИЕ ПАРАМЕТРЫ (СБРОС) ……… 155
14. ОПОЛАСКИВАНИЕ …………………………… 155
15. ПРИГОТОВЛЕНИЕ КОФЕ ……………………. 155
15.1 Регулировка кофемолки …………………….155
15.2 Советы для получения более горячего кофе
……………………………………………………….156
15.3 Приготовление кофе из кофе в зернах …156
15.4 Временное изменение вкуса кофе ………157
15.5 Приготовление кофе из предварительно
молотого кофе …………………………………..157
15.6 Индивидуальный подбор вкуса и
количества ………………………………………. 157
16. ПРИГОТОВЛЕНИЕ КАПУЧИНО ……………. 158
16.1 Очистка капучинатора после применения ..
……………………………………………………….158
17. ПОДАЧА ГОРЯЧЕЙ ВОДЫ ………………….. 158
18. ОЧИСТКА………………………………………. 159
18.1 Очистка кофемашины ………………………..159
18.2 Очистка внутреннего контура машины .159
18.3 Чистка контейнера для кофейной гущи .159
18.4 Очистка поддона для сбора капель и лотка
сбора конденсата ………………………………159
18.5 Чистка внутренней части машины ……..160
18.6 Очистка бачка для воды …………………….160
18.7 Очистка носиков узла подачи кофе ……..160
18.8 Очистка воронки для засыпки
предварительно молотого кофе …………. 160
18.9 Очистка заварочного блока ……………….. 160
19. УДАЛЕНИЕ НАКИПИ ………………………… 160
20. НАСТРОЙКА ЖЕСТКОСТИ ВОДЫ …………. 162
20.1 Измерение жесткости воды ……………….162
20.2 Настройка жесткости воды …………………162
21. ФИЛЬТР ДЛЯ СМЯГЧЕНИЯ ВОДЫ ……….. 162
21.1 Установка фильтра …………………………….162
21.2 Замена фильтра ………………………………… 162
22. ТЕХНИЧЕСКИЕ ДАННЫЕ …………………… 163
23. ТЕХНИЧЕСКИЕ ХАРАКТЕРИСТИКИ ………. 163
24. ЗНАЧЕНИЕ СВЕТОВЫХ ИНДИКАТОРОВ … 163
25. УСТРАНЕНИЕ НЕИСПРАВНОСТЕЙ ………… 166
-
Contents
-
Table of Contents
-
Troubleshooting
-
Bookmarks
Quick Links
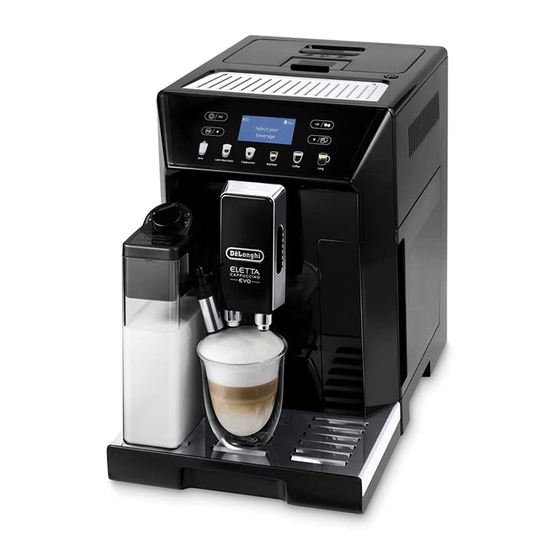
ECAM46.86X
BEAN TO CUP ESPRESSO AND
CAPPUCCINO MACHINE
Instructions for Use
Related Manuals for DeLonghi ELETTA CAPPUCCINO EVO ECAM46.86X
Summary of Contents for DeLonghi ELETTA CAPPUCCINO EVO ECAM46.86X
-
Page 1
ECAM46.86X BEAN TO CUP ESPRESSO AND CAPPUCCINO MACHINE Instructions for Use… -
Page 3
page 6 Decalcificante per macchine da caffè Descaler for coffee machines Détartrant pour machines à café Entkalker für Kaffeemaschinen De’Longhi Appliances s.r.l. Via L. Seitz, 47 31100 Treviso — ITALY Tel. +39 0422 4131 5413218631/04.15… -
Page 4: Table Of Contents
CONTENTS 12. DESCALE ……….15 1. INTRODUCTION ……….5 13. SETTING WATER HARDNESS …… 16 1.1 Letters in brackets ………5 13.1 Measuringwater hardness ……16 1.2 Troubleshooting and repairs ……5 13.2 Setting water hardness …….16 2. DESCRIPTION……….5 14. WATER SOFTENER FILTER ……16 2.1 Description of the appliance ……5 14.1 Installing the filter ……..17 2.2 Description of touch screen ……5…
-
Page 5: Introduction
Before using the appliance, always read the safety warnings. : Appliance settings menu / press to exit the menu : To customise beverages / scroll arrow 1. INTRODUCTION Directly selected beverages: Thank you for choosing this bean to cup espresso and cappuc- B4.
-
Page 6: Turning The Appliance On
• The first time you use the machine, the water circuit is empty and the appliance could be very noisy.The noise becomes less as the circuit fills. • Coffee has been used to factory test the appliance and it is therefore completely normal for there to be traces of coffee in the mill.
-
Page 7: Menu Settings
1. Press (B2) to enter the menu; 1. To turn the appliance off, press the button (A7) (fig. 2. Press the scroll arrows (B3) or (B10) until the required item is displayed; 2. If provided for, the appliance performs a rinse cycle then 3.
-
Page 8: Statistics
6.5 Statistics The display goes back to the previous screen. This displays statistics relating to the machine. To view the sta- Energy saving: tistics, proceed as follows: To disable or enable «Energy Saving», proceed as follows: 1. Press (B2) to enter the menu; •…
-
Page 9: Making Coffee Using Pre-Ground Coffee
5. Preparation begins. The selected beverage appears on the display (D5) together with a progress bar which gradually fills as preparation proceeds. Please note: • You can prepare 2 cups of ESPRESSO, RISTRETTO or ESPRES- SO LUNGO coffee at the same time by pressing «X2» (B10) during preparation of single beverages (the message is displayed for a few seconds at the start of preparation).
-
Page 10: Adjusting The Coffee Mill
4. Then select your required coffee: Please note: The grinding adjustment dial must only be turned when the Recipe Quantity coffee mill is in operation during the initial phase of coffee ≃ 40 ml preparation. Espresso (B7) If the coffee is delivered too slowly or not ≃…
-
Page 11: Adjust The Quantity Of Froth
3. Make sure the milk intake tube (D4) is correctly inserted Min. froth LATTE MACCHIATO/ as far as it will go in the bottom of the milk container lid FLAT WHITE (fig. 14); Max. froth CAPPUCCINO/CAPPUCCI- NO+ / HOT MILK (frothed) 8.3 Making cappuccino and milk-based coffees automatically 1.
-
Page 12: Programming And Selecting
The appliance then makes the coffee. Press to in- terrupt delivery when the required quantity of coffee is reached. 5. Save the settings by pressing (or press (B2)) . 6. «Parameters saved» or «Parameters not saved». The appli- ance is ready for use again. Please note: •…
-
Page 13: Cleaning The Internal Circuit
Important! edge and damage the appliance, the surface it rests on or the • Do not use solvents, abrasive detergents or alcohol to clean surrounding area. the coffee machine. With De’Longhi superautomatic coffee machines, no chemical products are required for cleaning purposes.
-
Page 14: Cleaning The Coffee Spouts
3. Replace the filter (if installed), fill the tank (A14) with fresh Do not use detergents to clean the infuser as this could cause water and replace; damage. 4. (Models with water softener filter only) Deliver 100ml of 5. Soak the infuser in water for about 5 minutes, then rinse water to reactivate the filter.
-
Page 15: Cleaning The Hot Water Nozzle
12. DESCALE Important! • Before use, read the instructions and the labelling on the descaler pack. • It is important to use De’Longhi descaler only. Using un- suitable descaler and/or performing descaling incorrectly may result in faults not covered by the manufacturer’s guarantee.
-
Page 16: Setting Water Hardness
9. Place an empty container with a recommended capacity of • If the water tank has not been filled to the MAX level, at the end of descaling, the appliance requests a third rinse to 2 litres under the hot water spout (C6) and coffee spouts guarantee that the descaler solution has been complete- (A9) (fig.
-
Page 17: Installing The Filter
purchase one from De’Longhi customer services. To use the filter 6. Insert the filter in the filter housing (A15) and press fully correctly, follow the instructions below. home (fig. 37); 7. Close the tank with the lid (A13) (fig. 38), then replace the 14.1 Installing the filter tank in the machine;…
-
Page 18: Technical Data
15. TECHNICAL DATA 1. Extract the tank (A14) and exhausted filter; 2. Press (B2) to enter the «Settings» menu; Voltage: 220-240 V~ 50/60 Hz max. 10A 3. Press the scroll arrows (B3) or (B10)until Absorbed power: 1450W «Maintenance» is displayed, then press (B11);…
-
Page 19
DISPLAYED MESSAGE POSSIBLE CAUSE REMEDY Fill beans container The coffee beans have run out. Fill the beans container (A4) (fig. 8). ESC to cancel The pre-ground coffee funnel (A4) is clogged. Empty the funnel with the help of the brush (C5) as described in section «11.8 Cleaning the pre-ground coffee funnel». -
Page 20: Troubleshooting
DISPLAYED MESSAGE POSSIBLE CAUSE REMEDY Replace filter The water softener filter (C4) is exhausted. Replace the filter or remove it as described in ESC to cancel section «14. Water softener filter». OK to replace General alarm The inside of the appliance is very dirty. Clean the inside of the appliance thoroughly, as described in section «11.
-
Page 21
PROBLEM POSSIBLE CAUSE REMEDY The coffee is delivered too The coffee is ground too finely. Turn the grinding adjustment dial (A5) one click slowly or a drop at a time. clockwise towards «7» while the coffee mill is in operation (fig. 11). Continue one click at a time until coffee delivery is satisfactory. -
Page 24
De’Longhi Appliances via Seitz, 47 31100 Treviso, Italy www.delonghi.com…
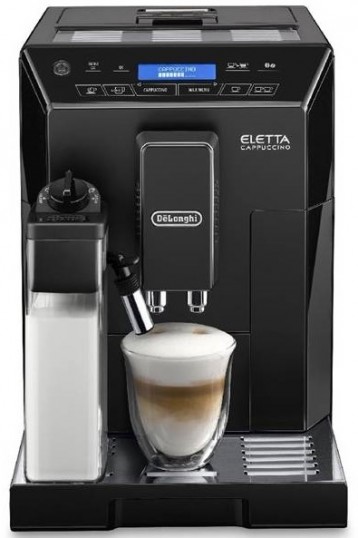
Кофемашина DeLonghi ECAM 44.664 B Eletta Cappuccino инструкция по эксплуатации

Подробная инструкция по эксплуатации автоматической кофемашины DeLonghi ECAM 44.664 B Eletta Cappuccino.
Вам также может быть интересно:

149
СОДЕРЖАНИЕ
1. ОСНОВНЫЕ ПРАВИЛА БЕЗОПАСНОСТИ … 150
2. ПРЕДУПРЕЖДЕНИЯ ПО БЕЗОПАСНОСТИ 151
2.1 Символы, используемые в инструкции .151
2.2 Применение по назначению ………………151
2.3 Инструкции по применению ……………….151
3. ВВЕДЕНИЕ …………………………………….. 151
3.1 Буквы в скобках…………………………………151
3.2 Неисправности и их устранение ………….152
4. ОПИСАНИЕ …………………………………….. 152
4.1 Описание прибора …………………………….152
4.2 Описание панели управления …………….152
5. ПОДГОТОВИТЕЛЬНЫЕ ДЕЙСТВИЯ ………. 152
5.1 Проверка прибора …………………………….. 152
5.2 Установка прибора …………………………….152
5.3 Подключение прибора ………………………. 153
5.4 Первое включение прибора ……………….153
6. ВКЛЮЧЕНИЕ ПРИБОРА ……………………. 153
7. ВЫКЛЮЧЕНИЕ ПРИБОРА …………………. 154
8. НАСТРОЙКА ЖЕСТКОСТИ ВОДЫ …………. 154
9. НАСТРОЙКА ТЕМПЕРАТУРЫ ………………. 154
10. АВТОВЫКЛЮЧЕНИЕ ………………………… 154
11. ЭКОНОМИЯ ЭНЕРГИИ ………………………. 155
12. ЗВУКОВОЙ СИГНАЛ …………………………. 155
13. ЗАВОДСКИЕ ПАРАМЕТРЫ (СБРОС) ……… 155
14. ОПОЛАСКИВАНИЕ …………………………… 155
15. ПРИГОТОВЛЕНИЕ КОФЕ ……………………. 155
15.1 Регулировка кофемолки …………………….155
15.2 Советы для получения более горячего кофе
……………………………………………………….156
15.3 Приготовление кофе из кофе в зернах …156
15.4 Временное изменение вкуса кофе ………157
15.5 Приготовление кофе из предварительно
молотого кофе …………………………………..157
15.6 Индивидуальный подбор вкуса и
количества ………………………………………. 157
16. ПРИГОТОВЛЕНИЕ КАПУЧИНО ……………. 158
16.1 Очистка капучинатора после применения ..
……………………………………………………….158
17. ПОДАЧА ГОРЯЧЕЙ ВОДЫ ………………….. 158
18. ОЧИСТКА………………………………………. 159
18.1 Очистка кофемашины ………………………..159
18.2 Очистка внутреннего контура машины .159
18.3 Чистка контейнера для кофейной гущи .159
18.4 Очистка поддона для сбора капель и лотка
сбора конденсата ………………………………159
18.5 Чистка внутренней части машины ……..160
18.6 Очистка бачка для воды …………………….160
18.7 Очистка носиков узла подачи кофе ……..160
18.8 Очистка воронки для засыпки
предварительно молотого кофе …………. 160
18.9 Очистка заварочного блока ……………….. 160
19. УДАЛЕНИЕ НАКИПИ ………………………… 160
20. НАСТРОЙКА ЖЕСТКОСТИ ВОДЫ …………. 162
20.1 Измерение жесткости воды ……………….162
20.2 Настройка жесткости воды …………………162
21. ФИЛЬТР ДЛЯ СМЯГЧЕНИЯ ВОДЫ ……….. 162
21.1 Установка фильтра …………………………….162
21.2 Замена фильтра ………………………………… 162
22. ТЕХНИЧЕСКИЕ ДАННЫЕ …………………… 163
23. ТЕХНИЧЕСКИЕ ХАРАКТЕРИСТИКИ ………. 163
24. ЗНАЧЕНИЕ СВЕТОВЫХ ИНДИКАТОРОВ … 163
25. УСТРАНЕНИЕ НЕИСПРАВНОСТЕЙ ………… 166
6
СОДЕРЖАНИЕ
ОСНОВНЫЕ ПРАВИЛА БЕЗОПАСНОСТИ ………….7
ПРЕДУПРЕЖДЕНИЯ ПО БЕЗОПАСНОСТИ ……….. 8
, ……………………8
………………………………………………8
………………………………….. 8
ВВЕДЕНИЕ ………………………………………………. 8
…………………………………………………….8
……………………………………. 8
ОПИСАНИЕ ……………………………………………….9
………………………………………………..9
………………………………… 9
………………………….. 9
…………………………………..9
ПОДГОТОВИТЕЛЬНЫЕ ДЕЙСТВИЯ ………………..9
……………………………………………….. 9
……………………………………………….. 9
………………………………………..10
………………………………… 10
ВКЛЮЧЕНИЕ АППАРАТА …………………………… 10
ВЫКЛЮЧЕНИЕ АППАРАТА ………………………… 10
ЗАДАНИЕ ПАРАМЕТРОВ В МЕНЮ ……………….. 11
……………………………………………………. 11
………………………………………………….11
………………………………………………. 11
( ) ……………………….. 11
…………………………………………….. 11
…………………………………. 11
( ) …. 12
………………………………………………..12
……………………………………….. 12
…………………………………… 12
………………………………………………………. 12
…………………………………………………..12
() ……………………………….. 12
…………………………………………….. 13
ПРИГОТОВЛЕНИЕ КОФЕ …………………………….13
………………………………………………… 13
………………………….. 13
…………..13
……………………………………….13
………….. 13
……………….14
…………………. 14
LONG ………….. 14
LONG ……14
LONG .. 14
, ,
. …………………………………………15
ПРИГОТОВЛЕНИЕ НАПИТКОВ С МОЛОКОМ ……15
…. 15
…………………… 15
………….. 15
“MILK MENU”(
) …………………………………………………………………. 15
………………………………………………………… 16
………………………………. 16
MILK MENU/ …….. 16
ПОДАЧА ГОРЯЧЕЙ ВОДЫ И ПАРА ………………. 17
…………………………………………..17
……………………………………………………… 17
ЧИСТКА ………………………………………………… 17
………………… 17
………………………………………………… 17
…………………………………………………18
…………………………………………………… 18
……………………….18
……………………………………….18
……………………… 18
……… 18
……………………………………… 18
…………………………… 19
/ …………………………19
УДАЛЕНИЕ НАКИПИ ………………………………… 19
……………………………………………………………19
………………………………………………………………. 19
ПРОГРАММИРОВАНИЕ ЖЕСТКОСТИ ВОДЫ ….. 20
…………………………………. 20
…………………………………… 20
ФИЛЬТР ДЛЯ СМЯГЧЕНИЯ ВОДЫ ………………. 20
………………………………………………. 21
………………………………………………….. 21
……………………………………………….. 21
ХАРАКТЕРИСТИКИ ………………………………….. 22
СООБЩЕНИЯ НА ДИСПЛЕЕ………………………… 23
УСТРАНЕНИЕ ПРОБЛЕМ ……………………………. 24