Руководство по эксплуатации
- Текст
- Оригинал
Advertising

Руководство по эксплуатации
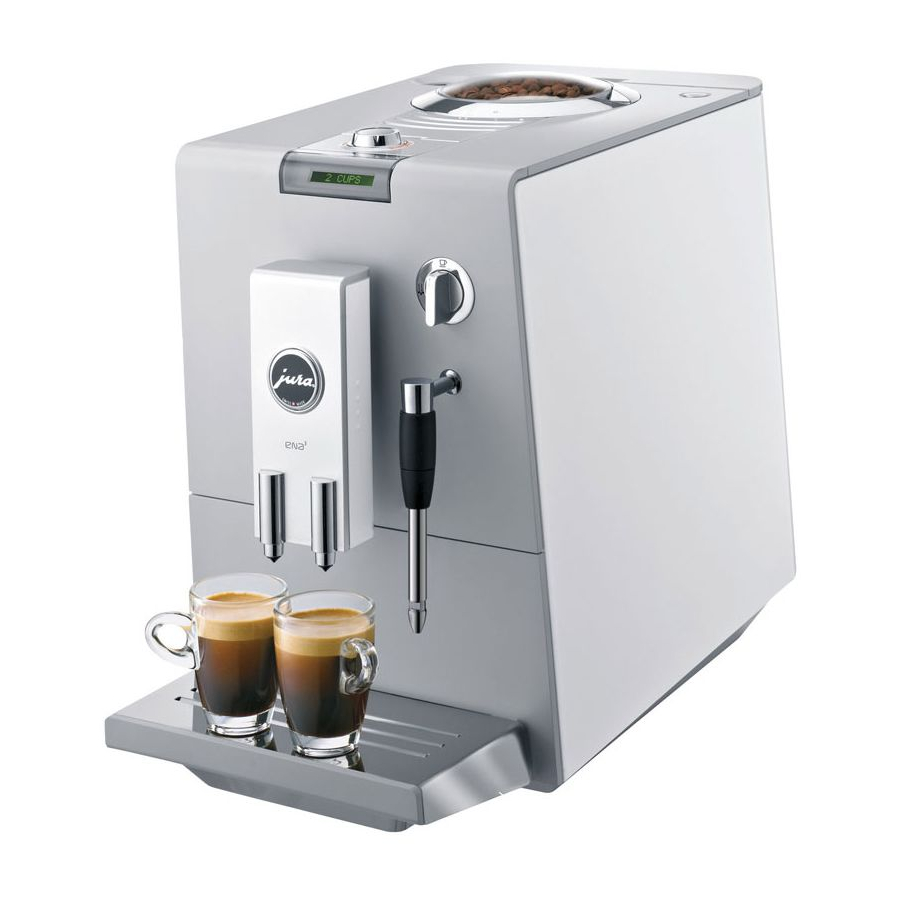
»Руководство по эксплуатации кофе-машины ENA 3«
отмечено сертификатом качества независимого
германского Союза работников технического надзора
TÜV SÜD за понятность и полноту изложения и охват
аспектов техники безопасности.
ru
Advertising
Эта инструкция подходит к следующим моделям:
ENA 3 Ristretto Black
- Manuals
- Brands
- Jura Manuals
- Coffee Maker
- ENA 3
- Instructions for use manual
-
Contents
-
Table of Contents
-
Troubleshooting
-
Bookmarks
Quick Links
Instructions for Use
The ‘ENA 3 Instructions for Use’ has been awarded the
seal of approval by the independent German Technical
Inspection Agency, TÜV SÜD, due to its easy-to-understand
style, its thoroughness and coverage of safety aspects.
en
en
en
en
it
Related Manuals for Jura ENA 3
Summary of Contents for Jura ENA 3
-
Page 1: Instructions For Use
Instructions for Use The ‘ENA 3 Instructions for Use’ has been awarded the seal of approval by the independent German Technical Inspection Agency, TÜV SÜD, due to its easy-to-understand style, its thoroughness and coverage of safety aspects.
-
Page 2: Important Safeguards
ENA 3 IMPORTANT SAFEGUARDS These safeguards apply for machines with UL safety test (see rating plate and chapter 8, ‘Technical data’). Follow the basic safety When using electrical appliances, basic safety precautions should precautions always be followed, to reduce the risk of fire, electric shock, and/or injury to persons, including the following: Read all instructions.
-
Page 3: Ena
ENA 3 Special cord set instructions a. A short power supply cord is provided to reduce the risk resulting from becoming entangled in or tripping over a long cord. Your ENA has a 3-pin grounded plug. b. Longer extension cords are available and may be used if care is exercised in their use.
-
Page 4
ENA 3 NEVER DO Never fill instant coffee, chocolate mix etc. into the grinder or (or you will void your ground coffee funnel (grinder by-pass). It will damage the warranty protection): functioning of the brewing chamber. Never fill sugar coated coffee beans into the bean hopper. In case of doubt, call your dealer. -
Page 5
ENA 3… -
Page 6: Table Of Contents
ENA 3 Your ENA 3 IMPORTANT SAFEGUARDS Control elements Proper use For your safety Welcome to the world of JURA Knowledge Builder …………………………11 Connector System …………………………11 © 3-colour plain text display ………………………12 Preparing and using for the first time Setting up…………………………..12 Filling the water tank ……………………….12…
-
Page 7
CAUTION The CAUTION symbol is used to draw References to the JURA website where attention to circumstances which could you can find interesting additional infor- result in damage to the machine. -
Page 8: Control Elements
ENA 3 Control elements Figure: ENA 3 Blossom White Water tank Bean container cover Powder chaft for pre-ground coffee Switch for hot water and steam Coffee grounds container preparation Drip tray Connector System for removable © Cup platform nozzles 2-stage frothing nozzle…
-
Page 9
ENA 3 Figure: Open cover On/off button Display Grinding wheel Professional Cappuccino Frother Cover Easy Cappuccino Frother P button 2-stage frothing nozzle Rinse button Hot water nozzle Rotary Switch The following nozzles are available from stockists and can be fitted to the Connector System ©… -
Page 10: Proper Use
Only connect the machine to a power supply by JURA or by a JURA approved service centre. in accordance with the information on the Make sure that the ENA and the power cable rating plate.
-
Page 11: Welcome To The World Of Jura
Cappuccino Welcome to the world of JURA JURA on the Internet Visit us on the Internet. At www.jura.com you will find the latest interesting information about your ENA and all facets of the world of coffee. 2-stage frothing nozzle Cappuccino…
-
Page 12: 3-Colour Plain Text Display
ENA 3 Hot water nozzle Remove the water tank and rinse with cold water. Fill the water tank with cold, fresh water and replace the tank. Filling the bean container CAUTION Coffee beans which have been treated with 3-colour plain text display additives (e.g.
-
Page 13: Using And Activating Filter
ENA 3 Using and activating filter Turn the Rotary Switch until LANGUAGE is displayed. Your ENA no longer requires descaling if you use ENGLISH CLARIS filter cartridges. E Perform the ‘Insert filter’ operation without interruptions. This will ensure optimum function of your ENA.
-
Page 14: Determining And Adjusting The Water Hardness
ENA 3 Press the Rotary Switch. Example: Changing the water hardness from OPEN TAP 16°dH 25°dH Turn the switch to position Precondition: is shown on the display. READY , water is discharged Open the cover behind the Rotary Switch. FILTER RINSING Press the P button until from the nozzle.
-
Page 15: Switching On The Machine
ENA 3 Switching on the machine If the fineness of grind setting is too fine, the coffee only drips from the coffee spout. When the ENA is switched on, a prompt to perform a rinse operation automatically appears. Press the on/off button to switch the ENA on.
-
Page 16: Coffees At The Touch Of A Button
ENA 3 2 coffees at the touch of a button Place the filler funnel for pre-ground coffee Precondition: is shown on the display. in the powder chaft. READY Place two cups under the coffee spout. Turn the Rotary Switch until 2 CUPS is displayed.
-
Page 17: Entering A Default Setting For The Amount Of Water For A Cup Size
ENA 3 E The pre-set amount of water can be Press the Rotary Switch again when enough changed during the brewing operation by coffee has been filled into the cup. turning the Rotary Switch. , the default setting for the amount of water for one coffee has been entered.
-
Page 18: Cappuccino With The Easy Cappuccino Frother
ENA 3 Place the cup under the coffee spout. E You can prepare more milk foam within Press the Rotary Switch to start coffee about 40 seconds. preparation. , the pre-set amount of water flows Place the cup under the coffee spout.
-
Page 19: Heating Milk With The Professional Cappuccino Frother
ENA 3 Turn the switch to position when the Press the Rotary Switch. milk foam has reached the required HEATING consistency. appears as soon as the ENA is READY sufficiently heated. E You can prepare more steam within about Turn the switch to position 40 seconds.
-
Page 20: Hot Water
ENA 3 Turn the switch to position Temperature: NORMAL HIGH , the milk is heated by the hot STEAM steam. The following applies when preparing 2 coffees: Turn the switch to position as soon as The amount of water set for 1 coffee is dispensed per cup when 2 cups are prepared.
-
Page 21: Energy-Saving Mode
ENA 3 Energy-saving mode E The automatic switch-off time can be set to A default energy-saving mode (Energy Save between 0.5 and 9 hours or deactivated Mode, E.S.M. ) setting can be selected on the © — HRS ENA. Example: Changing the automatic switch-off time…
-
Page 22: Language
ENA 3 Press the Rotary Switch to confirm the Clean machine setting. Descale machine , the units of water are then adjusted. Clean or descale the machine or change the UNIT Turn the Rotary Switch until filter whenever the appropriate indicator EXIT displayed.
-
Page 23: Changing The Filter Following A Prompt
Turn the switch to position , water is discharged If the wrong cleaning agent is used, the machine FILTER RINSING from the nozzle. could be damaged and/or detergent residues could be left in the water. Only use original JURA care products.
-
Page 24: Cleaning The Machine — Manually
ADD TABLET Open the powder chaft for pre-ground The ENA builds up limescale deposits over time coffee and drop in a JURA cleaning tablet. and automatically prompts you to descale the machine when necessary. The degree of build-up depends on the hardness of the water.
-
Page 25: Descaling The Machine — Manually
DE-SCALING E The descaling programme lasts approx. is continued. 40 minutes. EMPTY TRAY E JURA descaling tablets are available from Empty the coffee grounds container and stockists. drip tray and replace. E If a CLARIS filter cartridge is used Empty the receptacle and place it under the…
-
Page 26: Rinsing The Professional Cappuccino Frother
E The ENA will not prompt you to clean the Professional Cappuccino Frother. The ENA will not prompt you to rinse the E The JURA Cappuccino Cleaner is available Professional Cappuccino Frother. from stockists. Remove the milk pipe from the milk carton Remove the milk pipe from the milk carton or milk container.
-
Page 27: Dismantling And Rinsing The Professional Cappuccino Frother
E The ENA will not prompt you to clean the To ensure that the Easy Cappuccino Frother works Easy Cappuccino Frother. perfectly, you should rinse it with water whenever E The JURA Cappuccino Cleaner is available you have prepared some milk. from stockists.
-
Page 28: Dismantling And Rinsing The Easy Cappuccino Frother
ENA 3 Dismantling and rinsing the Remove the milk pipe from the milk carton Easy Cappuccino Frother or milk container. Pour 250 ml of fresh water into a receptacle Carefully remove the Easy Cappuccino and add one capful (max. 15 ml) of Frother from the Connector System ©…
-
Page 29: Cleaning The Bean Container
ENA 3 Rinse all three nozzle parts thoroughly under running water. Reassemble the nozzle and attach it to the Connector System © Cleaning the bean container Coffee beans may be covered with a slight oil film which remains on the walls of the bean container.
-
Page 30: Display Messages
ENA 3 5 Display messages Message Cause/Result Action The water tank is empty. Fill the water tank (refer to FILL WATER TANK You cannot prepare any coffee Chapter 1 ‘Preparing and using specialities, hot water or steam. for the first time – Filling the water tank’).
-
Page 31: Troubleshooting
Contact customer support in your loud noise. in the grinder. country. Contact information is available on the company website at www.jura. com. The nozzle does not produce The nozzle is either in the Adjust the position of the nozzle (refer enough milk foam.
-
Page 32: Transport And Environmentally Neutral Disposal
Please dispose of old machines in an environmen- tally neutral way. Contact information is available on the company website at www.jura.com. Old machines contain valuable materials which should be salvaged for recycling. Please therefore dispose of old machines via your regional…
-
Page 33: Index
Coffee grounds container 8 Hot water nozzle 9 Coffee spout Height-adjustable 8 Internet Connector System 8, 11 © JURA on the Internet 11 Contacts 32 Knowledge Builder 11 Cover 9 Bean container 8 Cup platform 8 Knowledge Builder 11 Descaling…
-
Page 34
ENA 3 P button 9 Technical data 32 Powder chaft for pre-ground coffee 8 Transport 32 Preparation Troubleshooting 31 Coffee 15 Pre-ground coffee 16 Use, proper 10 Preparing Using for the first time 12 Hot water 20 Preparing and using for the first time 12… -
Page 35
2006/95/EC – Low Voltage Directive 2004/108/EC – Electromagnetic Compatibility Technical changes We reserve the right to make technical changes. The illustrations used in the ENA 3 Instructions for Use show the ENA 3 Blossom White model. Your ENA 3 could incorporate minor changes. Feedback Your opinion is important to us! Use the contact link at www.jura.com.
![]() размер PDF файла инструкции 1,6mb
размер PDF файла инструкции 1,6mb
Руководство по эксплуатации
»Руководство по эксплуатации кофе-машины ENA 5«
отмечено сертификатом качества независимого
германского Союза работников технического надзора
TЊV SЊD за понятность и полноту изложения и охват
аспектов техники безопасности.
de
sv
ru
fr
it 110
ENA 5
Ваша ENA 5
Элементы управления 112
Использование по назначению 114
Ради Вашей безопасности 114
Добро пожаловать в мир кофе-машин JURA 115
JURA в Интернете ……………………………………………………………………………………………………………………………. 116
Электронный справочник Knowledge Builder ………………………………………………………………………………. 116
Система сменных насадок Connector System
Y …………………………………………………………………………… 116
3-цветный дисплей с текстовой индикацией ……………………………………………………………………………….117
1 Подготовка и пуск в эксплуатацию 117
Комплект поставки …………………………………………………………………………………………………………………………..117
Установка ………………………………………………………………………………………………………………………………………….117
Наполнение бункера для воды ………………………………………………………………………………………………………117
Заполнение контейнера для кофейных зерен ……………………………………………………………………………..117
Первый запуск машины …………………………………………………………………………………………………………………. 118
Установка и активация фильтра …………………………………………………………………………………………………… 118
Определение и регулировка степени жесткости воды ………………………………………………………………. 119
Регулировка кофемолки ………………………………………………………………………………………………………………..120
Включение кофе-машины ……………………………………………………………………………………………………………….121
Выключение кофе-машины …………………………………………………………………………………………………………….121
2 Приготовление 122
Советы бариста ………………………………………………………………………………………………………………………………. 122
1 чашка кофе простым нажатием кнопки ……………………………………………………………………………………… 123
2 чашки кофе простым нажатием кнопки …………………………………………………………………………………….. 123
Предварительно смолотый кофе …………………………………………………………………………………………………. 123
Разовые установки до начала и во время приготовления ………………………………………………………….124
Долговременная установка количества воды в соответствии с размером чашек ……………………125
Капучино при помощи профессиональ ного автоматического устройства для
приготовления капучино Profi Auto Cappuccino …………………………………………………………………………..125
Капучино при помощи автоматического устройства для приготовления капучино
Easy Auto Cappuccino ………………………………………………………………………………………………………………………126
Капучино при помощи 2-уровневой насадки для вспенивания и подогрева …………………………. 127
Подогрев молока при помощи профессионального автоматического устройства
для приготовления капучино Profi Auto Cappuccino……………………………………………………………………128
Подогрев молока при помощи 2-уровневой насадки для вспенивания и подогрева…………….128
Горячая вода ……………………………………………………………………………………………………………………………………129
3 Долговременные установки в режиме программирования 129
Напитки ……………………………………………………………………………………………………………………………………………129
Энергосберегающий режим …………………………………………………………………………………………………………..130
Автоматическое выключение ………………………………………………………………………………………………………….131
Единицы измерения количества воды ………………………………………………………………………………………….131
Язык …………………………………………………………………………………………………………………………………………………. 132
4 Обслуживание 132
Советы по обслуживанию ……………………………………………………………………………………………………………… 132
Промывка кофе-машины вручную ……………………………………………………………………………………………….. 133
Замена фильтра по запросу кофе-машины …………………………………………………………………………………. 133
Замена фильтра вручную ………………………………………………………………………………………………………………134 111
ENA 5
Описание символов Предупреждения:
JВНИМАНИЕ
Обязательно обращайте внимание на
информацию, которая сопровожда-
ется предупредительными знаками
ВНИМАНИЕ или ОСТОРОЖНО.
Сигнальное слово ОСТОРОЖНО
предупреждает о риске получения
тяжелых травм, а сигнальное слово
ВНИМАНИЕ ЂЂЂ о риске получения
легких травм.
ВНИМАНИЕ
ВНИМАНИЕ указывает на ситуацию,
при которой возможно
повреждение машины.Используемые символы:
EУказания и советы, облегчающие
процесс пользования кофе-машиной
ENA.
TТребуемое действие . В этом случае
Вам необходимо выполнить то или
иное действие.
@Ссылки на интересные дополнитель-
ные сведения, которые можно
получить от компании JURA в
Интернете: www.jura.com.
de
sv
ru
fr
it
Очистка по запросу кофе-машины ………………………………………………………………………………………………..134
Очистка кофе-машины вручную…………………………………………………………………………………………………….135
Удаление накипи по запросу кофе-машины ………………………………………………………………………………..135
Удаление накипи в кофе-машине вручную …………………………………………………………………………………. 137
Промывка профессионального автоматического устройства для приготовления
капучино Profi Auto Cappuccino …………………………………………………………………………………………………….. 137
Очистка профессионального автоматического устройства для приготовления
капучино Profi Auto Cappuccino ……………………………………………………………………………………………………..138
Разборка и промывка профессионального автоматического устройства для
приготовления капучино Profi Auto Cappuccino …………………………………………………………………………..139
Промывка автоматического устройства для приготовления капучино
Easy Auto Cappuccino …………………………………………………………………………………………………………………….. 140
Очистка автоматического устройства для приготовления капучино
Easy Auto Cappuccino …………………………………………………………………………………………………………………….. 140
Разборка и промывка автоматического устройства для приготовления капучино
Easy Auto Cappuccino ……………………………………………………………………………………………………………………… 141
Разборка и промывка 2-уровневой насадки для вспенивания и подогрева ……………………………142
Удаление посторонних предметов ……………………………………………………………………………………………….142
Очистка контейнера для кофейных зерен ……………………………………………………………………………………143
Удаление известковых отложений солей со стенок бункера для воды ……………………………………143
5 Сменный фильтр CLARIS plus ЂЂЂ вода для идеально приготовленного кофе 143
6 Сообщения на дисплее 145
7 Устранение неисправностей 147
8 Транспортировка и утилизация в соответствии с экологическими требованиями 148
Транспортировка/осушение системы…………………………………………………………………………………………… 148
Утилизация …………………………………………………………………………………………………………………………………….. 148
9 Технические данные 148
10 Контакты 149
Алфавитный указатель 149 1 Бункер для воды
2
Отделение для предварительно
смолотого кофе
3
Контейнер для кофейных отходов
4
Поддон для слива воды
5
Подставка для чашек
6
Крышка контейнера для кофейных
зерен 7
l переключатель с режимами
приготовления горячей воды и пара
8
Система Connector SystemY для
сменных насадок
9
автоматическое устройство для
приготовления капучино Easy Auto
Cappuccino
10
Поворо
Спросить у мастера «Что делать?»
— Вам ответят при первой возможности.
Использование инструкции для кофемашины JURA ENA 3 бесплатно. Инструкция по эксплуатации JURA ENA 3 доступна для скачивания из открытых источников.
-
Page 1: Jura ENA 3
de fr it en it fr The ‘ENA 3 Instructions for Use’ has been awarded the seal of approv al by the independent German T echnical Inspection Agency, TÜV SÜD , due to its easy-to-under stand style, its thoroughness and cover age of safety aspect s. Instruc tions for Use[…]
-
Page 2: Jura ENA 3
34 ENA 3 These safeguards apply for machine s with UL safety test (see r ating plate and chapter 8, ‘T echnical data’). When using electrical appliances, basic safety precautions should alwa ys be follow ed, to reduce the risk of fire , electric shock, and/or injury to per sons, including the follo wing: Z Read all instructions. Z Do not touch […]
-
Page 3: Jura ENA 3
35 ENA 3 de fr it en it fr a. A short power supply cord is provided to reduc e the risk resulting from becoming entangled in or tripping over a long c ord. Y our ENA has a 3-pin grounded plug. b. Longer extension cords are available and ma y be used if care is exercised in their use . c. If an extension cord is used, 1. the marked electrical rating[…]
-
Page 4: Jura ENA 3
36 ENA 3 Z Never fill instant coff ee, c hocolate mix etc. into the grinder or ground coffee funnel (grinder b y-pass). It will damage the functioning of the brewing chamber . Z Never fill sugar c oated coffee beans int o the bean hopper . In case of doubt, call your dealer . Z Never fill an ything other than coffee beans into the bean container (n[…]
-
Page 5: Jura ENA 3
37 ENA 3 de fr it en it fr[…]
-
Page 6: Jura ENA 3
38 ENA 3 Y our ENA 3 IMPORT ANT SAFEGU ARDS 34 Control elements 40 Proper use 42 For y our safety 42 W elcome to the world of JURA 43 Knowledge Builder ………………………………………………………………………………………………. …………………………… 43 Connector System © ………………………….[…]
-
Page 7: Jura ENA 3
39 ENA 3 de fr it en it fr Rinsing the Professional Cappuccino F rother ……………………………………………………………………………………. 58 Cleaning the Professional Cappuccino F rother …………………………………………………………………………………. 58 Dismantling and rinsing the Profe[…]
-
Page 8: Jura ENA 3
40 ENA 3 1 W ater tank 2 Powder c haft for pre-ground coffee 3 Coffee grounds container 4 Drip tra y 5 Cup platform 6 Bean container cover 7 l S witch f or hot wat er and steam preparation 8 Connector System © for remov able nozzles 9 2-stage frothing nozzle 10 Height -adjustable coffee spout Control elements ENA Figure: ENA 3 Blossom White 1 2 3 […]
-
Page 9: Jura ENA 3
41 ENA 3 de fr it en it fr 1 4 5 2 3 6 7 Figure: Open cov er 1 Q On/off button 2 Grinding wheel 3 Cover 4 P P button 5 c Rinse button 6 g Rotary Switch 7 Display 8 Professional Cappuccino F rother 9 Easy Cappuccino Fr other 10 2-stage frothing nozzle 11 Hot water no zzle The following no zzles are available from st ockists and can be fitted to the […]
-
Page 10: Jura ENA 3
42 ENA 3 Proper use The machine has been designed and built for domestic use. It should only be used to prepare coffee and to heat milk and w ater . Use for any other purpose will be deemed improper . JURA Elektroapparat e AG cannot acc ept any responsibility for the consequences of improper use. Before using the machine alw ays carefully read and […]
-
Page 11: Jura ENA 3
43 ENA 3 de fr it en it fr People , including children, who Z do not have the ph ysical, sensory or ment al capabilities to use the machine safely or Z are inexperienced or lack knowledge in ho w to use the machine safely must be supervised by a responsible person when using it, or must be instructed in how to use it correctly . Safe handling of th[…]
-
Page 12: Jura ENA 3
44 ENA 3 Z Hot wat er nozzle 3-colour plain text display Y our ENA features a 3-colour plain text display . The colours of the display texts have the following meanings: Z Green: Y our ENA is ready for use. Z Red: The ENA is prompting y ou to perform an action. Z Y ellow: Y ou are in programming mode . 1 Preparing and using for the first time This […]
-
Page 13: Jura ENA 3
45 ENA 3 de fr it en it fr g T T urn the Rotary Switch until LANGUAGE ENGL I SH is display ed. k T Press the Rotary Switch to c onfirm the language setting. OK , the language is then adjusted. O PEN TAP T Place a receptacle under the nozzle. l T T urn the switch to position m . SY STEM F I LL I NG CLOSE TAP y T T urn the switch to position o . HEA […]
-
Page 14: Jura ENA 3
46 ENA 3 k T Press the Rotary Switch. O PEN TAP l T T urn the switch to position m . F I L TER R I NS I NG , water is discharged from the nozzle . E Rinsing of the filter can be interrupted at any time . T o this purpose turn the switch clockwise. E The wat er may be slightly discoloured. This is not harmful to health and does not affect the taste.[…]
-
Page 15: Jura ENA 3
47 ENA 3 de fr it en it fr U If the fineness of grind setting is too fine , the coffee only drips from the c offee spout. Z Select a coarse setting for a darker roast. U If the fineness of grind is too coarse the coffee flow s too quickly from the coffee spout. Example : Adjusting the fineness of grind during coffee prepar ation. T Place the cup un[…]
-
Page 16: Jura ENA 3
48 ENA 3 2 coffees at the touc h of a button Precondition : READ Y is shown on the display . T Place t wo cups under the co ffee spout. g T T urn the Rotary Switch until 2 CUPS is display ed. k T Press the Rotary Switch to start coffee preparation. 2 CU PS , the pre-set amount of water flows into the cup s, preparation stops automatically . READY P[…]
-
Page 17: Jura ENA 3
49 ENA 3 de fr it en it fr E The pre-set amount of water can be changed during the brewing oper ation b y turning the Rotary Switch. One-off settings before and during coffee preparation alw ays f ollow this model. These settings are not saved. Example : Changing the co ffee strength of 1 coffee before prepar ation from NOR M AL to STRO NG . Precon[…]
-
Page 18: Jura ENA 3
50 ENA 3 T Place the cup under the coffee spout. k T Press the Rotary Switch to start coffee preparation. 1 C UP , the pre -set amount of water flo ws into the cup. Prepar ation stops automati- cally . T o ensure that the Professional Cappuccino F rother works perfectly, it should be rinsed and cleaned regularly (refer to Chapt er 4 ‘Rinse – Pr[…]
-
Page 19: Jura ENA 3
51 ENA 3 de fr it en it fr y T T urn the switch to position o when the milk foam has reached the required consistency . E Y ou can prepare more steam within about 40 seconds. T Place the cup under the coffee spout. k T Press the Rotary Switch to start coffee preparation. 1 C UP , the pre -set amount of water flo ws into the cup. Prepar ation stops […]
-
Page 20: Jura ENA 3
52 ENA 3 l T T urn the switch to position m . STEAM , the milk is heated by the hot steam. y T T urn the switch to position o as soon as the required temperature is reac hed. E Y ou can prepare more steam within about 40 seconds. T o ensure that the 2-stage frothing nozzle works perfectly , it should be rinsed regularly (refer to Chapt er 4 ‘Rins[…]
-
Page 21: Jura ENA 3
53 ENA 3 de fr it en it fr Energy-saving mode A default energy-saving mode (Energy Sav e Mode, E.S.M. © ) setting can be selected on the ENA. Programme item ENERG Y — / p : Z ENERG Y — U The ENA is then in constant stand-by mode. U All coffee products as well as hot water can be prepared without having to w ait. Z ENERG Y p U After approx. 5 minut[…]
-
Page 22: Jura ENA 3
54 ENA 3 k T Press the Rotary Switch to c onfirm the setting. OK , the unit s of water are then adjusted. UN I T g T T urn the Rotary Switch until EX I T is display ed. k T Press the Rotary Switch to exit progr am- ming mode. READY Language The language is selected when the machine is used for the first time. Example : Changing the language from EN[…]
-
Page 23: Jura ENA 3
55 ENA 3 de fr it en it fr Changing the filter f ollowing a prompt E After 50 litres of water ha ve flow ed through the filter , its capacit y is reached. The ENA automatically prompts you to replace the filter . E After two months the filter capacity is reached. The elapsed time can be check ed with the date plate on the cartridge holder . E If th[…]
-
Page 24: Jura ENA 3
56 ENA 3 E The cleaning progr amme only lasts about 15 minutes. E Do not interrupt the cleaning progr amme . The quality of cleaning will be impaired if you do so. E JURA cleaning tablets are available from stockists. Precondition : CLEAN / READ Y is displayed. T O pen the cov er behind the Rotary Switch. c T Press the rinse button. EMPTY TRA Y T E[…]
-
Page 25: Jura ENA 3
57 ENA 3 de fr it en it fr CAUTION Risk of damage if the descaling agent comes into contact with sensitive sur faces. T Remove splashes immediately . E The descaling programme lasts approx. 40 minutes. E JURA descaling tablets are available from stockists. E If a CLARIS filter cartridge is used and activated, you will not be prompt ed to descale th[…]
-
Page 26: Jura ENA 3
58 ENA 3 k T Press the Rotary Switch. EMPTY TRA Y T Continue with the third prompt to take action (indicated by T ), as described in the section ‘Descaling the machine following a prompt’. Rinsing the Professional Cappuccino F rother T o ensure that the Professional Cappuccino F rother works perfectly, y ou should rinse it with water whene ver […]
-
Page 27: Jura ENA 3
59 ENA 3 de fr it en it fr T Rinse the recept acle thoroughly , fill with 250 ml of fresh water and immerse the milk pipe in the wat er . T Empt y the receptacle under the nozzle and replace under the nozzle . g T T urn the Rotary Switch until STEAM is display ed. k T Press the Rotary Switch. HEA T I NG READY appear s as soon as the ENA is sufficie[…]
-
Page 28: Jura ENA 3
60 ENA 3 T Remove the milk pipe from the milk carton or milk container . T Pour 250 ml of fresh water into a receptacle and add one capful (max. 15 ml) of Cappuccino Cleaner . T Immer se the milk pipe in the receptacle. T Place another receptacle under the nozzle. g T T urn the Rotary Switch until STEAM is display ed. k T Press the Rotary Switch. H[…]
-
Page 29: Jura ENA 3
61 ENA 3 de fr it en it fr T Rinse all three nozzle par ts thoroughly under running wat er . T Reassemble the nozzle and attach it to the Connector System © . Cleaning the bean container Coffee beans may be co vered with a slight oil film which remains on the walls of the bean c ontainer . These residues may negatively aff ect the coffee results. […]
-
Page 30: Jura ENA 3
62 ENA 3 5 Display messages Message Cause/Result Action F I LL WATER T ANK The water tank is empty . Y ou cannot prepare any coffee specialities, hot wa ter or steam. T Fill the wat er tank (refer to Chapter 1 ‘Preparing and using for the first time – Filling the water tank’). EMPTY GRO U NDS The coffee grounds container is full. Y ou cannot […]
-
Page 31: Jura ENA 3
63 ENA 3 de fr it en it fr 6 T roubleshooting Problem Cause/Result Action Grinder is making a very loud noise. There are foreign objects in the grinder . T Contact customer suppor t in your country. Contact information is av ailable on the company w ebsite at www .jura.c om. The nozzle does not produce enough milk foam. The nozzle is either in the […]
-
Page 32: Jura ENA 3
64 ENA 3 7 T ransport and environmentally neutral disposal T ransport/Empt ying the system K eep the packaging of your ENA. It should be used to protect the machine during transpor — tation. In order to protect the ENA from frost during transportation, the system must be emptied. Precondition : READY appear s on the display . g T T urn the Rotary S[…]
-
Page 33: Jura ENA 3
65 ENA 3 de fr it en it fr Index 2-stage frothing nozzle 40 , 41 Dismantling and rinsing 60 3-colour plain text display 44 A Adjusting Grinder 46 Language 54 Units of water 53 Automatic switch-off 53 B Bean container Cleaning 61 Filling 44 C Cappuccino With the 2-stage frothing nozzle 50 With the Easy Cappuccino F rother 50 With the Professional Ca[…]
-
Page 34: Jura ENA 3
66 ENA 3 T T echnical data 64 T ransport 64 T roubleshooting 63 U Use, proper 42 Using for the first time 44 W W ater amount Default setting 49 W ater hardness Determining and adjusting 46 W ater tank 40 Descaling 61 Filling 44 P P button 41 Powder c haft for pre-ground coffee 40 Preparation Coffee 47 Pre-ground coffee 48 Preparing Hot water 52 Pre[…]
-
Page 35: Jura ENA 3
67 ENA 3 de fr it en it fr Directives The machine complies with the follo wing EU directives: Z 2006/95/EC – Lo w V olt age Directive Z 2004/108/E C – Elec tromagnetic Compatibilit y T echnical changes W e reserve the right to make tec hnical changes. The illustrations used in the ENA 3 Instructions for Use show the ENA 3 Blossom White model. Y[…]
-
Page 36: Jura ENA 3
34 7. In f ormas j on om re g elverk Placer ing/V entilation Q #`_/_ FÖRSÄKRA DIG OM A TT HUVUDBR YT ARE OCH UTT A G ÄR LÄTÅTK OMLIGA, NÄR DU STÄLLER DIN UTRUSTNING PÅPLA TS. Placer ing/V entilation #<[…]
ENA 3
Technical data
Key technologies
Intelligent Pre Brew Aroma System (I.P.B.A.S.©)
Two cups in a single brewing operation
CLARIS plus filter cartridge ENA
Variable brewing unit
5 – 16 g
Powerful 5-level conical grinder
High-performance pump, 15 bar
Thermoblock heating system
Additional pre-ground coffee powder
Integrated rinsing/cleaning/descaling programme
Adjustable water hardness
Automatic recognition of filter change
Automatic recognition of maintenance programmes
Automatic recognition to fill beans
Zero Energy Switch
JURA Elektroapparate AG
Unsere Produkte sind stets auf dem neusten Stand der Technik. Deshalb sind Änderungen der technischen Daten vorbehalten.
Page 1 from 3