Кондиционер для дома aux инструкция пульт управления

Инструкции

J

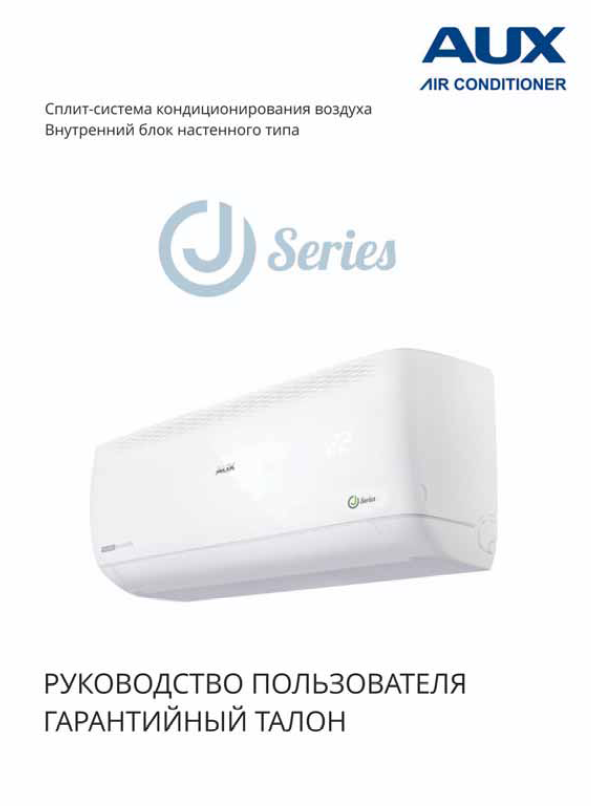
Руководство по эксплуатации серии J

pdf
,
15.62 MiB

D inv

Руководство по эксплуатации серии D inv 2020

pdf
,
682.99 KiB

Lk 700 inv 2019

Руководство по эксплуатации серии LK inv 2019

pdf
,
2.05 MiB

Lk on off 2019

Руководство по эксплуатации серии LK on/off 2019

pdf
,
2.04 MiB

D on off

Руководство по эксплуатации серии D on/off 2020

pdf
,
674.40 KiB

Thumb instrykciya wifi aux 01

Инстуркция WiFi

pdf
,
1.31 MiB

Fj 2019

Руководство по эксплуатации серии FJ on/off 2019

pdf
,
2.08 MiB

Fp 2019

Руководство по эксплуатации серии FP on/off 2019

pdf
,
2.04 MiB

Kids

Руководство по эксплуатации серии Kids

pdf
,
638.10 KiB

Free match 2020

Инструкция FreeMatch 2020

pdf
,
1.02 MiB

Инструкция пульт YKR-T

pdf
,
1.02 MiB

Инструкции полупромышленные

                 2018 12 24 14 11 11

LCAC инструкции (общий) ON-OFF и Inverter 2018.11

pdf
,
8.64 MiB

User manual lcac v2018.02 1  pdf.io  001

LCAC инструкции (общий) ON-OFF и Inverter 2018

pdf
,
4.41 MiB

                 2019 09 05 15 39 13

LCAC инструкции (общий) ON-OFF и Inverter R32 2019.02

pdf
,
3.84 MiB

Инструкции ARV NEXT

Thumb user manual arvwm v2017.03

Инструкция ARVWM

pdf
,
38.78 MiB

Thumb user manual arvca v2017.03

Инструкция ARVCA

pdf
,
76.90 MiB

Thumb user manual arvcf v2017.03

Инструкция ARVCF

pdf
,
76.70 MiB

Thumb user manual arvsd   md   hd   fa v2017.03

Инструкция ARVSD, MD, HD, FA

pdf
,
85.52 MiB

Oblozhka instrukcii arv next series 01

AUX ARV пуско-наладочные работы

pdf
,
564.17 KiB

Oblozhka instrukcii arv6 series 01

Пуско-наладочные работы AUX ARV6

pdf
,
2.15 MiB

Installation

AUX ARV6 Мануал по установке наружные блоки

pdf
,
4.10 MiB

          mini

AUX Mini Мануал по установке наружные блоки

pdf
,
4.60 MiB

Инструкции Free Match

Free match 2020

Инструкция FreeMatch 2020

pdf
,
1.02 MiB

ОФИЦИАЛЬНЫЙ ДИЛЕР КЛИМАТИЧЕСКОЙ ТЕХНИКИ AUX.


Вход / Регистрация

  • Оплата
  • Доставка
  • Гарантии и возврат

AUX-RUS.RU

AUX-RUS.RU

Выберите категорию

  • Аксессуары
  • Мульти сплит-системы
    • Внутренние блоки
      • Серия ALCA
      • Серия ALCF
      • Серия ALMD
      • Серия AMCA
      • Серия AMCF
      • Серия AMSD
      • Серия AMWM
    • Комплекты мульти сплит-систем
    • Мультизональные
      • Серия ARV
    • Наружные блоки
      • Серия AM
  • Настенные кондиционеры
    • J Progressive Inverter Black
    • Серия DE Inverter
    • Серия FJ Black on/off
    • Серия FJ Silver on/off
    • Серия J on/off
    • Серия JD Inverter
    • Серия Prime Inverter
    • Серия Prime on/off
    • Серия Q Fresh Inverter
    • Серия Q Inverter
    • Серия Q Light Inverter
    • Серия Q Light on/off
    • Серия Q on/off
    • Серия Smart Inverter
  • Полупромышленные кондиционеры
    • Канальные кондиционеры
      • Инверторные канальные кондиционеры
      • Неинверторные канальные кондиционеры
    • Кассетные кондиционеры
      • Инверторные кассетные кондиционеры
      • Неинверторные кассетные кондиционеры
    • Напольно-потолочные кондиционеры
      • Инверторные напольно-потолочные кондиционеры
      • Неинверторные напольно-потолочные кондиционеры

ВРЕМЯ РАБОТЫ:

ПН-ПТ 9:00-19:00

НАШ ТЕЛЕФОН

+7 495 921-50-42


Меню

AUX-RUS.RU

AUX-RUS.RU

0

/
руб.


Просмотр категорий


  • Настенные кондиционерыНастенные кондиционеры
    • Серия FJ Black on/offСерия FJ Black on/off
      • AUX ASW-H07B4/FJ-BR1/AS-H07B4/FJ-R1
      • AUX ASW-H09B4/FJ-BR1/AS-H09B4/FJ-R1
      • AUX ASW-H12B4/FJ-BR1/AS-H12B4/FJ-R1
      • AUX ASW-H18A4/FJ-BR1/AS-H18A4/FJ-R1
      • AUX ASW-H24A4/FJ-BR1/AS-H24A4/FJ-R1
    • Серия FJ Silver on/offСерия FJ Silver on/off
      • AUX ASW-H07B4/FJ-SR1/AS-H07B4/FJ-R1
      • AUX ASW-H09B4/FJ-SR1/AS-H09B4/FJ-R1
      • AUX ASW-H12B4/FJ-SR1/AS-H12B4/FJ-R1
      • AUX ASW-H18B4/FJ-SR1/AS-H18B4/FJ-R1
      • AUX ASW-H24B4/FJ-SR1/AS-H24B4/FJ-R1
    • Серия J on/offСерия J on/off
      • AUX ASW-H07A4/JD-R1/AS-H07A4/JD-R1
      • AUX ASW-H09A4/JD-R1/AS-H09A4/JD-R1
      • AUX ASW-H12A4/JD-R1/AS-H12A4/JD-R1
      • AUX ASW-H18A4/JD-R1/AS-H18A4/JD-R1
      • AUX ASW-H24A4/JD-R1/AS-H24A4/JD-R1
    • Серия JD InverterСерия JD Inverter
      • AUX ASW-H09A4/JD-R2DI AS-H09A4/JD-R2DI
      • AUX ASW-H12A4/JD-R2DI AS-H12A4/JD-R2DI
      • AUX ASW-H18A4/JD-R2DI AS-H18A4/JD-R2DI
      • AUX ASW-H24A4/JD-R2DI AS-H24A4/JD-R2DI
      • AUX ASW-H09A4/JD-R2DI (v1) AS-H09A4/JD-R2DI (v1)
      • AUX ASW-H12A4/JD-R2DI (v1) AS-H12A4/JD-R2DI (v1)
      • AUX ASW-H18A4/JD-R2DI (v1) AS-H18A4/JD-R2DI (v1)
      • AUX ASW-H24A4/JD-R2DI (v1) AS-H24A4/JD-R2DI (v1)
    • J Progressive Inverter BlackJ Progressive Inverter Black
      • AUX ASW-H09B4/JD-R2DI AS-H09B4/JD-R2DI
      • AUX ASW-H09B4/JD-R2DI AS-H09B4/JD-R2DI (black series)
      • AUX ASW-H12B4/JD-R2DI/AS-H12B4/JD-R2DI
    • Серия Prime on/offСерия Prime on/off
      • AUX ASW-H07A4/FP-R1/AS-H07A4/FP-R1
      • AUX ASW-H09A4/FP-R1/AS-H09A4/FP-R1
      • AUX ASW-H12A4/FP-R1/AS-H12A4/FP-R1
      • AUX ASW-H18A4/FP-R1/AS-H18A4/FP-R1
      • AUX ASW-H24A4/FP-R1/AS-H24A4/FP-R1
      • AUX ASW-H36A4/FP-R1/AS-H36A4/FP-R1
    • Серия Prime InverterСерия Prime Inverter
      • AUX ASW-H07A4/FP-R1DI/AS-H07A4/FP-R1DI
      • AUX ASW-H09A4/FP-R1DI/AS-H09A4/FP-R1DI
      • AUX ASW-H12A4/FP-R1DI/AS-H12A4/FP-R1DI
      • AUX ASW-H18A4/FP-R1DI/AS-H18A4/FP-R1DI
      • AUX ASW-H24A4/FP-R1DI/AS-H24A4/FP-R1DI
    • Серия Q Light on/offСерия Q Light on/off
      • AUX ASW-H07A4/QH-R1 / AS-H07A4/QH-R1
      • AUX ASW-H09A4/QH-R1 / AS-H09A4/QH-R1
      • AUX ASW-H12A4/QH-R1 / AS-H12A4/QH-R1
      • AUX ASW-H18A4/QH-R1 / AS-H18A4/QH-R1
      • AUX ASW-H24A4/QH-R1 / AS-H24A4/QH-R1
    • Серия Q on/offСерия Q on/off
      • AUX ASW-H07A4/HA-R1/AS-H07A4/HA-R1
      • AUX ASW-H09A4/HA-R1/AS-H09A4/HA-R1
      • AUX ASW-H12A4/HA-R1/AS-H12A4/HA-R1
      • AUX ASW-H18A4/HA-R1/AS-H18A4/HA-R1
      • AUX ASW-H24A4/HA-R1/AS-H24A4/HA-R1
    • Серия Q InverterСерия Q Inverter
      • AUX ASW-H09A4/HA-R2DI/AS-H09A4/HA-R2DI
      • AUX ASW-H12A4/HA-R2DI/AS-H12A4/HA-R2DI
      • AUX ASW-H18A4/HA-R2DI/AS-H18A4/HA-R2DI
      • AUX ASW-H24A4/HA-R2DI/AS-H24A4/HA-R2DI
    • Серия Q Fresh InverterСерия Q Fresh Inverter
      • AUX ASW-H09A4/QF-R2DI/AS-H09A4/QF-R2DI
      • AUX ASW-H12A4/QF-R2DI/AS-H12A4/QF-R2DI
    • Серия Q Light InverterСерия Q Light Inverter
      • AUX ASW-H07A4/QH-R1DI / AS-H07A4/QH-R1DI
      • AUX ASW-H09A4/QH-R1DI / AS-H09A4/QH-R1DI
      • AUX ASW-H12A4/QH-R1DI / AS-H12A4/QH-R1DI
      • AUX ASW-H18A4/QH-R1DI / AS-H18A4/QH-R1DI
      • AUX ASW-H24A4/QH-R1DI / AS-H24A4/QH-R1DI
    • Серия Smart InverterСерия Smart Inverter
      • AUX ASW-H24B4/LK-700R1DI/AS-H24B4/LK-700R1DI
    • Серия DE Inverter (АРХИВ)Серия DE Inverter (АРХИВ)
  • МУЛЬТИ СПЛИТ-СИСТЕМЫМУЛЬТИ СПЛИТ-СИСТЕМЫ
    • Внутренние блокиВнутренние блоки
      • Серия ALCAСерия ALCA
      • Серия ALCFСерия ALCF
      • Серия AMCAСерия AMCA
      • Серия AMCFСерия AMCF
      • Серия AMSDСерия AMSD
      • Серия AMWMСерия AMWM
    • Наружные блокиНаружные блоки
      • Серия AMСерия AM
    • МультизональныеМультизональные
      • Серия ARVСерия ARV
    • Комплекты мульти сплит-системКомплекты мульти сплит-систем
      • AUX AMWM-H07/4R2(J)×2+AM2-H14/4DR1
      • AUX AMWM-H07/4R2(J)×2+AM2-H18/4DR1B
      • AUX AMWM-H07/4R2(J)+AMWM-H09/4R2(J)+AM2-H18/4DR1B
      • AUX AMWM-H07/4R2(J)×3+AM3-H21/4DR1
      • AUX AMWM-H07/4R2(J)×4+AM4-H36/4DR1
      • AUX AMWM-H09/4R2(J)×2+AM2-H18/4DR1B
      • AUX AMWM-H09/4R2(J)×2+H12/4R2(J)+AM3-H27/4DR1B
      • AUX AMWM-H09/4R2(J)×3+AM3-H27/4DR1B
      • AUX AMWM-H09/4R2(J)×4+AM4-H36/4DR1
      • AUX AMWM-H07/4R2(J)×3+H09/4R2(J)×2+AM5-H42/4DR1
      • AUX AMWM-H09/4R2(J)×5+AM5-H42/4DR1
  • ПОЛУПРОМЫШЛЕННЫЕ КОНДИЦИОНЕРЫПОЛУПРОМЫШЛЕННЫЕ КОНДИЦИОНЕРЫ
    • Кассетные кондиционерыКассетные кондиционеры
      • Инверторные кассетные кондиционерыИнверторные кассетные кондиционеры
      • Неинверторные кассетные кондиционерыНеинверторные кассетные кондиционеры
    • Канальные кондиционерыКанальные кондиционеры
      • Инверторные канальные кондиционерыИнверторные канальные кондиционеры
      • Неинверторные канальные кондиционерыНеинверторные канальные кондиционеры
    • Напольно-потолочные кондиционерыНапольно-потолочные кондиционеры
      • Инверторные напольно-потолочные кондиционерыИнверторные напольно-потолочные кондиционеры
      • Неинверторные напольно-потолочные кондиционерыНеинверторные напольно-потолочные кондиционеры
  • АксессуарыАксессуары
    • Проводной пульт AUX XK-05
    • ИК пульт управления AUX XK-K
    • Центральный пульт управления AUX CC-02
  • Магазин
  • О нас
  • Монтаж
  • Обслуживание
  • Наши работы
  • Блог
  • Контакты


Избранное

0


Сравнить

0

/
руб.

8-495-921-50-42

aux-rus@yandex.ru

Блог

Главная » Наши новости »

Наши новости

Инструкции и каталоги

  • Опубликовано author-avatar

    AUX КЛИМАТ

AUX Инструкции и каталоги

AUX КЛИМАТ


12


Авг

Мы предлагаем вам ознакомиться с номенклатурой выпускаемой продукции кондиционеров AUX. Любой каталог, или руководство по эксплуатации можно загрузить бесплатно с нашего сайта и использовать по своему усмотрению. Просим вас оставить свой комментарий о нашем Интернет-магазине на странице отзывов.


pdf-2   Каталог климатических систем AUX 2023 г.

pdf-2   Каталог климатических систем AUX 2022 г.

pdf-2   Каталог климатических систем AUX 2021 г.

pdf-2   Руководство по эксплуатации. Сплит-системы настенного типа серии Smart Inverter

pdf-2   Руководство по эксплуатации. Сплит-системы настенного типа серии FJ Black on/off

pdf-2   Руководство по эксплуатации. Сплит-системы настенного типа серии FJ Silver on/off

pdf-2   Руководство по эксплуатации. Сплит-системы настенного типа серии Prime on/off

pdf-2   Руководство по эксплуатации. Сплит-системы настенного типа серии Prime Inverter

pdf-2   Руководство по эксплуатации. Сплит-системы настенного типа серии DE Inverter

pdf-2   Руководство по эксплуатации. Сплит-системы настенного типа серии Q Fresh Inverter

pdf-2   Руководство по эксплуатации. Сплит-системы настенного типа серии Q Inverter

pdf-2   Руководство по эксплуатации. Сплит-системы настенного типа серии Q on/off
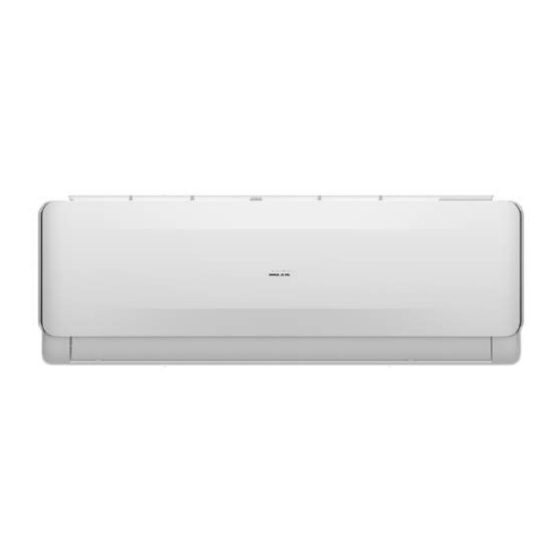
pdf-2   Руководство по эксплуатации. Сплит-системы настенного типа серии J on/off

pdf-2   Руководство по эксплуатации. Сплит-системы настенного типа серии J Inverter

Новые
Отзывы о кондиционерах AUX

Обратно к списку

Добавить комментарий

Ваш адрес email не будет опубликован. Обязательные поля помечены *

Комментарий *

Имя *

Email *

Сайт

Сохранить моё имя, email и адрес сайта в этом браузере для последующих моих комментариев.

БЫСТРАЯ ДОСТАВКА

Очень быстрая доставка.

КОНТРОЛЬ КАЧЕСТВА

Отслеживаем качество товара

ЕСТЬ ВЫБОР

Большой выбор товаров

ПОСТОЯННАЯ ПОДДЕРЖКА

Полная поддержка покупателей

Источник

Если после покупки сплит-системы под рукой не оказалось инструкции, воспользуйтесь этой статьей, чтобы включить кондиционер AUX. Здесь мы кратко и понятно рассказываем, как настроить аппарат, используя пульт дистанционного управления.

Быстрое включение и настройка

Обозначение кнопок

Самая важная кнопка, отвечающая за включение и выключение кондиционера. При нажатии  один раз аппарат включится, а при нажатии во второй раз — выключится;

Вторая по важности кнопка, необходима для выбора режима работы. Работает последовательно, т.е. после каждого нажатия будет установлен один из режимов: авто, охлаждение, нагрев, осушение, вентилирование.  Нажимайте на эту кнопку, пока не выберите оптимальный режим работы;

С помощью этой кнопки можно быстро включить режим нагрева воздуха. При нажатии  один раз режим включится, а при нажатии во второй раз — выключится;

С помощью этой кнопки можно быстро включить режим охлаждения воздуха. При нажатии  один раз режим включится, а при нажатии во второй раз — выключится;

Если ранее вы выбрали режим вентилирования, настройте скорость вращения вентилятора с помощью кнопки «SPEED». Она работает по тому же принципу, что и «MODE», только при последовательном нажатии будет увеличиться скорость вращения;

С помощью этой кнопки можно увеличить температуру на 1 градус;

С помощью этой кнопки можно уменьшить температуру на 1 градус;

В кондиционере есть специальные направляющие (т.н. «жалюзи»), с помощью которых можно регулировать направление потока воздуха. Эта кнопка отвечает за регулировку вертикальных направляющих. Нажмите на нее один раз. Вы увидите и услышите, что жалюзи начали свое движение. Нажмите на кнопку повторно, чтобы зафиксировать их в своем положении;

Также в кондиционере есть горизонтальные направляющие. Настраиваются по тому же принципу, что вертикальные (см. выше «Кнопка U/D SWING или ►»);

Отвечает за настройку таймера включения кондиционера. Нажмите один раз, с помощью кнопок  ┿ или ▲/— или ▼ настройте часы.

Отвечает за подтверждение выбора. Например, после установки таймера необходимо нажать «ОК», чтобы сохранить настройки.

Инструкция

схема кондиционера

Если вы не хотите разбираться в многочисленных функциях, воспользуйтесь этой простой инструкцией, чтобы быстро и легко настроить кондиционер:

  1. Убедитесь, что кондиционер подключен к сети;
  2. Направьте пульт управления в сторону аппарата и 1 раз нажмите кнопку «ON/OFF». Вы должны услышать характерный звук, а также увидеть зеленый светодиод на корпусе кондиционера. Это означает, что аппарат включен и готов к работе;
  3. Если вы хотите включить режим охлаждения, нажмите кнопку «COOL». Если нужен режим нагрева воздуха — нажмите «HEAT»;
  4. С помощью кнопок ┿ или ▲/— или ▼ настройте температуру. По умолчанию в режиме охлаждения устанавливается 25 градусов;
  5. Далее отрегулируйте направление потока воздуха. Для большинства пользователей достаточно только вертикальной регулировки. За это отвечает кнопка «U/D SWING» или ►. Нажмите 1 раз, чтобы направляющие начали движение вверх-вниз. Нажмите второй раз, чтобы они зафиксировались в своем положении.

Это базовая настройка. Если вы хотите установить режим осушения или вентилирования воздуха, а также установить таймер, изучите обозначения кнопок. В статье выше мы подробно об этом рассказываем.

Надеемся, эта статья была полезна для вас. В комментариях ниже вы можете рассказать о своем опыте настройки сплит-системы, а также поделиться впечатлениями от использования кондиционера AUX. Желаем удачи!

Источник

AUX FH Series Owner's Manual

  • Contents

  • Table of Contents

  • Troubleshooting

  • Bookmarks

Quick Links

INVERTER SERIE FH

ASW-FH

CL80001 ~ CL80004

loading

Related Manuals for AUX FH Series

Summary of Contents for AUX FH Series

  • Page 1
    INVERTER SERIE FH ASW-FH CL80001 ~ CL80004…
  • Page 2
    …………………………………………….
  • Page 3: Table Of Contents

    Manual de Instalación y Usuario ÍNDICE MANUAL DE USUARIO ………………..Leer antes de la operacion………………..Precauciones de seguridad ………………. Descripcion de las partes ………………..Instrucciones de funcionamiento ………………. Cuidado y mantenimiento ………………… Solucion de problemas ………………..MANUAL DE INSTALACION ………………Precauciones de seguridad ………………

  • Page 4: Manual De Usuario

    MANUAL DE USUARIO Lea el presente manual con detenimiento antes de usar el aire acondicionado y consérvelo para futuras consultas. AIRE ACONDICIONADO Tipo INVERTER El diseño y las especificaciones del presente manual están sujetos a cambio sin previo aviso para la mejora del producto. Contacte con su agente de ventas o fabricante para más informa- ción Lea el presente manual:…

  • Page 5: Leer Antes De La Operacion

    LEER ANTES DE LA OPERACION ATENCIÓN Contacte con un técnico de servicio autorizado para la reparación y el mantenimiento de la unidad. Contacte con un instalador autorizado para la instalación de la unidad. El uso de este electrodoméstico no está pensado para personas (niños incluidos) con una reducida capacidad física, sensorial o mental, o que carezcan de experiencia y conocimientos a menos que estén siendo supervisados o instruidos en el uso del electrodoméstico por parte de una persona que se responsabilice de su seguridad.

  • Page 6: Precauciones De Seguridad

    PRECAUCIONES DE SEGURIDAD Para evitar lesiones al usuario y otras personas así como daños materiales, se deben respetar las siguientes instrucciones. El uso incorrecto de la unidad por no leer las instrucciones puede causar daños físicos y materiales. Las indicaciones se clasifican según los dos símbolos siguientes: ATENCIÓN Indica posibilidad de muerte o daño grave.

  • Page 7
    PRECAUCIONES DE SEGURIDAD ATENCIÓN No utilice agua para limpiar Ventile la habitación debi- Cuando se deba sustituir el el aire acondicionado. damente cuando use la filtro metálico, no toque las unidad con calderas, etc. partes metálicas de la unidad. El agua puede penetrar en la Podría haber carencia Podría provocar daño físico.
  • Page 8: Descripcion De Las Partes

    DESCRIPCION DE LAS PARTES ★ Unidad interior Unidad interior Unidad exterior ★ Unidad exterior NOTA: Todas las ilustraciones de este manual son solo explicativas. Su aire acondicionado puede ser algo diferente. La forma real prevalecerá.

  • Page 9: Instrucciones De Funcionamiento

    INSTRUCCIONES DE FUNCIONAMIENTO Temperatura de funcionamiento Refrigeración 18 ~ 32 ºC Interior 0 ~ 30 ºC Calefacción Refrigeración -10 ~ 47 ºC Exterior Calefacción -10 ~ 30 ºC Funcionamiento manual El funcionamiento manual puede emplearse de modo temporal si el mando a distancia no funciona o si la unidad precisa de mantenimiento.

  • Page 10
    INSTRUCCIONES DE FUNCIONAMIENTO Control de la dirección del flujo de aire Funcionamiento de la unidad Modo AUTO Ajuste correctamente la dirección del flujo de aire. De lo contrario, podría causar sensaciones molestas Al seleccionar el modo de funcionamiento AUTO, la unidad eligirá…
  • Page 11: Cuidado Y Mantenimiento

    CUIDADO Y MANTENIMIENTO Limpieza de la rejilla y la carcasa Apague el sistema antes de proceder a su limpieza. Utilice un trapo suave y seco para limpiar la unidad. No use lejías ni materiales abrasivos. NOTE: El cable de corriente debe estar desconectado antes de proceder a la limpieza de la unidad interior.

  • Page 12
    CUIDADO Y MANTENIMIENTO Mantenimiento Si va a dejar la unidad si funcionamiento durante un largo periodo, lleve a cabo lo siguiente: Haga funcionar el ventilador interior durante varias horas para secar el interior de la unidad. Pare la unidad, desconéctela de la alimentación y retire las pilas al mando a distancia. Limpie los filtros.
  • Page 13: Solucion De Problemas

    SOLUCION DE PROBLEMAS Los siguientes sucesos podrían ocurrir durante el funcionamiento normal de la unidad: Protección del aire acondicionado: Protección del compresor El compresor no puede volver a ponerse en marcha hasta transcurridos 3 minutos de su parada. Aire anti-frío (solo en modelos frío/calor) La unidad no está…

  • Page 14
    SOLUCION DE PROBLEMAS Si se produce alguno de los siguientes errores, detenga el aire acondicionado inmediatamente, desconecte la corriente y, a continuación, vuelva a conectarlo. Si el problema persiste, desco- necte la corriente y contacte con el servicio de atención al cliente más próximo. El indicador de funcionamiento u otros indicadores continúan parpadeando.
  • Page 15
    SOLUCION DE PROBLEMAS Listado de códigos de error: Código de Error Indicador «COOLING» Indicador «HEATING» Indicador «TIMER» Descripción 1 parpadeo Error del sensor de temperatura ambiente unidad interior 2 parpadeos Error del sensor de temperatura de tuberia unidad exterior 3 parpadeos Error del sensor de temperatura de tuberia unidad interior Error del ventilador de la unidad interior o problema de la E4/Fb…
  • Page 16: Manual De Instalacion

    MANUAL DE INSTALACIÓN Lea el presente manual con detenimiento antes de usar el aire acondicionado y consérvelo para futuras consultas. AIRE ACONDICIONADO Tipo INVERTER El diseño y las especificaciones del presente manual están sujetos a cambio sin previo aviso para la mejora del producto. Contacte con su agente de ventas o fabricante para más informa- ción Lea el presente manual:…

  • Page 17: Precauciones De Seguridad

    PRECAUCIONES DE SEGURIDAD PRECAUCIONES DE INSTALACIÓN Lea el presente manual de instalación con detenimiento para asegurar la correcta instalación de la unidad. Si el cable de corriente está dañado, deberá ser sustituido exclusivamente por personal cualificado. La instalación será realizada exclusivamente por personal autorizado y en cumplimiento con la regulación nacional sobre conexiones eléctricas.

  • Page 18: Instalacion

    INSTALACIÓN ELECCIÓN DE LA MEJOR UBICACIÓN Unidad Interior No debería haber ninguna fuente de calor o corriente cerca de la unidad. No debería haber ningún obstáculo bloqueando la circulación del aire. Un lugar donde sea fácil realizar el drenaje Un lugar donde se tenga en cuenta la prevención de ruido.

  • Page 19
    INSTALACIÓN UNIDAD INTERIOR COLOCACIÓN DE LA PLACA DE MONTAJE NOTA: NOTA: La pared que monta es suficientemente fuerte Encajar la placa de montaje y y sólida para evitar la vibración.. perforar la pared de acuerdo con su estructura y los correspondientes Colocación de placa de montaje puntos de montate.
  • Page 20: Instalacion De La Unidad Interior

    INSTALACIÓN UNIDAD INTERIOR COLOCACIÓN DE LA MANGUERA DE DRENAJE Drenaje 1. Ponga la manguera de drenaje con pendiente descendiente .No instale la manguera Coloque y fije la manguera de de drenaje como se ilustra en las Figuras. desagüe al 2. Al conectar el conector de la manguera de drenaje conducto como aísle la parte de conexión del tubo de drenaje se indica en las…

  • Page 21
    INSTALACIÓN UNIDAD INTERIOR CONEXIÓN ELÉCTRICA A LA UNIDAD INTERIOR Trabajos Electricos Normas de seguridad eléctrica para la instalación inicial 1. Si hay un problema serio de seguridad acerca de la fuente de alimentación, los técnicos deben negarse a instalar el aire acondicionado y explicárselo al cliente hasta que se resuelva el problema. 2.
  • Page 22: Instalacion De La Unidad Exterior

    INSTALACIÓN UNIDAD EXTERIOR PRECAUCIÓN DE LA UNIDAD EXTERIOR Instale la unidad exterior sobre una base rígida para evitar aumentar el ruido y vibración. Determinar la dirección de salida de aire, donde el aire descargado no esté bloqueado. En caso de que el sitio de instalación esté expuesto a fuertes vientos, como una playa, asegúrese de que el ventilador funciona correctamente poniendo la unidad longitudinalmente en la pared o usando placas de blindaje o anti-polvo.

  • Page 23
    INSTALACIÓN UNIDAD EXTERIOR CONEXIÓN ELÉCTRICA DE LA UNIDAD EXTERIOR 1. Retire la tapa de la caja de conexión eléctrica de la unidad exterior aflojando el tornillo. 2. Conecte los cables conectivos a los terminales como se identifica con sus números coincidentes en el bloque de terminales de las unidades interior y exterior.
  • Page 24
    INSTALACIÓN UNIDAD EXTERIOR 2. Cuando se usa la bomba de vacio Manómetro priete completamente las tuercas cónicas, A, B, C, D, conecte la válvula manométrica con la válvula de carga de la bomba de -76cmHg vacio, conecte la válvula de gas de la unidad exterior a la entra del manómetro.
  • Page 25: Control Remoto

    CONTROL REMOTO Lea el presente manual con detenimiento antes de usar el aire acondicionado y consérvelo para futuras consultas.

  • Page 26
    CONT R OL R EMOTO iFEEL…
  • Page 27
    CONT R OL R EMOTO TRA NS MIT DIGITAL ON/OFF RUNNING S ET ROOM MODE RUNNING MODE SPEED TIMER ON OFF TI MER FEE LING iFEEL 1 ON/OFF Pulsar este botón para seleccionar entre grados Celsius «ºC» o entre grados Fahrenheit «ºF». 3.
  • Page 28
    CONT R OL R EMOTO 5. iFEEL «iFEEL» 6. TIMER 7. HEALTH / iCLEAN Esta función realiza una auto limpieza en la unidad interior. Cuando se activa la función «iClean», inicialmente la unidad funciona en modo refrigeración con el ventilador a baja velocidad, durante este período el agua de condensación arrastra el polvo de la batería.
  • Page 29
    CONT R OL R EMOTO 9. TURBO 10. MODE AUTO COOL HEAT 11. SLEEP Esta función ayuda a ahorrar energia y aporta un mayor comfort durante la noche. Si se activa, el equipo incrementa (en refrigeración) o disminuye (en calefacción) automáticamente la temperatura de consigna 1ºC cada hora durante las primeras 2 horas, el equipo se detiene automaticamente a las 7 horas desde la activación de la función.
  • Page 30
    CONT R OL R EMOTO 14 . Anti-F *La función Anti-F puede funcionar cuando la unidad se apaga con el mando a distancia en los modos COOL, DRY, o AUTO. El equipo funcionará en modo HEAT, con el ventilador a baja velocidad durante 3 minutos antes de la parada, para eliminar la humedad dentro del evaporador con el fin de evitar que un desprendimiento de mal olor de moho.
  • Page 31
    CONT R OL R EMOTO…
  • Page 32
    CONT R OL R EMOTO…
  • Page 33
    CONT R OL R EMOTO…
  • Page 34
    Installation and Owner’s Manual CONTENT OWNER’S MANUAL …………………. Read before operation ………………..Safety precautions ………………….Names of parts ………………….. Operating instructions ………………..Care and maintenance ………………..Troubleshooting ………………….INSTALLATION MANUAL ………………… Safety precautions ………………….Installation ……………………Indoor unit installation ………………..Outdoor unit installation ………………..
  • Page 35: Owner’s Manual

    OWNER´S MANUAL Before using your air conditioner, please read this manual carefully and keep it for future reference.. INVERTER SPLIT-TYPE ROOM AIR CONDITIONER The design and specifications are subject to change without prior notice for product improvement. Consult with the sales agency or manufacturer for details.

  • Page 36: Read Before Operation

    READ BEFORE OPERATION CAUTION Contact an authorised service technician for repair or maintenance of this unit. Contact the authinstaller for installation of this unit. This appliance is not intended for use by persons(including children) with reduced physical, sensory or mental capabilities, or lack of experience and knowledge, unless they have been given supervision or instruction concerning use of the appliance by a person responsible for their safety.

  • Page 37: Safety Precautions

    SAFETY PRECAUTIONS To prevent injury to the user or other people and property damage, the following instructions must be followed. Incorrect operation due to ignoring of instructions may cause harm or damage. The seriousness is classified by the following indications. This symbol indicates the possibility of death or serious injury.

  • Page 38
    SAFETY PRECAUTIONS CAUTION Do not clean the air Ventilate the room well When the air filter is to be conditioner with water. when used together removed, do not touch the with a stove, etc. metal parts of the unit. Water may enter the unit and An oxygen shortage It may cause an injury.
  • Page 39: Names Of Parts

    NAMES OF PARTS ★ IndoorUnit Air inlet Indoor Unit 、 1 Fron t pan el 、 2 A ir filter 、 Auto button 、 4 Louver 、 5 S ign al receptor Air outlet 、 6 S upply c ord 、…

  • Page 40: Operating Instructions

    OPERATING INSTRUCTIONS Operating temperature Cooling 18 ~ 32 ºC Indoor 0 ~ 30 ºC Heating Cooling -10 ~ 47 ºC Outdoor Heating -10 ~ 30 ºC Manual operation Manul operation can be used temporarily in case the remote controller is disable or maintenance necessary.

  • Page 41
    OPERATING INSTRUCTIONS Airflow direction control How the air conditioner works Adjust the air flow direction properly otherwise, it AUTO operation When you set the air conditioner in AUTO mode, it will might cause discomfort or cause uneven room automatically select cooling, heating(cooling/heating temperatures.
  • Page 42: Care And Maintenance

    CARE AND MANTENANCE Care and maintenance Cleaning the Grille, Case and Remote Controller Turn the system off before cleaning. To clean, wipe with a soft, dry cloth. Do not use bleach or abrasives. NOTE: Supply power must be disconnectd before cleaning the indoor unit.

  • Page 43
    CARE AND MANTENANCE Maintenance If you plan to idle the unit for a long time, perform the following: 1 . Cl ean th e i nd oor unit and ai r filt er. 2. Select FAN only mode, let the indoor fan run for a while to dry the inside of the unit. 3.
  • Page 44: Troubleshooting

    TROUBLESHOOTING The following events may occur during normal operation. Protection of the air conditioner. Compressor protection The compressor can’t restart for 3 minutes after it stops. Anti-cold air (Cooling and heating models only) The unit is designed not to blow cold air on HEAT mode, when the indoor heat exchanger is in one of the following three situations and the set temperature has not been reached.

  • Page 45
    TROUBLESHOOTING Stop the air conditioner immediately if one of the following faults occur. Disconnect the power and contact the nearest customer service center. If the E( 0,1..) or P( 0, 1 ..) code appears on the LED(LCD)window, disconnect the power and contact the service people. Trouble Fuse blows frequently or circuit breaker trips frequently.
  • Page 46
    TROUBLESHOOTING Error code list: Error code COOLING indicator HEATING indicator TIMER indicator Description 1 blink Indoor environment temprature sensor fault 2 blinks Outdoor pipe temprature sensor fault 3 blinks Indoor pipe temprature sensor fault E4/Fb 4 blinks Indoor fan motor circuit fault E5/5E 5 blinks Indoor and outdoor communication failure…
  • Page 47: Installation Manual

    INSTALLATION MANUAL Before using your air conditioner, please read this manual carefully and keep it for future reference.. INVERTER SPLIT-TYPE ROOM AIR CONDITIONER The design and specifications are subject to change without prior notice for product improvement. Consult with the sales agency or manufacturer for details.

  • Page 48: Safety Precautions

    SAFETY PRECAUTIONS INSTALLATION PRECAUTIONS Please read this installation manual carefully before operating the unit to ensure correct installation. If the power cord is damaged, replacement work shall be performed by authorised personnel only. Installation work must be performed in accordance with the national wiring standards by authorised personnel only.

  • Page 49: Installation

    INSTALLATION SELECT THE BEST LOCATION Indoor unit There should not be any heat source or stream near the unit. Above 15cm There should not be any obstacles blocking the air circulation. A place where air circulation in the room is good. A place where drainage can be easily done.

  • Page 50: Indoor Unit Installation

    INDOOR UNIT INSTALLATION INSTALLATION PLATE MOUNTING NOTE: NOTE: The mounting wall is strong and solid Mount the Installation Plate and drill enough to prevent it from the vibration. holes in the wall according to the wall structure and corresponding Installation Plate Mounting mounting points on the installation 1.

  • Page 51
    INDOOR UNIT INSTALLATION CONNECTIVE PIPE AND DRAINAGE INSTALLATION Dr ai nag e 1. Run the drain hose sloping downward. Do not install the drain hose as illustrated in wrong figures. 2. When connecting extension drain hose, insulate the connecting part of extension drain hose with a shield pipe, do not let Wrong the drain hose slack.
  • Page 52
    INDOOR UNIT INSTALLATION CONNECT THE CABLE TO THE INDOOR UNIT Electrical work Electric safety regulations for the initial Installation 1. If there is serious safety problem about the power supply, the technicians should refuse to install the air conditioner and explain to the client until the problem is solved. 2.
  • Page 53: Outdoor Unit Installation

    OUTDOOR UNIT INSTALLATION OUTDOOR INSALLATION PRECAUTION Install the outdoor unit on a rigid base to prevent increasing noise level and vibration. Determine the air outlet direction where the discharged air is not blocked. In the case that the installation place is exposed to strong wind such as a seaside, make sure the fan operating properly by putting the unit lengthwise along the wall or using a dust or shield plates.

  • Page 54
    OUTDOOR UNIT INSTALLATION CONNECT THE CABLE TO THE OUTDOOR UNIT 1. Remove the electrical control board cover from the outdoor unit by loosening the screw. 2. Connect the connective cables to the terminals as identified with their respective matched numbers on the terminal block of indoor and outdoor units.
  • Page 55
    OUTDOOR UNIT INSTALLATION 2. When using the Vacuum Pump 1. Completely tighten the flare nuts, A, B, C, D, connect the manifold valve charge hose to a charge port of the packed valve on the gas pipe side. 2. Connect the charge hose connection to the vacuum pump. 3.
  • Page 56: Remote Controller

    REMOTE CONTROLLER Please read this Owner’s Manual carefully before operation. Save this manual in a safe place for future reference.

  • Page 57
    REMOTE CONTROLLER AIR-CONDITIONER REMOTE CONTROLLER INSTRUCTIONS iFEEL “ ” Read this instructions carefully so that ● you can use the air-conditioner safely and correctly. “ ” Take good care of the instructions ● that it can be referred to at any time.
  • Page 58
    REMOTE CONTROLLER Buttons description Note: The remote controller display all symbols during power-on and only those corresponding to current operation the rest of the time. iFEEL 1 ON/OFF Press this button to turn on/off the unit. This will clear the existing timer and SLEEP settings. Press this button to set the temperature display to Fahrenheit, which is displayed by default in Celsius.
  • Page 59
    REMOTE CONTROLLER 4. DISPLAY Press this button to turn on/off the display. This is for the convenience of users who are unconformable sleeping with the backlight on. 5. iFEEL Press this button to set the temperature display on the remote controller to ambient temperature and press this button again to set it to preset temperature.
  • Page 60
    REMOTE CONTROLLER 9. TURBO Press this button only in COOL or HEAT mode to set TURBO on or off to speedy the cooling or heating. When TURBO is on, the air speed is HIGH. When TURBO is off, the air speed will restore to previous status.
  • Page 61
    REMOTE CONTROLLER 14 .Anti-F The Anti-F functions when the unit is turned off with the remote controller in COOL, DRY or AUTO mode. It will operate in HEAT mode (FAN mode for cool only units), with the internal fan running with weak flow for 3 minute before stop, to remove the moisture within the evaporator so as to prevent it from giving off bad smell from mold.
  • Page 62
    REMOTE CONTROLLER…
  • Page 63
    REMOTE CONTROLLER…
  • Page 64
    REMOTE CONTROLLER Attention 1.Aim the remote con troller toward s the receiver on the air- conditio ner. 2.The remote controller s hould be within 8 meters away from the receiver. 3.No obstacle s be tween the re mo te controller and receiver. 4.Do not drop or throw the remote con trolle r.
  • Page 66
    C/ PROVENZA 392 P2 08025 BARCELONA SPAIN (+34) 93 446 27 80…

Источник

Понравилась статья? Поделить с друзьями:
  • Кондиционер для аквариумной воды чистая вода инструкция
  • Кондиционер для аквариумной воды метиленовый синий инструкция
  • Кондиционер для аквариума чистая вода инструкция по применению
  • Кондиционер грии пульт инструкция по применению
  • Кондиционер голдстар инструкция к пульту управления