-
Contents
-
Table of Contents
-
Troubleshooting
-
Bookmarks
Quick Links
LG
Room Air Conditioner
SERVICE MANUAL
MODELS: AS-H0766KA2
AS-H0966KA2
AS-H126RKA2
AS-H186TKA2
LS-H246TKA2
website http://biz.LGservice.com
LS-H0766KA2
LS-C0966KA2
LS-H0966KA2
LS-C126RKA2
LS-H126RKA2
CAUTION
• BEFORE SERVICING THE UNIT, READ THE SAFETY
PRECAUTIONS IN THIS MANUAL.
• ONLY FOR AUTHORIZED SERVICE PERSONNEL.
LG
Related Manuals for LG LS-H0766KA2
Summary of Contents for LG LS-H0766KA2
-
Page 1: Service Manual
Room Air Conditioner SERVICE MANUAL MODELS: AS-H0766KA2 LS-H0766KA2 AS-H0966KA2 LS-C0966KA2 AS-H126RKA2 LS-H0966KA2 AS-H186TKA2 LS-C126RKA2 LS-H246TKA2 LS-H126RKA2 CAUTION • BEFORE SERVICING THE UNIT, READ THE SAFETY PRECAUTIONS IN THIS MANUAL. • ONLY FOR AUTHORIZED SERVICE PERSONNEL.
-
Page 2: Table Of Contents
Air Conditioner Service Manual TABLE OF CONTENTS LG Model Name ………………………….3 Safety Precautions……………………….5 Dimensions…………………………10 Symbols Used in this Manual ……………………10 Indoor Unit…………………………10 Outdoor Unit………………………..11 Product Specifications ……………………..14 Installation …………………………16 Selection of the Best Location……………………16 Piping Length and Elevation……………………16 How to Fix Installation Plate ……………………17 Drill a Hole in the Wall ……………………..17…
-
Page 3: Lg Model Name
LG Model Name 2003 Code Type Code of Model Meaning Producing Center, L: Chang-won R22 N: India Refrigerant A: Chang-won R410A Z: Brazil C: Chang-won R407C D: Indonesia T: China M: Mexico K: Turkey R22 V: Vietnam E: Turkey R410A…
-
Page 4
Nano Plasma F+(A/changeove)+A/clean+4way Nano Plasma F+(A/changeove)+A/clean+PTC Nano Plasma F+(A/changeove)+Autoclean+4way+PTC Nano Plasma F+(A/changeove)+A/clean+4way+Low A+PTC Negative ION+A/Clean (Nano)Plasma+Negative ION+A/Clean 4way+(Nano)Plasma F+Negative ION+Healthy dehumidification+A/Clean Nano Plasma F+4Way+(A/changeove)+A/clean+ Serial No. LG Model De velopment Serial No. * ARTCOOL COLOR Mirror White Blue Wood Metal Cherry… -
Page 5: Safety Precautions
Safety Precautions Safety Precautions To prevent injury to the user or other people and property damage, the following instructions must be followed. I Incorrect operation due to ignoring instruction will cause harm or damage. The seriousness is classified by the following indications. This symbol indicates the possibility of death or serious injury.
-
Page 6
Safety Precautions For re-installation of the installed product, Do not install, remove, or re-install the unit by always contact a dealer or an authorized ser- yourself. vice center. • There is risk of fire, electric shock, explosion, or • There is risk of fire, electric shock, explosion, or injury. -
Page 7
Safety Precautions I Operation Do not turn the air-conditioner ON or OFF by Use a dedicated outlet for this appliance. plugging or unplugging the power plug. • There is risk of fire or electrical shock. • There is risk of fire or electrical shock. Grasp the plug to remove the cord from the Do not place a heater or other appliances near outlet. -
Page 8
Safety Precautions Unplug the unit if strange sounds, odors, or Be cautious that water could not enter the smoke comes from it. product. • There is risk of electric shock or fire. • There is risk of fire, electric shock, or product dam- age. -
Page 9
Safety Precautions I Operation Use a soft cloth to clean. Do not use harsh Do not touch the metal parts of the product detergents, solvents, etc. when removing the air filter. They are very sharp! • There is risk of fire, electric shock, or damage to the •… -
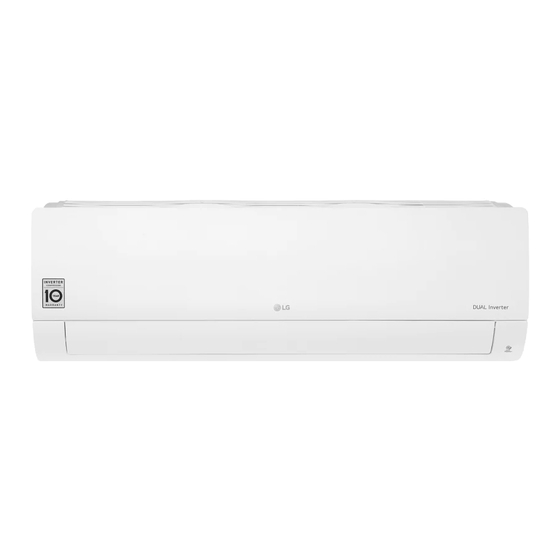
Page 10: Dimensions
Dimensions Dimensions Symbols Used in this Manual This symbol alerts you to the risk of electric shock. This symbol alerts you to hazards that could cause harm to the air conditioner. NOTICE This symbol indicates special notes. Indoor Unit Installation plate Model 7K, 9K Btu Series 12K Btu Series…
-
Page 11: Outdoor Unit
Dimensions Dimensions Outdoor Unit Gas side (3-way valve) Liquid side (2-way valve) MODEL 7k, 9k Btu Series 12k Btu Series unit Service Manual 11…
-
Page 12
Dimensions Outdoor Unit Gas side (3-way valve) Liquid side (2-way valve) MODEL 18K But Series 12 Room Air Conditioner… -
Page 13
Dimensions Outdoor Unit Gas side Liquid side MODEL AS-H246TKA2 74.5 Service Manual 13… -
Page 14: Product Specifications
Product Specifications Product Specifications Table-1 Model Name AS-H0766KA2 AS-H0966KA2 AS-H126RKA2 AS-H186TKA2 AS-H246TKA2 Item Unit 7000 9000 12000 18500 23500 Cooling Capacity Btu/h 7300 9300 12500 19000 23500 Heating Capacity Moisture Removal 1Ø,220-240V,50Hz 1Ø,220-240V,50Hz 1Ø,220-240V,50Hz 1Ø,220-240V,50Hz 1Ø,220-240V,50Hz Power Source Ø, V, Hz 5.0/5.7 5.8/6.6 8.8/9.5…
-
Page 15
Product Specifications Table-2 Model Name LS-H0766KA2 LS-H0966KA2 LS-H126RKA2 LS-C126RKA2 LS-C0966KA2 Item Unit 7000 9000 12000 12000 9000 Cooling Capacity Btu/h 7300 9000 13000 Heating Capacity Moisture Removal 1Ø,220-240V,50Hz 1Ø,220-240V,50Hz 1Ø,220-240V,50Hz 1Ø,220-240V,50Hz 1Ø,220-240V,50Hz Power Source Ø, V, Hz 5.0/5.7 5.8/6.6 8.8/9.5 8.8/9.5… -
Page 16: Installation
Installation Installation Selection of the Best Location Indoor unit Rooftop Installations: • Do not have any heat or steam near the unit. • If the outdoor unit is installed on a roof structure, be sure to level the unit. Ensure the roof structure and •…
-
Page 17: How To Fix Installation Plate
Installation How to Fix Installation Plate Drill a Hole in the Wall The wall you select should be strong and solid • Drill the piping hole with a ø70mm hole core drill. enough to prevent vibration Drill the piping hole at either the right or the left with the hole slightly slanted to the outdoor side.
-
Page 18: Flaring Work And Connection Of Piping
Flaring work and connection of piping Flaring work and connection of piping Flaring work • Carry out flaring work using flaring tool as shown below. Outside diameter Flaring work inch Main cause for refrigerant leakage is due to defect in the Ø6.35 0~0.5 flaring work.
-
Page 19: Indoor Unit Installation
Flaring work and connection of piping Connecting the pipings to the indoor unit and For right rear piping drain hose to drain pipe. Route the indoor tubing and the drain hose in the direction of • Align the center of the pipes and sufficiently tighten rear right.
-
Page 20: For Left Rear Piping
Flaring work and connection of piping • Bundle the piping and drain hose together by wrapping Connecting the pipings to the indoor unit and them with vinyl tape for enough to cover where they fit into the drain hose to drain pipe. the rear piping housing section.
-
Page 21
Flaring work and connection of piping • Wrap the area which accommodates the rear piping hous- Indoor unit installation ing section with vinyl tape. • Remove the spacer. Indoor Connection • Ensure that the hooks are properly seated on the installa- unit piping pipe tion plate by moving it left and right. -
Page 22: Connection Of The Pipes-Outdoor
Flaring work and connection of piping Connection of the pipes-Outdoor • Bad case Align the center of the pipings and sufficiently • Following bending type from right to left could cause tighten the flare nut by hand. problem of pipe damage. Finally, tighten the flare nut with torque wrench until the wrench clicks.
-
Page 23: Connecting The Cable Between Indoor Unit And Outdoor Unit
Connecting the cable between indoor unit and outdoor unit Connecting the cable between indoor unit and outdoor unit Connect the cable to the Indoor unit. • Connect the cable to the indoor unit by connecting the wires to the terminals on the control board individually according to the outdoor unit connection.
-
Page 24: Connect The Cable To The Outdoor Unit
Connecting the cable between indoor unit and outdoor unit Connect the cable to the outdoor unit Outdoor Unit Remove the control cover from the unit by Terminal block loosening the screw. Connect the wires to the terminals on the con- Over 5mm trol board individually.
-
Page 25: Checking The Drainage And Forming The Pipings
Checking the drainage and forming the pipings Checking the drainage and forming the pipings Checking the drainage Form the piping To remove the front panel from the indoor unit. Form the piping by wrapping the connecting portion of the indoor unit with insulation mate- •…
-
Page 26: Air Purging
Air purgingd AIR PURGING Air purging • Do a leak test of all joints of the tubing(both indoor and out- door) and both gas and liquid side service valves. Air and moisture remaining in the refrigerant system have Bubbles indicate a leak. Be sure to wipe off the soap with a undesirable effects as indicated below.
-
Page 27
Air purgingd Soap water method (1) Remove the caps from the 2-way and 3-way valves. Gas side (2) Remove the service-port cap from the 3-way valve. (3) To open the 2-way valve turn the valve stem counter- clockwise approximately 90°, wait for about 2~3 sec, and close it. -
Page 28: Test Running
Test running TEST RUNNING 1. Check that all tubing and wiring have been properly con- NOTE: If the actual pressure is higher than shown, the system is nected. most likely over-charged, and charge should be removed. If the actual pressure are lower than shown, the system is 2.
-
Page 29: Operation
Operation Operation Function of Controls • DISPLAY 1) C/O Model Operation Indicator • ON while in appliance operation, OFF while in appliance pause. • Flashing while in disconnection or short in Thermistor. (3 sec off / 0.5 sec on) Comp. Running Incidator •…
-
Page 30: Defrost Control
Operation • While in compressor off, the indoor fan repeats low airflow speed and pause. • While the intake air temp is between compressor on temp. and compressor off temp., 10-min dehumidification operation and 4-min compressor off repeat. ➲ Setting Temp+0.5°C Compressor ON Temp.
-
Page 31: Sleep Timer Operation
Operation I Airflow Speed Selection • The airflow speed of the indoor fan is set to high, medium, low, or chaos (auto) by the input of the airflow speed selection key on the remote control. I Sleep Timer Operation • When the sleep time is reached after <1,2,3,4,5,6,7,0(cancel) hr> is input by the remote control while in appli- ance operation, the operation of the appliance stops.
-
Page 32: Test Operation
Operation I Test operation • During the TEST OPERATION, the unit operates in cooling mode at high speed fan, regardless of room tem- perature and resets in 18±1 minutes. • During test operation, if remote controller signal is received, the unit operates as remote controller sets. If you want to use this operation, open the front panel upward and Press the power button let it be pressed for about 3 seconds.
-
Page 33: Display Function
Operation Display Function 1. Heating Model 2. Cooling Model Operation Indicator Operation Indicator • Cooling, Soft Dry, Fan, Heating • Cooling, Soft Dry, Fan Compressor on Indicator Deicer Indicator DOOR • Hot-start, Deice Self-diagnosis Function Error Error Display LED Error contents SVC check point Code (Indoor body operation LED)
-
Page 34: Remote Control Operations
Operation Remote Control Operations The remote control transmits the signals to the system. 34 Room Air Conditioner…
-
Page 35: Disassembly
Disassembly Disassembly Indoor Unit Disconnect the unit from power supply before mak- ing any checks. Be sure the power switch is set to “OFF”. To remove the Grille from the Chassis. • Set the up-and-down air discharge louver to open position (horizontally) by finger pressure.
-
Page 36
Disassembly 2. To remove the Control Box. • Remove securing screws. Caution label • Pull the control box out from the chassis carefully. 3. To remove the Discharge Grille. • Unhook the discharge grille and pull the discharge grille out from the chassis carefully. 4. -
Page 37
Disassembly • Unhook the tab on the right inside of the chassis at the same time, slightly pull the evaporator toward you until the tab is clear of the slot. 5. To remove the Motor Cover • Remove 2 securing screw. •… -
Page 38: Schematic Diagram
Schematic Diagram Schematic Diagram Electric Control Device • Heat Pump Model(LED TYPE) 38 Room Air Conditioner…
-
Page 39: Wiring Diagram
Schematic Diagram Wiring Diagram Indoor Unit Models: AS-H0766KA2, AS-H0966KA2, Models: LS-C126RKA2 AS-H126RKA2, LS-H0766KA2, LS-C0966KA2 LS-H0966KA2, LS-H126RKA2 AS-H186TKA2, AS-H246TKA2 Outdoor Unit Models: LS-H0766KA2, Models: LS-C126RKA2 Models: AS-H246TKA2 LS-H0966KA2, LS-C0966KA2 AS-H126RKA2, LS-H0766KA2, LS-H0966KA2, LS-H126RKA2 AS-H186TKA2 Service Manual 39…
-
Page 40: Components Location
Schematic Diagram Components Location MAIN P.W.B ASSEMBLY • TOP VIEW 2004/06/19 DIP CN-DISP1 250V/T2A CN-U/D FUSE RY-COMP CN-TH1 C02H C12L CN-4WAY CN-N1 C01H CN-N2 NF01J C09D R03D C01J R04F ZNR01J C02J C07D C01F RY-FAN RY-4WAY R11L C11L IC01L ZNR01F R01L R03L C08D C01A…
-
Page 41
Schematic Diagram DISPLAY ASSEMBLY – 6871A20575 OSC01B Service Manual 41… -
Page 42: Troubleshooting Guide
Troubleshooting Guide Troubleshooting Guide Refrigeration Cycle Diagram (1) Cooling Only Models INDOOR UNIT OUTDOOR UNIT LIQUID SIDE CAPILLARY TUBE HEAT HEAT EXCHANGE EXCHANGE (EVAPORATOR) (CONDENSER) GAS SIDE COMPRESSOR (2) Cooling & Heating Models INDOOR UNIT OUTDOOR UNIT CHECK VALVE LIQUID SIDE (Heating Model only) 3-WAY VALVE CAPILLARY TUBE…
-
Page 43: 2-Way, 3-Way Valve
Troubleshooting Guide 2-way, 3-way Valve 2-way Valve (Liquid Side) 3-way Valve (Gas Side) Valve cap Hexagonal wrench (4mm) Open position Flare nut Flare nut Closed position Open position Closed position piping piping Service Service connection connection port cap port To outdoor unit To outdoor unit Works Shaft position…
-
Page 44: Pumping Down
Troubleshooting Guide Pumping Down Liquid side Indoor unit Outdoor unit Open 2-Way valve Gas side Closed 3-Way valve CLOSE CLOSE Purge the air • Procedure (6) Operate the air conditioner at the cooling (1) Confirm that both the 2-way and 3-way valves cycle and stop it when the gauge indicates are set to the open position.
-
Page 45
Troubleshooting Guide Balance Refrigerant of the 3-way Valve (Gas leakage) Liquid side Indoor unit Outdoor unit 3-Way valve Open Gas side 3-Way valve Open OPEN CLOSE • Procedure (1) Confirm that both the 2-way and 3-way valves (3) Open the valve (Lo side) on the charge set and are set to the back seat. -
Page 46
Troubleshooting Guide Evacuation (All amount of refrigerant leaked) Liquid side Indoor unit Outdoor unit 3-Way valve Open Gas side 3-Way valve Open Vacuum pump OPEN CLOSE • Procedure (1) Connect the vacuum pump to the center hose (3) Close the valve (Lo side) on the charge set, of charge set center hose turn off the vacuum pump, and confirm that the gauge needle does not move (approxima-… -
Page 47: Gas Charging
Troubleshooting Guide Gas Charging (After Evacuation) Liquid side Indoor unit Open Outdoor unit 3-Way valve Gas side Open 3-Way valve Check valve Charging cylinder OPEN CLOSE • Procedure (1) Connect the charge hose to the charging This is different from previous procedures. cylinder.
-
Page 48
Troubleshooting Guide Additional gas charging (Gas leakage) • When refrigerant is insufficient by leakage, recharge the unit with the refrigerant up to normal operating suc- tion pressure. • Use the graph or the equation below to get operating suction pressure according to indoor and outdoor tem- perature. -
Page 49: Cycle Parts
Troubleshooting Guide Cycle Parts Trouble analysis 1. Check temperature difference between intake and discharge air and operating current. Temp. difference : approx. 0°C • All amount of refrigerant leaked Current : less than 80% of out. Check refrigeration cycle. rated current Temp.
-
Page 50: Electronic Parts
Troubleshooting Guide Electronic Parts Product does not operate at all. (* Refer to Electronic Control Device drawing and Schematic diagram.) Turn off Main Power (After 10 seconds) Turn on Main Power Does «beeping» sound is made from the Indoor Unit? Primarily, the operating condition of Micom is OK.
-
Page 51: The Product Is Not Operate With The Remote Controller
Troubleshooting Guide The product is not operate with the remote controller. Turn on Main Power While the compressor has been stopped, the compressor does not operate owing to the delaying function for 3 minutes after stopped. When the compressor stopped Indoor Fan is driven by a low speed. At this point the wind speed is not controlled by the remote controller.
-
Page 52: Compressor/Outdoor Fan Are Unable To Drive
Troubleshooting Guide Compressor/Outdoor Fan are unable to drive. Turn on Main Power Operate «Cooling Mode( )» by setting the desired temperature of the remote controller is less than one of the indoor temperature by 1°C at least. When in Air Circulation Mode, Compressor/Outdoor Fan is stopped. Check the sensor for indoor temperature is attached as close as to be effected by the temperature of Heat Exchanger(EVA).
-
Page 53: When Indoor Fan Does Not Operate
Troubleshooting Guide When indoor Fan does not operate. Turn off Main power Check the connection of CN-MOTOR Check the Fan Motor Check the Fuse(AC250V/T2A) Check the related circuit of indoor Fan Motor. • The pin NO 63 of Micom, and the part for driving TRIAC(the input and output signal of IC01M, PIN NO 7, 10) •…
-
Page 54: When Vertical Louver Does Not Operate
Troubleshooting Guide When Vertical Louver does not operate. • Confirm that the Vertical Louver is normally geared with the shaft of Stepping Motor. • If the regular torque is detected when rotating the Vertical Louver with hands Normal • Check the connecting condition of CN-U/D Connector •…
-
Page 55: When Heating Does Not Operate
Troubleshooting Guide When Heating does not operate Turn ON Main Power Operate “Heating Mode( )” by setting the desired temperature of the remote control is higher than one of the indoor temperature by 2°C at least. In heating Mode, the indoor fan operates in case the pipe temperature is higher than 28°C.
-
Page 56
Troubleshooting Guide Turn off Main Power • Check the electrical wiring diagram of outdoor side. • Check the abnormal condition for the component of Compressor/Outdoor Fan Motor, 4 way. • Check the «open» or «short» of connecting wires between indoor and outdoor. -
Page 57: Exploded View
Exploded View Exploded View Indoor Unit 135316 135313 152302 131410 733010 359011 342800 354210 147581 268711 268712 346810 35211B 135516 W0CZZ 352150 135311 146811 267110 249951 Service Manual 57…
-
Page 58
Exploded View 135316 Option Parts 152313 135314 152302 131410 733010 359011 267110 342800 159830 Part for Plasma Models 135311 354210 159901-1 159901-2 35211B Part for 145201 Plasma Models 268712 249951 346810 266090 135516 268714-2 268714-1 352150 668713 145200 146811 264110 266090 264110 Part for Plasma… -
Page 59
Exploded View Outdoor Unit: 7,9,18K Btu/h Models 437211 349480 437212 554031 435301 435511 546810 559010 649950 552111 552116 552202 Part for H/P Models 567502 Part for External Models 561410 554160 447900 550140 552203-1 430411 552203-2 Service Manual 59… -
Page 60
Exploded View Outdoor Unit: 12k Btu/h Models 437211 435301 237204-2 435300 237204-1 435511 554031 546810 552111 559010 567502 Part for External Models WOCZZ-2 554160 447910 552202 649950 550140 552203-1 561410 552116 Part for 430410 552203-2 H/P Models 60 Room Air Conditioner… -
Page 61
Exploded View Outdoor Unit 554032 437212 435512 552111 649950 W0CZZ-1 435511 559010 W0CZZ-2 668713 546810 552202 552116 Part for H/P Models 553000 567502 447910 Part for 435301 External Models 554160 552203-2 550140 430410 552203-1 437210 Service Manual 61… -
Page 62: Replacement Parts List
Replacement Parts List Replacement Parts List Parts List (Indoor) PART No. LOCATION DESCRIPTION REMARKS AS-H0766KA2 AS-H0966KA2 AS-H126RKA2 AS-H186TKA2 AS-H246TKA2 131410 CHASSIS ASSEMBLY 3141A20017A 3141A20017A 3141A20024A 3141A20028A 3141A20028A 267110 REMOTE CONTROLLER ASSEMBLY 6711A90023C 6711A90023C 6711A90023C 6711A90023C 6711A90023C 346810 MOTOR ASSEMBLY,INDOOR 4681A20151A 4681A20151A 4681A20048A 4681A20003D 4681A20067A 135516 COVER ASSEMBLY,MOTOR…
-
Page 63
Replacement Parts List Parts List (Indoor) PART No. LOCATION DESCRIPTION REMARKS LS-H0766KA2 LS-H0966KA2 LS-H126RKA2 LS-C126RKA2 LS-C0966KA2 430410 BASE ASSEMBLY,OUTDOOR 3041A20079A 3041A20079A 3041A20072D 3041A20072B 3041A20079A 552203-1 VALVE,SERVICE 2H02479P 2H02479P 5220A20005B 5220A20005B 2H02479P 552203-2 VALVE,SERVICE 5220A20040A 5220A20040A 2H01890P 2H01890P 5220A20040A 554031 CONDENSER ASSEMBLY,BENDING… -
Page 64
Replacement Parts List Parts List (Outdoor) PART No. LOCATION DESCRIPTION REMARKS AS-H0766KA2 AS-H0966KA2 AS-H126RKA2 AS-H186TKA2 AS-H246TKA2 430410 BASE ASSEMBLY,OUTDOOR 3040A20079A 3041A20079A 3041A20072D 3041A10027A 3041A30003H 435511 COVER ASSEMBLY,CONTROL(OUTDOOR) 3551A30115D 3551A30115D 3551A30136A 3551A30079N 3551A30007X 437210 PANEL ASSEMBLY,FRONT(OUTDOOR) 3721A20258A 3721A20258A 3721A10153B 3721A20260A 3721A20005H 237204 PANEL SIDE 3720A29001A… -
Page 65
Replacement Parts List Parts List (Outdoor) PART No. LOCATION DESCRIPTION REMARKS LS-H0766KA2 LS-H0966KA2 LS-H126RKA2 LS-C126RKA2 LS-C0966KA2 430410 Base Assembly,Outdoor 3041A20079A 3041A20079A 3041A20072D 3041A20072B 3041A20079A 552203-1 Valve,Service 2H02479P 2H02479P 5220A20005B 5220A20005B 2H02479P 552203-2 Valve,Service 5220A20040A 5220A20040A 2H01890P 2H01890P 5220A20040A 554031 Condenser Assembly,Bending… -
Page 66
October, 2006 P/No.: 3828A20462C Printed in Korea…
Краткое описание гарантии производителя
Срок покрытия
- Работа : 36 месяцев
- Запчасти : 36 месяцев
Точные условия гарантии доступны в гарантийном талоне, входящем в обязательный пакет документов, прилагаемых при покупке техники.
Если вам необходим ремонт, воспользуйтесь онлайн заявкой на ремонт или свяжитесь с нами.Пожалуйста, заранее подготовьте серийный номер вашего изделия и документы, подтверждающие покупку (чек). В негарантийных случаях может взиматься плата за диагностику, ремонтные работы и запчасти.
Посмотреть инструкция для LG LS-H0766KA2 бесплатно. Руководство относится к категории кондиционеры, 1 человек(а) дали ему среднюю оценку 7.5. Руководство доступно на следующих языках: английский. У вас есть вопрос о LG LS-H0766KA2 или вам нужна помощь? Задайте свой вопрос здесь
Не можете найти ответ на свой вопрос в руководстве? Вы можете найти ответ на свой вопрос ниже, в разделе часто задаваемых вопросов о LG LS-H0766KA2.
Что означает БТЕ (BTU)?
БТЕ (BTU) означает Британскую тепловую единицу (British Thermal Unit). Данный показатель отображает мощность охлаждения.
Что означает R-410A?
R-410A — это хладагент, используемый в устройствах, охлаждающих до нуля градусов по Цельсию.
Как часто следует прочищать фильтры кондиционера LG?
Чем чище фильтры — тем выше качество воздуха. В связи с этим рекомендуется чистить фильтры кондиционеров LG по крайней мере четыре раза в год.
Инструкция LG LS-H0766KA2 доступно в русский?
К сожалению, у нас нет руководства для LG LS-H0766KA2, доступного в русский. Это руководство доступно в английский.
Не нашли свой вопрос? Задайте свой вопрос здесь
LG Model Name ……………………………………………………………………………………………………………………………..3
Safety Precautions…………………………………………………………………………………………………………………………5
Dimensions………………………………………………………………………………………………………………………………….10
Symbols Used in this Manual …………………………………………………………………………………………………….10
Indoor Unit………………………………………………………………………………………………………………………………10
Outdoor Unit……………………………………………………………………………………………………………………………11
Product Specifications …………………………………………………………………………………………………………………14
Installation …………………………………………………………………………………………………………………………………..16
Selection of the Best Location……………………………………………………………………………………………………16
Piping Length and Elevation………………………………………………………………………………………………………16
How to Fix Installation Plate ………………………………………………………………………………………………………17
Drill a Hole in the Wall ………………………………………………………………………………………………………………17
Drain hose junction…………………………………………………………………………………………………………………..17
Flaring work…………………………………………………………………………………………………………………………….18
Connection of Piping Indoor………………………………………………………………………………………………………18
Connection of the Pipes-Outdoor……………………………………………………………………………………………….22
Checking the Drainage……………………………………………………………………………………………………………..25
Form the Piping ……………………………………………………………………………………………………………………….25
AIR PURGING ………………………………………………………………………………………………………………………………26
Air purging………………………………………………………………………………………………………………………………26
Air purging with vacuum pump …………………………………………………………………………………………………..26
Test Running ……………………………………………………………………………………………………………………………….28
Operation …………………………………………………………………………………………………………………………………….29
Function of Controls …………………………………………………………………………………………………………………29
Display Function ……………………………………………………………………………………………………………………..33
Self-diagnosis Function…………………………………………………………………………………………………………….33
Remote Control Operations……………………………………………………………………………………………………….34
Disassembly ………………………………………………………………………………………………………………………………..35
Indoor Unit………………………………………………………………………………………………………………………………35
Schematic Diagram………………………………………………………………………………………………………………………38
Electric Control Device ……………………………………………………………………………………………………………..38
Wiring Diagram………………………………………………………………………………………………………………………..39
Components Location ………………………………………………………………………………………………………………40
Troubleshooting Guide …………………………………………………………………………………………………………………42
Refrigeration Cycle Diagram ……………………………………………………………………………………………………..42
2-way, 3-way Valve …………………………………………………………………………………………………………………43
Cycle Parts……………………………………………………………………………………………………………………………..49
Electronic Parts ……………………………………………………………………………………………………………………….50
Exploded View……………………………………………………………………………………………………………………………..57
Replacement Parts List ………………………………………………………………………………………………………………..62
Air Conditioner Service Manual
Types of Manuals:
The main types of LG LS-H0766KA2 instructions:
- User guide — rules of useing and characteristics
- Service manual — repair, diagnostics, maintenance
- Operation manual — description of the main functions of equipment
Air Conditioner Instructions by LG:
-
Gree GWC30QF-D3DNB4G
Models: ’Service ManualChange for lifeGREE ELECTRIC APPLIANCES, INC. OF ZHUHAIGWC30LB-D3DNB2G GWC30QF-D3DNB4G GWH30LB-D3DNB2G VIRU30HP230V1AH GWH30QF-D3DNB4G GWC36LB-D3DNB2G GWC36QF-D3DNB4G GWH36LB-D3DNB2G GWH36LB-D3DNA5G VIRU36HP230V1AH GWH36QF-D3DNB4G (Refrigerant R410A) …
GWC30QF-D3DNB4G Air Conditioner, 115
-
Panasonic CS-C9MKV
© Panasonic HA Air-Conditioning (M) Sdn. Bhd. 2011. Unauthorized copying and distribution is a violation of law. Order No: PHAAM1101045C3 Indoor Unit Outdoor Unit CS-C9MKV CS-C12MKV CS-C18MKV CS-C24MKV CS-C28MKV CU-C9MKVCU-C12MKVCU-C18MKVCU-C24MKVCU-C28MKV This service information is designed for experience …
CS-C9MKV Air Conditioner, 112
-
York Sunline 2000 D3CG090
SAFETY CONSIDERATIONSDue to system pressure, moving parts and electricalcomponents, installation and servicing of air conditioningequipment can be hazardous. Only qualified, trained, servicepersonnel should install, repair, maintain or service thisequipment.Observe all precautions in the literature, on labels and tagsa …
Sunline 2000 D3CG090 Air Conditioner, 20
-
Mitsubishi Mr.Slim MFZ-KA09NA
FLOOR TYPE AIR CONDITIONERSMFZ-KA09NA MFZ-KA12NA MFZ-KA18NAFrançaisEspañolEnglishINSTALLATION MANUAL For INSTALLER• This manual only describes the installation of indoor unit. When installing the outdoor unit, refer to the installation manual of outdoor unit.MANUAL DE INSTALACIÓN PARA EL INSTALADOR• En este …
Mr.Slim MFZ-KA09NA Air Conditioner, 24
-
Frico TKW40
HydronicCeiling CassetteTKW 20-70GB“Hydronic Ceiling Cassette” Fan Coil UnitIVentilconvettori “Hydronic Ceiling Cassette”FVentiloconvecteurs “Hydronic Ceiling Cassette”DHydronik-KassettengeräteEUnidades Fan Coil tipo «Hydronic Ceiling Cassette»NLVentilatieconvector “Hydronic Ceiling Cassette” …
TKW40 Air Conditioner, 34
-
Champion Model 44
(1M)1/08PrintedinU.S.A.CH06344” Single Tank High-TemperatureRack Conveyor Dishwashing MachineMODEL 44MODEL 44 RACK CONVEYORSPECIFIER STATEMENTSpecified unit will be Champion Model 44 high temperature rack conveyor dishwashing machine. ConstructedofType304stainlesssteelandmea …
Model 44 Dishwasher, 6