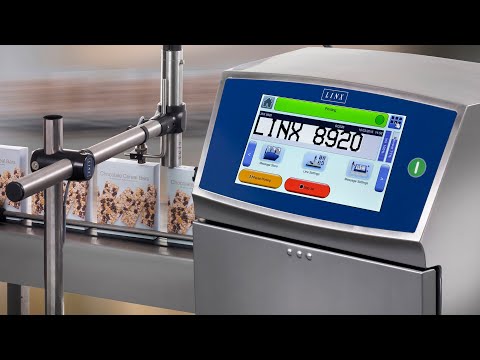
Каплеструйный принтер LINX 4900
- Обзор
- Характеристики
- Видео
- Брошюры
- Образцы печати
Обзор
Надежный каплеструйный принтер обеспечивает полное, простое и качественное решение задач промышленной маркировки практически в любом производственном секторе.
Печатает от одной до двух строк текста и графику высотой до 10 мм. Наносит дату (любые форматы), номер партии, смены, логотип и т.п.
Обтекаемый корпус из нержавеющей стали с классом защиты IP55, полностью закрытая конструкция печатающей головки гарантируют эффективное использование принтера на предприятиях, где возможен контакт с водой и в пыльных цехах.
Модель сочетает простоту и высокую эффективность работы с низкой стоимостью эксплуатации, что идеально подходит для решения задач маркировки на конвейерных линиях со скоростями до 6,25 м/с.
Возможности печати
- Нанесение простой информации в 1 / 2 строки:
— фиксированный текст
— переменные данные (дата, время, номер смены, номер партии, счетчик)
— функция сдвига даты
— логотипы - Печать со скоростью до 6,25 м/сек
- Размер символов от 1,4 до 9,5 мм
- Максимальная длина сообщения 682 символа
- Реверс, инверсия, переворот сообщения
Надежность и функциональность
- Запуск и остановка струи по нажатию одной кнопки — также просто, как включить или выключить конвейер
- Стальной корпус с оценкой IP55 — легко моется и допускает работу в пыльных и влажных помещениях
- Чернильная система с бесщеточной помпой — не требуется замена дорогой детали на всем протяжении ‘жизни’ прибора
- Автоматическая диагностика и электронный контроль параметров струи — никакого вмешательства в работу
- Уникальная система автопромывки FullFlush™ — обеспечивает надежный запуск, допускает длительную остановку (до 30 дней) и требует ручной очистки печатающей головки не чаще 1 раза в месяц
- Ударопрочная печатающая головка, без подвижных и регулируемых элементов — отсутствие простоев из-за неквалифицированного вмешательства в работу
- Печать при любой ориентации печатающей головки относительно объекта без потери качества печати
- Добавка чернил и растворителя без остановки печати — нет необходимости останавливать конвейерную линию
- WYSIWYG дисплей, регулируемый контраст экрана и русифицированная QWERTY клавиатура — работа как на обычном компьютере
- память на 50 сообщений и 100 логотипов — для минимального редактирования сообщений
| Тип печатающей головки | ULTIMA | ULTIMA plus | MINI (4900 DC) |
| Количество печатаемых строк | 1 или 2 | 1 или 2 | 1 или 2 |
| Стандартная (базовая) скорость, м/c | 2,01 / 0,63 | 1,61 / 0,54 | 1,95 / 0,85 |
| Высокая скорость (опция HS), м/с | 4,69 / 0,82 | 5,20 / 1,36 (DC) | — |
| Сверхвысокая скорость (опция SHS), м/с | 6,25 / 1,44 | 7,28 / 1,05 | 6,83 / 2,93 |
| Оптимальное расстояние до объекта, мм | 12 | 12 | 4, 8 или 12 |
| Диапазон высот печатаемых символов, мм | 1,8 — 8,8 | 2,1 — 9,5 | 1,4 — 4,6 |
| Количество используемых растров | 10 | 10 | 15 |
| Количество сообщений / лого в памяти | 50 / 100 | 50 / 100 | 50 / 100 |
| Максимальная длина сообщения (количество символов) | 682 | 682 | 682 |
| Длина шланга печатающей головки, м | 2 или 4 | 2 или 4 | 2 или 4 |
| Расход чернил (при печати растром 7×5) | 90 млн. знаков на литр | 55 млн. знаков на литр | 220 млн. знаков на литр |
skype: Automatics-nn
загрузка…
кристина язвинская
Мастер
(1457),
на голосовании
9 лет назад
Голосование за лучший ответ
Andrey Neo
Ученик
(185)
9 лет назад
загляни на этот сайт может найдешь что тебе нужно)
Источник: http://linx.labelpack.ru/index.php?name=Shop&op=view&id=1
Евгений Бутенко
Мыслитель
(9512)
9 лет назад
Смотри здесь:
http://www.avsnn.ru/download/11/

OlerМудрец (14683)
9 лет назад
рекламные буклеты очень сильно помогут!
Oler
Мудрец
(14683)
9 лет назад
зайди на сайт linx , напиши в техподдеожку- всегда помогут.
Похожие вопросы
-
Page 1
Linx 4900 Ink Jet Printer Operating Manual… -
Page 2: Copyright Notice
Linx in good faith. However, it is acknowledged that there may be errors or omissions in this operating manual. Linx shall not be liable for any loss or damage arising from the use of any information, particulars or errors in this operating manual, or maintenance carried out by unauthorized personnel, or any incorrect use of the product, whatsoever.
-
Page 3: About This Manual
About this Manual About this Manual This manual describes how to operate the Linx 4900 Ink Jet Printer, a specialist printer system for use in production line environments for printing onto a wide range of substrates. The information contained in this edition of the operating manual is applicable to software Version 1.0.
-
Page 4: Safety
Therefore, it is essential that all operators of a Linx ink jet printer read and understand this safety section before attempting to operate it or to carry out any maintenance tasks on it.
-
Page 5
Printer Cover Security The 4900 ink jet printer has a security locking device fitted to the printer cover, to prevent operators from opening the cover and subjecting themselves to the potential lethal electrical hazards contained within. -
Page 6: Operating The Printer
Only personnel who have been fully trained and authorized by Linx are qualified to operate or maintain Linx printers. If you are in any doubt as to your abilities to operate or maintain the printer, DO NOT DO SO; consult your supervisor for guidance or contact your local Linx distributor who will be happy to advise you.
-
Page 7: Inks And Solvents
If the Material Safety Data Sheets have not been supplied or are not available, please contact your local Linx distributor. ALWAYS refer to the Material Safety Data Sheets before working with inks and solvents •…
-
Page 8
WARNING: IN ALL EMERGENCY CASES, REMOVE THE CASUALTY FROM THE HAZARD AND CHECK THE MATERIAL SAFETY DATA SHEETS FOR IMMEDIATE ACTION. EVACUATE THE CASUALTY TO MEDICAL AID IF REQUIRED. MP65492–1 (vii) Linx 4900 Operating Manual… -
Page 9: Noise Emissions
The noise emission level from this printer does not exceed 70 dBA. This means that there is no hazard to hearing from long-term exposure and, therefore, no legal requirement for ear protection to be worn when working in the vicinity of this printer. Linx 4900 Operating Manual (viii) MP65492–1…
-
Page 10: Table Of Contents
How to Use this Manual………………..xvi Related Publications ………………..xvii Document Conventions ………………… xvii 1 Introduction ……………………1 1.1 About the 4900 Printer System…………….1 1.1.1 Overview ………………….1 1.1.2 Printer System Features …………….2 1.2 Operating the Printer ………………..3 1.2.1 Printer Display Features……………..
-
Page 11
4.5.9 Handling a Field Overlap Message……………63 4.6 Selecting, Editing and Deleting Messages …………64 4.6.1 To Select a Message for Editing…………..64 4.6.2 To Edit a Message………………65 4.6.3 To Delete a Message………………66 4.6.4 To Delete the Current Message…………..67 Linx 4900 Operating Manual MP65492–1… -
Page 12
5.5.7 To Set the Display Contrast …………… 115 5.6 Changing the Passwords………………116 6 Remote Interface Setup ………………..117 6.1 About the Linx Remote Communications Interface ……….117 6.2 Introducing the Remote Setup Menu …………..118 6.2.1 To Access the Remote Setup Menu …………118 6.2.2 Option Availability……………… -
Page 13
B.2.4 Message Options Screen …………….182 B.2.5 Edit Message Screen ……………..183 B.2.6 Setup Menu ………………..184 B.2.7 Remote Setup Menu ………………186 B.2.8 Diagnostics Menu………………187 B.3 Keyboard Shortcuts ………………..188 B.3.1 Current Message Screen …………….188 B.3.2 Setup Menu ………………..188 B.3.3 Diagnostics Menu………………188 Linx 4900 Operating Manual (xii) MP65492–1… -
Page 14
Hungarian ……………………. 235 Italian ……………………236 Latvian ……………………237 Lithuanian ……………………. 238 Maltese ……………………239 Norwegian……………………. 240 Polish ……………………241 Portuguese ………………….. 242 Slovak ……………………243 Slovenian ……………………244 Spanish……………………245 Swedish ……………………246 MP65492–1 (xiii) Linx 4900 Operating Manual… -
Page 15
H.3.3 Activities …………………250 H.4 Printing……………………251 H.4.1 Aims ………………….251 H.4.2 Key Points ………………..251 H.4.3 Activities …………………251 H.5 Navigating the Linx 4900 ………………252 H.5.1 Aims ………………….252 H.5.2 Key Points ………………..252 H.5.3 Activities …………………252 H.6 Stopping Print and Shutting Down …………..253 H.6.1 Aims ………………….253 H.6.2 Key Points ………………..253… -
Page 16: Using This Manual
Chapter 2, ‘Getting Started’ describes how to switch the printer on, select a message, start and stop the printer, and power it down. It also introduces you to some fundamental controls and indicators of the 4900 printer system. Chapter 3, ‘Day-to-Day Operations’ describes the day-to-day printer operations such as working with the current message, selecting another message, starting and stopping printing, and checking the printer status.
-
Page 17: How To Use This Manual
It is worth having a brief look at this appendix initially to see what information may be useful to you. To see a detailed description of the full set of functions that the 4900 printer offers, refer to Chapters 3 and 4, which cover Day-to-Day Operations and Creating and Editing Messages, respectively.
-
Page 18: Related Publications
Stopped”… italics for external cross-references (cross-references made to another publication). For example, refer to the Simply the Linx 4900 pocket guide for further information. Menu and Screen Conventions Unless otherwise stated, the menus and screens shown in this manual reflect the following: •…
-
Page 19
Level C Level B, and/or Level C). This pointer icon indicates that the information contained in the section or Level A paragraph to which the icon refers is only applicable to the user level shown. Linx 4900 Operating Manual (xviii) MP65492–1… -
Page 20: Introduction
1.1 About the 4900 Printer System 1.1.1 Overview The Linx 4900 printer system is a fast, reliable, non-contact ink jet printer designed to provide versatile, uninterrupted operation in factory environments. It is used to apply sell-by dates, batch codes, logos and other variable information to a wide range of substrates on the production line using ‘continuous ink jet’…
-
Page 21: Printer System Features
Uses a shaft encoder to provide a constant print width regardless of line speed (combats conveyor speed fluctuation) Choice of Font and Character Height • New flexi-font capability for easy message size and print adjustment • Wide range of character heights and speeds Linx 4900 Operating Manual MP65492–1…
-
Page 22: Operating The Printer
Current Message Screen • Main work area provides access to all printer functions • View current message at all times Message Storage • Up to 50 message capacity • Easy message selection with preview facility MP65492–1 Linx 4900 Operating Manual…
-
Page 23: Navigating The System Menus
View Event List MESSAGE MESSAGE TYPE OPTIONS DIAGNOSTICS MENU MENU EDIT MESSAGE Select message for printing Set font size Delete message F2 Bold on/off Specify field type Save message and exit Figure 1-2 Navigating the System Menus Linx 4900 Operating Manual MP65492–1…
-
Page 24: About Continuous Ink Jet Printing
How do Linx printers work? The printer works by propelling a jet of conductive ink through a hole in the printhead nozzle. Before the ink exits the nozzle, it is pulsed (modulated) to produce a constant stream of identical ink drops.
-
Page 25
Chapter 1: Introduction 49203 ULTIMA ULTIMA Print pattern being created Figure 1-3 Printhead in Operation Linx 4900 Operating Manual MP65492–1… -
Page 26: Password Security System
Chapter 1: Introduction 1.4 Password Security System The password system can be used to control operator access to the 4900 printer functions. It can either be switched on to activate the PASSWORD screen and enforce password entry to certain printer functions, or it can be switched off at a particular ‘user level’.
-
Page 27
Chapter 1: Introduction This page left blank intentionally Linx 4900 Operating Manual MP65492–1… -
Page 28: Getting Started
Chapter 2: Getting Started 2 Getting Started This chapter is designed for anyone who is new to the 4900 printer. It Level A introduces you to some of the fundamental controls and indicators of the Level B Level C printer and aims to quickly get you started with some day-to-day printer operations.
-
Page 29: Before You Start
2.1 Before You Start CAUTION: You must read the ‘Safety’ section at the front of this manual before attempting to use the 4900 printer. If you are in any doubt, particularly where safety issues arise, please contact Linx or your Linx approved distributor.
-
Page 30: Switching On And Starting Up
Confirm that the printer has power applied. To do this, check that the green LED power indicator on the printer control panel is lit. 49049 A Power LED indicator B General Control keys and Display C Keyboard and Function keys Figure 2-3 Printer Control Panel MP65492–1 Linx 4900 Operating Manual…
-
Page 31: Viewing The Power-Up Sequence
About The four LED indicators are printer system status indicators. They light to show certain printer system conditions: Serious printer failure. It may be necessary to contact your local Linx fail distributor. Printer warning. A warning message is displayed on the Status line of warning the Display.
-
Page 32: Introducing The Current Message Screen
Error 3.04 Solvent Low A Current Message B Message Display Area C Current Message Name D Message Selection Cursor Indicators E Keyboard Status Indicator F Options G Status Line Figure 2-6 Current Message Screen Indicators MP65492–1 Linx 4900 Operating Manual…
-
Page 33: How To Print A Message
Scroll through the list, moving the menu cursor > ) to the message you want. Select the message. At the SELECT MESSAGE screen, you can type the first letter of the message name to quickly find the message you want. Linx 4900 Operating Manual MP65492–1…
-
Page 34
F2 : Select F3 : Delete Figure 2-8 Message Options Screen At the MESSAGE OPTIONS screen, press the [F2] function key: The CURRENT MESSAGE screen is redisplayed, showing the selected message as the current message. MP65492–1 Linx 4900 Operating Manual… -
Page 35: To Start Printing
See ‘Line Settings’ on page 30 for further information) 49058 CURRENT MESSAGE : MESSAGE 1 LINX PRINTING Stop Print Check Status Status : Printing Change Setup Figure 2-9 Current Message Screen—When Printing Linx 4900 Operating Manual MP65492–1…
-
Page 36: To Stop Printing
Do this… Restart printing Press the [start] key View the status of the printer Press the [F2] key Stop the jet running See the section ‘To Shut Down the Jet’ on page 21 for instructions MP65492–1 Linx 4900 Operating Manual…
-
Page 37: Working With The System Menus
At the CURRENT MESSAGE screen, press the [F4] function key: NOTE: If the Password system is switched On, the PASSWORD screen is displayed at this point and you must enter your password to continue. See ‘To Enter the Password’ above. Linx 4900 Operating Manual MP65492–1…
-
Page 38
Figure 2-13 Cursor at Set Time Setting At the Set Time setting, enter the current time by overtyping, for example, 15:40, then press the [enter] key to confirm your entry. Press the [esc] key to return to the CURRENT MESSAGE screen. MP65492–1 Linx 4900 Operating Manual… -
Page 39: Typing Keyboard Characters
To lock the keyboard in this mode, hold the [ctrl] key down and press the [lock] key. To unlock, repeat this locking action. Figure 2-15 Typing Keyboard Characters Linx 4900 Operating Manual MP65492–1…
-
Page 40: Shutting Down And Switching Off
When the countdown reaches zero, the power to the printer is switched off, and the printer Display and the Power LED indicator extinguish. NOTE: that the mains power supply switch (rocker switch) at the rear of the printer remains in the On position. MP65492–1 Linx 4900 Operating Manual…
-
Page 41
F2 : No F1 : Yes Figure 2-17 Power Down Screen Press the [F1] function key to select Yes (alternatively, press the [F2] function key to select No and return to the CURRENT MESSAGE screen). Linx 4900 Operating Manual MP65492–1… -
Page 42: Emergency Stop
CAUTION: Wherever possible, do not leave the printer in this state for too long as this may result in ink blockages. You should restart the jet and carry out a normal shutdown using the correct procedure as soon as possible. MP65492–1 Linx 4900 Operating Manual…
-
Page 43
Chapter 2: Getting Started This page left blank intentionally Linx 4900 Operating Manual MP65492–1… -
Page 44: Day-To-Day Operations
It also describes how to handle system ‘event’ messages and work with printer system passwords. NOTE: If you are new to the 4900 printer, you should first read Chapter 2, ‘Getting Started’ to familiarize yourself with the fundamental printer controls and indicators, and to start performing some basic printer operations.
-
Page 45: Introducing The Current Message Screen
Indicates the printer functions available to you. To select an option, you press the associated function key—[F1], [F2, [F3] or [F4]. Status Line Displays status messages, and printer warning and fault messages, known as ‘event messages’. Linx 4900 Operating Manual MP65492–1…
-
Page 46: Selecting And Printing Messages
] cursor keys until the cursor rests at the message you want. Type in the first character of the message name to quickly find the message you want. Note that the letter you enter is case sensitive. Press the [enter] key. MP65492–1 Linx 4900 Operating Manual…
-
Page 47
] key and the Down [ ] key to scroll through the list of stored messages. With each key press, the next message is displayed in the Message Display Area, and the message name changes accordingly. Linx 4900 Operating Manual MP65492–1… -
Page 48: To Start Printing
Status : Printing Change Setup Figure 3-4 Current Message Screen—When Printing NOTE: Actual printing is controlled by the line settings configured for See Also your production line. For further information, see ‘Line Settings’ on page 30). MP65492–1 Linx 4900 Operating Manual…
-
Page 49
Shaft Encoder option. This can be On or Off. A shaft encoder is a device used for line speed detection. Refer to Appendix A, ‘Installation and Setup’ for information about using See Also and setting up product sensors and shaft encoders. Linx 4900 Operating Manual MP65492–1… -
Page 50: To Stop Printing
The message “Stop Print : Please Wait” is displayed briefly in the Status Line, then printing stops. The options on the left side of the CURRENT MESSAGE screen are redisplayed (see Figure 3-1 on page 26), and the printer status changes to “Jet Running”. MP65492–1 Linx 4900 Operating Manual…
-
Page 51: To Shutdown The Jet
• If the ‘Auto Power Down’ function is not enabled, after the jet is shut down, the message in the Status Line changes to “Jet Stopped : Press Stop Key to Power Down” Linx 4900 Operating Manual MP65492–1…
-
Page 52: To Power Down And Switch Off
AUTO POWER DOWN screen. See Chapter 5, ‘Changing the System Setup’ for details. If you are unsure whether or not to power the printer off manually, you should consult your supervisor. MP65492–1 Linx 4900 Operating Manual…
-
Page 53
The power to the printer is switched off immediately, and the printer Display and the Power LED indicator extinguish. Note that the mains power supply switch at the rear of the printer (rocker switch) remains in the ON position. Linx 4900 Operating Manual MP65492–1… -
Page 54: Emergency Stop
You should clean the printhead and restart the jet, then carry out a normal jet shutdown and power down using the correct procedures as soon as possible. MP65492–1 Linx 4900 Operating Manual…
-
Page 55: Editing The Current Message
NOTE: If the Password system is switched On, the PASSWORD screen is displayed at this point and you must enter a password to continue. See ‘To Enter the Password’ on page 42 for further details. Linx 4900 Operating Manual MP65492–1…
-
Page 56: To Edit The Message
See Also fields, see Chapter 4, ‘Creating and Editing Messages’. When you have finished, press the [F4] function key to save the changes and exit. The CURRENT MESSAGE screen is redisplayed, showing the edited message. MP65492–1 Linx 4900 Operating Manual…
-
Page 57: Viewing The Printer Status
Chapter 3: Day-to-Day Operations 3.4 Viewing the Printer Status The 4900 printer has the following visual guides that show you the current status of the printer: • The Status Line at the bottom of the screen (or menu) displays messages about the operational status of the printer, such as “Starting Jet : Please Wait”.
-
Page 58: To Reset The Print Count
To reset or to change the value, press the [enter] key to select the Print Count option then overtype the number. Press the [enter] key to confirm your entry. Press the [esc] key to exit. MP65492–1 Linx 4900 Operating Manual…
-
Page 59: Handling System Events
System events are logged in the ‘Event List’ where they remain until they are resolved, or until the printer is switched off. See ‘To View Events in the List’ on page 41 for further information. Linx 4900 Operating Manual MP65492–1…
-
Page 60: To View Events In The List
See Also the system event messages. Press the [esc] key to exit. You can use a shortcut key to go to the EVENT LIST menu. To do this, press [L] at the CURRENT MESSAGE screen. MP65492–1 Linx 4900 Operating Manual…
-
Page 61: Working With Passwords
Chapter 3: Day-to-Day Operations 3.6 Working with Passwords The Linx 4900 printer has a password system that allows you to control the printer functions available to the printer operator. You can elect to work with the password system On (password controlled access to certain printer functions), or you can choose to work with the password system switched Off at a designated ‘user level’.
-
Page 62: To Switch The Password System On/Off
Press the [enter] key. At the Password option setting, press the Left [ ] or Right [ ] cursor keys to toggle the setting to Off, then press the [enter] key. Press the [esc] key to exit. MP65492–1 Linx 4900 Operating Manual…
-
Page 63
Press the [enter] key. At the Password setting, press the Left [ ] or Right [ ] cursor key to toggle the setting to On, then press the [enter] key. Press the [esc] key to exit. Linx 4900 Operating Manual MP65492–1… -
Page 64: Getting Help
Chapter 7, ‘Diagnostics and Maintenance’, and Appendix D, ‘System Event Messages’ • For any other help, including using the printer or the software, refer to the ‘Contents’ or ‘Index’ sections to locate the relevant information MP65492–1 Linx 4900 Operating Manual…
-
Page 65
Chapter 3: Day-to-Day Operations This page left blank intentionally Linx 4900 Operating Manual MP65492–1… -
Page 66: Creating And Editing Messages
4.12 ‘Inserting a Logo Field’ 4.13 ‘Creating a Message: Worked Example’ If you are new to the 4900 printer and wish to get started creating a message, go to the section ‘Creating a Message: Worked Example’ on page 82. MP65492–1…
-
Page 67: Introduction
B Date field C Remote field D Logo field E Timed Message field F Time field G Sequential Number field Figure 4-1 Example Field Types The next subsection ‘About Field Types’ describes each type of message field. Linx 4900 Operating Manual MP65492–1…
-
Page 68: About Field Types
A set of Arabic logos are installed on your printer as a standard. Additional logos may also be available in your printer software. You can place a logo in a message. See ‘Inserting a Logo Field’ on page 80 for further details. MP65492–1 Linx 4900 Operating Manual…
-
Page 69: Choosing The Message Type
You can view the range of message types available on your printer via the Diagnostics > System Configuration > Message Type menu. Full listings of message types for the Ultima and Ultima plus printheads See Also are provided in Appendix A, ‘Installation and Setup’. Linx 4900 Operating Manual MP65492–1…
-
Page 70: Selecting The Size
16 Flexible 16 Quality 16 Speed 16 Wide Figure 4-4 Character Sets Note that the numerical value in the name of each message type and character set indicates the height of the printed character, in drops. MP65492–1 Linx 4900 Operating Manual…
-
Page 71: Using A Bold Ratio
Use the F2 : Bold option on the EDIT MESSAGE screen to apply the defined bold ratio to a particular new message field NOTE: The bold ratio can only be applied to a new field, not an existing field. Linx 4900 Operating Manual MP65492–1…
-
Page 72: Reversing The Printed Message
You can change the orientation of the printed message from the normal forward orientation: 49275 to reverse orientation, where the message is printed right to left: 49276 Use the Reverse Message option in the SETUP menu to switch the setting On or Off. MP65492–1 Linx 4900 Operating Manual…
-
Page 73: Creating A New Message
16 Quality 16 Flexible Figure 4-7 Message Type Menu At the MESSAGE TYPE menu, scroll through the list of available message types until the cursor rests at the message type you want, then press [enter] key. Linx 4900 Operating Manual MP65492–1…
-
Page 74
Figure 4-8 Edit Message Screen: New Message You can now create the content of your message by adding text and/or other types of fields and then save the message. See the following sections in this chapter for details. MP65492–1 Linx 4900 Operating Manual… -
Page 75: Getting To Know The Edit Message Screen
Press [F3] to specify the field (Time, Timed Message, Sequential Number, Date, Remote or Logo field). Press [F4] to save the message and exit from the screen, back to the CURRENT MESSAGE screen. Figure 4-9 Edit Message Screen Features and Indicators Linx 4900 Operating Manual MP65492–1…
-
Page 76
Cursor position 49127 EDIT MESSAGE : MESSAGE 1 Size 16 FH (Caps) Bold Off Field Type Save & Exit Figure 4-10 Message Cursor Position MP65492–1 Linx 4900 Operating Manual… -
Page 77: Creating A Text Field
“Overlap: Press Enter to Edit” is displayed in the Status Line. See ‘Handling a Field Overlap Message’ on page 63 for further information. Linx 4900 Operating Manual MP65492–1…
-
Page 78: To Turn The Text Into A Field
If you want to change the text, edit the field. See ‘To Edit a Text Field’ on page 62 for details. 4.4.4 Saving the Message When you have finished creating the message: Press the [F4] function key to save the message and exit. Alternatively, press the [esc] key. MP65492–1 Linx 4900 Operating Manual…
-
Page 79: Working With Message Fields
(as you enter text). [enter] To turn the text into a field (when you have finished entering text). To select a field (with cursor at field). [ctrl] + [del] Delete a field from the message. Linx 4900 Operating Manual MP65492–1…
-
Page 80: Fine Tuning The Field Start Position
Continue creating the field as required. For multiple field messages, create the emboldened field before you create the other fields in the message because once a bold ratio is applied to the field, the width of the field increases. MP65492–1 Linx 4900 Operating Manual…
-
Page 81: Entering Text
Avoid typing in excess characters as this results in text ‘wraparound’. For example, typing ‘ABCD’ in a field which reads ‘ABC’ results in overwriting the ‘A’, thus the field would read ‘DBC’. See also NOTE under ‘Entering Text’. Linx 4900 Operating Manual MP65492–1…
-
Page 82: To Edit A Field
See ‘To Edit a Text Field’ on page 62 • If you are creating a new field, the cursor is in a position that is already occupied by another field. Move the cursor to a free space and start again MP65492–1 Linx 4900 Operating Manual…
-
Page 83: Selecting, Editing And Deleting Messages
Figure 4-14 Message Options Screen At the MESSAGE OPTIONS screen, press the [F1] function key. NOTE: If the Password system is switched On, the PASSWORD screen is displayed at this point and you must enter a password to continue. Linx 4900 Operating Manual MP65492–1…
-
Page 84: To Edit A Message
When you have finished, press the [F4] function key to save the changes and exit. The CURRENT MESSAGE screen is redisplayed, showing the edited message. MP65492–1 Linx 4900 Operating Manual…
-
Page 85: To Delete A Message
The DELETE MESSAGE screen is displayed: 49129 DELETE MESSAGE Delete Message MESSAGE 1 F2 : No F1 : Yes Figure 4-18 Delete Message Screen Linx 4900 Operating Manual MP65492–1…
-
Page 86: To Delete The Current Message
CURRENT MESSAGE screen is redisplayed. Note that the Message Display Area is blank (no message is selected). Press the [F2] function key to select No. The message is not deleted and the CURRENT MESSAGE screen is redisplayed showing the selected message MP65492–1 Linx 4900 Operating Manual…
-
Page 87: Creating A Time Field
49308 SELECT FIELD TYPE > Time Timed Message Sequential No. Date Figure 4-20 Select Field Type Menu: Time Option Scroll to the Time option (as shown in the above example), then press the [enter] key. Linx 4900 Operating Manual MP65492–1…
-
Page 88
Field Type Save & Exit Figure 4-22 Edit Message Screen: Time Field NOTE: The current time is not displayed in the message until you have finished editing the message and returned to the CURRENT MESSAGE screen. MP65492–1 Linx 4900 Operating Manual… -
Page 89: Creating A Timed Message Field
Next Message Time Message Figure 4-24 Timed Message Menu At the TIMED MESSAGE menu, you can do the following: NOTE: You must set up a minimum of two messages, each with a different start time. Linx 4900 Operating Manual MP65492–1…
-
Page 90: Editing A Timed Message Field
If you wish to add another message to the field, you must delete the field and start again. To delete the field, at the EDIT MESSAGE screen select the field and press [ctrl] + [del]. MP65492–1 Linx 4900 Operating Manual…
-
Page 91: Creating A Sequential Number Field
Scroll to the Sequential No. option (as shown in Figure 4-26 above), then press the [enter] key. The SEQUENTIAL NUMBER menu is displayed: 49123 SEQUENTIAL NUMBER > Reset Number Current Number Start Number End Number Interval No of Repeats Repeat Count Figure 4-27 Sequential Number Menu Linx 4900 Operating Manual MP65492–1…
-
Page 92
Use any other characters as non-incrementing characters, for example, ‘.’ or ‘/’. These must be entered at the same position in both the Start Number and End Number option values, for example, Start Number 000/000A End Number 999/999Z. MP65492–1 Linx 4900 Operating Manual… -
Page 93
EDIT MESSAGE screen, for example: 49115 EDIT MESSAGE : MESSAGE 1 LINX Sell by dd mmm yy Size 7 FH (Caps) Bold Off Field Type Save & Exit Figure 4-28 Edit Message Screen: Sequential Number Linx 4900 Operating Manual MP65492–1… -
Page 94: Creating A Date Field
When used with standard fonts, note the leading spaces (4– 6–23). The DATE menu allows you to specify the ‘offset’ number of days. This period from the current date creates the actual printed date. MP65492–1 Linx 4900 Operating Manual…
-
Page 95: To Create A Date Field
At the DATE FORMAT menu, scroll to the format you want, then press the [enter] key to select it. The DATE menu is displayed showing the date format selected: 49304 DATE > Offset Format : dd mmm yy Figure 4-32 Date Menu Linx 4900 Operating Manual MP65492–1…
-
Page 96
Bold Off Field Type Save & Exit Figure 4-33 Edit Message Screen: Date Field NOTE: The actual printed date is not displayed until you have finished editing the message and returned to the CURRENT MESSAGE screen. MP65492–1 Linx 4900 Operating Manual… -
Page 97: Creating A Remote Field
You can create one or more remote fields, in which case incoming data fills each field in the order in which the fields are created. The 4900 printer has RS232 communications installed as standard, however, data can only be received by the printer once it is connected to the remote device using an RS232 interface cable, and the Remote Interface settings have been configured.
-
Page 98
Note that a remote field is indicated by a number of asterisks (*), according to the number of characters specified when the field is created. Once data is received, the asterisks are replaced by the incoming data. MP65492–1 Linx 4900 Operating Manual… -
Page 99: Inserting A Logo Field
A set of Arabic logos are installed in your printer as standard. Additional logos are only available if your printer software has been configured with logos. For further information, contact your local Linx distributor. Logos can then be used with any message by inserting a logo field.
-
Page 100
EDIT MESSAGE : MESSAGE 1 LINX Sell by dd mmm yy ********* BATCH 9999 hh:mm Night Shift Size 7 FH (Caps) Bold Off Field Type Save & Exit Figure 4-39 Edit Message Screen: Logo Field MP65492–1 Linx 4900 Operating Manual… -
Page 101: Creating A Message: Worked Example
Print the message NOTE: The following examples assume that the correct line speed is set up for your production line. For further information about setting up the line speed see Chapter 5, ‘Changing the System Setup’. Linx 4900 Operating Manual MP65492–1…
-
Page 102: To Create A New Message
Enter Name > MESSAGE 1 Figure 4-42 New Message Screen: Message 1 Press the [enter] key. The MESSAGE TYPE menu is displayed: 49189 MESSAGE TYPE > 7 Quality 7 Flexible 16 Quality 16 Flexible Figure 4-43 Message Type Menu MP65492–1 Linx 4900 Operating Manual…
-
Page 103: To Create A Text Field
The EDIT MESSAGE screen is displayed. 4.13.2 To Create a Text Field In this example, you add the text field ‘LINX’ using 16-high characters. At the EDIT MESSAGE screen, press the [F1] function key to step through the Size options until 16 FH (Caps) is displayed:…
-
Page 104: To Insert A Sell-By Date
(c) Press the Up [ ] or Down [ ] arrow key to move the menu cursor to the Date option: 49302 SELECT FIELD TYPE Time Timed Message Sequential No. > Date Figure 4-48 Select Field Type Menu: Date Option MP65492–1 Linx 4900 Operating Manual…
-
Page 105
The EDIT MESSAGE screen is redisplayed: 49112 EDIT MESSAGE : MESSAGE 1 LINX Sell by dd mmm yy Size 7 FH (Caps) Bold Off Field Type Save & Exit Figure 4-51 Edit Message Screen: Sell-by Date Linx 4900 Operating Manual MP65492–1… -
Page 106: To Insert A Batch Number
(c) Press the Up [ ] or Down [ ] arrow key to move the menu cursor to the Sequential No. option: 49305 SELECT FIELD TYPE Time Timed Message > Sequential No. Date Figure 4-54 Select Field Type Menu: Sequential No. Option MP65492–1 Linx 4900 Operating Manual…
-
Page 107
(g) Press the [esc] key to save and return to the EDIT MESSAGE screen: 49115 EDIT MESSAGE : MESSAGE 1 LINX Sell by dd mmm yy Size 7 FH (Caps) Bold Off Field Type Save & Exit Figure 4-57 Edit Message Screen: Sequential Number Linx 4900 Operating Manual MP65492–1… -
Page 108: To Insert A Timed Message
Sequential No. Date Figure 4-59 Select Field Type Menu: Timed Message Option Press the [enter] key. The TIMED MESSAGE menu is displayed: 49130 TIMED MESSAGE Next Message > Time Message Figure 4-60 Timed Message Menu MP65492–1 Linx 4900 Operating Manual…
-
Page 109: To Print The Message
Field Type Save & Exit Figure 4-61 Edit Message Screen: Timed Message 4.13.6 To Print the Message Press the [start] key. The printer starts printing and the CURRENT MESSAGE screen is displayed showing the message. Linx 4900 Operating Manual MP65492–1…
-
Page 110: Changing The System Setup
Chapter 5: Changing the System Setup 5 Changing the System Setup The Linx 4900 printer provides a menu of options that enables you to Level B change various system settings to your requirements. Level C From the SETUP menu, you can change the message parameters, line settings and installation settings if you make any changes to the configuration of your production line.
-
Page 111: Accessing The Setup Menu
The example above shows the SETUP menu options that are displayed for the User Level C password, when the printer status is “Jet Off”. See the next section, ‘Option Availability’ on page 93 for further details. Linx 4900 Operating Manual MP65492–1…
-
Page 112: Option Availability
– Remote Setup Menu – – – sub-options – – – Diagnostic Menu sub-options see Diagnostics Menu in Chapter 7, ‘Diagnostics and Maintenance’. – – – Solv Add Time Figure 5-2 Setup Menu Option Availability MP65492–1 Linx 4900 Operating Manual…
-
Page 113: Adjusting The Message Parameters
Figure 5-4 below). For example, the adjustment range of the 7 Quality message type is +10% to –5%. To do this, press the Right [ ] and Left [ ] arrow keys to step through the available settings, then press the [enter] key. Linx 4900 Operating Manual MP65492–1…
-
Page 114
+10% to –5% +10% to –5% 16 Speed 0% to –5% 16 Wide 0% to –5% 0% to –5% Figure 5-4 Print Height Ranges Note that the Normal setting is 0%. Press the [esc] key to exit. MP65492–1 Linx 4900 Operating Manual… -
Page 115: To Adjust The Message Width
Figure 5-5 Setup Menu: Print Width Option Press the [enter] key. At the Print Width setting, type in the value to adjust the message width, then press the [enter] key. Press the [esc] key to exit. Linx 4900 Operating Manual MP65492–1…
-
Page 116: To Set The Print Width Value: Shaft Encoder
Print Width Print Delay : 16 Enter the calculated pulses per mm value at this setting. Figure 5-6 Setting the Print Width Press the [enter] key to confirm your entry. Press the [esc] key to exit. MP65492–1 Linx 4900 Operating Manual…
-
Page 117: To Set The Print Delay
Adjust the Print Delay to initially print the message on the product. • Adjust the Print Width for the required message width. • Make final adjustments to the Print Delay to achieve the precise print registration. Linx 4900 Operating Manual MP65492–1…
-
Page 118: Defining The Bold Ratio
Press the [enter] key to select the option. At the Bold Ratio option setting, type in the ratio within the range of 1–9 (1 is standard print), then press the [enter] key to save the setting. Press the [esc] key to exit. MP65492–1 Linx 4900 Operating Manual…
-
Page 119: Reversing The Printed Message
NOTE: Messages are always displayed on the CURRENT MESSAGE screen in the normal forward orientation, even when the Reverse Message setting is On. Press the [enter] key to save the setting. Press the [esc] key to exit. Linx 4900 Operating Manual MP65492–1…
-
Page 120: Changing The Line Settings
SETUP Set Time : 10:16 Set Date : 15:08:03 Julian Date Format : European > Primary Trigger : Leading Edge Figure 5-10 Setup Menu: Primary Trigger Option Press the [enter] key to select the option. MP65492–1 Linx 4900 Operating Manual…
-
Page 121
(photocell) input is ignored. In this mode, the Print Delay option determines the number of blank rasters between individual messages. Press the [enter] key to save the setting. Press the [esc] key to exit. Linx 4900 Operating Manual MP65492–1… -
Page 122: To Enable A Shaft Encoder
Width option is used to determine the width of each message. See ‘To Set the Print Width Value: Shaft Encoder’ on page 97 for details. Press the [enter] key to save the setting. Press the [esc] key to exit. MP65492–1 Linx 4900 Operating Manual…
-
Page 123: To Set The Alarm
The following ALARM menu is displayed: 49224 ALARM > Mode : Pulsed Failure : Yes Warning : Yes Printing : No Ink and Solvent : No Figure 5-12 Alarm Menu Note that the above example shows the default settings. Linx 4900 Operating Manual MP65492–1…
-
Page 124
“3.03 Ink Low” or “3.04 Solvent Low” event message occurs—depending on the Mode option setting above. Press the [enter] key to save each setting. Press the [esc] key to exit. MP65492–1 Linx 4900 Operating Manual… -
Page 125: To Set The Auto Power Down Options
Press the [stop] key from any screen when the printer is in “Idle”, followed by the [F1] key • Set the main power supply switch on the rear panel to the ‘0’ (Off) position (as a last resort) The default Auto Power Down setting is On. Linx 4900 Operating Manual MP65492–1…
-
Page 126
Note that the Idle Time (mins) setting is only used in conjunction with the Printer Idle setting, not the Auto Power Down setting. Press the [enter] key to save each setting. Press the [esc] key to exit. MP65492–1 Linx 4900 Operating Manual… -
Page 127: Changing The Installation Settings
Figure 5-14 Setup Menu: Set Time Option Press the [enter] key. At the Set Time setting, enter the time, in a 24 hour format, by overtyping. Press the [enter] key to confirm your entry. Press the [esc] key to exit. Linx 4900 Operating Manual MP65492–1…
-
Page 128: To Set The Date
Figure 5-15 Setup Menu: Set Date Option Press the [enter] key. At the Set Date setting, enter the date, in the format dd:mm:yy, by overtyping. Press the [enter] key to confirm your entry. Press the [esc] key to exit. MP65492–1 Linx 4900 Operating Manual…
-
Page 129: To Specify The Julian Date Format
1 Mar Day 060 1 Mar Day 061 31 Dec Day 365 31 Dec Day 366 Figure 5-17 Julian Date Format Press the [enter] key to confirm your entry. Press the [esc] key to exit. Linx 4900 Operating Manual MP65492–1…
-
Page 130: To Set The Head Height
Enter the value in units of whole or half metres, for example ‘0.5m’. If the end of the printhead is lower than the base of the printer, you must type a negative (–) value, for example, ‘–2.0m’. MP65492–1 Linx 4900 Operating Manual…
-
Page 131
4-metre printhead conduit lengths. NOTE: Care must be exercised with this option, otherwise poor printer performance will result if incorrectly set. Press the [enter] key to confirm your entry. Press the [esc] key to exit. Linx 4900 Operating Manual MP65492–1… -
Page 132: To Set The System Language
This example (Figure 5-21) shows the languages available in the Euro 1 Language Group. See ‘About Language Groups’ on page 114 for further information. Scroll to the language required and press the [enter] key to select it. Press the [esc] key to exit. MP65492–1 Linx 4900 Operating Manual…
-
Page 133: About Language Groups
Arabic Arabic Arabic Arabic Arabic Logos Arabic Arabic Arabic Arabic Arabic Special Logos Available via Available via Available via Available via Available via (customised) Linx Linx Linx Linx Linx Figure 5-22 4900 Language Groups Linx 4900 Operating Manual MP65492–1…
-
Page 134: To Set The Display Contrast
You can increase or decrease the contrast of the printer display to suit your requirements. To set the display contrast, at any screen: press [ctrl]+[shift] in conjunction with the Up [ ] and Down [ ] arrow keys. MP65492–1 Linx 4900 Operating Manual…
-
Page 135: Changing The Passwords
5.6 Changing the Passwords The Change Password option enables you to change the Level B and Level C passwords. For further information on the 4900 password system, including switching the password system on/off, refer to ‘Working with Passwords’ in Chapter 3, ‘Day-to-Day Operations’.
-
Page 136: Remote Interface Setup
It uses a point-to-point, serial data transfer protocol. The hardware connection to Linx printers is based on the RS232 standard. The format of the commands and data is described in the Linx Remote See Also Communications Interface Reference Manual (FA76014), together with examples and information on hardware connections and printer setup.
-
Page 137: Introducing The Remote Setup Menu
SETUP menu differ according to the current printer status (Jet Off, Jet Running or Printing), and the user level password (Level B or Level C). The table on page 93 shows you the validity of the REMOTE SETUP See Also menu options and sub-options. Linx 4900 Operating Manual MP65492–1…
-
Page 138: Configuring The Remote Interface Settings
Any value between 01 and 31 can be set. It is also used to identify other ‘special’ data characters. This is described in further detail in the Linx Remote Communications Interface Reference Manual (FA76014).
-
Page 139
This option can be set to any value between 1 and 244. • 4800 Translation This option allows you to enable translation of 4900 data so that the 4900 printer can be used within applications that communicate with other types of Linx printers, typically alongside 4800 and 6200 printer(s). -
Page 140: Serial Parameters Menu
This option determines the type of Parity Bit to be used. It can be set to None, Odd or Even. • Data Bits This option shows the number of Data Bits used. This is for display purposes only and cannot be changed. MP65492–1 Linx 4900 Operating Manual…
-
Page 141: Flow Control Menu
The Xon Char option can be set to any value between 01 and 31 (ASCII control characters SOH to US). • Xoff Char The Xoff Char option can be set to any value between 01 and 31 (ASCII control characters SOH to US). Linx 4900 Operating Manual MP65492–1…
-
Page 142: Message Delimiters Menu
The printer has completed a print sequence. ENQ 05 The computer is triggering a ‘print go’. Note that each character is preceded by the escape character so that it can be distinguished from normal data. MP65492–1 Linx 4900 Operating Manual…
-
Page 143
Print End Char The Print End character is issued by the printer when printing stops, i.e. when a ‘stop print’ command is issued or the message print count reaches 0 with no other message pending. Linx 4900 Operating Manual MP65492–1… -
Page 144: Print Mode Menu
Printing takes place once for each set of remote data received. If no more data is received, any print triggers that occur are dealt with according to how the failure condition has been set up (see below). MP65492–1 Linx 4900 Operating Manual…
-
Page 145
The former is used to download complete static field structures, and the latter is used to download text characters to be inserted in predefined remote fields in the message. Both are described in the Linx Remote Communications Interface Reference Manual (FA76014). •… -
Page 146
For each print, the printer checks whether any data exists in the remote buffer. If there is data, it is taken from the next occupied block and loaded into the message for printing. MP65492–1 Linx 4900 Operating Manual… -
Page 147
Chapter 6: Remote Interface Setup This page left blank intentionally Linx 4900 Operating Manual MP65492–1… -
Page 148: Diagnostics And Maintenance
User Level C password, when the printer status is “Jet Off”. See the next section ‘Option Availability’ for further details. You can use a shortcut key to access the DIAGNOSTICS menu. To do this, press [D] at the SETUP menu. MP65492–1 Linx 4900 Operating Manual…
-
Page 149: Option Availability
– PCB Issue – – – Configuration – – – Ref Pressures – – – Set Pressure – – – Set Modulation – – – – Generate Test Pattern Figure 7-2 Diagnostics Menu Option Availability Linx 4900 Operating Manual MP65492–1…
-
Page 150: Performing Diagnostic Functions
Chapter 7: Diagnostics and Maintenance 7.2 Performing Diagnostic Functions The Linx 4900 printer provides several diagnostic indicators that enable you to identify quickly all the events (failures and warnings) that might have occurred during printer operation. These indicators include the following: •…
-
Page 151: To View The Jet State
The DIAGNOSTICS menu option Set Modulation also shows this value (see Figure 7-1 on page 129). Phase The phase position, which is the drop break-off point from the jet stream. Linx 4900 Operating Manual MP65492–1…
-
Page 152
Press the [Esc] key to exit from the screen. You can use a shortcut key to open the MONITOR JET screen. To do this, press [M] at the CURRENT MESSAGE screen, or press [M] at the DIAGNOSTICS menu. MP65492–1 Linx 4900 Operating Manual… -
Page 153: To View The Scheduled Maintenance Interval
Once the time has counted down to zero (0) hours, the system event message “Scheduled Maintenance Req’d” is reported, and a minus (–) sign appears in front of the time. Press the [Esc] key to exit from the menu. Linx 4900 Operating Manual MP65492–1…
-
Page 154: To View The System Configuration
Ultima printhead with a 2-line Standard Speed (SS) configuration: 49013 MESSAGE TYPE > 7 Quality 7 Flexible 16 Quality 16 Flexible Figure 7-6 Message Type Menu Messages Stored Indicates the number of messages currently stored. MP65492–1 Linx 4900 Operating Manual…
-
Page 155: To View The System Pressure Values
SETUP menu. Select Diagnostics Menu > Ref Pressures. The following PRESSURE REFS screen appears. 49230 PRESSURE REFS > Printhead Ref : 184 Solvent Add : 188 Maximum Run : 255 Figure 7-7 Pressure Refs Screen Linx 4900 Operating Manual MP65492–1…
-
Page 156
When the pressure exceeds this value after the jet/warm-up period solvent is normally added. Maximum Run The maximum pressure used by the printer to establish the jet. Press the [Esc] key to exit from the screen. MP65492–1 Linx 4900 Operating Manual… -
Page 157: To Generate And Print Test Patterns
“Test Patterns Generated” is displayed briefly in the status line. Press the [esc] key to exit. Once the test patterns have been generated, you can select, print, and edit a test pattern message. See ‘Editing and Printing a Test Pattern’ on page 139. Linx 4900 Operating Manual MP65492–1…
-
Page 158: To View The Type Of Ink In Use
The Ink Type Selection option displays the ink type used in the printer. This option is set during commissioning of the printer and cannot be changed. There are four types of ink available for the 4900 printer: A, B, C and D. Type A is the default ink type.
-
Page 159: To View The Solvent Add Time
Scroll through the menu options to Solvent Add Time, as shown below: 49045 SETUP Change Language Remote Setup Menu Diagnostic Menu > Solvent Add Time : 30 Figure 7-11 Setup Menu: Solvent Add Time Option Linx 4900 Operating Manual MP65492–1…
-
Page 160: Performing Routine Maintenance
Chapter 7: Diagnostics and Maintenance 7.3 Performing Routine Maintenance The Linx 4900 printer requires minimal, but regular maintenance to ensure trouble-free operation. This section describes how to perform the following routine maintenance tasks: • Cleaning the printer cabinet • Cleaning the printhead •…
-
Page 161: To Clean The Printer Cabinet
General To clean the printer cabinet, use a soft lint-free cloth lightly soaked in a mild detergent. Ink Spillages If ink is accidentally spilled onto the exterior of the printer, Linx recommends the following procedures: To clean this… Do this……
-
Page 162: To Clean Or Replace The Air Filter
(to the base of the printer), and the tab facing outmost (away from the printer). The air filter should be cleaned at least once a week; in dusty conditions, however, this may have to be done on a daily basis. MP65492–1 Linx 4900 Operating Manual…
-
Page 163: To Refill With Ink Or Solvent
AND REVERSIBLE LOCAL DAMAGE TO THE EYES, AND NON-ALLERGIC CONTACT DERMATITIS. CAUTION: Use only Linx ink and solvent. Do not add ink or solvent until prompted by the printer. Never add more than one bottle of ink or solvent at a timeoverfilling the printer with ink or solvent, or using incorrect inks and solvents could seriously damage the printer.
-
Page 164
15 seconds to allow the contents to drain into the system. The “3.03 Ink Low” or “3.04 Solvent Low” warning disappears from the Status Line. Ensure that the bottle is empty, then remove the bottle and refit the filler cap. MP65492–1 Linx 4900 Operating Manual… -
Page 165: To Clean The Printhead
This will cause damage to the printhead and may void your warranty. Cleaning solvent The solvent used to clean the printhead must be the same as that used in the printer. Linx 4900 Operating Manual MP65492–1…
-
Page 166
Hold the printhead as shown in Figure 7-15 below, or mount it on a wash station if you have one. 49298 ULTIMA ULTIMA WASH THIS AREA ONLY Figure 7-15 Cleaning the Printhead Ensure that the cleaning solvent corresponds to the solvent type being used in the printer. MP65492–1 Linx 4900 Operating Manual… -
Page 167
Any surplus solvent will run down the printhead and can be collected in the container for disposal (in accordance with local regulations). Linx 4900 Operating Manual MP65492–1… -
Page 168
Use the brush, where possible, to remove ink deposits that do not immediately wash off. Finish the cleaning with a wash and allow the cover tube to dry. Refit the printhead in the cover tube and firmly tighten the securing screw. MP65492–1 Linx 4900 Operating Manual… -
Page 169: To Flush The Nozzle
NOTE: The Nozzle Flush sequence should normally cure any nozzle alignment problems. However, if the procedure is unsuccessful, use the Nozzle Clear sequence to solve the problem. Linx 4900 Operating Manual MP65492–1…
-
Page 170: To Clear The Nozzle
“Clearing Nozzle : Please Wait” message on the Status Line to indicate that the Clear Nozzle sequence is in progress. This message is displayed for the duration of the Clear Nozzle sequence— approximately 20 seconds. MP65492–1 Linx 4900 Operating Manual…
-
Page 171
NOTE: To verify that the nozzle is clear, start the jet and check that the jet is coming from the nozzle and passing directly into the gutter. If the Clear Nozzle sequence was unsuccessful, contact your local Linx distributor. Linx 4900 Operating Manual MP65492–1… -
Page 172: Appendix A: Installation And Setup
If you are not sure of any procedure, Linx recommends that you contact your local Linx distributor, who will be pleased to advise you or send out a trained Linx-approved service engineer.
-
Page 173: Locating The Printer
A Mains Power Supply Switch B Printhead Conduit Entry/Exit C Trigger/Shaft Encoder Connector D External Alarm Connector E Trigger/Shaft Encoder Connector F RS232 Interface Connector G External Power Connector Figure A-1 Linx 4900 Printer Rear Panel Linx 4900 Operating Manual MP65492–1…
-
Page 174: Connecting To A Power Source
Appendix A: Installation and Setup A.2 Connecting to a Power Source The Linx 4900 printer has a power rating of 200 VA, and operates on a single-phase, 50/60 Hz a.c. supply of 100 V to 230 V. This means that any a.c.
-
Page 175: Attaching The Printhead To The Production Line
Appendix A: Installation and Setup A.3 Attaching the Printhead to the Production Line The printhead can work from any angle if clamped in place with a Linx printhead bracket. The printhead bracket ensures secure and vibration-free operation. 68446 The ideal distance between the printhead and the product is 12 mm.
-
Page 176: Routing The Printhead Conduit
• Ensure that the conduit is not in contact with sharp edges NOTE: Refer to Appendix F, ‘Technical Specification’ for the dimensions of the conduit length, diameter and minimum bend radius. MP65492–1 Linx 4900 Operating Manual…
-
Page 177: Setting Up Product Sensors
Appendix A: Installation and Setup A.4 Setting up Product Sensors The Linx 4900 printer uses product sensors to detect the presence of the product to be printed on. There are variations in the way the printer interprets a trigger signal. However, it usually prints a message in response to such a signal from the product sensor.
-
Page 178: To Connect A Product Sensor
You must not connect the screen to 0 volts. CAUTION: EMC performance may be compromised by the use of unsuitable product sensors and cables. Use only Linx approved accessories. MP65492–1…
-
Page 179: Setting Up Line Speed Detection
It must be installed and driven in a position where it best follows the movement of the product being printed on. Linx offers the following range of shaft encoders for line speed detection: • 2500 pulses per revolution (p.p.r.) •…
-
Page 180: To Enable A Shaft Encoder
You must not connect the screen to 0 volts. CAUTION: EMC performance may be compromised by the use of unsuitable shaft encoders and cables. Use only Linx approved accessories. Width Adjuster Unit…
-
Page 181: To Select The Encoder, Gearing And Print Width
Check that the calculated print performance—size and speed— is adequate. Step 4: Calculate the print width value from the pitch factor and enter it at the Print Width setting in the SETUP menu. Step 5: Check the print samples for performance. Linx 4900 Operating Manual MP65492–1…
-
Page 182
49146 Character Set Character Width 5 FH (Caps) 7 FH (Caps) 16 FH (Caps) 16 non-FH 7 Arab Num 16 Arab Num Figure A-8 Character Widths MP65492–1 Linx 4900 Operating Manual… -
Page 183
From Figure A-9, the required raster pitch (0.373 mm) is slightly higher than the ideal raster pitch (0.353 mm) for a 7 Quality message type, using an Ultima 62 µm printhead. Linx 4900 Operating Manual MP65492–1… -
Page 184
7 Speed 0.428 8.00 3.42 7 Wide 0.568 9.14 5.20 16 Quality 0.428 1.31 0.54 16 Speed 0.428 1.83 0.78 16 Wide 0.559 1.88 1.05 Figure A-10 Ultima plus Printhead Ideal Raster Pitch, and Raster Rate MP65492–1 Linx 4900 Operating Manual… -
Page 185
(a whole number) to give the actual raster pitch. This should be as close as possible to the required raster pitch. The table below gives the encoder pitch for standard Linx encoders and wheels. You can calculate the encoder pitch for other gearing or drives by… -
Page 186
Pitch Factor (rounded to the nearest whole number) = Required Pitch (mm) Encoder Pitch (mm) Using the example from Step 1, the required raster pitch is 0.373 mm. A standard Linx encoder and wheel is used to try to achieve this. &#»! Encoder/Gearing Encoder Pitch… -
Page 187
The maximum line speed must be less than the maximum encoder speed. If this is not the case, repeat the selection process. The following table lists the maximum encoder speeds for standard Linx encoders and wheels: 68546 MAXIMUM ENCODER SPEEDS (m/s) -
Page 188
80 kHz. Maximum Encoder Speed (m/s) = 0.040 mm x 80 kHz 3.2 m/s This will not limit the expected printable maximum line speed. NOTE: The Limiting Signal Frequency for Linx standard encoders is 80 kHz. MP65492–1 Linx 4900 Operating Manual… -
Page 189
49063 SETUP Password : Off Print Height : Normal > Print Width Print Delay : 16 Enter the calculated pulses per mm value at this setting. Figure A-15 Print Width Setting Showing the Calculated Value Linx 4900 Operating Manual MP65492–1… -
Page 190
When you have entered the print width value, create a message using the character size and raster from the calculation. Take print samples at a variety of normal running speeds to confirm the settings. This must include the maximum running speed of the line. MP65492–1 Linx 4900 Operating Manual… -
Page 191
Calculate the Maximum Line Speed for the particular message type = Actual Raster Pitch x Raster Rate Calculate the Maximum Encoder Speed = Encoder Pitch x Specified Frequency for Linx Standard Encoders (80 kHz) Ensure that the Maximum Line Speed (Step 7) is less than the Maximum Encoder Speed (Step10.
-
Page 192: Appendix B: Printer Controls And System Menus
These include the General Control keys and the Keyboard Control keys of the Printer Control Panel. It also describes the system menu options and the keyboard shortcuts. The Linx 4900 Printer Control Panel is divided into the following two functional areas: •…
-
Page 193
Appendix B: Printer Controls and System Menus The following illustration illustrates the layout of the Linx 4900 Printer Control Panel: 49046 A General Control keys and Display B start key C stop key D LED status indicators E Display F Cursor Control keys… -
Page 194: General Control Keys And Indicators
A printer failure event. warning A printer warning event. ready That the jet is running and the printer is ready to print. power That the printer has power applied to it and is switched on. MP65492–1 Linx 4900 Operating Manual…
-
Page 195: Function Keys
F2: Check Status. The section ‘System Menu Options’ on page 180 describes the options available from the CURRENT MESSAGE screen, the PRINT STATUS screen, the MESSAGE OPTIONS screen and the EDIT MESSAGE screen. Linx 4900 Operating Manual MP65492–1…
-
Page 196: Keyboard Control Keys
(default) of the keyboard. The Keyboard Status Indicator changes to See ‘Keyboard Status Indicator’ on page 179 for further information. Note that pressing the [lock] key in conjunction with this key locks the keyboard with this key MP65492–1 Linx 4900 Operating Manual…
-
Page 197
Move the cursor one space forward within a text entry field. 1. Select the menu option at the menu cursor position. 2. Confirm an entry. 3. Select a message field for editing. Linx 4900 Operating Manual MP65492–1… -
Page 198: Keyboard Status Indicator
[shift] key, [ctrl] key and [lock] key, the keyboard status indicator changes according to the control key or keys that are pressed. This is illustrated in Figure B-3 below. 49287 [shift] key [shift] + [ctrl] key [ctrl] key Figure B-3 Using the Keyboard Status Indicator MP65492–1 Linx 4900 Operating Manual…
-
Page 199: System Menu Options
FIELD TYPE Time Timed Message Sequential No. DIAGNOSTICS Clear Nozzle Date Save/Exit Nozzle Flush Remote Monitor Jet Logo System Times System Configuration Ref Pressures Set Modulation Generate Test Pattern Figure B-4 4900 System Menus: Hierarchy Overview Linx 4900 Operating Manual MP65492–1…
-
Page 200: Current Message Screen
See ‘Setup Menu’ on page 184, and ‘Diagnostics Menu’ on page 187 for further details. *or, when printing: F1 : Stop Printing Stop printing. When printing is stopped, the option changes to F1: Change Message. MP65492–1 Linx 4900 Operating Manual…
-
Page 201: Print Status Screen
See ‘Edit Message Screen’ on page 183 for details. F2: Select Select the message for printing and return to the CURRENT MESSAGE screen. F3: Delete Delete the selected message. Linx 4900 Operating Manual MP65492–1…
-
Page 202: Edit Message Screen
Time, Timed Message, Sequential No, Date, Remote or Logo, then create a field. F4: Save & Exit Save the message and exit from the screen back to the CURRENT MESSAGE screen. MP65492–1 Linx 4900 Operating Manual…
-
Page 203: Setup Menu
Set the Julian date format. Primary Trigger Define the print trigger. Shaft Encoder Set up a shaft encoder. Auto Power Down Display the AUTO POWER DOWN menu where you can specify the auto power down settings. Linx 4900 Operating Manual MP65492–1…
-
Page 204
NOTE: Note that the options you see when you access the SETUP menu differ according to the current printer status and the user level password. Chapter 5, ‘Changing the System Setup’ includes a table detailing the validity of the SETUP menu options. MP65492–1 Linx 4900 Operating Manual… -
Page 205: Remote Setup Menu
Specify the characters used to delimit transmitted and received data over the interface. Print Control Specify and enable/disable ASCII control characters for print controls, such as ‘Print Trigger’ and ‘Print Go’. Print Mode Define various printing control setting. Linx 4900 Operating Manual MP65492–1…
-
Page 206: Diagnostics Menu
NOTE: Note that the options you see when you access the DIAGNOSTICS menu differ according to the current printer status and the user level password. Chapter 7, ‘Diagnostics and Maintenance’ includes a table detailing the validity of the DIAGNOSTICS menu options. MP65492–1 Linx 4900 Operating Manual…
-
Page 207: Keyboard Shortcuts
Delete the current message. B.3.2 Setup Menu Use this shortcut… To do this… Display the DIAGNOSTICS menu. Display the REMOTE SETUP menu B.3.3 Diagnostics Menu Use this shortcut… To do this… Display the MONITOR JET screen. Linx 4900 Operating Manual MP65492–1…
-
Page 208: Appendix C: Line Speeds And Print Quality
Printing at Speeds in Excess of the Recommended Maximum Printing at speeds in excess of the recommended maximum will stretch the appearance of the printed message. This applies irrespective of whether a shaft encoder is being used or not. MP65492–1 Linx 4900 Operating Manual…
-
Page 209: Printable Line Speeds
(m/s) 5 Wide 6.25 7 Flexible 1.99 7 Quality 2.01 7 Speed 3.53 7 Wide 4.69 16 Flexible 0.63 16 Quality 0.56 16 Speed 0.82 16 Wide 1.44 Figure C-1 Ultima Printhead Maximum Line Speeds Linx 4900 Operating Manual MP65492–1…
-
Page 210: Ultima Plus Printhead
Ideal Message Type Raster Pitch (m/s) 5 Wide 7.28 7 Quality 1.61 7 Speed 3.42 7 Wide 5.20 16 Quality 0.54 16 Speed 0.78 16 Wide 1.05 Figure C-2 Ultima plus Printhead Maximum Line Speeds MP65492–1 Linx 4900 Operating Manual…
-
Page 211: Ideal Raster Pitch
This helps to form ‘square’ (more precisely uniform) characters. For a particular application, you may wish to choose a different pitch, bearing in mind that the aspect ratio can be adjusted using the Print Width option. Linx 4900 Operating Manual MP65492–1…
-
Page 212: Calculation Formula
Line Speed (m/s) Number of products per second Number of products per metre Line Speed (m/s) Number of products per second x Pitch between products (in metres) MP65492–1 Linx 4900 Operating Manual…
-
Page 213
5 products / 1 second 1 metre per second line speed 5 products / 1 metre 5 products / 1 second x 0.20 metre pitch between products = 1 metre per second line speed Figure C-4 Example Calculation Formula Linx 4900 Operating Manual MP65492–1… -
Page 214: Appendix D: System Event Messages
This appendix describes the System Event messages for Version 1.0 software of the Linx 4900 printer. The Linx 4900 printer provides on-screen messages to help you diagnose problems and, in some cases, take corrective actions before imminent failure of the system. These messages are known as ‘System Event messages’.
-
Page 215: System Event Messages Summary
2.13 Hardware Safety Trip 3.20 No Time Of Flight 3.26 User Data Corrupt 3.29 No Message Stored 3.30 Message Name Exists 3.31 Message Memory Full 3.32 Remote Error Figure D-1 System Event Messages Summary Table Linx 4900 Operating Manual MP65492–1…
-
Page 216: System Failures
Description: Memory allocation has been exceeded. Cause(s): Programming error. Solution: Power down and restart the printer. If failure persists, contact your local Linx distributor. 1.02 Corrupt Program Data Description: Program and/or data stored in memory is corrupt. Cause(s): Unknown. Solution: Contact your local Linx distributor.
-
Page 217: Print Failures
However, most Print Failures initiate a normal jet shutdown sequence, and the printer can be restarted in the normal manner afterwards without the need to switch the mains power off and back on. Linx 4900 Operating Manual MP65492–1…
-
Page 218
Do not touch the printhead. Remove the printhead from the source of high temperature. Contact your local Linx distributor. NOTE: Hot substrates should be printed on from the side to avoid heat convection to the printhead. MP65492–1… -
Page 219
Ensure that the distance between the printhead and the substrate is 12 mm. See Appendix A, ‘Installation and Setup’’. If the failure persists, contact your local Linx distributor. 2.02 Phase Failure Description: The printer failed to obtain a valid phase position after 48 attempts. -
Page 220
Build-up of ink on the deflector plates. Solution: Clean the printhead; perform a Nozzle Flush and a Nozzle Clear. Chapter 7, ‘Diagnostics and Maintenance’. If the failure persists, contact your local Linx distributor. 2.04 300V Power Supply Description: Power supply failure. -
Page 221
Overflow in ink or solvent reservoir due to incorrect refilling. Leak within the ink or solvent system. Solution: Switch off the printer, and contact your local Linx distributor. 2.09 Misaligned Ink Jet Description: Under normal operating conditions, the gutter sense circuit detects the presence of ink flow in the gutter. -
Page 222
Possible partly blocked nozzle. Solution: Perform the Nozzle Clear function. See Chapter 7, ‘Diagnostics and Maintenance’. If the failure persists, contact your local Linx distributor. 2.12 Viscosity Description: As ink viscosity increases (thickens) due to evaporation or temperature changes, the printer compensates by adding solvent to the ink. -
Page 223: System Warnings
3.02 Memory Corrupt Description: Printer memory is corrupt. Cause(s): Electrical disturbance. Solution: Contact your local Linx distributor. 3.03 Ink Low Description: The ink in the ink tank has fallen below the minimum level. Cause(s): Low level of ink in the ink tank.
-
Page 224
Product sensor generating false triggers due to electrical disturbance. Inadequate product sensor for the current application. Solution: Contact your local Linx distributor. 3.06 Over Speed (Synchronous Data) Description: A ‘Print Go’ signal occurred before the printer could generate the message data, therefore, printing could not take place. -
Page 225
The remaining time interval until the next scheduled maintenance (shown in the SYSTEM TIMES menu), is zero or negative. Solution: Contact your local Linx distributor to arrange a scheduled maintenance visit. 3.12 Printhead Cover Off Description: Printhead cover tube is off. -
Page 226
Clean the printhead; perform a Nozzle Flush and a Nozzle Clear. See Chapter 7, ‘Diagnostics and Maintenance’. Restart production line. If failure persists, contact your local Linx distributor. 3.26 User Data Corrupt—Contact your local Linx Service Centre Description: Internal software error. -
Page 227
There is a problem with the remote communications interface. Cause(s): The printer has received the ‘Set Remote Error’ command (121) through the remote interface. Solution: Contact your on-site remote communications administrator. If failure persists, contact your local Linx distributor. Linx 4900 Operating Manual MP65492–1… -
Page 228: Appendix E: Extended Character Sets
Appendix E: Extended Character Sets Appendix E: Extended Character Sets Extended character sets allow you to type additional characters. The following extended character sets are available on the 4900 printer: • European • Greek • Russian NOTE: Availability of these extended character sets is determined by the language group, printer keyboard (European, Greek or Russian) and keyboard driver installed your printer.
-
Page 229: Typing Characters From Extended Character Sets
Hold the [ctrl] key down and press the key showing the required character on the bottom right of the key. To lock the keyboard in this mode, hold the [ctrl] key down and press the [lock] key. To unlock, repeat this locking action. Linx 4900 Operating Manual MP65492–1…
-
Page 230
If you do enter a character that is not available, an asterisk (*) character appears in its place. 49322 Font size Printable characters character only All characters All characters Figure E-2 Printable Characters (Extended Character Sets) MP65492–1 Linx 4900 Operating Manual… -
Page 231: European Characters
‘Typing Characters from Extended Character Sets’ on page 210. See also ‘Typing the Euro Currency Symbol’ below. Typing the Euro Currency Symbol To type the euro symbol: Hold the [ctrl] key down and press the [E] key. Linx 4900 Operating Manual MP65492–1…
-
Page 232
Appendix E: Extended Character Sets Figure E-3 4900 European Keyboard MP65492–1 Linx 4900 Operating Manual… -
Page 233: Greek Characters
Typing European (ASCII) Characters European characters are available from the Extended Character set. To type these characters, use the method described in the section ‘Typing Characters from Extended Character Sets’ on page 210. Linx 4900 Operating Manual MP65492–1…
-
Page 234
Appendix E: Extended Character Sets Figure E-4 4900 Greek Keyboard MP65492–1 Linx 4900 Operating Manual… -
Page 235: Russian Characters
Russian keyboard (see Figure E-5 on page 217) • Russian keyboard driver Typing Russian Characters To type Russian characters, use the method described in the section ‘Typing Characters from Extended Character Sets’ on page 210. Linx 4900 Operating Manual MP65492–1…
-
Page 236
Appendix E: Extended Character Sets Figure E-5 4900 Russian Keyboard MP65492–1 Linx 4900 Operating Manual… -
Page 237
Appendix E: Extended Character Sets This page left blank intentionally Linx 4900 Operating Manual MP65492–1… -
Page 238: Appendix F:technical Specification
49083 Speed: Standard Speed High Speed Super High Speed (SS) (HS) (SHS) Printheads: Ultima Ultima plus Figure F-1 Linx 4900 Printer Configurations F.1.2 Cabinet Construction Base tray unit: Stainless steel Top cover: Stainless steel Dimensions Height: 236 mm Width: 483 mm…
-
Page 239: Power Requirements
Up to 4.49 bar (65 p.s.i.) Maximum pressure: 6.21 bar (90 p.s.i.) under fault conditions Level Control Ink tank sense low: Warning reported at approximately 740 ml Solvent tank sense low: Warning reported at approximately 740 ml Linx 4900 Operating Manual MP65492–1…
-
Page 240: Memory Capacity
Up to 50 (dynamic allocation) Logo storage: Up to 100 F.1.7 Printhead Types Ultima: Mk 7 (62 µm nozzle) Ultima plus: Mk 7 (75 µm nozzle) Construction Printhead: Thermoplastic polyester body Cover tube: Stainless steel Conduit adaptor: Stainless steel MP65492–1 Linx 4900 Operating Manual…
-
Page 241
150mm (dynamic applications) Right-angled Printheads Body length: 265 mm Body diameter (all models): 42 mm Conduit length: 2 m or 4 m Conduit diameter: 22 mm Conduit minimum bend radius: 75 mm (static applications only) Linx 4900 Operating Manual MP65492–1… -
Page 242: Printing Performance Data
7.28 m/s (one line of 5 High characters) Minimum character height: 2.7 mm using 5 Wide message type Maximum character height: 8.8 mm using 16 Wide message type Printhead to Substrate Distance (recommended) Ultima: 12.0 mm Ultima plus: 12.0 mm MP65492–1 Linx 4900 Operating Manual…
-
Page 243: Regulatory Approvals
Electromagnetic compatibility (EMC). Generic standards. Emission standard for industrial environments. Applicable USA EMC Standards FCC 47CFR, Part 15. Class A Device. Enclosure Protection EN60529: 1992 Specification for degrees of protection provided by enclosures (IP code). Linx 4900 Operating Manual MP65492–1…
-
Page 244: Appendix G: Ec Declaration Of Conformity Certificates
Appendix G: EC Declaration of Conformity Certificates Appendix G: EC Declaration of Conformity Certificates MP65492–1 Linx 4900 Operating Manual…
-
Page 245: English
Appendix G: EC Declaration of Conformity Certificates English MP41067-01 Linx 4900 Operating Manual MP65492–1…
-
Page 246: Czech
Appendix G: EC Declaration of Conformity Certificates Czech MP41067-01 MP65492–1 Linx 4900 Operating Manual…
-
Page 247: Danish
Appendix G: EC Declaration of Conformity Certificates Danish MP41067-01 Linx 4900 Operating Manual MP65492–1…
-
Page 248: Dutch
Appendix G: EC Declaration of Conformity Certificates Dutch MP41067-01 MP65492–1 Linx 4900 Operating Manual…
-
Page 249: Estonian
Appendix G: EC Declaration of Conformity Certificates Estonian MP41067-01 Linx 4900 Operating Manual MP65492–1…
-
Page 250: Finnish
Appendix G: EC Declaration of Conformity Certificates Finnish MP41067-01 MP65492–1 Linx 4900 Operating Manual…
-
Page 251: French
Appendix G: EC Declaration of Conformity Certificates French MP41067-01 Linx 4900 Operating Manual MP65492–1…
-
Page 252: German
Appendix G: EC Declaration of Conformity Certificates German MP41067-01 MP65492–1 Linx 4900 Operating Manual…
-
Page 253: Greek
Appendix G: EC Declaration of Conformity Certificates Greek MP41067-01 Linx 4900 Operating Manual MP65492–1…
-
Page 254: Hungarian
Appendix G: EC Declaration of Conformity Certificates Hungarian MP41067-01 MP65492–1 Linx 4900 Operating Manual…
-
Page 255: Italian
Appendix G: EC Declaration of Conformity Certificates Italian MP41067-01 Linx 4900 Operating Manual MP65492–1…
-
Page 256: Latvian
Appendix G: EC Declaration of Conformity Certificates Latvian MP41067-01 MP65492–1 Linx 4900 Operating Manual…
-
Page 257: Lithuanian
Appendix G: EC Declaration of Conformity Certificates Lithuanian MP41067-01 Linx 4900 Operating Manual MP65492–1…
-
Page 258: Maltese
Appendix G: EC Declaration of Conformity Certificates Maltese MP41067-01 MP65492–1 Linx 4900 Operating Manual…
-
Page 259: Norwegian
Appendix G: EC Declaration of Conformity Certificates Norwegian MP41067-01 Linx 4900 Operating Manual MP65492–1…
-
Page 260: Polish
Appendix G: EC Declaration of Conformity Certificates Polish MP41067-01 MP65492–1 Linx 4900 Operating Manual…
-
Page 261: Portuguese
Appendix G: EC Declaration of Conformity Certificates Portuguese MP41067-01 Linx 4900 Operating Manual MP65492–1…
-
Page 262: Slovak
Appendix G: EC Declaration of Conformity Certificates Slovak MP41067-01 MP65492–1 Linx 4900 Operating Manual…
-
Page 263: Slovenian
Appendix G: EC Declaration of Conformity Certificates Slovenian MP41067-01 Linx 4900 Operating Manual MP65492–1…
-
Page 264: Spanish
Appendix G: EC Declaration of Conformity Certificates Spanish MP41067-01 MP65492–1 Linx 4900 Operating Manual…
-
Page 265: Swedish
Appendix G: EC Declaration of Conformity Certificates Swedish MP41067-01 Linx 4900 Operating Manual MP65492–1…
-
Page 266: Appendix H: Training Documentation
It is designed to enable a line supervisor to train personnel in the necessary skills needed to maintain normal line operation of the printer on a day-to- day basis. To achieve this, the course makes use of the Simply the Linx 4900 pocket guide.
-
Page 267
Stopping Print and Shutting Down Looking After Your Printer Review Equipment List Equipment Quantity Linx 4900 Printer Simply the Linx 4900 pocket guide 1 per trainee Magnifier or eyeglass as required (optional) Safety glasses 1 pair per trainee Safety gloves… -
Page 268: Introduction
Introduce yourself and the training course to the trainees. Explain domestic arrangements (timings, breaks, lunch, facilities etc.). Distribute a copy of the Simply the Linx 4900 pocket guide to each trainee, explaining its use. Explain the objectives of the course using the ‘Before you use the printer’ page in the Simply the Linx 4900 pocket guide.
-
Page 269: Getting Started
Specific checks relevant to the application (optional) H.3.3 Activities Refer to ‘Switching the printer on’ in the Simply the Linx 4900 pocket guide. Invite the trainees to find the two power switches, to switch the printer on, and observe the startup (splash) screen.
-
Page 270: Printing
Refer to ‘Selecting a message to print’ in the Simply the Linx 4900 pocket guide. Indicate the [F1] function key.
-
Page 271: Navigating The Linx 4900
Appendix H: Training Documentation H.5 Navigating the Linx 4900 H.5.1 Aims • To ensure that the trainees become familiar with, and can confidently use, the cursor control keys • To ensure that the trainees become familiar with the menu structure H.5.2 Key Points…
-
Page 272: Stopping Print And Shutting Down
(Emphasise the importance of wearing safety glasses during this operation.) Refer to ‘To shutdown and switch off’ in the Simply the Linx 4900 pocket guide. Invite a trainee to shut down the printer and note how the message changes in the Status Line.
-
Page 273: Looking After Your Printer
Low” warning, there will be an indication in the Status Line, indicating which tank needs refilling. Refer to ‘Ink and solvent precautions’ in the Simply the Linx 4900 pocket guide. A ‘Quick Quiz’ can be given to cover all the relevant safety aspects of working with the printer.
-
Page 274
Appendix H: Training Documentation Emphasise: • Never remove the bottle too early • Only one bottle of ink or solvent is to be added at any one time MP65492–1 Linx 4900 Operating Manual… -
Page 275: Review
If there is any confusion, run through the particular points again. If necessary, arrange a convenient time to cover again any areas where there is still confusion. These needs may only be relevant to individual trainees. Linx 4900 Operating Manual MP65492–1…
-
Page 276
Control Keys 14 3.32 Remote Error 208 Creating messages 47 new message 54 Creating a message About this manual ii worked example 82 Advisory messages 195 Current message Air filter deleting 67 cleaning and replacing 143 MP65492–1 Linx 4900 Operating Manual… -
Page 277
Euro symbol 212 Ideal raster pitch and raster rate European Character Set 209 Ultima printhead 165 European Characters 212 European characters 212 level 39 EVENT LIST screen 41 refilling 144 Extended Character Set safety vi Linx 4900 Operating Manual MP65492–1… -
Page 278
98 working with 60 print trigger 101 Message Cursor 56, 57 Line settings 30 MESSAGE DELIMITERS menu 123 changing 101 Message Delimiters Menu 123 Line speed Message Display Area 13 calculating 193 navigating 60 MP65492–1 Linx 4900 Operating Manual… -
Page 279
159 indicators 175 Pigmented inks 144, 148 Printer Status 30 Pitch Printhead 50 about ideal raster pitch 192 attaching to production line 156 maximum line speeds 190 cleaning 146 page 94, 96, 113 Linx 4900 Operating Manual MP65492–1… -
Page 280
Solvent Add Time 140 Nozzle Flush 150 space key 178 printer cabinet 142 Splash Screen 12 printhead 146 Standard Linx encoders and wheels RS232 78, 117, 119 encoder pitch 166 Russian characters 216 maximum encoder speeds 168 MP65492–1 Linx 4900 Operating Manual… -
Page 281
3.06 Over Speed (Synchronous creating 68 Data) 205 TIME menu 69 3.07 Over Speed (Asynchronous Time of flight 5, 132 Data) 205 Time option 68 3.11 Scheduled Maintenance Timed Message Reqd 206 field 49, 70 Linx 4900 Operating Manual MP65492–1… -
Page 282
Triggers print trigger 30 Typing keyboard characters 20 Ultima printhead ideal raster pitch and raster rate 165 line speeds 190 message types 190 Upper case typing 20, 210 Viewing print count 38 printer status 38 MP65492–1 Linx 4900 Operating Manual… -
Page 283
Index Linx 4900 Operating Manual MP65492–1… -
Page 284
Linx Printing Technologies plc Burrel Road St Ives Cambridgeshire PE27 3LA UK.
108/Экономичный маркиратор LINX 4900/Побывали на производстве у официального диллераПодробнее

Linx 5900 Каплеструйный принтер Linx 7900Подробнее
LINX5900 Нарушение ориентации струи ‘промывка сопла’Подробнее

Работа каплеструйного маркиратора Linx CJ400. ГосплемпредприятиеПодробнее
Настройка принтеров и сканеров в GNU/LinuxПодробнее
Каплеструйный принтер Linx 8900 — простота сервисного обслуживания без вызова специалистаПодробнее
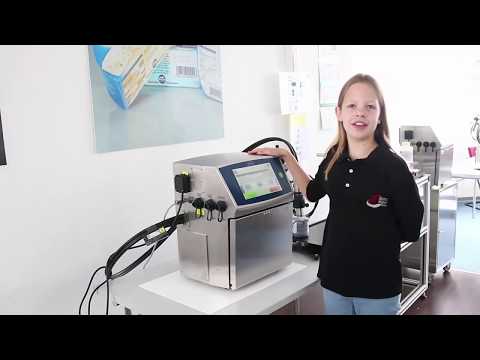
Linx Insight – новые возможности контроля производстваПодробнее
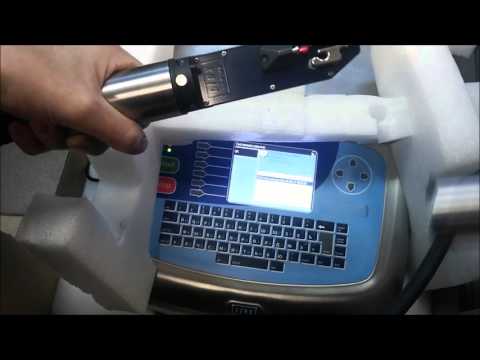
Let’s see Linx printer maintance :Replace the solvent filter, test ink path and the nozzle !Подробнее
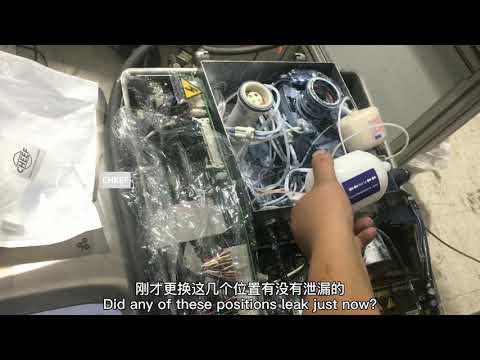
Удаленный веб-интерфейс Linx Insight® Для CIJ-принтера Linx 7900Подробнее
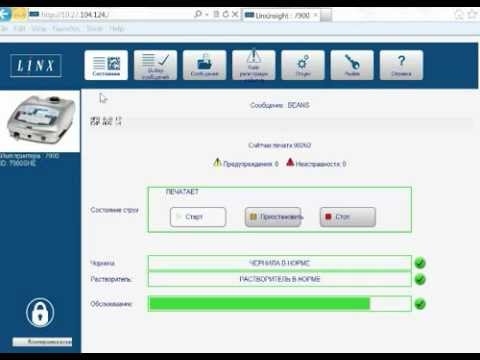
How to clean Linx CIJ Printer ( Touch screen Printer ) Nozzle cleaning Process.Подробнее
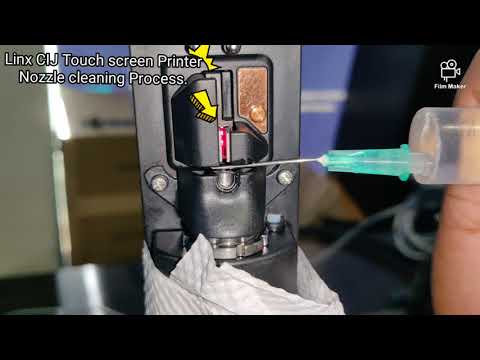
Преимущества каплеструйного маркиратора Linx 8900.Подробнее