-
Contents
-
Table of Contents
-
Bookmarks
Quick Links
Installation Instructions
MicroLogix™ 1200 Analog Output Module
(Catalog Number 1762-OF4)
Inside…
For More Information……………………………………………………………………..2
Description……………………………………………………………………………………3
Installation ……………………………………………………………………………………3
Mounting………………………………………………………………………………………5
System Assembly…………………………………………………………………………..7
Field Wiring Connections………………………………………………………………..7
Output Type Selection…………………………………………………………………….8
Wiring ………………………………………………………………………………………….8
I/O Memory Mapping …………………………………………………………………..11
Specifications ……………………………………………………………………………..16
AB Spares
Summary of Contents for Allen-Bradley MicroLogix 1200
Контроллеры Allen Bradley Micrologix

Ассортимент MicroLogix сейчас охватывает довольно много моделей, от крошечного MicroLogix 1000 до новейшего MicroLogix 1400, обеспечивающих онлайн-программирование и связь по Ethernet для программирования и обмена сообщениями. ПЛК MicroLogix программируются с помощью программного обеспечения RSLogix500.
MicroLogix инструкция, руководство
-
MicroLogix Руководство по выбору -
MicroLogix 1400 Инструкция по установке на русском -
MicroLogix 1400 Руководство по эксплуатации (Eng) -
MicroLogix 1100 Инструкция по установке на русском -
MicroLogix 1100 Руководство по эксплуатации (Eng)
MicroLogix Сравнение серий
| Семейство MicroLogix | Номер модели | Базовый ввод/вывод | Возможность ввода/вывода | Семейство расширения ввода/вывода | Относительный рейтинг | Ethernet Prg/MSG | Онлайн программирование | Рекомендуется |
|---|---|---|---|---|---|---|---|---|
| MicroLogix 1000 | 1761 | 32 | 32 точки | 1761 | 5 | Через Net-ENI | Нет | Нет |
| MicroLogix 1100 | 1763 | 18 | 4 модуля / 144 точки | 1762 | 2 | да | да | да |
| MicroLogix 1200 | 1762 | 24 или 40 | 6 модулей / 136 точек | 1762 | 3 | Через Net-ENI | Нет | Нет |
| MicroLogix 1400 | 1766 | 32 | 7 модулей / 256 точек | 1762 | 1 | да | да | да |
| MicroLogix 1500 | 1764 | 24 или 28 | 16 модулей / 512 точек | 1769 | 4 | Через Net-ENI | Нет | Нет |
MicroLogix особенности
Обратите внимание на следующие ограничения продуктов в ассортименте, которые привлекают внимание людей:
- Только новые модели, такие как MicroLogix 1100 и 1400, предлагают онлайн-программирование. Только по этой причине мы не рекомендуем покупать какие-либо устаревшие контроллеры MicroLogix;
- Каждый контроллер подходит только для одного типа расширения ввода-вывода — см. Таблицу совместимости выше;
- Номер семейства моделей — 1100, 1500 и т. д. не указывает на относительное ранжирование характеристик. Последними моделями являются MicroLogix 1100 и MicroLogix 1400, которые, например, намного превосходят более старый MicroLogix 1500;
- MicroLogix 1500 требует приобретения двух компонентов — базы и ЦП;
- Последовательный порт на большинстве контроллеров MicroLogix представляет собой штекер mini-DIN. ЦП MicroLogix 1500 1764-LSP имеет второй последовательный порт, но это 9-контактный D-разъем, позволяющий использовать стандартный перекрестный кабель для программирования;
- Стандартный кабель для программирования имеет артикул 1761-CBL-PM02, со штекером DIN на одном конце и 9-контактным D-разъемом на другом.
Для подключения к человеко-машинному интерфейсу используется кабель с двойным разъемом DIN 1761-CBL-HM02; - Семейство MicroLogix не имеет шасси — «объединительная плата» для данных проходит через каждый модуль расширения. Обратите внимание, что IO семейства (MicroLogix 1500) 1769 также требует, чтобы эта объединительная плата была завершена «торцевыми крышками»;
- В семействе 1769 IO есть строгие правила относительно количества модулей, которые может вместить каждый блок питания. Правила основаны на максимальном количестве модулей между источником питания и рассматриваемым модулем;
- Многие функции, встроенные в семейства PLC и SLC, становятся дополнительными модулями в семействе MicroLogix — например, часы реального времени, резервная память;
- Остерегайтесь различных вариантов питания и напряжения ввода-вывода. Существуют различные варианты переменного и постоянного тока, а также сверхнизкое и низкое напряжение. Информация для заказа MicroLogix 1100 и MicroLogix 1400 доступна на отдельных страницах.
-
Page 1
MicroLogix™ 1200 and MicroLogix 1500 Programmable Controllers (Bulletins 1762 and 1764) Instruction Set Reference Manual… -
Page 2
Important User Because of the variety of uses for the products described in this publication, those responsible for the application and use of this control Information equipment must satisfy themselves that all necessary steps have been taken to assure that each application and use meets all performance and safety requirements, including any applicable laws, regulations, codes and standards. -
Page 3
The trim pots (trimming potentiometers) on the controller 1762-L24BWA operated in reverse of the ladder logic. Corrected. 1762-L40AWA 1762-L40BWA 1762-L24AWA FRN3 November 2000 MicroLogix 1200 controllers now offer: • Full ASCII (read/write) 1762-L24BWA • PTO Controlled Stop 1762-L40AWA • PWM Ramping 1762-L40BWA •… -
Page 4
Summary of Changes MicroLogix 1500 Catalog Series Revision Firmware Release Date Enhancement Number Letter Letter Release No. 1764-LSP FRN2 February 1999 Initial product release. 1764-LSP FRN3 October 1999 MicroLogix 1500 Controllers with 1764-LSP Processor can now be used with Compact I/O (Bulletin 1769) Expansion Cables and Power Supplies. -
Page 5
In the Communications Status File, General Channel Status Block, Bit 15, Chapter 3 the Comms Toggle Push Button Bit, is now valid for MicroLogix 1200 and MicroLogix 1500 (previously was only the MicroLogix 1500). Added IMPORTANT notes about using the High-Speed Counter (HSC). -
Page 6
Summary of Changes Publication 1762-RM001C-EN-P — November 2000… -
Page 7: Table Of Contents
Embedded I/O ……..1-1 MicroLogix 1200 Expansion I/O ….. . 1-3 MicroLogix 1200 Expansion I/O Memory Mapping.
-
Page 8
Table of Contents Chapter 5 Using the High-Speed High-Speed Counter (HSC) Function File ….5-2 Counter High-Speed Counter Function File Sub-Elements Summary . . 5-4 HSC Function File Sub-Elements….. . 5-5 HSL — High-Speed Counter Load . -
Page 9
Table of Contents Chapter 10 Math Instructions Using the Math Instructions ……10-2 Updates to Math Status Bits ……10-3 ADD — Add, SUB — Subtract . -
Page 10
Table of Contents Chapter 15 Sequencer Instructions SQC- Sequencer Compare ……15-2 SQO- Sequencer Output……15-5 SQL — Sequencer Load . -
Page 11
Table of Contents Chapter 20 ASCII Instructions General Information ……20-1 ASCII Instructions. -
Page 12
MicroLogix 1200 Memory Programming Instructions Memory Usage and Execution Time A-1 Usage and Instruction MicroLogix 1200 Scan Time Worksheet ….A-7 Execution Time Appendix B… -
Page 13: Who Should Use This Manual
If you do not, obtain the proper training before using this product. Purpose of this Manual This manual is a reference guide for MicroLogix 1200 and MicroLogix 1500 controllers. It describes the procedures you use to program and troubleshoot your controller. This manual: •…
-
Page 14: Common Techniques Used In This Manual
Read this Document Document Number Information on understanding and applying micro controllers. MicroMentor 1761-MMB Information on mounting and wiring the MicroLogix 1200 Programmable MicroLogix 1200 Programmable 1762-IN006C-MU-P Controller, including a mounting template and door labels. Controllers Installation Instructions Detailed information on planning, mounting, wiring, and troubleshooting…
-
Page 15: Rockwell Automation Support
Preface Rockwell Automation Rockwell Automation offers support services worldwide, with over 75 Sales/Support Offices, 512 authorized Distributors and 260 authorized Support Systems Integrators located throughout the United States alone, plus Rockwell Automation representatives in every major country in the world. Local Product Support Contact your local Rockwell Automation representative for: •…
-
Page 16
Preface Publication 1762-RM001C-EN-P… -
Page 17: Embedded I/O
• Input Filtering on page 1-14 • Latching Inputs on page 1-15 Embedded I/O The MicroLogix 1200 and 1500 provide discrete I/O that is built into the controller as listed in the following table. These I/O points are referred to as Embedded I/O.
-
Page 18
I/O Configuration AC embedded inputs have fixed input filters. DC embedded inputs have configurable input filters for a number of special functions that can be used in your application. These are: high-speed counting, event interrupts, and latching inputs. The 1764-28BXB has two high-speed outputs for use as pulse train output (PTO) and/or pulse width modulation (PWM) outputs. -
Page 19: Micrologix 1200 Expansion I/O
MicroLogix 1200 expansion I/O (Bulletin 1762) is used to provide discrete and analog inputs and outputs and, in the future, specialty modules. For the MicroLogix 1200, you can attach up to six additional I/O modules. The number of 1762 I/O modules that can be attached to the MicroLogix 1200 is dependent on the amount of power required by the I/O modules.
-
Page 20: Micrologix 1200 Expansion I/O Memory Mapping
I/O Configuration MicroLogix 1200 Discrete I/O Configuration Expansion I/O Memory 1762-IA8 and 1762-IQ8 Input Image Mapping For each input module, the input data file contains the current state of the field input points. Bit positions 0 through 7 correspond to input terminals 0 through 7.
-
Page 21
I/O Configuration Analog I/O Configuration 1762-IF2OF2 Input Data File For each input module, slot x, words 0 and 1 contain the analog values of the inputs. The module can be configured to use either raw/proportional data or scaled-for-PID data. The input data file for each configuration is shown below. -
Page 22
I/O Configuration 1762-IF2OF2 Output Data File For each module, slot x, words 0 and 1 contain the channel output data. Table 1.3 Raw/Proportional Format Bit Position Channel 0 Data 0 to 32,768 Channel 1 Data 0 to 32,768 Table 1.4 Scaled-for-PID Format Bit Position Channel 0 Data 0 to 16,383 Channel 1 Data 0 to 16,383… -
Page 23: Micrologix 1500 Compact™ Expansion I/O
I/O Configuration MicroLogix 1500 If the application requires more I/O than the controller provides, you can attach I/O modules. These additional modules are called expansion I/O. Compact™ Expansion I/O Expansion I/O Modules Compact I/O (Bulletin 1769) is used to provide discrete and analog inputs and outputs and, in the future, specialty modules.
-
Page 24
I/O Configuration Figure 1.2 Horizontal Orientation Embedded I/O = Slot 0 Expansion Expansion I/O Bank 0 I/O Bank 1 In most cases, you can use the following address format: NOTE X:s/b (X = file type letter, s = slot number, b = bit number) See I/O Addressing on page 1-13 for complete information on address formats. -
Page 25: Micrologix 1500 Compact™ Expansion I/O Memory Mapping
I/O Configuration MicroLogix 1500 Discrete I/O Configuration Compact™ Expansion 1769-IA8I Input Image I/O Memory Mapping For each input module, the input data file contains the current state of the field input points. Bit positions 0 through 7 correspond to input terminals 0 through 7, bits 8 through 15 are not used.
-
Page 26
1-10 I/O Configuration 1769-IQ6XOW4 Input Image For each module, the input data file contains the current state of the field input points. Bit positions 0 through 5 correspond to input terminals 0 through 5, bits 6 through 15 are not used. Input Bit Position r = read, x = not used, always at a 0 or OFF state 1769-IQ6XOW4 Output Image… -
Page 27
I/O Configuration 1-11 Analog I/O Configuration 1769-IF4 Input Data File For each input module, words 0 through 3 contain the analog values of the inputs. Bit Position Analog Input Data Channel 0 Analog Input Data Channel 1 Analog Input Data Channel 2 Analog Input Data Channel 3 not used O0 U1 O1 U2 O2 U3 O3 Set to 0… -
Page 28
1-12 I/O Configuration Specialty I/O Configuration 1769-IT6 Thermocouple Module Input Data File The input data file contains the analog values of the inputs. Bit Position Analog Input Data Channel 0 Analog Input Data Channel 1 Analog Input Data Channel 2 Analog Input Data Channel 3 Analog Input Data Channel 4 Analog Input Data Channel 5… -
Page 29: I/O Addressing
Embedded I/O: slot 0 Expansion I/O: • slots 1 to 6 for MicroLogix 1200 (See page 1-3 for an illustration.) • slots 1 to 8 for MicroLogix 1500 (See page 1-7 for an illustration.) Word delimiter. Required only if a word number is necessary as noted below.
-
Page 30: I/O Forcing
PWM function, an instruction error is generated. Input Filtering The MicroLogix 1200 and 1500 controllers allow users to configure groups of DC inputs for high-speed or normal operation. Users can configure each input group’s response time. A configurable filter determines how long the input signal must be “on”…
-
Page 31: Latching Inputs
User Manual. Latching Inputs The MicroLogix 1200 and 1500 controllers provide the ability to individually configure inputs to be latching inputs (sometimes referred to as pulse catching inputs). A latching input is an input that captures a very fast pulse and holds it for a single controller scan.
-
Page 32
1-16 I/O Configuration Rising Edge Behavior — Example 1 Scan Number (X) Scan Number (X+1) Scan Number (X+2) Input Ladder Output Input Ladder Output Input Ladder Output Scan Scan Scan Scan Scan Scan Scan Scan Scan External Input Latched Status Input File Value Rising Edge Behavior — Example 2… -
Page 33
I/O Configuration 1-17 Falling Edge Behavior — Example 1 Scan Number (X) Scan Number (X+1) Scan Number (X+2) Scan Number (X+3) Input Ladder Output Input Ladder Output Input Ladder Output Input Ladder Output Scan Scan Scan Scan Scan Scan Scan Scan Scan Scan… -
Page 34: Configuring Expansion I/O Using Rslogix 500
1-18 I/O Configuration Configuring Expansion Expansion I/O must be configured for use with the controller. Configuring expansion I/O can be done either manually, or automatically. Using I/O Using RSLogix 500 RSLogix 500: 1. Open the “Controller” folder. 2. Open the “I/O Configuration” folder. 3.
-
Page 35
Chapter Controller Memory and File Types This chapter describes controller memory and the types of files used by the MicroLogix 1200 and MicroLogix 1500 controllers. The chapter is organized as follows: • Controller Memory on page 2-2 • Data Files on page 2-5 •… -
Page 36: Chapter 2 Controller Memory
(1) The string file is available in MicroLogix 1200 controllers and MicroLogix 1500 1764-LSP Series B and 1764-LRP processors. (2) The DAT files are only used in MicroLogix 1500 controllers. The PTO and PWM files are only used in MicroLogix 1200 and 1500 BXB units.
-
Page 37
MicroLogix 1200 User Memory The MicroLogix 1200 controller supports 6K of memory. Memory can be used for program files and data files. The maximum data memory usage is 2K words as shown below. -
Page 38
Controller Memory and File Types MicroLogix 1500 User Memory MicroLogix 1500, 1764-LSP Processor The 1764-LSP processor supports over 7K of memory. Memory can be used for program files and data files. The maximum data memory usage is 4K words as shown below. -
Page 39: Data Files
Controller Memory and File Types Data Files Data files store numeric information, including I/O, status, and other data associated with the instructions used in ladder subroutines. The data file types are: File Name File File Words per File Description Identifier Element Number Output File…
-
Page 40: Protecting Data Files During Download
Controller Memory and File Types Protecting Data Files Data File Download Protection During Download Once a user program is in the controller, there may be a need to update the ladder logic and download it to the controller without destroying user-configured variables in one or more data files in the controller.
-
Page 41
Controller Memory and File Types Access the Download Data File Protect feature using RSLogix 500 programming software. For each data file you want protected, check the Memory Module/Download item within the protection box in the Data File Properties screen as shown in this illustration. To access this screen, right mouse click on the desired data file. -
Page 42: Static File Protection
Using Static File Protection with Data File Download Protection Static File Protection and Data File Download Protection can be used in combination with any MicroLogix 1200 Controller Series B and higher, and MicroLogix 1500 Processor Series B and higher. Setting Static File Protection Static File Protection can be applied to the following data file types: •…
-
Page 43: Password Protection
Controller Memory and File Types Password Protection MicroLogix controllers have a built-in security system, based on numeric passwords. Controller passwords consist of up to 10 digits (0-9). Each controller program may contain two passwords, the Password and the Master Password. Passwords restrict access to the controller.
-
Page 44: Clearing The Controller Memory
2-10 Controller Memory and File Types Clearing the Controller If you are locked out because you do not have the password for the controller, you can clear the controller memory and download a new User Memory Program. You can clear the memory when the programming software prompts you for a System or Master Password to go on-line with the controller.
-
Page 45
Chapter Function Files This chapter describes controller function files. The chapter is organized as follows: • Overview on page 3-2 • Real-Time Clock Function File on page 3-3 • Trim Pot Information Function File on page 3-5 • Memory Module Information Function File on page 3-6 •… -
Page 46: Chapter 3 Overview
Overview Function Files are one of the three primary file structures within the MicroLogix 1200 and MicroLogix 1500 controllers (Program Files and Data Files are the others). Function Files provide an efficient and logical interface to controller resources. Controller resources are resident (permanent) features such as the Real-Time Clock and High-Speed Counter.
-
Page 47: Real-Time Clock Function File
Function Files Real-Time Clock The real-time clock provides year, month, day of month, day of week, hour, minute, and second information to the Real-Time Clock (RTC) Function File Function File in the controller. The programming screen is shown below: The parameters and their valid ranges are shown in the table below. Table 3.2 Real-Time Clock Function File Feature Address…
-
Page 48
Function Files Writing Data to the Real-Time Clock When valid data is sent to the real-time clock from the programming device or another controller, the new values take effect immediately. In RSLogix 500, click on Set Date & Time in the RTC Function File screen to set the RTC time to the current time on your PC. -
Page 49: Trim Pot Information Function File
Function Files Trim Pot Information The composition of the Trim Pot Information (TPI) Function File is described below. Function File Table 3.5 Trim Pot Function File Data Address Data Format Range Type User Program Access TPD Data O TPI:0.POT0 Word 0 — 250 Status Read Only…
-
Page 50: Memory Module Information Function File
Function Files Memory Module The controller has a Memory Module Information (MMI) File which is updated with data from the attached memory module. At power-up or on Information Function detection of a memory module being inserted, the catalog number, series, File revision, and type (memory module and/or real-time clock) are identified and written to the MMI file in the user program.
-
Page 51
Function Files MP — Module Present The MP (Module Present) bit can be used in the user program to determine when a memory module is present on the controller. This bit is updated once per scan, provided the memory module is first recognized by the controller. -
Page 52
Function Files LE — Load on Error The LE (Load on Error) bit represents the status of the load on error setting in the program stored in the memory module. It enables you to determine the value of the selection without actually loading the user program from the memory module. -
Page 53: Dat Function File (Micrologix 1500 Only)
Function Files DAT Function File Data Access Tool (DAT) configuration is stored in the processor in a specialized configuration file called the DAT Function File. The DAT (MicroLogix 1500 only) Function File, which is part of the user’s control program, is shown below.
-
Page 54
3-10 Function Files Use your programming software to ensure that the integer IMPORTANT file you specify in the TIF location, as well as the appropriate number of elements, exist in the controller’s user program. The example table below shows a DAT configured to use integer file number 50 (DAT:0.TIF = 50). -
Page 55
Function Files 3-11 Target Bit File (TBF) The value stored in the TBF location identifies the bit file with which the DAT will interface. The DAT can read or write to any valid bit file within the controller. Valid bit files are B3 through B255. When the DAT reads a valid bit file number, it can access the first 48 bits (0 to 47) of the specified file on its display screen. -
Page 56: Base Hardware Information Function File
• The DAT always starts at bit 0 of a data file. It cannot start at any other address within the file. Base Hardware The base hardware information (BHI) file is a read-only file that contains a description of the MicroLogix 1200 Controller or the MicroLogix 1500 Information Function Base Unit. File Table 3.8 Base Hardware Information Function File (BHI)
-
Page 57: Communications Status File
43 to 70 Reserved • MicroLogix 1500 1764-LSP Series B and 1764-LRP Processors words 43 to 70 when using Modbus RTU Slave: 43 to 69 Modbus Slave Diagnostic Counters Block • MicroLogix 1200 3-18 • MicroLogix 1500 1764-LSP Series B and 1764-LRP Processors •…
-
Page 58
3-14 Function Files Table 3.11 General Channel Status Block Word Description Communications Channel General Status Information Category Identifier Code Length Format Code Communications Configuration Error Code ICP – Incoming Command Pending Bit This bit is set (1) when the controller determines that another device has requested information from this controller. Once the request has been satisfied, the bit is cleared (0). -
Page 59
Function Files 3-15 Table 3.12 DH-485 Diagnostic Counters Block Word Description 0 to 7 NAK – No Memories Sent 8 to 15 NAK – No Memories Received 0 to 7 Total Bad Message Packets Received 8 to 15 Reserved 14 to 22 — Reserved Table 3.13 DF1 Full-Duplex Diagnostic Counters Block Word… -
Page 60
Duplicate Message Packets Received 19 to 22 — Reserved Table 3.15 Modbus RTU Slave Diagnostic Counters Block (MicroLogix 1200 Controllers, and MicroLogix 1500 1764-LSP Series B and 1764-LRP Processors) Word Description Diagnostic Counters Category Identifier Code (always 2) Length (always 30) -
Page 61
Function Files 3-17 Table 3.16 ASCII Diagnostic Counters Block (MicroLogix 1500 1764-LRP Processors only) Word Description 13 to 18 — Reserved Bad Character Count 20 to 22 — Reserved Table 3.17 Active Node Table Block Word Description Active Node Table Category Identifier Code (always 3) Length (always 4 for DH-485, always 0 for DF1 Full-Duplex, DF1 Half-Duplex Slave, Modbus RTU Slave, and ASCII) Format Code (always 0) -
Page 62: Input/Output Status File
3-18 Function Files Table 3.18 Modbus RTU Slave Diagnostics (MicroLogix 1200 Controllers, and MicroLogix 1500 1764-LSP Series B and 1764-LRP Processors) Word Description Diagnostic Counters Category Identifier Code (always 10) Length (always 14) Format Code (always 0) Pre-Send Time Delay…
-
Page 63: Chapter 4 Instruction Set
Chapter Programming Instructions Overview Instruction Set The following table shows the MicroLogix 1200 and 1500 programming instructions listed within their functional group. Functional Group Description Page High-Speed Counter The high-speed counter instructions (along with the HSC function file) allow you to monitor and control the high-speed outputs.
-
Page 64: Using The Instruction Descriptions
Programming Instructions Overview Using the Instruction Throughout this manual, each instruction (or group of similar instructions) has a table similar to the one shown below. This table provides Descriptions information for all sub-elements (or components) of an instruction or group of instructions. This table identifies the type of compatible address that can be used for each sub-element of an instruction or group of instructions in a data file or function file.
-
Page 65
By supporting these three addressing methods, the MicroLogix 1200 and 1500 allow incredible flexibility in how data can be monitored or manipulated. Each of the addressing modes are described below. -
Page 66
The MicroLogix 1200 and 1500 support indirection (indirect addressing) for Files, Words and Bits. To define which components of an address are to be indirected, a closed bracket “[ ]” is used. The following examples illustrate how to use indirect addressing. -
Page 67
Programming Instructions Overview Indirect Addressing of a File B3:0 0001 Limit Test Copy File Low Lim Source #N[N50:100]:10 10< Dest #N7:0 Test N50:100 Length 10< High Lim 25< • Address: N[N50:100]:10 • Description: In this example, the source of the COP instruction is indirected by N50:100. -
Page 68
Programming Instructions Overview Indirect Addressing of Bit B3:0 B3:0 0002 [B25:0] 0003 • Address: B3/[B25:0] • Description: In this example, the element to be used for the indirection is B25:0. The data in B25:0 defines the bit within file B3. If the value of location B25:0 = 1017, the XIC instruction is processed using B3/1017. -
Page 69
In this section, an indexed addressing example is shown first. Then an equivalent indirect addressing example is shown. Indexed addressing is supported by SLC 500 and MicroLogix 1000 programmable controllers. The MicroLogix 1200 and 1500 do not support indexed addressing. This example is shown for comparison purposes. Indexed Addressing Example The following ADD instruction uses an indexed address in the Source A and Destination addresses. -
Page 70
Programming Instructions Overview Indirect Addressing Example An equivalent example using indirect addressing is shown below. In place of using the index register, S:24, the user can designate any other valid word address as the indirect address. Multiple indirect addresses can be used within an instruction. -
Page 71
Chapter Using the High-Speed Counter The MicroLogix 1200 has one 20 kHz high-speed counter; the MicroLogix 1500 has two. Functionally, the counters are identical. Each counter has four dedicated inputs that are isolated from other inputs on the controller. HSC0 utilizes inputs 0 through 3 and HSC1 (MicroLogix 1500 only) utilizes inputs 4 through 7. -
Page 72: High-Speed Counter (Hsc) Function File
Using the High-Speed Counter High-Speed Counter Within the RSLogix 500 Function File Folder, you see a HSC Function File. This file provides access to HSC configuration data, and also allows the (HSC) Function File control program access to all information pertaining to each of the High-Speed Counters.
-
Page 73
Using the High-Speed Counter The HSC is extremely versatile; the user can select or configure each HSC for any one of eight (8) modes of operation. (Operating Modes are discussed later in this chapter. See section HSC Mode (MOD) on page 5-16). -
Page 74: High-Speed Counter Function File Sub-Elements Summary
Using the High-Speed Counter High-Speed Counter Each HSC is comprised of 36 sub-elements. These sub-elements are either bit, word, or long word structures that are used to provide control over Function File the HSC function, or provide HSC status information for use within the Sub-Elements Summary control program.
-
Page 75: Hsc Function File Sub-Elements
Using the High-Speed Counter HSC Function File All examples illustrate HSC0. Terms and behavior for HSC1 are identical. Sub-Elements Program File Number (PFN) Description Address Data Format HSC Modes Type User Program Access PFN — Program HSC:0.PFN word (INT) 0 to 7 control read only File Number (1) For Mode descriptions, see HSC Mode (MOD) on page 5-16.
-
Page 76
Using the High-Speed Counter Function Enabled (FE) Description Address Data Format Type User Program Access HSC Modes FE — Function HSC:0/FE bit 0 to 7 control read/write Enabled (1) For Mode descriptions, see HSC Mode (MOD) on page 5-16. The FE (Function Enabled) is a status/control bit that defines when the HSC interrupt is enabled, and that interrupts generated by the HSC are processed based on their priority. -
Page 77
Using the High-Speed Counter Counting Enabled (CE) Description Address Data Format HSC Modes Type User Program Access CE — Counting HSC:0/CE bit 0 to 7 control read/write Enabled (1) For Mode descriptions, see HSC Mode (MOD) on page 5-16. The CE (Counting Enabled) control bit is used to enable or disable the High-Speed Counter. -
Page 78
Using the High-Speed Counter User Interrupt Enable (UIE) Description Address Data Type User Program Format Access Modes UIE — User Interrupt Enable HSC:0/UIE bit 0 to 7 control read/write (1) For Mode descriptions, see HSC Mode (MOD) on page 5-16. The UIE (User Interrupt Enable) bit is used to enable or disable HSC subroutine processing. -
Page 79
Using the High-Speed Counter User Interrupt Pending (UIP) Description Address Data Format Type User Program Access HSC Modes UIP — User HSC:0/UIP bit 0 to 7 status read only Interrupt Pending (1) For Mode descriptions, see HSC Mode (MOD) on page 5-16. The UIP (User Interrupt Pending) is a status flag that represents an interrupt is pending. -
Page 80
5-10 Using the High-Speed Counter Low Preset Interrupt (LPI) Description Address Data Format HSC Modes Type User Program Access LPI — Low HSC:0/LPI bit 2 to 7 status read/write Preset Interrupt (1) For Mode descriptions, see HSC Mode (MOD) on page 5-16. The LPI (Low Preset Interrupt) status bit is set (1) when the HSC accumulator reaches the low preset value and the HSC interrupt has been triggered. -
Page 81
Using the High-Speed Counter 5-11 High Preset Mask (HPM) Description Address Data Format HSC Modes Type User Program Access HPM — High HSC:0/HPM bit 0 to 7 control read/write Preset Mask (1) For Mode descriptions, see HSC Mode (MOD) on page 5-16. The HPM (High Preset Mask) control bit is used to enable (allow) or disable (not allow) a high preset interrupt from occurring. -
Page 82
5-12 Using the High-Speed Counter High Preset Reached (HPR) Description Address Data Format HSC Modes Type User Program Access HPR — High HSC:0/HPR bit 2 to 7 status read only Preset Reached (1) For Mode descriptions, see HSC Mode (MOD) on page 5-16. The HPR (High Preset Reached) status flag is set (1) by the HSC sub-system whenever the accumulated value (HSC:0.ACC) is greater than or equal to the high preset variable (HSC:0.HIP). -
Page 83
Using the High-Speed Counter 5-13 Underflow Interrupt (UFI) Description Address Data Format HSC Modes Type User Program Access UFI — Underflow HSC:0/UFI bit 2 to 7 status read/write Interrupt (1) For Mode descriptions, see HSC Mode (MOD) on page 5-16. The UFI (Underflow Interrupt) status bit is set (1) when the HSC accumulator counts through the underflow value and the HSC interrupt is triggered. -
Page 84
5-14 Using the High-Speed Counter Overflow Mask (OFM) Description Address Data Format HSC Modes Type User Program Access OFM — Overflow HSC:0/OFM bit 0 to 7 control read/write Mask (1) For Mode descriptions, see HSC Mode (MOD) on page 5-16. The OFM (Overflow Mask) control bit is used to enable (allow) or disable (not allow) an overflow interrupt from occurring. -
Page 85
Using the High-Speed Counter 5-15 Count Direction (DIR) Description Address Data Format HSC Modes Type User Program Access DIR — Count HSC:0/DIR bit 0 to 7 status read only Direction (1) For Mode descriptions, see HSC Mode (MOD) on page 5-16. The DIR (Count Direction) status flag is controlled by the HSC sub-system. -
Page 86
5-16 Using the High-Speed Counter Count Up (CU) Description Address Data Format HSC Modes Type User Program Access CU — Count Up HSC:0/CU bit 0 to 7 status read only (1) For Mode descriptions, see HSC Mode (MOD) on page 5-16. The CU (Count Up) bit is used with all of the HSCs (modes 0 to 7). -
Page 87
Using the High-Speed Counter 5-17 HSC Mode 0 — Up Counter Table 5.4 HSC Mode 0 Examples Input Terminals I1:0.0/0 (HSC0) I1:0.0/1 (HSC0) I1:0.0/2 (HSC0) I1:0.0/3 (HSC0) CE Bit Comments I1:0.0/4 (HSC1) I1:0.0/5 (HSC1) I1:0.0/6 (HSC1) I1:0.0/7 (HSC1) Function Count Not Used Not Used Not Used… -
Page 88
5-18 Using the High-Speed Counter HSC Mode 2 — Counter with External Direction Table 5.6 HSC Mode 2 Examples Input Terminals I1:0.0/0 (HSC0) I1:0.0/1 (HSC0) I1:0.0/2 (HSC0) I1:0.0/3 (HSC0) CE Bit Comments I1:0.0/4 (HSC1) I1:0.0/5 (HSC1) I1:0.0/6 (HSC1) I1:0.0/7 (HSC1) Function Count Direction… -
Page 89
Using the High-Speed Counter 5-19 HSC Mode 4 — Two Input Counter (up and down) Table 5.8 HSC Mode 4 Examples Input Terminals I1:0.0/0 (HSC0) I1:0.0/1 (HSC0) I1:0.0/2 (HSC0) I1:0.0/3 (HSC0) CE Bit Comments I1:0.0/4 (HSC1) I1:0.0/5 (HSC1) I1:0.0/6 (HSC1) I1:0.0/7 (HSC1) Function Count Up… -
Page 90
5-20 Using the High-Speed Counter Using the Quadrature Encoder The Quadrature Encoder is used for determining direction of rotation and position for rotating, such as a lathe. The Bidirectional Counter counts the rotation of the Quadrature Encoder. The figure below shows a quadrature encoder connected to inputs 0, 1, and 2. -
Page 91
Using the High-Speed Counter 5-21 HSC Mode 7 — Quadrature Counter (phased inputs A and B) With External Reset and Hold Table 5.11 HSC Mode 7 Examples Input I1:0.0/0 (HSC0) I1:0.0/1 (HSC0) I1:0.0/2 (HSC0) I1:0.0/3 (HSC0) Comments Terminals I1:0.0/4 (HSC1) I1:0.0/5 (HSC1) I1:0.0/6 (HSC1) I1:0.0/7 (HSC1) -
Page 92
5-22 Using the High-Speed Counter Accumulator (ACC) Description Address Data Format Type User Program Access ACC — Accumulator HSC:0.ACC long word (32-bit INT) control read/write The ACC (Accumulator) contains the number of counts detected by the HSC sub-system. If either mode 0 or mode 1 is configured, the value of the software accumulator is cleared (0) when a high preset is reached or when an overflow condition is detected. -
Page 93
Using the High-Speed Counter 5-23 Overflow (OVF) Description Address Data Format Type User Program Access OVF — Overflow HSC:0.OVF long word (32-bit INT) control read/write The OVF (Overflow) defines the upper count limit for the counter. If the counter’s accumulated value increments past the value specified in this variable, an overflow interrupt is generated. -
Page 94
5-24 Using the High-Speed Counter Output Mask Bits (OMB) Description Address Data Format Type User Program Access OMB — Output Mask Bits HSC:0.OMB word (16-bit binary) control read only The OMB (Output Mask Bits) define which outputs on the controller can be directly controlled by the high-speed counter. -
Page 95
Using the High-Speed Counter 5-25 High Preset Output (HPO) Description Address Data Format Type User Program Access HPO — High Preset Output HSC:0.HPO word (16-bit binary) control read/write The HPO (High Preset Output) defines the state (1 = ON or 0 = OFF) of the outputs on the controller when the high preset is reached. -
Page 96: Hsl — High-Speed Counter Load
High Preset N7:0 True False Low Preset N7:1 46.7 µ s 0.0 µ s Output High Source N7:2 MicroLogix 1200 word Output Low Source N7:3 47.3 µ s 0.0 µ s long word 39.7 µ s 0.0 µ s MicroLogix 1500 word 40.3 µ…
-
Page 97: Rac — Reset Accumulated Value
• Counter Number — Specifies which high-speed counter is being used: – Counter Number 0 = HSC0 (MicroLogix 1200 and 1500) – Counter Number 1 = HSC1 (MicroLogix 1500 only) • Source — Specifies the location of the data to be loaded into the HSC accumulator.
-
Page 98
5-28 Using the High-Speed Counter Publication 1762-RM001C-EN-P… -
Page 99: Pto — Pulse Train Output
1200 and 1500 BXB units. Relay outputs are not capable of performing very high-speed operations. Instruction Type: output Table 6.1 Execution Time for the PTO Instruction Controller When Rung Is: True False 75.6 µ s 24.4 µ s MicroLogix 1200 72.6 µ s 21.1 µ s MicroLogix 1500 Publication 1762-RM001C-EN-P…
-
Page 100: Pulse Train Output Function
Using High-Speed Outputs Pulse Train Output The MicroLogix 1200 1762-L24BXB and 1762-L40BXB controllers each support one high-speed output. A MicroLogix 1500 controller utilizing a Function 1764-28BXB Base Unit supports two high-speed outputs. These outputs can be used as standard outputs (not high-speed) or individually configured for PTO or PWM operation.
-
Page 101
Using High-Speed Outputs 8. The PTO instruction is DONE. While the PTO instruction is being executed, status bits and information are updated as the main controller continues to operate. Because the PTO instruction is actually being executed by a parallel system, status bits and other information are updated each time the PTO instruction is scanned while it is running. -
Page 102
Using High-Speed Outputs Momentary Logic Enable Example In this example, the rung state is a momentary or transitional type of input. This means that the false-to-true rung transition enables the PTO instruction and then returns to a false state prior to the PTO instruction completing its operation. -
Page 103
Using High-Speed Outputs Standard Logic Enable Example In this example, the rung state is a maintained type of input. This means that it enables the PTO instruction Normal Operation (NO) and maintains its logic state until after the PTO instruction completes its operation. With this type of logic, status bit behavior is as follows: The Done (DN) bit becomes true (1) when the PTO completes and remains set until the PTO rung logic is false. -
Page 104: Pulse Train Outputs (Pto) Function File
Using High-Speed Outputs Pulse Train Outputs Within the RSLogix 500 Function File Folder, you see a PTO Function File with two elements, PTO0 (1762-L24BXB, 1762-L40BXB, and 1764-28BXB) (PTO) Function File and PTO1 (1764-28BXB only). These elements provide access to PTO configuration data and also allow the control program access to all information pertaining to each of the Pulse Train Outputs.
-
Page 105: Pulse Train Output Function File Sub-Elements Summary
Using High-Speed Outputs Pulse Train Output The variables within each PTO sub-element, along with what type of behavior and access the control program has to those variables, are listed Function File individually below. All examples illustrate PTO 0. Terms and behavior for Sub-Elements Summary PTO 1 (MicroLogix 1500 only) are identical.
-
Page 106
Using High-Speed Outputs PTO Output (OUT) Sub-Element Address Data Format Range Type User Program Description Access OUT — Output PTO:0.OUT word (INT) 2 or 3 control read only The PTO OUT (Output) variable defines the output (O0:0/2 or O0:0/3) that the PTO instruction controls. This variable is set within the function file folder when the control program is written and cannot be set by the user program. -
Page 107
Using High-Speed Outputs PTO Run Status (RS) Sub-Element Address Data Format Range Type User Program Description Access RS — Run Status PTO:0/RS 0 or 1 status read only The PTO RS (Run Status) bit is controlled by the PTO sub-system. It can be used by an input instruction on any rung within the control program. -
Page 108
6-10 Using High-Speed Outputs PTO Idle Status (IS) Sub-Element Address Data Format Range Type User Program Description Access IS — Idle Status PTO:0/IS bit 0 or 1 status read only The PTO IS (Idle Status) is controlled by the PTO sub-system. It can be used in the control program by an input instruction. -
Page 109
Using High-Speed Outputs 6-11 PTO Enable Hard Stop (EH) Sub-Element Address Data Format Range Type User Program Description Access EH — Enable Hard Stop PTO:0/EH 0 or 1 control read/write The PTO EH (Enable Hard Stop) bit is used to stop the PTO sub-system immediately. -
Page 110
6-12 Using High-Speed Outputs PTO Operating Frequency Status (OFS) Sub-Element Address Data Format Range Type User Program Description Access OFS — Operating PTO:0.OFS word (INT) 0 to 20,000 status read only Frequency Status (Hz) The PTO OFS (Output Frequency Status) is generated by the PTO sub-system and can be used in the control program to monitor the actual frequency being produced by the PTO sub-system. -
Page 111
Using High-Speed Outputs 6-13 PTO Accel / Decel Pulses (ADP) Sub-Element Address Data Format Range Type User Program Description Access ADP — Accel/Decel PTO:0.ADP long word (32-bit see below control read/write Pulses INT) The PTO ADP (Accel/Decel Pulses) defines how many of the total pulses (TOP variable) will be applied to each of the ACCEL and DECEL components. -
Page 112
6-14 Using High-Speed Outputs PTO Controlled Stop (CS) Sub-Element Description Address Data Range Type User Program Format Access CS — Controlled Stop PTO:0/CS 0 or 1 control read/write The PTO CS (Controlled Stop) bit is used to stop an executing PTO instruction, in the run portion of the profile, by immediately starting the decel phase. -
Page 113
Using High-Speed Outputs 6-15 PTO Jog Frequency (JF) Sub-Element Address Data Range Type User Program Description Format Access JF — Jog Frequency (Hz) PTO:0.JF word (INT) 0 to 20,000 control read/write The PTO JF (Jog Frequency) variable defines the frequency of the PTO output during all Jog phases. -
Page 114
6-16 Using High-Speed Outputs PTO Jog Continuous (JC) Sub-Element Address Data Format Range Type User Program Description Access JC — Jog Continuous PTO:0/JC 0 or 1 control read/write The PTO JC (Jog Continuous) bit instructs the PTO sub-system to generate continuous pulses. -
Page 115
Using High-Speed Outputs 6-17 PTO Error Code (ER) Sub-Element Address Data Format Range Type User Program Description Access ER — Error Code PTO:0.ER word (INT) -2 to 7 status read only PTO ER (Error Codes) detected by the PTO sub-system are displayed in this register. -
Page 116: Pwm — Pulse Width Modulation
Controller When Rung Is: True False 126.6 µ s 24.7 µ s MicroLogix 1200 107.4 µ s 21.1 µ s MicroLogix 1500 PWM Function The PWM function allows a field device to be controlled by a PWM wave form. The PWM profile has two primary components: •…
-
Page 117: Pulse Width Modulation (Pwm) Function File
Using High-Speed Outputs 6-19 instruction is actually being executed by a parallel system, the status bits and other information are updated each time the PWM instruction is scanned while it is running. This provides the control program access to PWM status while it is running. PWM status is only as fresh as the scan time of the NOTE controller.
-
Page 118: Pulse Width Modulated Function File Elements Summary
6-20 Using High-Speed Outputs Pulse Width Modulated The variables within each PWM element, along with what type of behavior and access the control program has to those variables, are listed Function File Elements individually below. Summary Element Description Address Data Format Range Type User Program For More…
-
Page 119
Using High-Speed Outputs 6-21 PWM Decelerating Status (DS) Element Description Address Data Format Range Type User Program Access DS — Decelerating Status PWM:0/DS bit 0 or 1 status read only The PWM DS (Decel) bit is controlled by the PWM sub-system. It can be used by an input instruction on any rung within the control program. -
Page 120
6-22 Using High-Speed Outputs PWM Profile Parameter Select (PP) Element Description Address Data Format Range Type User Program Access PP — Profile Parameter Select PWM:0/PP bit 0 or 1 control read/write The PWM PP (Profile Parameter Select) selects which component of the waveform is modified during a ramp phase: •… -
Page 121
Using High-Speed Outputs 6-23 PWM Normal Operation (NS) Element Description Address Data Range Type User Program Format Access NS — PWM Normal Operation PWM:0/NS 0 or 1 status read only The PWM NS (Normal Operation) bit is controlled by the PWM sub-system. -
Page 122
6-24 Using High-Speed Outputs PWM Output Frequency (OF) Element Description Address Data Range Type User Program Format Access OF — PWM Output Frequency PWM:0.OF word (INT) 0 to 20,000 control read/write The PWM OF (Output Frequency) variable defines the frequency of the PWM function. -
Page 123
Using High-Speed Outputs 6-25 PWM Accel/Decel Delay (ADD) Element Description Address Data Format Range Type User Program Access ADD — Accel/Decel Delay PWM:0.ADD word (INT) 0 to 32,767 control read/write PWM ADD (Accel/Decel Delay) defines the amount of time in 10 millisecond intervals to ramp from zero to the specified frequency or duration. -
Page 124
6-26 Using High-Speed Outputs Publication 1762-RM001C-EN-P… -
Page 125: Xic — Examine If Closed Xio — Examine If Open
True False B3:0 0.9 µ s 0.8 µ s MicroLogix 1200 0.9 µ s 0.7 µ s MicroLogix 1500 Use the XIC instruction to determine if the addressed bit is on. Use the XIO instruction to determine if the addressed bit is off.
-
Page 126
Relay-Type (Bit) Instructions expansion I/O, or internal addresses (data or function files). Examples of devices that turn on or off: • a push button wired to an input (addressed as I1:0/4) • an output wired to a pilot light (addressed as O0:0/2) •… -
Page 127: Ote — Output Energize
When Rung Is: True False 1.4 µ s 1.1 µ s MicroLogix 1200 1.2 µ s 0.0 µ s MicroLogix 1500 Use an OTE instruction to turn a bit location on when rung conditions are evaluated as true and off when the rung is evaluated as false. An example of a device that turns on or off is an output wired to a pilot light (addressed as O0:0/4).
-
Page 128: Otl — Output Latch Otu — Output Unlatch
False B3:0 1.0 µ s 0.0 µ s 1.1 µ s 0.0 µ s MicroLogix 1200 0.9 µ s 0.0 µ s 0.9 µ s 0.0 µ s MicroLogix 1500 The OTL and OTU instructions are retentive output instructions. OTL turns on a bit, while OTU turns off a bit.
-
Page 129: Ons — One Shot
1.9 µs MicroLogix 1500 2.2 µs 1.7 µs The ONS instruction for the MicroLogix 1200 and 1500 NOTE provides the same functionality as the OSR instruction for the MicroLogix 1000 and SLC 500 controllers. The ONS instruction is a retentive input instruction that triggers an event to occur one time.
-
Page 130: Osr — One Shot Rising Osf — One Shot Falling
Storage Bit B3:0/0 Output Bit B3:0/1 The OSR instruction for the MicroLogix 1200 and 1500 NOTE does not provide the same functionality as the OSR instruction for the MicroLogix 1000 and SLC 500 controllers. For the same functionality as the OSR instruction for the MicroLogix 1000 and SLC 500 controllers, use the ONS instruction.
-
Page 131
Relay-Type (Bit) Instructions Use the OSR and OSF instructions to trigger an event to occur one time. These instructions trigger an event based on a change of rung state, as follows: • Use the OSR instruction when an event must start based on the false-to-true (rising edge) change of state of the rung. -
Page 132
Relay-Type (Bit) Instructions Publication 1762-RM001C-EN-P… -
Page 133: Timer Instructions Overview
Chapter Timer and Counter Instructions Timers and counters are output instructions that let you control operations based on time or a number of events. The following Timer and Counter Instructions are described in this chapter: Instruction Used To: Page TON — Timer, On-Delay Delay turning on an output on a true rung TOF — Timer, Off-Delay Delay turning off an output on a false rung…
-
Page 134
Timer and Counter Instructions Each timer address is made of a 3-word element. Word 0 is the control and status word, word 1 stores the preset value, and word 2 stores the accumulated value. Table 8.2 Timer File Word Word 0 DN Internal Use Word 1 Preset Value… -
Page 135
Timer and Counter Instructions Timer Accuracy Timer accuracy refers to the length of time between the moment a timer instruction is enabled and the moment the timed interval is complete. Table 8.4 Timer Accuracy Time Base Accuracy 0.001 seconds -0.001 to 0.00 0.01 seconds -0.01 to 0.00 1.00 seconds… -
Page 136: Ton — Timer, On-Delay
False Accum 0< 18.0 µ s 3.0 µ s MicroLogix 1200 15.5 µ s 2.5 µ s MicroLogix 1500 Use the TON instruction to delay turning on an output. The TON instruction begins to count time base intervals when rung conditions become true.
-
Page 137: Tof — Timer, Off-Delay
False Accum 0< 2.9 µ s 13.0 µ s MicroLogix 1200 2.5 µ s 10.9 µ s MicroLogix 1500 Use the TOF instruction to delay turning off an output. The TOF instruction begins to count time base intervals when rung conditions become false.
-
Page 138: Rto — Retentive Timer, On-Delay
False Accum 0< 18.0 µ s 2.4 µ s MicroLogix 1200 15.8 µ s 2.2 µ s MicroLogix 1500 Use the RTO instruction to delay turning “on” an output. The RTO begins to count time base intervals when the rung conditions become true. As long as the rung conditions remain true, the timer increments its accumulator until the preset value is reached.
-
Page 139: How Counters Work
Timer and Counter Instructions How Counters Work The figure below demonstrates how a counter works. The count value must remain in the range of -32,768 to +32,767. If the count value goes above +32,767, the counter status overflow bit (OV) is set (1). If the count goes below -32,768, the counter status underflow bit (UN) is set (1).
-
Page 140
Timer and Counter Instructions The counter continues to count when the accumulator is NOTE greater than the CTU preset and when the accumulator is less than the CTD preset. Addressing Modes and File Types can be used as shown in the following table: Table 8.11 CTD and CTU Instructions Valid Addressing Modes and File Types For definitions of the terms used in this table see Using the Instruction Descriptions on page4-2. -
Page 141: Ctu — Count Up Ctd — Count Down
Accum 0< True False True False 9.0 µ s 9.2 µ s 9.0 µ s 9.0 µ s MicroLogix 1200 6.4 µ s 8.5 µ s 7.5 µ s 8.5 µ s MicroLogix 1500 Count Down Counter C5:0 Preset 0<…
-
Page 142: Res — Reset
When Rung Is: True False 5.9 µ s 0.0 µ s MicroLogix 1200 4.8 µ s 0.0 µ s MicroLogix 1500 The RES instruction resets timers, counters, and control elements. When the RES instruction is executed, it resets the data defined by the RES instruction.
-
Page 143
Chapter Compare Instructions Use these input instructions when you want to compare values of data. Instruction Used To: Page EQU — Equal Test whether two values are equal (=) NEQ — Not Equal Test whether one value is not equal to a second value ( ≠… -
Page 144: Using The Compare Instructions
Compare Instructions Using the Compare Most of the compare instructions use two parameters, Source A and Source B (MEQ and LIM have an additional parameter and are described Instructions later in this chapter). Both sources cannot be immediate values. The valid data ranges for these instructions are: -32768 to 32767 (word) -2,147,483,648 to 2,147,483,647 (long word)
-
Page 145: Equ — Equal Neq — Not Equal
Data Size When Rung Is: Source B N7:1 True False 0< 1.3 µ s 1.1 µ s MicroLogix 1200 EQU word 2.8 µ s 1.9 µ s long word 1.3 µ s 1.1 µ s word Not Equal Source A N7:0 2.5 µ…
-
Page 146: Grt — Greater Than Les — Less Than
When Rung Is: Source B N7:1 True False 0< 1.3 µ s 1.1 µ s MicroLogix 1200 word 2.8 µ s 2.7 µ s long word Less Than (A<B) 1.2 µ s 1.1 µ s MicroLogix 1500 word Source A N7:0 2.6 µ…
-
Page 147: Geq — Greater Than Or Equal To Leq — Less Than Or Equal To
When Rung Is: Source B N7:1 True False 0< 1.3 µ s 1.1 µ s MicroLogix 1200 word 2.8 µ s 2.7 µ s long word 1.2 µ s 1.1 µ s MicroLogix 1500 word Less Than or Eql (A<=B) 2.6 µ…
-
Page 148: Meq — Mask Compare For Equal
When Rung Is: Mask N7:1 True False 0000h< Compare N7:2 1.9 µ s 1.8 µ s MicroLogix 1200 word 0< 3.9 µ s 3.1 µ s long word 1.7 µ s 1.7 µ s MicroLogix 1500 word 3.5 µ s 2.9 µ…
-
Page 149: Lim — Limit Test
When Rung Is: 0< Test True False 0< High Lim N7:1 6.4 µ s 6.1 µ s MicroLogix 1200 word 0< 14.4 µ s 13.6 µ s long word 5.5 µ s 5.3 µ s MicroLogix 1500 word 12.2 µ s 11.7 µ…
-
Page 150
Compare Instructions The Low Limit, Test, and High Limit values can be word addresses or constants, restricted to the following combinations: • If the Test parameter is a constant, both the Low Limit and High Limit parameters must be word or long word addresses. •… -
Page 151
Chapter Math Instructions Use these output instructions to perform computations using an expression or a specific arithmetic instruction. Instruction Used To: Page ADD — Add Add two values 10-4 SUB — Subtract Subtract two values 10-4 MUL — Multiply Multiply two values 10-5 DIV — Divide Divide one value by another… -
Page 152: Using The Math Instructions
10-2 Math Instructions Using the Math Most math instructions use three parameters, Source A, Source B, and Destination (additional parameters are described where applicable, later Instructions in this chapter). The mathematical operation is performed using both Source values. The result is stored in the Destination. When using math instructions, observe the following: •…
-
Page 153: Updates To Math Status Bits
Math Instructions 10-3 Updates to Math Status After a math instruction is executed, the arithmetic status bits in the status file are updated. The arithmetic status bits are in word 0 in the processor Bits status file (S2). Table 10.2 Math Status Bits With this Bit: The Controller: S:0/0…
-
Page 154: Add — Add Sub — Subtract
0< Source B N7:1 True False 0< Dest N7:2 2.7 µ s 0.0 µ s MicroLogix 1200 ADD word 0< 11.9 µ s 0.0 µ s long word 3.4 µ s 0.0 µ s word 12.9 µ s 0.0 µ s…
-
Page 155: Mul — Multiply Div — Divide
When Rung Is: Source B N7:1 True False 0< Dest N7:2 6.8 µ s 0.0 µ s MicroLogix 1200 MUL word 0< 31.9 µ s 0.0 µ s long word 12.2 µ s 0.0 µ s word 42.8 µ s 0.0 µ…
-
Page 156: Neg — Negate
Controller Data Size When Rung Is: Dest N7:1 True False 0< 2.9 µ s 0.0 µ s MicroLogix 1200 word 12.1 µ s 0.0 µ s long word 1.9 µ s 0.0 µ s MicroLogix 1500 word 10.4 µ s 0.0 µ…
-
Page 157: Scl — Scale
Rate [/10000] N7:1 True False 0< Offset N7:2 10.5 µ s 0.0 µ s MicroLogix 1200 0< 8.7 µ s 0.0 µ s Dest N7:3 MicroLogix 1500 0< The SCL instruction causes the value at the Source address to be multiplied by the Rate (slope) value.
-
Page 158: Scp — Scale With Parameters
When Rung Is: Input Min. N7:1 True False 0< Input Max. N7:2 31.5 µ s 0.0 µ s MicroLogix 1200 word 0< 52.2 µ s 0.0 µ s Scaled Min. N7:3 long word 0< 27.0 µ s 0.0 µ s…
-
Page 159: Sqr — Square Root
Controller Data Size When Rung Is: Dest N7:1 True False 0< 26.0 µ s 0.0 µ s MicroLogix 1200 word 30.9 µ s 0.0 µ s long word 22.3 µ s 0.0 µ s MicroLogix 1500 word 26.0 µ s 0.0 µ…
-
Page 160: Swp — Swap
True False MicroLogix 1200 Series B and higher 13.7 µ s + 2.2 µ s/swapped word 0.0 µ s MicroLogix 1500 Series B and higher 11.7 µ s + 1.8 µ s/swapped word 0.0 µ s Use the SWP instruction to swap the low and high bytes of a specified number of words in a bit, integer, or string file.
-
Page 161
Math Instructions 10-11 Addressing Modes and File Types can be used as shown in the following table: Table 10.14 SWP Instruction Valid Addressing Modes and File Types For definitions of the terms used in this table see Using the Instruction Descriptions on page4-2. Address Address Data Files… -
Page 162
10-12 Math Instructions Publication 1762-RM001C-EN-P… -
Page 163: Using Decode And Encode Instructions
Chapter Conversion Instructions The conversion instructions multiplex and de-multiplex data and perform conversions between binary and decimal values. Instruction Used To: Page DCD — Decode 4 to 1-of-16 Decodes a 4-bit value (0 to 15), turning on the 11-2 corresponding bit in the 16-bit destination. ENC — Encode 1-of-16 to 4 Encodes a 16-bit source to a 4-bit value.
-
Page 164: Dcd — Decode 4 To 1-Of-16
True False 0000000000000000< 1.9 µ s 0.0 µ s MicroLogix 1200 0.9 µ s 0.0 µ s MicroLogix 1500 The DCD instruction uses the lower four bits of the source word to set one bit of the destination word. All other bits in the destination word are cleared.
-
Page 165: Enc — Encode 1-Of-16 To 4
True False 0000h< 7.2 µ s 0.0 µ s MicroLogix 1200 6.8 µ s 0.0 µ s MicroLogix 1500 The ENC instruction searches the source from the lowest to the highest bit, looking for the first bit set. The corresponding bit position is written to the destination as an integer.
-
Page 166: Frd — Convert From Binary Coded Decimal (Bcd)
True False 0< 14.1 µ s 0.0 µ s MicroLogix 1200 12.3 µ s 0.0 µ s MicroLogix 1500 The FRD instruction is used to convert the Binary Coded Decimal (BCD) source value to an integer and place the result in the destination.
-
Page 167
Conversion Instructions 11-5 FRD Instruction Source Operand The source can be either a word address or the math register. The maximum BCD source values permissible are: • 9999 if the source is a word address (allowing only a 4-digit BCD value) •… -
Page 168
11-6 Conversion Instructions To convert numbers larger than 9999 BCD, the source NOTE must be the Math Register (S:13). You must reset the Minor Error Bit (S:5.0) to prevent an error. Example The BCD value 32,760 in the math register is converted and stored in N7:0. -
Page 169
Conversion Instructions 11-7 Clearing S:14 before executing the FRD instruction is shown below: MOVE 0001 0010 0011 0100 Source N7:2 4660 Dest S:13 4660 CLEAR Dest S:14 S:13 and S:14 are FROM BCD Source S:13 displayed in BCD format. 00001234 Dest N7:0 1234… -
Page 170: Tod — Convert To Binary Coded Decimal (Bcd)
N7:1 True False 0000h< 17.2 µ s 0.0 µ s MicroLogix 1200 14.3 µ s 0.0 µ s MicroLogix 1500 The TOD instruction is used to convert the integer source value to BCD and place the result in the destination.
-
Page 171
Conversion Instructions 11-9 Updates to Math Status Bits Table 11.12 Math Status Bits With this Bit: The Controller: S:0/0 Carry always resets S:0/1 Overflow sets if BCD result is larger than 9999. On overflow, the minor error flag is also set. S:0/2 Zero Bit sets if result is zero, otherwise resets… -
Page 172
11-10 Conversion Instructions Publication 1762-RM001C-EN-P… -
Page 173: Using Logical Instructions
Chapter Logical Instructions The logical instructions perform bit-wise logical operations on individual words. Instruction Used To: Page AND — Bit-Wise AND Perform an AND operation 12-3 OR — Logical OR Perform an inclusive OR operation 12-4 XOR — Exclusive OR Perform an Exclusive Or operation 12-5 NOT — Logical NOT…
-
Page 174: Updates To Math Status Bits
• • • • (1) DAT files are valid for the MicroLogix 1500 only. PTO and PWM files are valid for MicroLogix 1200 and 1500 BXB units. (2) The Data Log Status file can only be used by the MicroLogix 1500 1764-LRP Processor.
-
Page 175: And — Bit-Wise And
When Rung Is: 0000h< Source B N7:1 True False 0000h< Dest N7:2 2.2 µ s 0.0 µ s MicroLogix 1200 word 0000h< 9.2 µ s 0.0 µ s long word 2.0 µ s 0.0 µ s MicroLogix 1500 word 7.9 µ s 0.0 µ…
-
Page 176: Or — Logical Or
When Rung Is: Source B N7:1 True False 0000h< Dest N7:2 2.2 µ s 0.0 µ s MicroLogix 1200 word 0000h< 9.2 µ s 0.0 µ s long word 2.0 µ s 0.0 µ s MicroLogix 1500 word 7.9 µ s 0.0 µ…
-
Page 177: Xor — Exclusive Or
When Rung Is: 0000h< Source B N7:1 True False 0000h< Dest N7:2 3.0 µ s 0.0 µ s MicroLogix 1200 word 0000h< 9.9 µ s 0.0 µ s long word 2.3 µ s 0.0 µ s MicroLogix 1500 word 8.9 µ s 0.0 µ…
-
Page 178: Not — Logical Not
Controller Data Size When Rung Is: Dest N7:1 True False 0< 2.4 µ s 0.0 µ s MicroLogix 1200 word 9.2 µ s 0.0 µ s long word 2.4 µ s 0.0 µ s MicroLogix 1500 word 8.1 µ s 0.0 µ…
-
Page 179: Chapter 13 Mov — Move
Controller Data Size When Rung Is: Dest N7:1 True False 0< 2.4 µ s 0.0 µ s MicroLogix 1200 word 8.3 µ s 0.0 µ s long word 2.3 µ s 0.0 µ s MicroLogix 1500 word 6.8 µ s 0.0 µ…
-
Page 180
• • (1) The ST file is not valid for MicroLogix 1500 1764-LSP Series A processors. (2) DAT files are valid for the MicroLogix 1500 only. PTO and PWM files are valid for MicroLogix 1200 and 1500 BXB units. (3) The Data Log Status file can only be used by the MicroLogix 1500 1764-LRP Processor. -
Page 181: Mvm — Masked Move
When Rung Is: 0< Mask N7:1 True False 0000h< Dest N7:2 7.8 µ s 0.0 µ s MicroLogix 1200 word 0< 11.8 µ s 0.0 µ s long word 7.2 µ s 0.0 µ s MicroLogix 1500 word 10.0 µ s 0.0 µ…
-
Page 182
13-4 Move Instructions Table 13.6 Mask Example (Word Addressing Level) Word Value in Value in Binary Hexadecimal 15 14 13 12 11 10 9 8 7 6 5 4 3 2 1 0 Value in Destination FFFF 1 1 1 1 1 1 1 1 1 1 1 1 1 1 1 1 Before Move Source Value 5555… -
Page 183
Chapter File Instructions The file instructions perform operations on file data. Instruction Used To: Page COP — Copy File Copy a range of data from one file 14-2 location to another FLL — Fill File Load a file with a program constant or a 14-3 value from an element address BSL — Bit Shift Left… -
Page 184: Chapter 14 Cop — Copy File
Length True False 19.08 µ s + 0.8 µs/word 0.0 µ s MicroLogix 1200 15.9 µ s + 0.67 µs/word 0.0 µ s MicroLogix 1500 The COP instruction copies blocks of data from one location into another. Table 14.2 COP Instruction Valid Addressing Modes and File Types For definitions of the terms used in this table see Using the Instruction Descriptions on page4-2.
-
Page 185: Fll — Fill File
Data Size When Rung Is: Length True False 14 + 0.6 µ s/word 0.0 µ s MicroLogix 1200 word 15 + 1.2 µ s/long word 0.0 µ s long word 12.1 + 0.43 µ s/word 0.0 µ s MicroLogix 1500 word 12.3 + 0.8 µ…
-
Page 186: Bsl — Bit Shift Left
False Length 1< 32 µ s + 1.3 µ s/word 1.3 µ s MicroLogix 1200 26.1 µ s + 1.06 µ s/word 1.4 µ s MicroLogix 1500 The BSL instruction loads data into a bit array on a false-to-true rung transition, one bit at a time.
-
Page 187
File Instructions 14-5 If you wish to shift more than one bit per scan, you must create a loop in your application using the JMP, LBL, and CTU instructions. This instruction uses the following operands: • File — The file operand is the address of the bit array that is to be manipulated. -
Page 188: Bsr — Bit Shift Right
Length 1< 32 µ s + 1.3 µ s/word 1.3 µ s MicroLogix 1200 26.1 µ s + 1.07 µ s/word 1.4 µ s MicroLogix 1500 If you wish to shift more than one bit per scan, you must create a loop in your application using the JMP, LBL, and CTU instructions.
-
Page 189
File Instructions 14-7 • Bit Address — The source is the address of the bit to be transferred into the bit array at the last (highest) bit position. • Length — The length operand contains the length of the bit array in bits. -
Page 190: Ffl — First In, First Out (Fifo) Load
Control R6:0 True False Length 1< Position 0< 11.3 µ s 11.1 µ s MicroLogix 1200 word 11.7 µ s 11.2 µ s long word 10.0 µ s 9.8 µ s MicroLogix 1500 word 10.9 µ s 9.7 µ s…
-
Page 191
File Instructions 14-9 This instruction uses the following operands: • Source — The source operand is a constant or address of the value used to fill the currently available position in the FIFO stack. The address level of the source must match the FIFO stack. If FIFO is a word size file, source must be a word value or constant. -
Page 192
14-10 File Instructions Addressing Modes and File Types can be used as shown in the following table: Table 14.11 FFL Instruction Valid Addressing Modes and File Types For definitions of the terms used in this table see Using the Instruction Descriptions on page4-2. Address Address Data Files… -
Page 193: Ffu — First In, First Out (Fifo) Unload
Length 1< Position 0< 33 µ s + 0.8 µ s/word 10.4 µ s MicroLogix 1200 word 36 µ s + 1.5 µ s/ long word 10.4 µ s long word 27.7 µ s + 0.65 µ s/word 9.7 µ s…
-
Page 194
14-12 File Instructions This instruction uses the following operands: • FIFO — The FIFO operand is the starting address of the stack. • Destination — The destination operand is a word or long word address that stores the value which exits from the FIFO stack. The FFU instruction unloads this value from the first location on the FIFO stack and places it in the destination address. -
Page 195
File Instructions 14-13 Addressing Modes and File Types can be used as shown in the following table: Table 14.13 FFU Instruction Valid Addressing Modes and File Types For definitions of the terms used in this table see Using the Instruction Descriptions on page4-2. Address Address Data Files… -
Page 196: Lfl — Last In, First Out (Lifo) Load
Control R6:0 True False Length 1< Position 0< 25.5 µ s 10.4 µ s MicroLogix 1200 word 31.6 µ s 10.4 µ s long word 22.2 µ s 9.7 µ s MicroLogix 1500 word 27.4 µ s 9.7 µ s…
-
Page 197
File Instructions 14-15 This instruction uses the following operands: • Source — The source operand is a constant or address of the value used to fill the currently available position in the LIFO stack. The data size of the source must match the LIFO stack. If LIFO is a word size file, source must be a word value or constant. -
Page 198
14-16 File Instructions Addressing Modes and File Types can be used as shown in the following table: Table 14.15 LFL Instruction Valid Addressing Modes and File Types For definitions of the terms used in this table see Using the Instruction Descriptions on page4-2. Address Address Data Files… -
Page 199: Lfu — Last In, First Out (Lifo) Unload
Control R6:0 True False Length 1< Position 0< 29.1 µ s 10.4 µ s MicroLogix 1200 word 31.6 µ s 10.4 µ s long word 25.6 µ s 9.7 µ s MicroLogix 1500 word 27.4 µ s 9.7 µ s…
-
Page 200
14-18 File Instructions This instruction uses the following operands: • LIFO — The LIFO operand is the starting address of the stack. • Destination — The destination operand is a word or long word address that stores the value which exits from the LIFO stack. The LFU instruction unloads this value from the last location on the LIFO stack and places it in the destination address. -
Page 201: Sequencer Instructions
Chapter Sequencer Instructions Sequencer instructions are used to control automatic assembly machines or processes that have a consistent and repeatable operation. They are typically time based or event driven. Instruction Used To: Page SQC — Sequencer Compare Compare 16-bit data with stored data 15-2 SQO — Sequencer Output Transfer 16-bit data to word addresses…
-
Page 202: Chapter 15 Sqc- Sequencer Compare
When Rung Is: Mask N7:0 True False Source I:0.0 Control R6:0 23.5 µ s 7.1 µ s MicroLogix 1200 word Length 1< 26.3 µ s 7.1 µ s Position 0< long word 20.1 µ s 6.3 µ s MicroLogix 1500 word 22.7 µ…
-
Page 203
Sequencer Instructions 15-3 The following figure explains how the SQC instruction works. Sequencer Compare File #B10:11 Mask FFF0 Source I:3.0 Control R6:21 Length 4< Position 2< Input Word I:3.0 0010 0100 1001 1101 Mask Value FFF0 1111 1111 1111 0000 Sequencer Ref File #B10:11 Word Step… -
Page 204
15-4 Sequencer Instructions This instruction uses the following operands: • File — This is the sequencer reference file. Its contents, on an element-by-element basis, are masked and compared to the masked value stored in source. If file type is word, then mask and source must be NOTE words. -
Page 205: Sqo- Sequencer Output
When Rung Is: Dest N7:1 True False Control R6:0 Length 1< 23.2 µ s 7.1 µ s MicroLogix 1200 word Position 0< 26.6 µ s 7.1 µ s long word 20.0 µ s 6.3 µ s MicroLogix 1500 word 23.1 µ s 6.3 µ…
-
Page 206
15-6 Sequencer Instructions If the position is equal to zero at start-up, when you switch the controller from the program mode to the run mode, the instruction operation depends on whether the rung is true or false on the first scan. •… -
Page 207
Sequencer Instructions 15-7 This instruction uses the following operands: • File — This is the sequencer reference file. Its contents, on an element-by-element, basis are masked and stored in the destination. If file type is word, then mask and source must be NOTE words. -
Page 208: Sql — Sequencer Load
Control R6:0 True False Length 1< Position 0< 21.7 µ s 7.0 µ s MicroLogix 1200 word 24.3 µ s 7.1 µ s long word 19.1 µ s 6.3 µ s MicroLogix 1500 word 21.1 µ s 6.3 µ s…
-
Page 209
Sequencer Instructions 15-9 On a false-to-true rung transition, the SQL instruction loads words or long words into a sequencer file at each step of a sequencer operation. This instruction uses the following operands: • File — This is the sequencer reference file. Its contents are received on an element-by-element basis from the source. -
Page 210
15-10 Sequencer Instructions Addressing Modes and File Types can be used as shown in the following table: Table 15.6 SQL Instruction Valid Addressing Modes and File Types For definitions of the terms used in this table see Using the Instruction Descriptions on page4-2. Address Address Data Files… -
Page 211: Chapter 16 Jmp — Jump To Label
When Rung Is: True False 1.0 µ s 0.0 µ s MicroLogix 1200 1.0 µ s 0.0 µ s MicroLogix 1500 The JMP instruction causes the controller to change the order of ladder execution. Jumps cause program execution to go to the rung marked LBL label number.
-
Page 212: Lbl — Label
When Rung Is: True False 1.0 µ s 1.0 µ s MicroLogix 1200 1.0 µ s 1.0 µ s MicroLogix 1500 The LBL instruction is used in conjunction with a jump (JMP) instruction to change the order of ladder execution. Jumps cause program execution to go to the rung marked LBL label number.
-
Page 213: Sbr — Subroutine Label
When Rung Is: True False 1.0 µ s 1.0 µ s MicroLogix 1200 1.0 µ s 1.0 µ s MicroLogix 1500 The SBR instruction is a label which is not used by the processor. It is for user subroutine identification purposes as the first rung for that subroutine.
-
Page 214: Sus — Suspend
When Rung Is: True False 0.9 µ s 0.0 µ s MicroLogix 1200 1.0 µ s 0.0 µ s MicroLogix 1500 The TND instruction is used to denote a premature end-of-ladder program execution. The TND instruction cannot be executed from a STI subroutine, HSC subroutine, EII subroutine, or a user fault subroutine.
-
Page 215: End — Program End
Table 16.7 Execution Time for the MCR Instructions Controller Instruction When Rung Is: True False 1.2 µ s 1.2 µ s MicroLogix 1200 MCR Start 1.6 µ s 1.6 µ s MCR End 0.8 µ s 0.8 µ s MicroLogix 1500 MCR Start 1.0 µ…
-
Page 216
16-6 Program Control Instructions While the rung state of the first MCR instruction is true, execution proceeds as if the zone were not present. When the rung state of the first MCR instruction is false, the ladder logic within the MCR zone is executed as if the rung is false. -
Page 217
I/O. Mask N7:0 Length Table 17.1 Execution Time for the IIM Instruction Controller When Rung Is: True False 26.4 µ s 0.0 µ s MicroLogix 1200 22.5 µ s 0.0 µ s MicroLogix 1500 Publication 1762-RM001C-EN-P… -
Page 218
17-2 Input and Output Instructions The IIM instruction allows you to selectively update input data without waiting for the automatic input scan. This instruction uses the following operands: • Slot — This operand defines the location where data is obtained for updating the input file. -
Page 219: Iom — Immediate Output With Mask
When Rung Is: True False 22.3 µ s 0.0 µ s MicroLogix 1200 MicroLogix 1500 1764-LSP 18.4 µ s 0.0 µ s MicroLogix 1500 1764-LRP 19.4 µ s 0.0 µ s The IOM instruction allows you to selectively update output data without waiting for the automatic output scan.
-
Page 220: Ref- I/O Refresh
Table 17.5 Execution Time for the REF Instruction Controller When Rung Is: True False 0.0 µ s MicroLogix 1200 see p. A-7 0.0 µ s MicroLogix 1500 see p. B-6 The REF instruction is used to interrupt the program scan to execute the I/O scan and service communication portions of the operating cycle for all communication channels.
-
Page 221
Chapter Using Interrupts Interrupts allow you to interrupt your program based on defined events. This chapter contains information about using interrupts, the interrupt instructions, and the interrupt function files. The chapter is arranged as follows: • Information About Using Interrupts on page 18-2. •… -
Page 222: Information About Using Interrupts
• Program File 10 is executed. • Program File 2 execution resumes immediately after program file 10 is rung 275 scanned. (1) The MicroLogix 1200 has one HSC Interrupt, HSC0. The MicroLogix 1500 has two, HSC0 and HSC1. Publication 1762-RM001C-EN-P…
-
Page 223
6. resumes normal execution from the point where the controller program was interrupted When Can the Controller Operation be Interrupted? The Micrologix 1200 and 1500 controllers only allow interrupts to be serviced during certain periods of a program scan. They are: • At the start of a ladder rung •… -
Page 224
18-4 Using Interrupts Priority of User Interrupts When multiple interrupts occur, the interrupts are serviced based upon their individual priority. When an interrupt occurs and another interrupt(s) has already occurred but has not been serviced, the new interrupt is scheduled for execution based on its priority relative to the other pending interrupts. -
Page 225
MicroLogix 1500 Memory Usage and Instruction Execution Time on page B-1 for more information. 2. Multiply the maximum rung time by the Communications Multiplier corresponding to your configuration in the MicroLogix 1200 Scan Time Worksheet on page A-7, or MicroLogix 1500 Scan Time Worksheet on page B-6. -
Page 226
18-6 Using Interrupts User Fault Routine The user fault routine gives you the option of preventing a controller shutdown when a specific user fault occurs. The fault routine is executed when any recoverable or non-recoverable user fault occurs. The fault routine is not executed for non-user faults. -
Page 227: User Interrupt Instructions
When Rung Is: True False 1.0 µ s 1.0 µ s MicroLogix 1200 1.0 µ s 1.0 µ s MicroLogix 1500 The INT instruction is used as a label to identify a user interrupt service routine (ISR). This instruction is placed as the first instruction on a rung and is always evaluated as true.
-
Page 228: Sts — Selectable Timed Start
When Rung Is: True False 57.5 µ s 0.0 µ s MicroLogix 1200 50.7 µ s 0.0 µ s MicroLogix 1500 The STS instruction can be used to start and stop the STI function or to change the time interval between STI user interrupts. The STI instruction has one operand: •…
-
Page 229: Uid — User Interrupt Disable
0 Note: Bits 7 to 15 must be set to zero. (1) The MicroLogix 1200 has one HSC Interrupt, HSC0. The MicroLogix 1500 has two, HSC0 and HSC1. To disable interrupt(s): 1. Select which interrupts you want to disable.
-
Page 230: Uie — User Interrupt Enable
0 Note: Bits 7 to 15 must be set to zero. (1) The MicroLogix 1200 has one HSC Interrupt, HSC0. The MicroLogix 1500 has two, HSC0 and HSC1. To enable interrupt(s): 1. Select which interrupts you want to enable.
-
Page 231: Uif — User Interrupt Flush
0 Note: Bits 7 to 15 must be set to zero. (1) The MicroLogix 1200 has one HSC Interrupt, HSC0. The MicroLogix 1500 has two, HSC0 and HSC1. To flush interrupt(s): 1. Select which interrupts you want to flush.
-
Page 232: Using The Selectable Timed Interrupt (Sti) Function File
18-12 Using Interrupts Using the Selectable Timed Interrupt (STI) Function File The Selectable Timed Interrupt (STI) provides a mechanism to solve time critical control requirements. The STI is a trigger mechanism that allows you to scan or solve control program logic that is time sensitive. Example of where you would use the STI are: •…
-
Page 233
Using Interrupts 18-13 Selectable Time Interrupt (STI) Function File Sub-Elements Summary Table 18.10 Selectable Timed Interrupt Function File (STI:0) Sub-Element Description Address Data Format Type User Program For More Access Information PFN — Program File Number STI:0.PFN word (INT) control read only 18-13 ER — Error Code… -
Page 234
18-14 Using Interrupts STI User Interrupt Executing (UIX) Sub-Element Description Address Data Format Type User Program Access UIX — User Interrupt Executing STI:0/UIX binary (bit) status read only The UIX (User Interrupt Executing) bit is set whenever the STI mechanism completes timing and the controller is scanning the STI PFN. -
Page 235
Using Interrupts 18-15 STI User Interrupt Pending (UIP) Sub-Element Description Address Data Format Type User Program Access UIP — User Interrupt Pending STI:0/UIP binary (bit) status read only The UIP (User Interrupt Pending) is a status flag that represents an interrupt is pending. -
Page 236
18-16 Using Interrupts STI Error Detected (ED) Sub-Element Description Address Data Format Type User Program Access ED — Error Detected STI:0/ED binary (bit) status read only The ED (Error Detected) flag is a status bit that can be used by the control program to detect if an error is present in the STI sub-system. -
Page 237: Using The Event Input Interrupt (Eii) Function File
Using Interrupts 18-17 Using the Event Input The EII (event input interrupt) is a feature that allows the user to scan a specific program file (subroutine) when an input condition is detected Interrupt (EII) Function from a field device. File Within the function file section of RSLogix 500, the user sees an EII folder.
-
Page 238
18-18 Using Interrupts EII Function File Sub-Elements EII Program File Number (PFN) Sub-Element Description Address Data Format Type User Program Access PFN — Program File Number EII:0.PFN word (INT) control read only PFN (Program File Number) defines which subroutine is called (executed) when the input terminal assigned to EII:0 detects a signal. -
Page 239
Using Interrupts 18-19 EII User Interrupt Enable (UIE) Sub-Element Description Address Data Format Type User Program Access UIE — User Interrupt Enable EII:0/UIE binary (bit) control read/write The UIE (User Interrupt Enable) bit is used to enable or disable EII subroutine processing. -
Page 240
18-20 Using Interrupts EII Event Interrupt Enable (EIE) Sub-Element Description Address Data Format Type User Program Access EIE — Event Interrupt Enabled EII:0/EIE binary (bit) control read/write EIE (Event Interrupt Enabled) allows the event interrupt function to be enabled or disabled from the control program. When set (1), the function is enabled, when cleared (0, default) the function is disabled. -
Page 241
Using Interrupts 18-21 EII Edge Select (ES) Sub-Element Description Address Data Format Type User Program Access ES — Edge Select EII:0/ES binary (bit) control read only The ES (Edge Select) bit selects the type of trigger that causes an Event Interrupt. -
Page 242
18-22 Using Interrupts Publication 1762-RM001C-EN-P… -
Page 243: Chapter 19 The Pid Concept
Chapter Process Control Instruction This chapter describes the MicroLogix 1200 and MicroLogix 1500 Proportional Integral Derivative (PID) instruction. The PID instruction is an output instruction that controls physical properties such as temperature, pressure, liquid level, or flow rate using process loops.
-
Page 244: The Pid Equation
0.01 to 327.67 (minutes) (1) Applies to MicroLogix 1200 and 1500 PID range when Reset and Gain Range (RG) bit is set to 1. For more information on reset and gain, see PLC 5 Gain Range (RG) on pa ge19-13.
-
Page 245: Pid — Proportional Integral Derivative
True False Setup Screen 295.8 µ s 11.0 µ s MicroLogix 1200 251.8 µ s 8.9 µ s MicroLogix 1500 It is recommended that you place the PID instruction on a rung without any conditional logic. If conditional logic exists, the Control Variable output remains at its last value, and the CVP CV% term and integral term are both cleared when the rung is false.
-
Page 246: Input Parameters
19-4 Process Control Instruction Input Parameters The table below shows the input parameter addresses, data formats, and types of user program access. See the indicated pages for descriptions of each parameter. Input Parameter Descriptions Address Data Format Range Type User For More Program Information…
-
Page 247: Read/Write
Process Control Instruction 19-5 Setpoint MAX (MAXS) Input Address Data Range Type User Parameter Format Program Descriptions Access MAXS — Setpoint PD10:0.MAXS word -32,768 to +32,767 control read/write Maximum (INT) If the SPV is read in engineering units, then the MAXS (Setpoint Maximum) parameter corresponds to the value of the setpoint in engineering units when the control input is at its maximum value.
-
Page 248
19-6 Process Control Instruction Output Limit (OL) Output Parameter Address Data Range Type User Program Descriptions Format Access OL — Output Limit PD10:0/OL binary 1 = enabled control read/write 0 = disabled An enabled (1) value enables output limiting to the values defined in PD10:0.CVH (Control Variable High) and PD10.0.CVL (Control Variable Low). -
Page 249: Output Parameters
Process Control Instruction 19-7 Output Parameters The table below shows the output parameter addresses, data formats, and types of user program access. See the indicated pages for descriptions of each parameter. Output Parameter Descriptions Address Data Format Range Type User Program For More Access Information…
-
Page 250: Tuning Parameters
19-8 Process Control Instruction Tuning Parameters The table below shows the tuning parameter addresses, data formats, and types of user program access. See the indicated pages for descriptions of each parameter. Tuning Parameter Address Data Format Range Type User For More Descriptions Program Information…
-
Page 251
Process Control Instruction 19-9 Controller Gain (K Tuning Parameter Address Data Format Range Type User Program Descriptions Access KC — Controller Gain — K PD10:0.KC word (INT) 0 to 32,767 control read/write Gain K (word 3) is the proportional gain, ranging from 0 to 3276.7 (when RG = 0), or 0 to 327.67 (when RG = 1). -
Page 252
19-10 Process Control Instruction Time Mode (TM) Tuning Parameter Address Data Range Type User Program Descriptions Format Access TM — Time Mode PD10:0.TM binary 0 or 1 control read/write The time mode bit specifies when the PID is in timed mode (1) or STI mode (0). -
Page 253: Read Only
Process Control Instruction 19-11 Zero Crossing Deadband (ZCD) Tuning Parameter Address Data Range Type User Program Descriptions Format Access ZCD — Zero Crossing PD10:0.ZCD word (INT) 0 to 32,767 control read/write Deadband The deadband extends above and below the setpoint by the value entered.
-
Page 254
19-12 Process Control Instruction Automatic / Manual (AM) Tuning Parameter Address Data Format Range Type User Program Descriptions Access AM — Automatic/Manual PD10:0/AM binary (bit) 0 or 1 control read/write The auto/manual bit can be set or cleared by instructions in your ladder program. -
Page 255
Process Control Instruction 19-13 PLC 5 Gain Range (RG) Tuning Parameter Address Data Format Range Type User Program Descriptions Access RG — PLC 5 Gain Range PD10:0/RG binary (bit) 0 or 1 control read/write When set (1), the reset (TI) and gain range enhancement bit (RG) causes the reset minute/repeat value and the gain multiplier (KC) to be divided by a factor of 10. -
Page 256
19-14 Process Control Instruction Derivative Action Bit (DA) Tuning Parameter Address Data Format Range Type User Program Descriptions Access DA — Derivative Action Bit PD10:0/DA binary (bit) 0 or 1 control read/write When set (1), the derivative (rate) action (DA) bit causes the derivative (rate) calculation to be evaluated on the error instead of the process variable (PV). -
Page 257
Process Control Instruction 19-15 PV Out Of Range (PV) Tuning Parameter Address Data Format Range Type User Program Descriptions Access PV — PV Out of Range PD10:0/PV binary (bit) 0 or 1 status read/write The process variable out of range bit is set (1) when the unscaled process variable •… -
Page 258: Runtime Errors
19-16 Process Control Instruction Runtime Errors Error code 0036 appears in the status file when a PID instruction runtime error occurs. Code 0036 covers the following PID error conditions, each of which has been assigned a unique single byte code value that appears in the MSB of the second word of the control block.
-
Page 259: Analog I/O Scaling
Process Control Instruction 19-17 Analog I/O Scaling To configure an analog input for use in a PID instruction, the analog data must be scaled to match the PID instruction parameters. In the MicroLogix 1200 and 1500, the process variable (PV) in the PID instruction is designed to work with a data range of 0 to 16,383.
-
Page 260: Application Notes
19-18 Process Control Instruction Application Notes The following paragraphs discuss: • Input/Output Ranges • Scaling to Engineering Units • Zero-crossing Deadband • Output Alarms • Output Limiting with Anti-reset Windup • The Manual Mode • Feed Forward ATTENTION Do not alter the state of any PID control block value unless you fully understand its function and how it will affect your process.
-
Page 261
Process Control Instruction 19-19 Scaling to Engineering Units Scaling lets you enter the setpoint and zero-crossing deadband values in engineering units, and display the process variable and error values in the same engineering units. Remember, the process variable PV must still be within the range 0 to 16383. -
Page 262
19-20 Process Control Instruction Zero-Crossing Deadband DB The adjustable deadband lets you select an error range above and below the setpoint where the output does not change as long as the error remains within this range. This lets you control how closely the process variable matches the setpoint without changing the output. -
Page 263
Process Control Instruction 19-21 Output Limiting with Anti-Reset Windup You may set an output limit (percent of output) on the control variable. When the instruction detects that the control variable has exceeded a limit, it sets an alarm bit (bit LL for lower limit, bit UL for upper limit), and prevents the control variable from exceeding either limit value. -
Page 264: Application Examples
19-22 Process Control Instruction Feed Forward or Bias Applications involving transport lags may require that a bias be added to the CV output in anticipation of a disturbance. This bias can be accomplished using the processor by writing a value to the Feed Forward Bias element (word FF).
-
Page 265
Process Control Instruction 19-23 Procedure 1. Create your ladder program. Make certain that you have properly scaled your analog input to the range of the process variable PV and that you have properly scaled your control variable CV to your analog output. -
Page 266
19-24 Process Control Instruction 10. Set the loop update time (and STI time interval if applicable) to a value of 5 to 10 times faster than the natural period. For example, if the cycle time is 20 seconds, and you choose to set the loop update time to 10 times faster than the natural rate, set the loop update time to 200, which would result in a 2-second rate. -
Page 267
Process Control Instruction 19-25 Verifying the Scaling of Your Continuous System To ensure that your process is linear, and that your equipment is properly connected and scaled, do the following: 1. Place the PID instruction in MANUAL and enter the following parameters: –… -
Page 268
19-26 Process Control Instruction Determining the Initial Loop Update Time To determine the approximate loop update time that should be used for your process, perform the following: 1. Place the normal application values in MinS and MaxS. 2. Type: 50 in CO%. 3. -
Page 269: Ascii Instructions
AWT — ASCII Write Write a string. 20-11 • MicroLogix 1200 Series B, FRN 3 or later ABL — Test Buffer for Line Determine the number of characters in the buffer, up 20-14 • MicroLogix 1500 Series B, FRN 4 or later to and including the end-of-line character.
-
Page 270: Instruction Types And Operation
ACL (ASCII Clear Buffer) AWA (ASCII Write with Append) AWT (ASCII Write) (1) For the MicroLogix 1200 Series A, these instructions only transmit data. MicroLogix 1200 Series B, FRN 3 and later MicroLogix 1500 Series B, FRN 4 and later…
-
Page 271
ASCII Instructions 20-3 When any of the other port control instructions are encountered in a ladder logic program, it may or may not execute immediately depending on the contents of the ASCII queue. The ASCII queue is a FIFO (first-in, first-out) queue which can contain up to 16 instructions. -
Page 272: Protocol Overview
General tab of Channel Configuration option in RSLogix 500. MicroLogix 1200 Series B, FRN 3 and later, and MicroLogix 1500 Series B, FRN 4 and later For the AWA and AWT instructions, you can use DF1 Full-Duplex protocol as described above.
-
Page 273: String (St) Data File
ASCII Instructions 20-5 String (ST) Data File File Description The string data file is used by the ASCII instructions to store ASCII character data. The ASCII data can be accessed by the source and destination operands in the ASCII instructions. The string data file can also be used by the copy (COP) and move (MOV, MVM) instructions.
-
Page 274: Control Data File
20-6 ASCII Instructions Control Data File File Description The control data element is used by ASCII instructions to store control information required to operate the instruction. The control data element for ASCII instructions includes status and control bits, an error code byte, and two character words as shown below: Table 20.2 ASCII Instructions Control Data File Elements Control Element…
-
Page 275: Acl — Ascii Clear Buffers
Controller When Instruction Is: Receive Buffer True False 0.0 µ s MicroLogix 1200 clear buffers: both 249.1 µ s receive 28.9 µ s transmit 33.6 µ s 0.0 µ s MicroLogix 1500 Series B, FRN 4 or later clear buffers: both 203.9 µ…
-
Page 276: Aic — Ascii Integer To String
Data Size When Instruction Is: Dest ST14:1 True False 29.3 µ s + 5.2 µ s/character 0.0 µ s MicroLogix 1200 word 82.0 µ s 0.0 µ s long word 25 µ s + 4.3 µ s/character 0.0 µ s MicroLogix 1500 Series B, FRN 4 or later word 68.7 µ…
-
Page 277: Awa — Ascii Write With Append
Error 268 µ s + 12 µ s/character 14.1 µ s MicroLogix 1200 236 µ s + 10.6 µ s/character 12.5 µ s MicroLogix 1500 Series B, FRN 4 or later Use the AWA instruction to write characters from a source string to an external device.
-
Page 278
20-10 ASCII Instructions When using this instruction you can also perform in-line indirection. See page 20-29 for more information. Entering Parameters Enter the following parameters when programming this instruction: • Channel is the number of the RS-232 port, Channel 0. (For the 1764-LRP only, you can select either Channel 0 or Channel 1). -
Page 279: Awt — Ascii Write
Error 268 µ s + 12 µ s/character 14.1 µ s MicroLogix 1200 MicroLogix 1500 Series B, FRN 4 or later 237 µ s + 10.6 µ s/character 12.8 µ s Use the AWT instruction to write characters from a source string to an external device.
-
Page 280
20-12 ASCII Instructions to be sent or, send data on a time interval. If sent on a time interval, use an interval of 0.5 second or greater. Do not continuously generate streams of ASCII data out of IMPORTANT a communications port. If ASCII write instructions execute continuously, you may not be able to re-establish communications with RSLogix 500 when the controller is placed into the RUN mode. -
Page 281
ASCII Instructions 20-13 Addressing Modes and File Types can be used as shown below: Table 20.10 AWT Instruction Valid Addressing Modes and File Types For definitions of the terms used in this table see Using the Instruction Descriptions on page4-2. Address Address Function Files… -
Page 282: Abl — Test Buffer For Line
False Error 0< MicroLogix 1200 Series B, FRN 3 or later 115 µ s + 8.6 µ s/character 12.5 µ s MicroLogix 1500 Series B, FRN 4 or later 94 µ s + 7.6 µ s/character 11.4 µ s The ABL instruction is used to determine the number of characters in the receive buffer of the specified communication channel, up to and including the end-of-line characters (termination).
-
Page 283: Acb — Number Of Characters In Buffer
Characters 2< True False Error 0< MicroLogix 1200 Series B, FRN 3 or later 103.1 12.1 84.2 µ s 11.0 µ s MicroLogix 1500 Series B, FRN 4 or later Use the ACB instruction to determine the number of characters in the buffer.
-
Page 284: Aci — String To Integer
When Instruction Is: 0< True False 17.6 µ s + 7.2 µ s/character 0.0 µ s MicroLogix 1200 Series B, word FRN 3 or later 24.6 µ s + 11.6 µ s/character 0.0 µ s long word 14.2 µ s + 6.3 µ s/character 0.0 µ…
-
Page 285
ASCII Instructions 20-17 Entering Parameters Enter the following parameters when programming this instruction: • Source — The contents of this location are converted to an integer value. • Destination — This is the location which receives the result of the conversion. -
Page 286: Acn — String Concatenate
True False MicroLogix 1200 Series B, FRN 3 or later 22.6 µ s + 11.5 µ s/character 0.0 µ s MicroLogix 1500 Series B, FRN 4 or later 17.9 µ s + 10.2 µ s/character 0.0 µ s The ACN instruction combines two ASCII strings. The second string is appended to the first and the result stored in the destination.
-
Page 287: Aex — String Extract
Dest ST10:3 14.8 µ s + 2.9 µ s/character 0.0 µ s MicroLogix 1200 Series B, FRN 3 or later 12.4 µ s + 2.6 µ s/character 0.0 µ s MicroLogix 1500 Series B, FRN 4 or later The AEX instruction creates a new string by taking a portion of an existing string and storing it in a new string.
-
Page 288: Ahl — Ascii Handshake Lines
Control R6:2 Channel Status 0000h< 109.4 µ s 11.9 µ s MicroLogix 1200 Series B, FRN 3 or later Error 0< 89.3 µ s 10.8 µ s MicroLogix 1500 Series B, FRN 4 or later The AHL instruction is used to set or reset the RS-232 Request to Send (RTS) handshake control line for a modem.
-
Page 289
ASCII Instructions 20-21 • AND Mask is the mask used to reset the RTS control line. Bit 1 corresponds to the RTS control line. A value of “1” in the AND mask resets the RTS control line; a value of “0” leaves the line unchanged. The valid data range for the mask is from 0000 to FFFF hexadecimal. -
Page 290: Ard — Ascii Read Characters
String Length 10< Characters Read 0< MicroLogix 1200 Series B, FRN 3 or later 132.3 µ s + 49.7 µ s/character 11.8 µ s Error 0< MicroLogix 1500 Series B, FRN 4 or later 108 µ s + 44 µ s/character 10.7 µ…
-
Page 291: Arl — Ascii Read Line
String Length 15< Characters Read 0< MicroLogix 1200 Series B, FRN 3 or later 139.7 µ s + 50.1 µ s/character 11.7 µ s Error 0< MicroLogix 1500 Series B, FRN 4 or later 114 µ s + 44.3 µ s/character 10.6 µ…
-
Page 292
20-24 ASCII Instructions • Characters Read (POS) is the number of characters that the controller moved from the buffer to the string (0 to 82). This field is read-only and resides in word 2 of the control data file. • Error displays the hexadecimal error code that indicates why the ER bit was set in the control data file. -
Page 293: Asc — String Search
N7:1 0< MicroLogix 1200 Series B, FRN 3 or later 16.2 µ s + 4.0 µ s/matching character 0.0 µ s MicroLogix 1500 Series B, FRN 4 or later 13.4 µ s + 3.5 µ s/matching character 0.0 µ s Use the ASC instruction to search an existing string for an occurrence of the source string.
-
Page 294: Asr — Ascii String Compare
When Instruction Is: True False MicroLogix 1200 Series B, FRN 3 or later 9.2 µ s + 4.0 µ s/matching character 0.0 µ s MicroLogix 1500 Series B, FRN 4 or later 7.5 µ s + 3.5 µ s/matching character 0.0 µ…
-
Page 295
ASCII Instructions 20-27 Entering Parameters Enter the following parameters when programming this instruction: • Source A is the location of the first string used for comparison. • Source B is the location of the second string used for comparison. Addressing Modes and File Types can be used as shown below: Table 20.30 ASR Instruction Valid Addressing Modes and File Types For definitions of the terms used in this table see Using the Instruction Descriptions on page4-2. -
Page 296: Timing Diagram For Ard, Arl, Awa, And Awt Instructions
20-28 ASCII Instructions Timing Diagram for ARD, ARL, AWA, and AWT Instructions Rung Condition Enable Bit (EN) Queue Bit (EU) Running Bit (RN) Done Bit Error Bit (DN or ER) 3 4 5 1 — rung goes true 2 — instruction successfully queued 3 — instruction execution complete 4 — instruction scanned for the first time after execution is complete 5 — rung goes false…
-
Page 297: Using In-Line Indirection
ASCII Instructions 20-29 Using In-line Indirection This allows you to insert integer and long word values into ASCII strings. The Running bit (RN) must be set before the string value can be used. The following conditions apply to performing in-line indirection: •…
-
Page 298: Ascii Instruction Error Codes
20-30 ASCII Instructions ASCII Instruction Error The following error codes indicate why the Error bit (ER) is set in the control data file. Codes Error Code Description Recommended Action decimal hexadecimal 0x00 No error. The instruction completed successfully. None Required. 0x03 The transmission cannot be completed because the Check the modem and modem connections.
-
Page 299: Ascii Character Set
> The standard ASCII character set includes values up to 127 decimal (7F hex). The MicroLogix 1200 and 1500 Controllers also support an extended character set (decimal 128 to 255). However, the extended character set may display different characters depending on the platform you are using.
-
Page 300
20-32 ASCII Instructions Publication 1762-RM001C-EN-P… -
Page 301
Chapter Communications Instructions This chapter contains information about the Message (MSG) and Service Communications (SVC), communication instructions. This chapter provides information on: • how messaging works • what the instructions look like • how to configure and use the instructions •… -
Page 302
21-2 Communications Instructions storage area that keeps track of messages that have not been allocated a buffer. The queue operates as a first-in first-out (FIFO) storage area. The first message request stored in the queue is the message that is allocated a buffer as soon as a buffer becomes available. -
Page 303: Msg — Message
Rung Condition When Rung Is: True False 20.0 µ s 6.0 µ s MicroLogix 1200 Steady State True 230.0 µ s False-to-True Transition for Reads 264 µ s + 1.6 µ s per word False-to-True Transition for Writes 17.0 µ s 6.0 µ…
-
Page 304: The Message File
MG11:0.RBN Remote Bridge Node Address Word read only MG11:0.CHN Channel — 0 (channel 0) Word read only Always 0 for MicroLogix 1200 Controllers and MicroLogix 1500 1764-LSP Processors MG11:0.CHN Channel — 0 (channel 0) or 1 (channel 1) Word read/write MicroLogix 1500 1764-LRP Processors MG11:0.NOD Target Node Number…
-
Page 305: Read/Write
(1) The file number for RTC function files is set to 0 by the programming software. (2) RTC and ST are only permitted in the MSG instruction for MicroLogix 1200 and 1500 Series B Controllers. The Control Bits, Sub-Element 16, of the MSG File Element are defined…
-
Page 306
21-6 Communications Instructions The Status Bits, Sub-Element 17, of the MSG File Element are defined below. Message File Sub-Element 17 — Status bits Address Description Parameter Size User Program Access Reserved read only MG11:0.0/ST Start: read only 1 = MSG transmitted and acknowledged by target device 0 = MSG has not been received by target… -
Page 307: Local Messages
DC SOURCE DC SOURCE CABLE CABLE CABLE CABLE EXTERNAL EXTERNAL EXTERNAL EXTERNAL MicroLogix 1000 MicroLogix 1200 MicroLogix 1500 Example 2 — Local DeviceNet Network with DeviceNet Interface (1761-NET-DNI) SLC 5/03 with 1747-SDN PanelView 550 PanelView DANGER DANGER Master DeviceNet Network Personal…
-
Page 308
21-8 Communications Instructions Example 3 — Local DF1 Half-Duplex Network Rockwell Software RSLinx 2.0 (or RS-232 higher), SLC 5/03, SLC 5/04, and (DF1 Half-Duplex Protocol) SLC 5/05, or PLC-5 processors configured for DF1 Half-Duplex Modem Master. MicroLogix MicroLogix MicroLogix 1000 (Slave) 1200 (Slave) 1500 (Slave) SLC 5/04 (Slave) -
Page 309: Configuring A Local Message
Communications Instructions 21-9 Configuring a Local Message Setup Screen Message The rung below shows a MSG instruction preceded by conditional logic. Access the message setup screen by double-clicking Setup Screen. B3:0 0000 Read/Write Message MSG File MG11:0 Setup Screen The RSLogix Message Setup Screen is shown below. This screen is used to setup “This Controller”, “Target Device”, and “Control Bits”.
-
Page 310
The target device is compatible with and supports the sending data PLC5 command set. (1) See Important note below. The Common Interface File (CIF) in the MicroLogix 1200, IMPORTANT 1500, and SLC 500 processors is File 9. The CIF in the MicroLogix 1000 controller is Integer File 7. -
Page 311
(1)(2) String (ST) (1)(3) Real-Time Clock (RTC) (1) Applies to MicroLogix 1200 Series B and later, and 1500 Series B and later only. (2) 485CIF write ST-to-485CIF only. (3) 500CPU write RTC-to-Integer or RTC-to-RTC only. Size in Elements This variable defines the amount of data (in elements) to exchange with the target device. -
Page 312
21-12 Communications Instructions The table below is not intended to illustrate file NOTE compatibility, only the maximum number of elements that can be exchanged in each case. Message Type File Type Element Size Maximum Number of Elements per Message 485CIF O, I, B, N 1-word 2-word… -
Page 313
O, I, S, B, N, L N, RTC (1) 500CPU write RTC-to-Integer or RTC-to-RTC only. Applies to MicroLogix 1200 Series B and later, and 1500 Series B and later only. The data table offset is used for 485CIF type messages. A valid offset is any value in the range 0 to 255 and indicates the word or byte offset into the target’s Common Interface File (CIF). -
Page 314
21-14 Communications Instructions “Control Bits” Parameters Ignore if Timed Out (TO) Address Data Format Range Type User Program Access MG11:0/TO Binary On or Off Control Read / Write The Timed Out Bit (TO) can be set in your application to remove an active message instruction from processor control. -
Page 315
Communications Instructions 21-15 Enabled and Waiting (EW) Address Data Format Range Type User Program Access MG11:0/EW Binary On or Off Status Read Only The Enabled and Waiting Bit (EW) is set after the enable bit is set and the message is in the buffer (not in the queue) and waiting to be sent. The EW bit is cleared after the message has been sent and the processor receives acknowledgement (ACK) from the target device. -
Page 316: Remote Messages
The MicroLogix 1000 can respond to remote message NOTE requests, but it cannot initiate them. The MicroLogix 1200 capabilities are the same as the NOTE MicroLogix 1500 in this example. This functionality is also available on Ethernet by replacing the SLC 5/04 at DH-485 node 17 with an SLC 5/05 processor.
-
Page 317
CHS GND CHS GND CHS GND TERM SHLD CHS GND DC SOURCE DC SOURCE DC SOURCE CABLE CABLE CABLE DC SOURCE EXTERNAL EXTERNAL EXTERNAL CABLE EXTERNAL MicroLogix 1000 MicroLogix 1200 MicroLogix 1500 SLC 5/05 Ethernet Network SLC 5/05 PLC-5E Publication 1762-RM001C-EN-P… -
Page 318: Configuring A Remote Message
SLC 5/04 (node 51 on the DH+ network) starting at address N:50:0. The SLC 5/04 at Node 23 of the DH+ network is configured for passthru operation. The MicroLogix 1200 capabilities are the same as the NOTE MicroLogix 1500 in this example.
-
Page 319
CABLE CABLE DC SOURCE EXTERNAL EXTERNAL EXTERNAL CABLE EXTERNAL MicroLogix 1000 MicroLogix 1200 MicroLogix 1500 SLC 5/04 DH+ Network Node 23 octal (19 decimal) Link ID = 100 Node 63 octal (51 decimal) Node 40 octal (32 decimal) SLC 5/04 PLC-5 “This Controller”… -
Page 320
21-20 Communications Instructions Remote Bridge Address This variable defines the remote node address of the bridge device. In this example, the remote bridge address is set to zero, because the target device, SLC 5/04 at node 63 (octal) is a remote-capable device. If the target device is remote-capable, the remote bridge address is not required. -
Page 321: Msg Instruction Error Codes
Communications Instructions 21-21 MSG Instruction Error When the processor detects an error during the transfer of message data, the processor sets the ER bit and enters an error code that you can Codes monitor from your programming software. Error Code Description of Error Condition Target node is busy.
-
Page 322
21-22 Communications Instructions Error Code Description of Error Condition Connection refused by destination host. Connection was broken. Reply not received before user–specified timeout. No network buffer space available. PCCC Description: Illegal Address Format, a field has an illegal value. PCCC Description: Illegal Address format, not enough fields specified. PCCC Description: Illegal Address format, too many fields specified. -
Page 323: Timing Diagram For The Msg Instruction
Communications Instructions 21-23 Timing Diagram for the The following section describes the timing diagram for a message instruction. MSG Instruction (3) Target node (5) Target node processes packet (1) Rung goes true. receives packet. successfully and returns data (read) or acknowledges receipt (write). 1.
-
Page 324
21-24 Communications Instructions 2. At the next end of scan, REF, or SVC instruction, the controller determines if it should examine the communications queue for another instruction. The controller bases its decision on the state of the channel’s Communication Servicing Selection (CSS) and Message Servicing Selection (MSS) bits, the network communication requests from other nodes, and whether previous message instructions are already in progress. -
Page 325
Communications Instructions 21-25 4. Step 4 is not shown in the timing diagram. If you do not receive an ACK, step 3 does not occur. Instead, either no response or a negative acknowledge (NAK) is received. When this happens, the ST bit remains clear (0). -
Page 326: Svc — Service Communications
When Rung Is: True False 208 µ s + 1.6 µ s per word 0.0 µ s MicroLogix 1200 166 µ s + 1.4 µ s per word 0.0 µ s MicroLogix 1500 1764-LSP or 1764-LRP with one channel selected 327 µ…
-
Page 327
Communications Instructions 21-27 Controller Channel Select Setting Channel(s) Serviced MicroLogix 1200 MicroLogix 1500 with 1764-LSP Processor 1 MicroLogix 1500 with 1764-LRP Processor 1 both 0 and 1 Communication Status Bits The following communication status bits allow you to customize or monitor communications servicing. -
Page 328: Msg Instruction Ladder Logic
21-28 Communications Instructions MSG Instruction Ladder Enabling the MSG Instruction for Continuous Operation Logic The message instruction is enabled during the initial processor program scan and each time the message completes. For example, when the DN or ER bit is set. 0000 Read/Write Message MSG File…
-
Page 329: Local Messaging Examples
DH-485 protocol, 0 to 254 for DF1 protocol, or 0 to 63 for DeviceNet™. Local/Remote Specifies whether the message is local or remote. (1) Applies to MicroLogix 1200 Series B and later, and 1500 Series B and later. (2) 485CIF write ST-to-485CIF only. (3) 500CPU write RTC-to-Integer or RTC-to-RTC only.
-
Page 330
N, RTC (1) Output and input data types are not valid local data types for read messages. (2) 500CPU write RTC-to-Integer or RTC-to-RTC only. Applies to MicroLogix 1200 Series B and later, and 1500 Series B and later only. Publication 1762-RM001C-EN-P… -
Page 331
485CIF <—> read/write 485CIF —> write 485CIF (1) Output and input data types are not valid local data types for read messages. (2) Applies to MicroLogix 1200 Series B and later, and 1500 Series B and later only. Publication 1762-RM001C-EN-P… -
Page 332
21-32 Communications Instructions Example 3 — Local Read from a PLC-5 Message Instruction Setup In this example, the controller reads 10 elements from the target device’s (Local Node 2) N7 file, starting at word N7:50. The 10 words are placed in the controller’s integer file starting at word N7:0. -
Page 333
Chapter Data Logging (MicroLogix 1500 1764-LRP Processor only) Data Logging allows you to capture (store) application data as a record for retrieval at a later time. Each record is stored in a user-configured queue in battery backed memory (B-Ram). Records are retrieved from the 1764-LRP processor via communications. -
Page 334: Chapter 22 Queues And Records
22-2 Data Logging (MicroLogix 1500 1764-LRP Processor only) Queues and Records The 1764-LRP processor has 48K bytes (48 x 1024) of additional memory for data logging purposes. Within this memory, you can define up to 256 (0 to 255) data logging queues. Each queue is configurable by size (maximum number of records stored), and by length (each record is 1 to 80 characters).
-
Page 335
Data Logging (MicroLogix 1500 1764-LRP Processor only) 22-3 Example Queue 0 This queue is used to show how to calculate the string length of each record and maximum number of records. Table 22.1 Queue 0 (Date = , Time = , Delimiter = ,) Date Time… -
Page 336
22-4 Data Logging (MicroLogix 1500 1764-LRP Processor only) Number of Records Using Queue 0 as an example, each record consumes: Record Field Memory Consumption Date 2 bytes Time 2 bytes N7:11 2 bytes L14:0 4 bytes T4:5.ACC 2 bytes I1:3.0 2 bytes B3:2 2 bytes… -
Page 337
Data Logging (MicroLogix 1500 1764-LRP Processor only) 22-5 For queue 5, the formatted string length is 29 characters, as shown below: Data Time N7:11 I1:3.0 I1:2.1 Characters = 8 + 1 + 6 + 1 + 6 + 1 + 6 = 29 characters Number of Records Using Queue 5 as an example, each record consumes: Record Field… -
Page 338: Configuring Data Log Queues
22-6 Data Logging (MicroLogix 1500 1764-LRP Processor only) Configuring Data Log Data Logging is configured using RSLogix 500 programming software version V4.00.00 or later. Queues 1. Open a 1764-LRP application. The first step in using Data Logging is to configure the data log queue(s). Access to this function is provided via the RSLogix 500 Project tree: Double-click Configuration to…
-
Page 339
Data Logging (MicroLogix 1500 1764-LRP Processor only) 22-7 Enter the following information: Data Log Queue Description Configuration Parameter Number of Records Defines the number of records (data sets) in the queue. Separator Character Choose the character to act as the separator for the data in this queue (tab, comma, or space). -
Page 340: Dlg — Data Log Instruction
22-8 Data Logging (MicroLogix 1500 1764-LRP Processor only) DLG — Data Log Instruction Instruction Type: output Table 22.3 Execution Time for the DLG Instruction Data Log Controller When Rung Is: queue number True False 67.5 µ s + 11.8 µ s/date stamp 6.7 µ…
-
Page 341: Data Log Status File
Data Logging (MicroLogix 1500 1764-LRP Processor only) 22-9 Data Log Status File There is a Data Log Status (DLS) file element for each Data Log Queue. The DLS file does not exist until a data log queue has been configured. The Data Log Status file has 3-word elements.
-
Page 342
22-10 Data Logging (MicroLogix 1500 1764-LRP Processor only) File Size (FSZ) File Size (FSZ) shows the number of records that are allocated for this queue. The number of records is set when the data log queue is configured. FSZ can be used with RST to determine how full the queue is. To address this word in ladder logic, use the format: DLS0:Q.FSZ, where Q is the queue number. -
Page 343: Retrieving (Reading) Records
Data Logging (MicroLogix 1500 1764-LRP Processor only) 22-11 Retrieving (Reading) Data is retrieved from a data logging queue by sending a logical read command that addresses the Data Log retrieval file. The oldest record is Records retrieved first and then, deleted. The record is deleted as soon as it is queued for transmission.
-
Page 344
22-12 Data Logging (MicroLogix 1500 1764-LRP Processor only) Information for Creating Your Own Application Controller Receives Communications Packet Table 22.5 Command Structure CMD 0f FNC A2 Byte Size File No. File Tpe Ele. No. S/Ele. No. Field Function Description Destination Node Source Node Command Code Status Code… -
Page 345: Conditions That Will Erase The Data Retrieval File
If the data integrity check fails, the record is deleted and an error is sent with STS of 0xF0 and ext STS of 0x0E. For more information on writing a DF1 protocol, refer to Allen-Bradley publication 1770-6.5.16, DF1 Protocol and Command Set Reference Manual (available from www.theautomationbookstore.com).
-
Page 346
22-14 Data Logging (MicroLogix 1500 1764-LRP Processor only) Publication 1762-RM001C-EN-P… -
Page 347: Programming Instructions Memory Usage And Execution Time
These values depend on whether you are Instructions Memory using word or long word as the data format Usage and Execution Time Table A.1 MicroLogix 1200 Memory Usage and Instruction Execution Time for Programming Instructions Programming Instruction Instruction Word Long Word Mnemonic Execution Time in µs Memory…
-
Page 348
MicroLogix 1200 Memory Usage and Instruction Execution Time Table A.1 MicroLogix 1200 Memory Usage and Instruction Execution Time for Programming Instructions Programming Instruction Instruction Word Long Word Mnemonic Execution Time in µs Memory Execution Time in µs Memory Usage in… -
Page 349
MicroLogix 1200 Memory Usage and Instruction Execution Time Table A.1 MicroLogix 1200 Memory Usage and Instruction Execution Time for Programming Instructions Programming Instruction Instruction Word Long Word Mnemonic Execution Time in µs Memory Execution Time in µs Memory Usage in… -
Page 350
MicroLogix 1200 Memory Usage and Instruction Execution Time Table A.1 MicroLogix 1200 Memory Usage and Instruction Execution Time for Programming Instructions Programming Instruction Instruction Word Long Word Mnemonic Execution Time in µs Memory Execution Time in µs Memory Usage in… -
Page 351
MicroLogix 1200 Memory Usage and Instruction Execution Time Indirect Addressing The following sections describe how indirect addressing affects the execution time of instructions for the Micrologix 1200 controllers. The timing for an indirect address is affected by the form of the indirect address. -
Page 352
MicroLogix 1200 Memory Usage and Instruction Execution Time Execution Time Example – Word Level Instruction Using and Indirect Address ADD Instruction Addressing • Source A: N7:[*] • Source B: T4:[*].ACC • Destination: N[*]:[*] ADD Instruction Times • ADD Instruction: 2.7 µs •… -
Page 353: Micrologix 1200 Scan Time Worksheet
MicroLogix 1200 Memory Usage and Instruction Execution Time MicroLogix 1200 Calculate the scan time for your control program using the worksheet below. Scan Time Worksheet Input Scan (sum of below) Overhead (if expansion I/O is used) = 55 µs Expansion Input Words X 10 µs (or X 14 µs if Forcing is used) Number of modules with Input words X 80 µs…
-
Page 354
MicroLogix 1200 Memory Usage and Instruction Execution Time Publication 1762-RM001C-EN-P… -
Page 355: Programming Instructions Memory Usage And Execution Time
Appendix MicroLogix 1500 Memory Usage and Instruction Execution Time This appendix contains a complete list of the MicroLogix 1500 programming instructions. The list shows the memory usage and instruction execution time for each instruction. Execution times using indirect addressing and a scan time worksheet are also provided. Programming The tables below lists the execution times and memory usage for the programming instructions.
-
Page 356
MicroLogix 1500 Memory Usage and Instruction Execution Time Table B.1 MicroLogix 1500 Controllers — Memory Usage and Instruction Execution Time for Programming Instructions Programming Instruction Instruction Word Long Word Mnemonic Execution Time in µs Memory Execution Time in µs Memory Usage in Usage in False… -
Page 357
MicroLogix 1500 Memory Usage and Instruction Execution Time Table B.1 MicroLogix 1500 Controllers — Memory Usage and Instruction Execution Time for Programming Instructions Programming Instruction Instruction Word Long Word Mnemonic Execution Time in µs Memory Execution Time in µs Memory Usage in Usage in False… -
Page 358
MicroLogix 1500 Memory Usage and Instruction Execution Time Table B.1 MicroLogix 1500 Controllers — Memory Usage and Instruction Execution Time for Programming Instructions Programming Instruction Instruction Word Long Word Mnemonic Execution Time in µs Memory Execution Time in µs Memory Usage in Usage in False… -
Page 359
MicroLogix 1500 Memory Usage and Instruction Execution Time Execution Times for the Indirect Addresses For most types of instructions that contain an indirect address(es), look up the form of the indirect address in the table below and add that time to the execution time of the instruction. -
Page 360: Micrologix 1500 Scan Time Worksheet
MicroLogix 1500 Memory Usage and Instruction Execution Time MicroLogix 1500 Calculate the scan time for your control program using the worksheet below. Scan Time Worksheet Input Scan (sum of below) Overhead (if expansion I/O is used) = 53 µs Expansion Input Words X 3 µs (or X 7.5 µs if Forcing is used) Number of modules with Input words X 10 µs Input Scan Sub-Total = Program Scan…
-
Page 361
Appendix System Status File The status file lets you monitor how your controller works and lets you direct how you want it to work. This is done by using the status file to set up control bits and monitor both hardware and programming device faults and other status information. -
Page 362: Status File Overview
System Status File Status File Overview The status file (S:) contains the following words: Address Function Page Arithmetic Flags Controller Mode STI Mode S:2/9 Memory Module Program Compare S:2/15 Math Overflow Selection C-10 S:3H Watchdog Scan Time C-10 Free Running Clock C-10 Minor Error Bits C-11…
-
Page 363: Status File Details
System Status File Status File Details Arithmetic Flags The arithmetic flags are assessed by the processor following the execution of any math, logical, or move instruction. The state of these bits remains in effect until the next math, logical, or move instruction in the program is executed.
-
Page 364
System Status File Controller Mode User Application Mode Address Data Format Range Type User Program Access S:1/0 to S:1/4 binary 0 to 1 1110 status read only Bits 0 through 4 function as follows: S:1/0 to S:1/4 Mode Controller Mode Use by MicroLogix Controller S:1/4 S:1/3 S:1/2 S:1/1 S:1/0 1200… -
Page 365
System Status File Fault Override At Power-Up Address Data Format Range Type User Program Access S:1/8 binary 0 or 1 control read only When set (1), causes the controller to clear the Major Error Halted bit (S:1/ 13) at power-up. The power-up mode is determined by the controller mode switch (MicroLogix 1500 only) and the Power-Up Mode Behavior Selection bit (S:1/12). -
Page 366
System Status File Load Memory Module Always Address Data Format Range Type User Program Access S:1/11 binary 0 or 1 control read only For this option to work, you must set (1) this bit in the control program before downloading the program to a memory module. When this bit is set in the memory module and power is applied, the controller downloads the memory module program. -
Page 367
System Status File The following table shows the Power-Up Mode under various conditions MicroLogix 1200 Major Error Power-Up Mode at Last Power-Down Power-Up Mode Halted Mode Behavior Remote False Last State REM Download, Download, REM Program, REM Program Program or Any Test mode… -
Page 368
System Status File Major Error Halted Address Data Format Range Type User Program Access S:1/13 binary 0 or 1 status read/write The controller sets (1) this bit when a major error is encountered. The controller enters a fault condition and word S:6 contains the Fault Code that can be used to diagnose the condition. -
Page 369
System Status File STI Mode STI Pending Data Format Range Type User Program Access Address S:2/0 binary 0 or 1 status read only (1) This bit can only be accessed via ladder logic. It cannot be accessed via communications (such as a Message instruction from another device). -
Page 370
C-10 System Status File Math Overflow Selection Address Data Format Range Type User Program Access S:2/14 binary 0 or 1 control read/write Set (1) this bit when you intend to use 32-bit addition and subtraction. When S:2/14 is set, and the result of an ADD, SUB, MUL, or DIV instruction cannot be represented in the destination address (underflow or overflow), •… -
Page 371
System Status File C-11 Minor Error Bits Overflow Trap Bit Address Data Format Range Type User Program Access S:5/0 binary 0 or 1 status read/write If this bit is ever set (1) upon execution of the END or TND instruction, a major error (0020H) is generated. -
Page 372
(1) This bit can only be accessed via ladder logic. It cannot be accessed via communications (such as a Message instruction from another device). This address is duplicated at STI:0/UIL. SeeUsing the Selectable Timed Interrupt (STI) Function File on page 18-12 for more information. Retentive Data Lost (MicroLogix 1200 only) Address Data Format Range… -
Page 373
This bit is set (1) whenever an invalid string length occurs. When S:5/15 is set, the Invalid String Length Error (1F39H) is written to the Major Error Fault Code word (S:6). This bit applies to the MicroLogix 1200 and 1500 Series B Controllers. Major Error Code Address… -
Page 374
C-14 System Status File Suspend Code Address Data Format Range Type User Program Access word -32,768 to status read/write +32,767 When the controller executes an Suspend (SUS) instruction, the SUS code is written to this location, S:7. This pinpoints the conditions in the application that caused the Suspend mode. -
Page 375
System Status File C-15 Math Register Address Data Format Range Type User Program Access S:13 word -32,768 to status read/write +32,767 (low byte) S:14 word -32,768 to status read/write +32,767 (high byte) These two words are used in conjunction with the MUL, DIV, FRD, and TOD math instructions. -
Page 376
C-16 System Status File User Fault Routine File Number Address Data Format Range Type User Program Access S:29 word 0 to 255 status read only This register is used to control which subroutine executes when a User Fault is generated. STI Set Point Data Format Range… -
Page 377
System Status File C-17 Outgoing Message Command Pending Data Format Range Type User Program Access Address S:33/2 binary 0 or 1 status read only (1) This bit can only be accessed via ladder logic. It cannot be accessed via communications (such as a Message instruction from another device). -
Page 378
C-18 System Status File Data File Overwrite Protection Lost Address Data Format Range Type User Program Access S:36/10 binary 0 or 1 status read/write When clear (0), this bit indicates that at the time of the last program transfer to the controller, protected data files in the controller were not overwritten, or there were no protected data files in the program being downloaded. -
Page 379
System Status File C-19 RTC Hours Data Format Range Type User Program Access Address S:40 word 0 to 23 status read only (1) This word can only be accessed via ladder logic. It cannot be accessed via communications (such as a Message instruction from another device). -
Page 380
C-20 System Status File OS Catalog Number Address Data Format Range Type User Program Access S:57 word 0 to 32,767 status read only This register identifies the Catalog Number for the Operating System in the controller. OS Series Address Data Format Range Type User Program Access… -
Page 381
System Status File C-21 User Program Functionality Type Address Data Format Range Type User Program Access S:63 word 0 to 32,767 status read only This register identifies the level of functionality of the user program in the controller. Compiler Revision — Build Number Address Data Format Range… -
Page 382
C-22 System Status File Publication 1762-RM001C-EN-P… -
Page 383: Identifying Controller Faults
Appendix Fault Messages and Error Codes This chapter describes how to troubleshoot your controller. Topics include: • identifying controller faults • contacting Rockwell Automation for assistance Identifying Controller While a program is executing, a fault may occur within the operating system or your program.
-
Page 384
Routine on page 18-6 for information on creating a user fault subroutine. Fault Messages This section contains fault messages that can occur during operation of the MicroLogix 1200 and MicroLogix 1500 programmable controllers. Each table lists the error code description, the probable cause, and the recommended corrective action. -
Page 385
• Upgrade the OS using ControlFlash. 000B BASE HARDWARE The base hardware faulted or is Non-User • Replace the Controller (MicroLogix 1200 FAULT incompatible with the OS. only). • Replace the Base Unit (MicroLogix 1500 only). • Contact your local Rockwell Automation… -
Page 386
Fault Messages and Error Codes Error Advisory Message Description Fault Recommended Action Code Classification (Hex) • Either reset bit S:1/9 if this is consistent 0016 STARTUP The user fault routine was executed Recoverable PROTECTION FAULT at power-up, prior to the main ladder with the application requirements, and program. -
Page 387
Fault Messages and Error Codes Error Advisory Message Description Fault Recommended Action Code Classification (Hex) • A fault routine number was • Either clear the fault routine file number 0028 INVALID OR Non-User NONEXISTENT USER entered in the status file, number (S:29) in the status file, or •… -
Page 388
Fault Messages and Error Codes Error Advisory Message Description Fault Recommended Action Code Classification (Hex) 003D INVALID SEQUENCER A sequencer instruction (SQO, SQC, Recoverable Correct the user program, then re-compile, LENGTH/POSITION SQL) length/position parameter is reload the program and enter the Run mode. greater than 255. -
Page 389
Fault Messages and Error Codes Error Advisory Message Description Fault Recommended Action Code Classification (Hex) • Reconfigure the expansion I/O system so 0083 MAX I/O CABLES The maximum number of expansion Non-User EXCEEDED I/O cables allowed was exceeded. that it has an allowable number of cables. •… -
Page 390
Fault Messages and Error Codes Error Advisory Message Description Fault Recommended Action Code Classification (Hex) • Either an expansion I/O power • Correct the user program to eliminate a EXPANSION I/O (1)(2) xx8B Non-User POWER SUPPLY supply is configured in the user power supply that is not present •… -
Page 391: Contacting Rockwell Automation For Assistance
Fault Messages and Error Codes Contacting Rockwell If you need to contact Rockwell Automation or local distributor for assistance, it is helpful to obtain the following information ready: Automation for • controller type, series letter, and revision letter of the base unit Assistance •…
-
Page 392
D-10 Fault Messages and Error Codes Publication 1762-RM001C-EN-P… -
Page 393
• Modbus™ RTU Slave Protocol (MicroLogix 1200 Controllers and MicroLogix 1500 Series B and higher Processors only) on page E-9 • ASCII Driver (MicroLogix 1200 and 1500 Series B and higher Controllers only) on page E-13 See your controller’s User Manual for information about required network devices and accessories. -
Page 394: Communication Protocol
Protocol Configuration DH-485 Communication The information in this section describes the DH-485 network functions, network architecture, and performance characteristics. It also helps you Protocol plan and operate the controller on a DH-485 network. DH-485 Network Description The DH-485 protocol defines the communication between multiple devices that coexist on a single pair of wires.
-
Page 395
Protocol Configuration DH-485 Configuration Parameters When communications are configured for DH-485, the following parameters can be changed: Table E.1: Parameter Options Programming Software Default Baud Rate 9600, 19.2K 19.2K Node Address 1 to 31 decimal Token Hold Factor 1 to 4 Max Node Address 1 to 31 The major software issues you need to resolve before installing a network… -
Page 396
All devices should be set to the same maximum node IMPORTANT address. MicroLogix 1200 and 1500 Remote Packet Support These controllers can respond and initiate with device’s communications (or commands) that do not originate on the local DH-485 network. This is useful in installations where communication is needed between the DH-485 and DH+ networks. -
Page 397: Df1 Full-Duplex Protocol
RS-232 connection to external devices, such as computers, or other controllers that support DF1 Full-Duplex. DF1 is an open protocol. Refer to DF1 Protocol and Command Set Reference Manual, Allen-Bradley publication 1770-6.5.16, for more information. DF1 Full-Duplex Operation DF1 Full-Duplex protocol (also referred to as DF1 point-to-point protocol) is useful where RS-232 point-to-point communication is required.
-
Page 398: Df1 Half-Duplex Protocol
DF1 Half-Duplex link. The MicroLogix controllers can only act as slave devices. A device that can act as a master is required. Several Allen-Bradley products support DF1 Half-Duplex master protocol. They include the SLC 5/03™ and higher ®…
-
Page 399
Protocol Configuration When the system driver is DF1 Half-Duplex Slave, the following parameters can be changed: Table E.3 DF1 Half-Duplex Slave Configuration Parameters Parameter Options Programming Software Default Baud Rate 300, 600, 1200, 2400, 4800, 9600, 19.2K, 38.4K 1200 Parity none, even none Source ID… -
Page 400
Protocol Configuration Considerations When Communicating as a DF1 Slave on a Multi-drop Link When communication is between either your programming software and a controller or between two controllers via a slave-to-slave connection on a larger multi-drop link, the devices depend on a DF1 Master to give each of them polling permission to transmit in a timely manner. -
Page 401: Modbus™ Rtu Slave Protocol
The modbus Memory map is summarized in Table E.4 and detailed in Table E.5 below: Table E.4 Modbus to MicroLogix Memory Map — Summary (MicroLogix 1200 Controllers and MicroLogix 1500 1764-LSP Series B and 1764-LRP Processors only) Modbus Description Valid MicroLogix Addressing…
-
Page 402
E-10 Protocol Configuration Table E.5 Modbus to MicroLogix Memory Map — Detail (MicroLogix 1200 Controllers and MicroLogix 1500 1764-LSP Series B and 1764-LRP Processors only) Modbus Addressing Modbus Address Reference Modbus Function Code (decimal) 0001 to 4096 Read/Write Modbus Coil Data space… -
Page 403
Protocol Configuration E-11 The controller responds to the Modbus command function codes listed in Table E.6 below: Table E.6 Supported Modbus Commands (MicroLogix 1200 Controllers and MicroLogix 1500 1764-LSP Series B and 1764-LRP Processors only) Command Function Code Subfunction Code (decimal) -
Page 404
Protocol Configuration When the system driver is Modbus RTU Slave, the following communication port parameters can be changed: Table E.8 Modbus RTU Slave Communications Configuration Parameters (MicroLogix 1200 Controllers and MicroLogix 1500 Series B and higher Processors only) Parameter Options Programming… -
Page 405: Ascii Driver
The ASCII driver provides connection to other ASCII devices, such as bar code readers, weigh scales, serial printers, and other intelligent devices. (MicroLogix 1200 and 1500 Series B and higher You can use ASCII by configuring the RS-232 port, channel 0 for ASCII…
-
Page 406
E-14 Protocol Configuration When the driver is set to ASCII, the following parameters can be changed: Table E.9 ASCII Channel Configuration Parameters Parameter Description Programming Software Default Baud Rate Toggles between the communication rate of 300, 600, 1200, 2400, 4800, 9600, 19.2K, and 38.4K. 1200 Parity Toggles between None, Odd, and Even. -
Page 407: Glossary
Glossary The following terms are used throughout this manual. Refer to the Allen-Bradley Industrial Automation Glossary, Publication Number AG-7.1, for a complete guide to Allen-Bradley technical terms. address A character string that uniquely identifies a memory location. For example, I:1/0 is the memory address for data located in Input file word 1, bit 0.
-
Page 408
I/O Expansion I/O is I/O that is connected to the controller via a bus or cable. MicroLogix 1200 controllers use Bulletin 1762 expansion I/O. MicroLogix 1500 controllers use Bulletin 1769 expansion I/O. For MicroLogix controllers, embedded I/O is all I/O residing at slot 1 and higher. -
Page 409
Glossary encoder A device that detects position, and transmits a signal representing that position. executing mode Any run or test mode. false The status of an instruction that does not provide a continuous logical path on a ladder rung. Field Effect Transistor. DC output capable of high-speed operation. FIFO (First-In-First-Out) The order that data is stored and retrieved from a file. -
Page 410
Glossary instruction A mnemonic defining an operation to be performed by the processor. A rung in a program consists of a set of input and output instructions. The input instructions are evaluated by the controller as being true or false. In turn, the controller sets the output instructions to true or false. -
Page 411
Glossary modem Modulator/demodulator. Equipment that connects data terminal equipment to a communication line. modes Selected methods of operation. Example: run, test, or program. negative logic The use of binary logic in such a way that “0” represents the desired voltage level. network A series of stations (nodes) connected by some type of communication medium. -
Page 412
Glossary on-delay time The ON delay time is a measure of the time required for the controller logic to recognize that a signal has been presented at the input terminal of the controller. one shot A programming technique that sets a bit ON or OFF for one program scan. -
Page 413
Glossary read To acquire data. For example, the processor reads information from other devices via a read message. relay An electrically operated device that mechanically switches electrical circuits. relay logic A representation of binary or discrete logic. restore To transfer a program from a device to a controller. reserved bit A location reserved for internal use. -
Page 414
Glossary sourcing A term used to describe current flow between two devices. A sourcing device or circuit provides a power. status The condition of a circuit or system. terminal A point on an I/O module that external devices, such as a push button or pilot light, are wired to. -
Page 415
AHL instruction 20-20 life expectancy AIC instruction 20-8 operation AIC+ Advanced Interface Converter battery low status bit C-13 Allen-Bradley baud rate contacting for assistance baud rate status C-15 support BHI Function File 3-12 allow future access setting 2-10 AND instruction… -
Page 416
DF1 full-duplex bit (B) DF1 half-duplex control (R) DH485 counter (C) Modbus Slave RTU I/O images for expansion modules (MicroLogix 1200) communication scan I/O images for expansion modules (MicroLogix 1500) communications input (I) active status bit C-17 input and output addressing examples… -
Page 417
12-5 DAT function file executing mode event input interrupt (EII) 18-17 execution time high-speed counter (HSC) MicroLogix 1200 instructions input/output status file (IOS) 3-18 MicroLogix 1500 instructions memory module information (MMI) expansion I/O pulse train output (PTO) analog I/O configuration… -
Page 418
21-7 definition logic MicroLogix 1200 execution times logical instructions 12-1 MicroLogix 1500 execution times logical NOT instruction 12-6 overview logical OR instruction… -
Page 419
NOT instruction 12-6 memory module password mismatch status bit C-12 memory usage MicroLogix 1200 instructions MicroLogix 1500 instructions OEM lock 2-10 OEM lock status bit MEQ instruction offline message (MG) file 21-4… -
Page 420
21-16 MicroLogix 1200 scan time worksheet remote packet support MicroLogix 1500 scan time worksheet RES instruction 8-10 programming device reserved bit proportional integral derivative reset accumulated value instruction… -
Page 421
100 µSec scan time status C-17 maximum scan time status target bit file C-15 3-11 scan time worksheet target integer file MicroLogix 1200 temporary end instruction 16-4 MicroLogix 1500 terminal scan toggle status bit throughput C-17 SCL instruction… -
Page 422
Index automatically clearing faults user interrupt disable instruction 18-9 contacting Allen-Bradley for assistance user interrupt enable instruction 18-10 identifying controller faults user interrupt flush instruction 18-11 manually clearing faults user program functionality type status C-21 using the fault routine true… -
Page 423
MicroLogix 1200 and 1500 Alphabetical List of Instructions Instruction- Description Page Instruction- Description Page ABL — Test Buffer for Line 20-14 MCR — Master Control Reset 16-5 ACB — Number of Characters in Buffer 20-15 MEQ — Mask Compare for Equal… -
Page 424
Publication 1762-RM001C-EN-P — November 2000 PN 40072-079-01(C) Supersedes Publication 1762-RM001B-US-P — April 2000 © 2000 Rockwell International Corporation. Printed in the U.S.A.
|
Документ |
Катaложный номер |
Тип документа |
|
|
Визуализация. Брошюра |
2706, 2711P, 2711,2711E, 6182H, 6181P, 6181H, 6155R, 6180W, 6186 |
Брошюра |
IAVISU-BR001B-RU-P |
|
Руководство по выбору платформы визуализации. Руководство по выбору |
2706, 2711P, 2711,2711E, 6182H, 6181P, 6181H, 6155R, 6180W, 6186 |
Руководство по выбору |
VIEW-SG001A-RU-P |
|
Получение результатов с помощью PanelBuilder32. Программное обеспечение разработки приложений для стандартных терминалов PanelView |
Программное обеспечение разработки приложений для стандартных терминалов PanelView |
2711-6.19-RU |
|
|
Быстрый запуск PanelBuilder32. Программное обеспечение разработки приложений для стандартных терминалов PanelView |
Программное обеспечение разработки приложений для стандартных терминалов PanelView |
2711-6.20-RU |
|
|
Начало работы с PanelBuilder Software. Руководство пользователя |
Руководство пользователя |
2711-6.2-RU |
|
|
Эффективность, гибкость, долговечность |
PanelView 550, 600, 900, 1000, 1400 |
2711-1.11-RU |
|
|
Терминалы оператора. Информация об изделии |
PanelView 1400 CRT |
Информация об изделии |
2711-1.12-RU |
|
Плоскопанельные терминалы оператора. Информация об изделии |
PanelView 550, PanelView 600 |
Информация об изделии |
2711-1.13-RU |
|
Плоскопанельные терминалы оператора. Информация об изделии |
PanelView 1000 |
Информация об изделии |
2711-1.14-RU |
|
Плоскопанельные терминалы оператора. Информация об изделии |
PanelView 900 |
Информация об изделии |
2711-1.6-RU |
|
Стандартные терминалы оператора PanelView. Руководство пользователя |
PV300, PV550, PV600, PV900, PV1000, PV1400 |
Руководство пользователя |
2711-6.1-RU |
|
Панели оператора и модули дисплеев PanelView Plus с 700 по 1500 и PanelView Plus Compact 1000. Инструкция по установке |
2711 P-Kxxxx, 2711 P-Txxxx, 2711 P-Bxxxx, 2711 PWxxxx, 2711PC-T10C4D1 |
Инструкция по установке |
2711P-IN0001I-RU-P |
|
Панели оператора PanelView Plus и PanelView Plus Compact 400 и 600. Инструкция по установке |
2711 P-Kxxxx, 2711 P-Txxxx, 2711 P-Bxxxx, 2711 PWxxxx, 2711PC-T10C4D1 |
Инструкция по установке |
2711P-IN0002G-RU-P |
|
Панели оператора PanelView Plus Compact. Описание продукта |
2711PС |
Описание продукта |
2711PC-PP001A-RU-P |
|
Терминалы PanelView Plus 6. Руководство пользователя |
2711P |
Руководство пользователя |
2711P-UM006B-RU-P |
PanelView 5500 Graphic Terminals
PanelView Plus 7 Graphic Terminals
|
Bulletin 2711P PanelView Plus 7 Operator Interfaces Product Profile |
2711P-PP013 |
|
Visualization Solutions Selection Guide |
VIEW-SG001 |
|
Bulletin 2711P PanelView Plus 7 Standard Terminals Environmental Specifications Technical Data |
2711P-TD008 |
|
Bulletin 2711P PanelView Plus 7 Performance Terminals Technical Data |
2711P-TD009 |
|
Bulletin 2711P PanelView Plus 7 Standard Terminals Mounting Levers Installation Instructions |
2711P-IN032 |
|
Bulletin 2711P PanelView Plus 7 Standard Terminals User Manual |
2711P-UM007 |
|
Bulletin 2711P PanelView Plus 7 Performance Terminals User Manual |
2711P-UM008 |
|
Bulletin 2711P PanelView Plus 7 Standard Terminals Cutout Templates |
2711P-DS010 |
|
Bulletin 2711P PanelView Plus 7 Standard Procurement Specifications for 4…15 inch Displays |
2711P-SR003 |
|
Bulletin 2711P PanelView Plus 7 Performance Procurement Specifications for 7…19 inch Displays |
2711P-SR002 |
PanelView Plus 6 Graphic Terminals
PanelView Plus 6 Compact Graphic Terminals
PanelView 800 Graphic Terminals
|
Bulletin 2711R PanelView 800 Graphic Terminals Brochure |
2711R-BR001 |
|
Bulletin 2711R PanelView 800 Product Profile |
2711R-PP001 |
|
Visualization Solutions Selection Guide |
VIEW-SG001 |
|
Bulletin 2711R PanelView 800 Graphic Terminals Technical Data |
2711R-TD001 |
|
Bulletin 2711R PanelView 800 HMI Graphic Terminals Installation Instructions |
2711R-IN001 |
|
Bulletin 2711R PanelView 800 Graphic Terminals Adapter Plate Kit Installation Instructions |
2711R-IN002 |
|
Bulletin 2711R PanelView 800 Graphic Terminals User Manual |
2711R-UM001 |
PanelView Component Graphic Terminals
Семейство универсальных контроллеров Allen Bradley MicroLogix 1200 от немецкой компании Rockwell Automation — оборудование для получения широкого спектра вычислительных возможностей. В отличие от предыдущего поколения устройств MicroLogix 1000, эта серия предоставляет максимальную гибкость для обеспечения ввода и вывода. В общем каталоге собраны также другие виды промышленного оборудования этого производителя, сопутствующие аксессуары и комплектующие.
Технические характеристики
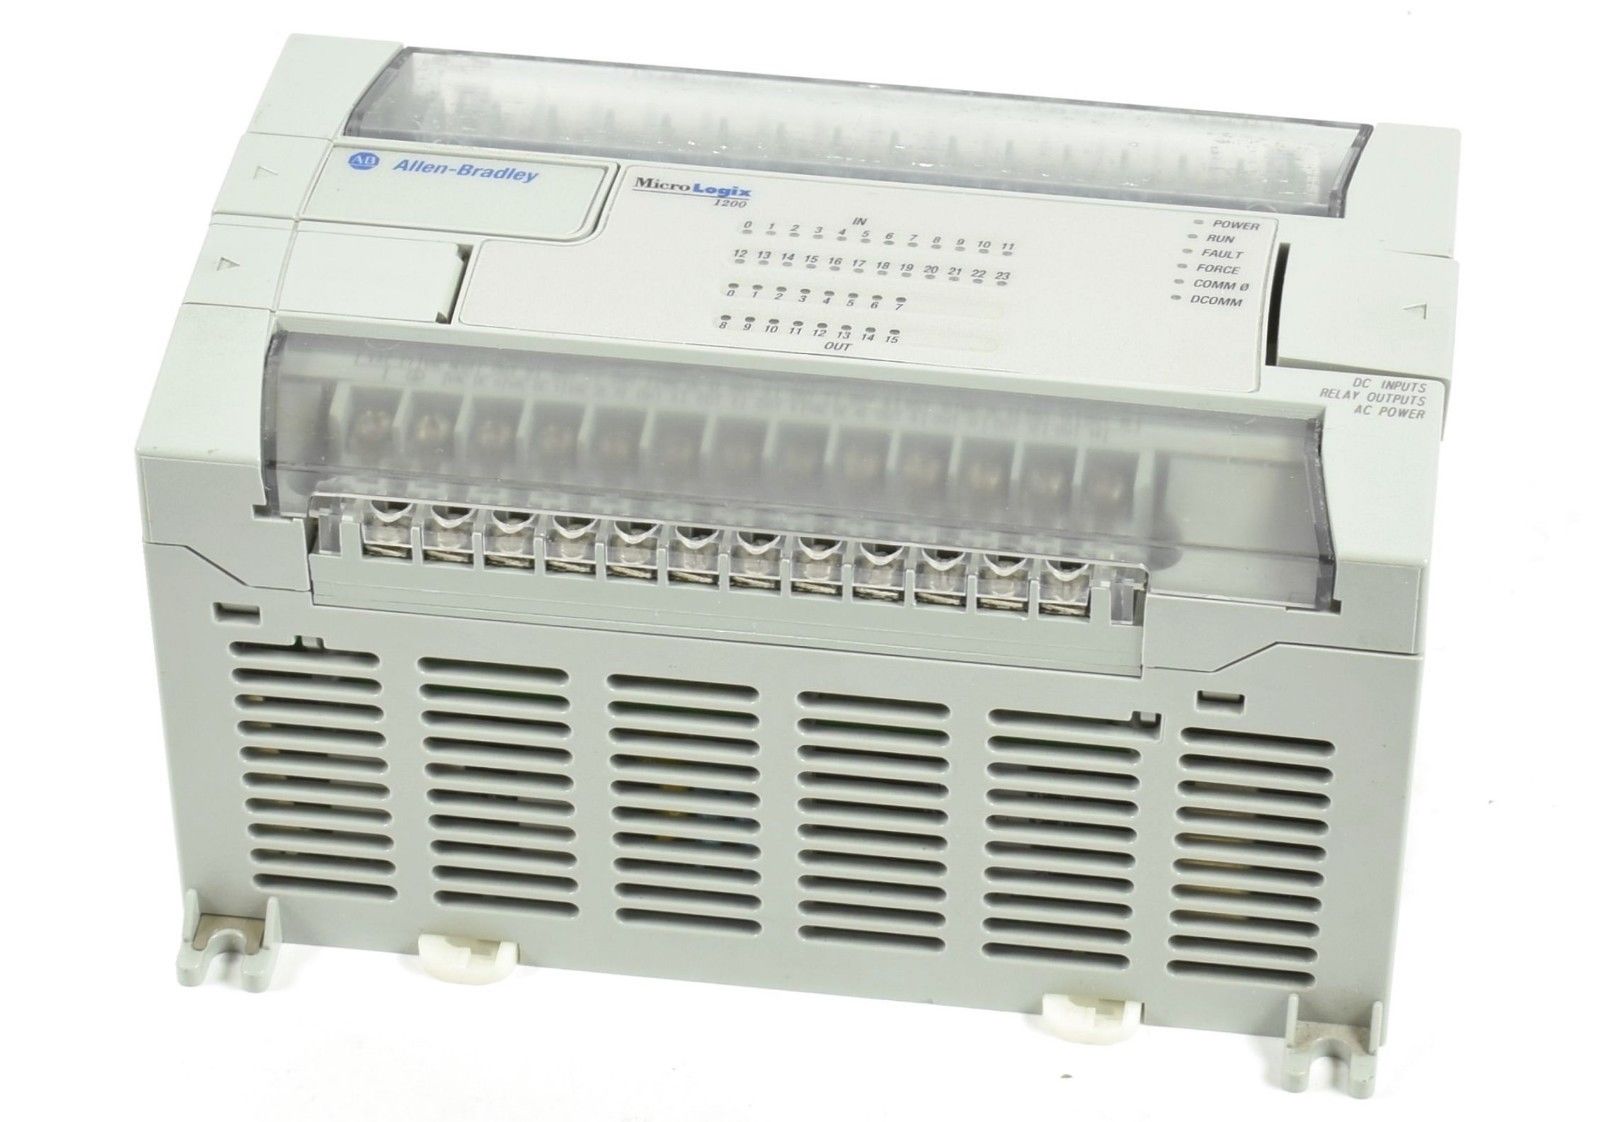
Контроллеры MicroLogix 1200 обеспечивают функциональность сопутствующих систем. Работают с использованием уже существующей SLC архитектуры. Есть возможность подобрать модель с нужным числом входов/выходов: 24 или 40.
Хотя характеристики контроллеров этой линейки схожи с MicroLogix 1000, есть различия:
- использование памяти 6K-слов;
- диапазон входного напряжения переменного тока – от 85 до 265 В;
- 8 режимов работы быстродействующего счетчика на 20 кГц;
- есть 2 позициометра для подстройки аналогового типа;
- разрешение таймера до 1 ms;
- чтение и запись ASCII кодов;
- есть 4 быстродействующих входа «защелки»;
- добавочный порт Programming/HMI для быстрой связи с другими устройствами;
- полный набор инструкций с поддержкой PID и ASCII.
Конструкция контроллеров линейки MicroLogix 1200 предполагает возможность защиты данных в процессе загрузки файла данных. Это нужно для потери информации в процессе применения сопутствующих программ. Есть обновляемая прошивка программного обеспечения для удобства его быстрого обновления.
Сфера применения
Основное предназначение контроллеров типа MicroLogix 1200 — создание многофункциональной рабочей системы с взаимозаменяемыми элементами. Применяются для:
- эффективной автоматизации производственных процессов, в том числе в сложных условиях;
- управления системами автоматизации различной масштабности;
- обеспечение потребностей интеллектуальных систем, как способ обеспечения бесперебойного производственного процесса;
- автоматизация зданий, отдельных видов оборудования;
- комплексное управление различными видами машин.
Возможно использовать вспомогательные модули для расширения функционала.
Преимущества
Семейство производительных контроллеров MicroLogix 1200 может применяться для быстрого расширения вычислительных возможностей. Например, при необходимости количество выходов может быть увеличено до 136. Ключевые особенности:
- операционная система с флэш-памятью для быстрого обновления в автоматическом режиме;
- увеличенная емкость внутренней памяти контроллера (с 4K-слов до 6К-слов);
- возможность увеличения числа каналов входов и выходов;
- есть кнопка переключения коммуникаций для переключения для различными параметрами;
- использование отдельного файла данных для числа с плавающей точкой;
- надежная защита клеммных выходов от случайного касания в процессе обслуживания;
- дополнительные часы реального времени, которые предназначены для эффективного планирования мероприятий по контролю;
- использование улучшенных вариантов связи (использование одноранговых сетей, форматов SCADA/RTU, DH-485, DeviceNet и EtherNet/IP).
Еще одно преимущество контроллеров Allen Bradley MicroLogix 1200 — цена этого оборудования.